The Pegasos book
92
The Pegasos book « Le livre du Pegasos » Compilation of articles on the Pegasos Volume 3 : MorphOS May 2007 edition - By Geoffrey CHARRA (V2.3) Translated from french by Geoffrey CHARRA (December 2007), With the help of Eric WALTER, Thibault JEANSON, Denis HILLIARD (translation) and Fulvio PERUGGI (corrections) Sponsored by
Transcript of The Pegasos book
The Pegasos book« Le livre du Pegasos »
Compilation of articles on the PegasosVolume 3 : MorphOS
May 2007 edition - By Geoffrey CHARRA (V2.3)Translated from french by Geoffrey CHARRA (December 2007),
With the help of Eric WALTER, Thibault JEANSON, Denis HILLIARD (translation) and Fulvio PERUGGI (corrections)
Sponsored by

The Pegasos book – Volume 3 : MorphOS
Contents1 Presentation of MorphOS .............................................................................................. 6 2 Installation of MorphOS ............................................................................................... 8
2.1 Preparation ........................................................................................................... 8 2.2 Booting from CD .................................................................................................... 8 2.3 Installing the Hard Drive ........................................................................................ 9
2.3.1 Partition 0 (boot) ............................................................................................ 9 2.3.2 Partition 1 (system) ...................................................................................... 10 2.3.3 Partition 2 to N (data) ................................................................................... 11 2.3.4 Save of partition table and check ..................................................................... 11
2.4 Format the Partitions ........................................................................................... 11 2.5 Copy MorphOS onto your Hard Drive ...................................................................... 11 2.6 Boot from your Hard Drive .................................................................................... 12 2.7 Auto-booting ....................................................................................................... 12 2.8 Screen mode setup ............................................................................................. 13 2.9 Changing from a Pegasos I to a Pegasos II ............................................................. 13 2.10 Troubleshooting ................................................................................................. 13 2.11 In the event of impossible boot : deleting the MBR with a PC… ................................ 14 2.12 Installing 3D graphic drivers ................................................................................ 15 2.13 Other updates ................................................................................................... 16
3 Presentation of the MorphOS tree ................................................................................ 17 4 MorphOS preferences ................................................................................................ 18
4.1 Audio ................................................................................................................. 19 4.2 Debug ................................................................................................................ 19 4.3 Font ................................................................................................................... 20
4.3.1 Use of FTManager .......................................................................................... 20 4.4 IControl .............................................................................................................. 20 4.5 Input ................................................................................................................. 21 4.6 Locale ................................................................................................................ 21 4.7 ModeEdit ............................................................................................................ 21 4.8 Printer ................................................................................................................ 22
4.8.1 Config tab ..................................................................................................... 22 4.8.2 Graphics tab ................................................................................................. 22
4.9 ScreenMode ........................................................................................................ 23 4.10 Serial ............................................................................................................... 23 4.11 SFS .................................................................................................................. 23 4.12 Sound .............................................................................................................. 25 4.13 Time ................................................................................................................ 25 4.14 USB ................................................................................................................. 25 4.15 Individualize the preférences ............................................................................... 26
5 MUI (Magic User Interface) ........................................................................................ 27 5.1 Global MUI Settings ............................................................................................. 27 5.2 Menus ................................................................................................................ 28
5.2.1 The classic menu ........................................................................................... 28 5.2.2 The contextual menu ..................................................................................... 28 5.2.3 The popup menu ........................................................................................... 29
May 2007 edition – Geoffrey CHARRA – http://www.efika.org
2

The Pegasos book – Volume 3 : MorphOS
5.3 The classes ......................................................................................................... 29 5.3.1 System ........................................................................................................ 30 5.3.2 Windows ...................................................................................................... 30 5.3.3 Groups ......................................................................................................... 31 5.3.4 Buttons ........................................................................................................ 32 5.3.5 Scrollbars ..................................................................................................... 33 5.3.6 Listviews ...................................................................................................... 33 5.3.7 Strings ......................................................................................................... 34 5.3.8 Sliders et Gauges ......................................................................................... 34 5.3.9 Menus .......................................................................................................... 35 5.3.10 Drag & Drop ................................................................................................ 35 5.3.11 Keyboard .................................................................................................... 35 5.3.12 Images ....................................................................................................... 36 5.3.13 Help ........................................................................................................... 36
5.4 External classes ................................................................................................... 36 5.5 Individual settings ............................................................................................... 37
6 Ambient ................................................................................................................... 38 6.1 Menus ............................................................................................................... 38 6.2 Contextual menus ................................................................................................ 39 6.3 Icons ................................................................................................................ 39 6.4 Keyboard shortcuts and combinations .................................................................... 39 6.5 Icons bar ............................................................................................................ 40 6.6 Ambient FAQ ....................................................................................................... 40 6.7 Obtaining the latest version of Ambient .................................................................. 41
6.7.1 Downloading and installing ............................................................................. 41 6.7.2 Compiling the sources ................................................................................... 41 6.7.3 Customizing the icons ................................................................................... 42 6.7.4 Troubleshooting and hints ............................................................................... 42
7 Tips and hints ........................................................................................................... 44 7.1 Create a PNG icon ............................................................................................... 44 7.2 Tools to add to MorphOS 1.4 ................................................................................. 45
7.2.1 File manager ................................................................................................. 45 7.2.2 ARexx ......................................................................................................... 45 7.2.3 Installer ...................................................................................................... 45 7.2.4 FAT95 ......................................................................................................... 45 7.2.5 Other elements ............................................................................................ 45
7.3 Tips to operate some softwares ............................................................................. 46 7.3.1 Lightwave ..................................................................................................... 46 7.3.2 Imagine 5.1x ................................................................................................ 46 7.3.3 Aweb ........................................................................................................... 46 7.3.4 Turbocalc ..................................................................................................... 46 7.3.5 Wordworth .................................................................................................... 46 7.3.6 Zone Xplorer PPC ........................................................................................... 46 7.3.7 Earth 2140 / Softwares with bad colours .......................................................... 46 7.3.8 Sgrab ........................................................................................................... 47
7.4 Create a multiboot on Pegasos .............................................................................. 47 7.4.1 Introduction .................................................................................................. 47 7.4.2 BootCreator usage ......................................................................................... 47 7.4.3 Other examples ............................................................................................. 48 7.4.4 Generating the script ..................................................................................... 49 7.4.5 Result .......................................................................................................... 49
7.5 Creating a MorphOSBootCD .................................................................................. 49 7.5.1 Preamble ...................................................................................................... 49 7.5.2 The backup method ...................................................................................... 50 7.5.3 The update method ........................................................................................ 52 7.5.4 VGA boot (Optionnal) ..................................................................................... 53 7.5.5 Setting CD speed (optionnal) .......................................................................... 53
7.6 Using MorphUP, the package manager ................................................................... 54 7.6.1 Introduction to MorphUP ................................................................................. 54
May 2007 edition – Geoffrey CHARRA – http://www.efika.org
3

The Pegasos book – Volume 3 : MorphOS
7.6.2 Introduction to the packages system ................................................................ 54 7.6.3 Installation ................................................................................................... 55 7.6.4 Using « muCl » client ..................................................................................... 55 7.6.5 Using the « muGen » packages generator ......................................................... 56
8 Network setting ......................................................................................................... 59 8.1 TCP/IP stack install under MorphOS ...................................................................... 59
8.1.1 Installing Miami ............................................................................................. 59 8.1.2 Installing MOSNet .......................................................................................... 60
8.2 ADSL on Pegasos ................................................................................................. 61 8.2.1 Configuration of MiamiDX ............................................................................... 61 8.2.2 Remarks ....................................................................................................... 63 8.2.3 Alcatel SpeedTouch modem ............................................................................ 63 8.2.4 ADSL with a Freebox (France only) .................................................................. 64
8.3 Connection of a Pegasos to a network LAN - DHCP (Internet via ADSL modem) ........... 64 8.3.1 Step 1 : Cables ............................................................................................. 64 8.3.2 Step 2 – Configuration of the network .............................................................. 64 8.3.3 Step 3 – Configuration of TCP/IP stack ............................................................. 64 8.3.4 Step 4 – Launching of TCP/IP stack .................................................................. 65 8.3.5 Step 5 – Test of TCP/IP stack .......................................................................... 65
8.4 Sharing files with another computer ....................................................................... 66 8.4.1 Sharing files with FTP .................................................................................... 66 8.4.2 Sharing files with Samba ................................................................................ 66
8.5 Remote use of MorphOS and Pegasos .................................................................... 67 8.5.1 VNC server on Pegasos / MorphOS .................................................................. 67 8.5.2 VNC client under Windows XP/2000/NT PC ....................................................... 67 8.5.3 VNC client under MorphOS ............................................................................. 68 8.5.4 VNC client under Mac .................................................................................... 68 8.5.5 Other VNC server under MorphOS .................................................................... 68
8.6 Wireless Wifi connection ....................................................................................... 70 8.6.1 Use of a wireless Ethernet adaptater ................................................................ 70 8.6.2 Use of a Wifi acces point ................................................................................. 70
9 Software development on MorphOS ............................................................................ 71 9.1 C/C++ language .................................................................................................. 71
9.1.1 SDK ............................................................................................................. 71 9.1.2 Developement tools and libraries ..................................................................... 71 9.1.3 3D API (OpenGL) .......................................................................................... 72 9.1.4 Physic engine (OpenGL) ................................................................................ 73
9.2 Other programming languages .............................................................................. 73 10 Emulation of AmigaOS 68k softwares ......................................................................... 74
10.1 Introduction ...................................................................................................... 74 10.2 Prerequisite ....................................................................................................... 74 10.3 ROM / Kickstart and ADF ..................................................................................... 74
10.3.1 ROM / Kickstart ........................................................................................... 74 10.3.2 Transforming an Amiga floppy into an ADF file ................................................ 76
10.4 Installing .......................................................................................................... 76 10.4.1 Basic install ................................................................................................. 76 10.4.2 Installing AmigaOS 3.9 ................................................................................. 76 10.4.3 Configuring E-UAE ....................................................................................... 78 10.4.4 Starting E-UAE ............................................................................................ 82 10.4.5 Other configuration examples ........................................................................ 83
10.5 Conclusion ........................................................................................................ 84 11 Sites about MorphOS ................................................................................................ 85
11.1 Information and forums ...................................................................................... 85 11.1.1 Sites in english ............................................................................................ 85 11.1.2 Sites in french ............................................................................................. 85 11.1.3 Sites in german ........................................................................................... 85
11.2 Download .......................................................................................................... 85 11.2.1 MorphOS natives softwares ........................................................................... 85 11.2.2 Amiga 68k compatible softwares for MorphOS : ............................................... 85
May 2007 edition – Geoffrey CHARRA – http://www.efika.org
4

The Pegasos book – Volume 3 : MorphOS
12 Overview of MorphOS softwares ................................................................................ 86 12.1 Software ........................................................................................................... 86 12.2 Demos .............................................................................................................. 86
13 Compiling CVS Ambient ........................................................................................... 90 13.1 Pre-requisite .................................................................................................... 90 13.2 Necessary patch of libaboxstubs.a ....................................................................... 90 13.3 Downloading the sources ................................................................................... 91 13.4 Compilation (debug) .......................................................................................... 91 13.5 Compilation (release) ........................................................................................ 91 13.6 Installing ......................................................................................................... 91 13.7 Various patches ................................................................................................ 92
13.7.1 Activation of icon effects ............................................................................... 92 13.7.2 Small icons ................................................................................................ 92
May 2007 edition – Geoffrey CHARRA – http://www.efika.org
5
The Pegasos book – Volume 3 : MorphOS
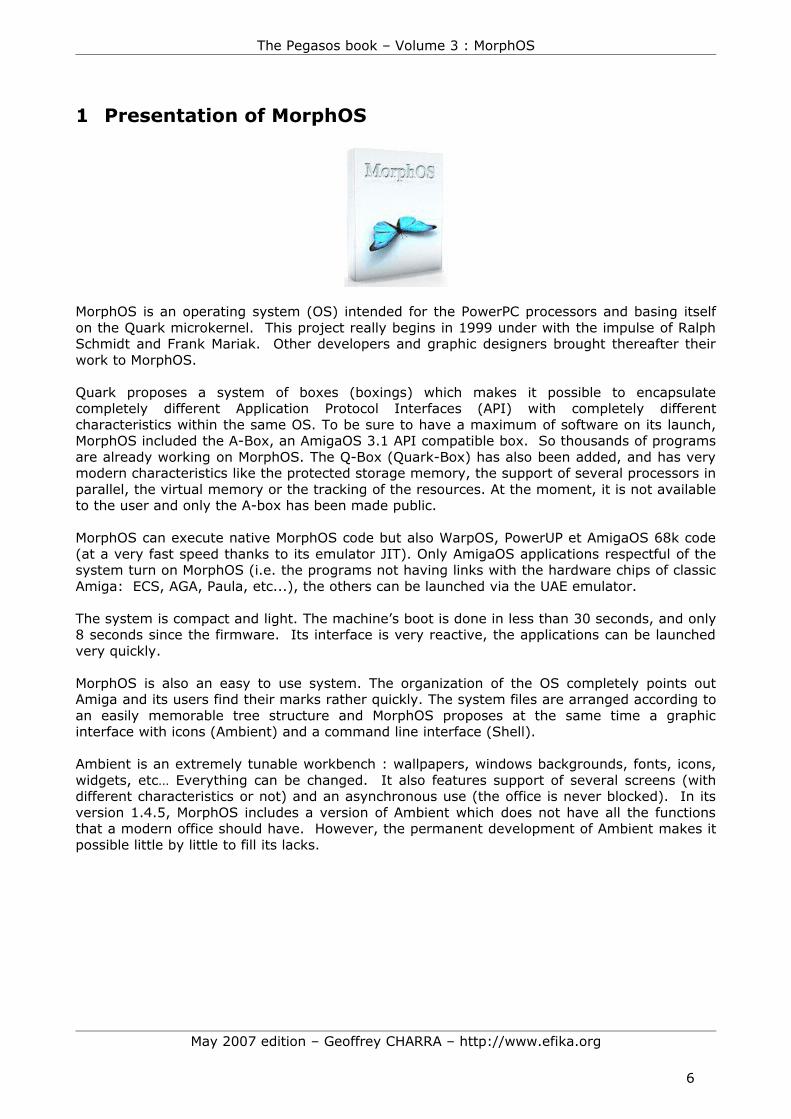
1 Presentation of MorphOS
MorphOS is an operating system (OS) intended for the PowerPC processors and basing itself on the Quark microkernel. This project really begins in 1999 under with the impulse of Ralph Schmidt and Frank Mariak. Other developers and graphic designers brought thereafter their work to MorphOS.
Quark proposes a system of boxes (boxings) which makes it possible to encapsulate completely different Application Protocol Interfaces (API) with completely different characteristics within the same OS. To be sure to have a maximum of software on its launch, MorphOS included the A-Box, an AmigaOS 3.1 API compatible box. So thousands of programs are already working on MorphOS. The Q-Box (Quark-Box) has also been added, and has very modern characteristics like the protected storage memory, the support of several processors in parallel, the virtual memory or the tracking of the resources. At the moment, it is not available to the user and only the A-box has been made public.
MorphOS can execute native MorphOS code but also WarpOS, PowerUP et AmigaOS 68k code (at a very fast speed thanks to its emulator JIT). Only AmigaOS applications respectful of the system turn on MorphOS (i.e. the programs not having links with the hardware chips of classic Amiga: ECS, AGA, Paula, etc...), the others can be launched via the UAE emulator.
The system is compact and light. The machine’s boot is done in less than 30 seconds, and only 8 seconds since the firmware. Its interface is very reactive, the applications can be launched very quickly. MorphOS is also an easy to use system. The organization of the OS completely points out Amiga and its users find their marks rather quickly. The system files are arranged according to an easily memorable tree structure and MorphOS proposes at the same time a graphic interface with icons (Ambient) and a command line interface (Shell).
Ambient is an extremely tunable workbench : wallpapers, windows backgrounds, fonts, icons, widgets, etc… Everything can be changed. It also features support of several screens (with different characteristics or not) and an asynchronous use (the office is never blocked). In its version 1.4.5, MorphOS includes a version of Ambient which does not have all the functions that a modern office should have. However, the permanent development of Ambient makes it possible little by little to fill its lacks.
May 2007 edition – Geoffrey CHARRA – http://www.efika.org
6
The Pegasos book – Volume 3 : MorphOS
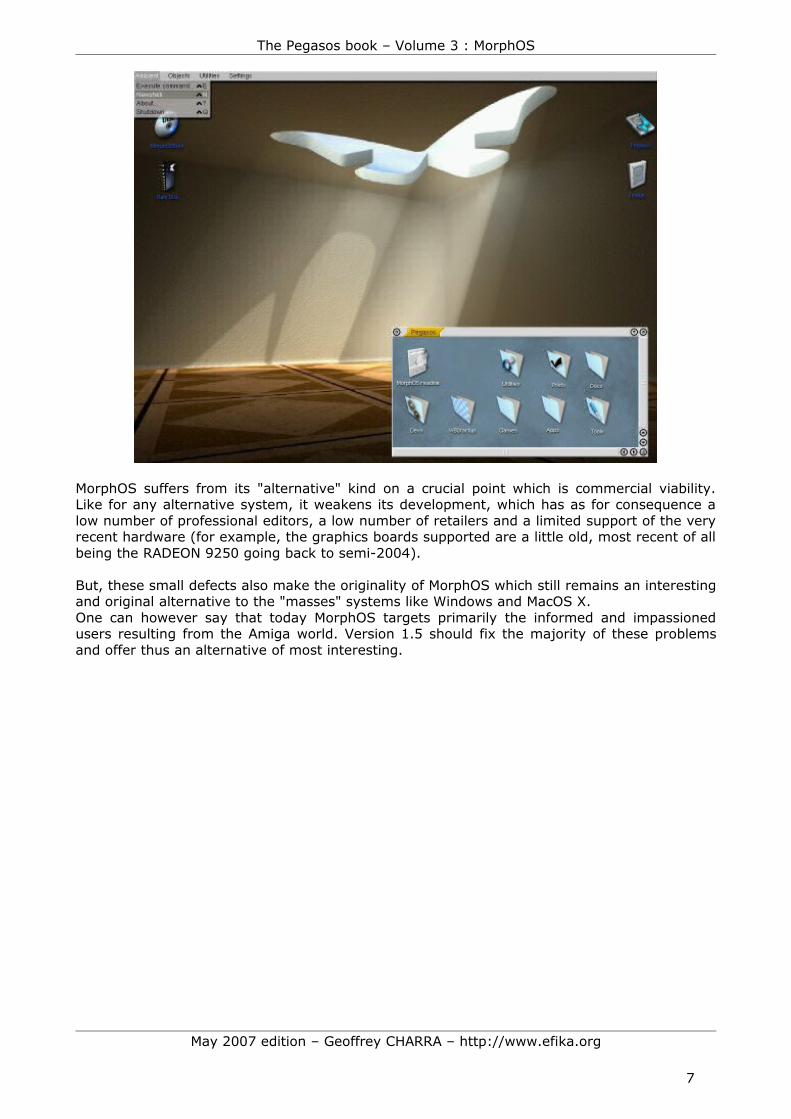
MorphOS suffers from its "alternative" kind on a crucial point which is commercial viability. Like for any alternative system, it weakens its development, which has as for consequence a low number of professional editors, a low number of retailers and a limited support of the very recent hardware (for example, the graphics boards supported are a little old, most recent of all being the RADEON 9250 going back to semi-2004).
But, these small defects also make the originality of MorphOS which still remains an interesting and original alternative to the "masses" systems like Windows and MacOS X.One can however say that today MorphOS targets primarily the informed and impassioned users resulting from the Amiga world. Version 1.5 should fix the majority of these problems and offer thus an alternative of most interesting.
May 2007 edition – Geoffrey CHARRA – http://www.efika.org
7
The Pegasos book – Volume 3 : MorphOS
2 Installation of MorphOS 2.1 Preparation
In order to get the current MorphOSboot-CD-Image you should log in the provided FTP Server ftp.morphos-team.net and download the latest version. To obtain your connexion information, your must register on http://support.morphos-team.net/. Registering is limited to Pegasos or Amiga owners (PowerUP version) only.
If you don't have the means to burn a CD from the image, use the CD that came with your system. You can upgrade to the latest version at some future time.
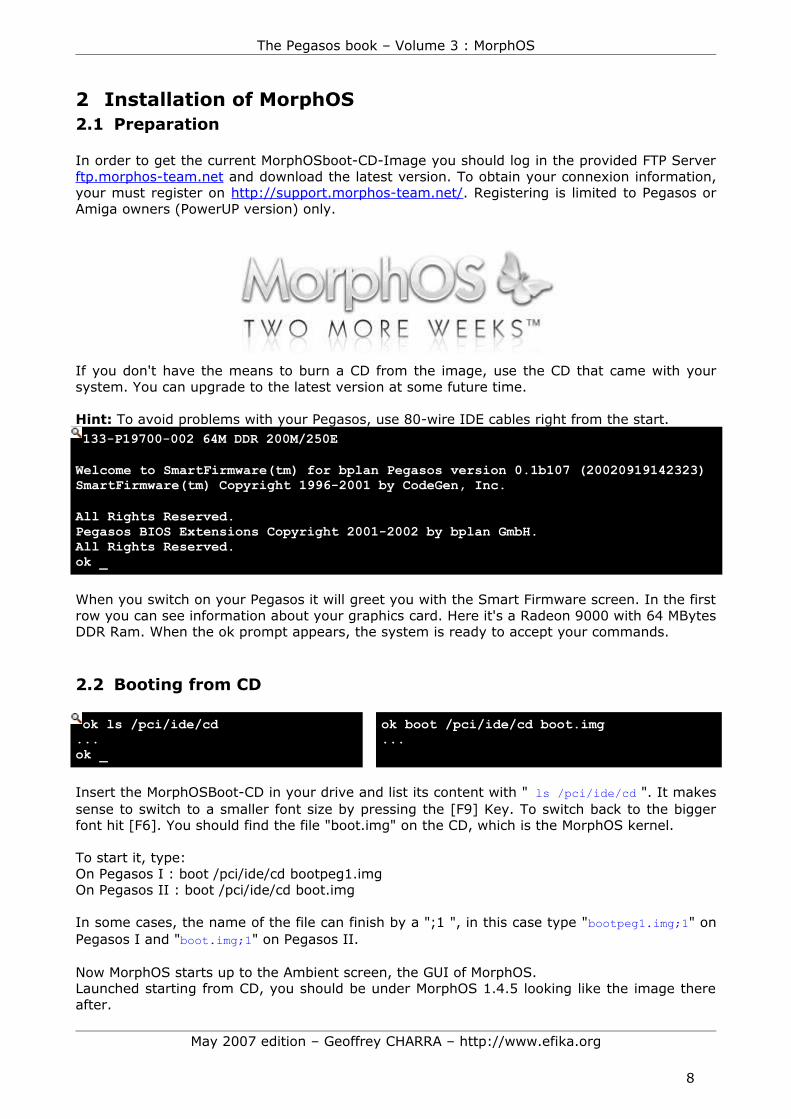
Hint: To avoid problems with your Pegasos, use 80-wire IDE cables right from the start.133-P19700-002 64M DDR 200M/250EWelcome to SmartFirmware(tm) for bplan Pegasos version 0.1b107 (20020919142323)SmartFirmware(tm) Copyright 1996-2001 by CodeGen, Inc.All Rights Reserved.Pegasos BIOS Extensions Copyright 2001-2002 by bplan GmbH.All Rights Reserved.ok _
When you switch on your Pegasos it will greet you with the Smart Firmware screen. In the first row you can see information about your graphics card. Here it's a Radeon 9000 with 64 MBytes DDR Ram. When the ok prompt appears, the system is ready to accept your commands.
2.2 Booting from CD
ok ls /pci/ide/cd...ok _
ok boot /pci/ide/cd boot.img...
Insert the MorphOSBoot-CD in your drive and list its content with " ls /pci/ide/cd ". It makes sense to switch to a smaller font size by pressing the [F9] Key. To switch back to the bigger font hit [F6]. You should find the file "boot.img" on the CD, which is the MorphOS kernel.
To start it, type: On Pegasos I : boot /pci/ide/cd bootpeg1.imgOn Pegasos II : boot /pci/ide/cd boot.img
In some cases, the name of the file can finish by a ";1 ", in this case type "bootpeg1.img;1" on Pegasos I and "boot.img;1" on Pegasos II.
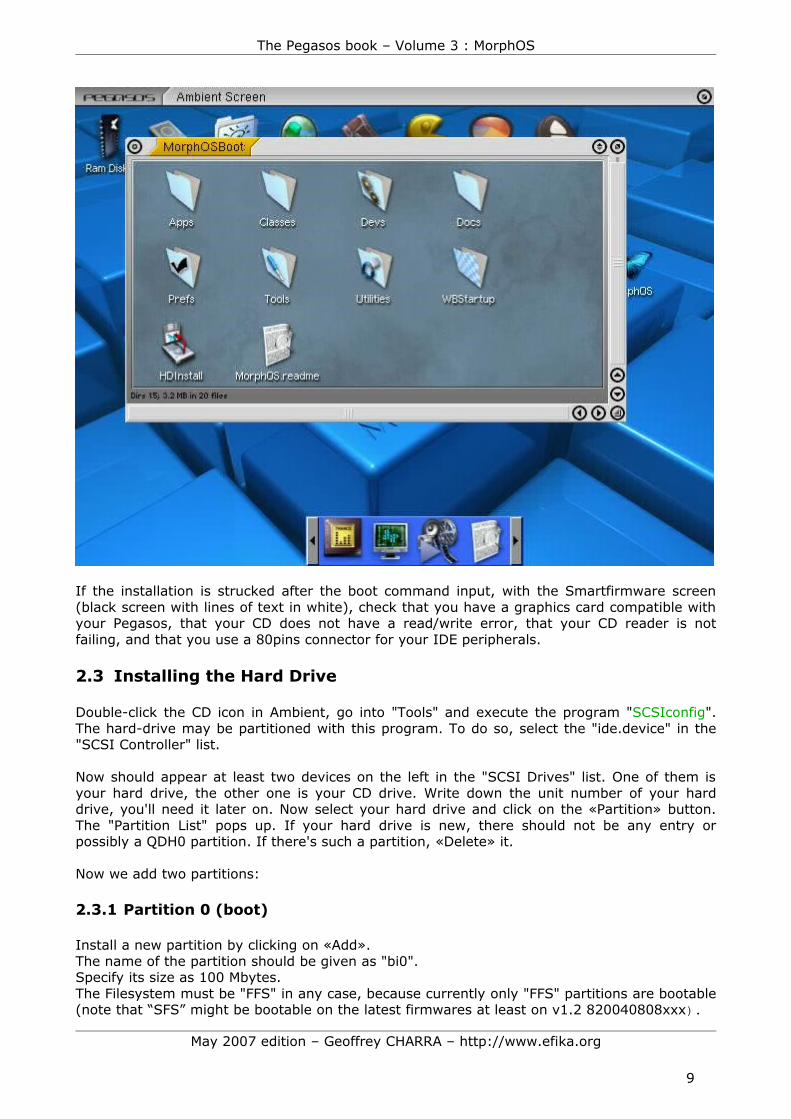
Now MorphOS starts up to the Ambient screen, the GUI of MorphOS.Launched starting from CD, you should be under MorphOS 1.4.5 looking like the image there after.
May 2007 edition – Geoffrey CHARRA – http://www.efika.org
8
The Pegasos book – Volume 3 : MorphOS
If the installation is strucked after the boot command input, with the Smartfirmware screen (black screen with lines of text in white), check that you have a graphics card compatible with your Pegasos, that your CD does not have a read/write error, that your CD reader is not failing, and that you use a 80pins connector for your IDE peripherals.
2.3 Installing the Hard Drive
Double-click the CD icon in Ambient, go into "Tools" and execute the program "SCSIconfig". The hard-drive may be partitioned with this program. To do so, select the "ide.device" in the "SCSI Controller" list.
Now should appear at least two devices on the left in the "SCSI Drives" list. One of them is your hard drive, the other one is your CD drive. Write down the unit number of your hard drive, you'll need it later on. Now select your hard drive and click on the «Partition» button. The "Partition List" pops up. If your hard drive is new, there should not be any entry or possibly a QDH0 partition. If there's such a partition, «Delete» it.
Now we add two partitions:
2.3.1 Partition 0 (boot)
Install a new partition by clicking on «Add».The name of the partition should be given as "bi0".Specify its size as 100 Mbytes.The Filesystem must be "FFS" in any case, because currently only "FFS" partitions are bootable (note that “SFS” might be bootable on the latest firmwares at least on v1.2 820040808xxx).
May 2007 edition – Geoffrey CHARRA – http://www.efika.org
9
The Pegasos book – Volume 3 : MorphOS
At this time the mask must still be changed from "0xffffffff" to "0xfffffffe". The warning that the settings are not optimal may be clicked away without concern.Remove the check mark under "Boot".Set the check mark under "Mount".Click on «OK».
2.3.2 Partition 1 (system)
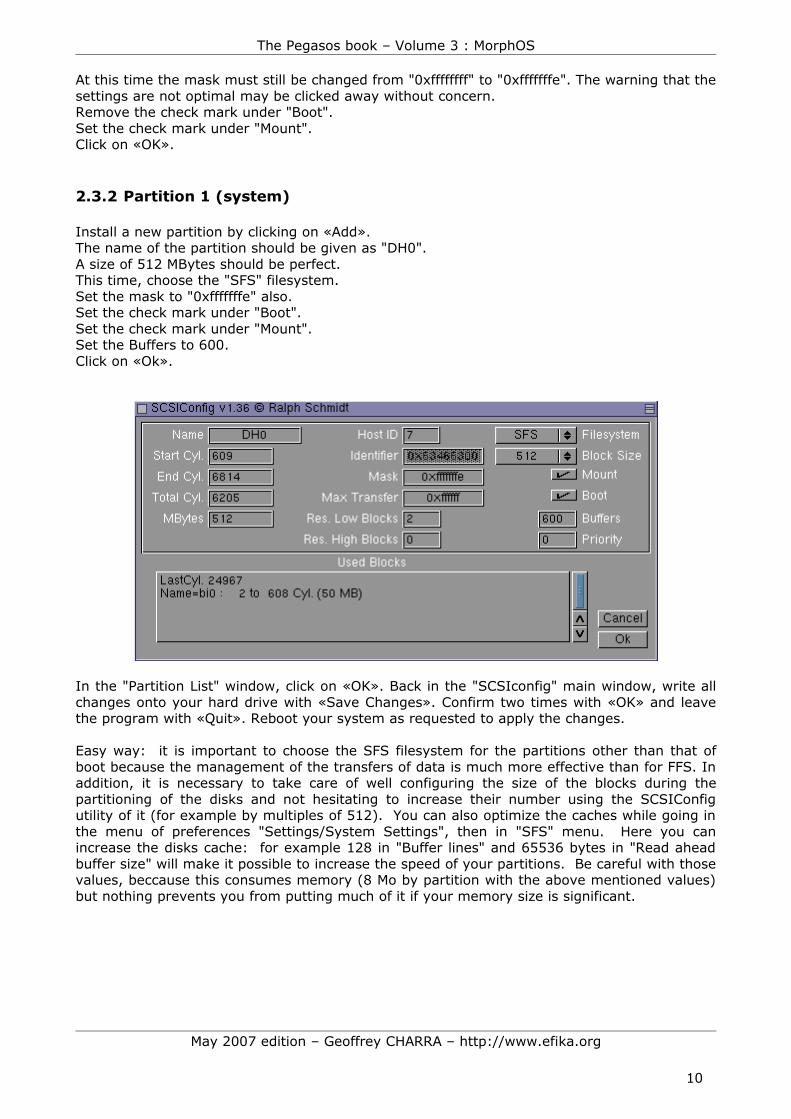
Install a new partition by clicking on «Add».The name of the partition should be given as "DH0".A size of 512 MBytes should be perfect.This time, choose the "SFS" filesystem.Set the mask to "0xfffffffe" also.Set the check mark under "Boot".Set the check mark under "Mount".Set the Buffers to 600.Click on «Ok».
In the "Partition List" window, click on «OK». Back in the "SCSIconfig" main window, write all changes onto your hard drive with «Save Changes». Confirm two times with «OK» and leave the program with «Quit». Reboot your system as requested to apply the changes.
Easy way: it is important to choose the SFS filesystem for the partitions other than that of boot because the management of the transfers of data is much more effective than for FFS. In addition, it is necessary to take care of well configuring the size of the blocks during the partitioning of the disks and not hesitating to increase their number using the SCSIConfig utility of it (for example by multiples of 512). You can also optimize the caches while going in the menu of preferences "Settings/System Settings", then in "SFS" menu. Here you can increase the disks cache: for example 128 in "Buffer lines" and 65536 bytes in "Read ahead buffer size" will make it possible to increase the speed of your partitions. Be careful with those values, beccause this consumes memory (8 Mo by partition with the above mentioned values) but nothing prevents you from putting much of it if your memory size is significant.
May 2007 edition – Geoffrey CHARRA – http://www.efika.org
10

The Pegasos book – Volume 3 : MorphOS
2.3.3 Partition 2 to N (data)
You can then create other partitions of various sizes to put your software and data at it. The characteristics of these partitions will have to be like this: SFS filesystem, 1024 blocksize, a 600 buffer and "mount" box checked.
2.3.4 Save of partition table and check
After the reboot, type "ls /pci/ide/disk@0,0" at the SmartFirmware prompt. With this command you may check if the partitions were installed correct. The first zero in the command stands for Channel 0, the second for Master. If the unit number you wrote down before is not 0, you have to change the command the following way:
Unit 0 == /pci/ide/disk@0,0 [channel0,master]Unit 1 == /pci/ide/disk@0,1 [channel0,slave]Unit 2 == /pci/ide/disk@1,0 [channel1,master]Unit 3 == /pci/ide/disk@1,1 [channel1,slave]
ok ls /pci/ide/disk@0,0RDB patition 0 <FFS> : <bi0> (0x444F5301)RDB patition 1 <SFS> : <DH0> (0x53465300)ok _
If you see the same display as in the figure above, everything is alright. If there are DOS partitions instead of RDB partitions, you'll get an "The Filesystem is not supported" error when booting from hard drive (see Troubleshooting there after for a solution). Now proceed with booting from CD.
2.4 Format the Partitions
Now we'll format the partitions you just created. Select "Format Disk..." from the "Utilities" entry of the menue bar. Choose the partition you want to format on the left, give it a name in the "Label" text field and click on «Format». A reasonable name would be "System" for DH0 and "Bootimg" for bi0. When you formatted both partitions, «Close» the program.
2.5 Copy MorphOS onto your Hard Drive
To copy the files onto the hard disk, use the "HDInstall" script which is supplied on the CD. The script recognises an already installed version of MorphOS and updates it. All settings are kept. But don't forget to backup your data before updating an old version.
May 2007 edition – Geoffrey CHARRA – http://www.efika.org
11
The Pegasos book – Volume 3 : MorphOS
2.6 Boot from your Hard Drive
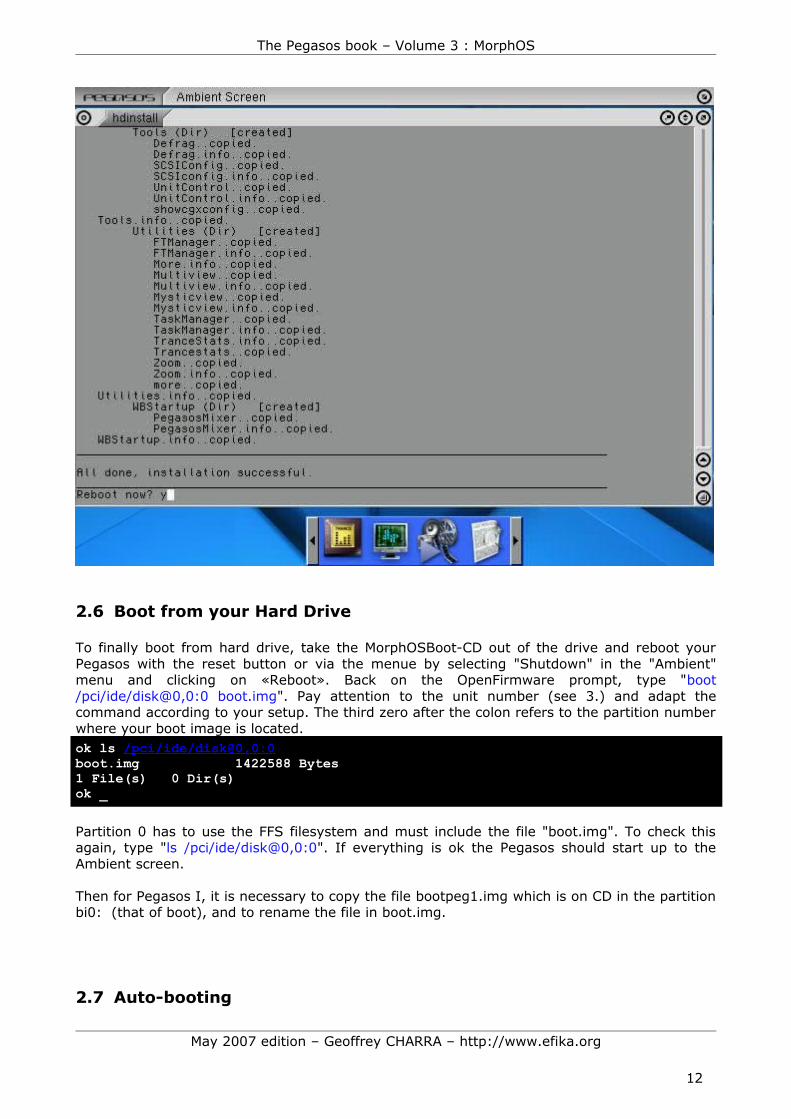
To finally boot from hard drive, take the MorphOSBoot-CD out of the drive and reboot your Pegasos with the reset button or via the menue by selecting "Shutdown" in the "Ambient" menu and clicking on «Reboot». Back on the OpenFirmware prompt, type "boot /pci/ide/disk@0,0:0 boot.img". Pay attention to the unit number (see 3.) and adapt the command according to your setup. The third zero after the colon refers to the partition number where your boot image is located.ok ls /pci/ide/disk@0,0:0boot.img 1422588 Bytes1 File(s) 0 Dir(s)ok _
Partition 0 has to use the FFS filesystem and must include the file "boot.img". To check this again, type "ls /pci/ide/disk@0,0:0". If everything is ok the Pegasos should start up to the Ambient screen.
Then for Pegasos I, it is necessary to copy the file bootpeg1.img which is on CD in the partition bi0: (that of boot), and to rename the file in boot.img.
2.7 Auto-booting
May 2007 edition – Geoffrey CHARRA – http://www.efika.org
12

The Pegasos book – Volume 3 : MorphOS
If your Pegasos is not new or if you bought a new complete machine in a retailer, you can be skip this stage.On opposite, To avoid typing the command line shown under 6. everytime you start your system, you may enable the Auto-Boot feature. After a reboot, type the following lines on the OpenFirmware prompt:
“printenv” <- display of your parameters"setenv boot-file boot.img ramdebug""setenv boot-device /pci/ide/disk@0,0:0" <- check for the right HDD unit !"setenv auto-boot-timeout 3000" <- Auto-boot after 3 seconds"setenv auto-boot? true"Check that "disk0,0;0" is appropriate for your configuration. The first two figures indicate the number of the unit on chain IDE ("0,0 "for port IDE 0 as a Master," 0,1 "for port IDE 0 as a slave," 1,0 "for port IDE 1 as a Master and" 1,1 "for port IDE 1 as a slave). The last figure is the number of the partition ("0 "if you followed our example).
The "ramdebug" parameter in the first line redirects the debug output which is normally sent to the serial interface to RAM, so you may use the serial interface for another purpose. It has also an positive effect on the speed of your system.
If you eventually don't want to use the Auto-boot feature, press [Esc] to interrupt the boot timeout. To deactivate Auto-booting permanently enter "setenv auto-boot? false" at the prompt. ok printenv...ok _
To check the environment variables you just set, type "printenv". Now you may start MorphOS by entering "boot". When you start your Pegasos the next time, the booting will run automatically.
2.8 Screen mode setup
Go in "Settings/System settings" and select "Mode Edit" to choose a monitor. Choose then a screen in the "Monitor" tab then select a resolution in the "Modes" tab. Double-click on this resolution (at least 640x480) then click on "Test" to display it. Now adapt your monitor to this resolution. Once that that is appropriate to you, press on ESC key to return to the menu and then click on "Save". Start again. Go again in "Settings/System settings" and select "Screen mode". Click on Ambient choose a resolution, a skin and save.
2.9 Changing from a Pegasos I to a Pegasos II
If you’re changing from Pegasos I to Pegasos II, but that you want to preserve your current hard disk, your system will have to be updated. For that, it is necessary to copy the file "boot.img" of Pegasos II in your "Boot:” partition and the new file "parallel.device" in SYS:MorphOS/Devs/.
2.10Troubleshooting
I can't burn the ISO Image to CD with MakeCD
May 2007 edition – Geoffrey CHARRA – http://www.efika.org
13

The Pegasos book – Volume 3 : MorphOS
If the ISO is recognized by MakeCD as "Audio", this may mean that you are using an old MakeCD version. Get the latest version, which may be found at http://makecd.core.de (Twister).
I can't boot from the CD by typing "boot /pci/ide/cd boot.img". I get the error message "boot.img not found"Make sure that the data on the CD is recognized by typing "ls /pci/ide/cd". If the boot.img data is, for example, shown as "boot.img;1", try typing "boot /pci/ide/cd boot.img;1" to boot. (Twister)This error occurs if the ISO is burned on a CD-RW wich hasn't been deleted properly before. Also check that your CD drive is working correctly.
SmartFirmware can't find any of the two partitionsDid you pay attention to to unit number where necessary ? Make sure the hard drive is connected with an 80-wire IDE cable. Did you follow the steps exactly and in the right order while installing your hard drive ?
When I boot from the hard-drive I get the error message: "The Filesystem is not supported"Probably the hard drive you're using was once in a PC and has a MBR (Master Boot Record) which causes this error message to appear. To solve this problem you should make use of the program "HDWrite", which may be found in the "SYS:Tools/debug" directory on your hard disk or on “MorphOSBoot:MorphOS/C” on your CD. All you need is a file wich is between 512 and 1024 Bytes in size. The program file "reboot" in "Mossys:c/" with about 800 Bytes is just perfect for our purpose. Type "HDwrite ide.device <unit> MOSSYS:c/reboot 0" in the Shell but replace <unit> with the unit number of of your hard drive.If this still does not work, then see the paragraph "3.2.11: In the event of impossible boot : deleting the MBR on a PC".
While booting from hard drive, the operation stops after loading the "boot.img" at the Smart Firmware screen without displaying any error message.After loading the "boot.img", the system tries to start from a bootable partition. This error occurs if you made more than one partition bootable. Ensure that only DH0 is installed as a bootable partition. If you want to boot from another partition than DH0 from time to time, use the "bootdevice" parameter. E.g.: "boot /pci/ide/disk@0,0:0 boot.img bootdevice=dh1".The booting stops at the MorphOS logo and nothing else happens.If you're trying to use a AGP and a PCI graphics card at the same time remove one of the two cards. It's not possible to use more than one Gfx card at one time.Check also that you’re using a MorphOS compatible graphic card (see list before).
I can't hear any sounds.If you aren't hearing any sounds then you should start the "Pegasosmixer" (found in WBStartup drawer) and save the settings. The "Pegasosmixer" can normally be started with the keyboard combination [ctrl]+[ralt]+[p], too.
2.11In the event of impossible boot : deleting the MBR with a PC…
If your Pegasos still refuse to boot from the CD after an installation of MorphOS, it is very probable that the MBR was not correctly removed from the hard disk.
This kind of problem can appear if you have an hard disk coming from a PC.
The MBR (Master Boot Record) is a zone at the head of the hard disk indicating to the computer where is the OS to be used. The Pegasos does not use this information in this form but that can even prevent the computer of recognizing a bootable installation of MorphOS.
If you already tried to remove the MBR with the tool MorphOS "HDWrite" and that you checked and tested scrupulously all the previous assistance tips without success, you will have then to
May 2007 edition – Geoffrey CHARRA – http://www.efika.org
14

The Pegasos book – Volume 3 : MorphOS
carry out the operation using a PC as many hard disks constructors tools are unfortunately only available for this platform.
To do this, two steps :- Delete the MBR then reinstall MorphOS- If that is still not enough, you will have to do a low level format of the hard disk. It consists in filling of zeros a hard disk to crush all the. Warning ! After a low level you will not be able to recover your data with classic softwares (Easy Recovery par exemple).
To make these operations, you will have either to download the specific utility to your hard disk model (recommended), or use a bootable cédérom utilities.
Under Windows :Those softwares require a PC with installed Windows OS.
- IBM/Hitachi : http://www.hitachigst.com/hdd/support/downloads/dft32_v405_b00.exe- Maxtor : http://downloads.maxtor.com/downloads/_files/maxtor/fr_fr/downloads/mxblst4win.EXE- Samsung : http://www.samsung.com/Products/HardDiskDrive/utilities/hutil.htm (choose a software
depending of your disk)- Seagate : http://www.seagate.com/support/disc/drivers/discwiz.html (choose the middle column) - Western Digital : http://support.wdc.com/download/index.asp?cxml=n&pid=999&swid=1
In ISO :These ISO images are burnable on cédérom, but nevertheless require to connect the hard disk in a PC, that whatever the operating system installed above. To burn them, you will need a burning software (Ahead Nero or Alcohol 120% Windows pennies, K3B or Nautilus under Linux).
- IBM/Hitachi : http://www.hitachigst.com/hdd/support/downloads/dft32_v405_b00.iso- Maxtor : http://downloads.maxtor.com/downloads/_files/maxtor/fr_fr/downloads/mxblst4cd.zip- Samsung : Only exists for Windows or DOS - Seagate : http://www.seagate.com/support/disc/drivers/discwiz.html (choose the left
column) - Western Digital : Only exists for Windows or DOS
Utilities on bootable CDs :This CD gathers a whole series of software making it possible to format, partition and test your hard disk and system. It was conceived for the computers of the PC type. To burn it, you will need a burning software (Ahead Nero or Alcohol 120% Windows pennies, K3B or Nautilus under Linux).For the Ultimate Boot CD : http://www.planetmirror.com/pub/ubcd/3.3/ubcd33-basic.zip
After formatting the MBR (or a low level formatting if necessary), you can then continue the partitioning and the installation of MorphOS following this tutorial.
2.12Installing 3D graphic drivers
First, get the « MorphOS3DUpdate_R2.lha » file on the MorphOS FTP website (ftp.morphos-team.net/updates).Then to install the graphic drivers, double-click on the Install icon and follow the instructions.This update contains the drivers for the graphic cards based on the following GPUs :- 3Dfx Avenger (Voodoo 3)- 3Dfx Napalm (Voodoo 4 et Voodoo 5)- ATI rv100 (Radeon 7000 et Radeon VE)- ATI r100 (Radeon 7200)- ATI rv200 (Radeon 7500)- ATI r200 (Radeon 8500 et Radeon 9100)- ATI rv250 (Radeon 9000)
May 2007 edition – Geoffrey CHARRA – http://www.efika.org
15

The Pegasos book – Volume 3 : MorphOS
- ATI rv280 (Radeon 9200 et Radeon 9250)
2.13Other updates
On the MorphOS FTP website, you will also find a few more updates that you can add manually to your system (ftp.morphos-team.net/updates) :
- rtl_8139pci.device : update of the network driver for network adapters based on Realtek RTL8139 chip (useless if you use on the mainboard integrated network ports)
- parallel.device : parallel port update- ft2.library : fonts library update- iffparse.library : iff parsing update- Apdf_upd.lha : APDF application update (PDF reading)- Trance-50.12.lha- Ambient official version (the latest can be found on http://ambient-desktop.org/ and is
daily-built).
Other non official updates are also available out of the MorphOS’s website :- MUICON (console) : http://dreamolers.binaryriot.org/muicon/index.php- Printer fix : http://www.bwelf.de/axel/download/MOS1.4-Printer-Fix.lha - Reggae datatypes : http://teleinfo.pb.bialystok.pl/reggae/- MUI 4 (beta) : http://www.stuntz.com/muibeta_20070425.lha (or
http://www.sasg.com/mui/)- AHI 6.0 (sound) : http://arp2.berlios.de/ahi/ or http://de5.aminet.net/hard/drivr/ppc-
morphos-ahiusr.lha- Poseidon (USB stack) : http://www.platon42.de/poseidon.html- ixemul49.20.lha http://binaryriot.com/dreamolers/sshcon/ixemul.lha- powersdl11.8.lha (SDL library) http://www.aminet.net/util/libs/powersdl.lha- AmigaGuideDT.lha (Amiga guide format documentation reading) :
http://main.aminet.net/util/dtype/AmigaGuideDT.lha- Sound datatypes pack :
http://teleinfo.pb.edu.pl/~krashan/software/sounddatatypespack3.lhaInstaller.lha : http://aminet.net/util/misc/Installer.lha
- powersdl11.10.lha : http://main.aminet.net/util/libs/powersdl.lha
Some other useful tools made from bounties, can complete your system :
- MOSNet (TCP/IP stack) : http://www.morphzone.org/modules/mydownloads/visit.php?lid=383- MorphUP (packages installation) : http://member.ycn.com/~hausrup/downloads/morphup/- SFSDoctor (disk tool) : http://home.elka.pw.edu.pl/~mszyprow/programy/sfsdoctor/
Developers should also consider the following upgrades, all available on http://developer.morphosppc.com/:
- gg-gcc-2.95.3.lha (SDK GCC compiler update)- gg-binutils-2.9.1.lha (SDK binary utils update)- libnix_update.tar.bz2 (Libnix update)
A list with all those tools is maintained by Fulvio Peruggi :http://www.webalice.it/fulvio.peruggi/public/Pegasos&MorphOS/Documents/TheBigListOfMorphOSUpgrades.html
May 2007 edition – Geoffrey CHARRA – http://www.efika.org
16

The Pegasos book – Volume 3 : MorphOS
3 Presentation of the MorphOS treeHere is the MorphOS tree (version 1.4.5) :
AppsCClassesDevsDocsFontsLLibsLocaleMorphOS
AmbientCClassesDevsFontsLLibsLocalePrefsSTP
PrefsSStorageToolsUtilitiesWBStartup
This tree structure is close to the AmigaOS one. This organization makes it possible to have a well structured system where it is easy to find your way. The commands are for example in the "C" directory, the libraries are in "Libs", the preferences files are in "Prefs", the fonts in "Font", etc...
In addition, "Apps" contains various applications which were integrated into MorphOS : APDF (PDF reader), Kaya (MP3 and OGG reader) and Morphtris (game). Other software will be included in next version. Note : Voyager (web browser) and FxPaint (graphic editor) are not more available since MorphOS 1.4.5. MorphOS directory is dedicated to what constitutes the heart of our OS (Ambient, basic MCCs for MUI, libraries necessary to the basic operation of MorphOS, etc...). Consider that all that is inside is private, managed by the MorphOS Team. This implies that during delivery of new version of MorphOS, the installation of the latter allows any changes inside this directory. Thus never put in your personal data (third libraries, a datatype which you developed yourself or coming from Aminet, etc…). On the other hand, all the other directories are considered to be yours and you can thus put what good seems to you inside.
May 2007 edition – Geoffrey CHARRA – http://www.efika.org
17

The Pegasos book – Volume 3 : MorphOS
4 MorphOS preferencesIn order to personalize the system and to manage multiple settings, MorphOS has a very intuitive panel of preferences.
The preferences system is needed on any OS. MorphOS proposes a whole panel of various preferences. Its configuration menu is accessible via the "Settings/System Settings" menu. We will see in detail the various menus of preferences available on MorphOS in this chapter.
May 2007 edition – Geoffrey CHARRA – http://www.efika.org
18

The Pegasos book – Volume 3 : MorphOS
4.1 Audio
Choose here the audio mode which will be used by all compatible applications AHI (sound driver of Pegasos). You will be able to define several units, certain applications allow to choose them.
Note also the presence of PegasosMixer in WBStartup. It makes it possible to set the volume and the balance of the audio’s inputs and outputs. You can reach it by the Ctrl-alt left-P keyboard shortcut or since Ambient - > Utilities - > Exchange menu.
4.2 Debug
These options are intended for the developers. They make it possible to add debug information. These debug outputs are done, by default, via the serial port. If you have a PC and a nullmodem cable, you will be able to get them, for example, with the HyperTerminal program of Windows. You will be able to redirect the debug output to a "buffer" in memory by adding the option "ramdebug" to the sequence of "boot" in SmartFirmware (see documentation). The "Getramdebuglog" command (available from MorphOS FTP site) makes it possible to redirect this "buffer" to the "ram:morphos.log" file. By adding the "logserver" option to the sequence of "boot", the “hits” will be posted in a "MorphOSLog" window.By adding EDebugFlags="logextended" in the firmware the logs will be more detailed. You will find an article for the interpretation of the “Debug log” files on the http://mdc.morphos.net/ site.These options are reserved to the experienced users, your retailer will have perhaps already added the option "ramdebug" not to encumber the serial port. To be sure, strike Escape key in
May 2007 edition – Geoffrey CHARRA – http://www.efika.org
19

The Pegasos book – Volume 3 : MorphOS
SmartFirmware before the launching of MorphOS, then type "printenv". Then look at the value of the "boot-file" variable if the option "ramdebug" is present. To know all the commands refer to the documentation of SmartFirmware in SYS:Docs/.
4.3 Font
Indicate here the fonts used by the system. "System font" is used for the texts displaying in a shell or with Multiview, for example. "Screen Font" corresponds to the font used in the title bar the windows screens. To choose icons font it is necessary to go to "Settings Ambient".The Antialias option makes it possible to soften fonts edges according to the type of screen used. A few TrueType fonts are installed. For example, "Bitstream Vera" has all the accentuated caracters.You will be able to add your own TrueType fonts thanks to the FTManager program of the SYS:Utilities directory.Indeed the TrueType fonts must be converted to be compatible with MorphOS. Note that the management of the fonts should be enhanced in the future versions of MorphOS in order not to require any conversion.
4.3.1 Use of FTManager
It is used to create two files of "description" placed in “Fonts:”. Pre-installed fonts are situated in “MOSSYS:fonts/” and their source in MOSSYS:fonts/_ttf/. To add new fonts, avoid modifying “MOSSYS:” which could make you lose them with the next update of MorphOS ; instead the best is to create a “Fonts:ttf/” directory and place there the fonts which one wishes to add.
In fact the fonts can be placed anywhere, because one of the description files (otag) contains the path to the font. The whole being not to move this “ttf” directory thereafter. With FTManager, choose the source directory (ex: “Fonts:ttf”) then double-click on the font of your choice. A window opens, it is then possible to modify it’s name, then click on install. Two files will be created in “Fonts:”. For example for a font "milice.ttf", there must be in the directory font: the milice.font and milice.otag files which points towards the source directory containing "milice.ttf".
4.4 IControl
In the HotKeys tab you will be able to define keys combinations for actions related to the windows and screens. On standard keyboards, some keys are not recognized automatically with the "Sample" button, but can be used with the following definitions: end, insert, home, page_up, page_down, with or without CTRL and ALT keys. Warning : these shortcuts will take over all other key assignments, think to it and avoid choosing already existing combinations.
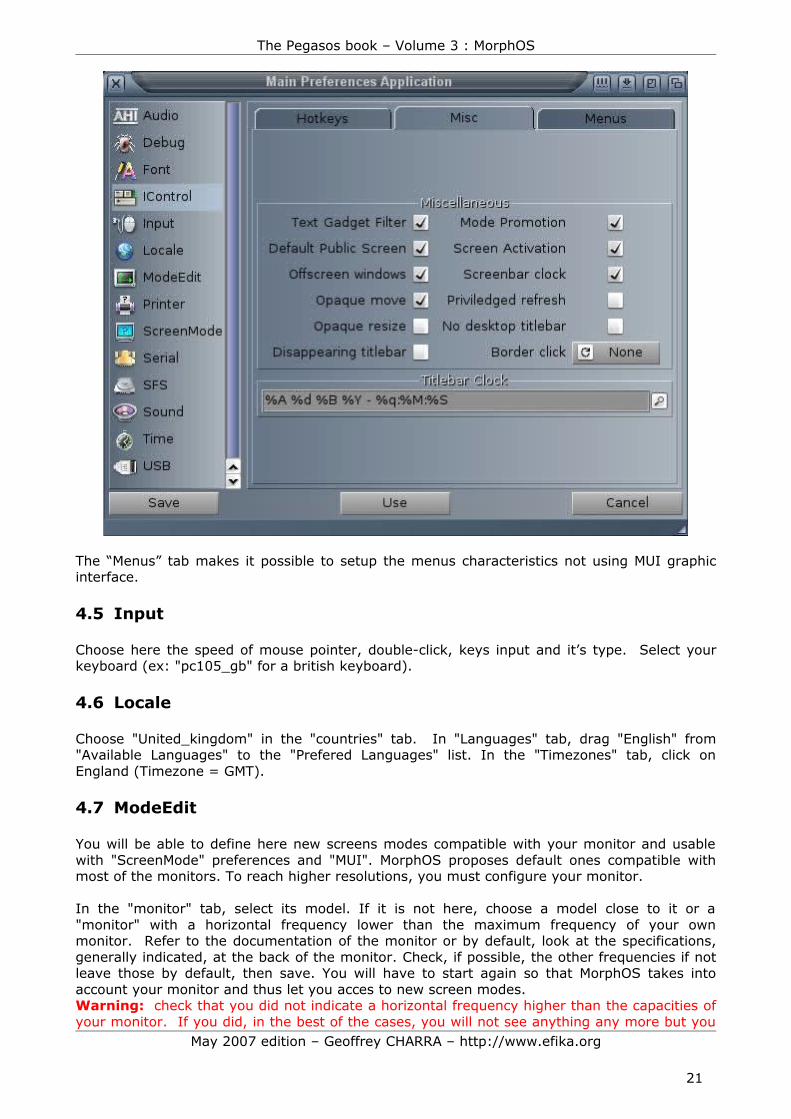
The Misc tab holds some options for the windows and screens as well as codes to display the hour in the screen bar. For example: %A %B %e - %q:%M:%S will display the date of the as follows : Wednesday December 31 - 23:59:59.
May 2007 edition – Geoffrey CHARRA – http://www.efika.org
20
The Pegasos book – Volume 3 : MorphOS
The “Menus” tab makes it possible to setup the menus characteristics not using MUI graphic interface.
4.5 Input
Choose here the speed of mouse pointer, double-click, keys input and it’s type. Select your keyboard (ex: "pc105_gb" for a british keyboard).
4.6 Locale
Choose "United_kingdom" in the "countries" tab. In "Languages" tab, drag "English" from "Available Languages" to the "Prefered Languages" list. In the "Timezones" tab, click on England (Timezone = GMT).
4.7 ModeEdit
You will be able to define here new screens modes compatible with your monitor and usable with "ScreenMode" preferences and "MUI". MorphOS proposes default ones compatible with most of the monitors. To reach higher resolutions, you must configure your monitor.
In the "monitor" tab, select its model. If it is not here, choose a model close to it or a "monitor" with a horizontal frequency lower than the maximum frequency of your own monitor. Refer to the documentation of the monitor or by default, look at the specifications, generally indicated, at the back of the monitor. Check, if possible, the other frequencies if not leave those by default, then save. You will have to start again so that MorphOS takes into account your monitor and thus let you acces to new screen modes.Warning: check that you did not indicate a horizontal frequency higher than the capacities of your monitor. If you did, in the best of the cases, you will not see anything any more but you
May 2007 edition – Geoffrey CHARRA – http://www.efika.org
21

The Pegasos book – Volume 3 : MorphOS
will be able always to start since MorphOS CD and reinstall it. But in the worst of the cases, there is a risk to damage the monitor.
To create a new mode, in the "modes" tab click on "New". A new window appears (Edit Mode). Choose the depth (ex: 24 bits) and move "scan mode" over "normal", then in the list, choose the requested resolution. Click on "test", a test screen must appear, if it is not the case, press on the "Esc" key. If that is appropriate to you, click on "OK", then save. As long as you are there, edit the already existing modes which do not correspond to the capacities of your monitor. With a modern monitor, it is recommended to choose a vertical frequency higher than 75 Khz.
4.8 Printer
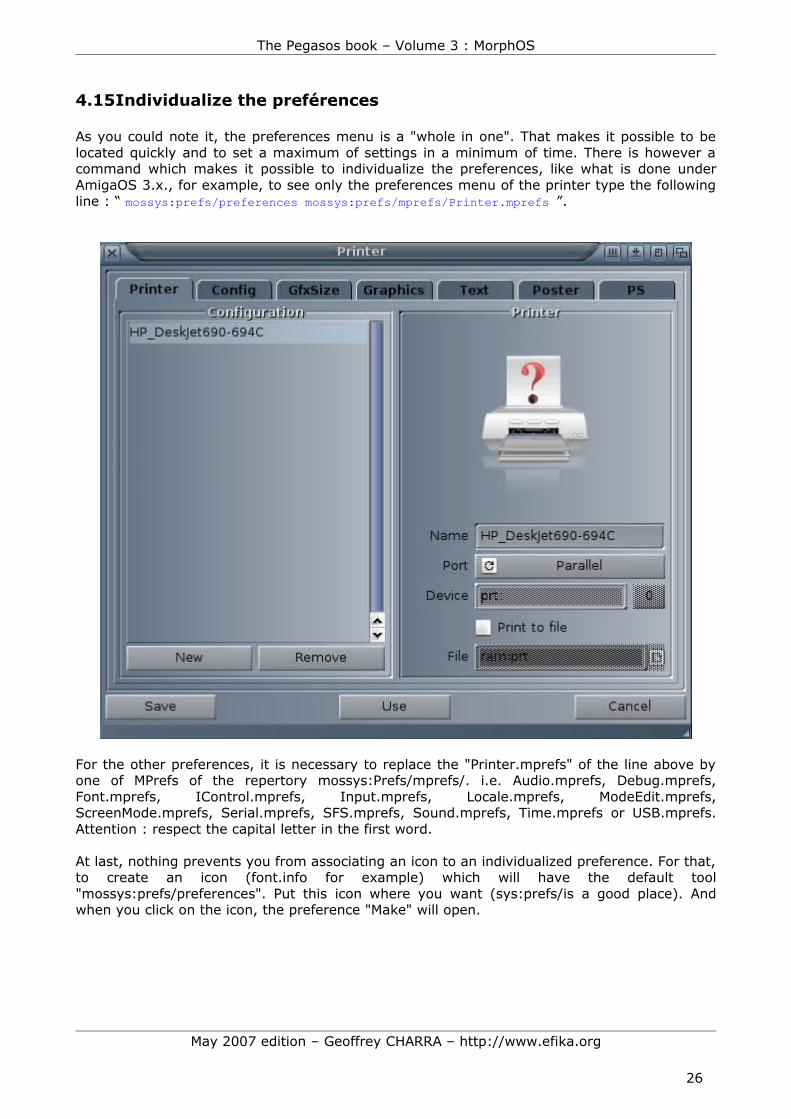
Click on "New" and choose your printer in the list of the "Prefs Printer" window. If it is your first use, uncheck the option "Keep current configuration" which is used to preserve an old configuration. According to the connector type of your printer, indicate the type of port to be used. If it’s a USB printer, choose "Device" for the port and enter "usbparallel.device" in text field. The next slider corresponds to the unit number of the port, leave the value on zero.
4.8.1 Config tab
According to the printer model and the driver chosen, you will be able to have access to additional parameters with to the "Settings Printer" button. The other parameters are used to configure printing for all the applications. Note that certain programs, like word processing, have their own printing configuration system which will override thos parameters if you configure them. The "density", "medium" and "quality" modes can change according to the selected driver and have a direct influence on printing quality.
4.8.2 Graphics tab
These settings are also important for printing quality of graphics. The "Dithering" part makes it possible to setup the weaving used for the printing. "Standard" allows to choose the matrix. "Ordered", "Dowry", "Line" are "ordered" weaving. For a better result, choose "Diffuse" type so the weaving thus will be less visible by removing the too geometrical patterns. "Size" makes it possible to choose the pattern used for the weaving. For "Diffuse" that goes from "Floyd-Steinberg", faster but relatively ordered, with "Super-Diff" which removes all symetrical structures. This mode gives very good result for the clear colors but not always for the dark parts in which case "FS-Big" seems a good compromise.Lastly, "16 Mio colours" and “Pure Black” should be checked. This “Pure Black” option makes it possible to use the black toner rather than a mixture of the three colors, yellow, magenta and cyan to obtain the black color, if the printer allows, it and according to your settings "TrueMatch".In the zone "Colour/Brightness", activate "TrueMatch Correction". This option is a system of color correction. Click on "Settings" and in the "Printer - Colour Correction" window, choose a table of correction for your model of printer (see low for MorphOS 1.4).
The "Auto" option in "TrueMatch UCR" lets the correction table determine the level of use of black ink if “Pure black” option is enabled. You can determine this level thanks to "UCR Value" if "Auto" is unckecked. If the printing is too dark, clicking on "Brightness" will setup the colors quantity the way the eye perceives the luminosity.
The "Colour Gamma Correction" zone makes it possible to setup the level "Gamma" for each color if, for example, one of them is dominant or opposite. Don’t forget to click on "OK" to validate the "Settings". If the printing is not correct in spite of the use of the "TrueMatch" correction, you will be able to use "Brightness" settings for luminosity, "Contrast" for contrast, "Gamma" for luminosity without modifying the extreme colors (ex: black or pure white) and
May 2007 edition – Geoffrey CHARRA – http://www.efika.org
22

The Pegasos book – Volume 3 : MorphOS
"Colour" for the quantity of color. Lastly, "Smoothing" - "Super" allows to fade the effect of staircase visible for example with the Bitmap fonts.
"TrueMatch" under MorphOS: a selection of correction table in the "Printer - Colour Correction" window does not work under MorphOS. To select it and if you have the "TurboPrint" program, test with "TurboPrefs". Indeed, the preferences of TurboPrint are compatible with "Printer" which is a port of TurboPrint for MorphOS. If not, seek in "MOSSYS:TP/colors/" for the file corresponding to your printer and rename it by leaving only the extension ".tpm " and enable "TrueMatch".
A patch was realised which fixes part of the problems encountered with the printing under MorphOS 1.4.x. The file is to be downloaded on http://www.bwelf.de/axel/download/MOS1.4-Printer-Fix.lha. For it’s installation, it is necessary to erase your configuration files (MOSSYS:TP/configs/_Last _, _ Save _ and the file which bears the name of your printer), then to launch the control panel of the printer and to create a new one again.
4.9 ScreenMode
You will be able to modify here the screen mode for Ambient and create new ones. Double-click on the line "Ambient". In the new window, choose a screen mode created in "ModeEdit" as well as a "skin" (appearance) among those available. You will be able to also add new screens of various resolutions which will be usable by the applications using MUI interface. That will let you open them on their own screen in a more suitable resolution.
To go from one screen to another, move the mouse pointer at the upper right corner and click on the left button. While pressing on the right button, a list of the opened screens will appear and you will be able to select one. It is the same for the windows by clicking with the right button in their upper right corner.
4.10Serial
It’s the serial ports configuration. These settings can be useful with certain programs or peripherals. Refer to their documentations. If you use a modem on this port, the port must be setup with the TCP/IP stack program.
4.11SFS
You will have here access to the partitions list formatted with the SFS file system. You will obtain information and will be able to manage settings for each partition selected in the list. The first part informs you on the name of selected volume and the version of SFS. The statistics indicate the number of access which were made on missing data from the disk cache. Below you will be able to check the presence or not of the "recycled" directory which keeps the last suppressed files. TD64 indicates that it is a partition of great capacity (> 4 Go).
May 2007 edition – Geoffrey CHARRA – http://www.efika.org
23

The Pegasos book – Volume 3 : MorphOS
" Cache Setting " makes it possible to setup the quantity of buffer memory for the cache. That makes it possible to keep the last data in memory and thus to limit the accesses to the disk for unmodified one. "Buffer lines" setups the number of buffers, "Read ahead buffer size" setups the size of each buffer, below you will be able to read the quantity of memory used by the SFS cache for the partition. You will be able to increase the cache’s size of your the most requested partitions, for example SYS:, Work: or those containing the masks of your Internet browsers. A number of buffer at 128 and with the size of 32 Kbytes, for example, reserves 4 Mb of memory for each partitions thus setup. Do not be too greedy ! The "CopyBack" copy-mode activates the cache writing, the written data are not written immediatly on the disk. SFS waits until being able to rather write large packages of data of a blow than several small ones on continuation which is faster. This mode should always be selected. However, there is a risk to lose the data if an unstable application corrompts the cache. This risk is very limited (almost null) for most of the applications. On opposite, "writethrough” copy-mode, writes "through" the cache directly on the disk. Use this mode only in case of big problems with "CopyBack".
The last part makes it possible to define the maximum length of the file names (leave it to the maximum one) and the number of files which will be preserved in the "recycled" directory. This directory is very useful because it preserves the last suppressed files which can be helpfull in the event of an error. This option must be activated during the formatting of the partition with the accessible tool since small Ambient - > Utilities - > Format Disk, by checking the options "recycled" and "show recycled". This last option makes it possible to make the directory visible under Ambient by choosing "View have - All files of “iconview” pop-menu (if not it will be accessible only by the Shell commands). Of course, the "recycled" directory will be created only after formatting of the partition and thus loss of all the data of the latter. Think of making a backup if it is not empty !
May 2007 edition – Geoffrey CHARRA – http://www.efika.org
24
The Pegasos book – Volume 3 : MorphOS
4.12Sound
Setup here the way in which MorphOS will announce you an error. "Flash Display" activates the display of an alarm resulting in a red flash on the title bar of the screen. "Play sound" associates a sound to it. It can be a "beep" which you will be able to setup the pitch, the length and the volume, or it can also be a sample in a MorphOS compatible format via the datatypes. AIFF, WAVE and MP3 formats are recognized in standard. Note that DisplayBeep() (the function which makes flash the screen) does not play a sound in MorphOS 1.4. The "Datatype" tab makes it possible to choose which AHI available unit will be used by the system. For that, move the units wished in the list "Preferred Units" in the order of your choice.
4.13Time
Date and hour settings with a premium superb clock ! If you have difficulties to select with precision the year or the hour, press on the “Tabulation” key in order to activate the zone (year, hour, minute...) to modify. Then press on the keyboard arrows to modify the values.
4.14USB
USB Poseidon stack settings. The bottom part displays the information messages that you will be able to choose the level thanks to the cell after "Information level". The button "flush all messages" erases them all. "Online" and "Offline" restarts or disconnect USB stack. The top part contains several tabs. The first, "general" displays information on the version and the author of Poseidon and the preferences program "Trident" which you are using.
The "Hardware" tab displays the list of the controllers present in the Pegasos and the "device" (driver) used for each one of them. In standard, there must be two units (0 and 1) with the "uhciusb.device". A unit for the two external ports and another for the internal port.
The "Device" tab lists USB peripherals connected and recognized by Poseidon. On basis, the two units must appear as HUB followed by the peripherals which they are connected to. The column "class" indicates the type of peripheral and "Binding" shows to which device, of Poseidon, it is binded. The "Scan Class" button scans all the connected peripherals and allocates them the adequate device (class). This attribution is made with the starting of MorphOS or the connection of a new peripheral, but this button can be useful, for example, to restore the links of Poseidon following a modification of yours or if you want to reactivate a peripheral. The "Release binding" button disable the link with the Poseidon device for a selected peripheral. If a USB peripheral is not correctly recognized, you will be able to force a link towards a device by selecting it in a list. Here’s how to proceed : disable it (Release Binding), click on right button of the mouse and choose a class in the list then click "Scan Class". To restore the links found by Poseidon, choose "Force Binding : None" then "Scan Class". Warning, if you to force the use of a device, be sure of what you do before saving your settings.
May 2007 edition – Geoffrey CHARRA – http://www.efika.org
25
The Pegasos book – Volume 3 : MorphOS
4.15Individualize the preférences
As you could note it, the preferences menu is a "whole in one". That makes it possible to be located quickly and to set a maximum of settings in a minimum of time. There is however a command which makes it possible to individualize the preferences, like what is done under AmigaOS 3.x., for example, to see only the preferences menu of the printer type the following line : “ mossys:prefs/preferences mossys:prefs/mprefs/Printer.mprefs ”.
For the other preferences, it is necessary to replace the "Printer.mprefs" of the line above by one of MPrefs of the repertory mossys:Prefs/mprefs/. i.e. Audio.mprefs, Debug.mprefs, Font.mprefs, IControl.mprefs, Input.mprefs, Locale.mprefs, ModeEdit.mprefs, ScreenMode.mprefs, Serial.mprefs, SFS.mprefs, Sound.mprefs, Time.mprefs or USB.mprefs. Attention : respect the capital letter in the first word.
At last, nothing prevents you from associating an icon to an individualized preference. For that, to create an icon (font.info for example) which will have the default tool "mossys:prefs/preferences". Put this icon where you want (sys:prefs/is a good place). And when you click on the icon, the preference "Make" will open.
May 2007 edition – Geoffrey CHARRA – http://www.efika.org
26

The Pegasos book – Volume 3 : MorphOS
5 MUI (Magic User Interface) MUI (Magic User Interface) is a graphic interface developed by Stefan Stuntz for Amiga 68k since 1992. From now on, it forms integral part of the new operating PowerPC systems, like MorphOS. This interface is entirely configurable by the user and offers to the programmers a system management of graphic interfaces complete and relatively simple to apprehend (see the tutorials on http://www.guru-meditation.net).
Version 3.9 of MUI is the graphic interface of MorphOS basis. It makes it possible to setup the aspect of a great number of elements in the system. Its main features are (in version 3.9): Customisable and flexible. 32 bits Interface. Extensible by external classes Presence of help bubbles"Jump To Screen" function which makes it possible to jump from an application of a screen to anotherMenus can be docked in the application window Mouse roller supportGradient support
Note : MUI4 is now available as beta on the editor’s website : “http://www.sasg.com”.
5.1 Global MUI Settings
The global preferences make it possible to setup all the graphic aspects and the design for all MUI-compatible applications. Thereafter, you will be able to make settings for each one of them. The global preferences can be accessed by "Settings/Global MUI settings" menu from Ambient. Ambient has its own preferences via "Ambient MUI settings". On Amiga, it can be reached by "MUI:mui".
Caution: In MorphOS 1.4, volume "MUI:" does not exist any more ! This can be a problem when installing programs like IBrowse, for example, which seeks "MUI:libs/mui/" to install the necessary classes needed for it to work. The standard elements of MUI are included in MorphOS and a directory is designed to receive the "external classes" installed by some programs. I propose to use it to create the “MUI:” volume and missing directories as for a traditional MUI installation.
For that you just have to do as follows : Make an assignment of MUI like this: "assign MUI: SYS:classes/mui" Create the MUI:libs directory while typing: "makedir MUI:libs" Create the MUI:libs/mui directory while typing: "makedir MUI:libs/mui" Assign the MUI libraries while typing : "assign Libs: MUI:libs ADD" Add the first and the last of the lines above in your using-startup.
Thus, you will not have any more problems with MUI at the time of the installation of a program. You are not forced to make this modification of the system. Sometimes it is enough to copy MUI classes in "SYS:classes/mui" but a few installation scripts can stop if the above directories are missing. In all the cases be sure of what you do and do not hesitate to make a backup of your "SYS:" partition before all modifications.
Your settings are backup on the disk in "Envarc:mui/". If you modify an element for an particular application, a preferences file is then created with the application name. To share these settings with other applications, copy it in "MUI:presets/", it will be thus accessible since the "presets" from the contextual menu.
May 2007 edition – Geoffrey CHARRA – http://www.efika.org
27
The Pegasos book – Volume 3 : MorphOS
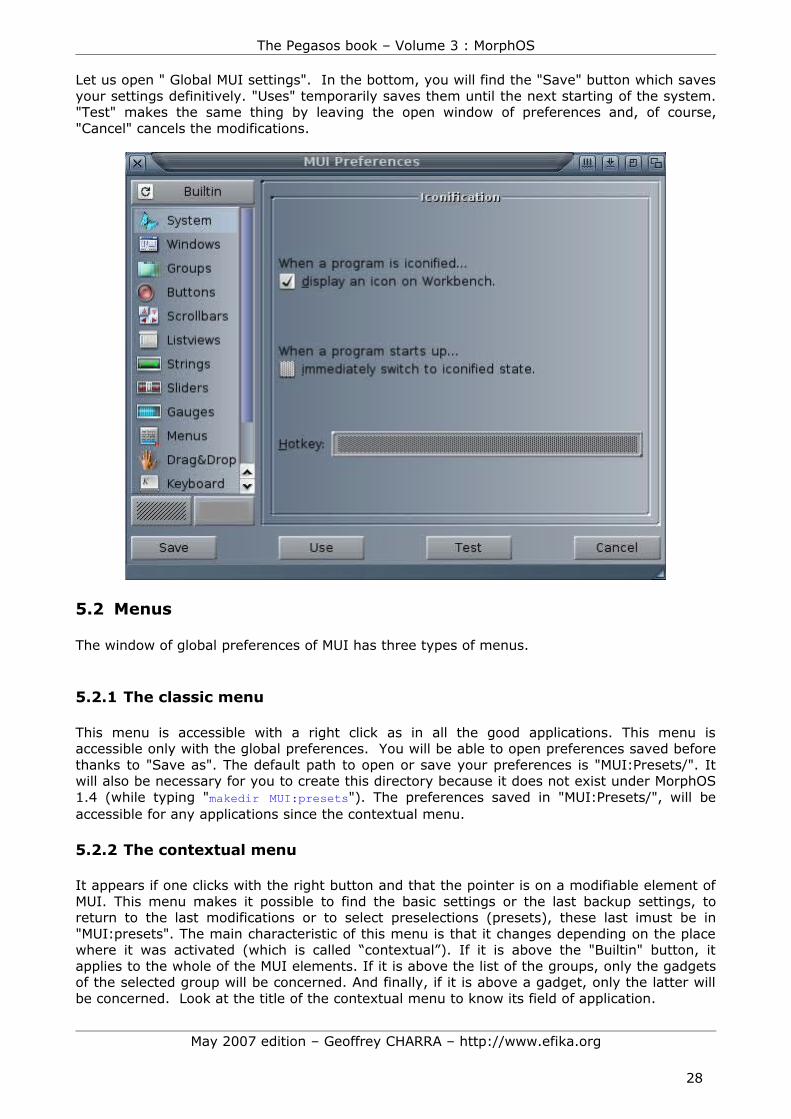
Let us open " Global MUI settings". In the bottom, you will find the "Save" button which saves your settings definitively. "Uses" temporarily saves them until the next starting of the system. "Test" makes the same thing by leaving the open window of preferences and, of course, "Cancel" cancels the modifications.
5.2 Menus
The window of global preferences of MUI has three types of menus.
5.2.1 The classic menu
This menu is accessible with a right click as in all the good applications. This menu is accessible only with the global preferences. You will be able to open preferences saved before thanks to "Save as". The default path to open or save your preferences is "MUI:Presets/". It will also be necessary for you to create this directory because it does not exist under MorphOS 1.4 (while typing "makedir MUI:presets"). The preferences saved in "MUI:Presets/", will be accessible for any applications since the contextual menu.
5.2.2 The contextual menu
It appears if one clicks with the right button and that the pointer is on a modifiable element of MUI. This menu makes it possible to find the basic settings or the last backup settings, to return to the last modifications or to select preselections (presets), these last imust be in "MUI:presets". The main characteristic of this menu is that it changes depending on the place where it was activated (which is called “contextual”). If it is above the "Builtin" button, it applies to the whole of the MUI elements. If it is above the list of the groups, only the gadgets of the selected group will be concerned. And finally, if it is above a gadget, only the latter will be concerned. Look at the title of the contextual menu to know its field of application.
May 2007 edition – Geoffrey CHARRA – http://www.efika.org
28
The Pegasos book – Volume 3 : MorphOS
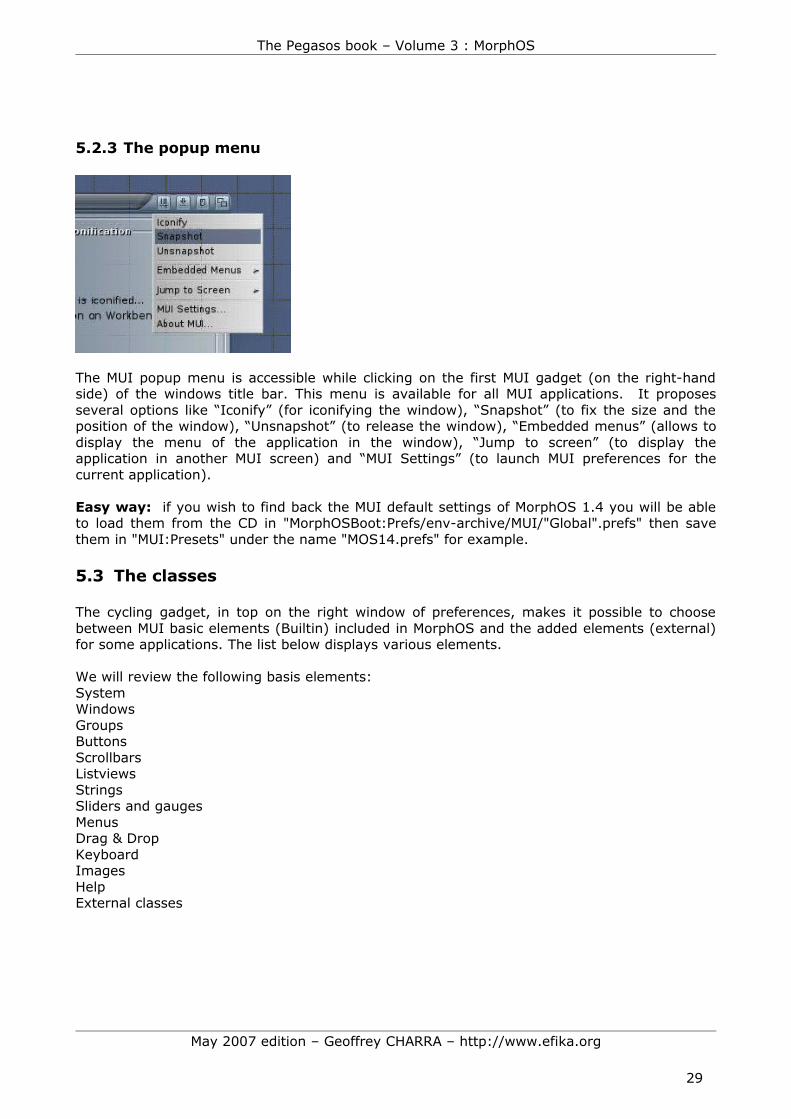
5.2.3 The popup menu
The MUI popup menu is accessible while clicking on the first MUI gadget (on the right-hand side) of the windows title bar. This menu is available for all MUI applications. It proposes several options like “Iconify” (for iconifying the window), “Snapshot” (to fix the size and the position of the window), “Unsnapshot” (to release the window), “Embedded menus” (allows to display the menu of the application in the window), “Jump to screen” (to display the application in another MUI screen) and “MUI Settings” (to launch MUI preferences for the current application).
Easy way: if you wish to find back the MUI default settings of MorphOS 1.4 you will be able to load them from the CD in "MorphOSBoot:Prefs/env-archive/MUI/"Global".prefs" then save them in "MUI:Presets" under the name "MOS14.prefs" for example.
5.3 The classes
The cycling gadget, in top on the right window of preferences, makes it possible to choose between MUI basic elements (Builtin) included in MorphOS and the added elements (external) for some applications. The list below displays various elements.
We will review the following basis elements: SystemWindowsGroupsButtonsScrollbarsListviewsStringsSliders and gaugesMenusDrag & DropKeyboardImagesHelpExternal classes
May 2007 edition – Geoffrey CHARRA – http://www.efika.org
29

The Pegasos book – Volume 3 : MorphOS
5.3.1 System
Set the iconification mode here, with or without icon. The interface of MUI applications can be re-displayed via the "Exchange" tool of the " Ambient/Utilities" menu. The other settings are grayed because they apply individually. They make it possible to activate the iconification on starting and to choose the keyboard shortcuts to launch the interface of current MUI application.
5.3.2 Windows
In the "control" then "positions" group, indicate if MUI must remember the size and position of the window when the applications are left. One can also choose the gadgets which will appear in the bar of title of the windows.
Easy way: immobilize one moment the pointer of the mouse on a gadget to have its description.
Below, you will be able to choose the default fonts. If no font is specified for the other elements, it is those which will be used.
"Blending" makes it possible to set the edges mixing of the gadgets with the background. More the percentage is high minus contours will be visible. Generally, a value between 50% and 60% improves the general aspect appreciably but that also depends on the other settings and the tastes of each one. The "Background" zone makes it possible to choose the background of the windows and the requests. The choice of the background is possible for practically all MUI elements. Clicking on "Window" will reveal the window "Adjust Background".
May 2007 edition – Geoffrey CHARRA – http://www.efika.org
30

The Pegasos book – Volume 3 : MorphOS
The "Pattern" tab proposes predefined patterns, "color" makes it possible to choose among the basic colors of MUI, from their positions in the palette used or with the RGB colors wheel. The "Bitmap" tab makes it possible to select a basic image and to set its luminosity and its colors. All the image formats supported by MorphOS are usable. Lastly, the "Gradient" tab, makes it possible to create gradients. The zone "Border Spacing" sets the width of the edges of the windows. The higher the value is, the more space between the elements inside the window and the edges will be large.
5.3.3 Groups
The majority of the elements of MUI are placed in groups like here. In "Title" you will be able to set the aspect and the position of the titles of the groups. The "Frame" group is present in many MUI elements and makes it possible to set the edges of the current element. In the
May 2007 edition – Geoffrey CHARRA – http://www.efika.org
31

The Pegasos book – Volume 3 : MorphOS
group "Frame", click on "Normal". A window opens, "Adjust Frame", chooses among edges suggested and adjusts spacing between the contents and selected edge.
Below on the left, "Spacing" makes it possible to set spacing between each group and the edge of the page. At side, in "Background", set the groups background ("framed"), of the page containing them ("page") and of another type of group ("Register", that one finds for example in the "Adjust Background" window tabs).
Easy way: drag and drop is possible between elements of the same type. For example, if you wish the same adjustment for "Frame/Normal" and "Virtual", drag the button of the one on the other. Same for the "Background".
5.3.4 Buttons
Set, here, the aspect of all the types of buttons.
"Text Buttons" makes it possible to set edges, the backgrounds and the font for the buttons texts and cycling.
In "Cycle Short props", "Menu" allows to choose if the various values are displayed by alternation in the button ("never"), if a menu appears with all the values ("always") or only if there is more than three values ("3 or more"). In these last two cases the aspect used will be the one which is selected in the paragraph "3.9 Menus" in "Menubox Design".
The "Image Short props" group makes it possible to choose the aspect of each "MUI button images " here present. You will be able to choose the drawing for each element. Click, for example, on "Checkmark", a window opens. You will be able to choose among basic elements ("Vector") or more sophisticated in "external" tab.
May 2007 edition – Geoffrey CHARRA – http://www.efika.org
32

The Pegasos book – Volume 3 : MorphOS
5.3.5 Scrollbars
As for the buttons, choose here graphics for the bars and the scroll arrows.
The checkbox below makes it possible to activate the use of the middle button or the roller.
5.3.6 Listviews
This element allows lists displaying like the one used to select the various elements of MUI in "MUI preferences" window.
May 2007 edition – Geoffrey CHARRA – http://www.efika.org
33

The Pegasos book – Volume 3 : MorphOS
In "Control" then "Selection", choose the "multi-selection" method when it is possible, with or without the Shift key. "Smooth" makes it possible to soften the listings scroll. You can select the fonts to use and spacing between the elements of the list (Leading).
"Design" makes it possible to choose edges and backgrounds of the lists. You can note here that there are two kinds of lists. Lists with selectable entries and others in simple reading. You can see these two types of lists in the USB preferences of System settings or Trident. The left list is a " Input List " and the one on the bottom is a simple reading one (Readonly).
The "Cursor" zone makes it possible to set the backgrounds of the elements active and selected in the lists.
5.3.7 Strings
These settings relate to the character strings cells.
"String Gadgets" corresponds to the input characters gadgets (for example the "Ambient/Execute command" window). "Text fields", adjusts the aspect of the simple displaying cells (for example the "Ambient/About" window). Note that some applications use other MUI classes for the texts cells. It is about "Newstring" or "TextInput" (for example the inpu cell for Voyager’s URL). Look in "external" list of MUI settings of the concerned application.
5.3.8 Sliders et Gauges
As for the text buttons, set here the "sliding" buttons and their containers, as well as the measure gauges used to display the level of advancement of a process.
May 2007 edition – Geoffrey CHARRA – http://www.efika.org
34

The Pegasos book – Volume 3 : MorphOS
5.3.9 Menus
We saw that there were several types of menus. A common menu to all MUI applications and accessible starting from the title bar of each MUI window, a contextual menu, present in some applications, which opens according to the placement of the pointer of the mouse and finally the specific menu to each application.
The aspect of these menus is set in "Menubox Design". Adjust the background of the menus, the aspect of the elements under the pointer, the font. "Shadows" makes it possible to choose the size of the shade under the menu. "Delay" fixes the duration of temporization before the opening of a sub-menu at the time of the passage of the pointer of the mouse. Lastly, "Titles" applies to the titles of the contextual menus.
The "Default Menus" group sets the mode of appearance of the application’s menus. "Type" allows to choose if the menu opens in top of the screen, the window or under the pointer of the mouse. In this last case the menu bar will appear horizontally ("mouse pulldown") or vertically ("mouse popup") under the mouse pointer. The last type "OS menu" makes it possible to use the configured menu in "System Setting" for non-MUI applications. "Pullstick" and "Popstick" make it possible to choose if the menu remains open or not when one releases the right button of the mouse. "auto" keeps the menu opened if the click is short.
"Embedded Menus" makes it possible to dock the menu of each application inside its window and a permanent way. You will be able to set its position and its aspect independently of the other menus (like above).
Easy way: the presence and the position of the menu of an application can be setup starting from the MUI menu of the title window.
5.3.10Drag & Drop
We saw it, some MUI elements can be moved on others of the same type. For example to classify the elements of a list or to copy a background from another. "Left Button", if checked, makes it possible to move an element selected while remaining pressed on the left button of the mouse and the key of keyboard indicated. "Middle button", is the same with the middle button. "Autostart" moves the element automatically if the button of the mouse remains pressed and that one moves the pointer of the number of pixels indicated.
"Frame" defines edges and "Look" sets the "transparency" of the moved element.
5.3.11Keyboard
"Color of active object" makes it possible to choose the color of the edges of active MUI element. You can control various MUI elements thanks to keyboard shortcuts defined below. By default, pressing "Enter" is equivalent to click on the active element, you can switch from an element to another with the key of tabulation, and "ESC" key will close the active application.
May 2007 edition – Geoffrey CHARRA – http://www.efika.org
35

The Pegasos book – Volume 3 : MorphOS
5.3.12Images
Choose here the images of illustration for the storage units, volumes and directories, the network, like some control buttons for the audio and video players/recorders. The managers of RO files and ClassAction (on Aminet) use some of these settings.
5.3.13Help
The majority of the applications using MUI include an online help. It can appear if the key "Help" is requested and by leaving the pointer to the top of an element for the length of time defined by the "slidder" button. This help can disappear with each movement from the mouse or only when the pointer leaves the element concerned. Two aspects are available, either a round bubble looking like a comic strip or a configurable rectangle. One will be able to choose the size and the type of font as well as the ratio height/width for the help display.
Easy way: on a PC keyboard, the "help" key is generally beside "CTRL" key of right-hand side. There is a pictogram above describing a menu and a pointer of mouse. The help is sometimes used by certain applications to send messages. It is the case, for example, of the program as useless as essential “MisterBanana”.
5.4 External classes
You will be able to even discover the other external settings by yourself. The latter are used by some applications in particular. It is perhaps preferable to set them starting from MUI preferences of the concerned application. In this case, only MUI external elements used by this application will be present in list "external".
Here is a description of some external classes MUI with, between brackets, some examples of applications using them: BetterString: another class for the text cells with a better management of the input (Yam and SimpleMail). Busy: bar of waiting way K2000 (IBrowse). Bwin: window without edge (PolyNet). Newstring: another type of input cell for texts (IBrowse). Nlisttree: used for displaying tree structures (IBrowse). Nlistviews: management of the lists displayers more powerful and configurable, used by many applications (YAM, SimpleMail, AmitradeCenter, VoodooX, etc).
May 2007 edition – Geoffrey CHARRA – http://www.efika.org
36

The Pegasos book – Volume 3 : MorphOS
TextEditor: classify containing a mini text editor (edition of the messages in YAM and SimpleMail). TextInput: classify for the input and the displaying of texts. Used by Travelling for the input of the URL or the texts in a page. Toolbar: configurable tool bar (YAM). TWFmultiLED and Lamp: add the support of LEDs (luminous points), usefull for FTP softwares.
Find other descriptions on http://www.amiga.dk/tumult/desc.html. The developers will be able to find a help with MUI programming in french language on Amiga and MorphOS on the impossible to circumvent site Guru Meditation (http://www.guru-meditation.net/).
5.5 Individual settings
The aspect of each application can be modified individually from the MUI window menu of the application concerned (and of its characteristic finely). A file is then created in volumes containing the MUI environment variables to knowing "ENV:MUI/" for the temporary settings and "ENVARC:MUI/" for the final settings. The file created will have the name of the application and will contain the values for modified MUI elements. The other elements will use the settings defined in "Global MUI settings" preferences and saved in the file "Global.prefs". Each window of MUI settings of an application offers an additional adjustment. "Screen" makes it possible to choose if the application opens on the "Ambient" screen (Workbench), on another open public screen or its own screen. To know some more about creation of public screens see the paragraph "ModeEdit" of the chapter about MorphOS preferences.
May 2007 edition – Geoffrey CHARRA – http://www.efika.org
37

The Pegasos book – Volume 3 : MorphOS
6 Ambient Ambient is the MorphOS workbench, it was developed by David Gerber and is now maintained by a small team of volunteers developers. A workbench is used to manage the files and to manage all the operations of an operating system on the level of the user. Version 1.41SE is included in MorphOS 1.4.5 and it’s source code (as for the next versions) is downloadable freely on the page of the Ambient project on Sourceforge :http://sourceforge.net/projects/morphosambient/ The latest version is the V1.43 (March 15th 2006) (http://ambient-desktop.org/).
Its principal features are :Based on MUI (great possibilities of graphic customization). Multi-threaded and asynchronous (the workbench never freezes). 64 bits management (volumes of big sizes are managed correctly). Localisation (can be translated in any language). Support of ARexx.Support of several types of pig iron and cast iron (Standard 0, 1, 42, TrueType, etc.) thanks to the use of the diskfont.library. Support of several types of icons (PNGIcons, GlowIcons/NewICons, icons of AmigaOS 1.x, etc). Support of Altivec (only in the next versions). MIME types. Various views : list, icons, images, etc… Graphic parameters supporting the transparency, the imposition of colors, color ranges
The user interface is composed of menus, contextual menus, short cut-keyboard, icons and customisable icon bars.
6.1 Menus
When you click with the right mouse button on the title bar of Ambient or on all inactive zones of the workbench (bottom of the screen for example), the main menu is displayed.
It is composed of the following categories : Ambient: Execute command (to manage an order or a script). NewShell (launches the command line interpreter). About (the information window is displayed on Ambient). Shutdown (leave MorphOS or shutdown the computer).
Objects: Panel/New (creates a bar of icons personnalisable). Utilities Exchange (launches the commodities manager). System Monitor (gives information on the computer and the system). Format Disk (tool for formatting disks).
Settings: Ambient Settings (management of the CLI, wallpapers, icons...). System Settings (system preferences : screen size, printing, fonts…). Ambient MUI Settings (customization of Ambient MUI’s graphic user interface elements). Global MUI Settings (customisation of the other MUI’s graphic user interface elements).
May 2007 edition – Geoffrey CHARRA – http://www.efika.org
38

The Pegasos book – Volume 3 : MorphOS
6.2 Contextual menus
Contextual menus are visible when the mouse pointer is over an active zone and the right mouse busson pressed.
The main active zones are :The window foreground gadgetThe window background gadgetIconsInside windows
Note that if you click with the right mouse button on any other zone, the main menu will be displayed instead. MUI has also it’s own contextual menu : many classes have this option which can be used in any MUI using software.
6.3 Icons
The standards icons under Ambient are in PNG format, and called judiciously PNGIcons. It is in fact simple images used as icons. Being with PNG format, they are thus in 16 or 24 bits and support the transparency via alpha channel. One can speak about icons 32 bits since these last can be images 24 bits with the 8 bits of alpha channel (24 + 8 = 32 bits).
Ambient also supports other systems of icons like GlowIcons, NewIcons, MagicWB and the icons of AmigaOS 1.x. It should be noted that the Iconographics particular type of icon is also supported.
Some options concerning the icons are available in "Settings" menu then "Ambient Settings" and "Icon Display". Their size is customizable, as well as the graphic effect applied when one clicks on it. One can also modify the font related to the icons.
6.4 Keyboard shortcuts and combinations
Many keyboard shortcuts exist in the system. Some of them are listed (and modifiable) in the "Hotkeys" options (which are in the "Settings" menu, then in “System Settings” and "IControl").
Here are the main ones : Double-click on a window with the left button of the mouse: the window appears in foreground. CTRL LALT i: iconifies the selected window. CTRL LALT c: center the selected window. CTRL LALT z: zoom/unzoom the selected window. CTRL LALT k: closes the selected window. LCommand m: displays the following screen. LCommand n: displays the Ambient screen. LCommand v: validate the request of a window. LCommand b: cancel the request of a window. RCommand e: displays the window "Execute a command". RCommand n: displays a new Shell window. RCommand ?: displays the "About" window of Ambient. RCommand q : displays the options window to close or shutdown.
In addition to these keyboard shortcuts, there are other various combinations of keys functions:
May 2007 edition – Geoffrey CHARRA – http://www.efika.org
39

The Pegasos book – Volume 3 : MorphOS
LALT + double-click on the icon of a directory : opens the directory and closes the parent directory. LCommand LALT: same function as left muse click. RCommand RALT: same function as right mouse click. Help + mouse pointer on an active zone : displays information on the pointed elements. RCommand + arrow (high, low, right-hand side, left) : move the mouse pointer. Double-click on middle button of the mouse : allows to move inside a window of Ambient (or in some MUI windows) according to the movements of the mouse.
6.5 Icons bar
The creation of an icon bar makes it possible to launch your favorite applications in only one click. It is launched from "Objects" then "Panel" and "New" menus. To add an new shortcut to an application from the bar, you just have to drag and drop the icon of the application inside. By moving the mouse pointer on the bar and clicking on the right button, the contextual menu of the bar can be displayed. To configure it, go in "Properties": you will be able to thus modify the position and aspect of the bar.
6.6 Ambient FAQ
Where can I find customization examples ? Examples of customization of Ambient’s workbench can be found on MorphZone.org web pages (http://www.morphzone.org).
How to see all the files in a directory without using a Shell or "show all" instead of "show icons" for each windowOpen a shell (amiga-N).Add an icon to the directory or to the partition which one wants to see the files without icon while typing (for example) : copy morphos:disk.info mypartition: orcopy morphos:docs.info mypartition:mydirectory.info for a directory. Open this directory or this partition with a double-clicking. Right click “view as/show all” right click “snapshot/all”. Note : it only works if the directory has an icon.
How to have the full path to a directory displayed in the window title bar and not just a part?Press the “/” key of keyboard.
How to use the same window for browsing ?Since version 1.41SE of Ambient it is possible to do it. In version 1.43, it is also possible to enable a toolbar for browsing in the same window. For that you need to check « Enable Browser Mode » in Ambient Settings / Toolbar.
What can be done to have smaller icons ?Go in Ambient preferences and change the icons size option which is by default on "Huge". However, the size below is much too small. The other solution (the best) is to use a set of customized icons.
May 2007 edition – Geoffrey CHARRA – http://www.efika.org
40
The Pegasos book – Volume 3 : MorphOS
Can we use an alternative workbench to Ambient ?Yes, other alternative workbench exists and can be run under MorphOS :
- Scalos, free : http://scalos.noname.fr/products/scalos/main/ScalosBeta_41.1a_MOS.lha- Directory Opus Magellan, commercial- Amiga Workbench 3.9, commercial
6.7 Obtaining the latest version of Ambient6.7.1 Downloading and installing
The latest Ambient versions (>= 1.42) are available as « daily builds on Ambient’s website. http://www.ambient-desktop.com/http://morphosambient.sourceforge.net/ http://sourceforge.net/projects/morphosambient/
For people speaking Swedish, an Ambient guide is also available :http://tiw-pro.web.internet.telia.com/~1698137/Bilder/Ambientguide.pdf Note also that the latest Ambient versions (>= 1.42) require MUI V4 alpha which is a version of MUI still under development. So do not complain about it in case of problem to the "Ambient team" !
On Ambient’s website, it is also possible to get images for the toolbar or for the menus also as « filetypes/mimetypes ».
These versions (as official V1.43) need MUI V4 alpha :Download MUI4alpha on the editor’s website (I still point out that it is about an alpha version !) : “ http://www.sasg.com/mui/muialpha_mos_20050714.lha “. Also note, that a beta is now available.To install it, made a backup of the directories concerned and copy the contents of the file directly under "mossys:". For that it will be necessary to boot on the installation CD, or you will have a message indicating that some files cannot be overwritten.
You will also need MUI class TextimputMCC :Download class MUI TextimputMCC: « ftp://ftp.vapor.com/pub/misc/textinput_293.lzx ».Install the libaries with the delivered installer from archive. Then copy the file "TextimputMCC.h" being in "developer" to "gg:os-include/MUI".
To install the newest Ambient, first, make a backup copy of your "MOSSYS:ambient" directory somewhere on your hard disk. Then copy the downloaded files over it.
Then restart your computer. You should now be under a new Ambient.
6.7.2 Compiling the sources
Please see Ambient’s website directly for help about compiling the sources. Today, the official binaries are not released with the matching sources.
In appendix you will find some information to help you to compile Ambient. Note however that this information is not maintained any more because it changes too often. If you want the sources only to be able to use the latest version, it is easier to download the lastest "daily-build".
May 2007 edition – Geoffrey CHARRA – http://www.efika.org
41

The Pegasos book – Volume 3 : MorphOS
6.7.3 Customizing the icons
It is possible to personalize the icons appearing in the "toolbar" (by drag and drop in "Ambient settings" menu). For that, in the "mossys:Ambient/images" installation directory, copy the 32x32 size PNG files of your choice by naming them in the following way."Device List" : devicelist"File copy" : filecopy"File move" : filemove"Delete" : delete"Clipboard copy" : clipcopy"Clipboard paste" : clippaste"Select" : select"Icon info" : iconinfo"Format" : format"Make directory" : makedir"Make link" : makelink"Rename" : rename"Up" : up"prev" : prev"next" : next
Warning : the updates are taken into account only after reboot.
If a file is missing, the image corresponding to the return (prev or toolbar_prev.png) in the sources, is then selected.
If you have the sources, you can also find the names of these files in the file "toolbargroup.c" of the sources towards line 110 ("definition_all" variable).
6.7.4 Troubleshooting and hints
Impossible to do drag and drop in the "toolbar" part of "Ambient settings": Backup the “envarc:mui/«global.prefs” file then remove it. That should now work after a restart but you will have to entirely remake your MUI configuration.
Activation of icons effectsIn « config.h » set USE_DROP_EFFECT_PREFS to 1.
Deleting the MUI4 message on bootUnder the shell enter the following command :setenv save I_KNOW_MUI_IS_BETA 1Restart.
Hint : the « / » keyA small hint to finish: the "/" key makes it possible to make a combo box appear in the toolbar in which one can input files and directories paths in a textual way.
May 2007 edition – Geoffrey CHARRA – http://www.efika.org
42

The Pegasos book – Volume 3 : MorphOS
Customizing the filetypes (or mimetypes) See the various examples available on the Ambient’s website.
May 2007 edition – Geoffrey CHARRA – http://www.efika.org
43

The Pegasos book – Volume 3 : MorphOS
7 Tips and hints 7.1 Create a PNG icon
The system is provided with FxPaint, an image processing software. With it, the creation of PNG format icons is very easy.To create an icon in PNG format, you will require FxPaint software. This commercial software is available at IOSpirit : http://amiga.iospirit.de/index.php?mode=products&modmode=info&product_id=1&sid=1933890Gc233e65679b3df07).
Install it, then start the software.Create an image (anything).Resize your icon in 64x64 with the “Picture” menu, and then with the “Scale” option.Save your image in PNG format under a filename ending with “.info”.
This is the basic method but things can be improved : here is how to create a PNG icon from an already existing image in a few steps :Start your favorite web browser and go to WikiPeg main page: http://www.wikipeg.org. Click on « Enter Wikipeg, Pegasos and MorphOS wiki », or go straight to the URL http://www.wikipeg.org/wiki/wakka.php?wiki=PagePrincipale.
With FxPaint, capture the screen of WikiPeg (click on the first button on the top-left of FxPaint, then select the icon displaying a screen and then capture the screen of your browser).With the « cut » tool, delimit the butterfly.
Resize the picture, for example in 64 pixels x 64 pixels, with the menu “Picture” then “Scale”.With the “magic stick” tool (in mode region/140), select the exterior of the butterfly (it is a white area).Select “Antialias” in the menu of the layertoolbox (in the toolbar, it is the icon at the 4th row, 2nd column).Save the picture in PNG format with the option “Layer as alpha channel”, under a filename finishing by “.info”.
As a result you will have a nice PNG icon representing a butterfly:
Remark: of course you are not compelled to put your icon in a 64 pixels x 64 pixels, but this size is quite widespread and well-adapted to our screens current resolution (for example 1024x768).
It is possible to use other methods to create PNG icons, in particular with other softwares. Jean-Yves Auger and Arnaud Schwetta (the author of the WikiPeg logo) have written an article in french to create a PNG icon with the TV Paint and Perfect Paint softwares (http://obligement.free.fr/articles/tvp-iconepng.php/).
Please note also the website “Made in pixel” (http://madeinpixel.free.fr) proposes tutorials in french dedicated to the use of graphic tools for Amiga, among which TVPaint, Perfect Paint or FPaint.
May 2007 edition – Geoffrey CHARRA – http://www.efika.org
44

The Pegasos book – Volume 3 : MorphOS
7.2 Tools to add to MorphOS 1.4
Version 1.4.x of MorphOS lacks some softwares; it is necessary to solve these small problems by adding various tools:
7.2.1 File manager
Ambient lacks some functions and it cannot perform some actions (add a comment, sort, file protection,...) on several files at once yet. Therefore you may want to use a file manager to perform those actions. The most famous are Directory Opus 4 and EcoDisk (freewares, available on Aminet) or Magellan (commercial).
7.2.2 ARexx
ARexx, powerful scripting system, is not 100% functional in MorphOS 1.4.x. Just rename the file MOSSYS:Libs/rexxsyslib.library in something else, then copy the 68k version of this file in MOSSYS:Libs/.The 68k version is available in particular in AmigaOS 3.9.
Then do not forget to activate ARexx, for example by adding the line « MOSSYS:C/RexxMast >NIL: » in your user-startup file. Be careful not to put Rexxmast in your WBStartup.
7.2.3 Installer
The « Installer » file is required to execute installation scripts. It’s not included in MorphOS 1.4.x. You may find it on Aminet, in an archive named « Installer-43_3.lha ». Uncompress the archive, then copy the file « Installer » in the directory SYS:c/.
7.2.4 FAT95
USB is recognized by MorphOS 1.4.x but to support some peripherals not compliant with the « MassStorage » norm like some USB keys, it is necessary to add the file « FAT95 » in the directory « SYS:L » (http://main.aminet.net/disk/misc/fat95.lha). Then you need to configure MorphOS USB stack so that it can use this file : to do this, start the preferences panel, go to « USB », then « Classes » and double-click on « massstorage.class ». Insert the file FAT95 in the line « FAT Filesystem » (Note: it should be already configured by default).
7.2.5 Other elements
You may add other elements in order to complete MorphOS 1.4.x functionalities. All those files are available on Aminet.
SimpleFind 3: file search toolScoot: system monitorSnoopium: DOS event trackerXad master: to uncompress archivesVoodoo-X: interface for archives management (to be used with Xad Master)Jano Editor : text editor
May 2007 edition – Geoffrey CHARRA – http://www.efika.org
45

The Pegasos book – Volume 3 : MorphOS
7.3 Tips to operate some softwares
Here are some tips to start on MorphOS apparently not compatible softwares.
7.3.1 Lightwave
Edit the file MOD-Config (in « Programs/LightWaveSupport/ ») so that the directories are correct. Then start Modechange, found in « Programs/Utilities/ » and select a 1024x768 resolution in 8 bits. If you want to switch from layout to rendered, set the layout in 1024x768 in the options (this tip works with Lightwave 5.20a and has not been tested with any other version).
7.3.2 Imagine 5.1x
Force the executable to use the 68k mode. To do so, with an editor, just modify in the executable one letter of the character string « powerpc.library », so that the library cannot be found and MorphOS JIT is triggered upon execution.
7.3.3 Aweb
Aweb requires the following softwares to work: ClassAct : http://www.amitrix.com/Files/classact33.lha TitleBar : ftp://de.aminet.net/pub/aminet/dev/gui/titlebar_ic.lha
After installing it, if you cannot start it, check that the fonts « Times » and « Courier » are present in the Fonts: directory (these fonts are available in AmigaOS 3.1 or 3.9 for example).Check also that the line « C:CAPrefs >NIL: » is present in your user-startup.Lastly, if the pictures are not displayed, set decoding of GIF, PNG and JPG pictures to « internal »: Aweb -> Preferences -> Browser -> MIME -> PNG/JPG -> I (internal).
7.3.4 Turbocalc
If you cannot access Turbo Calc menus (no response to right-click), copy the file « Turbocalc.STD » to the root of the software. This file can be found in « Turbocalc:TCLibs ».
7.3.5 Wordworth
If you have bad colors, click on the Wordworth icon with the mouse right button. Go to « Information » and add the tooltype: « Tooltype PICASSO=TRUE ».If the software is too slow, the option « ramdebug » in the firmware boot command has not been set. Go to the firmware and input the following line (without inverted commas): « setenv boot-file boot.img ramdebug ».
7.3.6 Zone Xplorer PPC
Requires the following software to work (ClassAct/Reaction): ClassAct : http://www.amitrix.com/Files/classact33.lha
7.3.7 Earth 2140 / Softwares with bad colours
If you encounter softwares (especially games) with bad colours, a possible solution is to add the tooltype « RGB16BE=YES » in your graphic card file in SYS:MorphOS/Devs/Monitors/.
May 2007 edition – Geoffrey CHARRA – http://www.efika.org
46

The Pegasos book – Volume 3 : MorphOS
7.3.8 Sgrab
If the software freezes upon start-up, you may be using the wrong jpeg.library library version. Try to download the one found on Aminet (http://main.aminet.net/util/libs/jpeglibrary.lha and replace yours (probably the WOS version) with the 060 version.
7.4 Create a multiboot on Pegasos7.4.1 Introduction
It is possible to create a menu in the Pegasos OpenFirmware in order to allow easy start of different configurations without resorting to long and forbidding command lines.
This work will be done through a little tool named BootCreator, available on http://www.tbs-software.com/morgoth/projects.html. Personnally I could test BootCreator on Pegasos2 only, but several people used it successfully on Pegasos1, even if the « timeout » functionality does not seem to work because of the firmware version.
BootCreator exists both in MorphOS and Linux version. The procedure here described concerns the MorphOS version, but it is strictly identical for Linux.
BootCreator is not only useful in the case of several operating systems, but for example, allows also to start MorphOS with different options (debug, etc).
7.4.2 BootCreator usage
Pegasos firmware is « scriptable » in Forth language. This means that it is fit with a an integrated Forth interpreter that allows to execute softwares within it. This very functionality will allow to create a start menu.Since Forth is not a very-straightforward language – certainly in fact because it is not that common – the drafting of the script will be done by a software : BootCreator.
BootCreator is a command line run-time which will turn a configuration file containing all parameters of the menu we wish to create into a Forth script directly usable by the firmware.
Once the archive is uncompressed, you are in possession of the executable « BootCreator » and a configuration file example located in the « examples » directory, named « example.bc ». The latter is the configuration file <to pass as parameter> to the executable in order to generate the Forth script.
Now, edit this file with any text editor.
# Example description file for bootcreator 1.1[VERSION]1
[TITLE]Boot Menu
[SETTINGS]AbortOnKey = falseTimeout = 9Default = 1
May 2007 edition – Geoffrey CHARRA – http://www.efika.org
47

The Pegasos book – Volume 3 : MorphOS
[SECTION]Local HD -> Morphos (Normal)ide:0 boot2.img ramdebug edebugflags="logkprintf"
[SECTION]Local HD -> Morphos (Debug)ide:0 boot2.img ramdebug edebugflags="logextended logkprintf permmemtrack memtrack"
[SECTION]Local HD -> Linux 2.6.8 (Normal)ide:0 linux-2.6.8.img video=radeonfb:1024x768@70 root=/dev/hda5
Section [VERSION] must contain « 1 » for a Pegasos II and « 0 » for a Pegasos I.Section [TITLE] contains the text you want to be displayed above your menu.Section [SETTINGS] contains three values that speak for themselves:AbortOnKey = false/true (gives up if a key is pressed)Timeout = x (waits x seconds before starting the default choice)Default = x (sets the default choice)Sections [SECTION] each contain a couple of values defining a choice line of the menu.
For each section [SECTION], the first line defines the content of the line that will be displayed in the menu and the second line contains exactly what you would have entered as a command line in the openfirmware.
7.4.3 Other examples
Of course those examples are valid only if you have already installed the systems in question and will have to be adapted to your configuration.To start MorphOS « normally », without activating the debug on the serial port, input:
[SECTION]MorphOSide:0 boot.img ramdebug
To start PegXLin (with the following configuration: Voodoo graphic card, boot partition on partition 1 of the master hard drive of the second IDE port), input :
[SECTION]PegXLinide:0 pegxlin root=/dev/hdb1 video=tdfx hdc=ide-scsi l2cr=0X800000000
To start MacOS X through PegXMac (with the following configuration: Radeon graphic card, MacOnLinux boot partition on partition 1 of the slave hard drive of the first IDE port), input :
[SECTION]MacOS Xide:0 boothd root=/dev/hdb1 video=radeonfb:1024x768-8@75 hdd=scsi hdc=scsistartmacosx
To start PegXMac start menu (with the following configuration: Radeon graphic card, MacOnLinux boot partition on partition 1 of the slave hard drive of the first IDE port), input :
[SECTION]PegXMac Menuide:0 boothd root=/dev/hdb1 video=radeonfb:1024x768-8@75 hdd=scsi hdc=scsi
May 2007 edition – Geoffrey CHARRA – http://www.efika.org
48

The Pegasos book – Volume 3 : MorphOS
To start Linux Debian 2.6.8 (with the following configuration: Radeon graphic card, Linux boot partition on partition 5 of the master hard drive of the first IDE port), input :
[SECTION]Linux 2.6.8ide:0 linux-2.6.8.img video=radeonfb:1024x768@70 root=/dev/hda5
7.4.4 Generating the script
Once the file is modified, generate the Forth script with the following command line:bootcreator examples/example.bc bootmenu
As a result, this will create the file « bootmenu » that you may still edit if you wish to see what looks like the resulting Forth program. In order for the firmware to access the Forth file, put it on a partition that it is able to read. The FFS partition containing MorphOS kernel is certainly the most appropriate.
The last thing to do is to modify the firmware variable « boot-file » so that it executes the menu instead of starting directly such or such MorphOS or Linux kernel. To do so, use the following command line in the firmware (supposing the “boot-device” variable is already set to the correct partition):
setenv boot-file bootmenu
7.4.5 Result
On next start-up, your Pegasos should display a menu looking like this :
If you have made a mistake in the menu setting, do not panick: it is still possible to take back control in the firmware and start manually MorphOS partition or CD-Rom.
7.5 Creating a MorphOSBootCD7.5.1 Preamble
For this, you will need some knowledge in: - Advanced usage of the shell - Extracting lha archives - Usage of a cd-burning software - Usage of SCSIconfig - Basic usage of the OpenFirmware
May 2007 edition – Geoffrey CHARRA – http://www.efika.org
49
The Pegasos book – Volume 3 : MorphOS
Creating a MorphOSbootCD with own expansions and individual adjustments isn't too hard to accomplish and should the worse happen it will allow access to those beloved programs that are not included in the original cd.
In this chapter, two methods are described to create a MorphOSbootCD.
One way is the backup method, where the current system is used as the base. The other is the update method where the orginal MorphOSbootCD will be the base.
The scripts described in this chapter can be found in the CreateBootCD archive :
http://www.morphos-news.de/guides/cdboot/CreateBootCD_en.lha
7.5.2 The backup method
With some small modifications and cosmetic operations, your system (that over years has been carefully expanded and configured to your liking), can also be moved to cd.
Be aware though that if you use the MorphOS system from cd, it will no longer be able to write data to SYS:, which can cause trouble for some programs. ENV-variables are not only written to Env: but also to Envarc: and Turboprint doesn't like the write-access to "Turboprint:configs/" to be denied.
This is a small problems that can be solved. The system only has to be told from which media it is currently started. This can be easily achieved with an ENV-variable. This variable is just written to ENVARC: shortly before the creation of the iso-image and afterwards deleted. With the help of this variable "cdboot" it is now possible to modify shell scripts like the startup-sequence.
7.5.2.1 Modification of the startup-sequence
The main startup-sequence in "MOSSYS:s/" usually shouldn't be modified. That is also the reason for saving the modified startup-sequence as "Startup-Sequence_cdboot" and only renaming it into "Startup-Sequence" for the iso creation.
For Turboprint the following modifications must be carried out in order to prevent error-messages on startup.
The original entry :Assign TurboPrint: MOSSYS:TPif exists “TurboPrint:configs/_Last_” NOREQRun <>NIL: TurboPrint:turbo/ttpendif
must be replaced by : ;start cdboot modification copy mossys:TP/configs env:TP/configs all Assign TurboPrint: env:TP Assign TurboPrint: MOSSYS:TP add if exists "TurboPrint:configs/_Last_" NOREQ Run <>NIL: TurboPrint:turbo/ttp endif ;end cdboot modification
In the Startup-Sequence other adjustments can be made, but these are not necessarily indications of a boot-cd, as for example the implementation of a vga-boot option.
May 2007 edition – Geoffrey CHARRA – http://www.efika.org
50

The Pegasos book – Volume 3 : MorphOS
7.5.2.2 Modification of the User-Startup
In the User-Startup the ENV-variable cdboot can now demonstrate its usefulness. With its help it is possible to turn entries on or off for the cds' boot-process. This can be achieved with an "IF" condition. Entries without such an "IF" condition are executed both on cd-bootup, and on hd-bootup.
Example : if exists "env:cdboot" NOREQ ;entries which are only started on cd-bootup endif
if not exists "env:cdboot" NOREQ ;entries which are not started on cd-bootup endif
Those who don't want to write conditional queries for cdboot like this can alternatively write a special User-Startup for their BootCd that is called "User-Startup_cdboot".
In any case, to prevent trouble with ENVARC: the User-Startup should be expanded with the following entry :
if exists “env:cdboot” NOREQassign envarc: env:endif
As the bootcd will have a different volumename than the system-hd, several programs will have trouble finding some data. As an example, Ambient integrated panels will have this problem. The following Assign entry solves this problem for cd-bootup.
Assign name_systempartition: sys:
For all other modifications of the user-startup, only basic suggestions can be given, as the needs are different for every single user. The cd should always be able to boot without the harddisk being present. As only the system partition is burned to cd within this method, all references to other partitions should be avoided. Often Assigns are set to other partitions.
7.5.2.3 Modification of the WBStartup
If there are also "critical" programs in the WBStartup, it will be an advantage to create an extra "WBStartup_cdboot" directory from where these programs are exclusively taken just for cdboot.
7.5.2.4 Further preparations
Those who followed the general installation suggestions and installed their MorphOS system onto a SFS partition shouldn't forget to copy the Boot.img to SYS: .
If an alternative icon is required for the BootCD, it has to be placed as "Disk.info_cdboot" in SYS: . If wished a different CybergraphX bootpic can be used,too. Regarding this the CGXbootPic.library for the BootCD is copied to "MOSSYS:libs/CGXbootPic.library_cdboot" .For the creation of the iso-image additionally the program mkisofs from the CDRTools is needed, and has to be copied to C: after extraction.
See http://sourceforge.net/project/showfiles.php?group_id=48010&package_id=116341
May 2007 edition – Geoffrey CHARRA – http://www.efika.org
51
The Pegasos book – Volume 3 : MorphOS
7.5.2.5 Shell-script for creating the BootCD
To automate a sequence of several steps the script called "Create_BootCD_SYS" is used, which takes over the following jobs: create and delete the ENV-variable cdboot in envarc: rename and reset the Startup-Sequence_cdboot rename and reset the User-Startup_cdboot rename and reset the WBStartup_cdboot rename and reset the Disk.info_cdboot rename and reset the CGXbootPic.library_cdboot create the iso image with mkisofs With the default settings the iso image will be created in the Ram Disk. In case of RAM being insufficient the variable "outpath" in the script must be altered to an other path. If the size of the iso image is to big for a CD-R/RW, both several files and whole directories can be excluded for the iso-creation within "Create_BootCD_SYS" .
The script also assists with resetting all variables and data to the original state in case the system is copied back from cd to harddisk. This is why it should get a place in SYS: in order to be present for this work.
After the successful creation of the iso image it just has to be burned onto cd and can then be booted on the same way like the orginal MorphOSbootCD.
7.5.3 The update method
The update method is for those who don't want to make any modifications on their current system or who have a completely different intention for the bootcd.
For that a 700MB FFS partition with the name "ES0" (EmergencySystem) is created with SCSIconfig and the "auto-mount" and "bootable" flags are set. The boot priority has to be smaller than the one of the current system. As very likely most of the users left the bootpriority for the current system on 0, a bootpriority of "-1" for "ES0" should be sufficient.
After creating and formating "ES0" the complete original MorphOSbootCD can be copied onto this partition. To test the just installed 2nd system, reboot the computer and enter this in the OpenFirmware :boot /disk@0,0:5 boot.img bootdevice=ES0
Of course this must be adjusted to the configuration of your own system. In this case shown ES0 is the 5th partition on the 1st harddisk. So you won't have enter this again and again a Bootmanager can be installed (see BootCreator).
When the 2nd system is bootable from "ES0" it can then be modified to your own taste. Here I'd like to point you to the information box "VGA Boot", as this should be a basic element for a MorphOSbootCD.
If the system is now completely configured and adjusted to your individual tastes, you can now test with the entry "C:Lock ES0: on > NIL:" on the very top of the startup-sequence to see if the system would work okay a read only media. As generally the Startup-Sequence in "ES0:morphos/s/" shouldn't be altered, the original startup-sequence is copied to "ES0:morphos/s/startup-sequence_org" before modification. This additionally gives the advantage of not having to remove the "Lock" entry everytime manually, as a script can take over the exchanging of the Startup Sequences. If further adjustments have to be made on "ES0" the write lock can be removed with entering "C:Lock ES0: off" in a shell.
For the creation of the iso-image additionally the program mkisofs from the CDRTools is needed, which has to copied to C: after extraction.
May 2007 edition – Geoffrey CHARRA – http://www.efika.org
52

The Pegasos book – Volume 3 : MorphOS
To make the creation of the iso images as comfortable as possible the included script called "Create_BootCD_ES0" is used, which automates the following working-steps :
rename and reset the Startup-Sequence rename and reset the Disk.info_cdboot create the iso images with mkisofs
With the default settings the iso image will be created in the Ram Disk. In case of RAM being insufficient the variable "outpath" in the script must be altered to an other path.
After the successful creation of the iso image it just has to be burned onto cd and can then be booted on the same way like the original MorphOSbootCD.
7.5.4 VGA boot (Optionnal)
Few users will use their system on a VGA screenmode with 60hz refresh rate. But in case of a monitor failure or just use on a different monitor (or if you just chose bad monitor settings), then in the worst case the monitor might stay black or will just give a "Out of range" message. In case of that eventuality it would be desirable to reduce the screen settings on MorphOS-startup to a VGA resolution with 60hz refresh.
Here the little program KeyPressed comes in which can be downloaded here :
http://www.morphos-news.de/software.php?lg=en&search=MOS_Tools
After extracting, the file KeyPressed is copied to C: and the following lines are added in the startup-sequence before IPrefs, but after where ENV: is copied :;start VGA-Boot modificationif exists C:keypressed c:KeyPressed 99 if warn rename env:sys/PublicScreens.prefs env:sys/PublicScreens.prefs_ endifendif;end VGA-Boot modification
The 99 behind Keypressed is the RAWCode for the Ctrl/Strg key. If this is held down on bootup the VGA-Boot will be activated.
7.5.5 Setting CD speed (optionnal)
When the MorphOSbootCD is finished is sitting in a very fast (and therefore very noisy!) cdrom it may be suitable to degrade the read-speed of that cdrom. For that purpose the program SetCDSpeed can be used, which is included in the cd player archive :
http://www.morphos-news.de/software.php?lg=en&search=CDPlayer
The program can be copied into WBStartup and both the device and the unit of the cdrom it will affect can be adjusted via tooltypes. In case of an alteration of the hardware configuration or if the cd is used in another Pegasos, this program can fail to be run with the proper perameters and so won't work.
Instead of the SetCDSpeed program the included script SetCDSpeed.script can be copied to the WBStartup. On system startup, this script scans for the current unit of the cdrom on the ide-controller, so the cd read-speed can be easily reduced even on a different pegasos system. The script also can be aborted, so the full read-speed is available. In order to use this script the program SetCDSpeed must be copied to C: .
Please don't forget that SetCDSpeed needs the multimediatools.library.
May 2007 edition – Geoffrey CHARRA – http://www.efika.org
53

The Pegasos book – Volume 3 : MorphOS
7.6 Using MorphUP, the package manager7.6.1 Introduction to MorphUP
MorphUP is a package manager created by Rupert Hausberger. Its role is to install and uninstall software and files on your system by means of a network connection.
For that it offers creation, reception, checking and packages installing features.
Developped as a bounty, is it not included in MorphOS 1.4.5 today, but it can be downloaded directly on the author’s website : http://natmeg.stamey.at/
In addition, the "mcGen" application requires TextEditor MUI class:http://sourceforge.net/projects/texteditor-mcc/
Note that this version (1.0) is still beta, and a few bugs might remain (personally I did not find any).
7.6.2 Introduction to the packages system
The packages system contains an index, in which all the information are saved and of packages containing data. The files extensions are the following :- ".pmi" : "Package Manager Index" - index (entry point for a user or “client”)- ".pmf" : "Package Manager File" : “single” package composed of a single file- ".pmp" : "Package Manager Package" : first file of a « full » package- ".pm<n>" - "Package Manager <n>" : other files of a “full” package, part <n>
MorphUP manages three types of packages having each one their advantages and disadvantages:
- « Full package » : this type of package gathers several files. These files are gathered and compressed in only one file which is then split in several parts if its size is too significant.
Advantage : Fast download and compact data Disadvantage: all must be reloaded with each change, even if if only one file
was modified.
- « Single package » : for each file added to this package, a file package is generated. The files obtained have a random name with a suffix "pmf".
Advantage : fast because only the modified files are downloaded Disadvantage: network problems if a great number of files are in the package.
- « Link package » : this type of package is used when the files are not hosted locally (such as for example for Aminet files). A URL towards the file is added to the package.
Avantage : no need of storage space Disadvantage: can not be edited
The packages can be gathered by "classes" being able to be pre-configured. The classes allow to assign a specific destination directory depending of the class type. In the same way "data-classes" can be defined for the files and directories within a package.
MorphUP is composed of two distinct applications: - muGen : generation, edition and update of index packages - muCl : receiving, checking and installation of packages
May 2007 edition – Geoffrey CHARRA – http://www.efika.org
54

The Pegasos book – Volume 3 : MorphOS
7.6.3 Installation
The installation of MorphUP is very simple, it is enough to uncompress the lha file and to copy the extracted directory at any place on your disk. It is also necessary to install he TextEditor.mcc MUI class, for the generation application works properly.
7.6.4 Using « muCl » client
The main client window contains a toolbar, two tabs and three sub windows.
In the sub-windows, the left part contains the list of index known by the software while on the right appears the files and directories contained in the package (in top the "private" files of the application and in bottom the common files like the fonts, libraries or other...).
The toolbar can handle all usual operations (completed by a context menu)
The « Log » tab displays all the operations made (information and errors).
To add a new index, click on "Add" in the toolboor, then in the small window which opens, select "Add hosted index" if the packages are on a Web site or on "local Add index" if they are on your disk (for example if you want to test packages that you generated yourself). Most of the time, you will thus select "Add hosted index". In both cases, it is necessary to input the exact path to the index file ("pmi").
Here are a few examples of index files available for « Add hosted index » :
The Pegasos book : http://wikipeg.free.fr/morphup/ThePegasosBook.pmi
Various tools from Rupert Hausberger, the MorphUP’s author :
May 2007 edition – Geoffrey CHARRA – http://www.efika.org
55

The Pegasos book – Volume 3 : MorphOS
http://member.ycn.com/~hausrup/morphup/morphos/index-mos.pmi
Various softwares ported on MorphOS by Guillaume Roguez « Yomgui » (Python, Blender, Feeling…) : http://yellowblue.nerim.net/mu/my_softwares.pmi
To install a package, click on the "Install" button after having selected the package or only some files in the tree structure. To uninstall, just click on the button "Uninstall".
To remove an index, click on the « Remove » button. This will not deleted the files located on your hard disk. For that click on “Uninstall” before.
The "Pack info" and "File info" buttons respectively make it possible to obtain information on selected packages or on the selected file.
The "Settings" button opens a window which makes it possible to assign directories paths to the various classes of packages.
The "Update" button of the toolbar makes it possible to update the files list of the various packages known by the software. This operation is also carried out automatically on the software’s startup (if you have at least one index).
The "Check" button makes it possible as for him to check packages.
The “Showmode Real/Flat” drop-down menu makes it possible to display the contents of the tree structure of the packages in the form of tree or all files.
7.6.5 Using the « muGen » packages generator
The use of the packages generator is of course necessary only if you create files (software, documents, images, vidéos, sounds...) which you want to place at the disposal of the public and whose updates are rather frequent.
When you click on the "mcGen" icon a first window appears in which one can choose either to create a new index ("New index"), or to open an already existing index ("Open index").
If you click on "New index", the application will then require you choose a directory (on disk) and a index filename (pmi).
If you click on "Load index", you will have to then choose an existing file and your packages previously edited will be loaded in the software.
May 2007 edition – Geoffrey CHARRA – http://www.efika.org
56

The Pegasos book – Volume 3 : MorphOS
To add a package, you need to click on "Add package" in left-bottom. A window of the following type should appear:
Input then at least a name of package and a type of distribution (full/single).Also choose a package class.The you can fill the other fields which are optional.In « picture » you can select a picture for your package which will be resized automatically by the software.Validate by clicking on « OK ».Note: if the window does not appear, check that you installed TextEditor.mcc MUI class properly.
May 2007 edition – Geoffrey CHARRA – http://www.efika.org
57

The Pegasos book – Volume 3 : MorphOS
Back in the main window you can then select the files and directories contained in your package thanks to the buttons "Add", "Add files recursive flat"... etc...
To generate the package, click on « Save » and wait while generation.
You can then test your package while launching "muCl" and by selecting the file index which you created.
Lastly, the "Settings" button makes it possible to carry out the various settings of "muGen". In "Program/Miscellaneous", in the field "default generator" you can for example input your name.
May 2007 edition – Geoffrey CHARRA – http://www.efika.org
58
The Pegasos book – Volume 3 : MorphOS
8 Network settingThe network setting of a Pegasos under MorphOS is a significant stage in order to be able to more easily download and install files via a local area network and/or while reaching Internet.
8.1 TCP/IP stack install under MorphOS
There is no TCP/IP stack installed by default in MorphOS 1.4.x. To be able to run a Pegasos on a network under MorphOS, it is thus necessary to start by installing a TCP/IP stack.
There are three TCP/IP stacks today: - Miami and Miami Deluxe http://www.nordicglobal.com- AmiTCP (Genesis) http://main.aminet.net/comm/tcp/gendemo104.lha .- MOSNet, new TCP/IP stack for MorphOS which was developped as a bounty for the public domain (see http://www.morphzone.org).
Warning: Miami and Miami Deluxe are shareware and require a key. Unfortunately it is not possible to pay for registering anymore with Miami/MiamiDX. It is thus necessary "to manage" to find one by other means. Genesis also requires a key already provided to the owners of Amiga OS3.9.
Today it is recommended to use MOSNet which is new and rather easy to install.The following tutorials are however based on Miami (for most of them) and Genesi, but as there are differences for the installation, the configuration network remains almost the same problem whatever the TCP/IP stack is.
In our example, we used Miami (for MiamiDX it is almost the same thing).
8.1.1 Installing Miami8.1.1.1 Step 1 : Loading and uncompress
Download the various files of Miami:Main archive : ftp://de.aminet.net/pub/aminet/comm/tcp/Miami32b2-main.lhaProgram : ftp://de.aminet.net/pub/aminet/comm/tcp/Miami32b-020.lhaGraphic User Interface (with MUI) : ftp://de.aminet.net/pub/aminet/comm/tcp/Miami32b-MUI.lhaUncompress all archives in memory.
8.1.1.2 Step 2 : Correction of the installation script
Before installing Miami it is necessary to edit the installation script or it will not work on MorphOS. For that it is necessary to go in the directory "Miami32b_Install" and to edit the "Install_Miami" file (with any text editor such as for example MorphEd). It is necessary to comment the lines 111 to 121 (these are tests which are done to check that the muimaster.library is installed and in version 3.8). For that, just add one ';' at the beginning of each line to comment the script.
8.1.1.3 Step 3 : Installation
Launch the installation script.Follow the default choices. it is necessary to create a directory Miami if not the files will be copied anywhere on the hard disk.Reboot.Significant step so that the MIAMI: assign is added to the user-startup.
May 2007 edition – Geoffrey CHARRA – http://www.efika.org
59

The Pegasos book – Volume 3 : MorphOS
8.1.2 Installing MOSNet
After having uncompressed the MOSNet archive file, for example in "RAM:", click on "Install" to launch the installation. For that choose "Intermediate user" and select a directory where to install, for example "SYS:MOSNet/".
Then, add the following lines at the end of your S :user-startup with your favorite editor :Assign MOSNet: SYS:MOSNetAssign LIBS: MOSNet:Libs ADDPath MOSNet:C ADDRun >:nil MOSNet :MOSNet
Note: the last line is faculative. It makes it possible to the TCP/IP stack to be automatically launched at each startup. So thereafter, if you use "viarhine-wakeup" set the call of this tool before the TCP/IP stack start.
Then, if you are in DHCP(*) check in the MOSNet:db/interfaces file the presence of the following line (if you do not use the standard network interface of the Pegasos, you will need to uncoment the other line):eth0 DEV=DEVS:networks/via_rhinepci.device UNIT=0 IP=DHCP UP
If you are not in DHCP, it will be necessary to edit the files "MOSNet:db/interfaces" and "MOSNet:db/resolv.conf". See "ADSL on Pegasos" chapter for more details.
Then restart your Pegasos. The stack should normally being launched.
To optimize the transfers (in particular with Samba), add the following lines in MOSNet:db/general.config:TCP_SendSpace=16384TCP_RecvSpace=16384
To remove the graphic user interface on stack’s startup, set in “ MOSNet :db/general.config” :OPENGUI=NO
(*) : see « Connection of a Pegasos to a LAN network with DHCP (Internet via ADSL modem) »
May 2007 edition – Geoffrey CHARRA – http://www.efika.org
60

The Pegasos book – Volume 3 : MorphOS
8.2 ADSL on Pegasos
This paragraph details the installation of the ADSL (Asymetric Digital Suscriber Line) on your Pegasos to connect it to Internet.
If you have a USB modem, you will have to use a PC or a Mac or any machine you want which has of ports USB and a pilot for modem USB, then it will be enough to connect Pegasos in network TCP/IP on this machine.
8.2.1 Configuration of MiamiDX8.2.1.1 Hardware interface
First of all, you have to define a hardware interface to communicate with the network adaptater : for that, you just have to go into the "Hardware" tab and create a new entry of Ethernet type. Name it as you want, but as much as that is significant, then select the suitable driver. You can choose between a Sana-II device (Ariadne-II.device for example, unit 0) or MNI driver (optimized internal Miami driver), if your network adaptater is supported.
The managed boards are given in the documentation of Miami, in MNI section. Click then on "Sana-II parameters" and then on "query device". If you have chosen a MNI driver, do "find board" and select detected board, then "MNI parameters" and configure the parameters automatically.
Note that MNI driver of the Ariadne2 board does not function correctly under MorphOS. Once this made, your hardware Ethernet interface is active, which allows the modem and your machine to communicate.
Then we must create an entry which corresponds to the ADSL protocol used. We thus create a hardware interface of “Serial” type. The type of device is "serial device driver". Then, according to whether the protocol that you use for the ADSL is PPPoE or PPTP, choose the suitable device (in miami:devs/) : if you are in PPTP, choose miamipptp.device and if you are in PPPoE, select miamipppoe.device ensuring that the version is higher or equal to 1.7 (if go back to have a look on http://www.nordicglobal.com ).
The other settings must be set like this :Unit : 0Speed : 460800Use CD : checkedFlow Control : RTS/CTSEOF mode : autoMTU : 1492 (decrease the value if you encounter problems thereafterSerial mode : 8n1
Modem settings :DTR mode : hangupDial prefix : ATDDial suffix : /rEscape char : +Leave the empty remainder.
May 2007 edition – Geoffrey CHARRA – http://www.efika.org
61

The Pegasos book – Volume 3 : MorphOS
8.2.1.2 Dialer section
The protocol used for the ADSL is similar to the PPP to a certain extent, also you must create an entry in this section. You only have to create an entry and give him a name.
8.2.1.3 Ethernet Interface section
To communicate with the modem we must create an Ethernet interface of the type LAN. Eth0 is a name usually used. Chose then the hardware Ethernet interface previously created.
If you have an Alcatel SpeedTouch Home modem :IP type : static IP address : 10.0.0.10Netmask Type : staticNetmask : 255.0.0.0Gateway etc, set priority to 0.Multicasts : Send as broadcastsMulticast pri : 0
If you have a ECI Hi-Focus modem :IP type : staticIP address : 192.168.0.1Netmask Type : staticNetmask : 255.0.0.0Gateway etc, réglez la priorité a 0.Multicasts : Send as broadcastsMulticast pri : 0
TCP/IP settings :Get Dynamic host name, priority : 0Get Dynamic DNS servers : ignoreDHCP enable : disabled.
8.2.1.4 PPP Interface section
Lastly, it acts to create an interface PPP Dial-out Internet to establish connection with provider ADSL. Choose Dialer and the Hardware which you created previously.
IP Type : dynamicGataway type : dynamicMulticasts : disabledGui default : enabled
PPP Settings :Allow MS-CHAP : enabledUser name : use the login given by your Internet provider (ex: fti/xxxxx@fti for wanadoo)Password : your passwordthe other fields as they are.
TCP/IP settings :Get Dynamic host name priority : 1Get dynamic DNS servers : verify and addDHCP : as you want !
May 2007 edition – Geoffrey CHARRA – http://www.efika.org
62

The Pegasos book – Volume 3 : MorphOS
Logging :I advise you to keep a trace of PPP and DIAL connections, which makes it possible to better analyze the possible problems that you could encounter.
8.2.1.5 Database section
DNS servers :You can put the DNS servers of your Internet provider here, although they in theory are added automatically according to the preceding adjustments.Once all these adjustments carried out, do not forget to save. I pass on the other sections which are not essential for connection ADSL, but do not forget to read documentation, many interesting options/settings exists.
8.2.2 Remarks
To get connected, you just have to press “online” (simple, no ?). A DIAL window must appear, and if all occurs well you will see then a LCP window, then NCP.
Some current problems :
8.2.2.1 The dial window loops, displaying NO CARRIER
Either you badly chose PPPOE or PPTP device, or you did not create your hardware Ethernet interface well. It must be also noted, that after a “wild” reboot, this kind of problem can happen. It is then necessary to wait between 2 and 5 minutes approximately. That is due to the fact that Miami reinitializes PPPoE session not correctly. In PPTP this kind of problem should not happen too often.
8.2.2.2 The DIAL phase succeeds, but it stops on LCP’s
It would seem that your account is not recognized. To be sure, read the log file which you specified in PPP log. If you see a "Authentification failed" or "operation timed out", either your account is not yet active, or your Internet provider played football with its identification server. NCP phase in theory correctly proceeds, if you block on "finding host name" or "findig addresses", it is not too “serious”, it is enough to disable the options in Interface - > PPP interface - > TCP/IP settings Get dynamic host name and DNS servers.
8.2.3 Alcatel SpeedTouch modem
If you have an Alcatel SpeedTouch modem, it is possible to configure it, since it has a telnet, ftp and Web server. Type http://10.0.0.138 in a navigator and you will go to the modem configuration page. It is thus possible to pass from PPTP mode to PPPoE mode (remains to know if your DSLAM manages the two protocols). Via telnet it is even possible to set the modem as “mode pro”, but I will not detail this handling here because it can himself appear dangerous for the modem.
May 2007 edition – Geoffrey CHARRA – http://www.efika.org
63
The Pegasos book – Volume 3 : MorphOS
8.2.4 ADSL with a Freebox (France only)
Paragraph only available in french original version.
8.3 Connection of a Pegasos to a network LAN - DHCP (Internet via ADSL modem)
One supposes here that the network is made up : of a ADSL Ethernet modem. of a router making the link between Internet (the WAN or Wide Area Network) and the local area network (the LAN or Local Area Network). of one or more machines already present on the router (inter alia PC).
Note (France only) : if you do not have a router but you have a Freebox modem, you can use it directly as router (it replaces in this case at the same time the router and modem ADSL).
8.3.1 Step 1 : Cables
ADSL Modem connected on the telephone plug, with ADSL filter.Router<->WAN (ADSL modem) linked by straight RJ-45 cable.Router<-> LAN machines linked with crossed RJ45 cables.
The router allows several machines of the LAN to share the same Internet connection while making correspond several LAN addresses with port numbers, to an Internet address allocated by the Internet provider. For more information on the routers, see : http://www.commentcamarche.net/lan/routeurs.php3 (french).
One thus connects Pegasos on the router via a cross RJ-45 cable.
8.3.2 Step 2 – Configuration of the network
It is necessary to activate the DHCP (Dynamic Host Configuration Protocol) on the router. As its name indicates it, that will make it possible to the router to automatically assign IP addresses to the machines connected to the LAN. For more information on the DHCP, see :http://www.commentcamarche.net/internet/dhcp.php3.
8.3.3 Step 3 – Configuration of TCP/IP stack8.3.3.1 With Miami
We consider here that the used stack is Miami.Launch MiamiInit (in the directory installed of Miami). Click on « Continue ».Chose « other SANA-II driver » et « Continue ».Input the name of the Pegasos Ethernet device :
May 2007 edition – Geoffrey CHARRA – http://www.efika.org
64
The Pegasos book – Volume 3 : MorphOS
« DEVS:Networks/via_rhinepci.device » in « Device », keep Unit to 0. Click on « Continue ».
Miami then displays a dialog box with the text « Contacting RArp server please Wait ».Subnetmask : keep to 255.255.255.0.Default gateway : 192.168.0.1 (router IP on the LAN).DNS : 192.168.0.1 (router IP on the LAN).
Note: if the machine is blocked during the configuration (it happens sometimes on Pegasos I), it is necessary then to input all manually (after having disconnected the Ethernet cable from the Pegasos). It is then necessary to choose an IP address for the Pegasos, for example 192.168.0.100. This address must be then defined as static on the router (see router documentation for that).
8.3.3.2 With MOSNet
Check in the MOSNet:db/interfaces file the presence of the following line if you use the standard network interface of Pegasos: eth0 DEV=DEVS:networks/via_rhinepci.device UNIT=0 IP=DHCP UP
If you use a RTL RTL8139 interface, comment the line Via-Rhine by adding "#" in front of and uncomment the following line: eth1 DEV=DEVS:networks/rtl_8139pci.device UNIT=0 IP=DHCP UP
8.3.4 Step 4 – Launching of TCP/IP stack8.3.4.1 With Miami
Re-connect RJ45 cable if it’s disconnected.Launch Miami and check TCP/IP parameters (one can then pass by again them in DHCP if they should have been put in statics during the configuration). Lastly, to start the pile click on Online.
8.3.4.2 With MOSNet
Restart your comuter. If you have added the stack’s startup in your « s :user-startup », or start it manually by entering the following command :Run >nil : MOSNet:MOSNet
8.3.5 Step 5 – Test of TCP/IP stack
On the LAN, with « ping » command from a shell :ping 192.168.0.1 (router)ping 192.168.0.101 (machine 1 – if there is a computer with this IP address)
On the WAN/Internet with « ping » command from a shell, or with a Internet browser like Voyager (installed by defaut into « Apps » directory), or with FTP (shell with command line).
May 2007 edition – Geoffrey CHARRA – http://www.efika.org
65

The Pegasos book – Volume 3 : MorphOS
8.4 Sharing files with another computer8.4.1 Sharing files with FTP
The simplest manner to set up file sharing is with FTP. For that, you will need a FTP server on the Pegasos or on the other computer.
8.4.1.1 Pegasos as FTP client
On a PC, one can for example install the EFTP FTP server, which is free for private individuals. Its configuration is rather simple and intuitive : it is necessary to configure a user and "download" and "upload" directories on the PC and launch the server. On the Pegasos, one only has to use ftp in command line via a shell, or with a software like AmiTradeCenter.
8.4.1.2 Pegasos as FTP server
On Pegasos, one can install RC-FTPd as FTP server and use the PC like a FTP client.
To configure it :Launch TCP/IP stack (Miami) but do not click on “online” yet (if not it can lead to problems during configuration). Go to "Prefs". Select "Users" in the left menu then click on "Add" in the right part of the window to add a new user. Choose him a name and a password.
Finally check that the column "0" is checked (it corresponds to the group "0"). Select "Groups" in the left menu then click on "Add". Choose a directory, give him an alias “toto” and choose the rights that the FTP client will have (for example check "Read", "Write", "Delete", "Subdirs" in the column "0"). Leave the preferences, and launch TCP/IP stack. Move FTP server from "FTP closed" to "FTP open".
Your FTP server is now functional and accessible on your LAN network.
On RC-FTPd see the article of Jérôme Chappuis : http://obligement.free.fr/articles/rcftpd.php (french) and for more information on the networks in general on Amiga and Pegasos, visit the “Amiga en reseau” site (http://amigaenreseau.free.fr/) (french again !).
8.4.2 Sharing files with Samba
To be completed…
May 2007 edition – Geoffrey CHARRA – http://www.efika.org
66

The Pegasos book – Volume 3 : MorphOS
8.5 Remote use of MorphOS and Pegasos
Remote use of your Pegasos can be very practical, for example if you want to use your Pegasos while being installed in your garden and by means of a wifi laptop or even at your office, by Internet. Everything is possible if you can control the MorphOS workbench of your remote Pegasos.
8.5.1 VNC server on Pegasos / MorphOS
For using your remote Pegasos under MorphOS, you need to use a VNC server. VNC (Virtual Network Connection) is a multi-platforms network protocol allowing the use of a machine (the server) since another machine (the client).
In our case, it is thus a question of using a Pegasos under MorphOS (the server) since another client machine (PC, Mac, Amiga...).
Since mid-August 2005, a VNC server is available for MorphOS here : http://binaryriot.com/dreamolers/vncserver/.
Its use is rather simple because the software is limited to 3 tabs.
A first tab ("Status") displays which are the VNC clients who are connected. The second tab ("Settings") displays the parameters of VNC server (let the default settings unchanged).The third tab ("Access list") displays the list of IP addresses of the computers authorized to connect. The simplest is to authorize only IP addresses of specific machines.
To make the server work, the simplest is to leave the default settings and to only specify the client IP address.
One should not forget to launch a TCP/IP stack like MiamiDX or AmiTCP before the VNC server, not to have the error message "Unable to find bsdsocket.library".
In case of problem, do not forget in MiamiDX (or AmiTCP) to allow the use of port 5900 (personally I didn’t have to do it).
8.5.2 VNC client under Windows XP/2000/NT PC
Once the server’s lauched, a client is needed to connect. For Windows, one can use the following client : http://www.realvnc.com/download.html
Note : VNC Windows client needs a name of machine and not an IP address alone. If your Pegasos is not recognized (ping pegasos does not answer), it is necessary to update the C:\WINDOWS\system32\drivers\etc\hosts file and to add a line containing IP address of the Pegasos followed by its name.
Example of C:\WINDOWS\system32\drivers\etc\hosts file : 127.0.0.1 localhost192.168.0.101 pegasos
For a connection outside of your private network (LAN), for example from Internet, do not forget to open the necessary ports on your firewall (by default 5900).
May 2007 edition – Geoffrey CHARRA – http://www.efika.org
67

The Pegasos book – Volume 3 : MorphOS
MorphOS’s workbench of a Pegasos with Quake, the whole seen from a PC with Firefox and the Far Cry game (Quake is unusable in remote, it is just to make the picture’s look nice : do not dream !).
8.5.3 VNC client under MorphOS
Ther is a VNC client for MorphOS : TwinVNC (http://twinvnc.free.fr/). For more information, see directly the site which is in French and does contain an online documentation.
8.5.4 VNC client under Mac
There are many VNC clients under MacOS X, the most widespread and simplest to use is OSXvnc : http://www.redstonesoftware.com/vnc.html.
8.5.5 Other VNC server under MorphOS
It has today less interest since there is a dedicated VNC server for MorphOS, but one can also use the Amiga software AmiVNC (http://wuarchive.wustl.edu/aminet/comm/tcp/AmiVNC.lha) which is a VNC server which can work under MorphOS in 68k mode thanks to its CyberGraphX support.
Not being dedicated to Pegasos/MorphOS, this version has the following disadvantages :it is rather slow it does not have apparently any mean to move the windows of Ambient with the mousethe colors are not in 24bits (this problem can be corrected, but I did not find yet how)
After having recovered the AmiVNC file from Aminet, and after having uncompressed it under MorphOS, one needs to get the executable "AmiVNC.060" which is in the tree structure
May 2007 edition – Geoffrey CHARRA – http://www.efika.org
68

The Pegasos book – Volume 3 : MorphOS
"Executable/RTG & Planar". This executable alone is sufficient for a use under MorphOS and can be placed anywhere in your environment.
Before all, it is necessary to launch your TCP/IP stack (MiamiDX or AmiTCP). The first time it is necessary to launch AmiVNC.060 with the option - pMyPassword where MyPassword is the password which will be necessary to use with VNC client. This command will create the password which will be saved.
Follows, it is enough to type the command “AmiVNC –a” to launch the server (on 3DFX Voodoo without the option -a the colors are completely weird, this option does not fixes the number of colors problem which seems to be 256).
The option -v allows in addition, to have a verbose mode (in case of error it can be usefull).
In short it is very simple :AmiVNC.060 -pMyPassword -v => creation of the password. AmiVNC.060 -a -v => launching of the server.
For more details on all the options see the AmiVNC site of Stéphane GUILLARD (http://s.guillard.free.fr/AmiVNC/AmiVNC.htm), the french author, or directly the included sources.
May 2007 edition – Geoffrey CHARRA – http://www.efika.org
69

The Pegasos book – Volume 3 : MorphOS
8.6 Wireless Wifi connection
This paragraph describes two possible methods in order to connect a Pegasos under MorphOS to a network via a wireless connection of Wifi type.
8.6.1 Use of a wireless Ethernet adaptater
A SANA-II driver named prism2.device exists. It makes it possible to use a 11Mbits/s wireless Ethernet adaptater on MorphOS.
This driver has today few limitations :
- Support of wireless PCMCIA boards based on Prism II chipset and variants only- Only Wifi 802.11b (11Mbits) is supported (but not the 802.11g)- Encryption WEP (10 or 26 digits) but not WPA
Le Prism2 driver be downloaded from Aminet : http://main.aminet.net/hard/drivr/prism2.lha.See its "readme" file for the installation.
8.6.2 Use of a Wifi acces point
This method is more generic since it can be also used for a game console having a network connection but not a wireless connection.
It is a question here of simply using the network adaptater of the Pegasos without adding an additional Wifi adaptater, by connecting the Pegasos directly to the Wifi access point.
Sometimes some old routers can be "re-flashed " in access point or even switch to access point.
It is then enough to setup the access point from a PC or a Mac, then to connect it directly to the RJ-45 network plug of the Pegasos.
There is only need to configure TCP/IP stack under MorphOS as described previously. The Pegasos sees then a traditional connection network. There is no need to install a specific driver or anything else.
Of course, in this case that means that the router must be connected to the telephone plug and this solution will not be appropriate to everyone.
May 2007 edition – Geoffrey CHARRA – http://www.efika.org
70
The Pegasos book – Volume 3 : MorphOS
9 Software development on MorphOS To develop on MorphOS, first subscribe to MorphOS Developper Connection (http://developer.morphosppc.com/ ) .This free subscription grants access to:MorphOS SDK download (C/C++).A specialised forum on MorphOS developmentDocumentationPublic tools to help development
Moreover the website Guru Meditation (http://www.guru-meditation.net/) (french) proposes tutorials dedicated to development on MorphOS and AmigaOS.
The website http://www.biclodon.com/documentation also contains help for using MorphOS’s serial debug output facility.
9.1 C/C++ language9.1.1 SDK
MorphOS SDK installation is rather straightforward.
9.1.1.1 Package
It is recommanded to download the following packages:
mossdk_base.lha (basic files, installation scripts, licence,...)mossdk_contributions.lha (contributions), mossdk_devenv.lha (complete GG environment), mossdk_devenv_includes.lha (associated includes), mossdk_documentation.lha (documentation and examples), mossdk_install.txt (English installation documentation)mossdk_morphed.lha (text editor).libnix_update.tar.bz2 (update)OpenPci2.1-SDK050605.zip (OpenPCI)tinygl_sdk.lha (OpenGL 1.1)
9.1.1.2 Installation
Just uncompress the archive (for example in RAM). Then double-click on « Install » and here it goes! Best is to leave all default options and always answer 'yes' to the questions (in particular the one assigning SDK: in the user-startup). Further to the reboot it is possible to place the MorphED editor icon on the desktop.
Note : on SDK version 1.0 of MDC, once SDK is installed, there is a program named « sed », located in the archive « mossdk_devenv.lha » which is not correctly installed. To finish the installation of « sed », proceed the following way (once the SDK is installed):Open a new shell (Right COMMAND+n)Enter the following line (it allows to copy the files of the « sed » distribution to the right place):copy GG:sed_tem/#? GG: move all force.Then delete this useless directory « GG:sed_tem » with : delete GG:sed_tem
9.1.2 Developement tools and libraries9.1.2.1 Automatic Makefile
May 2007 edition – Geoffrey CHARRA – http://www.efika.org
71

The Pegasos book – Volume 3 : MorphOS
A makefile allowing to generate a complete arborescence of makefile is available:http://cgenre.dev.free.fr/
9.1.2.2 Feelin
Feelin is an object-oriented system created for AmigaOS and then ported to MorphOS.It is a tool composed of a small shared library (the heart of the object system), which offers everything you need to create a complete object environment and an extendable system to create and manage graphical interfaces MUI.Original site: http://www.gofromiel.com/feelin/MorphOS port: http://yellowblue.nerim.net/
9.1.2.3 IDE
There is not really any full IDE (Integrated Development Environment) on MorphOS.As of today, the SDK together with the editor MorphEd is the most complete development tools suite.A commercial IDE including GoldEd also as a few C/C++ and LISP tools is also available :Cubic IDE (GoldEd Studio) : http://www.dietmar-eilert.net/cubic/index.htm
Lastly, there is also an IDE still in development :AmIDE : http://sourceforge.net/projects/amigaide
9.1.3 3D API (OpenGL)
There are several OpenGL implementations on MorphOS. However they are incomplete compared to the versions found on Linux, Windows or MacOS X for example.
9.1.3.1 TinyGL
This is the most complete OpenGL hardware implementation on MorphOS (stemming from a first version with full software rendering). 3D hardware rendering is possible only with some graphic cards depending on Pegasos I or 2 as well (see before). Some games like Shogo, Wipeout 2097, Freespace, Quake 1 and 2 run on MorphOS with 3D hardware rendering. For the time being, the graphic cards used do not allow to take advantage of shaders (vertex and pixel – yet it is possible on some Radeon from a pure hardware point of view). This library is available on MDC http://developer.morphosppc.com/. See also http://3d.morphos-team.net/.
About OpenGL, here is a link with a little less than 300 links related to OpenGL and sorted by sub-categories (in english):http://www.dmoz.org/Computers/Programming/Graphics/Libraries/OpenGL/.
May 2007 edition – Geoffrey CHARRA – http://www.efika.org
72
The Pegasos book – Volume 3 : MorphOS
9.1.3.2 SDL : Simple Direct Media Layer
These are multi-platforms libraries allowing low level access to audio, keyboard, mouse, joystick, 3D acceleration through OpenGL and 2D video (TinyGL encapsulation). These libraries are used as the basis for numerous open source applications. Available on http://www.lehtoranta.net/powersdl/. Official site : http://www.libsdl.org.
9.1.3.3 MiniGL
It is an OpenGL implementation allowing to perform hardware rendering (3D handled by the GPU) without display lists (but there are instead vertex arrays), and without lights, pixels and vertex shaders. MiniGL belongs to Hyperion and must normally be compiled only for code running on AmigaOS. There is therefore a licence problem with MorphOS. Thus if you intend to use MiniGL on MorphOS and comply with the licence, you must compile your software for 68k or WarpOS, which is not the ideal. Anyway it is available at http://wuarchive.wustl.edu/aminet/dev/c/minigl.lha. This API is almost not used anymore.
9.1.3.4 StormMesa
Mesa implementation.See http://www.haage-partner.de/download//Amiga/3DWorld/StormMesa/.This API is almost not used anymore.
9.1.4 Physic engine (OpenGL)
The physic engine "Open Dynamics Engine" or ODE is an open source C/C++ crossplatform library, making it possible to simulate the rigid dynamics of the bodies (collision detection, frictions and others...). ODE is useful for simulating vehicles, objects in virtual reality environments and virtual creatures. It is currently used in many computer games, 3D authoring tools and simulation tools. It is available on http://www.lehtoranta.net/libs/ode.lha. Official site: http://www.ode.org.
9.2 Other programming languages
Of course there are other languages than C/C++ available.Among the most popular:Pascal with FreePascal: (http://scenergy.dfmk.hu/amiga/fpc_mos/fpc_20050915.lha )Java with Jamiga (http://sourceforge.net/projects/jamiga/ )Python (http://yellowblue.nerim.net/python)ARexxPerl (V5.6.1 on Aminet)
May 2007 edition – Geoffrey CHARRA – http://www.efika.org
73

The Pegasos book – Volume 3 : MorphOS
10Emulation of AmigaOS 68k softwares10.1Introduction
MorphOS is compatible with a consequent AmigaOS list of software : AmigaOS 68k, WarpOS, PowerUP and also a few AmigaOS 4.0 with OS4Emu. But it is not able to launch directly Amiga applications using Paula, OCS or AGA chipsets.
In order to make those applications work, we need to use an emulator. For that, we will use E-UAE which is an UAE (Ubiquitous Amiga Emulator) version based on WinUAE. This Amiga emulator can run a 3.1 or a 3.9 system as well as old OCS games.
10.2Prerequisite
Here, we will use E-UAE 0.8.29 version being compiled for MorphOS by Fabien Coeurjoly. This version supports almost all the features available in WinUAE, except the JIT emulation and the graphic user interface.
E-UAE archive is available at http://fabportnawak.free.fr/uae. The latest is the 0.8.29 WIP3 version.
The archive contains two different versions: - E-UAE.SDL, which needs the powersdl.library and which offers P96 support (Picasso
graphic cards support) also as the ability to switch between full screen and window screen.
- The other version is the original one, it is called E-UAE and it is slightly faster with overlay support.
If you want to use the SDL version of E-UAE, you must download and install the PowerSDL library (version 10.5 or higher): http://dk.aminet.net/util/libs/powersdl.lha.
A graphic user interface is also available: “rhLauncher” created by Rupert Hausberger.It can be downloaded on the following URLs :http://member.ycn.com/~hausrup/downloads/rhLaunch/rhlaunch.lhaor via MorphUP : http://member.ycn.com/~hausrup/morphup/morphos/index_mos.pmi .
10.3ROM / Kickstart and ADF10.3.1ROM / Kickstart
The Kickstart is a chip contained in ROM containing the essential elements of the operating system and an Amiga can’t boot without it. You can either buy a CD with all the kickstarts or get your Amiga’s kickstarts by yourselve.
If you wish to use all or almost all existing Amiga ROMs, the simpliest is to buy a CD from Cloanto Amiga Forever on the Amiga Forever’s website (http://www.amigaforever.com/). You will also have the advantage to have a few software in ADF format needed for emulation.Three version are available from $29.95 to higher. Once you will have the CD, you will be able to retrieve the kickstarts from the « Emulation\shared\ROM » directory. Be aware that all the kickstarts contained on this CD require a key. This key is necessary to make the ROMs work with E-UAE. For that, you will need the "kickstart_key_file" option in the configuration file.
A copy of your kickstart can also be done with your Amiga, using the “Transrom” tool which can be found in the WinUAE archive (http://www.winuae.net/files/WinUAE1320.zip).
May 2007 edition – Geoffrey CHARRA – http://www.efika.org
74
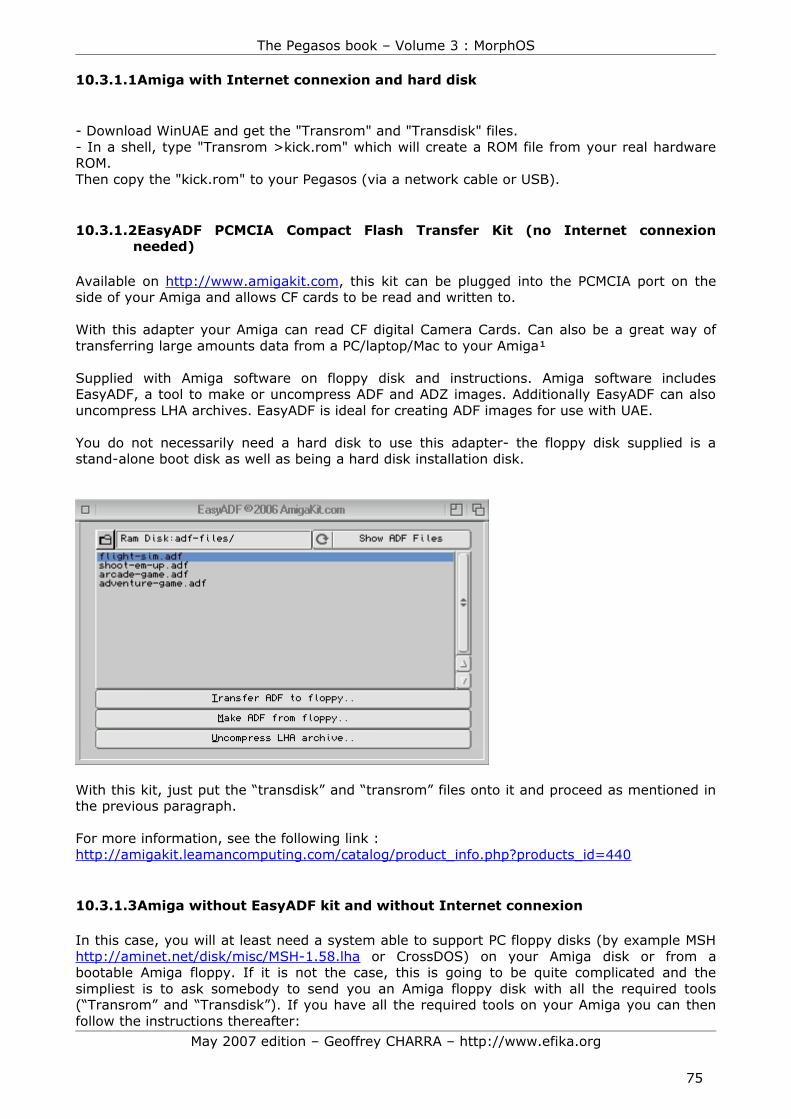
The Pegasos book – Volume 3 : MorphOS
10.3.1.1Amiga with Internet connexion and hard disk
- Download WinUAE and get the "Transrom" and "Transdisk" files.- In a shell, type "Transrom >kick.rom" which will create a ROM file from your real hardware ROM.Then copy the "kick.rom" to your Pegasos (via a network cable or USB).
10.3.1.2EasyADF PCMCIA Compact Flash Transfer Kit (no Internet connexion needed)
Available on http://www.amigakit.com, this kit can be plugged into the PCMCIA port on the side of your Amiga and allows CF cards to be read and written to.
With this adapter your Amiga can read CF digital Camera Cards. Can also be a great way of transferring large amounts data from a PC/laptop/Mac to your Amiga¹
Supplied with Amiga software on floppy disk and instructions. Amiga software includes EasyADF, a tool to make or uncompress ADF and ADZ images. Additionally EasyADF can also uncompress LHA archives. EasyADF is ideal for creating ADF images for use with UAE.
You do not necessarily need a hard disk to use this adapter- the floppy disk supplied is a stand-alone boot disk as well as being a hard disk installation disk.
With this kit, just put the “transdisk” and “transrom” files onto it and proceed as mentioned in the previous paragraph.
For more information, see the following link :http://amigakit.leamancomputing.com/catalog/product_info.php?products_id=440
10.3.1.3Amiga without EasyADF kit and without Internet connexion
In this case, you will at least need a system able to support PC floppy disks (by example MSH http://aminet.net/disk/misc/MSH-1.58.lha or CrossDOS) on your Amiga disk or from a bootable Amiga floppy. If it is not the case, this is going to be quite complicated and the simpliest is to ask somebody to send you an Amiga floppy disk with all the required tools (“Transrom” and “Transdisk”). If you have all the required tools on your Amiga you can then follow the instructions thereafter:
May 2007 edition – Geoffrey CHARRA – http://www.efika.org
75

The Pegasos book – Volume 3 : MorphOS
- You need a 720K PC disk. If you don’t have any, you can use an Amiga disk and format it on a PC or a high density PC floppy disk, then put a ribbon tape on the left hole and format it in 720K on a PC.
- Copy « Transrom » from WinUAE to the root of the 720K PC disk. Copy also “Transdisk” which will be used to rip Amiga disks.
- Boot your Amiga with the Workbench.- Launch the application necessary to read PC disks if not already launched (like MSH or
CrossDOS).- Supposed that you have enough memory space, do the "Transrom >kick.rom" command
from CLI. This will create a 256 or 512K file depending of your kickstart revision. If you don’t have enough space use the floppy disk directly and type "Transrom >DF0:kick.rom".
- Then copy your Amiga kick.rom to the 720K PC disk with the command "copy RAM:kick.rom DF0:" or by drag and drop.
- You can then copy this ROM file to your Pegasos.
10.3.2Transforming an Amiga floppy into an ADF file
To create an ADF file (Amiga Disk File) from an Amiga floppy disk, use the “Transdisk” program also available in WinUAE. Do the same as for the Kickstart except for an additional command to type on your Amiga : “transdisk >ram:df0.adf”.
Various ADF can be freely foung on Internet. Here, we will use tge ADF of the E-type game for example (http://obligement.free.fr/jeux/etype.lha). E-Type has the advantage to be free, self-bootable and able to work with any ROM.
10.4Installing10.4.1Basic install
If this is not already the case, you first need to have a working SDL system. For that, download and install PowerSDL (version 10.5 or higher) : http://dk.aminet.net/util/libs/powersdl.lha .
Then proceed to the following steps:- Create a drawer named "E-UAE" on a partition of your hard disk.- Uncompress the E-UAE archive. Then, copy all the files inside it.- Place your Kickstart ROMS in the "E-UAE/roms" drawer.- Place your ADF files in the "E-UAE/floppies" drawer (E-type in our example).- Place you HDF files into the "E-UAE/hardfiles" (optional).- You will also need an AmigaOS (anyone). The simpliest is to get your old Amiga system
(avoid copying customized workbenches with PowerPC file: that would not work). If you don’t have any preinstalled system, you can use either the 3.1 or 3.5 systems almost preinstalled on the OS3.5 and OS3.9 CDs).
10.4.2Installing AmigaOS 3.910.4.2.1The AmigaOS 3.9 CD
The best is to install a new AmigaOS 3.9 system from scratch to have a “clean” system. Here is how to proceed for that:- Under MorphOS, insert the AmigaOS 3.9 CD, then double click on the “OS-Version3.9”
icon and then select a full installation in the “E-UAE/workbench39” directory created before.
- Proceed to install and answer the few questions which are asked by the application
May 2007 edition – Geoffrey CHARRA – http://www.efika.org
76
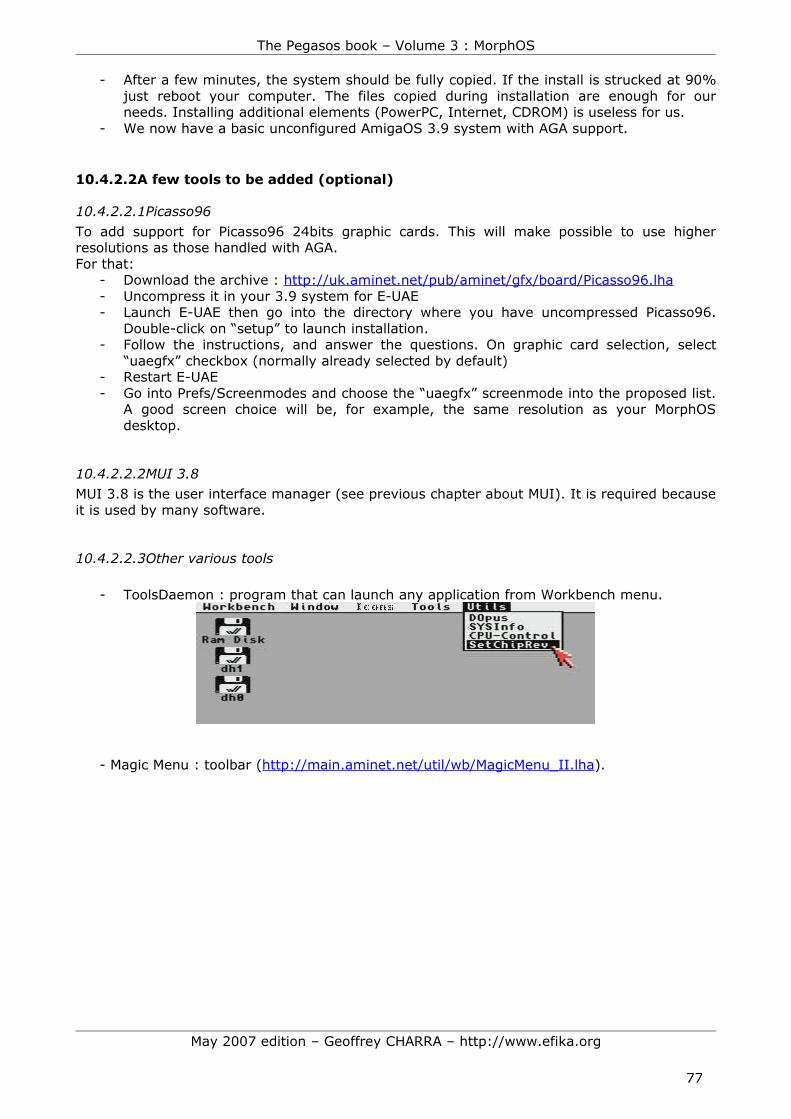
The Pegasos book – Volume 3 : MorphOS
- After a few minutes, the system should be fully copied. If the install is strucked at 90% just reboot your computer. The files copied during installation are enough for our needs. Installing additional elements (PowerPC, Internet, CDROM) is useless for us.
- We now have a basic unconfigured AmigaOS 3.9 system with AGA support.
10.4.2.2A few tools to be added (optional)
10.4.2.2.1Picasso96 To add support for Picasso96 24bits graphic cards. This will make possible to use higher resolutions as those handled with AGA.For that:
- Download the archive : http://uk.aminet.net/pub/aminet/gfx/board/Picasso96.lha- Uncompress it in your 3.9 system for E-UAE- Launch E-UAE then go into the directory where you have uncompressed Picasso96.
Double-click on “setup” to launch installation.- Follow the instructions, and answer the questions. On graphic card selection, select
“uaegfx” checkbox (normally already selected by default)- Restart E-UAE- Go into Prefs/Screenmodes and choose the “uaegfx” screenmode into the proposed list.
A good screen choice will be, for example, the same resolution as your MorphOS desktop.
10.4.2.2.2MUI 3.8MUI 3.8 is the user interface manager (see previous chapter about MUI). It is required because it is used by many software.
10.4.2.2.3Other various tools
- ToolsDaemon : program that can launch any application from Workbench menu.
- Magic Menu : toolbar (http://main.aminet.net/util/wb/MagicMenu_II.lha).
May 2007 edition – Geoffrey CHARRA – http://www.efika.org
77

The Pegasos book – Volume 3 : MorphOS
- WHDLoad and JST : install and launch from your hard disk, any 3rd party software which is originally stored on a bootable floppy disk (http://www.whdload.de/).
10.4.3Configuring E-UAE
You must know that when you start UAE, it uses a default configuration named “.uaerc”.
We are then going to create this file. In a shell, type:ed drawer_name:uae/.uaerc
An empty file named “.uaerc” opens. You are going to enter the following parameters inside it:
filesystem=rw,dh0:E-UAE/workbench39filesystem=rw,dh1:E-UAE/games
kickstart_rom_file=roms/kick31.romfloppy_speed=400
gfx_framerate=1gfx_width=1280gfx_height=1024gfx_width_windowed=640gfx_height_windowed=512gfx_fullscreen_amiga=yesgfx_fullscreen_picasso=yesgfx_linemode=doublegfx_correct_aspect=truegfx_center_horizontal=smartgfx_center_vertical=smartshow_leds=true
sound_output=normalsound_bits=16
May 2007 edition – Geoffrey CHARRA – http://www.efika.org
78

The Pegasos book – Volume 3 : MorphOS
sound_frequency=22050sound_channels=stereosound_interpol=none
cpu_type=68040cpu_speed=maxcpu_compatible=falsecpu_cycle_exact=false
chipmem_size=4bogomem_size=0fastmem_size=0z3mem_size=32gfxcard_size=4
chipset=agaimmediate_blits=truecollision_level=full
joyport0=mousejoyport1=joy0kbd_lang=uk
You can do any change you want, but try to stay as close to this example for a start. Now that your configuration file is ready, you just have to save it.
In our example, we are using an Amiga 1200 system, with AGA support, 2Mb of Chip RAM, 32Mb of Fast RAM, a 68040 processor and AmigaOS 3.9 as the operating system.
A few explanations:
filesystem=rw,dh0:E-UAE/workbench39
-> We are going to use the "E-UAE/workbench39" directory where we have installed our 3.9 system before as our operating system. In E-UAE, the system will be on the “dh0” partition.
filesystem=rw,dh1:games
-> This is a second partition, optional, named DH1. To add a new partition, just create a new directory in E-UAE and copy anything that you want into it. In the above example, a game directory.
kickstart_rom_file=roms/kick31.rom
-> Here, we use the Kickstart 3.1. The file is into the "roms" directory of E-UAE.
floppy_speed=400
-> This line sets the floppy driver speed. A speed of “100” is the real speed, so "400" can multiply real speed by four. The maximum speed is "800" or "0". A few software are now working very well (or not booting) if the speed is not the real one.
gfx_framerate=1
-> Skips a frame on two for display’s speedup.
May 2007 edition – Geoffrey CHARRA – http://www.efika.org
79

The Pegasos book – Volume 3 : MorphOS
gfx_width=1280
gfx_height=1024
-> Screen resolution in pixels when using P96 graphic mode in E-UAE.
gfx_width_windowed=640
gfx_height_windowed=512
-> Screen resolution in pixels when using E-UAE in windowed mode.
gfx_fullscreen_amiga=yes
-> Full screen for OCS/ECS/AGA screen resolution. With “no", emulation is started in windowed mode.
gfx_fullscreen_picasso=yes
-> Full screen for P96 screen resolution. With “no", emulation is started in windowed mode.
gfx_linemode=double
-> Only for lower vertical resolutions. "double" doubles each horizontal line which avoid black lines. "scanlines" does the opposite: this inserts an empty line into each line.
gfx_correct_aspect=true
gfx_center_horizontal=smart
gfx_center_vertical=smart
-> With those three parameters, the image will be centered and will have a correct vertical/horizontal ratio.
show_leds=true
-> Displays LEDs at the lower right corner of the emulation window. Useful to watch the floppy or hard disk activity.
sound_output=normal
sound_bits=16
sound_frequency=22050
sound_channels=stereo
sound_interpol=none
-> For those 5 previous parameters, we choose the emulation sound quality: 22050 Hz in 16 bits stereo. To switch the sound off, just put “none" instead of "normal".
cpu_type=68040
-> The processor used during emulation. The 68040 will give good performances for using AmigaOS3.9. Also possible : 68000 and 68020.
cpu_speed=maxMay 2007 edition – Geoffrey CHARRA – http://www.efika.org
80

The Pegasos book – Volume 3 : MorphOS
-> Processor speed. The "max" or "0" value are the faster. The highest one (until 8) will slow down emulation.
cpu_compatible=false
-> "false" breaks the processor instruction set compatibility. This can make possible to gain a bit of speed. The "true" is here to have a 100% compatibility when required.
cpu_cycle_exact=false
-> With "false", the clock cycle of the processor is not respected. This can make an hypothetic gain of speed against some compatibility. Other possible value: "true".
chipmem_size=4
-> Chip memory size. This must be multiplied by 512Kb to have the total amount. Here, "4" gives 2Mb of Chip memory. We can not use 4Mb of Chip memory under E-UAE.
bogomem_size=0
-> Bogo memory size. This must be multiplied by 1Mb to have the total amount. This memory is useless for enduser.
fastmem_size=0
-> Fast memory size. This must be multiplied by 1Mb to have the total amount. This memory is limited to 8Mb. Here it has been replaced by Z3 memory.
z3mem_size=32
-> Memory size through ZorroIII port. This must be multiplied by 1Mb to have the total amount. It is limited to 4Gb.
gfxcard_size=4
-> Memory size of the graphic card. This must be multiplied by 1Mb to have the total amount. Here we have selected a 4Mb graphoc card. Fantasy values over 8Mb are useless on an Amiga 68k.
chipset=aga
-> Graphic chipset selection: “ocs” or “ecs” values can also be used. « aga » gives the best resolutions and colors compared to “OCS” or “ECS” but its emulation is slower.
immediate_blits=true
-> Speeds up Blitter functions. Some games do not work correctly with this feature.
collision_level=full
-> How does E-UAE handles collisions : "full" gives a total handling. Other possible values are "none" and "playfields"
May 2007 edition – Geoffrey CHARRA – http://www.efika.org
81

The Pegasos book – Volume 3 : MorphOS
joyport0=mouse
-> Your mouse is plugged on port 0 under E-UAE.
joyport1=joy0
-> Your joystick will be plugged on port 1 under E-UAE. The "0" of "joy0" is the number used by the lowlevel.library to recognize your joystick. You can also use "joy1" or "joy2".
kbd_lang=uk
-> Language of your keyboard.
10.4.4Starting E-UAE
Now, start E-UAE. You are now under a base workbench but with a slow speed (E-UAE is slower than UAE.
And thanks to WHDLoad, you are able to launch all your ECS/OCS/AGA Amiga games from your hard disk.
10.4.4.1A few useful keys
The useful keys for E-UAE (standard version) are the following :F12 + Q = Quit UAE.F12 + R = Restart UAE (warm reset).F12 + shift gauche + R = Restart UAE (cold reset).F12 + D = Displays debug window.
F12 + S = Fullscreen/windowed screen mode switch.
F12 + G = Grab mouse (windowed mode).
May 2007 edition – Geoffrey CHARRA – http://www.efika.org
82
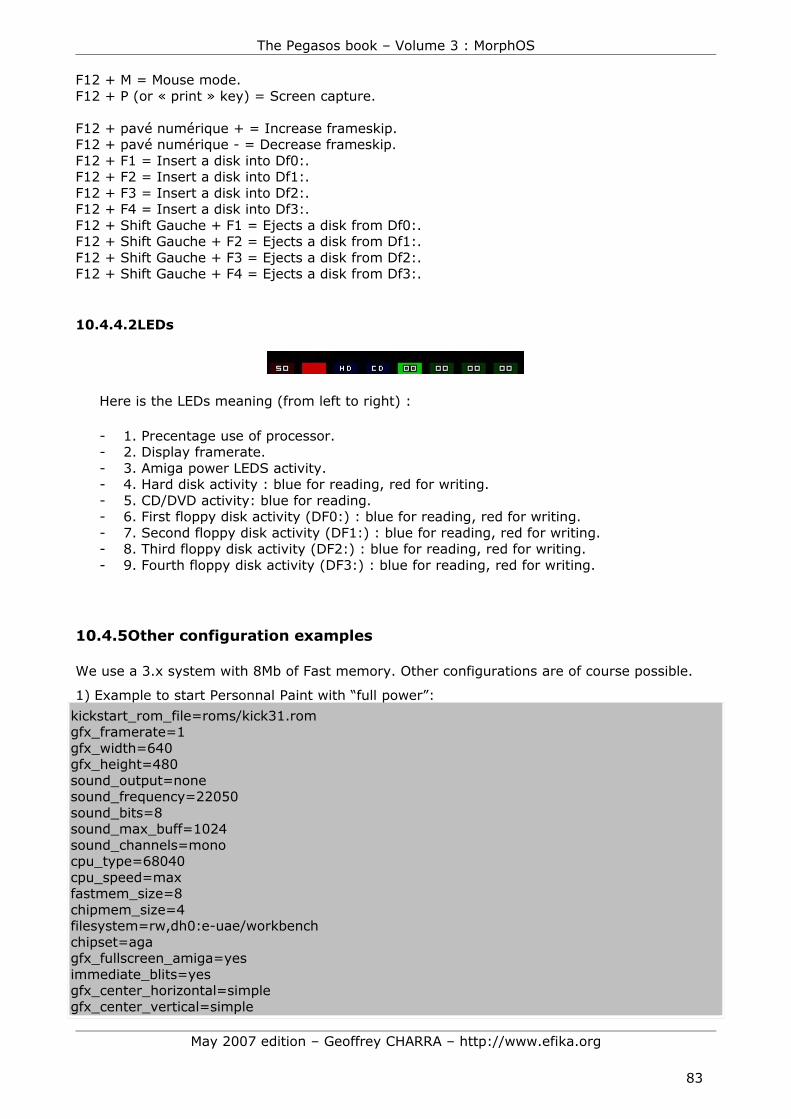
The Pegasos book – Volume 3 : MorphOS
F12 + M = Mouse mode.F12 + P (or « print » key) = Screen capture.
F12 + pavé numérique + = Increase frameskip.F12 + pavé numérique - = Decrease frameskip.F12 + F1 = Insert a disk into Df0:.F12 + F2 = Insert a disk into Df1:.F12 + F3 = Insert a disk into Df2:.F12 + F4 = Insert a disk into Df3:.F12 + Shift Gauche + F1 = Ejects a disk from Df0:.F12 + Shift Gauche + F2 = Ejects a disk from Df1:.F12 + Shift Gauche + F3 = Ejects a disk from Df2:.F12 + Shift Gauche + F4 = Ejects a disk from Df3:.
10.4.4.2LEDs
Here is the LEDs meaning (from left to right) :
- 1. Precentage use of processor.- 2. Display framerate.- 3. Amiga power LEDS activity.- 4. Hard disk activity : blue for reading, red for writing.- 5. CD/DVD activity: blue for reading.- 6. First floppy disk activity (DF0:) : blue for reading, red for writing.- 7. Second floppy disk activity (DF1:) : blue for reading, red for writing.- 8. Third floppy disk activity (DF2:) : blue for reading, red for writing.- 9. Fourth floppy disk activity (DF3:) : blue for reading, red for writing.
10.4.5Other configuration examples
We use a 3.x system with 8Mb of Fast memory. Other configurations are of course possible.
1) Example to start Personnal Paint with “full power”:kickstart_rom_file=roms/kick31.romgfx_framerate=1gfx_width=640gfx_height=480sound_output=nonesound_frequency=22050sound_bits=8sound_max_buff=1024sound_channels=monocpu_type=68040cpu_speed=maxfastmem_size=8chipmem_size=4filesystem=rw,dh0:e-uae/workbenchchipset=agagfx_fullscreen_amiga=yesimmediate_blits=yesgfx_center_horizontal=simplegfx_center_vertical=simple
May 2007 edition – Geoffrey CHARRA – http://www.efika.org
83
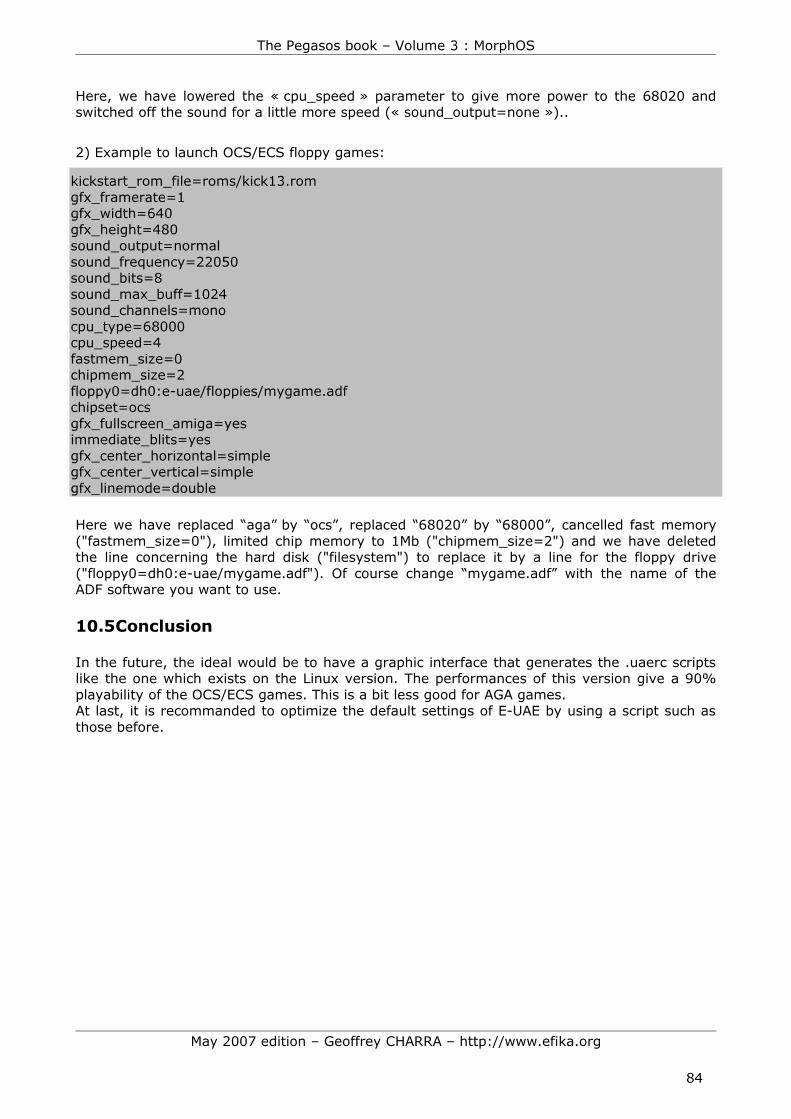
The Pegasos book – Volume 3 : MorphOS
Here, we have lowered the « cpu_speed » parameter to give more power to the 68020 and switched off the sound for a little more speed (« sound_output=none »)..
2) Example to launch OCS/ECS floppy games:
kickstart_rom_file=roms/kick13.romgfx_framerate=1gfx_width=640gfx_height=480sound_output=normalsound_frequency=22050sound_bits=8sound_max_buff=1024sound_channels=monocpu_type=68000cpu_speed=4fastmem_size=0chipmem_size=2floppy0=dh0:e-uae/floppies/mygame.adfchipset=ocsgfx_fullscreen_amiga=yesimmediate_blits=yesgfx_center_horizontal=simplegfx_center_vertical=simplegfx_linemode=double
Here we have replaced “aga” by “ocs”, replaced “68020” by “68000”, cancelled fast memory ("fastmem_size=0"), limited chip memory to 1Mb ("chipmem_size=2") and we have deleted the line concerning the hard disk ("filesystem") to replace it by a line for the floppy drive ("floppy0=dh0:e-uae/mygame.adf"). Of course change “mygame.adf” with the name of the ADF software you want to use.
10.5Conclusion
In the future, the ideal would be to have a graphic interface that generates the .uaerc scripts like the one which exists on the Linux version. The performances of this version give a 90% playability of the OCS/ECS games. This is a bit less good for AGA games. At last, it is recommanded to optimize the default settings of E-UAE by using a script such as those before.
May 2007 edition – Geoffrey CHARRA – http://www.efika.org
84

The Pegasos book – Volume 3 : MorphOS
11Sites about MorphOS11.1Information and forums11.1.1Sites in english
MorphOS Development Team – official site : http://www.morphos-team.net MorphOS Development Team – 3D drivers : http://3d.morphos-team.net/MorphOS Development Team – support registering : http://support.morphos-team.netMorphOS Developers Connection – MorphOS development: http://developer.morphosppc.com/MorphZone, MorphOS forum, download and bounties (multi languages) : http://www.morphzone.org/MorphOS News : news on MorphOS : http://www.morphos-news.de/
11.1.2Sites in french
Obligement, magazine about AmigaOS and MorphOS : http://obligement.free.frAmiga Impact, French AmigaOS and MorphOS news : http://www.amigaimpact.org WikiPeg : le Wiki about Pegasos, MorphOS and Linux (& Pegasos book) : http://www.wikipeg.org
11.1.3Sites in german
Deutsche Pegasos Community : http://pegasosforum.de
11.2Download11.2.1MorphOS natives softwares
MorphOS Development Team - Téléchargements : http://download.morphos-team.netMorphOS News - Software section : http://www.morphos-news.de/software.php?lg=enMorphZone - download section : http://www.morphzone.org/modules/mydownloads/Pegasos forum – programs section : http://www.pegasosforum.de/dload.php?action=category&cat_id=2
MorphOS home page : http://www.morphos.org/fileslinks.php3Obligement – download section : http://obligement.free.fr/telechargements.phpObligement – softwares links : http://obligement.free.fr/liens.php#logiciel
11.2.2Amiga 68k compatible softwares for MorphOS :
Aminet : http://www.aminet.net/A.D.A. Amiga Demos : http://ada.planet-d.net/index.phpOS4 Depot : http://os4depot.net
May 2007 edition – Geoffrey CHARRA – http://www.efika.org
85

The Pegasos book – Volume 3 : MorphOS
12 Overview of MorphOS softwares12.1Software
A non extensive overview of MorphOS compatible software list is available at the following URL: http://www.wikipeg.org/morphos
Note : this list is not maintained anymore in the Pegasos book to avoid a fastidious translation work between different versions.
An another and more complete list is also available at http://pegasos.jinak.cz/software.html.
12.2Demos
These demos can be downloaded on http://wikipeg.free.fr/download or on http://www.morphzone.org.
Demo Groupe / Année DétailsAbsolon Venus Art and
MadWizards 1998
3rd Gravity 98 amiga demoAnother dream away
MadWizards 2002
1st Slash 2002
May 2007 edition – Geoffrey CHARRA – http://www.efika.org
86

The Pegasos book – Volume 3 : MorphOS
By night Encore 2003
1st Symphony 2003
PD
Chrysler Fit & Bandragon 2004
1st Motorola Inside
PD
Cull bazar MadWizards 2001
11th Assembly 01 combined demo
PD
Death trial Mankind 2000
1st Ukonx 2000
PD
Dose 2 Mfx 2001
5th Assembly 2001
PD
Everything dies Venus art 1998 PD
May 2007 edition – Geoffrey CHARRA – http://www.efika.org
87

The Pegasos book – Volume 3 : MorphOS
Fate fits karma MadWizards 2003
2nd Breakpoint 2003
PD
Fluffy digital snowflakes
MadWizards 2004
2nd BreakPoint 2004
PD
Ghost In The Machine
Venus art 1997 Aaugust 1997, Gravity Party II PD
Glare MadWizards 2005
Mach 2005 – 3rd BreakPoint
PD
Jenny thinks Fit & Bandragon 2004
4th Assembly 2004
PD
New dawn fade MadWizards 2002
8th Mekka & Symposium 02 amiga demo
No sync Universe 2003 3rd Equinoxe 2003 combined demo PD
May 2007 edition – Geoffrey CHARRA – http://www.efika.org
88

The Pegasos book – Volume 3 : MorphOS
No sync is back Universe 3rd IGDRP 2 PD
Own love balance MadWizards 2003
1st Equinoxe 2003
PD
Sulaco Encore 2002
Abstract 2002
PD
The field where I died
Venus art 2nd Intel Outside 98 amiga demo PD
The unbelievable truth
Mankind 2000
1st Euskal 2000
PD
Till I find you MadWizards 2003
2nd Kindergarden 2003
PD
Yelow rose of Texas Fit & Bandragon 2004
1st Assembly PD
May 2007 edition – Geoffrey CHARRA – http://www.efika.org
89

The Pegasos book – Volume 3 : MorphOS
13 Compiling CVS AmbientThe Information thereafter will give you a little assistance to compile the sources of Ambient. This information is not maintained but makes it possible to compile the version 1.42. Thank you to contact us if any change is needed.
13.1Pre-requisite
Download and install the following files :MUI4alpha : Download MUI4alpha on the editor’s website (I still point out that it is about an alpha version!) "http://www.sasg.com/mui/muiâlpha_mos_20050714.lha". To install it, made a backup of the directories concerned and copy the contents of the file directly under "mossys:". For that it will be necessary to boot on the installation CD, or you will have a message indicating that some files cannot be overwritten.
MorphOS’s SDK : Download the SDK and its updates (in particular "libnix_update.tar.bz2") from “http://developer.morphosppc.com”. For the installation see chapter 3.10.
CVS : Download CVS from sourceforge: "http://sourceforge.net/cvs/?group_id=131132 ". Install CVS while following the associated README. Assign a CVSHOME directory which will contain your sources.
SED : Download sed on Aminet: "http://www.aminet.net/package.php?package=dev/gg/sed-bin.lha". Then, copy the binary contents from the archive in "C: ".
PNG2C : Download PNG2C: sources : « http://zapek.com/software/png2c/ »binaire compiled only : « http://wikipeg.free.fr/download/pegasos/development/C_CPP/png2c_bin.lha » To install PNG2C, place the binary of "png2c" in gg: (and maybe be also in your Ambient sources directory).
TextimputMCC : Download class MUI TextimputMCC: « ftp://ftp.vapor.com/pub/misc/textinput_293.lzx ».Install the libaries with the delivered installer from archive. Then copy the file "TextimputMCC.h" being in "developer" to "gg:os-include/MUI".
Note: you will probably have also to copy the file "rev" which is under ambient towards "modules/about".cp CVSHOME:ambient/rev CVSHOME:ambient/modules/about/rev
13.2Necessary patch of libaboxstubs.a
For the compilation proceeds well after having installed the SDK plus the updates, you need to "patch" the file libaboxstubs.a by getting two modules of the old version. For that do the following operations. Copy the file "libaboxstubs.a" being in "mossdk_devenv/MorphOS SDK/InstallData/DevEnv/support/gg_tree/ppc-morphos/lib/libnix" in "RAM: ". Then, open a shell and execute the following commands which will extract the modules contained in the file from "RAM:" and will add them to the file contained in your development environment :cd ram:
May 2007 edition – Geoffrey CHARRA – http://www.efika.org
90

The Pegasos book – Volume 3 : MorphOS
ar x ram:libaboxstubs.acp gg:ppc_morphos/lib/libaboxstubs.a gg:ppc_morphos/lib/libaboxstubs_old.aar cr gg:ppc_morphos/lib/libaboxstubs.a WritePixelArrayAlpha.o ProcessPixelArray.o
13.3Downloading the sources
If you’ve never used CVS, create a directory “CVSHome” somewhere on your hard disk (ex: DH2:CVSHome). Then make an assignment (that you can add to your S:user_startup file) such as for example:assign CVSHOME: DH2:CVSHome
Now, go to your directory CVSHOME: where you are going to download the Ambient sources by doing the following commands :cvs -d:pserver:[email protected]:/cvsroot/morphosambient logincvs -z3 -d:pserver:[email protected]:/cvsroot/morphosambient co -P ambient
Those two commands will download the latest sources from Ambient in a directory called « ambient » which will be created under your “CVSHOME:” directory.
13.4Compilation (debug)
For compiling the sources, in the "ambient" directory that you just created (ex: "CVSHOME:ambient"), do successively the following commands :makemake libsmake modules
13.5Compilation (release)
In "CVSHOME:ambient" directory, edit the "config.h" file and comment on the definition of DEBUG.
For that, replace :#ifndef DEBUG#define DEBUG 1#endif
By :/*#ifdef BETA_RELEASE#define DEBUG 1#endif*/
Save and quit.Then under « CVSHOME:ambient » do :make
The resulting file must of course be smaller than that of the debug version.
13.6Installing
First, make a backup copy of your "MOSSYS:ambient" directory somewhere on your hard disk. Then copy the following files :copy Ambient MOSSYS:ambient/copy libs/pnglib/png.alib MOSSYS:ambient/libs/copy libs/zlib/z.alib MOSSYS:ambient/libs/
May 2007 edition – Geoffrey CHARRA – http://www.efika.org
91

The Pegasos book – Volume 3 : MorphOS
Restart your computer. You should now be under your new compiled Ambient.
13.7Various patches 13.7.1Activation of icon effects
In « config.h » set USE_DROP_EFFECT_PREFS to 1.
13.7.2 Small icons
Note : is maybe not needed any more in the latest Ambient versions, apply it only if you are sure it is required.
With the MUI4alpha version a bug seems to prevent the displaying of icons in mode "list". It is possible to patch the sources in order to circumvent the problem in the following way while waiting for the next version.
In classes.h : search the line "DEFCLASS(view);" and add the line "DEFCLASS(gview);" just after.
In classes.c : search the line "CLASSENT(view)," and add the line "CLASSENT(gview)," just after.
Create a new file named "gviewclass.c" from the "viewclass.c" file : "cp viewclass.c gviewclass.c". Edit this file and replace DECSUBCLASS_NC(MUIC_Virtual_group, viewclass) by "DECSUBCLASS_NC(MUIC_Group, gviewclass)"
In "listviewclass.c" : replace "DECSUBCLASSPTR_NC(gviewclass, listviewclass)" by "DECSUBCLASSPTR_NC(gviewclass, listviewclass)"
In "makefile.objs" : search "viewclass.o" and add "gviewclass.o" just after.
In ".depend.morphos" : search "viewclass.o" and just after its declarations, add :"gviewclass.o: gviewclass.c ambient.h config.h debug.h errormsg.h \ memtrack.h mui_func.h classes.h sizes.h iconview.h mui_internal.h \ view_func.h threads.h contextmenu.h command.h rexx.h viewapi.h"
Then, re-compile the sources by doing "make". Copy the resulting "Ambient" file in "mossys:ambient". Reboot and switch to "List" mode. You should see appearing miniature icons.
May 2007 edition – Geoffrey CHARRA – http://www.efika.org
92