The Official Magazine of the Ducati Owners Club of the ... · Contact Marvin Jensen, Bakersville,...
17
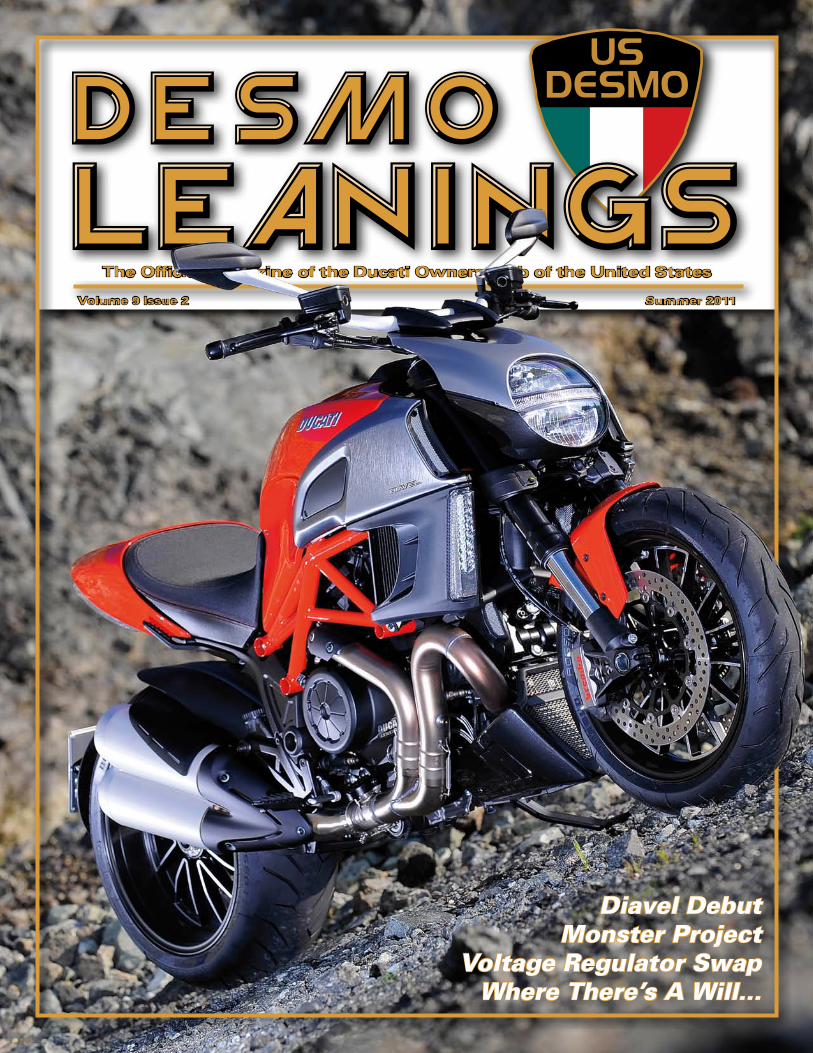
The Official Magazine of the Ducati Owners Club of the United States Volume 9 Issue 2 Summer 20 1 1 Diavel Debut Monster Project Voltage Regulator Swap Where There’s A Will...
Transcript of The Official Magazine of the Ducati Owners Club of the ... · Contact Marvin Jensen, Bakersville,...
The Official Magazine of the Ducati Owners Club of the United States
Volume 9 Issue 2 Summer 2011
Diavel DebutMonster Project
Voltage Regulator SwapWhere There’s A Will...
SUMMER 2011 www.USDESMO.com 1
828-274-4271
Specializing in European Motorcycles & Machining Services
SMC Inc.Andy Rounds 408 Plaza Drive Harrisburg, NC 28075 (704) 455-2434 cell: (704) 309-6298 [email protected]
www.smcspec.com
Engine Performance Upgrades and TuningSuspension Upgrades and TuningMachine Shop ServicesFabrication
Ohlins Authorized Service Center
Dynojet Tuner
Techno Research vehicle diagnostics for all Magneti
Marelli components
731 Westinghouse Blvd.(At I-77 Exit 1)
Charlotte, NC 28273704-882-6106
www.bmw-ducati.com
Tuesday – Friday 9:00AM – 6:00PM • Saturday 9:00AM – 4:00PM • Sunday – Monday Closed
MOTORCYCLES OF CHARLOTTEBMW - Ducati - Triumph - MV Agusta
Full Service DealerSalesParts
ServiceAccessories
Apparel

2 www.USDESMO.com SUMMER 2011 SUMMER 2011 www.USDESMO.com 3
Features7 TekTalk: Regulator Swap by Michael Todd
11 Diavel Debut by Neale Bayly
19 Monster Project by Bill Park
25 Where There’s A Will... by The Ducshop
27 A Few DABR Pics by Jim Calandro
The USual Suspects4 Piazza Del Mercato Classifieds
24 Tiny Tek Tips Battery Trick
28 Bench Racing Tall tales of fact and “friction”
Page 19
Jim Calandro . . . . . . . . . . . . .il Capo [email protected]
Clyde Romero. . . . . . . . . Consigliere [email protected]
Bob Lattanzi . . . . . . . . . . Consigliere [email protected]
Terry Wyse . . . . . . . . . . . Consigliere [email protected]
Larry Haber . . . . . . . . . . . Consigliere [email protected]
David Grogan . . . Revisore di Bozze [email protected]
Terry Boling . . . . . . Redattore Technico [email protected]
Lewis Kirk. . . . . .Curatore del Sito Web [email protected]
Advertisement Rates Size Per IssueBack Cover, Full Page. . . . . . . . . . . . . . $350Inside Covers, Full Page. . . . . . . . . . . . $3001/2 Inside Cover . . . . . . . . . . . . . . . . . . $200Full Page . . . . . . . . . . . . . . . . . . . . . . . . $2502/3 Page Horizontal . . . . . . . . . . . . . . . $2001/2 Page Horizontal . . . . . . . . . . . . . . . $1751/3 Page Horizontal . . . . . . . . . . . . . . . $150
The print run is 1500 copies. Contact us for ad specifications.
Ad rate is for four issues Advertise on the US Desmo web site with a
banner ad for only $75 per year.
US Desmo IncorporatedP.O. Box 615
Waxhaw, NC 28173www.usdesmo.com
The use of information in the Desmo Leanings is entirely the responsibility of the reader. No liability is accepted by the Editors, USDESMO Committee, USDESMO members or contributors to Desmo Leanings for the loss, damage or injury resulting from the direct or indirect use of information in Desmo Leanings and any errors or omissions therein. The views in Desmo Leanings are not necessarily those of the Editor or the Committee of the US DESMO INC. Any reproduction of articles, photos or other such material without the written permission of the Editor or creator is liable to copyright infringement.
Cover photo by Ducati.
Greetings from il CapoLast issue the topic was snow and the upcoming riding
season. As I write this we have done one track day and the oldest event for our club, the 16th Annual Ducks Along the Blue Ridge or DABR as it has become known. Our events are still experiencing lower attendance than historically, but the trend is up from last year. That coupled with the many cost-saving measures instituted last year has put the club on firmer financial footing. For now, the printed magazine will continue to be published.
Last year we did a first by introducing a calendar as our fourth issue. It was greeted well, and we plan on doing it again this year for the 2012 calendar. Most of the months have bikes picked, but if you have some photos you would like us to consider, please feel free to contact me and discuss it. Keep in mind we need high-resolution photos and watch the background so it does not to compete with the bike for preeminence in the photo. Detail shots are also important.
We introduced Tiny Tech Tips in the last issue and will continue with it as a regular feature. If you have a simple solution to an annoying problem that you can write up in a succinct two or three paragraphs, please feel free to share it with us. You can make someone else’s day simpler and get your fifteen minutes of fame. One of our future goals is to have an index of articles for all our past years of Desmo Leanings. That way if you have an event or a technical question, you can look it up. All past issues are on line, and if you want hard copies contact me. We have most but not all available for a small fee to cover postage and handling.
Our Ducks Head West rally has always had very light attendance. I am not sure why because we end up riding some of the best roads in the Southeast, and at the elevation we ride the temperature is warm but tolerable. Come out and join us and make it a better event.
Jim
il Capo
Page 25
Page 7
Page 11
Contenuto
Page 27
4 www.USDESMO.com SUMMER 2011 SUMMER 2011 www.USDESMO.com 5
Piazza Del Mercato
#1 Ducati Dealer in the Mid-Atlantic Region
1998 916 three spoke gold rear wheel for sale. $100 OBO Jim [email protected] 704.843.0429
Classified ads are free for US Desmo members. Spring issue deadline is February 28. Summer issue deadline is May 31. Autumn issue deadline is August 31. Winter issue deadline is November 30. Please provide an accurate description of about 500 characters, price and contact information, plus a digital photograph. You can also list a classified ad on the US Desmo web site, www.usdesmo.com.
2008 Triumph Speed Triple Clubmans, Arrow 3-1,rear hugger, seat cowl & belly pan. Bike has 3,900 miles and has a new Pilot Power dual compound on rear. Stock exhaust, bars and mounts are included. Comes with rear Pit Bull stand and full bike cover. Asking $8,500. Call Jeff Dwyer 704.895.2859 or email me at [email protected]
1987 750 Paso Good condition, 9488 miles. All stock except for a Corbin seat and Dyna coils. New battery. Service just done, set valves, new belts. etc. Like new 16” Michelin tires. Runs great! $2250.00 OBOI also have another one with 8300 miles. It has been repainted yellow, service not done yet, make offer.Contact Marvin Jensen, Bakersville, NC [email protected] 828.467.0167
1993 900SS parted out Frame (straight), $300.00 (NC salvage title) Fuel tank, no rust, needs paint, complete, $200.00Snowflake rotors from ST4S, excellent cond. $165.00Spiegler Iron Full Floating rotors, good condition, $325.00Stainless brake lines, front, rear, clutch, Goodrich brand with red coating, $75.00Carrozzeria 6 spoke wheels, forged aluminum, black, excellent condition, $1250.00Pro Italia billet rear sets, new condition. $200.00Many other misc. parts available.Contact Marvin Jensen, Bakersville, NC [email protected] 828.467.0167
2008 1098S Motor less than 1,600 miles on it. Street ridden only. Motor is complete and includes oil cooler. This motor is in perfect condition and bike was dissembled by Ducati Tech II. Also have radiator from same which includes dual fans and hoses.Motor priced at $1,995. Will deliver within 200 miles of Charlotte, NC. Radiator priced at $495. Call Jeff Dwyer 704.895.2859 or email me at [email protected]
2008 Ducati 1098S Black (Rare) $18500 4986 Miles, Like new with new tires, transferable 7500 mile service included by Motorcycles of Charlotte, meticulously maintained and serviced, always garaged, synthetic oil, service records, no damage history, never dropped. TERMIGNONI - Full 70mm Racing Exhaust w/ECU and Racing Air Filter. EVR - Full Vented Clutch Cover Black w/Vented Clutch Pressure Plate Red. PIRELLI - Diablo Supercorsa SP High-Performance Road & Track Tires. STOCK GOODIE BOX - Exhaust/ECU/Misc parts, passenger accessories included. STANDS Ducati Front Stand and Pit Bull Rear Stand included. CHICKEN HAWK RACING - Digital Pro-Line Tire Warmers (Red front/rear) included. Motorcycle located in South Charlotte/Ballantyne area. Reasonable offers considered. Jeff 704.661.3012
6 www.USDESMO.com SUMMER 2011 SUMMER 2011 www.USDESMO.com 7
Your leading BMW, Ducati, and Husqvarna dealer for the Southeast
BMW Ducati Husqvarna Motorcycles of Atlanta is your leading BMW, Ducati, and Husqvarna Motorcycle dealer for the Southeast, with a complete product line selection of the latest models, genuine Ducati gear and accessories, and the exclusive source for BMW Rider’s Apparel in Georgia.
Our highly qualified and friendly staff makes shopping with family owned and operated franchise a pleasantly unique experience. If you have any questions about new or used Ducati motorcycle, accessories, parts or service, please give us a call. Better yet visit our showroom and say hi! Or visit our useful and informative website.
Bob and Lynda Wooldridge
BMW Ducati Husqvarna Motorcycles of Atlanta1750 Cobb Parkway SE, Marietta, GA 30060Hours — Tuesday–Friday 9AM-6PM, Saturday 9AM-5PM GPS Coordinates — 33° 54.602’ North 84° 29.652’ West (770) 984-9844 • Toll free: (866) 984-9844 • Fax: (770) 984-9824http://www.bmwma.com • http://ducatima.com
BMW Ducati Husqvarna Motorcycles of Atlanta
Voltage Regulator Rectifier UpgradeMotolectric Hi-Cap Wiring UpgradeHeadlight Switch ReplacementVoltage Indicator InstallationBy Michael Todd, Member # 01379
OKSo my friends make fun of me. Maybe it is because they are jealous. Maybe it is because they have more reliable
motorcycles. Much like a beautiful Italian supermodel, a beautiful Italian Supersport makes your friends wish they were you. They see your popularity swell when the crowd forms to gawk at your babe and her curves. Then they wait to pounce when she has her annual hissy-fit 5 minutes later.
Yes, each year I spend in excess of $500 fixing what ails my high maintenance Italian Supermodel. I try to make the best of it and be a glass-half-full kind or guy. Of course, it is all worth the trouble because the sex is fantastic!
This time it was my charging system, a typical problem for all the earlier Ducatis. When I asked for opinions and read the blogs, I found that upgrades were in order to make the bike work like it should have out of the factory 15 years ago. Four main mods were in order. New heavier gauge leads for battery, starter, starter solenoid and ground was the first. A replacement high-capacity gel battery was second. A new regulator/rectifier and a way to indicate low voltage was third. Last, I needed a way to turn off the headlight to assist the battery during starting and initial, post-start charging.
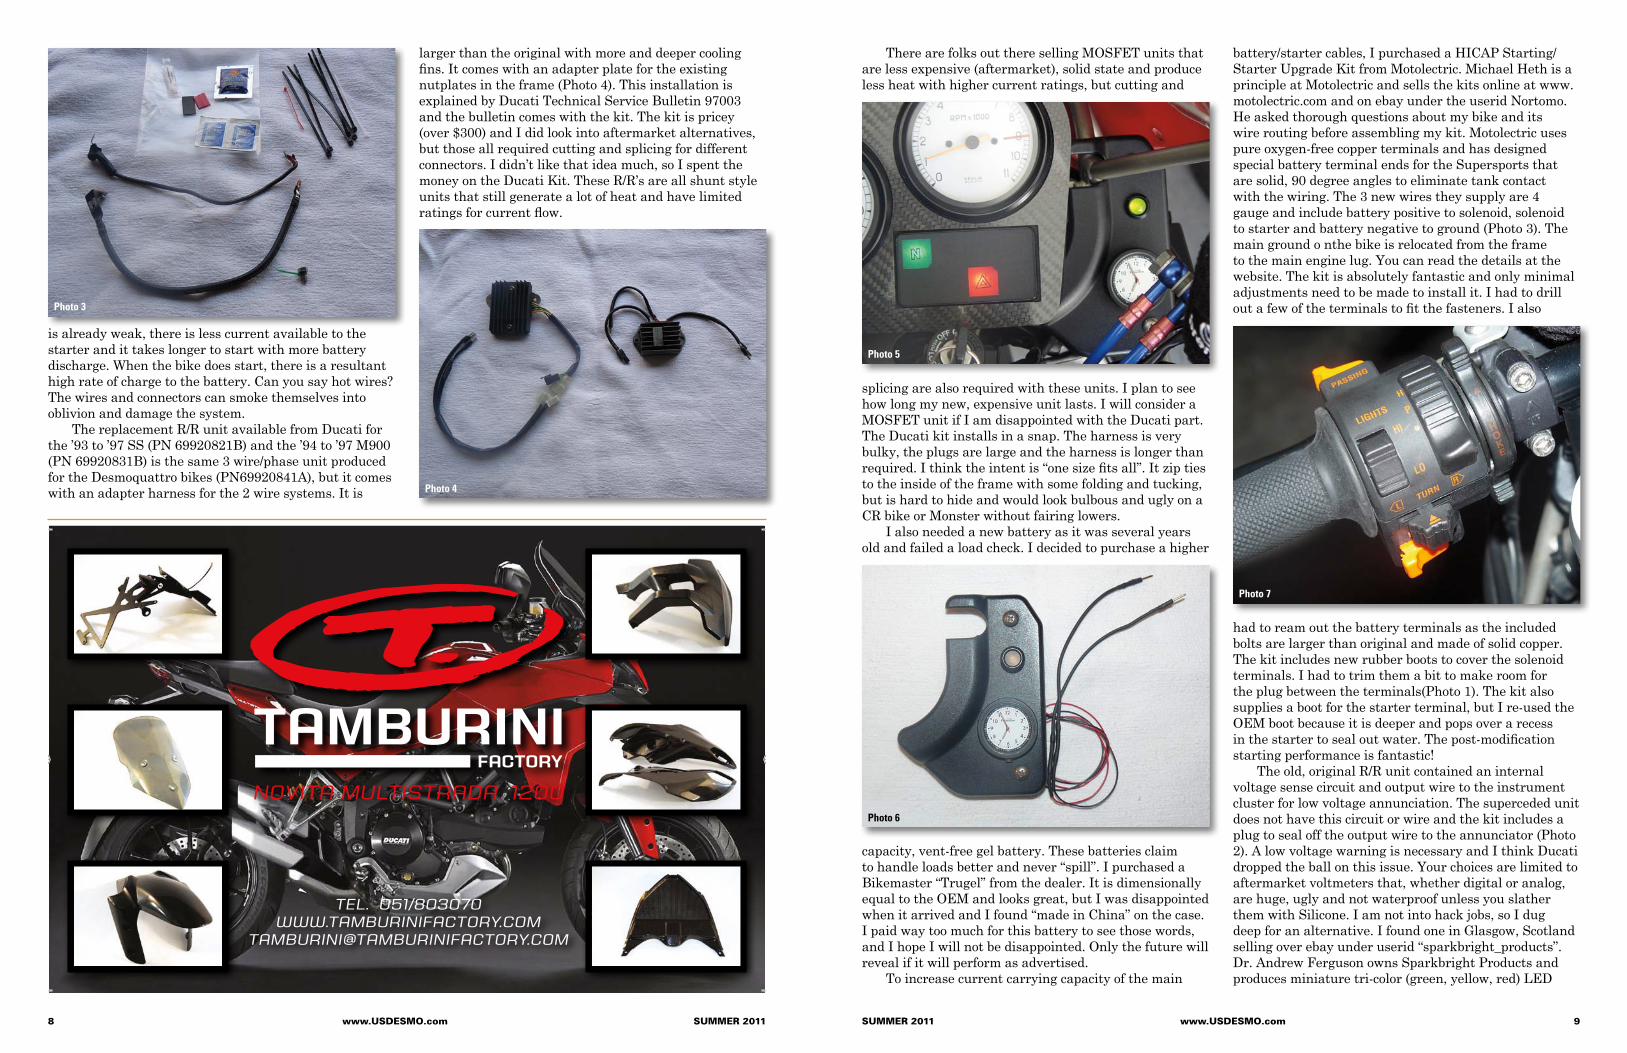
The original regulator/rectifier (R/R) unit for the 2 wire/phase system was not capable of handling high charging current and the heat generated by that current. These bikes are high compression and have thicker oil (for air-cooled twins) and as a result, are harder to turn-over. This is even more pronounced when the oil is very cold. The starters are small (for reduced weight and space) and draw higher current to turn. If your battery
Photo 1
Photo 2
8 www.USDESMO.com SUMMER 2011 SUMMER 2011 www.USDESMO.com 9
is already weak, there is less current available to the starter and it takes longer to start with more battery discharge. When the bike does start, there is a resultant high rate of charge to the battery. Can you say hot wires? The wires and connectors can smoke themselves into oblivion and damage the system.
The replacement R/R unit available from Ducati for the ’93 to ’97 SS (PN 69920821B) and the ’94 to ’97 M900 (PN 69920831B) is the same 3 wire/phase unit produced for the Desmoquattro bikes (PN69920841A), but it comes with an adapter harness for the 2 wire systems. It is
larger than the original with more and deeper cooling fins. It comes with an adapter plate for the existing nutplates in the frame (Photo 4). This installation is explained by Ducati Technical Service Bulletin 97003 and the bulletin comes with the kit. The kit is pricey (over $300) and I did look into aftermarket alternatives, but those all required cutting and splicing for different connectors. I didn’t like that idea much, so I spent the money on the Ducati Kit. These R/R’s are all shunt style units that still generate a lot of heat and have limited ratings for current flow.
TEL. 051/803070www.TamburinifacTory.com
noViTa muLTiSTraDa 1200
pagina_pubblicitaria_1.indd 3 08/12/10 14.02
There are folks out there selling MOSFET units that are less expensive (aftermarket), solid state and produce less heat with higher current ratings, but cutting and
splicing are also required with these units. I plan to see how long my new, expensive unit lasts. I will consider a MOSFET unit if I am disappointed with the Ducati part. The Ducati kit installs in a snap. The harness is very bulky, the plugs are large and the harness is longer than required. I think the intent is “one size fits all”. It zip ties to the inside of the frame with some folding and tucking, but is hard to hide and would look bulbous and ugly on a CR bike or Monster without fairing lowers.
I also needed a new battery as it was several years old and failed a load check. I decided to purchase a higher
capacity, vent-free gel battery. These batteries claim to handle loads better and never “spill”. I purchased a Bikemaster “Trugel” from the dealer. It is dimensionally equal to the OEM and looks great, but I was disappointed when it arrived and I found “made in China” on the case. I paid way too much for this battery to see those words, and I hope I will not be disappointed. Only the future will reveal if it will perform as advertised.
To increase current carrying capacity of the main
battery/starter cables, I purchased a HICAP Starting/Starter Upgrade Kit from Motolectric. Michael Heth is a principle at Motolectric and sells the kits online at www.motolectric.com and on ebay under the userid Nortomo. He asked thorough questions about my bike and its wire routing before assembling my kit. Motolectric uses pure oxygen-free copper terminals and has designed special battery terminal ends for the Supersports that are solid, 90 degree angles to eliminate tank contact with the wiring. The 3 new wires they supply are 4 gauge and include battery positive to solenoid, solenoid to starter and battery negative to ground (Photo 3). The main ground o nthe bike is relocated from the frame to the main engine lug. You can read the details at the website. The kit is absolutely fantastic and only minimal adjustments need to be made to install it. I had to drill out a few of the terminals to fit the fasteners. I also
had to ream out the battery terminals as the included bolts are larger than original and made of solid copper. The kit includes new rubber boots to cover the solenoid terminals. I had to trim them a bit to make room for the plug between the terminals(Photo 1). The kit also supplies a boot for the starter terminal, but I re-used the OEM boot because it is deeper and pops over a recess in the starter to seal out water. The post-modification starting performance is fantastic!
The old, original R/R unit contained an internal voltage sense circuit and output wire to the instrument cluster for low voltage annunciation. The superceded unit does not have this circuit or wire and the kit includes a plug to seal off the output wire to the annunciator (Photo 2). A low voltage warning is necessary and I think Ducati dropped the ball on this issue. Your choices are limited to aftermarket voltmeters that, whether digital or analog, are huge, ugly and not waterproof unless you slather them with Silicone. I am not into hack jobs, so I dug deep for an alternative. I found one in Glasgow, Scotland selling over ebay under userid “sparkbright_products”. Dr. Andrew Ferguson owns Sparkbright Products and produces miniature tri-color (green, yellow, red) LED
Photo 3
Photo 4
Photo 5
Photo 6
Photo 7
10 www.USDESMO.com SUMMER 2011 SUMMER 2011 www.USDESMO.com 11
voltage indicators controlled by miniature Printed Circuit Boards (PCB’s). The unit I purchased requires a single 14mm hole and snaps into position. It easily fits in the RH dash panel. There are 2 wires to install to a switched source (Photo 6). I spliced in some aviation grade Daniels connector pins and inserted them into the back side of the general relay which is right next to the RH dash panel.
I am an aircraft technician and had access to the pins. I also own the crimp tools. Any suitable, bladed, crimp connector should slide into the relay, or you can
cut into the wiring and install a 3 way splice. The voltage thresholds on the indicator can be custom designed, but Andrew’s initial set-up is fine for my bike or any other 12 volt bike. It is very tasteful, very affordable and while not absolutely waterproof, can be sealed with minimal silicone and replaced easily and affordably if it fails. (Photo 5)
My last desire was to be able to switch off my headlamp during starting and initial post-start battery charging to reduce demands on the system. The European bikes have a headlamp switch, but thanks to our DOT, not so in the states. I could have installed
an appropriately rated in-line switch somewhere on the bike for the headlight. I didn’t like the “somewhere” part of that option or cutting into my harness. I could have purchased an aftermarket switch from CA-Cycleworks, but they also required some wiring and soldering to make it operate like the original. Another option was a used, clapped out, European OEM switch on ebay….but for some reason, folks are way too proud of their junk. The prices were absolutely ridiculous for old, faded, scratched up hardware. I decided to order a new OEM European switch (PN 036138456) for $130 (Photo 8). That’s about
$30 more than what the ebayers wanted! In the end, it looks and operates correctly and was plug and play. I might not recommend spending the kind of money I did on items like this if my bike was “track day only” or rough around the edges, but my bike is a clean example of the species and to me it was worth it.
The bike starts and runs fantastic with these modifications and I highly recommend them. In the future, I hope to break down alone with my cell phone as my only companion. Then I can call my brother to come get me and avoid spoiling the image everyone has about my hot Supermodel.
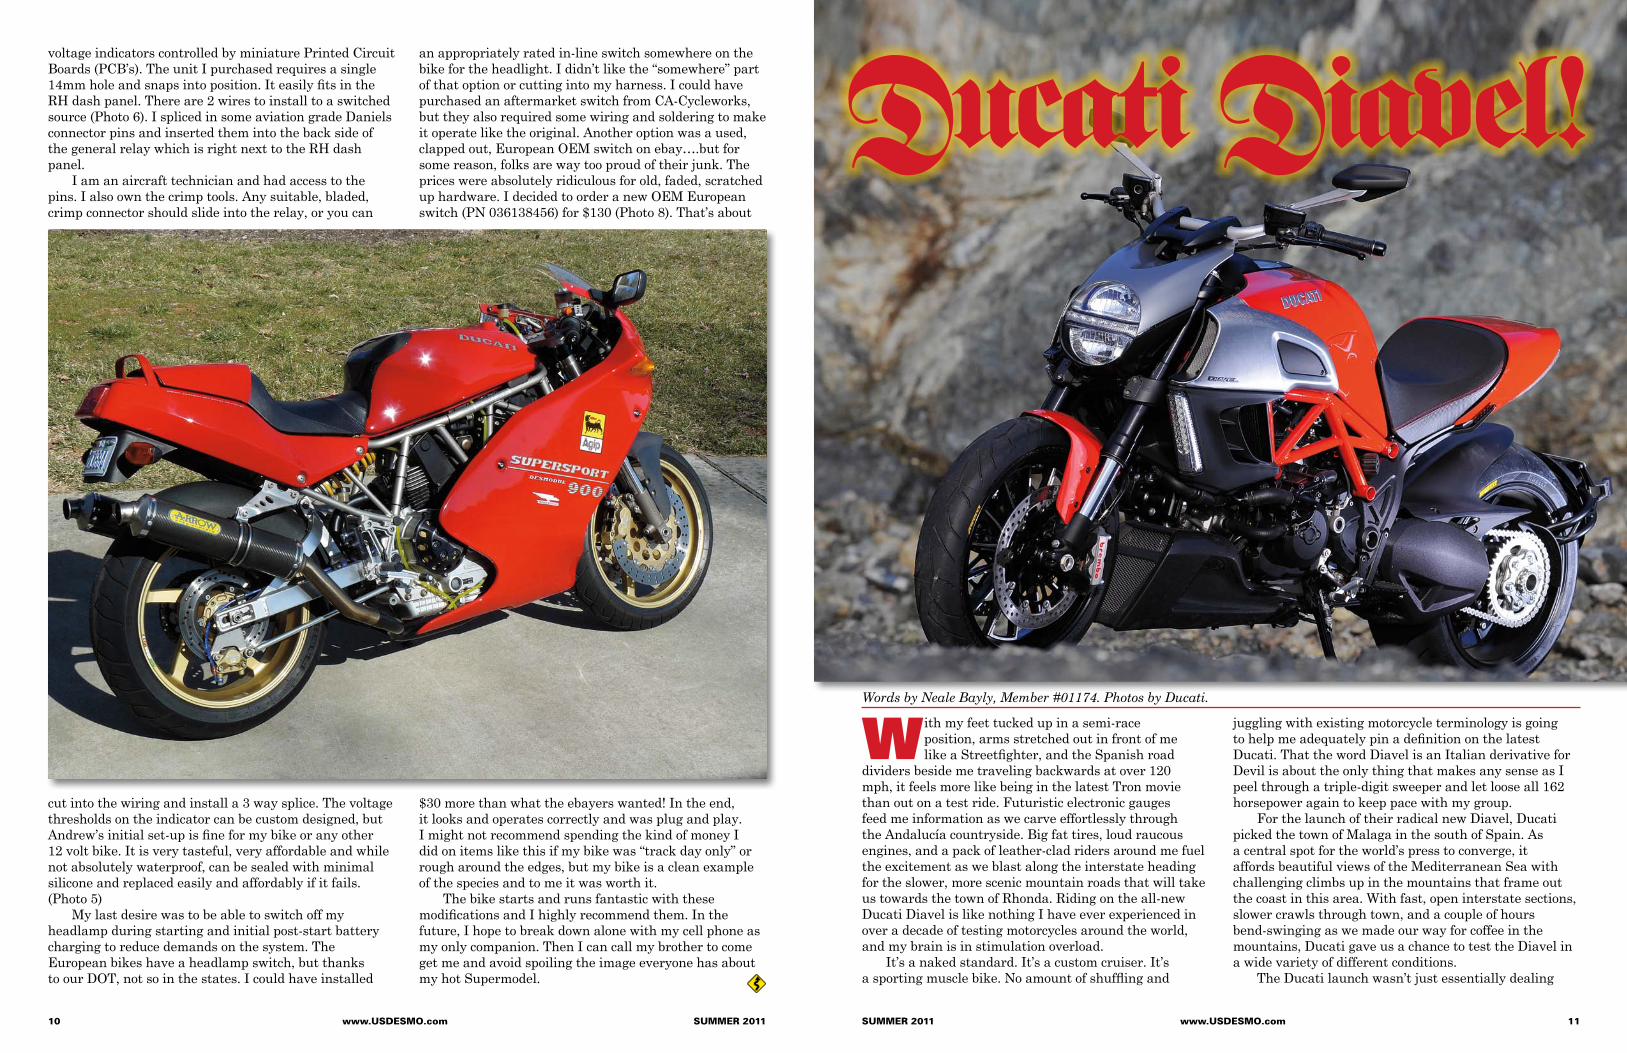
W ith my feet tucked up in a semi-race position, arms stretched out in front of me like a Streetfighter, and the Spanish road
dividers beside me traveling backwards at over 120 mph, it feels more like being in the latest Tron movie than out on a test ride. Futuristic electronic gauges feed me information as we carve effortlessly through the Andalucía countryside. Big fat tires, loud raucous engines, and a pack of leather-clad riders around me fuel the excitement as we blast along the interstate heading for the slower, more scenic mountain roads that will take us towards the town of Rhonda. Riding on the all-new Ducati Diavel is like nothing I have ever experienced in over a decade of testing motorcycles around the world, and my brain is in stimulation overload.
It’s a naked standard. It’s a custom cruiser. It’s a sporting muscle bike. No amount of shuffling and
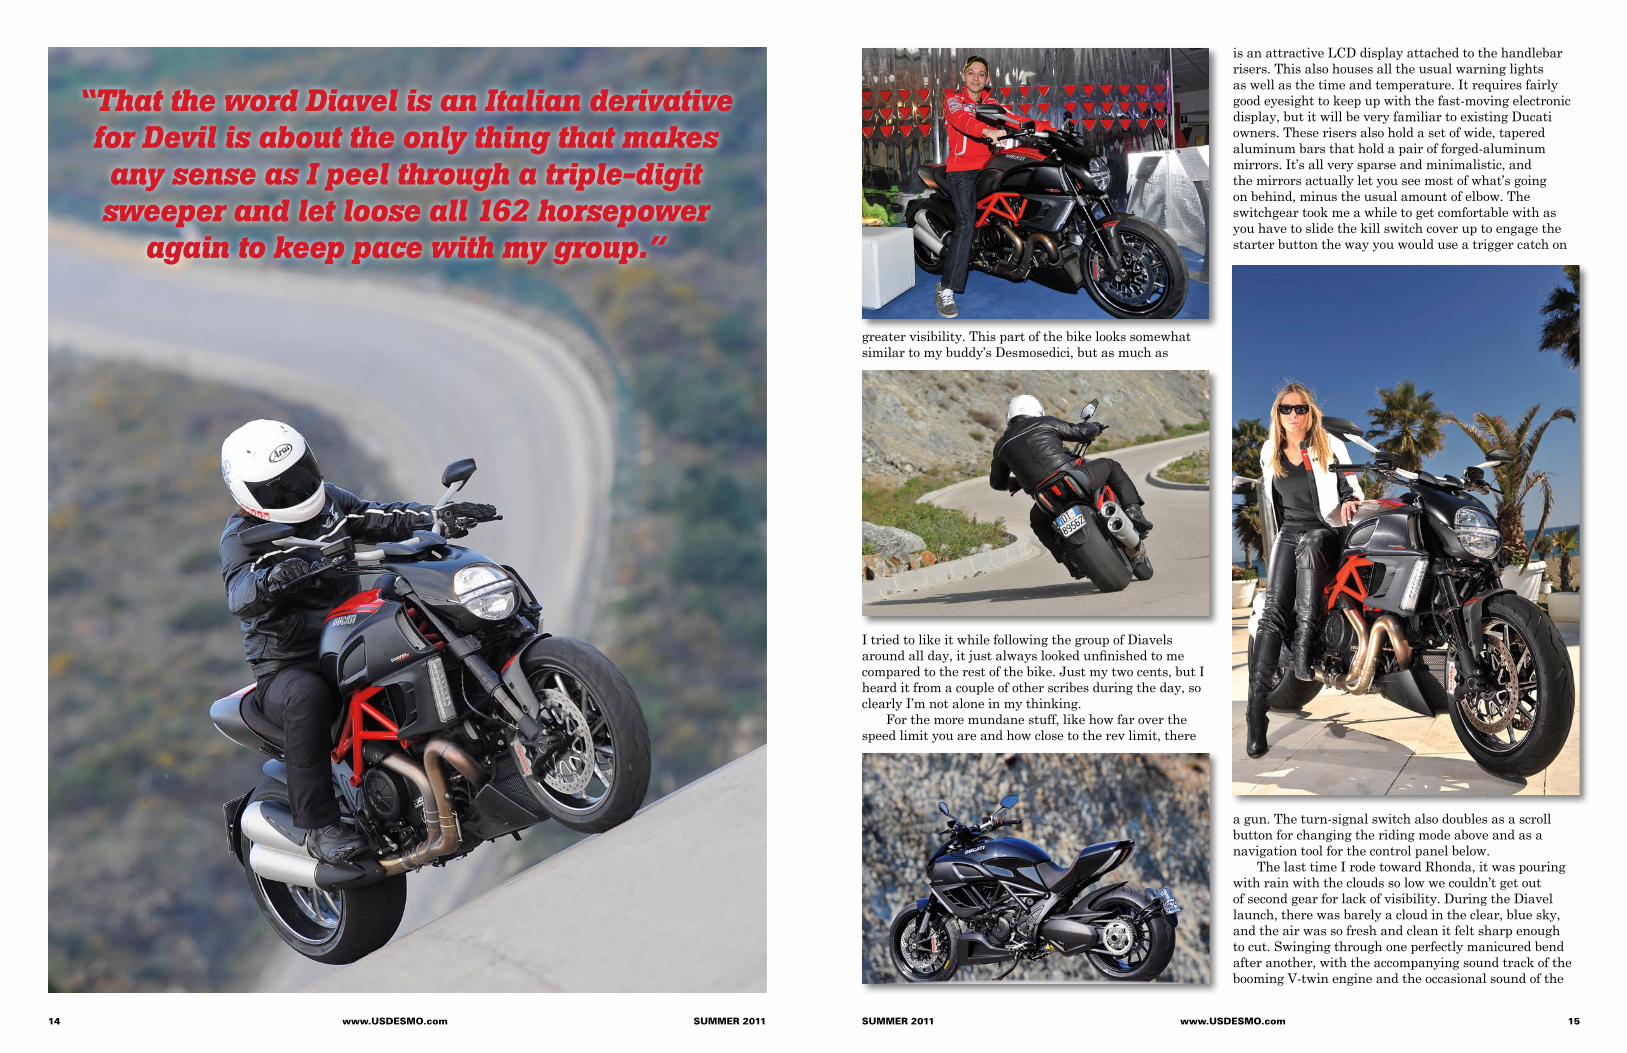
juggling with existing motorcycle terminology is going to help me adequately pin a definition on the latest Ducati. That the word Diavel is an Italian derivative for Devil is about the only thing that makes any sense as I peel through a triple-digit sweeper and let loose all 162 horsepower again to keep pace with my group.
For the launch of their radical new Diavel, Ducati picked the town of Malaga in the south of Spain. As a central spot for the world’s press to converge, it affords beautiful views of the Mediterranean Sea with challenging climbs up in the mountains that frame out the coast in this area. With fast, open interstate sections, slower crawls through town, and a couple of hours bend-swinging as we made our way for coffee in the mountains, Ducati gave us a chance to test the Diavel in a wide variety of different conditions.
The Ducati launch wasn’t just essentially dealing
Ducati Diavel!
Words by Neale Bayly, Member #01174. Photos by Ducati.
12 www.USDESMO.com SUMMER 2011 SUMMER 2011 www.USDESMO.com 13
with new graphics, styling, or minor upgrades like a lot of intros lately, and the press brief was enough to make my head spin. Jet-lagged and on some weird time schedule and sitting in a warm, dark room is normally the kiss of death for staying alert and attentive. Not so this time, as the Ducati designers, engineers, and marketing staff told their stories. The new Diavel is so totally new and fresh, and jam-packed with such a plethora of advanced electronics, it actually ended up being a fairly long affair as we learned all the intimate details. From anti-lock brakes to multiple-position traction control, different ride modes, keyless ignition and all the custom parts, the connection to the Tron movie actually started before I even rode the bike.
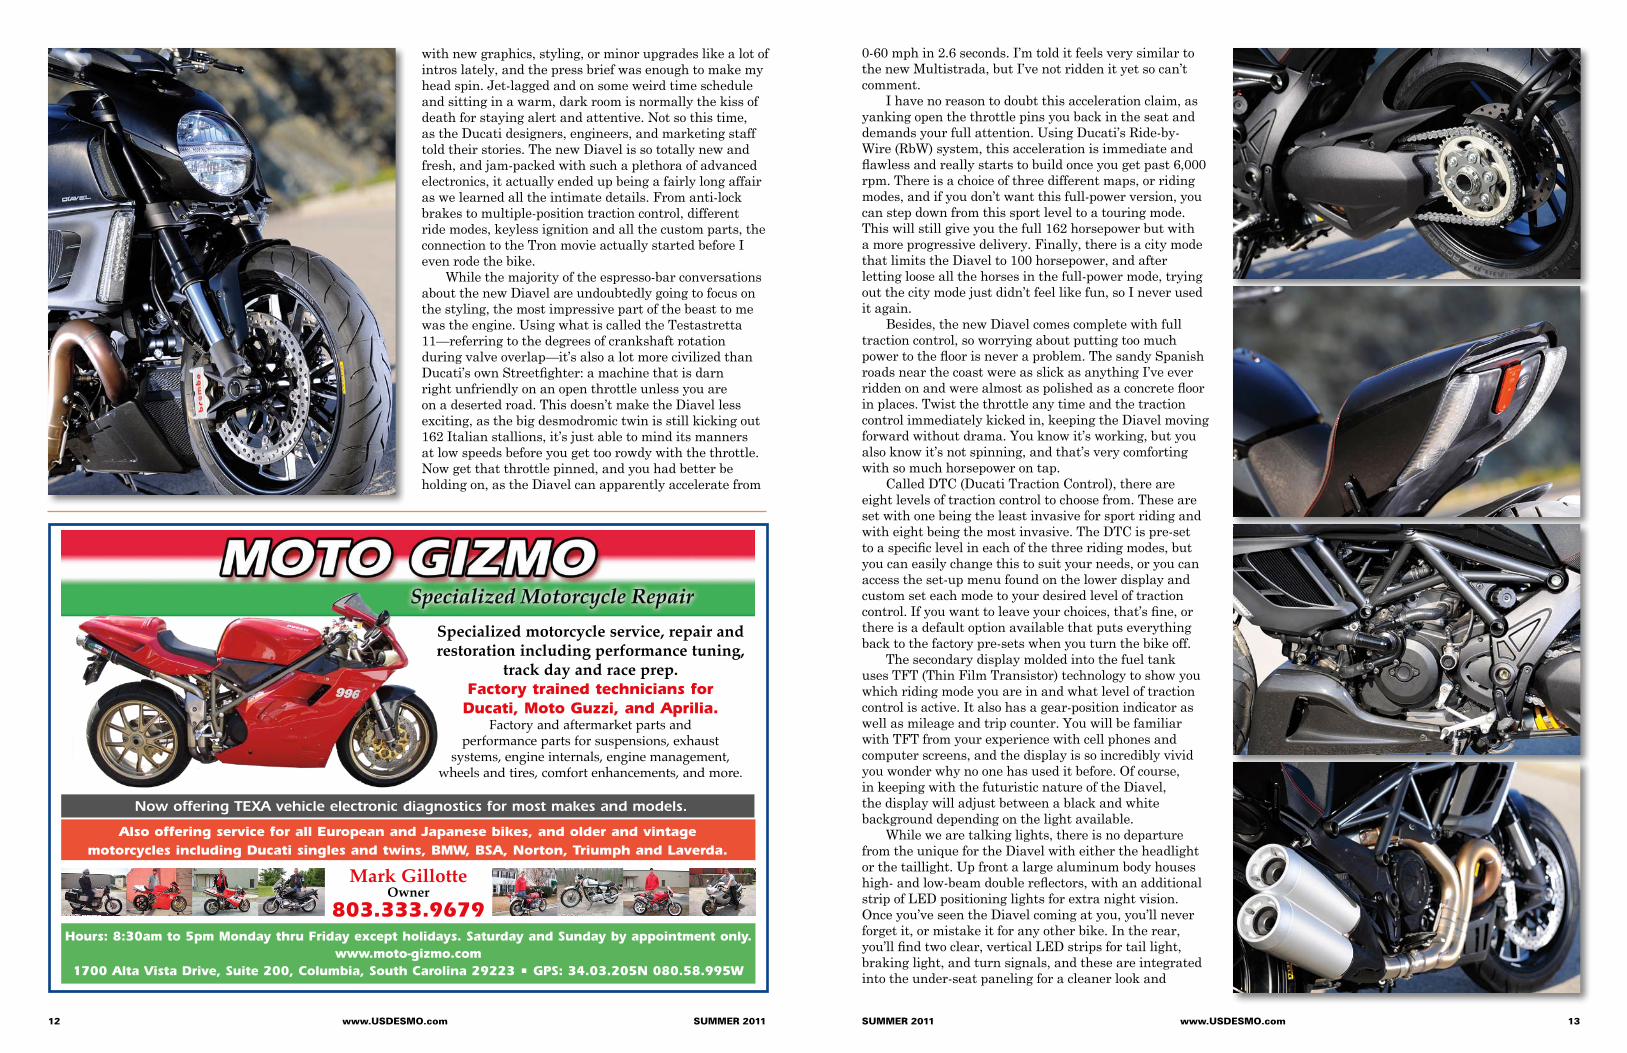
While the majority of the espresso-bar conversations about the new Diavel are undoubtedly going to focus on the styling, the most impressive part of the beast to me was the engine. Using what is called the Testastretta 11—referring to the degrees of crankshaft rotation during valve overlap—it’s also a lot more civilized than Ducati’s own Streetfighter: a machine that is darn right unfriendly on an open throttle unless you are on a deserted road. This doesn’t make the Diavel less exciting, as the big desmodromic twin is still kicking out 162 Italian stallions, it’s just able to mind its manners at low speeds before you get too rowdy with the throttle. Now get that throttle pinned, and you had better be holding on, as the Diavel can apparently accelerate from
0-60 mph in 2.6 seconds. I’m told it feels very similar to the new Multistrada, but I’ve not ridden it yet so can’t comment.
I have no reason to doubt this acceleration claim, as yanking open the throttle pins you back in the seat and demands your full attention. Using Ducati’s Ride-by-Wire (RbW) system, this acceleration is immediate and flawless and really starts to build once you get past 6,000 rpm. There is a choice of three different maps, or riding modes, and if you don’t want this full-power version, you can step down from this sport level to a touring mode. This will still give you the full 162 horsepower but with a more progressive delivery. Finally, there is a city mode that limits the Diavel to 100 horsepower, and after letting loose all the horses in the full-power mode, trying out the city mode just didn’t feel like fun, so I never used it again.
Besides, the new Diavel comes complete with full traction control, so worrying about putting too much power to the floor is never a problem. The sandy Spanish roads near the coast were as slick as anything I’ve ever ridden on and were almost as polished as a concrete floor in places. Twist the throttle any time and the traction control immediately kicked in, keeping the Diavel moving forward without drama. You know it’s working, but you also know it’s not spinning, and that’s very comforting with so much horsepower on tap.
Called DTC (Ducati Traction Control), there are eight levels of traction control to choose from. These are set with one being the least invasive for sport riding and with eight being the most invasive. The DTC is pre-set to a specific level in each of the three riding modes, but you can easily change this to suit your needs, or you can access the set-up menu found on the lower display and custom set each mode to your desired level of traction control. If you want to leave your choices, that’s fine, or there is a default option available that puts everything back to the factory pre-sets when you turn the bike off.
The secondary display molded into the fuel tank uses TFT (Thin Film Transistor) technology to show you which riding mode you are in and what level of traction control is active. It also has a gear-position indicator as well as mileage and trip counter. You will be familiar with TFT from your experience with cell phones and computer screens, and the display is so incredibly vivid you wonder why no one has used it before. Of course, in keeping with the futuristic nature of the Diavel, the display will adjust between a black and white background depending on the light available.
While we are talking lights, there is no departure from the unique for the Diavel with either the headlight or the taillight. Up front a large aluminum body houses high- and low-beam double reflectors, with an additional strip of LED positioning lights for extra night vision. Once you’ve seen the Diavel coming at you, you’ll never forget it, or mistake it for any other bike. In the rear, you’ll find two clear, vertical LED strips for tail light, braking light, and turn signals, and these are integrated into the under-seat paneling for a cleaner look and
14 www.USDESMO.com SUMMER 2011 SUMMER 2011 www.USDESMO.com 15
greater visibility. This part of the bike looks somewhat similar to my buddy’s Desmosedici, but as much as
I tried to like it while following the group of Diavels around all day, it just always looked unfinished to me compared to the rest of the bike. Just my two cents, but I heard it from a couple of other scribes during the day, so clearly I’m not alone in my thinking.
For the more mundane stuff, like how far over the speed limit you are and how close to the rev limit, there
is an attractive LCD display attached to the handlebar risers. This also houses all the usual warning lights as well as the time and temperature. It requires fairly good eyesight to keep up with the fast-moving electronic display, but it will be very familiar to existing Ducati owners. These risers also hold a set of wide, tapered aluminum bars that hold a pair of forged-aluminum mirrors. It’s all very sparse and minimalistic, and the mirrors actually let you see most of what’s going on behind, minus the usual amount of elbow. The switchgear took me a while to get comfortable with as you have to slide the kill switch cover up to engage the starter button the way you would use a trigger catch on
a gun. The turn-signal switch also doubles as a scroll button for changing the riding mode above and as a navigation tool for the control panel below.
The last time I rode toward Rhonda, it was pouring with rain with the clouds so low we couldn’t get out of second gear for lack of visibility. During the Diavel launch, there was barely a cloud in the clear, blue sky, and the air was so fresh and clean it felt sharp enough to cut. Swinging through one perfectly manicured bend after another, with the accompanying sound track of the booming V-twin engine and the occasional sound of the
“That the word Diavel is an Italian derivative for Devil is about the only thing that makes any sense as I peel through a triple-digit sweeper and let loose all 162 horsepower
again to keep pace with my group.”
16 www.USDESMO.com SUMMER 2011 SUMMER 2011 www.USDESMO.com 17
hero blobs marking their territory, the Diavel threw the next set of pre-conceived ideas out of the window. Even though it has a 62.6-inch wheelbase, and a 240-series rear tire, it can really hustle through the curves. Now a sport bike it is not, and you always have to remain conscious you have a long bike to turn, so more thought is obviously needed. But as we carved our way up the beautiful mountainside, I realized I’ve never gone faster on a bike with this sort of riding position and comfort. My friend Arthur Coldwells, the owner of Ultimate Motorcycling, was riding with me, and we’ve put on some crazy miles around the world together. So when we got to the coffee stop, after profusely manifesting that we
absolutely weren’t pushing it, his big shit-eating grin was all I needed to back up my feelings about the Diavel’s excellent handling.
Heading back down the mountain, we were taking it just as easy as I left progressively more foot-peg metal on the Andalucía tarmac. This gave a wonderful opportunity to put the brakes to the test. Looking like they were lifted straight from Ducati’s Superbike, there are two 4-piston Brembo Monobloc calipers up front clamping down on 320mm discs. Fluid makes its way to the pad via a radial-pump master cylinder stored in a uniquely styled reservoir. The lever is adjustable, and the setup is not so strong that it overwhelms the front fork when you
get aggressive. It lacks the initial bite of something like the 1198, but that’s fine for the street. It’s also got a nice sweet-spot for trail braking with all the power you need for getting the 456-pound Diavel under control when you pull a little harder. The rear brake is also very strong, and this setup comprises a two-piston Brembo working
on smaller 265mm disc. Suspension is a mix of Marzocchi forks up front and
a Sachs shock in the back. A black-bodied 50mm inverted setup comes equipped with pre-load, compression, and rebound settings, and is held in place by a beautiful, cast-aluminum, slash-cut triple clamp. These are blacked out and certainly add to the Diavel’s looks. In the rear,
the spring holding your butt off the wheel is mounted horizontally under the chassis. It features an external adjuster for setting pre-load as well as compression and rebound damping adjustment.
Ducati quote figures of 28 degrees for rake and 130mm of trail with a 24mm offset. Somehow, the people who have recently won a MotoGP world championship and more World Superbike championships than any other manufacturer have figured out how to juggle the numbers to achieve the impossible here. They have made
a long-wheelbased, fat-tired motorcycle handle way better than it has any right to—better also than I had expected from looking at the spec sheet before our ride.
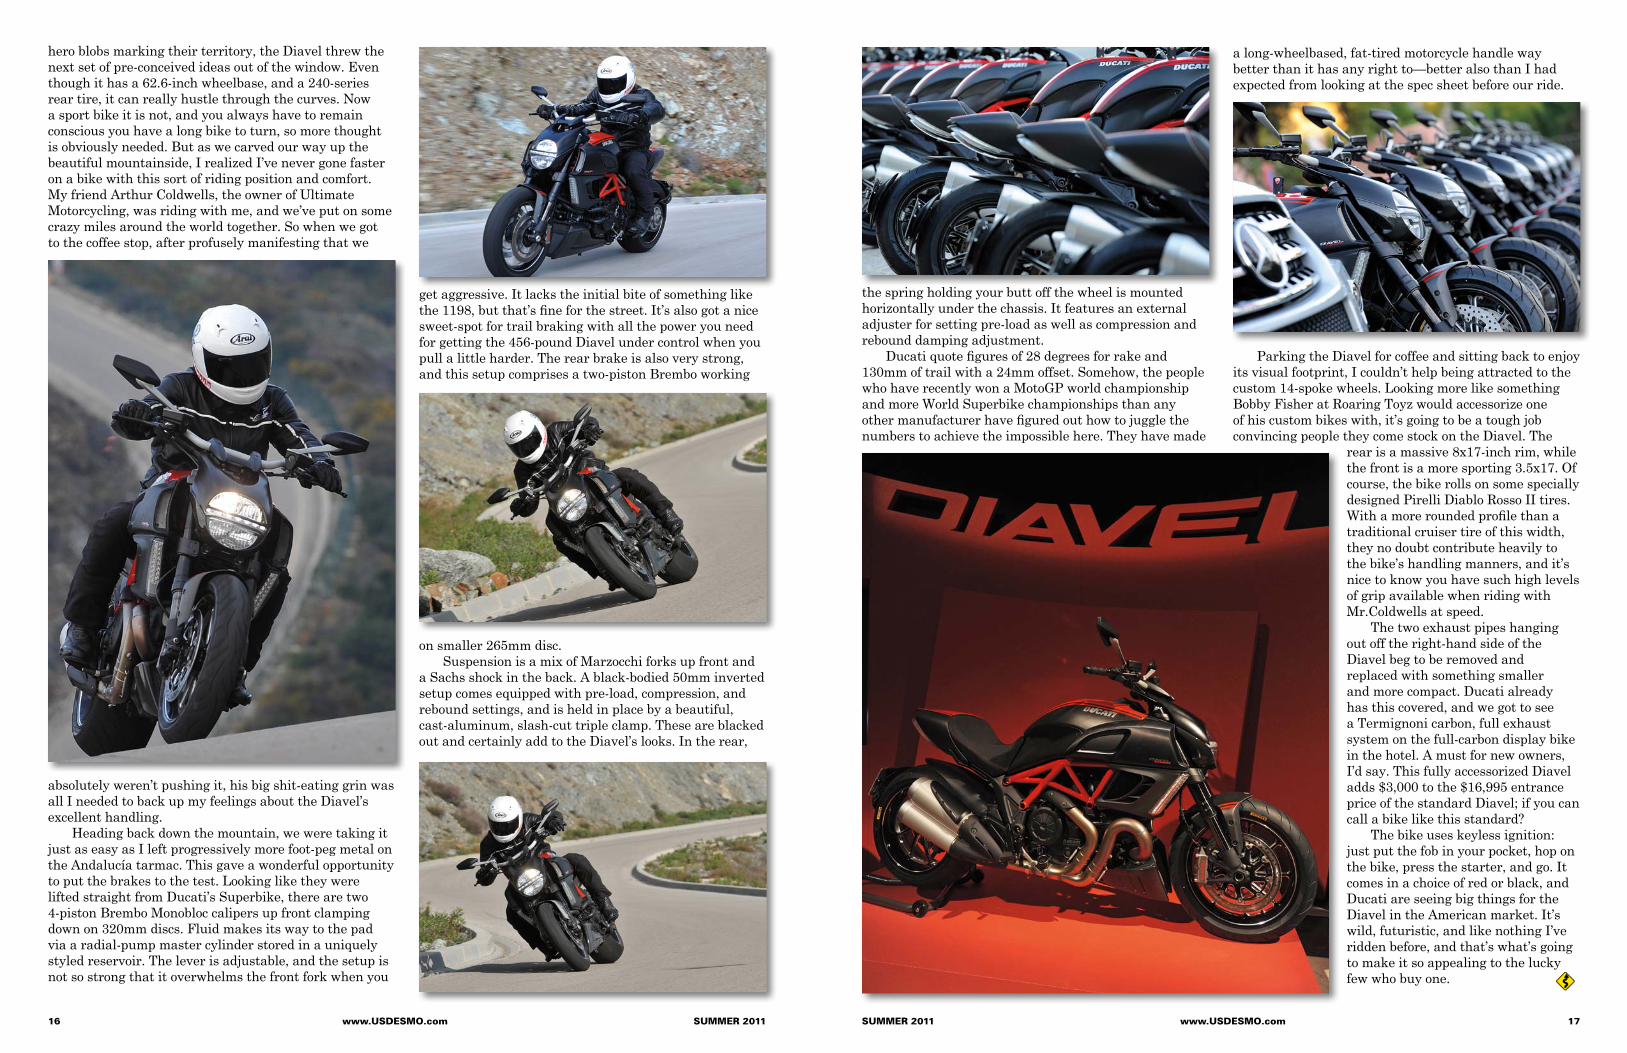
Parking the Diavel for coffee and sitting back to enjoy its visual footprint, I couldn’t help being attracted to the custom 14-spoke wheels. Looking more like something Bobby Fisher at Roaring Toyz would accessorize one of his custom bikes with, it’s going to be a tough job convincing people they come stock on the Diavel. The
rear is a massive 8x17-inch rim, while the front is a more sporting 3.5x17. Of course, the bike rolls on some specially designed Pirelli Diablo Rosso II tires. With a more rounded profile than a traditional cruiser tire of this width, they no doubt contribute heavily to the bike’s handling manners, and it’s nice to know you have such high levels of grip available when riding with Mr.Coldwells at speed.
The two exhaust pipes hanging out off the right-hand side of the Diavel beg to be removed and replaced with something smaller and more compact. Ducati already has this covered, and we got to see a Termignoni carbon, full exhaust system on the full-carbon display bike in the hotel. A must for new owners, I’d say. This fully accessorized Diavel adds $3,000 to the $16,995 entrance price of the standard Diavel; if you can call a bike like this standard?
The bike uses keyless ignition: just put the fob in your pocket, hop on the bike, press the starter, and go. It comes in a choice of red or black, and Ducati are seeing big things for the Diavel in the American market. It’s wild, futuristic, and like nothing I’ve ridden before, and that’s what’s going to make it so appealing to the lucky few who buy one.
18 www.USDESMO.com SUMMER 2011 SUMMER 2011 www.USDESMO.com 19
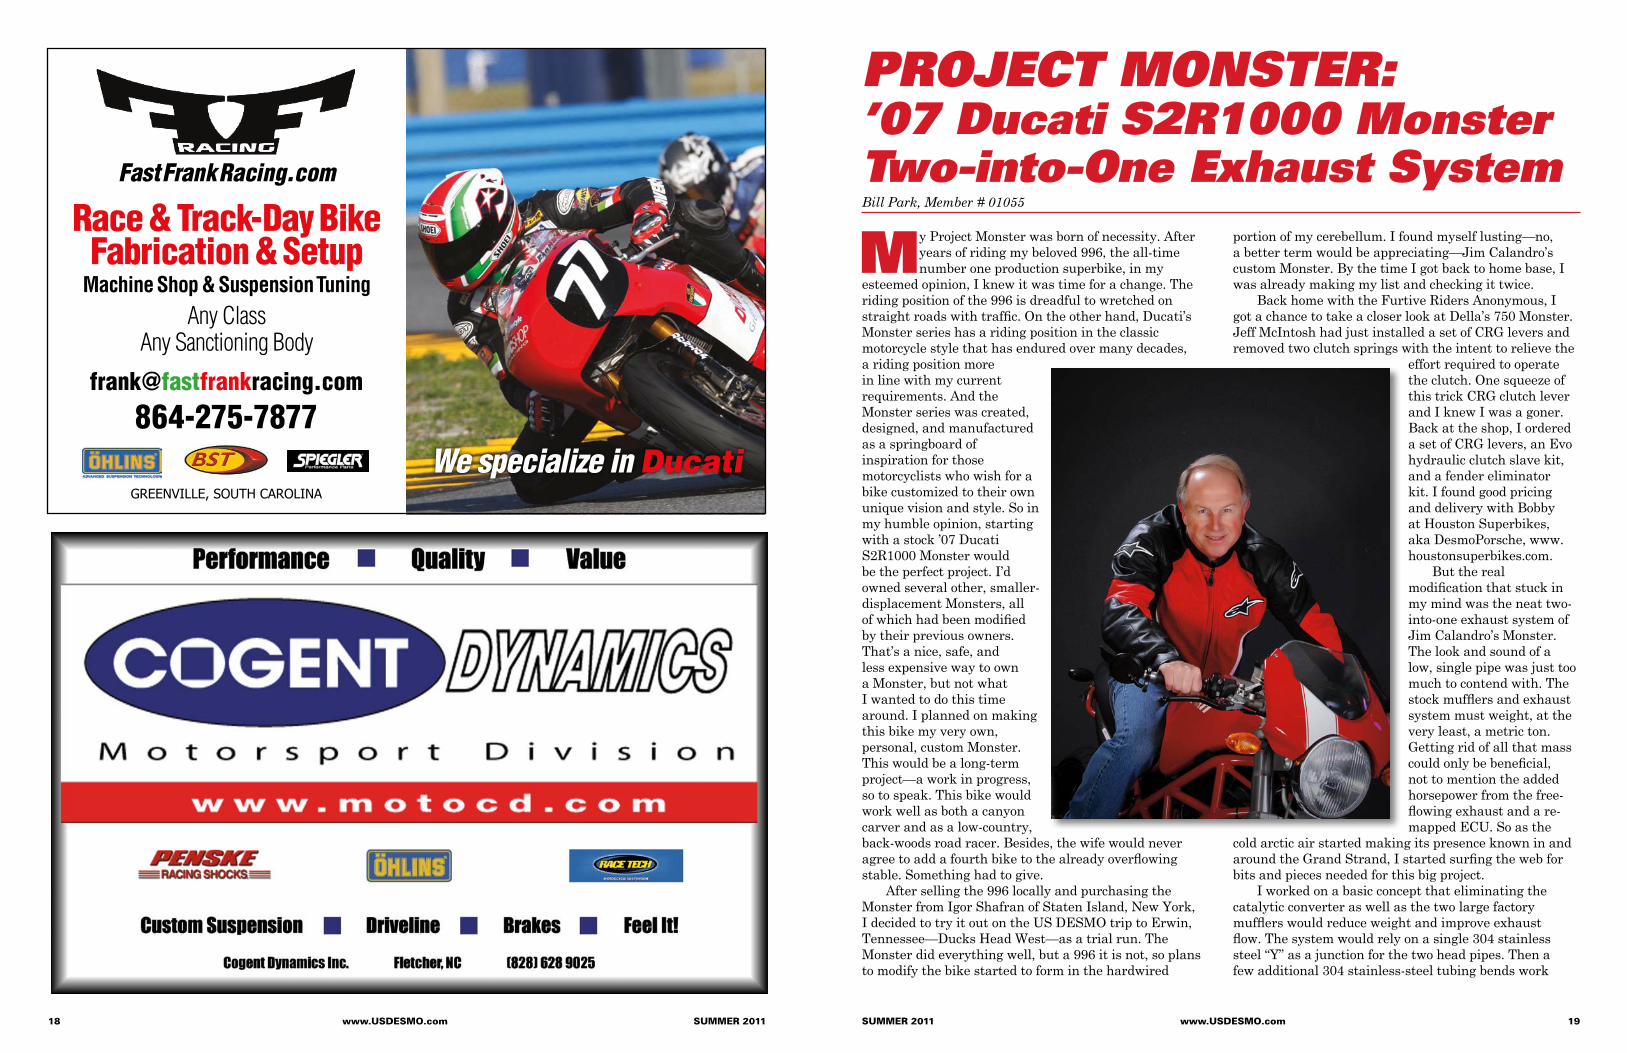
My Project Monster was born of necessity. After years of riding my beloved 996, the all-time number one production superbike, in my
esteemed opinion, I knew it was time for a change. The riding position of the 996 is dreadful to wretched on straight roads with traffic. On the other hand, Ducati’s Monster series has a riding position in the classic motorcycle style that has endured over many decades, a riding position more in line with my current requirements. And the Monster series was created, designed, and manufactured as a springboard of inspiration for those motorcyclists who wish for a bike customized to their own unique vision and style. So in my humble opinion, starting with a stock ’07 Ducati S2R1000 Monster would be the perfect project. I’d owned several other, smaller-displacement Monsters, all of which had been modified by their previous owners. That’s a nice, safe, and less expensive way to own a Monster, but not what I wanted to do this time around. I planned on making this bike my very own, personal, custom Monster. This would be a long-term project—a work in progress, so to speak. This bike would work well as both a canyon carver and as a low-country, back-woods road racer. Besides, the wife would never agree to add a fourth bike to the already overflowing stable. Something had to give.
After selling the 996 locally and purchasing the Monster from Igor Shafran of Staten Island, New York, I decided to try it out on the US DESMO trip to Erwin, Tennessee—Ducks Head West—as a trial run. The Monster did everything well, but a 996 it is not, so plans to modify the bike started to form in the hardwired
portion of my cerebellum. I found myself lusting—no, a better term would be appreciating—Jim Calandro’s custom Monster. By the time I got back to home base, I was already making my list and checking it twice.
Back home with the Furtive Riders Anonymous, I got a chance to take a closer look at Della’s 750 Monster. Jeff McIntosh had just installed a set of CRG levers and removed two clutch springs with the intent to relieve the
effort required to operate the clutch. One squeeze of this trick CRG clutch lever and I knew I was a goner. Back at the shop, I ordered a set of CRG levers, an Evo hydraulic clutch slave kit, and a fender eliminator kit. I found good pricing and delivery with Bobby at Houston Superbikes, aka DesmoPorsche, www.houstonsuperbikes.com.
But the real modification that stuck in my mind was the neat two-into-one exhaust system of Jim Calandro’s Monster. The look and sound of a low, single pipe was just too much to contend with. The stock mufflers and exhaust system must weight, at the very least, a metric ton. Getting rid of all that mass could only be beneficial, not to mention the added horsepower from the free-flowing exhaust and a re-mapped ECU. So as the
cold arctic air started making its presence known in and around the Grand Strand, I started surfing the web for bits and pieces needed for this big project.
I worked on a basic concept that eliminating the catalytic converter as well as the two large factory mufflers would reduce weight and improve exhaust flow. The system would rely on a single 304 stainless steel “Y” as a junction for the two head pipes. Then a few additional 304 stainless-steel tubing bends work
PROJECT MONSTER:’07 Ducati S2R1000 MonsterTwo-into-One Exhaust SystemBill Park, Member # 01055
FastFrankRacing.com
864-275-7877We specialize in Ducati
Race & Track-Day Bike Fabrication & Setup
Machine Shop & Suspension Tuning
Any ClassAny Sanctioning Body
Greenville, South Carolina
20 www.USDESMO.com SUMMER 2011 SUMMER 2011 www.USDESMO.com 21
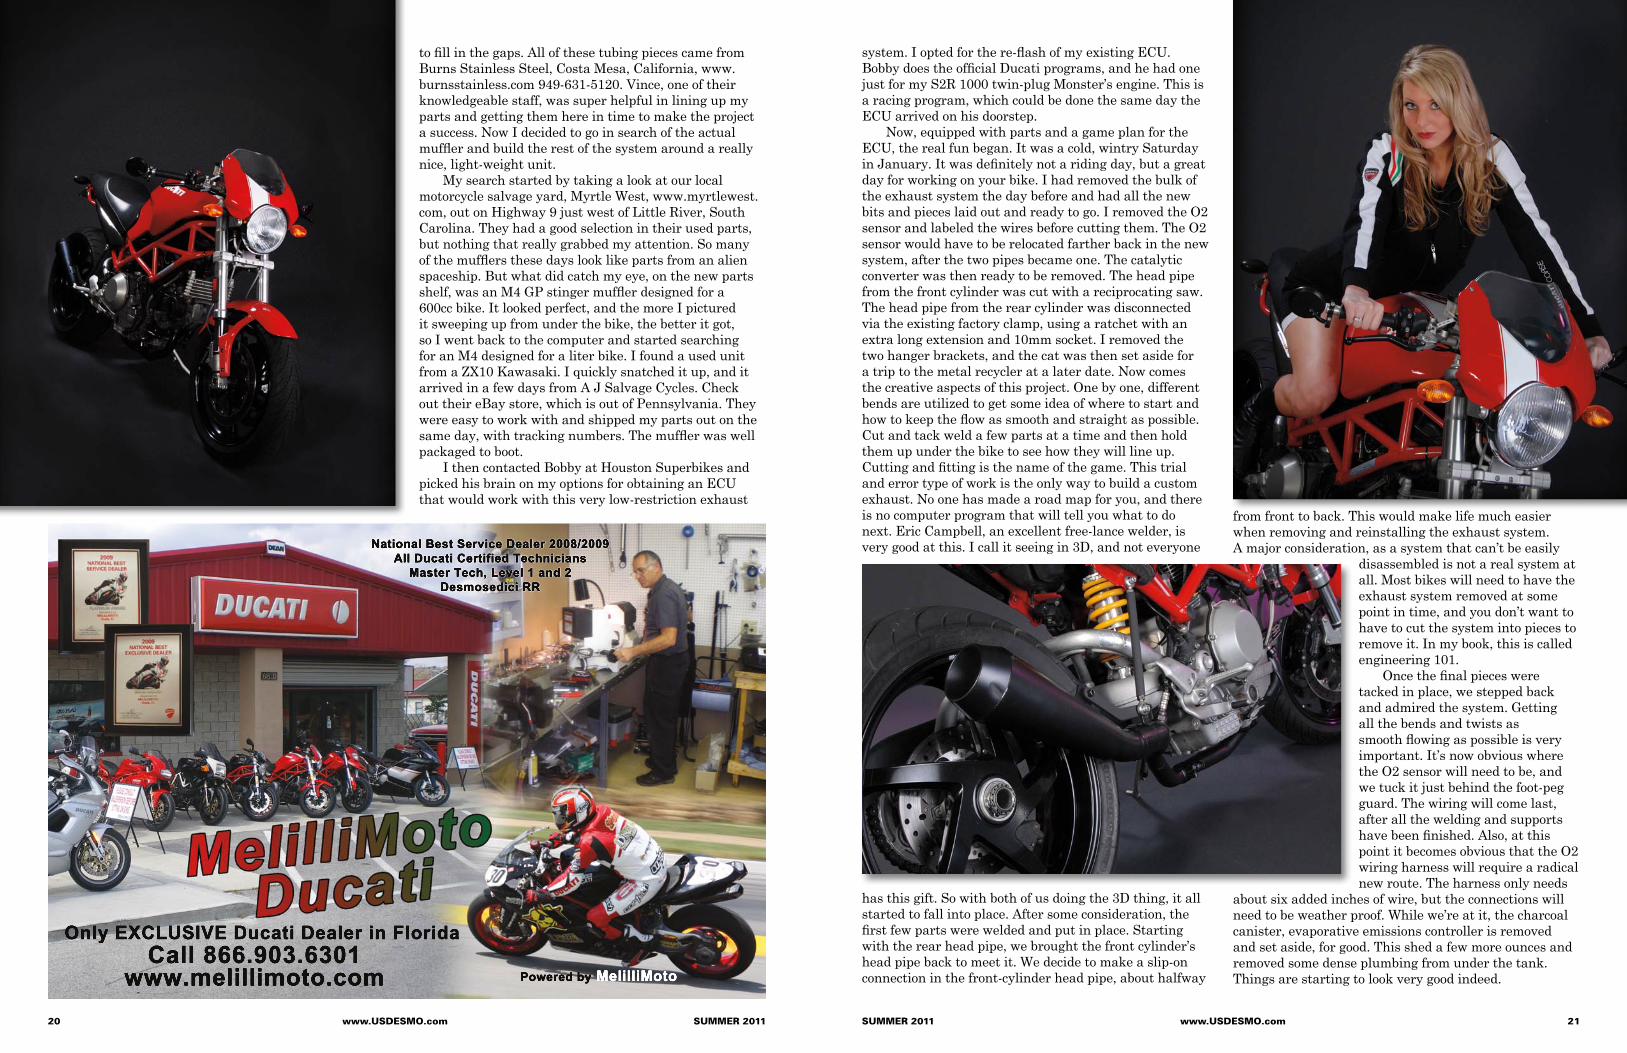
system. I opted for the re-flash of my existing ECU. Bobby does the official Ducati programs, and he had one just for my S2R 1000 twin-plug Monster’s engine. This is a racing program, which could be done the same day the ECU arrived on his doorstep.
Now, equipped with parts and a game plan for the ECU, the real fun began. It was a cold, wintry Saturday in January. It was definitely not a riding day, but a great day for working on your bike. I had removed the bulk of the exhaust system the day before and had all the new bits and pieces laid out and ready to go. I removed the O2 sensor and labeled the wires before cutting them. The O2 sensor would have to be relocated farther back in the new system, after the two pipes became one. The catalytic converter was then ready to be removed. The head pipe from the front cylinder was cut with a reciprocating saw. The head pipe from the rear cylinder was disconnected via the existing factory clamp, using a ratchet with an extra long extension and 10mm socket. I removed the two hanger brackets, and the cat was then set aside for a trip to the metal recycler at a later date. Now comes the creative aspects of this project. One by one, different bends are utilized to get some idea of where to start and how to keep the flow as smooth and straight as possible. Cut and tack weld a few parts at a time and then hold them up under the bike to see how they will line up. Cutting and fitting is the name of the game. This trial and error type of work is the only way to build a custom exhaust. No one has made a road map for you, and there is no computer program that will tell you what to do next. Eric Campbell, an excellent free-lance welder, is very good at this. I call it seeing in 3D, and not everyone
has this gift. So with both of us doing the 3D thing, it all started to fall into place. After some consideration, the first few parts were welded and put in place. Starting with the rear head pipe, we brought the front cylinder’s head pipe back to meet it. We decide to make a slip-on connection in the front-cylinder head pipe, about halfway
from front to back. This would make life much easier when removing and reinstalling the exhaust system. A major consideration, as a system that can’t be easily
disassembled is not a real system at all. Most bikes will need to have the exhaust system removed at some point in time, and you don’t want to have to cut the system into pieces to remove it. In my book, this is called engineering 101.
Once the final pieces were tacked in place, we stepped back and admired the system. Getting all the bends and twists as smooth flowing as possible is very important. It’s now obvious where the O2 sensor will need to be, and we tuck it just behind the foot-peg guard. The wiring will come last, after all the welding and supports have been finished. Also, at this point it becomes obvious that the O2 wiring harness will require a radical new route. The harness only needs
about six added inches of wire, but the connections will need to be weather proof. While we’re at it, the charcoal canister, evaporative emissions controller is removed and set aside, for good. This shed a few more ounces and removed some dense plumbing from under the tank. Things are starting to look very good indeed.
to fill in the gaps. All of these tubing pieces came from Burns Stainless Steel, Costa Mesa, California, www.burnsstainless.com 949-631-5120. Vince, one of their knowledgeable staff, was super helpful in lining up my parts and getting them here in time to make the project a success. Now I decided to go in search of the actual muffler and build the rest of the system around a really nice, light-weight unit.
My search started by taking a look at our local motorcycle salvage yard, Myrtle West, www.myrtlewest.com, out on Highway 9 just west of Little River, South Carolina. They had a good selection in their used parts, but nothing that really grabbed my attention. So many of the mufflers these days look like parts from an alien spaceship. But what did catch my eye, on the new parts shelf, was an M4 GP stinger muffler designed for a 600cc bike. It looked perfect, and the more I pictured it sweeping up from under the bike, the better it got, so I went back to the computer and started searching for an M4 designed for a liter bike. I found a used unit from a ZX10 Kawasaki. I quickly snatched it up, and it arrived in a few days from A J Salvage Cycles. Check out their eBay store, which is out of Pennsylvania. They were easy to work with and shipped my parts out on the same day, with tracking numbers. The muffler was well packaged to boot.
I then contacted Bobby at Houston Superbikes and picked his brain on my options for obtaining an ECU that would work with this very low-restriction exhaust
Powered by MelilliMotowww.melillimoto.comCall 866.903.6301
Only EXCLUSIVE Ducati Dealer in Florida
National Best Service Dealer 2008/2009All Ducati Certified Technicians
Master Tech, Level 1 and 2Desmosedici RR
22 www.USDESMO.com SUMMER 2011 SUMMER 2011 www.USDESMO.com 23
For a copy of Arai’s new 40-page color catalog plus an Arai sticker pak, please send $4.00 in cash or stamps($5.00 U.S. Currency if outside the U.S.) to Arai Americas, Inc., Dept. 15MEN2010, P.O. Box 9485, Daytona, FL 32120.
Specifi cations subject to change without notice. ©2010 Arai Helmets.The Offi cial Helmet of the Daytona 200.
In the entire Arai Helmet Company, only 15 men make helmet shells.
only 15 men.Imagine the knowledge, commitment, expertise, and fanatical attention to detail it must take to earn that right.
only 15 men.You’d think there’d be hundreds of men and machines cranking out Arai shells for the world. But that’s not what a rider who buys an Arai expects. An Arai rider expects handmade care and attention, and that’s what you get. You can get mass-produced helmets anywhere. You get handmade ones here.
only 15 men.Understand that these 15 have to make every shell for all of Arai’s F-1, Indy car and NASCAR helmets, motorcycle racers and riders helmets for the whole planet. One at a time, by hand.
only 15 men.It gets even better. Arai’s obsession with excellence is so extreme that the composition of the resins used to bond the shell components can be changed several times in a single day - just to compensate for changes in ambient temperature, humidity and barometric pressure inside the factory that could affect the bonding properties. Yes, we’re serious. Because a rider must be able to trust what’s under Arai paint.
Finally, every single Arai shell is measured for thickness and weight to conform to Arai’s rigorous tolerances. (No easy random or batch testing around here.)
The result of all this is that you get to wear one of the ones that makes it.(Put a price on that.)
Convince yourself at www.AraiAmericas.com
A HIGHER STANDARD
After a couple of trial installations and removals of the entire exhaust system, the go-ahead is given to weld up all the seams. This is another area where Eric shines. He has that touch and steady hand, afforded him by his youth, that makes his TIG welds look like they were done by some space-age robot: smooth, seamless welds with no blobs, globs, or blisters. And no leaks, either. A new threaded boss for the O2 sensor is made from 316 stainless steel, and installation is completed during the final welding process. The threads for this boss are 18mm x 1.5mm pitch and we just happen to have the tap in our extensive inventory.
The M4 Moto GP muffler is just a fuzz too loose for my liking. So a quick trip to Main Street Auto Repair
in downtown Conway, South Carolina, and the 2-inch ID connector pipe that the muffler slips over is swaged oversized, just slightly, and bingo, the fit is perfect. Amazing what you can do with the right tools.
Okay, the wiring is done, the exhaust system has been reinstalled, and all the connections are nice and tight. The re-flashed ECU is installed, and the battery is reconnected. You must do this in this order, or you may fry your re-flashed ECU. The engine fired on the first revolution, and the melodious sound of a 90-degree V-twin filled the shop. People came running from all over to see what was making such beautiful music. Most of us are gearheads around here, so it doesn’t take much to get this group excited. But the sound is great. Just what the doctor ordered.
Now for a visit with Mark Gillotte at Moto Gizmo, Columbia, South Carolina, www.moto-gizmo.com, for a quick balancing of the throttle bodies and setting of the CO. Something we used to do by ear and unisync in the pre-fuel injection era of carburetion. Mark Gillotte, owner and mechanic, is a stickler for details and a perfectionist when it comes to Ducati motorcycles—well, for that matter, any bike. Mark found some flies in the ointment but was able to get the bike set up and running great.
The power from the racing program is obvious, now that the system has been dialed in.
Now with a few days of running time, the system is uninstalled and packaged for a quick trip to Jeff Howell at Jet Hot, www.jet-hot.com, located in Burlington, North Carolina, for a heat-resistant coating of all the parts, even the clamps and head-pipe flanges. Nice to have a great high-temp coating process center in our own back yard. I chose the black coating to help make the system disappear against the dark asphalt, making the bike look even leaner and meaner. Jet Hot covers the spectrum from a shiny aluminum color to a jet black finish. Check out their web site for more info.
With the system coated and reinstalled, I still had two things left on my project list. First, have some real photographs made of the Monster with its new pipe by my good friend and hand surgeon, Dr. Stewart Haskins. He can fix your carpel tunnel and do your portrait with equal prowess. I’m his poster child for his carpel tunnel surgery technique, and his photos grace this article.
Last but not least, a quick trip to KWS Motorsports of North Charleston, South Carolina, www.kwsmotorsports.com, for a dyno test for rear-wheel horsepower. Sorry I didn’t think to do this before we started the Monster project, but I am told on high authority that it is difficult at best to get an accurate before-and-after measure of the rear-wheel horsepower. I’m told that
there are so many factors such as tire and chain wear, bearings and brake pad drag, and engine and clutch condition that all factor into the equation. The chances of getting any concrete information are, at best, a real stretch.
The cycle magazines like to see rear-wheel horsepower to help clear the air, as crankshaft horsepower comes from a wide variety of methods. I’m told that some manufacturers remove exhaust systems, stators, and anything that may cause drag and reduce the final number. So, for what it’s worth, the rear-wheel horsepower, with the new two-into-one exhaust, came out at 102. This surprised even me.
Now looking ahead, I can see additional projects with the Monster as a base starting point. I can also see contracting custom exhaust systems for street and racing applications. Options for Ducati, Aprillia, and MV Augusta non-superbike applications are limited at best. So, if you’re in the market for a customized exhaust system, then check out my Project Monster and give me a call.
Next installment for Project Monster: some suspension work with Rick Tannenbaum at Cogent Dynamics. Stay tuned.

24 www.USDESMO.com SUMMER 2011 SUMMER 2011 www.USDESMO.com 25
by Jim ‘il Capo’ Calandro, Member #00001
Whenever I get a new bike—well, most of them are used but they are still new to me—I install a hookup for a battery tender. I use it both to keep the battery charged and to connect up my electric vest. Over the years I have done this on about 20 bikes, and each one provided its own challenge. The main problem is that by adding the extra eye connector, the mounting screw is a little short to reach the nut. Most batteries have a post that is hollow and has five holes in it: one on the top and four around the sides. The nut that holds the bolt in is usually a very crude flat piece of metal that just slides in from the side of the terminal, and you have to put the screw down through the top hole and catch the nut. Well, without any wires attached it is simple. When you add more than one wire connector, it becomes more difficult with each one. This is a result of the top of the terminal being taller than the screw is long, and once it has two or more eye connectors under it, the length will not allow it to reach the nut.
For years I had tried various small, flat-bladed screwdrivers to attempt to lift the nut. The problem is the space around the battery does not always allow for this. One day I had an epiphany. Why not put an “O” ring under the nut? I found one that was just about as thick as the space between the nut and the top of the terminal. Pushing it under the nut raised the nut up to the bottom of the post where the screw could reach it. The real advantage is it holds the nut in place so you do not have to grow a third hand to hold wires and nut and turn the screw. The hole in the “O” ring allows for the screw to go in as far as necessary to make a tight connection. One of those simple fixes that makes you slap your forehead and say, “Why did I not think of this years ago?”
TinyTekTip #2Oh for a Better Day, or How I Solved a Short Problem
We have a ton of these TinyTekTips, and we bet you do too! Send us your favorites and we’ll print ‘em and collect ‘em on the web site.
It took six of us to get Mark onto the race track: three to hold the bike, one to put it in gear, one to strap his legs in, and another to ride behind, but among us we
helped a paralyzed man ride his Ducati again.Mark Brereton became paralyzed four years ago
when he crashed at Barber Motorsports Park while practicing for an AMA race. The doctors believed Mark would never walk again, but this past weekend Mark defied all the odds and not only walked but rode his Ducati 748 around Barber for three 20-minute track sessions with SportbikeTrackTime.
The 38-year-old gained limited use of his legs two years ago and is able to stand and walk short distances with the aid of a walker. With this limited ability, Mark approached Ducshop to add a thumb shifter to his 748 so he could shift gears and finish the lap he thought he would never be able to.
Mark Sutton worked tirelessly to have the bike finished for the SBTT weekend, and all of Ducshop’s regular track-day-goers were on hand to help get Mark
onto the track to ride.It was a harrowing first session, but with much pride
and jubilation, and to the cheers and tears of his family and friends, Mark Brereton rode his Ducati again.
Mark has quite a list of people to thank: Richard Harris and all the crew at SportbikeTrackTime for sponsoring his track time; Brian Van of SportbikeTrackGear.com for decking him out with leathers, back protector, and gloves; TJ at ridersdiscount.com for the boots; Pirelli for providing his tires; Lee McCurdy for donating a Baxley stand; Neil Hodgson for donating the helmet; and Mark’s wife Sam, daughter Olivia, and son Devin for all their support and frayed nerves.
Mark would also like to thank all the Ducshop people who helped him on the day, including Sean Massey, Peter Runyon, Cliff Clarke, and Lewis and Trudy Guthrie. But most of all he’d like to extend a big thank you to Mark Sutton for preparing his bike to ride.
WHERE THERE’S A WILL, THERE’S A WAY
story by The Ducshop
NPR DUCATITHE SOUTHEAST’S NEWEST DUCATI DEALER
SOUTH’S LARGEST DUCATI PERFORMANCE INVENTORYONE DAY SHIPPING TO MOST OF THE SOUTHEASTKNOWLEDGABLE & ENTHUSIASTIC STAFFSAME DAY SERVICING WITH APPOINTMENTCURRENT MODEL CERTIFIED TECHSPREMUIM USED BIKE INVENTORYTRADE-INS WELCOMERACE AND TRACK SUPPORTNO ADDED FEES ON NEW BIKE PURCHASES
ASK ABOUT OUR US DESMO DISCOUNTS AND SPECIALS!
AWARDED NATIONAL NEW DEALER OF THE YEAR BY DUCATI NORTH AMERICAWe are committed to making your Ducati dealer experience as satisfying as your Ducati riding experience. Decades of passion and know-how have come together to offer you the most knowledgeable and friendly service you will find anywhere. We’re here to make a difference...
www.NPRDucati.com • 706.310.0002 • 1461 Greensboro Hwy, Watkinsville GA 30677

26 www.USDESMO.com SUMMER 2011 SUMMER 2011 www.USDESMO.com 27
Ducks Along The Blue Ridge 2011
Tom Rolland • 2808 Prenda de Oro NW • Albuquerque, New Mexico 87120 email: [email protected] • http://www.webgrafex.com/ducatibeltbuckles/
®
Clean.....Lube.....Ride
Motorcycle chain and wheel work made easy.
www.wheeljockey.com
Wheel and Tire Cleaning
Chain Maintenance
Valve Stem Positioning • Tire Inspection
Patent Pending
SUMMER 2011 www.USDESMO.com 27
Marvin Jensen heads out to test the route. Bill Park on a loaner BMW from Moto Gizmo. Quite a diversity of bikes at the rally.
Our stop in Independence, VA before we start the long trek on Hwy 58. Notice all the Guzzis this year.
Proof that is does not always rain at DABR! Have Monster will travel.
Moto-Art-MartMoto-Art-MartRide Like the WindBill Park is a metallurgical engineer and small business owner, manufacturing high performance trim tabs for offshore racing boats and a self taught artist. His is an avid motorcyclist, gear head, and a fan of World SuperBike and MotoGP. His automotive and motorcycle art works are highly sought after by collectors around the world.
View the gallery and purchase prints at www.motoartmart.com
Bill [email protected] • 153 Winyah Road, Conway, SC 29526
28 www.USDESMO.com SUMMER 2011
Endless Transformations Multistrada 1200. A dream Ducati: 4 bikes in 1. A sport bike, long-distance tourer, urban machine and an adventurous enduro are now all one click away. With the Testastretta 11° engine, the Multistrada 1200 is a masterpiece of sport, comfort, safety and handling, ready to transform itself for every new ride, for every new thrill.
ducatiusa.com
Recommended Powered by
Bench RacIngTall tales of fact and “friction”
Down Shift: A moment of weightlessnessby Neale Bayly, Member #01174
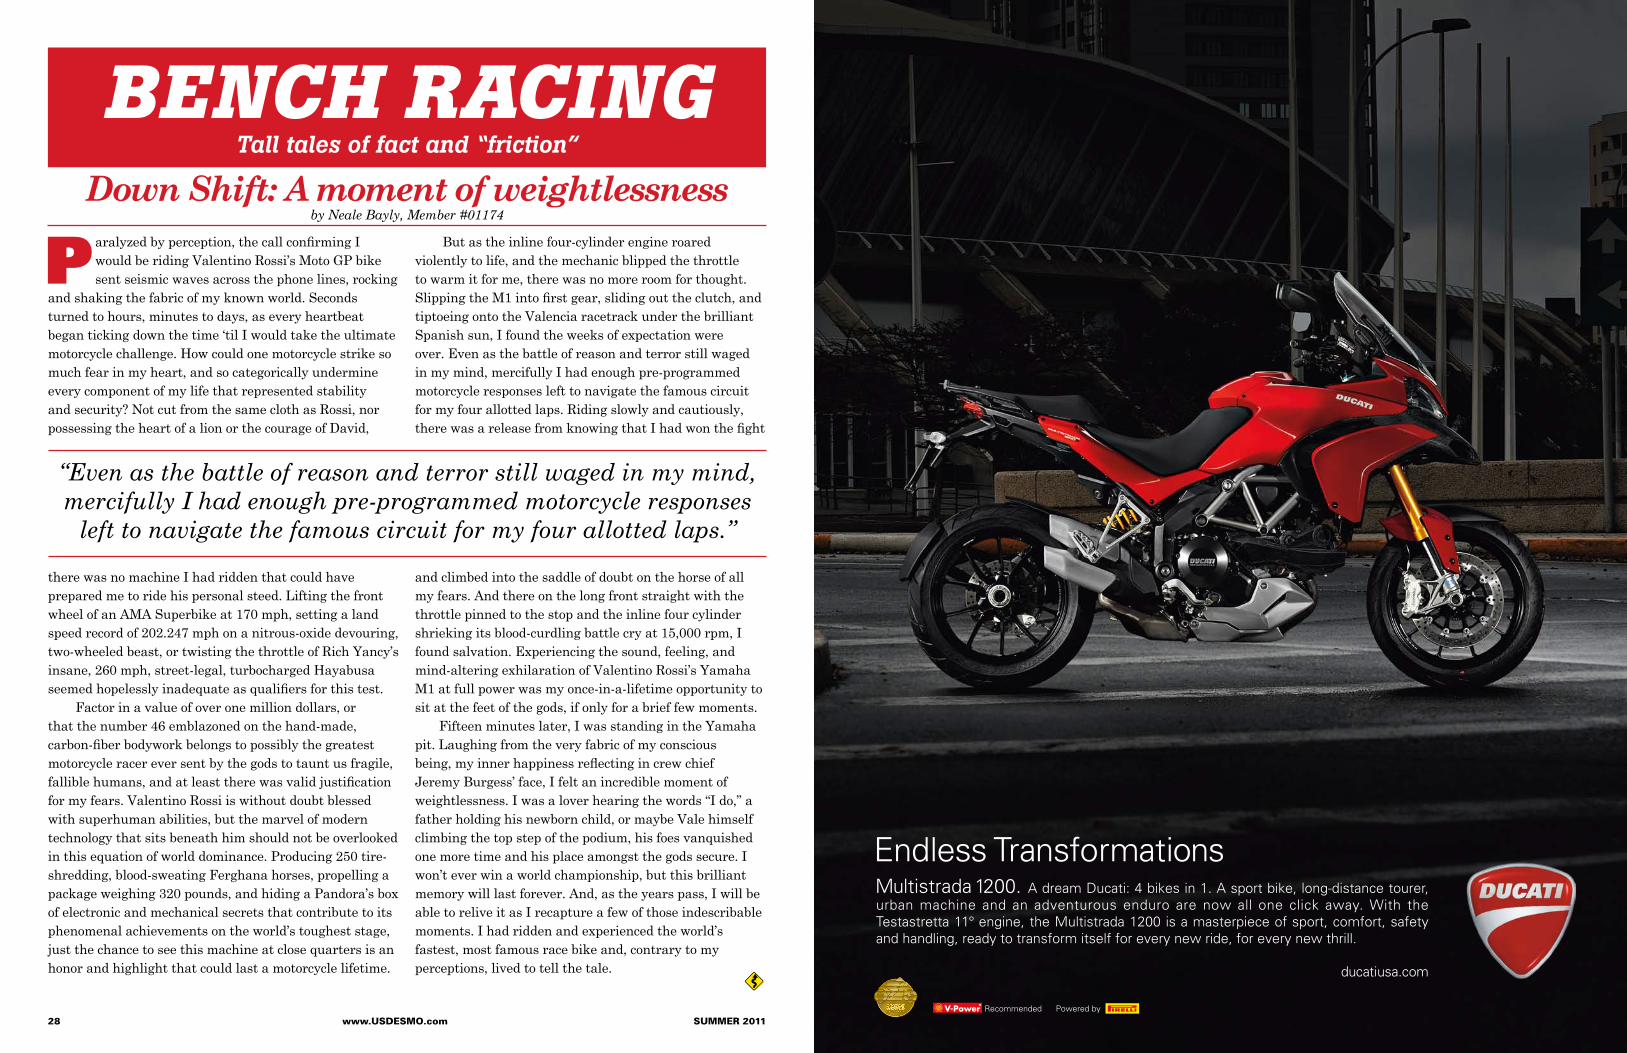
P aralyzed by perception, the call confirming I would be riding Valentino Rossi’s Moto GP bike sent seismic waves across the phone lines, rocking
and shaking the fabric of my known world. Seconds turned to hours, minutes to days, as every heartbeat began ticking down the time ‘til I would take the ultimate motorcycle challenge. How could one motorcycle strike so much fear in my heart, and so categorically undermine every component of my life that represented stability and security? Not cut from the same cloth as Rossi, nor possessing the heart of a lion or the courage of David,
there was no machine I had ridden that could have prepared me to ride his personal steed. Lifting the front wheel of an AMA Superbike at 170 mph, setting a land speed record of 202.247 mph on a nitrous-oxide devouring, two-wheeled beast, or twisting the throttle of Rich Yancy’s insane, 260 mph, street-legal, turbocharged Hayabusa seemed hopelessly inadequate as qualifiers for this test.
Factor in a value of over one million dollars, or that the number 46 emblazoned on the hand-made, carbon-fiber bodywork belongs to possibly the greatest motorcycle racer ever sent by the gods to taunt us fragile, fallible humans, and at least there was valid justification for my fears. Valentino Rossi is without doubt blessed with superhuman abilities, but the marvel of modern technology that sits beneath him should not be overlooked in this equation of world dominance. Producing 250 tire-shredding, blood-sweating Ferghana horses, propelling a package weighing 320 pounds, and hiding a Pandora’s box of electronic and mechanical secrets that contribute to its phenomenal achievements on the world’s toughest stage, just the chance to see this machine at close quarters is an honor and highlight that could last a motorcycle lifetime.
But as the inline four-cylinder engine roared violently to life, and the mechanic blipped the throttle to warm it for me, there was no more room for thought. Slipping the M1 into first gear, sliding out the clutch, and tiptoeing onto the Valencia racetrack under the brilliant Spanish sun, I found the weeks of expectation were over. Even as the battle of reason and terror still waged in my mind, mercifully I had enough pre-programmed motorcycle responses left to navigate the famous circuit for my four allotted laps. Riding slowly and cautiously, there was a release from knowing that I had won the fight
and climbed into the saddle of doubt on the horse of all my fears. And there on the long front straight with the throttle pinned to the stop and the inline four cylinder shrieking its blood-curdling battle cry at 15,000 rpm, I found salvation. Experiencing the sound, feeling, and mind-altering exhilaration of Valentino Rossi’s Yamaha M1 at full power was my once-in-a-lifetime opportunity to sit at the feet of the gods, if only for a brief few moments.
Fifteen minutes later, I was standing in the Yamaha pit. Laughing from the very fabric of my conscious being, my inner happiness reflecting in crew chief Jeremy Burgess’ face, I felt an incredible moment of weightlessness. I was a lover hearing the words “I do,” a father holding his newborn child, or maybe Vale himself climbing the top step of the podium, his foes vanquished one more time and his place amongst the gods secure. I won’t ever win a world championship, but this brilliant memory will last forever. And, as the years pass, I will be able to relive it as I recapture a few of those indescribable moments. I had ridden and experienced the world’s fastest, most famous race bike and, contrary to my perceptions, lived to tell the tale.
“Even as the battle of reason and terror still waged in my mind, mercifully I had enough pre-programmed motorcycle responses
left to navigate the famous circuit for my four allotted laps.”
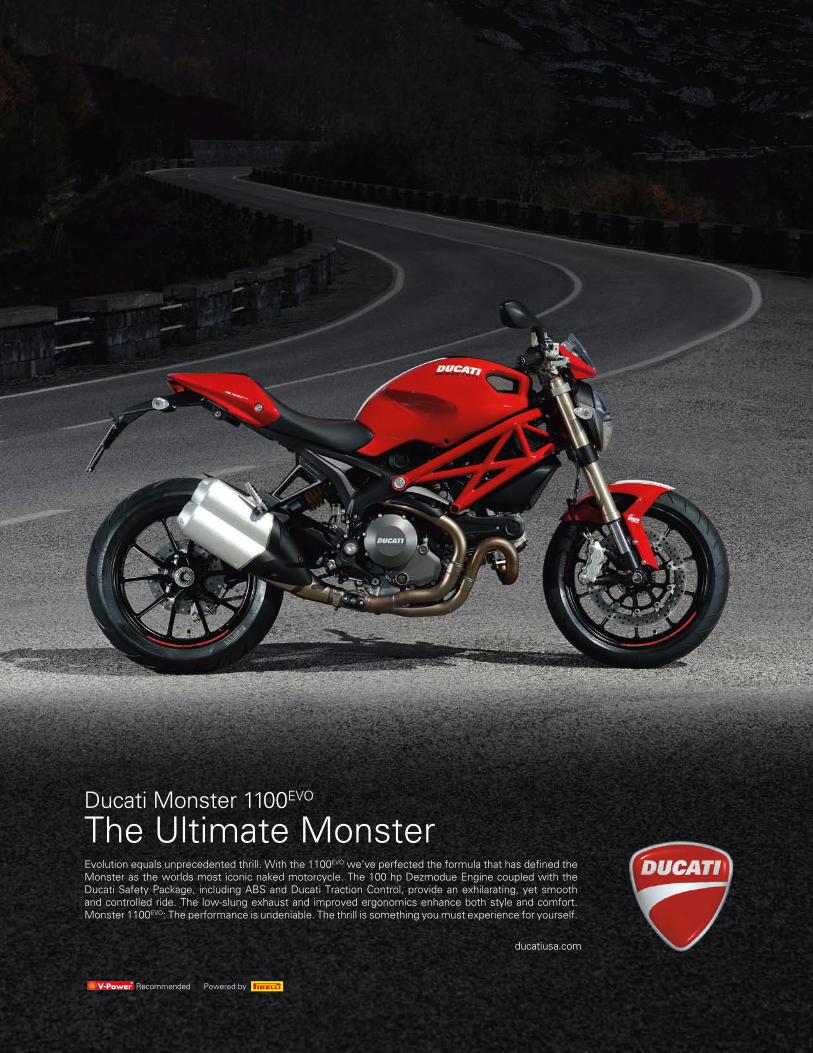
Evolution equals unprecedented thrill. With the 1100EVO we’ve perfected the formula that has defined the Monster as the worlds most iconic naked motorcycle. The 100 hp Dezmodue Engine coupled with the Ducati Safety Package, including ABS and Ducati Traction Control, provide an exhilarating, yet smooth and controlled ride. The low-slung exhaust and improved ergonomics enhance both style and comfort. Monster 1100EVO: The performance is undeniable. The thrill is something you must experience for yourself.
ducatiusa.com
Recommended Powered by
Ducati Monster 1100EVO
The Ultimate Monster