THE MIRACLE - pianoeducation.org · The Miracle Piano Teaching System Project Manager Piano Method...
34
THE • MIRACLE PIANO TEACHING SYSTEM Nintendo Entertainment System® User's Guide
Transcript of THE MIRACLE - pianoeducation.org · The Miracle Piano Teaching System Project Manager Piano Method...

THE • MIRACLE PIANO TEACHING SYSTEM
Nintendo Entertainment System® User's Guide

TheMiracle
Piano Teaching SystemNintendo Entertainment Systems
User's Guide
Copyright © 1990, 1991 The Software Toolworks, Inc.All rights reserved

TABLE OF CONTENTS
TABLE OF CONTENTSGetting Started on Your NES ........................................................... 1
What's In the Package .................................................................. 1What's In Store for the Future ....................................................... 2Rear Connectors on The Miracle .................................................. 2Connecting The Miracle to Your NES ........................................... 3Starting the Program ..................................................................... 4
Using the NES Software ....................................................................5Welcome Screen ............................................................................ 5Game Controls ............................................................................... 6Telling The Miracle Your Age ........................................................ 6Selecting a Chapter ....................................................................... 6The Chalkboard .............................................................................. 7Options Screen .............................................................................. 8Activities ......................................................................................... 9Finger Numbers/Note Names ..................................................... 10Practice Notes ............................................................................. 11Steady Quarters .......................................................................... 11The Shooting Gallery .................................................................. 12Practice Rhythms ........................................................................ 13Roboman ...................................................................................... 14Sheet Music ................................................................................. 15Flashcards .................................................................................... 16The Practice Room ..................................................................... 17Hand Indicator .............................................................................. 18Toolworks Orchestra/Solo Performance ..................................... 19Other Activities ............................................................................ 19Demonstration Mode ................................................................... 19Select Another Piece ................................................................... 19Return to Lesson ......................................................................... 19
Common Questions and Answers ................................................. 21
Index .................................................................................................. 23
i

CREDITS
CREDITS
Testing
Jon Mandel
Gary Davenport, DMA
Jon MandelNorman Worthington
Michael DuffyZareh GorjianDavid GrenewetzkiAndrew IversonJohn KrauseDon LaabsMark ManyenHenrik MarkarianBetsy ScafatiPeter Stone
Fred Werner
Debbra FreemanThomas Mun sellRalf SchipkeJacob Smith
Cathy LePardJohn Turly
The Miracle Piano Teaching System
Project Manager
Piano Method
Program Design
Software Development
Music Design
Music Transcription
The Miracle Keyboard
Hardware Design
Hardware Production
Chuck MonteJoe BusternaMike CollinsJohn DirksonAnne GrahamRay LivingstonShaul MardinalPaul White
Val GarciaPeter GilliganBen Okawa
Sound Design Drew Neumann
III
CREDITS
Documentation
Manual Design & Production
Illustrations
Anne SchwimerDarilyn KotzenbergCory Haibloom
Carol DickasonRoger Nelson
Copyrights Software Copyright © 1990, 1991 The Software Toolworks, Inc. All rightsreserved.
Manual Copyright © 1990, 1991 The Software Toolworks, Inc. All rightsreserved.
The Software Toolworks® is a registered trademark of and Toolworks is atrademark of The Software Toolworks, Inc. The Miracle and The MiraclePiano Teaching System are trademarks of The Software Toolworks, Inc.
Nintendo® is a registered trademark of Nintendo of America, Inc.
Radio Shack is a Division of Tandy Corporation.
The photographs in the chapter HISTORY OF THE PIANO in THE MIRACLE PIANO
TEACHING SYSTEM OWNER'S MANUAL, are used by permission of The BettmanArchive.
Mindscape and the Mindscape logo are registered trademarks of MindscapeInc., A Software Toolworks Company.
iv

CREDITS
NES SongCopyrights
The following are Original Musical compositions written and orchestrated byFred Werner. Copyright © 1990 by Cats Eye Productions, Inc. and TheSoftware Toolworks, Inc. All rights reserved.
Journey, Northwood, For Laura, Sad Story, Woodbird, Treble Explorer,Sharps 'n Flats, Treble Teaser, Black & White, For Denise, Dots, EightyEight, For Jessica, Top Ten, Carefree, Gina's Lament, Rose Bud, Bull Frog,Chimp, Chopstick, Space Cadet, Frightnight, Channel 11, Toccata,Renaissance, For Ana, Clouds, Technotron.
The following music is used with permission:
Let's Go Crazy(Prince Nelson)© 1984 Controversy MusicAll Rights on behalf of Controversy Music for the USA & CanadaAdministered by WB Music Corp.All Rights Reserved. Used By Permission.
Star Wars(John Williams)
1977 Warner-Tamerlane Publishing Corp.All Rights Reserved. Used By Permission.
Hound Dog(Jerry Leiber, Mike Stoller)© 1956 Gladys Music & MCA Music Publishing (Renewed)All Rights on behalf of Gladys Music for the USA Administered by Chappel& Co.All Rights Reserved. Used By Permission.
My Funny Valentine(Lorenz Hart, Richard Rodgers)© 1937 Chappel & Co. (Renewed)All Rights Reserved. Used By Permission.
Puff (The Magic Dragon)(Peter Yarrow, Leonard Lipton)© 1963 Pepamar Music Corp.All Rights Reserved. Used By Permission.
V

CREDITS
Advisory A very small portion of the population may experience epileptic seizureswhen viewing certain kinds of flashing lights or patterns that are commonlypresent in our daily environment. These persons may experience seizureswhile watching some kinds of television pictures or playing certain videogames. Players who have not had any previous seizures may nonethelesshave an undetected epileptic condition. We suggest that you consult yourphysician if you have an epileptic condition or if you experience any of thefollowing symptoms while playing video games: altered vision, muscletwitching, other involuntary movements, loss of awareness of yoursurroundings, mental confusion and/or convulsions.
Warning: Do NOT Use with Front or Rear Projection TV
Do not use a front or rear projection television with your NintendoEntertainment System ® (NES) and this video game. Your projectiontelevision screen may be permanently damaged if video games with stationaryscenes or patterns are played on it.
Similar damage may occur if you place a video game on hold or pause.
If you use your projection television with this video game, neither TheSoftware Toolworks, Inc. nor Nintendo of America Inc. will be liable for anydamage. This situation is not caused by a defect in the NES or The MiraclePiano Teaching System; other fixed or repetitive images may cause similardamage to a projection television. Please contact your TV manufacturer forfurther information.
Caution
Insert or remove The Miracle cartridge from your NES only when the poweris off. Inserting or removing the cartridge while the power is on can causepermanent damage to the cartridge.
Vi

CREDITS
FCC Notice This equipment has been tested and found to comply with the limits for aClass B digital device, pursuant to Part 15 of the FCC Rules. These limits aredesigned to provide reasonable protection against harmful interference in aresidential installation. This equipment generates, uses and can radiate radiofrequency energy and, if not installed and used in accordance with theinstructions may cause harmful interference to radio communications.However, there is no guarantee that interference will not occur in a particularinstallation. If this equipment does cause harmful interference to radio ortelevision reception, which can be determined by turning the equipment offand on, the user is encouraged to try to correct the interference by one or moreof the following measures:
• Reorient or relocate the receiving antenna.
• Increase the separation between the equipment and receiver.
• Connect the equipment into an outlet on a circuit different from that towhich the receiver is connected.
• Consult the dealer or an experienced radio/TV technician for help.
V II

CREDITS
Technical Support For technical support in the USA, please contact:
The Software Toolworks, Inc.60 Leveroni CourtNovato, CA 94949Telephone: (415) 883-5157FAX: (415) 883-3303
For parts, call: (800) 234-3088
For technical support in Europe, please contact:
Mindscape InternationalThe Coach House, Hooklands EstateScaynes HillWest SussexEngland, United KingdomRH17 7NGTelephone: 0 11 44 (444) 831-761FAX: 0 11 44 (444) 831-688
For technical support in Australia and New Zealand, please contact:
Mindscape International5/6 Gladstone RoadCastle Hill, New South WalesAustralia 2154Telephone: (02) 899-2277FAX: (02) 899-2348
viii

Foot Pedal Earphones Keyboard The MiraclePower Supply Cable
Owner's Manual This User'sGuide
The MiracleCartridge
The Miracle Keyboard
Keyboard Overlay
GETTING STARTED ON YOUR NES
GETTING STARTED ON YOUR NESWelcome to The Miracle Piano Teaching System for the NintendoEntertainment System® (NES)! In the months to come, your NES willprovide hundreds of Lessons to teach you how to play the piano.
Once you've found a place for The Miracle keyboard, setting it up is easy.
What's In the Package For starters, check The Miracle Piano Teaching System package. Removeand identify each of these parts:
Contents of The Miracle Box
1

GETTING STARTED ON YOUR NES
What's In Store for Please fill out your Warranty Registration Card and mail it right away. Thisthe Future is the only way we can keep in touch and let you know about:
• Future software upgrades.
• Add-on products, such as new Lessons.
• Advanced courses.
Rear Connectors Look at the the rear connectors on the back of the keyboard.on The Miracle
Rear Connectors on The Miracle Keyboard
The rear connectors are:
• MIDI - Use In and Out to connect The Miracle to another MusicalInstrument Digital Interface (MIDI) device if you have one.
• Miracle Port - Use The Miracle Cable to connect The Miracle to yourNES.
• Audio Out - Use the Head Phone jack to plug in your head phones; useLT and RT to connect The Miracle to your stereo.
• Input - Use the Foot Pedal jack to plug in the foot pedal; use the Switchto turn The Miracle on and off; use Power and the Keyboard PowerSupply to plug The Miracle into the electrical outlet.
For information about the keyboard overlay, foot pedal, earphones, stereoaudio connectors, and the MIDI connector, see ABOUT THE KEYBOARD in THE
MIRACLE PIANO TEACHING SYSTEM OWNER'S MANUAL.
When The Miracle is properly connected and turned on, the instrument andvolume indicators light up.
2

MIRACLE PORT
GETTING STARTED ON YOUR NES
Connecting The To connect The Miracle to your NES, follow the steps below.Miracle to YourNES CAUTION: Do not plug any cable other than The Miracle Cable into the
Miracle Port. Using another cable in this port can damage The Miracle andwill void your warranty.
1. Plug the wide end of The Miracle Cable into the Miracle Port on theback of the keyboard. Plug the small end into Controller Port #1 on theNES.
I mportant Note: Don't plug The Miracle Cable into the #2 Port on theNES. It won't work.
2. Connect an NES Game Controller to Port #2 on the NES.
3. Plug the Keyboard Power Supply into the the Power connector on theback of the keyboard and into the electric outlet.
4. Plug the Foot Pedal into the Foot Pedal jack. It doesn't matter whichside of the plug is up.
5. Put the pedal on the floor with the foam (squishy) side up.
3

The Top of the Keyboard
GETTING STARTED ON YOUR NES
6. Use the On/Off Switch and turn The Miracle keyboard on. Theinstrument and volume indicators will light up.
7. Press any key to make sure that sound comes out of the built-in speakers.Adjust the volume as necessary by pressing the up and down Volumekeys.
Starting the Program To start learning with The Miracle:
1. Put The Miracle cartridge into the NES.
2. Turn on the NES.
3. Press the Select button to get past the title screens. See USING THE
NES SOFTWARE.
4
USING THE NES SOFTWARE
USING THE NES SOFTWAREThe Miracle presents music and information to you in a variety of ways,ranging from standard sheet music to arcade games. This chapter identifiesThe Miracle's screens that appear on your Nintendo Entertainment System®(NES) and explains their uses.
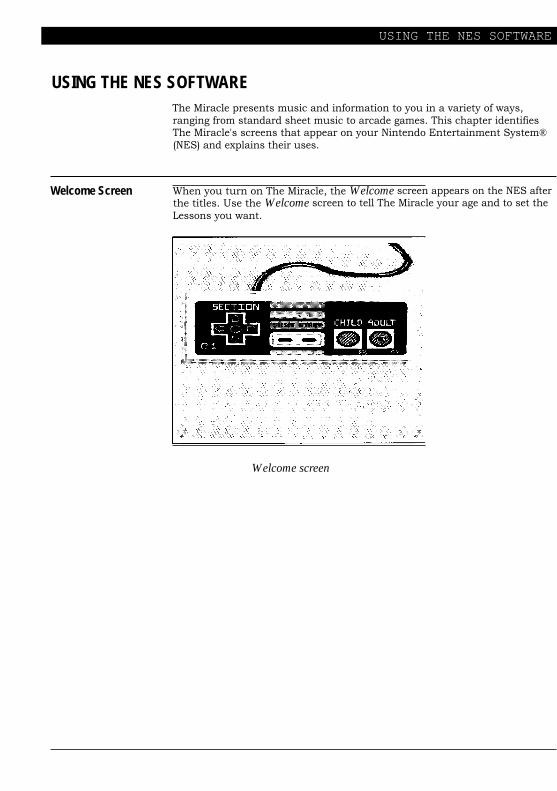
Welcome Screen When you turn on The Miracle, the Welcome screen appears on the NES afterthe titles. Use the Welcome screen to tell The Miracle your age and to set theLessons you want.
Welcome screen

USING THE NES SOFTWARE
Game Controls The following are the NES Controller commands that you'll use mostfrequently:
To Perform This Function Press These Buttons
Restart Activity
Return to Chalkboard from Activity Select
Skip to next Lesson from Chalkboard Select, A
Go to previous Lesson from Chalkboard
Pause; continue Start
Telling The MiracleYour Age
The Miracle offers slightly different training for children than it does foradults. The material covered is the same, but the text in Child format iseasier to read.
At the Welcome screen, adults and teenagers should press A to select theAdult text. Pre-teens should press B to select the Child text. The mode youselect is highlighted. Press Start to begin.
Selecting a Chapter The Lessons in the course are organized into Chapters. As you begin eachday's practice, go back to the Chapter where you left.
The Chapter where The Miracle will start appears on the Welcome screen andthe Chalkboard screen as a Section number. Example: 01.01 is Lesson 1 inChapter 1.
To select a different Chapter:
I. Press the Up and Dn arrow keys.
2. Press Start to begin.
6

USING THE NES SOFTWARE
The Chalkboard Chalkboard screens explain what to do in each Lesson. They also provideinteresting trivia about the material in that Lesson, and talk about yourprogress.
After reading a Chalkboard, press a button on your NES game controller tocontinue. Available functions appear at the bottom of the screen.
These Chalkboard functions match the buttons on the game controller asfollows:
A Begin the Activity for this Lesson.
B Go back to the previous Lesson
Select Go to the Options screen, which lets you jump between Lessons,hear the music for the current Lesson, or go to the Practice Room.
The Chapter and Lesson number appears as a Section number at the bottomright corner of the Chalkboard. When you finish for the day, this numbersays where you stopped. Use it to return to that Chapter the next time you useThe Miracle.
Note: If you have difficulty completing a Lesson, The Miracle providesChalkboards and exercises to help you overcome your problem. These OopsChalkboards do not have Chapter and Lesson numbers.
Chalkboard screen
7

USING THE NES SOFTWARE
Options Screen When you press Select from a Chalkboard screen, the Options screenappears, which has these options:
• Next Lesson Jump ahead to the next Lesson.
• Previous Lesson Redo the previous Lesson.
• Welcome Screen Go to the Welcome screen to change theChapter number or student age.
• Practice Room Go to the Practice Room.
• Listen to the Piece Listen while The Miracle demonstrates thepiece that you're learning to play. After thedemonstration, you automatically return to theLesson.
• Continue Return to the Lesson where you left.
To use the Options screen:
1. Use the Up and Dn arrow keys to move the yellow arrow to yourselection.
2. Press A to go to that selection.
Options screen

USING THE NES SOFTWARE
Activities The Lessons use eight different Activities:
• Finger Numbers/Note Names
• Practice Notes
• Steady Quarters
• The Shooting Gallery
• Practice Rhythms
• Roboman
• Sheet Music
• Flashcards
During all Activities except Flashcards, your NES game controller providesthe following options:
B Restarts the Activity at the beginning.
Start Pauses the Activity. Press Start again to continue.
Select Returns you to the Chalkboard for the Lesson.
See FLASHCARDS for information about that Activity's special NES controlleroptions.
9

USING THE NES SOFTWARE
Finger Numbers/ This Activity allows you to play without knowing how to read music. It isNote Names used only in the early Lessons, before musical notation is introduced.
The green arrow indicates which note to play. A blue X under a note meansthat you played that note incorrectly.
The onscreen keyboard matches the action of The Miracle keyboard. Whenyou press a key, the same key on the screen keyboard also appears to pressdown.
In some Lessons, finger numbers (and occasionally finger names) appear onthe keys of the onscreen keyboard.
Finger Numbers & Note Names
1 0

USING THE NES SOFTWARE
Practice Notes This Activity teaches the notes and fingering of a piece of music. Also use itto familiarize yourself with the hand position changes required to play thepiece.
Because the purpose of this Activity is to concentrate on playing the correctnotes and fingering, no set rhythm for the piece is provided. All notes appearon the staff as black circles.
A green finger number appears under the note you must play. This fingernumber does not advance until you play the correct note.
Grey brackets indicate points in the piece that require a different handposition.
Practice Notes
Steady Quarters This Activity is identical to Practice Notes except that the metronome isturned on. This provides practice making smooth transitions from one handposition to another. During this Activity, play one note per beat.
11
USING THE NES SOFTWARE
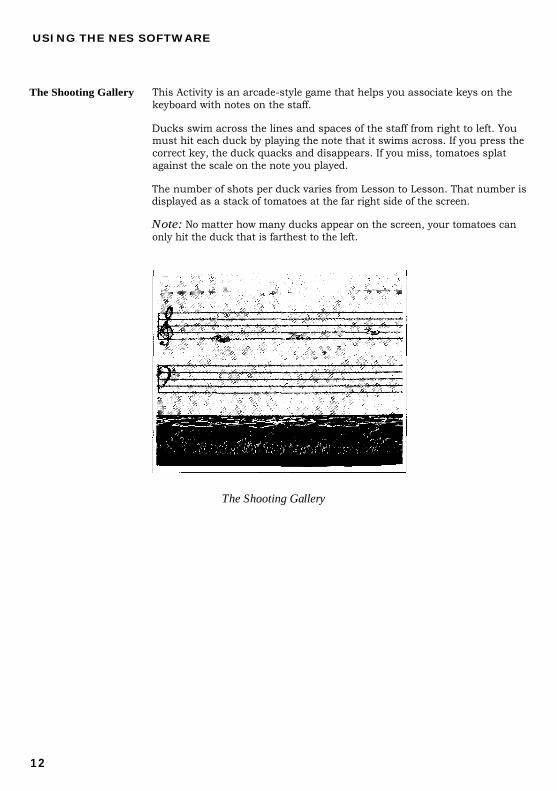
The Shooting Gallery This Activity is an arcade-style game that helps you associate keys on thekeyboard with notes on the staff.
Ducks swim across the lines and spaces of the staff from right to left. Youmust hit each duck by playing the note that it swims across. If you press thecorrect key, the duck quacks and disappears. If you miss, tomatoes splatagainst the scale on the note you played.
The number of shots per duck varies from Lesson to Lesson. That number isdisplayed as a stack of tomatoes at the far right side of the screen.
Note: No matter how many ducks appear on the screen, your tomatoes canonly hit the duck that is farthest to the left.
The Shooting Gallery
12

USING THE NES OFTWARE
Practice Rhythms This Activity is just for practicing rhythms. In it, you tap out rhythms usingonly one key, concentrating on when and how long you press that key.
Any single note on The Miracle keyboard may be used with this Activity.However, once selected, strike only that one key to tap out the rhythm.
When tapping out a rhythm to a two-handed piece, select a key on the left halfof the keyboard for your left hand, and on the right half of the keyboard foryour right hand.
The large numbers on the screen represent beats (ticks of the metronome). Insome Lessons, smaller numbers appear between the larger numbers. Theyrepresent subdivisions of each beat.
The yellow arrow moves one beat at a time. Since there may be more thanone note per beat, this is not necessarily the same as one note at a time.
The amount of time that you hold each note is indicated by a blue line, a noteof a specific time value, or both. Notes and lines that appear above the beatnumbers are played with the right hand. Notes and lines that appear belowthe numbers are played with the left hand.
Practice Rhythms
13
USING THE NES SOFTWARE
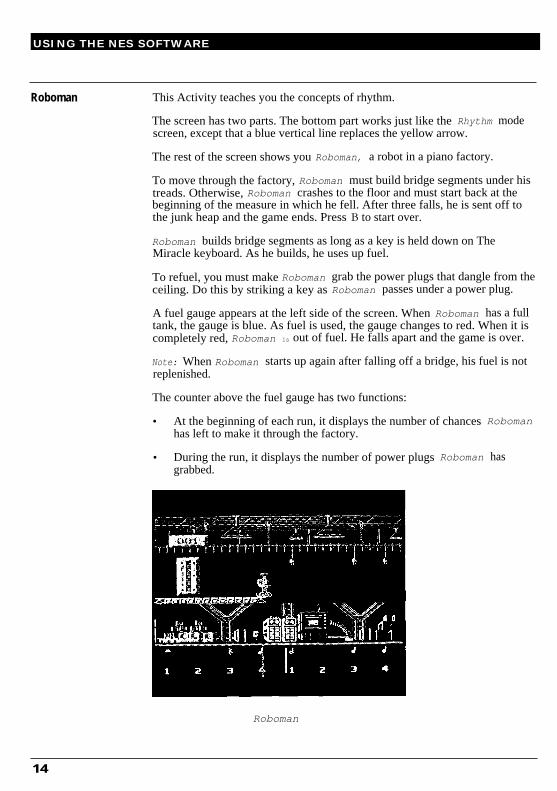
Roboman This Activity teaches you the concepts of rhythm.
The screen has two parts. The bottom part works just like the Rhythm modescreen, except that a blue vertical line replaces the yellow arrow.
The rest of the screen shows you Roboman, a robot in a piano factory.
To move through the factory, Roboman must build bridge segments under histreads. Otherwise, Roboman crashes to the floor and must start back at thebeginning of the measure in which he fell. After three falls, he is sent off tothe junk heap and the game ends. Press B to start over.
Roboman builds bridge segments as long as a key is held down on TheMiracle keyboard. As he builds, he uses up fuel.
To refuel, you must make Roboman grab the power plugs that dangle from theceiling. Do this by striking a key as Roboman passes under a power plug.
A fuel gauge appears at the left side of the screen. When Roboman has a fulltank, the gauge is blue. As fuel is used, the gauge changes to red. When it iscompletely red, Roboman is out of fuel. He falls apart and the game is over.
Note: When Roboman starts up again after falling off a bridge, his fuel is notreplenished.
The counter above the fuel gauge has two functions:
• At the beginning of each run, it displays the number of chances Robomanhas left to make it through the factory.
• During the run, it displays the number of power plugs Roboman hasgrabbed.
Roboman
14

USING THE NES SOFTWARE
Sheet Music This Activity presents music to you exactly as it would appear in sheet music.Sheet Music Lessons teach you to combine pitch and rhythm. Green arrowsindicate which note(s) you should play. As you play, the onscreen keyboardshows which keys you've pressed.
Sheet Music
15

USING THE NES SOFTWARE
Flashcards Flashcards test your understanding of what you've learned. All questions aremultiple choice. To answer them:
1. Use the Up and Down keys on your NES controller to move theonscreen arrow to your guess.
2. Press the A button.
If you guess wrong:
1. Use the Up and Down keys to try a different answer.
2. When you guess right, press the A button to move on to the next question.
Flashcards
16

USING THE NES SOFTWARE
The Practice Room In the Practice Room you can practice any piece of music in the course, usingThe Miracle's different Activities. It's a good idea to visit here often.Practice sharpens your skills so that you can tackle more advanced Lessons.
You get to the Practice Room from the Options screen.
Select a Piece
When you enter the Practice Room, you see the Select A Piece screen:
Practice Room: Select a Piece
The Level number next to each piece is the Chapter in which the piece isintroduced.
To select the piece you want to practice:
1. Use the Up and Down arrows on the NES controller, and positionthe yellow arrow next to:
• The piece you want to practice,
- or -
• Beside Next Screen to see a different menu of choices.
2. Press the A button to go to your selection.
17

USING THE NES SOFTWARE
To return to the Lessons:
1. Select Exit.
2. Press A.
After selecting a piece, the Practice Room menu appears.
Practice Room Menu
Hand Indicator The line below the words Practice Room indicates the hand you will practice:
• If the piece you selected was from a Lesson in which you used only yourright hand, this line says Right Hand.
• If the piece was from a left-handed Lesson, the line says Left Hand.
• If the piece was from a Lesson that worked with both hands, you maychoose to practice with your left hand, right hand, or both hands.
To choose your practice hand, use the Select button.
18

USING THE NES SOFTWARE
ToolworksOrchestra/SoloPerformance
The name and function of the first selection on the Practice Room menuchanges depending upon the piece of music you've chosen:
• Toolworks Orchestra appears when the piece is available with fullaccompaniment. This gives you practice playing with others.
• Solo Performance appears when the piece is played in the Lessonwithout accompaniment. If The Miracle played one hand for you in theLesson, it will also do it here.
The Activity used also depends upon which piece is selected:
• Finger Numbers/Note Names is used with pieces from Chapters 1-4.
• Sheet Music is used with all other pieces.
Other Activities You may also practice only the rhythm or only the notes of a piece byselecting one of these Activities:
Practice Rhythms.
Practice Notes.
You may also choose Roboman, Shooting Gallery, Select Another Piece,Return to Lesson, or Demonstrate the Piece.
These activities work the same way they do in the Lessons.
Demonstration Mode If you don't press a NES controller button at the title screen, the systemgoes into Demonstration mode. In this mode, The Miracle plays variouspieces from the course while displaying the different Activities. The wordDemo appears in blue at the bottom of the screen.
You may also enter this mode from the Practice Room to demonstrate aspecific piece. To do this, select Demonstrate The Piece from the PracticeRoom menu.
To exit Demonstration mode, press the Select button on your NES gamecontroller.
Select Another Piece Use this to select another song for practice.
Return to Lesson Use this to go back to the Lesson.
19

COMMON QUESTIONS AND ANSWERS
COMMON QUESTIONS AND ANSWERSHere are some commonly asked questions about running The MiracleKeyboard and Piano Teaching System on the Nintendo Entertainment System(NES). For additional information, see THE MIRACLE PIANO TEACHING SYSTEM
OWNER'S MANUAL.
Why don't I hear anything when I press a key on the keyboard?
• Check that the earphones aren't connected. When earphones areattached, the speakers on The Miracle are turned off.
• Check the volume. Make sure that at least 3 or 4 volume indicators are litup. Press the volume keys (AT) to change the volume.
• Check the power supply. Make sure it's plugged into the wall, and makesure the other end hasn't slipped out of the back of The Miracle.
• Make sure The Miracle is turned on.
How come nothing happens, when I turn on my NES?
• Check The Miracle cable. It must be plugged into NES ControllerPort #1. It won't work if it is plugged into Controller Port #2.
• Check The Miracle cartridge. Make sure it is fully inserted into theNES and pushed all the way down.
Make sure your TV is turned on, and that the brightness is high enough soyou see a picture.
Check your NES connections to your TV. If you're not sure howthings should be connected, look in the manual that came with yourNES.
Why can't I hear the metronome?
Check the volume on your TV. The metronome sound comes out of theTV, not out of The Miracle keyboard, so your TV volume must be highenough for you to hear it.
Check your NES. See if other games make noise. If they don't,make sure your NES is properly connected to your TV (see yourNES owner's manual).
Make sure you're supposed to hear a metronome. Some activities, likethe duck game or pitch practice, don't have a metronome sound.
Why can't I hear the metronome when I use the earphones?
The metronome sound comes out of your TV, not out of the Miraclespeakers and not out of the earphones. Make sure the TV volume is loudenough so you can hear the metronome while you are wearing yourearphones.
21
COMMON QUESTIONS AND ANSWERS
I pushed the Piano button, so why doesn't it sound like a piano?
• Look for a blinking light. If you find one, the keyboard is in librarymode, or in one of the preset modes. Hold down the Select button (onthe lower right) and press the Scroll Down button. Then try the Pianobutton again.
• The keyboard may be split (playing one sound for the notes below middleC and a different sound for the notes above). Press the Piano buttonagain, by itself.
Why doesn't the Foot Pedal work?
• Make sure the foam side is facing up.
• Make sure the connector is fully inserted into the back of The Miracle.
The keyboard makes noise, so why isn't the program respondingto what I play?
• Make sure The Miracle cable is properly connected, both to The MiraclePort on the back of the keyboard and to NES Controller Port #1.
• See if The Miracle is demonstrating something for you. Look for theDemo icon at the bottom of the screen. If so, wait for a Lesson where youplay.
The Miracle is hooked into my stereo, so why does the sound stillcome out of The Miracle speakers?
• Plugging your stereo into the RCA connectors on the back of The Miracledoesn't disable The Miracle speakers. To turn off the speakers, plug inthe headphones.
The Miracle is hooked into my stereo, so why doesn't anythingcome out of my speakers?
Make sure The Miracle volume is set high enough. The Miracle volumecontrols the volume that your stereo gets.
Check the RCA connectors. Make sure each is plugged into the rightplace. For more information, see ABOUT THE KEYBOARD in THE MIRACLE
PIANO TEACHING SYSTEM OWNER'S MANUAL.
• Make sure your stereo is switched to the source that The Miracle ishooked to (usually AUX).
Why don't I see more pieces to select in the Practice Room?
• Select the second-to-last item on the screen and you'll see another screenof choices.
22

I NDEX
INDEXAabout the keyboard
Ggame controller 5-6
See your Owner's Manual.connecting the 3
Activitiesgame controller options 9
with Activitieswith Chalkboard
97
in the Lessons 9 with Flashcards 16in the Practice Room
adult level19
HSee age level.
age level hand selection 18
changing 6, 8 Head Phone 1-2
selecting adult or child 6 jack 2Audio Out 2 problems with 21
See also your Owner's Manual.
C icartridgeChalkboard screens
1, 47
InputSee also your Owner's Manual.
2
Chapterchanging the 8
instrument indicators 2, 4
selecting thechild age level
See age level.
6 Jjack
common questions and answers 21-22 Foot Pedal 2
connecting The Miracle 3-4 Head Phone 2See also your Owner's Manual.
DDemonstrate the Piece 19
KDemonstration mode 19 keyboard 1-3
duck game connecting to NES 3
See Shooting Gallery. overlay IPower Supply 1-2
E rear connectors 2See also your Owner's Manual.
earphones 1-2, 21See also head phone. L
F Lessons
Flashcards 16jumping to next 8
Foot Pedal 1-3jumping to previousreturning to 8,
819-20
connecting the 3listening to music 8, 19
jack 2problems with 22
23

I NDEX
M practicingnotes 11, 19
Manuals 1 rhythms 13, 19Menus problems 21-22
Options screen 8 earphones 21Practice Room 18 Foot Pedal 22
metronome 13 metronome 21problems with 21 Piano button 22
MIDI 2 Practice Room 22Miracle Cable 1-3 program 22Miracle Port 1-3 stereo 22
See also The Miracle. NES 21Musical Instrument Digital Interface volume 21-22
See MIDI. programproblems with 22
N starting the 4
NES 1-5Activities controls 9 0connecting the 3 questions and answers 21-22Flashcards controls 16 Quick Start Card 1game controller 3, 5-6 quiz screensproblems with 21-22starting the 4
See Flashcards.
Nintendo Entertainment System RSee NES.
notation 15 rear connectors 2
See Sheet Music. returning to Lessons 19
note rhythm practices 13, 19
names 10practices 11, 19
Roboman 14, 19
S0 Screen types
On/Off Switch 2, 4 Welcome 5
Oops Chalkboards 7 Chalkboard 7
Options screen 8 Oops 7Options menu 8
P Flashcards 16Select a Piece 17
package contents 1 selectingPiano button problems 22 Chapters 6, 8
See also your Owner's Manual pieces 17, 19power 1-4 student age level 6, 8
connector 3 setup 3-4supply 1-2 See your Owner's Manual.switch 4 Sheet Music 15
Practice Notes 11, 19 Shooting Gallery 12, 19Practice Rhythms 13, 19 SoftwarePractice Room 17-20 starting the 4
Activities 17 using the 5-20problems with 22 Solo Performance 19Select a Piece 17 staff notation 15selecting hands 18 starting the program 4
24

I NDEX
Steady Quarters 11stereo problems 22
See also your Owner's Manual.student age
changing the level 6, 8selecting the level 6
switch 2, 4
TThe Miracle
Activities 9Cable 1-3cartridge 1, 4connecting 3-4package contents 1Port 2-3problems with 21-22rear connectors 2using the software 5-20See also your Owner's Manual.
The Miracle Piano Teaching SystemSee The Miracle.
Toolworks Orchestra 19
Uusing the software 5-20
Vvolume
adjusting the orchestra 8indicators 2, 4problems with 21-22See also your Owner's Manual.
WWarranty Registration Card I- 2Welcome screen 5, 8
25

The Coach House • Hooklands Estate • Scaynes Hill • West Sussex RH17 7 NG • Tel: 0444 831 761