The Little French Bakery Cookbook - Above the...
15
The Little French Bakery Cookbook SWEET & SAVORY RECIPES AND TALES FROM A PASTRY CHEF AND HER COOKING SCHOOL Susan Holding Skyhorse Publishing
Transcript of The Little French Bakery Cookbook - Above the...

The Little French Bakery
Cookbooksweet & savory recipes and tales from a
pastry chef and her cooking school
Susan Holding
Skyhorse Publishing

CONTENTS
Chapter One – Let’s Get Started
Meet Susan xxStory: My First Days in Paris xx
Equipment for Your Kitchen xxKitchen Set-up xx
Story: Using a scale at School xxWeights and Temperature Conversion Chart xx
Chapter Two – Must Have Recipes and TechniquesHow and Why to Caramelize Onions xx
Slicing for Caramelized Perfection xxWhy do you need them? xx
Tart Crust xxStory: Basic Pastry Final Exam xx
Perfect Cheese Course xxHow to Make Great Stock xxCrème Fraîche xxOven Roasted Cherry Tomatoes xxPoached Pears and Tinned Fruits xxVanilla Beans xxNutmeg – That certain “Je ne sais quoi” xx
Chapter Three – Appetizers and Starter CoursesBaked Goat Cheese Salad xxCaramelized French Onion Dip xxSummer Mango Salsa xxQuick Cheese Crackers xxGoat Cheese Butter and Radishes xxSun Dried Tomato Torta xxPuff Pastry Salmon Puffs xxWarm Olives xx

Story: My Dad’s Favorite Dessert xxStrawberry Mousse Cake (Charlotte) xxTiramisu xxEnglish Trifle xx
Desert Sand Sponge Cake (Victoria) xxStory: Every Christmas Eve xx
Lemon Cheesecake with Fresh Berries xxStory: My Very First Cheesecake and Fancy Mixer xx
Profiteroles xxTart Tatin xx
Chapter Six – Cookies, Bars and BrowniesCranberry Oatmeal Chip Cookies xxMolasses Cookies xxKitchen Sink Cookies xx
Story: Lessons from Grandma on Making Cookies xxSugar Cookies xxDiamond French Butter Cookies xxOur Best Brownie xxToffee Bars xxPecan Crescents xx
Story: Did You Always Like to Bake? xxRaspberry Coconut Bars xx
Chapter Seven – CakesCarrot Cake xxThe Perfect Birthday Chocolate Cake with Chocolate Glaze xxConfetti Angel Food Cake xx
Story: My Favorite Birthday Cake xxMarry Me Chocolate Cake (Almost flourless) xxBanana Cake with Cream Cheese Icing xxOrange Caramel Layer Cake xx
Chapter Eight – Big Meals for Big DealsBeef Tenderloin with Two Sauces xx
Story: Getting to Know Beef xx
Sacristain (Puff Pastry Sticks) xxSpicy in the Pan Shrimp xx
Story: My First Big Dinner Party xxMussels with Garlic and White Wine xx
Story: Let’s Forget Dinner and Eat Mussels xx
Chapter Four – BreadsFarmhouse White xx
Story: My First Bread xxBaguettes xx
Story: My Friend Kim’s Bread Phobia xxFougasse xx
Story: Bread Night and Pretzel Bread xxHoney Whole Wheat Bread xxPissaladiere xxSpicy Cheese Bread xxPizza Dough – Thin Crust xxPizza Dough – All American xxFamily Feast Dinner Rolls xxFeel the Love Bread Sticks xxGrisini Bread Sticks xx
Chapter Five – Pastry 101Pastry Creme (Crème Pâtissière) xx
Story: March to the Poubelle xxPâte a Choux xx
Story: St. Honore and the Patron Saint of Pastry Chefs xxÉclair and Variations xx
Story: Olive and Dexter xxLadyfingers xxPerfect Whipped Cream xxChocolate Caramel Mousse xx
Story: The Most Requested Dinner Party Dessert xxMadeleines xxWeekend Pound Cake xxMerengue (Swiss, French, and Italian) xx
Mushrooms, Kisses and Fairy Fingers xxSchaum Torte xx
Fresh Strawberry Tart xxStory: Nappage – A Noun or Verb? xx
All American Apple Pie with Crumble Top xxTriple Berry Two Crust Pie xxBerry Galette xxChocolate Ganache Tart xxLemon Curd Tart with Berries xx
Chapter Thirteen – Comfort FoodsMeatloaf for Company xxBerry Cobbler xxFour Cheese and Chicken Enchiladas xxWinter Sunday Football Chili xxGary’s Egg Scramble xxHerb Oil for Pizza and Dipping xxCaramel Sauce xxCheese Fondue xxDad’s Thanksgiving Dressing xxHow to Roast a Chicken xx
Boeuf Bourguignon xxStory: The Heart of Paris xx
Oven Roasted Brussel Sprouts and Cauliflower xxCatering Chicken xx
Story: My First Catering Event xxYes, You Too Can Make Ribs xx
Chapter Nine – SoupsSoup de Poisson with The Show xx
Story: Your First Night in Paris xxOnion Soup xxButternut Squash with Apple xxTortilla Soup xxTomato Bisque xx
Chapter Ten – The Breakfast ClassMoravian Sugar Cake xx
Story: What’s a Moravian and Mashed Potatoes? xxBig Fluffy Cinnamon Rolls xxThe Best Icing xxCream Cheese Coffee Cake Slices xxGluten Free Strawberry Rhubarb Coffee Cake xxCooking School Granola xxCinnamon Coffee Cake xx
Chapter Eleven – Our Family FavoritesAntipasto Pasta Salad xxJambalaya with Spicy Sauce xx
Story: Meeting My First Famous Chef xxRisotto xx
Chapter Twelve – Tarts and PiesTarte au Pomme xxFrangipane Tart with Pears xxMushroom and Caramelized Onion Tart xx
The Little French Bakery Cookbook 1
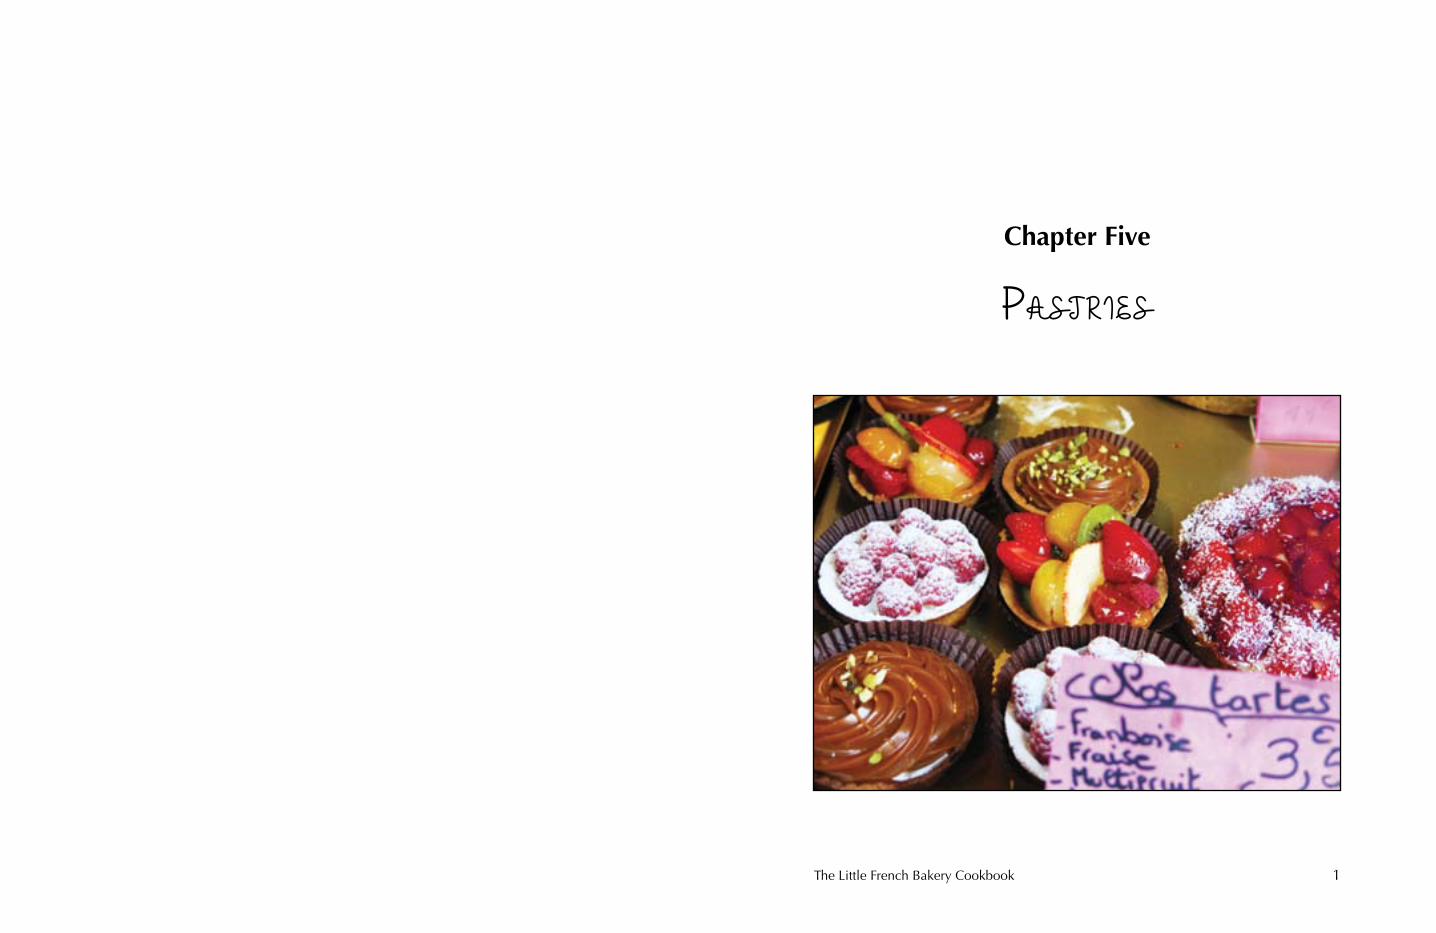
Chapter Five
Pastries
2 The Little French Bakery Cookbook The Little French Bakery Cookbook 3
for pastry chefs, (too much weighing and measuring) let alone pastry students in
their first course.
It was early in the course, and we had seen pastry cream prepared, and made it ...
once. The chef suggested we divide the main recipe and each make a component
as if we were working together in a restaurant. One or two people would make a
sponge cake, another the mousse, and another the crème pâtissière. This sounded
very reasonable. We quickly divided the duties between the members of our small
group, carefully increasing the amounts so each of us would have the perfect
amount for our individual dessert.
We carefully completed our mise en place (gathered our ingredients) and went
to work. Our Chef walked about the room watching us, and helping with any
questions and offering help with locations of ingredients. We had the feeling there
were about a million other places he’d rather be, and he had more or less drawn
the short straw to teach late that night. Every time he passed by my work station,
I got a whiff of his amazing cologne and a stern glance that made me even more
nervous. My French was caveman at best, so as he’d pass by, I’d muster a “bonjour
Chef” and offer a nice Wisconsin smile. He smiled back, but looked like he had just
tasted something sour.
My contribution to our group was the pastry cream. We needed four times the
recipe for four students so I had to separate sixteen eggs. It went fine. No broken
yolks, and no spills. I gathered the milk, sugar, flour, cornstarch and eggs and
headed over to the stove. I combined the ingredients in the order and technique
from my notes and memory. Or so I thought. I stood at the cooktop stirring and
stirring, smiling away at the Chef as he approached. He stood beside me, and
watched me stir. I had nothing to contribute to a conversation so I kept stirring and
nervously smiling. Finally, he broke the silence with “Qu’est ce que c’est?” I ‘m
sure I looked at him with a blank, panicked stare. “Qu’est-ce que tu fais?” (what
are you making?), he asked. I thought to myself, what is wrong with him? Surely
he’s seen someone make pastry cream before. “Crème pâtissière, Chef”, I said,
hoping that he’d move on. But no. Then came the moment. The belly flop in front
of your swimming class moment. In one motion, he flicked his head up and to the
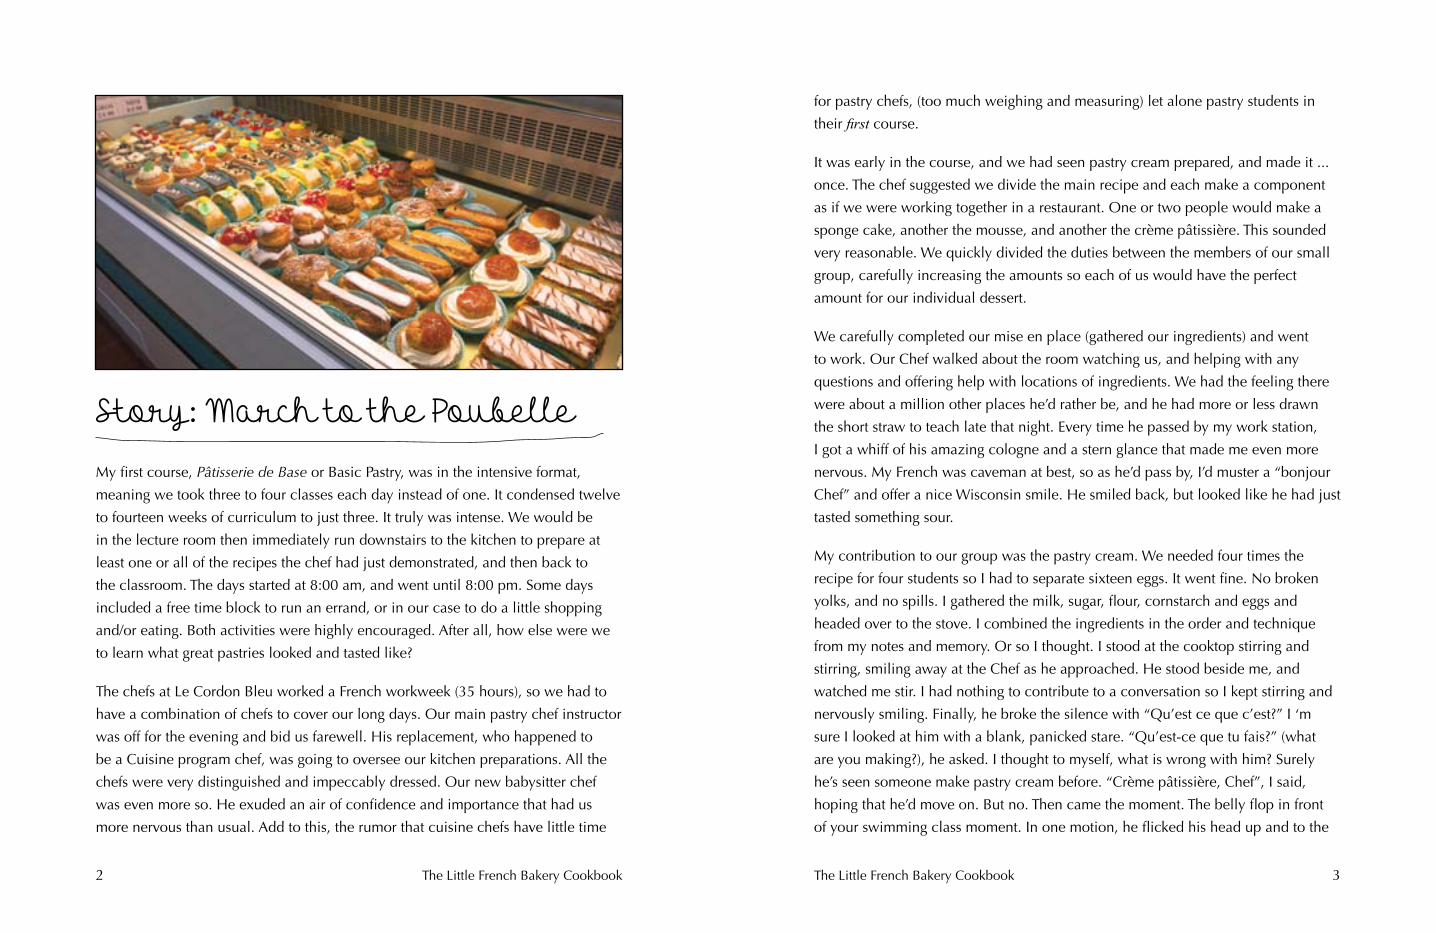
Story : March to the Poubelle
My first course, Pâtisserie de Base or Basic Pastry, was in the intensive format,
meaning we took three to four classes each day instead of one. It condensed twelve
to fourteen weeks of curriculum to just three. It truly was intense. We would be
in the lecture room then immediately run downstairs to the kitchen to prepare at
least one or all of the recipes the chef had just demonstrated, and then back to
the classroom. The days started at 8:00 am, and went until 8:00 pm. Some days
included a free time block to run an errand, or in our case to do a little shopping
and/or eating. Both activities were highly encouraged. After all, how else were we
to learn what great pastries looked and tasted like?
The chefs at Le Cordon Bleu worked a French workweek (35 hours), so we had to
have a combination of chefs to cover our long days. Our main pastry chef instructor
was off for the evening and bid us farewell. His replacement, who happened to
be a Cuisine program chef, was going to oversee our kitchen preparations. All the
chefs were very distinguished and impeccably dressed. Our new babysitter chef
was even more so. He exuded an air of confidence and importance that had us
more nervous than usual. Add to this, the rumor that cuisine chefs have little time

4 The Little French Bakery Cookbook The Little French Bakery Cookbook 5
To this day, I think of him every time I make pastry cream. It’s not good, it’s great,
and I have him to thank. Merci beaucoup, Chef.
While I can’t stand beside you, I can walk you through the steps of making crème
pâtissière. Perfect pastry cream.
side, made THE tisk sound, and picked up my saucepan. “Suivez-moi”, he said. I
looked behind me where my classmates stood paralyzed watching and hoping one
could translate. “He wants you to follow him”, one piped up. So off we went from
one end of the kitchen to the other. It felt like the distance of a football field, but it
was really about fifty feet. I was about three steps behind, wondering where could
we be going. We arrived at our destination, a gleaming stand holding a perfectly
attached garbage bag. Why couldn’t we just use the garbage can at our end of the
room? He stepped on the foot pedal with his gorgeous French, perhaps Italian shoes
and up went the lid. He stretched out his arms, lifted the pan over his head and
slowly dumped the gooey, wallpaper paste mess from the pan into the garbage. My
pastry cream was poubelle. Garbage.
“Répéter,” he said as he put the pan in a nearby sink. I made the walk of shame
back to my workstation. My friends were pale, very sympathetic and trying not
to make eye contact. They had busied themselves with things to do that required
crouching behind the workstation on the other side. I willed myself not cry. After
all, he didn’t yell and scream. But now what? I had no idea what I had done
wrong.
“Je vais vous aider à faire de la crème pâtissière”, he said. I will help you make
pastry cream. I gathered a new set of ingredients. He stood beside the entire time.
Part of me wanted to crawl in a hole, and the other part felt like I had a pro at my
side who wasn’t going to let me screw this up again.
We went to the stove together. I don’t know what I did wrong the first time and
never will. The second batch required very little time at the stove. “Aller vite,” go
fast, he said, motioning with his arms so I knew just how fast to go. Our pastry
cream was perfect. He held the plastic wrap-lined pan as I plopped the rich,
dreamy vanilla custard into the pan. “Vous avez fait un bon travail ce moment.” You
did a good job that time. No hugs and back slaps, but a slight warmth in his eyes to
let me know it was okay.

6 The Little French Bakery Cookbook The Little French Bakery Cookbook 7
Crème Pâtissière (Pastry Cream)Ingredients:
1 liter milk (whole or 2%)
1 vanilla bean, seeds scraped (see Chapter 1)
8 egg yolks from large-sized eggs
250 grams sugar (1 1⁄3 cups), divided
60 gm all-purpose flour (2⁄3 cups)
60 gm cornstarch (6Tbsp + 1 tsp)
1. Line a 13 x 9 inch baking pan with plastic wrap. Make sure the ends of the wrap extend at least eight to ten inched past the ends of the pan. Set aside. Be sure you have a space for the pan in your refrigerator. The bottom of the refrigerator is best since it’s the coolest. Be sure it’s not too close to any perishable items such as mayonnaise.
2. Pour the milk and one half of the sugar into a large sauce pan. Add the vanilla seeds and pod. Heat the milk mixture to a low simmer. There should be steam and small bubbles. Using a skimmer or spatula, remove the vanilla bean pod from the milk.
3. While the milk is heating, place the egg yolks in a medium/large bowl. Whisk to loosen. While gently whisking, add the remaining half of the sugar.
4. Whisk until thoroughly combined. Whisk in the flour and cornstarch until com-bined. The mixture will be stiff.
5. Make sure the pastry cream has your undivided attention. Have your lined pan within reach. This is the grand finale!
6. At the stove, carefully pour one third of the milk into the bowl containing the egg mixture. Whisk/stir well to loosen. Return the saucepan to the heat. Heat briefly to a rolling simmer. Pour the milk/egg mixture from the bowl into the saucepan whisking constantly and very quickly taking care to whisk in the bot-tom corners of the pan. The mixture will quickly become pastry cream.
7. Whisk over heat just until you see a large bubble “plop” up to the surface. Whisk as you pour the cream into the plastic-lined pan.
8. Cover the pastry cream with the plastic wrap which is extending over the ends of the pan. Place in the refrigerator for at least three hours, or until cool throughout.

8 The Little French Bakery Cookbook The Little French Bakery Cookbook 9
Olive and Dexter
Shortly after I started teaching cooking classes, I added birthday party classes for
small bakers. Most of the younger children don’t bake in class. Instead we decorate
small cakes together. Each child decorates a two layer six inch cake. I decorate
a big cake for the treat after class. The little six inch cakes are filled with icing,
stacked together, frosted, decorated more, then placed carefully onto a cake board
with a fancy doily then into a real cake box tied with a bow.
Some of my little cake decorators are now high school graduates, college graduates,
and are even brides and grooms. Each party has fond memories.
One of my parties didn’t involve cake. Meet Olive. She was turning ten years
old and didn’t have an interest in decorating cakes. She wanted to bake.
Not just anything, she wanted to make real French pastries. Her mom and I
discussed options and passed a few ideas past Olive. Eclairs were a hit. The day
of the party arrived. Olive and her friends were bright, happy as could be, and
adorable. Trailing behind with his dad was Dexter, Olive’s little brother. The
plan was to have Dexter and his dad go off on an adventure while the girls and
mom baked and celebrated the big day. Dexter soon learned of his imminent
departure and had other ideas in mind. He quickly dissolved into tears. Weepy
to be exact; begging to stay. My heart was melting. The adults were making eye
contact trying to think of a plan. Wanting to keep Olive’s party little-brother-
free, and feeling his pain, I made the proposal. What if Dexter stays and works
as my helper? He won’t bake with the girls, but he’ll stand beside me and help
me. Olive seemed okay with the idea, and Dexter was all in. We all put on our
aprons including four year old Dexter. As I explained how to make pâté à choux,
whipped cream and pastry cream to the girls, Dexter stood at my side holding
spoons, spatulas, and beaming as my class assistant. The pastries were beautiful.
The party was a great success. A few days later an envelope arrived in the mail.
It was a note from Dexter in his best four year old penmanship. It was many
years ago, and I still have his note. We had a great day, and I know I’ll remember
the day, and I hope he and Olive to do too. Make your own party with some
delicious eclairs!

10 The Little French Bakery Cookbook The Little French Bakery Cookbook 11
Pâté à ChouxMakes about 24 4-5 inch eclair shells
Ingredients:
250 grams water (1 cup)
100 gram butter, cut into pieces (1 stick minus 1 Tbsp.)
20 grams sugar (12⁄3 Tbsp.)
5 grams salt (1 tsp.)
150 grams all-purpose flour (11⁄2 cups)
4 large eggs
1. Preheat your oven to 375 degrees F.
2. In a medium saucepan, add the water, butter, salt and sugar. Heat until the butter melts and the water is steamy and at or just about to boil.
3. Turn off the heat for a moment, and add the flour all at once. Place the pan back over low heat. With a wooden spoon (or similar spoon), stir quickly to combine. The mixture will pull completely away from the sides of the pan and looks a lot like mashed potatoes. Continue stirring until a film of dough appears on the bottom of the pan, about 2-3 minutes.
4. Transfer the dough to a mixing bowl. Stir in one egg at time. Be sure to incorpo-rate the eggs completely before adding another. Stir until the mixture is smooth and glossy. Be careful not to add all the eggs. You may not need all four. The choux should slowly fall from the spoon, similar to thick lava.
5. Transfer the choux paste to a piping bag fitted with a 1⁄2 inch open tip. Line a baking sheet with a silicone mat or parchment paper. Using a ruler or pencil as a guide, pipe 1⁄2 – 3⁄4 inch wide by 4 inch long lines of choux paste.
6. When all the dough has been piped, whisk the remaining egg and brush on the dough. Be very careful not to let the egg drip over the edge of the dough and onto the baking sheet. This may keep the dough from fully puffing in the oven.
7. Then, dip a fork in a cup of water and run the back of the tines gently lengthwise down the dough.
Tip! If you stick your index finger in the dough, swirl it around and pull it out,
the dough should like like a bird’s beak off the end of your finger. Most of the
time, I only need to add three to three and a half eggs.

12 The Little French Bakery Cookbook The Little French Bakery Cookbook 13
Strawberry or Raspberry Mousse Cake (Charlotte)Makes one Charlotte
Ingredients:
One recipe Ladyfinger Sponge cake
300 gm frozen fruit puree
30 gm lemon juice
100 gm sugar (1⁄2 cup) –or to taste
4-5 gelatin leaves (3 1⁄4 tsp powdered gelatin)
450 gm heavy cream (1 pint)
Fresh berries for garnish
1. Place the gelatin leaves in cold water to soften. If using powdered gelatin, dis-solve in 1⁄4 cup cold water.
2. Whip the cream to medium peaks and place in the refrigerator.
3. Prepare the ladyfinger sponge cake as in the Chocolate Caramel Mousse recipe.
4. In a saucepan, place 1⁄2 of the fruit puree, lemon juice and sugar.
3. Heat until the sugar and puree has melted. Squeeze the water from the gelatin leaves and place in the warm mixture. If using powdered gelatin, add the dis-solved gelatin & water to the saucepan.
4. Mix well to melt and incorporate the gelatin thoughout the mixture. Cool slightly.
5. Place the remaining cold puree in a large bowl. Mash with a fork to break up any large frozen pieces.
6. Add the warm puree mixture to the cold and mix. The mixture should begin to thicken. Allow the mixture to continue to cool (but don’t place in refrigerator), until thickened to the texture of loose pudding.
7. Fold in 1⁄3 of the whipped cream to lighten the mixture. Continue adding and folding in the whipped cream until for mousse is well combined.
8. Spoon the mousse into the ladyfinger ring. Add a layer of sponge trimmings or a disk of sponge cake to help fill the middle, then fill to the top with the remain-ing mousse. Smooth with an offset spatula. Or, spoon into small dessert bowls. Garnish with fresh fruit. Place in refrigerator until ready to serve, or two hours. This will allow the gelatin to completely set the mousse.
8. Place the baking sheet in the oven and bake for 20-25 minutes until the pas-try is golden brown. The creases in the pastry should also be golden brown. If under-baked, the puffs can collapse, or be wet and doughy on the inside.
9. Remove the pastry from the oven and immediately transfer to a wire rack to cool. If you are planning to make eclairs, poke the bottom of the pastry with the end of a clean small paint brush, or skewer in two places, about 1⁄3 from each end.
10. When cool, fill a pastry bag fitted with a narrow tip. Insert the tip into the holes you made in the bottom and gently fill with cream. Don’t overfill. You should just feel a change in the weight of the pastry. Place the pastry back on the wire rack until ready to dip.
11. Prepare the chocolate glaze. Hold the eclair on the side, and press the top into the chocolate. Lift from the chocolate, still upside down, wiping against the edge of the bowl to catch any excess. Carefully turn the eclair over and place in a paper pastry cup or onto a serving platter. Refrigerate until ready to serve. Serve well chilled.

14 The Little French Bakery Cookbook The Little French Bakery Cookbook 15
Madeleines
Madeleines instantly take me to Paris. The ingredients are simple and combine to
make this sweet little cake. Left open to the air, they’ll become crunchy and more
like a cookie. I believe the second bite is always the best. Many cafes in France
serve a petit madeleine beside your demitasse cup. The waiters at Restaurant
Benoit have been known to appear at the end of a meal with a pan of freshly
made madeleines. A sweet treat from the kitchen. Look for madeleine pans at your
favorite kitchen supply shop.
Makes 24 large or 48 small madeleines
Ingredients:
200 g butter (14 Tbsp), plus some for buttering the madeleine pans
4 large eggs
170 g granulated sugar (3⁄4 cup plus 2 Tbsp)
1 pinch salt
10 g honey (1⁄2 Tbsp)
5 g baking powder (1 tsp)
180 g flour (1 3⁄4 cup plus 1 Tbsp)
Confectioners’ Sugar for dusting
1. Preheat your oven to 350 degrees F. With a pastry brush, brush the pan with softened butter; just in the recessed parts where the madeleines will be. Dust with flour, and tap out any extra.
2. In a clear container, melt the butter and allow to rest until the solids have settled to the bottom.
3. Whisk the sugar and eggs together for at least five minutes, until they are light and pale yellow.
4. Add the salt and honey.
5. Fold in baking powder and flour.
6. Carefully pour in the butter, keeping the milk solids back. Fold to combine.
7. Place the bowl in the refrigerator for about twenty minutes to firm the batter.
8. When the batter is cool, spoon it into a pastry bag fitted with a 1/2 inch open tip. If you don’t have one, you can use a plastic zippered bag, with

16 The Little French Bakery Cookbook The Little French Bakery Cookbook 17
one corner snipped off. Pipe a strip of batter down the center 1/3 of each indentation.
9. Place in the oven and bake for 6-8 minutes or until puffed and golden brown. The madeleines should spring back when lightly touched.
10. Remove the pans(s) from the oven, and immediately rap the edge of the pan on the work surface to knock the cakes from the pan.
11. Transfer them to a cooling rack. If desired, top with sifted confectioners’s sugar when cool.

18 The Little French Bakery Cookbook The Little French Bakery Cookbook 19
Salted Caramel Apple Cheesecake TartServes 8-10
When the weather turns cool and fall is in the air, there’s nothing better than
caramel and apples. Paired with cheesecake and a crunchy graham crust, you’ll
have just the dessert for an autumn dinner or pumpkin carving party.
For the crust:
1 pkg graham crackers (about 12 full crackers) crushed into crumbs
3 Tbsp unsalted butter, melted
1⁄4 tsp salt
1⁄2 tsp vanilla extract
1⁄4 cup granulated sugar
For the cheesecake filling:
1 pound cream cheese (any assort-ment of full or low fat), at room temperature
1 cup granulated sugar (192 gm)
1 tsp vanilla extract
1 Tbsp all-purpose flour
1⁄2 tsp salt
2 large eggs
1 large egg yolk
2 Tbsp heavy cream or sour cream
1-2 Golden Delicious or Granny Smith apples
1-2 Tbsp granulated sugar (for sprin-kling on the apples)
a few dashes of cinnamon
For the caramel layer:
1 1⁄2 cups granulated sugar (288 gm)
1⁄2 cup water
1 cup heavy cream
1⁄2 cup granulated sugar (96 gm)
2 Tbsp unsalted butter
Sea salt flakes for garnish

20 The Little French Bakery Cookbook
1. Preheat your oven to 350 degrees F. Line an 8 inch round cake pan lined with foil. The foil should extend slightly over the edge of the pan. Spray the foil with cooking spray or lightly oil.
2. Mix all the crust ingredients together until they feel like wet sand. Press into the bottom of the cake pan. Bake for 10 minutes, remove and cool while you prepare the filling. Keep your oven on.
3. With a mixer, beat the cream cheese to loosen, then add the sugar. Beat until smooth. Be sure to scrape the bowl to combine well.
4. Add the eggs, one at a time, mixing well after each addition. Add the cream, salt, flour and vanilla and beat. Pour the cheesecake mixture onto the crust.
5. Peel and core the apple. Cut the apple in half top to bottom, then make thin slices (vertically is easiest). Try to make the slices all one thickness if you can. Layer the slices on top of the cheesecake in two concentric rings. Sprinkle with sugar and cinnamon.
6. Place in the oven and bake for 15 minutes. Reduce the oven heat to 300 degrees and bake for an additional 15 minutes or until the cheesecake feels firm to the touch. If apples begin to brown too much, cover the pan with foil.
7. Remove from the oven, to a cooling rack while you prepare the caramel.
8. In a deep saucepan, add the water and the sugar. Heat over medium/high heat. At the same time, in another saucepan, heat the cream and 1/2 cup sugar to a simmer.
9. Continue cooking the sugar and water mixture without stirring until the mix-ture is a medium amber caramel color. Carefully pour the cream mixture into the caramel. Add the cream with caution. The mixture will bubble, sputter and steam. Stir gently to dissolve any caramel bits. When the bubbling has sub-sided, transfer the caramel into a heat proof bowl. Stir in the butter one table-spoon at a time.
10. Pour the caramel onto the apples in a thin layer. You will not use all the cara-mel. Reserve some for drizzling at the table. Allow the dessert to cool com-pletely. Lift the tart from the pan using the foil to lift. Gently peel the foil away from the sides and slide a plate under the crust.
11. When ready to serve, sprinkle with sea salt flakes. Store the cheesecake in the refrigerator.


![INSIDE THE JEWISH BAKERY - ERRATA (Updated 8/24/2014) · INSIDE THE JEWISH BAKERY - ERRATA (Updated 8/24/2014) "[No cookbook] is perfect. Even [Julia Child's] iconic ... ERRATA –](https://static.fdocuments.in/doc/165x107/5f0609c27e708231d415fb8a/inside-the-jewish-bakery-errata-updated-8242014-inside-the-jewish-bakery-.jpg)