THE LAB ONLINE LESSON GUIDE (Junior)
25
THE LAB ONLINE LESSON GUIDE (Junior) CONTENTS 1. What do You Need for the Lesson 2. How to install Lego Ev3 Mindstorm 3. How to Join a Lesson 4. How do You Proceed with the Lesson 5. How to Share Your Screen
Transcript of THE LAB ONLINE LESSON GUIDE (Junior)

THE LAB ONLINE LESSON GUIDE
(Junior)
CONTENTS
1. What do You Need for the Lesson
2. How to install Lego Ev3 Mindstorm
3. How to Join a Lesson
4. How do You Proceed with the Lesson
5. How to Share Your Screen

6. How do You Test Your Code
7. How do You End the Lesson
1. What do You Need for the Lesson • Laptop with built-in/external camera and microphone
• Chrome browser installed
• Ideally headset with microphone, if not, a quiet room would be required
• Email invite or the link to access the lesson
2. How to install Lego Mindstorm EV3 • Download Lego Mindstorm EV3 via https://www.lego.com/en-
us/themes/mindstorms/downloads
• Scroll down to the “Desktop Software” section of the screen. (Do Not Download from
the “Apps” section – these are mobile device only)
• For mac user please download the mac version
• For windows user, please download the windows version
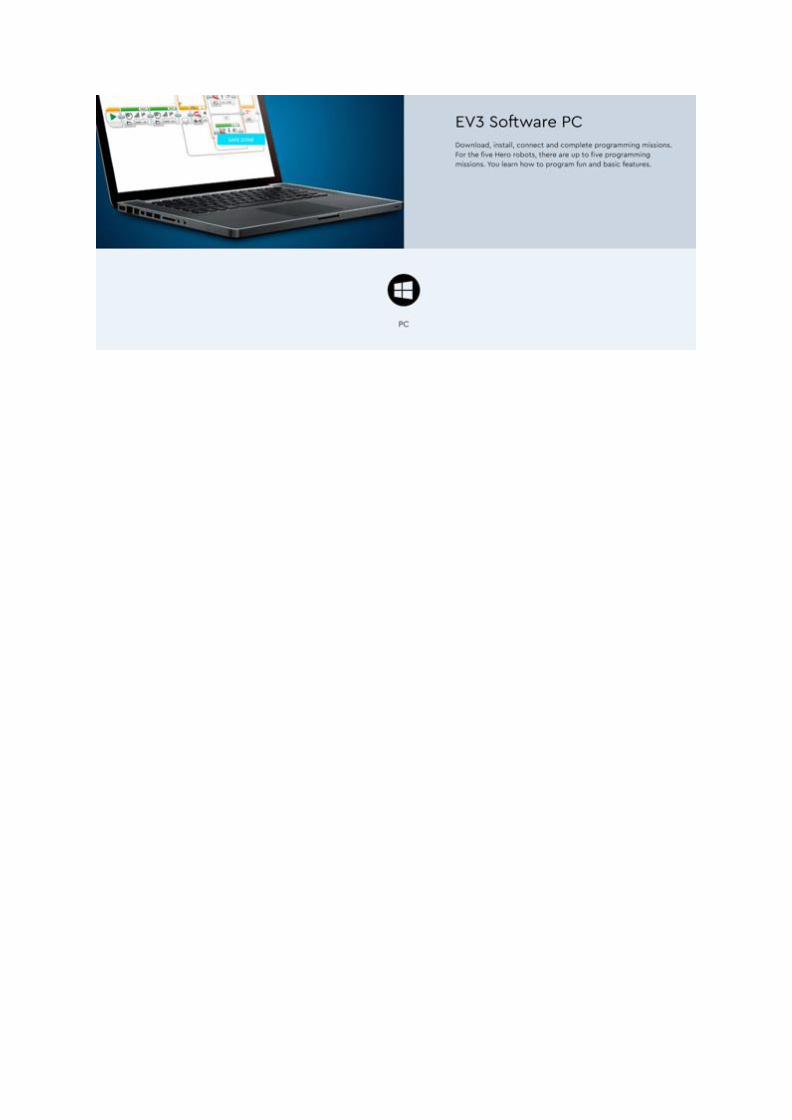

• Please download Gyro sensor block and Ultrasonic block
• Double click and install the Lego Mindstorm EV3
• Wait for the extraction to complete

• Once extraction is completed, click on “Next”
• Please select on I accept the above 2 License Agreement before clicking on “Next”

• Please select on I accept the above 2 License Agreement before clicking on “Next”
• Wait for it to complete the installation
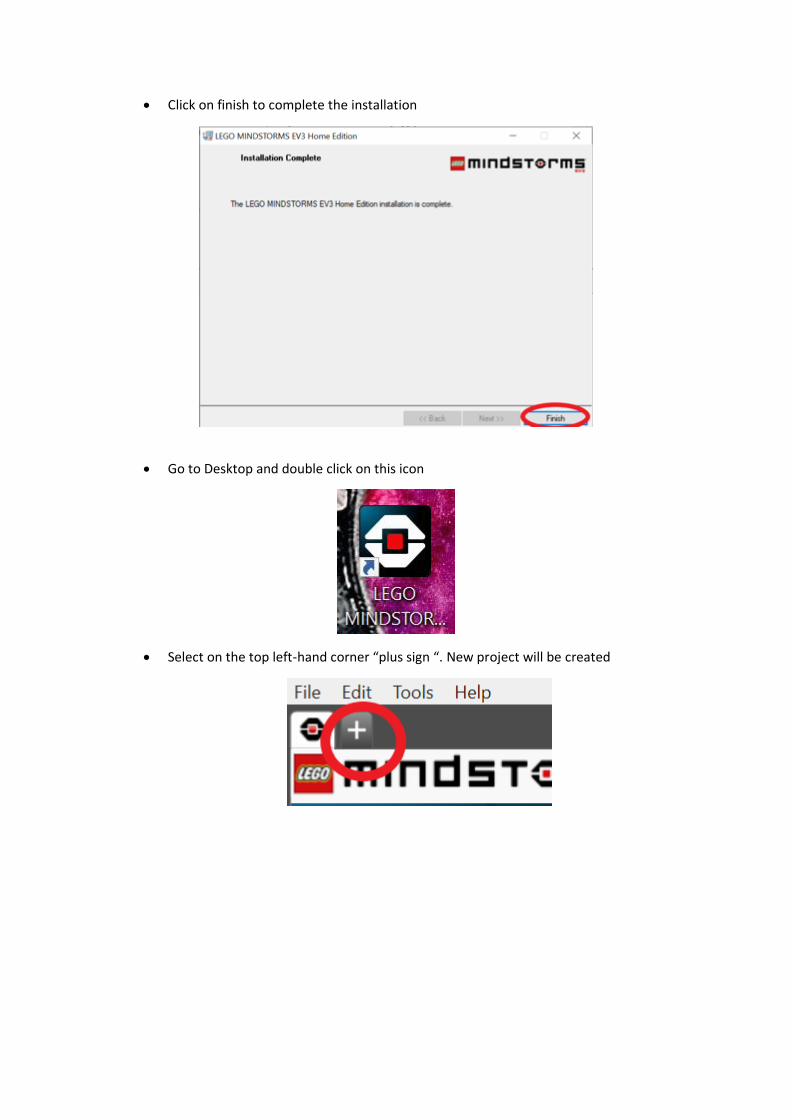
• Click on finish to complete the installation
• Go to Desktop and double click on this icon
• Select on the top left-hand corner “plus sign “. New project will be created
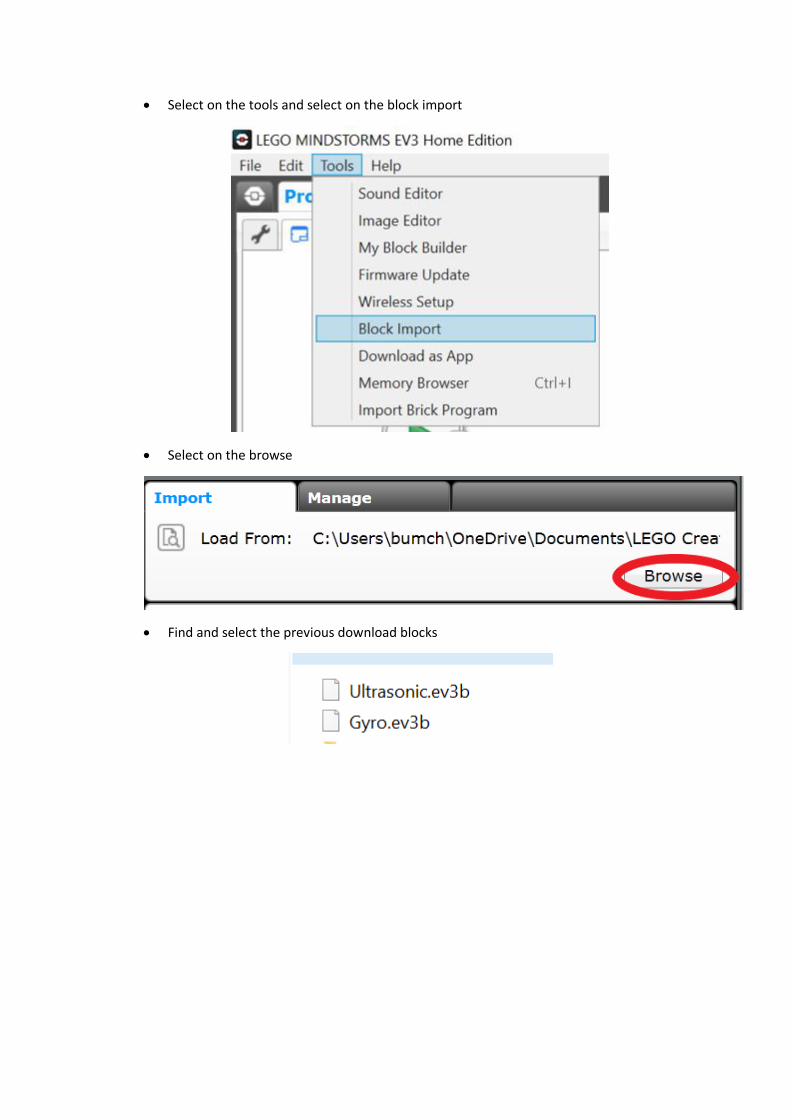
• Select on the tools and select on the block import
• Select on the browse
• Find and select the previous download blocks

• You will be able to see the two block names and import them
• Select Ok , close and restart Mindstorm Ev3
• Email invite or the link to access the lesson
3. Bluetooth connection
Follow these steps to set up Bluetooth on your P-Brick: Use the arrow buttons to choose Bluetooth in the 'Settings' screen on the P-Brick. A pop-up will appear with a list of options.

1. Using the up and down buttons for navigation, highlight 'Bluetooth', then press the center button and a checkmark will appear in the Bluetooth box. You’ve enabled
Bluetooth and should see an icon in the top left of the P-Brick display. If the 'iPhone/iPad/iPod' option is checked, you won’t be able to connect to anything except an iOS device like an iPhone, iPad or iPod Touch. For all other connections, keep this unchecked.
To connect your software to your P-Brick:
macOS
1. Start the LEGO® MINDSTORMS® EV3 Software and connect your P-Brick to your Mac using the USB cable.
2. In the EV3 software, make your way to the Hardware Page and click Refresh.
3. A new window will pop up and list all previously connected and available P-Bricks. It might take a few minutes before your P-Brick is shown. Find the one you want to connect to and select it.
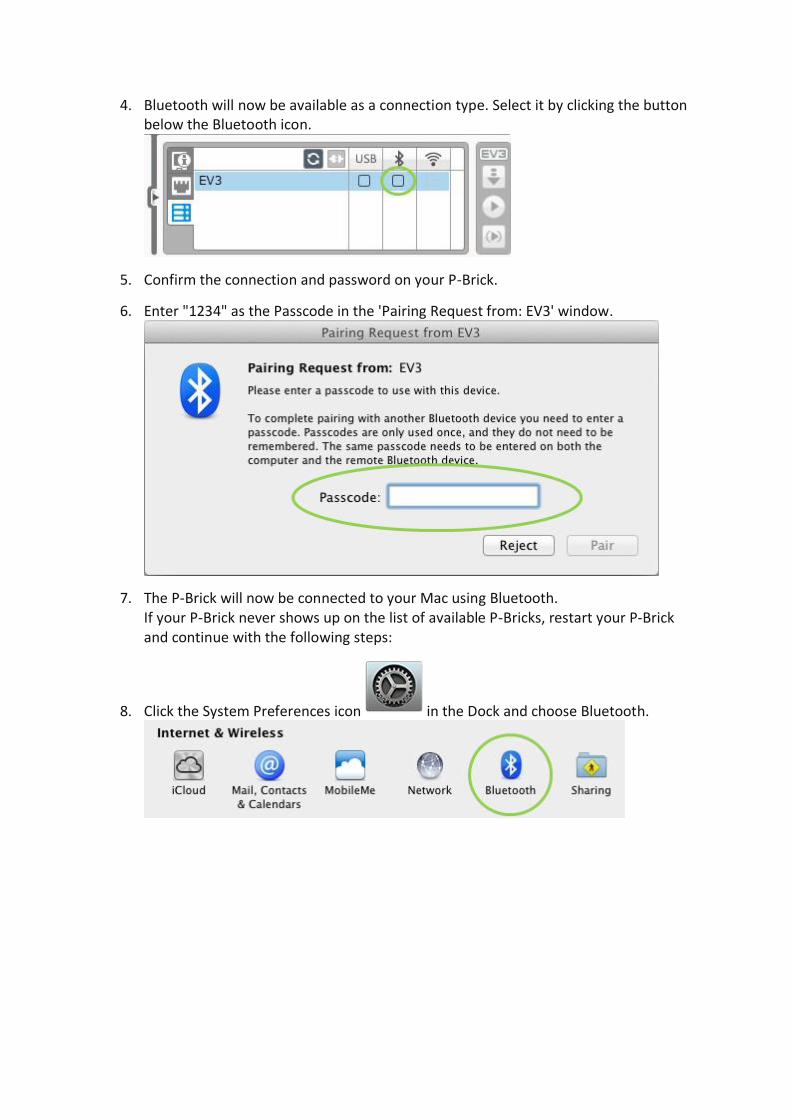
4. Bluetooth will now be available as a connection type. Select it by clicking the button below the Bluetooth icon.
5. Confirm the connection and password on your P-Brick.
6. Enter "1234" as the Passcode in the 'Pairing Request from: EV3' window.
7. The P-Brick will now be connected to your Mac using Bluetooth. If your P-Brick never shows up on the list of available P-Bricks, restart your P-Brick and continue with the following steps:
8. Click the System Preferences icon in the Dock and choose Bluetooth.

9. Choose 'Set Up New Device' or 'Add new Device'.
10. The Bluetooth Setup Assistant will search for all devices available over Bluetooth. It might take a few minutes before your P-Brick is shown. When it is, choose it and click 'Continue'.
11. Confirm the connection and password on your P-Brick.
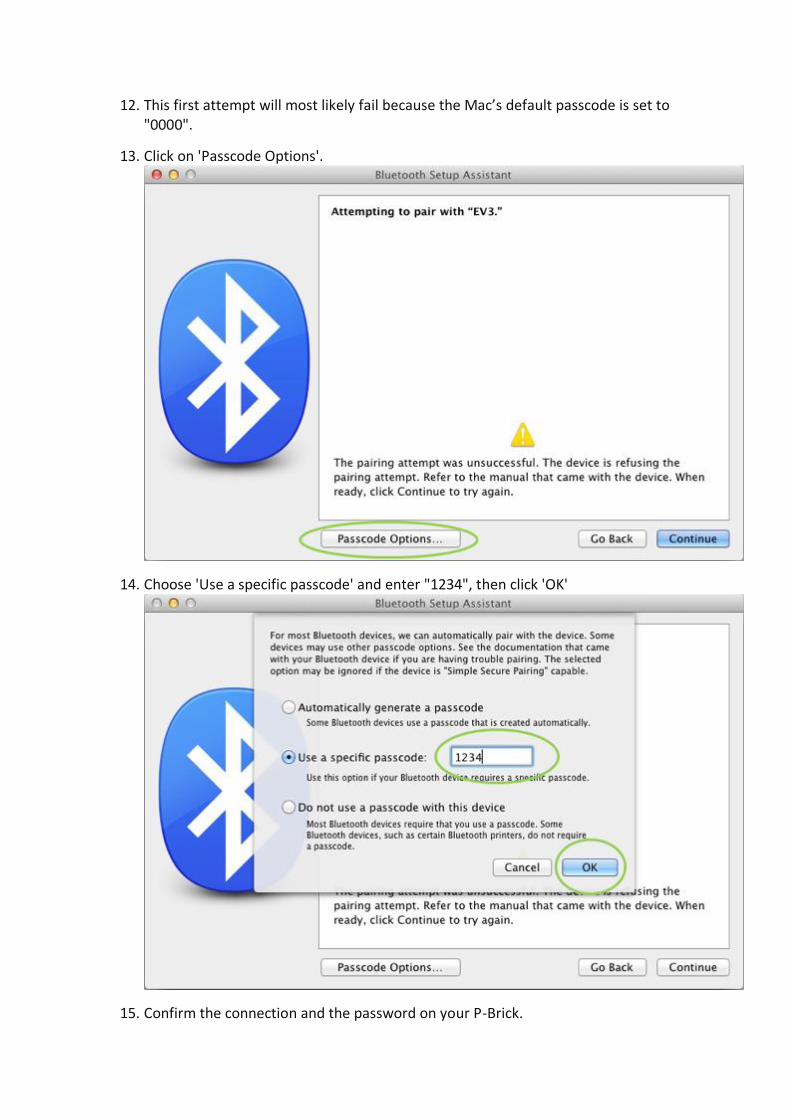
12. This first attempt will most likely fail because the Mac’s default passcode is set to "0000".
13. Click on 'Passcode Options'.
14. Choose 'Use a specific passcode' and enter "1234", then click 'OK'
15. Confirm the connection and the password on your P-Brick.

16. You’ll now see a window confirming that your P-Brick has been paired successfully. Click 'Quit'.
17. Your P-Brick will now show up on the list of known Bluetooth devices.
18. Repeat steps 1-7.

Windows
1. In the EV3 software, make your way to the Hardware Page and click Refresh.
2. Your P-Brick will be available over Bluetooth. Click on the button below the Bluetooth icon to connect.
3. Your computer will connect to your P-Brick. You might have to confirm the connection and password '1234' on your P-brick at this stage.
If you can’t see the P-Brick in the Hardware Page in the application, continue with the following steps.
Open the Start Menu and click on 'Devices and Printers'.

1. Click on 'Add a device'.
2. It’ll take a moment for your P-Brick to show up in the list of available devices. Select it and press 'Next'.
3. The PC will try to connect to the P-Brick.
4. Confirm connection and password on the P-Brick.

5. On the PC, enter "1234" like below and click 'Next'.
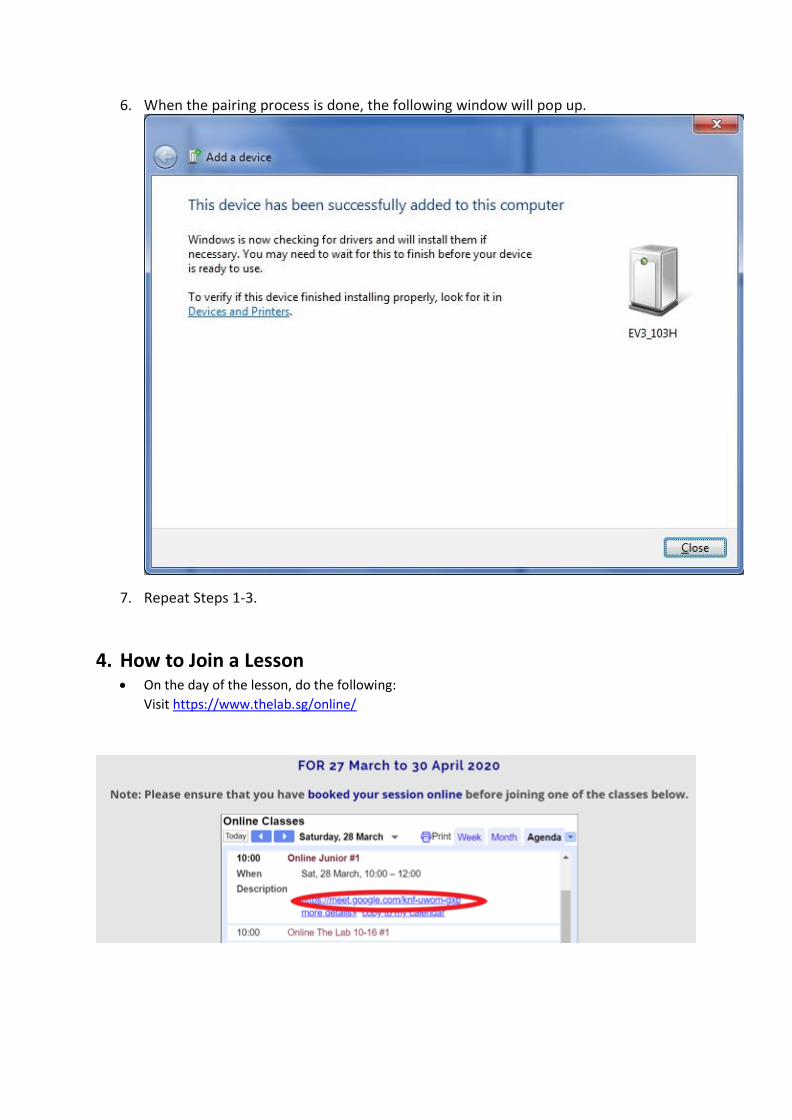
6. When the pairing process is done, the following window will pop up.
7. Repeat Steps 1-3.
4. How to Join a Lesson • On the day of the lesson, do the following:
Visit https://www.thelab.sg/online/

Click on "Join Now"
Click 'Allow' if prompted
to use microphone and
camera
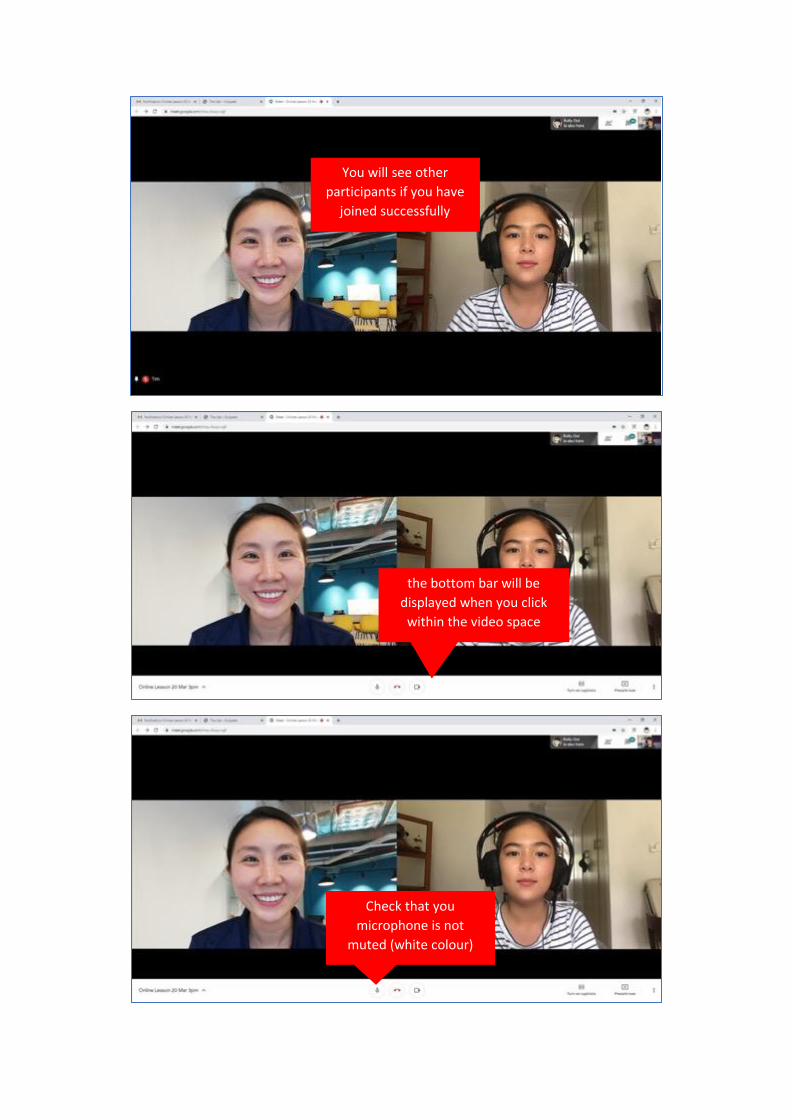
Check that you
microphone is not
muted (white colour)
You will see other
participants if you have
joined successfully
the bottom bar will be
displayed when you click
within the video space

Check that your speaker
volume is audible
Click on the human icon
to see the group list

5. How do You Proceed with Your Lesson • Follow the instructor’s instruction
This panel allows you to
display full view of your
instructor by clicking on
the thumbnail
If your instructor wants to show
you his screen, click on the
people icon
then select his
presentation icon
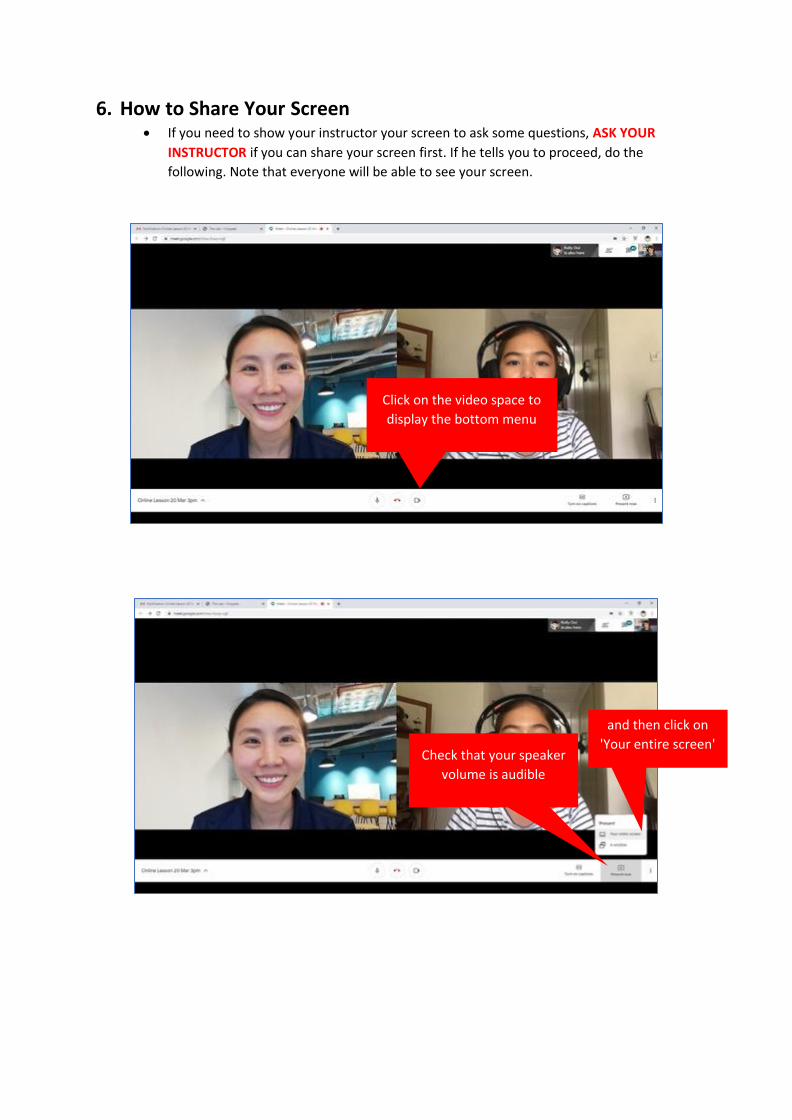
6. How to Share Your Screen • If you need to show your instructor your screen to ask some questions, ASK YOUR
INSTRUCTOR if you can share your screen first. If he tells you to proceed, do the
following. Note that everyone will be able to see your screen.
Check that your speaker
volume is audible
and then click on
'Your entire screen'
Click on the video space to
display the bottom menu

Click on the
desktop
thumbnail then click share
If you want to stop sharing,
click 'Stop presenting'
Your screen is now
being shared.

7. How do You End the Lesson • Close the browser to end your session.