The Art of High Fire Glazes Paul Nash, Ceramic Artist ... · PDF fileThe Art of High Fire...
39
1 The Art of High Fire Glazes Paul Nash, Ceramic Artist paulnashceramics.com Part 2 CONTENTS Introduction 1-5 Stoneware Glazes 6-12 Percentages 9 Bentonite and Gums 6-7 Stoneware Clay 13-17 Earthenware Clay 18 Clay Shrinkage 19 Water Absorption 20 Bonding Slips 21-22 Raku 23-24 Kilns and Firing 25-31 Kiln Wash 32 Packing Clay 32 Plaster of Paris 33-37 Glossary 38-39 I have been teaching high fire reduction ceramic art for over forty years and have been working in ceramics for over fifty years. The one question that keeps coming up from students, whether they are beginners or advanced students, is why does a glaze do this or that after the pot comes out of the kiln? After all these years, I have seen a pattern from most of my students. It takes anywhere from one year to three years to explain the relationship of an application of a glaze or glazes in the high fire reduction process. So I thought if I put the examples in an easy to understand format for the students, it would make my life easier as an educator, teaching the art of the high fire process. The purpose of this book is to show the wide variety of colors and textures from high fire stoneware glazes. There are many stable varieties and combinations of glazes. The earth minerals are easily accessible throughout the United States. With basic changes, one can expand one’s palette of colors and textures, using just a few basic glazes. I recommend three great books in the ceramic field. All ceramic students should have these books. Clay and Glazes for the Potter by Daniel Rhodes, Hands in Clay by Charlotte F. Speight, and The Art and
-
Upload
truongphuc -
Category
Documents
-
view
226 -
download
3
Transcript of The Art of High Fire Glazes Paul Nash, Ceramic Artist ... · PDF fileThe Art of High Fire...

1
The Art of High Fire Glazes Paul Nash, Ceramic Artist paulnashceramics.com
Part 2
CONTENTS Introduction 1-5 Stoneware Glazes 6-12 Percentages 9 Bentonite and Gums 6-7 Stoneware Clay 13-17 Earthenware Clay 18 Clay Shrinkage 19 Water Absorption 20 Bonding Slips 21-22 Raku 23-24 Kilns and Firing 25-31 Kiln Wash 32 Packing Clay 32 Plaster of Paris 33-37 Glossary 38-39
I have been teaching high fire reduction ceramic art for over forty years and have been working in ceramics for over fifty years. The one question that keeps coming up from students, whether they are beginners or advanced students, is why does a glaze do this or that after the pot comes out of the kiln? After all these years, I have seen a pattern from most of my students. It takes anywhere from one year to three years to explain the relationship of an application of a glaze or glazes in the high fire reduction process. So I thought if I put the examples in an easy to understand format for the students, it would make my life easier as an educator, teaching the art of the high fire process. The purpose of this book is to show the wide variety of colors and textures from high fire stoneware glazes. There are many stable varieties and combinations of glazes. The earth minerals are easily accessible throughout the United States. With basic changes, one can expand one’s palette of colors and textures, using just a few basic glazes. I recommend three great books in the ceramic field. All ceramic students should have these books. Clay and Glazes for the Potter by Daniel Rhodes, Hands in Clay by Charlotte F. Speight, and The Art and

2
Craft of Clay by Susan Peterson. Before you use my book, you should have studied and memorized the information in these books. My book will give the ceramic artist a solid foundation, so you will not be wasting time and money. There are a few more excellent books out there, but any good ceramic teacher would agree that the books I have mentioned above, are the books that a new student or advanced student to ceramics should have. There are three good basic high fire base glazes that make all the other glazes, with only a few exceptions. These glazes can make a wide variety of glazes: the Celadon glaze, the Semi Matt glaze, and the Stony Matt glaze. This book will illustrate that from these glazes and the addition of metallic oxides and/or carbonates, you will get an endless variety of colors and textures. I am going to use three glaze formulas that will give you an excellent starting point. These glazes are cheap to make, are made up of minerals that are easily accessible, and are reliable in a stoneware or porcelain firing. Even though you will get a very good starting point for high fire glazes from this book, the kiln you use and the way you fire the kiln will also change the glaze color and texture. Over the years I have fired several updraft kilns: the old West Coast Kilns and Fred Olsen Kilns. Both of these updraft kilns fire quite well. You can get good clay color and nice Celadons, Copper Reds, Iron Blues, and Chun Red Blues (Chun glazes are boron base glazes). I have also fired downdraft kilns. The downdraft kilns do take longer to fire and the results are pretty close to being the same as an updraft kiln. The kind of kilns that I would recommend for this day and age are the Paul Geil Kilns. Paul Geil has taken the updraft design of a kiln and added the downdraft damper flue design to it. Normally the damper of an updraft kiln is at the top of the ceiling roof. He has put the damper at the bottom, like a downdraft kiln. The uniqueness of this is that you don’t need a big chimneystack at the back of the kiln, like the standard downdraft kiln. The Geil Kiln doesn’t fit any of the concepts of kiln building. The kiln fires great. The clay color is richer and the glaze colors has a depth and beauty that the old design kilns can’t achieve. If you can’t afford a Geil Kiln, I would recommend the Fred Olsen Kiln Kit. If you have experience in building kilns, I would take the Olsen Kiln Kit and modify it to the Paul Geil design. There is no doubt that Paul Geil Kilns will replace all the old standard updraft kilns and downdraft kilns of the past. I first fired one of Paul’s

3
kilns in the mid 1970’s, early in my studio and teaching career. This was when Paul had just started a business of building kilns. Initially I thought that this was a very strange but interesting concept, to use an updraft burner assembly with a downdraft damper, and to have the flue ending at the top of the kiln. I realized, don’t judge a kiln by its look. It fired great, excellent, and outstanding. Before I start introducing the glaze formulas and applications of a glaze, you need to understand the firing atmosphere of a kiln. There are oxidation, reduction and neutral atmospheres in firing a kiln. All gas kilns fire in oxidation in the beginning of the firing. Body reduction starts around 1,600 to 1,900-degree Fahrenheit. I start body reduction at 1,900, glaze reduction starting right after the body reduction, one moving into the other so you don’t lose the body color, and ending in a neutral, and then back to a short oxidation at the end. You need to understand these processes and be able to experiment in firing a glaze kiln, to get an even temperature top and bottom, to know how much of a reduction atmosphere to obtain to get good results, and to know how much of an oxidation soak is necessary at the end of the firing. When I was learning how to fire a kiln, I would put into the kiln 4,5,6, cone packs with a clay pool catch, to catch the cones as they melt into a liquid glass during the firing of the kiln. The 4,5,6 cones would be in front of the 9,10,11 cones. If the kiln is uneven in temperature at the time the 4,5,6 cones melt, this will give you enough time to play with the damper and/or the burners to even out the kiln before you start to get to the maturing temperature of cone 9,10,11. If the kiln is even top and bottom when the temperature is at cone 4,5,6, the kiln will be even at cone 9,10,11. It is always best to work and watch an experienced kiln expert fire a kiln before you start firing kilns. There is the stress and responsibility of safely firing all the pottery that is in the kiln. I will go into more detail later about firing a reduction kiln. Clay bodies are important. I have used the commercial stoneware clays and I have seen many students use all kinds of commercial stoneware clays from different companies. None of them are that good. My new students get very frustrated because of the grog or silica sand in the clay that cuts their fingers and hands. My advance students get frustrated because of the poor working quality of the stoneware clays. Some of these qualities are short plasticity, bad color, and poor fit of a glaze. These problems were my problems early in my career in the 1970’s, so I had Aardvark Clay and Supply Company in Santa Ana, California start to make a clay body for me. This was a clay body which I had used at the Chouinard Art School, when I attended there as an undergraduate student in the late 1960’s.
4
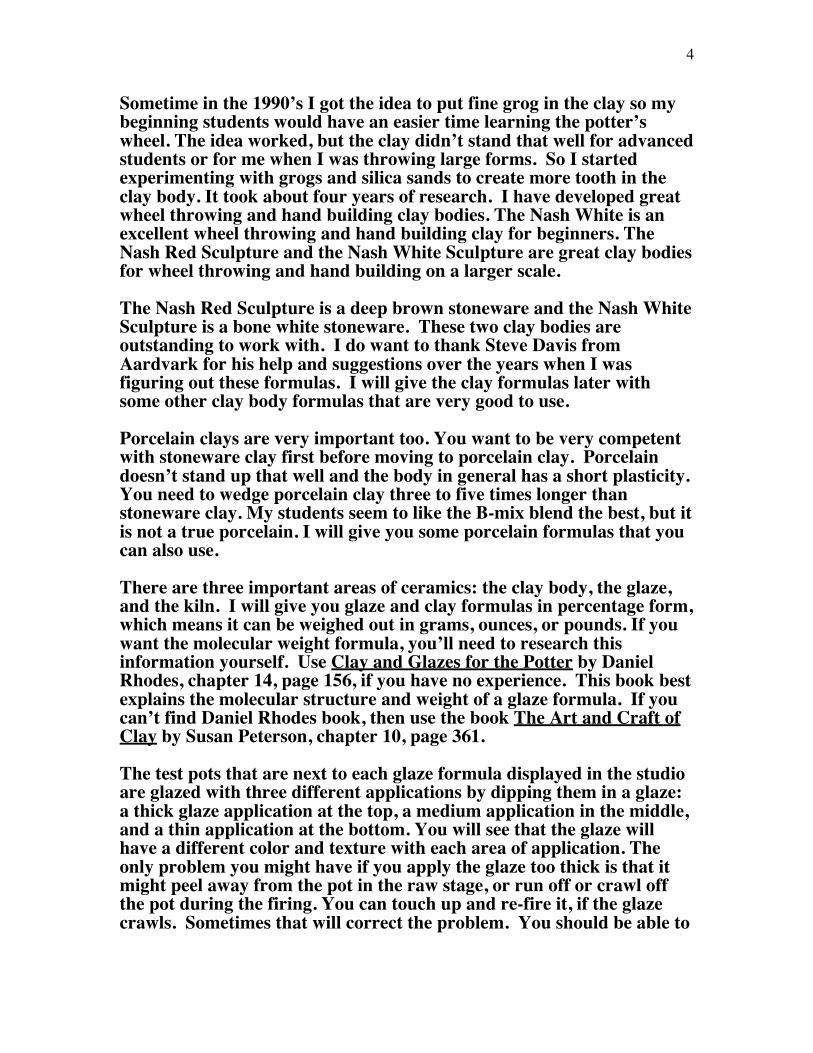
Sometime in the 1990’s I got the idea to put fine grog in the clay so my beginning students would have an easier time learning the potter’s wheel. The idea worked, but the clay didn’t stand that well for advanced students or for me when I was throwing large forms. So I started experimenting with grogs and silica sands to create more tooth in the clay body. It took about four years of research. I have developed great wheel throwing and hand building clay bodies. The Nash White is an excellent wheel throwing and hand building clay for beginners. The Nash Red Sculpture and the Nash White Sculpture are great clay bodies for wheel throwing and hand building on a larger scale. The Nash Red Sculpture is a deep brown stoneware and the Nash White Sculpture is a bone white stoneware. These two clay bodies are outstanding to work with. I do want to thank Steve Davis from Aardvark for his help and suggestions over the years when I was figuring out these formulas. I will give the clay formulas later with some other clay body formulas that are very good to use. Porcelain clays are very important too. You want to be very competent with stoneware clay first before moving to porcelain clay. Porcelain doesn’t stand up that well and the body in general has a short plasticity. You need to wedge porcelain clay three to five times longer than stoneware clay. My students seem to like the B-mix blend the best, but it is not a true porcelain. I will give you some porcelain formulas that you can also use. There are three important areas of ceramics: the clay body, the glaze, and the kiln. I will give you glaze and clay formulas in percentage form, which means it can be weighed out in grams, ounces, or pounds. If you want the molecular weight formula, you’ll need to research this information yourself. Use Clay and Glazes for the Potter by Daniel Rhodes, chapter 14, page 156, if you have no experience. This book best explains the molecular structure and weight of a glaze formula. If you can’t find Daniel Rhodes book, then use the book The Art and Craft of Clay by Susan Peterson, chapter 10, page 361. The test pots that are next to each glaze formula displayed in the studio are glazed with three different applications by dipping them in a glaze: a thick glaze application at the top, a medium application in the middle, and a thin application at the bottom. You will see that the glaze will have a different color and texture with each area of application. The only problem you might have if you apply the glaze too thick is that it might peel away from the pot in the raw stage, or run off or crawl off the pot during the firing. You can touch up and re-fire it, if the glaze crawls. Sometimes that will correct the problem. You should be able to

5
re-fire a pot six to eight times before the clay will fatigue and break. The Celadon glazes, if applied too thick, will craze. All the glazes I am using work really well. You will not get crazing or shivering from these glazes. You can combine all these glazes together by overlapping one glaze over the other to create patterns. This is how you will start to get beautiful combinations of colors and textures. You will need to experiment with how you overlap a glaze, to dip the pot and/or pour the glaze over the pot, and dip the pot again into a different glaze, and/or pour another glaze over the pot. This will create endless variations of color. This process is called a Eutectic, to create a tertiary color by overlapping different glazes over each other. An easy way to understand the general thickness of a glaze is: if it’s thinner than your finger nail, that’s thin; if it’s the thickness of your thumb nail, that’s medium; and if it’s the thickness of your big toe nail, that’s too thick. The best way to see the thickness of a glaze in the raw stage is to scratch the surface with a needle tool. Just scratch a line about an inch long and you will see the depth of the raw glaze. Then rub that area with your finger and the line will usually disappear. If the line does not disappear, just add a little glaze, let the glaze dry, and smooth it down with a tool of your choice. Before I start giving the glaze formulas, I think you should know how the formulas came to me. These glazes are from Chouinard Art School, which is now renamed the California Institute of the Arts, in Valencia, California, when I was studying there for my undergraduate degree. They are the original glaze formulas from China. These glaze formulas traveled to Korea, then Japan, then England, and then to the United States in the 1930’s. Alfred University, in Alfred, New York, analyzed the glazes early in the 1930’s and these glaze formulas started their journey to the University of Southern California and Chouinard Art School, both in Los Angeles, California.
6
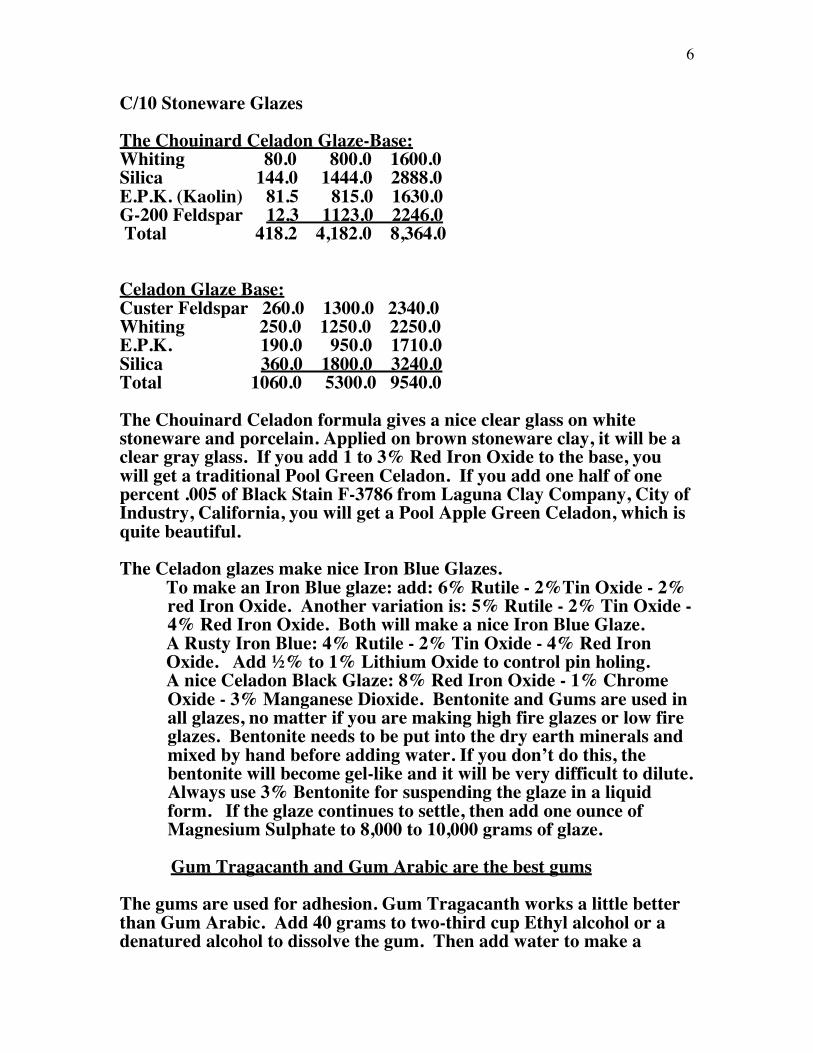
C/10 Stoneware Glazes The Chouinard Celadon Glaze-Base: Whiting 80.0 800.0 1600.0 Silica 144.0 1444.0 2888.0 E.P.K. (Kaolin) 81.5 815.0 1630.0 G-200 Feldspar 12.3 1123.0 2246.0 Total 418.2 4,182.0 8,364.0 Celadon Glaze Base: Custer Feldspar 260.0 1300.0 2340.0 Whiting 250.0 1250.0 2250.0 E.P.K. 190.0 950.0 1710.0 Silica 360.0 1800.0 3240.0 Total 1060.0 5300.0 9540.0 The Chouinard Celadon formula gives a nice clear glass on white stoneware and porcelain. Applied on brown stoneware clay, it will be a clear gray glass. If you add 1 to 3% Red Iron Oxide to the base, you will get a traditional Pool Green Celadon. If you add one half of one percent .005 of Black Stain F-3786 from Laguna Clay Company, City of Industry, California, you will get a Pool Apple Green Celadon, which is quite beautiful. The Celadon glazes make nice Iron Blue Glazes.
To make an Iron Blue glaze: add: 6% Rutile - 2%Tin Oxide - 2% red Iron Oxide. Another variation is: 5% Rutile - 2% Tin Oxide - 4% Red Iron Oxide. Both will make a nice Iron Blue Glaze. A Rusty Iron Blue: 4% Rutile - 2% Tin Oxide - 4% Red Iron Oxide. Add ½% to 1% Lithium Oxide to control pin holing.
A nice Celadon Black Glaze: 8% Red Iron Oxide - 1% Chrome Oxide - 3% Manganese Dioxide. Bentonite and Gums are used in all glazes, no matter if you are making high fire glazes or low fire glazes. Bentonite needs to be put into the dry earth minerals and mixed by hand before adding water. If you don’t do this, the bentonite will become gel-like and it will be very difficult to dilute. Always use 3% Bentonite for suspending the glaze in a liquid form. If the glaze continues to settle, then add one ounce of Magnesium Sulphate to 8,000 to 10,000 grams of glaze.
Gum Tragacanth and Gum Arabic are the best gums The gums are used for adhesion. Gum Tragacanth works a little better than Gum Arabic. Add 40 grams to two-third cup Ethyl alcohol or a denatured alcohol to dissolve the gum. Then add water to make a

7
gallon of the liquid gum. Use one ounce of liquid Gum Tragacanth to every 1000 grams of glaze batch. Gum Tragacanth is expensive. The next best gum is Gum Arabic. If you use the Gum Arabic, use two ounces of liquid gum to every 1000 grams of glaze batch. Dissolve the same way for all gums. Always add liquid gum to the glazes that are also in a liquid form. You can always add more gum to a glaze if the glaze coating is not sticking to the pot. C.M.C. also works well as an adhesive and is the cheapest gum you can buy. C.M.C. is a man-made gum in the science industry. If you use the C.M.C., weigh out 30 grams and dissolve the same way as the other gums. You only need to add two to three ounces to 8,000 to 10,000 grams of a glaze batch. C.M.C. will have a tendency to thicken the glaze if you use too much. If that happens, just add more water to thin the consistency of the glaze. You won’t have this problem with the natural gums. Semi Matt Glaze Base: G-200 Feldspar 2570.0 Tennessee Ball#1 454.0 Colemanite 722.0 Dolomite 460.0 Talc 884.0 Whiting 280.0 Silica 1198.0 Total: 6568.0 This base glaze makes a very nice semi-clear glaze. It looks good by itself. If you start adding percentages of different oxides or carbonates, you will get endless beautiful variations of colors. Some of the most popular ones are: Semi Matt Gold: 5% Rutile - 1%Tin Oxide, and 1%Lithium Oxide to control pin holing. One ounce of Magnesium Sulphate to 8,000-gram batch also helps to prevent pin holing. Semi Matt Blue: 1% Cobalt Carbonate. Semi Matt Chrome: 1% Chrome Oxide. Semi Matt Green: 2% Chrome Oxide. Semi Matt Blue Green: 1% Cobalt Carbonate - 1/2% Chrome Oxide. Semi Matt Green Blue: 1% Chrome Oxide - 1/2% Cobalt Carbonate. Semi Matt Gray: 2% Copper Oxide. Semi Matt Gray Blue: 2% Copper Oxide - 1% Cobalt Carbonate. Semi Matt Blue Green with flecks: 1/2% Cobalt Carbonate- 1/2 %Chrome Oxide - 1/2% Copper Oxide.

8
You can go on and on with percentage variations on your own and continue to get beautiful subtle colors. If you take out the whiting from the Semi Matt Glaze, you will get a blue lavender color from the Cobalt. Made sure you re-add the total batch of the glaze, if you remove the whiting. If you use Kona F4 Feldspar in the formula instead of G-200, you will get a nice texture change in the glaze. You can eliminate the whiting in the formula and get nice color variations with the addition of Oxides and Carbonates. Oxides and Carbonates are always calculated to the batch weight. An example: for 1% of Cobalt Carbonate to the batch weight of the Semi Matt Glaze, 6,566.0 you would add 65.66 grams of cobalt, 65.7 because you would round it off. 10,000 grams of dry glaze will usually fill a 5-gallon bucket, so you might want to go a little under the 10,000-gram mark. Most glazes call for 1/4% to 5% of an oxide or carbonate to be added. I have given you percentage figures up to 1/32 of a percent: 1%: .01 1/2%: .005 1/4%: .0025 1/8%: .00125 1/16%: .000625 1/32%: .0003125 Stony Matt Glaze Base: Whiting 440.0 Dolomite 884.0 Talc 904.0 Cornwall Stone Feldspar 1600.0 Nepheline Syenite 1108.0 E.P.K. 2000.0 Total: 6936.0 Cornwall Stone comes from England, so it will be more expensive than the other feldspars, but it is worth it. Cornwall Stone will leave hard rocks in the sieve when screening the glaze. Throw out whatever rocks are left in the 80-mesh sieve or dissolve in hot water. Cornwall Stone Feldspar and some other minerals have large impurities that will not pass through an 80-mesh screen. Throw these impurities out. You do not want them in the glaze.

9
I was experiencing a little shivering if there was a sharp edge on a piece of pottery made from the Nash Red Clay body. I divided the total percentages by 5 to work with a smaller total Batch. I increased the whiting by 5 % each time until the shivering stopped. If you don’t understand shivering and crazing you should look it up in one of your ceramic books. The Stony Matt Base is a beautiful off-white Matt glaze. 1% Copper Oxide: Oatmeal Matt 1% Manganese Dioxide: Light to toasty Oatmeal Matt 3% Vanadium Oxide: Soft Yellow Rust Matt 1/2% Cobalt Carbonate: Stony Blue Matt 4% Rutile - 2% Red Iron Oxide – 1% Tin Oxide – 1/2% Lithium Carbonate: Goldbrown Green Matt. This combination is very unpredictable, but fun because it’s never the same. As you can see with these three base glazes and the colorants, you will have a solid base of very good glazes to work with. Here are some other base glazes that are very reliable: Heavy Iron Glaze (Tenmoku) G-200 3160.0 Silica 2040.0 E.P.K. 750.0 Whiting 1330.0 Red Iron Oxide 710.0 Total: 7990.0 Add 3% Bentonite You can double the E.P.K. and you will get a nice Kaki glaze from the Heavy Iron Glaze. If you remove the Red Iron Oxide, you will have a clear glaze base with the Heavy Iron and the Kaki glazes. Red Kaki Glaze G-200 3120.0 Silica 1620.0 Bone Ash 720.0 Whiting 480.0 Talc 420.0 E.P.K. 360.0 Red Iron Oxide 720.0
7440.0 Add 3% Bentonite You can add Red Kaki and Copper Reds together to make nice combinations.
10
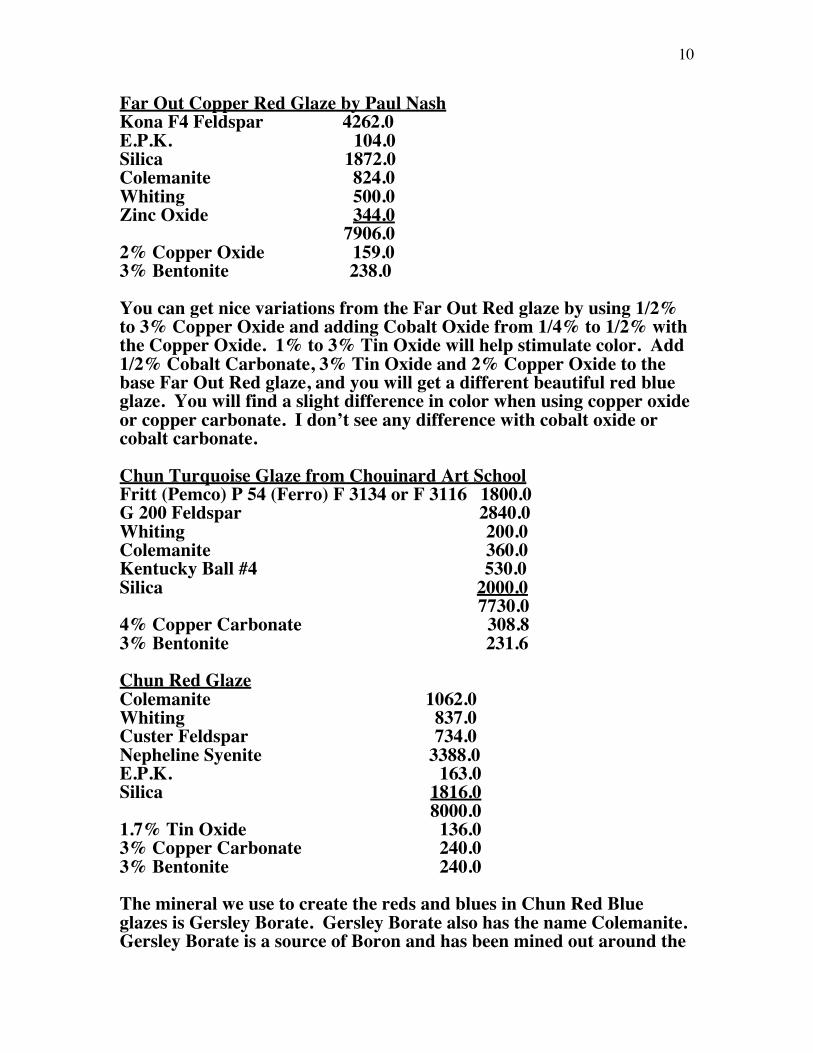
Far Out Copper Red Glaze by Paul Nash Kona F4 Feldspar 4262.0 E.P.K. 104.0 Silica 1872.0 Colemanite 824.0 Whiting 500.0 Zinc Oxide 344.0 7906.0 2% Copper Oxide 159.0 3% Bentonite 238.0 You can get nice variations from the Far Out Red glaze by using 1/2% to 3% Copper Oxide and adding Cobalt Oxide from 1/4% to 1/2% with the Copper Oxide. 1% to 3% Tin Oxide will help stimulate color. Add 1/2% Cobalt Carbonate, 3% Tin Oxide and 2% Copper Oxide to the base Far Out Red glaze, and you will get a different beautiful red blue glaze. You will find a slight difference in color when using copper oxide or copper carbonate. I don’t see any difference with cobalt oxide or cobalt carbonate. Chun Turquoise Glaze from Chouinard Art School Fritt (Pemco) P 54 (Ferro) F 3134 or F 3116 1800.0 G 200 Feldspar 2840.0 Whiting 200.0 Colemanite 360.0 Kentucky Ball #4 530.0 Silica 2000.0 7730.0 4% Copper Carbonate 308.8 3% Bentonite 231.6 Chun Red Glaze Colemanite 1062.0 Whiting 837.0 Custer Feldspar 734.0 Nepheline Syenite 3388.0 E.P.K. 163.0 Silica 1816.0 8000.0 1.7% Tin Oxide 136.0 3% Copper Carbonate 240.0 3% Bentonite 240.0 The mineral we use to create the reds and blues in Chun Red Blue glazes is Gersley Borate. Gersley Borate also has the name Colemanite. Gersley Borate is a source of Boron and has been mined out around the

11
year 2000 and was recreated in ceramic industry for us to use. I use the Laguna Gersley Borate from Laguna Clay Company in the City of Industry, California. Copper Grape Red Chun Glaze Zinc Oxide 200.0 Barium Carbonate 408.0 Dolomite 408.0 Colemanite 408.0 Whiting 656.0 Custer Feldspar 4080.0 Silica 2040.0 8200.0 2% Copper Carbonate 164.0 1/4% Cobalt Carbonate 20.5 1% Tin Oxide 82.0 3% Bentonite 246.0 Rusty Shino Glaze Nepheline Syenite 3200.0 Kona F4 Feldspar 1040.0 Spodumene 720.0 Kentucky Ball#4 1200.0 E.P.K. 640.0 Redart Clay 240.0 Soda Ash (Need to dissolve in water) 960.0 8000.0 3% Bontonite 240.0 Shino White Glaze Soda Ash 200.0 Kona F4 550.0 Nepheline Syenite 2250.0 Spodumene 750.0 E.P.K. 500.0 Kentucky Ball #4 750.0 5000.0 3% Bentonite 150.0 Shino Glazes are supposed to go on thick to get crawling. After glazing let the pottery set for a few days so the sodium carbonate can come to the surface of the raw glaze. The glaze also looks good applied thin if you don’t want crawling.
12
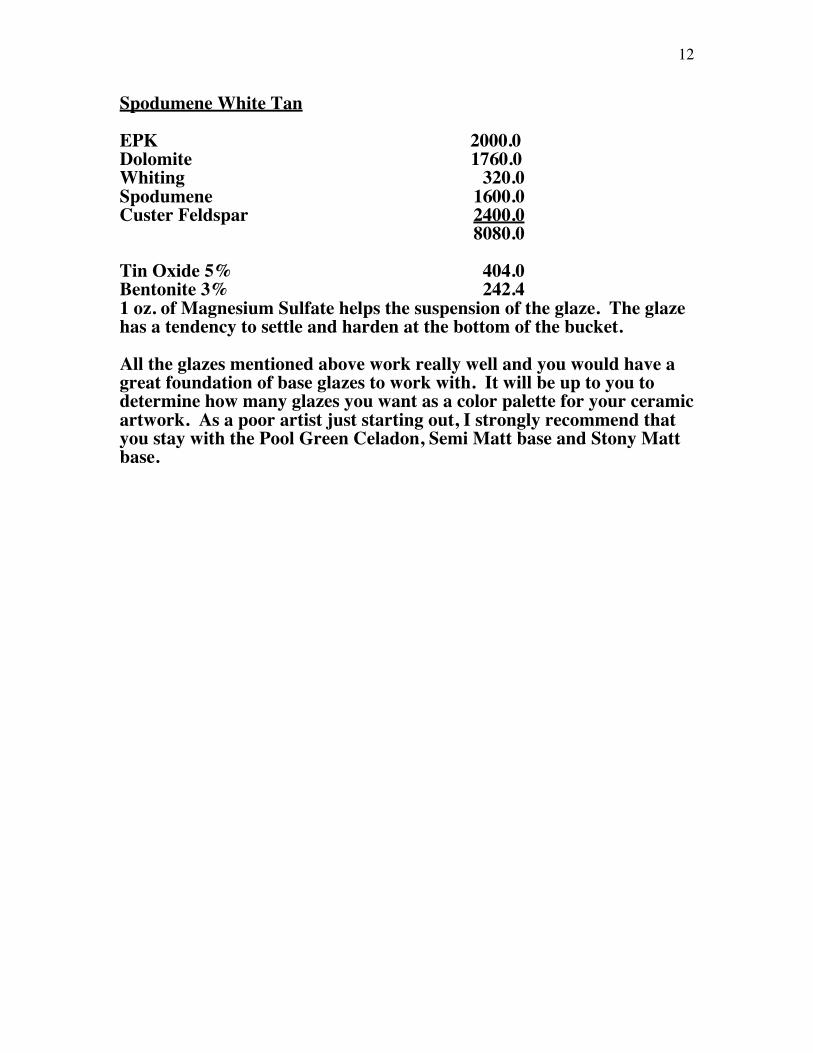
Spodumene White Tan EPK 2000.0 Dolomite 1760.0 Whiting 320.0 Spodumene 1600.0 Custer Feldspar 2400.0 8080.0 Tin Oxide 5% 404.0 Bentonite 3% 242.4 1 oz. of Magnesium Sulfate helps the suspension of the glaze. The glaze has a tendency to settle and harden at the bottom of the bucket. All the glazes mentioned above work really well and you would have a great foundation of base glazes to work with. It will be up to you to determine how many glazes you want as a color palette for your ceramic artwork. As a poor artist just starting out, I strongly recommend that you stay with the Pool Green Celadon, Semi Matt base and Stony Matt base.

13
CLAY BODY FORMULAS
C/10 STONEWARE CLAY Brown Gray White Porcelain
Porcelain 2.5 Goldart (stoneware) 1 2 Red Clay (earthenware) 1 Kentucky Ball #4 2 2 2 2.5 Lincoln Fire Clay #60 4 4 XX Sagger Fire Clay 6 Potash Feldspar (Custer) 1 1 1 2.5 Silica 1 1 1 2.5 10.0 10.0 10.0 10.0
Add 10% Grog to all clays for throwing, and 20 to 30% for hand building.
Clay bodies are formulated in percentages adding up to 10. Stoneware clay bodies are 80% clay, 20% fillers (feldspar and silica). Percentages are the equivalent of grams, ounces or pounds. Grog and Silica Sand are additives, and are not part of the total percentage of the clay body. It is important to distinguish the difference between Silica and Silica Sand. They are two completely different minerals. Old Hickory #5 Ball Clay is a good replacement for Kentucky Ball #4 Clay.
14
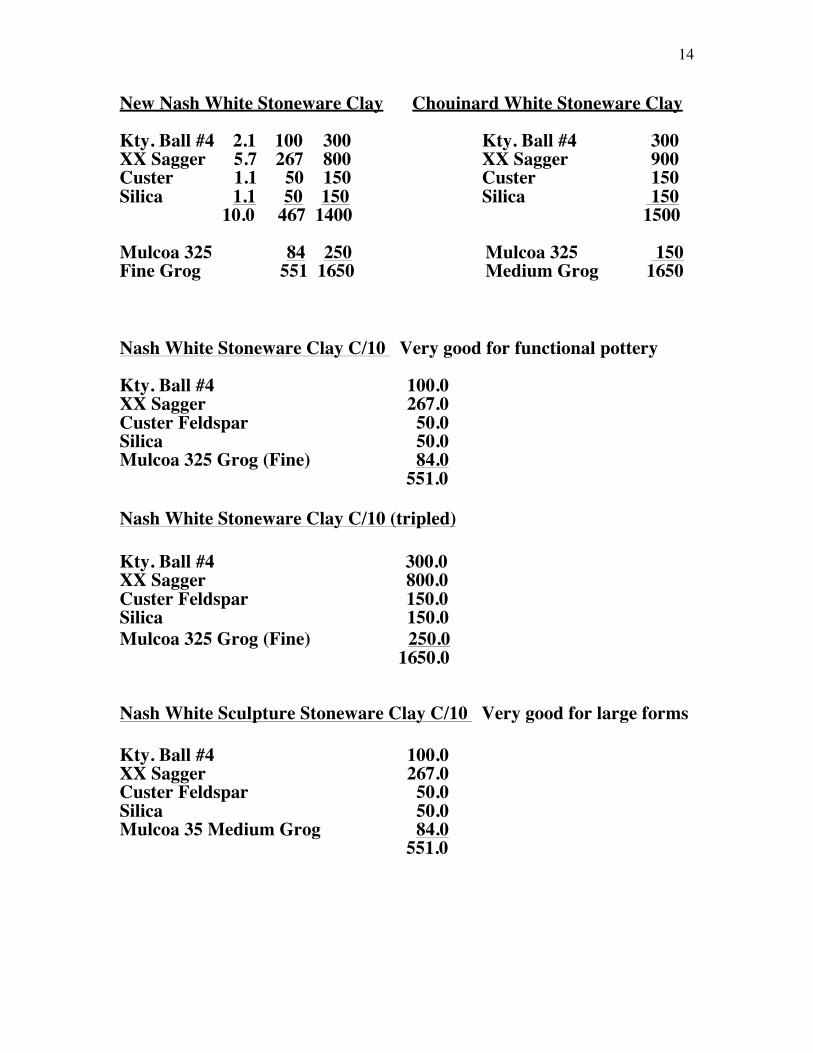
New Nash White Stoneware Clay Chouinard White Stoneware Clay Kty. Ball #4 2.1 100 300 Kty. Ball #4 300 XX Sagger 5.7 267 800 XX Sagger 900 Custer 1.1 50 150 Custer 150 Silica 1.1 50 150 Silica 150 10.0 467 1400 1500 Mulcoa 325 84 250 Mulcoa 325 150 Fine Grog 551 1650 Medium Grog 1650 Nash White Stoneware Clay C/10 Very good for functional pottery Kty. Ball #4 100.0 XX Sagger 267.0 Custer Feldspar 50.0 Silica 50.0 Mulcoa 325 Grog (Fine) 84.0 551.0 Nash White Stoneware Clay C/10 (tripled) Kty. Ball #4 300.0 XX Sagger 800.0 Custer Feldspar 150.0 Silica 150.0 Mulcoa 325 Grog (Fine) 250.0 1650.0
Nash White Sculpture Stoneware Clay C/10 Very good for large forms Kty. Ball #4 100.0 XX Sagger 267.0 Custer Feldspar 50.0 Silica 50.0 Mulcoa 35 Medium Grog 84.0 551.0

15
Nash White Sculpture Stoneware Clay C/10 (tripled) Kty. Ball #4 300.0 XX Sagger 800.0 Custer Feldspar 150.0 Silica 150.0 Mulcoa 35 Grog (Medium) 250.0 1650.0
Nash Red Big Sculpture Stoneware Clay C/10 For very large forms Kty. Ball#4 50.0 Red Horse Clay 16.7 XX Sagger 267.0 Custer Feldspar 50.0 Silica 50.0 Mulcoa 35 Grog (Medium) 42.0 Mulcoa 20 Grog (Coarse) 42.0 517.7 Nash Red Big Sculpture Stoneware Clay C/10 (tripled) Kty. Ball#4 250.0 Red Horse Clay 50.0 XX Sagger 800.0 Custer Feldspar 150.0 Silica 150.0 Mulcoa 35 Grog (Medium) 125.0 Mulcoa 20 Grog (Coarse) 125.0 1650.0 I used to use Red Iron Oxide, 1.7% added to the total weight of the Nash White Stoneware, to make the Nash Red Stoneware C/10. Only use Red Iron Oxide # 521. Do not use a high yielding Iron Oxide #4284. Dunting will occur. After many years of using the Iron Oxide, very now and then I would get Shivering with some of the matt glazes, I decided to take out the Red Iron Oxide and change it to natural red clay. Changing to the Red Horse Clay has given a nicer plasticity to the Nash Red Clay Body. All the Nash Clay Bodies have approximately 18% Grog in them. From a powder grog, a medium grog and course grog.

16
If you’re going to work very large then change all the grog to course mesh grog. All the Nash clay bodies salt very well. Nash Red Stoneware Clay C/10 (tripled) Very good for functional pottery Kty. Ball#4 250.0 Red Horse Clay 50.0 XX Sagger 800.0 Custer Feldspar 150.0 Silica 150.0 Muloca 325 Grog (Fine) 250.0
1650.0
Joe-S (Soldate) Clay C/10 Lincoln Fire #60 200 Kty. Ball #4 100 Custer 40 Silica Sand (60 mesh) 40 380 2 cups Red Iron Oxide – This addition makes a brown stoneware.
Chouinard Brown Stoneware Clay C/10 This is a very good clay body. Lincoln Fire #60 200 Red Clay 50 Kty. Ball #4 100 Goldart 50 Custer 50 Silica 50 Grog 50
550
John Mason Sculpture Clay C/10 Kty. Ball #4 100 Lincoln Fire #60 100 Silica Sand 30
230

17
CLAY BODIES: HIGH FIRE EARTHENWARE
Chouinard Red High Fire Earthenware Clay C/5 Red Clay 300 Kty. Ball #4 60 Lincoln Fire #60 150 Custer 60 Silica 30 Grog 60
660
One cup Barium Carbonate will stop scumming of the C/5 Red Clay.
Chuck Baxter C/5 (buff colored) Lincoln Fire #60 175 Kty. Ball #4 100 Goldart 125 Talc 25 Nepheline Syenite 50 Silica 25 500 High Fire Earthenware and Low Fire Earthenware are usually fired in an oxidation atmosphere in an electric kiln.
18
CLAY BODIES: LOW FIRE EARTHENWARE
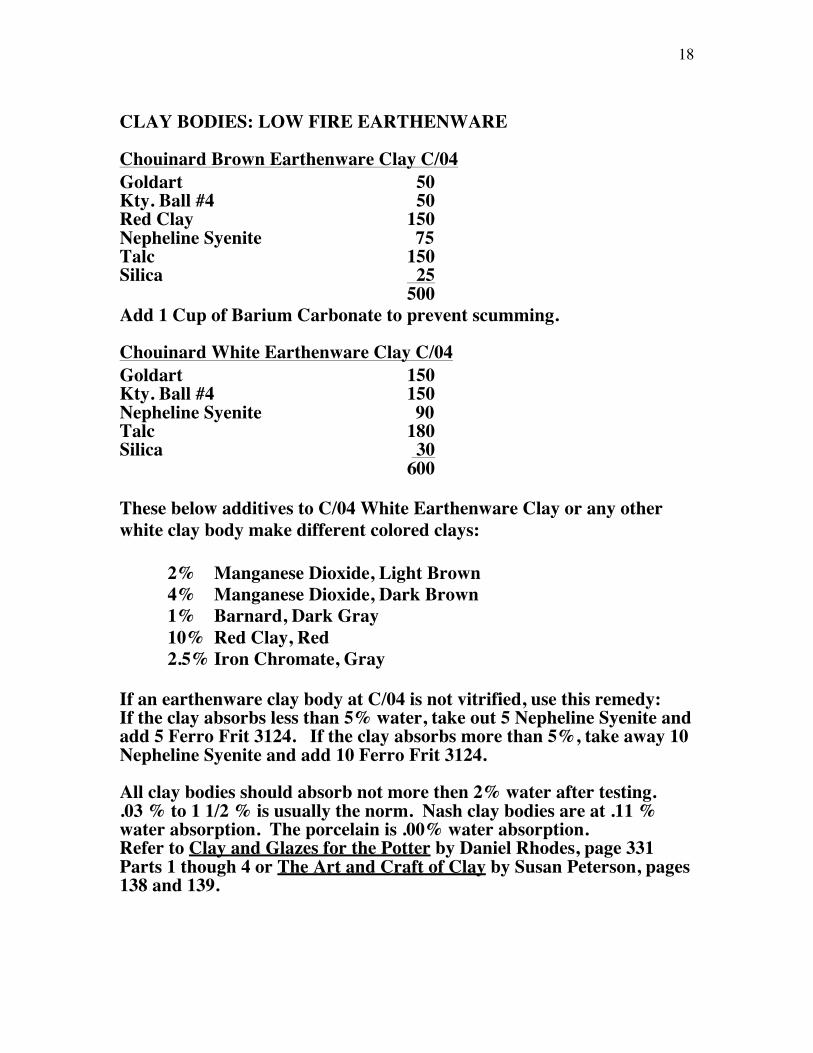
Chouinard Brown Earthenware Clay C/04 Goldart 50 Kty. Ball #4 50 Red Clay 150 Nepheline Syenite 75 Talc 150 Silica 25
500 Add 1 Cup of Barium Carbonate to prevent scumming.
Chouinard White Earthenware Clay C/04 Goldart 150 Kty. Ball #4 150 Nepheline Syenite 90 Talc 180 Silica 30 600 These below additives to C/04 White Earthenware Clay or any other white clay body make different colored clays:
2% Manganese Dioxide, Light Brown 4% Manganese Dioxide, Dark Brown 1% Barnard, Dark Gray 10% Red Clay, Red 2.5% Iron Chromate, Gray
If an earthenware clay body at C/04 is not vitrified, use this remedy: If the clay absorbs less than 5% water, take out 5 Nepheline Syenite and add 5 Ferro Frit 3124. If the clay absorbs more than 5%, take away 10 Nepheline Syenite and add 10 Ferro Frit 3124. All clay bodies should absorb not more then 2% water after testing. .03 % to 1 1/2 % is usually the norm. Nash clay bodies are at .11 % water absorption. The porcelain is .00% water absorption. Refer to Clay and Glazes for the Potter by Daniel Rhodes, page 331 Parts 1 though 4 or The Art and Craft of Clay by Susan Peterson, pages 138 and 139.
19
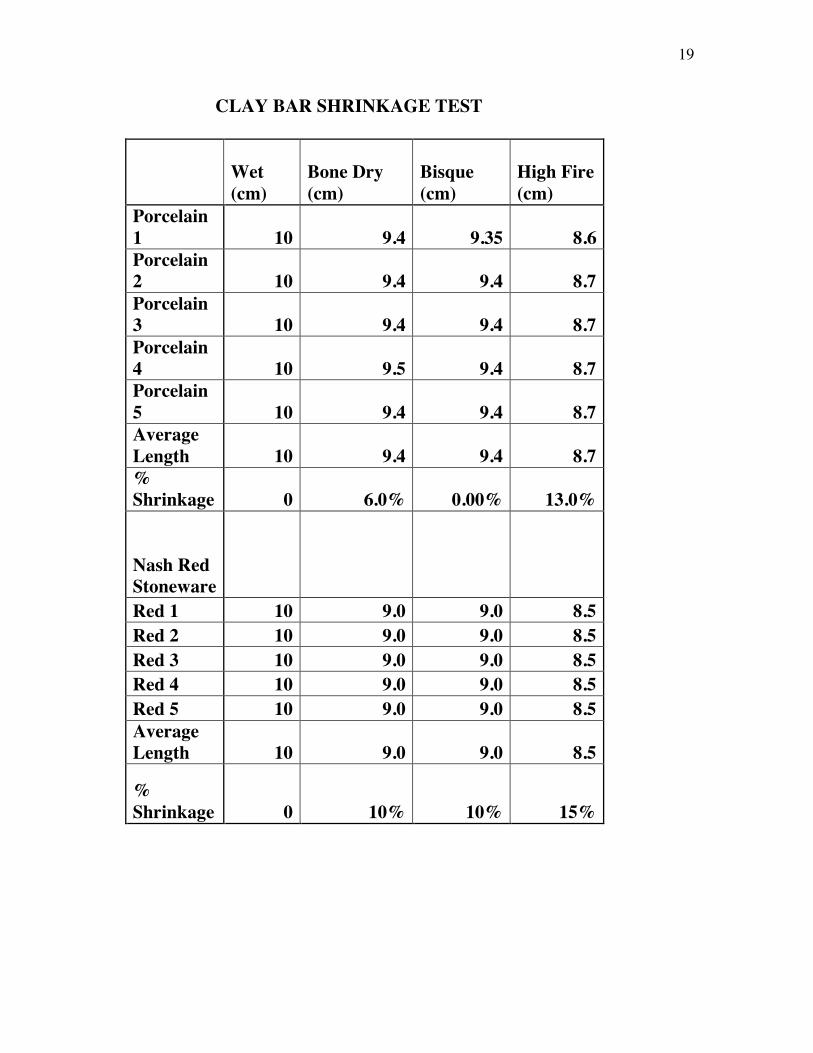
CLAY BAR SHRINKAGE TEST
Wet (cm)
Bone Dry (cm)
Bisque (cm)
High Fire (cm)
Porcelain 1 10 9.4 9.35 8.6 Porcelain 2 10 9.4 9.4 8.7 Porcelain 3 10 9.4 9.4 8.7 Porcelain 4 10 9.5 9.4 8.7 Porcelain 5 10 9.4 9.4 8.7 Average Length 10 9.4 9.4 8.7 % Shrinkage 0 6.0% 0.00% 13.0% Nash Red Stoneware Red 1 10 9.0 9.0 8.5 Red 2 10 9.0 9.0 8.5 Red 3 10 9.0 9.0 8.5 Red 4 10 9.0 9.0 8.5 Red 5 10 9.0 9.0 8.5 Average Length 10 9.0 9.0 8.5
% Shrinkage 0 10% 10% 15%

20
WATER ABSORPTION
Clay Body Original Weight (g) Saturation Final Weight (g)
% Water Absorption
Porcelain 1 76.40 76.40 Porcelain 2 79.10 79.10 Porcelain 3 79.55 79.55 Porcelain 4 83.70 83.70 Porcelain 5 109.40 109.40 Porcelain 6 90.10 90.10 Porcelain 7 86.40 86.40 Average 86.4 86.4 0. 00% Clay Body Nash Red 1 93.60 93.60 Nash Red 2 92.05 92.30 Nash Red 3 93.00 93.20 Nash Red 4 91.85 91.95 Nash Red 5 91.70 91.90 Nash Red 6 86.75 86.80 Nash Red 7 89.20 89.45 Red Average 91.2 91.3 0.11%

21
SLIP BONDING FORMULAS
Slips work like a glue in ceramics. It is for connecting wet or leather hard pieces of clay together. The old school slip is just clay and water until it becomes a liquid. Don’t confuse bonding slips with casting slips. Casting slips are completely different. Casting slips are designed to pour into plaster molds. Using only vinegar works well for plastic clay, you don’t need to use a slip if the clay consistency is on the soft side. Vinegar is an acid and because it is an acid the clay particles can make a stronger bond when connecting. Any kind of mild acid will work, coffee, tea, soda, etc. I used to use clay and water with a little vinegar. Then I went to wet clay and vinegar only to make a slip for connecting pieces together and I found that works very well. I also like using bone dry clay and vinegar for making a slip and connecting wet pieces of clay together. Eliminating the water causes less shrinkage with the clay pieces. Using a bone-dry vinegar slip works for patching broken pieces back together. Soak the broken pieces in vinegar until you see the clay surface starting to soften and then add the bone-dry slip and connect. In Susan Peterson book The Craft and Art of Clay, 4th Edition on page 35 Handbuiding with Porcelain, she talks about patching cracks by making a paste of powdered bisque, Epsom salt and water. From my experiences with trying to patch broken pieces you have a 50/50 change of success. The rules I use, if you want one, make three, because there is always a loss factor. This last formula for a bonding slip also works well. Vinegar 1 cup Karo Syrup 1 cup Clay body that you are working with 1 cup Hydrogen Peroxide 1 teaspoon

22
Depending on the size of your project, you may want to double or even triple the quantities of the formula before you get started. Mix thoroughly. If slip appears to be too soupy, gradually add more clay until slip becomes thicker. Wet Work: This slip bonding formula works best in the wet working stages. Apply liberally to scored areas and allow drying slowly. Clean surrounding surfaces of any excess. Important: Make sure your work area is always protected with newspaper or any material that you do not want to keep. Slip will dry like concrete, so clean up any spills immediately. Never allow slip to dry on your tools or your brushes. Always keep tools and brushes submerged in water while working. Wash with soap and water when finished. Never leave container with slip open while working. Always keep closed in between applications. Bisque Ware: Successful repairs have also been made with bisque ware. However, additional bisque firing is recommended to secure the repair. Make every effort to avoid touching the repaired area. As always, delicate care should be taken when handling the entire piece until after the glaze firing. Storage: The slip will store well, as long as the container is properly sealed. If it appears to be too thick after storage, gradually add vinegar until it becomes more consistent. Note: Smells like rotting fish in the drying process.
23
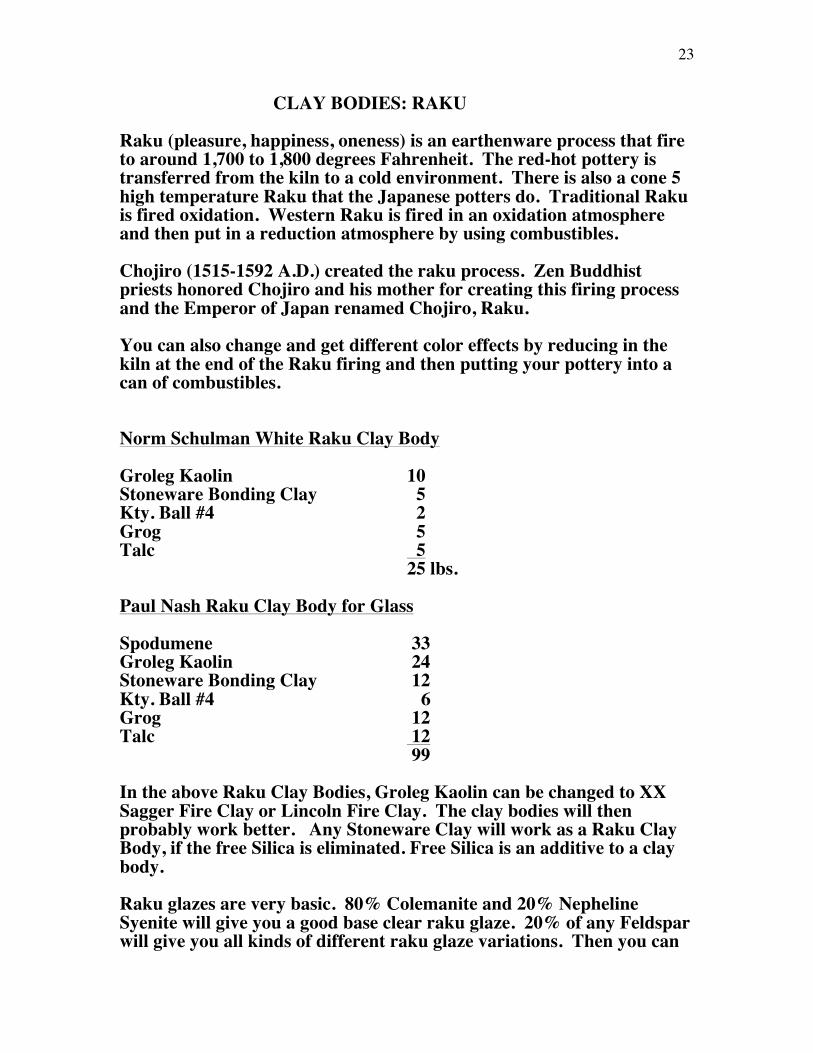
CLAY BODIES: RAKU Raku (pleasure, happiness, oneness) is an earthenware process that fire to around 1,700 to 1,800 degrees Fahrenheit. The red-hot pottery is transferred from the kiln to a cold environment. There is also a cone 5 high temperature Raku that the Japanese potters do. Traditional Raku is fired oxidation. Western Raku is fired in an oxidation atmosphere and then put in a reduction atmosphere by using combustibles. Chojiro (1515-1592 A.D.) created the raku process. Zen Buddhist priests honored Chojiro and his mother for creating this firing process and the Emperor of Japan renamed Chojiro, Raku. You can also change and get different color effects by reducing in the kiln at the end of the Raku firing and then putting your pottery into a can of combustibles. Norm Schulman White Raku Clay Body Groleg Kaolin 10 Stoneware Bonding Clay 5 Kty. Ball #4 2 Grog 5 Talc 5
25 lbs.
Paul Nash Raku Clay Body for Glass Spodumene 33 Groleg Kaolin 24 Stoneware Bonding Clay 12 Kty. Ball #4 6 Grog 12 Talc 12 99 In the above Raku Clay Bodies, Groleg Kaolin can be changed to XX Sagger Fire Clay or Lincoln Fire Clay. The clay bodies will then probably work better. Any Stoneware Clay will work as a Raku Clay Body, if the free Silica is eliminated. Free Silica is an additive to a clay body. Raku glazes are very basic. 80% Colemanite and 20% Nepheline Syenite will give you a good base clear raku glaze. 20% of any Feldspar will give you all kinds of different raku glaze variations. Then you can
24
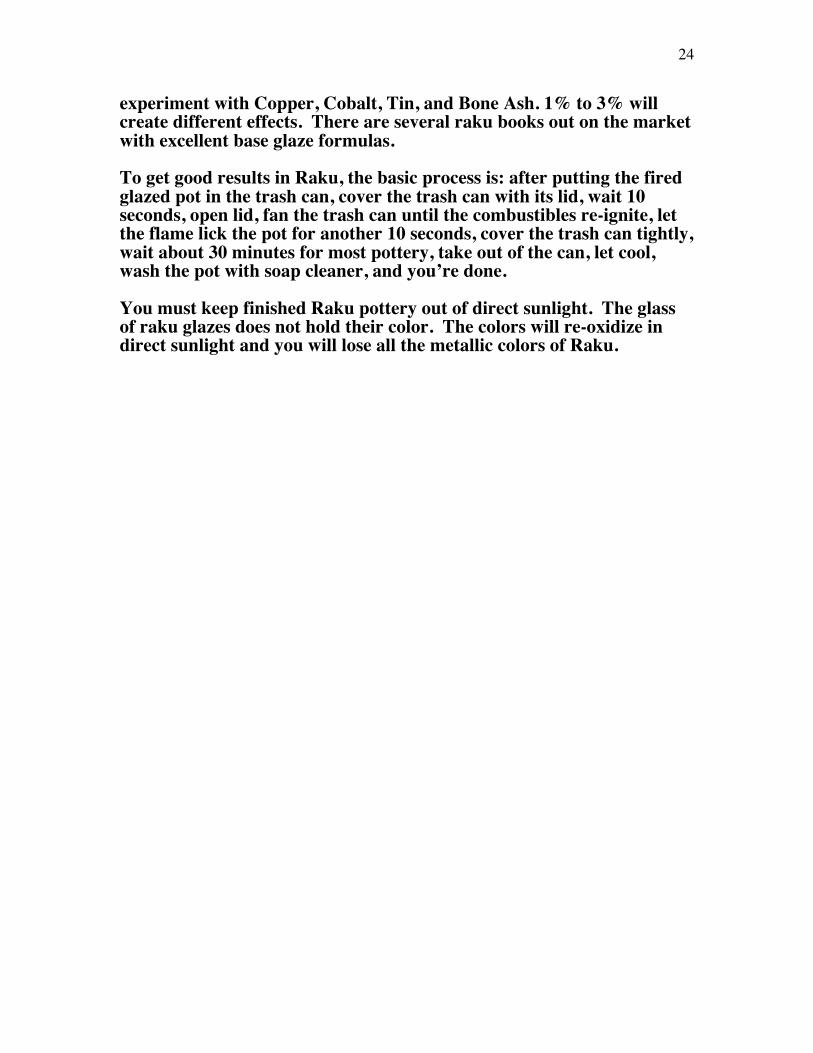
experiment with Copper, Cobalt, Tin, and Bone Ash. 1% to 3% will create different effects. There are several raku books out on the market with excellent base glaze formulas. To get good results in Raku, the basic process is: after putting the fired glazed pot in the trash can, cover the trash can with its lid, wait 10 seconds, open lid, fan the trash can until the combustibles re-ignite, let the flame lick the pot for another 10 seconds, cover the trash can tightly, wait about 30 minutes for most pottery, take out of the can, let cool, wash the pot with soap cleaner, and you’re done. You must keep finished Raku pottery out of direct sunlight. The glass of raku glazes does not hold their color. The colors will re-oxidize in direct sunlight and you will lose all the metallic colors of Raku.

25
THE KILN INSTRUCTIONS FOR STACKING A STANDARD BISQUE KILN A bisque firing is a low-temperature oxidation firing, to harden the clay into a rock-like material for the preparation of glazing. The bisque firing brings about chemical changes, which keeps the clay from dissolving back into a slip. The bisque makes the glazing process much easier. Bisque firing also facilitates storing and stacking of ware. Before the bisque firing process, the clay objects are called greenware. Clay starts to become a rock like material when it is fired above 900 degrees Fahrenheit (F). However, most bisque firings range from 1700 degrees F, cone 09, to 1830 degrees F. cone 06, and are a matter of personal choice. This class fires to 1830 degrees F, cone 06, in the electric kilns. It is a three-day process: loading and preheating overnight, firing to temperature, cooling and unloading. Before you begin to load, check to see that the kiln is free of debris. Vacuum any broken shards or packing clay from the interior of the kiln. Use caution when vacuuming, because the electrical elements are fragile, and the kiln is lined with soft brick. Next, get an instructor or lab assistant to help you position the 06 cone and/or set the controls on the kiln. It is necessary for the greenware that it is placed on each shelf to be of a similar height. Start with the smallest pieces of pottery at the bottom of the kiln. In order to find greenware of similar heights for each shelf, use two matching posts to measure the greenware. These two posts will represent the pot and the shelf in the stacked kiln. Lay one post horizontally on the vertical post, to create a post and lintel structure. The lintel post represents the kiln shelf. It is easier to bring the posts to the greenware shelves to check the size than to bring the greenware to the kiln. Begin by selecting pieces of similar height for the bottom shelf. Place a total of three posts on each shelf, two on the outside edges at both ends and one at the middle edge on the other side. Continue to stack the kiln in this manner, stacking the back of the kiln and then the front of the kiln.

26
The pieces to be fired must be completely dry or the moisture contained in the clay and/or air pockets will be heated to steam and cause the piece to explode. To test for dryness hold the piece against your cheek. If the piece feels cold, it is still damp. When in doubt, don't load. Exploding clay shards often destroy more than one piece. Pick up the ware by supporting the bottom with your hands. Do not lift the piece by the rim and the wall, since these areas of an unfired piece is the thinnest, weakest part, and it breaks easily. Avoid sliding the ware over a dusty shelf. That will gouge and scratch the bottom of the piece, resulting in an unsightly, unprofessional surface. (If you should break someone else's greenware while loading, leave a note in the piece identifying yourself.) The greenware with the exception of porcelain, which is too fragile--may be stacked one inside of another, stacked rim to rim, stacked horizontally, or stacked on its edge. Stacking pieces inside of one another is usually limited to two or three pieces, with the heaviest piece on the bottom. Avoid suspending a piece by its rim over a smaller piece, since the two may shrink at different rates, and either or both pieces might crack by the stress. Covers should be fired in place, to prevent warping, and large knobby covers can be inverted to save space. The taller pieces are usually reserved for the top shelf, because post sizes are limited and the taller posts are less stable. When a shelf is fully loaded, place a small coil of packing clay, about the size of a ½ inch rope, on the top of each post for the next shelf. Then place the kiln shelf on top of the posts, and then hit the middle of the kiln shelf with you fist. This will stabilize the kiln shelf. Packing clay helps to prevent warped shelves from wobbling. Packing clay or any clay can be used in the bisque firing. Finish loading by placing the posts on each shelf directly over each other. It is not necessary to kiln wash the shelves because the greenware is not glazed. Late in the afternoon begin the firing by turning on one bottom switch to low. Set the timer for 20 hours. Leave the door of the kiln propped open with the width of a post, and leave the plugs out of the peepholes. This allows moisture to escape from the kiln atmosphere. The greenware is preheated overnight before the actual firing begins. For

27
normal pottery thickness of 1/8 to 1/4 inch, a pre-heat of 7 hours is adequate. In the morning continue the firing as follows.
1. Close the lid. Put the plugs in the peepholes. 2. Reset the timer to 10 hours. 3. Turn all the switches to low for 2 hours. 4. Turn all the switches to medium for 2 hours. 5. Turn all the switches to high for 8 to 10 hours. Reset timer to 12
hours. The cone will drop and the automatic shutoff will turn off the kiln, or the timer will shut off the kiln.
When the ware is cool enough to handle, in about twenty hours, you can stack the fired pieces on the bisque shelves. Vacuum any broken shards or packing clay from the interior of the kiln in preparation for the next firing. The bottom shelves are left in place from firing to firing. The thicker the clay wall structure is, the longer the firing needs to be. I pre-heat for 72 hours and fire 48 to 72 hours to bisque for an object that is 2 inch to 3 inches thick. Additional information about firing can be found in your textbooks, Clay and Glazes For The Potter by Daniel Rhodes. Art and Craft of Clay by Susan Peterson
28
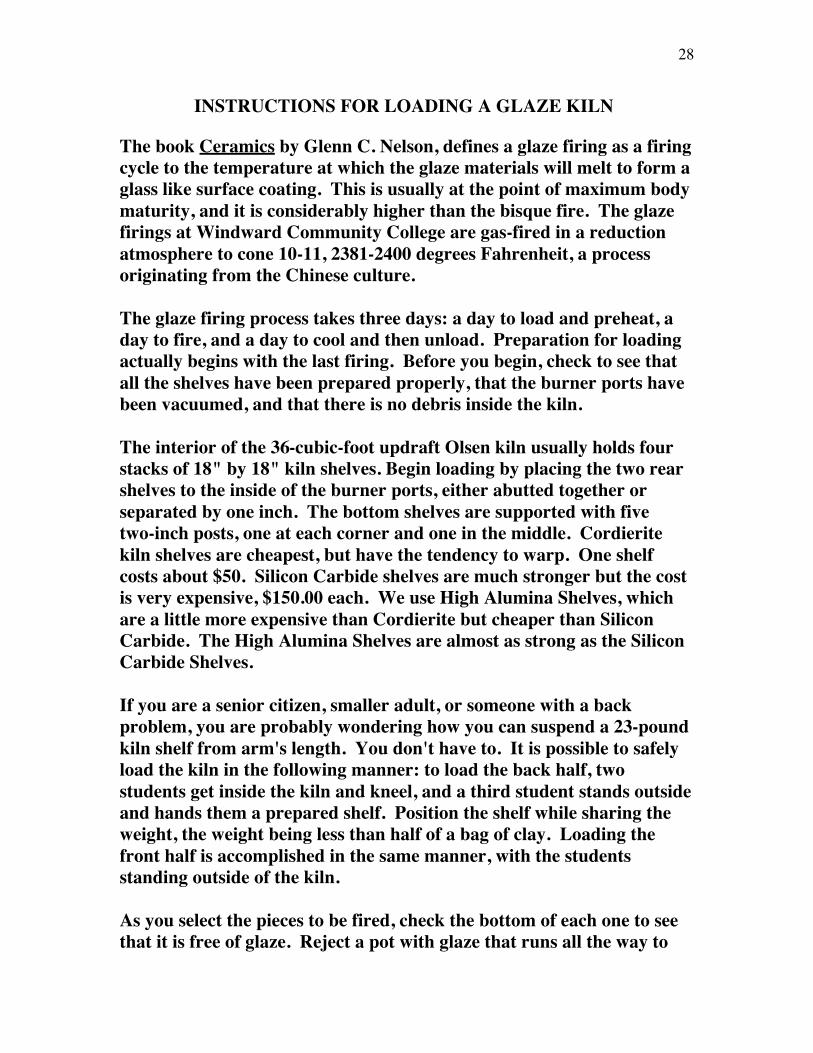
INSTRUCTIONS FOR LOADING A GLAZE KILN The book Ceramics by Glenn C. Nelson, defines a glaze firing as a firing cycle to the temperature at which the glaze materials will melt to form a glass like surface coating. This is usually at the point of maximum body maturity, and it is considerably higher than the bisque fire. The glaze firings at Windward Community College are gas-fired in a reduction atmosphere to cone 10-11, 2381-2400 degrees Fahrenheit, a process originating from the Chinese culture.
The glaze firing process takes three days: a day to load and preheat, a day to fire, and a day to cool and then unload. Preparation for loading actually begins with the last firing. Before you begin, check to see that all the shelves have been prepared properly, that the burner ports have been vacuumed, and that there is no debris inside the kiln. The interior of the 36-cubic-foot updraft Olsen kiln usually holds four stacks of 18" by 18" kiln shelves. Begin loading by placing the two rear shelves to the inside of the burner ports, either abutted together or separated by one inch. The bottom shelves are supported with five two-inch posts, one at each corner and one in the middle. Cordierite kiln shelves are cheapest, but have the tendency to warp. One shelf costs about $50. Silicon Carbide shelves are much stronger but the cost is very expensive, $150.00 each. We use High Alumina Shelves, which are a little more expensive than Cordierite but cheaper than Silicon Carbide. The High Alumina Shelves are almost as strong as the Silicon Carbide Shelves. If you are a senior citizen, smaller adult, or someone with a back problem, you are probably wondering how you can suspend a 23-pound kiln shelf from arm's length. You don't have to. It is possible to safely load the kiln in the following manner: to load the back half, two students get inside the kiln and kneel, and a third student stands outside and hands them a prepared shelf. Position the shelf while sharing the weight, the weight being less than half of a bag of clay. Loading the front half is accomplished in the same manner, with the students standing outside of the kiln. As you select the pieces to be fired, check the bottom of each one to see that it is free of glaze. Reject a pot with glaze that runs all the way to

29
the bottom of the glazed piece of pottery. Be alert to an unusual clay color, students will sometimes glaze greenware by mistake. Examine the lid of a covered piece to see that it is sitting properly as it is placed on the shelf. The slightest misalignment will glaze the lid to the body. Fill the shelf with pieces of equal height; making sure that no piece touches another piece or a post. Select a post size to clear the tallest piece. Take a minute now to find four posts that are exactly the same height, which would spare you later from the sight of a fully-loaded swaying kiln shelf. Place four posts at the corners of each shelf. The top shelf is usually reserved for the tallest and widest pieces. Place a small coil of packing clay, about the thickness of a 1/2” piece of rope, on the top of each post. Then place the kiln shelf on top of the posts, then hit the middle of the kiln shelf with you fist, this will stabilize the kiln shelf. The packing clay helps to steady warped shelves. Packing clay for glaze firings is a mix of 90% E.P.K. (China clay), and 10% Kentucky Ball #4 clay. Do not substitute any other clay for the packing clay provided, because low-fire clays would liquefy at these temperatures, and stoneware and porcelain will fuse onto the shelves and posts. Continue stacking, first the back half, then the front, in this manner. The posts of each shelf should be directly over each other. For the best possible firing conditions, stagger the shelf heights of the two sides so they do not abut each other. This is very important! Potters have mixed feelings about letting the glazed ware overhang a shelf. The very least that can be said about it is that a glaze exposed to a direct flame will fire to a different color value. This is called licking the pot. The overhanging piece of pottery may warp. To fire a piece with a base that exceeds the width of one shelf, you must level the two shelves. A piece fired on uneven shelves may slump or crack. When you begin loading the front half of the Olsen kiln, notice the two white dots on the back inside wall of the kiln. These dots mark the location of the cone packs at the front of the kiln. Place your cone packs on a shelf and/or any combination of posts, which bring the bottom of the cones to the level of the peepholes. The slumping cones are signals to

30
the potter of the temperatures at which reduction begins and the firing ends. When the desired temperature is achieved, the kiln is turned off, the damper is closed, and the kiln is allowed to cool overnight. After all the color is gone from the interior of the kiln, the damper is opened, and the door is cracked open. The potter opens the door in small increments to avoid thermal shock to the fired pottery. Unloading the kiln is the payoff for all your hard work. (It is considered bad manners to remove your piece from the kiln before the loaders have inspected the firing.) The location of the ware in the kiln can make a difference. We know from experience, for instance, that the Red Kaki looks best on the outside of the shelf, that Far Out Red needs the protection of the interior, that Shino looks best on the bottom left shelves, and that Semi-Matt Gold looks good anywhere. If a glaze runs off a piece and sticks to the shelf, remove the shelf with the piece still attached and set it aside. It is that potter's responsibility to chip the shelf clean. Glazes, which have run onto the kiln shelf, must be chipped off with a hammer and chisel. If the glaze isn't entirely removed and is covered over with kiln wash, any piece that comes in contact with the glaze during the next firing will stick to the shelf. Scrape off any loose kiln wash and paint the shelves again with a fresh solution. Kiln Wash is equal parts of kaolin clay and silica, is highly refractory and resistant to the effects of high temperature. Kiln wash helps to prevent glazes from fusing to kiln furniture. Wash off any surplus kiln wash from the sides and bottoms of the shelves, because any excess has a tendency to fly around the kiln atmosphere and land in the middle of your best plate. Vacuum any chips of broken clay, chunks of packing clay, or flakes of kiln wash from the burner ports and the interior of the kiln. Any obstruction of the burner ports from debris of this sort would interfere with combustion and result in an uneven firing.

31
FIRING A HIGH FIRE REDUCTION KILN I start body and glaze reduction at 1900 degrees Fahrenheit. I was taught to start body reduction at around 1600 degrees. But after many years of firing, I have found that one can still get a good body reduction starting at the higher temperature, which cuts down a little on the time to reach Cone 10. The kiln fires in oxidation up to 1,900, then it goes into a reduction atmosphere. The earth mineral in the glaze will start to flux around 2,000 degrees. I like to have at least 5 inches of a flame at the top peephole and about a 2-inch flame at the bottom peep hole. The kiln fires this way until we get to cone 8, about 6 to 8 hours. At cone 8, I put the kiln into a heavy reduction, so there is some smoke licking at the end of the flames. The temperature will drop anywhere from one hundred to two hundred degrees and then settle into a soak. I soak for 45 minutes and then go back to the original reduction flame of 5 inches on the top peephole and a 2-inch fame at the bottom peephole. When cone 9 starts to move, I put the kiln in an oxidation neutral atmosphere until I get cone 10 to bend. Shut down the kiln and close the damper. I like to have Cone 11 tipping a little bit. All gas kilns start with the damper 1/2 open firing in an oxidation atmosphere. From there adjust the damper when you start to get color in the kiln. At 1,900 degrees the inside of the kiln is a nice orange red color and I close the damper to 1/3 open to start the reduction. Always check your peephole flames. Get to know the neutral flame atmospheres, from an oxidation neutral flame to a reduction neutral flame.

32
KILN WASH AND PACKING CLAY Kiln Wash: 50% E.P.K. (Kaolin) 50% Alumina Hydrate. Mix kiln wash into a slip consistency. Add gum. Packing Clay: 50% E.P.K. 50% Alumina Hydrate. Mix into a clay consistency and wedge it. Alumina Hydrate is expensive. You can replace it with silica. Kiln Wash: 50% E.P.K. 50% Silica / add gum Packing Clay: 50% E.P.K. 50% Silica Packing Clay: 90% E.P.K. 10% Kentucky Ball#4
In closing, ceramics is an endless process. The information in this book is from 40 plus years of working with clay and fire. There is always some loss factor in ceramics. Ceramic industry after more then 400 years of modern ceramic technology still loses 20% of its ceramic products from pots cracking, glazes pin holing, crawling and so forth. As a production potter, my loss factor had been about 10%. As a ceramic artist, my loss factor is about 30%. The important thing is that you are having fun and enjoying the miracles of clay and fire. I would like to extend a big aloha and gratitude to several ceramic artists who have helped me retest and update some of the glaze formulas and materials. Thank you Betty Oshima, Setsu Meyer, Bryce Myers and Rebecca Braun. I would like to thank Artist Noreen Naughton, who has put in many hours editing this document. Good Luck and May The Force Be With You. Sincerely, Paul Nash Professor of Art/Ceramics

33
PLASTER OF PARIS Always use U S. Pottery Plaster #1. It will give a strong but absorbent plaster for making plaster bats, tops for wedging tables, drying slabs, etc. It will take a few practice tries before you get the mixing process down.
WATER-PLASTER RATIO -- 1 to 1 3/8 by weight
Water Plaster Water Plaster ½ pint 11 oz. 6 quarts 16 lb. 8 oz. 1 pints 1 lb. 6 oz. 7 quarts 19 lb. 4 oz. 1 ½ pints 2 lb. 4 oz. 8 quarts 22 lb. 1 quart 2 lb. 12 oz. 9 quarts 24 lb. 12 oz. 1 ½ quarts 4 lb. 8 oz. 10 quarts 27 lb. 8 oz. 2 quarts 5 lb. 8 oz. 11 quarts 30 lb. 4 oz. 2 ½ quarts 6 lb. 14 oz. 12 quarts 33 lb. 3 quarts 8 lb. 4 oz. 13 quarts 35 lb. 12 oz. 3 ½ quarts 9 lb. 10 oz. 14 quarts 38 lb. 8 oz. 4 quarts 11 lb. 15 quarts 41 lb. 4 oz. 4 ½ quarts 12 lb. 6 oz. For each additional quart of
water beyond 15, add 2 lb. 12 oz. plaster
5 quarts 13 lb. 12 oz. 5 ½ quarts 15 lb. 2 oz. Plaster comes in the form of a white powder. When mixed with water, it recovers the water it had, prior to being treated by heat, and ends up with the same composition as the original gypsum. Add salt to the water if you want to slow the action of the setting time (5 to 10% Salt). Use hot water to speed the action of the setting time. 2 3/4 lbs. plaster and 1 qt. water makes a 6" wheel-throwing bat.
34
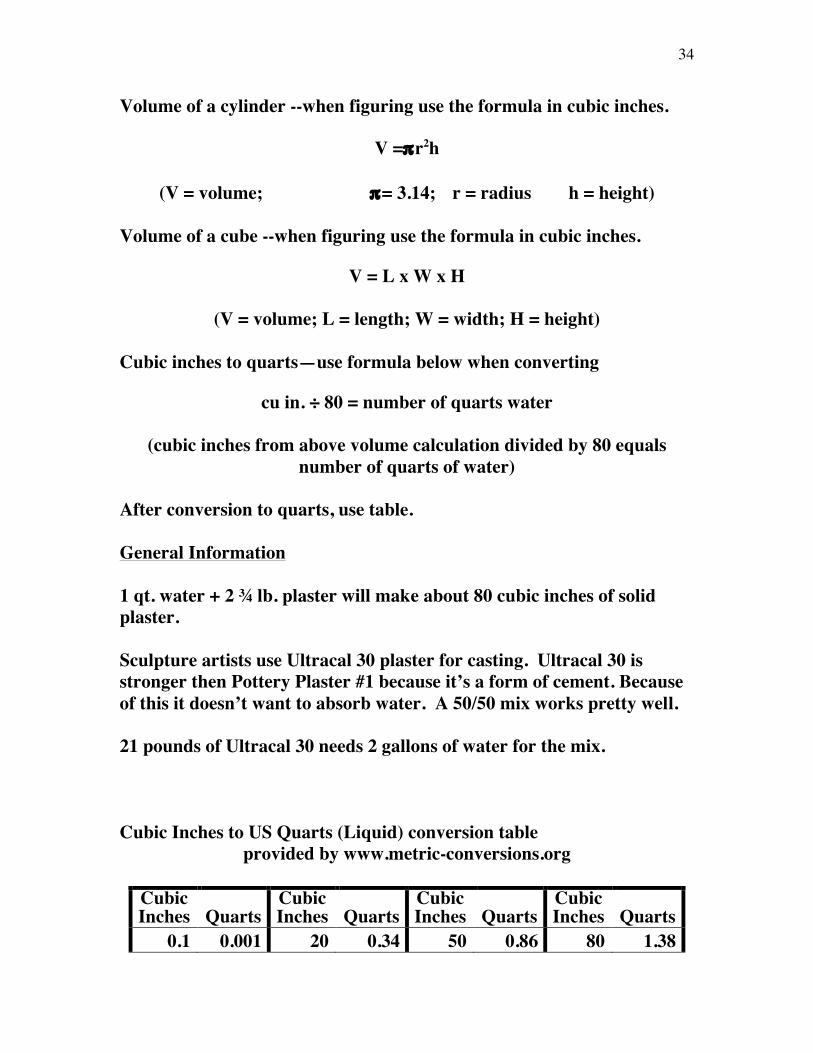
Volume of a cylinder --when figuring use the formula in cubic inches.
V =πr2h
(V = volume; π= 3.14; r = radius h = height) Volume of a cube --when figuring use the formula in cubic inches.
V = L x W x H
(V = volume; L = length; W = width; H = height) Cubic inches to quarts—use formula below when converting
cu in. ÷ 80 = number of quarts water
(cubic inches from above volume calculation divided by 80 equals number of quarts of water)
After conversion to quarts, use table.
General Information 1 qt. water + 2 ¾ lb. plaster will make about 80 cubic inches of solid plaster. Sculpture artists use Ultracal 30 plaster for casting. Ultracal 30 is stronger then Pottery Plaster #1 because it’s a form of cement. Because of this it doesn’t want to absorb water. A 50/50 mix works pretty well. 21 pounds of Ultracal 30 needs 2 gallons of water for the mix. Cubic Inches to US Quarts (Liquid) conversion table
provided by www.metric-conversions.org
Cubic Inches Quarts
Cubic Inches Quarts
Cubic Inches Quarts
Cubic Inches Quarts
0.1 0.001 20 0.34 50 0.86 80 1.38

35
0.2 0.003 21 0.36 51 0.88 81 1.4 0.3 0.005 22 0.38 52 0.9 82 1.41 0.4 0.006 23 0.39 53 0.91 83 1.43 0.5 0.008 24 0.41 54 0.93 84 1.45 0.6 0.01 25 0.43 55 0.95 85 1.47 0.7 0.012 26 0.45 56 0.96 86 1.48 0.8 0.013 27 0.46 57 0.98 87 1.5 0.9 0.015 28 0.48 58 1 88 1.52
1 0.01 29 0.5 59 1.02 89 1.54 2 0.03 30 0.51 60 1.03 90 1.55 3 0.05 31 0.53 61 1.05 91 1.57 4 0.06 32 0.55 62 1.07 92 1.59 5 0.08 33 0.57 63 1.09 93 1.61 6 0.1 34 0.58 64 1.1 94 1.62 7 0.12 35 0.6 65 1.12 95 1.64 8 0.13 36 0.62 66 1.14 96 1.66 9 0.15 37 0.64 67 1.16 97 1.67
10 0.17 38 0.65 68 1.17 98 1.69 11 0.19 39 0.67 69 1.19 99 1.71 12 0.2 40 0.69 70 1.21 100 1.72 13 0.22 41 0.7 71 1.22 200 3.45 14 0.24 42 0.72 72 1.24 300 5.17 15 0.25 43 0.74 73 1.26 400 6.90 16 0.27 44 0.76 74 1.28 500 8.62 17 0.29 45 0.77 75 1.29 600 10.34 18 0.31 46 0.79 76 1.31 700 12.07 19 0.32 47 0.81 77 1.33 800 13.79
48 0.83 78 1.35 900 15.52 49 0.84 79 1.36 1000 17.24
INFORMATION HYDRATED CALCIUM SULPHATE
2CaSO4 .0. 5H20 Plaster (Gypsum) Calcine-dry fire to 325°F-375°F, (163°C-170°C) . Drives off 75% of the chemical water to form 2CaS04.2H20 ----- 2CaS04.0.5H20+3H20

36
(released as steam) after heating. This is known as plaster of Paris. From the heating we lose 3 molecules of H20, which leaves the plaster in the above formula. Plaster is caustic to our skin, so apply Vaseline to your hands and arms to protect them. Do not use green soap on hands. The plaster will not set up. Grease your mold with green soap, mold soap, or hospital soap. All are the same. A good liquid dish soap or shampoo will work. Vaseline works very good well. 1. Sift plaster into the water.
2. Keep your hand flat at the bottom of the bucket and undulate slowly, trying not to create air bubbles. Air bubbles that come up to the surface can be skimmed off with your other hand and/or a spoon.
3. Try to pour just before it starts to thicken, but don’t pour too soon. 4. You can pour the plaster through a 20 or 30 mesh screen to break
up air bubbles when pouring into a mold. 5. After pouring, shake the mold with your hands. Air bubbles will come up to the surface. Blow on the air bubbles and they will
disappear. 6. When the plaster gets to its hottest point, you release it from the mold. That is the easiest way to release it, than to let it cool and release it then.
7. It is best to let the plaster cure for two weeks, drying slowly, but you can force dry it at about 100°F or 35°C. U.S. Pottery plaster #1
is the best gypsum for making molds, bats, and slabs.

37
GLOSSARY TERMS Amphibole: Any group of rocks forming minerals containing calcium, magnesium, iron, aluminum and sodium combined with silica. Amphibole Pyroxene: Any of a group of igneous rock forming silicate minerals that contain calcium, magnesium, iron, or aluminum. Aeolian: Wind blown. Alkaline: Having properties of an alkali, having oxides of barium, strontium, and sometimes magnesium. Alkali: A compound of hydrogen and oxygen with any one of the elements lithium, sodium, potassium, rubidium, and cesium. Solubility in water and capability of neutralizing acids. A mixture of salts in the soil; carbonate of sodium. Ammonium: The chemical ion NH4. Ammonium Chloride: White crystalline compound NH4 Cl. Amorphous: Shapeless, formless. Attenuate: To make or become thin. Basalt: A fine to dense igneous rock calcium or sodium in its composition. Biotite: A brown or dark green form of mica, with silicate of iron, magnesium, potassium, and aluminum. Bismuth: A heavy brittle grayish white metallic chemical element used in making luster’s. Borates: A salt or ester. Burette: A graduated glass tube with a small aperture for measuring fluids. Calcite: Calcium carbonate crystalline form; a major constituent of

38
limestone, marble and chalk. Carbonate: A salt or ester of carbonic acid. Carbonate Acid: Formed when carbon dioxide dissolves in water. Carbon Dioxide: Incombustible gas. Chloride: A compound of chlorine with another element or a radical. Chlorine: Irritating gas used as an oxidizing agent. Colloidal: Resembling liquid gelatin. Cristobalite: A silica calcined at 1500°C, 2732°F for investment casting. Ester Acid: Compound formed by the reaction of an acid and an alcohol. Ferro: Latin word meaning iron; ferrous iron. Ferro-Magnesian: Group of Amphibole Pyroxenes. Hydrochloric Acid: A strong corrosive irritating acid. Kaolin: Hydrous aluminum silicate used in making porcelain. Limestone: Stone formed by organic remains of shells. Metamorphic: A change in the structure of rock. Mica: Any class of silicates. Muriadic Acid: Hydrochloric acid. Nitrate: A salt or ester of nitric acid. Nitric Acid: A corrosive liquid. Nitrogen: Tasteless, odorless, gaseous chemical; 78% of the earth's

39
atmosphere by volume. Props: Post supports. Pin Holing: Add 1% (80 grams) Lithium Carbonate and 1 ounce or 28 grams of Magnesium Sulphate to an 8,000 batch of glaze to eliminate pin holing. You can add more Magnesium Sulphate but start with one ounce. Resin: A substance obtained from the gum or sap of some trees used in varnishes and plastics. Shale: A rock formed by clay. Silica: Crystalline silicon dioxide. Silicon: Non-metallic element. Slag: Waste left after the melting of ores and the separation of metal from them. Theta: Measurement of any given angle. Volatile: Vaporizing. Volt: The speed of the ohm; electrical potential.