the - Amazon Simple Storage Servicebonus.pdf · Apart from any fair dealing for the purpose of...
63
JULES CLANCY the Soupstones How to Setup Your Life Saving Pantry PANTRY COOKBOOK
Transcript of the - Amazon Simple Storage Servicebonus.pdf · Apart from any fair dealing for the purpose of...

JULES CLANCY
the Soupstones
How to Setup Your Life Saving Pantry PANTRY COOKBOOK

For my little family xx
© Jules Clancy 2014This ebook is copyright. Apart from any fair dealing for the purpose of private study, research, criticism or review, as permitted under the Copyright Act, no part of this ebook may be reproduced by any process without written permission. Enquiries should be addressed to the author.
All rights reserved.
Getting the most fromthis eBook
How to make the most of this eCookbook...
There's quite a bit of detail on setting up and getting your pantry working for you. If you have the time and the inclination to go through the whole book that's awesome!
But if not, don't worry!
The main reason I've included this bonus with your Soupstones meal planning membership is because your pantry can be a real 'life saver' when it comes to dealing with changes to your schedule.
The easiest way to set up your 'insurance policy' get your pantry working for you is to follow the two simple steps below.
Step 1. Choose 2 pantry recipes from this eCookbook.
Step 2. Write a shopping list and buy the ingredients you need. And next time you need a quick dinner, cook one of your pantry meals.
You'll always have something in the house you can easily turn into a quick healthy meal! And that's the best thing your pantry can do for you!Ô

Getting the most from this eCookbook
Recipe Index
Step by step guide to setting up your pantry
How to stock your pantry
13 Ways to help your pantry come to the rescue
4 Common Pantry Mistakes
Pantry Recipes
About the Author
Contents
Ôinteractive documentclickable links

SOUPS
Beet & Tomato Soup
Pea & Pesto Soup
SALADS
Chickpea & Veggie Salad
Quinoa & Grilled Veg Salad
Warm Salmon Salad
Recipe INDEXGRAINS & LEGUMES
Creamy Coconut Lentils
Green Spinach Lentils
Rice & Greens
PASTA & NOODLES
Garlic & Chilli Spaghetti
Noodles with Parmesan Peas
VEGGIES
Broccoli Pantry Curry
Pantry Cauliflower Cheese
Quick Veg Curry
Quick Veggie Satay
Ôinteractive documentclickable links
Step-by-Step Guide
A Step by Step Guide to Setting up and Using Your Pantry
STEP 1. Choose 2 pantry recipes.
You thought I was going to say something like ‘set aside some time to clean out your pantry’ didn’t you?
Well the good news is, for your pantry to really help you it just needs to do two things:
1. Supply enough of the right ingredients to make a particular meal.
2. Help you remember you have said ingredients when you’re feeling tired & hungry.
And all it takes for this to happen is for you to choose just 2 recipes that you want to have as your backup.
Then it’s up to step 2…
STEP 2. Buy the ingredients for those recipes.
It doesn’t matter how you look at it, unless you have actual ingredients in the house, you won’t be able to cook.
So make sure you buy some ingredients that you know will actually go together to make something delicious and quick. Then move onto step 3.
Ô
3. Wipe down the shelf.
4. Put the ‘keepers’ back in some sort of order.
I try and keep ‘like’ items together so I have the bottle together with things like vinegars and sauces and oils, spices live in my ‘spice box’ the canned goods live together and so on. You’ll see what I mean when you watch the ‘virtual tour video’ on the next tab.
Ô
A Step by Step Guide to Setting up and Using Your Pantry
STEP 3. Relax.
Pat yourself on the back and remember that next time you need a quick, emergency meal, instead of resorting to pizza, just head home and have some fun whipping up one of your delicious pantry dinners.
It’s that simple.
OPTIONAL BONUS
STEP 4. Set aside some time for a pantry ‘spring cleaning’ session.
It’s up to you to choose the format. Sometimes I take on the whole pantry at once, but mostly I just clean one shelf at a time. Here’s how I do it….
1. Remove everything from the shelf.
2. Throw out anything that smells funny, is well past the ‘best before’ date, you have no idea what you’d use it in OR anything you don’t really like.
Stocking Your
Pantry
How to Stock Your Pantry
SUPER IMPORTANT! Please don’t feel like you need to rush out and buy everything on this list. It’s designed to give you ideas. If you feel like it, you’re welcome to choose one or two items from each category, but you could also just let your pantry grow organically by choosing 2 or more pantry recipes below and making sure you stock those ingredients.
oils
good quality extra virgin olive oil – for salads and drizzling§ cheaper extra virgin olive oil – for cooking (I buy in bulk)
rice bran oil or macadamia oil – for frying and where you need a neutral flavoured oil.
vinegar
sherry or rice (wine) vinegar – my favourites. Red wine vinegar would also be OK.
balsamic – because sometimes you want a little more sweetness.
lemons – not technically vinegar, but they do the same thing.
Ô

pesto
vegemite – not for everyone
peanut butter – for people who don’t like vegemite.sweeteners – honey, rice malt syrup, maple syrup
sauces & condiments
mustard – I always have both dijon & wholegrain
soy sauce – wonderfully versatile
mayonnaise – I’ve gotten into making my own, but that’s not for everyone
ketchup – that’s tomato sauce for the Aussies out there
oyster and/or fish sauce – for Asian cooks
Ô
How to Stock Your Pantry
canned things
tomatoes – preferably whole peeled
chickpeas – my all time favourite pantry ingredient
beans – butter beans, cannellini, red kidney
lentils
fish – tuna in oil (with chilli), sardines
chicken – I preferred smoked chicken
coconut milk – especially for Asian cooks and vegan / dairy free fans.
jars
curry paste – red Thai or Indian
tomato – paste, puree or pasta sauce (marinara sauce)
tahini – ground sesame seeds
vegetables – roast red peppers, grilled eggplant (aubergines)

baking – [not for everyone]
flour – plain flour, bread flour, rice flour (or gluten free flour), almond meal
sugar – white sugar, brown sugar, stevia
other – cocoa powder, baking powder, dried yeast
chocolate – 70% cocoa solids
dry goods
lentils – red, puy or french-style green lentils dried beans & chickpeas
carbs – pasta / noodles / couscous / basmati rice (definitely not essential!) / barley
other – rolled oats, quinoa, chia seeds, oat bran, chia seed bran
Ô
How to Stock Your Pantry
pantry vegetables
potatoes, garlic, onions
seasonings
salt – sea salt flakes like Maldon, cheaper fine sea salt or kosher salt for salting water.
black peppercorns – best quality you can afford
spices, dried chilli flakes or chilli powder, curry powder, ground cumin, ground coriander, garam masala (Indian spice blend), smoked paprika

freezer
vegetables – frozen peas, broad beans, spinach
fruit – berries, bananas, mango
protein – meat, sausages, fish, poultry
herbs – rosemary, kaffir lime leaves, curry leaves, thyme,
spices – fresh turmeric, ginger
other – puff pastry, bread
Ô
How to Stock Your Pantry
nuts
[not necessarily all at once] almonds, pinenuts, hazelnuts, walnuts, hazelnuts, pistachios, brazil nuts, cashews
fridge
cheese – parmesan, ricotta, goats cheese, halloumi, cottage cheese, other hard cheeses other dairy – butter, yoghurt
condiments – mayonnaise, aioli, pesto, miso paste, pickled veg, mustard, sauerkraut, kimchee, capers, olives, harissa, wasabi.
long life vegetables (fridge) – cabbage, cauliflower, celery, carrots, beets (although the leaves will wilt), parsnip, celeriac (celery root), kohlrabi, sweet potato, green onions (scallions), ginger, pumpkin (winter squash), swedes & rutabagas
protein – packaged smoked fish, eggs, cured meats (prosciutto, salami), dried chorizo, packaged tofu, cryovacced meat (only keeps for about 2 weeks)

Ô
13 Ways
13 Ways To Help Your Pantry Come to the Rescue
Without some sort of pantry backup, life can be much harder than it needs to be.
The thing is, having some sort of pantry doesn’t need to be difficult or scary. Or require some sort of super human organisation.
1. Automate your shopping list.
A pantry is only as helpful as the ingredients it stocks. By developing the habit of having an ongoing list for pantry and other household items, you’ll find that you ‘automatically’ replenish pantry stock on a regular basis.
2. Organise your pantry into groups of similar items.
Now I’m not suggesting that you alphebetize your spices, but having some sort of structure or order to your pantry can make a massive difference. If like items are grouped together it can save you time trying to find what you need. And you’ll also be able to tell at a glance which types of items you’re getting low on.

6. Develop the habit of actually looking in your fridge and freezer on a regular basis.
There can be a whole world of options in both these locations. But you need to know about them to take advantage of them. I’m guilty of only opening the freezer when I want to get something out. And I’m always surprised at whats in there.
7. Explore options for stocking your ‘fridge’ pantry
Don’t fall into the trap of thinking your pantry is only about the store cupboard ingredients stored at room temperature. The marvel of modern refrigeration makes ‘pantry’ staples out of many different foods. Think cheeses (especially halloumi), tofu, yoghurt, other dairy products, eggs, smoked fish, salami and other cured meats.
8. Find a butcher who will cryovac for you.
Meat will keep for up to a month in the fridge, ready to use when vacuum packed or ‘cryovacced’. We’ve started buying our meat direct from the farmer and he packs everything up in cryovac. So some goes into the freezer but much of it just sits in the fridge until needed.
Ô
13 Ways To Help Your Pantry Come to the Rescue
3. Avoid the trap of deep shelves
There’s a saying of of sight out of mind for a reason. If you’re ever lucky enough to be designing a pantry, make sure your shelves aren’t too deep so you have maximum visibility. If a complete pantry redesign isn’t possible, consider investing in a few boxes so you can easily slide them out and have full view of all the contents.
4. Develop the habit of actually looking in your pantry on a regular basis
You know when you’re deciding what to wear and it feels like you have nothing suitable. And then you look in your wardrobe and find heaps of things you’d forgotten about. It’s the same with food and pantries. Don’t rely on your memory. Use your eyes and you’ll find possibilities opening up.
5. When shopping choose some ‘long shelf life’ vegetables
I’ve had celery and cabbages which have lasted up to a month in the fridge. Making sure some of your veg will last into the next week or longer, takes the pressure off getting the amount of food you buy exactly ‘right’.

12. Have a spring clean from time to time.
A clean pantry can be a thing of joy. It’s also helpful to identify what you aren’t using to stop repeat purchase mistakes. Or inspire you to
13. Have a ‘use up the pantry’ project every now and then.
If you’re feeling a little broke. Or you know you’re going away for a while. It can be fun and economical to try eating from the pantry to have a little clear out.
Ô
13 Ways To Help Your Pantry Come to the Rescue
9. Rotate produce in your fridge on a regular basis.Lets face it, things can easily hide at the back of the fridge and get forgotten. I have a large and a smaller space in my veg drawer. Since I adopted the policy of transferring all the older veg to the small drawer before putting new purchases away. AND remembering to look in the smaller drawer first. I’ve made a massive difference to the amount of veg I throw away.
10. Freeze in small, easily accessible packages.
We’ll cover freezing and defrosting in greater detail soon. But for now remember, taking the time to divide food into small packets before freezing makes it much quicker and easier to defrost as you need.
11. Explore the world of frozen veg & fruit.
Frozen produce can be just as good, and in the case of frozen peas even better than ‘fresh’ produce from the supermarket. Think beyond frozen peas and berries. Soy beans (edamame), broad beans, mango, spinach, broccoli, cauliflower can all be wonderful from the freezer.

Ô
4 Common Mistakes
4 Most Common Pantry Mistakes (How to Avoid)
Mistake 1. Running out of essential ingredients.
I’ve said it before, a pantry is only useful if it contains actual ingredients you can use for actual dishes or recipes you love to cook and eat.
Think about your shopping habits. Decide on the best frequency for you to have a dedicated ‘pantry’ shop – it could only be once a month where you write a list and do a big stockup. Or it might be something you do once a week.
Another solution is to decide whether it would be helpful to have a list that you create ‘as you go’ near the pantry or on the fridge. (I don’t but my Mum used to live by her list)
Mistake 2. Suffering from ‘pantry chaos’ An overflowing pantry with things stuffed in willy-nilly, can be just as useless as an empty pantry. And a lot more daunting. Chaos is also unlikely to inspire you when you’re feeling tired and hungry.
Think about it, isn’t the thought of a chaotic pantry enough to make you want to avoid your scary pantry all together and just pick up the phone and order some delivery?

Ô
4 Most Common Pantry Mistakes (How to Avoid).
Overcoming pantry chaos isn’t as difficult as you’d think. Develop some sort of order to your pantry that works for you. I find keeping like ingredients together helps.
3. Letting items go past their use-by date.
Even long-living items eventually go bad, but the good new is this is really easy to avoid. When you put your shopping away, remember to rotate. Add newly purchased items to the back of the stack or row and use front items first. Too easy.
4. Allowing infestation to strike. This used to be a big problem when I was living in Sydney. Between the cockroaches and Indian meal moths, there was a lot of waste in my pantry. That was until I invested in a set of glass canisters from Ikea that look great and weren’t very expensive.
I can’t recommend this enough. Get a system for sealing open packets – preferably glass canisters but at the least use zip-lock bags – open packets are an invitation to insects and moths.

PantryRECIPES
Ô

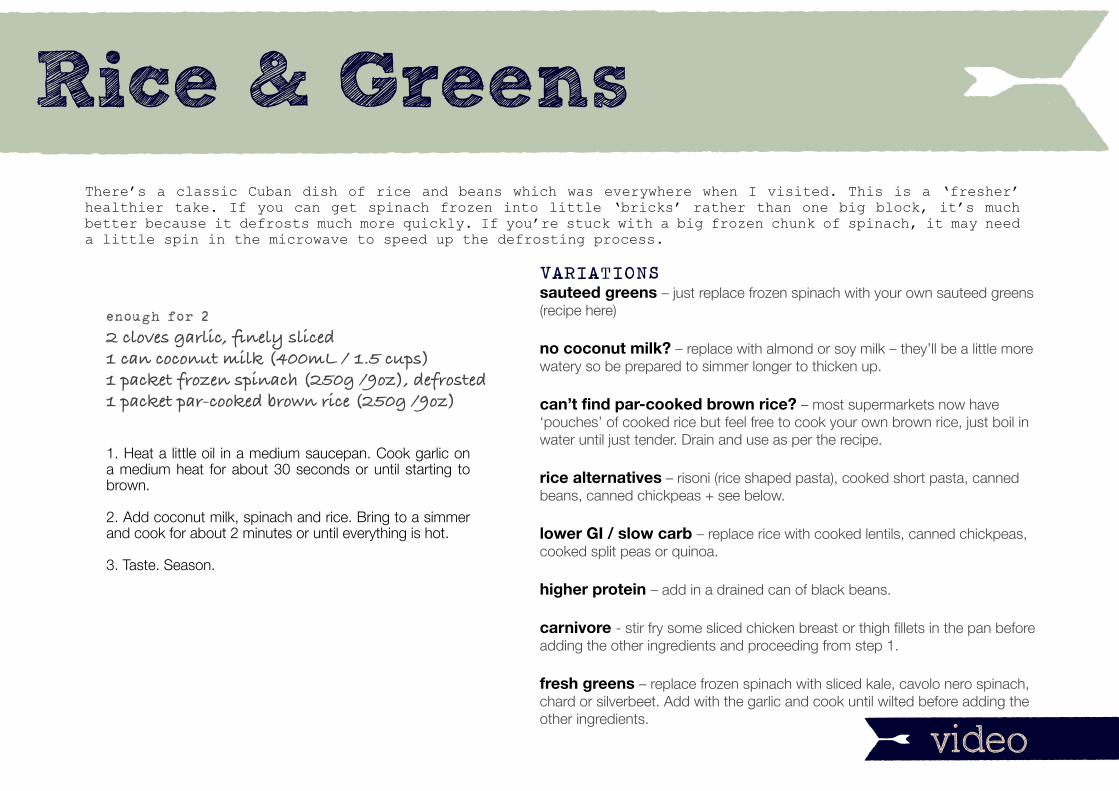
Rice & Greens
ÔÔ
Ô
Rice & Greens There’s a classic Cuban dish of rice and beans which was everywhere when I visited. This is a ‘fresher’ healthier take. If you can get spinach frozen into little ‘bricks’ rather than one big block, it’s much better because it defrosts much more quickly. If you’re stuck with a big frozen chunk of spinach, it may need a little spin in the microwave to speed up the defrosting process.
enough for 2
2 cloves garlic, finely sliced1 can coconut milk (400mL / 1.5 cups)1 packet frozen spinach (250g /9oz), defrosted1 packet par-cooked brown rice (250g /9oz)
1. Heat a little oil in a medium saucepan. Cook garlic on a medium heat for about 30 seconds or until starting to brown.
2. Add coconut milk, spinach and rice. Bring to a simmer and cook for about 2 minutes or until everything is hot.
3. Taste. Season.
VARIATIONSsauteed greens – just replace frozen spinach with your own sauteed greens (recipe here)
no coconut milk? – replace with almond or soy milk – they’ll be a little more watery so be prepared to simmer longer to thicken up.
can’t find par-cooked brown rice? – most supermarkets now have ‘pouches’ of cooked rice but feel free to cook your own brown rice, just boil in water until just tender. Drain and use as per the recipe.
rice alternatives – risoni (rice shaped pasta), cooked short pasta, canned beans, canned chickpeas + see below.
lower GI / slow carb – replace rice with cooked lentils, canned chickpeas, cooked split peas or quinoa.
higher protein – add in a drained can of black beans.
carnivore - stir fry some sliced chicken breast or thigh fillets in the pan before adding the other ingredients and proceeding from step 1.
fresh greens – replace frozen spinach with sliced kale, cavolo nero spinach, chard or silverbeet. Add with the garlic and cook until wilted before adding the other ingredients.
video

PROBLEM SOLVING GUIDEtoo watery? – simmer for a little longer to reduce down.
rice too crunchy – simmer for a little longer to soften.
bland – it needs salt.
too rich – Next time use less coconut milk. A splash of lemon juice will help freshen things up for now.
LEFTOVER POTENTIAL?OK. Will keep in the fridge for 1-2 weeks. The rice will absorb the liquid over time so it may dry out. Just add a splash of water as you reheat to moisten.
SERVING SUGGESTIONSLovely in big nourishing bowls on its own.
Rice & Greens...
Ô

Quick Veg Curry

ÔÔ
Ô
Quick Veg Curry
enough for 2
1 jar tomato pasta sauce (400g / 14oz)1 can white beans (440g / 15oz), drained1 jar roasted red peppers (280g / 10oz), drained1/2 – 1 teaspoons chilli flakes4 teaspoons curry powder
1. Place tomato sauce (marinara sauce), beans, peppers, chilli and curry powder and bring to a simmer.
2. Cook gently for 2 -3 minutes or until the curry is hot.
3. Taste and season, adding more curry powder and chilli if you think it needs it. Serve with a generous drizzle of extra virgin olive oil.
VARIATIONScarnivore - brown some diced chicken, beef or pork in a pan then add the curry ingredients as per the recipe.
no chilli flakes? – Use fresh chilli or chilli powder.
different veg – feel free to add in any veg you have on hand. Wilting some spinach or card through will add a different dimension.
no curry powder? – Replace with another spice blend such as garam masala or just use an equal mixture of ground cumin and ground coriander.
no tomato sauce – replace with canned tomatoes.
video

PROBLEM SOLVING GUIDEtoo hot – if you’ve overdone it on the chilli, add in a generous slug of olive oil to take the edge off or serve the curry with some chopped cucumber or natural yoghurt.
too thick – add in more water and bring back to a simmer.
too watery – simmer for a little longer to help it reduce down.
too bland? add in more curry powder for now and next time, remember to try a different brand of curry powder. Spices also lose their flavour with age, so make sure your curry powder is fresh.
LEFTOVER POTENTIAL?Will keep in the fridge for a week or so.
SERVING SUGGESTIONSYou could serve it in bowls like a stew like I have in the picture but it will be pretty full-on.
Steamed rice is a great accompaniment if you happen to have some on hand. For slow-carbers, try grating some cauliflower in a food processor and using that as a raw alternative to rice. It actually tastes really lovely.
Quick Veg Curry...
Ô

Warm Salmon & Chickpea Salad

ÔÔ
Ô
Warm Salmon & Chickpea Salad For me this is about as ‘comforting’ as food can get. It’s also about as easy as well. The only down side is that it isn’t the prettiest dish, but trust me, your taste buds don’t care about superficial looks.
enough for 1 or 2
1 medium can salmon (200g / 7oz), drained1 can chickpeas (400g / 14oz), drained1 tablespoon rice vinegar or lemon juice
1. Heat a little olive oil in a frying pan / skillet.
2. Add chickpeas and stir fry for a minute or so to warm them. Add salmon and break up with a fork.
3. Meanwhile, combine vinegar or lemon juice in a bowl with 2-3 tablespoons extra virgin olive oil. Season.
4. Toss hot salmon and chickpeas into the dressing.
VARIATIONSprettier – toss in a few handfuls of salad leaves or flat leaf parsley.
budget – replace salmon with tuna. And think about using home cooked chickpeas instead of canned.
vegetarian – skip the salmon and serve warm chickpeas with goats cheese or parmesan.
vegan – replace the salmon with grilled veg from the deli or a jar. Red peppers or eggplant are both great.
no canned chickpeas? – replace with other cooked or canned legumes, you’ll need about 250g (9oz).
short on time – skip the cooking and toss the drained chickpeas and salmon into the dressing.
video
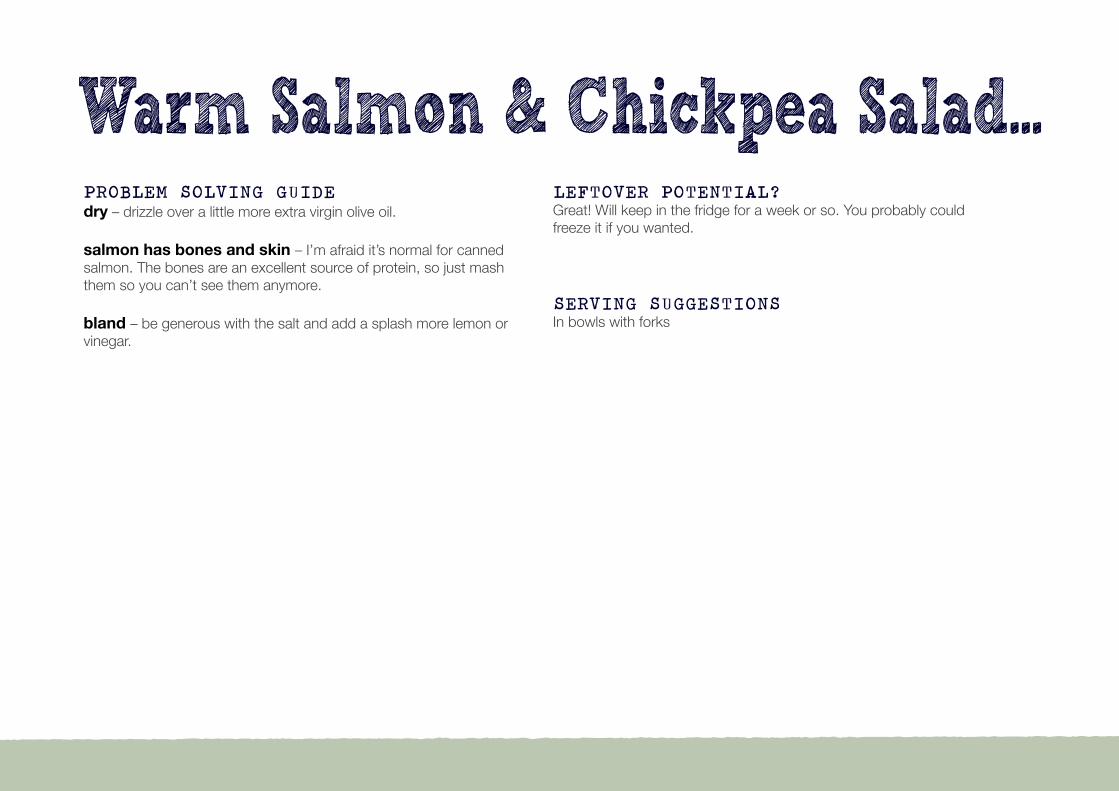
PROBLEM SOLVING GUIDEdry – drizzle over a little more extra virgin olive oil.
salmon has bones and skin – I’m afraid it’s normal for canned salmon. The bones are an excellent source of protein, so just mash them so you can’t see them anymore.
bland – be generous with the salt and add a splash more lemon or vinegar.
LEFTOVER POTENTIAL?Great! Will keep in the fridge for a week or so. You probably could freeze it if you wanted.
SERVING SUGGESTIONSIn bowls with forks
Warm Salmon & Chickpea Salad...
Ô

Garlic & Chilli Spaghetti

ÔÔ
Ô
Garlic & Chilli Spaghetti
enough for 1
100g (3.5oz) spaghetti or other pasta2 tablespoons extra virgin olive oil1/2 – 1 teaspoon dried chilli flakes1 clove garlic, finely sliced
1. Bring a pot of salted water to the boil. Add pasta and set the timer for 1 minute less than the duration recommended on the packet.
2. Stir pasta every few minutes, but meanwhile make your sauce.
3. Gently heat oil in a small saucepan. Add chilli and garlic and fry for a minute or until garlic is starting to go a little brown. Remove from the heat.
4. When the pasta timer rings. Taste pasta and give it a little longer if it is still too crunchy. When the pasta is al dente, scoop out a cup of cooking liquid and drain.
5. Return pasta to the hot pan and toss in the oil. Taste and season and add a little cooking water if it looks too dry.
VARIATIONScarnivore – fry some pancetta or bacon in the oil. Or serve with some finely sliced jamon or proscuitto.
lemon & garlic – skip the chilli and proceed as per the recipe, add in the zest of half a lemon at the end and serve with a squeeze of lemon.
rosemary – ditch either the chilli, garlic or both and replace with the leaves from a sprig of rosemary.
greens – to make it into more of a complete meal, toss in a large handful of washed salad green or rocket (arugula) leaves and finish with a squeeze of lemon.
cheesy – serve with freshly grated parmesan if you like, but to be honest I like it better with the simplicity of just the chilli and garlic.
gluten-free / slow carb -because this dish is really relying on the quality of the pasta, don’t be tempted to try it with GF pasta. Instead, drain a can of chickpea or white beans and gently fry in the oil with the garlic and chilli.
video

PROBLEM SOLVING GUIDEbland - make sure you’re generous with the salt and pepper.
too dry – toss in a little reserved pasta cooking water or if you’ve forgotten to fish some out before draining the pasta, just a little more of your best quality extra virgin olive oil instead.
pasta gluey or falling apart – this is either overcooking or poor quality drained pasta. Next time reduce the cooking time or use a different brand of pasta.
pasta chalky – if the pasta isn’t cooked enough, you get a white chalky centre in the middle of each strand. A little of this is good and is what the Italians call ‘al dente’ or to the tooth. Too much makes for unpleasant eating so next time cook a little longer.
bitter flavours – both the chilli and garlic will go bitter if they are overcooked and burnt so be careful not to get the oil too hot or to cook them too long.
LEFTOVER POTENTIAL?Will keep in the fridge for a week or so. Doesn’t reheat that well. Either microwave or pan fry in a little more oil.
SERVING SUGGESTIONSMakes a very comforting simple supper when the cupboard is bare.
For a more complete meal serve with a green salad or some steamed broccoli dressed with lemon juice.
Garlic & Chilli Spaghetti...
Ô

Green Spinach Lentils

ÔÔ
Ô
Green Spinach Lentils If I had to pick a favourite lentil it would be ‘Puy’ also known as ‘French-Style Green Lentils’. For me, they’re the ‘rolls royce’ of the lentil world. I just adore the deep, earthy flavour and the fact that if you over cook them they still keep their shape. If you can get spinach frozen into little ‘bricks’ rather than one big block, it’s much better because it defrosts much more quickly. If you’re stuck with a big frozen chunk of spinach, it may need a little spin in the microwave to speed up the defrosting process.
enough for 2 to 3
200g (7oz) French-style green lentils250g (9oz) frozen spinach, defrosted2 tablespoons soy sauce2 tablespoons rice or white wine vingearparmesan cheese, to serve
1. Bring a saucepan of unsalted water to the boil.
2. Simmer lentils for 11-15 minutes, or until just tender. Drain.
3. Add a little oil to the pan and pop it back on a medium heat. Add spinach and stir to break up the chunks.
4. Return drained lentils to the pan. Add soy, vinegar and 2-3 tablespoon extra virgin olive oil. Taste and add more soy or vinegar if needed.
5. Serve with Parmesan shavings on top.
VARIATIONSsauteed greens – just replace frozen spinach with your own sauteed greens (recipe here)
dairy-free / vegan – replace parmesan with sliced almonds.
can’t find ‘French-style’ lentils – replace with regular green or brown lentils or split peas. You’ll need to adjust the simmering time – use the packet directions as a guide. Brown rice will also work.
different veg? – replace with frozen peas or broccoli. Cook the veg in the oil until just defrosted before adding the lentils back to the pot.
carnivore – fry some bacon or chorizo in the pot before adding the spinach. Or toss in a few handfuls of shredded BBQ chicken from the shop. Or serve layered with prosciutto or jamon instead of the parmesan.
as a side – serve along side grilled sausages or a roast or BBQ chicken.
super quick – replace lentils with 2 cans of lentils, drained and proceed from step 4.
soy-free – skip the soy sauce and season with fish sauce OR just use salt.
video

PROBLEM SOLVING GUIDElentils too crunchy – make sure you use unsalted water to cook the lentils as salt may cause their skins to toughen. And keep simmering (or boiling) until you’re happy.
mushy – this just means the lentils were over cooked. Next time keep a closer eye on them. Not much can be done at this stage.
spinach still frozen – you may need to give it a zap in the microwave to speed things up. Or just add to the pot and stir to break up the chunks as best you can.
bland – add more soy and vinegar.
LEFTOVER POTENTIAL?Great! Will keep in the fridge for 1-2 weeks. Will freeze OK.
SERVING SUGGESTIONSIn big bowls with loads of parmesan. Or see above for suggestions as a side.
Green Spinach Lentils...
Ô

Pantry Cauliflower Cheese

ÔÔ
Ô
Pantry Cauliflower Cheese Cauliflower cheese is usually served as a side and tends to be a bit on the ‘stodgy’ side. Here we’re treating it as a simple main course and freshening things up by serving with fresh goats cheese and finely grated parmesan instead of the more usual heavy melted cheese. I love this method for cooking a whole range of veg from fresh broccoli and broccolini to asparagus to even thing like bok choy. It’s super quick and with the combination of charring and steaming give lovely complex veggie flavours. Frozen veg can be a little on the ‘watery’ side. This cooking method is brilliant because it cooks off all the extra water, leaving you with concentrated tasty veg.
enough for 2
1 bag frozen cauliflower (500g / 1lb)2 large handfuls grated parmesan cheese100g (3.5oz) goats cheese
1. Heat a frying pan on a super high heat for 3-4 minutes. You want it charring hot to instantly defrost the frozen cauli.
2. Add a little oil and the cauli. Cover and cook for 3 minutes, still on a super high heat.
4. Stir and return lid. Cook for another 1-2 minutes or until the cauli is browned in places and hot all over.
5. Divide hot cauli between 2 plates. Top with cheeses. Season.
VARIATIONSvegan / dairy-free – serve the hot cauli drizzled with tahini and lemon juice. Or try it on a bed of hummus.
fresh – chop cauli into tiny trees. And cook as per the recipe. May take a little longer for the cauli to be tender.
different veg – replace cauli with broccoli.
different cheeses – ricotta, guryere, cheddar or whatever you have in the fridge. This is a great dish to use up odds and ends of cheese. Just grate harder cheeses and crumble or slice softer ones.
carnivore – serve as a side to a BBQ chicken.
more substantial - add a drained can of white beans such as cannellini to the pan and stir to heat through or serve with a fried egg per person.
budget - replace the goats cheese with ricotta.
video
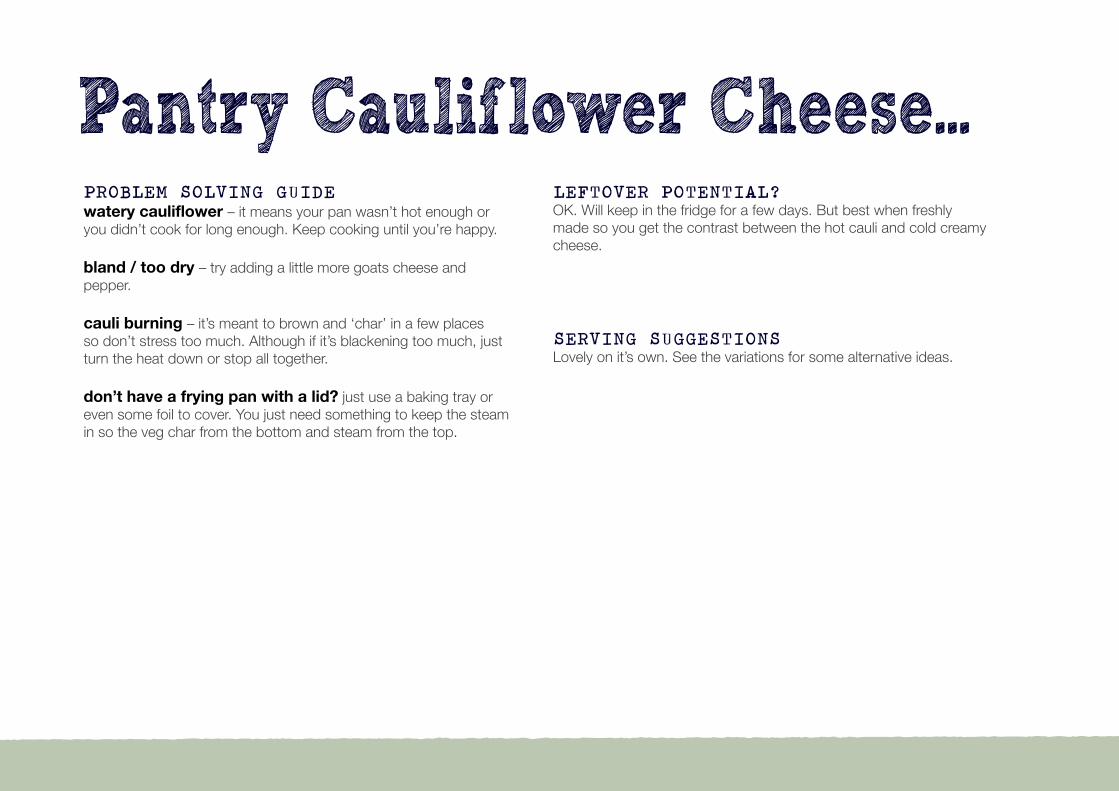
PROBLEM SOLVING GUIDEwatery cauliflower – it means your pan wasn’t hot enough or you didn’t cook for long enough. Keep cooking until you’re happy.
bland / too dry – try adding a little more goats cheese and pepper.
cauli burning – it’s meant to brown and ‘char’ in a few places so don’t stress too much. Although if it’s blackening too much, just turn the heat down or stop all together.
don’t have a frying pan with a lid? just use a baking tray or even some foil to cover. You just need something to keep the steam in so the veg char from the bottom and steam from the top.
LEFTOVER POTENTIAL?OK. Will keep in the fridge for a few days. But best when freshly made so you get the contrast between the hot cauli and cold creamy cheese.
SERVING SUGGESTIONSLovely on it’s own. See the variations for some alternative ideas.
Pantry Cauliflower Cheese...
Ô
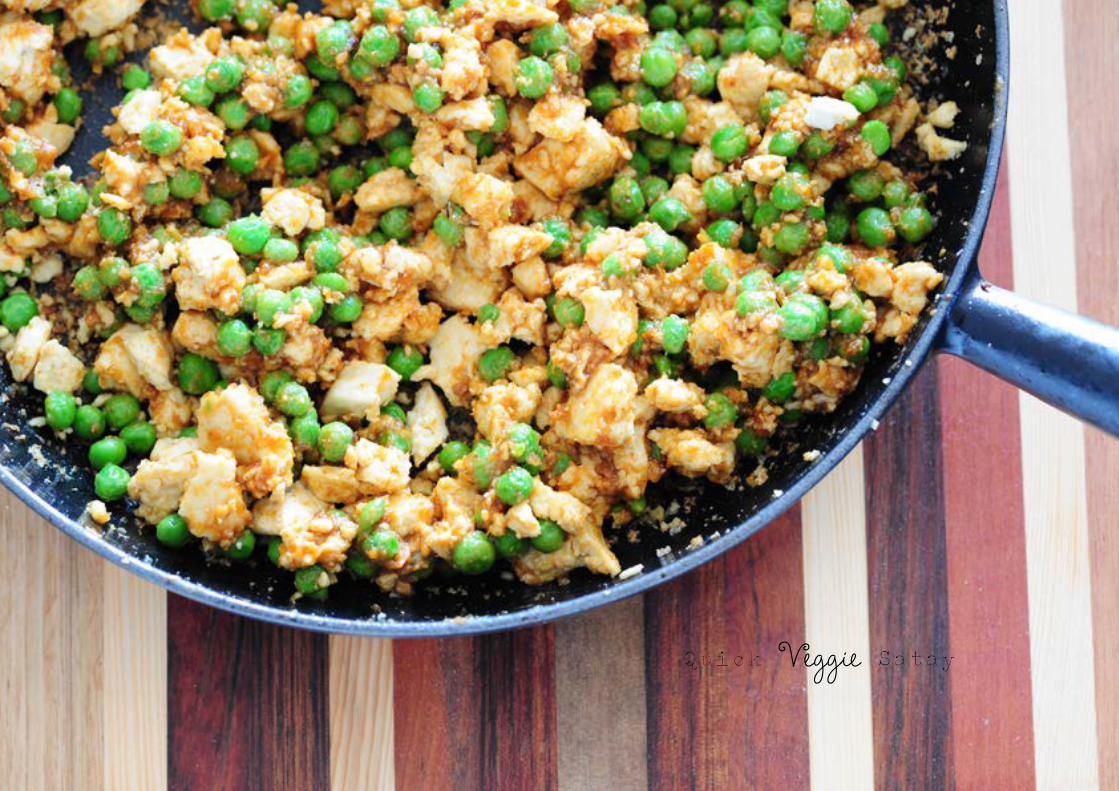
Quick Veggie Satay

ÔÔ
Ô
Quick Veggie Satay There’s a big peanut butter fan in our house. So anything satay tends to be an instant winner. This isn’t the best looking dish, but please don’t let that put you off!
enough for 2
300g (11oz) firm tofu, crumbled1/2 bag frozen peas (250g / 9oz)1-2 tablespoons Thai red curry paste3-4 tablespoons peanut butter1-2 tablespoon soy sauce
1. Heat a generous glug of oil in a large frying pan or skillet. Stir fry the tofu for 2-3 minutes or until starting to brown.
2. Add peas and continue to cook for another few minutes.
3. Add curry paste, peanut butter and soy and stir until combined. Taste and add extra of the 3 flavourings as you think it needs it.
VARIATIONScarnivore – replace tofu with pork sausage meat or minced (ground) chicken or even beef.
soy-free – use fish sauce or salt instead of the soy sauce. And see the carnivore section for tofu replacement ideas.
no Thai curry paste? – replace with 2-3 teaspoon of good quality curry powder instead.
different veg - replace peas with spinach.
video
PROBLEM SOLVING GUIDEtofu sticking to the pan – use more oil and stir a bit more energetically.
bland – add more soy and curry paste. Or just season with a little salt.
dry – this is meant to be a dryish, stir-fry style dish but the peanut butter can make it feel dryer than it really is. Next time back off on the peanut butter.
LEFTOVER POTENTIAL?Great! Will keep in the fridge for 1-2 weeks.
SERVING SUGGESTIONSIn big bowls.
Quick Veggie Satay...
Ô

Noodles with Parmesan Peas

ÔÔ
Ô
Noodles with Parmesan Peas I love using noodles instead of pasta in more Italian style dishes because there are so many noodles which cook more quickly. It might sound a little weird, but if you give it a try you’ll see that the noodles take on the flavours of the ‘sauce’ and it’s actually really lovely.
My favourite are hokkien or Singapore noodles which are yellow and plump. They come in packets that are shelf stable but you can also find them in the chiller section of the supermarket or Asian grocery store. They are a great pantry staple because they take hardly any time to cook.
enough for 2
2-3 tablespoons butter1/2 packet frozen peas (250g / 9oz)1 packet soft noodles (200g / 7oz), see note above2-3 handfuls grated parmesan cheese
1. Heat a frying pan or skillet on a medium high heat. Add a little oil, the butter and peas and cook for a few minutes to start the peas defrosting.
2. Break the noodles apart a little with your fingers and add to the pan. Stir fry until the peas are hot and the noodles softened. Season.
3. Serve with parmesan on top.
VARIATIONSvegan / dairy-free - use olive oil instead of the butter and serve with finely grated brazil nuts or almond meal instead of the parmesan.
low GI / slow carb / gluten-free – replace noodles with a drained can of chickpeas or white beans.
different noodles – replace with cooked pasta or dried wheat or soba noodles cooked according to the packet directions.
carnivore – brown some bacon or chorizo in the pan before starting at step 1.
pea-free – replace peas with frozen broccoli or cauliflower. Will need longer cooking before the noodles are added..
video

PROBLEM SOLVING GUIDEcan’t find ‘soft’ noodles? – replace with cooked pasta or dried wheat or soba noodles cooked according to the packet directions.
noodles falling apart – when noodles are overcooked they can get fragile. So keep an eye on them and remove from the heat before this happens.
bland – add more parmesan or next time consider trying a different brand of parmesan.
too dry – add in a little more oil or a splash of lemon juice.
LEFTOVER POTENTIAL?OK but best when freshly cooked
SERVING SUGGESTIONSIn bowls with extra parmesan on the side.
Noodles with Parmesan Peas...
Ô

Creamy Coconut Lentils

ÔÔ
Ô
Creamy Coconut Lentils Red lentils are one of my favourite pantry staples because they’re cheap, packed with protein, are really quick to cook and taste super delicious. This dish is ‘comfort central’ in a similar way to a good risotto.
I also think that coconut milk is an underutilized ingredient apart from Asian cooking. This recipe really showcases how versatile coconut milk can be.
enough for 2
1 can tomatoes (400g / 14oz)1 can coconut milk (400mL / 1.5 cups)200g (7oz) red lentils1 teaspoon dried chilli flakes or 1/2 teaspoon chilli powder, optional
1. Place all ingredients in a saucepan. Bring to the boil.
2. Simmer for about 8 minutes or until lentils are ‘al dente’. Taste. Season.
VARIATIONSno canned tomatoes? – replace with 1.5 cups commercial tomato based pasta sauce, 4 tablespoons tomato paste + 1.5 cups water or 1.5 cups tomato puree.
no coconut milk – coconut cream is fine or replace with water or stock and add in a few tablespoons of butter or olive oil at the end.
can’t find red lentils? – replace with green or brown lentils or even quinoa or brown rice. You’ll need to cook these for much longer and may also need to add water.
greener – stir in some defrosted spinach or fresh baby spinach leaves at the end.
more veg – feel free to add zucchini, red capsicum (bell peppers) or finely chopped cauliflower. Again you may need to cook a little longer and add water so the veg soften..
video
PROBLEM SOLVING GUIDEbland – be generous with the salt & pepper. Try a little more chilli as well.
burning – red lentils have a tendency to stick to the bottom of the pan so it’s important to stir on a regular basis. Try reducing the heat as well. You may need to add a little water if you find its getting too thick but the lentils aren’t cooked. Start with 1/4 cup and add as required.
too thick / lentils not cooking – we’re aiming for ‘al dente’ like pasta which means the lentils will still have a bit of chew to them. The aim is to cook them just enough so they won’t break your teeth. You may need to add a little water if you find its getting too thick but the lentils aren’t cooked. Start with 1/4 cup and add as required.
mushy – red lentils will go from just cooked to mushy very quickly. So its important to keep an eye on them. I tend to err on the side of undercooked rather than mush, but it’s up to you.
LEFTOVER POTENTIAL?Great! Will keep in the fridge for 1-2 weeks. Can be frozen.
SERVING SUGGESTIONSIn big bowls. Lovely served on a bed of fresh leaves such as baby spinach if you have any in the house – but also good without.
Creamy Coconut Lentils...
Ô

Tuna & Lentil Salad
ÔÔ
Ô
Tuna & Lentil Salad
enough for 2
1 tablespoon sherry or white wine vinegar1 can lentils (400g / 14oz), drained & rinsed2 tablespoons capers2 cans tuna in oil (125g /5oz each)
1. If your tuna is in good quality olive oil, place 2 tablespoons of the oil in a large salad bowl. Drain and discard the rest of the oil or keep it for another use.
2. Toss vinegar in with the oil. Add drained lentils and toss to combine.
3. If the capers are salted, place them in a little bowl of water then remove and squeeze dry. Toss in with the salad.
4. Flake tuna into the salad and toss lightly. Taste and season.
VARIATIONScarnivore – crumble and pan fry a few good quality pork sausages and use them to replace the tuna. Or use drained canned chicken.
vegetarian – replace tuna with a couple of halved boiled eggs and/or soft goats cheese or feta crumbled over.
vegan – replace tuna with a large handful or brazil nuts or walnuts or an avocado cut into chunks.
fresh – to freshen things up, toss in a handful of chopped flat leaf parsley or torn mint leaves or a handful of washed baby spinach leaves.
tomato – toss in a large handful of halved cherry tomatoes and maybe a little fresh basil if you have it.
fancy – I generally use regular tuna in oil which is really great but to take it up a level, seek out some good quality tuna slices in oil. Seared tuna steaks would also be a great alternative.
video

PROBLEM SOLVING GUIDEtoo salty – be careful with the seasoning as the capers and tuna tend to be quite salty.
too dry – toss in a little more extra olive oil and vinegar or serve with a generous dollup of good quality mayonnaise.
no canned lentils? – replace with canned chickpeas, butter beans or other white beans. Or cook some dried lentils and use those.
need some greens? - toss in a small handful of spinach, salad leaves or flat leaf parsley leaves.
no capers?- replace with some finely chopped red onion or chives or even some roasted pine nuts.
LEFTOVER POTENTIAL?Will keep in the fridge for a week or so.
SERVING SUGGESTIONSBrilliant on its own or toss in some leaves for a more salady vibe.
Tuna & Lentil Salad...
Ô

Broccoli Pantry Curry
ÔÔ
Ô
Broccoli Pantry Curry I once asked a nutritionist friend of mine whether fresh or frozen veg were better nutritionally. I was surprised that she said unless the fresh veg are super-fresh, that frozen actually tend to have higher vitamin levels. A good reason not to feel guilty about the convenience of frozen veg as part of your repertoire of ‘pantry meals’.
I used to think that you needed more than just ‘curry powder’ to make a curry. But as I’ve discovered time and time again, a good curry powder is a brilliant way to instantly transform a dish into a tasty curry. I like to make my own but most commercial curry powders will do the job. You might like to experiment with different brands to find your favourite.
enough for 2
1 can coconut milk (400mL / 1.5 cups)1 bag frozen broccoli (500g / 1lb)2-3 teaspoons curry powder
1. Add coconut milk, frozen broccoli and curry powder to a medium saucepan.
2. Cover and place on a high heat. Bring to a boil then cook for about 5 minutes or until the broccoli is hot and cooked.
3. Taste and season generously, it will need quite a bit of salt. You may like to add a little more curry powder too.
VARIATIONSfresh broccoli – replace frozen with 2 heads broccoli chopped into little trees and stems finely sliced. May need to simmer a little longer for the broccoli to cook.
different veg – try cauliflower or peas.
more substantial – serve on a bed of steamed rice of finely grated raw cauliflower (aka ‘cauliflower rice’).
no curry powder? – replace with 2-3 tablespoons thai style curry paste.
richer – stir in 2-3 tablespoon peanut butter.
carnivore – add some finely sliced chicken breast or thigh fillets with the broccoli. Make sure chicken is cooked through before serving.
video

PROBLEM SOLVING GUIDEwatery – A downside to using frozen veg is they can seem quite watery. For a thicker curry, simmer a little longer with the lid off (best to remove the broccoli while you do this so it doesn’t over cook).
bland – It will need quite a bit of salt. You may like to add a little more curry powder too. Or for a more fiery curry add a little fresh or dried chilli.
mushy broccoli – it’s easy to overcook frozen veg because the freezing process changes the texture. Not much can be done for now but next time keep an eye on it.
LEFTOVER POTENTIAL?Great! Will keep in the fridge for 1-2 weeks.
SERVING SUGGESTIONSIn big bowls with a spoon. If you have fresh basil or coriander leaves (cilantro) you could serve them on top..
Broccoli Pantry Curry...
Ô
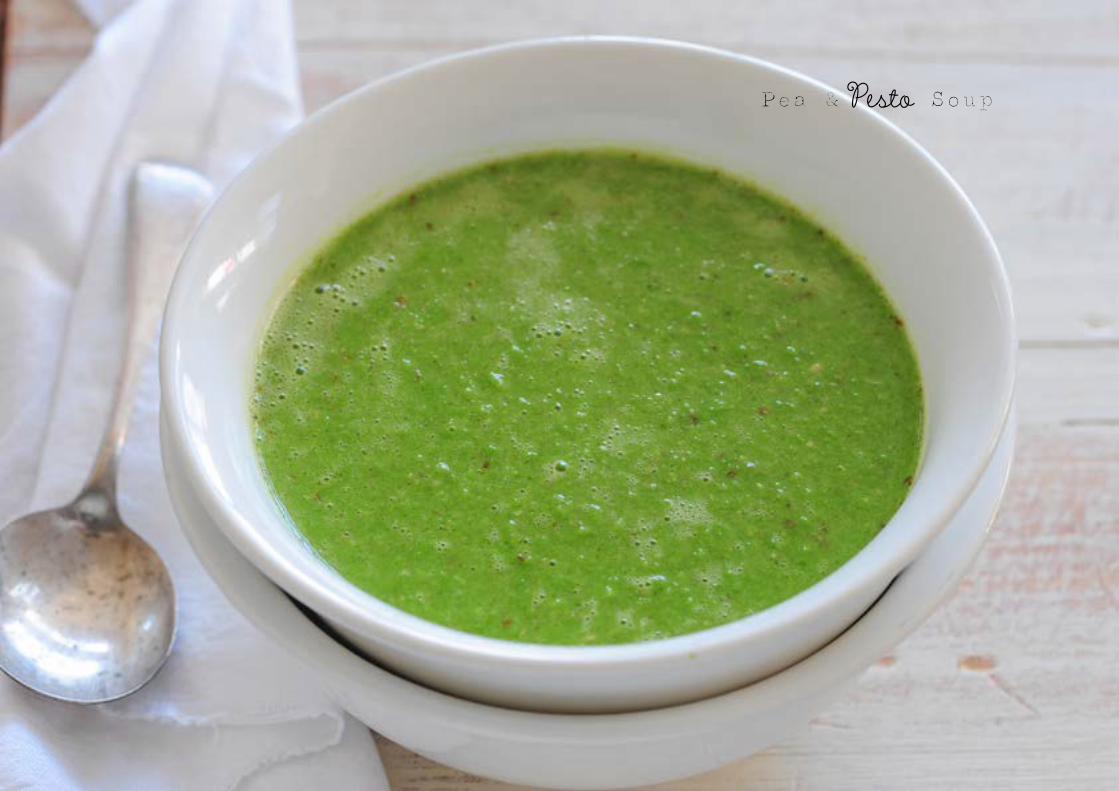
Pea & Pesto Soup

ÔÔ
Ô
Pea & Pesto Soup Frozen peas are seriously one of the best pantry (or freezer) ingredients. I love that they don’t require any prep and can actually taste better than fresh peas.
This is a great ‘pantry’ recipe to have up your sleeve. It’s perfect for nights when you need dinner to be on the table in 10 minutes or less.
enough for 2
500g (1lb) frozen peas2-4 tablespoons pesto
1. Bring 2 1/2 cups water to the boil in a medium pot.
2. Add peas and cook for 5 minutes, or until the peas are hot and tender.
3. Puree with a stick blender. Stir in a little pesto, taste and add more if desired. Season.
VARIATIONSvegan / dairy-free – either replace the pesto with a large handful of torn basil leaves or use a vegan pesto like this Sicilian nut pesto.
no pesto? – the peas on their own make a really lovely pure soup. Or add in a few handfuls of grated parmesan.
pesto-lovers – if you are using good quality home made pesto, you might like to serve with a big dollop of pesto on top.
richer – add in a few tablespoon of butter when pureeing the soup.
video
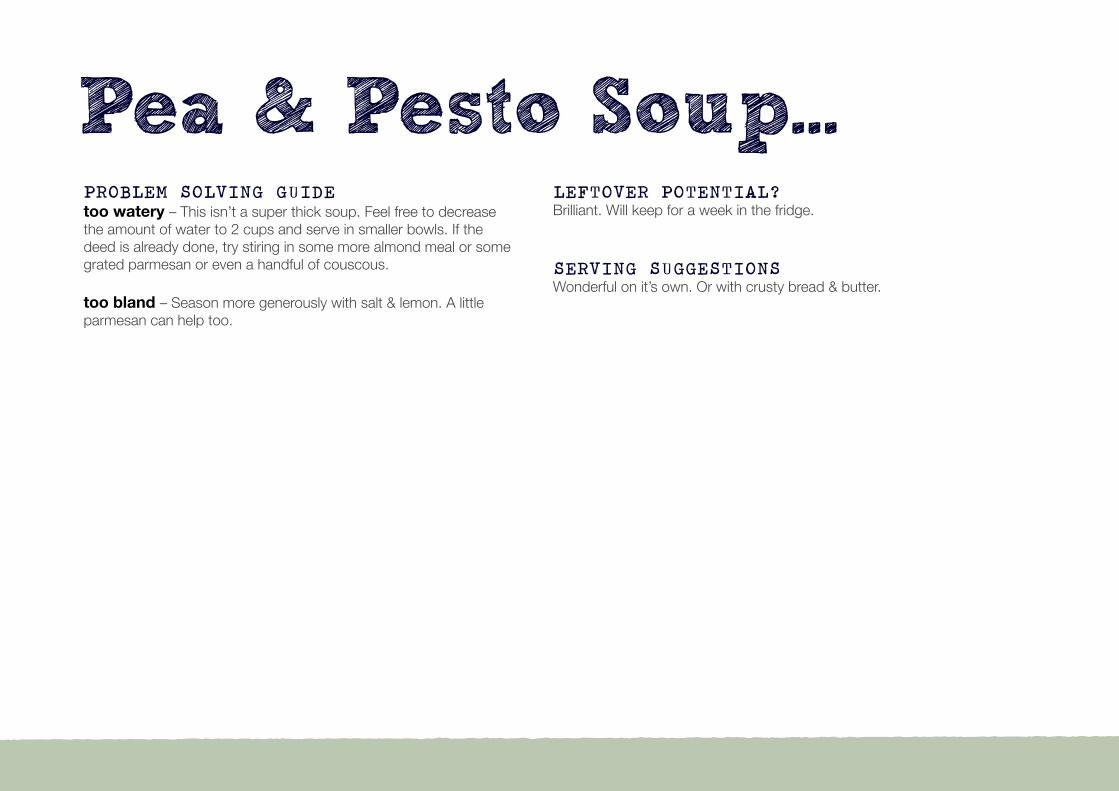
PROBLEM SOLVING GUIDEtoo watery – This isn’t a super thick soup. Feel free to decrease the amount of water to 2 cups and serve in smaller bowls. If the deed is already done, try stiring in some more almond meal or some grated parmesan or even a handful of couscous.
too bland – Season more generously with salt & lemon. A little parmesan can help too.
LEFTOVER POTENTIAL?Brilliant. Will keep for a week in the fridge.
SERVING SUGGESTIONSWonderful on it’s own. Or with crusty bread & butter.
Pea & Pesto Soup...
Ô
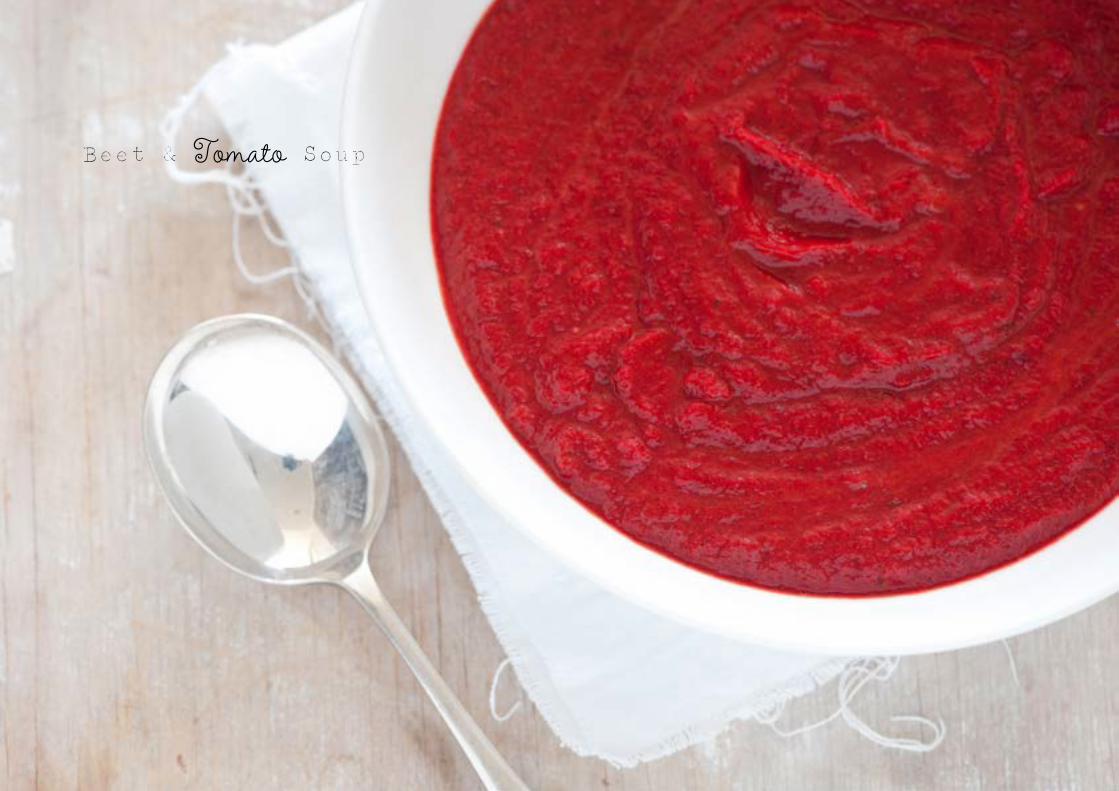
Beet & Tomato Soup
ÔÔ
Ô
Beet & Tomato Soup Beets are one of my all time favourite vegetables. I just can’t get enough. And while I do prefer the flavour of home roasted beets, I keep canned beets in the pantry for beet emergencies! I like the flavour of beets canned or bottled in beet juice rather than vinegar – it completely changes the flavour and makes them much more approachable
enough for 2
1 jar tomato pasta sauce (400g / 14oz)1 can baby beets (440g / 15oz), drained2 teaspoons ground cumin or coriander6-8 tablespoons almond butter
1. Place tomato sauce (marinara sauce), half a jar of water, beets and cumin or coriander in a medium saucepan and bring to a simmer.
2. Remove from the heat and puree with a stick blender or food processor.
3. Return to the heat and stir in almond butter. Bring back to a simmer taste and season. If it is too tart, add more almond butter or a little sugar to soften the acidity.
VARIATIONScarnivore – serve with some finely sliced salami.
no cumin? - Use ground coriander or leave it unspiced.
fresh – to make from scratch roast a large bunch of beets until tender then allow them to cool and use as per the recipe. You may need to season the soup with a little wine vinegar or balsamic to make up for the fact that fresh beets don’t have the added acid of canned beets.
nut-free - Replace almond butter with fresh cream or soured cream.
video

PROBLEM SOLVING GUIDE
too tart or acidic – canned beets can be strong. Add a little sugar or some more almond butter or cream to balance out the tartness.
too thick – add in more water and bring back to a simmer.
no tomato sauce – replace with canned tomatoes.
no almond butter? replace with fresh cream or tahini (ground sesame seeds) or cashew butter.
LEFTOVER POTENTIAL?Will keep in the fridge for a week or so.
SERVING SUGGESTIONSBrilliant on its own. Also lovely with a little natural yoghurt or some goats cheese.
Beet & Tomato Soup...
Ô

Chickpea & Veggie Salad

ÔÔÔ
Chickpea & Veggie Salad
enough for 2
1 jar grilled red peppers (280g / 10oz), drained1 jar grilled eggplant (280g / 10oz), drained1 can chickpeas (400g / 14oz), drained1 tablespoon sherry or red wine vinegarhandful almonds, optional
1. Place a medium frying pan or skillet over a medium heat. Add drained peppers, eggplant (aubergine) and chickpeas. Stir fry for a few minutes or until the veg are warm and the chickpeas have browned slightly.
2. Meanwhile, combine vinegar with 2 tablespoons extra virgin olive oil. Wait and season later as there is probably enough salf in the veg and chickpeas already.
3. Toss warm veg in with the salad. Taste and season. Serve with almonds scattered over the top.
VARIATIONScarnivore – fry some sliced chorizo or other sausage in the pan and add to the salad. Or serve with some finely sliced salami or proscuitto scattered over.
more protein – shed the meat from half a BBQ chicken and toss in at the end. Or serve with a couple of halved boiled eggs.
greens – to freshen things up, toss in a handful of chopped flat leaf parsley or torn mint leaves or a handful of washed baby spinach leaves.
cheesy - serve with soft goats cheese or feta crumbled over.
nut-free – skip the almonds completely or substitute in some cheese or protein as per the suggestions above.
video

PROBLEM SOLVING GUIDEtoo salty – be careful with the seasoning as preserved veg tend to be quite salty.
too dry – toss in a little extra olive oil and vinegar.
too oily – next time drain your veg on paper towel before using. For now just transfer the salad to a clean bowl, leaving as much oil behind as you can. Toss in the clean bowl to disperse more of the oil onto the sides of the bowl.
no veg? – feel free to char grill some red pepper and sliced eggplant (aubergine) yourself if you can’t find good prepackaged ones. Or use whatever veg you have on hand, some slice and softened onions would be lovely as would a drained jar of artichoke hearts or sun dried tomatoes. Olives would also work – pretty much all the antipasto veg are great.
LEFTOVER POTENTIAL?Will keep in the fridge for a week or so.
SERVING SUGGESTIONSWith the chickpeas and almonds it’s a great vegetarian meal on its own.
Also lovely as a side salad with grilled or roast meat or poultry. Would also be great with kebabs or falafels
Chickpea & Veggie Salad...
Ô

Quinoa & Grilled Veg Salad

ÔÔ
Ô
Quinoa & Grilled Veg Salad I just love quinoa in salads as it has the most wonderful chewy texture. This is one of those salad which improves with a little time to ‘marinate’ in the dressing which makes it perfect as a do ahead lunch.
enough for 2
100g (3.5oz) quinoa, any colour2 tablespoons lemon juicelarge handful roast eggplant, sliced & drainedlarge hand grilled red capsicum (bell peppers), sliced & drained on paper towelhandful brazil nuts or almonds, to serve
1. Bring a medium pot of water to the boil. Rinse quinoa well then simmer for 10-12 minutes or until al dente like pasta. Drain.
2. Combine lemon juice with 2 tablespoons extra virgin olive oil. Season.
3. Toss warm quinoa in the dressing. Add eggplant and red capsicum and serve with nuts sprinkled over.
VARIATIONSroast veg – let your imagination run wild here, roast pumpkin or sweet potato, roast beets, roast parsnip are all lovely.
other grilled veg – feel free to use home grilled veg. In summer zucchini are a favourite. Fennel or grilled asparagus are good too.
carnivore – replace nuts with finely sliced salami or cooked chicken.
nut-free – skip the nuts and use a soft goats cheese or blue cheese instead.
warm salad – either serve while still warm or reheat in the microwave or a saucepan.
leafy – toss in some flat leaf parsley leaves or a handful of baby spinach.
video
PROBLEM SOLVING GUIDEcan’t find quinoa? – use brown rice cooked according to the packet directions.
bland – season with a little salt and possible more lemon juice
dry – drizzle in a little more olive oil.
LEFTOVER POTENTIAL?Great! Will keep in the fridge for 1-2 weeks. The nuts will lose their crunch over time so best if added at the last minute.
SERVING SUGGESTIONSA wonderful lunchbox salad. OR for a healthier option serve over a handful of baby spinach leaves.
Quinoa & Grilled Veg Salad...
Ô

about the author
I’m Jules Clancy and am first and foremost a food lover who adores her veggies. The type of girl who plans her holidays around restaurant reservations.
Before I quit my corporate job I had an hour commute each way. When I got home it would be late and I'd be starving. And even though I love to cook, I'd often find myself just settling for the quickest thing, like cheese on toast.
Not exactly healthy.
Around that time I discovered the wonderful blog, Zen Habits and the concept of minimalism. As I simplified my life, I applied the same process to my shopping and cooking and I started sharing my quicker and easier meals on Stonesoup.
Over time my blog readership has grown to over 250,000 unique visitors per month. But the best part is the emails and comments I get from Stonesoup readers saying how it is making a difference to their cooking and their lives.
Which is why I opened the doors to my first online cooking class back in 2010. Since then I've helped over 1000 people like you to simplify their cooking without sacrificing health or taste.
One of the things that makes the SVCS special is that its a chef-free zone. You see I'm a home cook, just like you. AND I have a degree in food science, which means I understand to science behind what works in the kitchen. So I know which corners you can cut without sacrificing flavour or nutrition. Everything at the SVCS is about real life home cooking.
When I’m not cooking, writing about food or taking photographs [of food], I can be found indulging my passions for long boozy lunches, travel, running, cookbooks, growing my own veggies, cheese, red shoes and Irishmen, [OK one Irish man in particular].
You can contact me at:[email protected]