Textiles Studies Curriculum - International Bureau of … Studies Curriculum Directorate for Quality...
43
-
Upload
vuongkhuong -
Category
Documents
-
view
217 -
download
3
Transcript of Textiles Studies Curriculum - International Bureau of … Studies Curriculum Directorate for Quality...


Directorate for Quality and Standards in Education - Curriculum Management and eLearning Department – Textiles Studies – 2012
1
Textiles Studies Curriculum

Directorate for Quality and Standards in Education
Curriculum Management and eLearning Department
TEXTILES STUDIES CURRICULUM UNITS – FORM 1
TXT 7.1 One way to sew it up 1
TXT 7.2 Christmas Stockings
TXT 7.3 Taking a Look at Textiles
TXT 7.4 Rags to Riches
TXT 7.5 Creative Design
TXT 7.6 Colour Your Life
To access the pages click on the page title below

Directorate for Quality and Standards in Education - Curriculum Management and eLearning Department – Textiles Studies – 2012
3
Subject: Textiles Studies Form 1 Unit code and title: TXS 7.1 One way to sew it up 1
Strand: AIDS TO SEWING Unit Duration: 9 sessions of 40 minutes; Total 6 hours
OBJECTIVES The students will be able :
1. To identify and name the commonly used small sewing tools/equipment for dressmaking purposes,
2. To identify and name large sewing equipment, 3. To select, use, care for, and store all sewing tools appropriately, 4. To gain knowledge and identify different types of sewing machines and name the main parts of the sewing machine, 5. To identify, name and work temporary stitches.
Key Words Points to note Resources
Key Terms: Pins, hand sewing
needles, pin- cushion. Coloured
threads, tacking cotton. Measuring
tape, dressmakers tailor’s shears,
pinking shears, seam ripper, tailor’s
chalk, tracing wheel, carbon paper.
Sewing machine
New Technical Terms: treadle
sewing machine, hand sewing
machine, computerized sewing
machine, steam and dry iron, ironing
board sleeve board. Long and short
and even tacking. tailor’s and
diagonal tacking.
The approach to teaching and learning Textiles
Studies is based on the development of a creative
student. Students work on an identified brief,
creating a plan to fit the brief and implementing the
brief while being constantly aware of health and
safety rules. Through hands on experiences and
with ongoing investigation and modification,
students are encouraged to find solutions and
improve their work through evaluation.
Needlework box. Small and large sewing tools – sewing
machines, irons, ironing board etc.
Pictures of all tools. Samples of worked temporary stitches.
Interactive white board.
PowerPoint Presentation
http://www.ehow.com/list_6685667_hand-held-sewing-
tools.html
http://home.howstuffworks.com/framed.htm?parent=sewing-
http://home.howstuffworks.com/framed.htm?parent=sewing-
machine.htm&url=http://www.history.rochester.edu/Scientific_A
merican/mystery/howe.htm

Directorate for Quality and Standards in Education - Curriculum Management and eLearning Department – Textiles Studies – 2012
4
Teaching objectives Examples of teaching experiences and activities Indicators of learning outcomes
The teacher will help the students: To identify and name the commonly used small sewing tools/equipment for dressmaking purposes. (1 lesson)
Starter suggestion: Show a PowerPoint Presentation of various people doing different jobs. Students in mixed abilities groups discuss the various tools each worker is making use of. They eventually come to the conclusion that various jobs require the use of different tools.
Main activities: Preferably pair off the students and ask each group to talk about the small equipment that are necessary for Textiles Studies/sewing purposes at home or at school.
The teacher will then ask the students to suggest a suitable container where the small tools will be kept. Other possible answers could be: “in a nice needlework basket or a tin box”. The teacher tries to instil environmental awareness by becoming conscious to the three ‘Rs’, suggesting a biscuit tin or a clean shoe box which can be appropriately recycled to store these tools in.
The teacher shows the students the needlework box full of different tools and asks the students to name the tools and explain what they know of these tools, namely their use and care.
A video clip of different tools is shown to the students. Again students are paired off and given three sets of cards. The first set is of pictures of different tools, another set with different names of tools and the third set with the each tool’s performance. Each group will have to identify and name the tool and match it to its
Students identify, name and explain the function and proper
care of all the small sewing tools/equipment. They can use
each of them safely and confidently. (Level 8)
Students identify, name and state some of the functions and
general care of all the small sewing tools/equipment. They can
use most of the small tools safely.. (Level 7)
Students identify and name the very basic of the small sewing
tools; with help, they will outline the function of some of the
sewing tools/equipment. They can use the basic ones, under
supervision. (Level 6)
Students draw, match the wording of four of the small sewing tools/equipment and write them down in their file. They can use the basic ones in a restrictive manner under supervision. (Level 5)

Directorate for Quality and Standards in Education - Curriculum Management and eLearning Department – Textiles Studies – 2012
5
proper function.
http://www.youtube.com/watch?v=tVx8TlcPsKM
Other possible activities: On an interactive whiteboard students will be asked to match the tool to its name, or to identify the small tools shown. A word search on a handout can also be used.
To identify and name large sewing equipment. (1 lesson)
Starter suggestion: Students are grouped in pairs and asked to take a look around the Textiles Studies Room and make a list of the large sewing tools that are used for sewing, pressing and storing of different items.
Main activities: The students will be given a pack of different pictures of tools used for different jobs and they have to choose the tool necessary to use in the Textiles Studies Room.
Another list of tools is given out to students and each group will be asked to cut and fix the pictures of each tool on their files. Each tool has to have the proper name assigned to it.
Teacher will ask questions regarding the function of each tool and a discussion will follow. Some examples of questions that can be asked include: What is the difference between the dry and the steam iron? Why do we use an ironing board? What is a sleeve board? Discussion will continue regarding the safety of each tool.
http://tlc.howstuffworks.com/home/ironing-tips.htm
Students identify, name and explain the function and proper
care of all the small sewing tools/equipment. They can use
each of them safely and confidently.(Level 8)
Students will identify, name and state the function and general
care of all the large sewing equipment. They can use most of
the large equipment safely. (Level 7)
Students identify and name the very basic of the small sewing
tools; with help, they will outline the function of some of the
sewing tools/equipment. They can use the basic ones, under
supervision. (Level 6)
Students draw, match the wording of four of the small sewing tools/equipment and write them down in their file. They can use the basic ones in a restrictive manner under supervision.. (Level 5)

Directorate for Quality and Standards in Education - Curriculum Management and eLearning Department – Textiles Studies – 2012
6
Other possible activities: Teacher asks students to
research information and present a Storyboard or a brief
PowerPoint Presentation on large and small tools.
To select, use, care for, and store all sewing tools appropriately. (1 lesson)
Starter suggestion: A picture of a disorganized
Needlecraft room is shown to the students. A discussion
will follow to elicit the possible accidents that could
happen.
Main activity: A debate will be conducted and the class is
divided into two groups. Each group will have to choose
a speaker to deliver the points that are noted in the
pictures and students name the possible accidents and
what precautions should be taken to avoid such
accidents. Also each group has to suggest ways of how
to store all the tools that are scattered around the room
shown in the picture and what safety precautions should
be taken, giving justified reasons. (Fire extinguisher, fire
blanket, sewing machine safety guard, first-aid box, fire
escape and fire drill). Points will be given to each group
and a chart will be fixed on the wall noting what points
each group will generate during these debates.
Other possible activities: Students will be asked to
conduct an interview with a Health and Safety Teacher
or fire rescue personal or a policeman regarding a
particular accident that this person might have
encountered.
Students explain, giving reasons, while showing confidence of
the practical skills in the proper handling, safe use, correct care
and storage of tools. (Level 8)
Students explain in detail and show adequate practical skills in
the proper handling, safe use, correct care and storage of
tools. (Level 7)
Students explain briefly and, with some guidance, show some
basic practical skills in the handling, use and care of some
tools. (Level 6)
Students outline and, with continuous help and support, show
some elementary practical skills in the handling, care, safe use
of some basic tools. (Level 5)

Directorate for Quality and Standards in Education - Curriculum Management and eLearning Department – Textiles Studies – 2012
7
To gain knowledge and identify different types of sewing machines and name the main parts of the sewing machine. (3 lessons)
Starter suggestion: Students are presented with
pictures of different types of sewing machines. (Treadle,
hand and computerized sewing machines). The students
are encouraged to comment and spot the differences.
Following this, they will write their observations and
note the differences of the machines shown.
Main activities: The lists are read out and a discussion
will follow on the performance of these sewing
machines. Teacher will question the approximate time a
person may take to learn how to use each sewing
machine. Students will identify the differences between
the sewing machines and the different functions of each
machine shown. The treadle and the hand sewing
machine have very minimal functions compared to the
electric and the computerized one. Cost is also discussed
and taken into consideration when buying a sewing
machine.
The teacher will then display the sewing machine that
there is in class and point out to the students the name
of different part of the sewing machine. The teacher will
then show the students how to thread the sewing
machine and asks each student to try to thread the
sewing machine themselves.
The students will watch a video clip of how the sewing
machine works.
Students identify, name and explain the function, proper care
and safe use of each of the different sewing machines. They
can use more than one of the sewing machines in the Textiles
Room safely and confidently. (Level 8)
Students identify, name and state the function and general
care of the sewing machines. They can use one sewing
machine in the Textiles Room safely and with some
confidence. (Level 7)
Students identify and name some of the large sewing machine
parts. With help, they will outline the function of some of
these parts. They can make basic use of the sewing machine in
a restrictive manner while under supervision. (Level 6)
Students match, with help, names with the drawings of the
common types of temporary stitches and will attempt to work
two types of temporary stitches diligently but with support..
(Level 5)
Directorate for Quality and Standards in Education - Curriculum Management and eLearning Department – Textiles Studies – 2012
8
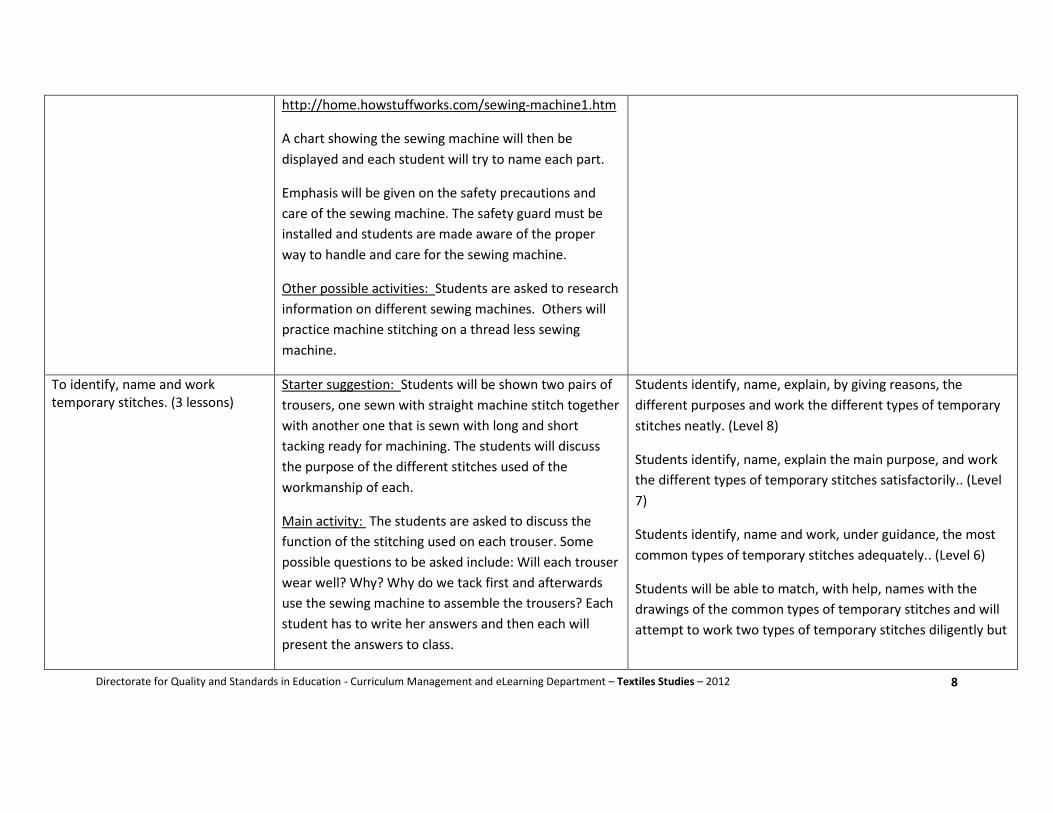
http://home.howstuffworks.com/sewing-machine1.htm
A chart showing the sewing machine will then be
displayed and each student will try to name each part.
Emphasis will be given on the safety precautions and
care of the sewing machine. The safety guard must be
installed and students are made aware of the proper
way to handle and care for the sewing machine.
Other possible activities: Students are asked to research
information on different sewing machines. Others will
practice machine stitching on a thread less sewing
machine.
To identify, name and work temporary stitches. (3 lessons)
Starter suggestion: Students will be shown two pairs of
trousers, one sewn with straight machine stitch together
with another one that is sewn with long and short
tacking ready for machining. The students will discuss
the purpose of the different stitches used of the
workmanship of each.
Main activity: The students are asked to discuss the
function of the stitching used on each trouser. Some
possible questions to be asked include: Will each trouser
wear well? Why? Why do we tack first and afterwards
use the sewing machine to assemble the trousers? Each
student has to write her answers and then each will
present the answers to class.
Students identify, name, explain, by giving reasons, the
different purposes and work the different types of temporary
stitches neatly. (Level 8)
Students identify, name, explain the main purpose, and work
the different types of temporary stitches satisfactorily.. (Level
7)
Students identify, name and work, under guidance, the most
common types of temporary stitches adequately.. (Level 6)
Students will be able to match, with help, names with the
drawings of the common types of temporary stitches and will
attempt to work two types of temporary stitches diligently but

Directorate for Quality and Standards in Education - Curriculum Management and eLearning Department – Textiles Studies – 2012
9
http://www.youtube.com/watch?v=uJUL3tu-Fec
Teacher will show samples of tacking stitches. Each
stitch will be named and students will be asked to
identify it by its specific name.
http://www.youtube.com/watch?v=vG4-
6LRKwfk&feature=related
Scraps of fabrics will be handed out to each student and
they will be shown how to thread the needle with
tacking cotton. Three rows will be drawn on the fabric
given and the teacher will demonstrate how each stitch
will be worked. Individual attention will be given to each
student. Students will continue working the stitches at
home. Others could find information on each stitch and
present a chart on the steps of how to work each stitch.
Once worked, stitches would be mounted on cards and
displayed in their portfolios.
Other possible activities: Students could prepare a
PowerPoint Presentation of four slides on temporary
stitches and present it to the class. Using the Internet
and working in groups, students could research and
download different images of temporary stitches and
prepare a chart with these images to hang in class.
with support. (Level 5)

Directorate for Quality and Standards in Education - Curriculum Management and eLearning Department – Textiles Studies – 2012
10
Subject: Textiles Studies Form 1
Unit code and title: TXS 7.2 Christmas Stockings
Strand 1: FASHION, DESIGN AND TEXTILES Unit Duration: 9 sessions of 40 minutes; Total 6 hours
Strand 2: AIDS TO SEWING
OBJECTIVES The teacher will help the student:
1. To become familiar and practise basic ways of permanently stitching fabrics. 2. To investigate ways of designing a Christmas stocking. 3. To layout and cut out the Christmas stocking, 4. To experiment with different methods of decorating the Christmas stocking, 5. To select and use specific methods for joining and finishing Christmas stockings.
Key Words Points to note Resources
Key Terms: stitches, Christmas
stocking, print, decorations,
ribbon, embroidery thread,
sewing machine, recycle.
New Terms: Permanent stitches,
straight stitch and zig-zag, felt,
appliqué, seam, photo-story.
The approach to teaching and learning Textiles
Studies is based on the development of a creative
student. Students work on an identified brief,
creating a plan to fit the brief and implementing
the brief while being constantly aware of health
and safety rules. Through hands on experiences
and with ongoing investigation and modification,
students are encouraged to find solutions and
improve their work through evaluation.
Fabric for working stitches, fabrics and thread for stockings. Felt scarps or
other non fraying fabric for appliqué. Decorations such as braid, ribbon,
beads, sequins, fabric paints, stencils and buttons. Fabrics and
decorations can be recycled or reused items salvaged from unused
garments or household items. Sewing and embroidery thread, patterns
and small tools found in the needlework box. Sewing machine and iron.
http://www.thequiltshow.com/os/images/projects/10034.pdf
http://www.freeapplique.com/Christmaspatterns.html
http://www.youtube.com/watch?v=WpyF4FRdmiE
http://www.youtube.com/watch?v=oknwFIMCiVg&feature=related

Directorate for Quality and Standards in Education - Curriculum Management and eLearning Department – Textiles Studies – 2012
11
Teaching objectives Examples of teaching experiences and activities Indicators of learning outcomes
The teacher will:
help students become familiar and practise basic ways of permanently stitching fabrics. (1 lesson)
Starter suggestion: The students examine sewn items to determine what stitching is and to
brainstorm the different methods and equipment used for hand and machine stitching. The
students can link to other lessons where temporary stitches were covered and compare and
distinguish between these stitches and the permanent stitches.
http://www.creativesewingtips.com/basic-sewing-stitches.html
Main activity: Students make a list and draw some permanent stitches on their worksheets.
Students watch the teacher demonstrate how to make basic permanent stitches. These can be
hand or machine stitches. Each student is given a piece of fabric where to try basic stitches. These
stitches can be continued at home. The use of striped fabric is recommended, so students can
stitch in a straight line without the need for marking.
http://www.5min.com/Video/Learn-Basic-Sewing-Stitches-145438337
http://www.allfreesewing.com/Video-Tutorials/Video-Sewing-101-Hand-Sewing-Basics
http://www.sewdresses.com/sew-dresses/sewing-how-to-sewing-easy-sewing-stitches
http://stitchschool.blogspot.com/2010/01/running-stitch.html
The students will be able to illustrate
the basic permanent stitches using
clear diagrams. The student will be
able to work the basic stitches by
hand or machine. (Level 8)
The students will be able to write the
names of some permanent stitches
and match them to the diagram found
on the teacher’s books, handouts or
website. The student will be able to
work some of the basic stitches by
hand or machine. (Level 7)
The students will be able to
distinguish the names of two
permanent stitches and match them
to the diagram found on the teacher’s
books, handouts or website. The
student will be able to work the two
simplest stitches by hand or machine..
(Level 6)
The students will be able to list the
names of two permanent stitches and
match them with the diagram found

Directorate for Quality and Standards in Education - Curriculum Management and eLearning Department – Textiles Studies – 2012
12
on the teacher’s books, handouts or
website. The student will be able to
work the simplest stitches by hand.
(Level 5)
To investigate ways of designing a Christmas Stocking. (2 lessons)
Starter suggestion: The students watch a video clip showing the making of a Christmas stocking.
Students will be asked about the Maltese traditional “bag” which was a very common practice in
Malta before the Christmas stocking was introduced. This “Hessian” bag used to be filled with
fresh and dried fruits and a few sweets, and given to the children after midnight mass. Students
may be given a chance to opt to make this bag instead of a Christmas stocking. Exemplars from
past years can be shown to the students so that they can better visualize how decorations can be
implemented.
http://www.marthastewart.com/article/felt-stockings
Main activity: The students are given blank paper to design their own Christmas stocking. They
can download a pattern from various sites or make use of the teacher’s copies. Patterns provided
by the teacher can help students visualize the different sizes that can be obtained using a
photocopier. Various sizes of stockings can be made keeping in mind students’ ability. Students
are encouraged to suggest ways of recycling fabrics, buttons, braid, tinsel etc… they have at
home. Decorative motifs can be hand drawn or downloaded from the internet. Students can
suggest embroidery stitches that can be used to outline the shapes. They can draw the stitches on
their shapes.
Other possible activities: A dictionary of decorative stitches can be found and embroidery thread
and other yarns provided. Students should be encouraged to try different stitches on different
backgrounds to visualize the result. There are various levels of difficulty to tackle according to
aptitude and time available.
http://inaminuteago.com/stitchindex.html
The students research and download a
pattern from the internet, modify it to
their needs and plan the decorative
features with very little use of the
teachers’ resources.. (Level 8)
The students download a pattern from
the internet and modify it to their
needs. They will make a plan of the
decorative features with the help of
the teachers’ resources. (Level 7)
The students will be able to
distinguish the names of two
permanent stitches and match them
to the diagram found on the teacher’s
books, handouts or website. The
student will be able to work the two
simplest stitches by hand or
machine.(Level 6)
The students will be able to list the
names of two permanent stitches and
match them with the diagram found

Directorate for Quality and Standards in Education - Curriculum Management and eLearning Department – Textiles Studies – 2012
13
on the teacher’s books, handouts or
website. The student will be able to
work the simplest stitches by hand.
(Level 5)
To layout and cut
out the Christmas
stocking.
(2 lessons)
Starter suggestion: The students watch the teacher laying out, pinning and marking the pattern
on the fabric. Using the interactive whiteboard, they write each step the teacher is going through.
Each student can take her turn to write a point down, so that at the end the whole method is
written down and can be printed or sent to them through emails.
http://www.marthastewart.com/268556/felt-stockings?video_id=0
http://www.marthastewart.com/268556/felt-stockings
Main activity: After watching the demonstration, the students will lay out their own stocking
pattern with the help of the teacher. Owing to the fact that the students bring different fabrics,
provision has to be made for explaining different widths of fabric and difficulties in marking
certain fabrics such as slippery or woolly ones, where different marking mediums have to be used.
After pinning and marking, the students cut around the outline. Using the same principle the
students mark and cut any appliqué shapes which will be used as decoration. Shapes have to be
reinforced with Vilene if the fabric frays or is very lightweight. During this activity, the teacher can
group the students when cutting out decorations. In this way they can help each other as well as
share the fabrics they have to avoid waste when they need tiny bits of felt to decorate. Pre-
prepared shapes can be cut for students who do not manage to cut their own.
Other possible activities: Students can take pictures of their work as they progress. They can build
a photostory showing how their stocking was created. This can be uploaded on the internet or
used for an etwinning project.
The students lay out the pattern in the
most economical way taking into
account the fabric grain. They will
mark and cut out the stocking and
decorations in an accurate and neat
way with hardly any help from the
teacher. (Level 8)
The students download a pattern from
the internet and modify it to their
needs. They will make a plan of the
decorative features with the help of
the teachers’ resources. . (Level 7)
The students copy a Christmas
stocking pattern supplied by the
teacher and decorate the stocking
using only the teachers’ resources..
(Level 6)
The students copy a simple Christmas
stocking using the patterns supplied
by the teacher. The students choose
the decorations from those found in

Directorate for Quality and Standards in Education - Curriculum Management and eLearning Department – Textiles Studies – 2012
14
class with the help of the teacher and
the students in their group. (Level 5)
To experiment with different methods of decorating the Christmas stocking, (2 lessons)
Starter suggestion: The teacher shows worked examples of different finished stockings and
finished stitched, printed or stencilled samplers. Students watch a video clip showing how to work
hand appliqué.
http://www.youtube.com/watch?v=x_Y04BeZxo8&feature=related
Main activity: Students watch the teacher work embroidery stitches using stranded cotton.
Stitches can be started from the simplest stitch such as the running stitch to other more complex
stitches such as stem and chain stitch. Students can choose whichever stitches they want.
Another alternative is to stick the shapes with glue or to print designs using stencils and fabric
paints. The teacher can demonstrate these methods to the students depending on their
preference and ability. Students can also try these methods in groups and then compare results.
For the students who have missed lessons the decorations must be simplified, allowing them to
catch on with the aim of finishing the stocking with the others in time for Christmas. Simple
decorative methods can also be continued or experimented on at home.
http://www.youtube.com/watch?v=c7LZYnvXAe8&feature=relatedhttp://www.stitchingcow.com
/patterns/category/30/Tutorials
http://www.youtube.com/watch?v=axDBl7lJuJs&NR=1
Other possible activities: Time permitting students can watch a video clip showing how to attach
beads and sequins to their decorations.
http://www.youtube.com/watch?v=794UZyOheH8&feature=related
The students decorate their stocking,
using more than one method of
embellishment and producing an
excellent and interesting result.. (Level
8)
The students decorate their stocking
creatively, using a chosen method of
embellishment and produce a neat,
interesting and pleasing result.. (Level
7)
The students decorate their stocking,
using a chosen basic method of
embellishment and achieve a
satisfactory result. (Level 6)
The students decorate their stocking
very simply using a chosen method of
embellishment. . (Level 5)
To select and use
specific methods for
Starter suggestion: The students have their decorated stocking pieces and once the decoration is
finished, they can suggest ways of joining the two pieces together. During this brainstorming
The students join the stocking pieces
together neatly and accurately,

Directorate for Quality and Standards in Education - Curriculum Management and eLearning Department – Textiles Studies – 2012
15
joining and finishing
Christmas stockings.
(2 lessons)
sessions the teacher can show the students different stockings that have been joined in different
methods, such as with running stitch, blanket stitch or by machine. Different yarns can be used
for hand stitching, to make the stocking as interesting as possible.
http://www.simplymodernmom.com/2009/12/blanket-stitch-christmas-stockings/
https://www.craftstylish.com/item/7805/easy-felt-stockings
http://www.youtube.com/watch?v=E5OIpC2TgWc
Main activity: Students determine which method they prefer to use, depending on their realistic
options. Some students do not find machining easy at this stage, so they can hand stitch the
seam. They can also blanket stitch the edges together or use simple stitches such as running
stitch. Stitching can be done with decorative thread woollen yarn. This activity requires support
from the teacher, so students can be grouped together according to the method of joining they
choose and the teacher can demonstrate each method while the students can watch the videos
either on interactive whiteboard or computers in the room. If the stocking is not completely
finished, the activity can be finished at home.
Other possible activities:
The students can watch this particular video, showing how a crazy patchwork stocking can be
made with scraps of fabrics.
http://www.youtube.com/watch?v=cBQCe1T5LUM
showing excellent practical skills.
(Level 8)
The students join the stocking pieces
together neatly and accurately,
showing good levels of practical skills.
(Level 7)
The students join the stocking pieces
together adequately, showing limited
skill levels. (Level 6)
The students join the stocking pieces
together with difficulty and showing
very little practical skills while under
the continuous guidance of the
teacher. (Level 5)

Directorate for Quality and Standards in Education - Curriculum Management and eLearning Department – Textiles Studies – 2012
16
Subject: Textiles Studies Form 1
Unit Duration: 9 sessions of 40 minutes; Total 6 hours
Strand 1: FASHION, DESIGN AND TEXTILES OBJECTIVES The teacher will help the students:
1. To explore the use of textiles, 2. To list different fabric properties and match them to meet needs and requirements, 3. To discover the properties of various fabrics by conducting simple tests, 4. To investigate the basic structure of woven fabric,
5. To gain knowledge on the basic care of textile items, including interpreting basic care labels.
Key Words Points to note Resources
Key Terms:
textiles, fabric properties, absorption, crease resistance, fire resistance, sunlight resistance, washing, drying, bleaching, dry clean, ironing.
New Terms: woven, warp, weft, selvedge, grain, bias, right side, wrong side, care label.
The approach to teaching and learning Textiles
Studies is based on the development of a
creative student. Students work on an
identified brief, creating a plan to fit the brief
and implementing the brief while being
constantly aware of health and safety rules.
Through hands on experiences and with
ongoing investigation and modification,
students are encouraged to find solutions and
improve their work through evaluation.
Picture on the various uses of textiles, pictures of people wearing different clothing, video clip with various pictures showing people in various jobs/occasions, flashcards with pictures of various clothing and household items, table on properties of various fibres, equipment needed for fabric tests, fabric samples, samples of plain weave fabrics, care labels, iron and ironing board, handouts and worksheets.
http://www.ehow.com/fabric-properties/
http://quilting.about.com/od/fabricembellishment/ss/fabric_grain.htm
http://www.squidoo.com/fabric_grain
http://www.textileaffairs.com/lguide.htm
http://www.apparelsearch.com/care_label_symbols.htm
http://en.wikipedia.org/wiki/Laundry_symbol

Directorate for Quality and Standards in Education - Curriculum Management and eLearning Department – Textiles Studies – 2012
17
Teaching objectives Examples of teaching experiences and activities Indicators of learning outcomes
The teacher will help the student: To explore the use of textiles. (2 lessons)
Starter suggestion: The teacher invites students to share what they
understand by textiles. A brainstorming activity follows with the students
listing various uses of textiles. A picture showing the various uses of
textiles can be given so that students identify that textiles can be used
inside the home, outside the home and for clothing. The picture can be
obtained from:
Cunningham, A. & King, H. (1989) Textiles Investigations. Heinemann
Educational: Oxford, p. 129.
Main activity: The teacher explains that textiles are mostly used for
making clothes. Students can list various reasons for wearing clothes.
They discuss some of the reasons why they choose their clothes by
drawing up a chart with three columns: the different times of a particular
day, clothes worn during different times of the day and reasons for
wearing that type of clothing. They can present their results in a pie
chart.
Ridgwell, J. & Davies, L. (1990) Skills in Home Economics: Textiles.
Heinemann Educational Publishers: Oxford, p. 8.
Students can connect to the internet to find pictures of various people
and look for reasons for wearing such types of clothes.
Other possible activities: Students can be given a task where they look
around their home or school and make a list of about ten different ways
in which textiles are used. Students can also interview a person doing a
particular job, e.g. chef, policeman, athlete, etc., asking him/her about
The students explain in detail the various uses
of different textiles inside the home, outside
the home and for clothing purposes. They
give reasons for the wear of different clothes
during a wide range of occasions and at
different times of the day. (Level 8)
The students explain in short the use of
different textiles inside the home, outside the
home and for clothing purposes. They justify
the choice of particular clothing wear during
the different times of the day. (Level 7)
The students outline the use of different
textiles inside the home, outside the home
and for clothing purposes with some help
from the teacher. (Level 6)
The students identify the use of different
textiles inside the home, outside the home
and for clothing purposes with constant
prompting from the teacher. (Level 5)

Directorate for Quality and Standards in Education - Curriculum Management and eLearning Department – Textiles Studies – 2012
18
the style of their uniform and why they think it is such.
A recapitulation activity can be done by connecting to the internet and
browsing this website:
http://www.childrensuniversity.manchester.ac.uk/interactives/artanddes
ign/talkingtextiles/whataretextiles.asp
The previous website enables the students to recall the uses of textiles by
means of an online interactive quiz.
http://www.fabrics-manufacturers.com/outdoor-fabric.html
To list different fabric properties and match them to meet needs and requirements. (2 lessons)
Starter suggestion: The teacher can prepare a video clip/flashcards with
various pictures showing people in their various job uniforms and in their
special occasion attire. This activity will help the students identify the
fact that fabric properties are kept in mind when choosing fabrics for
specific jobs/occasions.
Main activity: A brainstorming activity can be done, listing different fabric
properties. The students will be divided in groups and are given
flashcards with pictures of various clothing and household items. They
are to list desired fabric properties for each item of clothing and reasons
why each property is important. Each group will prepare a chart listing
various fabric properties and explaining for what each fabric property is
suitable. Each group will have the opportunity to present the work done
on a chart and give a short presentation in front of the whole class.
Other possible activities: Students can be given a table with different
types of fibres and their properties ranked from 0-10. They can be asked
questions, such as, which is the fibre most suitable to wear next to the
The students discuss the attributes of
different fabric properties and, giving
reasons, they match these to the specific
needs and requirements of identified jobs and
occasions. (Level 8)
The students explain in short the attributes of
different fabric properties and match these to
the specific needs and requirements of
identified jobs and occasions. (Level 7)
The students identify the attributes of some
basic fabric properties and match these to the
basic needs and requirements of some jobs
with guidance from the teacher. (Level 6)
The students name the properties of common
fabrics with prompting from the teacher.

Directorate for Quality and Standards in Education - Curriculum Management and eLearning Department – Textiles Studies – 2012
19
skin and why?
Sinclair, R. (1997) Skills in Textiles Technology. Heinemann Educational
Publishers: Oxford, p. 46.
They can connect to various internet sites so that they will get familiar
with the range of properties that different types of fibres have. They will
understand that different fibres have different properties and these
properties are needed to meet different needs and requirements such as
for particular jobs.
http://www.samthelamb.com/index.htm
http://www.youtube.com/user/woolmarkonline#p/u/2/xsooOyRZB0Q
http://www.colgate.com.au/app/PDP/2xUltraConcentrate/AU/fabric-
care-guide-information.cvsp
http://www.colgate.com.au/app/PDP/2xUltraConcentrate/AU/fabric-
care-guide-information.cvsp
(Level 5)
To discover the properties of various fabrics by conducting simple tests. (3 lessons)
Starter suggestion: A quick revision of fabric properties is carried out at
the beginning of the lesson. Students are asked to play the role of a
manufacturer of a clothing industry; they have to find a way of how to
identify the fabric property of specific clothing. The answer should be
that fabric tests could be one way of discovering the properties of various
fabrics.
Main activity: With the help of the teacher, the students conduct the
following fabric tests: water absorption (hoop method only), crease
The students show competence in following
safety precautions and conduct fabric tests
using different types of natural and synthetic
fabrics; they discuss and record in detail the
results of each test. (Level 8)
The students conduct fabric tests using
different types of natural and synthetic
fabrics under supervision and briefly

Directorate for Quality and Standards in Education - Curriculum Management and eLearning Department – Textiles Studies – 2012
20
recovery, flammability and resistance to light: using different types of
fabrics, both natural and synthetic. Results are recorded onto experiment
sheets provided. The following booklet contains worksheets which are a
step-by-step guide for the tests mentioned above to be carried out. A
section called Evaluating your results is included for recording the result
of each test.
Grech, C. (1999) Testing fabric properties. In-service 1999: Malta
http://www.youtube.com/watch?v=kb4tCcnA6jo&feature=related
Other possible activities: Students can repeat these experiments at home
on various household items. For example, the absorbency test can be
carried out on different types of towels or floor cloths to find out which
type is the most absorbent. The flammability test is not to be carried out
at home for safety purposes.
http://missourifamilies.org/features/materialarticles/feature7.htm
comment and record the results of each test..
(Level 7)
The students carry out, with teacher’s help,
some fabric tests and record in simple form
the results obtained.. (Level 6)
The students fill in a simple guided sheet with
the results obtained when carrying out some
fabric tests with teacher’s help. (Level 5)
To investigate the basic
structure of woven fabric.
(1 lesson)
Starter suggestion: Students will be given a piece of plain weave fabric. They are to observe the piece of fabric given and encouraged to try to identify and comment on the structure of a plain weave fabric. By fraying the plain weave fabric, the students will observe and find out that the fabric is made by interlacing two yarns at right angles to each other, the weft and the warp yarns. Main activity: Students are presented with the terms selvedge and straight grain. With the help of the teacher, they are led to define their meaning. By trying to fray the selvedge, students will realise that the selvedge does not fray and it is firm. A test for finding the direction of the warp or selvedge may be carried out. On a square piece of woven fabric,
The students apply the properties of the
warp, weft and bias to match the specific
design requirements of common different
fabric items and clothing.. (Level 8)
The students investigate the structure of
different fabrics to label swatches of fabrics
and draw illustrations while explaining in
short the properties of the warp, weft and
bias. (Level 7)

Directorate for Quality and Standards in Education - Curriculum Management and eLearning Department – Textiles Studies – 2012
21
the direction of the warp yarns/selvedge may be determined by pulling each straight edge firmly. The warp yarns will not ‘give’ while the weft yarns will ‘give’ slightly. The students identify that the weft and warp yarns are firm and will not stretch but the warp is stronger than the weft. The bias is explored, as students will find out that by stretching the sample fabric on the bias, it is more flexible and stretchy. Students can also fix samples, marking the right and wrong sides of fabric in file. Other possible activities: Students can look for pictures of garments or parts of garments which they think are cut on the bias. With help, they will provide simple explanations why they think that these are cut on the bias. They can also try cutting very small sample patterns on the grain and on the bias to explore and feel the difference between the two. http://www.youtube.com/watch?v=Vh72ucqvRgQ
The students show awareness, while handling
and labelling some fabric samples that the
construction of different fabrics, contribute to
a different property. (Level 6)
The students identify the right side and wrong
side of fabric and comment briefly on the
obvious differences, if any.. (Level 5)
To gain knowledge on the
basic care of textile items,
including interpreting basic
care labels.
(1 lesson)
Starter suggestion: Students read care labels found on their uniform or textile item in their possession. Although they do not know their meaning, they will get familiar with the care label and the symbols used. Main activity: The teacher explains that care labels are needed on each item of clothing so that we will know how to care for them. Students will draw and give the meaning of the basic care label symbols including: washtub, bleaching triangle, drying square, dry cleaning circle and ironing. The ironing symbols only should be covered in detail. The students can handle the iron and observe the heat settings. They can try the heat settings on various fabric samples. Other possible activities: A matching exercise on basic care label symbols and their meaning can be given. Students can take a look at care label symbols on items of clothing that they have at home and observe the differences and similarities that various clothing have with regards to care label symbols. Students can browse websites to get more familiar with the care label
The students explain in detail the care of
different textile items and give reasons for
the interpretation of different care labels
(Level 8)
The students explain the general care of
common textile items and interpret the
meaning of different care labels.. (Level 7)
The students explain in simple terms the
general care of common textile items and
match care label symbols with their meaning
with support from the teacher. (Level 6)
The students outline the general care given to

Directorate for Quality and Standards in Education - Curriculum Management and eLearning Department – Textiles Studies – 2012
22
symbols and find out that each symbol category is varied according to the type of fabric used. http://www.youtube.com/watch?v=hb_N7N_ETTI&feature=related http://www.kew.org/plant-cultures/schools/schools_textiles_care.html
common textile items and recall the symbols
of some common care labels with continuous
prompting from the teacher. (Level 5)

Directorate for Quality and Standards in Education - Curriculum Management and eLearning Department – Textiles Studies – 2012
23
Subject: Textiles Studies Form 1
Unit code and title: TXS 7.4 Rags to Riches Unit Duration: 9 sessions of 40 minutes; Total 6 hours
Strand 1: Fashion, Design and Textiles OBJECTIVES The teacher will help the students:
1. To explore the history of fibres, 2. To identify and describe the sources of natural fibres. 3. To identify man-made and synthetic fibres, 4. To categorize some common fabrics for clothing and household items, 5. To identify and explore the environmental aspect of fibres.
Key Words Points to note Resources
Key Terms: Cotton, linen, wool, silk, silkworm, sheep, flax, cotton ball, man-made fibres, synthetic, absorbs moisture, washing, environment, warm, soft, light weight, heavy weight, cool, clean, comfortable, strong, wrinkles
New Technical Terms: Manufactured, clammy, sustainability, breathes, hardwearing, shrinks, scratchy, absorbs heat, dyeing, reflect heat, stretchable, lustrous.
The approach to teaching and
learning Textiles Studies is based on
the development of a creative
student. Students work on an
identified brief, creating a plan to fit
the brief and implementing the brief
while being constantly aware of
health and safety rules. Through
hands on experiences and with
ongoing investigation and
modification, students are
encouraged to find solutions and
improve their work through
evaluation.
Samples of the following: Cotton balls, silk cocoons, raw wool, fibre and fabric samples of cotton, linen, silk and wool, CD of the History of wool in Malta, photos or computer images of the weaving cottage industry in Malta, handouts and worksheets
http://www.youtube.com/watch?v=oZP8DCN7dbc
http://cottontoday.cottoninc.com/
http://www.youtube.com/watch?v=orwrgv75Z4o&feature=relatedhttp://www.youtube.com/watch?v=UaaKg2qsNHs&NR=1
http://www.sardegnadigitallibrary.it/index.php?xsl=626&s=17&v=9&c=4460&id=8698
http://www.fabrics.net/manufact.asp
http://www.dolceta.eu/malta/Mod5/spip.php?rubrique54
http://www.elna.com/engb/sewingideas.php?sewingidea=405&new=1

Directorate for Quality and Standards in Education - Curriculum Management and eLearning Department – Textiles Studies – 2012
24
Teaching objectives Examples of teaching experiences and activities Indicators of learning outcomes
The teacher willhelp the student: To explore the history of fibres. (1 lesson)
Starter suggestion: The students watch a short clip showing how wool from sheep
was traditionally used to make blankets and how cotton was grown in Malta in past
times and used to make fabric for various household items and clothing. The
students can view photos of the weaving cottage industry still used in Malta. This
industry makes use of natural fibres to make items for the home.
Main activity: Students are divided into groups. They are introduced to fibres by
handling different raw samples of natural fibres. They use the internet to discover
how these fibres have been around for a long time, and have been used by ancient
civilizations for clothing, accessories and household items, with special reference to
the cotton and wool industry in Malta in past times. Students can help each other
to download images and create a chart, a page in their file or a photo-story about
the history of fibres with special reference to Malta and Gozo. This activity can be
extended and/or continued as homework.
http://www.historyforkids.org/learn/clothing/cotton.htm
http://www.naturalfibres2009.org/en/index.html
http://www.youtube.com/watch?v=FzTMH5NdwWY
Other possible activities: Students are encouraged to look for possible articles or
items which are still available in some homes. These antique samples are usually
hand made and are handed down as heirlooms from one generation to the other.
Samples of cotton plants can still be found growing in the countryside in Malta, and
if a plant can be found, the seeds can be used to plant and watch the seedling grow.
The students become familiar with the
history of fibres and be able to give an
account of it without any help and in
various ways. (Level 8)
The students become familiar with the
history of fibres and they are able to
produce an outline of the common
fibres. . (Level 7)
The students show some understanding
of the history of fibres and they are able
to compare the information with some
help. (Level 6)
The students have limited understanding
of the history of fibres and are able to
list, with continuous guidance from the
teacher, the outline/development.
(Level 5)
To identify and describe the sources of natural
Starter suggestion: The students look at a variety of clothing items and fabric
samples of different fibre content. The students are divided into groups. A
The students explain in some detail how
natural fibres are obtained and how

Directorate for Quality and Standards in Education - Curriculum Management and eLearning Department – Textiles Studies – 2012
25
fibres . (2 lessons)
discussion and handling of samples will help students determine the content.
Main activity: The students are asked about their knowledge of fibres. Starting from
the known to the unknown the discovery of fibres starts to unfold. Here the teacher
can guide the students to various websites to see how silkworms are farmed and
how this beautiful fibre is made into the richest of the fibres.
http://www.silk.org.uk/
http://www.youtube.com/watch?v=e5olY3oWXzA&feature=related
Each fibre can be researched and the natural fibres are presented again. This time
the fibres or tiny hairs can be observed and compared regarding length, lustre,
fineness etc. The students can be given information (handout) on the origin of the
four basic natural fibres. In groups, the students create a chart with samples of the
four main natural fibres. A sample of each fibre can be stuck to the chart. Students
can also identify international labels linked to fibre content. Books and handouts
can be of help to some pupils who might find it difficult to spell technical words.
http://www.aussiewoolbedding.com/woolmark
At home students can go on a fibre hunt to identify one or two items made from
natural fibres. They can also research how the fibre is processed to make it into
fabric.
Other possible activities: According to their ability, the students will find out
specific information about fibres from internet sites. These sites show how a fibre is
processed from the field to the manufacturer to make the necessary items.
Students come up with a list of garments and household items made from natural
fibres. Students can find out what parachutes were made of before manufactured
fibres were invented.
each fibre is identified by its particular
fibre content label. They are able to
compile a chart finding their own
samples of the natural fibres. (Level 8)
The students explain how natural fibres
are obtained and how each fibre is
identified by its particular fibre content
label. They can prepare a chart by
selecting samples of natural fibres found
in the classroom. (Level 7)
The students show some basic
understanding of how the natural fibres
are obtained and how each fibre is
identified by its particular fibre content
label. They are able to give proof of their
understanding by creating a chart with
samples provided by the teacher. (Level
6)
The students will recall how natural
fibres are obtained and recognize the
fibre content label. They will create a list
of these fibres and stick a sample of the
fibre given by the teacher. (Level 5)

Directorate for Quality and Standards in Education - Curriculum Management and eLearning Department – Textiles Studies – 2012
26
To identify man-made and
synthetic fibres.
(2 lessons)
Starter suggestion: The students are presented with different items made from synthetic fibres, such as an anorak, an umbrella, a PVC apron etc… In groups the students compare the feel of these fibres to the natural fibres. They investigate the use of these fibres and the reason why there was a need for these fibres. During this brainstorming session the students create a web diagram on the interactive whiteboard, showing the various needs which inspired the discovery of these fibres.
Main activity: In groups, and with the help of the teacher’s marked samples of fabrics, the students will try to identify the names of some samples of these main manufactured fibres.
http://www.madehow.com/Volume-2/Polyester.html
According to their ability, students can make a chart showing how manufactured fibres are classified and stick samples of these fibres or fabrics on their files. Finally the students will play the game dress me up to evaluate their knowledge of fibres. The game will help the students to become familiar with common fibre terminology.
http://www.bbc.co.uk/scotland/education/as/tech/fabric_colour/which_fabric/dress_up/index.shtml
Other possible activities: Students can conduct an experiment where they subject different fabrics to different environments such as burying natural and manufactured fabrics in the ground, to see how long each sample will take to rot. Groups of students can compile a table showing the results of this experiment.
http://www.need.org/needpdf/SecNaturalandManMadeFibers.pdf
The students identify and produce a list
of how the main man-made and
synthetic fibres are classified and select
and match various samples from a
school fabric box or from fabrics found
at home. (Level 8)
The students produce a list showing how
the main man-made and synthetic fibres
are classified and distinguish various
samples of fabrics provided. (Level 7)
The students show basic understanding
how the main man-made and the
synthetic fibres are classified and are
able to distinguish a few samples of the
fabrics provided, with some help from
the teacher. (Level 6)
The students identify, with help and
prompting from the teacher, how the
main man-made and synthetic fibres are
classified and recognize, again with
prompting, a few of the samples of the
fabric provided. (Level 5)
To categorize some
common fabrics for
clothing and household
Starter suggestion: The students are asked to look at the samples they brought
from home and try to name them. Students can come to the classroom when they
have some free time to obtain samples from the Textiles Studies room if no samples
The students select and distinguish a
comprehensive number of fabrics and

Directorate for Quality and Standards in Education - Curriculum Management and eLearning Department – Textiles Studies – 2012
27
items.
(1 lesson)
are available at home. Students can be grouped to make sharing of samples easy, so
that a wider selection of samples is available for everyone. To supplement this they
will then be given other fabric samples in common use. It will be easy for students
to find samples of denim and towelling, but more difficult to find a pure linen
sample.
Main activity: Students will stick the samples on their files/ handout and are
encouraged to identify their names and use. Flashcards with names of fabrics can
be used and a matching exercise done for the less able students. Students will
select pictures of garments and other items and match them with fabric samples.
This is a practical session where students become familiar with fabrics in common
use. A lens can be used to observe the fabric more closely. Students can discuss
print, weave, knit and other characteristics of certain fabrics.
Other possible activities: Students are divided into groups. The teacher can supply
figure templates which the students can dress up using their favourite fabrics from
the samples available. These can be scanned by the students at home.
http://www.fashion-era.com/elegant_fashion_templates.htm
More adventurous students can create a swatch file showing interesting fabrics used for soft furnishings, car seats, tents etc and keep this in class for reference. http://www.robertkaufman.com/fabrics/designers/february_13_creative/
identify their names. (Level 8)
The students select some fabric samples
they brought from home and stick them
on the worksheet under their proper
name. (Level 7)
The students distinguish a few common
fabric samples and stick them on their
worksheet with some help from the
teacher. (Level 6)
The students match and label different
fabric samples on their worksheet and
write the names from the flash cards,
with continuous help from the teacher.
(Level 5)
To identify and explore the environmental aspect of fibres. (3 lessons)
Starter suggestion: The students will link to Dolceta site to Your Sustainable Wardrobe:
http://www.dolceta.eu/malta/Mod5/spip.php?rubrique54
Together with the teacher students read and discuss fashion and the environment.
In groups, students can discuss and put forward ideas of how textiles can be
The students explain by giving various
examples, how to be a sustainable
consumer of textiles and produce a
textile item, made from a discarded
textile item and other components.
(Level 8)

Directorate for Quality and Standards in Education - Curriculum Management and eLearning Department – Textiles Studies – 2012
28
recycled or reused. They can examine an item which they brought from home and
suggest ways how the item can be reused or recycled. Students will be encouraged
to embark on a reuse/recycling project. The teacher will show some recycling
projects/ exemplars.
Main activity: Students can be grouped and each group can redesign a different
item from what we usually discard such as jeans, jackets, broken umbrellas, and old
quilts that are no longer fashionable or are torn in some places. Simplicity website:
http://www.simplicity.com/t-how-to-sew-jeans-purse.aspx
can be accessed to show how this can be done to produce lovely projects. Students
are encouraged to be creative and plan an interesting and useful item. Project
should recycle or reuse fabric, buttons etc Small items can be made such as a face
cloth from an old torn towel, cleaning cloths from old sheets, bags and purses from
old jeans and trousers, according to the ability of the students and the time
available. This would be a good time to help students plan their collage, using
fabrics and other components “rescued from the thrash bin”. The more
adventurous students can try their hand at felting old woollen sweaters at home by
incorrectly washing them in the washing machine. This felted fabric can be reused
for their collage.
Other possible activities: quiz from dolceta website
http://www.dolceta.eu/malta/Mod5/spip.php?article231
The students explain by giving some
examples how to be a sustainable
consumer of textiles and produce an
interesting textile item, made from a
discarded textile item. (Level 7)
The students explain briefly how the
consumer can be responsible when
choosing and using textile items to
protect the environment. Students make
a simple item from a discarded textile
item with regular help from the teacher.
(Level 6)
The students outline how the consumer
can be responsible when choosing and
using textile items to protect the
environment. With continuous help
from the teacher, the students make a
very simple item from a discarded textile
item. (Level 5)

Directorate for Quality and Standards in Education - Curriculum Management and eLearning Department – Textiles Studies – 2012
29
Subject: Textiles Studies Form 1
Unit code and title: TXS 7.5 Creative Design
Strand: FASHION, DESIGN AND TEXTILES Unit Duration: 9 sessions of 40 minutes; Total 6 hours
OBJECTIVES: The teacher will help the students:
1. To define a simple fabric collage in its various forms, 2. To design and plan a simple fabric collage creatively, 3. To embellish the collage using various techniques including embroidery stitches and appliqué,
4. To identify embroidery stitches by name and work a number of basic embroidery stitches, 5. To present an effective finished product and be able to evaluate its process.
Key Words Points to note Resources
Key Terms: Fabric collage, felt fabric, embroidery thread, embroidery stitches- stem stitch, lazy daisy stitch, buttonhole stitch, couching, feather stitch and chain stitch. New Technical Terms: sequins, beading, appliqué, trims, quilting, stamping, stencilling, block-printing, fabric paint/markers, bondaweb and Vilene, layout of pattern, correct grain line placement, pinning , cutting and marking.
The approach to teaching and learning Textiles
Studies is based on the development of a creative
student. Students work on an identified brief,
creating a plan to fit the brief and implementing
the brief while being constantly aware of health
and safety rules. Through hands on experiences
and with ongoing investigation and modification,
students are encouraged to find solutions and
better their work through evaluation.
Students are encouraged to develop skills and
attitudes to create attractive textile items in a
time-effective manner.
PowerPoint presentation, assortment of different fabrics, embroidery threads, trims, sequins etc…
http://video.about.com/diyfashion/How-to-Design-a-Fabric-Collage.htm
http://www.youtube.com/watch?v=C5k0FVi3ZmQ
http://www.youtube.com/watch?v=Rhpa7gOlbJU&NR=1
http://www.youtube.com/watch?v=ToXWQH6yi5w&feature=relmfu
http://www.youtube.com/watch?v=i8hw8_eoGlc&feature=related
http://www.sublimestitching.com/patterns/all
http://www.cindycooksey.com/obox_road_trip.html

Directorate for Quality and Standards in Education - Curriculum Management and eLearning Department – Textiles Studies – 2012
30
Teaching objectives Examples of teaching experiences and activities Indicators of learning outcomes
The teacher will help the
students:
To define a simple fabric
collage in its various forms. (1
lesson)
.
Collage is an art form that involves using an assortment of different materials to create a picture. Fabrics offer great options for these collages because they come in a variety of colours, materials and prints
that will give built-in interest, dimension and texture to the collage. It can be finished as a picture or a wall hanging.
Starter suggestion: Teacher shows a short PowerPoint presentation of past projects. A display of different fabrics, embroidery threads, pictures of different embroidery stitches and sequins is exhibited. The students explore and discuss the various ways how the collages shown have been creatively assembled. At the same time, reference is made to how the use of fabrics has been included.
Main activities: During a brainstorming session the teacher asks the students to think of possible sources of inspirations for their collage. The theme could be based on a ‘garden full of flowers’, ‘under the sea’, ‘a favourite character in a poem, or a fairytale’. Students are encouraged to decide which picture/theme they wish to work on.
Motifs or designs provided by the teacher can be of help for some
students. If desired the collage can be worked out in the form of a comic
strip/story with a group.
Each student in the group can work on one section of the comic
strip/story and then the collage can be presented as a final product of
the teamwork.
Other possible activities: At home, students can research pictures on the Internet for ideas; although students, especially the more capable ones,
The students explain in some detail what a
fabric collage is and give various examples of
what can be included in a collage. (Level 8)
The students explain what a fabric collage is
and give some clear examples of what can be
included in a collage. (Level 7)
The student s explain in simple terms what a
fabric collage is and, with some assistance, give
a few examples of what can be included in a
collage. (Level 6)
The students define a fabric collage as basically
a fabric picture and identify with continuous
prompting, a simple example of what has been
included in a collage that is presented in class.
(Level 5)

Directorate for Quality and Standards in Education - Curriculum Management and eLearning Department – Textiles Studies – 2012
31
are encouraged to create their own creative designs. Further work can be done in consultation with the Art teacher.
To design and plan a simple fabric collage creatively. (2 lessons)
Starter suggestion: After the students decide which theme they will work
on, a handout will be distributed to each student to fill it in. This will be
an exercise which will help the students to analyse factors relating to
size, colour scheme, techniques to be used, choice of suitable fabrics,
trimmings, sequins, etc.
Main activities: Questions like, What material can I use for the
background? Shall I use Hessian, Felt or tied and dyed fabric? What
different techniques can I use? Shall I use appliqué? What is appliqué?
Shall I use fabric paint/fabric markers? Stencilling or block printing?
Which embroidery stitches are suitable for my collage?
How am I going to cut and mark my design onto the fabric?
The students will have to decide the tasks they wish to work on and a
plan must be formulated. A time chart or a flow chart can be designed
with the help of the teacher so that the student makes efficient use of
time allotted for the making of the collage. Safety measures must also be
taken into consideration. The students will then start copying their
designs onto the chosen fabric.
http://www.youtube.com/watch?v=uXvMP2VypEs&NR=1
Other possible activities: Students research other techniques using
books found in the school library or use the Internet. This information
can be presented to the class as a PowerPoint Presentation. Others can
conduct a questionnaire regarding different techniques still popular
The students provide good evidence of
creativity and a detailed logical sequence of
the design and planning process of the fabric
collage. ( Level 8)
The students provide promising evidence of
creativity and a logical sequence of the design
and planning process of the fabric collage. (
Level 7)
The students include some flair of creativity
with prompting from the teacher and present,
with some assistance, an outline of the basics
in the design and planning of the fabric collage.
(Level 6)
The students follow the basic steps in the
design and planning process of the fabric
collage with continuous help and direction
from the teacher. ( Level 5)

Directorate for Quality and Standards in Education - Curriculum Management and eLearning Department – Textiles Studies – 2012
32
today as opposed to traditional ones and present their results in a form
of a pie chart using ICT.
Others research different techniques such as English and Italian quilting,
crazy and log cabin patchwork and other techniques. They present their
findings to their class as a photo-story for discussion purposes.
To embellish the collage using various techniques, including embroidery stitches and appliqué. (2 lessons)
Starter suggestion: Students will be shown a video clip on how appliqué
is worked.
http://www.youtube.com/watch?v=axDBl7lJuJs&NR=1
Main activities: Some may opt to work on appliqué, while others will use
fabric paint or fabric markers to outline their designs. Bondaweb will be
introduced and students will be shown how to use it to fix their appliqué
onto the background fabric. This will eventually be decorated either by
different stitches or other trims and ribbons.
Most objects can be recreated in a collage using 3D technique known as
soft sculpture. These items can be given shape and form by padding,
stuffing, stiffening and layering.
The teacher would make available different packs with instructions and
design clues of different techniques at the work stations to help the
students decide on the choice of the technique to work on.
Other possible activities: The more able students may make their own
blocks for their block printing while others may create their own stencils.
Others may want to make use of both paint and embroidery stitches.
Beadsand sequins may also be used.
The students show evidence of some creative
details and good practical work in the
embellishment of the fabric collage. (Level 8)
The students show evidence of satisfactory
practical work in the embellishment of the
fabric collage. (Level 7)
The students show evidence of basic skills in
the embellishment of the fabric collage. (Level
6)
The students show evidence of elementary
work in the embellishment of the fabric
collage. (Level 5)

Directorate for Quality and Standards in Education - Curriculum Management and eLearning Department – Textiles Studies – 2012
33
http://www.youtube.com/watch?v=794UZyOheH8&feature=related
To identify embroidery stitches by name and work a number of basic embroidery stitches (2 lessons)
Starter suggestion: The teacher will demonstrate how to work some of
the embroidery stitches. The teacher will give out scraps of fabrics for
embroidery sampling. Students are paired off and each group can
choose a different embroidery stitch and practice how to work it. The
teacher will go round and help those who find it difficult to work these
stitches to secure their appliquéd design onto the fabric.
Pictures of embroidery stitches will be given to students and each will be
matched to its appropriate name.
Students can access a blog where the basic embroidery stitches can be
viewed.
http://stitchschool.blogspot.com/2010/01/running-stitch.html
The teacher will show a sampler of different embroidery stitches. Using
the interactive white board the students will drag and drop the stitches
shown to their respective name and picture.
Main activities: Students are paired off in groups, a design motif will be
given to each group and each group will fill it in with the most
appropriate stitches.
Students will have the opportunity to access Internet sites where
different embroidery stitches are worked in an elaborate manner.
http://inaminuteago.com/stitchindex.html
The work can be exhibited during some school functions or in the
The students illustrate, name and work mostly
independently a good number of embroidery
stitches. (Level 8)
The students name and work neatly a number
of basic embroidery stitches. (Level 7)
The students name and work with some
guidance a limited number of basic embroidery
stitches. (Level 6)
The students match the name and work, with
continuous guidance, a total of four basic
embroidery stitches. (Level 5)

Directorate for Quality and Standards in Education - Curriculum Management and eLearning Department – Textiles Studies – 2012
34
classroom.
Other possible activities: Besides working on their creative collage
students can work samplers of other embroidery stitches for their own
use and put in their portfolio for future reference.
To present an effective finished product and be able to evaluate its process. (2 lessons)
Starter suggestion: Teacher will show students different methods of finishing collages. Some are mounted on picture frames while others are finished as wall hangings.
Main activities: Students will be asked to bring their finished work to class. Each student will be asked to evaluate her work. An evaluation sheet will be handed out to each student and each will fill it accordingly.
Peer evaluation is recommended and students will give their opinion regarding the finished work and identify improvements to the finished work if needed.
Are the stitches secured well on the wrong side? The correct methods of how the work should be finished are discussed. Pressing the finished work on the right side should be avoided for fear of causing the threads or the raised stitches and techniques to flatten.
The work should be placed face downwards on several layers of fabric covered with a clean white cotton fabric. Another layer of white fabric should cover the finished work and pressing should be done very lightly.
The different processes of mounting of their collage will be discussed and each student will choose the best way her collage will be presented, taking into consideration where the collage will be placed in the home.
Other possible activities: Students could be encouraged to mount their own work by cutting a piece of board or card the size of their work. The design can then be mounted onto this with the excess edges of the
The students report in detail the main
strengths and weaknesses and suggest some
tangible improvements; also show evidence of
good craftsmanship and original creativity of
the finished collage. (Level 8)
The student s identify the main strengths and
weaknesses of the finished collage and show
evidence of satisfactory craftsmanship and
creativity of the finished collage. (Level 7)
The students identify with help, the obvious
strengths and weaknesses and show evidence
of adequate craftsmanship and simple
creativity of the finished collage. (Level 6)
The students identify, with prompting from the
teacher, some strength and weakness and will
show evidence of simple craftsmanship and
creativity of the finished collage. (Level 5)

Directorate for Quality and Standards in Education - Curriculum Management and eLearning Department – Textiles Studies – 2012
35
fabric secured firmly out of sight on the wrong side of the work. Students can take pictures of their work and create a PowerPoint Presentation of four slides. Each slide will have a basic explanation of the process involved.

Directorate for Quality and Standards in Education - Curriculum Management and eLearning Department – Textiles Studies – 2012
36
Subject: Textiles Studies Form 1
Unit code and title: TXS 7.6 Colour Your Life
Strand 1: Fashion, Design and Textiles Unit Duration: 9 sessions of 40 minutes; Total 6 hours
Strand 2: Aids to Sewing
OBJECTIVES The teacher will help the student:
1. To use the colour wheel to produce different colour schemes in relation to textiles and fashion, 2. To use Tie and Dye to produce an original textile item, 3. To explore how natural dyes can be used to apply colour to fabrics, 4. To use the 8½ heads rule to draw fashion drawings, 5. To investigate the role of basic consumer rights and responsibilities in relation to Textiles and Fashion.
Key Words Points to note Resources
Key words:
Colour wheel, primary colours, secondary colours, tertiary colours, tie and dye, fashion, designer, fashion house, consumer.
New Technical Terms:
Monochromatic colours, complementary colours, warm colours, cold colours, hue, shade, tint, tone, hot and cold water dyes, colour fastness, 8½ heads, mood board, consumer rights and responsibilities.
The approach to teaching and learning Textiles Studies is
based on the development of a creative student.
Students work on an identified brief, creating a plan to fit
the brief and implementing the brief while being
constantly aware of health and safety rules. Through
hands on experiences and with ongoing investigation and
modification, students are encouraged to find solutions
and improve their work through evaluation.
Colour wheel, string, pieces of cotton fabric, Hot water dyes, cold water dyes, Hot water, Bucket, Natural dyes e.g: beetroot, 8½ heads chart, cardboard paper, scissors, magazines, consumer and competition division leaflets.
Colour wheel: http://www.tigercolor.com/color-lab/color-theory/color-theory-intro.htm http://www.kinderart.com/textiles/easytiedye.shtml http://www.theecologist.org/green_green_living/clothing/404783/how_to_dye_clothes_using_natural_methods.html http://www.littlehandsdesign.com/interactive_fashion_studio.asp

Directorate for Quality and Standards in Education - Curriculum Management and eLearning Department – Textiles Studies – 2012
37
Teaching objectives Examples of teaching experiences and activities Indicators of learning outcomes
The teacher will help the students: To use the colour wheel to produce different colour schemes in relation to textiles and fashion. (2 lessons)
Starter suggestion: Flashcards showing different colours are displayed on the
board. Students are asked what they can see. Students discuss what colour
means for them, the importance of colour when buying textiles, and the
influence of colour trends on clothes’ choice.
Teacher presents a large colour wheel chart and refers to Primary, Secondary
and Tertiary colours with the help of flashcards. Students are encouraged to
discuss the relation between these colours by explaining how secondary
colours are produced from primary colours and how tertiary colours are
produced from secondary colours. Students will fill in an empty template of
the colour wheel to keep as a resource.
http://www.xtec.cat/~maltemir/Tertiary%20colours.htm
Main Activity: Students work in groups to create a colour wheel using
cardboard paper and pictures of textiles from magazines. Students are
encouraged to discuss and work together. Teacher presents Monochromatic,
complimentary and harmonious colours using an interactive PowerPoint which
displays pictures with examples. Warm and Cool colours are highlighted using
flashcards. Students are encouraged to use the terms ‘warm colours’ and ‘cool
colours’. Students work in groups on an activity related to warm and cool
colours. During this activity students are expected to fill in a fashion design
silhouette according to the situation (warm or cool). All students are expected
to participate and use the correct colour schemes according to the situation.
As recapitulation of the colour wheel students play a game on the association
of colour. There will be two sets of cards facing down and the students will
have to pick two: one from each pile and see if the colour matches with its
The students produce a colour wheel showing the
primary, secondary and tertiary colours and select
colours to situations in life whilst distinguishing
between warm and cool colours. (Level 8)
The students produce a colour wheel showing the
primary, secondary and tertiary colours and relate
colours to situations in life. (Level 7)
The students identify a colour wheel and give an
example of primary and secondary colours. (Level
6)
The students recognize a colour wheel and give an
example of primary and secondary colours with
prompting from the teacher. (Level 5)

Directorate for Quality and Standards in Education - Curriculum Management and eLearning Department – Textiles Studies – 2012
38
association.
Other possible activities: A video clip is used as an introduction or as
recapitulation. Students are asked to discuss and give examples of how
different colour schemes can be used and relate to adaptation to different
situations.
http://www.youtube.com/watch?v=59QGexKdFUI
To use Tie and Dye to produce an original textile item.(2
lessons)
Starter suggestion: A short video on tie and dye is shown to the students.
Students are asked questions related to what they just saw and discuss how
tie and dye can be used as a creative way of adding colour to fabric.
Teacher presents a display to the students of what is needed for tie and dye.
All materials needed are explained together with their role in the tie and dye
process. Reference is made to the difference between cold and hot water
dyes, the type of fabric which absorbs the dye more easily and the use of salt
as a fixative.
Main Activity: Students go through the tie and dye process and work in groups
to fill in a simple worksheet on the process of tie and dye. Students prepare
materials needed for tie and dye. Various textile items can be made using tie
and dye e.g. cushions, bags, and scarves.
Teacher presents a PowerPoint presentation which shows students different
tying techniques in order to produce different effects as the end result. All
students are expected to plan their design and choose at least two different
tying techniques to be used.
http://www.helenhudspith.com/textiles.html (Tie and Dye PowerPoint)
Students are to use string to tie up their fabric and with the help of the
The students prepare the fabric for dyeing using
various ways of tying, repeating the process and
using more than one colour. (Level 8)
The students prepare the fabric for dyeing using
at least two different ways of tying. (Level 7)
The students prepare the fabric for dyeing using
one way of tying with some help from the
teacher. (Level 6)
The students prepare the fabric for dyeing using
one way of tying with the continuous help of the
teacher. (Level 5)

Directorate for Quality and Standards in Education - Curriculum Management and eLearning Department – Textiles Studies – 2012
39
teacher mix the dye to dye their fabric. As a recapitulation students are to be
divided into two groups and do a short quiz on the important points of the
lesson.
To explore how natural dyes can be used to apply colour to fabrics. (2 lessons)
Starter suggestion: Discuss with the students that before we had synthetic
dyes, people had to make their own paints and dyes using plants and other
resources available. A display of different items that can be used to dye fabrics
is shown to the students. Present: spinach, onions, blueberries, beetroot,
carrots, walnuts, strawberries, red cabbage, coffee and different flowers.
http://www.pburch.net/dyeing/naturaldyes.shtml
http://www.pioneerthinking.com/crafts/crafts-basics/naturaldyes.html
Main Activity: The students are shown a PowerPoint presentation with
different pictures of natural dyes. Students prepare different dye solutions
using natural ingredients. Different samples of fabric are dyed using a
selection of natural dyes.
Results are to be presented and commented on. Emphasis should be made on the intensity of the colour, the different hues produced as well as the final result.
Other possible activities: Students think about other possible natural dyes which can be used and try them out.
The students explain in detail and illustrate the
use of three ingredients to dye fabric naturally.
(Level 8)
The students explain in some detail and illustrate
how to prepare fabric for dyeing using at least
two natural ingredients. (Level 7)
The students prepare, with considerable help
from the teacher, the fabric for dyeing, using one
ingredient. (Level 6)
The students illustrate the use of at least two
ingredients to dye fabric naturally, using the help
of their peers and of the support and guidance of
the teacher. (Level 5)
To use the 8½ heads rule to draw fashion drawings. (2 lessons)
Starter suggestion: A piece of paper is to be given to all students and they are
encouraged to write down the meaning of fashion for them. Papers are to be
collected, read, interpreted and stuck on a chart which shall represent the
meaning of fashion for the young generation.
The students will be able to prepare a mood
board and three fashion drawings.(Level 8)
The students prepare a mood board and draw
two fashion drawings using figure templates.

Directorate for Quality and Standards in Education - Curriculum Management and eLearning Department – Textiles Studies – 2012
40
Main Activity: The word ‘fashion’ should be discussed in various contexts and
meanings. Importance should be given to the students’ feelings towards the
ever changing cycle of fashion. Related words such as: fashionable, trendy,
haute couture, fashion house, fashion designer, brand names and street
fashion should be discussed.
Each student is to choose an envelope which corresponds to a theme. Various
themes should be presented such as: nature, sea, flowers, animals, Asian,
country and western, winter etc... Students are to produce 2 fashion drawings
using figure templates related to their particular theme.
http://www.designersnexus.com/design/free-fashion-croquis-templates/
http://www.fashion-era.com/fashion_tutorials.htm
An example of a mood board is shown and explained to the students.
Emphasis must be made that a mood board can be very individual and a
creative way to express feelings on a particular topic.
Students are to create a mood board related to their particular topic and
attach the fashion drawings to it. As a recapitulation activity students take part
in a crossword quiz.
Other possible activities: Students design outfits and garments using fashion
design programs on the computer and online.
http://www.fashionplaytes.com/design/new
(Level 7)
The students use a figure template to draw one
fashion drawing and construct a mood board with
some guidance from the teacher. (Level 6)
The students reproduce, with continuous
guidance from the teacher, a fashion drawing
using the help of a figure template and ready-
made drawings. (Level 5)
To investigate the role of basic consumer rights and
Starter suggestion: A provocative statement is written on the board to get
students thinking. ‘All that matters when shopping is getting the best deal
The students apply consumer rights and
responsibilities according to different situations

Directorate for Quality and Standards in Education - Curriculum Management and eLearning Department – Textiles Studies – 2012
41
responsibilities in relation to Textiles and Fashion. (1 lesson)
possible: i.e. the lowest price. Do you agree or disagree? Why?’
Main Activity: The term ‘rights’ should be discussed with the students.
Emphasis should be made to basic rights. Students work in groups to come up
with a list of rights that they think consumers should be entitled to in relation
to textiles. Each group’s work should be presented and discussed.
With the help of flashcards basic consumer rights and responsibilities should
be explained and discussed with the students. Particular emphasis should be
made on the right to redress and places from where consumers can get more
information should be pointed out.
Students work in groups to tackle different situations in which they will have
to make a complaint related to textiles using different forms of redress.
Students can access the Maltese consumer and competition department
website for more information.
https://secure2.gov.mt/consumer/home?l=1
Other possible activities: As a recapitulation, students play a quick board game
related to consumer rights and responsibilities in relation to textiles and
fashion.
related to textiles. (Level 8)
The students comprehend the difference between
consumer rights and responsibilities and give
different examples. (Level 7)
The students recognize a consumer right and
responsibility whilst stating an example with the
help of the teacher. (Level 6)
The students recall, with prompting from the
teacher, one consumer right and responsibility in
relation to textiles. (Level 5)