Template for creating BMS Process Descriptionsbms.paramountgroup.com/PAT...
18
Template for creating BMS Process Descriptions QUAL-301-740 / 04 Based on template: QUAL-301-740DATE: 2016-05-01 COMPILED BY CHECKED BY RATIFIED BY _________________________ _ Name ________________________________ Date _________________________ _________________________ _ Name ________________________________ Date _________________________ BMS Steering Committee ________________________________ Minutes of Meeting Ref _________________________ _
Transcript of Template for creating BMS Process Descriptionsbms.paramountgroup.com/PAT...
Template for creating BMS Process DescriptionsQUAL-301-740 / 04
Based on template: QUAL-301-740 DATE: 2016-05-01
COMPILED BY CHECKED BY RATIFIED BY
__________________________Name
________________________________Date
__________________________Signature
__________________________Name
________________________________Date
__________________________Signature
BMS Steering Committee
________________________________Minutes of Meeting Ref
__________________________Date
CLASSIFICATION: Company Confidential

AMENDMENT RECORD
RFC PAGE PARAGRAPH ISSUE DATE AUTHOR
QUAL-301-740 / 04 Company Confidential Pg 2/16
2016-05-01This document and its contents are strictly confidential and cannot be used, reproduced and communicated without the prior authorisation of Paramount
Template for creating BMS Process Descriptions

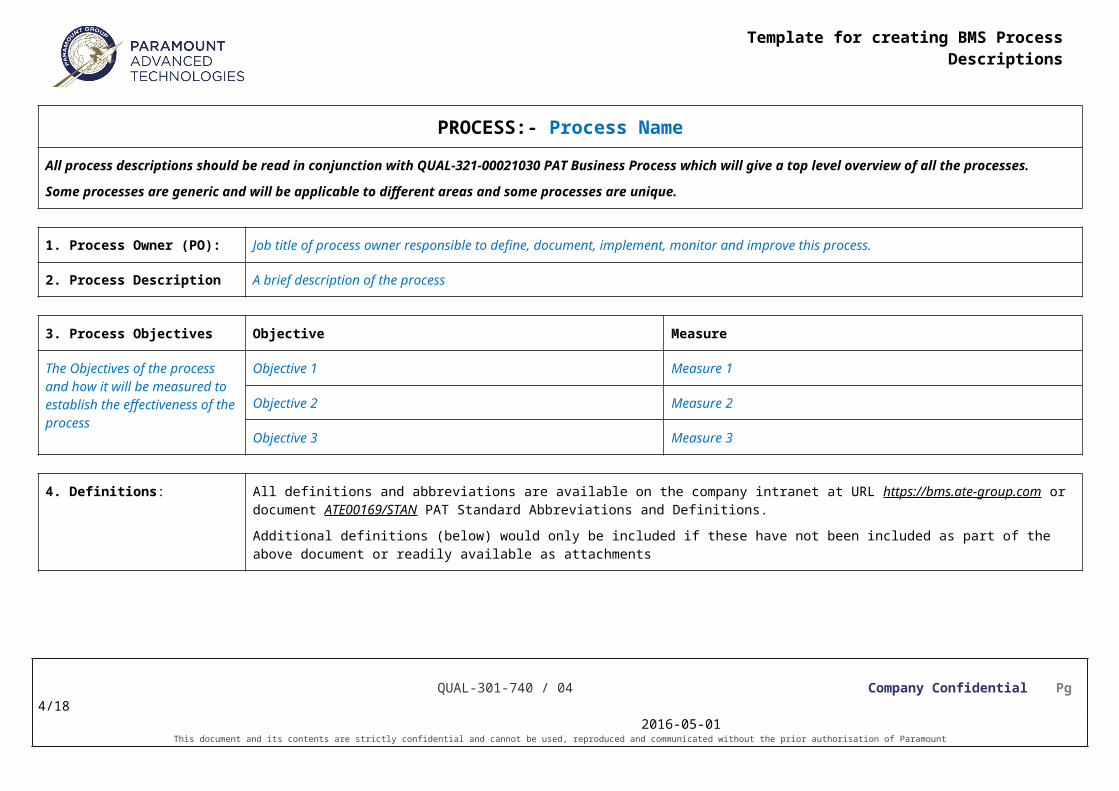
PROCESS:- Process Name
All process descriptions should be read in conjunction with QUAL-321-00021030 PAT Business Process which will give a top level overview of all the processes.Some processes are generic and will be applicable to different areas and some processes are unique.
1. Process Owner (PO): Job title of process owner responsible to define, document, implement, monitor and improve this process.
2. Process Description A brief description of the process
3. Process Objectives Objective Measure
The Objectives of the process and how it will be measured to establish the effectiveness of the process
Objective 1 Measure 1
Objective 2 Measure 2
Objective 3 Measure 3
4. Definitions: All definitions and abbreviations are available on the company intranet at URL https://bms.ate-group.com or document ATE00169/STAN PAT Standard Abbreviations and Definitions.
Additional definitions (below) would only be included if these have not been included as part of the above document or readily available as attachments
4.1 Additional Definitions Word or Acronym Definition or explanation
QUAL-301-740 / 04 Company Confidential Pg 3/16
2016-05-01This document and its contents are strictly confidential and cannot be used, reproduced and communicated without the prior authorisation of Paramount
Template for creating BMS Process Descriptions
5. Resources Resources required to execute the process
5.1 Resources (What & Who) Materials / Equipment / Software / Tools Who
What do we need to execute this process? Who will execute this process, and specific skills and competencies required
5.2 Resources (How) Methods / Procedures / Techniques
How will we execute this process – reference methods and techniques; call up forms, other processes, works instructions.
6. Process Flow Diagram
Swimlane process flow indicating the accountabilities and process flow. Appendix B contains guidance.
The swimlane process flow diagram describes the process. The process activities below elaborate, if necessary, the activities.
QUAL-301-740 / 04 Company Confidential Pg 4/16
2016-05-01This document and its contents are strictly confidential and cannot be used, reproduced and communicated without the prior authorisation of Paramount
Template for creating BMS Process Descriptions

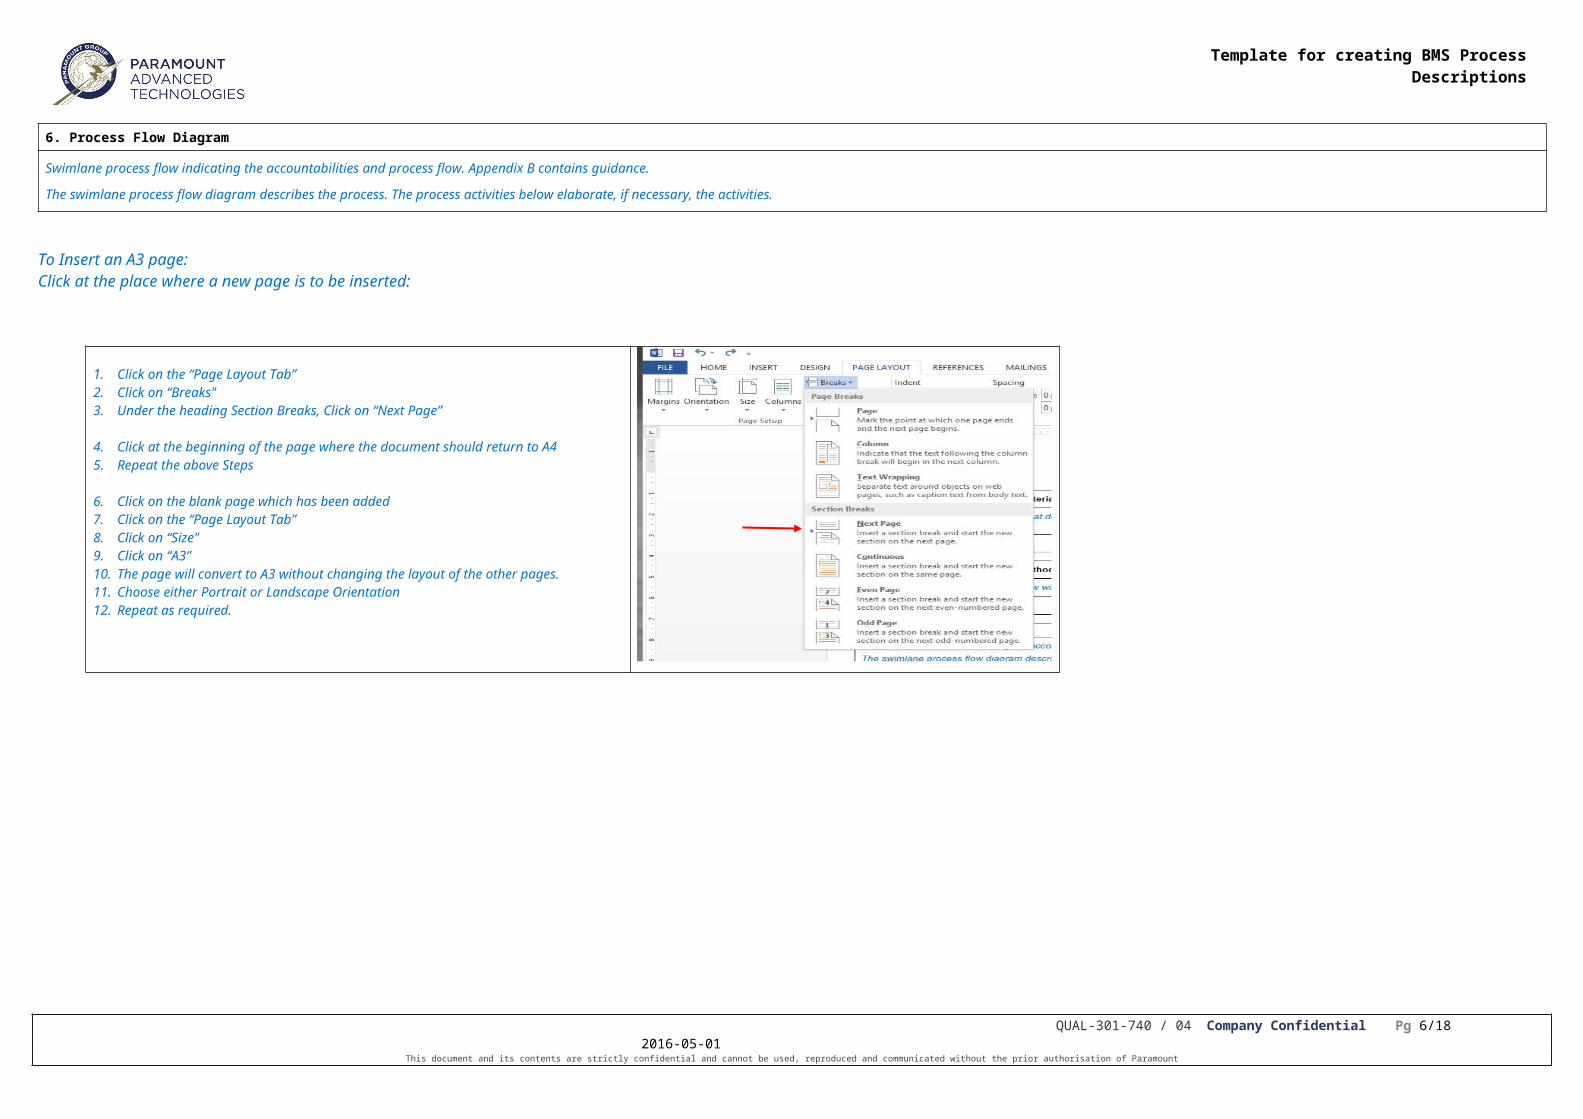
6. Process Flow Diagram
Swimlane process flow indicating the accountabilities and process flow. Appendix B contains guidance.
The swimlane process flow diagram describes the process. The process activities below elaborate, if necessary, the activities.
To Insert an A3 page:Click at the place where a new page is to be inserted:
1. Click on the “Page Layout Tab”2. Click on “Breaks" 3. Under the heading Section Breaks, Click on “Next Page”
4. Click at the beginning of the page where the document should return to A45. Repeat the above Steps
6. Click on the blank page which has been added7. Click on the “Page Layout Tab”8. Click on “Size" 9. Click on “A3”10. The page will convert to A3 without changing the layout of the other pages.11. Choose either Portrait or Landscape Orientation12. Repeat as required.
QUAL-301-740 / 04 Company Confidential Pg 5/16
2016-05-01This document and its contents are strictly confidential and cannot be used, reproduced and communicated without the prior authorisation of Paramount
Template for creating BMS Process Descriptions
7. Process Activities
No Inputs Activities Outputs
1 Input required to perform the activity
Brief description of the activity, including key reviews, gates or control points necessary to complete the activity.
Outputs generated by the process activity, e.g. Reviewed and approved specification Minutes of review
2
3
8. Additional Information Any additional information / documentation which is applicable to this process, or guidance.
8.1 Attachments / Annexures / Additional information
9. RecordsIdentifies records generated by this process which are managed in accordance with QUAL-321-00021014.The same records can be available as a hardcopy and /or electronic record – Indicate the requirements for both.
RecordsHard Copy Where
StoredElectronic Copy
Where Stored
Retention period (Years)
Disposal Method
E.g. Audit Report No Location Yes Repository 3 Delete
QUAL-301-740 / 04 Company Confidential Pg 6/16
2016-05-01This document and its contents are strictly confidential and cannot be used, reproduced and communicated without the prior authorisation of Paramount
Template for creating BMS Process Descriptions

RecordsHard Copy Where
StoredElectronic Copy
Where Stored
Retention period (Years)
Disposal Method
QUAL-301-740 / 04 Company Confidential Pg 7/16
2016-05-01This document and its contents are strictly confidential and cannot be used, reproduced and communicated without the prior authorisation of Paramount
Template for creating BMS Process Descriptions

Appendix A: Instructions for completing the templateNote: These instructions do not form part of the final process description – please delete these pages after completing the above part of the template.
1. Always use a blank template when setting up a new process description
2. Change the title of the process description on the front page
3. Change the number on the front page to the new / existing number
4. Change the footer to reflect the same document number
5. The date in the footer will be the date that the document is issued and this must be changed when new revisions or updates to the document are done.
6. Update the information in the amendment record block.
7. The “ Minutes of Meeting Ref number ” is obtainable from QA Manager / Director Compliance / BMS Specialist
8. As there are a wide variety of possible requirements and / or combinations per process, please customise each process description as required.
9. Ensure that only the current version of this document is available in EMS
10. Where required, ensure any supporting documentation is updated, or if no longer in use, is removed from use
Setting up document properties:
View the properties for the current document.
QUAL-301-740 / 04 Company Confidential Pg 8/16
2016-05-01This document and its contents are strictly confidential and cannot be used, reproduced and communicated without the prior authorisation of Paramount
Template for creating BMS Process Descriptions

1. In Word 2010 you can alter these by going to File2. On the right hand side of the screen - Click on Properties.3. Choose either
Show Document Panel. This opens a pane above the document. Advanced Properties
Change the properties for the current document.4. Access the properties as described above.5. Click on Advance Properties6. Type the information that you want changed in the appropriate property field boxes.
Create custom properties for a document.7. In the Document Properties dialog box, click the Custom tab. 8. In the Name box, type a name for the custom property, or select a name from the list. 9. In the Type list, select the data type for the property that you want to add. 10. In the Value box, type a value for the property. The value that you type must match the selection in the Type list. For example, if you select
Number in the Type list, you must type a number in the Value box. Values that don't match the property type are stored as text. 11. Click Add. 12. Click Ok
QUAL-301-740 / 04 Company Confidential Pg 9/16
2016-05-01This document and its contents are strictly confidential and cannot be used, reproduced and communicated without the prior authorisation of Paramount
Template for creating BMS Process Descriptions

Appendix B: Guidance on Swim Lane / Flow chartsProcesses may be made up of various sub process – if necessary, these sub processes can have their own process description and can be hyperlinked so as to prevent the overall or main process description from becoming too involved or complicated.
Process descriptions can be a Top-level description which would be an overview of a division or more specific (sub process) where it describes a function within the Top-level process description.
For Example: Develop System Process is a top level description for Systems Engineering and consists of a number of sub processes making up the overall process Buy process is a sub process covering the purchasing / procuring of raw materials and is part of many different processes.
1. Process Flow diagrams should be done in swim lanes, utilising Visio
2. Keep the process simple: left-to-right, top-to-bottom
3. Minimise flow and direction changes
4. Limit intersecting task lines where possible
5. If necessary, use a legend for clarification
6. Use Job titles / functions in the left hand column and not peoples’ names to indicate who is responsible
7. More than one process flow can be included in a process description provided that all the sub processes are unique and not applicable to other processes.
1. Use a Verb Convention for describing an activity / process Example – Invoke Buy Process / Issue Items / Plan Production
2. Number the process steps in the sequence that the process will occur and number the steps to describe the activity with the same number so that it is easy to relate the description of inputs, activities, controls and outputs to a particular task box in the flow diagram.
We use a subset of the BPMN version 1.2 standard business process modelling notation (http://www.omg.org/spec/BPMN/1.2) for creating cross functional swim lane flow diagrams.
Once you have opened a page in Visio
QUAL-301-740 / 04 Company Confidential Pg 10/16
2016-05-01This document and its contents are strictly confidential and cannot be used, reproduced and communicated without the prior authorisation of Paramount
Template for creating BMS Process Descriptions

1. Click on “More Shapes”2. Click on “My Shapes”3. Click on “BPMN_M” or “BPMNA_M” 4. The required shapes will appear in the Shapes Bar
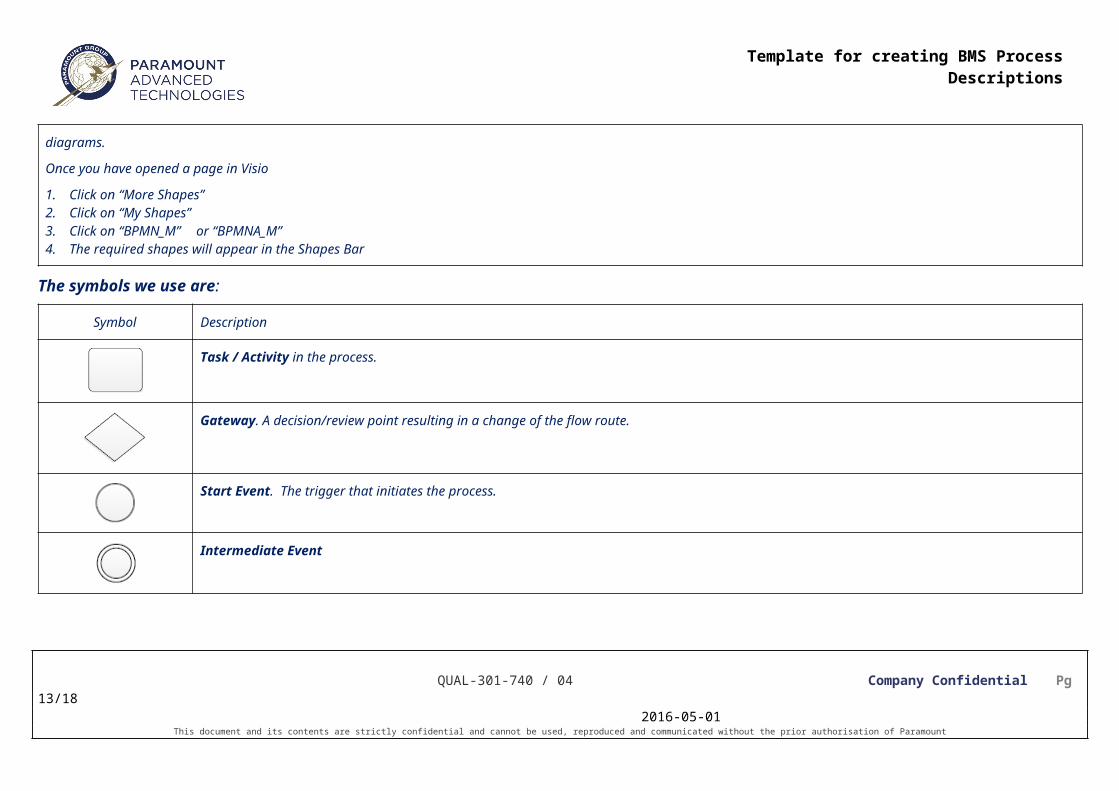
The symbols we use are:
Symbol Description
Task / Activity in the process.
Gateway. A decision/review point resulting in a change of the flow route.
Start Event. The trigger that initiates the process.
Intermediate Event
End Event. The result of the process.
QUAL-301-740 / 04 Company Confidential Pg 11/16
2016-05-01This document and its contents are strictly confidential and cannot be used, reproduced and communicated without the prior authorisation of Paramount
Template for creating BMS Process Descriptions

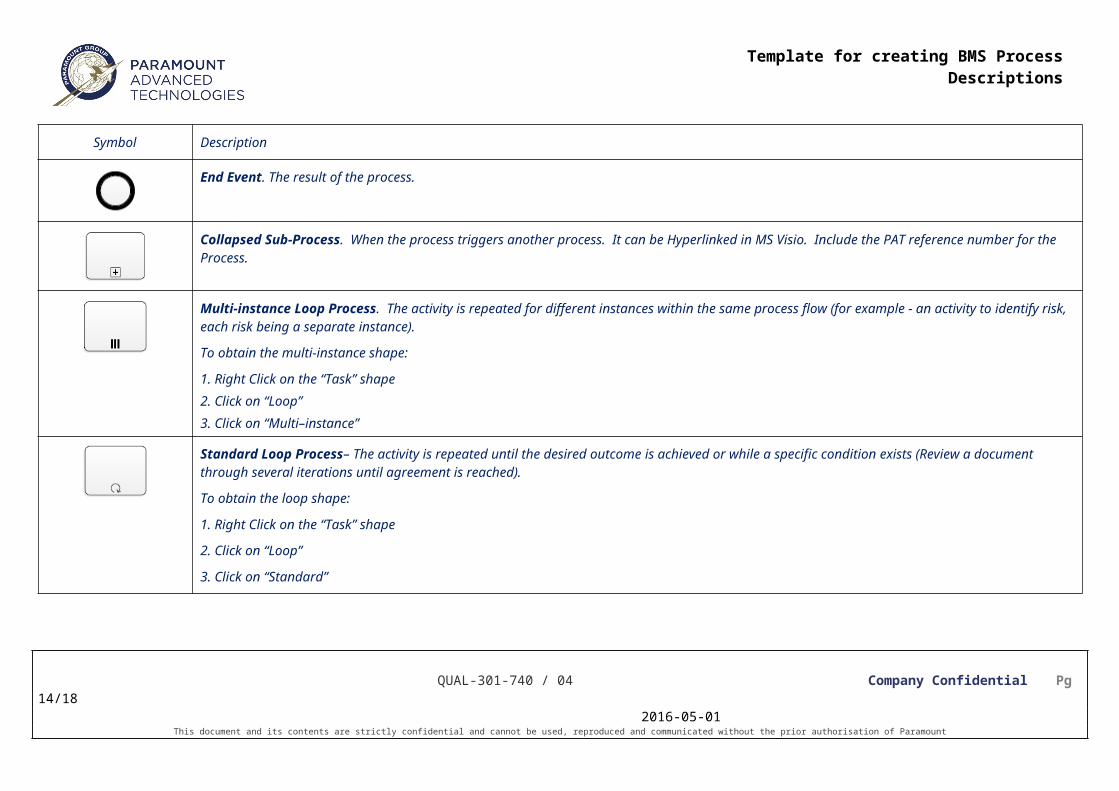
Symbol Description
Collapsed Sub-Process. When the process triggers another process. It can be Hyperlinked in MS Visio. Include the PAT reference number for the Process.
Multi-instance Loop Process. The activity is repeated for different instances within the same process flow (for example - an activity to identify risk, each risk being a separate instance).
To obtain the multi-instance shape:
1. Right Click on the “Task” shape2. Click on “Loop”3. Click on “Multi–instance”
Standard Loop Process– The activity is repeated until the desired outcome is achieved or while a specific condition exists (Review a document through several iterations until agreement is reached).
To obtain the loop shape:
1. Right Click on the “Task” shape
2. Click on “Loop”
3. Click on “Standard”
DatabaseTo obtain the database shape:
1. Click on “More Shapes”
2. Click on “Flowchart”
3. Click on “Miscellaneous Flowchart Shapes (Metric)”
QUAL-301-740 / 04 Company Confidential Pg 12/16
2016-05-01This document and its contents are strictly confidential and cannot be used, reproduced and communicated without the prior authorisation of Paramount
Template for creating BMS Process Descriptions
Symbol Description
4. The shapes will appear in the Shapes Bar
5. Scroll until you see the database shape
Sequence Flow
Sequence flow (two directions)
To obtain the sequence flow:
1. Click on “More Shapes”
2. Click on “Visio Extras”
3. Click on “Connectors (Metric)”
4. The shapes will appear in the Shapes Bar
4. Scroll until you see the “Single Arrowhead” shape
Sequence Flow (Conditional). The process takes this route if the condition is met. Always preceded by an activity.
To obtain the Conditional process flow:
1. Right click on the “Arrow” shape
2. Click on “Condition Type”
3. Click on “Conditional”
Note: Arrow must have been used from the shapes bar on the left hand side and not one obtained from clicking on the blue arrow by the shape
Message flow
QUAL-301-740 / 04 Company Confidential Pg 13/16
2016-05-01This document and its contents are strictly confidential and cannot be used, reproduced and communicated without the prior authorisation of Paramount
Template for creating BMS Process Descriptions
To save a Visio Flow diagram:1. Click on “File”2. Click on “Save As”3. In block for “File Name” – type in name of Document4. In block for “Save as Type” – scroll down to “PDF” and click5. Click on “Save”
To add a Visio Flow Diagram to the Process Template 1. Copy and paste the saved PDF document.
To Resize a pageWhen new diagrams are begun, based on specific Templates in Visio, page size and orientation is pre-set by the Template definition.
At any time you may change the Page size by selecting
Click on Design Tab Click on Page Setup Dropdown Arrow
o Page Setup appears
QUAL-301-740 / 04 Company Confidential Pg 14/16
2016-05-01This document and its contents are strictly confidential and cannot be used, reproduced and communicated without the prior authorisation of Paramount
Template for creating BMS Process Descriptions

To resize a Visio Page perform the following: Locate the Mouse Cursor at EXACTLY the Right Edge of the Page. Hold down the Ctrl Key on the Keyboard
Note that the Mouse Cursor Arrow has changed and become a Double-Headed arrow
While holding down the Ctrl key on the keyboard, Left-Click, Hold Down and Drag the mouse Cursor to the Right a desired distance, then release the Left Mouse Button
Notice that the Page has now been altered in Width to be the width defined by the amount of the movement of the Mouse Cursor to the Right.
This action can be utilized at any one of the four edges of the page: Left, Top, Right, and Bottom.
QUAL-301-740 / 04 Company Confidential Pg 15/16
2016-05-01This document and its contents are strictly confidential and cannot be used, reproduced and communicated without the prior authorisation of Paramount
Print Setup1. Print Setup
Choose the size of page (A4 / A3) required Choose either Portrait or Landscape Click on Fit to 1:1 (Print Zoom will show the comment “ Fit exactly to 1 sheet”)
2. Page Size Click on “Pre-determined size” Choose the size of page (A4 / A3) required
3. Drawing Scale “No Scale” should be automatically selected
4. Layout and Routing Style – should be Flowchart Direction – will be either “Top to Bottom” or “Left to Right” as applicable
5. Click Apply6. Click OK
Template for creating BMS Process Descriptions

This technique of Ctrl+Dragging the page edge to resize can be applied to any page at any time.
Note, however, it ONLY affects the drawing page, and not the printer page size. Page Setup will have to be corrected for the printer settings to be enabled.
QUAL-301-740 / 04 Company Confidential Pg 16/16
2016-05-01This document and its contents are strictly confidential and cannot be used, reproduced and communicated without the prior authorisation of Paramount
Template for creating BMS Process Descriptions