Teacher Resource Guidebook - Key Resources List
47
Key Resources page 1 ALL TESSA Key Resources: Table of Contents Assessing Learning 2 Using mind maps and brainstorming to explore ideas 4 Being a resourceful teacher in challenging circumstances 7 Using explaining and demonstrating to assist learning 8 Using group work in your classroom 11 Using investigations in the classroom 14 Working with large and/or multigrade classes 29 Using the local community/environment as a resource 31 Planning and preparing your lessons 34 Using questioning to promote thinking 36 Researching in the classroom 39 Using role play/dialogue/drama in the classroom 41 Using storytelling in the classroom 44 Using new technologies 46
-
Upload
school-vegetable-gardening-victory-gardens -
Category
Education
-
view
83 -
download
1
Transcript of Teacher Resource Guidebook - Key Resources List

Key Resources page 1�
ALL TESSA Key Resources: Table of Contents
Assessing Learning 2
Using mind maps and brainstorming to explore ideas 4
Being a resourceful teacher in challenging circumstances 7
Using explaining and demonstrating to assist learning 8
Using group work in your classroom 11
Using investigations in the classroom 14
Working with large and/or multigrade classes 29
Using the local community/environment as a resource 31
Planning and preparing your lessons 34
Using questioning to promote thinking 36
Researching in the classroom 39
Using role play/dialogue/drama in the classroom 41
Using storytelling in the classroom 44
Using new technologies 46

Key Resources page 2�
Key Resource: Assessing learning
Assessment
Assessment falls into two categories. One category looks back and makes a
judgement on what has been learned already. This is called summative
assessment. The second category is when we use assessment as part of the
learning process (for example when we use questioning to check whether pupils
have understood something). We call this formative assessment.
Summative assessment can be seen in the form of tests and marks which tell
the pupils how well they have done in a particular subject or piece of work.
Formative assessment is quite different. Formative assessment – or assessment
for learning – is based on the idea that pupils will improve most if:
• they understand what it is they are meant to learn;
• they know where they are now;
• they can see how they can close the gap between these two.
As a teacher, you will get the best out of your pupils if you aim to use the three
points above, which makes assessment as much a responsibility for the pupil as
it is for the teacher. How does this work?
Pupils understanding what it is they are meant to learn
When you decide the learning outcomes for a topic or a piece of work you
should share it with the pupils. You need to be clear by distinguishing not just
what it is they have to DO, but what it is you are expecting them to LEARN. So
to check they have understood, rather than saying ‘Have you all understood?’
ask a question that gives you the chance to assess whether they have really
understood. For example:
• ‘Who can explain in their own words what we have to do and what we aim
to learn?’
• ‘How can you make me sure that you have understood what I have just
said?’
• ‘So what is it we are going to do today?’
Their answers will enable you to know if they understand what it is they have to
learn before they start. Give them time to explore the true meaning of your

Key Resources page 3�
learning outcomes.
Knowing where they are now in their learning process
In order to help pupils improve, you and they need to know the current state of
their knowledge. It is your role to be sensitive, constructive and enthusiastic in
finding out the current state of knowledge of your pupils. Insensitive comments
and behaviour can have a damaging effect on pupil confidence, motivation and
enthusiasm. Think back to those teachers who damaged your own confidence
and enthusiasm, and do not follow their behaviour. Instead, when you talk to
pupils about their current learning, make sure that they find your feedback both
useful and constructive. Do this by:
� pinpointing pupils’ strengths and suggesting how they might further
improve them;
� being clear about weaknesses and positive about how they might be
tackled, checking that pupils understand and are positive about your
advice;
� checking with pupils for examples of your feedback that they found useful.
Assessment for learning is a two-way process.
Closing the learning gap
You will need to provide opportunities for pupils to improve their work. This
means that by talking to them about their work you may discover
misconceptions that mean you have to modify the content and style of what you
have been teaching if you want to close the gap between where they are now
and where you wish them to be.
Very often, by slowing down with a group of pupils you can actually speed up,
because you have given them time and confidence to think and understand
what they need to do to improve. By letting pupils talk about their work
amongst themselves and reflecting on where the gaps are and how they might
close them, you are providing them with ways to assess themselves.
Key to all this is you, the teacher, demonstrating a belief in your pupils, giving
constructive guidance on how to improve and providing opportunities for them
to take charge of their own learning.

Key Resources page 4�
Key Resource: Using mind maps and brainstorming to explore
ideas
What is brainstorming?
Brainstorming is a group activity that generates as many ideas as possible on a
specific issue or problem then decides which idea(s) offers the best solution. It
involves creative thinking by the group to think of new ideas to address the
issue or problem they are faced with. Brainstorming helps pupils to:
• understand a new topic;
• generate different ways to solve a problem;
• be excited by a new concept or idea;
• feel involved in a group activity that reaches agreement.
How to set up a brainstorming session
� Before starting a session, you need to identify a clear issue or problem.
This can range from a simple word like ‘energy’ and what it means to the
group, or something like ‘How can we develop our school environment?’
To set up a good brainstorm, it is essential to have a word, question or
problem that the group is likely to respond to. In very large classes,
questions can be different for different groups. Groups themselves should
be as varied as possible in terms of gender and ability.
� There needs to be a large sheet of paper that all can see in a group of
between six and eight pupils. The ideas of the group need to be recorded
as the session progresses so that everyone knows what has been said and
can build on or add to earlier ideas. Every idea must be written down,
however unusual.
� Before the session begins, the following rules are made clear:
� Everyone in the group must be involved.
� No one criticises anyone else’s ideas or suggestions.
� Unusual and innovative ideas are welcomed.
� Lots of different ideas are needed.
� Everyone needs to work quickly. Brainstorming is a fast and furious
activity.

Key Resources page 5�
Running the session
The teacher’s role initially is to encourage discussion, involvement and the
recording of ideas. When pupils begin to struggle for ideas, or time is up, get
the group (or groups) to select their best three ideas and say why they have
chosen these.
Finally:
� summarise for the class what they have done well;
� ask them what they found useful about their activity. What did they
discover in the brainstorming that they didn’t realise before?
What is mind mapping?
Mind mapping is a way of representing key aspects of a central topic. Mind
maps are visual tools to help pupils structure and organise their own thinking
about a concept or topic. A mind map reduces large amounts of information into
an easy-to-understand diagram that shows the relationships and patterns
between different aspects of the topic.
When to use a mind map
A mind map is useful when you want to encourage creativity as its structure
encourages free thinking.
When trying to solve a problem, a mind map helps to highlight the aspects of
the problem and how they relate to one another.
A mind map can help to revise previous work with a class – quickly and in an
organised way.
Use mind maps when you want to encourage discussion, variety,
experimentation and thinking in class groups
How to make a mind map
� Begin by drawing a box in the centre of a piece of paper. Write in it the
main theme, topic or idea you are going to represent.
� Make branches from the main box that have sub-themes associated with
the main theme.
� Be creative with your basic map, adding in ideas around your sub-themes.

Key Resources page 6�
� Try a mind map out on your own before trying it with your class. You
could use it as a demonstration.
The following page shows a mind map of all the information teachers thought of
at a workshop on the topic ‘all we know about water’:

Key Resources page 7�
Key Resource: Being a resourceful teacher in challenging
circumstances
Many teachers work in difficult contexts. They may have large classes. They
may have few resources. The pupils in these contexts are not likely to have
resources at home to compensate for limited school resources.
A group of teachers working in such circumstances recently brainstormed
suggestions about how to be resourceful despite such difficult conditions. They
came up with many ideas and decided that the following seven were most
useful:
• Make maximum use of the local environment as a teaching aid. All schools
have an environment that can be exploited for discussion, investigations and
sources of classroom data.
• Make maximum use of the local community as a teaching aid. Parents and
others are an important source for stories, for remembering what things
were like in the past, and for having opinions on everyday issues.
• Exploit the communication systems currently in place. Nearly all communities
now have access to radio, often with many channels available. Use the
systems available to stimulate debate and discussion.
• Make teaching aids from materials around the school. Old boxes, magazines,
newspapers and even plastic bottles can be turned into teaching aids (one of
the teachers in the discussion group described how she had built a model of
a volcano using such materials, the model could be opened out to show the
‘inner workings’ of the volcano).
• Cooperate with other schools, directly or by exchange of letters. This can be
highly motivating for pupils and it opens up all sorts of possible exchanges of
information (for example, exchanges of information between urban and rural
schools can lead to interesting comparisons).
• Let the school become a resource for the local community: one teacher
described how mothers joined in the reading classes and thus improved their
own literacy.
• Set up a school garden: plants can be grown in even a small area. Pupils of
all ages can benefit from participating in the planning, planting, growing and
use stages in the development of a garden.
The TESSA programme would like to receive letters or emails about ideas for teaching in challenging conditions.

Key Resources page 8�
Key Resource: Using explaining and demonstrating to assist
learning
Introduction
Explaining is the giving of understanding to another. Demonstrations are ways
of assisting the explanation process by using artefacts or other methods to show
pupils something so that they understand it better.
Explaining
An explanation used in a lesson can help pupils to understand:
• concepts or ideas – including those that are new or unfamiliar to pupils, for example ‘density’ or ‘volume’;
• cause and effect – rain is caused by air cooling, a flat battery means the car won’t start;
• processes – how things work, how people and animals behave;
• relationships – between people, things and events: the role of
grandparents in a family, why flies are insects and spiders are not, the common features of important yearly festivals.
To explain well, you, the teacher, have to understand the subject matter well
(what is to be taught). For example, if you do not understand that a spider is
not an insect, neither will your pupils.
Key knowledge features about explaining
When explaining new concepts or ideas, four key features will help you structure
and sequence your explanation:
� Labels and names. The actual words used to name the concept (insect,
electricity, colour, ambition).
� Attributes. There are two kinds, namely:
� ‘Must have’ features, which are essential parts of the concept like ‘wings’
(bird) ‘thorax’ (insect);
� ‘May have’ features that may occur, but not always. A sparrow is brown,
but not all birds are. Some insects have hard shells, but not all do.
� Examples. In your explanations you will need to give examples that
illustrate what you mean. For example, ants and flies are insects, but a snail, though it has antennae, is not an insect. It is a mollusc.

Key Resources page 9�
� Finally, you will have a set of ‘must have’ rules at the end that apply to
what you are explaining. So your rules for insects would be: six legs, a head, thorax, abdomen, two antennae, and two or four wings.
Assisting learning by demonstrating
How explaining is done is just as important as having good subject knowledge.
Just giving out information is not enough. Demonstrating an idea or a concept in
a practical way often assists pupil learning. This can be done by:
� using pictures, diagrams, models, specimens and artefacts to show what you mean;
� getting pupils themselves to examine the subject of your explanation. For instance, as you explain about a plant, they can see what you are talking
about better if they have a specimen in front of them;
� enabling all pupils to see clearly what you are explaining. A demonstration provides the link between ‘knowing about’ and ‘being able to do.’ Let them
experiment in small groups by handling, drawing, discussing, watching and experimenting. Demonstrations are most effective when they are
accurate, when pupils are able to see clearly and understand what is going on, and when brief explanations and discussion occur during the
demonstration.
� asking for feedback from the pupils about their understanding of what
they have seen.
Explaining is not one-way
Always remember that to avoid pupil confusion in your explanations and
demonstrations, you need to fully involve them to check that they understand
what you are saying and doing. Important points to be aware of are:
• asking them questions to find out what they already know and understand;
• finding out about misconceptions that are holding them back and which need to be ‘unlearned’;
• using small groups to exchange ideas and understanding about the topic you are explaining or demonstrating, then:
• asking them to explain to you and to each other what they understand about the current topic;
• being prepared to use different words with different pupils to make your explanations clearer.
Key Resources page 10�
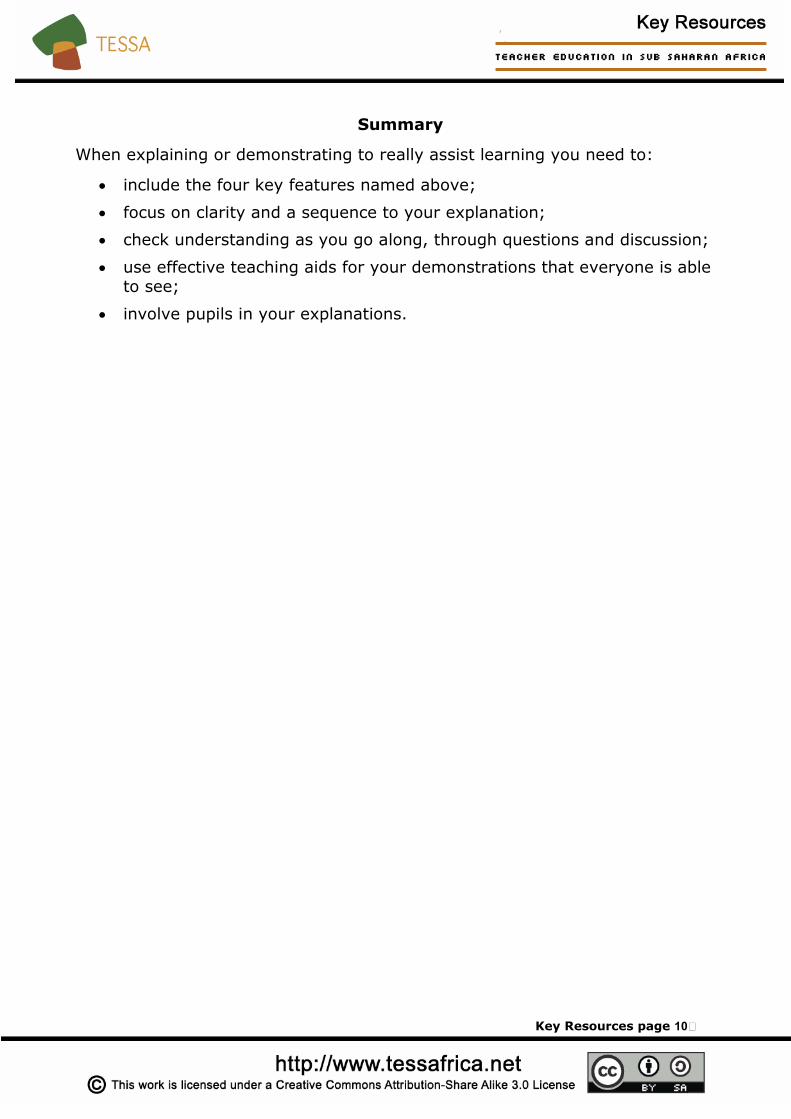
Summary
When explaining or demonstrating to really assist learning you need to:
• include the four key features named above;
• focus on clarity and a sequence to your explanation;
• check understanding as you go along, through questions and discussion;
• use effective teaching aids for your demonstrations that everyone is able to see;
• involve pupils in your explanations.

Key Resources page 11�
Key Resource: Using group work in your classroom
What group work does
Group work can be very effective way of motivating pupils to learn by
encouraging them to think, communicate, exchange ideas and thoughts, and
make decisions. In groups, pupils can both teach others and learn from each
other in ways that result in a powerful and active form of learning.
When to do group work
Group work can be used:
• at the start of a lesson or topic, to find out what pupils already know;
• during a lesson, to encourage understanding or to share views and
opinions about a topic;
• at the end of a lesson, to help pupils think about their learning and be
clear about what they know and what they still need to understand.
Before you start
� Before starting a group session, be clear about what you want to achieve
from it. It needs to have a clear purpose or objective. For example: ‘By
the end of the session we will be able to describe how rain is formed and
what it does to our local landscape.’
� Divide the class into manageable groups depending on the size of your
class, but don’t make them too large – everyone needs to be able to
contribute. You may have to move furniture or perhaps have some groups
outside.
� Give each individual a job to do in the group. These could include:
recorder of what’s said; organiser; devil’s advocate; peacekeeper;
spokesperson; link person with other groups.
� Decide ways in which you will divide pupils into groups. You could use
friendship groups, put similar personalities together, different
personalities together, similar ability groups, mixed ability groups – or
have no category at all. Which one will work best in the situation you are
planning?

Key Resources page 12�
� Plan enough time for the pupils to reach a conclusion as well as time at
the end of the session for each group – and you – to summarise the
conclusions.
Introducing the group work
� Once pupils are in their groups, explain that working together to solve a
problem or reach a decision is an important part of their learning and
personal development. Tell them what you expect of them in terms of
behaviour (e.g. respect for each other, listening, making decisions) and
individual roles (e.g. spokesperson, recorder).
� Explain the task clearly and have it written on the board as well. Tell the
pupils what they have to do and what the outcome of their group work
should look like. This is very important because if they do not understand
what they have to do, the session will get off to a bad start. Allow pupils
to ask questions before you start, and be helpful with your answers.
Managing the group work
� Check how the groups are doing. Resist the temptation to get involved too
soon. Let them struggle with difficulties for a while. If you give them
answers too quickly they will come to rely on you rather than on
themselves. If necessary, clarify your instructions. It is important to
remember that all learning requires us to struggle with difficulty or
uncertainty. So expect a lot from your pupils, telling them how confident
you are in them as you go between the groups.
Ending the group work
� End with a whole-class session in which you get, for example, one idea
from each group until you meet the original objective, or ask each group
to tell you about the most interesting thing they learned. Try to make the
final session an exchange of ideas rather than you telling them what they
have missed.
� Summarise the work of the groups in a way that makes them feel proud
of what they have done. Also, ask them to tell you how well they thought
they worked in a group. This gives you a clue about their own response to
group work.

Key Resources page 13�
� Finally, think about how well you did in managing the group session.
Recognise the parts you did well and note those areas where you could
have done things differently to make the groups more effective. Use this
information to develop your techniques for the next time, and note your
own improvement and that of your pupils.

Key Resources page 14�
Key Resource: Using investigations in the classroom
Children are naturally curious. Good teaching exploits this very human
characteristic. Over the past few decades increasing attention has been given to
using investigative approaches in the classroom. Rather than just telling pupils
something, why not make them think about a topic or area of enquiry? At its
simplest, this might just be ‘asking a question’ rather than ‘telling’. This
promotes a more active approach that is much more effective than passive
‘telling’ in promoting lasting learning. Increasingly, however, teachers plan to
use investigations to promote active learning.
Investigations are already well established in the teaching of science (through
experiments) but the same technique can be used in all subjects. Mathematics
or numeracy, for example, becomes much more interesting if pupils have to
work out real problems. The same is true of other subjects. In geography or
social studies, rather than just telling pupils about environmental problems, why
not set them a task? You will find a number of examples of topics that can be
taught in this way in the TESSA modules.
There are different strategies for approaching investigations. Below is a detailed
example when looking at the teaching of science topics, but you can take a
similar approach in any area. The following basic steps can be taken.
Beginning
Use brainstorming to open a topic (see Key Resource: Using mind maps and
brainstorming to explore idea). You can do this with the whole class, or
begin with groups and then have a whole-class session. The important things
are to make pupils think actively about the issues being raised and to establish
their current knowledge of the topic.
Choosing the focus
A brainstorming session will throw up many different ideas: these will probably
have been recorded on the chalkboard or on a chart of some sort. You, as the
teacher, now have the opportunity to focus on the key area that is to be
investigated. For example, you may wish to teach about the link between
human activity (for example farming) and the local environment. In the
brainstorm, some pupils talk about local worries about the declining fertility of

Key Resources page 15�
the soil. You might decide that an investigation into ‘whether the local soil is
less fertile and if so why’ should be the focus.
Planning your investigative approach
All sorts of methods are available to you. You could carry out detailed interviews
with local farmers or discuss with grandparents or older members of the
community ‘what things used to be like’ or ‘how crops used to grow’. It is
important that pupils think about the methods to be used and why. This helps
them develop personal investigative skills.
Carrying out and reporting the investigation
The pupils then have to carry out the investigation. Before they do this, it is
important to establish the way the findings are going to be reported back. The
form this takes depends on the nature of the investigation. You can have a fairly
informal investigation, for example where pupils ask older family members what
the village was like 20 years ago. The report back might then be ‘verbal
reporting’ to the whole class. You might have asked each member of the class
to ask the same five questions to at least two older members of the family. The
report back then could be in the form of a chart, so that you can show
similarities and differences in the findings.
Interpreting findings
Once the data is reported and recorded, the findings have to be interpreted.
This is key and it is very important that you, the teacher, do not dominate
discussions initially. Make the pupils voice their own ideas (in verbal or written
forms) before beginning to steer them, perhaps through questioning, to the key
learning interpretations you are looking for.
The investigative approach should become habit for the good teacher. Set out
below is a much more detailed way of using investigations in science.

Key Resources page 16�
An investigative approach to science
A possible approach to teaching investigation
Step 1 -
Brainstorming/getting ideas
Step 2 - Choosing the variables
Step 3 - Asking a question Step 4 - Planning the experiment
Step 5 - Carrying out the
experiment
Step 6 - Recording & Presenting
Step 7 - Interpreting &
Evaluating
Step 8 - Reporting back
Step 1 - Brainstorming or getting ideas
This table is made available to the
children. This may be put up on the
wall as a poster or written on the
board. The teacher then initiates a
class discussion on the investigation
topic.
Planning [1]
What could we investigate?
What could we measure or
observe?

Key Resources page 17�
Example: Investigation into factors
that affect germination and growth.
The teacher may begin by reminding
the children about what germination
means, then pose the question: What
affects germination? The purpose of
the investigation is to discover if and
how a particular factor affects
germination in a particular plant, e.g.
cress.
The children are asked to suggest
any factor that might affect the
germination of cress.
Planning [1]
What could we investigate?
light temperature quantity of
medium
acid rain seed type closeness
of seeds
What could we measure or
observe?
light temperature volume of
water

Key Resources page 18�
Step 2 - Choosing the variables
Once again the table is made
available to the children. This
may be put up on the wall as a
poster or written on the board
or copies given to group leaders
or to all the pupils.
The group are asked to select
one variable that they will
change
(independent variable) and one
that they will measure
(dependent variable). All the
other variables must be kept
the same if there is to be a fair
test.
Planning [2]
I am going to find out
what happens to ...
... when I change ...
I am going to keep these the same
(constant) to make it fair ...

Key Resources page 19�
Fair Testing
The concept of a fair test is crucially important in planning an
investigation. The pupils should be taught to control the variables other
than the dependent and independent variables in a conscious way.
Often the more ‘obvious’ a variable is, the more likely it is to be
controlled, but the pupils should be trained to consider their set-up and
decide on the variables to be controlled.
A fair test is one in which only the independent variable is seen to cause
a change in the dependent variable. If, for example, two things change,
say temperature and humidity, you cannot be sure which of these
causes the change in the dependent variable; it may be temperature or
it may be humidity or it may be a combination of both.
• It is only by carrying out a fair test that you can be sure that it is
what you have changed (independent variable) that is affecting what
you measured (dependent variable).
• It is easier to recognise that a test is fair than it is to plan and carry
out a fair test.
• You will need to encourage the pupils to make sure that all relevant
aspects have been controlled (kept the same).
• Most pupils need only say that they intend to keep certain things the
same, but the most able pupils should be encouraged to discuss what
value each control variable should have.
Note: the words independent variable and dependent variable do not
need to be taught at this stage!
Key Resources page 20�
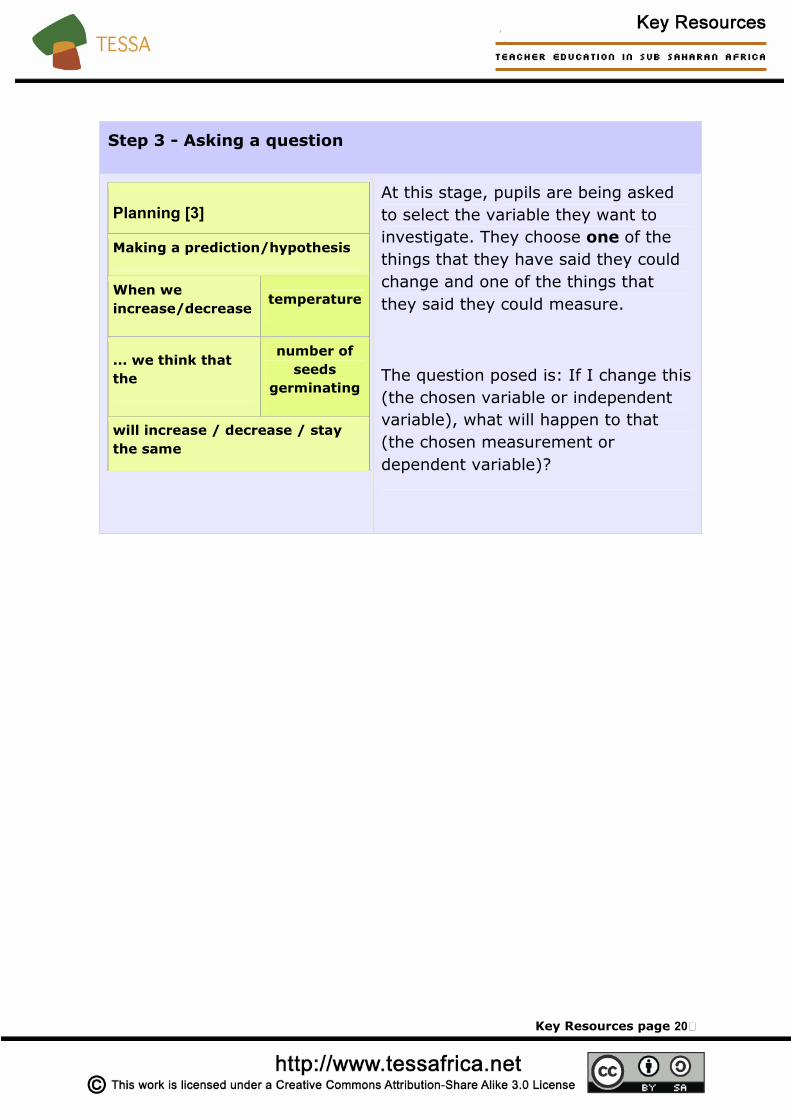
Step 3 - Asking a question
At this stage, pupils are being asked
to select the variable they want to
investigate. They choose one of the
things that they have said they could
change and one of the things that
they said they could measure.
The question posed is: If I change this
(the chosen variable or independent
variable), what will happen to that
(the chosen measurement or
dependent variable)?
Planning [3]
Making a prediction/hypothesis
When we
increase/decrease temperature
... we think that
the
number of
seeds
germinating
will increase / decrease / stay
the same

Key Resources page 21�
Step 4 - Planning the experiment
The pupils now plan the
experimental procedure. It is
very important to stress that
only one of the variables can
be changed during the
experiment. As a result the
variable being measured will,
presumably, change. All other
variables must be kept
constant to ensure a fair test.
Planning [4]
Designing the experiment
Listing what
you need
Describe how you will
use them. Make a
diagram if you want.
30 cress seeds
cotton wool
3 dishes
cling film
thermometer
water
1. Put a layer of about 2 cm depth of cotton
wool in each dish.
2. Add 5 cm3 water to each.
3. Lay 10 cress seeds on top of each piece of
cotton wool.
4. Cover the dish with cling film. Leave dish A
at 10 °C, dish B at 20 °C and dish C at
30 °C.
5. Leave each for three days, then count how
many seeds have sprouted in each dish.

Key Resources page 22�
Step 5 - Carrying out the experiment
Before they carry out their experiment it is important that the teacher
makes sure that the procedure to be followed is safe. For this reason it
is important to include a TEACHER CHECKPOINT before the pupils are
allowed to continue with the practical and to ensure that suitable safety
precautions are used.
The pupils collect evidence by carrying out the experiment and
carefully noting the changes occurring in the dependent variable. They
may also measure the variables they are keeping constant to ensure
that they are kept constant throughout their experimental procedure.

Key Resources page 23�
Step 6 - Recording & Presenting (1)
The pupils are encouraged to record
the results from their investigation
by producing a table of results. The
table includes the independent
variable (what they were changing)
and the dependent variable (what
they were measuring).
The production of the table of
results will help the pupils in
constructing a bar chart or graph of
their results.
An average may need to be taken
to get more accurate results.
Graphs and charts are powerful tools because they enable pupils to see
the result of what they changed (the independent variable) affecting
what they measured (the dependent variable). This gives a picture of
the information they have collected and helps them to identify patterns
and trends. It also helps the pupils to develop understanding by relating
pattern and trends to their scientific knowledge.
The type of graph that is appropriate depends on the type of variable
used for the key variables i.e. what they change (independent variable)
and what they measure (dependent variable). The table below shows
the types of graphs that should be drawn for different types of
variables.
What we
changed
What we
measured
temperature
(°C)
no. of seeds
germinating
10 5
20 7
30 9

Key Resources page 24�
Step 6 - Recording & Presenting (2)
What type of graph should be used?
What is ...
... changed?
(independent
variable) e.g.
... measured?
(dependent
variable) e.g.
Type of table Type of graph
WORDS
type of cloth
WORDS
amount of wear
no graph
WORDS
type of cloth
NUMBERS
size of stain
(cm2)
NUMBERS
length of
elastic band
(cm)
WORDS
pitch of note
no graph
NUMBERS
concentration
of acid (%)
NUMBERS
no. of bubbles

Key Resources page 25�
Step 6 - Recording & Presenting (3)
Looking for a pattern in the results
What we
measured
number of seeds
germinating
temperature (°C)
By careful examination of the bar
chart or graph, the pupils should be
able to identify any trend or pattern
that appears in their results.
In this case, there is an increase in
the number of seeds germinating with
increasing temperature.

Key Resources page 26�
Step 7 - Interpreting & Evaluating (1)
Finding a pattern in the results
When we
increased temperature (°C)
There was ...
an increase in the
a decrease in the
no change in the
number of seeds
germinating
The pupils are now asked to ‘make
sense’ of their results.

Key Resources page 27�
Step 7 - Interpreting & Evaluating (2)
Drawing a valid conclusion
Was the investigation
a fair test? Yes No
The conclusion from our investigation is ...
The number of seeds germinating is controlled by
temperature. When you increase the
temperature the number of cress seeds
germinating increases.
If they are satisfied that the
experiment represented a fair
test, they may now draw a
conclusion from their
investigation.
If the experiment was not a
fair test, no conclusion may
be reached.

Key Resources page 28�
Step 8 - Reporting back
After the practical part of the investigation is over, a reporting back
session is vital. The importance of this stage is frequently underestimated
and sometimes bypassed altogether (although admittedly often because
of pressure of time). The reporting back session needs careful handling if
the learning outcomes are to be fully achieved. Here the pupils should try
to use their own evidence to justify the conclusions at which they have
arrived.
The reporting stage can be followed by a ‘consolidation’ stage where the
pupils are encouraged to use the information they have gained to further
advance their knowledge and understanding. This kind of reflective
discussion, where the group outcomes are shared, can be very useful.
http://www.ise5-
14.org.uk/Prim3/New_Guidelines/Investigations/Poss_aproach.htm

Key Resources page 29�
Key Resource: Working with large and/or multigrade classes
Top 20 ideas for teaching large classes
1. Plan ahead and prepare thoroughly; problems can be magnified in large classes, but they can also be dealt with effectively.
2. Maximise classroom space by removing unnecessary furniture, and use space outside the classroom for learning and activities. Ask your pupils for
suggestions on arranging the classroom in a comfortable way.
3. Do everything possible to get to know your pupils. A positive relationship
with your pupils means they will be more willing to actively participate in class.
4. Give opportunities for pupils to individually introduce themselves to the class.
5. Move around the class when talking – this engages pupils, and it can reduce
the physical and social distance between you and your pupils.
6. Be natural and personal in class and outside of it – be yourself!
7. Tell your pupils you will be available before and after class to answer any
questions they might have.
8. Keep track of frequently asked questions or common mistakes. Use these to
develop lessons and help pupils avoid making mistakes.
9. Be aware of the class. If you notice or even feel that there is something
wrong, ask a pupil what is going on. Invite small groups of pupils to visit you to discuss important class issues. When necessary, involve pupils and use
positive discipline to deal with misbehaviour.
10. To check the content of your lessons and the knowledge and skills of your
pupils, to identify those pupils that need your special attention.
11. Recognise the attention span of pupils is limited: 15 minutes of lecture
followed by an activity and then additional lecture if needed is ideal. Determine what information can be delivered in forms other than lecture and
develop these methods. For instance, group work, role play, pupil
presentations, reading outside class, and in-class writing can be excellent ways to vary classroom routine and stimulate learning.
12. Develop a formal lesson plan to organise your teaching; this is a way to
monitor whether or not your pupils are understanding what is taught; and a chance for you to think about what to do next and how to improve your
teaching. In your plan, identify what topic is to be taught, the learning objectives, teaching methods, classroom arrangement, main activities,
resources and assessment methods.

Key Resources page 30�
13. Explain to your pupils exactly how and why you are teaching in a certain way. For example, ‘This is why I give quizzes at the end of class (to check on
your understanding.’
14. Develop a visual display of the day’s topics and learning objectives (such
as a list on the chalkboard). This will make following the flow of the class much easier for you and your pupils. Plan for a clear beginning, middle and
end to the class.
15. Use ‘prompts’ to develop pupils’ question and answer skills, and count to
ten after you ask a question to give time for the pupil(s) to answer.
16. Give assignments that really assess whether or not your pupils are
learning what you are teaching. Can they explain the process they used to
solve a problem, and can they apply what they are learning to everyday life? Give clear and thorough instructions for all assignments.
17. Develop a portfolio system or other ways to keep track of pupil performance – both successes and areas needing improvement – and to
identify those pupils who require extra attention.
18. Develop exams that really tell you if your pupils have learned and can
apply what you have taught them, not just what they remember.
19. Give prompt feedback on assignments and exams. Involve your pupils in
the grading process to give faster feedback.
20. Reflect on your teaching. Discuss with your colleagues and pupils how
your class can be improved. Visit the classes of colleagues who are also teaching many pupils, and exchange ideas and materials. Above all, view the
challenge of teaching a large class as an opportunity, not a problem.

Key Resources page 31�
Key Resource: Using the local community/environment as a
resource
Introduction
It is important that you plan and prepare your lessons so that they stimulate
your pupils’ interest. Part of this planning involves identifying resources that will
engage your pupils in learning. One valuable resource you can explore and use
is your local environment, where not only do you have people who have
expertise in a wide range of topics but you also have access to a range of
natural resources.
Using such dynamic resources will:
• motivate your pupils;
• stimulate their thinking;
• open their eyes to the richness and diversity around them;
• develop a link with the local community;
• provide you with support;
• link the curriculum to your pupils’ lives;
• introduce them to new experiences.
Using local experts in your classroom
Maybe you are doing some work on money in mathematics or you are doing
pattern in your art lessons. How could you introduce these topics to your pupils
in a way that will capture their interest? One way would be to invite in a local
shopkeeper to talk about how they use money in their work or a local
dressmaker who uses traditional patterned fabrics. Your pupils will be interested
to hear about what the visitors do and will want to ask questions and so this
needs to be carefully planned. If you choose to do this you need to be clear
what you would like your pupils to gain and learn from the experience and then
follow the steps below to prepare.
Before the visit
� Ask your principal/head teacher’s permission to invite the visitor.

Key Resources page 32�
� Identify who you would like to ask.
� Ask if they would be willing to come.
� Talk to your class about the visit and what they would like to know.
� Ask them to write an invitation to the visitor.
� Plan with your class the questions they want to ask.
� Agree together with your class who will do this.
� Discuss how you will sit when the visitor comes – in rows or in a
horseshoe shape so that everyone can see.
� Confirm the visit with your guest and tell them what will happen.
� Ask them to bring some things to show the class.
On the day of the visit
Arrange for some pupils to meet the visitor at the appointed time at the school
gate and bring them to the class. Introduce the visitor to the class and allow
them to talk for a short time to the class about what they do (10–15 minutes),
showing what they have brought if appropriate. Encourage your pupils to ask
questions. When the visit is finished, ask one of your class to thank the visitor
for coming.
After the visit
Think how you will use what your pupils have seen and heard. You could ask
them to share their ideas in groups and make lists or posters of the key things
they learned. You could plan more lessons using the ideas and information as
the context for them to learn more about the topic. They could research more
about the topic. They could share their ideas with other classes or their parents
at a special parents evening or exhibition.
Using other local resources
The outside environment can be seen as a place to collect resources but it can
also be an extension of your inside classroom. Here are some ideas about how
to use the local environment to support, resource and extend your classroom
teaching.

Key Resources page 33�
Living things
Wherever your school is, there will be a variety of living things that you could
collect and bring into the classroom for shorts periods for your pupils to
investigate and observe. You could do the collecting or you could take your class
out to do the collecting. Bringing in leaves, for example, will enable pupils to
study these more closely. Creatures such as preying mantis, certain spiders or
other insects can be kept in suitable conditions/containers for a short period of
time. Be clear what your pupils are going to learn and give them time to
observe the creatures safely so they are not frightened and they do not frighten
the animals either. Make sure they respect the animals and plants and
understand how important these are to the community.
Local materials
There are many other things that you might be able to collect from the local
environment – whether you are in a rural or urban setting – that might help you
in the classroom. These include:
� rocks and stones to study;
� rocks and stones to use as counters;
� recyclable materials, such as card, paper, wire, wood, fabric, plastic
containers.
All of these and many other materials could be gathered over time, so that when you want to do modelling with your class you have a stock of paper and
card. Or when you want to do posters with your class about science you have some card for each group to write on. Always ask if you can have the materials
you see. Ask your class to help you gather materials in advance of your lessons.
The extended classroom
Rather than bring the outside into the classroom, take your pupils out into the
school grounds or further. If you decide to do this, always gain permission from
the head teacher or principal beforehand. Taking pupils out to see the plants
and animals in the real world will inspire more pupils. Taking them out to look at
the way the environment is used, buildings are laid, the local stream flows or
where the cattle graze will interest your pupils more and stimulate their deeper
thinking skills if you plan challenging activities for them to do.

Key Resources page 34�
Key Resource: Planning and preparing your lessons
Why planning and preparing is important
Consistently good lessons have to be planned. By planning and preparing well,
you are concentrating on:
� what your pupils need to know in order to progress;
� how you are going to teach this in a way they understand;
� how you judge what they have learned at the end of it.
So planning is a continual process that helps you to think and prepare what is
needed to help your pupils respond well to you and content of what you teach.
For your pupils to learn from your lessons they need to be:
� interested – if they are not, nothing of any value will take place;
� very clear about what you want them to do and achieve.
Planning lessons
First of all, think of the curriculum you need to follow, and begin by breaking up
subjects and topics into sections that can fit into a lesson time. One topic may
take up four lessons, but another only two. Now you need to use your skill to
makes these topics into lessons your pupils find interesting. To do this, you
need to be clear about what you want to do. Learning objectives and learning
outcomes will help you.
All lessons need learning objectives, that is, what is it that pupils should
know/understand/be able to do/be aware of at the end of the lesson. A learning
objective is a statement about what you aim to do. For example:
At the end of the lesson the pupils will…
� have made their own clay pot.
� know how to recognise parts of a particular plant.
� understand how and why river meanders occur.
Lesson plans also need a learning outcome, that is, ‘How do I know that pupils
have achieved the objectives I set them?’ For example:
� Are the pots complete?
� In what ways will I judge how much they know about the plant?
� How will I measure their understanding about meanders?

Key Resources page 35�
A successful lesson will show you can assess how much your pupils have
achieved and that both you and they know what they need to tackle next.
Preparing lessons
Preparing lessons concentrates on what you need to do to achieve the learning
outcomes. Think of preparing your lessons in three parts. These parts are:
• Introduction
• Main part of lesson
• Checking on learning (often called a plenary session), in which you and your pupils find out what has been learned.
Introduction
At the start of a lesson, explain your learning objectives in a way your pupils
understand so that they know exactly what is expected of them. Get them
interested in what they are about to do by allowing them to share what they
know already.
Main part of the lesson
In this section, you will explain new information and develop activities that help
pupils to develop and confirm their own learning. These activities can be
brainstorming, group work, problem solving, experimentation etc. Whatever you
choose will be aimed at helping the pupils to achieve your original objectives in
the most effective way. As well as the content you have prepared, the resources
you use and the way you make use of your classroom space will influence how
successful your lesson will be. Variety is an important part of lesson planning
and preparation.
Checking on learning
Always leave time at the end to find out how much progress pupils have made.
Refer back to the learning objectives. Summarise the lesson by highlighting its
key points. Also summarise what they have done already and what they will be
doing next time. Allow time for pupils to tell you and each other about their
learning so that you know what to plan next.
Finally, ask yourself if you are clear about the progress pupils have made. What did you do well to
help them understand and what could you have done a bit better?

Key Resources page 36�
Key Resource: Using questioning to promote thinking
Introduction
Good questioning is an important skill for you, the teacher, to acquire.
Questioning can be used to find out what your pupils know and assess their
progress, but can also be used to inspire them, help extend their thinking skills
and develop enquiring minds. Questions you can ask can be divided into two
broad categories:
� Lower level questions, which involve the recall of facts and knowledge
previously taught, often involving closed questions (a yes or no answer).
� Higher level questions, which ask the pupil to use bits of information
previously learned to form an answer or to support an answer in a logical
manner. Higher level questions are often more open-ended.
There are two issues with both higher and lower level questions. These are:
• encouraging pupils to respond;
• improving the quality of their responses.
Encouraging pupils to respond
Many teachers allow just one second before answering the question themselves
or asking another question. This leaves no time for pupils to think what they
might say. By waiting between three and six seconds before saying anything
gives pupils time to think of answers. Research indicates that this has a positive
effect on pupils’ achievement. By waiting after posing a question there is an
increase in:
� the length of pupil responses;
� the number of pupils offering responses;
� the frequency of pupil questions;
� the number of responses from less capable pupils;
� positive interactions between pupils.
The way incorrect responses are handled will determine whether pupils continue
to respond to the teacher’s questions. ‘That’s wrong’, ‘You are stupid’ or other
humiliation or punishment often stops pupils volunteering any more answers
from fear of further embarrassment or ridicule. Instead, if you can pick out
parts of the answers that are correct and ask them in a supportive way to think

Key Resources page 37�
a bit more about their answer you may encourage more active participation.
This helps your pupils to learn from their mistakes in a way that negative
behaviour towards them does not. The following phrase shows how you might
handle an incorrect answer in a more supportive way:
‘You were right about evaporation forming clouds, but I think we need to explore a bit more about what you said about rain. Can anyone else help
us?”
Improving the quality of responses
Helping pupils to think more deeply and improve the quality of their answers is
a crucial part of your role. To help pupils achieve more, you need to be able to:
� prompt;
� probe to seek clarification;
� build on answers by refocusing;
� sequence questions in a way that extends thinking;
� listen very carefully to pupil answers in order to ask the right question.
Prompting is about adding hints that help pupils develop and improve their
answers. Begin by choosing what is right in the answer and offering information,
further questions and other clues. (‘So what would happen if you added a
weight to the end of your paper aeroplane?’)
Probing is about trying to find out more, helping pupils clarify what they are
trying to say to improve a disorganised answer or one that is partly right. (‘So
what more can you tell me about how this fits together?’)
Refocusing is about building on correct answers to link pupils’ knowledge to
knowledge they have previously learned. This broadens their understanding.
(‘That is good. But how does it link with what we were looking at last week in
our local environment topic?’)
Sequencing questions means asking questions in a certain order to extend
thinking. Here, your intention is to lead pupils to summarise, compare, explain
or analyse. This means you must have questions ready that stretch pupils, but
not so far that they lose the meaning of the questions. (‘Explain how you
overcame your earlier problem. What difference did that make? What do you
think you need to tackle next?’)
Listening enables you not just to look for the answer you are expecting, but to
Key Resources page 38�
alert you to unusual or innovative answers that you may not have expected.
Such answers could highlight misconceptions that need correcting, or they may
show a new approach that you had not considered. Your response to these
could be very important in maintaining motivation. (‘I hadn’t thought of that.
Tell me more why you think that way.’)
Common mistakes in questioning
It is often said that ‘questions are only as good as the answers they get’.
Common errors in questioning, which discourage pupils from offering answers or
participating, are:
• asking too many questions at once;
• asking a question and answering it yourself;
• asking a difficult question too early;
• always asking the same type of question;
• asking a question in a threatening way;
• not using probing questions;
• not giving pupils enough time to think;
• ignoring answers;
• not correcting wrong answers;
• failing to see the implications of answers;
• failing to build on answers.
If you do any of these, think about how you might adapt your approach and find ways of doing the
opposite. Watch and see the improvement in pupil performance.

Key Resources page 39�
Key Resource: Researching in the classroom
Good teachers like to find out as much as they can about their classes and the
teaching approaches that work best. This is often a very informal process. For
example, it is very common to discuss the best way to teach a certain topic with
other teachers. These same discussions might extend to other topics. Why is the
attendance of boys in the school much poorer than the attendance of girls? In
what ways can parents or guardians be encouraged to come and talk to us
about their children’s progress?
This can become a more thorough process if you adopt the sorts of approaches
and methods that researchers use. You can use what is often termed ‘action
research’ to help improve your teaching and your school generally. The word
‘action’ is used to signify that you expect to gain information upon which you
can ‘act’ fairly quickly.
Many books and publications now describe the ‘action research’ approach. Here
we set out a very straightforward approach in just four stages.
Stage 1 – Defining the research question
Take the problem or issues you want to examine and formulate it in terms of a
research question. For example, you may have become worried that some girls
in the class seem to have problems doing homework. This worry becomes a
question:
‘Why do some girls have problems doing schoolwork, especially homework, at
home?’
Stage 2 – Deciding on methods to help answer the research question
You then have to think about the methods you use to explore this problem. For
example, you could give the girls a short questionnaire asking them about
working at home and the reasons why they experience difficulties. This assumes
the pupils have reasonably good written skills. You could carry out individual
interviews with the girls. In some situations, you might be able to visit the
homes and interview the parents or guardians.
Stage 3 – Carrying out the research and recording findings
Find time to carry out interviews, observations or surveys. This is your research.

Key Resources page 40�
When you have carried out the research, it is a good idea to write up the
findings. Sometimes teachers do this as part of a course (an upgrading course
for example) and have to write things up in a formal way. Even if you are doing
this for your own benefit, it is useful to note down your findings.
Stage 4 – Make changes
Interpret and reflect on your findings. Once you have the data, you need to
think about what it means and what the implications are. For example, if the
interviews with the girls revealed that some of them are expected to take over
‘childcare’ at home and find doing homework a problem, then you need to think
about how you deal with this. Do you talk to the parents or guardians to stress
the importance of the girls being able to do their homework? Or do you provide,
for example, lunchtime opportunities for the girls to carry out their homework?
The research process then carries on as you evaluate the impact of the changes
you have made.
Action research can be built into the general strategies for improving teaching
and improving schools. It can be done individually but it is also very effective
when groups of teachers work cooperatively to try to solve particular problems.

Key Resources page 41�
Key Resource: Using role play/dialogue/drama in the
classroom
Introduction
Pupils, and adults too, learn best when they are actively engaged in the learning
experience. Role play, dialogue and drama are very active ways to explore what
your pupils already know. By interaction with others and sharing their ideas,
your pupils can build a broader and/or deeper understanding of the topic.
The three strategies in this key resource allow pupils to develop their thinking
skills, work in contexts that allow them to talk about more sensitive issues and
use their creativity and imagination to extend their knowledge and to resolve
problems. You will have to plan your lessons carefully and think how you
introduce them to the techniques. You will need to think about whether you
work with the whole class at once or with small groups. This may depend on the
size of your class and their ages.
All of the three methods below have strengths that allow you to use them
across a range of curriculum areas.
So, how can you use these strategies in your classroom, what things do you
need to think about if you want to use them and what benefits will they bring?
Dialogue
An important part of your role in helping your pupils learn has to be helping
them to think about what they know and what they do not know or cannot do.
Unless you encourage them to talk about their ideas and listen to other people’s
viewpoints they will not be able to extend their own understanding as much as
they could. Straightforward reading and answering questions exercises do not
challenge their thinking and ideas as much as activities where they have to
apply the ideas to relevant situations. For example, pupils will understand the
idea of gravity and how things fall to the ground much better if they have to
plan and investigate ways to slow down how things fall. By discussing what they
are going to do, they have to think about what they already know, why and how
things fall, and what they could do to slow them down.
Talking in groups of about four/five will give all pupils the opportunity to speak
and listen to other’s ideas, but sometimes just asking pupils to talk in pairs for a
few minutes for one key idea to share with the class can be just as valuable.
Shy pupils, who do not normally participate in larger class discussions, may feel

Key Resources page 42�
more confident about speaking in these smaller groups and so you would be
able to find out more about what they know and how they think.
As a teacher, you need to be aware of your pupils’ interests and knowledge and
how they learn so that you can match your teaching better to their needs.
Give pupils frequent opportunities to talk in groups about different topics and
make sure they have enough time to do it.
Role play
Role play is when pupils are assigned a role and, during a small scenario, act as
they think the person they are being would act in such a situation. For example,
in one of your citizenship or life skills classes, you may be exploring how to
resolve conflict in the playground. Rather than use an incident from your class,
you can make up a scenario in which a similar incident occurred. It may be in a
home or community setting, but while the story is detached from the
playground, the issues are the same.
You could assign pupils to roles and give them time to think about the little
scene they are going to develop or you could just ask them to do it without any
planning time. You will need to try both ways to see the benefits for yourself of
both approaches. You could have just one group performing in front of the rest
of the class or you could let all the class work in small groups at once (so no
group is being watched). You could put your pupils into groups and ask them to
assign roles themselves before giving them time to explore how they might
resolve the conflict.
If you have a large class or a small classroom you may have to allow some
groups to work outside. These pupils need to be aware of their responsibility to
be sensible and not disturb other classes at work, although as they work you
will be moving around and supporting them. You will have to think about what
kind of feedback you want from the groups about their experiences and feelings.
Some groups will be more willing than others to show their role plays. Some
may prefer to tell you what they have learned from doing the role plays.
Drama
Using drama in the classroom is a good strategy to motivate most pupils. It can
be used in many different ways and provides opportunities for the whole class to
be involved in the creative process of producing a drama. Not everyone has to
be an actor in the drama; some pupils can be used in other ways that may
relate more to their talents and personality. Drama or telling a story through

Key Resources page 43�
acting or dancing can be a stimulating way to encourage pupils to think about
issues such as relationships, power struggles in history, local environmental
issues and debates. It is not unlike role play but has an end product. This is a
production of some kind that can be shown to the rest of the class, the school at
assembly or to the parents and the local community.
This will give the pupils something to work towards and motivates them. It is
useful to use both scripted plays and improvised plays to explore their ideas
around an issue. Drama is also a good way to assess what your pupils
understand about a topic. For example, one class did a play about their
understanding of how the brain works using pretend telephones to show how
messages go from the brain to the ears, eyes, nose, hands and mouth and
back.
If you decide to use drama in your classroom, you could use a scripted play that
has been written down, or you could draft an outline and let the pupils write the
script for themselves. They could also improvise their drama and then work out
what to say as they practise acting out the scene(s).
When setting up a drama lesson – or series of lessons, as dramas take time to
develop – these are the things you need to remember:
• Be clear why you are using drama to help your pupils learn.
• Give clear instructions and explanations about the purpose of the drama.
• Have an outline of a drama in mind if your pupils need such support when
improvising so you can make suggestions.
• Build in time for them to practise.
• Be ready to give support and suggest ideas when they have difficulty.
• Use language lessons for them to write their plays and the dialogue.
• The play can relate to a topic in science or social studies or citizenship/life
skills lessons.
• Give them opportunities to perform to an audience whenever possible as
this will boost their self-esteem and confidence, even for those who work
only on the production rather than performance side.
• Involve your pupils as much as you can in all the stages of the process
and decision making.

Key Resources page 44�
Key Resource: Using storytelling in the classroom
Stories help us make sense of our lives. There are many traditional stories that
have been passed down from generation to generation, which were told to us
when we were young, that explain some of the rules and values of the society
that we were born into. Stories are a very powerful medium, especially if they
are well told or written. Stories are entertaining, exciting, stimulating and can
transport us out of our everyday life into fantasy worlds, but they can also be
challenging. They can provide guidance about how we live our lives; they can
stimulate our thinking about new ideas; they can help us explore our feelings
and help us to think through problems in a context that is detached from reality
and therefore less threatening.
Stories have a strong role to play in the classroom in all curriculum areas and
can be used in a number of ways for a range of purposes. The next part
explores when and how you might use story in your classroom to develop your
pupils’ knowledge and understanding of their world.
How can you use stories in your classroom?
Stories can be used at the start, middle or end of lessons.
Start of the lesson
Most often stories used at this stage are to set the scene for the lesson, to
stimulate interest, find out what pupils know already and to provide a context
for the main work of the lesson.
Middle of the lesson
Stories used at this stage provide a context for the work the class is doing. They
may be analysing or using:
• the values in the story;
• the reactions of the characters;
• the ideas contained in the story;
• the claims made in the story;
• the structure of the story;
• the ideas in the story to broaden and deepen understanding of a subject.

Key Resources page 45�
End of the lesson
Stories used at this stage are often used to pull learning together, so selecting a
story for this stage is much more difficult.
They can be used to just relax the pupils and give them a pleasurable
experience before they go home from school. Stories have an immense value in
themselves in that they provide comfort, support and entertainment. They help
build confidence and self-esteem and help your pupils learn more about
themselves as they relate to the characters in the story, so the telling or
reading of stories just for pleasure cannot be overestimated.
Most societies throughout the world have used storytelling as a way of passing
on their history and values. This is very true in Africa, which has a wealth of
national and local traditional stories.
Where do we find and how do we select our stories?
Stories can be found in books, in the local community, and in yourself and your
pupils.
You need to select the story because of its message and the purpose for which
you want to use it. For example, you may be investigating the sun and moon in
your science lessons and use a traditional tale about how the sun and moon
came to be in the sky at the start of the lesson to stimulate interest and to
explore the truths of the story.
You may find your story in a book or it may be a local traditional tale that has
not been written down, from your childhood or that of your pupils. You could
also invent or write your own story to tell or read to your class or ask them to
write the stories. These could be collected and made into a book of local stories
or into books of stories about a particular curriculum area. There is no age limit
to using story with your pupils but obviously you would need to select
appropriately for those in your class.
Using story in your lessons is one way to involve the local community, as you
can invite a renowned storyteller to come in to tell the tale. You could extend
this to set up a storytelling club within the school for those interested in
developing their storytelling skills and ensuring that such tales are not lost from
the community.
Stories and storytelling play a key role in holding many communities together and so their importance should
not be ignored in the classroom.

Key Resources page 46�
Key Resource: Using new technologies
New technologies, often in educational contexts meaning information and
communication technologies (ICTs), offer huge potential for classroom use.
Although the availability of such technologies is limited in many African
countries, that situation is changing rapidly. New forms of ICTs are appearing all
the time. The experience of those with some knowledge of ICTs is not always a
guide to the way in which new forms of ICTs can be most effectively used for
learning.
This key resource, therefore, suggests how you, as a teacher, approach new
technologies, rather than acting as a guide as to how they can be used. Here
are ten points to help you establish a good approach to the potential of new
technologies:
• The use of new technologies, like any other teaching and learning
strategy, needs planning for: you need to understand the potential of any
specific form of ICT (a computer with Internet access, for example) before
incorporating it into your daily teaching.
• Get advice about how different equipment and applications work. The
introduction of computers into schools is usually linked to some sort of
training. Computers also have plenty of ‘self help’ systems, so make sure
that you understand how these work.
• Pupils may need some help in acquiring basic skills: it is important to
establish good class routines and positive attitudes to the use of ICTs.
• ICTs allow the use of ‘software’ that can significantly help the learner,
individually or in a group, but some software is better than others. As the
teacher, you need to think carefully about which ICT applications are
useful, in the same way that you might decide that some books are more
useful than others.
• The most expensive technologies are not always the most effective! Audio
clips or radio instruction, which has been around for a long time remains
highly effective – but now you can deliver it using mobile phones and
computers as well as radios and tape players.
• The presentation of pupils’ work through the use of word processing
packages can be very good, but it is important to remember that good
presentation is not the same as good learning. Just using new
technologies for ‘presentational purposes’ fails to exploit their potential for

Key Resources page 47�
learning.
• New technologies can help speed up tedious processes and make learning
more interesting. For example, mathematics or science investigations can
move more rapidly if some calculations are done electronically.
• Some new technologies can really transform learning opportunities. The
use of simulations in science teaching, for example, allows pupils to
investigate things that it would be impossible to experiment with in the
classroom. It is important for you, as the teacher, to think about how such
technologies really do transform the learning experience.
• New forms of technology may have greater potential for use in the African
context than older established technologies. Mobile or cell phones, for
example, are now becoming like mini computers. Teachers and pupils can
use the skills they develop in using mobile technologies for teaching and
learning and this should be kept under review.
• Community awareness of the use of new technologies is also important.
The resources that are likely to become available for schools and teachers
could also provide useful support for the community.
For more ideas about using new technologies, look at the TESSA website.