Task two workflow by tom crook
9
Task Two Workflow By Tom Crook 1. Creating my Sprite My First action of Game Maker was to create my first Sprite for my game. The Following picture shows the creation of my first Sprite. Here I have named my Sprite ‘player1_spr’. This Picture shows an example of my sprite in the first stages after a few minutes of work. I have used Simple colours and will Advance the look of my sprite throughout the game making process. 2. Sprite Properties What I did next was adjust the properties of my sprite. I set the origin to centre to accommodate the range of my Sprite and to make sure all movement comes from this point of my sprite. Next I set the collision mask and I set
Transcript of Task two workflow by tom crook

Task Two Workflow By Tom Crook
1. Creating my Sprite
My First action of Game Maker was to create my first Sprite for my game. The Following picture shows the creation of my first Sprite.
Here I have named my Sprite ‘player1_spr’.
This Picture shows an example of my sprite in the first stages after a few minutes of work. I have used Simple colours and will Advance the look of my sprite throughout the game making process.
2. Sprite Properties
What I did next was adjust the properties of my sprite. I set the origin to centre to accommodate the range of my Sprite and to make sure all movement comes from this point of my sprite. Next I set the collision mask and I set the collision mask to diamond as I believe it is best fit for my Sprite. The collision mask acts as a sort of hit detection, For example the Sprite will react to any contact within the range of the Collision mask.
3. Creating an object and object properties
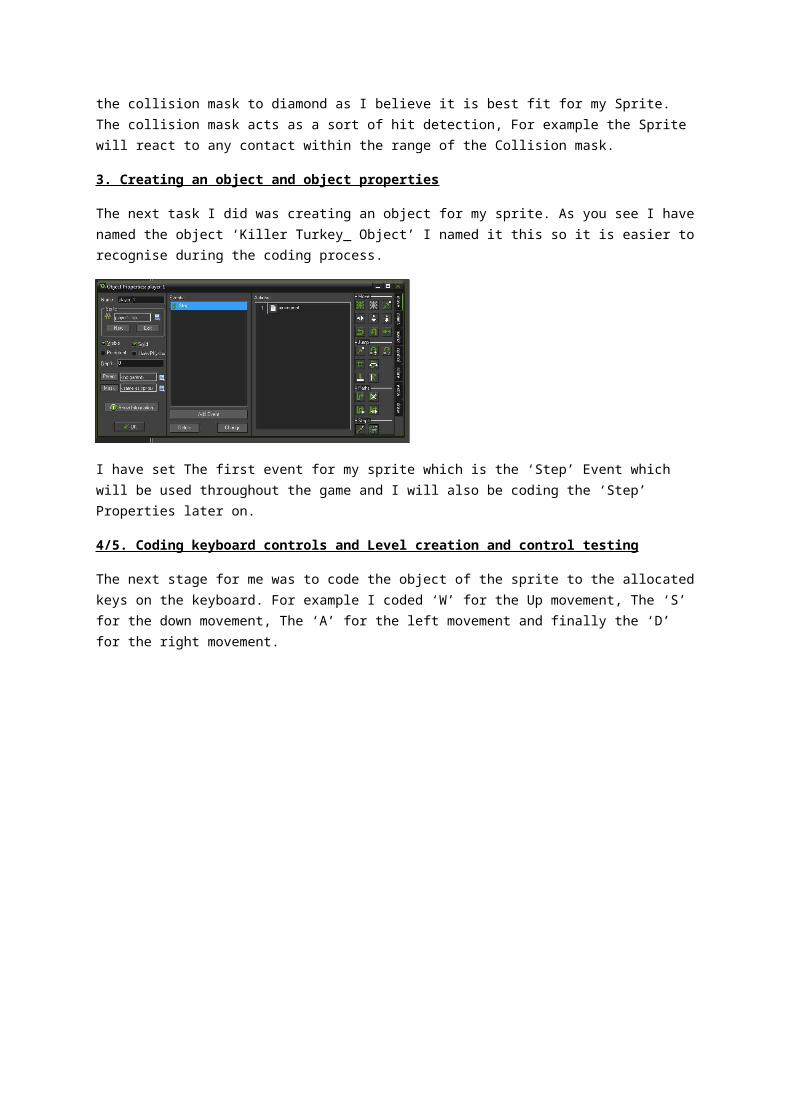
The next task I did was creating an object for my sprite. As you see I have named the object ‘Killer Turkey_ Object’ I named it this so it is easier to recognise during the coding process.
I have set The first event for my sprite which is the ‘Step’ Event which will be used throughout the game and I will also be coding the ‘Step’ Properties later on.
4/5. Coding keyboard controls and Level creation and control testing
The next stage for me was to code the object of the sprite to the allocated keys on the keyboard. For example I coded ‘W’ for the Up movement, The ‘S’ for the down movement, The ‘A’ for the left movement and finally the ‘D’ for the right movement.
This image is showing that I have created a room for my sprite enabled the background colour to black and I can show me coding works as if you use the W,A,S,D keys it will move Left, right, up and down.
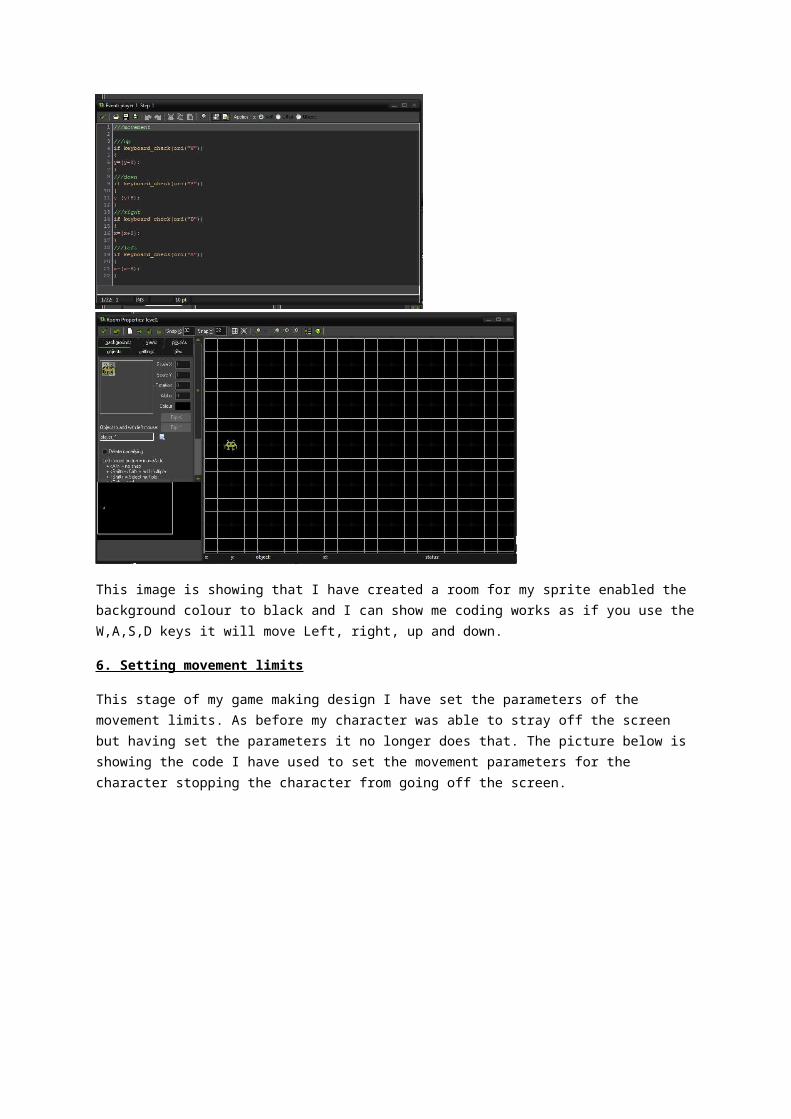
6. Setting movement limits
This stage of my game making design I have set the parameters of the movement limits. As before my character was able to stray off the screen but having set the parameters it no longer does that. The picture below is showing the code I have used to set the movement parameters for the character stopping the character from going off the screen.
7. Creating a scrolling background
The next thing I’d implied into my game was the scrolling background. This first picture is of me editing my background to my specific choice.
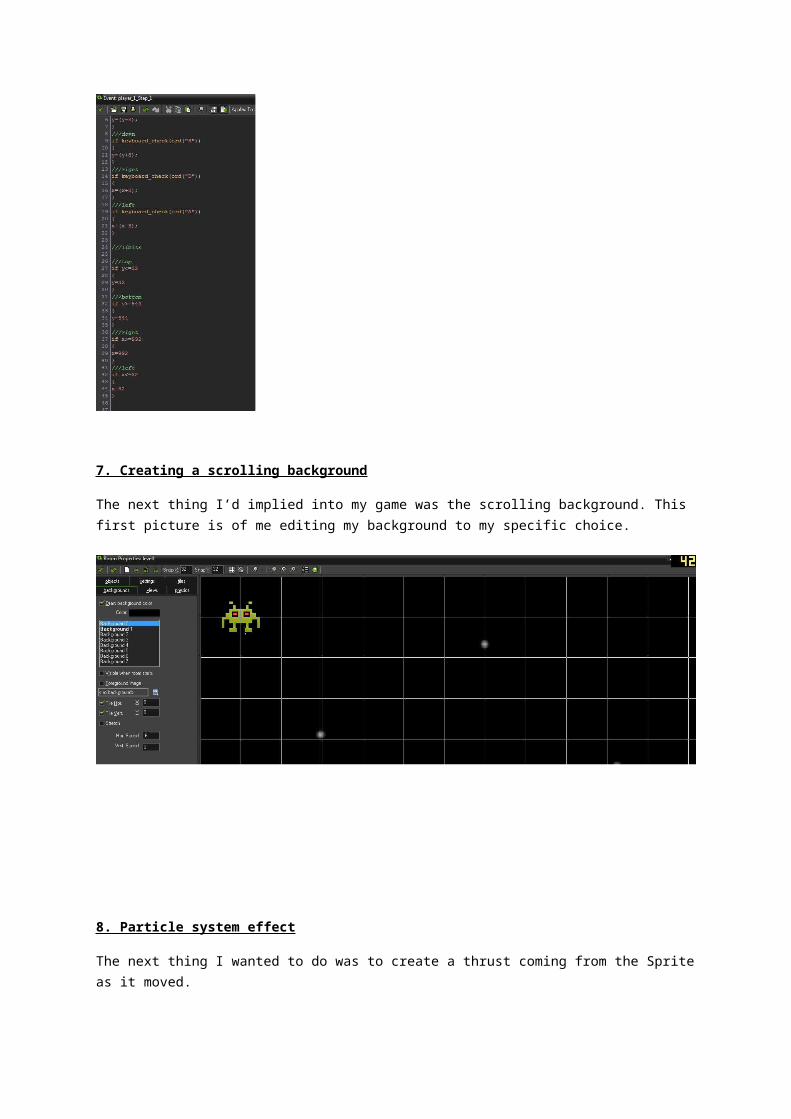
8. Particle system effect
The next thing I wanted to do was to create a thrust coming from the Sprite as it moved.
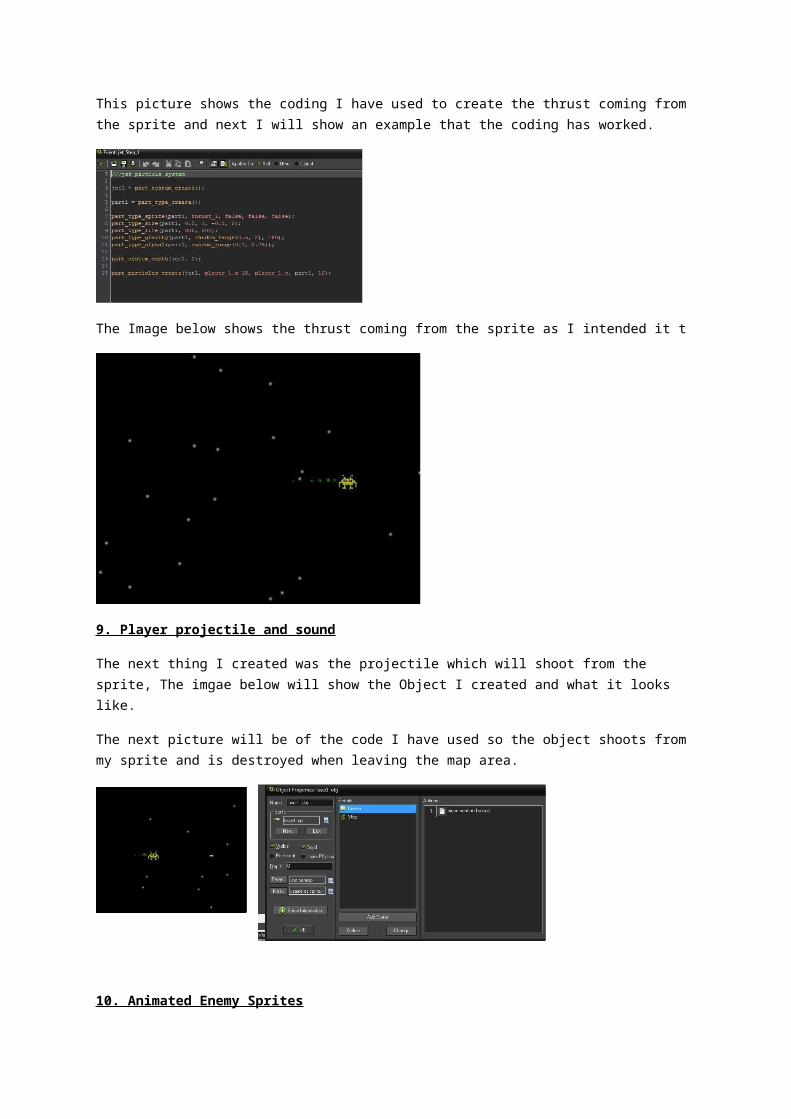
This picture shows the coding I have used to create the thrust coming from the sprite and next I will show an example that the coding has worked.
The Image below shows the thrust coming from the sprite as I intended it t
9. Player projectile and sound
The next thing I created was the projectile which will shoot from the sprite, The imgae below will show the Object I created and what it looks like.
The next picture will be of the code I have used so the object shoots from my sprite and is destroyed when leaving the map area.
10. Animated Enemy Sprites
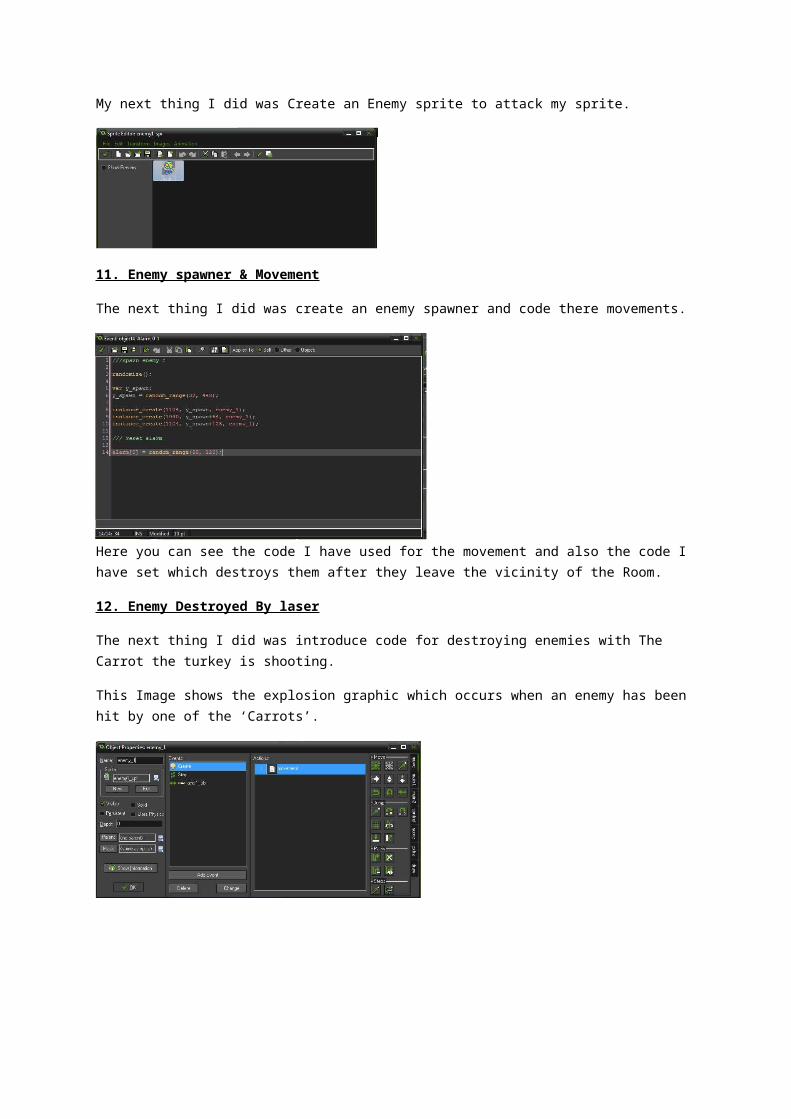
My next thing I did was Create an Enemy sprite to attack my sprite.
11. Enemy spawner & Movement
The next thing I did was create an enemy spawner and code there movements.
Here you can see the code I have used for the movement and also the code I have set which destroys them after they leave the vicinity of the Room.
12. Enemy Destroyed By laser
The next thing I did was introduce code for destroying enemies with The Carrot the turkey is shooting.
This Image shows the explosion graphic which occurs when an enemy has been hit by one of the ‘Carrots’.
13. Enemy Projectiles
The next part of my project was to code in so that the enemies would shoot some sort of projectile at your Character.
The image above shows the code I have used to be able to allow the enemy sprite to launch a projectile at my created sprite.
As you can see from the following image the projectiles are being launched at the created sprite.

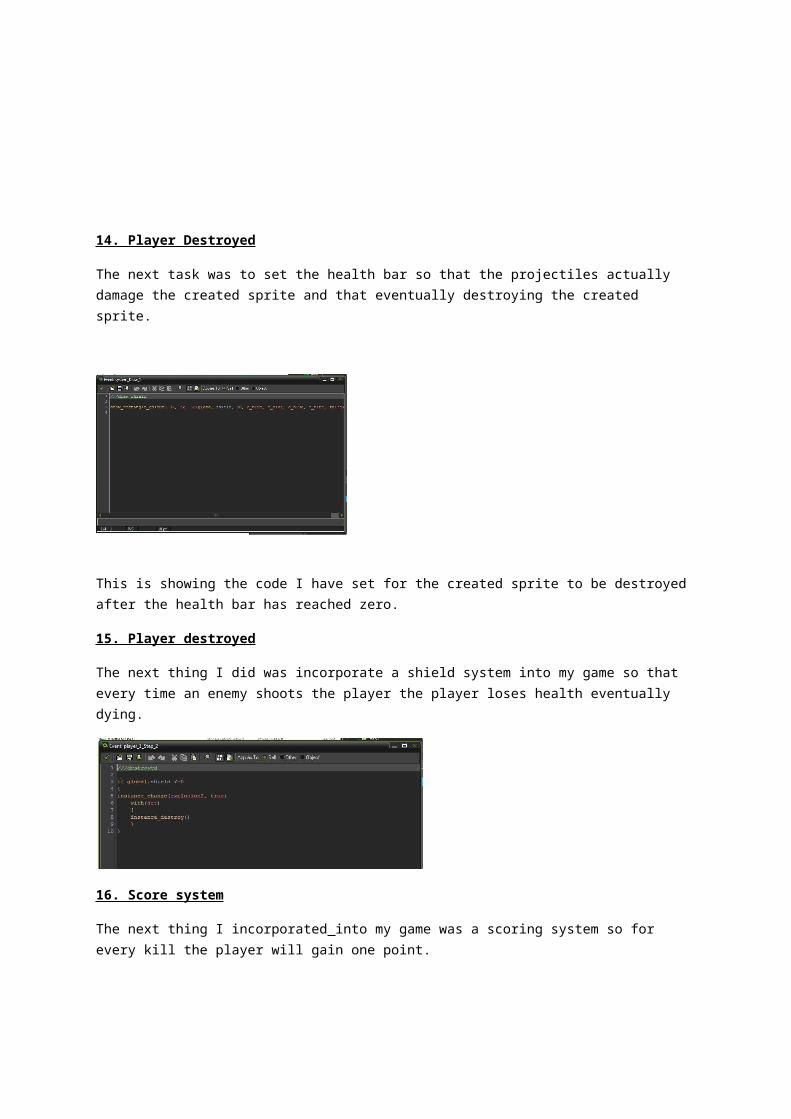
14. Player Destroyed
The next task was to set the health bar so that the projectiles actually damage the created sprite and that eventually destroying the created sprite.
This is showing the code I have set for the created sprite to be destroyed after the health bar has reached zero.
15. Player destroyed
The next thing I did was incorporate a shield system into my game so that every time an enemy shoots the player the player loses health eventually dying.
16. Score system
The next thing I incorporated into my game was a scoring system so for every kill the player will gain one point.
17. Second enemy
The final thing which I incorporated in my game was to add a second enemy but this enemy was set to a specific path with not much movement.