Taleo Scheduling Center Configuration Guide - Oracle€¦ · A Taleo Scheduling Center...
36
Taleo 10 Taleo Scheduling Center Configuration Guide March, 2010
Transcript of Taleo Scheduling Center Configuration Guide - Oracle€¦ · A Taleo Scheduling Center...

BP(A|S)
Taleo 10
Taleo Scheduling CenterConfiguration Guide
March, 2010

Configuration Guide Taleo Scheduling Center i
Confidential Information and Notices
Confidential InformationThe recipient of this document (hereafter referred to as "the recipient") agrees that the Confidential Information disclosed herein by Taleo shall be retained in confidence by the recipient, and its respective employees, affiliates and/or subsidiaries.
For the purpose herein, the term "Confidential Information" shall mean the following:
1. Any information, know-how, data, process, technique, design, drawing, program, formula or test data, work in process, business plan, sales, suppliers, customer, employee, investor or business information contained in a document, whether in written, graphic, or electronic form; or
2. Any document, diagram, or drawing which is either conspicuously marked as "Confidential", known or reasonably known by the other party to be confidential, or is of a proprietary nature, and is learned or disclosed in the course of discussions, demonstrations, or other collaboration undertaken between the parties.
Limited Rights Notice (Dec 2007)1. These data are submitted with limited rights under Subcontract No. 6896589. These data may
be reproduced and used by the Government with the express limitation that they will not, without written permission of the Contractor, be used for purposes of manufacture nor disclosed outside the Government; except that the Government may disclose these data outside the Government for the following purposes, if any; provided that the Government makes such disclosure subject to prohibition against further use and disclosure: None.
2. This notice shall be marked on any reproduction of these data, in whole or in part.
© 2010 Taleo Corporation. Do not reproduce without the written permission of Taleo Corporation.

Configuration Guide Taleo Scheduling Center ii
Table of Contents
Confidential Information and Notices .................................................................. i
Taleo Scheduling Center ConfigurationUser Access ...................................................................................................1-1
Administrator User .....................................................................................1-1Scheduling Center User ..............................................................................1-1Granting User Access to the Taleo Scheduling Center ...................................1-2
Screening Services .........................................................................................1-3Screening Service .......................................................................................1-3Input Field .................................................................................................1-4Result Field ................................................................................................1-5Result Set Field ..........................................................................................1-6Creating a Screening Service ......................................................................1-7Activating a Screening Service .....................................................................1-7Adding a Screening Service to a Candidate Selection Workflow .....................1-7Creating a Screening Service Field ..............................................................1-8Creating a Phase .......................................................................................1-8Deactivating a Screening Service .................................................................1-8Deleting a Message Template from a Screening Service ................................1-9Deleting a Screening Service Field ...............................................................1-9Editing a Screening Service .........................................................................1-9Editing a Screening Service Field ...............................................................1-10Previewing a Screening Service User-defined Form ......................................1-10Editing a Service Label .............................................................................1-10Previewing a Screening Service User-defined Form ......................................1-11Previewing a Service Label ........................................................................1-11
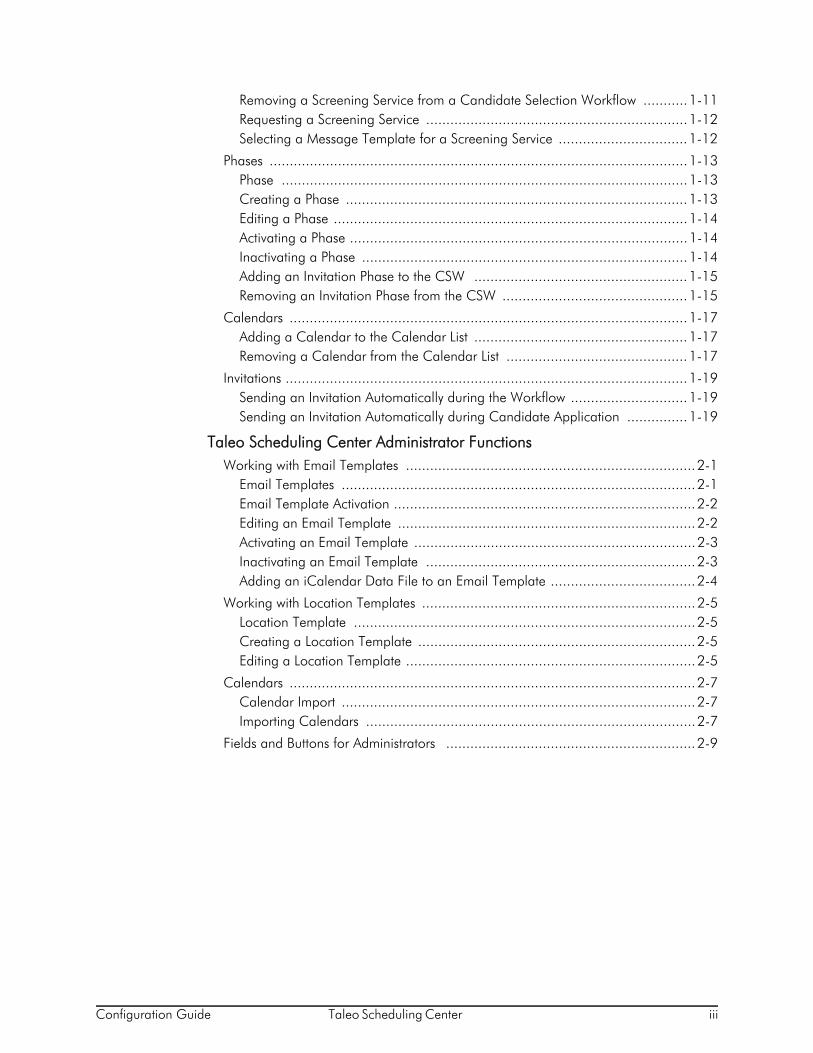
Configuration Guide Taleo Scheduling Center iii
Removing a Screening Service from a Candidate Selection Workflow ...........1-11Requesting a Screening Service .................................................................1-12Selecting a Message Template for a Screening Service ................................1-12
Phases ........................................................................................................1-13Phase .....................................................................................................1-13Creating a Phase .....................................................................................1-13Editing a Phase ........................................................................................1-14Activating a Phase ....................................................................................1-14Inactivating a Phase .................................................................................1-14Adding an Invitation Phase to the CSW .....................................................1-15Removing an Invitation Phase from the CSW ..............................................1-15
Calendars ...................................................................................................1-17Adding a Calendar to the Calendar List .....................................................1-17Removing a Calendar from the Calendar List .............................................1-17
Invitations ....................................................................................................1-19Sending an Invitation Automatically during the Workflow .............................1-19Sending an Invitation Automatically during Candidate Application ...............1-19
Taleo Scheduling Center Administrator FunctionsWorking with Email Templates ........................................................................2-1
Email Templates ........................................................................................2-1Email Template Activation ...........................................................................2-2Editing an Email Template ..........................................................................2-2Activating an Email Template ......................................................................2-3Inactivating an Email Template ...................................................................2-3Adding an iCalendar Data File to an Email Template ....................................2-4
Working with Location Templates ....................................................................2-5Location Template .....................................................................................2-5Creating a Location Template .....................................................................2-5Editing a Location Template ........................................................................2-5
Calendars .....................................................................................................2-7Calendar Import ........................................................................................2-7Importing Calendars ..................................................................................2-7
Fields and Buttons for Administrators ..............................................................2-9

BP(A|S)
Taleo Scheduling CenterConfiguration
• User Access . . . . . . . . . . . . . . . . . . . . . . . . . . . . . . . . . . . . . . . . . . . . . . . . 1-1
• Screening Services . . . . . . . . . . . . . . . . . . . . . . . . . . . . . . . . . . . . . . . . . . . 1-3
• Phases . . . . . . . . . . . . . . . . . . . . . . . . . . . . . . . . . . . . . . . . . . . . . . . . . . . 1-13
• Calendars . . . . . . . . . . . . . . . . . . . . . . . . . . . . . . . . . . . . . . . . . . . . . . . . 1-17
• Invitations. . . . . . . . . . . . . . . . . . . . . . . . . . . . . . . . . . . . . . . . . . . . . . . . . 1-19

Configuration Guide Taleo Scheduling Center 1-1
Taleo Scheduling Center Configuration User Access
User Access
Administrator UserA Taleo Scheduling Center Administrator is a user that has all permissions, for all calendars in the Taleo Scheduling Center.
Detailed Description
The Taleo Scheduling Center has an Administrator level of access which allows a user to create, manage or edit all calendars. The Administrator user can also grant permissions to other users for the ownership or access to calendars. A user that has been granted an Administrator user type permission has all the permissions of a Read-Only, Mark Arrived/No Show, Manage Timeslots and Administer Calendars user.
A Taleo Scheduling Center Administrator user does not necessarily have Administrator rights for the Recruiting Center.
The administrator is the only user that can assign ownership of a calendar to a user.
An Administrator is a user that was granted the Manage Scheduling Center user type permission by a Taleo 10 Administrator in SmartOrg Administration.
Benefits
• Allows a user to create calendars.
• Allows a user to grant permissions to users.
• Allows a user to grant calendar ownership.
• Allows a user to efficiently manage candidate appointments.
Scheduling Center UserA Scheduling Center user is a user that has been granted access to the Scheduling Center.
Detailed Description
Users can be granted one of two user type permissions by a Taleo 10 Administrator in SmartOrg Administration:
The Access Scheduling Center user type permission only gives users access to the Scheduling Center. The functions users will be allowed to perform in the Scheduling Center will depend on the Calendar Role they will be granted. Users can be granted the following Calendar Roles:
• Read-Only• Mark Show/No Show• Manage Timeslots• Schedule Appointments• Administer Calendars• Calendar Owner

Configuration Guide Taleo Scheduling Center 1-2
Taleo Scheduling Center Configuration User Access
The Create calendars and access Scheduling Center user type permission gives users the ability to create calendars via the Add New Calendar link in Scheduling Center. Users granted this permission will automatically be assigned the Calendar Owner calendar role (although the creator does not have to be the owner). Users with this user type permission will still need to be assigned calendar roles for other calendars they do not own or create.
Users granted the Create calendars and access Scheduling Center user type permission can choose another Calendar Owner or remain the Calendar Owner. However, the users granted the Create calendars and access Scheduling Center user type permission will always keep the Calendar Owner calendar role allowing them to go back to the calendar after creation.
The Create calendars and access Scheduling Center user type permission should be used to grant users the ability to create calendars without granting full Scheduling Center Administration rights.
Granting User Access to the Taleo Scheduling CenterTo be able to access the Taleo Scheduling Center, users must be granted a user type permission by an Administrator of the Recruiting Center.
Prerequisite
The Manage User Types and the Access Administration user type permissions grant users access to this feature.
The user being granted access to the Taleo Scheduling Center must be active.
Administrator must know the user type assigned to the user.
Users cannot grant themselves access to the Taleo Scheduling Center.
Configuration > [SmartOrg] Administration > User Types
Steps
1. In the User Types list, select a user type.
2. Click Select next to Functional Domains.
3. Click Recruiting.
4. Click Edit next to Scheduling Center.
5. Select a user type permission.
Result
User with this user type now has access to the Scheduling Center screening service.
Next Step
User must try at least once, unsuccessfully, to sign in to the Taleo Scheduling Center. Only then will the Administrator be able to grant the user permissions for Taleo Scheduling Center.
Configuration Guide Taleo Scheduling Center 1-3
Taleo Scheduling Center Configuration Screening Services
Screening Services
Screening ServiceAn organization can choose to have external partners provide specialized screening services.
Detailed Description
An organization can choose to have some services executed by a third party. A screening services partner can supply services such as:
• candidate assessment
• background check
• tax credit eligibility
• interview guides
• interview scheduling
• validated tests to identify and measure a candidate’s qualifications, motivations, abilities and eligibility
Screening services must be activated by the support service before they can be used in a requisition flow. Services are sourced to the application using an external tool, and enabled by default if the service does not require any additional configuration.
Once a service is made available by the support service, the service can be activated or deactivated by the system administrator and made available or not to users when creating a requisition.
All screening services have the same properties, however, the settings of these properties will vary according to the service. The system administrator can configure the screening service i.e. modify input fields, phases, etc.
The languages in which an external service is available depend on the languages used by the service providers and vendors.
Screening services are available to users provided they have been granted the user type permission. User type permissions are granted by an administrators through the SmartOrg product.
Benefits
• Allows an organization to delegate specialized services to third party providers.
• Allows an organization to concentrate resources on recruiting services.
Configuration
User Type Permissions
Name Location
Access Screening Services configuration Configuration > [SmartOrg] Administration > User Types > Recruiting > Administration

Configuration Guide Taleo Scheduling Center 1-4
Taleo Scheduling Center Configuration Screening Services
Input FieldAn input field is a specified area of the application where a user must enter or choose information to request a service.
Detailed Description
An input field is a specified area of the application where the user must enter or choose information that will be sent to request a partner service. Input fields used in the application are specific to the service, therefore depending on the service used, the fields displayed in the application will differ from one service to another.
The properties of an input field are:
• Code: The internal name of the input field. The code is a read-only property.
• Name: The label of the field used in the requisition file. Depending on the service definition, the name can be an editable property.
• Domain: The type of field. The domain is a read only property. The possible values are:
• Text• Multilingual text• Numerical• Selection• Date• Date UTC sensitive• Boolean
• Mandatory: If the service definition specifies the field as mandatory, then the input field will always be mandatory. If the service definition specifies the input field as optional, then the client will be able to configure the field as being either mandatory or not.
• Default Value: this is the value of the field used by default by the system. Depending on the service definition, this can be an editable property.
Input fields are displayed in the requisition file under the Screening section.
Benefits
• Allows a system administrator to specify if input fields are mandatory or not therefore making sure that important information is supplied.
• Allows a system administrator to customize the labels of an input field.
Services related user type permissions are grouped under the Reruiting functional domain.
Configuration > [SmartOrg] Administration > User Types > Recruiting > Other
User Type Permissions
Name Location

Configuration Guide Taleo Scheduling Center 1-5
Taleo Scheduling Center Configuration Screening Services
Configuration
Result FieldA result field is a field for which a partner service will send one result value per service request.
Detailed Description
A result field is a field for which a partner service will send one result value per service request. Result fields are specific to the service, therefore depending on the partner service used, the result fields displayed will differ from one service to another. When requesting an external partner service, the result fields will be displayed to the service partner to enter or select the results of the requested service.
The properties of a result field are:
• Domain: The type of field. The domain is a read only property. The possible values are:
• Text• Multilingual text• Numerical• Selection• Date time sensitive• Boolean
• Code: The internal name of the result field. The code is a read-only property.
• Name: The label of the field used to return results.Depending on the service definition, this can be an editable property.
• Default Value: depending on the service definition, this can be an editable property.
Result fields are never mandatory because the service partner can send the value of the results not all at once. Once the service partner sends back the results to the application, the application from which the service was requested will use a predetermined user-defined form to display the results supplied by the partner.
Benefits
• Allows an administrator to customize the labels of a fields
User Type Permissions
Name Location
Access Screening Services configuration Configuration > [SmartOrg] Administration > User Types > Recruiting > Administration

Configuration Guide Taleo Scheduling Center 1-6
Taleo Scheduling Center Configuration Screening Services
Configuration
Result Set FieldA result set field is a field for which the partner will send more than one result value per service request.
Detailed Description
A result set field is a field for which the partner will send more than one result value per service request. Result set fields are specific to the service, therefore depending on the partner service used, the fields displayed will differ from one service to another. When requesting an external partner service, the result set fields will be displayed to the service partner to enter or select the results of the selected service:
The properties of a result set field are:
• Domain: The type of field. The domain is a read only property. The possible values are:
• Text• Multilingual text• Numerical• Selection• Date• Date time sensitive• Boolean
• Code: The internal name of the result set field. The code is a read-only property t
• Name: The label of the field used to return results.Depending on the service definition, this can be an editable property.
• Default Value: this is the value of the field used by default by the system. Depending on the service definition, this can be an editable property.
Result fields are never mandatory because the service partner can send the value of the results not all at once.
Benefits
• Allows an administrator to customize the labels of a fields.
User Type Permissions
Name Location
Access Screening Services configuration Configuration > [SmartOrg] Administration > User Types > Recruiting > Administration

Configuration Guide Taleo Scheduling Center 1-7
Taleo Scheduling Center Configuration Screening Services
Configuration
Creating a Screening ServiceA system administrator cannot create a screening service. Screening services are provided with the system.
Next Step
Activating a screening service.
Activating a Screening ServicePrerequisite
The Access Screening Services configuration and the Access Administration user type permissions must be granted in the SmartOrg User Type feature.
The screening service must be inactive.
Configuration > [Recruiting] Administration > Screening Services
Steps
1. Click the name of a service.
2. Click Activate located next to the name of the service.
Result
The service is available in the Recruiting Center when users request an external service.
Adding a Screening Service to a Candidate Selection WorkflowPrerequisite
The Access Screening Services configuration and the Access Administration user type permissions grant users access to this feature.
Configuration > [Recruiting] Administration > Screening Services
Steps
1. Click on the name of a service.
2. Click Create next to CSW Action.
3. Select values in the fields as required.
4. Click Save.
User Type Permissions
Name Location
Access Screening Services configuration Configuration > [SmartOrg] Administration > User Types > Recruiting > Administration

Configuration Guide Taleo Scheduling Center 1-8
Taleo Scheduling Center Configuration Screening Services
Result
When the candidate selection workflow will be used in the Recruiting Center, the execution of the screening service will be carried out automatically.
Creating a Screening Service FieldA system administrator cannot create an input, result or result set field for a screening service.
Next Step
Editing a screening service field.
Creating a PhasePrerequisite
The Access Screening Services configuration and the Access Administration user type permissions grant users access to this feature.
Configuration > [Recruiting] Administration > Selections > Large Selections tab > Custom tab
Steps
1. In the Custom tab, click the elements link located on the same row as the service for which you are creating a phase.
2. Select New.
3. Complete the fields.
4. Click Done.
Result
A new phase is now available in the drop down list under phase in the CSW Action section of the service.
Next Step
Adding an invitation phase to a requisition.
Deactivating a Screening ServicePrerequisite
The Access Screening Services configuration and the Access Administration user type permissions must be granted in the SmartOrg User Type feature.
Configuration > [Recruiting] Administration > Screening Services
Steps
1. Click the name of a service.
2. Click Deactivate located next to the name of the service.
Result
The service is no longer available in the Recruiting Center when requesting a service.

Configuration Guide Taleo Scheduling Center 1-9
Taleo Scheduling Center Configuration Screening Services
Deleting a Message Template from a Screening ServicePrerequisite
The Access Screening Services configuration and the Access Administration user type permissions must be granted in the SmartOrg User Type feature.
Configuration > [Recruiting] Administration > Screening Services
Steps
1. Click on the name of a service.
2. Click Edit next to Correspondence.
3. Click Delete next to a message template
4. Click Save.
Result
The template can no longer be used when requesting a screening service.
Deleting a Screening Service FieldA system administrator cannot delete an input, result or result set field of a screening service.
Next Step
Editing a screening service field.
Editing a Screening ServicePrerequisite
The Access Screening Services configuration and the Access Administration user type permissions must be granted in the SmartOrg User Type feature.
Configuration > [Recruiting] Administration > Screening Services
Steps
1. Click the name of a service.
2. Click Edit next to Properties.
3. Modify the settings and properties as required.
4. Click Save.
Result
The modifications applied to the properties and settings of the service are displayed in the service page and in Recruiting Center under the Screening section of a requisition.
Next Step
Configuring a language.
Configuration Guide Taleo Scheduling Center 1-10
Taleo Scheduling Center Configuration Screening Services
Editing a Screening Service FieldPrerequisite
The Access Screening Services configuration and the Access Administration user type permissions must be granted in the SmartOrg User Type feature.
Configuration > [Recruiting] Administration > Screening Services
Steps
1. Click the name of a service.
2. Click the name of a field.
3. Click Edit next to properties.
4. Edit the information.
5. Click Save.
Result
The input, result or result set fields of the screening service re customized to a specific need.
Previewing a Screening Service User-defined FormPrerequisite
The Access Screening Services configuration and the Access Administration user type permissions must be granted in the SmartOrg User Type feature.
Configuration > [Recruiting] Administration > Screening Services
Steps
1. Click on a screening service.
2. Click Preview this form located beside the form you want to preview.
Result
The final layout of a user-defined form used in a screening service is displayed to the system administrator.
Editing a Service LabelPrerequisite
The Access Screening Services configuration and the Access Administration user type permissions must be granted in the SmartOrg User Type feature.
Configuration > [Recruiting] Administration > Screening Services
Steps
1. Click on the name of a service.
2. Click Edit next to Labels.
3. Complete the fields as required.
4. Click Save.

Configuration Guide Taleo Scheduling Center 1-11
Taleo Scheduling Center Configuration Screening Services
Result
When a screening request is sent to a candidate, labels will reflect changes in the e-mail sent to the candidate.
Next Step
Previewing a service label.
Previewing a Screening Service User-defined FormPrerequisite
The Access Screening Services configuration and the Access Administration user type permissions must be granted in the SmartOrg User Type feature.
Configuration > [Recruiting] Administration > Screening Services
Steps
1. Click on a screening service.
2. Click Preview this form located beside the form you want to preview.
Result
The final layout of a user-defined form used in a screening service is displayed to the system administrator.
Previewing a Service LabelPrerequisite
The Access Screening Services configuration and the Access Administration user type permissions must be granted in the SmartOrg User Type feature.
Configuration > [Recruiting] Administration > Screening Services
Steps
1. Click on the name of a service.
2. Click Preview next to Labels.
Result
The labels will be displayed as the candidate will see them.
Removing a Screening Service from a Candidate Selection WorkflowPrerequisite
The Access Screening Services configuration and the Access Administration user type permissions must be granted in the SmartOrg User Type feature.
Configuration > [Recruiting] Administration > Screening Services
Steps
Configuration Guide Taleo Scheduling Center 1-12
Taleo Scheduling Center Configuration Screening Services
1. Click on the name of a screening service.
2. In the CSW Actions section of the service page, click Remove located beside the CSW you want to remove.
Result
This action will no longer be executed during the candidate selection workflow.
Requesting a Screening ServicePrerequisite
A screening service must be available in the application.
A user type permissions grants users access to this feature.
Candidate must be in a selection process.
Steps
1. In the Candidate list, click on the name of a candidate.
2. In the More Actions list, select Request Screening Service.
3. Select a service from the Available Service drop-down list.
4. Comment is necessary.
5. Click Done.
Result
Candidate will receive a request from a screening service.
Selecting a Message Template for a Screening ServicePrerequisite
The Access Screening Services configuration and the Access Administration user type permissions must be granted in the SmartOrg User Type feature.
Configuration > [Recruiting] Administration > Screening Services
Steps
1. Click on the name of a service.
2. Click Edit next to Correspondence.
3. Click select
4. Select a Message template.
5. Click Select.
6. Click Save.
Result
The new templates will be used when requesting a screening service.
Configuration Guide Taleo Scheduling Center 1-13
Taleo Scheduling Center Configuration Phases
Phases
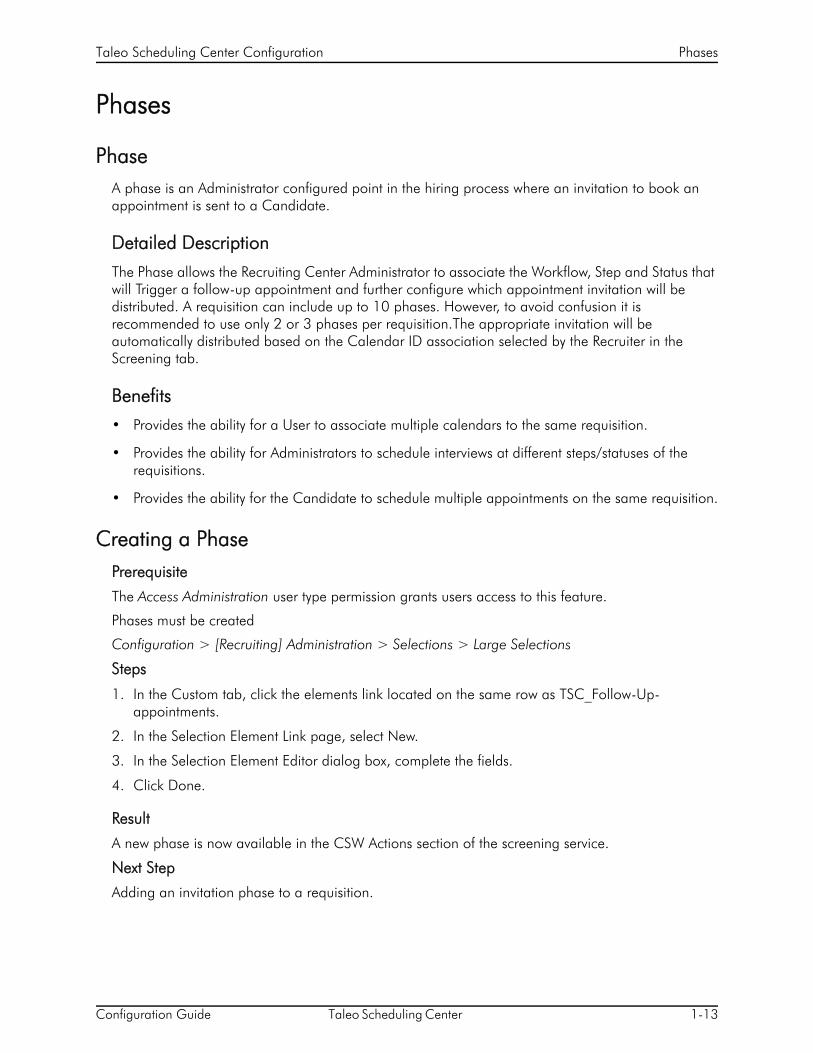
PhaseA phase is an Administrator configured point in the hiring process where an invitation to book an appointment is sent to a Candidate.
Detailed Description
The Phase allows the Recruiting Center Administrator to associate the Workflow, Step and Status that will Trigger a follow-up appointment and further configure which appointment invitation will be distributed. A requisition can include up to 10 phases. However, to avoid confusion it is recommended to use only 2 or 3 phases per requisition.The appropriate invitation will be automatically distributed based on the Calendar ID association selected by the Recruiter in the Screening tab.
Benefits
• Provides the ability for a User to associate multiple calendars to the same requisition.
• Provides the ability for Administrators to schedule interviews at different steps/statuses of the requisitions.
• Provides the ability for the Candidate to schedule multiple appointments on the same requisition.
Creating a PhasePrerequisite
The Access Administration user type permission grants users access to this feature.
Phases must be created
Configuration > [Recruiting] Administration > Selections > Large Selections
Steps
1. In the Custom tab, click the elements link located on the same row as TSC_Follow-Up-appointments.
2. In the Selection Element Link page, select New.
3. In the Selection Element Editor dialog box, complete the fields.
4. Click Done.
Result
A new phase is now available in the CSW Actions section of the screening service.
Next Step
Adding an invitation phase to a requisition.

Configuration Guide Taleo Scheduling Center 1-14
Taleo Scheduling Center Configuration Phases
Editing a PhaseAn administrator user can edit the name of an existing phase.
Prerequisite
The Access Administration user type permissions grants users access to this feautre.
A phase must be created in the Recruiting Administration.
Configuration > [Recruiting] Administration > Selections > Large Selections
Steps
1. In the Custom tab, click the Elements link located on the same line as TSC_Follow-Up-appointments.
2. In the Selection Element List, select an existing appointment phase.
3. In the Selection Element Editor dialog box, complete the fields.
4. Click Done.
Result
The selected phase is now edited and remains available in the CSW Actions section of the screening service.
Activating a PhaseTo add a phase to a workflow, the phase must first be activated in the recruiting.
Prerequisite
The Access Administration user type permissions grants users access to this feature.
Configuration > [Recruiting] Administration > Selections > Large Selections
Steps
1. In the Custom tab, click the Elements link located on the same row as TSC_Follow-Up-appointments.
2. In the Selection Element List, click on a phase.
3. In the Selection Element Editor window, choose the radio button to activate the phase.
4. Click Done.
Result
The phase is now activated in the drop down list under phases, in the CSW Action section of the screening service.
Inactivating a PhaseA phase cannot be added to a workflow if it is inactivated in the Recruiting Center.
PrerequisiteT
The Access Administration user type permission grants users access to this feature.
Configuration > [Recruiting] Administration > Selections > Large Selections
Configuration Guide Taleo Scheduling Center 1-15
Taleo Scheduling Center Configuration Phases
Steps
1. In the Custom tab, click the Elements link located on the same row as TSC_Follow-Up-appointments.
2. In the Selection Element List, click on a phase.
3. In the Selection Element Editor window, choose the radio button to inactivate the phase.
4. Click Done.
Result
The phase is now inactivated in the drop down list under phases, in the CSW Action section of the screening services.
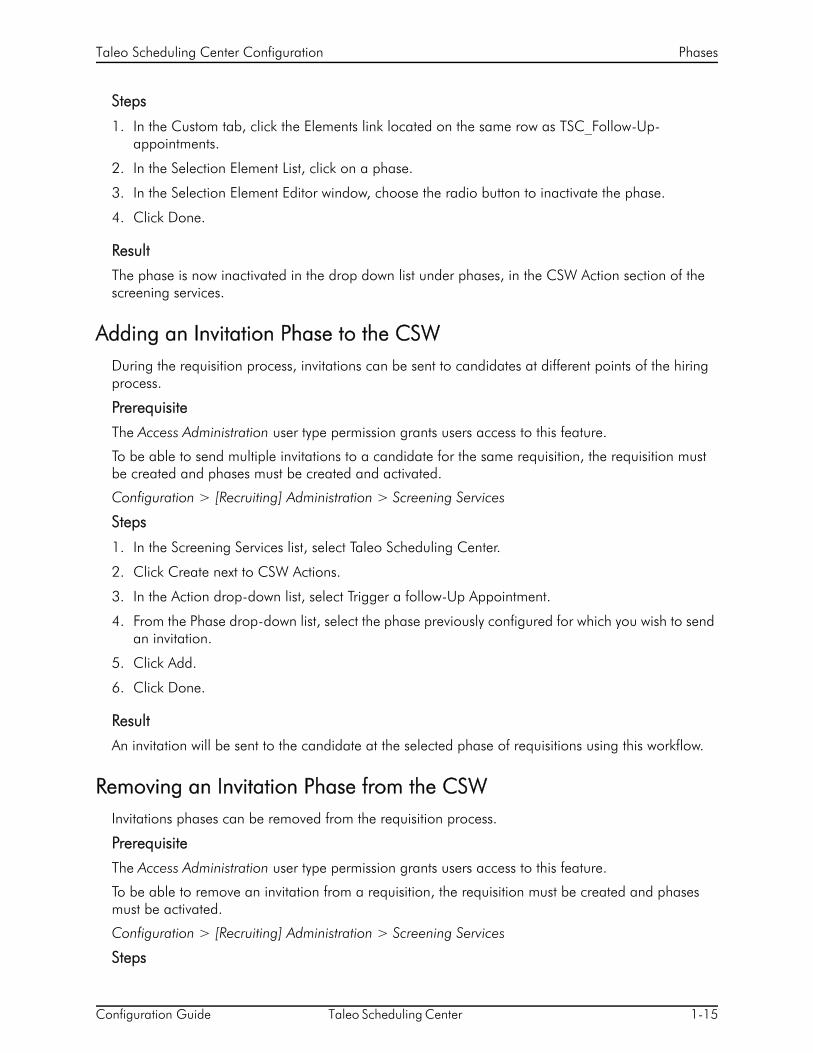
Adding an Invitation Phase to the CSW During the requisition process, invitations can be sent to candidates at different points of the hiring process.
Prerequisite
The Access Administration user type permission grants users access to this feature.
To be able to send multiple invitations to a candidate for the same requisition, the requisition must be created and phases must be created and activated.
Configuration > [Recruiting] Administration > Screening Services
Steps
1. In the Screening Services list, select Taleo Scheduling Center.
2. Click Create next to CSW Actions.
3. In the Action drop-down list, select Trigger a follow-Up Appointment.
4. From the Phase drop-down list, select the phase previously configured for which you wish to send an invitation.
5. Click Add.
6. Click Done.
Result
An invitation will be sent to the candidate at the selected phase of requisitions using this workflow.
Removing an Invitation Phase from the CSWInvitations phases can be removed from the requisition process.
Prerequisite
The Access Administration user type permission grants users access to this feature.
To be able to remove an invitation from a requisition, the requisition must be created and phases must be activated.
Configuration > [Recruiting] Administration > Screening Services
Steps

Configuration Guide Taleo Scheduling Center 1-16
Taleo Scheduling Center Configuration Phases
1. In the Screening Services list, select a screening service.
2. In the CSW Actions section, click Remove next to the appropriate Candidate selection workflow.
Result
The invitation phase is removed from the workflow.
Configuration Guide Taleo Scheduling Center 1-17
Taleo Scheduling Center Configuration Calendars
Calendars
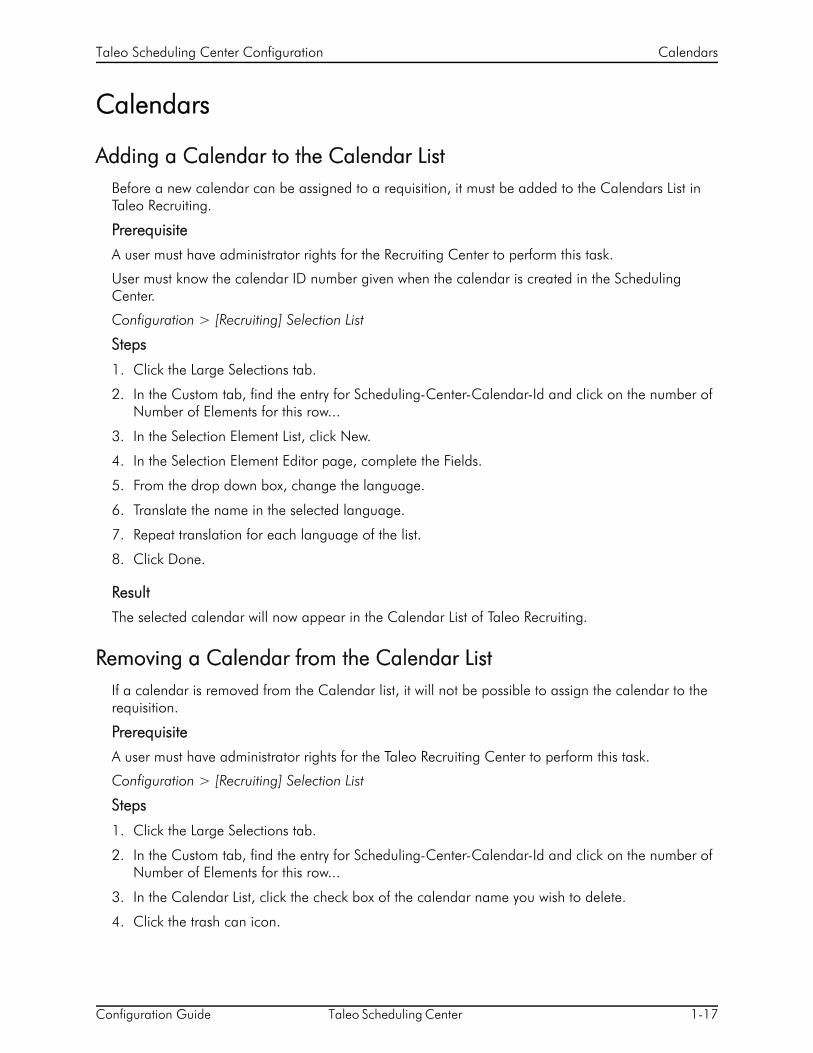
Adding a Calendar to the Calendar ListBefore a new calendar can be assigned to a requisition, it must be added to the Calendars List in Taleo Recruiting.
Prerequisite
A user must have administrator rights for the Recruiting Center to perform this task.
User must know the calendar ID number given when the calendar is created in the Scheduling Center.
Configuration > [Recruiting] Selection List
Steps
1. Click the Large Selections tab.
2. In the Custom tab, find the entry for Scheduling-Center-Calendar-Id and click on the number of Number of Elements for this row...
3. In the Selection Element List, click New.
4. In the Selection Element Editor page, complete the Fields.
5. From the drop down box, change the language.
6. Translate the name in the selected language.
7. Repeat translation for each language of the list.
8. Click Done.
Result
The selected calendar will now appear in the Calendar List of Taleo Recruiting.
Removing a Calendar from the Calendar ListIf a calendar is removed from the Calendar list, it will not be possible to assign the calendar to the requisition.
Prerequisite
A user must have administrator rights for the Taleo Recruiting Center to perform this task.
Configuration > [Recruiting] Selection List
Steps
1. Click the Large Selections tab.
2. In the Custom tab, find the entry for Scheduling-Center-Calendar-Id and click on the number of Number of Elements for this row...
3. In the Calendar List, click the check box of the calendar name you wish to delete.
4. Click the trash can icon.

Configuration Guide Taleo Scheduling Center 1-18
Taleo Scheduling Center Configuration Calendars
Result
The selected calendar will no longer appear in the Calendar List of Taleo Recruiting.
Configuration Guide Taleo Scheduling Center 1-19
Taleo Scheduling Center Configuration Invitations
Invitations
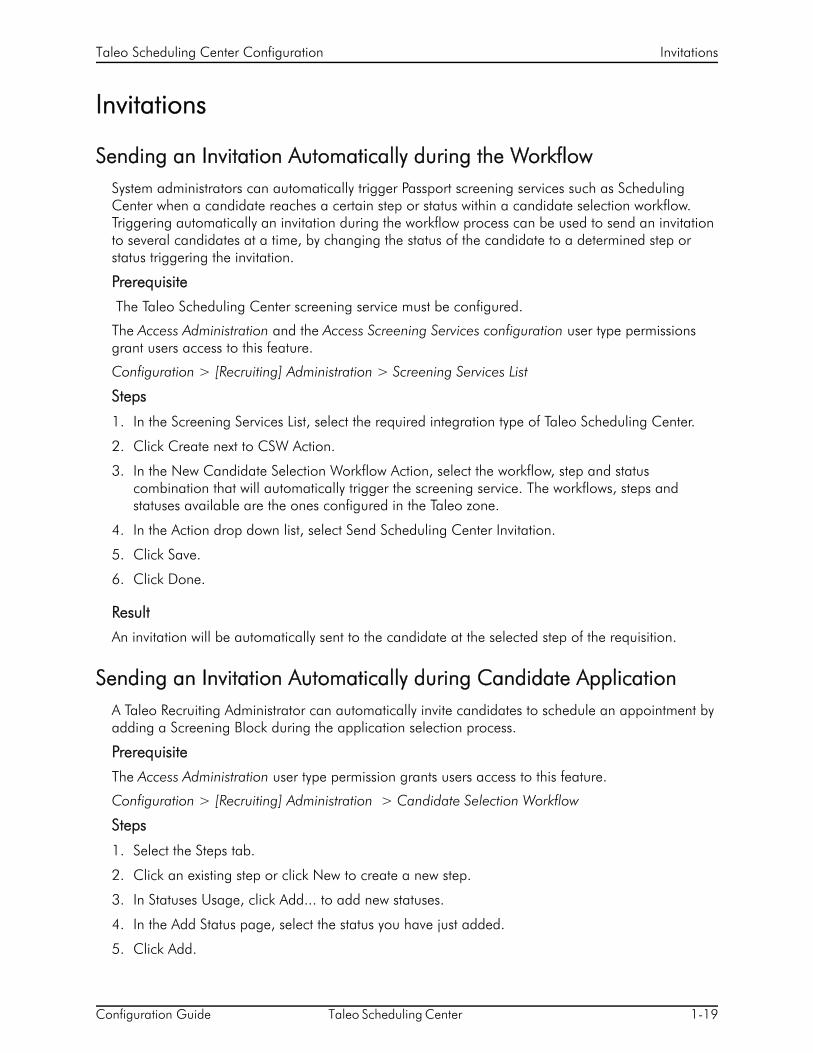
Sending an Invitation Automatically during the WorkflowSystem administrators can automatically trigger Passport screening services such as Scheduling Center when a candidate reaches a certain step or status within a candidate selection workflow. Triggering automatically an invitation during the workflow process can be used to send an invitation to several candidates at a time, by changing the status of the candidate to a determined step or status triggering the invitation.
Prerequisite
The Taleo Scheduling Center screening service must be configured.
The Access Administration and the Access Screening Services configuration user type permissions grant users access to this feature.
Configuration > [Recruiting] Administration > Screening Services List
Steps
1. In the Screening Services List, select the required integration type of Taleo Scheduling Center.
2. Click Create next to CSW Action.
3. In the New Candidate Selection Workflow Action, select the workflow, step and status combination that will automatically trigger the screening service. The workflows, steps and statuses available are the ones configured in the Taleo zone.
4. In the Action drop down list, select Send Scheduling Center Invitation.
5. Click Save.
6. Click Done.
Result
An invitation will be automatically sent to the candidate at the selected step of the requisition.
Sending an Invitation Automatically during Candidate ApplicationA Taleo Recruiting Administrator can automatically invite candidates to schedule an appointment by adding a Screening Block during the application selection process.
Prerequisite
The Access Administration user type permission grants users access to this feature.
Configuration > [Recruiting] Administration > Candidate Selection Workflow
Steps
1. Select the Steps tab.
2. Click an existing step or click New to create a new step.
3. In Statuses Usage, click Add... to add new statuses.
4. In the Add Status page, select the status you have just added.
5. Click Add.

Configuration Guide Taleo Scheduling Center 1-20
Taleo Scheduling Center Configuration Invitations
6. Select a Step Progression Level.
7. Click Add.
8. In the Automatic Progression of Applications page, click Allow candidates to reach this status automatically when the (optional) conditions specified below are met.
9. In the Conditions section, select an existing condition, or click Create Condition... The New Condition page opens.
10.Complete the fields as required.
11.In the Workflows list, select an existing workflow, or click New to create a new one
12.Complete the fields as required.
13.In Steps Usage, click Add to add screening step, or click New to create a new one.
Result
An invitation is automatically sent to the candidate applying on a Careers Section.

BP(A|S)
Taleo Scheduling CenterAdministrator Functions
• Working with Email Templates . . . . . . . . . . . . . . . . . . . . . . . . . . . . . . . . . . . 2-1
• Working with Location Templates . . . . . . . . . . . . . . . . . . . . . . . . . . . . . . . . . 2-5
• Calendars . . . . . . . . . . . . . . . . . . . . . . . . . . . . . . . . . . . . . . . . . . . . . . . . . 2-7
• Fields and Buttons for Administrators . . . . . . . . . . . . . . . . . . . . . . . . . . . . . . 2-9

Configuration Guide Taleo Scheduling Center 2-1
Taleo Scheduling Center Administrator Functions Working with Email Templates
Working with Email Templates
Email TemplatesEmails sent via Taleo Scheduling Center can be configured to reflect organization communication style.
Enhancements
An Appointment Confirmed - Calendar Owner email template was created. When the candidate confirms an appointment, an email is automatically sent to the calendar owner.
An Appointment Cancelled - Candidate email template was created. When the user cancels an appointment, an email is automatically sent informing the candidate that the apppointment has been canceled.
iCalendar data files (.ics) can be added to the appointment confirmed email templates for the candidate and the calendar owner to add the appointment to their calendar.
Detailed Description
Administrators have the ability to configure system emails with their organization branding rather that having only one email model used by all zone users. If email templates are not configured, then the system default templates will be used. The following default types of email templates are supplied with the application:
• Appointment Cancelled -Candidate
• Appointment Confirmed
• Appointment confirmed - Calendar Owner• Appointment confirmed - Full Candidate Permissions• Appointment confirmed - No Permissions• Appointment confirmed - Cancel Only Permissions• Phone Confirmed - Full Candidate Permissions• Phone Confirmed - No Permissions• Phone Confirmed - Cancel Only Permissions
• Appointment Request
• Appointment Request - Full candidate Permissions• Phone appointment - Full Candidate Permissions
• Appointment Soon
• Appointment Reminder - Full Candidate Permissions• Appointment Reminder - Cancel Only Permissions• Appointment Reminder - No Permissions• Phone Reminder - Full Candidate Permissions• Phone Reminder - Cancel Only Permissions• Phone Reminder - No Permissions
The first part of the email type name represents in which instance the email will be used and the second part represents the candidate permission to whom the email will be sent.

Configuration Guide Taleo Scheduling Center 2-2
Taleo Scheduling Center Administrator Functions Working with Email Templates
Templates cannot be manually created, however default templates can be modified to the specific needs of your organization. Only one default template can exist for each type of email.
A template is edited either by typing text or by adding variables. These variables will automatically call information from the application and display it in the template.
The user can choose to attach an iCalendar data file (ICS file) to the Appointment Confirmed email templates. If the ICS file is attached to the email template, then the candidates and the owner of the calendar receiveing the email confirmation notification will be able to add the confirmation to their calendar.
For example, if the variable {Candidate.LastName}is used in the template then the last name of the candidate will be automatically included in the template by the system.
By default notifications are not sent automatically by the system, email are sent only if the user has set the Send email field to Yes.
Email templates can be configured for multiple languages.
Benefits
• Improved and enhanced communication between Users and Candidates regarding appointments.
• Taleo Scheduling Center emails can be configured to meet organization standards and requirements.
• Clients can control email content.
• Candidates can receive emails containing client specific content.
Email Template ActivationAllows a system administrator to choose if an email will be sent or not by the system.
Detailed Description
The administrator can choose to inactivate an email template meaning that emails using this template will not be sent to the candidate. All email templates are by default set to Active, that is emails based on the template are sent to the candidates by the system.
Activation or inactivation is automatically applied to every locale version of the calendar.
Benefits
• Allows administrators to choose which emails are sent out by the system.
Editing an Email TemplateAn email template can be modified to reflect the organization branding and standards.
Prerequisite
The Manage Scheduling Center user type permission grants users access to this feature.
Steps
1. In Taleo Scheduling Center, click on the Administration link.

Configuration Guide Taleo Scheduling Center 2-3
Taleo Scheduling Center Administrator Functions Working with Email Templates
2. In the Administration page, click on the Email Templates link.
3. In the Email Templates page, click on the name of the template you wish to edit.
4. In the Edit Email page, modify fields and add variables as required.
5. Click Update.
Result
Changes will reflect in the email sent using the modified email template.
Activating an Email TemplateAllows an administrator to have the system send to candidates emails using a specific template.
Prerequisite
The Manage Scheduling Center user type permission grants users access to this feature.
Email template must be inactive.
Steps
1. In the Scheduling Center, click the Administration link.
2. Click Email Templates.
3. In the Email Templates list, click on the name of a template.
4. Select Yes.
5. Click Update.
Result
Emails using this template will be sent by the system.
Inactivating an Email TemplateAllows the Taleo Scheduling Center Administrator to stop the system from sending emails to candidates.
Prerequisite
The Manage Scheduling Center user type permission grants users access to this feature.
Email template must be active.
Steps
1. In the Scheduling Center, click the Administration link.
2. In the Administration page, click Email Templates.
3. In the Email Templates list, click on the name of a template.
4. In the Edit page, select No.
5. Click Update.
Result
Emails using this template will no longer be sent by the system.

Configuration Guide Taleo Scheduling Center 2-4
Taleo Scheduling Center Administrator Functions Working with Email Templates
Adding an iCalendar Data File to an Email TemplatePrerequisite
A user type permission grants users access to this feature
A calendar role grants users access to this feature.
Taleo Scheduling Center > Administration > Email Templates.
Steps
1. Select an Appointment Confirmed email template.
2. Select Yes for the Send .ics field.
3. Click Save.
Result
When the email will be sent, the .ics file will be added to the email allowing the recipients to add the appointment to their calendar.

Configuration Guide Taleo Scheduling Center 2-5
Taleo Scheduling Center Administrator Functions Working with Location Templates
Working with Location Templates
Location TemplateInformation on how and where an interview will take place can be saved as a template for reuse purposes.
Detailed Description
In Taleo Scheduling Center, it is possible to create a template for location information. When a calendar is created, information on where or how an interview will be carried out must be completed. When creating a calendar, the administrator must choose the location where the appointment will take place. If templates are created for a specific location, information will be automatically populated into the fields when the calendar is created for a chosen location. The administrator can choose to use the location information as is, or to modify it. In this case, the changes will not be saved in the template and will apply only for that specific calendar. To save the changes into the template, the location must be modified and saved in the Location configuration pages.
Benefits
• Reduces the number of keystrokes required when creating a new calendar.
Creating a Location TemplateA location template can be created to automatically populate the information of the location fields used when creating a calendar.
Prerequisite
The Manage Scheduling Center user type permission grants users access to this feature.
Steps
1. In Taleo Scheduling Center, click on the Administration link.
2. In the Administration page, click on the Locations link.
3. In the Locations page, select the type of location from the Location Type drop down list.
4. In the Locations page, click Add New Location.
5. In the Location page, complete fields as required.
6. Click Save.
Result
Changes will reflect in the location template used to create a calendar. If this location is selected when creating a calendar, the information will be automatically populated in the fields of the new calendar.
Editing a Location TemplateA location template can be edited to reflect the information related to the organization.

Configuration Guide Taleo Scheduling Center 2-6
Taleo Scheduling Center Administrator Functions Working with Location Templates
Prerequisite
The Manage Scheduling Center user type permission grants users access to this feature.
Steps
1. In Taleo Scheduling Center, click on the Administration link.
2. In the Administration page, click on the Locations link.
3. In the Locatios page, click on the name of a template.
4. In the Location page, modify fields as required.
5. Click Save.
Result
Changes will reflect in the location template used to create a calendar.

Configuration Guide Taleo Scheduling Center 2-7
Taleo Scheduling Center Administrator Functions Calendars
Calendars
Calendar ImportAdministrators can import a large number of calendars to have them automatically created by the system.
Detailed Description
In cases where a large number of calendars need to be created, the Administrator can have the system automatically create several calendars at a time. The Administrator adds in a spreadsheet the information for each calendar needing to be created (name, scheduling cushion etc.). This information is uploaded to the system then calendars are automatically created with the information included in each row of the spreadsheet. Calendars are then downloaded into the Taleo Scheduling Center. Once these calendars are imported in the Taleo Scheduling Center, they are available to Administrators and Calendar Owners, but permissions will need to be granted for any other type of users for them to have access to these calendars. These calendars can be used as is in the Taleo Scheduling Center or edited.
Benefits
• Clients can create large volumes of calendars automatically.
• Calendar creation keystroke input is reduced.
Importing CalendarsAllows a system administrator to download calendars.
Prerequisite
The Manage Scheduling Center user type permission grants users access to this feature.
All spreadsheet fields must be completed.
Only one upload can be performed at a time.
Secondary locale information is optional.
Administration > Import Calendars
Steps
1. In the Import Calendar page, click the link of a template.
2. Click Open.
3. In the displayed spreadsheet, complete all fields for each calendar to be created.
4. Save the EXCEL file in a CSV format.
5. Log back in to the Taleo Scheduling Center.
6. In the Import Calendars page, click Browse to select the CSV file previously saved.
7. Select a type of calendar from the Select Calendar Type field (same type as for the CSV file).

Configuration Guide Taleo Scheduling Center 2-8
Taleo Scheduling Center Administrator Functions Calendars
8. Select if the first row of the spreadsheet contains headers or not.
9. Click Save.
Result
The spreadsheet is validated by the system, uploaded and then calendars are created in the Taleo Scheduling Center. Download can take several minutes for large imports.

Configuration Guide Taleo Scheduling Center 2-9
Taleo Scheduling Center Administrator Functions Fields and Buttons for Administrators
Fields and Buttons for Administrators
Each entry in the table includes a field or button, a description, possible values (when they are predefined), the part of the application to which the field applies.
Field Description Header
Action Selects an action to perform in the requisition process.
Screening Services
Active Calendar Allows the calendar to be used in a requisition for candidates to book appointments.
Calendars
Always Active Allows setting the phase to Always active in Taleo Recruiting Center.
Selection List
City The city the appointment will be held in and the municipal laws that apply.
Calendars
Code The number of the phase used to edit a selection element in Taleo Recruiting Administration.
Selection List
Country The country the appointments will be held in and the laws that apply.
Calendars
Description Describes the phase used to edit a selection element in the Taleo Recruiting Administration.
Selection List
Language check boxes The languages in which the calendar can be displayed to candidates.
Calendars
Phase Adds an invitation phase to the requisition.
Screening Services
Scheduling Cushion (in minutes) Applies to same day scheduling. Represents the amount of time prior to an appointment that a candidate can self-schedule. For example, if set to 60 minutes and the candidate is self-scheduling 30 minutes prior to the appointment, that appointment will be unavailable.
Timeslots
Scheduling Horizon (in days) How long in advance a candidate may book an appointment on this calendar. The default value is 14 days. Note: This attribute can be edited once appointments have been made.
Timeslots
Select As Primary Locale Displays the language in which the calendar will be displayed to the administrator and recruiters. Note: If only one language is offered, it will default to the current language and the button will automatically be checked.
Calendars

Configuration Guide Taleo Scheduling Center 2-10
Taleo Scheduling Center Administrator Functions Fields and Buttons for Administrators
State/Province The state or province in which the appointments will be held. This will determine the state/provincial laws that applies to the appointments.
Calendars
Timezone Ttimezones worldwide from which the appointments on the calendar will be booked. This attribute cannot be edited once appointments have been made.
Calendars
Zone User Users to whom you can assign permissions.
Permissions
Field Description Header