Tactical Handcuff Basic Certification · Products designed for your ... ASP, INC Box 1794 2511 E...
92
Basic Certification (ABC) Course Syllabus Tactical Handcuff
Transcript of Tactical Handcuff Basic Certification · Products designed for your ... ASP, INC Box 1794 2511 E...
Basic Certification (ABC) Course Syllabus
Tactical Handcuff

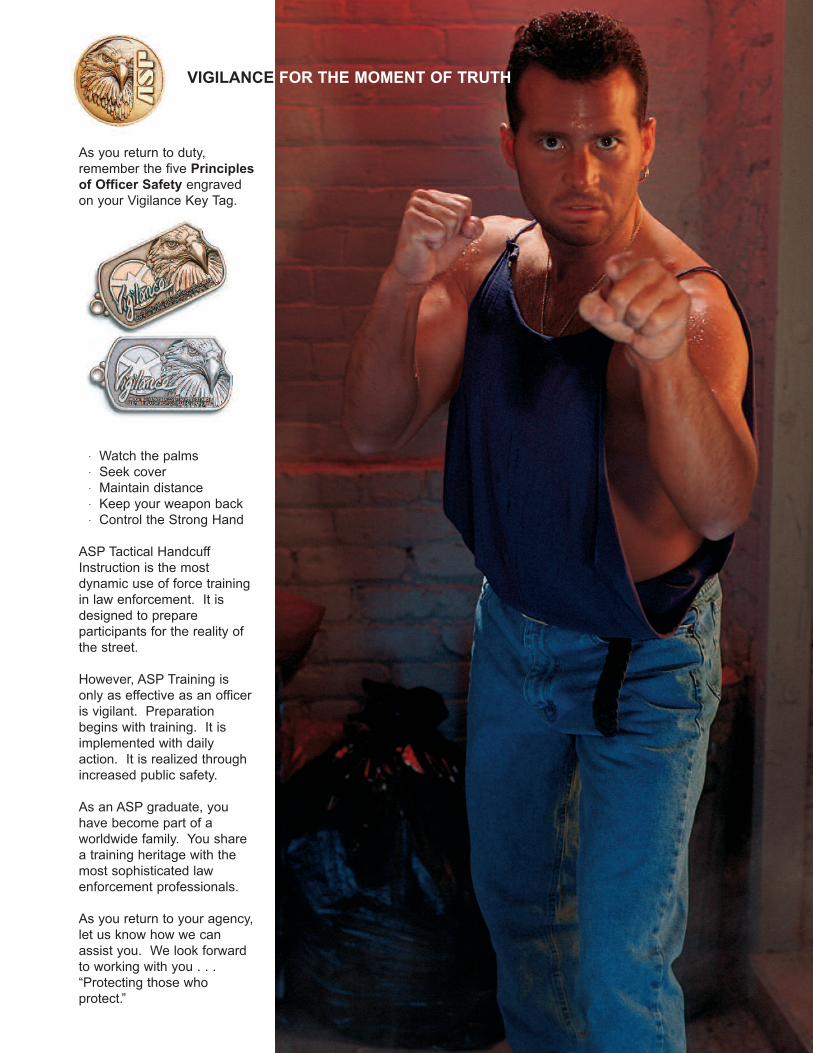
As you return to duty,
remember the five Principles
of Officer Safety engraved
on your Vigilance Key Tag.
· Watch the palms· Seek cover· Maintain distance· Keep your weapon back· Control the Strong Hand
ASP Tactical Handcuff
Instruction is the most
dynamic use of force training
in law enforcement. It is
designed to prepare
participants for the reality of
the street.
However, ASP Training is
only as effective as an officer
is vigilant. Preparation
begins with training. It is
implemented with daily
action. It is realized through
increased public safety.
As an ASP graduate, you
have become part of a
worldwide family. You share
a training heritage with the
most sophisticated law
enforcement professionals.
As you return to your agency,
let us know how we can
assist you. We look forward
to working with you . . .
“Protecting those who
protect.”
VIGILANCE FOR THE MOMENT OF TRUTH
“Protecting thosewho protect . . .”
ASP Basic Certification (ABC) is themost dynamic restraint training in lawenforcement. The program is basedupon a conceptual model for the use offorce . . . the Confrontational Continuum.ASP Restraint training has been implemented by agencies throughout theworld. Thousands of police officers havelearned first hand that ASP techniqueswork under the stress of actual streetconfrontations.
This 4-hour competency based trainingprogram teaches the ASP principles ofcontrol. Here are easily remembered,incredibly effective handcuff techniques.Here is training that can be used by allofficers under actual field conditions. Here are court defensible proceduresthat have reduced liability while improving officer safety. This is the training program that revolutionizedpolice handcuff instruction.
ASP Basic Certification . . . the most tactically sophisticated handcuff trainingin law enforcement.
9
780965 054737
51000
ISBN 0-9650547-3-X
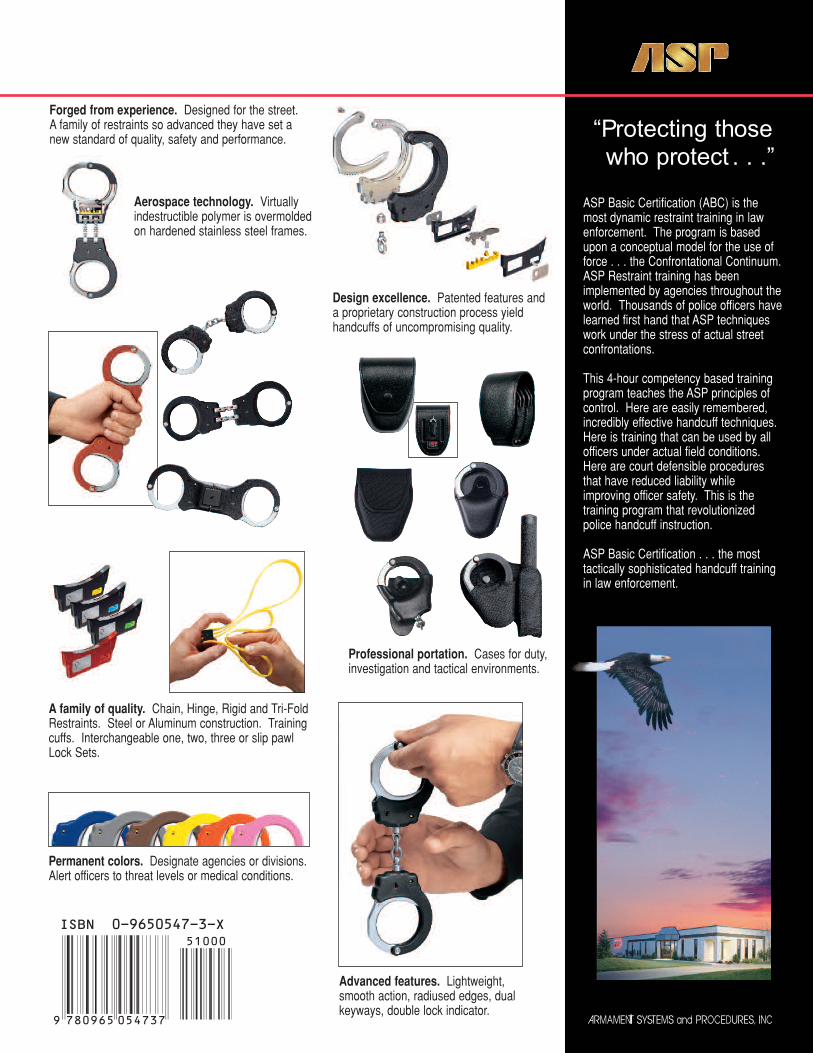
Forged from experience. Designed for the street.A family of restraints so advanced they have set anew standard of quality, safety and performance.
Aerospace technology. Virtuallyindestructible polymer is overmoldedon hardened stainless steel frames.
A family of quality. Chain, Hinge, Rigid and Tri-FoldRestraints. Steel or Aluminum construction. Trainingcuffs. Interchangeable one, two, three or slip pawlLock Sets.
Advanced features. Lightweight,smooth action, radiused edges, dualkeyways, double lock indicator.
Permanent colors. Designate agencies or divisions.Alert officers to threat levels or medical conditions.
Professional portation. Cases for duty,investigation and tactical environments.
Design excellence. Patented features anda proprietary construction process yieldhandcuffs of uncompromising quality.
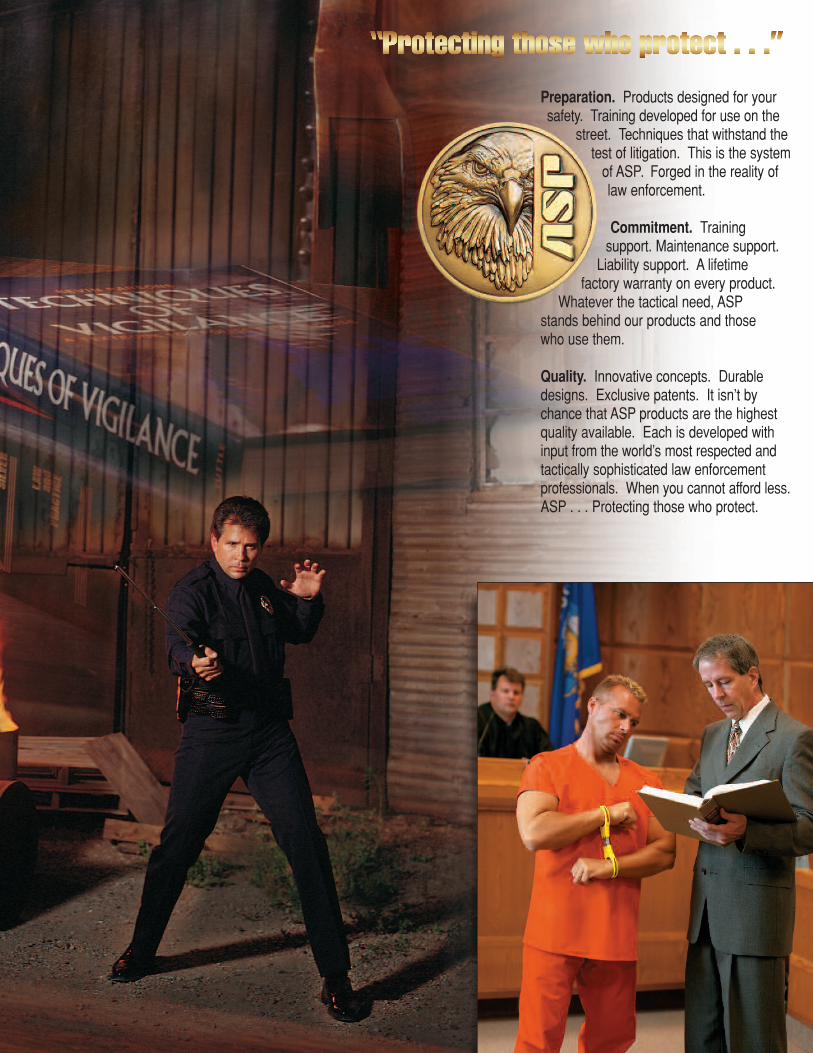
Preparation. Products designed for yoursafety. Training developed for use on the
street. Techniques that withstand thetest of litigation. This is the system
of ASP. Forged in the reality oflaw enforcement.
Commitment. Training support. Maintenance support.
Liability support. A lifetime factory warranty on every product.
Whatever the tactical need, ASP stands behind our products and those who use them.
Quality. Innovative concepts. Durabledesigns. Exclusive patents. It isn’t bychance that ASP products are the highestquality available. Each is developed withinput from the world’s most respected andtactically sophisticated law enforcementprofessionals. When you cannot afford less.ASP . . . Protecting those who protect.
“Protecting those who protect . . .”


TACTICAL HANDCUFF
ASP BASIC CERTIFICATION
(ABC)
COURSE SYLLABUS
© January 2009
ASP, INC
Box 1794
2511 E Capitol DR
Appleton, WI 54911
O (800) 236-6243 · (920) 735-6242
F (800) 236-8601 · (920) 735-6245
asp-usa.com
Copyright 2009 by Armament Systems and Procedures, INC
All rights reserved. No part of this book may be reproduced or transmitted in any form or by any
means, electronic or mechanical, including photocopying, recording or by any information
storage and retrieval system, without permission in writing from the publisher.
Please note that all factual information such as names, addresses and telephone numbers listed
in this book are subject to change.
ISBN 0-9650547-3-X
Published by:
ARMAMENT SYSTEMS AND PROCEDURES, INC
2511 E Capitol DR
Appleton, WI 54911
Editor: Kevin Parsons, PhD
PRINTED IN THE UNITED STATES OF AMERICA
January 2009

FORWARD
ASP Handcuff Training presents a systems approach to the restraint of subjects. ASP
handcuff instruction utilizes the same basic techniques for application of Chain, Hinge, Rigid
and Disposable Restraints. Gone are the fine motor skills and complex techniques that are
impressive in the classroom but quickly discarded on the street. Here you will find realistic
instruction that can be safely utilized by all officers under the stress of real world confrontations.
An integral component of ASP Handcuff Training is the design of the restraints. Each
was developed with the input from working officers in the field who presented ASP with their
wish list of requirements during the ten year development cycle of the product line. The four
ASP restraints have been designed for the street. Each fills a specific need.
Chain cuffs are easily applied with the smoothest ratchet in the industry. Hinge
restraints provide increased control. Rigid cuffs fold for easy transport and then snap open to
lock in place. They control even the most resistant subject. Tri-Fold Disposable Restraints fold
to a compact configuration for easy transport. They open to present large diameter loops that
are rapidly applied with a single pull of the removable ring.
The approach to the protection of police officers that we call ASP would not have been
possible without the efforts of literally thousands of Instructors throughout the world. The ASP
philosophy is different than that of other firms. We do not view training as a profit center.
Rather, training is a service that we provide at no charge. While other companies send
Instructors a bill, we send them support and provide them with a commitment to stand behind
their needs as they instruct their officers.
ASP Instructor Trainers are the backbone of the ASP training program. To them, I
acknowledge my heartfelt appreciation. The training that they endured to become Trainers is,
without question, the most intense in the industry. The quality of their instruction stands apart
in the profession. Special recognition must go to:
Matthew Antkowiak (TX)
David Bachi
(Australia)
Thomas Bardugon (GA)
Andreas Bauch
(Germany)
Scott Bechthold (MN)
Miguel Angel Garcia Berdud
(Spain)
Terence Brennan
(Ireland)
Kenneth Butera (NJ)
Brian Conway
(Ireland)
Ken Cope (FL)
Manuel Correa (NY)
Lino Couto
(Canada)
Marco Cruz
(Portugal)
Jon Cusack (FL)
John Davis
(Ireland)
Hector Deoleo (MD)
Jay Dowke (CA)
David Duch
(Spain)
Aude Engrand
(France)
Abdullah Erdogan
(Turkey)
Sam Faulkner (OH)
Lloyd Fitzgerald
(United States)
Stanislav Gazdik
(Czech Republic)
James Goddard
(England)
Benito Gonzalez (NY)
Fabrice Halopeau
(France)
Gil Hansen (IA)
William Hansler (NY)
Daryell Harmon (TX)
Herve Hottat
(Belgium)

During the next four hours, you will participate in training that is known throughout the
law enforcement community for its intensity and realism. As you return to your agency to pass
on what you have learned, please contact us if we can assist you in any manner. We look
forward to having you join us “Protecting those who protect.”
Kevin Parsons, PhDChairman and CEO
January 2009
Russell Jenkins (MA)
Bruce Johnstone
(England)
Richard Kay
(Australia)
Michael King
(England)
Daniel Koenigsmann (PA)
Vitor Hugo Machado Lima
(Portugal)
Benito Maij
(Netherlands)
Louis Marquez (TX)
Bruce McAlpine (CA)
Sean McCreadie
(England)
Laurent Mellet
(France)
Avery Moore (TX)
Chad Mullinix (SC)
Zane Nickell (OH)
Rui Oliveira
(Portugal)
Daniel Renuncio Mateos
(Spain)
Kevin Parsons, PhD (WI)
Thomas Rodriguez (NY)
James Schramm (NY)
Ronald Schwint (SD)
Tom Sharkey
(Canada)
James Skyrm (MD)
Michael Smith
(England)
Rogerio Soares
(Portugal)
Carlos Sobrino Luengo
(Spain)
Michael Son (IL)
Quinton Swanson
(New Zealand)
Jaime Torres Gutierrez
(Mexico)
Frederic Touzani
(France)
Paul Underhill
(England)
Geert Vanlerberghe
(Belgium)
Simon Verbanck
(Belgium)
Michael Walsh
(Ireland)
Mark Williams
(England)
Omer Yasar
(Turkey)

TABLE OF CONTENTS
Forward
Section 1: Course Introduction
1.01 Personnel ..................................................................................................1
1.01a AIC............................................................................................1
1.01b TSM ..........................................................................................1
1.01c Distributor .................................................................................1
1.02 Registration ................................................................................................2
1.03 Student Introduction ...................................................................................2
1.04 Course Description.....................................................................................2
1.05 Program Standards ....................................................................................3
1.06 Safety .........................................................................................................3
Section 2: Control Theory
2.01 Overview ....................................................................................................5
2.02 Confrontational Continuum ........................................................................5
2.03 Force Options.............................................................................................5
2.04 Subject Action ............................................................................................7
2.05 Officer Reaction .........................................................................................7
2.06 Use of Force Evaluations...........................................................................7
2.07 Totality of the Situation...............................................................................8
2.08 Officer/Subject Factors...............................................................................8
2.09 Special Circumstances...............................................................................8
2.10 Restraint .....................................................................................................8
2.11 Documentation ...........................................................................................9
2.12 Liability Considerations ..............................................................................9
2.13 Use of Force Report.................................................................................10
Section 3: Technical Characteristics of the ASP Tactical Restraint System
3.01 Overview...................................................................................................11
3.02 Handcuff Design.......................................................................................11
3.02a Interlocking Unitized Frame ...................................................12
3.02b Reinforced Swivel ..................................................................12
3.02c Dual Keyway ..........................................................................12
3.02d One-Direction Unlock .............................................................13
3.02e Double Lock Indicator ............................................................13
3.02f Lightweight .............................................................................13
3.02g Radiused Edges.....................................................................13
3.02h Range.....................................................................................13
3.02i Color Coding ..........................................................................13
3.02j Replaceable Lock Sets ..........................................................14
3.02k Compressed Cheek Plates ....................................................14
3.02l High Contact Bow ..................................................................14
3.02m Smooth Action ........................................................................14

3.02n Deep Set Teeth ......................................................................14
3.02o Contrasting Bow.....................................................................15
3.03 Chain Handcuffs.......................................................................................15
3.04 Hinge Handcuffs.......................................................................................15
3.05 Rigid Handcuffs........................................................................................15
3.06 Aluminum Handcuffs ................................................................................15
3.07 Tri-Fold Disposable Restraints.................................................................16
3.08 Maintenance.............................................................................................16
3.09 Marking ....................................................................................................16
3.10 Accessories..............................................................................................16
3.10a Portation .................................................................................17
3.10b Keys .......................................................................................17
3.10c Scarab Cutter .........................................................................18
3.10d Repair Kit ...............................................................................18
3.10e Training Aids...........................................................................18
Section 4: Body Mechanics
4.01 The Pyramid.............................................................................................19
4.01a Wide Base ..............................................................................19
4.01b Deep Base..............................................................................20
4.01c Low Center .............................................................................20
4.01d Head Over Center ..................................................................20
4.02 Hand Position...........................................................................................20
4.03 Relaxation v Tension ................................................................................20
4.04 Center ......................................................................................................20
4.05 Decentralization .......................................................................................21
4.06 Position ....................................................................................................21
4.07 Power Generation ....................................................................................21
4.07a Balance...................................................................................21
4.07b Endurance ..............................................................................21
4.07c Flexibility .................................................................................21
4.07d Focus ......................................................................................21
4.07e Speed .....................................................................................22
4.07f Strength ..................................................................................22
4.07g Simplicity.................................................................................22
Section 5: Restraint Training Terminology
5.01 Aluminum .................................................................................................23
5.02 Backloading..............................................................................................23
5.03 Back Up....................................................................................................23
5.04 Bow ..........................................................................................................23
5.05 Bow Guides..............................................................................................23
5.06 Bow Track ................................................................................................23
5.07 Breakaway ...............................................................................................23
5.08 Bridge.......................................................................................................23
5.09 Chain Cuff ................................................................................................24
5.10 Cheek Plates............................................................................................24
5.11 Combat Cuffing ........................................................................................24

5.12 Compliant Cuffing.....................................................................................24
5.13 Conical Geometry ....................................................................................24
5.14 Cuff Cover ................................................................................................24
5.15 Double Lock .............................................................................................24
5.16 Double Lock Bar ......................................................................................24
5.17 Down in Front...........................................................................................24
5.18 European Lock Set ..................................................................................25
5.19 Extension Lock Design ............................................................................25
5.20 Finger Track .............................................................................................25
5.21 Flex Frame Technology............................................................................25
5.22 Hand Guard..............................................................................................25
5.23 High Contact Bow ....................................................................................25
5.24 High Security Lock Set.............................................................................25
5.25 Hinge Cuff ................................................................................................25
5.26 Keyway.....................................................................................................25
5.27 Lock Bar (Pawl)........................................................................................25
5.28 Lock Set ...................................................................................................26
5.29 Loosen & Lock .........................................................................................26
5.30 Lowered Strike Force...............................................................................26
5.31 Mainspring................................................................................................26
5.32 One Pawl..................................................................................................26
5.33 Orientation Disk........................................................................................26
5.34 Palm Swell ...............................................................................................26
5.35 Pawl (Lock Bar)........................................................................................26
5.36 Pivot Bushing ...........................................................................................26
5.37 Polymer Technology.................................................................................26
5.38 Pop · Place · Pull .....................................................................................27
5.39 Presentation .............................................................................................27
5.40 Pry the Palm ............................................................................................27
5.41 Purchase ..................................................................................................27
5.42 Raised Strike Force .................................................................................27
5.43 Ratchet Teeth ...........................................................................................27
5.44 Reaction Side...........................................................................................27
5.45 Reinforcing Ribs.......................................................................................27
5.46 Restraints .................................................................................................28
5.47 Rigid Cuffs................................................................................................28
5.48 Rock & Lock .............................................................................................28
5.49 Roller Loc .................................................................................................28
5.50 Rotational Release...................................................................................28
5.51 Security Post ............................................................................................28
5.52 Single Lock...............................................................................................28
5.53 Slip Pawl ..................................................................................................28
5.54 Stabilization..............................................................................................28
5.55 Stacking ...................................................................................................28
5.56 Subject Control.........................................................................................28
5.57 Swivel .......................................................................................................29
5.58 Swivel Collar ............................................................................................29
5.59 Tactical Handcuff ......................................................................................29
5.60 Tactical Lock Set ......................................................................................29
5.61 Three Pawl ...............................................................................................29

5.62 Training Cuffs ...........................................................................................29
5.63 Training Lock Set .....................................................................................29
5.64 Tri-Fold Disposable Restraints.................................................................29
5.65 Two Pawl..................................................................................................29
5.66 Ulna..........................................................................................................29
5.67 Weapon Side............................................................................................30
5.68 Wedge Lock Design .................................................................................30
Section 6: Training Format
6.01 Floor Dynamics ........................................................................................31
6.02 Warm-Up & Warm-Down..........................................................................31
6.03 Progressive Training ................................................................................31
6.03a Skill Discussion.......................................................................31
6.03b Skill Demonstration.................................................................32
6.03c Skill Practice ...........................................................................32
6.04 Practice Sequences .................................................................................32
6.04a By the Numbers .....................................................................32
6.04b Slow for Form.........................................................................32
6.04c Full Speed and Power............................................................32
6.04d Simulation...............................................................................32
6.05 Training Equipment ..................................................................................33
6.05a Training Bags .........................................................................33
6.05b Training Batons ......................................................................33
6.05c Red Restraints .......................................................................33
6.06 Drill Formations ........................................................................................33
6.06a Line.........................................................................................34
6.06b Wheel .....................................................................................34
6.06c Post ........................................................................................34
6.06d Circle ......................................................................................34
6.06e Three Minute ..........................................................................34
6.07 Verbalization.............................................................................................35
6.08 Stances ....................................................................................................35
6.08a Interview.................................................................................35
6.08b Combat...................................................................................36
6.09 Reaction Hand Defense...........................................................................36
6.10 Safe Separation .......................................................................................37
6.10a Check .....................................................................................37
6.10b Redirect ..................................................................................37
6.11 Stabilization..............................................................................................38
6.12 Restraint ...................................................................................................38
6.12a Tactical Handcuffs ..................................................................38
6.12b Disposable Restraints ............................................................38
Section 7: Restraint Concepts
7.01 Always Handcuff ......................................................................................39
7.02 Dialogue ...................................................................................................39
7.03 Control, then Cuff .....................................................................................39
7.04 Palm Reading...........................................................................................39

7.05 Weapon Hand Control..............................................................................40
7.06 Angle of Advantage..................................................................................40
7.07 Reactionary Gap ......................................................................................40
7.08 Time (Get It On) .......................................................................................40
7.09 Cuff, then Search .....................................................................................40
7.10 Retention..................................................................................................40
Section 8: Basic Restraint Skills
8.01 Portation (Carrying Tactical Restraints) ...................................................41
8.02 Control the Subject ..................................................................................41
8.03 Watch the Palms ......................................................................................42
8.04 Presentation (Drawing Tactical Restraints) ..............................................42
8.05 Handcuff Grip ...........................................................................................42
8.06 Place & Push............................................................................................42
8.07 Rock & Lock .............................................................................................44
8.07a Rock.......................................................................................44
8.07b Lock .......................................................................................44
8.08 Combat Cuffing ........................................................................................44
8.09 Rigid Restraint..........................................................................................44
8.09a Palm Swell .............................................................................45
8.09b Orientation Disk .....................................................................45
8.09c Pry the Palm ..........................................................................45
8.09d Stacking .................................................................................45
8.10 Slide, Lock, Search ..................................................................................46
8.10a Slide........................................................................................46
8.10b Double Lock............................................................................46
8.10c Loosen & Lock........................................................................47
8.10d Search ....................................................................................47
8.11 Raising the Subject ..................................................................................47
8.12 Movement ................................................................................................47
8.13 Transport and Removal............................................................................48
8.13a Transport ................................................................................48
8.13b Handcuff Key ..........................................................................48
8.13c Scarab Cutter .........................................................................48
8.13d Removal..................................................................................48
Section 9: Evaluation
9.01 Physical Testing .......................................................................................51
9.01a Dynamic Proficiency Testing...................................................51
9.01b Static Proficiency Testing........................................................51
9.02 Written Examination .................................................................................51
9.03 Class Critique...........................................................................................51
9.04 Awards Presentation ................................................................................52
9.05 Armament Systems and Procedures .......................................................52

APPENDIXES
A Tactical Handcuffs Technical Specifications
B The Seven Components of Power
C ASP Warm-Up
D ASP Basic Certification (ABC) Training Critique

OVERHEADS
A The Confrontational Continuum
B Chain Handcuff Exploded View
C Hinge Handcuff Exploded View
D Rigid Handcuff Exploded View
E Tri-Fold Restraint Cutaway
F Pyramid Concept
G Daily Dozen


TOPIC NOTES
SECTION 1: COURSE INTRODUCTION
ASP Restraint Certification teaches Criminal Justice
Personnel Tactical Restraint fundamentals in an
operational setting. The ASP Basic Certification (ABC)
Handcuff program focuses on mechanical functions and
maintenance procedures for ASP Tactical Restraints. It
increases officer familiarity and skill with the full range of
ASP Handcuffs.
Participation in all aspects of this program is a
requirement for ABC certification. The nature of restraint
training requires strict discipline. Safe training
procedures must be followed by all participants. (SeeSection 1.06)
1.01 Personnel
The combined efforts of a number of people are
required to make an ASP training program successful.
1.01a AIC: Armament Systems and Procedures has
three levels of handcuff certification: ASP Basic
Certification (ABC) for field personnel, ASP
Instructor Certification (AIC) for agency
Instructors and ASP Trainer Certification (ATC)
for Instructor Trainers. ASP Trainers (ATCs) are
selected for their instructional skill and experience
and are certified to conduct certification programs
for all ASP product lines. Each candidate must
complete an intensive competency based training
and testing process.
1.01b TSM: ASP Technical Support Managers (TSMs)
are factory trained sales personnel who provide
technical product information. They serve as a
local contact directly to the factory. TSMs assist
with the procurement of equipment and
coordination of training programs.
1.01c Distributor: ASP Distributors are selected based
upon their ability to service client agencies. They
stock ASP products and act as the local source
for all ASP training equipment.

TOPIC NOTES
2
1.02 Registration
The seminar Information Sheet requests participant
background data that is required for Basic Certification.
The participant’s name will appear on certificates exactly
as it is written on the Information Sheet.
Participants must be on “full duty” status, and any
health problems must be described in the medical section
of the registration form. Individuals with medical
problems that prohibit their ability to complete the ASP
Warm-Up may not participate in the course.
All participants must sign the Release from Liability
and Assumption of Risk Agreement.
1.03 Student Introduction
All participants in ASP Basic Certification programs
are treated as peers. Participants provide a personal
introduction including:
· Name
· Agency
· Special physical skills (wrestling, boxing, karate)
· Prior training experience
· Other restraint programs attended
· What you hope to learn
1.04 Course Description
The ASP Basic Certification (ABC) program is a 4-
hour, hands on seminar which trains participants in the
operational use of ASP Tactical Handcuffs. The program
is simple to learn and easy to understand. It provides
efficient restraint techniques for Criminal Justice
personnel without long hours of training. Techniques
were designed to work effectively for all officers, male
and female, large and small, athletic as well as
individuals in less than peak physical condition.
The program provides portation (carrying) and
presentation (drawing) procedures as well as handcuff
application techniques. These tactics are quickly
learned, easily practiced and readily maintained long
after the program is completed. ASP training provides
techniques that work 90% of the time with 90% of the
subjects an officer faces. However, as a realistic training
program for the “real police,” ASP instruction recognizes
that nothing works 100% of the time. For this reason, all
ASP training retains the officer’s ability to disengage or
escalate.
I hear . . . I forget
I see . . . I learn
I do . . . I remember

TOPIC NOTES
3
ASP Tactical Restraints are designed to be used as a
temporary restraint, not a long term control device.
Techniques taught in the ABC program follow this
standard. There are no complicated holds or complex
moves. Because of this, the ASP program avoids the
training complexities which often plague other handcuff
programs.
The training incorporates drills which simulate the
wide variety of street encounters which require restraints.
The program participant will have a basic understanding
of the conditions in which the handcuff may be used,
justification for use and how to document these actions.
1.05 Program Standards
The ASP Basic Certification (ABC) program is based
on modern, court defensible police standards for the
application of temporary restraints.
The techniques in all ASP Tactical Restraint
programs are designed to meet three basic standards of
training:
· The techniques work on the street, not just in
the ideal setting of a classroom.
· The techniques are court defensible and are
backed by the nation’s most experienced use
of force consultants.
· The program is administratively feasible for
use in a contemporary law enforcement
agency.
Based on a model for the use of force, the
Confrontational Continuum, ASP programs provide a
conceptual basis for the use of Tactical Restraints in an
operational setting.
1.06 Safety
Safety is the ultimate responsibility of the Instructor.
The goal of all ASP instruction is “injury free training.”
Handcuff instruction is by definition a contact activity. For
this reason, a number of safety procedures are required
during ASP training:
1. No functional firearms or other weapons are
allowed in the training area.

TOPIC NOTES
4
2. No jewelry (rings, earrings, necklaces) should
be worn by participants. Plastic training
watches are allowed.
3. Mouthguards are required for each participant.
4. Shoes worn by each participant must have
good lateral and linear support.
5. Only ASP Tactical Restraints, keys, cutters and
training equipment may be used during
training.
6. The training area must be sanitized and all
items which may injure students removed or
insulated. All training equipment must be
grounded against walls when not in use.
7. The Instructor will have a Safety Set including
a cold pack and elastic wrap.
8. All activities must stop at the sound of the
whistle.
9. Participants may strike target areas only when
they are covered by a Training Bag or
protective training suit.
10. Keep restraints in scabbards on duty belts
when they are not in use during the training
session. (Do not lay them on the floor or throw
them back and forth between students.)
NOTE
It is essential for participant safety that only
ASP manufactured restraints, keys and
training equipment be employed in conjunction
with ASP Tactical Handcuff programs. Other
manufacturers have attempted to imitate ASP
designs. Only ASP equipment has been
engineered and produced to safely withstand
the rigors of Tactical Handcuff instruction. The
ASP Training Baton, Baton Carrier and
Training Bag are vital to successful, dynamic
training sessions.

TOPIC NOTES
5
SECTION 2: CONTROL THEORY
(See Overhead A)
2.01 Overview
The ability to use force against the public is the
primary factor which distinguishes the police from the
remainder of society. No other segment of our population
is permitted this license. As a result of this responsibility,
the use of force by the police comes under close scrutiny
by both the public and the courts.
2.02 Confrontational Continuum
In an attempt to define and clarify appropriate
circumstances for the use of force, the Confrontational
Continuum was developed.
The Continuum provides the law enforcement
administrator with a realistic means of evaluating force
usage. The Continuum provides the street officer with
reasonable guidance in determining what level of force is
needed and a means of documenting that use of force.
The physical process of arrest occurs after control
has been achieved. Force must cease when control has
been effected. The use of force on an individual who is
already under control is punishment and exceeds the
bounds of all prevailing standards of police conduct.
The Confrontational Continuum was initially
developed in an effort to explain to law enforcement
personnel the proper response to an assailant’s actions.
It was designed as a mechanism for explaining the level
of force that was employed and the circumstances under
which it was exercised.
2.03 Force Options
The horizontal Force Option line provides a series of
responses which are available for use by a law
enforcement officer when confronting a subject. Specific
agencies have diverse labels for techniques. However,
the order of escalation is generally consistent from
agency to agency.
Dialogue is the best defensive tactic. It is the most
fundamental use of force that can be employed.
Dialogue as a means of persuading an individual to
comply is the foundation on which all additional force is

TOPIC NOTES
6
built. “Talking” a subject into compliance avoids the
inherent dangers of a physical confrontation in which the
officer or subject may be injured.
However, if dialogue is not effective, the next means
of gaining control is the use of an escort technique. This
is a low level compliance procedure, non-threatening and
non-violent. The purpose of escort compliance is to
remove from the area a subject who may present a threat
to the officer or the public. From a physical standpoint,
escort is perhaps the most commonly employed
technique by law enforcement personnel.
When an escort technique fails or would be unsafe,
the next force option is a pain compliance technique.
Pain compliance involves the manipulation of a joint to
cause pain. Compliance results from an effort on the part
of the individual to relieve the discomfort. Pain
compliance could be used in circumstances under which
it would be too dangerous to initially attempt to escort an
individual. In those circumstances in which escort is
inappropriate or ineffective and yet a higher use of force
is not justified, pain compliance is an entirely appropriate
and often extremely effective procedure. The use of
Oleoresin Capsicum is classified as a pain compliance
procedure.
Mechanical control (a punch, kick, throw or stun) is
the next option available if pain compliance is ineffective
or would be inappropriate. The use of mechanical control
has a higher probability of gaining compliance but also
has a higher potential for injury to the subject. As a
result, mechanical control is employed only in those
circumstances in which the preceding levels of force
would prove to be inappropriate as a result of the
assailant’s behavior or have shown themselves to be
ineffective as a means of control.
When mechanical control fails or would be
inappropriate, the use of an impact weapon is required.
The baton is an intermediate level of force and bridges
the gap between the use of hands or fists and the use of
a firearm to control an assailant. The police officer who
is not issued a baton but carries a firearm has no use of
force option between hands or fists and the use of deadly
force.
Finally, if the intermediate force of a baton proves
inappropriate or is ineffective, the firearm may be
required to stop the subject.

TOPIC NOTES
7
2.04 Subject Action
The vertical Subject Action line delineates the
assailant’s action during a confrontation. The horizontal
Force Options line defines a law enforcement officer’s
defensive responses.
2.05 Officer Reaction
The Officer Reaction line bisects the Subject Action
line and the Force Options line, marking the officer’s
reaction to an increased use of violence by the subject.
As the subject’s resistance increases, the officer’s
response must increase appropriately to maintain
control.
2.06 Use of Force Evaluations
The goal of a law enforcement officer in a
confrontation is control of the subject. It is imperative that
this control not be a 50/50 balance. The officer must win
and not just 50 percent of the time. If half the
confrontations result in a failure to control a subject, the
officer and the general public are put in critical danger.
An officer needs to maintain control. Each technique
employed in a confrontational situation must be
evaluated in terms of its likelihood to gain control
compared to its likelihood to cause damage. Those
techniques which offer a high degree of control and a
limited potential for damage are preferred options.
A misconception of those who do not understand the
concept of the Confrontational Continuum is the
assumption that officers must exhaust every lower option
before moving to a higher level response. Such thinking
is both naive and dangerous. The purpose of the
Confrontational Continuum is to give officers a guide to
selection of reasonable force options. There is no
requirement to attempt implementation of each lower
level alternative.
In evaluating techniques, a final consideration must
be made to insure officer safety. This involves the
officer’s ability to instantly disengage or escalate in
response to a confrontation. Techniques which tie an
officer to a subject must be rejected. Techniques which
do not allow the ability to escalate the force option in
response to a subject’s threat are unacceptable.

TOPIC NOTES
8
2.07 Totality of the Situation
All actions, relational factors between parties and
conditions surrounding the street confrontation comprise
the Totality of the Situation. These include the
Officer/Subject Factors and the Special Circumstances
listed below. Each relevant condition relates to the
confrontation in determining the officer’s course of action.
2.08 Officer/Subject Factors
- age - skill level
- gender - multiple officers
- size - multiple subjects
- fitness
It is reasonable that a discrepancy in the age, gender,
physical size, fitness or skill level of individuals involved
in the confrontation may mandate that an officer use
more or less force to control the situation.
In a similar manner, it would be reasonable for a
single officer to use more force in controlling a situation
when confronted by multiple subjects.
In addition to Officer/Subject Factors, a confrontation
may include Special Circumstances which would allow
an officer to increase the use of force.
2.09 Special Circumstances
- close proximity to a firearm/weapon
- special knowledge
- injury or exhaustion
- ground position
- disability
- imminent danger
A subject in close proximity to a firearm or other
weapon creates an increased danger to the officer which
must be dealt with immediately. An officer may have
special knowledge of a subject’s skills that would require
the use of increased force. An officer who is injured,
exhausted, on the ground, disabled or is in imminent
danger would be justified in escalating through the use of
force options.
2.10 Restraint
In each situation where the officer is forced to employ
physical force to stop an assault or control the subject,

TOPIC NOTES
9
the confrontation ends with the subject being restrained.
Defensive measures should not be viewed as discrete
disciplines of escort, pain compliance, mechanical
control, baton, firearm or handcuffing. As a result, all
ASP techniques ultimately end with the subject being
restrained. Restraint of the subject after control must be
viewed as part of all Use of Force training.
2.11 Documentation
A critical portion of any defensive tactics program
must include training in documentation. A properly
documented report detailing a street confrontation is the
first step in minimizing potential civil liability. Although
reports vary from agency to agency, basic information is
necessary in all Use of Force Reports. When
documenting a case of violent resistance, always include
the following:
1. The type of call which first brought the
officer in contact with the subject
2. The number of persons involved in the
situation
3. The time of day, physical setting and type of
situation
4. What the subject said to the officer
5. The subject’s demeanor and attitude
6. What the officer said
7. The subject’s actions and officer’s reactions
8. A detailed report of the officer’s injuries,
including photographs when possible
9. A detailed report of the subject’s injuries,
including photographs when possible
10. Names, addresses and telephone numbers
of neutral witnesses not involved in the
confrontation
2.12 Liability Considerations
Avoid conclusionary statements such as, “I used
reasonable force to effect the arrest.” Use concrete,

TOPIC NOTES
10
precise descriptions of the confrontation and the Force
Options used.
Include all Officer/Subject Factors and Special
Circumstances involved in the confrontation. These
pieces of information will not only aid a conviction in
criminal court, but will also help in defending the officer’s
actions should a civil suit develop as a result of the
confrontation. Short, generic descriptions of a
confrontation may cause a future reader of the report to
mistakenly believe something is being hidden.
2.13 Use of Force Report
In an effort to improve the reports written by officers
involved in confrontations, Armament Systems and
Procedures makes available, without charge to the law
enforcement community, the Use of Force Report decal.
TOPIC NOTES
11
SECTION 3: TECHNICAL CHARACTERISTICS
OF THE ASP TACTICAL RESTRAINT SYSTEM
3.01 Overview
Modern police handcuffs trace their origin to the
swing through bow design of George Carney that was
patented in 1912. Construction consisted of a series of
stamped plates that were riveted together. The first
major advance in fabrication technology came in 1981
with the introduction of copper brazed handcuffs by
James Kruger of Smith & Wesson. The first major
advance in linkage came that same year with the hinged
handcuff design patented by David Sullivan and
manufactured by the Peerless Handcuff Company. The
advantage of using a handcuff to both control and
restrain a subject was pioneered by Dennis Elam with his
Quick Cuff program. Hiatt & Company introduced the
first practical rigid handcuff design with their folding Ultra-
Cuff.
Despite these innovations, handcuff features
remained static and limited. Construction technology
remained traditional and basic. Innovation was limited.
ASP Tactical Handcuffs are classified as temporary
restraining devices. They are designed to be quick, quiet
and highly effective. The unique nature of the restraints
makes them ideal for Criminal Justice personnel in an
operational setting.
ASP Tactical Handcuffs are certified under the US
Department of Justice, National Institute of Justice (NIJ)
Standard 0307.01 formulated by the Law Enforcement
Standards Laboratory of the National Bureau of
Standards.
ASP Tactical Restraints are available in a variety of
styles to meet specific needs. (See Appendix A)
3.02 Handcuff Design
As with all ASP products, the design for Tactical
Handcuffs originated in the field. ASP Trainers surveyed
instructors and officers throughout the world. The most
desirable handcuff features were listed and categorized.
The result is a handcuff unlike any other. The design
introduces features, construction and materials that are
innovative, real world and strong.
ASP Handcuffs overmold a hardened, ribbed,
stainless steel frame with ordnance grade polymer.

TOPIC NOTES
12
Restraints can be color coded by agency, division or the
security threat of the subject. Lock Sets are replaceable
and available in yellow One Pawl (Tactical), blue Two
Pawl (High Security), green Three Pawl (European) and
red Slip Pawl (Training) configurations. Bows are
available in steel or aluminum. The flat bow face
provides improved wrist contact during application. The
cuff indicates proper restraint orientation by both color
and feel. The conical bow geometry of the Tactical
Handcuff increases the range of restraint with 22 locking
positions. The same cuff fits large subjects as well as
women and juveniles.
All ASP restraints
have a keyway on
each side of the
handcuff. The
radiused edges and
high visibility double
lock indicator
increase the safety
of the subject.
3.02a Interlocking Unitized Frame
An optimized frame design was
achieved through the use of
sophisticated computerized
engineering programs. Strength
potential was maximized through
the selection of an optimal
combination of materials,
hardening, frame geometry and
reinforcing ribs.
3.02b Reinforced Swivel
The swivel has traditionally been the weakest part
of any handcuff design. The Tactical Handcuff
uses a roller bearing style mechanism to provide
360° reinforcement of the swivel while insuring
smooth, non-binding rotation.
3.02c Dual Keyway
Traditional handcuff training taught officers to
position the “keyhole up.” In the classroom, the
emphasis was on this “proper technique.” The
reality of the street focused on “getting the cuffs
on.” Tactical Handcuffs are designed for the “real
police.” Keyways are on both sides of each cuff.
Now the emphasis can be on safe application.
Whatever way the handcuff is applied, the keyway
will always be up.

TOPIC NOTES
13
3.02d One-Direction Unlock
Standard handcuffs require a turn in one direction
to release the double lock and in another to
release the single lock. Tactical Cuffs release
both locks in a single turn.
3.02e Double Lock Indicator
Failure to double lock
handcuffs can result in
overtightened restraints.
The resulting handcuff
neuropathy is a major cause
of litigation. Double locking
also provides protection
against shimming handcuffs
open. The bright indicators
of Tactical Cuffs provide a high visibility warning
to double lock the restraints.
3.02f Lightweight
Patent pending construction produces a stainless
steel cuff that weighs less than standard designs.
Overmolded in ordnance grade polymer, Tactical
Cuffs are rugged and reliable.
3.02g Radiused Edges
There are no sharp edges on ASP Tactical
Handcuffs. The result is a safe cuff that will not
cut the subject and is less likely to cause nerve
damage.
3.02h Range
The unique conical geometry of the Tactical
Handcuff wedge closure design provides a
greater span of locking positions. As a result,
these cuffs can accommodate larger wrists while
at the same time still being able to secure the
smaller wrists of juveniles and women.
3.02i Color Coding
Identifier overmolded color frames are available
for agencies or divisions and to designate the
medical condition or security threat of subjects.
Standard colors are Blue, Brown, Gray, Yellow,
Orange and Pink.

TOPIC NOTES
14
3.02j Replaceable Lock Sets
Changing a keyway or
repairing a cuff is rapid and
easy. While an armorer’s tool
depresses the retaining pin,
the Lock Set is cammed out of
its recess. Lock Sets are replaceable and
available in a series of Tactical, High Security,
European and Training designs.
3.02k Compressed Cheek Plates
The bow will drag as it
swings through handcuff
cheek plates that have
been compressed. Use
the cheek plates of a
second set of cuffs to
open up the binding
plates until the bow
swings freely.
3.02l High Contact Bow
The flat contact surface of
the Tactical Handcuff bow
provides an improved
purchase on the wrist of
the subject. The result is
a cuff that is more easily
applied. The handcuff will
not fail to engage as a
result of a round bow slipping to the side as it is
placed on a round wrist. The flat engagement
surface of the Tactical Cuff bow assures positive
cuff application.
3.02m Smooth Action
Precision components combine with advanced
computer design to create an ultra smooth ratchet
action. The locking bar (pawl) to bow tooth
(ratchet) engagement is so smooth in all 22
positions that no backloading is necessary prior to
handcuff application.
3.02n Deep Set Teeth
Both locking bar (pawl) and bow tooth (ratchet)
engagement are set deep for an extra secure hold
under even the most dynamic field conditions.

TOPIC NOTES
15
3.02o Contrasting Bow
The bows of standard Tactical Handcuffs differ in
color from the overmolded frame. This feature
combined with the flat face bow gives visual and
tactile indication for proper handcuff orientation.
3.03 Chain Handcuffs (See Overhead B)
Chain cuffs provide less control of
handcuffed subjects. However, they are
easier to apply. A precision machined
chain swivel has ball bearing smooth
rotation. Stainless steel chains are TIG
welded for strength. A heavy walled
collar reinforces the swivel against lateral
pressure.
3.04 Hinge Handcuffs (See Overhead C)
Hinge cuffs provide increased control
of handcuffed subjects. They are more
difficult to apply to a resisting subject.
Stainless steel links provide a secure
and rigid restraint. ASP Hinge Handcuffs
fold in four locations to create a compact
restraint that is easily carried.
3.05 Rigid Handcuffs (See Overhead D)
Rigid Handcuffs provide the greatest
control of a subject. They are well suited
to specialized subject control applications.
A folding lock mechanism allows the ASP
Rigid Handcuffs to be retained in a
compact carrier. The cuffs open and lock
into a rigid configuration. Rigid handcuffs
provide both control and restraint. They
have special application in courtroom and
airline security settings.
3.06 Aluminum Handcuffs
A black bow indicates lightweight
ASP Restraints. These Chain, Hinge
and Rigid Cuffs have forged
aluminum bows. They are 20% lighter
than their steel counterparts, yet meet
the strength requirements of professional
duty restraints.

TOPIC NOTES
16
3.07 Tri-Fold Disposable Restraints (See Overhead E)
Designed for special
operation settings (gang,
mass arrest, tactical team),
Tri-Fold Restraints also
provide an auxiliary cuff for
the plainclothes or uniform
officer. The wide, round
edged straps fold compactly
or expand to form an
oversized loop. The
retaining block prohibits
access to the ratchets while providing an extremely
strong positive lock with smooth single pull application.
3.08 Maintenance
Handcuffs are a mechanical device. They should be
inspected frequently to insure proper function. Tactical
Handcuffs should be carried in a protective case to keep
them free from dirt and debris. Should the handcuffs
become contaminated with blood or other bodily fluids,
use appropriate bleach solution or autoclave sterilization
techniques. Avoid temperatures above 300°F (148.9°C).
After sterilization, apply a small amount of silicone to the
pivot pin. Remove all excess oil as it will attract lint and
dust.
3.09 Marking
Identification marks should not be stamped or etched
on any part of the Tactical Handcuffs. Compression or
displacement of metal during marking may cause
malfunction of the handcuffs. Contact ASP or your
Authorized ASP Distributor to learn about the officer and
agency laser marking programs that are available from
the factory.
3.10 Accessories
ASP Tactical Restraints are part of a family of
products. The related components were designed to
create a total system for subject control.

TOPIC NOTES
17
3.10a Portation
A series of advanced technology
cases have been engineered for
Tactical Restraints. These carriers
protect the restraints while
providing immediate accessibility.
Each ASP Handcuff Case incorporates a retainer
for a spare cuff key. Be certain that the double
lock of Tactical Handcuffs is not engaged prior to
“casing the cuffs.”
3.10b Keys
An assortment of Clip,
Swivel and Logo Handcuff
Keys have been designed
for ASP Tactical Handcuffs.
All incorporate high
strength, hardened steel
construction. Handcuff keys
should never be tied to the
officer. A handcuff key becomes locked into the
keyway during removal. The officer must
maintain the ability to disengage from the cuff at
all times.
Investigator
Tactical
Double
Combo
Duty
Federal

TOPIC NOTES
18
3.10c Scarab Cutter
The Scarab Restraint Cutter uses a
piercing blade and compound
leverage to sever a Tri-Fold
Restraint. The surgical
stainless steel blade is
shrouded to protect both the
officer and subject. The telescoping handles of
the Scarab lock onto the officer’s keyring.
3.10d Repair Kit
A service kit for repair of Tactical Handcuffs allows
rapid replacement of the Lock Set.
3.10e Training Aids
Both clear Cutaway
Restraints and Red
Training Restraints are
produced by ASP.
Cutaways help officers
understand the operation
of Tactical Handcuffs.
Red Training Restraints are available in Chain,
Hinge, Rigid and Tri-Fold configurations. They
are released by rotating the wrists of the
handcuffed subject.

TOPIC NOTES
19
SECTION 4: BODY MECHANICS
The principles of human movement form the
foundation of all ASP techniques. The ability to use the
basic principles of body mechanics dramatically
increases an officer’s potential to control a confrontation
while decreasing the chances of injury.
4.01 The Pyramid
The foundation of body mechanics is the Pyramid
Concept of defensive measures:
1. Wide Base
2. Deep Base
3. Low Center
4. Head Over Center
A law enforcement officer may use these principles to
gain advantage and control an assailant. (See Overhead F)
4.01a Wide Base: Keep the feet shoulder width apart.
This stance will maintain lateral balance (from
side-to-side) which is not present when the feet
Pyramid Concept

TOPIC NOTES
20
are together. The body’s weight is equally
distributed between both legs.
4.01b Deep Base: Linear balance (front and back) is
maintained using a Deep Base, placing the feet
one step apart, Reaction Leg forward, Weapon
Leg back.
When combined with a Wide Base, this position
balances the body from all sides.
4.01c Low Center: To further enhance balance, a Low
Center is achieved by slightly bending the knees.
The body’s weight rests equally on both feet
without creating tension in the knees or ankles.
4.01d Head Over Center: This position keeps the
weight of the body balanced over the base. The
head is kept over the center of the body.
4.02 Hand Position
During a confrontation, the hands are often the first
line of defense to an attack. They must be kept above
the waistline and in front of the body to allow a rapid
response to a sudden assault. The hands, forearms and
elbows should not be overextended where they can be
grabbed. They should not be too close to the body where
they provide little protection to the head and upper body.
4.03 Relaxation v Tension
Tense muscles cannot engage in dynamic movement
which is vital during the application of restraints. Tense
muscles expend greater energy and can tire an officer
prematurely.
While maintaining the Pyramid Concept of body
mechanics, the officer needs to remain relaxed in order to
put the four principles into action.
4.04 Center
The officer uses the Pyramid Concept in order to
maintain balance during the execution of ASP restraint
procedures. Center is achieved by building the four
components of the pyramid.

TOPIC NOTES
21
4.05 Decentralization
Using proper distancing techniques, the assailant is
kept off balance and, therefore, in a weaker tactical
position. Decentralization is achieved by removing the
components of the pyramid.
4.06 Position
During a confrontation, maintain a strong pyramid
position. This provides Safe Separation while keeping
the officer within striking distance of the subject. Assaults
by the assailant are Checked or Redirected as the officer
moves to a Weapon Side position of advantage.
Movement is always done in Pyramid Stance.
4.07 Power Generation
Maximum striking potential is achieved through use of
the Seven Components of Power. These elements for
increasing an officer’s control potential were outlined in
1980 by DR Kevin Parsons: (See Appendix B)
4.07a Balance is the most basic component of power. It
must be automatic, instantly fluid, present during
continuous movement and capable of being
sustained as momentum increases. Balance is
linked with timing and is improved by working with
moving targets.
4.07b The second component of power is endurance,
primarily cardiovascular. Endurance is improved
through aerobic exercises such as running,
swimming or bicycling. A rule of thumb is to run
one mile a day in preparation for every three
minutes of a fight.
4.07c The third component of power is flexibility.
Rigidity presents tremendous problems during a
confrontation. It is tied to tension, fear,
nervousness and lack of confidence. Flexibility is
improved by stretching and relaxation. Flexibility
is enhanced when muscles are in dynamic
tension, resisting each other in perfect tone.
4.07d Focus is the fourth component of power. Focus
is the result of proper mind/body coordination and
occurs when the mental and physical systems
complement each other to the point that total

TOPIC NOTES
22
concentration can be directed to a specific
technique for a short period of time. The two
barriers to focus are hesitation and
overcompensation. Hesitation is often tied to lack
of flexibility. Overcompensation is defined as
“trying too hard.”
4.07e Speed is the fifth component of power. It is
generated through continuous repetition until a
technique is both physiologically and
psychologically routine and lag time has been
reduced. It is clear from ballistics research that
speed is vitally important to the generation of
devastating power.
4.07f The sixth component of power is strength. The
low ranking of strength in the power typology is
due to the other factors which can make up for the
lack of strength and the manner in which
alternative components can impair power if not
present with strength. The strongest officer
possesses little power when off balance,
exhausted or inflexible.
4.07g The seventh component of power is simplicity.
Repetition of fundamentals combined with clear,
systematic sequencing yields tremendous power.
Keep it short and simple (KISS).
TOPIC NOTES
23
SECTION 5: RESTRAINT TRAINING
TERMINOLOGY
In order to insure the safety of participants, both the
Instructor and students must share a common training
terminology. For the purpose of explanation and
instruction, the following terms are used throughout the
ASP Restraint Certification program:
5.01 Aluminum
Lightweight ASP restraints with black bows.
5.02 Backloading
The ability of a restraint to draw the last several
teeth of the bow back through the frame to a set
position prior to handcuffing. Often required in
restraints with extremely stiff lock mechanisms.
5.03 Back Up
When Hinge Handcuffs are stacked behind the
back, the subject’s palms should face upward.
5.04 Bow
The swing-through retention mechanism that
employs ratchet teeth to lock the restraint in place
on the subject’s wrist.
5.05 Bow Guides
A unique ASP design that employs a
geometrically precise pierced stainless steel arc
to maintain alignment of the bow within the frame.
5.06 Bow Track
A retention mechanism on each side of the bow
which retains integrity of the restraint during
extreme stress.
5.07 Breakaway
The key activated bridge release opposite the
palm swell on Rigid Handcuffs.
5.08 Bridge
The heat treated stainless steel locking
mechanism of the Rigid Handcuff.
TOPIC NOTES
24
5.09 Chain Cuff
Tactical Handcuffs which are joined by a stainless
steel chain that is welded to a 360° swivel and
surrounded by a reinforcing collar. Chain
Handcuffs are the easiest of all restraints to apply
in a tactical setting.
5.10 Cheek Plates
The two polymer covered stainless steel arms
that retain the bow.
5.11 Combat Cuffing
Restraint of a violent, resistant, non-responsive or
tactical subject that requires the use of force to
control, stabilize and restrain.
5.12 Compliant Cuffing
Restraint of a non-violent subject that is
responsive to verbal commands.
5.13 Conical Geometry
An ever-changing arc that is derived from the
conical diameter of the ASP Tactical Handcuffs.
This wedge lock design allows a wider range of
locking positions to secure large subjects as well
as juveniles and women with use of the same
restraint.
5.14 Cuff Cover
A metallic enclosure for either Chain or Hinge
ASP Handcuffs that blocks access to keyways
and positions a subject’s hands at a safe and
ergonomically correct position for transport. Part
of a keyless transport kit which includes a waist
chain.
5.15 Double Lock
The mechanism that prevents the handcuff from
either tightening or being removed.
5.16 Double Lock Bar
A highly visible polymer structure that may be
engaged to prevent movement of the lock bar.
5.17 Down in Front
When Rigid Handcuffs are stacked in front of the
body, the subject’s palms should face downward.

TOPIC NOTES
25
5.18 European Lock Set
The three pawl Lock Set (color code green).
5.19 Extension Lock Design
Both cuffs of the Rigid Restraint must be
extended for the automatic lock to engage.
Designed to prevent accidental activation.
5.20 Finger Track
The recess on the lower edge of Rigid Handcuffs
that keeps an officer’s fingers clear of the bow
guides.
5.21 Flex Frame Technology
The use of an overmolded stainless steel frame to
reduce injury potential from excessive lateral
stress due to improper handcuff application.
5.22 Hand Guard
The recess on the upper edge of Rigid Handcuffs
that keeps the officer’s hand clear of the bow as it
swings around during application of the cuffs.
5.23 High Contact Bow
A flat face swing-through locking mechanism that
provides better positioning on the subject’s wrists.
The flat surface engages the round portion of the
subject’s wrist allowing a better purchase and
more positive application of the restraint by
preventing the bow from slipping to one side of
the wrist or the other.
5.24 High Security Lock Set
The two pawl Lock Set with a divider plate and
enhanced pick resistance (color code blue).
5.25 Hinge Cuff
Tactical Handcuffs which are joined by stainless
steel links with four pivot points. Hinge Handcuffs
provide improved control of the subject.
5.26 Keyway
A beveled key access port that is blocked by an
integral security post.
5.27 Lock Bar (Pawl)
A pivoting retention mechanism with one-direction
steel teeth that allow the mating surfaces on the
bow to swing through the frame while preventing
movement in the opposite direction.

TOPIC NOTES
26
5.28 Lock Set
A unitized insert that contains the lock bar (pawl)
and double lock indicator.
5.29 Loosen & Lock
The design of ASP restraints allows a cuff that
tests too tight to be loosened and double locked
without removing the key from the Lock Set.
5.30 Lowered Strike Force
The orientation disk on Rigid Handcuffs for left-
handed officers.
5.31 Mainspring
The pressure mechanism that locks the bridge of
Rigid Handcuffs in place.
5.32 One Pawl
The Tactical locking system for handcuffs (color
code yellow).
5.33 Orientation Disk
The feature on a Rigid Handcuff near the bow
guides which contacts the thumb to confirm
proper orientation of the cuff. A raised Strike
Force for right-handed and a lowered Strike Force
for left-handed officers.
5.34 Palm Swell
The center section of the Rigid Handcuffs that is
raised to fill the palm of the hand and provide
increased control of the cuff.
5.35 Pawl (Lock Bar)
A pivoting retention mechanism with one-direction
steel teeth that allow the mating surfaces on the
bow to swing through the frame in one direction
while preventing movement in the opposite.
5.36 Pivot Bushing
A precision machined structure that provides for
smooth rotation of the bow through the frame.
5.37 Polymer Technology
The use of advanced thermoplastics to achieve
design criteria not possible with traditional
engineering materials.

TOPIC NOTES
27
5.38 Pop · Place · Pull
The process of applying Tri-Fold Restraints
consisting of opening the folded restraint, placing
it on the wrists of the subject and pulling the
removable Tri-Fold Ring.
5.39 Presentation
The process of removing handcuffs from their
carrier and positioning them in the hand prior to
application.
5.40 Pry the Palm
Rigid Handcuffs may
be applied from the
inside or outside to
the subject’s right or
left hand. Whatever
the position of
application, the cuffs
should extend from
the palm side of the
subject’s hand. Pressure is applied by blocking
the top of the hand and prying up.
5.41 Purchase
The contact surface of the handcuff as it rests on
the wrist prior to application.
5.42 Raised Strike Force
The orientation disk on Rigid Handcuffs for right-
handed officers.
5.43 Ratchet Teeth
Single direction retention surfaces on the face of
the bow which mate with the locking bar (pawl)
and maintain the engagement of the bow within
the frame.
5.44 Reaction Side
The side of the officer’s body that is bladed
closest to the subject. Handcuffs are commonly
worn on the Reaction Side.
5.45 Reinforcing Ribs
Computer calculated structural geometries that
dramatically increase the strength of the
hardened stainless steel frame.

TOPIC NOTES
28
5.46 Restraints
A generic term that encompasses Tri-Fold
Disposable, Chain, Hinge and Rigid Handcuffs.
5.47 Rigid Cuffs
Tactical Handcuffs which open and lock into a
fixed position. Rigid cuffs allow the officer to
control and restrain a subject.
5.48 Rock & Lock
The ASP system for applying Tactical Restraints
in which the back of the officer’s hand is toward
the subject and the palm is toward the officer.
5.49 Roller Loc
The proprietary retention mechanism used in ASP
Tri-Fold Restraints.
5.50 Rotational Release
The method by which a student removes either
disposable or hard training restraints.
5.51 Security Post
An integral blocking structure that prevents
common objects from entering the handcuff
keyway.
5.52 Single Lock
The mechanism which prevents the bow from
being removed while allowing it to be ratcheted
tighter.
5.53 Slip Pawl
A training Lock Set that allows rapid application
and keyless release (color code red).
5.54 Stabilization
The positioning of a subject’s hands in a manner
that allows rapid application of restraints.
5.55 Stacking
The positioning of one hand above another (palm
up in back, palm down in front) to provide more
secure low profile control of a subject.
5.56 Subject Control
The positioning of a resisting individual so they
are no longer a threat to the officer or the public.

TOPIC NOTES
29
5.57 Swivel
A precisely machined, smooth rotating stainless
steel connecting mechanism for the handcuff
chains.
5.58 Swivel Collar
A precision machined heavy walled reinforcing
structure for the chain swivel.
5.59 Tactical Handcuff
An ASP design that incorporates an overmolded
stainless steel frame, replaceable Lock Set, dual-
sided keyway, radiused edges, high visibility
double lock indicator, one-direction unlock,
lightweight, high contact bow, wide range of
locking positions and ultra smooth action.
5.60 Tactical Lock Set
The standard ASP single pawl Lock Set (color
code yellow).
5.61 Three Pawl
The most commonly used locking system for
handcuffs in Europe (color code green).
5.62 Training Cuffs
Chain, Hinge, Rigid or Tri-Fold Restraints that are
color coded red and can be released by rotating
the wrists.
5.63 Training Lock Set
The slip pawl Lock Set which allows rotational
release of restraints by a student (color code red).
5.64 Tri-Fold Disposable Restraints
Disposable restraints which are designed for one
time use. Rapidly applied, Tri-Fold restraints
allow identification during mass arrests.
5.65 Two Pawl
The High Security locking system for handcuffs
that features a divider plate and extreme pick
resistance (color code blue).
5.66 Ulna
The large bone on the outside of the wrist.
Restraints should be applied between this bone
and the flare of the hand.

TOPIC NOTES
30
5.67 Weapon Side
The dominant side of the officer’s body. The side
where the firearm is most often worn. The ASP
Baton is commonly worn on the Weapon Side.
5.68 Wedge Lock Design
An ever-changing arc that is derived from the
conical diameter of the ASP Tactical Handcuff.
This conical geometry allows a wider range of
locking positions to secure large subjects as well
as juveniles and women with use of the same
restraint.
NOTE
Gross Motor Skills offer important
advantages to police officers. They require
less instruction time, reduce refresher time
and have a high level of retention. Gross
Motor Skills are also more likely to be
performed during times of high stress and
are more forgiving.

TOPIC NOTES
31
SECTION 6: TRAINING FORMAT
6.01 Floor Dynamics
The training environment is vital to the safety of class
participants. Floor space needs to be free of obstructions
and constructed of a material suitable for Tactical
Restraint training. Adequate space is also vital to safety.
One hundred square feet per student is recommended. A
class of 20 students requires approximately 2,000 square
feet of usable floor space, free of obstructions.
6.02 Warm-Up & Warm-Down
All ASP training sessions should be preceded by an
adequate routine for warming and stretching the body.
The ASP Warm-Up (Daily Dozen) can greatly reduce
muscle strains, pulls and tears. (See Overhead G)Warm-up exercises should emphasize flexibility and
agility without bouncing or jerking. Special care should
be taken to guard against neck, lower back and knee
injuries.
The Warm-Up should be repeated after extended
periods of lecture or other breaks in the training such as
meals.
The post activity Warm-Down should be done before
allowing the body to cool. The last six components of the
Daily Dozen will help the body remove the chemical by-
products of strenuous activity and will reduce follow-on
stiffness and soreness.
The ASP Warm-Up is included in Appendix C of this
manual.
6.03 Progressive Training
ASP training teaches new skills in a progressive
format of discussion, demonstration and practice.
Repetition during practice drills goes from basic skill
instruction to dynamic simulation.
6.03a Skill Discussion
The technique is explained by the Instructor who
provides an overview of the skill and of the tactical
environment in which the technique will be
utilized.

TOPIC NOTES
32
6.03b Skill Demonstration
The technique is demonstrated with particular
emphasis on the need which the skill meets.
6.03c Skill Practice
The technique is repeated to a level of mastery.
Drills progress from static, sequential movements
to simulations with a high level of fidelity.
6.04 Practice Sequences
Sequential ASP Tactical Restraint techniques are
taught using a four-part “progressive” format designed to
ensure that all participants gain competency during
training sessions.
Each of the four segments is structured to set a
deliberate pace of instruction. No more than eight (8)
repetitions should be done by any student during a drill
sequence before switching sides. No technique should
have more than three components. The four types of
training drills are:
6.04a By the Numbers: The first part of the format
breaks the various techniques into individual
steps of movement. The techniques are
presented in a 1-2-3 sequence as an introduction
to the skill.
6.04b Slow for Form: This intermediate step allows the
techniques to be executed as a system of
movement but concentrates on the form of
delivery, not power or speed.
6.04c Full Speed and Power: The third part of the
training sequence incorporates the previous
segments and adds the necessary dimensions of
speed and power in the execution of ASP
techniques.
6.04d Simulation: The final segment of the ASP
training format provides realistic, job-related,
dynamic use of the ASP Tactical Restraints under
situations of stress which approximate
operational use of the weapon during a
confrontation.

TOPIC NOTES
33
6.05 Training Equipment
Each item in the ASP training collection has been
designed to create a safe training envrionment while
preparing officers for the reality of the street.
6.05a Training Bags
ASP Training Bags were specifically designed for
Countermeasures, baton and restraint instruction.
Hold the safety bag tightly against the body. The
Reaction Hand goes through the support strap
and grips the handle. The Weapon Hand grips
the upper part of the support strap.
Each bag offers a visual cue for correct use. The
“ASP” on the front and back of the bag will be
upright for a right-handed officer. They will be
upside down for left-handed officers. This system
alerts Instructors and other officers to left-handed
students or those who position their bags
incorrectly during training drills.
6.05b Training Batons
The “soft baton” is utilized in pairs to allow
rapid repetitive practice of ASP Rock & Lock
techniques.
6.05c Red Restraints
Slip pawl Tri-Folds and hard handcuffs allow
repeated application. The restraints can be
rapidly removed with rotational release.
6.06 Drill Formations
There are five basic formations from which ASP
techniques are practiced. These training formats provide
repetition that enhances muscle memory. They develop
skills to a level of competency. They increase
performance under the stress of a confrontation.

TOPIC NOTES
34
6.06a Line: Students are placed in two lines facing
each other with one student serving as the
subject and the other student being the officer.
This formation allows the Instructor to look down
one line as the technique is performed and see
each student’s movement.
6.06b Wheel: Students are placed in two circles, one
inside the other. The inner circle faces outward
toward the second circle and plays the role of
attacker. The outer circle faces inward and plays
the role of the officer. The outer circle is directed
to move to the right, away from the attacker,
shielding the firearm after each technique. This
formation exposes each student to a wide variety
of partners. Wheel training is aerobic and
emphasizes dynamic movement.
6.06c Post: Students with training bags are placed at
alternating locations throughout the length of the
training room. Students perform a specified
technique moving in a zig-zag pattern between
bags.
6.06d Circle: Circle drills involve the entire class.
Students form a circle holding the training bags.
A single student enters the circle and will perform
techniques that have been learned against
opponents with training bags or training suits.
This drill requires officers to utilize body
mechanics and restraint techniques in a dynamic
setting.
6.06e Three Minute: Simulation training is provided
through use of training bags. One student serves
as the subject. A second is the officer. A third
student serves as safety coach and motivator.
The drill is run for three minutes with a minute
rest. The officer, bag holding subject and safety
coach then trade places for another three
minutes. At the end of each three minute drill, the
subject is taken to the ground, stabilized and
restrained.

TOPIC NOTES
35
6.07 Verbalization
The verbal exchange in any confrontation is very
important. Verbalization aids the subject in
understanding exactly what is expected by the officer. It
also provides bystanders with a perspective of what the
officer is trying to do. Law enforcement personnel should
document their verbalization in reports regardless of their
success in controlling the subject by dialogue.
Verbalization practice during training is as critical to a
successful program as the physical skills being learned.
Officers must be trained to turn bystanders into
witnesses.
6.08 Stances
Stances (Interview or Combat) are determined by the
level of threat encountered by the officer.
6.08a Interview: The Interview Stance is designed to
be a natural, comfortable way for officers to stand
at all times. All ASP techniques begin from the
Interview Stance.
A correct Interview Stance results in the pyramid
discussed in Section 4. Balance, power and rapid
response are possible from a correct Interview
Stance. The position is consistent with the
Weaver Shooting Stance.
Stand a minimum of two times (2x) the officer’s
arm length from the subject. This Safe
Separation provides time to recognize and react
to an attack. The officer has a strong pyramid.
The body is bladed to the subject with the
Weapon Side of the body away.
“Make me a witness”
Tell subjects what you want them to do.

TOPIC NOTES
36
6.08b Combat: The Combat Stance is designed to
maximize the potential for control while placing
the officer in the best defensive position. The
stance sends a strong visual message to the
subject that the officer is prepared for possible
aggression.
The relationship of the feet in the Combat Stance
is the same as in the Interview Stance. The feet
are slightly wider and the overall stance is deeper.
The Reaction Hand is at eye level with the elbow
bent protecting the upper body. The Weapon
Hand holds the restraints at shoulder level.
6.09 Reaction Hand Defense
The Reaction Hand is the first line of defense against
attack. The reflexive response of the Reaction Hand can
prevent a sudden assailant from disabling the officer. It
also creates distance and checks or redirects an
assailant’s attack.
In all ASP techniques, the Reaction Hand is kept up
to protect the face. Avoid swinging the arm out, away
from the body. An outstretched Reaction Hand leaves
the body open to additional assault.
The Interview Stance
1. Feet approximately shoulder width apart
2. Knees slightly bent, not locked
3. Reaction Leg forward
4. Weapon Leg back with foot angled at
about 45°
5. Reaction Hand up to protect the face
and guard the upper body
6. Weapon Hand slightly raised above the
waist to draw the baton or firearm
7. Body weight equally distributed on both
feet
TOPIC NOTES
37
An effective Reaction Hand Defense will often gain
the essential time needed to draw a baton or firearm and
control an assailant.
WEAPON HAND: Grips the baton, firearm or
restraint
REACTION HAND: Checks or Redirects assaults
6.10 Safe Separation
A Safe Separation of at least two times (2x) the
officer’s arm length allows the officer to deal with the
sudden assault of an individual. Safe Separation can be
established by:
6.10a Check: The Check is a technique designed to
stop the forward movement of a subject. The
technique can be performed with or without a
baton in the officer’s hand. Should the officer be
holding an expandable, care must be taken to
avoid dislodging the baton when the Check is
executed.
The officer performs the Check from either the
Interview or Combat Stance by thrusting the
Reaction or the Weapon and Reaction Hands into
the subject’s upper body. The arms are fully
extended but not locked. A solid Pyramid Stance
is necessary.
On contact with the subject, the officer pushes a
smaller attacker backwards. With a larger
assailant, the subject’s momentum moves the
officer back and away.
In both cases, Safe Separation is re-established.
6.10b Redirect: Redirection is a technique designed to
control and change the direction of a subject’s
attack.
When attacked, the officer waits until the last
possible moment before moving. This reduces
the subject’s ability to readjust the direction of
attack. Step away from the line of attack with the
Weapon Foot. Then follow with the Reaction
Foot. Turn the body to face the subject as they
pass.
TOPIC NOTES
38
As the assailant passes, the officer Redirects the
subject by pushing the upper torso of the attacker.
By stepping with the Weapon Foot first, the officer
reduces the risk of exposing the firearm to the
subject.
When creating Safe Separation, the officer should
give verbal directions to the subject such as,
“STOP” or “Get Back.” Loud, clear and specific
directions from an officer can often turn
bystanders into witnesses. (See Section 6.07)
6.11 Stabilization
When aggression and resistance cease, the officer
should move to a position of advantage to facilitate
restraint. Control is maximized by stabilizing the subject
against a solid object. The most efficient tactical
stabilization is to place the subject on a horizontal plane.
Placing the subject on the ground maximizes the officer’s
control.
6.12 Restraint
Either tactical (hard) handcuffs or disposable (soft)
restraints may be used with a stabilized subject. ASP
training allows officers to become proficient with a simple,
rapid technique for either application.
6.12a Tactical Handcuffs: Hard restraints are applied
by grasping the cuffs in the center, rocking a
restraint on the subject’s right hand and locking
the second cuff onto the subject’s left hand. The
technique is called Rock & Lock.
6.12b Disposable Restraints: Tri-Fold Restraints are
applied using the “three P” acronym. Inserting
the thumbs through the outer loops Pop the
restraints open, Place the restraints on the
subject and Pull the Tri-Folds tight.

TOPIC NOTES
39
SECTION 7: RESTRAINT CONCEPTS
ASP restraint techniques consist of core concepts
which apply to all handcuffing scenarios. They form the
basis for efficient application of ASP restraints
regardless of the tactics of a particular agency. Local
laws, operational requirements and administrative
considerations all impact the tactics employed by an
agency during handcuffing. ASP restraint skills are more
universal. They consist of basic handcuffing skills that
apply to the operation and application of ASP restraints.
7.01 Always Handcuff
Ultimately, the decision to handcuff a subject will rest
with the officer based upon training, experience and
department policy. From an officer safety perspective,
any subject who is arrested should be handcuffed.
Officers should be conditioned to behave in this manner.
It assures that all subjects are treated the same
regardless of age, sex, size or race.
7.02 Dialogue
Dialogue is intended to create compliance over
combat. It is the best defensive tactic. A clear, smooth,
neutral tone and specific instructions increase the
likelihood of subject compliance. Improper dialogue can
turn compliance into combat.
7.03 Control, then Cuff
A major safety error is the attempted application of
handcuffs too early. Police officers deal with two basic
types of subjects: Compliant “yes” people and resistant
“no” people.
Restraints should not be applied to a resisting
subject. In a combat environment, handcuffs can be
used against the officer.
Subjects must be under control prior to cuffing.
Control is established by stabilizing the subject.
7.04 Palm Reading
No police officer has ever been shot when the palms
of the subject’s hands were visible. Prior to handcuffing,
the palms of both hands must be facing the officer.

TOPIC NOTES
40
7.05 Weapon Hand Control
Officers must play the percentages, realizing that
nothing is 100%. Most people are right-handed.
Therefore, ASP techniques focus on restraint of the
subject’s right (dominant) hand “first and last.” Handcuffs
are first applied by right-handed officers to the right hand
of the subject. When removing handcuffs, the right hand
is the last hand released.
7.06 Angle of Advantage
The relationship of the officer to the subject during the
handcuffing process can dramatically impact the safety of
both parties. Blade the Reaction Side toward the subject
with the Weapon Side away. This allows the officer to
disengage or escalate the force option. A 45° angle to
the rear of the subject’s right side provides a position of
advantage while controlling the subject’s Weapon Hand.
7.07 Reactionary Gap
Prior to handcuffing, the officer should stand outside
the quick response range of the subject. This Safe
Separation allows the officer to disengage or escalate
should the subject become resistive. If a subject is going
to resist, most of the time it will come at first contact.
7.08 Time (Get It On)
The longer a restraining technique takes from contact
to cuffing, the more likely that combat will occur. When
dealing with compliant subjects, it is important to avoid
turning compliance into combat. The quick, smooth
practiced application of restraints is critical.
7.09 Cuff, then Search
Search after application of ASP restraints. This
provides a position of advantage for the officer and limits
the potential for resistance by the subject.
7.10 Retention
ASP restraints are not weapons. A prolonged effort to
retain the handcuff may expose the officer’s firearm.
When faced with a resisting subject, the restraint may
“cease to exist” as the officer makes a decision to
disengage or escalate the force option.

TOPIC NOTES
41
SECTION 8: BASIC RESTRAINT SKILLS
Officers face two general types of subjects in the field:
those who are compliant and those who are resistive.
Officers require simple restraining techniques that can be
executed under stress. The procedures must be rapid,
forgiving and safe. Safety for both the officer and for the
subject is critical. Officers do not practice the “Zen of
handcuffing.” Complex techniques requiring fine motor
skills do not work and will not be remembered. They may
create a confrontation and endanger the officer. Subjects
should be searched after (not prior to) the application of
restraints.
8.01 Portation (Carrying Tactical Restraints)
ASP Tactical Restraints are most often carried on the
Reaction Side of the body. A series of advanced
technology cases have been engineered for both hard
(Handcuff) and soft (Tri-Fold) restraints. These cases
protect restraints while providing immediate accessibility.
The ASP Tactical Handcuff is carried closed with the
chain, hinge or bridge in the downward position. Be
certain that the double lock is not engaged prior to casing
the cuffs. Tri-Folds can be carried folded or expanded for
immediate use.
When placed on the duty belt or tactical vest, care
should be used to place the restraint scabbard where it
will not push against the body when seated. Long
periods of wear may result in back or nerve damage.
8.02 Control the Subject
Chain and Hinge Handcuffs are not a tool for gaining
control of the subject. All subjects must be controlled
prior to handcuffing. An uncontrolled subject can employ
handcuffs as a weapon against the officer. Always
control, then cuff. To control a subject, they must be
stabilized. A subject can be stabilized on the ground,
against a wall or in an open space. Stabilization can
occur in a standing, kneeling or prone position. Rigid
Handcuffs (See Section 8.09) are the only ASP cuffs that
are designed to both control and then restrain a subject.

TOPIC NOTES
42
8.03 Watch the Palms
Regardless of the
location or position, both
of the subject’s palms
should be visible before
handcuffs are presented.
8.04 Presentation (Drawing Tactical Restraints)
Restraints are positioned in the Weapon Hand. Hold
one cuff, allowing the second to drop down. Grasp the
center of the restraint with the Weapon Hand securely
positioning the cuffs.
The handcuff case should be within reach of either
the Weapon or Reaction Hand. However, cross draw of
the handcuff may allow both arms to be trapped or pinned
unless Safe Separation is maintained.
Presentation and application of restraints should not
be attempted until the officer has established a position of
advantage, stabilized the subject and established control.
Use of the ASP Tactical Restraint should never be
done while holding a firearm.
8.05 Handcuff Grip
ASP Tactical Restraints are held in the Weapon Hand
for application to the subject. From this position, the
officer can disengage or escalate the confrontation with
the restraints in hand or draw a weapon as the restraints
“cease to exist.”
The restraint is held with a full hand grip of four
fingers and a thumb in a position vertical to the ground.
Chain, Hinge and Rigid cuffs are held with the bow facing
the subject while grasping the center of the restraint. The
Tri-Fold is held with both straps facing the subject and the
locking block held in the palm of the hand. Do not place
fingers around the chain or straps after restraints have
been applied.
8.06 Place & Push
ASP restraints are best applied between the large
bone on the outside of the wrist (ulna) and the base of the
hand. They should be snug enough not to slip over the
hand and yet loose enough not to impede blood flow or
impinge on the nerves in the wrist.

TOPIC NOTES
43
· Approach the subject from the 45° angle of
advantage.
· Maintain a solid pyramid stance.
· Most people are right-handed. It is preferable to
cuff the right hand first and then the left.
· Cuff the subject’s hands behind the back.
· Cuff with the backs of a subject’s hands facing
each other, palms out. Hinge and Rigid cuffs
permit the subject’s hands to be stacked for
increased security. (See Section 8.09d)
· Position the flat portion of the bow on the edge of
the subject’s wrist.
· Apply firm pressure until the bow rotates through
the body of the cuff and engages.
· Due to the advanced design of the ASP Tactical
Handcuffs, there is no need to be concerned with
the position of the keyhole during cuffing. A
keyway will always be accessible to safely and
conveniently unlock and remove Tactical
Handcuffs.
NOTE
Do not strike the edge of the wrist with the
handcuff. A double locked cuff can fracture the
wrist.
NOTE
Under special circumstances such as court
appearances or inmate transfer, there may be
requirements to cuff the subject with his hands
in front. In these applications, the Cuff Cover
will enhance control.

TOPIC NOTES
44
8.07 Rock & Lock
ASP restraints are applied to the subject using the
Rock & Lock technique.
8.07a Rock: Apply the “bottom” (little finger) restraint to
the subject’s right (dominant) hand in a downward
“rocking” motion (45° from shoulder to hip). As
the bow is pushed against the wrist, it will travel
through the restraint and swing over the subject’s
wrist.
8.07b Lock: Repeat with the “top” (thumb) restraint to
the subject’s left hand. If a cuff does not engage,
the officer’s Reaction Hand can scoop the bow
bringing both of the officer’s hands together and
ensuring that the restraint engages.
Tri-Fold Restraints should be tightened
simultaneously by pulling on the strap with the
Tri-Fold Ring.
8.08 Combat Cuffing
Attempting to apply handcuffs to a resisting subject
dramatically increases the danger to an officer. A loose
or open handcuff is a serious weapon. Combat Cuffing is
intended to be a multi-officer activity.
Apply a handcuff to the back of the subject’s Strong
Hand. Use the second cuff to pull the hand behind the
subject’s back. Bring the second hand of the subject to
the back. Place the handcuff frame onto the second wrist
of the subject. Grasp the bow. Bring it into the frame until
it engages the pawl.
8.09 Rigid Restraint
Rigid Handcuffs lock open to
restrict both lateral and linear
movement. Hinge Handcuffs
restrict only lateral movement.
Chain Handcuffs restrict neither. Rigid
Handcuffs are designed to both control and
restrain a subject.
NOTE
Do not handcuff a subject to yourself, a fixed
object or a vehicle.
NOTE
Left-handed officers may prefer to
control and apply the first cuff to the
subject’s left hand.

TOPIC NOTES
45
8.09a Palm Swell: The raised island on the
back side of rigid cuffs provides a
secure hand filling grip and shields the
keyway. A standard handcuff key
unlocks and allows folding of the cuffs.
The keyway is angled and incorporates
a 1/8 turn to release.
8.09b Orientation Disk:
The raised (for
right hand) or
lowered (for left
hand) thumb
index near the
bow guides
allows an officer to confirm proper orientation of
Rigid Handcuffs.
8.09c Pry the Palm: Rigid Handcuffs may be applied
from the inside or outside to the subject’s right or
left hand. Whatever the position of application,
the cuffs should extend from the palm side of the
subject’s hand. Apply pressure by blocking the
top of the hand and prying up.
Pressure with a Rigid Handcuff should be linear,
never lateral. Pressure is applied straight out in
direct alignment with the arm to stabilize the
subject on the ground.
8.09d Stacking: The design of Rigid Handcuffs
provides additional control during standard Rock
& Lock restraint. In addition, Rigid cuffs may be
utilized to stack a subject’s hands for increased
low profile control in a courtroom or on a
passenger aircraft. Stack the hands palm down in
front of the body.

TOPIC NOTES
46
8.10 Slide, Lock, Search
Subjects should be searched after double locking the
cuffs.
8.10a Slide: Once restraints have been applied, the
officer carefully “slides” the tip of finger partially
between the restraint and the subject’s wrist to
check for tightness. Use a handcuff key to
activate the double lock. This is done by “sliding”
the lock bar until the high visibility indicator has
disappeared.
· Tighten the bow until
only enough space
remains to insert the tip
of your finger between
the handcuff and the
subject’s wrist.
8.10b Double Lock: Engage the
double lock by using the pin
of the handcuff key to slide
the double lock bar into
position. The double lock
slot is beveled for easy
access from either side. The
double lock is extremely
NOTE
Overtightening handcuffs can cause soft tissue
or nerve damage.
NOTE
Flex Frame Technology reduces the
likelihood that a subject will be injured by an
improperly applied restraint. If a cuff would
cause injury due to lateral pressure from the
angle at which it is applied on the subject’s
wrist, the frame will flex. As the officer realigns
the cuff, it will return to normal and can be
applied, double locked and checked for
tightness. This flex frame design is a key
factor in preventing excessive lateral stress. It
prevents compression of nerves in the wrist
which result from improper handcuff
application.

TOPIC NOTES
47
smooth and easy to apply. Yet, it cannot be
accidentally engaged by the officer or deactivated
by the subject. The advanced design of the
Tactical Handcuff gives a visual indication if the
cuff is not double locked. A high visibility bar
signals the need to double lock the restraint.
8.10c Loosen & Lock: A handcuff that tests too tight
may be loosened by inserting the key, turning it in
the direction of the bow and releasing the Lock
Set.
The bow will open to a less constrictive position.
Turn the key away from the bow to activate the
double lock. It is not necessary to remove the key
and use the double lock pin to secure an adjusted
ASP cuff.
8.10d Search: After cuffing,
search the subject. Be alert
to objects such as pins or
metal strips that could be
used to shim restraints.
Items such as ballpoint pen
ink cartridges can be used
to pick handcuffs. Follow a
systematic, consistent
searching pattern. This
assures a complete search
each time.
8.11 Raising the Subject
Do not attempt to lift the subject from a prone cuffing
position. Grasping the subject by the shoulders, rock him
toward you into a seated position. Rotate him onto his
knee and up to a standing position.
8.12 Movement
The subject should not be tied to the officer during
movement. Control the right elbow of the subject with the
right hand. Place the left hand over the back and grasp
the edge of the subject’s hand.
Stabilize the subject’s elbow and twist the wrist for
control. Never grasp the handcuff links during transport
as the officer’s hand can be easily trapped by the subject.
Walk forward forcing the subject to walk to the side.
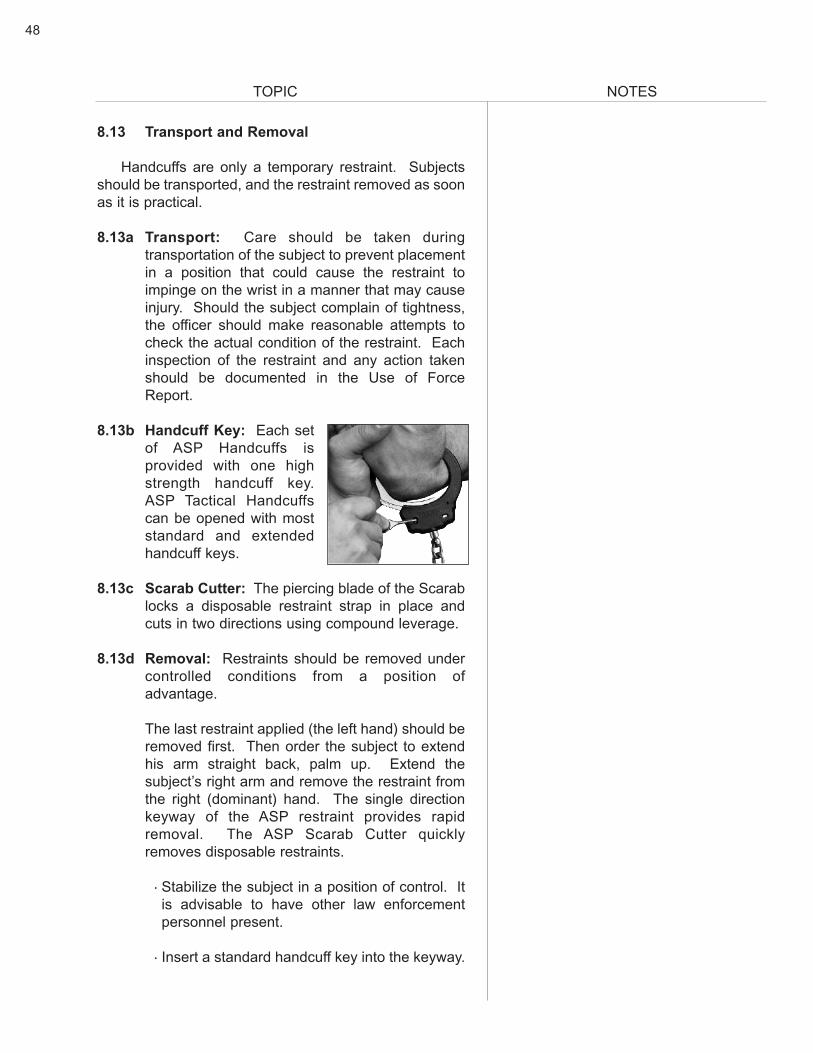
TOPIC NOTES
48
8.13 Transport and Removal
Handcuffs are only a temporary restraint. Subjects
should be transported, and the restraint removed as soon
as it is practical.
8.13a Transport: Care should be taken during
transportation of the subject to prevent placement
in a position that could cause the restraint to
impinge on the wrist in a manner that may cause
injury. Should the subject complain of tightness,
the officer should make reasonable attempts to
check the actual condition of the restraint. Each
inspection of the restraint and any action taken
should be documented in the Use of Force
Report.
8.13b Handcuff Key: Each set
of ASP Handcuffs is
provided with one high
strength handcuff key.
ASP Tactical Handcuffs
can be opened with most
standard and extended
handcuff keys.
8.13c Scarab Cutter: The piercing blade of the Scarab
locks a disposable restraint strap in place and
cuts in two directions using compound leverage.
8.13d Removal: Restraints should be removed under
controlled conditions from a position of
advantage.
The last restraint applied (the left hand) should be
removed first. Then order the subject to extend
his arm straight back, palm up. Extend the
subject’s right arm and remove the restraint from
the right (dominant) hand. The single direction
keyway of the ASP restraint provides rapid
removal. The ASP Scarab Cutter quickly
removes disposable restraints.
· Stabilize the subject in a position of control. It
is advisable to have other law enforcement
personnel present.
· Insert a standard handcuff key into the keyway.

TOPIC NOTES
49
· Turn the key toward the bow to unlock.
· Rotate the key 1/8 turn to disengage the double
lock bar. Rotating the key 3/4 turn releases
both the double and single lock.
· The design of ASP Tactical Handcuffs assures
that a keyway is always accessible for safe
removal of handcuffs.
· The advanced design of ASP Tactical
Handcuffs releases both double and single
locks by turning the handcuff key in a single
direction. A stop prevents the cuff from being
turned incorrectly.
Once restraints are removed, document any
marks or injuries to the subject. In addition, check
the operation of the restraints prior to recasing
them.
NOTE
· Handcuffs are a temporary restraining
device.
· Handcuffs do not insure the safety of an
officer.
· A handcuffed subject should still be
considered a threat.
· Handcuffs are not intended for long term
control.
· Check the subject’s hands and wrists on a
periodic basis to avoid soft tissue or nerve
damage from handcuffs.
· Handcuffs do not completely restrain or
immobilize a subject.
· A handcuffed subject should be kept under
observation.


TOPIC NOTES
51
SECTION 9: EVALUATION
9.01 Physical Testing
Testing of ASP restraint skills is competency based.
Participants must demonstrate handcuffing techniques to
a specified level of competency.
There are no grades in the ASP program. An
objective standard of performance has been established
for ASP restraint training. All participants meeting that
standard will be certified in operational use of Tactical
Restraints.
Performance is tested by a physical demonstration of
handcuffing techniques and a written examination of
restraint concepts.
There are two methods of testing ASP restraint
physical skills. The choice of method is left up to the
Instructor.
9.01a Dynamic Proficiency Testing: This is the most
accurate test of a student’s actual ability. Skills
being tested will one day be used in a
confrontation with an aggressive opponent who
thinks and moves. This method allows the ASP
Instructor to observe the student’s ability under
stress and to feel the control demonstrated by
each student.
9.01b Static Proficiency Testing: This method of
evaluation involves two students. Each assumes
the role of officer and subject. Students
demonstrate each ASP technique.
9.02 Written Examination
A written examination is part of the performance
evaluation of those seeking ASP certification. All grading
is competency based.
9.03 Class Critique
Each student is provided with a Training Critique (SeeAppendix D). Each section should be answered candidly.
These Critiques are returned to your Instructor and
not to the factory. They are an important component for
improving the quality of ASP restraint training.

TOPIC NOTES
52
9.04 Awards Presentation
At the conclusion of training, certificates will be
presented to individuals who have successfully
completed the requirements of the ABC program.
9.05 Armament Systems and Procedures
Armament Systems and Procedures is the world’s
largest manufacturer of intermediate force weaons. The
company has deep roots in the design and production of
tactically sophisticated, concealable armament for
government special users. The distinctive ASP Eagle
insignia is associated worldwide with the most advanced
tactical designs.
Armament Systems offers free ongoing training for all
aspects of ASP restraints. ASP training is currently
conducted in over 80 nations. Individual assistance with
agency modification of ASP programs is available without
charge.
Feedback from Criminal Justice personnel is valued
and desired. Comments are welcomed and encouraged.
Address correspondence to:
Kevin Parsons, PhD
Chairman and CEO
Armament Systems and Procedures, INC
2511 E Capitol DR
Box 1794
Appleton, WI 54912
Office (800) 236-6243 · (920) 735-6242
Fax (800) 236-8601 · (920) 735-6245
E-mail: [email protected]
Web Site: asp-usa.com
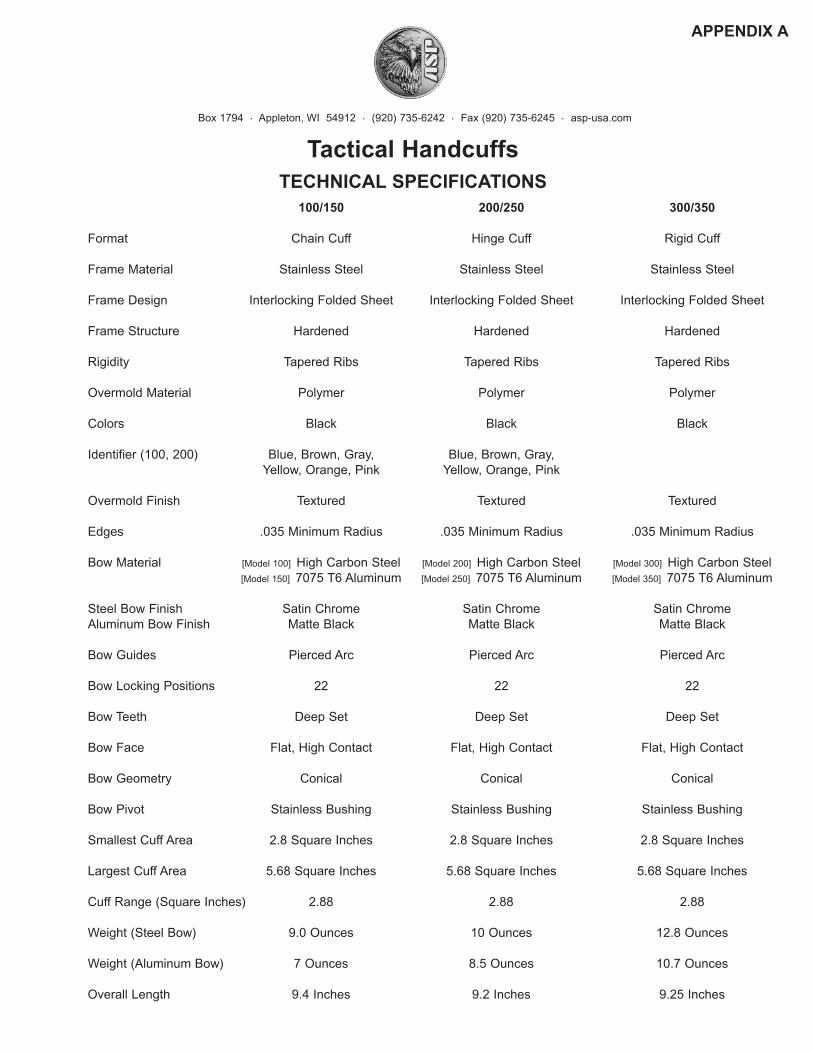
APPENDIX A
Tactical Handcuffs
TECHNICAL SPECIFICATIONS
100/150 200/250 300/350
Format Chain Cuff Hinge Cuff Rigid Cuff
Frame Material Stainless Steel Stainless Steel Stainless Steel
Frame Design Interlocking Folded Sheet Interlocking Folded Sheet Interlocking Folded Sheet
Frame Structure Hardened Hardened Hardened
Rigidity Tapered Ribs Tapered Ribs Tapered Ribs
Overmold Material Polymer Polymer Polymer
Colors Black Black Black
Identifier (100, 200) Blue, Brown, Gray, Blue, Brown, Gray,
Yellow, Orange, Pink Yellow, Orange, Pink
Overmold Finish Textured Textured Textured
Edges .035 Minimum Radius .035 Minimum Radius .035 Minimum Radius
Bow Material [Model 100] High Carbon Steel [Model 200] High Carbon Steel [Model 300] High Carbon Steel
[Model 150] 7075 T6 Aluminum [Model 250] 7075 T6 Aluminum [Model 350] 7075 T6 Aluminum
Steel Bow Finish Satin Chrome Satin Chrome Satin Chrome
Aluminum Bow Finish Matte Black Matte Black Matte Black
Bow Guides Pierced Arc Pierced Arc Pierced Arc
Bow Locking Positions 22 22 22
Bow Teeth Deep Set Deep Set Deep Set
Bow Face Flat, High Contact Flat, High Contact Flat, High Contact
Bow Geometry Conical Conical Conical
Bow Pivot Stainless Bushing Stainless Bushing Stainless Bushing
Smallest Cuff Area 2.8 Square Inches 2.8 Square Inches 2.8 Square Inches
Largest Cuff Area 5.68 Square Inches 5.68 Square Inches 5.68 Square Inches
Cuff Range (Square Inches) 2.88 2.88 2.88
Weight (Steel Bow) 9.0 Ounces 10 Ounces 12.8 Ounces
Weight (Aluminum Bow) 7 Ounces 8.5 Ounces 10.7 Ounces
Overall Length 9.4 Inches 9.2 Inches 9.25 Inches
Box 1794 · Appleton, WI 54912 · (920) 735-6242 · Fax (920) 735-6245 · asp-usa.com

JANUARY 2009
100/150 200/250 300/350
Frame Connection Welded Chain Four Point Hinge Sliding Bridge
Connection Material Stainless Steel Stainless Steel Stainless Steel
Swivel Design Reinforced Collar Riveted Link Locking Bars
Lock Set Replaceable Replaceable Replaceable
Lock Bar (Pawl) Stainless Steel Stainless Steel Stainless Steel
Lock Spring Coil Coil Coil
Double Lock Bar Polymer Polymer Polymer
Double Lock Indicator High Visibility Yellow, High Visibility Yellow, High Visibility Yellow,
Blue or Green Blue or Green Blue or Green
Keyway Double Sided Double Sided Double Sided
Key Plate Welded Stainless Steel Welded Stainless Steel Welded Stainless Steel
Contour Recessed Recessed Recessed
Security Post Stainless Stainless Stainless
Double Lock Slot Dual Dual Dual
Contour Beveled Beveled Beveled
Double and Single Lock Release One-Direction One-Direction One-Direction
Serial Number With Month and With Month and With Month and
Year Code Year Code Year Code
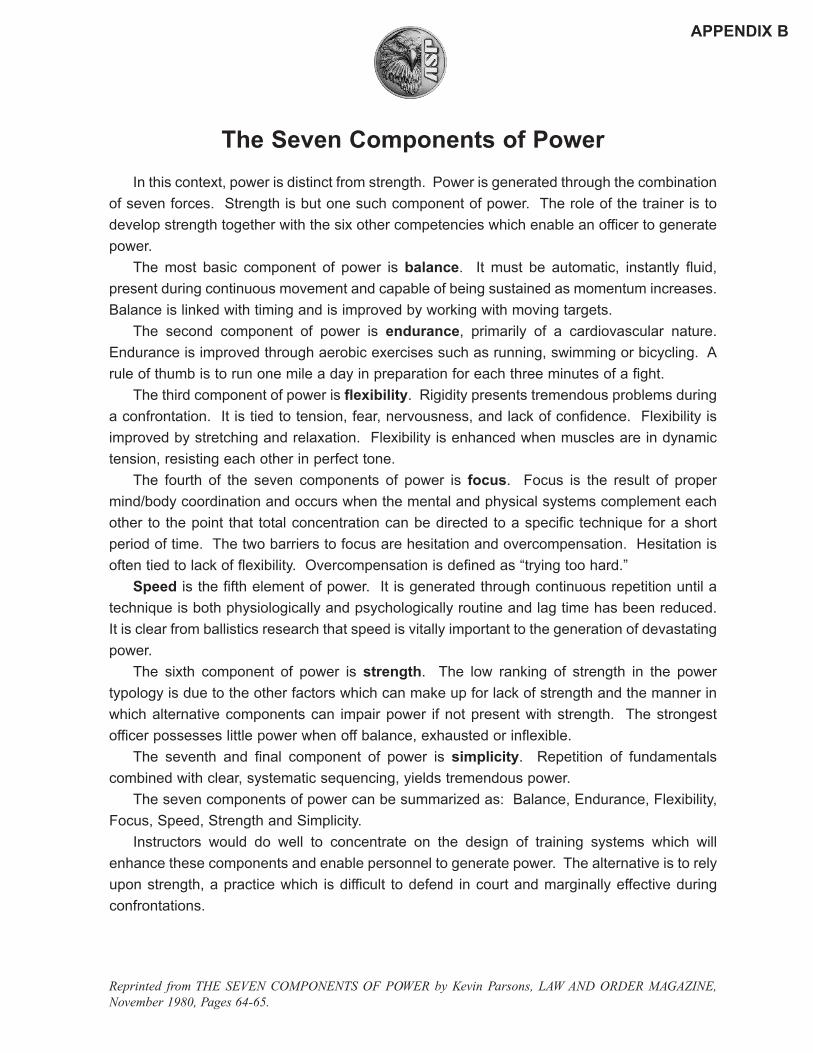
APPENDIX B
The Seven Components of Power
In this context, power is distinct from strength. Power is generated through the combination
of seven forces. Strength is but one such component of power. The role of the trainer is to
develop strength together with the six other competencies which enable an officer to generate
power.
The most basic component of power is balance. It must be automatic, instantly fluid,
present during continuous movement and capable of being sustained as momentum increases.
Balance is linked with timing and is improved by working with moving targets.
The second component of power is endurance, primarily of a cardiovascular nature.
Endurance is improved through aerobic exercises such as running, swimming or bicycling. A
rule of thumb is to run one mile a day in preparation for each three minutes of a fight.
The third component of power is flexibility. Rigidity presents tremendous problems during
a confrontation. It is tied to tension, fear, nervousness, and lack of confidence. Flexibility is
improved by stretching and relaxation. Flexibility is enhanced when muscles are in dynamic
tension, resisting each other in perfect tone.
The fourth of the seven components of power is focus. Focus is the result of proper
mind/body coordination and occurs when the mental and physical systems complement each
other to the point that total concentration can be directed to a specific technique for a short
period of time. The two barriers to focus are hesitation and overcompensation. Hesitation is
often tied to lack of flexibility. Overcompensation is defined as “trying too hard.”
Speed is the fifth element of power. It is generated through continuous repetition until a
technique is both physiologically and psychologically routine and lag time has been reduced.
It is clear from ballistics research that speed is vitally important to the generation of devastating
power.
The sixth component of power is strength. The low ranking of strength in the power
typology is due to the other factors which can make up for lack of strength and the manner in
which alternative components can impair power if not present with strength. The strongest
officer possesses little power when off balance, exhausted or inflexible.
The seventh and final component of power is simplicity. Repetition of fundamentals
combined with clear, systematic sequencing, yields tremendous power.
The seven components of power can be summarized as: Balance, Endurance, Flexibility,
Focus, Speed, Strength and Simplicity.
Instructors would do well to concentrate on the design of training systems which will
enhance these components and enable personnel to generate power. The alternative is to rely
upon strength, a practice which is difficult to defend in court and marginally effective during
confrontations.
Reprinted from THE SEVEN COMPONENTS OF POWER by Kevin Parsons, LAW AND ORDER MAGAZINE,November 1980, Pages 64-65.

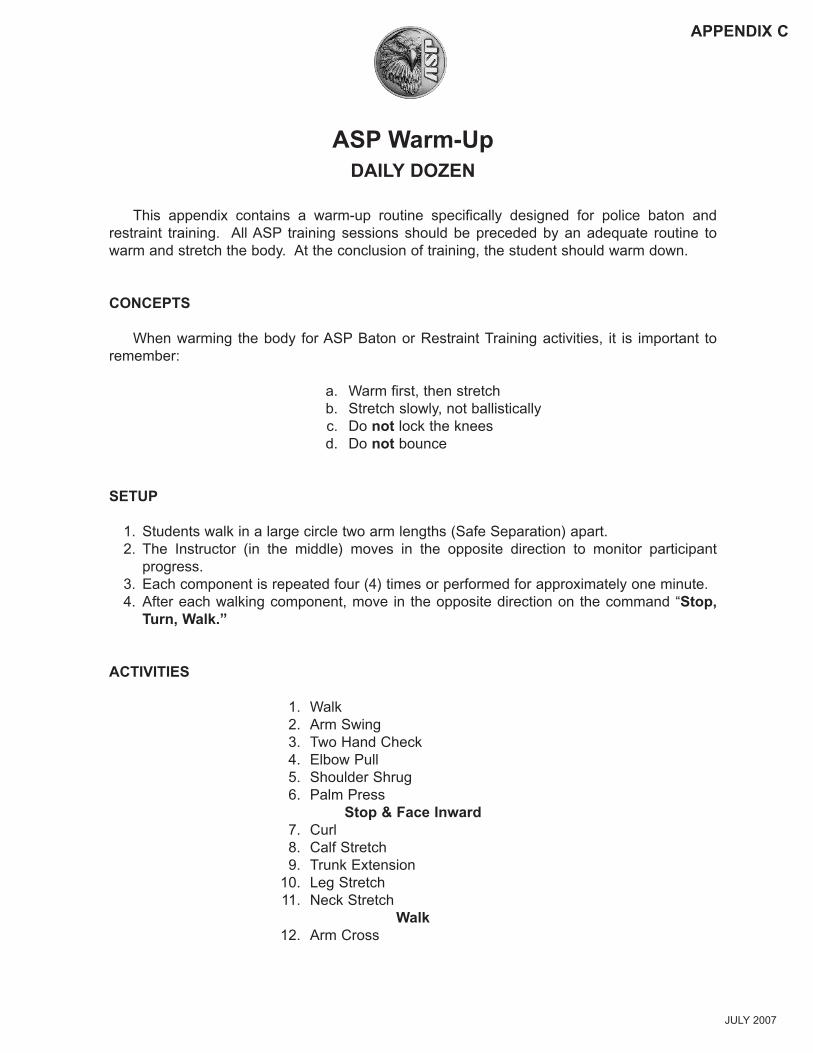
APPENDIX C
ASP Warm-Up
DAILY DOZEN
This appendix contains a warm-up routine specifically designed for police baton and
restraint training. All ASP training sessions should be preceded by an adequate routine to
warm and stretch the body. At the conclusion of training, the student should warm down.
CONCEPTS
When warming the body for ASP Baton or Restraint Training activities, it is important to
remember:
a. Warm first, then stretch
b. Stretch slowly, not ballistically
c. Do not lock the knees
d. Do not bounce
SETUP
1. Students walk in a large circle two arm lengths (Safe Separation) apart.
2. The Instructor (in the middle) moves in the opposite direction to monitor participant
progress.
3. Each component is repeated four (4) times or performed for approximately one minute.
4. After each walking component, move in the opposite direction on the command “Stop,
Turn, Walk.”
ACTIVITIES
1. Walk
2. Arm Swing
3. Two Hand Check
4. Elbow Pull
5. Shoulder Shrug
6. Palm Press
Stop & Face Inward
7. Curl
8. Calf Stretch
9. Trunk Extension
10. Leg Stretch
11. Neck Stretch
Walk
12. Arm Cross
JULY 2007


APPENDIX D
ASP Basic Certification (ABC)
TRAINING CRITIQUE
INSTRUCTOR:
Baton Handcuff
THIS EVALUATION WILL BE USED BY THE INSTRUCTOR TO IMPROVE FUTURE
WORKSHOPS. PLEASE GIVE YOUR CANDID REACTION TO THE FOLLOWING
QUESTIONS:
1. WHAT DID YOU LIKE ABOUT THE PROGRAM?
2. WHAT DID YOU DISLIKE ABOUT THE PROGRAM?
3. WHAT SHOULD BE RETAINED IN FUTURE PROGRAMS?
4. WHAT CHANGES SHOULD BE MADE IN THIS PROGRAM?
(over)
Box 1794 · Appleton, WI 54912 · (920) 735-6242 · Fax (920) 735-6245 · asp-usa.com

5. INSTRUCTOR EVALUATIONPoor Below Adequate Good Excellent
Average
Knowledge of Subject 1 2 3 4 5
Preparation and Organization 1 2 3 4 5
Enthusiasm for Class 1 2 3 4 5
Ability to Communicate 1 2 3 4 5
Attitude Toward Students 1 2 3 4 5
Suitability of Tests 1 2 3 4 5
Use of Class Time by Instructor 1 2 3 4 5
Overall Evaluation of Instructor 1 2 3 4 5
COMMENTS:
EVALUATOR BACKGROUND (Optional)
Name ________________________________________________________________ Rank __________
Agency _______________________________________________________________ State __________
Years of Law Enforcement Experience _______________________________________________________
______________________________________________________________________________________
Other Baton or Restraint Seminars Attended __________________________________________________
______________________________________________________________________________________
AUGUST 2005

OV
ER
HE
AD
A
THE CONFRONTATIONAL CONTINUUM®
Force Cont nuum®
Control TheoryThe Goal is ControlControl is not 50/50 You need Advantage for ControlEvaluate Propensity for Control v DamageAbility to Disengage or Escalate is Imperative
Totality of the SituationOfficer/Subject FactorsAge Multiple OfficersGender Multiple SubjectsSizeFitnessSkill Level
Special CircumstancesClose Proximity to a WeaponSpecial KnowledgeInjury or ExhaustionGround PositionDisabilityImminent DangerA
ssai
lant
Act
ion
Officer R
eaction
Force Options
Dialogue Escort Pain Mechanical Baton Firearm


OV
ER
HE
AD
B
CHAIN HANDCUFF EXPLODED VIEW
REPLACEABLE LOCK SETS


OV
ER
HE
AD
C
HINGE HANDCUFF EXPLODED VIEW
REPLACEABLE LOCK SETS


OV
ER
HE
AD
D
RIGID HANDCUFF EXPLODED VIEW
REPLACEABLE LOCK SETS


OV
ER
HE
AD
E
TRI-FOLD RESTRAINT CUTAWAY


1. Wide Base2. Deep Base3. Low Center4. Head Over Center
OV
ER
HE
AD
F
PYRAMID CONCEPT


OV
ER
HE
AD
G
DAILY DOZEN
Walk Arm Swing Two Hand Check Elbow Pull
Shoulder Shrug
Curl
Calf Stretch Trunk Extension Leg Stretch
Neck Stretch
Palm Press
Arm Cross
1 3
9 10
11 12
8
76
4
5
2
Stop andFace Inward
Walk