TABLE OF CONTENTS - Web.UVic.cathopper/Pe352/2003/Lisa Ryan Erin/PE 352 Lisa... · TABLE OF...
39
P.E. 352 UNIT PLAN: GYMNASTICS Erin Calver Lisa Appel Ryan Deutsch TABLE OF CONTENTS: 1.) Introduction and philosophical statement 2.) Entry level and exit outcomes 3.) Learning objectives 4.) Sequence of major events 5.) Managerial routines & organizational time savers 6.) Content analysis 7.) 12 warm-ups 8.) Description of task / activities 9.) Description of teaching styles 10.)Block plan 11.)Assessment procedures 12.)Lesson plans #1 & #2 13.)Safety considerations Introduction: This unit plan is designed for a co-ed grade 6 physical education class over a period of 10 one-hour lessons. There are 30 students in the class. Philosophical Statement: The aim of physical education is to enable all students to enhance their quality of life through active living. Physical education should contain various activities to motivate the students and meet all of their individual needs. Physical education should teach the students qualities that are important in daily life, such as teamwork, cooperation, goal setting and problem-solving techniques. The curriculum organizers from the IRP: Active Living, Movement, and Personal and Social Responsibility all incorporate these types of characteristics that are important to foster into the physical education teaching area. Most importantly, we believe that physical education should have a profound affect on the students so that they will lead healthy, active lives based on what they have learned. Also, we hope that the students will be role models for each other and encourage their peers to participate and understand the benefits and rewards associated with active living. Gymnastics will be able to develop skillful, confident and knowledgeable performers by emphasizing fun, fitness and fundamentals through a variety of teaching styles. We will expose the children to a number of interesting and challenging activities that will promote thinking and problem solving. Many of the
Transcript of TABLE OF CONTENTS - Web.UVic.cathopper/Pe352/2003/Lisa Ryan Erin/PE 352 Lisa... · TABLE OF...

P.E. 352 UNIT PLAN: GYMNASTICS
Erin Calver Lisa Appel
Ryan Deutsch
TABLE OF CONTENTS:
1.) Introduction and philosophical statement 2.) Entry level and exit outcomes 3.) Learning objectives 4.) Sequence of major events 5.) Managerial routines & organizational time savers 6.) Content analysis 7.) 12 warm-ups 8.) Description of task / activities 9.) Description of teaching styles 10.)Block plan 11.)Assessment procedures 12.)Lesson plans #1 & #2 13.)Safety considerations
Introduction: This unit plan is designed for a co-ed grade 6 physical education class over a period of 10 one-hour lessons. There are 30 students in the class.
Philosophical Statement:
The aim of physical education is to enable all students to enhance their quality of life through active living. Physical education should contain various activities to motivate the students and meet all of their individual needs. Physical education should teach the students qualities that are important in daily life, such as teamwork, cooperation, goal setting and problem-solving techniques. The curriculum organizers from the IRP: Active Living, Movement, and Personal and Social Responsibility all incorporate these types of characteristics that are important to foster into the physical education teaching area. Most importantly, we believe that physical education should have a profound affect on the students so that they will lead healthy, active lives based on what they have learned. Also, we hope that the students will be role models for each other and encourage their peers to participate and understand the benefits and rewards associated with active living.
Gymnastics will be able to develop skillful, confident and knowledgeable performers by emphasizing fun, fitness and fundamentals through a variety of teaching styles. We will expose the children to a number of interesting and challenging activities that will promote thinking and problem solving. Many of the

activities will be in a partner or group environment to encourage group cohesion and communication skills.
ENTRY LEVEL AND EXIT OUTCOMES: ENTRY LEVEL: • Students will have a varied level of gymnastic skill, ranging from no experience
to well experienced. • Some students are well-rounded athletes while others are inactive. • It is assumed that girls will be more flexible than boys. • Due to their young age, it is expected that all students will have a decent range of
motion and at least average flexibility. • It is assumed that the students understand the basic gymnastic terminology such
as forward roll, balance, headstand, etc. • It is assumed that all students are respectful to their peers and the instructor. CURRICULUM ORGANIZERS EXIT OUTCOMES Active Living Participate in and describe the benefits of warm-up Set and modify goals to develop personal fitness and
motor abilities Identify factors that affect choices of physical activity
for life Movement Demonstrate locomotor and non-locomotor skills,
body and space awareness, qualities, and relationships when performing gymnastic activities
Create a variety of sequences alone, in partners, or in groups
Use problem solving skills to solve movement challenges
Create, perform and evaluate sequences individually or in partners
Select, combine and perform locomotor and non-locomotor skills in movement sequences, alone or with others, with or without objects
Demonstrate body mechanics to improve gymnastics skills
Personal & Social Responsibility Identify and follow rules, routines, and procedures of safety
Demonstrate self-confidence while participating in physical activity
Identify and demonstrate a etiquette and fair play Identify and demonstrate positive attitudes that show
respect for individuals’ potential, interests, and cultural backgrounds
Identify leadership skills used while participating in

physical education UNIT LEARNING OBJECTIVES Psychomotor Domain:
• Students will be able to effectively set up/take down all necessary equipment • Students will gain an understanding of the Dominant Movement Patterns
(DMPs). These include statics, rotations, locomotions, supports, and balances.
• Students will be able to perform/demonstrate different body positions • Students will be able to perform/demonstrate different balances • Students will be able to perform/demonstrate types of locomotions • Students will be able to perform/demonstrate different types of landings • Students will be able to perform/demonstrate varies ways to roll • Students will be able to perform/demonstrate different types of supports • Students will be able to perform/demonstrate different types of springs
(jumps) • Students will be able to perform and effectively demonstrate varies rotations
and complex balances • Students will have to design and perform a dance sequence that combines
elements of all of the main DMPs Cognitive Domain:
• Students will have an understanding of safety considerations needed for gymnastics class
• Students will be able to demonstrate their knowledge of safety concerns in the gym, which pertain to gymnastics
• Students will be bale to accommodate for varying skill levels during the floor routines
• Students will gain knowledge of the main DMPs of gymnastics
Affective Domain:
• Students will be able to work with partners and groups with varying skill levels and abilities
• Students will be able to provide positive feedback to help initiate development of other learners
• Students will have fun while doing gymnastics • Students will develop team working and team building skills • Students will gain confidence in their abilities and DMPs of gymnastics • Students will learn to adhere to the safety guidelines

THE MAJOR EVENTS DAY 1 DAY 2 DAY 3 SAFETY AND TASK CARDS
SAFETY ASSESSMENT, BODY POSITIONS, AND BALANCES
LOCOMOTIONS, LANDINGS, AND PLANNED FALLS
DAY 4 DAY 5 DAY 6 ROLLS SUPPORTS AND
ASSESSMENTS SPRINGS
DAY 7 DAY 8 DAY 9 ROTATIONS AROUND ANTERIO-POSTERIOR AXIS AND COMPLEX BALANCES
FIELD TRIP TO VICTORIA GYMNASTICS
GROUP ROUTINE PRACTISE AND ASSESSMENT
DAY 10 FLOOR ROUTINE ASSESSMENT MANAGERIAL ROUTINES AND ORGANIZATIONAL TIME SAVERS: • Make sure students realize it is their responsibility to be changed and ready for
class on time. • Students designated to set up and take down equipment according to the class
list. • Begin every class with students seated on mats facing teacher. • Have a list of equipment required for the lesson written on the chalkboard so
students responsible for set-up can get started early. • All partners and groups are pre-selected by the teacher in order to ensure proper
rotation of partners and skilled individuals working with non-skilled individuals. • Practice a specific routine for ending each lesson: students take down equipment
then give teacher their daily effort and success mark before leaving.

CONTENT ANALYSIS:
Skill Conceptual Problem Key Elements-Simplified (cues outlined in task analysis)
Safety -use all equipment in an efficient, safe manner -awareness of space (in regards to spotting other students, equipment)
-knowledge of equipment & specific apparatus’ -safe positioning
Body Positions -use body parts to cover maximum surface area -provide a stable / comfortable stationary body position
-v-sit: legs spread in v -pike sit: straight legs -tuck sit: knees up
Balances -balance body weight over center of gravity -shift body weight in order to compensate for changes in center of gravity -partner balances:
-use limbs as stabilizers -awareness of each individual’s center of gravity
-one leg stand -toe stand -knee balance: balance while kneeling on one knee -shoulder balance: lying on back, balancing on shoulders
Locomotions -effective movement of body in different locomotive positions -awareness of movement -least amount of effort to produce maximum locomotion
-seal walk -bear walk -frog walk
Landings / Planned Falls
-cover as much surface area as possible -land on maximum amount of body parts to lessen impact -create landing over extended period of time -use joints (knees) to absorb fall -execute a safe landing imitating a proper fall
-feet: land on feet -hands: land on hands -back: land on back using arms to break fall
Rolls -safe, efficient rolls -use of momentum to create motion -position body to allow for maximum fluidity
-forward roll: roll over horizontal axis -backward roll: similar to forward only going backward -log roll: roll on side of body (longitudinal axis) -shoulder roll: similar to forward roll, more contact on shoulder

Supports -use strength to support body -determine best positioning to allow for maximum support / stability -minimal effort
-front support: support body weight on hands -back support: opposite of front support -bridge support: support weight on hands and feet -straddle support: support body weight on feet
Springs -maximum movement with minimal effort -use of muscles and joints (elastic energy) to propel body -tuck tightly to promote higher leaps, easier movement -flight:
-body compact in air -limbs extended-slows body -limbs close to body-makes body more streamlined
-One Leg: -split leap: leap from one leg to other -stag leap: like split leap, front leg bent -scissor leap: scissor action -cat leap: scissor; legs bent and turned out -Two Legs: -tuck jump: in air, bring knees to body -straddle jump: spread legs -half / full turns:180 degree or 360 degree turns
Rotations (around anterio-posterior axis)
-use of momentum to propel body -alignment of body parts to enable fluid movement -placement of head, body core in relation to direction of movement -get body to rotate around center of gravity
-cartwheel: foot, foot, hand, hand (hands form “T” on floor) -round-off: foot, foot, hand, hand, both feet; quarter turn to face start position
Complex Balances -center body over center of gravity -wide base to enable proper support / stability -cover large area to distribute weight -slow, deliberate movements
-HEADSTAND: -teddy bear stand: knees on elbows; head & hands on floor (triangle position) -head stand tuck: teddy; legs tucked position -full head stand: hands & head on ground, legs fully extended -HANDSTAND: -against wall: face to wall -kick-ups: kick feet up over head (tuck position) -full handstand: legs extended up, two hands stabilizing body
Group Routine -spacing (equipment, other students) -timing: music, fluidity
-listen to music -natural progressions -rotations and rolls faster than

-flow: how to progress from one skill to another -high vs. low levels / heights -strategies for routine (circuit, follow-the-leader, simultaneous)
landings and balances -be aware of other performers -communication / encouragement
WARM-UPS (12): 1) Gymnastics Obstacle Course
Time: 10 minutes Goal: To familiarize students with various pieces of gymnastics equipment in a non-threatening manner. Equipment: Floor beam (or bench), mats, spring board, wedge mat (cheese block), foam blocks. Formation: Single file at the start of the course, then scattered as students progress through the course. Description: The instructor sets up an obstacle course and the students perform the suggested activities at each station.
STATION ACTIVITY 1 Walk, leap, or roll down the beam (don’t
roll if using school bench) 2 At the end of beam, step off and jump over
block (stack of mats) 3 Leapfrog over foam blocks 4 Run, crawl, or roll up the wedge mat or
spring board 5 Jump off end of wedge mat or spring
board, perform 5 tuck jumps on the ‘X’ (marked on the floor with tape)
6 Follow the crazy maze (zigzag line on floor) using gymnastics locomotor skill, such as chasses
7 Have students go underneath a bridge (a mat spread across 2 objects that will provide a space underneath for students to crawl or slither under)
8 Start over

Application to Gymnastics: Students work with gymnastics equipment and begin to practice basic gymnastics motor skills.
2) Building Bridges
Time: 10 minutes Goal: Warm-up Equipment: Mats Formation: Partners Description: Students form pairs and perform the following activities:
ACTIVITY DESCRIPTION Under and Over In pairs, one student makes a bridge and
the partner crawls under Cross bridges One partner makes a bridge by arching
backward, and the other makes a bridge by arching forward over the top. Then the students switch positions.
Pirouette bridge Start on all fours (on hands and feet, stomach pointing towards the floor). Roll sideways through to a bridge position without moving forward or backward. Repeat in the other direction.

Application to Gymnastics: Practicing bridge positions improves back flexibility and shoulder and arm strength. Key performance points include keeping shoulders over hands, eyes looking back at fingertips (head back), feet and hands on the floor, and back arched.
3) Knee Touch Tag
Time: 10 minutes Goal: General warm-up to reinforce gymnastics skills Equipment: None Formation: Scattered Description: In this tag game, all players try to tag other players’ knees. Tagged players muct do 3 gymnastics skills designated by the teacher (e.g., rolls, leaps, cartwheels). Players may not cover their knees with their hands to avoid being tagged.
4) Card Shark Fitness
Time: 10 minutes Goal: Development of any selected gymnastics skills and exercises Equipment: Mats, playing cards, 4 posters with playing card suit symbols, 4 lists of various gymnastics skills, music and equipment to play it on

Formation: Suit posters are hung on each wall (one suit per wall) with lists or pictures of skills hung beside them. In the centre of the gym floor, place two decks of playing cards scattered face down. Students are scattered around the gym. Description: When music begins, students pick up one card each from the centre and then run quickly to the wall that matches the suit of the card. Each skill on the list beside the poster must be performed the number of times indicated by the playing card (numbered cards count at face value, jacks are 11, queens are 12, kings are 13, and aces are 14). The students then return to the centre of the gym and choose another playing card and proceed to the station matching the suit of that card. Application to Gymnastics: This game provides students with an opportunity to practice a variety of gymnastics skills while warming up or working on fitness. Skills must be performed quickly but correctly, as they would need to be done during a gymnastics routine.
5) Hold It
Time: 10 minutes Goal: To balance on a variety of large and small body parts in upright, inverted, symmetrical, and asymmetrical positions using good form; to know several classic balance positions as well as to invert solutions to balance problems; to develop a simple balance sequence – balance, weight transfer, balance. Equipment: Matted floor area Formation: Scattered Description: The teacher shows students pictures of a variety of classic balance poses (such as front support, back support, tuck, pike, tip-up, headstand) and names them. Students try several of the poses, holding them for 3 to 5 seconds. The teacher talks about balancing on a variety of body parts (hands, feet, knees, tummy, seat, shoulder, etc.) and has the students demonstrate several balances using these different parts. The students choose two of their favorite balances and link them in a short sequence. Application to Gymnastics: Students practice balances And transitional movements that are central to gymnastics performance.
6) Partner Balances
Time: 20 minutes Goal: To examine the principles of counter-balance and counter-tension

Equipment: Strip or panel mats arranged in a square, pictures of various balances. Formation: Scattered on mats Description: The instructor begins by showing the students pictures of several partner balances. The instructor then demonstrates one or two partner balances and explains the principles of good balance and supporting another person’s weight. Each student chooses a partner and a work space. Each pair should try several different partner balances, the ones pictures as well as ones they invent themselves. Then using a weight transfer action of his or her choice (such as a roll, cartwheel, step, or jump) this student approaches the partner, and they move into the partner balance with a smooth, logical transition. After holding the partner balance for 3 – 5 seconds, the student chooses another transitional action to move away and finishes in a second individual balance. The sequence is pose, transition, partner balance, transition, pose. Finally, the pair chooses 2 or 3 partner balances and develops a longer sequence. Application to Gymnastics: Students learn and practice more difficult balances and more challenging ways of moving into and out of those balances, both individually and with a partner.
7) Stunt Relays
Time: 5 – 10 minutes Goal: To practice leaps, jumps, and basic gymnastics skills Equipment: Mats arranged in a large square, other equipment determined by individual tasks, stickers or other small prizes. Formation: Small groups at stations Description: Create a jump relay course with four stations and as many teams as needed for everyone to participate. One station is set up at each corner of mat area. Each team member has to complete the course and tag the next person in line until everyone on the team has taken a turn.
STATION SKILL 1 Three Leaps 2 One Forward Roll 3 Your Favourite Jump 4 Cartwheel

Application to Gymnastics: This is an excellent opportunity for students to practice a variety of specific gymnastics skills in a setting that requires them to move quickly but accurately.
8) Wall Walk
Time: 10 minutes
Goal: To develop shoulder strength Equipment: Wall, mats arranged next to wall. Formation: Partners Description: From a front support (push-up) position with soles of feet against the wall, the student walks his or her feet up the wall to a mark or line and back down. (The mark should be at a height such that the student’s body forms an angle of about 45 degrees with the floor when his or her feet reach the mark). Repeat a total of 3 times. A partner should assist if necessary by holding the waist of the student who is walking up the wall. Students should try to keep their bodies extended and heads in line with the body when moving their feet up and down the wall.
Application to Gymnastics: This activity develops shoulder strength which is necessary to perform handstands and skills that require pushing off a surface (such as roundoffs).
9) Springing Circuits
Time: 5 minutes
Goal: To condition leg muscles Equipment: Matted floor area with various stations set up as circuits for springing over. These can include circuits with cones or foam cubes to spring over, carpet squares to spring to or over, mats arranged so that part of the mat is elevated and must be sprung over, etc. Formation: Lines, with teacher designating starting point for each student. Description: Springing circuits are arranged so students will alternate stations, moving from two feet to two feet to the next station where they move from one foot to two feet. A variety of stations can be used. Students should number off according to the number of station used. Emphasis is on proper take-off and landing and following the foot sequence indicated.
Application to Gymnastics: This activity reinforces the take-off and landing skills used in floor activities and vaulting.
10) Wheelbarrow Tag
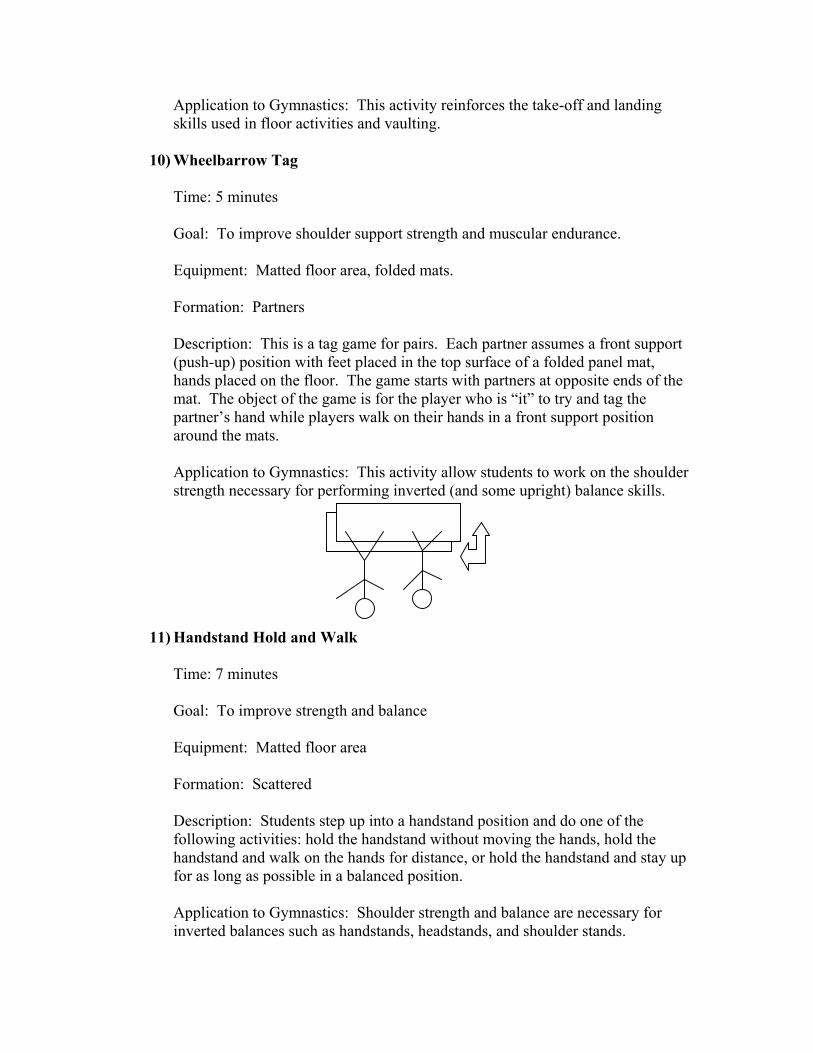
Time: 5 minutes Goal: To improve shoulder support strength and muscular endurance. Equipment: Matted floor area, folded mats. Formation: Partners Description: This is a tag game for pairs. Each partner assumes a front support (push-up) position with feet placed in the top surface of a folded panel mat, hands placed on the floor. The game starts with partners at opposite ends of the mat. The object of the game is for the player who is “it” to try and tag the partner’s hand while players walk on their hands in a front support position around the mats. Application to Gymnastics: This activity allow students to work on the shoulder strength necessary for performing inverted (and some upright) balance skills.
11) Handstand Hold and Walk
Time: 7 minutes Goal: To improve strength and balance Equipment: Matted floor area Formation: Scattered Description: Students step up into a handstand position and do one of the following activities: hold the handstand without moving the hands, hold the handstand and walk on the hands for distance, or hold the handstand and stay up for as long as possible in a balanced position. Application to Gymnastics: Shoulder strength and balance are necessary for inverted balances such as handstands, headstands, and shoulder stands.

12) Cross the Alligator Pit
Time: 10 – 20 minutes Goal: To improve agility, to stretch out the body, and to promote cooperation. Equipment: Matted floor area, targets (tape marks or other indicators), various gymnastics equipment (wedge mats, beams or benches, or other equipment that can be used in the manner described. Formation: Teams of students (size of the teams based on class size and available space) Description: Equipment is arranged so that the students can move safely from target to target on or over the equipment from a starting point to a finish point. Equipment and targets are set up so the team members will have to work together to get from a target to a piece of equipment. The targets and equipment are arranged around the floor with enough space between them that students must jump, leap os stretch to get to the next area. Team members help each other by providing a reaching assist, helping maintain balance upon landing, helping across the equipment (lifting, pulling, pushing, supporting each other), etc. Designate how each piece of equipment is to be crossed (by climbing over, crawling under, swinging under, walking across, etc.). The space between targets and equipment is the “alligator pit.” The object of the activity is to avoid the alligator pit (with help from team members) from the time the activity starts (on command of the teacher) until it ends (when students reach the last target or piece of equipment and can reach the end of the pit in safety). Targets and equipment must be crossed in the order designated by the teacher. Application to Gymnastics: Students work on stretching the body from the beginning to the end of a skill as they move from equipment to targets. This activity also promotes team work. TASKS / ACTIVITIES DESCRIPTIONS:
LESSON 2: BODY POSITIONS A) V-sit - students should sit on the mat, looking forward - legs are straight and spread apart in a “V” formation - toes are pointed - hands are reaching for or touching toes

B) Pike-sit - students should sit on the mat, looking forward - trunk is straight and stretched - legs are straight and knees are together - toes are pointed - hands are reaching for or touching toes C) Tuck-sit - students should sit on the mat, balanced on the buttocks - knees are tucked up near the chest and the toes are resting on the floor - arms are wrapped around the knees (hugging) - position should be held for 3 seconds BALANCES A) One Leg Stand - students stand on the mat on one leg - other leg is bent at the knee and raised to the hip level - students should lift their arms horizontally to the sides - hold position for at least 3 seconds Variations: - vary the arm position - vary the trunk positions - vary the leg positions - vary the apparatus B) Toe Stand - students stand on the mats on the balls of the toes - arms are lifted horizontally to the sides - hold position for at least 3 seconds C) Knee Balance - students kneel on the mat with one leg - the other leg is lifted straight backward and upward - students place their hands on the floor - look forward D) Shoulder Balance - students lie on their backs - arms and hands are pressed down into the floor - body is stretched straight above the student - toes point upwards - students should place the hips over the shoulders and arms - look at toes Variations: - vary the arm positions - vary the trunk positions - vary the leg positions

- vary the apparatus Culminating Activity: -task card activities (see ‘guided discovery’ under teaching styles) -GOAL: to introduce the students to the basic movements involved in gymnastics as well as the equipment in a fun and safe manner through guided discovery. LESSON 3: LOCOMOTIONS A) Seal Walk - start in a front support position with the toes pointed - keep legs straight and together - walk forward by taking steps with the hands and dragging the feet B) Bear Walk - students begin on all fours on the floor - legs are in the straddle position - students walk on their hands and feet, “scurrying” across the mats C) Frog Jump - start in a tuck position - students lean and reach forward with their hands
- as weight is transferred from feet to hands, students jump their feet forward to tuck close to hands
D) Lame Dog - students start in lunge position with hands on the ground - students keep the back leg straight - move forward by hopping, on bent leg, while pushing the floor behind with both hands E) Skipping - hopping on one foot, alternating legs - other leg comes up toward chest F) Hopping - jumping on two feet LANDINGS A) Feet - feet should be shoulder width apart - on landing, hands out and straight in front for balance - knees bent (not past 90°)

- absorb the impact by lowering the toes slowly (toe, ball, heel) Variations: - vary the height - vary the direction - vary the shape made in the air - combine variations B) Hands - hands shoulder width apart - fall forward to prone position - absorb fall by bending the elbows as you fall from the kneeling position to begin - absorb the impact (fingers - ball of hand - heel of hand) Variations: - vary the height, progressively - vary the direction C) Back - as fall backward, make sure head is raised well off mat - while in air, arms are folded over chest - with contact with met, arms straighten and slash at the mat - forearm and hand strike mat very hard (no more than 45° away from body) - rapid motion and should produce “slapping” sound Variations: - vary the height (as competency increases)
- vary the landing surface (as competency increases) D) Culminating Activity: Position and Balance Tag -similar to “frozen” tag -when tagged, student must assume a body position or balance -teammates free tagged students by replicating same body position or balance beside tagged teammate -“it” switched frequently -GOAL: the students will do the body positions and balances of their own accord in order to escape being caught; their teammates will have to replicate the same position / balance in order to free them (reciprocal learning) LESSON 4: ROLLS A) Forward Roll - students start standing tall - arms are stretched forward horizontally
-students then tuck knees and place hands close to feet, just in front of shoulders
- tuck the head toward the chest - lean forward and push with the legs - maintain the tuck position throughout the roll

- finish skill in sitting position with legs straight on floor Progressions: - roll down incline to tuck - roll down incline to stand - roll on flat mat to stand B) Backward Roll Progressions: - roll backward and forward like a ball - straighten the legs near the end of the back roll
- straighten the legs, then touch the toes on the floor behind the head - straighten the legs, touch toes and then push with the arms
Vary progressions by: - roll down an incline - roll on flat mat to stand C) Log Roll - students should begin by lying flat on stomach on mat - body should be stretched, legs straight and together, and arms stretched over the head and together - roll full 360° from stomach to back on stomach (can be continuous rolls) - be sure to keep body stiff D) Shoulder Roll (Right Handed Cue) - stand with feet staggered, right foot forward
- place right hand out in front of body and grab the right wrist with the left hand
- as roll, turn neck to the left, and roll over right shoulder Progression: - try other side roll E) Culminating Activity: -each student must create his or her own locomotion and teach it to a partner (reciprocal and practice) -GOAL: students will be creative in discovering their own style of movement and will become aware of the skills involved when they teach it to their partner (reciprocal / practice learning) LESSON 5: SUPPORTS A) Front Support - students assume a push-up position with straight arms - body should be straight and firm (back slightly curved upward) - legs should be straight and together - eyes looking forward Variations: - vary the apparatus - vary the body parts in contact - vary the configuration of body parts

- vary the elevations of body parts B) Back Support - reverse of the front support
- students start by sitting on the floor, hands by sides and legs stretched straight and together
- the student then straightens their arms and lifts their bottom of the floor - students straighten hips so that the body is straight from toes to shoulders - eyes should look forward Variations: - vary the apparatus - vary the body parts in contact - vary the configuration of body parts - vary elevations of body parts C) Bridge - student begin laying on backs
- hands are above the shoulders, beside their head, fingers pointing towards toes
- lift body, arch back and straighten legs Variations: - vary the apparatus - vary the body parts in contact - vary the configuration of body parts - vary elevations of body parts D) Straddle - students stand on the mat, with legs straight and staddled - upper body is bent at 90° to lower body - arms are stretched horizontally and sideways OR toward feet - eyes looking forward E) Culminating Activities: Timed "Hold it" Contest
-Group setting -Students get into a pre-determined support (front/rear support, etc.) -Attempt to remain in position for as long as possible -GOAL: To practice the various types of supports; to challenge the students by seeing who can hold the position for the longest period of time
Under and Over Game - divide the class into pairs, each member of the pair either one or two - teacher call out two commands: a support (front, back, or bridge) and a
direction (under or over) - students who are ones assume the position the teacher calls and their
partner (two) crawl under them from the side - reverse rolls - GOAL: to see which set of partners can complete the task without
touching each other
LESSON 6:

SPRINGS A) One Leg Springs i)Split Leap
- take off on one leg to a stride split in the air - land on other foot
ii)Stag Leap
- like a split leap except front leg is bent (or both bent)
iii)Scissor Leap - swing one leg (L) up into the air, forward or backward - bring the other leg up (R) and land on the first leg (L)
iv)Cat Leap
- as in the scissor leap except legs are bent and turned out
B) Two Leg Springs i)Tuck Jump
- jump off of two feet - in the air, bring knees to body, not the body down to knees
ii)Straddle Jump
- jump off of two feet - in the air, touch toes, always keeping legs straight
Progressions: - begin by getting students to touch their knees - touch shins - touch ankles - touch toes
iii)Half and Full Turns
- maintain a stiff body - take-off and landing is on same part of mat - hands above head - hold landing for 3 seconds
C) Culminating Activity: Me & My Shadow -With a partner (or group of 3) -Preferably of the same skill level -Decide which partner will be #1, and who will be #2 -Partner #1 begins by performing a spring of his/her choice -Partner #2 must attempt to copy the same spring
-Switch partners -GOAL: to practice different types of springs in a partner setting

LESSON 7: ROTATIONS AROUND ANTERIO-POSTERIOR AXIS A) Cartwheel
- start in a standing lunge position - hold arms forward horizontally - lean forward and place one hand in front of the student’s foot (use the
hand on the same side of the body as the front foot) - place the other hand in front of the first hand - kick the foot furthest from the hands into the air and forward, followed by
the other foot - foot-foot, hand-hand, foot-foot
B) Round-Off
- same as cartwheel except do a one quarter turn in the air to land on two feet facing the direction from which the movement originated
COMPLEX BALANCES (peer spotting may be required) A) Headstand
- student kneels on the mat and places his hands and head in a triangular formation
- student lifts the legs one at a time upwards
i)Teddy Bear Stand - students rest their knees on the same side elbow - slight backward lean with the hands taking most of the weight
ii)Head Stand Tuck Position - lift both legs in the tuck position off the floor
iii)Full Headstand - join the legs together in the air and straighten
B) Handstand
- students start in a standing position, stretching arms forward horizontally - step to lunge forward and place hands on the floor shoulder-width apart - keeping the back leg straight, the student kicks upward with it, and
simultaneously pushes against the floor with the front leg, straightening it during the push
- finish in near or momentary balance with both legs straight Progressions: - against wall first: walk legs up wall for support
- kick-ups: partial handstand position - Full handstand
C) Culminating Activity: Fitness Circuit -Students are divided into groups of 3-4 -Use of stations with task cards

-Controlled by music -Some example stations
(a) holding supports (b) rope climb (c) sprints (d) jumping
- GOAL: to bring together all of the previous unit components and concepts; to improve the fitness levels of each student.
LESSON 8
Field Trip: Victoria Gymnastics GOAL: Introduction to new experiences and equipment. To have FUN! LESSON 9 GROUP ROUTINE PRACTICE GOAL: To link all of the skills and concepts taught during the unit. Group interaction of all students. Have FUN.
LESSON 10 GROUP ROUTINE PERFORMANCE
- work together in groups of 5 (teacher will assign group according to co-ed ratios and skill levels (higher-skilled students can help lower-skilled students
- will be peer and teacher evaluated - must be 3-4 minutes and have accompanying music - Must include:
- 2 different balances - a balance held for at least 3 seconds - 3 different rolls - smooth transitions - contrast in timing (slow / fast) - presence of music - 1 cartwheel or 1 round-off - 1 headstand or 1 handstand - different forms of locomotion - ending pose
TEACHING STYLES:
Command Style:

The command style is an effective teaching tool because it is able to produce precision performance. It is a very useful style for teaching safety and the basic, fundamental movements of gymnastics. Gymnastic development is a constant, rapid process due to the many progressions of each skill, which can push the students learning and development rapidly. It is important for a learner to have a strong understanding and confidence of the basic skills of the dominant movement patterns in order to develop safely through all of the skill progression phases of gymnastics. The command style provides the learner with an effective way to build skills and develop sound fundamentals. It gives the learner a very solid foundation from which to build on. Objectives of Command Style (Mosston, 2002) Subject Matter Behavior
• To achieve accuracy and precision of performance
• To achieve immediate results • To master subject matter skills
• To achieve group conformity and uniformity
• To instill safety procedures • To control groups and individuals
Practice Style: The practice style creates confidence in the learner and helps develop their ability to reproduce a desired movement. Another important characteristic that helps development is that of effective positive feedback by the teacher on performance. Providing learners with efficient time to repeatedly practice a skill will help initiate the development of their skill and performance levels. The practice style will be used throughout the entire gymnastics unit. Once a basic understanding of a skill or concept is achieved through the use of the command style, learners will be given an opportunity to further practice and develop that skill to memory in a safe, positive learning environment. The practice style is also very apparent in the warm-ups and culminating activities of each lesson plan. Objectives of Practice Style (Mosston, 2002) Subject Matter Behavior
• To practice by oneself reproducing the model
• To develop proficiency of a skill
• To initiate an individual and private relationship between teacher and learner
• To experience independence Reciprocal Style:

Using the reciprocal style will provide learners with various social interaction experiences within a positive learning environment. This style, like the practice style, is to be used once the learners have developed the core basic skills of gymnastics. The reciprocal style will only be implemented after the learners have successfully demonstrated a general understanding of the DMPs. This style is excellent in furthering the development of the student. The reciprocal style will assist each learner’s development across all three domains: psychomotor, cognitive, and affective/social. In order to create an effective learning environment, task cards will be used to help facilitate learning while using this style of teaching. Example Checklist: HEADSTAND RECIPROCAL CHECKLIST 1. Start with head (hair-line to mat) and hands in equal-sided triangle shape base, hips over base. 2. Walk onto elbows with hips over base. Progress to a monkey stand. Walk legs back down again. 3. With triangle base walk hips up over base. 4. Lift legs bending knees if unable to lift. 5. Extend legs with weight over base, hips level with head 6. Lean legs back to feel weight distributed between head and hands. 7. When balanced extend legs into a split leg position 8. Recover slowly returning the legs to the ground. http:www.educ.uvic.ca/Faculty/thopper/WEB/247/archive352/week3/reciprocaltaskcard.htm Self Check • Performing a task and engaging in self-assessment • Role of the teacher:
• Make all subject matter, criteria and logistical decisions • Role of the learner:
• Work independently and check own performances against criteria prepared by the teacher
• This style may be used when a fairly simple task is being taught. The student will
have time to practice the task then assess themselves according to certain criteria. They are able to simplify or extend the task to their own personal abilities. Also, they will become more aware of the breakdown of the skills required to produce the movement etc. as they are focusing on specific criteria.
Inclusion

• Learners with varying degrees of skill participate in the same task by selecting a level of difficulty at which they can perform.
• Role of the teacher: • Make all subject matter decisions, including possible levels of task and
logistical decisions. • Role of the learner:
• Survey available levels in task, select an entry point, practice the task and if necessary make an adjustment in task level and check performance against criteria.
• This style may be used when a more challenging skill is being taught. The
students will be able to choose the level that they feel most comfortable with and will gradually work up from that particular level. In a gymnastics class, where the skill level of the students is varied, this style would be extremely effective.
Guided Discovery • Logical and sequential design of questions that lead a student to discover a
predetermined response. • Role of the teacher:
• Make all subject matter decisions, including target concept to be discovered and sequential design of questions for learner.
• Role of the learner: • Discover answers • Learner makes decisions about segments of the subject matter within the
topic selected by teacher. • This style can be used to engage the student’s in discussion or to introduce
certain tactical aspects of an activity. By asking for student input, the teacher is involving them in their learning and the class may be more attentive to a fellow student speaking. This style can also be used as closure at the end of a lesson. Through guided discovery questions, the teacher can create a student-led discussion of the key points focused on in the class.
• Example Task Cards:

TASK CARDS (teaching styles) 1) Equipment: Box or pommel horse and two mats behind the box. Safety: Be sure no to rush the person in front of you. Tasks:
1. Show 3 different ways of getting over the box 2. Show a stretch position a) on the box b) off the box onto the mats 3. Approach the apparatus from 3 different directions 4. Show a change of direction while you cross the box 5. Show a movement on the box in which the hips are higher then the head 6. Try to get onto the apparatus a) feet first b) hands first 7. Show 3 ways of getting over the box with a partner 8. Show an approach, a way of getting over the box, and a finish on the mat
involving a head-over-heels activity somewhere in the sequence 2) Equipment: Two Mats
Tasks: 1. Show 3 ways of traveling the length of the mats 2. Choose one quick movement and one slow movement of traveling, and
link them together 3. Show a balance on 2 small points 4. Show a head-over-heels activity 5. Show 3 different ways of approaching the mats 6. Make bridges between your hands and feet a) facing floor b) back toward
floor c) feet apart d) feet together 7. Show an approach, a stretch movement, a bridge and a balance on the
mats 8. Perform the above in a sequence that has a slow controlled finish
3) Equipment: Springboard or mini-trampoline, 2 mats behind springboard

Safety: Be careful to use only as much bounce as you are capable of controlling from the apparatus. Tasks:
1. Show different stretch shapes in the air. See how much height you can achieve
2. Land on the mats, facing in a different direction 3. Show 3 good ways of landing. Make sure that you have used a 2-foot
take-off each time 4. Show uneven shapes in the air 5. Make a thin or long shape in the air 6. From a good 2-footed approach, combine a stretch shape with a change of
direction and a good landing
4) Equipment: 4 mats Tasks:
1. Show a balance on 2 small parts and 1 big part 2. Show 3 different rolls with a stretch movement between each one 3. Travel the length of the mats, alternating the parts of the body that are
taking the weight 4. Show a balance coming out of a curl shape 5. Create a sequence in which there is a) a change of speed b) a change of
direction 6. Create a sequence that moves along the mat from a slow start to a build-
up of speed to a quick ending. Show a balance, a roll, a stretch position, a transfer of weight, and a change of direction
5) Equipment: 4 mats (in groups of 4) Tasks:
1. Show 3 different balances with your partner 2. Show a balance with your partner a) matching 1 body part with your
partner b) matching 2 body parts with your partner 3. Can half of your group assist the other half of your group in maintaining
a balance? 4. Create a group sequence that flows smoothly; has positions that are held
(static); has a change of direction; and has a good ending

6) Equipment: Balance beam (bench), 2 mats plus enough to cover the metal stand of the beam (in groups of 2)
Safety: Make sure metal stand of beam is covered with a mat Tasks:
1. Create a balance matching your partner’s then lose the balance slowly to begin a traveling movement
2. Move over, under or around your partner using the beam 3. Show different ways of getting onto and coming off the beam with your
partner Create a group sequence using the beam. Make sure that things FLOW. BLOCK PLAN: LESSON
Review Skills / Concepts
New Skills / Concepts
Major Teaching Points Organization of Lesson / Teaching Styles
ONE
1. Safety 2. Task Cards
1. Safety: a) equipment and facility - set-up procedure and take- down b) Spotting - be aware of safe positioning 2. Task Cards: (refer to Guided Discovery under ‘Teaching Styles’)
Introduction: - safety and equipment set-up Warm-up: Gymnastics Obstacle Course (command and guided discovery) Skill Development: -safety education -task cards (command and guided discovery)

Culminating Activity: - included in the task card activities
TWO
1. Safety Assessment 2. Body Positions 3. Balances
1. Safety Quiz 2. Body Positions: a) V-sit - sitting, straight legs spread apart, hands reaching or touching toes b) Pike sit - sitting, straight legs together, back straight, hands reaching or touching toes c) Tuck sit - sitting, knees tucked up near chest, arms hugging knees 3. Balances: (use arms for balance) a) One leg stand - bent knee raised to hip level b) Toe Stand - balance on tippy toes b) Knee Balance - kneeling on one leg, other leg lifted and straight, hands on floor, head up d) Shoulder Balance - lying on back, arms on mat, body in air 4. Ongoing Assessment: - self-check list - personal effort and success
mark
Warm-up: Partner Balances (reciprocal) Skill Development: - body positions - balances (command and practice) Culminating activity: - Position and Balance Tag
T 1. Safety 1. 1. Locomotions: Warm-up:

HREE
2. Body Positions 3. Balances
Locomotions 2. Landing and Planned Fall
a.) Seal walk - lower body dragging, use arms to locomote b.) Bear walk - walk on hands and feet, legs straddle position c.) Frog- - basic tucked frog style jump d.) Lame Dog - two hands and one foot walk e.) Skipping f.) Hopping 2. Landings: a) Feet - feet shoulder width apart, hands out and straight in front, knees bent and absorb impact b) Hands - hands shoulder width apart, absorb fall, fall forward c) Back - feet in air, back and arms absorbing impact, arms across chest to slapping mat 3. Ongoing Assessment: - self-check list - personal effort and success
mark
- Hold It (command, practice and guided discovery Skill Development: -locomotions Culminating Activity: -each student must create their own locomotion and teach it to a partner (reciprocal and practice)
FOUR
1. Locomotions 2. Landings and Planned Falls
1. Rolls
1. Rolls: a.) Forward - hands on ground, head tucked, body rotates around horizontal axis over head b.) Backward - hands behind body (fingers
Warm-Up: - Building Bridges (command, practice and reciprocal styles) Skill Development: -Rolls

forward), use momentum to roll body back over head (watch neck safety) c.) Log Roll - laying flat on ground, roll full 360 degrees from stomach to back on side d.) Shoulder Roll - right-handed cues: left foot forward, right hand in front, left hand grabs right wrist, neck to left, roll over right shoulder; progress to both sides. 2. Ongoing Assessment: - self-check list - personal effort and success
mark
Culminating Activity: -students must create a routine using all 4 rolls (practice and guided discovery)
FIVE
1. Rolls 1. Supports 2. Assessment
1. Supports: a.) Front - hands shoulder-width apart, straight arms, back horizontal to floor (static push-up position) b.) Back - opposite to front, fingers point toward toes, weight on hands and heels. c.) Bridge - lay down on back; hands behind head, above shoulders fingers point toward toes; lift body, arch back, straighten legs d.) Straddle - standing, legs wide apart, hands either reaching straight forward or toward feet 2. Assessment: - Forward Roll
Warm-up: Wheelbarrow Tag (practice) Skill Development: -supports Culminating Activity: -practice front to back supports vice versa -timed contest (who can hold each support longest) -“Under and Over” - Assessment

3. Ongoing Assessment: - self-check list - personal effort and success
mark
SIX
1. Supports 1. Springs 1. Springs: a.) One Leg: i.) Split Leap - take off on one leg to a stride split in the air, land on other foot ii.) Stag Leap - like a split leap only front leg is bent iii.) Scissor Leap - swing one leg (L) up into the air, then bring other leg up (R) and land on first leg (L); legs are straight. iv.) Cat Leap - same as scissor leap except legs are bent and turned out b.) Two legs: i.) Tuck Jump - in air, bring knees to body ii.) Straddle Jump - in air, as jump, straddle legs and hands between spread legs iii.) Half and Full Turns - hands above head, hold landing for balance (3 secs) 2. Ongoing Assessment: - self-check list - personal effort and success
mark
Warm-Up: Stunt Relays (guided discovery) Skill Development: -springs Culminating Activity: -Me and My Shadow -one partner does a spring and other partner must copy them (reciprocal and practice)
SEVE
1. Springs 1. Rotations around anterio-posterior axis
1. Rotations around anterio-posterior axis: a.) Cartwheel - foot, foot, hand, hand, foot, foot
Warm-Up: Wall Walk Skill Development:

N 2. Complex Balances
b.) Round-Off - foot, foot, hand, hand, feet; one-quarter turn to face start position 2. Complex Balances: a.) Headstand - (Checklist--See Reciprocal under Teaching Styles) i.) Teddy Bear Stand - knees resting on elbows ii.) Headstand Tuck Position iii.) Full Headstand - legs extended b.) Handstand: i.) against wall: one meter away from wall, walk legs up wall for support ii.) Kick-ups: kick feet up over body in partial handstand position iii.) Full Handstand: legs extended over center of gravity 3. Ongoing Assessment: - self-check list - personal effort and success
mark
-Reciprocal checklist -Rotations around anterio-posterior axis -Complex Balances Culminating Activity: Fitness Circuit controlled by music changes. (command, practice, inclusion)
EIGHT
1. N/A FIELD TRIP Victoria Gymnastics
Guest instructor from facility will introduce new equipment and how to use it. The objective of this trip is to provide students with a fun experience in a new learning environment.
Warm-Up: Cross the Alligator Pit Skill Development: Introduction to new equipment
NIN
1. N/A 1. Group Routine
1. Group Routine: a.) work together in a group of 5;
teacher assigned groups.
Warm-Up: Card Shark Fitness

E 2. Assessment (Alternating)
b.) peer and teacher evaluated c.) accompanying music 3-4min. d.) must have set components, according to criteria sheet 2. Assessment: - Headstand - Cartwheel 3. Ongoing Assessment: - self-check list - personal effort and success
mark
Skill Development: -communication, teamwork, group cohesion, social skills Culminating Activity: -practice routines -assessment
TEN
1. Floor Routine Assessment
1. Floor Routine Performance: a.) Peer and teacher evaluated b.) 3-4min routines encompassing skills 2. Assessment: - performance check-list (peer and teacher assessed)
Warm-Up: Handstand Hold and Walk Skill Development: Combination of activities together in group. (practice, reciprocal, inclusion, guided discovery Culminating Activity: -performance
ASSESSMENT:
It can be tough to assess students due to the short class periods, but it is still very important. There are reasons for assessment: observation of individual students, a gain in credibility with other teachers or parents, and assessment enables the teacher to check what exactly it is that they have taught and how well the students have been able to learn the skills and meet the desired objectives. Since teacher time is limited, another good way of providing evaluation is through self-testing and partner-testing. A self-check list is used in this gymnastics class to assess different skills. The students are told to place a check mark in each corresponding box across from their name as they are able to perform each of the skills three times in a row with good form and good body control. A peer is to check them for control and good form for each skill.

Name One Leg
Balance
Knee
Balance
Shoulder B
alance
Forward
Roll
Backw
ard R
oll
Log Roll
Shoulder R
oll(Lor
Bridge
Front Support
Back
Support
Cat leap on
Beam
½ Turn
with
held
Cartw
heel
Teddy Bear
or
1. 2. 3.
Daily, a personal effort and success assessment will be performed throughout the gymnastics unit. This includes a mark out of five given to the teacher by the students themselves, reflecting their effort and success rate for the day. If there is a difference between what the students feel they deserve as a mark and what the teacher feels they deserve, a compromise will be made. Attendance will also be an assessment factor to ensure that each student does not miss class for no valid reason. If the student does miss class, the final participation mark will reflect this. Personal Effort and Success Mark ( /5) 1 = in attendance 2 = needs improvement in effort 3 = fair effort and success 4 = good effort and success 5 = Excellent effort and success On the second day, a quick 2 minute safety quiz will be given to ensure that the students are aware of important safety precautions. The quiz will be: Safety Quiz ( /6): 1. When creating a tumbling floor space and connecting the mats, there should be a
gap between them. True or False? 2. It is not necessary to put mats around the beam or bench to be used. True or
False? Why did you choose this answer?
3. Gymnasts will have a much better feel for the floor and be able to perform skills more safely if they perform them in bare feet. True or False?
4. Every class, it is important to try an unsupervised, daredevil trick. True or false? 5. If someone is hurt, take care of the situation yourself and tell me about it after
class. True or False? The students are asked to perform a group routine on the last day and will be marked by their peers as well as the teacher. The following checklist will be used by the students and teacher when evaluating the performances. The performances will be marked as a group and not individually.

Group Name 2 Different
Balances
Balance held
still for 3
3 Different
ll
Smooth
Transitions
Contrasts in
Timing (fast /
slow)
Presence of M
usic (yes /
1 Cartw
heel O
R 1 R
oundoff
1 Headstand
OR
1
Different form
s of locom
otion
Ending Pose
FINA
L MA
RK
(/10)
1. 2. 3. 4. 5. In gymnastics, it is also important to analyze whether a skill or movement has been performed correctly mechanically. Due to the fact that this can be a time consuming procedure, only a few components are analyzed: the forward roll, headstand, and cartwheel. The checklists are as follows: Forward Roll ( /5): Name Head Tucked Knees Together Hands Pointing
in correct direction
Smooth Transition back to Feet
1. 2. 3. 4. 5. Headstand (Teddy Bear Stand, Tuck Headstand or Full Headstand) ( /5): Name Correct Triangle
Base Hands shoulder Width Apart
Held in Air for 5 seconds
1. 2. 3. 4. 5. Cartwheel ( /5): Name Arms and legs
stretched Foot-foot, Hand-hand, Foot, foot
Finish facing original position
Smooth motion
1. 2. 3.

4. 5.
*Refer to Appendix A for Lesson Plans #1 & #2 SAFETY IN GYMNASTICS:
The sport of gymnastics presents a high level of danger. This problem of danger and the growing concern of liability issues have made many Physical Education teachers hesitant to teach gymnastics (Teaching Children Gymnastics, 1994).
It is this concern that educators must cross by developing and implementing an effective safety program during the gymnastics unit. When such a safety program has been properly introduced to learners, the risk of injuries will be greatly reduced. SAFETY GUIDELINES THAT SHOULD BE INCLUDED TO REDUCE THE RISK OF INJURY: (A) Equipment:
• Teach learners about the equipment and inform them of the safety concerns and risks for each apparatus
• Evaluate each learner on safety concerns and issues • Use of proper equipment • Make sure equipment is in good working condition
(B) Teacher-concerns:
• Provide adequate supervision during high risk exercises • Be aware of the entire gym and identify high risk zones • Establish a set of rules for the gym • Use of space to allow learners to move safely • Use of safe progression (make sure skill can be demonstrated on floor before
adding height) • Must provide proper instruction • Create "fall zones" on the floor which allow for errors in skill (corrective
spacing of mats & equipment) • Identify "red flags" for student behavior problems • Procedures for dealing with an injury or emergency should be established
(Emergency Action Plan)

• Teacher must have an attitude of respect toward each learner to ensure all safety precautions will be met
(C) Students:
• Be responsible for their own actions • Be aware of the rules in the gym and all safety concerns • Students must demonstrate a respect toward other learners and the rules of
gymnastics in order to participate
IMPORTANCE OF PROPER WARM UPS AND COOL DOWNS
A proper warm up in gymnastics is a key element in reducing the amount and severity of injuries to muscles and joints. This is accomplished by raising the core body temperature, which increases the range of motion in the body. Warm ups that incorporate stretching will also be beneficial in improving the flexibility of an athlete, which is a very fundamental component in gymnastics. A warm up should last anywhere between 5 and 10 minutes in length. "When muscles are cold, they feel thick and stiff and hard to move, but when they are warm, they feel thin and flexible and easy to move" (Coaching Theory Level 1, 1988).
Keys to a warm up:
• Need to be FUN • Increase the core body temperature • Interaction with peers • Simple • Safe • Should have a FOCUS • Should CONNECT to the main activity • Vary exercises
Each gymnastics class should conclude with a cool down. This type of
activity is progressively less vigorous and includes some static stretching. Lasting between 3-5 minutes.
Guidelines on Stretching Exercises (Coaching Theory Level 1, pp 7-16)
• Patterns of slow, static stretching and holding are recommended • Progress from general to specific (major joints ---> sport specific)

REFERENCES: Ashworth S. & Mosston, M. Teaching Physical Education (6th Ed.) Macmillan: Toronto, 2002. Coaching Theory: National Coaching Certification Program. Coaching Association of Canada: Ottawa, 1998. (pp.7-16/17) Coaching Certification Manual: Introductory Gymnastics #1. Canadian Gymnastics Federation: Gloucester, Ontario, 1986. Schueler, Annemarie Gymnastic Task Cards. B.C. Teacher’s Federation, Vancouver, B.C. Werner, Peter H. Teaching Children Gymnastics: Becoming a Motor Teacher. Human Kinetics Publishers: U.S.A., 1994. (pp.30)