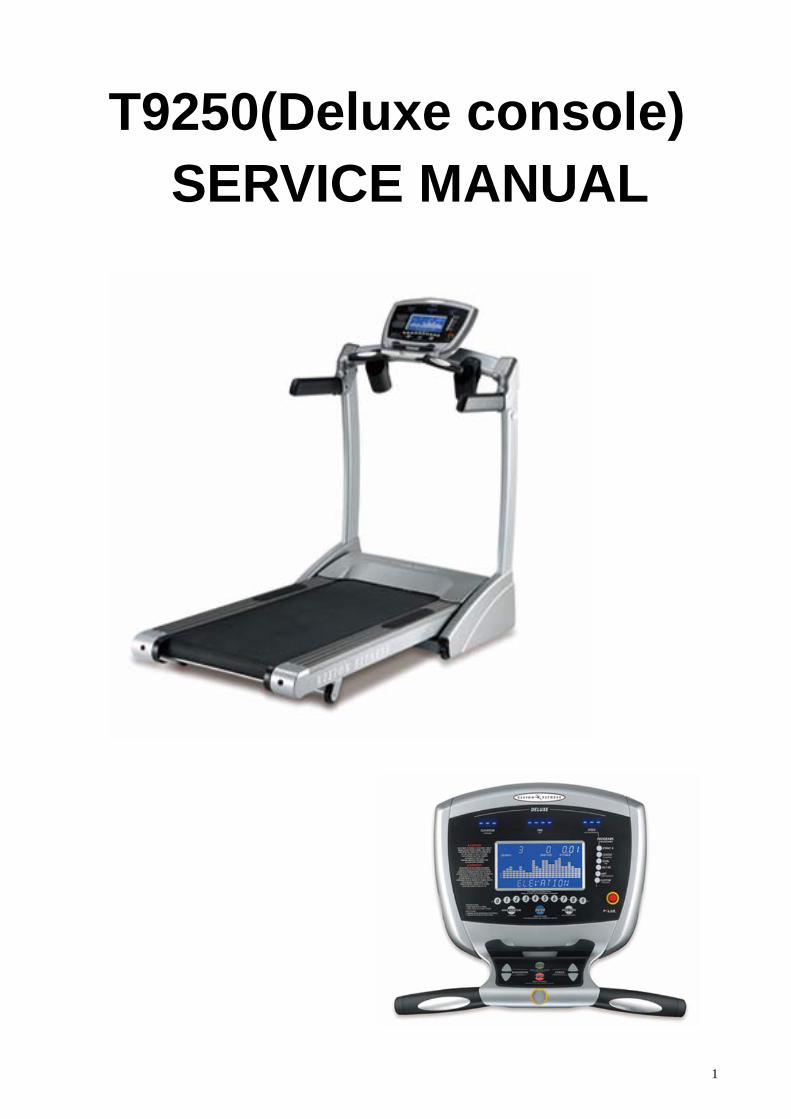
T9250(Deluxe console) SERVICE MANUAL...
13
1 T9250(Deluxe console) SERVICE MANUAL
Transcript of T9250(Deluxe console) SERVICE MANUAL...
1
T9250(Deluxe console) SERVICE MANUAL

2
TABLE OF CONTENTS
CHAPTER 1: SERIAL NUMBER LOCATION CHAPTER2: USING THE CONSOLE AND PROGRAM DESCRIPTION 2.1 Console Description 2.2 Program Information 2.3 USING YOUR CD / MP3 PLAYER 2.4 Demo Mode
CHAPTER 3: ENGINEERING MODE 3.1 Engineering Mode 3.2 Engineering Mode Overview
CHAPTER 4: ERROR CODE
CHAPTER 5: TROUBLESHOOTING 5.1 Electrical Diagram 5.2 Troubleshooting
3
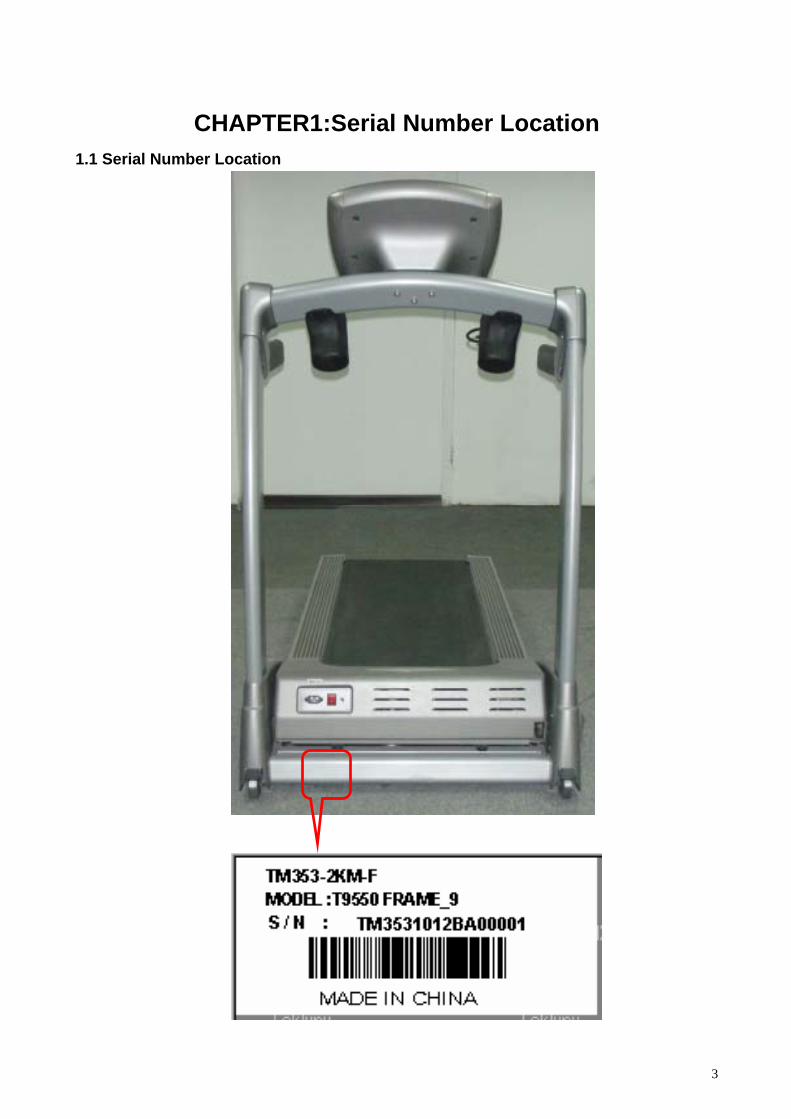
CHAPTER1:Serial Number Location
1.1 Serial Number Location

4
CHAPTER 2: Using the Console and Program Description 2.1 Console Description Note: There is a thin protective sheet of clear plastic on the overlay of the console that should be removed before use.
(details see the OM)
CHAPTER 3: ENGINEERING MODE 1) To enter Engineering Mode, press & hold the INCLINE UP “▲” and SPEED DOWN “-” keys at the same time for 3-5 seconds until Engineering Menu appears on the display. 2) Use the INCLINE and SPEED UP and DOWN keys to select a parameter. 3) Press ENTER to enter a parameter setting. 4) Use the INCLINE and SPEED UP and DOWN keys to change the parameter. 5) Press the ENTER key 3seconds to save the change to the parameter. 6) Press and hold the STOP key to exit Engineering Mode and return to normal operation.

5
MODE FUNCTION DESCRIPTION ENG 1 CONFIGURATION P2:MIN SPEED RPM
P3:MAX SPEED RPM P4:MIN ELEVATION P5:MAX ELEVATION P6:UNITS P7:MAX PROGRAM TIME P8:DEFAULT WEIGHT P9:ACCUMULATED TIME P10:ACCUMULATED DISTANCE P11:BELT THICKNESS P12:ROLLER DIAMETER P13:ELEVATION DIRECTION P14:PAUSE TIME P15:DEFAULT TIME P16:DEFAAULT AGE P17:DISABLE BEEP P18:SET LANGUAGE P19:ELEVATION ERRORS P20:EXIT ENG1
ENG 2 DISPLAY TEST Start Key – LCD/LED on Stop Key – LCD/LED off Any Other Key - Will show on the display window. Hold the STOP key for 3 seconds to return to the Engineering Menu.
ENG 3 BURN IN MODE BURN IN MODE ENG 4 Auto Calibration Auto calibrates the speed and incline. ENG5 SENSOR TEST SENSOR TEST ENG6 STUCK KEY TEST STUCK KEY TEST ENG7 EXIT ENGINEERING
MODE EXIT ENGINEERING MODE
ENTER key to save the change. console will display Figure A after remove the safety key;

6
Figure A

7
CHAPTER 4: ERROR CODE Error code table: Error Code Error code description Simple:E4 Deluxe and Premier: E4 No Elevation movement
No elevation moves
Simple:E6 Deluxe and Premier: E6 Elevation Lost
elevation connector falling off or hasn't been connected
Simple: E7 Deluxe and Premier: E7 Speed Error
Drive motor is out of control and accelerate the speed in a sudden
Simple: E9 Deluxe and Premier: E9 No Speed feedback
Speed sensor hasn't been connected or malfunction
Simple: E10 Deluxe and Premier: E10 Communication Error
No signal communication response between the PCB and MCB

8
CHAPTER 5: TROUBLESHOOTING
5.1 Electrical Diagram

9
10
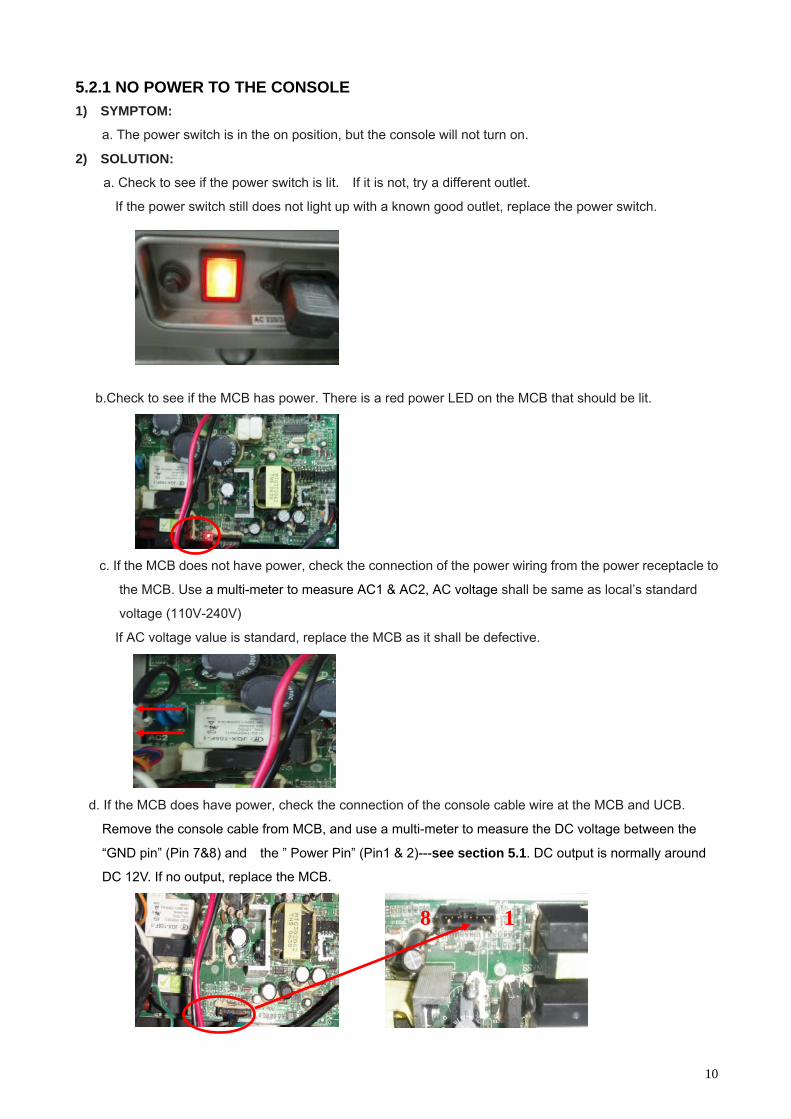
5.2.1 NO POWER TO THE CONSOLE 1) SYMPTOM:
a. The power switch is in the on position, but the console will not turn on.
2) SOLUTION:
a. Check to see if the power switch is lit. If it is not, try a different outlet.
If the power switch still does not light up with a known good outlet, replace the power switch.
b.Check to see if the MCB has power. There is a red power LED on the MCB that should be lit.
c. If the MCB does not have power, check the connection of the power wiring from the power receptacle to
the MCB. Use a multi-meter to measure AC1 & AC2, AC voltage shall be same as local’s standard
voltage (110V-240V)
If AC voltage value is standard, replace the MCB as it shall be defective.
d. If the MCB does have power, check the connection of the console cable wire at the MCB and UCB.
Remove the console cable from MCB, and use a multi-meter to measure the DC voltage between the
“GND pin” (Pin 7&8) and the ” Power Pin” (Pin1 & 2)---see section 5.1. DC output is normally around
DC 12V. If no output, replace the MCB.
1 8

11
If output is around DC 12V, check the console cable. If it is defective, replace the console cable.
If the console cable connections are all good, replace the PCB.
5.2.2 NO CONSOLE RESPONSE 1) SYMPTOM:
a. The power is on and the console lights up, but the treadmill does not run when keys are pressed.
2) SOLUTION:
a. Check if the console beeps when all keys are pressed. If no, replace the keypads.
b. If the console display “E9”
Check the connection of the speed sensor (encoder disk group) at the MCB (Figure A).
Remove the speed sensor (Figure B) from the motor and clean it, then re-test.
If the speed sensor is clean and has a good connection but still will not operate, replace the speed
sensor.
5.2.3 INCLINE MOTOR ISSUES 1) SYMPTOM:
a. The incline motor does not lift up or down.
2) SOLUTION:
a. The console should display “E4” or “E6”
If the console display “E6”, Check the connection of the elevation motor at the MCB (Figure C)
Enter Engineering Mode (See Section 4.1) and scroll to ”ENG 1”,choose ”P4” or “P5”, Press the key
Figure A Figure B
Figure C
12
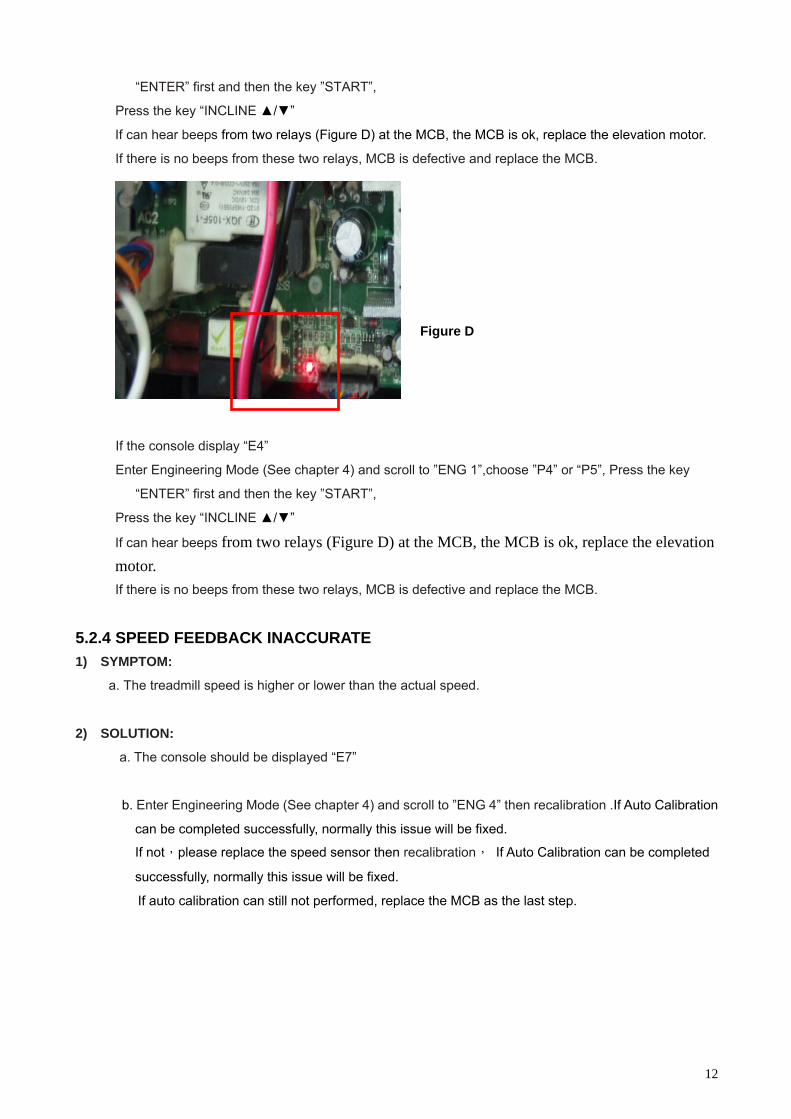
“ENTER” first and then the key ”START”, Press the key “INCLINE ▲/▼”
If can hear beeps from two relays (Figure D) at the MCB, the MCB is ok, replace the elevation motor.
If there is no beeps from these two relays, MCB is defective and replace the MCB.
If the console display “E4”
Enter Engineering Mode (See chapter 4) and scroll to ”ENG 1”,choose ”P4” or “P5”, Press the key
“ENTER” first and then the key ”START”, Press the key “INCLINE ▲/▼”
If can hear beeps from two relays (Figure D) at the MCB, the MCB is ok, replace the elevation motor.
If there is no beeps from these two relays, MCB is defective and replace the MCB.
5.2.4 SPEED FEEDBACK INACCURATE 1) SYMPTOM:
a. The treadmill speed is higher or lower than the actual speed.
2) SOLUTION:
a. The console should be displayed “E7”
b. Enter Engineering Mode (See chapter 4) and scroll to ”ENG 4” then recalibration .If Auto Calibration
can be completed successfully, normally this issue will be fixed.
If not,please replace the speed sensor then recalibration, If Auto Calibration can be completed
successfully, normally this issue will be fixed.
If auto calibration can still not performed, replace the MCB as the last step.
Figure D
13
5.2.5Communication Error 1) SYMPTOM:
a. The treadmill display”E10”
2) SOLUTION:
a. First replace the console wire.
b .Second replace the MCB.
c. Third replace the console.