SYSTEM FIRMWARE UPGRADE OF EMC® … FIRMWARE UPGRADE OF EMC® KAZEON IS1200 RUNNING ON INTEL®...
15
SYSTEM FIRMWARE UPGRADE OF EMC® KAZEON IS1200 RUNNING ON INTEL® SANDYBRIDGE PLATFORM BMC, BIOS, ME, and FRU/SDR Upgrades. ABSTRACT This white paper explains the instructions for the System Firmware Upgrade for the Kazeon IS1200 running on Intel Server Products having Intel(R) Server Board S2600GZ. August, 2014 EMC WHITE PAPER
Transcript of SYSTEM FIRMWARE UPGRADE OF EMC® … FIRMWARE UPGRADE OF EMC® KAZEON IS1200 RUNNING ON INTEL®...
SYSTEM FIRMWARE UPGRADE OF EMC® KAZEON IS1200 RUNNING ON INTEL® SANDYBRIDGE PLATFORM BMC, BIOS, ME, and FRU/SDR Upgrades.
ABSTRACT This white paper explains the instructions for the System Firmware Upgrade for
the Kazeon IS1200 running on Intel Server Products having Intel(R) Server Board S2600GZ.
August, 2014
EMC WHITE PAPER
To learn more about how EMC products, services, and solutions can help solve your business and IT challenges, contact your local representative or authorized reseller, visit www.emc.com, or explore and compare products in the EMC Store
Copyright © 2014 EMC Corporation. All Rights Reserved.
EMC believes the information in this publication is accurate as of its publication date. The information is subject to change without notice. The information in this publication is provided “as is.” EMC Corporation makes no representations or warranties of any kind with respect to the information in this publication, and specifically disclaims implied warranties of merchantability or fitness for a particular purpose.
Use, copying, and distribution of any EMC software described in this publication requires an applicable software license.
For the most up-to-date listing of EMC product names, see EMC Corporation Trademarks on EMC.com.
VMware and <insert other VMware marks in alphabetical order; remove sentence if no VMware marks needed. Remove highlight and brackets> are registered trademarks or trademarks of VMware, Inc. in the United States and/or other jurisdictions. All other trademarks used herein are the property of their respective owners.
Part Number H13389
2

TABLE OF CONTENTS
EXECUTIVE SUMMARY .............................................................................. 4 AUDIENCE ......................................................................................................... 4
REQUIREMENTS ........................................................................................ 4 Supported Systems ............................................................................................ 4
System KVM ...................................................................................................... 4
USB Key ........................................................................................................... 4
Release Notes .................................................................................................... 4
System and BIOS Passwords ............................................................................... 4
FIRMWARE UPDATE PROCEDURE FROM THE EMBEDDED EFI SHELL .......... 4 Prerequisites ..................................................................................................... 4
Logging in to the System .................................................................................... 4
Preparing the Firmware Updates .......................................................................... 5
Preparing the System for the Update .................................................................... 5
Starting the Update ............................................................................................ 8
Finishing the Update ......................................................................................... 14
Verifying the updates ....................................................................................... 14
RECOVERING FROM AN UPDATE FAILURE, OR BIOS CORRUPTION. ........ 15 BIOS Recovery Procedure ................................................................................. 15
3
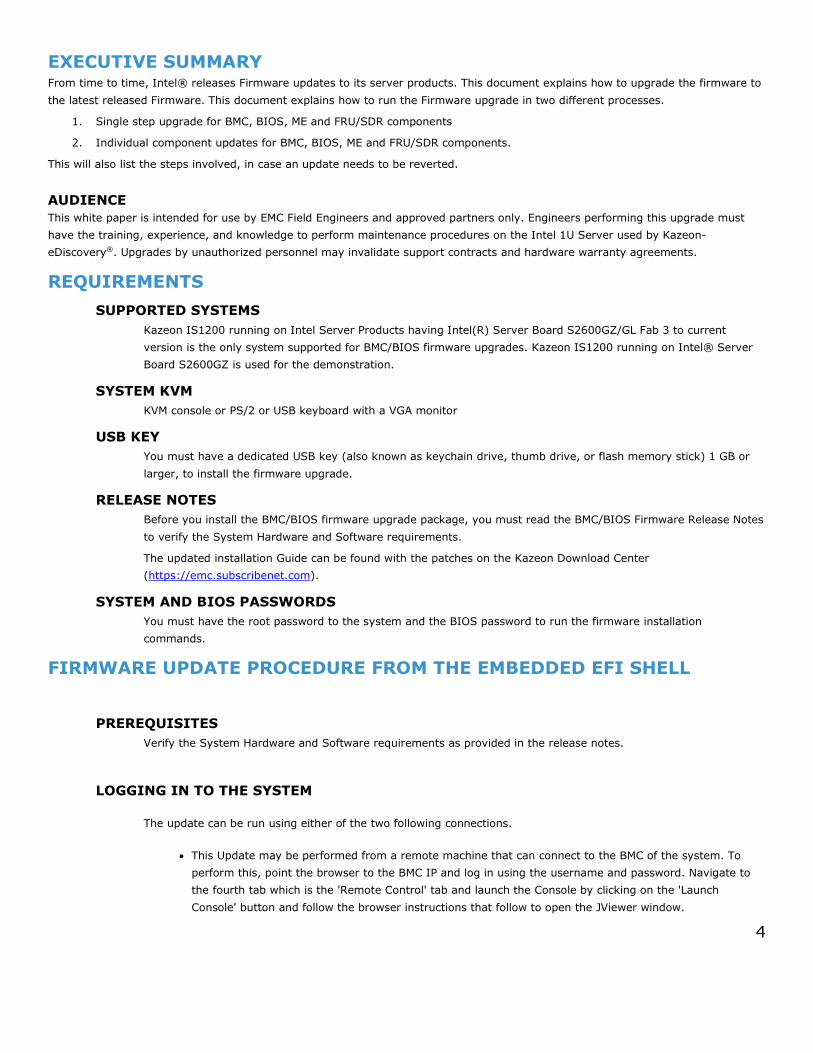
EXECUTIVE SUMMARY From time to time, Intel® releases Firmware updates to its server products. This document explains how to upgrade the firmware to the latest released Firmware. This document explains how to run the Firmware upgrade in two different processes.
1. Single step upgrade for BMC, BIOS, ME and FRU/SDR components
2. Individual component updates for BMC, BIOS, ME and FRU/SDR components.
This will also list the steps involved, in case an update needs to be reverted.
AUDIENCE This white paper is intended for use by EMC Field Engineers and approved partners only. Engineers performing this upgrade must have the training, experience, and knowledge to perform maintenance procedures on the Intel 1U Server used by Kazeon-eDiscovery®. Upgrades by unauthorized personnel may invalidate support contracts and hardware warranty agreements.
REQUIREMENTS SUPPORTED SYSTEMS
Kazeon IS1200 running on Intel Server Products having Intel(R) Server Board S2600GZ/GL Fab 3 to current version is the only system supported for BMC/BIOS firmware upgrades. Kazeon IS1200 running on Intel® Server Board S2600GZ is used for the demonstration.
SYSTEM KVM KVM console or PS/2 or USB keyboard with a VGA monitor
USB KEY You must have a dedicated USB key (also known as keychain drive, thumb drive, or flash memory stick) 1 GB or larger, to install the firmware upgrade.
RELEASE NOTES Before you install the BMC/BIOS firmware upgrade package, you must read the BMC/BIOS Firmware Release Notes to verify the System Hardware and Software requirements.
The updated installation Guide can be found with the patches on the Kazeon Download Center (https://emc.subscribenet.com).
SYSTEM AND BIOS PASSWORDS You must have the root password to the system and the BIOS password to run the firmware installation commands.
FIRMWARE UPDATE PROCEDURE FROM THE EMBEDDED EFI SHELL
PREREQUISITES Verify the System Hardware and Software requirements as provided in the release notes.
LOGGING IN TO THE SYSTEM The update can be run using either of the two following connections.
• This Update may be performed from a remote machine that can connect to the BMC of the system. To perform this, point the browser to the BMC IP and log in using the username and password. Navigate to the fourth tab which is the 'Remote Control' tab and launch the Console by clicking on the 'Launch Console' button and follow the browser instructions that follow to open the JViewer window.
4
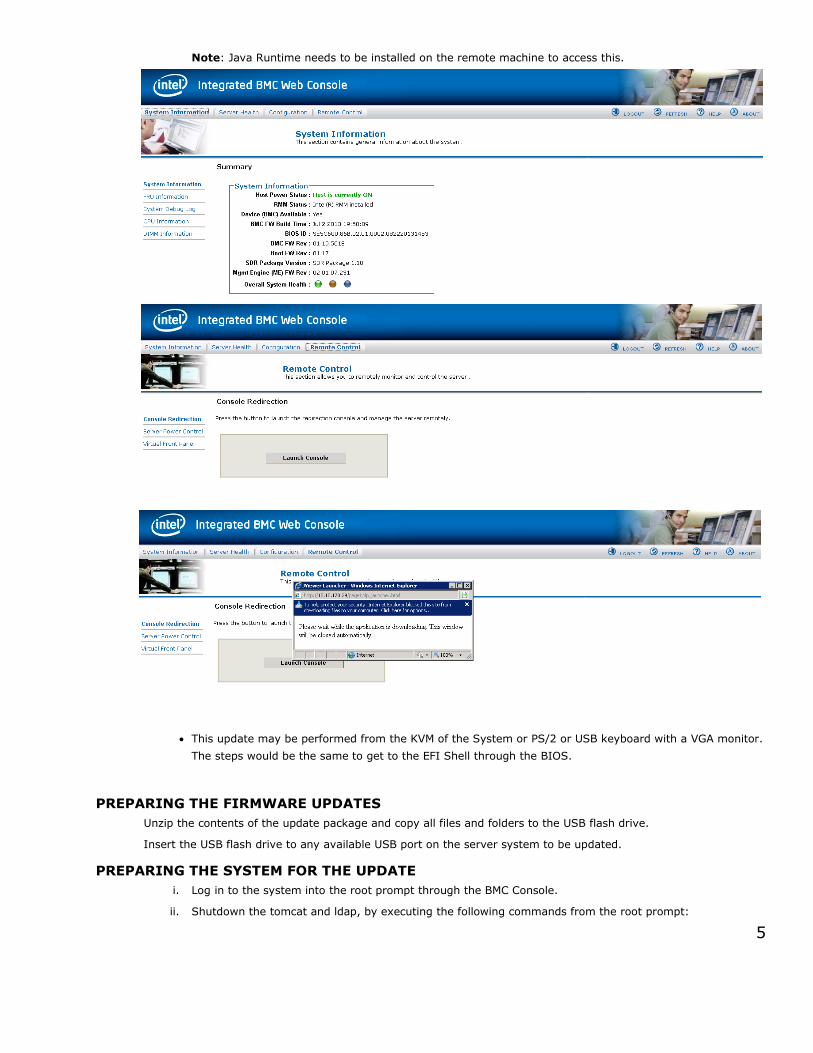
Note: Java Runtime needs to be installed on the remote machine to access this.
• This update may be performed from the KVM of the System or PS/2 or USB keyboard with a VGA monitor. The steps would be the same to get to the EFI Shell through the BIOS.
PREPARING THE FIRMWARE UPDATES Unzip the contents of the update package and copy all files and folders to the USB flash drive.
Insert the USB flash drive to any available USB port on the server system to be updated.
PREPARING THE SYSTEM FOR THE UPDATE i. Log in to the system into the root prompt through the BMC Console.
ii. Shutdown the tomcat and ldap, by executing the following commands from the root prompt:
5
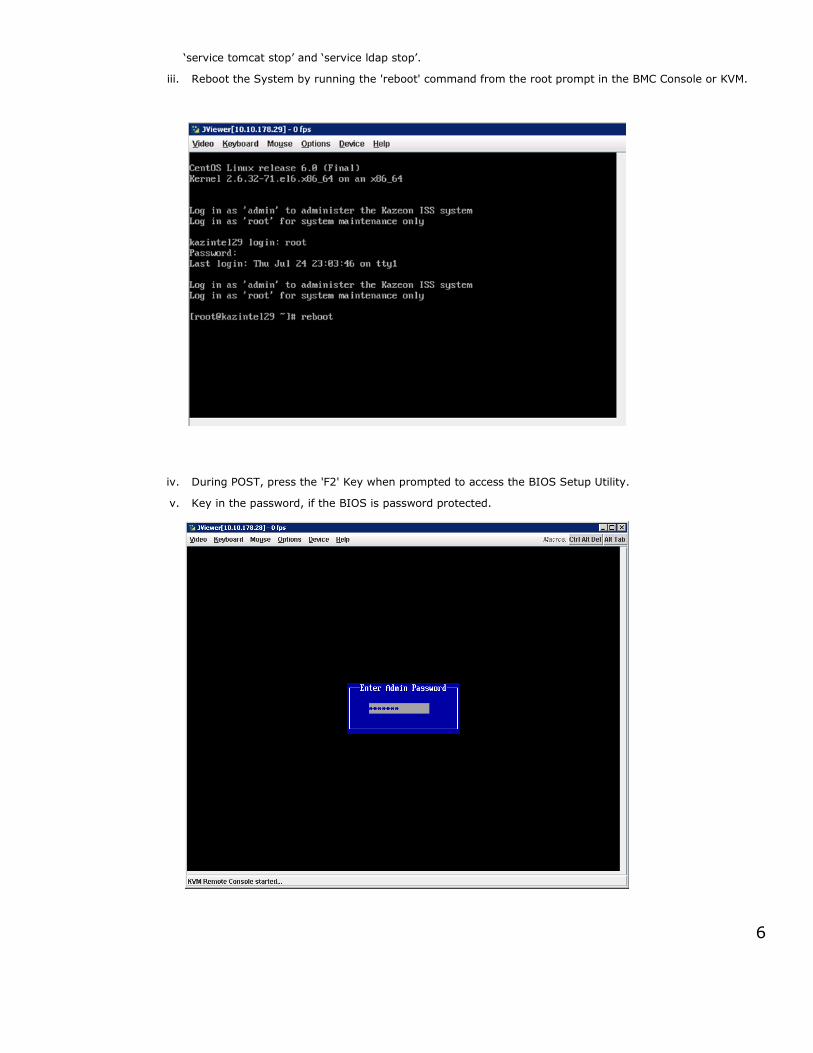
‘service tomcat stop’ and ‘service ldap stop’.
iii. Reboot the System by running the 'reboot' command from the root prompt in the BMC Console or KVM.
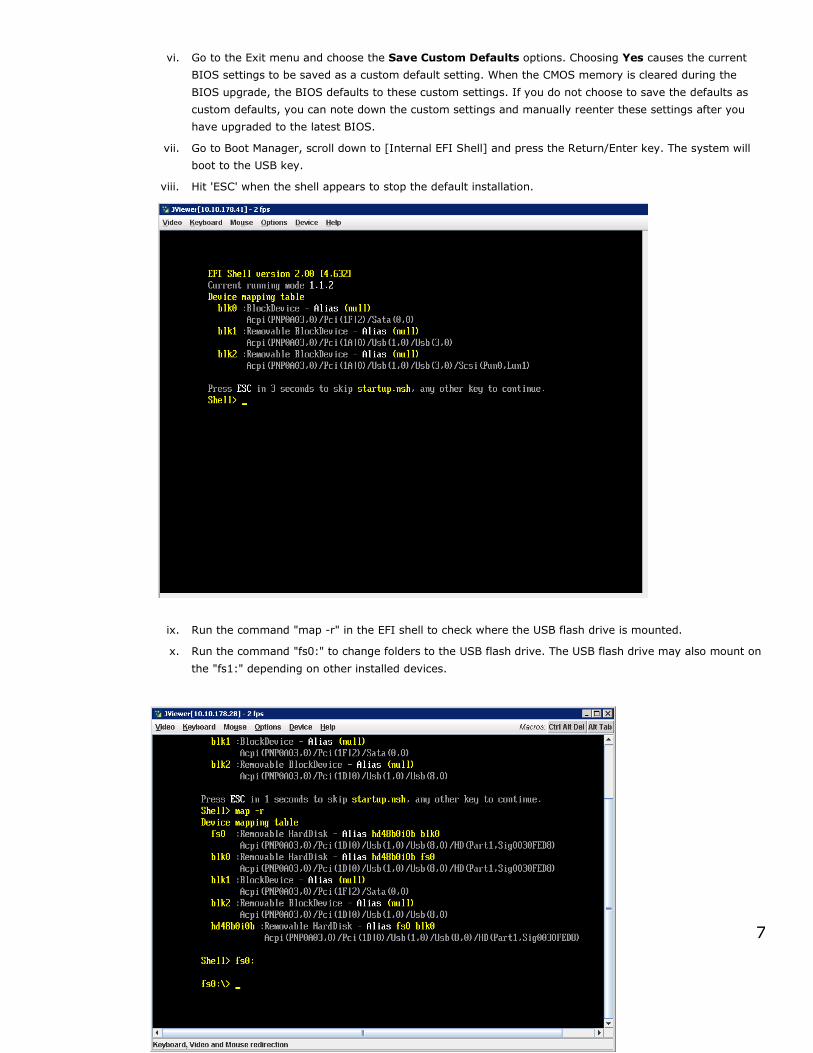
iv. During POST, press the 'F2' Key when prompted to access the BIOS Setup Utility.
v. Key in the password, if the BIOS is password protected.
6
vi. Go to the Exit menu and choose the Save Custom Defaults options. Choosing Yes causes the current BIOS settings to be saved as a custom default setting. When the CMOS memory is cleared during the BIOS upgrade, the BIOS defaults to these custom settings. If you do not choose to save the defaults as custom defaults, you can note down the custom settings and manually reenter these settings after you have upgraded to the latest BIOS.
vii. Go to Boot Manager, scroll down to [Internal EFI Shell] and press the Return/Enter key. The system will boot to the USB key.
viii. Hit 'ESC' when the shell appears to stop the default installation.
ix. Run the command "map -r" in the EFI shell to check where the USB flash drive is mounted.
x. Run the command "fs0:" to change folders to the USB flash drive. The USB flash drive may also mount on the "fs1:" depending on other installed devices.
7

STARTING THE UPDATE
• If a single step upgrade for BMC, BIOS, ME and FRU/SDR components is the option, then follow these instructions:
i. Run the command "Startup.nsh" to start updating all the firmware and BIOS updates.
ii. During the FRUSDR Update, the system will prompt for the desired updates. Enter ‘3’ to update both FRU and SDR, and further enter ‘N’ to respond to the other questions.
8
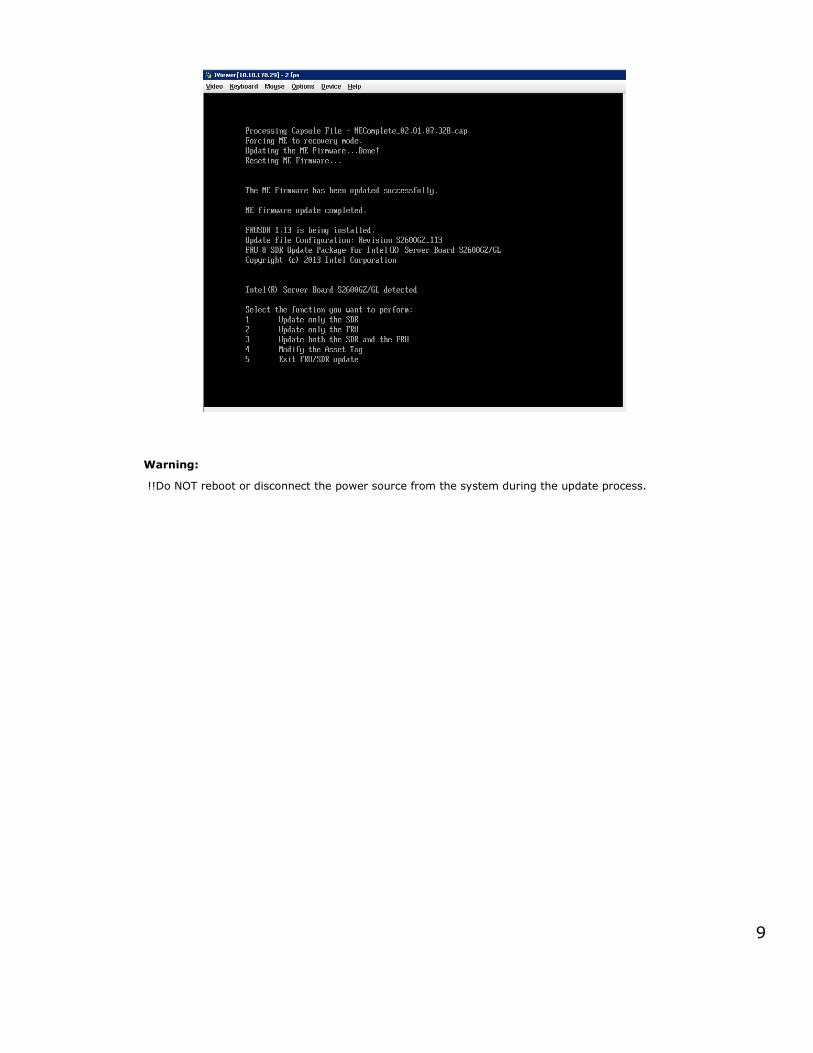
Warning:
!!Do NOT reboot or disconnect the power source from the system during the update process.
9
• If individual component updates for BMC, BIOS, ME and FRU/SDR components is the option then follow the following instructions:
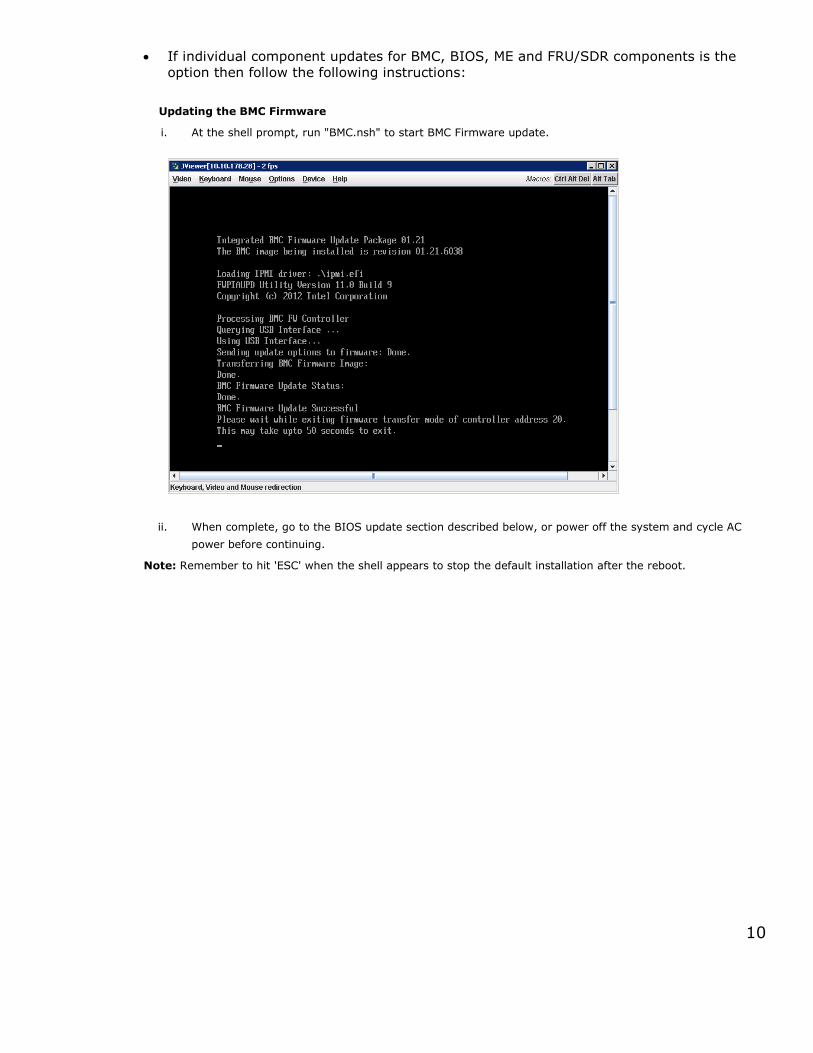
Updating the BMC Firmware
i. At the shell prompt, run "BMC.nsh" to start BMC Firmware update.
ii. When complete, go to the BIOS update section described below, or power off the system and cycle AC power before continuing.
Note: Remember to hit 'ESC' when the shell appears to stop the default installation after the reboot.
10
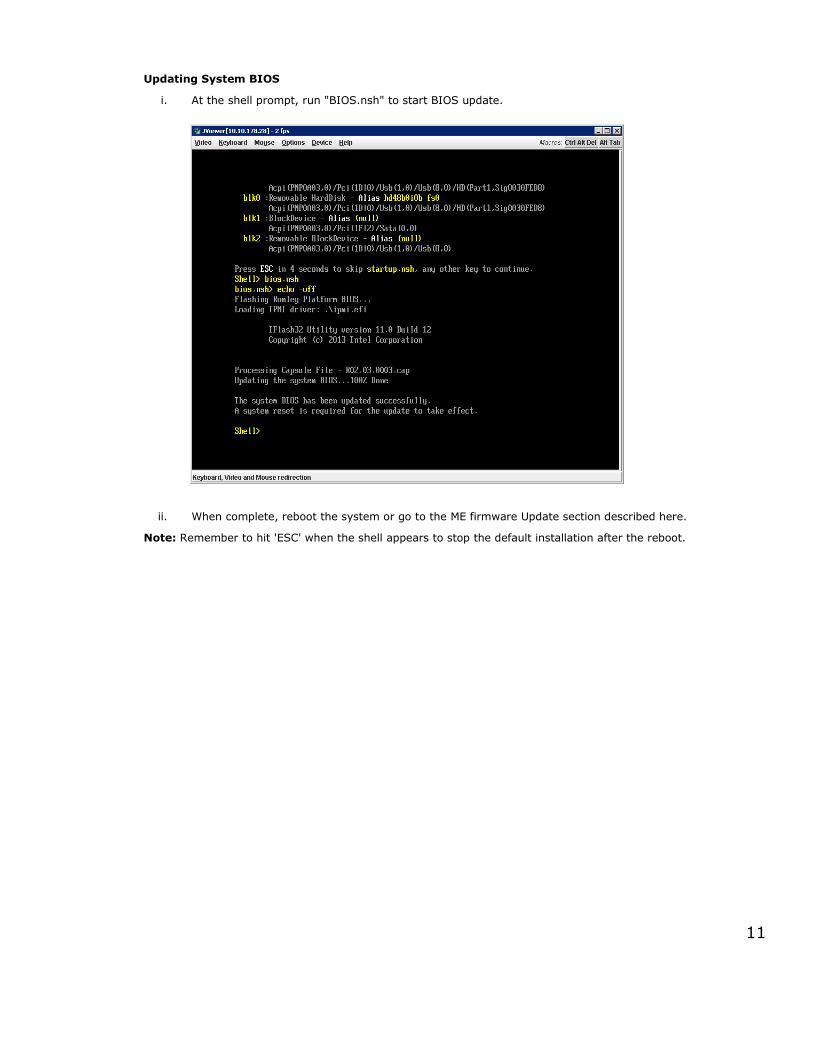
Updating System BIOS
i. At the shell prompt, run "BIOS.nsh" to start BIOS update.
ii. When complete, reboot the system or go to the ME firmware Update section described here.
Note: Remember to hit 'ESC' when the shell appears to stop the default installation after the reboot.
11
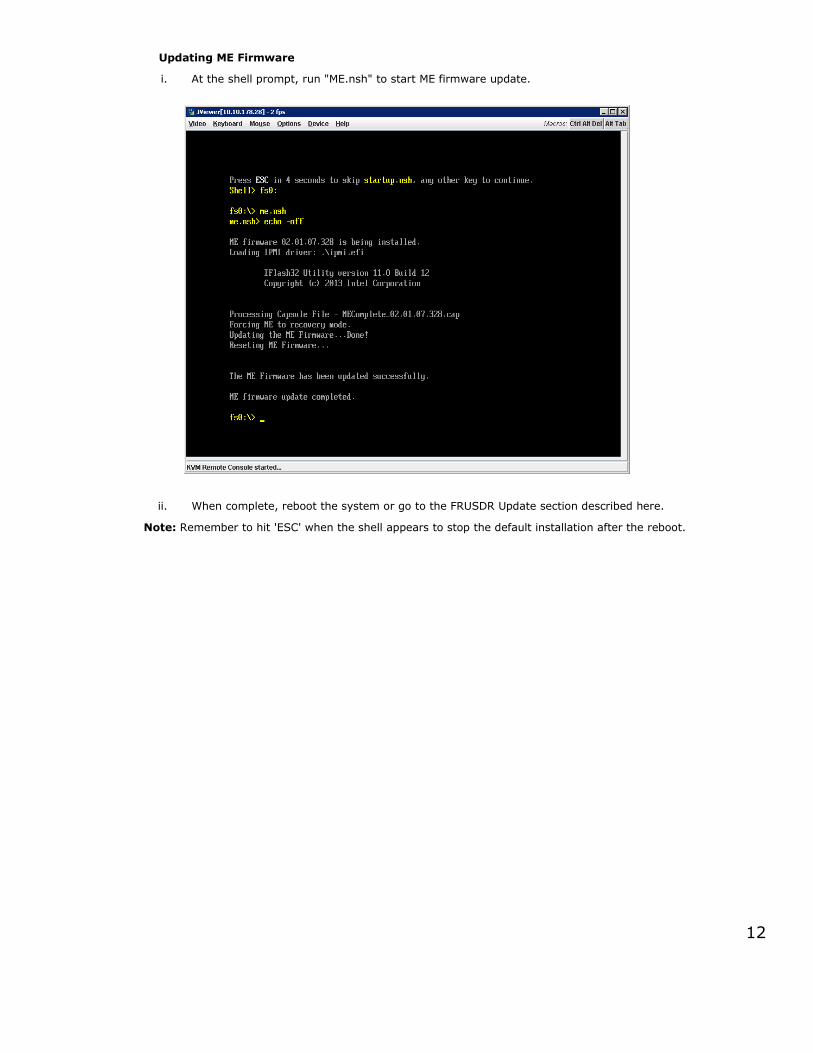
Updating ME Firmware
i. At the shell prompt, run "ME.nsh" to start ME firmware update.
ii. When complete, reboot the system or go to the FRUSDR Update section described here.
Note: Remember to hit 'ESC' when the shell appears to stop the default installation after the reboot.
12
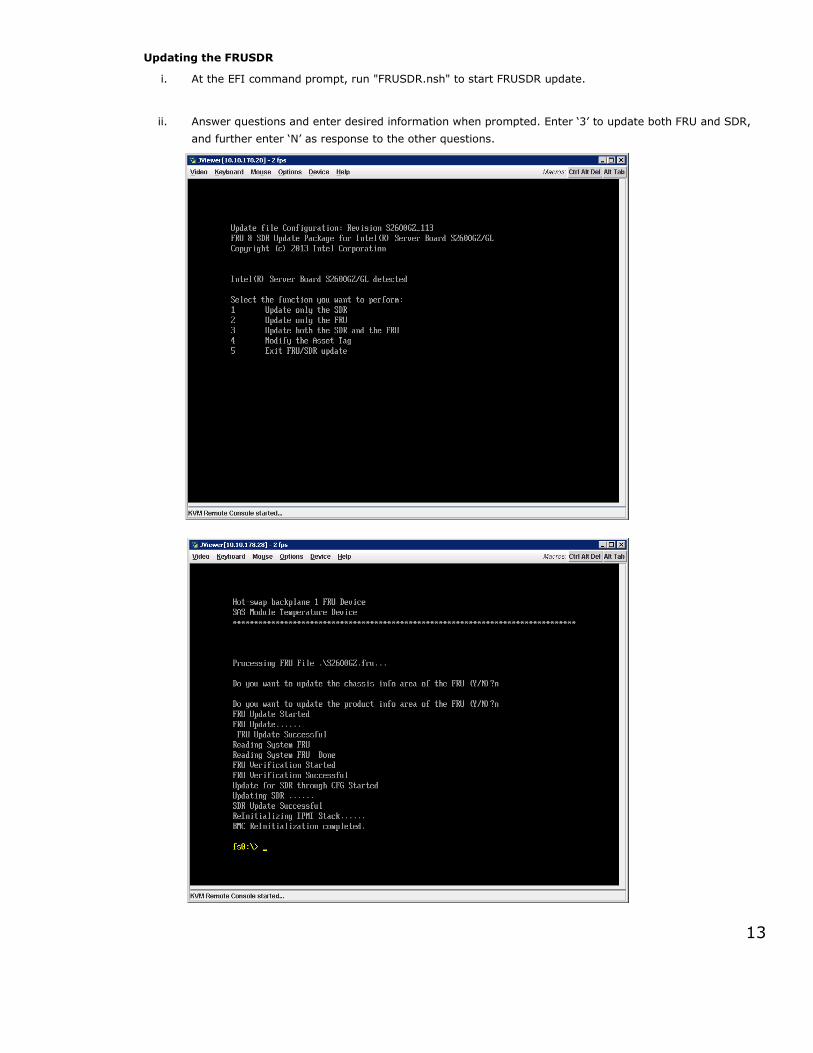
Updating the FRUSDR
i. At the EFI command prompt, run "FRUSDR.nsh" to start FRUSDR update.
ii. Answer questions and enter desired information when prompted. Enter ‘3’ to update both FRU and SDR, and further enter ‘N’ as response to the other questions.
13

FINISHING THE UPDATE Perform an AC power cycle on the System. When firmware upgrade is complete, you must perform an AC power cycle.
i. Shut down the system using one of the following ways:
a. Having physical access to the system, and by using the power control buttons or
b. Through the BMC console by navigating to ‘Remote Control’ tab and selecting the ‘Server Power Control’ from the left menu and then selecting the ‘Power OFF Server’ radio button.
ii. Remove the power cords from both power supplies of the system.
iii. Wait for 20 seconds.
iv. Reconnect the power cords to both of the system power supplies. The system will power up automatically.
VERIFYING THE UPDATES
i. Reboot the server.
ii. During POST, hit the ‘F2’ Key when prompted to access the BIOS Setup Utility.
iii. Hit the F9 key to load BIOS Defaults.
iv. If you saved your CMOS settings as custom defaults before the update, then go to the Exit menu and choose the Load Custom Defaults option to return to your previous custom settings. If the settings were not saved as custom defaults prior to the BIOS update, go through each screen of options and return the CMOS settings to the values that you wrote down prior to updating the BIOS.
v. At the MAIN menu verify if the BIOS revision is correct.
vi. Move cursor to the SERVER MANAGEMENT Menu.
vii. Move cursor down to the SYSTEM INFORMATION Option and press Enter.
viii. Verify if the BMC Firmware revision is correct.
ix. Verify if the SDR revision is correct.
x. Verify if the ME Firmware revision is correct.
xi. Go to the Server Management and select the BMC LAN Configuration restoring the values noted earlier.
xii. Press [F10] to save the settings and press ENTER to accept the changes and the server boots up the OS.
If the versions match the versions mentioned in the release notes, then the System Software Update is Complete.
14
RECOVERING FROM AN UPDATE FAILURE, OR BIOS CORRUPTION. In an unlikely event of the BIOS getting corrupted, leaving the system in an unbootable state, it may be necessary to perform the following BIOS Recovery procedure.
BIOS RECOVERY PROCEDURE
i. Copy the following BIOS update files from the Firmware update zip to the root directory of a USB media device (Recovery Media):
Note: These specific files will be located in the "BIOS Recovery Files" folder included in the System Update Package.
a. IPMI.EFI
b. IFlash32.EFI
c. RML.ROM
d. R##.##.####REC.CAP (where ##.##.#### = BIOS revision number)
e. STARTUP.NSH (modified to support BIOS recovery)
ii. Power OFF the system.
iii. Locate the BIOS Recovery Jumper on the server board and move the jumper block from pins 1-2 (default) to pins 2-3 (recovery setting).
iv. Insert the recovery media into any available USB port on the back of the server.
Note: The front panel USB ports may not work for this procedure on some server systems.
v. Power ON the system.
vi. The system will automatically boot into the embedded EFI Shell.
vii. The STARTUP.NSH file automatically executes and initiates the flash update. When complete, the IFlash utility will display a message
viii. Power OFF the system and return the BIOS Recovery jumper to its default position.
ix. Remove recovery media from the USB port.
x. Power ON the system.
xi. Do *NOT* interrupt the BIOS POST during the first boot.
15