Symantec NetBackup in Highly Available Environments ...danno/symantec/NetBackup...Symantec NetBackup...
76
Symantec NetBackup in Highly Available Environments Administrator's Guide for Windows, UNIX, and Linux Release 7.5
Transcript of Symantec NetBackup in Highly Available Environments ...danno/symantec/NetBackup...Symantec NetBackup...

Symantec NetBackup inHighly AvailableEnvironmentsAdministrator's Guide
for Windows, UNIX, and Linux
Release 7.5
Symantec NetBackup in Highly Available EnvironmentsAdministrator's Guide
The software described in this book is furnished under a license agreement andmay be usedonly in accordance with the terms of the agreement.
Documentation version: 7.5
Legal NoticeCopyright © 2012 Symantec Corporation. All rights reserved.
Symantec and the Symantec Logo are trademarks or registered trademarks of SymantecCorporation or its affiliates in theU.S. and other countries. Other namesmaybe trademarksof their respective owners.
This Symantec product may contain third party software for which Symantec is requiredto provide attribution to the third party (“Third Party Programs”). Some of the Third PartyPrograms are available under open source or free software licenses. The LicenseAgreementaccompanying the Software does not alter any rights or obligations you may have underthose open source or free software licenses. Please see theThird Party LegalNoticeAppendixto this Documentation or TPIP ReadMe File accompanying this Symantec product for moreinformation on the Third Party Programs.
The product described in this document is distributed under licenses restricting its use,copying, distribution, and decompilation/reverse engineering. No part of this documentmay be reproduced in any form by any means without prior written authorization ofSymantec Corporation and its licensors, if any.
THEDOCUMENTATIONISPROVIDED"ASIS"ANDALLEXPRESSORIMPLIEDCONDITIONS,REPRESENTATIONS AND WARRANTIES, INCLUDING ANY IMPLIED WARRANTY OFMERCHANTABILITY, FITNESS FOR A PARTICULAR PURPOSE OR NON-INFRINGEMENT,ARE DISCLAIMED, EXCEPT TO THE EXTENT THAT SUCH DISCLAIMERS ARE HELD TOBELEGALLYINVALID.SYMANTECCORPORATIONSHALLNOTBELIABLEFORINCIDENTALOR CONSEQUENTIAL DAMAGES IN CONNECTION WITH THE FURNISHING,PERFORMANCE, OR USE OF THIS DOCUMENTATION. THE INFORMATION CONTAINEDIN THIS DOCUMENTATION IS SUBJECT TO CHANGE WITHOUT NOTICE.
The Licensed Software andDocumentation are deemed to be commercial computer softwareas defined in FAR12.212 and subject to restricted rights as defined in FARSection 52.227-19"Commercial Computer Software - Restricted Rights" and DFARS 227.7202, "Rights inCommercial Computer Software or Commercial Computer Software Documentation", asapplicable, and any successor regulations. Any use, modification, reproduction release,performance, display or disclosure of the Licensed Software andDocumentation by theU.S.Government shall be solely in accordance with the terms of this Agreement.

Symantec Corporation350 Ellis StreetMountain View, CA 94043
http://www.symantec.com
Technical SupportSymantec Technical Support maintains support centers globally. TechnicalSupport’s primary role is to respond to specific queries about product featuresand functionality. TheTechnical Support group also creates content for our onlineKnowledge Base. The Technical Support group works collaboratively with theother functional areas within Symantec to answer your questions in a timelyfashion. For example, theTechnical Support groupworkswithProductEngineeringand Symantec Security Response to provide alerting services and virus definitionupdates.
Symantec’s support offerings include the following:
■ A range of support options that give you the flexibility to select the rightamount of service for any size organization
■ Telephone and/or Web-based support that provides rapid response andup-to-the-minute information
■ Upgrade assurance that delivers software upgrades
■ Global support purchased on a regional business hours or 24 hours a day, 7days a week basis
■ Premium service offerings that include Account Management Services
For information about Symantec’s support offerings, you can visit our Web siteat the following URL:
www.symantec.com/business/support/
All support services will be delivered in accordance with your support agreementand the then-current enterprise technical support policy.
Contacting Technical SupportCustomers with a current support agreement may access Technical Supportinformation at the following URL:
www.symantec.com/business/support/
Before contacting Technical Support, make sure you have satisfied the systemrequirements that are listed in your product documentation. Also, you should beat the computer onwhich theproblemoccurred, in case it is necessary to replicatethe problem.
When you contact Technical Support, please have the following informationavailable:
■ Product release level

■ Hardware information
■ Available memory, disk space, and NIC information
■ Operating system
■ Version and patch level
■ Network topology
■ Router, gateway, and IP address information
■ Problem description:
■ Error messages and log files
■ Troubleshooting that was performed before contacting Symantec
■ Recent software configuration changes and network changes
Licensing and registrationIf yourSymantecproduct requires registrationor a licensekey, access our technicalsupport Web page at the following URL:
www.symantec.com/business/support/
Customer serviceCustomer service information is available at the following URL:
www.symantec.com/business/support/
Customer Service is available to assist with non-technical questions, such as thefollowing types of issues:
■ Questions regarding product licensing or serialization
■ Product registration updates, such as address or name changes
■ General product information (features, language availability, local dealers)
■ Latest information about product updates and upgrades
■ Information about upgrade assurance and support contracts
■ Information about the Symantec Buying Programs
■ Advice about Symantec's technical support options
■ Nontechnical presales questions
■ Issues that are related to CD-ROMs, DVDs, or manuals

Support agreement resourcesIf youwant to contact Symantec regarding an existing support agreement, pleasecontact the support agreement administration team for your region as follows:
[email protected] and Japan
[email protected], Middle-East, and Africa
[email protected] America and Latin America

Technical Support . . . . . . . . . . . . . . . . . . . . . . . . . . . . . . . . . . . . . . . . . . . . . . . . . . . . . . . . . . . . . . . . . . . . . . . . . . . . . . . . . . . . . . . . . . . . . . . 4
Chapter 1 About in this guide . . . . . . . . . . . . . . . . . . . . . . . . . . . . . . . . . . . . . . . . . . . . . . . . . . . . . . . . . . . . . . 11
What's in this guide .... . . . . . . . . . . . . . . . . . . . . . . . . . . . . . . . . . . . . . . . . . . . . . . . . . . . . . . . . . . . . . . . . . . 11Documents related to NetBackup in highly available
environments ... . . . . . . . . . . . . . . . . . . . . . . . . . . . . . . . . . . . . . . . . . . . . . . . . . . . . . . . . . . . . . . . . . . . . . 12
Chapter 2 NetBackup protection against single points offailure . . . . . . . . . . . . . . . . . . . . . . . . . . . . . . . . . . . . . . . . . . . . . . . . . . . . . . . . . . . . . . . . . . . . . . . . . . . . . 13
About protecting against component failures ... . . . . . . . . . . . . . . . . . . . . . . . . . . . . . . . . . 13About protecting against network link failures ... . . . . . . . . . . . . . . . . . . . . . . . . . 15About protecting against storage device connection
failures ... . . . . . . . . . . . . . . . . . . . . . . . . . . . . . . . . . . . . . . . . . . . . . . . . . . . . . . . . . . . . . . . . . . . . . . . 15About protecting against storage device failure ... . . . . . . . . . . . . . . . . . . . . . . . . 16About protecting against media availability failures ... . . . . . . . . . . . . . . . . . . 16About protecting against master server failures ... . . . . . . . . . . . . . . . . . . . . . . . . 17About protecting against media server failures ... . . . . . . . . . . . . . . . . . . . . . . . . . 18About protecting against LAN client failures ... . . . . . . . . . . . . . . . . . . . . . . . . . . . . 21About protecting against SAN client failures ... . . . . . . . . . . . . . . . . . . . . . . . . . . . . 22
About protecting against site failures ... . . . . . . . . . . . . . . . . . . . . . . . . . . . . . . . . . . . . . . . . . . . 22About protecting catalog in highly available environments ... . . . . . . . . . . . . . . . 23About installing media servers in clusters ... . . . . . . . . . . . . . . . . . . . . . . . . . . . . . . . . . . . . . 24
About virtual storage units in a NetBackup cluster ... . . . . . . . . . . . . . . . . . . . . 24
Chapter 3 About site disaster recovery with catalog backupand recovery . . . . . . . . . . . . . . . . . . . . . . . . . . . . . . . . . . . . . . . . . . . . . . . . . . . . . . . . . . . . . . . . . . . 31
About catalog recovery .... . . . . . . . . . . . . . . . . . . . . . . . . . . . . . . . . . . . . . . . . . . . . . . . . . . . . . . . . . . . . . 31About full catalog recovery .... . . . . . . . . . . . . . . . . . . . . . . . . . . . . . . . . . . . . . . . . . . . . . . . . . . 32Performing full catalog restore ... . . . . . . . . . . . . . . . . . . . . . . . . . . . . . . . . . . . . . . . . . . . . . . 33Making the DR environment consistent after a full catalog
restore ... . . . . . . . . . . . . . . . . . . . . . . . . . . . . . . . . . . . . . . . . . . . . . . . . . . . . . . . . . . . . . . . . . . . . . . . . 35About partial catalog recovery .... . . . . . . . . . . . . . . . . . . . . . . . . . . . . . . . . . . . . . . . . . . . . . . 35Performing partial catalog restore ... . . . . . . . . . . . . . . . . . . . . . . . . . . . . . . . . . . . . . . . . . . 36
Contents

Making the DR environment consistent after a partial catalogrestore ... . . . . . . . . . . . . . . . . . . . . . . . . . . . . . . . . . . . . . . . . . . . . . . . . . . . . . . . . . . . . . . . . . . . . . . . . 37
About disk recovery in DR domain .... . . . . . . . . . . . . . . . . . . . . . . . . . . . . . . . . . . . . . . . . . . . . . . . 37Disk recovery in single-domain replication DR
environment .... . . . . . . . . . . . . . . . . . . . . . . . . . . . . . . . . . . . . . . . . . . . . . . . . . . . . . . . . . . . . . . . 38Auto Image Replication .... . . . . . . . . . . . . . . . . . . . . . . . . . . . . . . . . . . . . . . . . . . . . . . . . . . . . . . . 38Disk recovery in cross-domain replication DR environment .... . . . . . . . 38
Chapter 4 About site loss protection with catalogreplication . . . . . . . . . . . . . . . . . . . . . . . . . . . . . . . . . . . . . . . . . . . . . . . . . . . . . . . . . . . . . . . . . . . . . . . 41
About auto image replication .... . . . . . . . . . . . . . . . . . . . . . . . . . . . . . . . . . . . . . . . . . . . . . . . . . . . . . 41About conditions for support of replicated NetBackup catalogs ... . . . . . . . . . 41About catalog synchronization .... . . . . . . . . . . . . . . . . . . . . . . . . . . . . . . . . . . . . . . . . . . . . . . . . . . . 44About NetBackup catalog replication .... . . . . . . . . . . . . . . . . . . . . . . . . . . . . . . . . . . . . . . . . . . . 44
About multi-site single domain replication .... . . . . . . . . . . . . . . . . . . . . . . . . . . . . . 44About multi-site cross domain replication .... . . . . . . . . . . . . . . . . . . . . . . . . . . . . . . 47About full catalog replication .... . . . . . . . . . . . . . . . . . . . . . . . . . . . . . . . . . . . . . . . . . . . . . . . 49About partial catalog replication .... . . . . . . . . . . . . . . . . . . . . . . . . . . . . . . . . . . . . . . . . . . . 52
Chapter 5 Deploying NetBackup master servers with fullcatalog replication . . . . . . . . . . . . . . . . . . . . . . . . . . . . . . . . . . . . . . . . . . . . . . . . . . . . . . . . 55
About replication considerations .... . . . . . . . . . . . . . . . . . . . . . . . . . . . . . . . . . . . . . . . . . . . . . . . . 55About non-clustered NetBackup master server with catalog
replication .... . . . . . . . . . . . . . . . . . . . . . . . . . . . . . . . . . . . . . . . . . . . . . . . . . . . . . . . . . . . . . . . . . . . . . . . . 56Installing and configuring non-clustered NetBackup master
server with catalog replication .... . . . . . . . . . . . . . . . . . . . . . . . . . . . . . . . . . . . . . . . 56About globally clustered NetBackup master servers with catalog
replication .... . . . . . . . . . . . . . . . . . . . . . . . . . . . . . . . . . . . . . . . . . . . . . . . . . . . . . . . . . . . . . . . . . . . . . . . . 63Installing and configuring a globally clusteredNetBackupmaster
server with catalog replication .... . . . . . . . . . . . . . . . . . . . . . . . . . . . . . . . . . . . . . . . 63Populating the server tables in the EMM ..... . . . . . . . . . . . . . . . . . . . . . . . . . . . . . . . 66Upgrading NetBackup in clustered replication
configuration .... . . . . . . . . . . . . . . . . . . . . . . . . . . . . . . . . . . . . . . . . . . . . . . . . . . . . . . . . . . . . . . 67Failing over to secondary master server cluster ... . . . . . . . . . . . . . . . . . . . . . . . . 67Testing the NetBackup master server cluster in clustered
replication environment .... . . . . . . . . . . . . . . . . . . . . . . . . . . . . . . . . . . . . . . . . . . . . . . . 68
Contents8

Chapter 6 Using NetBackup to perform backups and restoresin a cluster . . . . . . . . . . . . . . . . . . . . . . . . . . . . . . . . . . . . . . . . . . . . . . . . . . . . . . . . . . . . . . . . . . . . . . 69
About backups and restores with NetBackup in a cluster ... . . . . . . . . . . . . . . . . . . 69Performing user-directed backups with NetBackup in a
cluster ... . . . . . . . . . . . . . . . . . . . . . . . . . . . . . . . . . . . . . . . . . . . . . . . . . . . . . . . . . . . . . . . . . . . . . . . . 69About restoring data in a cluster ... . . . . . . . . . . . . . . . . . . . . . . . . . . . . . . . . . . . . . . . . . . . . 70
About supported NetBackup database agents and options in acluster ... . . . . . . . . . . . . . . . . . . . . . . . . . . . . . . . . . . . . . . . . . . . . . . . . . . . . . . . . . . . . . . . . . . . . . . . . . . . . . . 72About backing up database files in a cluster ... . . . . . . . . . . . . . . . . . . . . . . . . . . . . . 73About user backups .... . . . . . . . . . . . . . . . . . . . . . . . . . . . . . . . . . . . . . . . . . . . . . . . . . . . . . . . . . . . . 73About NetBackup client in a cluster ... . . . . . . . . . . . . . . . . . . . . . . . . . . . . . . . . . . . . . . . . 73
Index . . . . . . . . . . . . . . . . . . . . . . . . . . . . . . . . . . . . . . . . . . . . . . . . . . . . . . . . . . . . . . . . . . . . . . . . . . . . . . . . . . . . . . . . . . . . . . . . . . . . . . . . . . . . . . . . . . . . 75
9Contents

Contents10
About in this guide
This chapter includes the following topics:
■ What's in this guide
■ Documents related to NetBackup in highly available environments
What's in this guideThe SymantecNetBackup inHighlyAvailableEnvironmentsAdministrator'sGuidediscusses various methods for making NetBackup highly available and providesguidelines for protecting NetBackup against single point of failures.
This guide looks at the components of a data protection system based onNetBackup. It outlines different configurations and solutions for reducing therisk of failure within a particular site and recovering from the loss of the site.
You can use this guide as an aid to create a NetBackup site disaster recovery planbecause it discusses catalog recovery and catalog replication process. However,this guide is not intended to provide a definitive disaster recovery plan for allNetBackup environments. Instead, you can use the information to develop sitedisaster recovery plans specific to your NetBackup environments.
This guide also provides guidelines for installing andupgradingNetBackupmasterservers. In addition, the guide details operating practices when catalogs arereplicated between clustered or non-clustered NetBackup master servers.
The guide does not cover the details of clustering or replication technologies thatare used. Please refer to your specific replication technology documentation fordetails on deploying and operating replication layers. Formore information aboutNetBackup master server clustering, refer to the Symantec NetBackup ClusteredMaster Server Administrator's Guide.
See “Documents related to NetBackup in highly available environments”on page 12.
1Chapter

Documents related to NetBackup in highly availableenvironments
When you refer to the Symantec NetBackup in Highly Available EnvironmentsAdministrator's Guide you may also want to refer to the following documents:
■ Refer to Symantec NetBackup Clustered Master Server Administrator's Guidefor information about clustering NetBackup.
■ Refer toSymantecNetBackupInstallationGuide for informationabout installingNetBackup.
■ Refer to Symantec NetBackup Administrator's Guide, Volume I and Volume IIfor general information about NetBackup.
About in this guideDocuments related to NetBackup in highly available environments
12

NetBackup protectionagainst single points offailure
This chapter includes the following topics:
■ About protecting against component failures
■ About protecting against site failures
■ About protecting catalog in highly available environments
■ About installing media servers in clusters
About protecting against component failuresNetBackup comprises a number of different components, each of which has thepotential to fail, and disrupt the backup or restore process.
Table 2-1 lists the component level points of failure and the related protectionmethod.
Table 2-1 NetBackup protection against component failures
Protection methodPoint of failure
See “About protecting against network link failures” on page 15.Network links
See “Aboutprotectingagainst storagedevice connection failures”on page 15.
Storage deviceconnections
See “About protecting against storage device failure” onpage 16.Storage devices
2Chapter
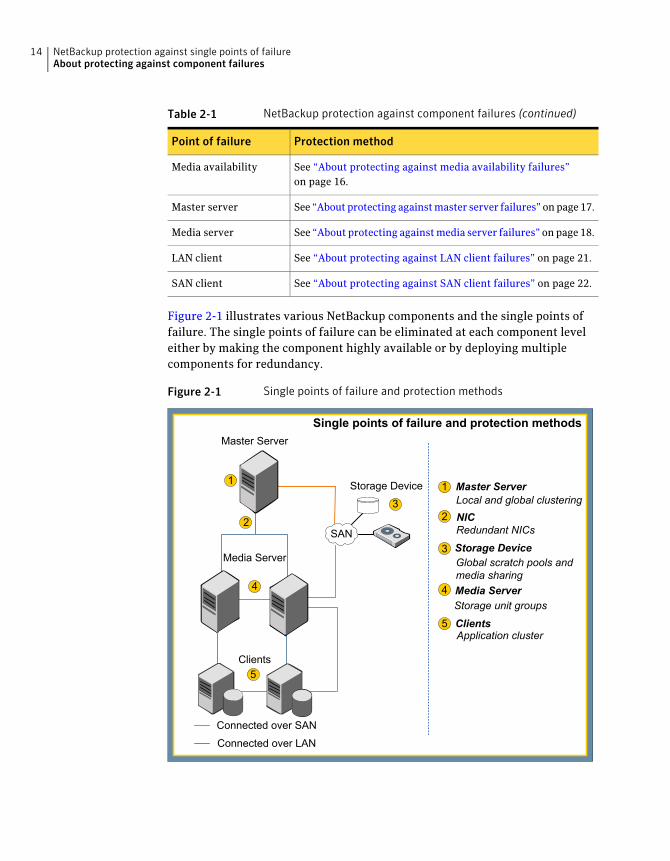
Table 2-1 NetBackup protection against component failures (continued)
Protection methodPoint of failure
See “About protecting against media availability failures”on page 16.
Media availability
See “About protecting againstmaster server failures”onpage17.Master server
See “About protecting againstmedia server failures” onpage 18.Media server
See “About protecting against LAN client failures” on page 21.LAN client
See “About protecting against SAN client failures” on page 22.SAN client
Figure 2-1 illustrates various NetBackup components and the single points offailure. The single points of failure can be eliminated at each component leveleither by making the component highly available or by deploying multiplecomponents for redundancy.
Figure 2-1 Single points of failure and protection methods
Master Server
Media Server
Clients
Storage Device
Connected over SAN
Connected over LAN
1
2
5
Single points of failure and protection methods
Master ServerLocal and global clusteringNICRedundant NICs
Storage DeviceGlobal scratch pools andmedia sharingMedia ServerStorage unit groups
ClientsApplication cluster
3
SAN
4
1
2
3
4
5
NetBackup protection against single points of failureAbout protecting against component failures
14

About protecting against network link failuresThe majority of backup traffic is transferred over network connections with 100MBand1Gbit speedwhichprovide transfer rate of around8MB/sec and65MB/sec,respectively. To make network links highly available, deploy redundant networkteaming.Due to cost considerations, network teaming is often restricted to backupservers and mission critical clients only. Non-mission critical clients have singlenetwork connections and the risk of connection failure (and the subsequent failureof the backup) is accepted.
About protecting against storage device connection failuresConnections to storage devices and their controllers also represent single pointsof failure. In case of connection failure, the device cannot be used.
See “About protecting against SAN connection failures” on page 15.
See “About protecting against robotic control connection failures” on page 15.
About protecting against SAN connection failuresSAN connections generally exist between the backup servers and the backupstorage; although the NetBackup SAN client also supports SAN connections fromclients tomedia servers. In all cases, to protectNetBackup against SANconnectionfailure, SANs should be configured to provide redundant connections betweenthe source and the target components.
Most SAN-attached disk arrays have redundant SAN connections and supportdynamic multi-pathing (DMP) software. This redundancy ensures that theconnection to the storage ismaintained even if onepath fails. Inmany cases, DMPsoftware also load balances traffic across SAN connections to improve the datatransfer rates to and from the disk storage.
Many SAN-attached tape devices also offer two connections for redundancy, andthus they appear to servers as two separate devices. Multi-path selection is notdynamic. NetBackup selects the first available path it finds and always uses thatpath. The second device path is only used if the first path is broken.
About protecting against robotic control connection failuresIn tape-based backup environments, the robotic control connections can be singlepoints of failure. The inability to send instructions to the tape library preventsbackup and restore operations, even if the tape drives are available.
Some tape libraries, such as Sun STK ACSLS or Quantum ATM, use a dedicatedcontrol software that runs on a server that is independent of the library. Suchcontrol servers can be clustered. The media servers send requests to the control
15NetBackup protection against single points of failureAbout protecting against component failures
server, which handles the movement of tapes between slots and drives in thelibrary.
Other tape libraries depend on a direct device connection from the NetBackupmaster server for control instructions to the library. If this device connection islost, the tape library cannot be used. SAN-attached tape libraries supportmultipleconnections to the robotic control for redundancy. You can configure theseconnections to provide protection against server failure. For example, you canconfigure one path to each node of a clustered master server. You must ensurethat the paths are not active at the same time. If both paths are active, conflictinginstructions can be issued, which could result in backup failure or data loss.
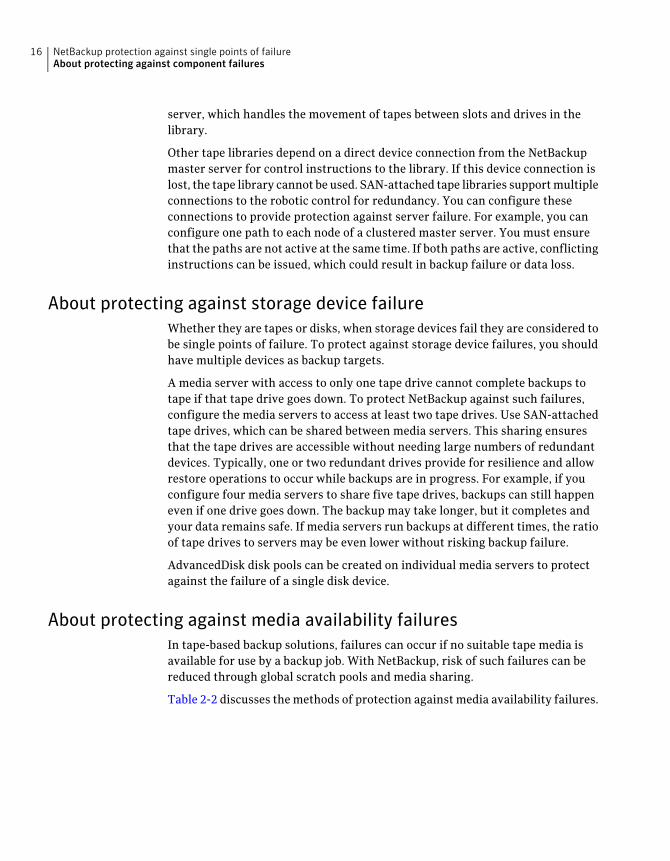
About protecting against storage device failureWhether they are tapes or disks, when storage devices fail they are considered tobe single points of failure. To protect against storage device failures, you shouldhave multiple devices as backup targets.
A media server with access to only one tape drive cannot complete backups totape if that tape drive goes down. To protect NetBackup against such failures,configure the media servers to access at least two tape drives. Use SAN-attachedtape drives, which can be shared between media servers. This sharing ensuresthat the tape drives are accessible without needing large numbers of redundantdevices. Typically, one or two redundant drives provide for resilience and allowrestore operations to occur while backups are in progress. For example, if youconfigure four media servers to share five tape drives, backups can still happeneven if one drive goes down. The backup may take longer, but it completes andyour data remains safe. If media servers run backups at different times, the ratioof tape drives to servers may be even lower without risking backup failure.
AdvancedDisk disk pools can be created on individual media servers to protectagainst the failure of a single disk device.
About protecting against media availability failuresIn tape-based backup solutions, failures can occur if no suitable tape media isavailable for use by a backup job. With NetBackup, risk of such failures can bereduced through global scratch pools and media sharing.
Table 2-2 discusses themethods of protection against media availability failures.
NetBackup protection against single points of failureAbout protecting against component failures
16
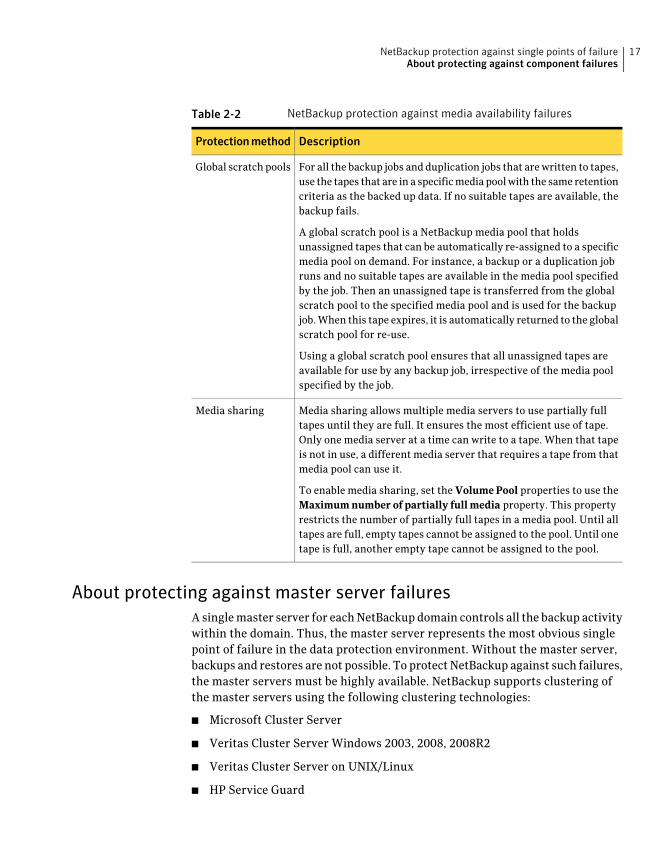
Table 2-2 NetBackup protection against media availability failures
DescriptionProtectionmethod
For all the backup jobs and duplication jobs that arewritten to tapes,use the tapes that are in a specificmedia poolwith the same retentioncriteria as the backed up data. If no suitable tapes are available, thebackup fails.
A global scratch pool is a NetBackup media pool that holdsunassigned tapes that can be automatically re-assigned to a specificmedia pool on demand. For instance, a backup or a duplication jobruns and no suitable tapes are available in the media pool specifiedby the job. Then an unassigned tape is transferred from the globalscratch pool to the specified media pool and is used for the backupjob.When this tape expires, it is automatically returned to the globalscratch pool for re-use.
Using a global scratch pool ensures that all unassigned tapes areavailable for use by any backup job, irrespective of the media poolspecified by the job.
Global scratch pools
Media sharing allows multiple media servers to use partially fulltapes until they are full. It ensures the most efficient use of tape.Only one media server at a time can write to a tape. When that tapeis not in use, a different media server that requires a tape from thatmedia pool can use it.
To enable media sharing, set the VolumePool properties to use theMaximum number of partially full media property. This propertyrestricts the number of partially full tapes in a media pool. Until alltapes are full, empty tapes cannot be assigned to the pool. Until onetape is full, another empty tape cannot be assigned to the pool.
Media sharing
About protecting against master server failuresAsinglemaster server for eachNetBackup domain controls all the backup activitywithin the domain. Thus, the master server represents the most obvious singlepoint of failure in the data protection environment. Without the master server,backups and restores are not possible. To protectNetBackup against such failures,the master servers must be highly available. NetBackup supports clustering ofthe master servers using the following clustering technologies:
■ Microsoft Cluster Server
■ Veritas Cluster Server Windows 2003, 2008, 2008R2
■ Veritas Cluster Server on UNIX/Linux
■ HP Service Guard
17NetBackup protection against single points of failureAbout protecting against component failures

■ HACMP for AIX
More information about installing and configuring NetBackup on these clustertechnologies is available in the Symantec NetBackup Clustered Master ServerAdministrator's Guide.
About protecting against media server failuresAlthough media servers can be configured with redundant network and SANconnections, the servers themselves remain single points of failure. Methods ofprotecting NetBackup against media server failures may vary depending on thetype of media servers that you use.
Table 2-3 lists the different types of media servers and the protection method.
Table 2-3 Type of media servers and protection method
DescriptionType ofmedia server
Run only the media server software and exclusively back up datafrom other systems.
See “About protecting against dedicated media server failures”on page 18.
Dedicated mediaservers
Run other applications also that require backing up. Also back updata from other systems.
See “About protecting against non-dedicated media serversfailures” on page 19.
Non-dedicated mediaservers
Run other applications also that require backing up. Do not backup data from other systems.
See “About protecting against SAN media server failures”on page 20.
SAN media servers
About protecting against dedicated media server failuresStorage unit groups can be used to protect NetBackup against the failure of asinglemedia server. Storage unit groups can also be used for load balancing acrossmultiple media servers to ensure optimal backup and restore performance.
Table 2-4 discusses the different modes in which you can configure the storageunit groups.
NetBackup protection against single points of failureAbout protecting against component failures
18

Table 2-4 Modes for configuring storage unit groups
DescriptionMode
In the failover mode, the first storage unit is always used, unlessthe media server is down. Excess jobs are queued rather thanbeing directed to the next storage unit. The failover modefunctions similarly to what would be seen if two media serverswere configured as an active or a passive cluster.
Failover
In the prioritized mode, the first available storage unit in the listis used. In thismode, jobs that exceed the total number the storageunit can handle, are directed to the next storage unit in the list.If the media server is down, all backups are directed to the nextstorage unit.
Prioritized
In the round robin mode, different storage units from the list areused in a cycle for each job. If each storage unit is on a differentmedia server, this acts as a load balancing mechanism.
Round robin
The load balance mode only works with Flexible Disk and MediaManager storageunit types. In the loadbalancemode,NetBackupcarries out checks on activity and resources available on eachmedia. The check is carried out before the backup are directed tothe media with the lightest load.
Load balanced
As a best practice, when using prioritized and failover groups to configure twostorage unit groups, use two media servers, as follows:
■ Configure each media server to have a single storage unit. For example, soNode A has STU A and Node B has STU B.
■ Configure two storage unit groups with the storage units in a specific order ineach one. In this example, SUG AB contains STU A, followed by STU B. SUGAB contains STU B followed by STU A.
■ Backup policies are then evenly shared between SUG AB and SUG BA.
During operation, the backup traffic is normally shared between the two nodes,but if one node fails, all backups automatically go to the other node.
About protecting against non-dedicatedmedia servers failuresStorage unit groups can also be used to protect against the failure of non-dedicatedmedia servers. However such use does not protect other applications running ofa given media server from the failure of that media server. In some casesnon-dedicated media servers may form part of cluster supporting otherapplications. These applications can be protected using virtual storage units.
19NetBackup protection against single points of failureAbout protecting against component failures
See “About virtual storage units in a NetBackup cluster” on page 24.
About protecting against SAN media server failuresUnlike regularmedia servers, SANmedia servers only protect themselves. A SANmedia server connects directly to the backup storage in the sameway as a regularmedia server. But it does not receive data fromother client systems over a networkor SAN link.
SAN media servers are usually deployed on the servers that support large,mission-critical applications, which are often clustered. While the applicationmay be clustered, you do not need to cluster the SAN media server itself. Instead,install the SAN media server software on each member node of the cluster andcreate application cluster definitions in the NetBackup EMM database for eachvirtual name the cluster uses. Then create a storage unit using the virtual nameof the cluster as the media server. The associated application with a given virtualname use the storage unit that is associated with the same virtual name forbackups.
See “About installing media servers in clusters” on page 24.
Restoring tape backups using an alternative media serverGenerally, while restoring files, NetBackup expects to use the same media serverand client that it used for the original backup. However, for disaster recovery,you use a different media server to restore the backup to a different client. Themedia servers and clients at the disaster recovery site are likely to have differentnames from those at the primary site.
NetBackup lets you configure failover restore media servers to handle restoresin the event that the original media server is unavailable.
To configure failover restore media servers:
■ On Windows master server, you can configure failover restore media serversusing the NetBackup Administration Console.Go to Host Properties > Master Server > Restore Failover.
■ On UNIX and Linux master servers , you must createFAILOVER_RESTORE_MEDIA_SERVER entry in the bp.conf file.
Restoring disk backups using an alternative media server.NetBackup can share disk storage pools between multiple media servers. Duringrestore, by default, NetBackup balances the job load and automatically directs therestore to the least busy media server rather than the one that made the backup.However, this process can cause problems if themedia server selected to perform
NetBackup protection against single points of failureAbout protecting against component failures
20

the restore is licensed as a SAN media server or does not have network access tothe client which requires a restore.
There are three options available if you encounter this problem:
■ Configure the force restore media server setting as follows:
■ On UNIX and Linux master servers, you createFORCE_RESTORE_MEDIA_SERVER entry in the bp.conf file.
■ On Windows master server, you can define this setting in the NetBackupAdministration Console.Go to Host Properties > Master Server.This setting works on a per-server basis. It lets you specify a media serverfor restore operations based on the media server that is used to make thebackup. To ensure that the same media server is used to make the backupand the restore, specify the same name for the backup and restore server.
■ Create the touch file USE_BACKUP_MEDIA_SERVER_FOR_RESTORE, asfollows:
■ On UNIX and Linux master server, create the file in/usr/openv/netbackup/db/config
■ On Windows master server, create the file in <install
path>\veritas\netbackup\db\config.
USE_BACKUP_MEDIA_SERVER_FOR_RESTORE is a global setting andalways forces restore to the server that did the backup.
Note:When the USE_BACKUP_MEDIA_SERVER_FOR_RESTORE touch file iscreated, all FAILOVER_RESTORE_MEDIA_SERVER andFORCE_RESTORE_MEDIA_SERVER settings are ignored.
■ Run the restore from the command line using the bprestore-disk_media_server command. This setting works on a per job level. It alsolets you specify the media server that is required for the specific restore job.Unlike the other two options, this setting is dynamic and can be applied whenneeded.
About protecting against LAN client failuresThe NetBackup client package (including the application agents) is not clusteraware and must be installed separately on each node of a cluster that is beingprotected as a NetBackup client. When backing up clustered applications specifythe virtual server name associated with the application as the client name in the
21NetBackup protection against single points of failureAbout protecting against component failures

backup policy. This will ensure that the correct node of the cluster is selectedduring the backup operation.
About protecting against SAN client failuresThe SAN client, like the SAN media server, does not send backup traffic over thenetwork to the media server. However unlike SAN media servers, which sendbackup data directly to the storage devices, SAN clients send backup data over aSAN connection to a remote media server.
SANclients are often used to protect clustered applications. To protectNetBackupagainst SAN client failures when used in this way, configure the SAN client asapplication clusters in EMM.This configuration also ensures that themedia servercontrolling the backup always opens a fiber transport connection to the activenode of the cluster when a backup is initiated.
About protecting against site failuresLocal clusteringprovides local failover for each site.However, these configurationsdo not provide protection against large-scale disasters such as major floods,hurricanes, and earthquakes that cause outages for an entire region. The entirecluster can get affected by such an outage. In such situations, global clusteringor wide area clustering ensures data availability by migrating applications to theremote clusters that are located considerable distances apart.
Global cluster architecture supports deployment of two or more datacenters,clusters, and subnets that are separated by a larger distance. A global clusterwithreplicatedmaster server cluster canmonitor andmanage the replication jobs andclusters at each site. In case of a site outage, it controls the shift of replicationroles to the secondary site. It brings up the critical applications and redirectsclient traffic, from one cluster to the other.
Auto image replication is a NetBackup feature which allows individual disk basedbackups to be replicated between NetBackup domains. Because the backups areautomatically recorded in the NetBackup catalog of the target domain there isnot need for catalog replication of complex catalog recovery procedures whenusing auto image replication. For more information, refer to the SymantecNetBackup Administrator's Guide, Volume I.
NetBackup protection against single points of failureAbout protecting against site failures
22

About protecting catalog in highly availableenvironments
TheNetBackup catalog contains information about both existing backups and thebackup policy, including what gets backed up when and to where and how longthe backup is kept for. As such the catalog is a single point of failure and needsto be protected. Using theRAID storage provides some protection against storagefailure. Replication can also protect against storage failure and site loss. Regularbackups of the catalog can protect against corruption and accidental data loss.
See Table 2-5 on page 23. discusses the variousmethods for protectingNetBackupcatalogs.
Table 2-5 NetBackup catalog protection in highly available environments
DescriptionProtection Method
The catalog backup protects the NetBackup catalog on the masterserver against both hardware failure and data corruption andcatalog backups should bemade on a regular basis, ideally at leastdaily. The catalog backup is policy-based so it has all of thescheduling flexibility of a regular backup policy. As the policyallows for incremental backups, catalog backup times for largecatalogs can be significantly reduced. However it should be notedthat recovery from incremental backups can take longer due tothe need to restore.
Catalog backupswritten to tapeusemedia from theCatalogBackupvolume pool only.
For more information, refer to the Symantec NetBackupAdministrator's Guide, Volume I.
Catalog backups
23NetBackup protection against single points of failureAbout protecting catalog in highly available environments

Table 2-5 NetBackup catalog protection in highly available environments(continued)
DescriptionProtection Method
Catalog replication is the process of creating and managingduplicate versions of a catalog database. Catalog replication copiesa database and synchronizes a set of replicas so that the changesthat are made to one replica are reflected in all the others.
Replicating the catalog to a standby master server at the disasterrecovery or secondary site ensures rapid catalog recovery at thedisaster recovery site. Continuous replication ensures that thecatalog is as up to date as the replication link allows.
Note: Replication does not protect against catalog corruption oraccidentally deleting or expiring images. You must make regularscheduled catalog backups.
See “About NetBackup catalog replication” on page 44.
See “About catalog recovery” on page 31.
Catalog replication
About installing media servers in clustersIn cluster configurationsNetBackupmedia servers and SANmedia servers shouldbe installed as non-failover applications on each node of the cluster. Configuringin this way allows all nodes of the cluster to function as media severs, either inconjunction with storage unit groups or virtual storage units that fail over withother applications running on the same cluster.
Configure each media server as you would in a non-clustered environment. Formore information, refer to the Symantec NetBackup Installation Guide.
See “About virtual storage units in a NetBackup cluster” on page 24.
About virtual storage units in a NetBackup clusterIn a typical NetBackup environment, the storage unit is associated with aNetBackup entity, such as themaster server ormedia server. In the configurationthat is described in this topic, however, a storage unit is associatedwith the virtualname of the application in the cluster environment. The storage unit for thatapplication is not associatedwith any specific node in the cluster and can failoverto any node in the cluster. This lack of association ensures that the storage unitfollows along with the application, wherever the application is running in thecluster. The NetBackup master server uses the virtual name of the application asthe media server name when it backs up the clustered application.
NetBackup protection against single points of failureAbout installing media servers in clusters
24

This configuration is supported forVeritas Cluster Server (VCS),Microsoft ClusterServer (MSCS), SunCluster , Service Guard, and HACMP.
Prerequisites when configuring a NetBackup media server ina cluster with virtual storage unitsThe following requirements must be met when you configure a standaloneNetBackup media server in a cluster with virtual storage units:
■ Your hardware must support the clustering technology and NetBackup. For alist ofNetBackup supported storage devices, visit the followingWeb site. Also,refer to the documentation that is included with your clustering software.http://entsupport.symantec.com
■ Verify that storage devices are properly installed and configured to work inthe cluster environment. Refer to the information onhow to configure storagedevices in the NetBackup Installation Guide.
■ An IP address and host name (virtual name) must be associated with eachclustered application.
■ Verify that your cluster (VCS, MSCS, SunCluster, Service Guard, or HACMP)is correctly installed and configured.
■ Make the NetBackup master server the EMM server and the robotic controlhost. (You may not be able to change the robotic control host in allconfigurations since not all robot types have a robot control option.)
■ Verify that youhave theNetBackupEnterprise Server 7.5 installation programandavalid license key. Youmust alsohave a valid license key for theNetBackupShared Storage option, if you perform backups to tape.
About installing NetBackup media software in a clusterInstall the NetBackup media server software on each node in the cluster. See theNetBackup Installation Guide for details.
Note:When you configure NetBackup as described in this topic, do not configurethe NetBackup media server as a failover application. The media server must betreated as a stand-alone application on each node in the cluster.
About configuring virtual storage units in a NetBackup clusterStorage units are configured differently depending on whether the storage isdisk-based or tape-based.
Figure 2-2 shows NetBackup as installed on local media servers.
25NetBackup protection against single points of failureAbout installing media servers in clusters
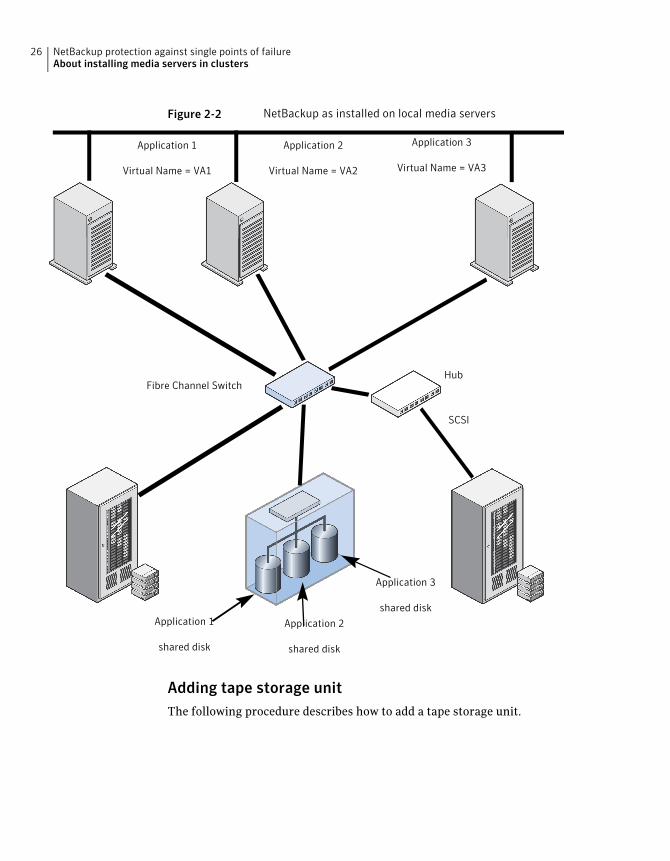
Figure 2-2 NetBackup as installed on local media servers
Application 2
Virtual Name = VA2
Application 3
Virtual Name = VA3
Application 1
Virtual Name = VA1
Application 1
shared disk
Application 2
shared disk
Application 3
shared disk
Fibre Channel SwitchHub
SCSI
Adding tape storage unitThe following procedure describes how to add a tape storage unit.
NetBackup protection against single points of failureAbout installing media servers in clusters
26

To add tape storage unit
1 Ensure NetBackup media server and the Shared Storage Option are installedand configured on all nodes in the cluster.
2 On the master server, make the following changes to the Servers list.
■ Add the hostname for each node of the cluster.
■ Add the virtual name for each highly available application.
For a UNIX/Linux environment, update the bp.conf file. For Windows, editthe Servers list in the host properties for the server.
3 On the master server, run the following command to add a host with thevirtual name of the application:
nbemmcmd -addhost -machinename <cluster_name> -machinetype
app_cluster
where <virtual_name> is the virtual name of the application.
4 On the master server, run the following command to associate the host witheach node where the application runs in the cluster:
nbemmcmd -updatehost -add_server_to_app_cluster -machinename
<node_name> -machinetype media -clustername <virtual_name>
-netbackupversion 7.5 -masterserver <master_name>
where the <node_name> is a node where the application can run.<virtual_name> is the virtual name of the application. <master_name> is thename of the NetBackup master server.
5 Repeat step 4 for each node where the application can run.
6 Oneachnodewhere themedia server is installed,make the following changesto the Servers list.
■ Add the hostname for each node of the cluster.
■ Add the virtual name for each highly available application.
7 Use the NetBackup Administration Console to create a storage unit for eachapplication. Specify the virtual nameof the application asmedia server namefor the storage unit.
8 To back up each application, create a policy that specifies the storage unityou created in step 7 for that application.
Allocate specific tape devices for this configuration so that you do not stressstorageunits jobs. Youwant to create storageunits for each applicationwithinthe cluster. Or, you may want to create storage unit groups which manyapplications can use.
27NetBackup protection against single points of failureAbout installing media servers in clusters

Adding disk storage unitsSymantec recommends that you use the NetBackup Administration Console toadd disk storage units. (You can also perform this task from the command line.)
To add a disk storage unit
1 On the master server, make the following changes to the Servers list.
■ Add the hostname for each node of the cluster.
■ Add the virtual name for each highly available application.
For a UNIX/Linux environment, update the bp.conf file. For Windows, editthe Servers list in the host properties for the server.
2 On the master server, run the following command to add a host with thevirtual name of the application:
nbemmcmd -addhost -machinename <virtual_name> -machinetype
app_cluster
where <virtual_name> is the virtual name of the application.
3 On the master server, run the following command to associate the host witheach node where the application runs in the cluster:
nbemmcmd -updatehost -add_server_to_app_cluster -machinename
<node_name> -machinetype media -clustername <virtual_name>
-netbackupversion 7.5 -masterserver <master_name>
where <node_name> is a node where the application can run.
<virtual_name> is the virtual name of the application.
<master_name> is the name of the NetBackup master server.
4 Repeat step 3 for each node where the application can run.
5 Oneachnodewhere themedia server is installed,make the following changesto the Servers list.
■ Add the hostname for each node of the cluster.
■ Add the virtual name for each highly available application.
6 Use the NetBackup Administration Console to create a disk storage unit foreach application. Specify the virtual name of the application asmedia servername for the storage unit.
7 To back up each application, create a policy that specifies the storage unityou created in step 6 for that application.
NetBackup protection against single points of failureAbout installing media servers in clusters
28

Upgrading a NetBackup media server in a cluster with virtualstorage unitsThe following procedure describes how to upgrade a standalone NetBackup 6.0or higher media server in a cluster with virtual storage units.
To upgrade a NetBackup media server in a cluster with virtual storage units
1 On eachnodewhereNetBackupmedia server is installed, install the softwareon the local disk as you would in a non-cluster environment.
Follow the instructions on how to upgrade as described in the SymantecNetBackup Installation Guide.
2 On the master server, run the following command:
nbemmcmd -updatehost -machinename <virtual_name> -machinetype
app_cluster -netbackupversion 7.5
where <virtual_name> is the virtual name of the application.
3 Repeat step 2 for each virtual application that you have in your clusterenvironment.
29NetBackup protection against single points of failureAbout installing media servers in clusters

NetBackup protection against single points of failureAbout installing media servers in clusters
30
About site disaster recoverywith catalog backup andrecovery
This chapter includes the following topics:
■ About catalog recovery
■ About disk recovery in DR domain
About catalog recoveryAmajor problemusers encounter during site disaster recovery is that the disasterrecovery (DR) site is not a mirror image of the production site. To perform DRoperations you need a copy of the NetBackup catalog from the productionmasterserver. TheNetBackup catalog backup and recovery process is primarily intendedfor recovering from catalog storage or master server failure rather than site loss.The default situation is that NetBackup restores the complete catalog includingthe EMM database. The EMM database includes details of the media servers,backup devices, and storage units. Master server use this information to directbackups and restores. Master servers also use this information to interrogate themedia servers, to establish the status of the backup devices. In a DR environmentwhich does not contain thesemedia servers, the performance of themaster servercan be affected. Also, the ability to carry out restore operations can be affected,as polling operations fail to connect and time out.
Use the following approaches to recover the NetBackup environment at a DR sitewhere the arrangement of media servers and clients is different from the mainproduction site. Both approaches have advantages and disadvantages.
3Chapter

■ In the full catalog recovery approach the whole catalog is recovered and thenunwanted configuration elements can be removed or disabled.See “About full catalog recovery” on page 32.
■ In the partial catalog recovery the EMM and the BMR databases are notrestored.See “About partial catalog recovery” on page 35.
The most appropriate method for recovery can be determined by the nature ofthe DR facility and how similar it is to the production facility.
When creating your disaster recovery plan, ensure that it is in line with theapproaches discussed in the following sections:
■ See “Planning a cross domain replicationdisaster recoverydomain”onpage48.
■ See “Performing full catalog restore” on page 33.
■ See “Performing partial catalog restore” on page 36.
About full catalog recoveryFull catalog recovery is primarily used to recover the catalog if thedata is corruptedor storage is lost at the production site. Full catalog recovery is recommended forsingle domain configurations. Full catalog recovery is used if the DR site has thesame number of media servers with the same names as those used at theproduction site.
Full catalog recovery has the following advantages over partial catalog recovery:
■ It restores the relational database components, which include the storage unitdefinitions, media assignment, and history.
■ It retains the tape information from the primary site including themedia pooland other assignment information.
■ It restores the BMR data.
■ It enables backups to be run at the DR site using the same policies and tapesthat are used at the production site.
With full catalog recovery, there are the following limitations:
■ Whenyou recover the relational database components, thedevice configurationand the server configuration set up at the DR site before recovery is lost. Youmust set it again after recovery. The information that exists in the relationaldatabase about production servers and devices may not exist at the DR site.To ensure smooth operation in theDR environment, these server entriesmustbe disabled and the devices associated with them should be removed.
About site disaster recovery with catalog backup and recoveryAbout catalog recovery
32

■ Full catalog recovery overwrites the device configuration and the serverconfiguration in the relational database. You must rediscover the DR domainserver and device configuration after the catalog is restored.
Performing full catalog restoreWith full catalog recovery the complete catalog backup is recovered to the DRmaster server. The media servers that do not exist in the DR environment aredeactivated to avoidunnecessarypooling.All device records are removedbecausethe device configuration at the DR site can be different to the production site.Device discovery is run to update the EMM database. You must perform thefollowing procedure before restores can be started. Also, document the procedurein your DR plan.
To prepare for full catalog restore
1 OnUNIX and Linuxmaster servers, create copies of the bp.conf and vm.conffiles.
2 Run the bprecover command to recover the entire catalog.
Note: The DR master server must have the same name and topology as theproduction master server. If the production master server is a cluster thenthe DR master server must also be a cluster. The number of member nodesand the names of the nodes can be different.
Note: If a catalog backup that was created on a separatemedia server is used,then amedia server with the same name is required for the catalog recovery.
3 Deactivate all the backup policies to prevent backups from startingautomatically.
■ You can do this manually using the NetBackup Adminstration Console
■ Or run the bppllist <policy> -set -inactive CLI.
4 Shut down NetBackup.
5 OnUNIX and Linuxmaster servers, replace the bp.conf and the vm.conf filesthat were restored from the catalog backup with the copies created in step 1.
6 Start theNetBackupRelationalDatabaseManager, NetBackupPBX, andEMMservices on the new master server.
■ On UNIX and Linux master servers, run the following commands:
■ /usr/openv/netbackup/bin/nbdbms_start_stop start
33About site disaster recovery with catalog backup and recoveryAbout catalog recovery
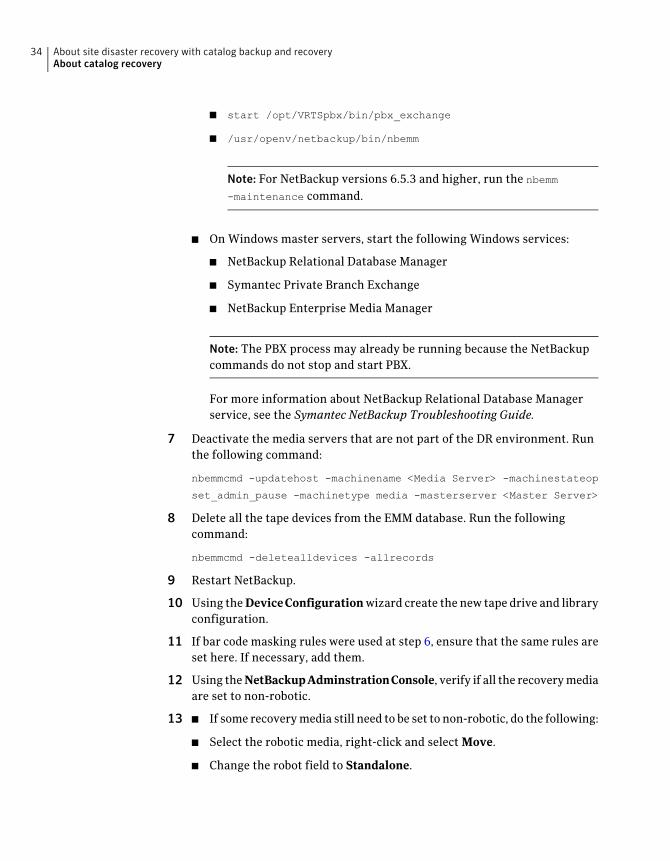
■ start /opt/VRTSpbx/bin/pbx_exchange
■ /usr/openv/netbackup/bin/nbemm
Note: For NetBackup versions 6.5.3 and higher, run the nbemm-maintenance command.
■ On Windows master servers, start the following Windows services:
■ NetBackup Relational Database Manager
■ Symantec Private Branch Exchange
■ NetBackup Enterprise Media Manager
Note: The PBX process may already be running because the NetBackupcommands do not stop and start PBX.
For more information about NetBackup Relational Database Managerservice, see the Symantec NetBackup Troubleshooting Guide.
7 Deactivate the media servers that are not part of the DR environment. Runthe following command:
nbemmcmd -updatehost -machinename <Media Server> -machinestateop
set_admin_pause -machinetype media -masterserver <Master Server>
8 Delete all the tape devices from the EMM database. Run the followingcommand:
nbemmcmd -deletealldevices -allrecords
9 Restart NetBackup.
10 Using theDeviceConfigurationwizard create the new tape drive and libraryconfiguration.
11 If bar code masking rules were used at step 6, ensure that the same rules areset here. If necessary, add them.
12 Using theNetBackupAdminstrationConsole, verify if all the recoverymediaare set to non-robotic.
13 If some recoverymedia still need to be set to non-robotic, do the following:■
■ Select the robotic media, right-click and select Move.
■ Change the robot field to Standalone.
About site disaster recovery with catalog backup and recoveryAbout catalog recovery
34
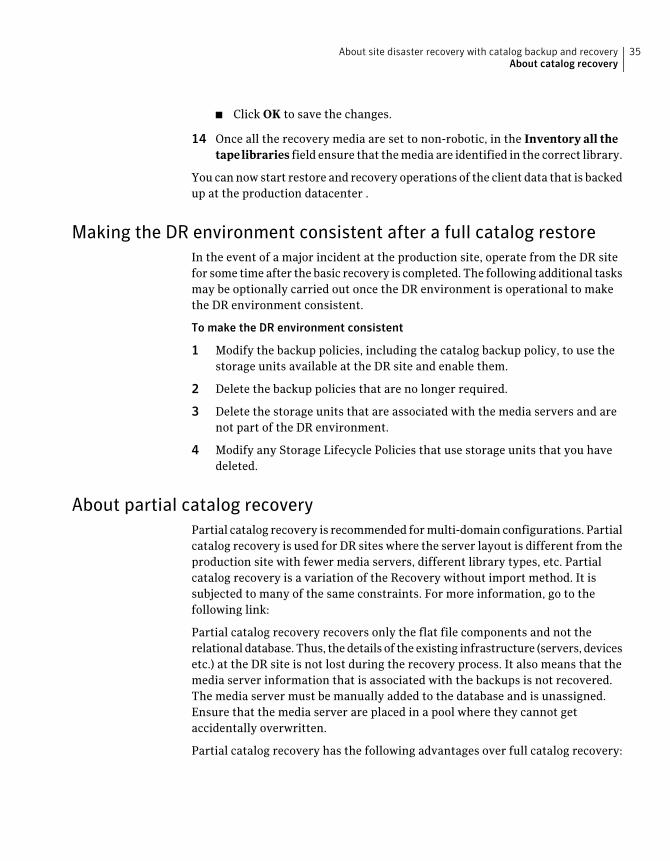
■ Click OK to save the changes.
14 Once all the recovery media are set to non-robotic, in the Inventory all thetapelibraries field ensure that themedia are identified in the correct library.
You cannow start restore and recovery operations of the client data that is backedup at the production datacenter .
Making the DR environment consistent after a full catalog restoreIn the event of a major incident at the production site, operate from the DR sitefor some time after the basic recovery is completed. The following additional tasksmay be optionally carried out once the DR environment is operational to makethe DR environment consistent.
To make the DR environment consistent
1 Modify the backup policies, including the catalog backup policy, to use thestorage units available at the DR site and enable them.
2 Delete the backup policies that are no longer required.
3 Delete the storage units that are associated with the media servers and arenot part of the DR environment.
4 Modify any Storage Lifecycle Policies that use storage units that you havedeleted.
About partial catalog recoveryPartial catalog recovery is recommended formulti-domain configurations. Partialcatalog recovery is used for DR sites where the server layout is different from theproduction site with fewer media servers, different library types, etc. Partialcatalog recovery is a variation of the Recovery without import method. It issubjected to many of the same constraints. For more information, go to thefollowing link:
Partial catalog recovery recovers only the flat file components and not therelational database. Thus, thedetails of the existing infrastructure (servers, devicesetc.) at the DR site is not lost during the recovery process. It also means that themedia server information that is associated with the backups is not recovered.The media server must be manually added to the database and is unassigned.Ensure that the media server are placed in a pool where they cannot getaccidentally overwritten.
Partial catalog recovery has the following advantages over full catalog recovery:
35About site disaster recovery with catalog backup and recoveryAbout catalog recovery

■ No elements of the configuration need to be removed or rediscovered. Therecovery process does not affect the general configuration of the DRenvironment.
■ It does not affect the server topology. The master server topology at the DRsite does not need to reflect the topology at the production site. Thus, a catalogbackup from a clusteredmaster server can be restored to a standalonemasterserver at the DR site.
■ The DR site can be a production site, provided the client names, backup policynames, and tape label ranges used in the two environments are unique. Also,it must be possible to do a partial recovery to another production backupdomain.
With partial catalog recovery, you cannot recover the tape information from theprimary site at theDRsite. Ensure that the tapes arenot accidentally overwritten.These tapes must not be easily used for backups at the DR site.
Performing partial catalog restoreWith partial catalog approach, it is assumed that restore operations do not needtapes to be assigned or located in specific media pools. It is also assumed that atape exists in EMM and NetBackup can mount and read the tape for restoring.The following steps must be carried out before restores can be started:
To prepare for partial catalog restore
1 OnUNIX andLinuxmaster servers create copies of the bp.conf and vm.conffiles.
2 Recover only the NetBackup catalog image and configuration files.
■ When using the NetBackup Administration Console, select the Partialcatalog recovery option when prompted.
■ Or run the bprecover -wizard command.
Note: The DR master server must have the same name as the productionmaster server.
Note: If a catalog backup that was created on a separatemedia server is used,a media server with the same name is required for the catalog recovery.
3 Run the cat_export –all –staging to export the metadata from thereplicated relational database backup.
About site disaster recovery with catalog backup and recoveryAbout catalog recovery
36
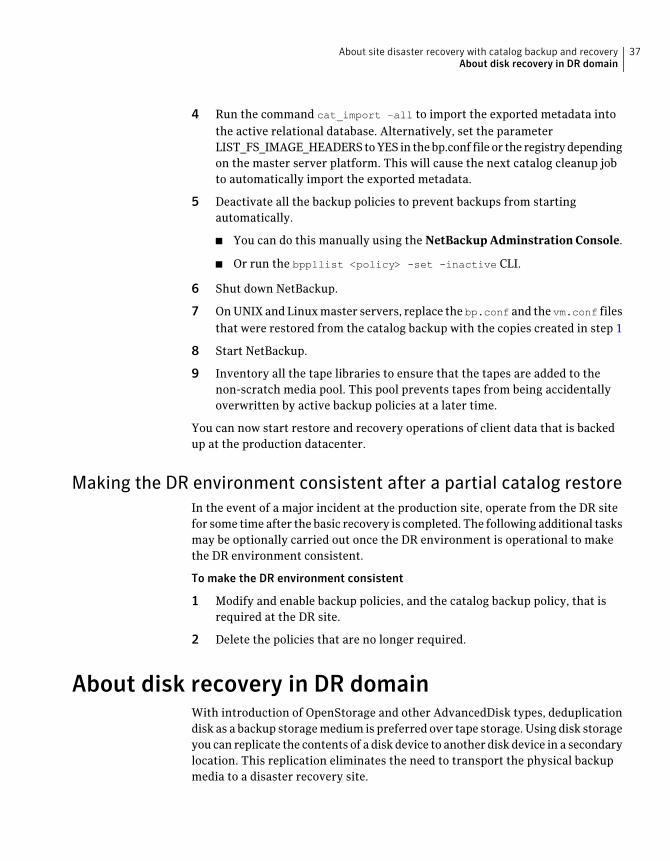
4 Run the command cat_import –all to import the exported metadata intothe active relational database. Alternatively, set the parameterLIST_FS_IMAGE_HEADERStoYES in thebp.conf file or the registrydependingon the master server platform. This will cause the next catalog cleanup jobto automatically import the exported metadata.
5 Deactivate all the backup policies to prevent backups from startingautomatically.
■ You can do this manually using the NetBackup Adminstration Console.
■ Or run the bppllist <policy> -set -inactive CLI.
6 Shut down NetBackup.
7 OnUNIX and Linuxmaster servers, replace the bp.conf and the vm.conf filesthat were restored from the catalog backup with the copies created in step 1
8 Start NetBackup.
9 Inventory all the tape libraries to ensure that the tapes are added to thenon-scratch media pool. This pool prevents tapes from being accidentallyoverwritten by active backup policies at a later time.
You can now start restore and recovery operations of client data that is backedup at the production datacenter.
Making the DR environment consistent after a partial catalog restoreIn the event of a major incident at the production site, operate from the DR sitefor some time after the basic recovery is completed. The following additional tasksmay be optionally carried out once the DR environment is operational to makethe DR environment consistent.
To make the DR environment consistent
1 Modify and enable backup policies, and the catalog backup policy, that isrequired at the DR site.
2 Delete the policies that are no longer required.
About disk recovery in DR domainWith introduction of OpenStorage and other AdvancedDisk types, deduplicationdisk as a backup storagemedium is preferred over tape storage.Using disk storageyou can replicate the contents of a disk device to another disk device in a secondarylocation. This replication eliminates the need to transport the physical backupmedia to a disaster recovery site.
37About site disaster recovery with catalog backup and recoveryAbout disk recovery in DR domain

Disk recovery in single-domain replication DR environmentYou can use the storage lifecycle policies, to optimize replication of deduplicatingdisks when duplicating backups within the same NetBackup domain. This is anefficient way to create duplicate copies of backup images at a disaster recoverysite,which is controlled by the samemaster server as theproduction site.However,optimized deduplication is effective only for single-domain replication.
Auto Image ReplicationAuto Image Replication extends the concept of duplicating backups to separatedomains, allowing individual backup copies to be sent to a DR domain. As backupcopies created using auto image replication are automatically cataloged in theDRdomain there is not need for additional recovery steps within the DR domain.Refer toSymantecNetBackupAdministrator'sGuide,VolumeIformore informationabout auto image replication.
Disk recovery in cross-domain replication DR environmentIf the disk technology being used does not support Auto Image Replication, analternative approach is simply to replicate the entire storage and then use acombination of catalog recovery and the nbcatsyncutility to populate the catalogat the disaster recovery location. You can use the nbcatsync utility forcross-domain replication. Using the nbcatsync utility, you can replicate diskstorage between the production domain and the disaster recovery domainwithoutimporting the entire contents of the replicated disk storage.
The nbcatsync utility facilitates replication even if disk media IDs recorded atthe EMM database and at the metadata component of the image database aredifferent. The nbcatsync utility aligns the disk media IDs in the image databasemetadata with the media IDs in the disaster recovery domain’s EMM database.The regular backups and catalog backups that aremade at the production site arewritten to the replicating disk storage. The catalog backup’s disaster recovery fileis sent to the disaster recovery domain.
The nbcatsync utility is supported on all master server platforms. You can use itwith all Advanced Disk types supported by NetBackup.
About site disaster recovery with catalog backup and recoveryAbout disk recovery in DR domain
38
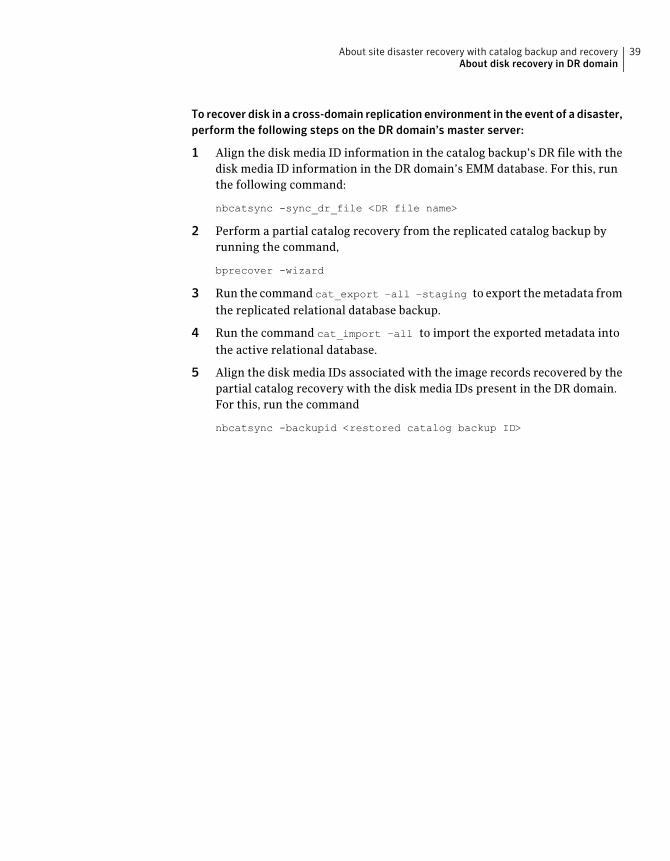
To recover disk in a cross-domain replication environment in the event of a disaster,perform the following steps on the DR domain’s master server:
1 Align the disk media ID information in the catalog backup’s DR file with thedisk media ID information in the DR domain’s EMM database. For this, runthe following command:
nbcatsync -sync_dr_file <DR file name>
2 Perform a partial catalog recovery from the replicated catalog backup byrunning the command,
bprecover -wizard
3 Run the command cat_export –all –staging to export themetadata fromthe replicated relational database backup.
4 Run the command cat_import –all to import the exported metadata intothe active relational database.
5 Align the disk media IDs associated with the image records recovered by thepartial catalog recovery with the disk media IDs present in the DR domain.For this, run the command
nbcatsync -backupid <restored catalog backup ID>
39About site disaster recovery with catalog backup and recoveryAbout disk recovery in DR domain

About site disaster recovery with catalog backup and recoveryAbout disk recovery in DR domain
40

About site loss protectionwith catalog replication
This chapter includes the following topics:
■ About auto image replication
■ About conditions for support of replicated NetBackup catalogs
■ About catalog synchronization
■ About NetBackup catalog replication
About auto image replicationThe Auto Image Replication feature allows backups to be duplicated between theNetBackup domains and it automatically creates the catalog entries in the targetdomain as the backups are duplicated. Symantec recommends the use of AutoImage Replication instead of live catalog replication as ameans of populating theNetBackup catalog at a disaster recovery site. Refer relevant section inNetBackupAdministrator’s Guide for more information on Auto Image Replication. Thedocument discusses alternative methods of replicating the catalog data are incase the network environment does not lend itself to the use of Auto ImageReplication.
About conditions for support of replicatedNetBackupcatalogs
A NetBackup environment set up for replication is supported in the same way asany other NetBackup server. If the replicated catalog volume fails and isunrecoverable within a reasonable amount of time, NetBackup support
4Chapter
recommendations are the same as in the case of an unrecoverable disk failure ofa non-replicated catalog. You should restore the catalog from the latest availablecatalog backup on the primary master server.
Note: Data can be lost in any data replication solution. To protect the NetBackupcatalog, you must not solely rely on the replication technology due to the risk offailure of the replication technology. Data on the primary NetBackup server canget corrupted due to replication to the secondary hot standby NetBackup server.Therefore, you must frequently back up the NetBackup server catalogs.
Warning: Replication can adversely affect the application performance. Sinceadditional time is required to commit changes to the NetBackup catalog, it mayaffect the overall backup times. Use replication at your own risk. Symantec shallhaveno liability for any replication failure based onyour failure to properly install,configure, and monitor your replication solution.
The conditions of support for replication of NetBackup catalogs are as follows:
■ The replication technology that is employed must maintain a consistent andwrite-ordered copy of the data at all times.
■ The use of asynchronous replication technologies is allowed, if write-orderfidelity can be maintained.
■ The use of scheduled replication technologies such as hourly snapshots is notsupported.
■ The NetBackup master server and the EMM server must reside on the samevirtual server that is controlled as a single entity.
■ The primary and the secondary master servers must be of similar type,specification, operating system, and use the same virtual host name.
■ The secondary master server must not have any other NetBackup function,neither in the same domain as the primary master server, nor in anotherdomain. For example, you cannot use the secondary master server as a mediaserver if it is not used as a master server. You also cannot use it as a masterserver for another NetBackup domain. Catalogs are replicated but cannot bemerged.
■ All master servers must be running NetBackup version 6.5.4 or higher.
■ Configure both the clustered and the non-clustered environments to use avirtual hostname and IP address for the NetBackup master server that isseparate fromthephysical host names and IP addresses of the servers. Separatevirtual hostname and IP address let you control the activemaster server node
About site loss protection with catalog replicationAbout conditions for support of replicated NetBackup catalogs
42
through DNS routing. It also prevents the primary and the secondary masterservers from being active in the domain at the same time. For clusteredenvironments this requirement is met automatically by the clusterconfiguration. For non-clustered environments the virtual hostnamemust bespecified during installation.
■ Ensure that the primary master server and the secondary master server usethe same version of NetBackup and dependent component. Verify that theoperating system, NetBackup binaries, EEBs, and configurations files that arenot included in the paths are specified for replication.
■ Replicationbetween clustered andnon-clusteredmaster servers is not possible.Server pairs must be either clustered or non-clustered.
■ TheNetBackup catalogmount pointmust be the same at both the primary andthe secondary sites.
■ Only the catalog data is replicated between servers and must all be co-locatedon a single volume or volume set for replication. For clustered master serversthe cluster common volume is replicated.Fornon-clusteredmaster serversSee “Aboutnon-clusteredNetBackupmasterserver with catalog replication” on page 56.for details of the paths that mustbe linked to a volume set for replication.
■ Ensure that the virtual name orDNS alias does not resolve to both the primaryand the secondary hosts at the same time.
■ Catalog replication does not remove the requirement for catalog backup.Regularly back up the NetBackup catalog from the primary master server toprotect against accidental image expiration or other inconsistencies that areintroduced in the catalog on the primary site and replicated to the secondarysite.
■ If catalogs are replicated between NetBackup domains (rather than to asecondary server that can access the primary domain’s media servers) onlythe backups that are written to the tape and the replicated BasicDisk storagecan be restored in the disaster recovery domain.
■ Replication of the catalogs to a secondary master server lets you restore dataduring a short-term outage of the primary master server. In cross domainreplication configurations, ensure that backups can be run after a failover.The catalogs should be able to be failed back to the primary server at a laterdatewithout data loss. Consider this support conditionwhen you planmakingbackups at the DR site during a prolonged outage and thenmoving back to theprimary site without losing information about the backups that are created atthe DR site.
43About site loss protection with catalog replicationAbout conditions for support of replicated NetBackup catalogs

■ Verify if NetBackup comes up using the replicated copy on the secondary site.This usage is not a requirement for support.
■ Both the catalog and the backup images must be accessible at the secondarysite.Users need to address the procedures that are related to availability of validcopies of the backup images. Users should also define procedures for enablingthe NetBackup server to restore from the images at the secondary site. Thisdocument does not address these procedures.
■ Users are responsible for installing, configuring, and monitoring their datareplication solution. Users must ensure that the replication technologycontinuously maintains a consistent write-ordered copy of the NetBackupcatalog volume.
About catalog synchronizationReplication is a near instantaneous activity compared to the movement of tapesbetween sites. Replicated catalog data that is presented in the DR domain can bemore current than the stock of tapes available in the DR domain which aredispatched from the production domain some time earlier. During restoreoperations, select only the backups that are created before the tapes weredispatched from the production domain for restore.
About NetBackup catalog replicationTo decide the NetBackup data protection strategy, you need to decide whetherthe DR site should be part of the same NetBackup domain or be a separateNetBackup domain.
NetBackup can be configured with catalog replication in the following ways:
■ Multi-site single domain replicationSee “About multi-site single domain replication” on page 44.
■ Multi-site cross domain replicationSee “About multi-site cross domain replication” on page 47.
About multi-site single domain replicationMulti-site single domain is used where clients and media servers at both sites areunder control of a commonmaster server. Since both servers are part of the samedomain, they see the same media servers and clients, and the NetBackup catalogis completely valid on the secondary master server.
About site loss protection with catalog replicationAbout catalog synchronization
44
In themulti-site single domainmodel, NetBackup catalogs are replicated betweenthe sites. In the event of a problem at the primary site, the master server is failedover to a standby node on the secondary site. Backups are created on both sites(either by in-line copy or duplication depending on the configuration). Thus, theloss of a single site does not represent a true disaster, but loss of a number ofapplication servers. Because the backup domain spans both sites, the loss of asingle site results in reduction of the backup and restore capability, rather thandestroying the backup environment. The multi-site single domain model uses acombination ofmaster server clustering and storage replication. This combinationallows the master server to be relocated easily and quickly to the secondarylocation.
The multi-site single domain model can be configured in following ways:
■ Multi-site single domain with stretched SANSee “About multi-site single domain with stretched SAN ” on page 45.
■ Multi-site single domain with optimized duplicationSee “About multi-site single domain with optimized duplication” on page 46.
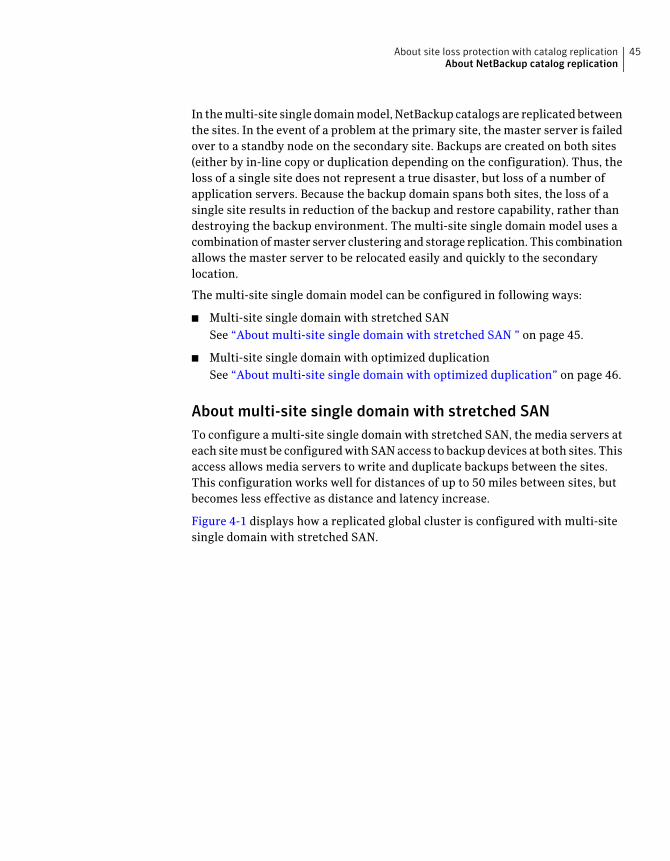
About multi-site single domain with stretched SANTo configure a multi-site single domain with stretched SAN, the media servers ateach sitemust be configuredwith SANaccess to backup devices at both sites. Thisaccess allows media servers to write and duplicate backups between the sites.This configuration works well for distances of up to 50 miles between sites, butbecomes less effective as distance and latency increase.
Figure 4-1 displays how a replicated global cluster is configured with multi-sitesingle domain with stretched SAN.
45About site loss protection with catalog replicationAbout NetBackup catalog replication
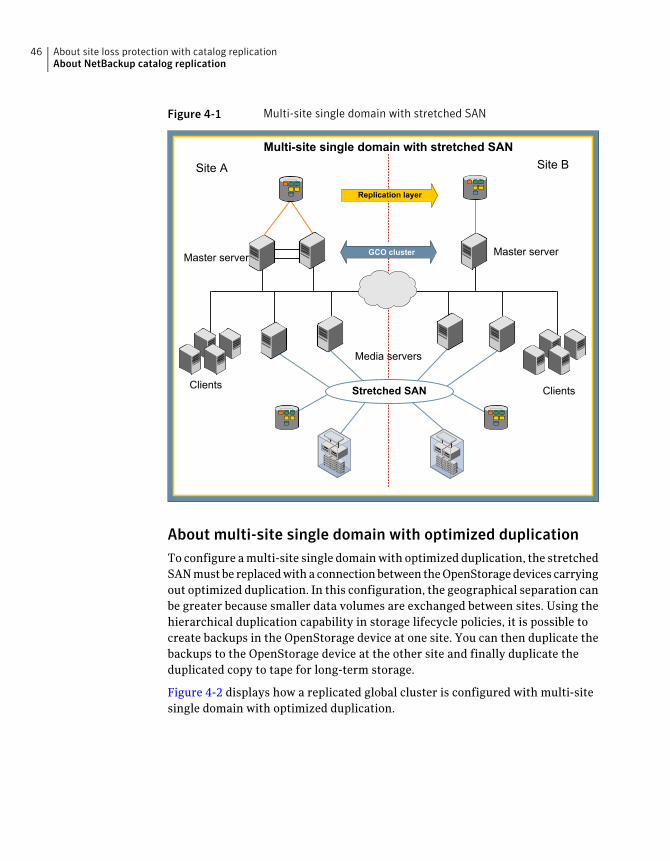
Figure 4-1 Multi-site single domain with stretched SAN
Master server
Media servers
Master serverGCO cluster
Replication layer
Stretched SAN
Multi-site single domain with stretched SAN
Clients Clients
Site BSite A
About multi-site single domain with optimized duplicationTo configure amulti-site single domainwith optimized duplication, the stretchedSANmust be replacedwitha connectionbetween theOpenStoragedevices carryingout optimized duplication. In this configuration, the geographical separation canbe greater because smaller data volumes are exchanged between sites. Using thehierarchical duplication capability in storage lifecycle policies, it is possible tocreate backups in the OpenStorage device at one site. You can then duplicate thebackups to the OpenStorage device at the other site and finally duplicate theduplicated copy to tape for long-term storage.
Figure 4-2 displays how a replicated global cluster is configured with multi-sitesingle domain with optimized duplication.
About site loss protection with catalog replicationAbout NetBackup catalog replication
46

Figure 4-2 Multi-site single domain with optimized duplication
Master server
Media servers
Master server
Replication layer
Multi-site single domain with optimized duplication
Clients Clients
Optimized duplication
Site BSite A
About multi-site cross domain replicationMulti-site cross domain replication is used when the DR site is a separateNetBackup domain than the production domain. The DR site has different mediaservers and devices.
Multi-site cross domain replication is only supported for tape and BasicDiskstorage. AdvancedDisk types have specific media server or device configurationrequirements that do not allow them to be accessed in disaster recovery domains.
About multi-site cross domain and BasicDisk storageYou can replicate the images that are stored on non-staging BasicDisk storagebetweendomains. The replication targetmust bemounted against the samemountpoint on a media server in the DR domain. Also, set theFAILOVER_RESTORE_MEDIA_SERVER parameter to ensure that the correctmedia server is selected. For example, you can replicate a BasicDisk storage unitusing the mount point /BD1 on media server prdmed1 in the production domainto the DR domain. /BD1 can bemounted on amedia server drmed1, if the bp.conffile on theDRmaster server is edited to set FAILOVER_RESTORE_MEDIA_SERVER= prdmed1 drmed1. This setting is only possible for the BasicDisk storage units
47About site loss protection with catalog replicationAbout NetBackup catalog replication
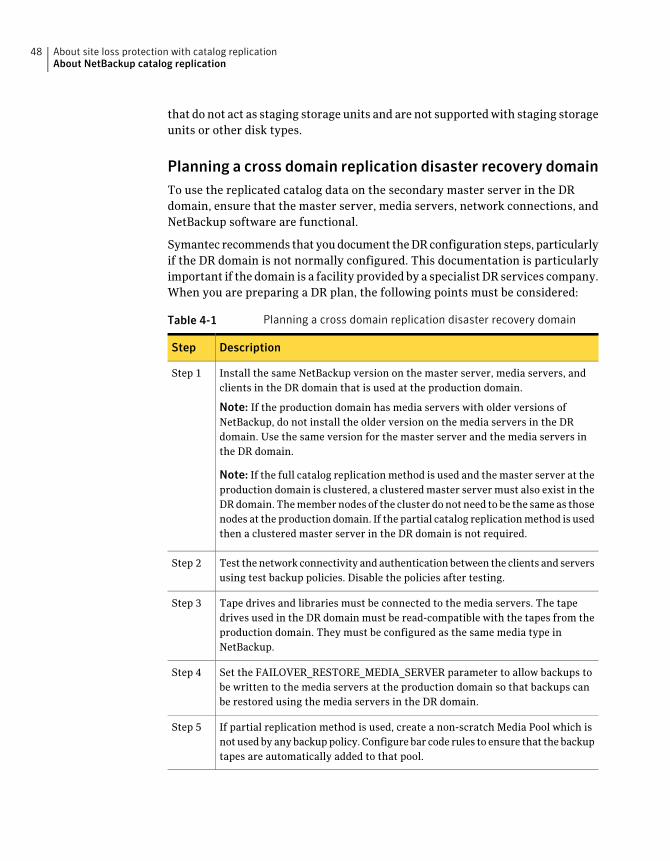
that do not act as staging storage units and are not supportedwith staging storageunits or other disk types.
Planning a cross domain replication disaster recovery domainTo use the replicated catalog data on the secondary master server in the DRdomain, ensure that the master server, media servers, network connections, andNetBackup software are functional.
Symantec recommends that youdocument theDRconfiguration steps, particularlyif the DR domain is not normally configured. This documentation is particularlyimportant if the domain is a facility provided by a specialist DR services company.When you are preparing a DR plan, the following points must be considered:
Table 4-1 Planning a cross domain replication disaster recovery domain
DescriptionStep
Install the same NetBackup version on the master server, media servers, andclients in the DR domain that is used at the production domain.
Note: If the production domain has media servers with older versions ofNetBackup, do not install the older version on the media servers in the DRdomain. Use the same version for the master server and the media servers inthe DR domain.
Note: If the full catalog replicationmethod is used and themaster server at theproduction domain is clustered, a clusteredmaster servermust also exist in theDRdomain. Themembernodes of the cluster donot need to be the sameas thosenodes at the production domain. If the partial catalog replicationmethod is usedthen a clustered master server in the DR domain is not required.
Step 1
Test thenetwork connectivity andauthenticationbetween the clients and serversusing test backup policies. Disable the policies after testing.
Step 2
Tape drives and libraries must be connected to the media servers. The tapedrives used in the DR domain must be read-compatible with the tapes from theproduction domain. They must be configured as the same media type inNetBackup.
Step 3
Set the FAILOVER_RESTORE_MEDIA_SERVER parameter to allow backups tobe written to the media servers at the production domain so that backups canbe restored using the media servers in the DR domain.
Step 4
If partial replication method is used, create a non-scratch Media Pool which isnot used by anybackuppolicy. Configure bar code rules to ensure that the backuptapes are automatically added to that pool.
Step 5
About site loss protection with catalog replicationAbout NetBackup catalog replication
48

Table 4-1 Planning a cross domain replication disaster recovery domain(continued)
DescriptionStep
If different library types areused in theDRdomain andat theproductiondomain,ensure that the barcodemasking operates in the sameway. Remove the trailingcharacterswherever required. You can configure rules tomanage this operation.
Step 6
Ensure the following:
■ If the original backup tapes are used for DR purposes, they must be loadedin the tape libraries in the DR domain.
■ If backups are duplicated to secondary tapes for DR purposes, then load theoff-site tapes in the tape libraries. Also the ALT_RESTORE_COPY_NUMBERfile is created with the appropriate copy number in it.
Note: Symantec recommends that the tapes are physically write-locked beforethey are placed in libraries in the DR domain. This locking reduces the risk ofaccidental overwriting of valid backups.
Step 7
About full catalog replicationIn full catalog replication, all parts of the catalog are replicated to the secondarymaster server. In full catalog replication, the tape information from theproductiondomain, the media pool, and other assignments is retained. Backups can be runin theDRdomain using the samepolicies and tapes that are used at the productiondomain. The replication can be reversed, which simplifies a transition back to theproduction domain. However, replicating the relational database componentsimplies that the device configuration and the server configuration of theproduction domain is replicated to theDRdomain. This configuration informationcannot be used and the configuration in the DR domain must be discovered afterrecovery.
Full catalog replication is not recommended for cross domain replication.
Recovering the catalog with full catalog replicationWith full catalog replication, complete catalog backup is recovered to the DRmaster server. The media servers that do not exist in the DR environment shouldbe deactivated to avoid unnecessary pooling. Since the device configuration atthe DR site is likely to be different to the production site all device records areremoved. Further, device discovery is run to update the EMM database.
This approach assumes that NetBackup is installed but not running on thesecondary master server and the media servers in the DR domain. Also, the
49About site loss protection with catalog replicationAbout NetBackup catalog replication
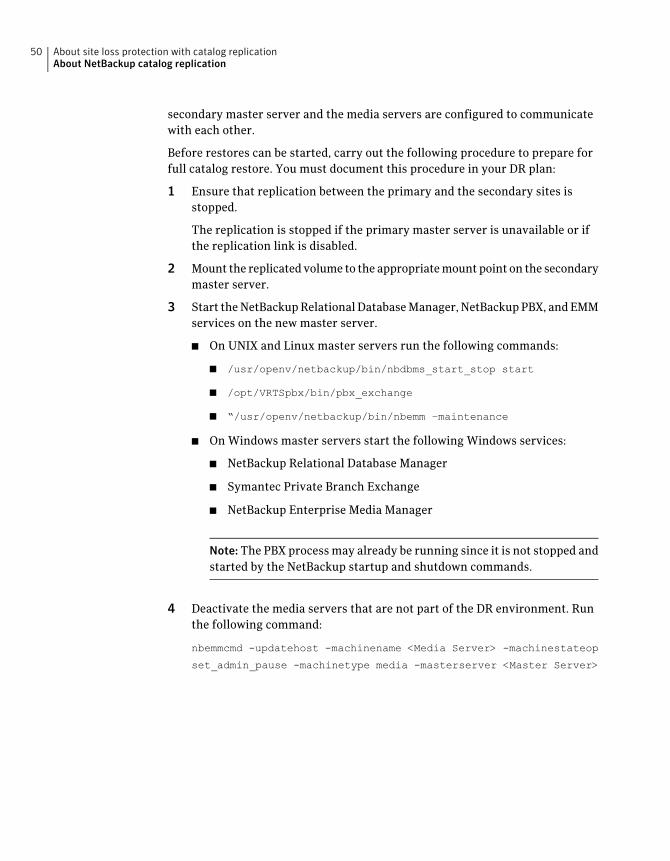
secondary master server and the media servers are configured to communicatewith each other.
Before restores can be started, carry out the following procedure to prepare forfull catalog restore. You must document this procedure in your DR plan:
1 Ensure that replication between the primary and the secondary sites isstopped.
The replication is stopped if the primary master server is unavailable or ifthe replication link is disabled.
2 Mount the replicated volume to the appropriatemount point on the secondarymaster server.
3 Start theNetBackupRelationalDatabaseManager, NetBackupPBX, andEMMservices on the new master server.
■ On UNIX and Linux master servers run the following commands:
■ /usr/openv/netbackup/bin/nbdbms_start_stop start
■ /opt/VRTSpbx/bin/pbx_exchange
■ “/usr/openv/netbackup/bin/nbemm –maintenance
■ On Windows master servers start the following Windows services:
■ NetBackup Relational Database Manager
■ Symantec Private Branch Exchange
■ NetBackup Enterprise Media Manager
Note: The PBX processmay already be running since it is not stopped andstarted by the NetBackup startup and shutdown commands.
4 Deactivate the media servers that are not part of the DR environment. Runthe following command:
nbemmcmd -updatehost -machinename <Media Server> -machinestateop
set_admin_pause -machinetype media -masterserver <Master Server>
About site loss protection with catalog replicationAbout NetBackup catalog replication
50
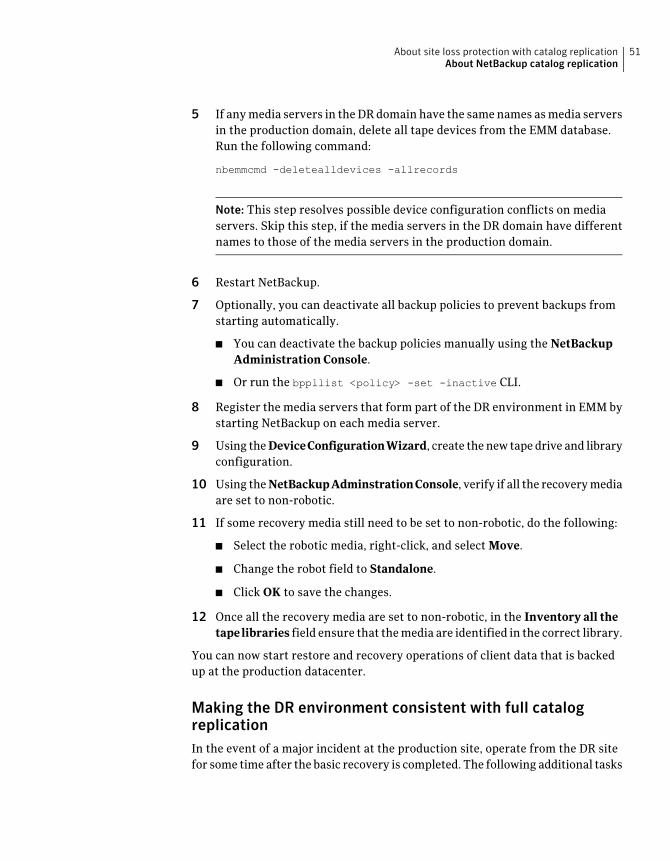
5 If anymedia servers in theDRdomain have the samenames asmedia serversin the production domain, delete all tape devices from the EMM database.Run the following command:
nbemmcmd -deletealldevices -allrecords
Note: This step resolves possible device configuration conflicts on mediaservers. Skip this step, if the media servers in the DR domain have differentnames to those of the media servers in the production domain.
6 Restart NetBackup.
7 Optionally, you can deactivate all backup policies to prevent backups fromstarting automatically.
■ You can deactivate the backup policies manually using the NetBackupAdministration Console.
■ Or run the bppllist <policy> -set -inactive CLI.
8 Register the media servers that form part of the DR environment in EMM bystarting NetBackup on each media server.
9 Using theDeviceConfigurationWizard, create thenew tapedrive and libraryconfiguration.
10 Using theNetBackupAdminstrationConsole, verify if all the recoverymediaare set to non-robotic.
11 If some recovery media still need to be set to non-robotic, do the following:
■ Select the robotic media, right-click, and select Move.
■ Change the robot field to Standalone.
■ Click OK to save the changes.
12 Once all the recovery media are set to non-robotic, in the Inventory all thetapelibraries field ensure that themedia are identified in the correct library.
You can now start restore and recovery operations of client data that is backedup at the production datacenter.
Making the DR environment consistent with full catalogreplicationIn the event of a major incident at the production site, operate from the DR sitefor some time after the basic recovery is completed. The following additional tasks
51About site loss protection with catalog replicationAbout NetBackup catalog replication

may be optionally carried out once the DR environment is operational to makethe DR environment consistent.
To make the DR environment consistent
1 Modify and enable the catalog backup policy and the other backup policiesthat are required in the DR domain.
2 Delete the policies that are no longer required.
3 Delete the storage units that are associated with the media servers that donot form part of the DR environment.
About partial catalog replicationIn partial catalog replication only the image database, policy, and the clientconfiguration are replicated. With partial catalog replication the relationaldatabase components are not replicated. Thus, themedia servers and the devicescan be preconfigured in the DR domain. You do no't need to rediscover them inthe event of a failover to the secondary master server. The tapes from theproduction domain are not assigned in the DR domain. You have tomanually addthe tapes to the database and place them in a pool where they cannot getaccidentally overwritten.
Performing partial catalog restore with partial catalogreplicationThepartial catalog replication approachuses the recoverywithout importmethod.In this method, the EMM database is not replicated to the DR master server. Inthismethod, it is assumed that restore operations do not need tapes to be assignedor located in specific media pools.
In this approach it is assumed that the secondary master server and any mediaservers at the secondary site are installed and configured. Also, the assumptionis the tape libraries and tape devices are configured.
Before restores can be started, carry out the following procedure to prepare forpartial catalog restore. Youmustdocument this procedure inyourdisaster recoveryplan.
Preparing an environment for partial catalog replication
Preparing an environment for partial catalog replication
The catalog imagemetadata,which is required to run restore operations, is storedin the relational database so the relational database (or a backup of it) must bereplicated along with the flat file information.
About site loss protection with catalog replicationAbout NetBackup catalog replication
52

Before attempting to use partial catalog replication under NetBackup 7.5, youneed to follow the steps:
To recover the catalog with partial catalog replication
1 Ensure that replication between the primary and the secondary sites isstopped.
Replication stops if the primary master server is unavailable or if thereplication link is disabled.
2 Mount the replicated volume to the appropriatemount point on the secondarymaster server.
3 Change the configuration on the source (production) and target (disasterrecovery) master servers to ensure that the staging area for the relationaldatabase is located on the replicated storage. It can be achieved as follows:
■ Create a suitable directory on the replicated storage.
■ Use the command nbdb_admin –vxdbms_nb_staging <directory> tomake this directory the staging area.
4 Locate the staging area for the relational database on the replicated storageto ensure that a copy of the relational database is replicated every time thecatalog is backed up. However youmaywant tomakemore frequent backupsof this component to ensure amore current recovery point. To ensure, createa script that runs the command nbdb_backup –online <directory>
-truncate_tlog. Schedule this script to run at regular intervals.
5 Run the command cat_export –all –staging to export the metadata fromthe replicated relational database backup.
6 Run the command cat_import –all to import the exported metadata intothe active relational database. Alternatively, set the parameterLIST_FS_IMAGE_HEADERStoYES in thebp.conf file or the registrydependingon the master server platform. It ensures the next catalog cleanup job toautomatically import the exported metadata.
7 Start NetBackup on the secondary master server.
8 If the backup policies are replicated, deactivate all backup policies to preventbackups from starting automatically.
■ You can deactivate the backup policies manually using the NetBackupAdministration Console.
■ Or run the bppllist <policy> -set -inactive CLI.
9 Ensure that barcode rules are defined to add tapes into a non-scratch mediapool which is not in use by any backup policy.
53About site loss protection with catalog replicationAbout NetBackup catalog replication
10 Ensure that theappropriateFAILOVER_RESTORE_MEDIA_SERVERsettingsare defined to direct restore operations through the media servers at thesecondary site.
11 Inventory all the tape libraries to ensure that the tapes are added to thenon-scratch media pool. This action prevents tapes from being accidentallyover written by active backup policies later.
You can now start restore and recovery operations of client data that is backedup at the production datacenter.
Making the DR environment consistent with partial catalogreplicationIn the event of a major incident at the production site, operate from the DR sitefor some time after the recovery is completed. The following additional tasksmaybe optionally carried out once the DR environment is operational to make the DRenvironment consistent.
To make the DR environment consistent with partial catalog replication
1 Modify and enable the catalog backup policy and any other backup policiesthat are required in the DR domain.
2 Delete the policies that are no longer required.
About site loss protection with catalog replicationAbout NetBackup catalog replication
54

Deploying NetBackupmaster servers with fullcatalog replication
This chapter includes the following topics:
■ About replication considerations
■ About non-clustered NetBackup master server with catalog replication
■ About globally clustered NetBackup master servers with catalog replication
About replication considerationsTo deploy NetBackup with catalog replication, you must consider the followingfactors for planning the actual deployment.
Table 5-1 Replication considerations
DescriptionConsiderations
Symantec does not recommend operating a master server as acombined master and media server. If the storage devices availableat the different sites are not compatible, it can lead to problems withstorage unit definitions and backup failures.
Catalog replication is not a substitute for catalog backup and thecatalog must be backed up on a regular basis.
Master serverconsiderations
5Chapter

Table 5-1 Replication considerations (continued)
DescriptionConsiderations
In amulti-site single domain configuration, themaster server controlsthemedia servers on both the sites. Themetadatamust pass betweenthe sites. Thismetadata traffic is sent over a standard I/P link betweenthe sites. The same link can be used as the heartbeat link for the globalcluster control. Symantec recommends that a link of at least 10Mb/secand ideally 100 Mb/sec must be provided between the sites to handlethis traffic.
If host-based replication is used, additional I/P bandwidth is requiredfor the replication layer. The additional bandwidth must also befactored in.
Networkingconsiderations
If the master server nodes at the secondary site are on a differentsubnet from themaster server nodes at the primary site, aDNSchangeis required as part of the failover process. You can initiate the DNSchange automatically by using the cluster failover process. You canalso initiate the process manually. The backup system does notfunction correctly until the change is fully propagated, which canaffect the recovery time in a site failover.
Note: To propagate the DNS change automatically by the clusterservice group, the DNS resource must come on-line after NetBackupstarts.
DNSconsiderations
About non-clustered NetBackup master server withcatalog replication
The following topic provides guidelines for installing, configuring, and operatingnon-clustered NetBackup master server cluster with catalog replication:
Installing and configuring non-clustered NetBackup master server withcatalog replication
The installation and configuration of non-clustered NetBackup master serverswith catalog replication progresses through multiple stages which are describedinTable 5-2
Note: VxSS or NBAC is not supported with catalog replication for non-clusteredmaster servers. Formore information aboutNBAC, refer to theNetBackupSecurityand Encryption Guide.
Deploying NetBackup master servers with full catalog replicationAbout non-clustered NetBackup master server with catalog replication
56

Table 5-2 Installing and configuring non-clustered NetBackup master servercluster with catalog replication
DescriptionStep
Make sure that you meet all the conditions of support beforeproceeding with the actual installation.
See “About conditions for support of replicated NetBackup catalogs”on page 41.
Step 1
Install and configure the non-clustered NetBackup master server onthe primary site.
See “Installing and configuring the primaryNetBackupmaster server”on page 57.
Step 2
Install and configure the non-clustered NetBackup master server onthe secondary site.
See “Installing and configuring secondary NetBackup master server”on page 59.
Step 3
Installing andconfiguring theprimaryNetBackupmaster serverThe primary master server is the server that normally functions as the masterserver. Thus, it must be installed first.
The following procedure provides guidelines for installing and configuring theprimary non-clustered master server with catalog replication.
To install and configure the primary non-clustered master server with catalogreplication
1 You must use a DNS alias name for the master server. The DNS alias nameensures a smooth failover to the secondary master server. Before you startthe installation, define this alias name in DNS and map it to the primarymaster server. Configure all the media servers and clients in the NetBackupdomain to use this alias name for the master server and EMM server.
2 Install the NetBackup master server on the primary master server node.Specify the alias name for the master server and EMM server.
3 Shut down NetBackup after the installation is complete.
4 To ensure that NetBackup starts correctly when switching to the secondarymaster server, modify the server.conf and vxdbms.conf files. Also, changethe string NB_<hostname> to NB_<alias name> in each file.
On Windows master server, these files are located at:
■ <install path>\VERITAS\netbackupdb\conf\server.conf
57Deploying NetBackup master servers with full catalog replicationAbout non-clustered NetBackup master server with catalog replication

■ <install path>\VERITAS\netbackupdb\data\vxdmbs.conf
On UNIX and Linux master server, these files are located at:
■ /usr/openv/var/global/server.conf
■ /usr/openv/db/data/vxdbms.conf
5 Move the catalog components to the volume that is replicated to the secondarymaster server.
For Windows installations, map the following paths to a common volume.Use the foldermountpoints or junctionpoints onWindows2003and symboliclinks on Windows 2008:
■ <install path>\VERITAS\netbackup\db
■ <install path>\VERITAS\netbackupdb\data
■ <install path>\VERITAS\netbackup\vault\sessions
■ <install path>\VERITAS\volmgr\misc
■ <install path>\VERITAS\netbackup\var
■ <install path>\VERITAS\kms
For UNIX and Linux installations, soft link the following paths to locationson a common volume:
■ /usr/openv/netbackup/db
■ /usr/openv/db/data
■ /usr/openv/netbackup/vault/sessions
■ /usr/openv/volmgr/database
■ /usr/openv/var
■ /usr/openv/kms
Note: You can use the nbdb_move command to relocate the EMM databaserather than linking /usr/openv/db/data for UNIX and Linux or <installpath>\VERITAS \netbackupdb\data for Windows. However, all other pathsmust be linked.
Deploying NetBackup master servers with full catalog replicationAbout non-clustered NetBackup master server with catalog replication
58
6 Configure NetBackup so that it can be manually started and stopped on theprimary master server. By default, NetBackup is started automatically whenthe master server is booted.
To prevent this automatic start, make the changes as per Steps 7, 8 and , 9after the initial installation and after applying patches or upgrades.
7 Make the following changes on the NetBackup master server.
■ On UNIX and Linux master server, remove the links to/etc/init.d/netbackup created during the installation to enableautomatic startup.Refer to the Symantec NetBackup Installation Guide for details of linksfor each operating system.
■ On Windows master server, go to the Services Manager and set theStartup type for all the NetBackup services to Manual.
8 Start NetBackup on the primary master server to confirm that it comes upcorrectly and then shut it down again.
At this stage, youmay run theNetBackupConfigurationWizard to configuremedia servers and storage devices.
9 To start and stop NetBackup manually run the following commands. It isrecommended to document these commands in the failover procedure.
On UNIX and Linux master server:
■ To start NetBackup, run the following command:/etc/init.d/netbackup start command
■ To stop NetBackup, run the following command/etc/init.d/netbackup stop
On Windows master server:
■ To start NetBackup, run the following command:<install path>\VERITAS\NetBackup\bin\bpup
■ To stop NetBackup, run the following command:<install path>\VERITAS\NetBackup\bin\bpdown
Installing and configuring secondaryNetBackupmaster serverThe following procedure provides guidelines for installing and configuring thesecondary non-clustered master server with catalog replication.
59Deploying NetBackup master servers with full catalog replicationAbout non-clustered NetBackup master server with catalog replication

To install and configure the secondary non-clustered master server with catalogreplication
1 Stop NetBackup on the primary master server.
2 Map the DNS alias name to the secondary master server.
3 Install the NetBackup master server on the secondary master server node,specifying the alias name for the master server and EMM server. Duringinstallation, apply the same list of servers on the secondary master server.
4 After the installation is complete, shut down NetBackup.
5 ToensureNetBackup starts correctlywhen switching to the secondarymasterserver, modify the server.conf and vxdbms.conf. Also, change the stringNB_<hostname> to NB_<alias name> in each file.
On Windows master server these files are located at:
■ <install path>\VERITAS\netbackupdb\conf\server.conf
■ <install path>\VERITAS\netbackupdb\data\vxdmbs.conf
On UNIX or Linux master server these files are located at:
■ /usr/openv/var/global/server.conf
■ /usr/openv/db/data/vxdbms.conf
6 Create a small disk volume (100 MB) and mount it to the same mount pointused for the replicated volume on the primary server. This volume is knownas the upgrade volume and is to be presented every time NetBackup isupgraded on the secondary master server.
Note: During a failover operation the replicated volume is mounted on thesecondary master server and not the upgrade volume.
7 Move the catalog components to the upgrade volume.
For Windows installations map the following paths to a common volumeusing foldermount points or junction points onWindows 2003 and symboliclinks on Windows 2008:
■ <install path>\VERITAS\netbackup\db
■ <install path>\VERITAS\netbackupdb\data
■ <install path>\VERITAS\netbackup\vault\sessions
■ <install path>\VERITAS\volmgr\misc
■ <install path>\VERITAS\netbackup\var
Deploying NetBackup master servers with full catalog replicationAbout non-clustered NetBackup master server with catalog replication
60
■ <install path>\VERITAS\kms
For UNIX and Linux installations, soft-link the following paths to locationson a common volume:
■ /usr/openv/netbackup/db
■ /usr/openv/db/data
■ /usr/openv/netbackup/vault/sessions
■ /usr/openv/volmgr/database
■ /usr/openv/var
■ /usr/openv/kms
8 Configure NetBackup so that it can be manually started and stopped on theprimary master server. By default, NetBackup is started automatically whenthe master server is booted.
To prevent this automatic start, make the changes as per Steps 7, 8 and , 9after the initial installation and after applying patches or upgrades.
9 Make the following changes on the NetBackup master server.
■ On UNIX and Linux master server, remove the links to/etc/init.d/netbackup created during the installation to enableautomatic startup.Refer to the Symantec NetBackup Installation Guide for details of linksfor each operating system.
■ On Windows master server, go to the Services Manager and set theStartup type for all the NetBackup services to Manual.
10 Start NetBackup on the primary master server. Confirm that NetBackupcomes up and then shut it down again.
At this stage, youmay run theNetBackupConfigurationWizard to configuremedia servers and storage devices.
11 To start and stop NetBackup manually the run the following commands. Itis recommended to document these commands in the failover procedure.
On UNIX and Linux master server:
■ To start NetBackup, run the following command:/etc/init.d/netbackup start command
■ To stop NetBackup, run the following command:/etc/init.d/netbackup stop
On Windows master server:
61Deploying NetBackup master servers with full catalog replicationAbout non-clustered NetBackup master server with catalog replication
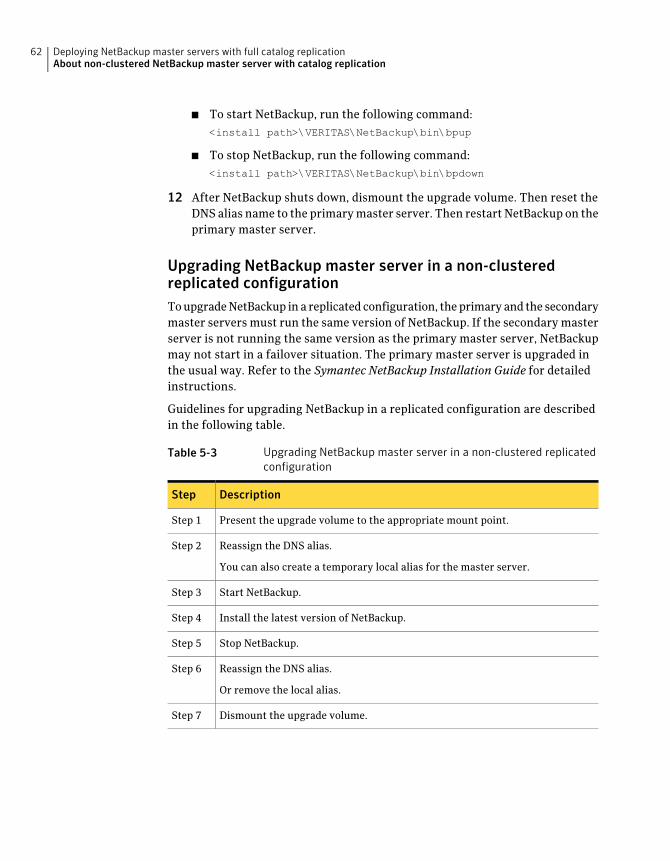
■ To start NetBackup, run the following command:<install path>\VERITAS\NetBackup\bin\bpup
■ To stop NetBackup, run the following command:<install path>\VERITAS\NetBackup\bin\bpdown
12 After NetBackup shuts down, dismount the upgrade volume. Then reset theDNS alias name to the primarymaster server. Then restart NetBackup on theprimary master server.
Upgrading NetBackup master server in a non-clusteredreplicated configurationToupgradeNetBackup ina replicated configuration, theprimaryand the secondarymaster servers must run the same version of NetBackup. If the secondary masterserver is not running the same version as the primary master server, NetBackupmay not start in a failover situation. The primary master server is upgraded inthe usual way. Refer to the Symantec NetBackup Installation Guide for detailedinstructions.
Guidelines for upgrading NetBackup in a replicated configuration are describedin the following table.
Table 5-3 Upgrading NetBackup master server in a non-clustered replicatedconfiguration
DescriptionStep
Present the upgrade volume to the appropriate mount point.Step 1
Reassign the DNS alias.
You can also create a temporary local alias for the master server.
Step 2
Start NetBackup.Step 3
Install the latest version of NetBackup.Step 4
Stop NetBackup.Step 5
Reassign the DNS alias.
Or remove the local alias.
Step 6
Dismount the upgrade volume.Step 7
Deploying NetBackup master servers with full catalog replicationAbout non-clustered NetBackup master server with catalog replication
62

Note:DuringmajorNetBackupupgrades suchas, from6.5.x to 7.0 the server.confand vxdbms.conf filesmay be replaced. After upgrading always check these files.Ensure that they contain the correct name for themaster server andmodify themif necessary.
About globally clustered NetBackup master serverswith catalog replication
This sectionprovides guidelines for installing, configuring, andoperatingagloballyclustered NetBackup master server with catalog replication.
Installing and configuring a globally clustered NetBackup master serverwith catalog replication
The installation and configuration of clustered NetBackup master servers withcatalog replication progresses through multiple stages which are described inTable 5-4.
Table 5-4 Installing and configuring clustered NetBackup master server clusterwith catalog replication
ActionDescriptionStage
Make sure that you meet all the conditions ofsupport before proceeding with the actualinstallation.
See “About conditions for support of replicatedNetBackup catalogs” on page 41.
See “About replication considerations” on page 55.
Installation prerequisitesStage 1
Install and configure the NetBackupmaster servercluster on the primary site.
See “Installing and configuringprimaryNetBackupmaster server cluster” on page 64.
Installing and configuringthe clustered NetBackupmaster on theprimary site
Stage 2
Install and configure the NetBackupmaster servercluster on the secondary site.
See “Installing and configuring secondaryNetBackup master server cluster” on page 65.
Installing and configuringthe clustered NetBackupmaster on the secondarynode
Stage 3
63Deploying NetBackup master servers with full catalog replicationAbout globally clustered NetBackup master servers with catalog replication
About clustering considerationsThe NetBackup master server nodes on both the sites must be configured asclustered master servers, although they can be single node clusters on each site.NetBackup allows a member node to be upgraded only while the node is off linewithout affecting the database structure. Therefore, if master servers are notclustered, there is a risk of data loss and corruption during an upgrade operation.
The NetBackupmaster server is an active or a passive application. It can only runon onenode of the cluster at any one time. In a replicated environment, the clustermembers at both sites effectively form a single cluster. You can create a globalcluster with two to four nodes, depending on the level of resilience required.
This configuration requires two nodes—one node at each site. Thisconfiguration is themost efficient in terms of the servers involved.The disadvantage of this configuration is that even a local problemwith the primary master server requires a site failover operation.
Single node clusterat both sites
This configuration requires three nodes—two at the primary siteand one at the secondary site. Duringnormal operations, since thereis single node at each site, site failover is not required to addressissues with the primary master server. Instead a local failover canbe used. However, there is no protection for the node on thesecondary site.
As a general best practice, this configuration is recommended.
Dual node onprimary site andsingle node onsecondary site
This configuration requires four nodes, three of which are alwaysidle. This configuration allows local failover capability at sites.Withthis configuration, if a local server problem is encountered, thereis no need to failover.
Dual node on bothsites
Installing and configuring primary NetBackup master serverclusterTo install the NetBackup master server cluster follow the instructions that aredescribed in the Symantec NetBackup Clustered Master Server Administraor'sGuide. Guidelines to install the primary NetBackup master server cluster withcatalog replication are described in the following table.
Deploying NetBackup master servers with full catalog replicationAbout globally clustered NetBackup master servers with catalog replication
64

Table 5-5 Guidelines to installing the primary NetBackup master server clusterwith catalog replication
DescriptionStep
When you install NetBackup master server cluster on primary node,specify:
■ Replicated storage as the mount point for the cluster commonstorage.
■ All servers that are part of the domain.
■ Servers that form the secondary site cluster.
Step 1
After the NetBackup cluster group is created, reconfigure the storageresources to include the replication control components.
Step 2
For some replications layers, especially for Veritas VolumeReplicator(VVR), the replication agent must be in a separate service group. Youmust link the agent with the NetBackup application service group.
Step 3
If the replication technology offers a bandwidth planning and analysistool, configure the NetBackup master server cluster to run on theprimary master server cluster for some time. Perform theconfiguration before you implement the replication layer and stretchthe cluster to the secondary site.
Step 4
Installing and configuring secondaryNetBackupmaster serverclusterTo install and configure the secondary NetBackup master server cluster, it is notnecessary to have the same number of nodes as the primary NetBackup masterserver cluster. The secondary NetBackup master server cluster can be a singlenode cluster but should be clustered.Guidelines to install the secondaryNetBackupmaster server clusterwith catalog replication are described in the following table.
Table 5-6 Guidelines to installing the secondary NetBackup master servercluster with catalog replication
DescriptionStep
Install the secondaryNetBackupmaster server cluster using the samevirtual name and cluster common mount point as the primaryNetBackup master server cluster.
Step 1
During installation, specify all the NetBackup servers, the masterserver cluster nodes and the media servers at the primary site.
Step 2
65Deploying NetBackup master servers with full catalog replicationAbout globally clustered NetBackup master servers with catalog replication
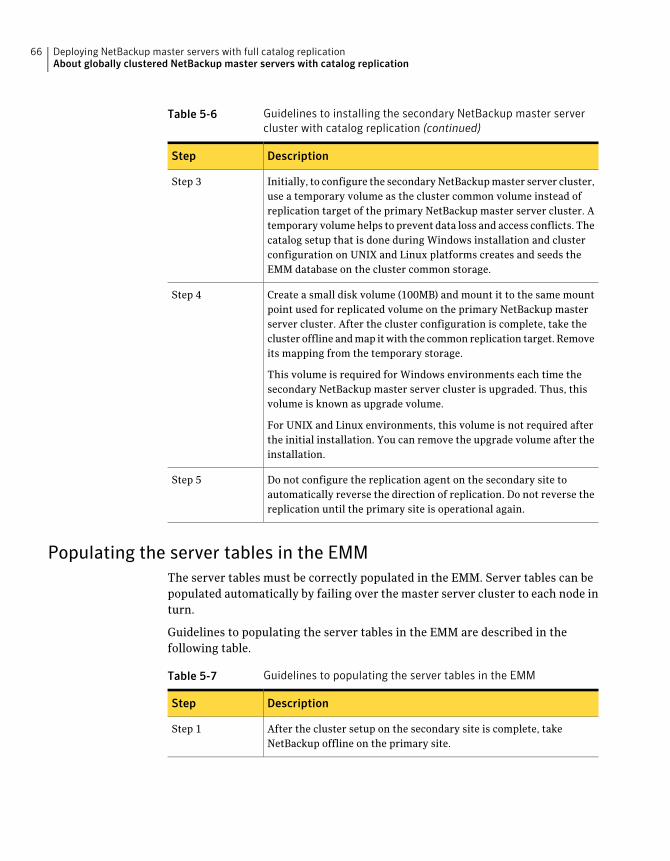
Table 5-6 Guidelines to installing the secondary NetBackup master servercluster with catalog replication (continued)
DescriptionStep
Initially, to configure the secondaryNetBackupmaster server cluster,use a temporary volume as the cluster common volume instead ofreplication target of the primary NetBackup master server cluster. Atemporary volumehelps to prevent data loss and access conflicts. Thecatalog setup that is done during Windows installation and clusterconfiguration on UNIX and Linux platforms creates and seeds theEMM database on the cluster common storage.
Step 3
Create a small disk volume (100MB) and mount it to the same mountpoint used for replicated volume on the primary NetBackup masterserver cluster. After the cluster configuration is complete, take thecluster offline andmap itwith the common replication target. Removeits mapping from the temporary storage.
This volume is required for Windows environments each time thesecondary NetBackup master server cluster is upgraded. Thus, thisvolume is known as upgrade volume.
For UNIX and Linux environments, this volume is not required afterthe initial installation. You can remove the upgrade volume after theinstallation.
Step 4
Do not configure the replication agent on the secondary site toautomatically reverse the direction of replication. Do not reverse thereplication until the primary site is operational again.
Step 5
Populating the server tables in the EMMThe server tables must be correctly populated in the EMM. Server tables can bepopulated automatically by failing over the master server cluster to each node inturn.
Guidelines to populating the server tables in the EMM are described in thefollowing table.
Table 5-7 Guidelines to populating the server tables in the EMM
DescriptionStep
After the cluster setup on the secondary site is complete, takeNetBackup offline on the primary site.
Step 1
Deploying NetBackup master servers with full catalog replicationAbout globally clustered NetBackup master servers with catalog replication
66

Table 5-7 Guidelines to populating the server tables in the EMM (continued)
DescriptionStep
Reverse the replication direction and bring NetBackup on-line on thesecondary site.
Bringing the NetBackup master server cluster on-line on a particularnode of the cluster automatically adds that node to the list of knownservers in the EMM server tables. In case of multiple nodes at thesecondary site, the master server must be failed over to each node.
Step 2
After all the member nodes are added, take NetBackup offline fromthe secondary site.
Step 3
Reverse the replication direction and bring NetBackup online on theprimary site.
Step 4
Upgrading NetBackup in clustered replication configuration
Note: The master server clusters at the primary and the secondary site must runthe same version of NetBackup. If there are different versions, NetBackup maynot start in a failover situation.
Failing over to secondary master server clusterYou need to failover to the secondary master server cluster when:
■ All the nodes of the primary master server cluster fail.
■ Access to the primary site is denied.
The exact failover procedure can vary for different replication technologies.
Table 5-8 lists the high-level steps to failover to the secondary master servercluster.
Table 5-8 Failing over to secondary master server cluster
DescriptionStep
Stop NetBackup on the primary master server cluster.Step 1
Stop or reverse the replication of the catalog volume.Step 2
If necessary, update the DNS with the new virtual IP address for themaster server.
Step 3
67Deploying NetBackup master servers with full catalog replicationAbout globally clustered NetBackup master servers with catalog replication
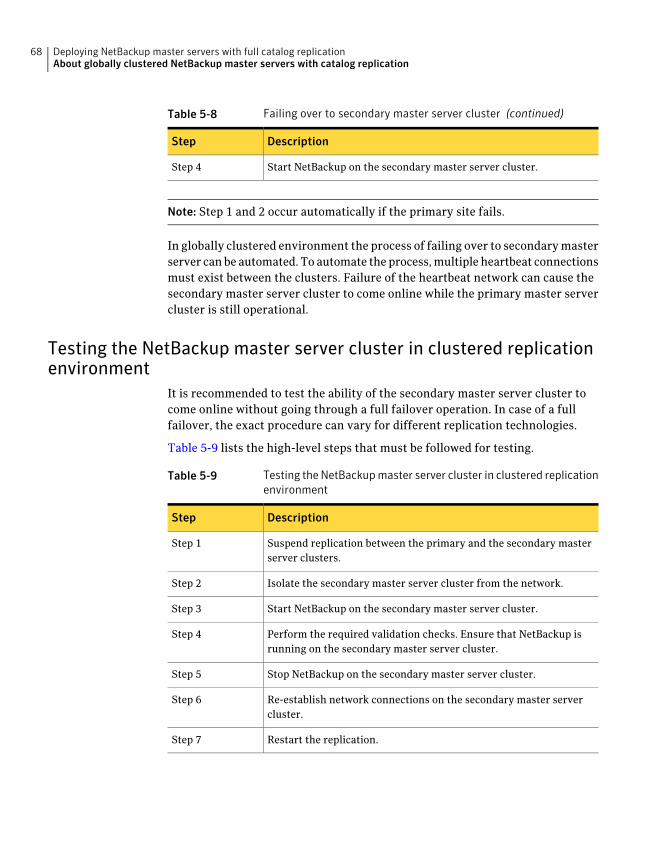
Table 5-8 Failing over to secondary master server cluster (continued)
DescriptionStep
Start NetBackup on the secondary master server cluster.Step 4
Note: Step 1 and 2 occur automatically if the primary site fails.
In globally clustered environment the process of failing over to secondarymasterserver canbe automated. To automate the process,multiple heartbeat connectionsmust exist between the clusters. Failure of the heartbeat network can cause thesecondary master server cluster to come online while the primary master servercluster is still operational.
Testing the NetBackup master server cluster in clustered replicationenvironment
It is recommended to test the ability of the secondary master server cluster tocome online without going through a full failover operation. In case of a fullfailover, the exact procedure can vary for different replication technologies.
Table 5-9 lists the high-level steps that must be followed for testing.
Table 5-9 Testing the NetBackup master server cluster in clustered replicationenvironment
DescriptionStep
Suspend replication between the primary and the secondary masterserver clusters.
Step 1
Isolate the secondary master server cluster from the network.Step 2
Start NetBackup on the secondary master server cluster.Step 3
Perform the required validation checks. Ensure that NetBackup isrunning on the secondary master server cluster.
Step 4
Stop NetBackup on the secondary master server cluster.Step 5
Re-establish network connections on the secondary master servercluster.
Step 6
Restart the replication.Step 7
Deploying NetBackup master servers with full catalog replicationAbout globally clustered NetBackup master servers with catalog replication
68
Using NetBackup toperform backups andrestores in a cluster
This chapter includes the following topics:
■ About backups and restores with NetBackup in a cluster
■ About supported NetBackup database agents and options in a cluster
About backups and restores with NetBackup in acluster
This topic provides links to instructions onhow toperformuser-directed backupsand restore data in a cluster. Additionally, specific instructions for performingbackups and restores can be found in other NetBackup guides. See theNetBackupBackup, Archive, and Restore Getting Started Guide and the administrator guidesfor NetBackup’s database agents and options.
The backup and restore process is the same whether you are in a cluster or anon-cluster environment. See the Symantec NetBackup Troubleshooting Guidefor further information onbackup and archive processes and on restore processes.
Performing user-directed backups with NetBackup in a clusterWhen you perform user-directed backups in a cluster, you can use the node nameor the virtual name of the client to perform the backup. If you choose the virtualname, the backup can be restored from any of the cluster nodes. You can alsoconfigure automatic backups.
6Chapter

To perform a user-directed backup on a Windows client
1 Open the Backup, Archive, and Restore console.
2 On the File menu, click Specify NetBackup Machines.
3 From the Source client list, select (or add) the wanted node or virtual name.
To perform a user-directed backup on a UNIX/Linux client
1 Open the Backup, Archive, and Restore console.
2 In the Login dialog box, enter the name of the client, either the node or thevirtual client name.
You must log on to the wanted node or virtual client. You cannot specify aclient other than the local client in the Java interface.
About restoring data in a clusterFor all file restore operations, use the procedures on how to perform restores inthe NetBackup Backup, Archive, and Restore Getting Started Guide. When yourestore files to the shared disk drives, restore those files to the virtual servername.
When you restore individual database files, restore those files to the virtual servername that corresponds to the client where the database application is installed.
Note:Since a computer canhavemultiple virtual names in a cluster environment,files can be backedup in the context ofmore than one client name. If you carefullyplan your backup policies, you can avoid this problem. However, it may benecessary to browse more than one client name to locate a backup image. Andyoumay need to performmore than one restore to restore all of the files that youneed.
The Backup, Archive, and Restore console operates in the context of that client’sname. You must perform a redirected restore to restore the files on the shareddisk that were backed up with the virtual server name. NetBackup allows aredirected restore operation only if the necessary configuration is performed onthe NetBackup master server. See the information on how to allow redirectedrestores in the Symantec NetBackup Administrator's Guide, Volume I.
There may be other situations that require the appropriate altnames directoryentries to be created on the master server. While NetBackup tries to restore filesfrom the client, the operation may fail with this error message:
131 client is not validated to use this server
Using NetBackup to perform backups and restores in a clusterAbout backups and restores with NetBackup in a cluster
70

If you see this message, you must set up the altnames directory to allow theoperation to succeed. For example, the required network interface parametermaybe set to a valid network name for the client. But this name may not match theNetBackup Client name parameter for that client. This situation often happensforNetBackup clients in a cluster. Alternatively, you canperforma server-directedrestore and avoid the need to set up the altnames directory.
See “Example: Performing a user-directed restore in a NetBackup cluster”on page 71.
Example: Performing a user-directed restore in a NetBackupclusterFor example, assume the cluster virtual server name is TOE and the cluster nodenames areTIC andTAC. Files on the shared diskmust be backedupby aNetBackuppolicy that includes TOE in the client list.
To performa server-directed restore of files on the shared disk, set both the sourceclient and the destination client to TOE. The server-directed restore does not haveto know which node is in control of the shared disk at the time of the restore.
To perform a user-directed restore of files in a NetBackup cluster
1 Create the following files on the master server.
For a UNIX or Linux server:
/usr/openv/netbackup/db/altnames/tic
/usr/openv/netbackup/db/altnames/tac
For a Windows server:
shared_drive_install_path\NetBackup\db\altnames\tic
shared_drive_install_path\NetBackup\db\altnames\tac
2 In both files, add the virtual server name TOE on one line in the file.
3 Determine which node (TIC or TAC) has control of the shared disk.
4 Start the Backup, Archive, and Restore interface on that node and select thevirtual server name (TOE) as the source client and the server.
■ On Windows computers, in the File menu, click Specify NetBackupMachines.
■ On UNIX or Linux computers, in the Actions menu, click NetBackupMachines.
5 Browse the backed-up files by using the virtual server name (TOE) from theshared disk and restore them as needed.
71Using NetBackup to perform backups and restores in a clusterAbout backups and restores with NetBackup in a cluster

About supported NetBackup database agents andoptions in a cluster
Only certain database agents andNetBackup options are supported in a clusteredenvironment.
For information on how to install and configure database agents and options ina cluster, refer to the administrator’s guide for that agent or option.
Database applications are installed on a cluster as virtualservers. To protect the data for these virtual servers, installthe appropriate NetBackup database agent on each node ofthe cluster. With NetBackup for Windows, database agentsare installed along with NetBackup server and theNetBackup client.. Also create a backup policy for thatdatabase agent. When you configure a policy for theapplication or database in the cluster, always use the virtualserver name of the application or database as the clientname in the policy. For complete installation andconfiguration instructions for a particular database agent,see the NetBackup documentation for that agent.
Backing up database files ina cluster
User backups that are run on individual nodes of the clustergenerally run as a backup of the node, not the NetBackupvirtual server. You may find it easier to use scheduledbackups rather than user backups to protect the data in thecluster.
User backups
Using NetBackup to perform backups and restores in a clusterAbout supported NetBackup database agents and options in a cluster
72

You may choose to install only the NetBackup client in acluster. In this configuration, you can back up the data fromthe cluster across the network to a separate NetBackupserver. In this situation the NetBackup-specificconfiguration tasks for tape devices, media, and so on, areseparate from the setup and maintenance of the clusteritself. However, theNetBackup client itself cannot fail over.
To install theNetBackupclient onanMSCS,VCS, SunCluster, Service Guard cluster, or HACMP cluster
The NetBackup client is installed on a cluster as it is in anon-clustered environment. Refer to the SymantecNetBackup Installation Guide for information on how toinstall theNetBackup client. OnWindows systems, youmayhave problems with name resolution when you try to backup data on the cluster. (This data can be either local data orshared data.) Consider setting the Required NetworkInterface parameter for each client to the fully qualifiedname of the node where the NetBackup client is installed.
NetBackup client in a cluster
About backing up database files in a clusterDatabase applications are installed on a cluster as virtual servers. To protect thedata for these virtual servers, install the appropriate NetBackup database agenton each node of the cluster. With NetBackup for Windows, database agents areinstalled along with NetBackup server and the NetBackup client.. Also create abackup policy for that database agent. When you configure a policy for theapplication or database in the cluster, always use the virtual server name of theapplication or database as the client name in the policy. For complete installationand configuration instructions for a particular database agent, see theNetBackupdocumentation for that agent.
About user backupsUser backups that are run on individual nodes of the cluster generally run as abackup of the node, not the NetBackup virtual server. You may find easier to usescheduled backups rather than user backups to protect the data in the cluster.
About NetBackup client in a clusterYou may choose to install only the NetBackup client in a cluster. In thisconfiguration, you can back up the data from the cluster across the network to aseparateNetBackup server. In this situation theNetBackup-specific configurationtasks for tape devices, media, and so on, are separate from the setup and
73Using NetBackup to perform backups and restores in a clusterAbout supported NetBackup database agents and options in a cluster

maintenance of the cluster itself. However, theNetBackup client itself cannot failover.
To install the NetBackup client on an MSCS, VCS, SunCluster , Service Guardcluster, or HACMP cluster
The NetBackup client is installed on a cluster as it is in a non-clusteredenvironment. Refer to the SymantecNetBackup InstallationGuide for informationon how to install the NetBackup client. On Windows systems, you may haveproblemswith name resolution when you try to back up data on the cluster. (Thisdata can be either local data or shared data.) Consider setting the RequiredNetwork Interface parameter for each client to the fully qualified name of thenode where the NetBackup client is installed.
Using NetBackup to perform backups and restores in a clusterAbout supported NetBackup database agents and options in a cluster
74

Aadding disk storage unit 28
Bbacking up database files 73backups
user-directed 69
Ccatalog protection
catalog replication 23See also catalog repllication
online catalog backup 23catalog recovery 31
full catalog recovery 32partial catalog recovery 35
catalog replicationcatalog synchronization 44conditions for support 41considerations. See replication considerationsfull catalog replication 49multi-site cross domain replication 47multi-site single domain 44partial catalog replication 52
catalog synchronization 44clustered master server
installing primary master server 64installing seconday master server 65server table 66testing with catalog replication 68upgrade volume 65upgrading NetBackup 67
Ddatabase agents 72dedicated media server protection
storage unit group 18disc recovery 37
Ffull catalog recovery 32
restoring full catalog 33full catalog replication 49
restoring full catalog 49full catalog restore 49
LLAN client protection 21
Mmaster server protection
clustering 17media availability protection
global scratch pool 16media sharing 16
media servernon-failover cluster configuration 24restore backup 20
multi-site cross domain replicationBasicDisk storage 47
multi-site single domain replication 44optimized duplication 46stretched SAN 45
NNetBackup client in cluster 73network link protection
redundant network teaming 15non-clustered master server
installing primary master server 57installing secondary master server 59upgrade volume 59upgrading NetBackup 62
non-dedicated media server protectionstorage unit group 19
non-failover cluster configurationmedia server 24SAN media server 24
Index
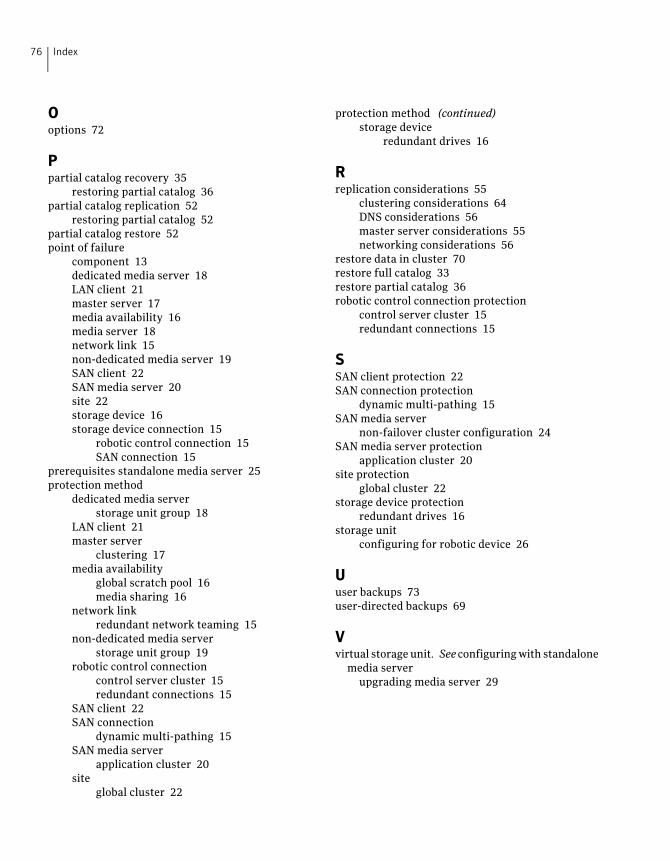
Ooptions 72
Ppartial catalog recovery 35
restoring partial catalog 36partial catalog replication 52
restoring partial catalog 52partial catalog restore 52point of failure
component 13dedicated media server 18LAN client 21master server 17media availability 16media server 18network link 15non-dedicated media server 19SAN client 22SAN media server 20site 22storage device 16storage device connection 15
robotic control connection 15SAN connection 15
prerequisites standalone media server 25protection method
dedicated media serverstorage unit group 18
LAN client 21master server
clustering 17media availability
global scratch pool 16media sharing 16
network linkredundant network teaming 15
non-dedicated media serverstorage unit group 19
robotic control connectioncontrol server cluster 15redundant connections 15
SAN client 22SAN connection
dynamic multi-pathing 15SAN media server
application cluster 20site
global cluster 22
protection method (continued)storage device
redundant drives 16
Rreplication considerations 55
clustering considerations 64DNS considerations 56master server considerations 55networking considerations 56
restore data in cluster 70restore full catalog 33restore partial catalog 36robotic control connection protection
control server cluster 15redundant connections 15
SSAN client protection 22SAN connection protection
dynamic multi-pathing 15SAN media server
non-failover cluster configuration 24SAN media server protection
application cluster 20site protection
global cluster 22storage device protection
redundant drives 16storage unit
configuring for robotic device 26
Uuser backups 73user-directed backups 69
Vvirtual storage unit. See configuringwith standalone
media serverupgrading media server 29
Index76