SUSE Linux Enterprise Server 10 Advanced Administration Workbook
102
Novell Training Services AUTHORIZED COURSEWARE www.novell.com COURSE 3073 SUSE Linux Enterprise Server 10 Advanced Administration Workbook 100-005063-001 Version 1 ONLINE VIEW ONLY-NO PRINTING OR DISTRIBUTION ALLOWED
Transcript of SUSE Linux Enterprise Server 10 Advanced Administration Workbook
Novell Training Services
AUTHORIZED COURSEWARE
www.novel l .comCOURSE 3073
SUSE Linux Enterprise Server 10 Advanced AdministrationWorkbook
100-005063-001Version 1
ONLINE VIEW ONLY-NO PRINTING OR DISTRIBUTION ALLOWED
Proprietary StatementCopyright © 2006 Novell, Inc. All rights reserved.
No part of this publication may be reproduced, photocopied, stored on a retrieval system, or transmitted without the express prior consent of the publisher. This manual, and any portion thereof, may not be copied without the express written permission of Novell, Inc.
Novell, Inc. 1800 South Novell PlaceProvo, UT 84606-2399
DisclaimerNovell, Inc. makes no representations or warranties with respect to the contents or use of this manual, and specifically disclaims any express or implied warranties of merchantability or fitness for any particular purpose.
Further, Novell, Inc. reserves the right to revise this publication and to make changes in its content at any time, without obligation to notify any person or entity of such revisions or changes.
Further, Novell, Inc. makes no representations or warranties with respect to any NetWare software, and specifically disclaims any express or implied warranties of merchantability or fitness for any particular purpose.
Further, Novell, Inc. reserves the right to make changes to any and all parts of NetWare software at any time, without obligation to notify any person or entity of such changes.
This Novell Training Manual is published solely to instruct students in the use of Novell networking software. Although third-party application software packages are used in Novell training courses, this is for demonstration purposes only and shall not constitute an endorsement of any of these software applications.
Further, Novell, Inc. does not represent itself as having any particular expertise in these application software packages and any use by students of the same shall be done at the students’ own risk.
Software PiracyThroughout the world, unauthorized duplication of software is subject to both criminal and civil penalties.
If you know of illegal copying of software, contact your local Software Antipiracy Hotline.
For the Hotline number for your area, access Novell’s World Wide Web page at http://www.novell.com and look for the piracy page under “Programs.”
Or, contact Novell’s anti-piracy headquarters in the U.S. at 800-PIRATES (747-2837) or 801-861-7101.
TrademarksNovell, Inc. has attempted to supply trademark information about company names, products, and services mentioned in this manual. The following list of trademarks was derived from various sources.
Novell, Inc. TrademarksNovell, the Novell logo, NetWare, BorderManager, ConsoleOne, DirXML, GroupWise, iChain, ManageWise, NDPS, NDS, NetMail, Novell Directory Services, Novell iFolder, Novell SecretStore, Ximian, Ximian Evolution and ZENworks are registered trademarks; CDE, Certified Directory Engineer and CNE are registered service marks; eDirectory, Evolution, exteNd, exteNd Composer, exteNd Directory, exteNd Workbench, Mono, NIMS, NLM, NMAS, Novell Certificate Server, Novell Client, Novell Cluster Services, Novell Distributed Print Services, Novell Internet Messaging System, Novell Storage Services, Nsure, Nsure Resources, Nterprise, Nterprise Branch Office, Red Carpet and Red Carpet Enterprise are trademarks; and Certified Novell Administrator, CNA, Certified Novell Engineer, Certified Novell Instructor, CNI, Master CNE, Master CNI, MCNE, MCNI, Novell Education Academic Partner, NEAP, Ngage, Novell Online Training Provider, NOTP and Novell Technical Services are service marks of Novell, Inc. in the United States and other countries. SUSE is a registered trademark of SUSE LINUX GmbH, a Novell company. For more information on Novell trademarks, please visit http://www.novell.com/company/legal/trademarks/tmlist.html.
Other TrademarksAdaptec is a registered trademark of Adaptec, Inc. AMD is a trademark of Advanced Micro Devices. AppleShare and AppleTalk are registered trademarks of Apple Computer, Inc. ARCserv is a registered trademark of Cheyenne Software, Inc. Btrieve is a registered trademark of Pervasive Software, Inc. EtherTalk is a registered trademark of Apple Computer, Inc. Java is a trademark or registered trademark of Sun Microsystems, Inc. in the United States and other countries. Linux is a registered trademark of Linus Torvalds. LocalTalk is a registered trademark of Apple Computer, Inc. Lotus Notes is a registered trademark of Lotus Development Corporation. Macintosh is a registered trademark of Apple Computer, Inc. Netscape Communicator is a trademark of Netscape Communications Corporation. Netscape Navigator is a registered trademark of Netscape Communications Corporation. Pentium is a registered trademark of Intel Corporation. Solaris is a registered trademark of Sun Microsystems, Inc. The Norton AntiVirus is a trademark of Symantec Corporation. TokenTalk is a registered trademark of Apple Computer, Inc. Tru64 is a trademark of Digital Equipment Corp. UnitedLinux is a registered trademark of UnitedLinux. UNIX is a registered trademark of the Open Group. WebSphere is a trademark of International Business Machines Corporation. Windows and Windows NT are registered trademarks of Microsoft Corporation.
All other third-party trademarks are the property of their respective owners.
ONLINE VIEW ONLY-NO PRINTING OR DISTRIBUTION ALLOWED
Contents
ONLINE VIEW ONLY-NO PRINTING OR DISTRIBUTION ALLOWED
Contents
Introduction
Course Scenario . . . . . . . . . . . . . . . . . . . . . . . . . . . . . . . . . . Intro-2
Exercise Conventions. . . . . . . . . . . . . . . . . . . . . . . . . . . . . . Intro-3
SECTION 1 Manage Virtualization with Xen
Exercise 1-1 Install Xen . . . . . . . . . . . . . . . . . . . . . . . . . . . . . . . 1-2
Exercise 1-2 Install a Guest Domain . . . . . . . . . . . . . . . . . . . . . 1-4
Exercise 1-3 Change Memory Allocation of a Guest Domain. . 1-6
Exercise 1-4 Check the Network Configuration. . . . . . . . . . . . . 1-8
Exercise 1-5 Automate Domain Startup. . . . . . . . . . . . . . . . . . . 1-9
. . . . . . . . . . . . . . . . . . . . . . . . . . . . . . . . . . . . . . . . . . . . . . . . . 1-9
SECTION 2 Configure a Web Application Server
Exercise 2-1 Install Apache . . . . . . . . . . . . . . . . . . . . . . . . . . . . 2-3
Exercise 2-2 Test the Apache Installation . . . . . . . . . . . . . . . . . 2-4
Exercise 2-3 Configure a Virtual Host . . . . . . . . . . . . . . . . . . . . 2-5
Exercise 2-4 Configure User Authentication . . . . . . . . . . . . . . . 2-8
Exercise 2-5 Configure SSL . . . . . . . . . . . . . . . . . . . . . . . . . . . 2-10
Exercise 2-6 Install PHP. . . . . . . . . . . . . . . . . . . . . . . . . . . . . . 2-14
Exercise 2-7 Install Tomcat . . . . . . . . . . . . . . . . . . . . . . . . . . . 2-15
Exercise 2-8 Use a Configuration Template. . . . . . . . . . . . . . . 2-16
Exercise 2-9 Install an Example Application . . . . . . . . . . . . . . 2-17
Exercise 2-10 Enable the Manager and Admin Tools . . . . . . . 2-19
Exercise 2-11 Configure rinetd to Forward Port 80 to Port 8080. . . . . . . . . . . . . . . . . . . . . . . . . . . . . . . . . . . . . . . . . . 2-20
Version 1 Copying all or part of this manual, or distributing such copies, is strictly prohibited. TOC-1To report suspected copying, please call 1-800-PIRATES.
SUSE Linux Enterprise Server 10 Advanced Administration / Workbook
ONLINE VIEW ONLY-NO PRINTING OR DISTRIBUTION ALLOWED
SECTION 3 Configure and Use Samba
Exercise 3-1 Install Samba . . . . . . . . . . . . . . . . . . . . . . . . . . . . . 3-2
Exercise 3-2 Configure a Share for the User Geeko . . . . . . . . . 3-3
Exercise 3-3 Access the Share of the User Geeko with smbclient . . . . . . . . . . . . . . . . . . . . . . . . . . . . . . . . . . . . . . . . . . . 3-5
Exercise 3-4 Mount Geeko's Share. . . . . . . . . . . . . . . . . . . . . . . 3-6
Exercise 3-5 Configure Samba as a Print Server . . . . . . . . . . . . 3-7
SECTION 4 Enable Fundamental Network Services
Exercise 4-1 Configure the Internet Daemon (xinetd) . . . . . . . . 4-2
Exercise 4-2 Configure Anonymous PureFTPd Access. . . . . . . 4-5
Exercise 4-3 Configure ntpd. . . . . . . . . . . . . . . . . . . . . . . . . . . . 4-7
Exercise 4-4 Set Up and Manage Network File System (NFS) . 4-9
SECTION 5 Create Shell Scripts
Introduction . . . . . . . . . . . . . . . . . . . . . . . . . . . . . . . . . . . . . . . 5-1Exercise 5-1 Prepare your Environment. . . . . . . . . . . . . . . . . . . 5-3
Exercise 5-2 Create a Basic Shell Script . . . . . . . . . . . . . . . . . . 5-4
Exercise 5-3 Use Variables and Command Substitution . . . . . . 5-5
Exercise 5-4 Use an if Control Structures . . . . . . . . . . . . . . . . . 5-6
Exercise 5-5 Use a while Loop. . . . . . . . . . . . . . . . . . . . . . . . . . 5-7
Exercise 5-6 Use Arithmetic Operators . . . . . . . . . . . . . . . . . . . 5-8
Exercise 5-7 Read User Input . . . . . . . . . . . . . . . . . . . . . . . . . . . 5-9
Exercise 5-8 Use Arrays . . . . . . . . . . . . . . . . . . . . . . . . . . . . . . 5-10
Exercise 5-9 Add more Commands . . . . . . . . . . . . . . . . . . . . . 5-11
Exercise 5-10 Use Shell Functions. . . . . . . . . . . . . . . . . . . . . . 5-12
SECTION 6 Compile Software from Source
Exercise 6-1 Compile a Simple C Program . . . . . . . . . . . . . . . . 6-2
Exercise 6-2 Compile Software from a Source Package . . . . . . 6-3
TOC-2 Copying all or part of this manual, or distributing such copies, is strictly prohibited. Version 1To report suspected copying, please call 1-800-PIRATES.
Contents
ONLINE VIEW ONLY-NO PRINTING OR DISTRIBUTION ALLOWED
SECTION 7 Perform a Health Check and Performance Tuning
Exercise 7-1 Analyze System Performance . . . . . . . . . . . . . . . . 7-2
Exercise 7-2 Reduce Resource Utilization . . . . . . . . . . . . . . . . . 7-7
Exercise 7-3 Tune an IDE Hard Drive with hdparm . . . . . . . . . 7-9
Exercise 7-4 Use Powertweak . . . . . . . . . . . . . . . . . . . . . . . . . 7-10
SECTION 8 Manage Hardware
Exercise 8-1 Manage the Linux Kernel Modules . . . . . . . . . . . . 8-2
Exercise 8-2 Add a device symlink with udev . . . . . . . . . . . . . . 8-4
Exercise 8-3 Explore Hardware Initialization . . . . . . . . . . . . . . 8-5
Exercise 8-4 Obtain Hardware Configuration Information . . . . 8-7
. . . . . . . . . . . . . . . . . . . . . . . . . . . . . . . . . . . . . . . . . . . . . . . . . 8-7
SECTION 9 Prepare for the Novell CLP 10 Practicum
Version 1 Copying all or part of this manual, or distributing such copies, is strictly prohibited. TOC-3To report suspected copying, please call 1-800-PIRATES.

SUSE Linux Enterprise Server 10 Advanced Administration / Workbook
ONLINE VIEW ONLY-NO PRINTING OR DISTRIBUTION ALLOWED
TOC-4 Copying all or part of this manual, or distributing such copies, is strictly prohibited. Version 1To report suspected copying, please call 1-800-PIRATES.
Introduction
ONLINE VIEW ONLY-NO PRINTING OR DISTRIBUTION ALLOWED
Introduction
This workbook is designed to help you practice the skills associated with SUSE Linux Enterprise Server 10 Advanced Administration (Course 3073) objectives.
These skills, along with those taught in SUSE Linux Enterprise Server 10 Fundamentals (Course 3071) and SUSE Linux Enterprise Server 10 Administration (Course 3072), prepare you to take the Novell Certified Linux Professional 10 (Novell CLP 10) certification practicum test.
x Instructions for setting up a self-study environment are in the directory setup on the Course DVD.
Before starting the exercises in this workbook, you need review the following:
■ Course Scenario
■ Exercise Conventions
Version 1 Copying all or part of this manual, or distributing such copies, is strictly prohibited. WB Intro-1To report suspected copying, please call 1-800-PIRATES.

SUSE Linux Enterprise Server 10 Advanced Administration / Workbook
ONLINE VIEW ONLY-NO PRINTING OR DISTRIBUTION ALLOWED
Course Scenario
The Digital Airlines management has made the decision to migrate several back-end services to Linux servers running SUSE Linux Enterprise Server 10. The services should run on one host in separate virtual machines.
You have already installed SUSE Linux Enterprise Server 10 before and are familiar with administering SUSE Linux Enterprise Server 10 from YaST and from the command line.
To be able to implement the migration plan, you need additional experience in the following areas:
■ Virtualization with Xen.
■ System settings on the configuration file level
■ Configuration of important services from the command line
■ Creating basic shell scripts and compiling software from source packages
You decide to set up a test server in the lab to enhance your skills in these areas.
WB Intro-2 Copying all or part of this manual, or distributing such copies, is strictly prohibited. Version 1To report suspected copying, please call 1-800-PIRATES.
Introduction
ONLINE VIEW ONLY-NO PRINTING OR DISTRIBUTION ALLOWED
Exercise Conventions
When working through an exercise, you will see conventions that indicate information you need to enter that is specific to your server.
The following describes the most common conventions:
■ italicized/bolded text. This is a reference to your unique situation, such as the host name of your server.
For example, if the host name of your server is DA50, and you see the following,
hostname.digitalairlines.com
you would enter
DA50.digitalairlines.com
■ 10.0.0.xx. This is the IP address that is assigned to your SUSE Linux Enterprise Server 10 server.
For example, if your IP address is 10.0.0.50, and you see the following
10.0.0.xx
you would enter
10.0.0.50
■ Select. The word select is used in exercise steps to indicate a variety of actions including clicking a button on the interface and selecting a menu item.
■ Enter and Type. The words enter and type have distinct meanings.
The word enter means to type text in a field or at a command line and press the Enter key when necessary. The word type means to type text without pressing the Enter key.
If you are directed to type a value, make sure you do not press the Enter key or you might activate a process that you are not ready to start.
Version 1 Copying all or part of this manual, or distributing such copies, is strictly prohibited. WB Intro-3To report suspected copying, please call 1-800-PIRATES.
SUSE Linux Enterprise Server 10 Advanced Administration / Workbook
ONLINE VIEW ONLY-NO PRINTING OR DISTRIBUTION ALLOWED
WB Intro-4 Copying all or part of this manual, or distributing such copies, is strictly prohibited. Version 1To report suspected copying, please call 1-800-PIRATES.
Manage Virtualization with Xen
ONLINE VIEW ONLY-NO PRINTING OR DISTRIBUTION ALLOWED
S E C T I O N 1 Manage Virtualization with Xen
In this section of the workbook, you learn how to do the following:
■ “Install Xen” on 1-2
In this exercise, you learn how to install Xen and configure domain0.
■ “Install a Guest Domain” on 1-4
In this exercise, you learn how to install a Xen guest domain using YaST.
■ “Change Memory Allocation of a Guest Domain” on 1-6
In this exercise, you learn how to change the memory allocation of a guest domain by changing the domain configuration file.
■ “Check the Network Configuration” on 1-8
This exercise assumes that you have a Xen system with domain0 and one more Xen domain running.
■ “Automate Domain Startup” on 1-9
In this exercise, you learn how to startup domains automatically when the system is booted.
Version 1 Copying all or part of this manual, or distributing such copies, is strictly prohibited. WB 1-1To report suspected copying, please call 1-800-PIRATES.

SUSE Linux Enterprise Server 10 Advanced Administration / Workbook
ONLINE VIEW ONLY-NO PRINTING OR DISTRIBUTION ALLOWED
Exercise 1-1 Install Xen
In this exercise, you learn how to install Xen and configure domain0.
Do the following:
■ Part I: Install XenPackages.
■ Part II: Prepare for Reboot
■ Part III: Reboot and Test Xen.
Part I: Install XenPackages.
Do the following:
1. Start the YaST Controll Center.
2. Select Software > Software Management.
3. From the Filter menu, select Search.
4. Enter xen in the search field and select search.
5. On the right side, select the packages xen, kernel-xen and xen-tools.
6. Select Accept and let YaST install all required software packages.
7. Close the YaST Control Center.
Part II: Prepare for Reboot
Do the following:
1. Open a terminal window and su- to the root user.
2. Open the file /boot/grub/menu.lst with a text editor (eg. vi).
3. Make sure, that there is a section with the title Xen in the file.
4. In this section, make sure that the parameter root= points to the root partition of your installation.
WB 1-2 Copying all or part of this manual, or distributing such copies, is strictly prohibited. Version 1To report suspected copying, please call 1-800-PIRATES.
Manage Virtualization with Xen
ONLINE VIEW ONLY-NO PRINTING OR DISTRIBUTION ALLOWED
5. Close the file.
6. Enter the command: insserv -r SuSEfirewall2_setup and insserv -r SuSEfirewall2_init
7. Close the terminal window.
Part III: Reboot and Test Xen.
1. Reboot your system.
2. At the boot menu, select the Xen entry and hit Return.
3. When the system has been booted, log in as user geeko with the password novell.
4. Open a terminal window and su- to the root user.
5. Enter the command xm list.
6. In the output you should see one domain (Domain-0) with the status running.
(End of Exercise)
Version 1 Copying all or part of this manual, or distributing such copies, is strictly prohibited. WB 1-3To report suspected copying, please call 1-800-PIRATES.
SUSE Linux Enterprise Server 10 Advanced Administration / Workbook
ONLINE VIEW ONLY-NO PRINTING OR DISTRIBUTION ALLOWED
Exercise 1-2 Install a Guest Domain
In this exercise, you learn how to install a Xen guest domain using YaST. Before you start with this exercise ,you must have installed xen on your system.
Do the following:
1. Open the YaST Control Center.
2. Select System > Virtual Machine Management.
3. Select Add.
4. Select Run an OS installation program and then Next.
5. Select Next.
6. After a while, a terminal window opens and a standard SUSE Linux Enterprise Server installation starts up. Select this window.
7. Press Alt+N.
8. Use the tab-key to navigate to the item “Yes, I Agree to the License Agreement”. Then press the space bar.
9. Press Alt+N.
10. Press Alt+N.
11. (Optional) Adjust the settings for Region and Time Zone. Navigate to the menus with the tab-key and use the arrow keys to change an option.
12. Press Alt+N.
13. Confirm the installation overview by pressing Alt+A.
14. Start the installation by pressing Alt+I.
15. (Wait till the installation has been finished.)
16. Select Continue in the Installation Complete message box.
17. Select Next in the domain configuration overview.
18. Select Finish in the Virtual Machine Started message box.
19. Switch to the terminal of the virtual domain.
WB 1-4 Copying all or part of this manual, or distributing such copies, is strictly prohibited. Version 1To report suspected copying, please call 1-800-PIRATES.
Manage Virtualization with Xen
ONLINE VIEW ONLY-NO PRINTING OR DISTRIBUTION ALLOWED
20. Select Next (Press Alt+P).
21. Enter novell as root password. Select Next to continue (Press Alt+N).
22. Accept that the password is too simple.
23. Select Alt-n to continue.
24. Select No, Skip this Test (Press Alt+O).
25. Select Next (Alt+N).
26. Select Next (Alt+N).
27. Select Next (Alt+N).
28. Create user geeko with the password novell.
29. Select Next (Alt+N).
30. Accept that the password is too simple.
31. Select Next (Alt+N).
32. Select Next (Alt+N).
33. Select Finish (Alt+F).
34. Test if you can login to the new domain as the user root with the password novell.
35. Please do not close the terminal window, we will use it in the next exercise.
(End of Exercise)
Version 1 Copying all or part of this manual, or distributing such copies, is strictly prohibited. WB 1-5To report suspected copying, please call 1-800-PIRATES.
SUSE Linux Enterprise Server 10 Advanced Administration / Workbook
ONLINE VIEW ONLY-NO PRINTING OR DISTRIBUTION ALLOWED
Exercise 1-3 Change Memory Allocation of a Guest Domain
In this exercise, you learn how to change the memory allocation of a guest domain by changing the domain configuration file.
The following assumes, that you still have an open terminal window of the guest domain, that you have configured in the previous exercises.
Do the follwoing:
1. Open a terminal window and su- to the root user.
2. Enter the command xm list.
3. Note the memory allocation of the domain vm1.
4. Switch to the terminal of the Xen domain and halt the system by typing halt. Wait till the system has been halted.
5. Return to the root terminal and use the command xm list to verify that the domain vm1 is not running anymore.
6. Open the file /etc/xen/vm/vm1 with a text editor.
7. Look for the memory parameter and change the value to 172.
8. Save and close the file.
9. Enter the following command to start the domain:
xm create -c -f /etc/xen/vm/vm1
10. Wait till the system has been booted and you see the login prompt.
11. Press the key combination Ctrl-] to detach from the domain terminal and return to the root terminal.
12. Use the command xm list to determine the memory allocation of domain vm1. It should be 172MB.
13. Also note the ID of domain vm1.
WB 1-6 Copying all or part of this manual, or distributing such copies, is strictly prohibited. Version 1To report suspected copying, please call 1-800-PIRATES.
Manage Virtualization with Xen
ONLINE VIEW ONLY-NO PRINTING OR DISTRIBUTION ALLOWED
14. Attach to the terminal of vm1 with the command xm console <noted_id>
(End of Exercise)
Version 1 Copying all or part of this manual, or distributing such copies, is strictly prohibited. WB 1-7To report suspected copying, please call 1-800-PIRATES.
SUSE Linux Enterprise Server 10 Advanced Administration / Workbook
ONLINE VIEW ONLY-NO PRINTING OR DISTRIBUTION ALLOWED
Exercise 1-4 Check the Network Configuration
This exercise assumes that you have a Xen system with domain 0 and one more Xen domain running.
Do the following:
1. Open a terminal window and su - to the root user.
2. Make sure that the domain vm1 is running by typing the command xm list.
3. In the output of the xm command, note the ID of the domain vm1.
4. View the network bridge configuration with the command brctl show.
5. You should see the configuration of the bridge xenbr0. The interfaces peth0 (physical interface) vif0.0 (virtual interface of domain 0) and the virtual interface vifx.0 (where x is the domain ID of domain vm1) should be added to the bridge.
6. Shutdown the domain with the command xm shutdown vm1.
7. Wait a moment and control with the command xm list if the domain has been shut down. Continue with next step when the domain vm1 is not listed anymore.
8. Enter the command brctl show again. Note that the inerface of the domain vm1 has been removed from the bridge.
9. Restart the domain with: xm create -f /etc/xen/vm/vm1
10. Note the ID of vm1 and check with brctl show if the interface of vm1 has been added again.
(End of Exercise)
WB 1-8 Copying all or part of this manual, or distributing such copies, is strictly prohibited. Version 1To report suspected copying, please call 1-800-PIRATES.
Manage Virtualization with Xen
ONLINE VIEW ONLY-NO PRINTING OR DISTRIBUTION ALLOWED
Exercise 1-5 Automate Domain Startup
In this exercise, you learn how to startup domains automatically when the system is booted.
Do the following:
1. Open a terminal window and su - to the root user.
2. Move the vm1 configuration file into the auto directory:mv /etc/xen/vm/vm1 /etc/xen/auto/
3. Shutdown vm1 with the command xm shutdown vm1.
4. Wait a moment and control with the command xm list if the domain has been shut down. Continue with next step when the domain vm1 is not listed anymore.
5. Reboot you system by entering reboot.
6. At the boot prompt, select the Xen entry.
7. When the system has been started up, log in to the graphical interface as user geeko with the password novell.
8. Open a terminal window and su - to the root user.
9. Enter the command xm list.
10. The domain vm1 should have been automatically started and should be listed in the xm output.
(End of Exercise)
Version 1 Copying all or part of this manual, or distributing such copies, is strictly prohibited. WB 1-9To report suspected copying, please call 1-800-PIRATES.

SUSE Linux Enterprise Server 10 Advanced Administration / Workbook
ONLINE VIEW ONLY-NO PRINTING OR DISTRIBUTION ALLOWED
WB 1-10 Copying all or part of this manual, or distributing such copies, is strictly prohibited. Version 1To report suspected copying, please call 1-800-PIRATES.
Configure a Web Application Server
ONLINE VIEW ONLY-NO PRINTING OR DISTRIBUTION ALLOWED
S E C T I O N 2 Configure a Web Application Server
In this section of the workbook, you can find the following exercises:
■ “Install Apache” on 2-3
In this exercise, you install the apache components on your system.
■ “Test the Apache Installation” on 2-4
In this exercise, you check if the installation of apache was successful.
■ “Configure a Virtual Host” on 2-5
In this exercise, you configure a virtual host for the accounting department.
■ “Configure User Authentication” on 2-8
In this exercise, you add user authentication to a virtual host.
■ “Configure SSL” on 2-10
In this exercise, you add SSL encryption to a virtual host.
■ “Install PHP” on 2-14
In this exercise, you install and test PHP.
■ “Install Tomcat” on 2-15
In this exercise, you install the tomcat component
■ “Use a Configuration Template” on 2-16
In this exercise, you use the minimal configuration template as server.xml file.
■ “Install an Example Application” on 2-17
In this exercise, you learn how to install an application using the auto deploy feature of Tomcat.
Version 1 Copying all or part of this manual, or distributing such copies, is strictly prohibited. WB 2-1To report suspected copying, please call 1-800-PIRATES.
SUSE Linux Enterprise Server 10 Advanced Administration / Workbook
ONLINE VIEW ONLY-NO PRINTING OR DISTRIBUTION ALLOWED
■ “Enable the Manager and Admin Tools” on 2-19
In this exercise, you enable the manager and the admin tool.
■ “Configure rinetd to Forward Port 80 to Port 8080” on 2-20
In this exercise, you configure rinetd to forward port 80 to port 8080
WB 2-2 Copying all or part of this manual, or distributing such copies, is strictly prohibited. Version 1To report suspected copying, please call 1-800-PIRATES.
Configure a Web Application Server
ONLINE VIEW ONLY-NO PRINTING OR DISTRIBUTION ALLOWED
Exercise 2-1 Install Apache
In this exercise, you install the apache components on your system.
Do the following:
1. Start YaST.
2. From the YaST Control Center, select Software > Software Management.
3. From the filter drop-down menu, select Search.
4. In the Search field, enter apache; then select Search.
5. On the right side, select the following packages.
❑ apache2
❑ apache2-example-pages
❑ apache2-prefork
6. Select Accept.
7. (Conditional) If YaST displays package dependencies, confirm by selecting Continue.
8. When prompted, insert the requested SUSE Linux Enterprise Server 10 CDs in the drive.
9. When installation is complete, close the YaST Control Center and remove the CD.
10. Open a terminal window and su to root.
11. To start Apache at boot time, enter the following:
insserv apache2
12. To start the Apache daemon, enter the following:
rcapache2 start
(End of Exercise)
Version 1 Copying all or part of this manual, or distributing such copies, is strictly prohibited. WB 2-3To report suspected copying, please call 1-800-PIRATES.
SUSE Linux Enterprise Server 10 Advanced Administration / Workbook
ONLINE VIEW ONLY-NO PRINTING OR DISTRIBUTION ALLOWED
Exercise 2-2 Test the Apache Installation
In this exercise, you check if the installation of apache was successful.
Do the following:
1. Start Firefox.
2. In the address bar of the web browser, enter the following:
http://localhost
If the Apache example page appears, the web server has been installed and started correctly.
3. (Conditional) If you are having problems displaying the page, you need to rename the file /srv/www/htdocs/index.html.en to/srv/www/htdocs/index.html.
(End of Exercise)
WB 2-4 Copying all or part of this manual, or distributing such copies, is strictly prohibited. Version 1To report suspected copying, please call 1-800-PIRATES.
Configure a Web Application Server
ONLINE VIEW ONLY-NO PRINTING OR DISTRIBUTION ALLOWED
Exercise 2-3 Configure a Virtual Host
In this exercise, you configure a virtual host for the accounting department.
x The file accounting.conf you create in this exercise can be difficult to modify properly. To help you understand what needs to be changed and where parameters are placed, the file is available on your 3073 Course CD in the directory /exercises/section_2.
Do the following:
1. From the terminal window (as root), create a directory for the virtual host by entering the following:
mkdir /srv/www/accounting
2. In the new directory, create a file index.html with the following content:
<html> <head> <title>Accounting Intranet Server</title> </head> <body> <h1>Accounting Intranet</h1> Under construction. </body></html>
x This file is also available on your 3073 Course CD in the directory/exercises/section_2.
3. Change to the directory /etc/apache2/vhosts.d/ by entering the following:
cd /etc/apache2/vhosts.d/
4. Copy the virtual host template file by entering the following:
cp vhost.template accounting.conf
Version 1 Copying all or part of this manual, or distributing such copies, is strictly prohibited. WB 2-5To report suspected copying, please call 1-800-PIRATES.
SUSE Linux Enterprise Server 10 Advanced Administration / Workbook
ONLINE VIEW ONLY-NO PRINTING OR DISTRIBUTION ALLOWED
5. Open the file accounting.conf in a text editor and make the following changes:
<VirtualHost accounting.da.com:80>
ServerName accounting.da.com
DocumentRoot /srv/www/accounting
ErrorLog /var/log/apache2/accounting.da.com-error_log
CustomLog /var/log/apache2/accounting.da.com-access_log combined
UseCanonicalName On
ScriptAlias /cgi-bin/ “/srv/www/cgi-bin”
<Directory “/srv/www/cgi-bin”> AllowOverride None Options +ExecCGI -Includes Order allow,deny Allow from all</Directory>
<Directory “/srv/www/accounting/”>AllowOverride NoneOptions Indexes FollowSymLinksOrder allow,deny
Allow from all</Directory>
6. For testing purposes, append “accounting.da.com” to the line “127.0.0.1” in the file /etc/hosts:
127.0.0.1 localhost accounting.da.com
7. Test the syntax of your configuration file by entering the following:
apache2ctl configtest
8. Reload Apache by entering the following:
rcapache2 reload
9. From the Konqueror browser, access the virtual host by entering the following:
WB 2-6 Copying all or part of this manual, or distributing such copies, is strictly prohibited. Version 1To report suspected copying, please call 1-800-PIRATES.
Configure a Web Application Server
ONLINE VIEW ONLY-NO PRINTING OR DISTRIBUTION ALLOWED
http://accounting.da.com
The accounting intranet index page is displayed.
10. Close the Konqueror browser.
(End of Exercise)
Version 1 Copying all or part of this manual, or distributing such copies, is strictly prohibited. WB 2-7To report suspected copying, please call 1-800-PIRATES.
SUSE Linux Enterprise Server 10 Advanced Administration / Workbook
ONLINE VIEW ONLY-NO PRINTING OR DISTRIBUTION ALLOWED
Exercise 2-4 Configure User Authentication
In this exercise, you add user authentication to a virtual host.
Do the following:
1. From the terminal window (as root), create the file htpasswd and add the user geeko to it by entering the following:
htpasswd2 -c /etc/apache2/htpasswd geeko
When prompted for a password, enter novell (twice).
2. Enter a another user (tux) with the following:
htpasswd2 -c /etc/apache2/htpasswd tux
3. When prompted for a password, enter novell (twice).
4. Open the virtual host configuration file/etc/apache2/vhosts.d/accounting.conf in a text editor.
5. Find the following directory directive:
<Directory “/srv/www/accounting/”>
6. Within this directory block, add the following lines:
AuthType BasicAuthName “Accounting Intranet”AuthUserFile /etc/apache2/htpasswdRequire user geeko
7. Check the syntax of the configuration file by entering the following command:
apache2ctl configtest
WB 2-8 Copying all or part of this manual, or distributing such copies, is strictly prohibited. Version 1To report suspected copying, please call 1-800-PIRATES.
Configure a Web Application Server
ONLINE VIEW ONLY-NO PRINTING OR DISTRIBUTION ALLOWED
8. Reload the Apache server by entering the following:
rcapache2 reload
9. Open the Konqueror browser; then enter the following:
http://accounting.da.com
A password dialog appears.
10. Enter a user name of tux and a password of novell.
11. Access should be denied, as the user tux is not configured in the require user option.
12. Retry with a user name of geeko and a password of novell.
13. Access the protected web site by selecting OK.
14. Access to the website should be granted for the user tux.
(End of Exercise)
Version 1 Copying all or part of this manual, or distributing such copies, is strictly prohibited. WB 2-9To report suspected copying, please call 1-800-PIRATES.
SUSE Linux Enterprise Server 10 Advanced Administration / Workbook
ONLINE VIEW ONLY-NO PRINTING OR DISTRIBUTION ALLOWED
Exercise 2-5 Configure SSL
In this exercise, you add SSL encryption to a virtual host.
Do the following:
1. From the terminal window (as root), create the file random by entering the following:
cat /dev/random > /tmp/random
2. Press some keys on the keyboard to generate random events which help to create the file.
3. Stop the process after about 15 seconds by pressing Ctrl+C.
4. Generate a server key by entering the following (on one line):
openssl genrsa -des3 -out /tmp/accounting.key -rand/tmp/random 1024
5. When prompted for a pass phrase, enter novell (twice).
6. Sign the key by entering the following (on one line):
openssl req -new -x509 -key /tmp/accounting.key -out /tmp/accounting.crt
WB 2-10 Copying all or part of this manual, or distributing such copies, is strictly prohibited. Version 1To report suspected copying, please call 1-800-PIRATES.
Configure a Web Application Server
ONLINE VIEW ONLY-NO PRINTING OR DISTRIBUTION ALLOWED
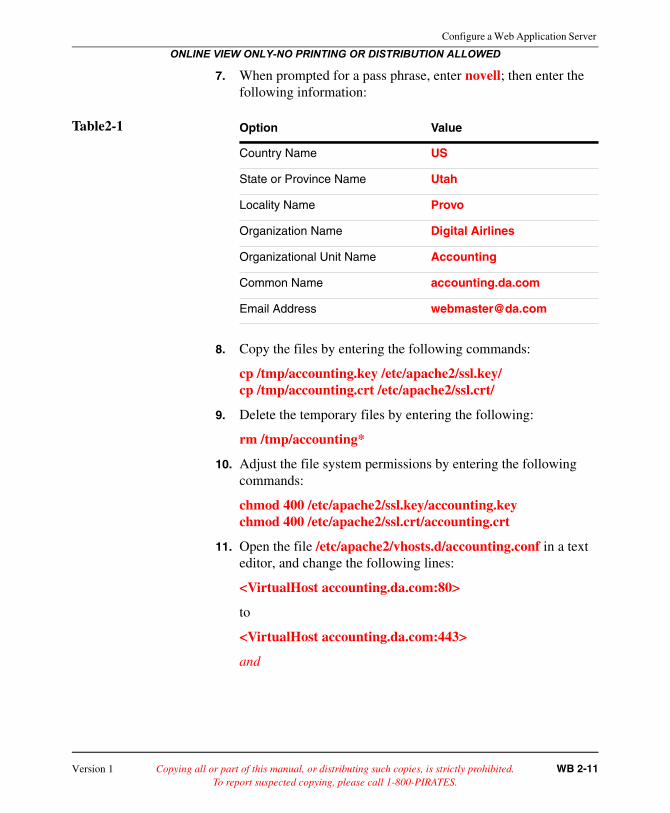
7. When prompted for a pass phrase, enter novell; then enter the following information:
8. Copy the files by entering the following commands:
cp /tmp/accounting.key /etc/apache2/ssl.key/cp /tmp/accounting.crt /etc/apache2/ssl.crt/
9. Delete the temporary files by entering the following:
rm /tmp/accounting*
10. Adjust the file system permissions by entering the following commands:
chmod 400 /etc/apache2/ssl.key/accounting.keychmod 400 /etc/apache2/ssl.crt/accounting.crt
11. Open the file /etc/apache2/vhosts.d/accounting.conf in a text editor, and change the following lines:
<VirtualHost accounting.da.com:80>
to
<VirtualHost accounting.da.com:443>
and
Table2-1 Option Value
Country Name US
State or Province Name Utah
Locality Name Provo
Organization Name Digital Airlines
Organizational Unit Name Accounting
Common Name accounting.da.com
Email Address [email protected]
Version 1 Copying all or part of this manual, or distributing such copies, is strictly prohibited. WB 2-11To report suspected copying, please call 1-800-PIRATES.
SUSE Linux Enterprise Server 10 Advanced Administration / Workbook
ONLINE VIEW ONLY-NO PRINTING OR DISTRIBUTION ALLOWED
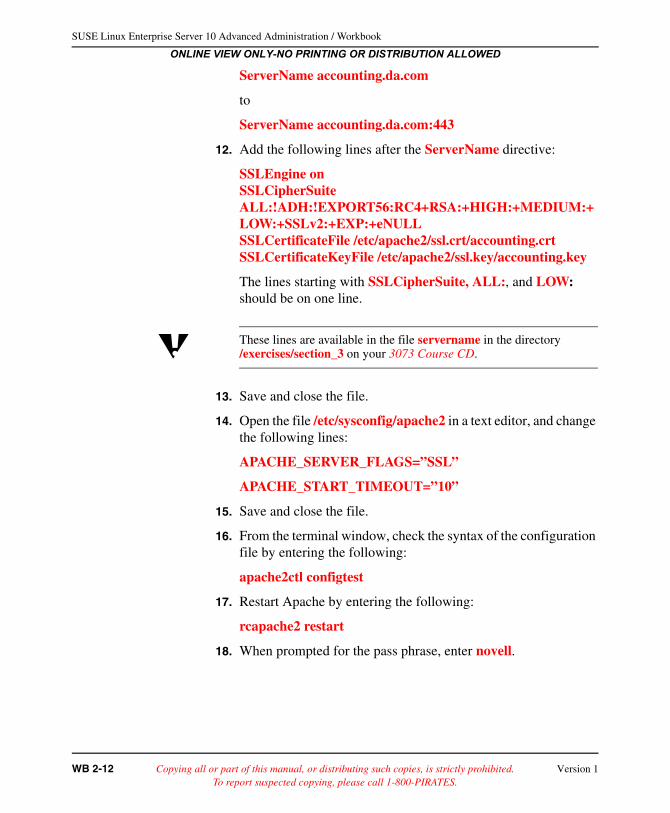
ServerName accounting.da.com
to
ServerName accounting.da.com:443
12. Add the following lines after the ServerName directive:
SSLEngine onSSLCipherSuite ALL:!ADH:!EXPORT56:RC4+RSA:+HIGH:+MEDIUM:+LOW:+SSLv2:+EXP:+eNULLSSLCertificateFile /etc/apache2/ssl.crt/accounting.crtSSLCertificateKeyFile /etc/apache2/ssl.key/accounting.key
The lines starting with SSLCipherSuite, ALL:, and LOW: should be on one line.
x These lines are available in the file servername in the directory /exercises/section_3 on your 3073 Course CD.
13. Save and close the file.
14. Open the file /etc/sysconfig/apache2 in a text editor, and change the following lines:
APACHE_SERVER_FLAGS=”SSL”
APACHE_START_TIMEOUT=”10”
15. Save and close the file.
16. From the terminal window, check the syntax of the configuration file by entering the following:
apache2ctl configtest
17. Restart Apache by entering the following:
rcapache2 restart
18. When prompted for the pass phrase, enter novell.
WB 2-12 Copying all or part of this manual, or distributing such copies, is strictly prohibited. Version 1To report suspected copying, please call 1-800-PIRATES.
Configure a Web Application Server
ONLINE VIEW ONLY-NO PRINTING OR DISTRIBUTION ALLOWED
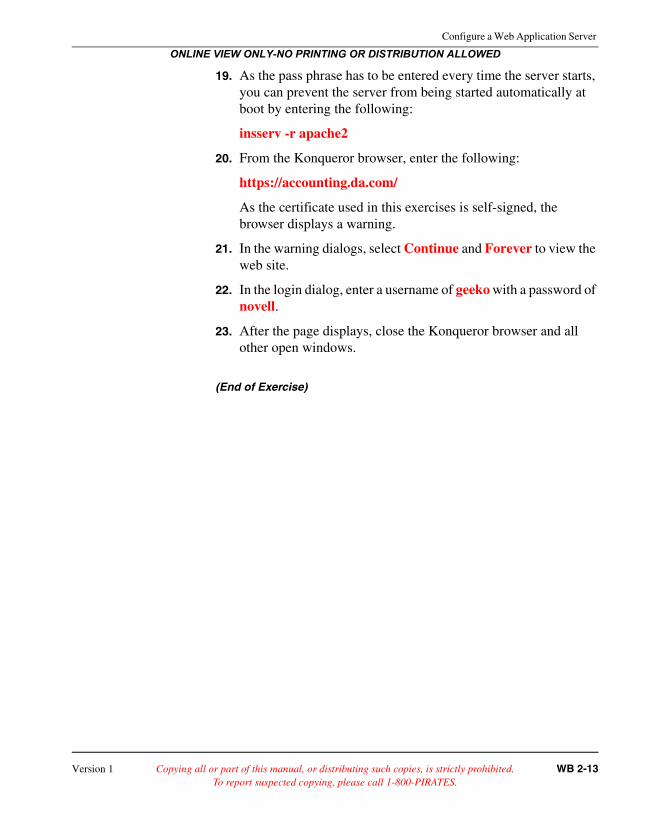
19. As the pass phrase has to be entered every time the server starts, you can prevent the server from being started automatically at boot by entering the following:
insserv -r apache2
20. From the Konqueror browser, enter the following:
https://accounting.da.com/
As the certificate used in this exercises is self-signed, the browser displays a warning.
21. In the warning dialogs, select Continue and Forever to view the web site.
22. In the login dialog, enter a username of geeko with a password of novell.
23. After the page displays, close the Konqueror browser and all other open windows.
(End of Exercise)
Version 1 Copying all or part of this manual, or distributing such copies, is strictly prohibited. WB 2-13To report suspected copying, please call 1-800-PIRATES.
SUSE Linux Enterprise Server 10 Advanced Administration / Workbook
ONLINE VIEW ONLY-NO PRINTING OR DISTRIBUTION ALLOWED
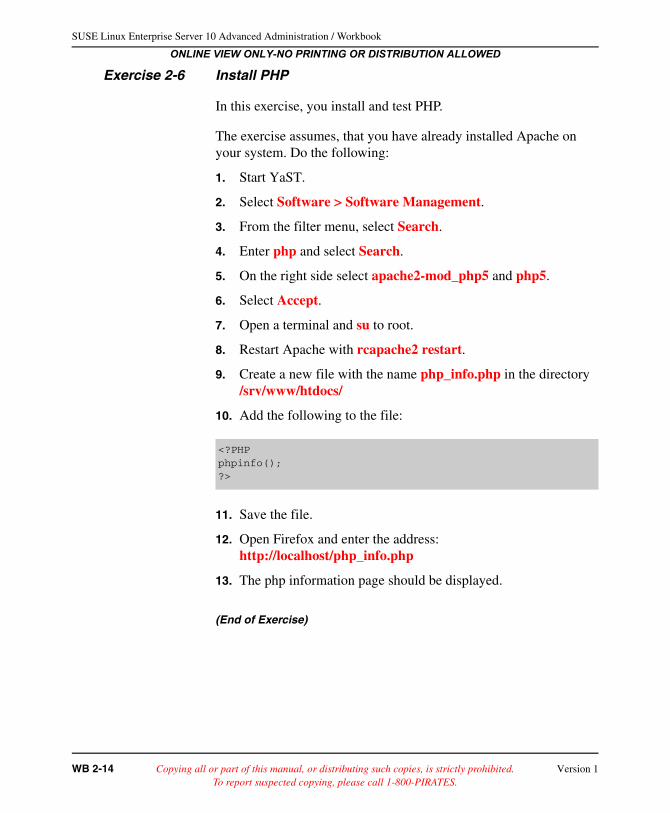
Exercise 2-6 Install PHP
In this exercise, you install and test PHP.
The exercise assumes, that you have already installed Apache on your system. Do the following:
1. Start YaST.
2. Select Software > Software Management.
3. From the filter menu, select Search.
4. Enter php and select Search.
5. On the right side select apache2-mod_php5 and php5.
6. Select Accept.
7. Open a terminal and su to root.
8. Restart Apache with rcapache2 restart.
9. Create a new file with the name php_info.php in the directory /srv/www/htdocs/
10. Add the following to the file:
11. Save the file.
12. Open Firefox and enter the address:http://localhost/php_info.php
13. The php information page should be displayed.
(End of Exercise)
<?PHPphpinfo();?>
WB 2-14 Copying all or part of this manual, or distributing such copies, is strictly prohibited. Version 1To report suspected copying, please call 1-800-PIRATES.
Configure a Web Application Server
ONLINE VIEW ONLY-NO PRINTING OR DISTRIBUTION ALLOWED
Exercise 2-7 Install Tomcat
In this exercise, you install the Tomcat components.
To install Tomcat, do the following:
1. Start YaST.
2. Start the package manager by selecting
System > Software Management
3. In the package manager, make sure that the Filter menu in the upper left corner is set to Search.
4. Enter tomcat in the Search field and confirm by selecting Search.
5. On the right side, select tomcat5 and tomcat5-admin-webapps entry in the Results list.
6. In the lower right corner of the package manager, select Accept.
7. When YaST displays a dialog about package dependencies, confirm this dialog.
8. After all packages have been installed, close YaST by selecting Close.
(End of Exercise)
Version 1 Copying all or part of this manual, or distributing such copies, is strictly prohibited. WB 2-15To report suspected copying, please call 1-800-PIRATES.

SUSE Linux Enterprise Server 10 Advanced Administration / Workbook
ONLINE VIEW ONLY-NO PRINTING OR DISTRIBUTION ALLOWED
Exercise 2-8 Use a Configuration Template
In this exercise, you use the minimal configuration template as server.xml file.
To use a configuration template, do the following:
1. Open a terminal window and su to the root user.
2. Change to the server configuration directory by entering
cd /usr/share/tomcat5/conf
3. Make a backup of the default configuration file by entering
mv server.xml server.xml.bak
4. Copy the minimal template by entering
cp server-minimal.xml server.xml
(End of Exercise)
WB 2-16 Copying all or part of this manual, or distributing such copies, is strictly prohibited. Version 1To report suspected copying, please call 1-800-PIRATES.
Configure a Web Application Server
ONLINE VIEW ONLY-NO PRINTING OR DISTRIBUTION ALLOWED
Exercise 2-9 Install an Example Application
In this exercise, you learn how to install an application using the auto deploy feature of Tomcat.
You will use the open source application vtsurvey as example. This application allows you to build simple web surveys.
Some steps in this part are specific to vtsurvey.
Do the following:
1. Open a terminal and su to the root user.
2. Create a temporary directory by entering
mkdir /tmp/survey
3. Copy the survey application from the student CD (/exercises/section_2) into the /tmp/survey directory.
4. Change into the directory by entering
cd /tmp/survey
5. Unzip the application archive by entering
unzip vtsurvey-2.2.3.zip
6. Create a /survey directory under /usr/local by entering
mkdir /usr/local/survey
7. Copy the /data directory by entering
cp -a data /usr/local/survey/
8. Assign all files in the /survey directory to the tomcat user by entering
chown -R tomcat /usr/local/survey
Please note that the directory /usr/local/survey is specific for the vtsurvey application.
Creating such a directory is not always necessary when installing applications in Tomcat.
Version 1 Copying all or part of this manual, or distributing such copies, is strictly prohibited. WB 2-17To report suspected copying, please call 1-800-PIRATES.
SUSE Linux Enterprise Server 10 Advanced Administration / Workbook
ONLINE VIEW ONLY-NO PRINTING OR DISTRIBUTION ALLOWED
9. Copy the .war file by entering
cp survey.war /usr/share/tomcat5/webapps
10. Start Tomcat by entering
rctomcat5 start
11. Open the deployment descriptor /usr/share/tomcat5/webapps/survey/WEB-INF/web.xmlwith a text editor.
12. Look for the following line
<param-value>localhost:8080</param-value>
13. Replace localhost with the hostname or the IP Address of your system.
Make sure you do not delete the port number.
14. Save the file and close the text editor.
15. Restart Tomcat by entering
rctomcat restart
16. Start Firefox.
17. Enter the following address in the address bar
http://Your_Hostname:8080/survey
18. The login screen of vtsurvey should appear on the screen.
19. If you want to try the application, the login is admin and the password is adminpass.
(End of Exercise)
WB 2-18 Copying all or part of this manual, or distributing such copies, is strictly prohibited. Version 1To report suspected copying, please call 1-800-PIRATES.
Configure a Web Application Server
ONLINE VIEW ONLY-NO PRINTING OR DISTRIBUTION ALLOWED
Exercise 2-10 Enable the Manager and Admin Tools
In this exercise, you enable the manager and the admin tool.
Do the following:
1. Open a terminal window and su to the root user.
2. Open the file /usr/share/tomcat5/conf/tomcat-users.xml with a text editor.
3. Add the following two lines in the role section to create a manager and admin role:
<role rolename="manager"/><role rolename="admin"/>
4. Create the following line in the user section to create a user:
<user username="kbailey" password="novell" roles="manager,admin"/>
5. Save the file and close the text editor.
6. Restart Tomcat by entering
rctomcat restart
7. Open a web browser and try to access the following two URLs:
http://Your_Hostname:8080/manager/htmlhttp://Your_Hostname:8080/admin
Use the credentials username=kbailey and password=novell in both cases to access the tools.
(End of Exercise)
Version 1 Copying all or part of this manual, or distributing such copies, is strictly prohibited. WB 2-19To report suspected copying, please call 1-800-PIRATES.
SUSE Linux Enterprise Server 10 Advanced Administration / Workbook
ONLINE VIEW ONLY-NO PRINTING OR DISTRIBUTION ALLOWED
Exercise 2-11 Configure rinetd to Forward Port 80 to Port 8080
In this exercise, you configure rinetd to forward port 80 to port 8080.
Do the following:
1. Start YaST.
2. Start the package manager by selecting
Software > Software Management
3. In the package manager, make sure that the Filter menu in the upper left corner is set to Search.
4. Enter rinetd in the Search field and confirm by selecting Search.
5. On the right side, select rinetd in the Results list.
6. In the lower right corner of the package manager select Accept.
7. When YaST displays a dialog about package dependencies, confirm this dialog.
8. After all packages have been installed, close YaST by selecting Close.
9. Create a new file /etc/rinetd.conf with the following content:
<your_ip_address> 80 <your_ip_address> 8080allow 10.0.0.*logfile /var/log/rinetd.loglogcommon
10. Save the file and close the text editor.
11. Make sure, that apache is not blocking port 80 by entering:
rcapache2 stop
12. Start rinetd by entering rcrinetd start
13. Try to access tomcat with the following address:
http://Your_Hostname/survey
(End of Exercise)
WB 2-20 Copying all or part of this manual, or distributing such copies, is strictly prohibited. Version 1To report suspected copying, please call 1-800-PIRATES.
Configure a Web Application Server
ONLINE VIEW ONLY-NO PRINTING OR DISTRIBUTION ALLOWED
Version 1 Copying all or part of this manual, or distributing such copies, is strictly prohibited. WB 2-21To report suspected copying, please call 1-800-PIRATES.
SUSE Linux Enterprise Server 10 Advanced Administration / Workbook
ONLINE VIEW ONLY-NO PRINTING OR DISTRIBUTION ALLOWED
WB 2-22 Copying all or part of this manual, or distributing such copies, is strictly prohibited. Version 1To report suspected copying, please call 1-800-PIRATES.

Configure and Use Samba
ONLINE VIEW ONLY-NO PRINTING OR DISTRIBUTION ALLOWED
S E C T I O N 3 Configure and Use Samba
In this section of the workbook, you can find the following exercises:
■ “Install Samba” on 3-2
In this exercise, you learn how to install the Samba components.
■ “Configure a Share for the User Geeko” on 3-3
In this exercise, you learn how to configure a basic samba share.
■ “Access the Share of the User Geeko with smbclient” on 3-5
In this exercise, you learn how to access a share with smbclient.
■ “Mount Geeko's Share” on 3-6
In this exercise, you mount a Samba share on a Linux system.
■ “Configure Samba as a Print Server” on 3-7
In this exercise, you configure a Samba Print Server.
Version 1 Copying all or part of this manual, or distributing such copies, is strictly prohibited. WB 3-1To report suspected copying, please call 1-800-PIRATES.
SUSE Linux Enterprise Server 10 Advanced Administration / Workbook
ONLINE VIEW ONLY-NO PRINTING OR DISTRIBUTION ALLOWED
Exercise 3-1 Install Samba
In this exercise, you learn how to install the Samba components.
Do the following:
1. From the start menu, select All Applications > System > YaST.
2. When prompted for the root password, enter novell; then select OK.
3. From the YaST Control Center, select Software > Software Mangement.
4. From the filter drop-down menu, select Search.
5. In the search field, enter samba; then select Search.
6. On the right, make sure that the following packages are selected:
❑ samba
❑ samba-client
7. Install the selected packages by selecting Accept.
(End of Exercise)
WB 3-2 Copying all or part of this manual, or distributing such copies, is strictly prohibited. Version 1To report suspected copying, please call 1-800-PIRATES.

Configure and Use Samba
ONLINE VIEW ONLY-NO PRINTING OR DISTRIBUTION ALLOWED
Exercise 3-2 Configure a Share for the User Geeko
In this exercise you learn how to configure a basic samba share.
Do the following:
1. From a terminal window, su to root.
2. Change to the directory /etc/samba.
3. Save the default Samba configuration file by entering the following:
mv smb.conf smb.save
4. Create the file smb.conf with a text editor.
5. Add the following lines to the configuration file:
[global]workgroup = Accountingnetbios name = Fileserver_your_host_namesecurity = user
[geeko-dir]comment = Geeko Directorypath = /srv/samba/geekovalid users = geekoread only = no
x This file is available on your 3038 Course CD in the directory/exercises/section_3.
6. Save and close the file.
7. Create the directory to export by entering the following commands:
mkdir /srv/samba/mkdir /srv/samba/geeko
8. Create a test file in the directory by entering the following:
touch /srv/samba/geeko/my_file
Version 1 Copying all or part of this manual, or distributing such copies, is strictly prohibited. WB 3-3To report suspected copying, please call 1-800-PIRATES.
SUSE Linux Enterprise Server 10 Advanced Administration / Workbook
ONLINE VIEW ONLY-NO PRINTING OR DISTRIBUTION ALLOWED
9. Adjust the directory permissions by entering the following commands:
chown geeko /srv/samba/geekochown geeko /srv/samba/geeko/my_file
10. Add geeko to the file smbpasswd file by entering the following:
smbpasswd -a geeko
11. When prompted for a password, enter novell (twice).
12. Check the syntax of the configuration file by entering the following:
testparm
13. Start the Samba servers by entering the following commands:
rcsmb startrcnmb start
(End of Exercise)
WB 3-4 Copying all or part of this manual, or distributing such copies, is strictly prohibited. Version 1To report suspected copying, please call 1-800-PIRATES.
Configure and Use Samba
ONLINE VIEW ONLY-NO PRINTING OR DISTRIBUTION ALLOWED
Exercise 3-3 Access the Share of the User Geeko with smbclient
In this exercise you learn how to access a share with smbclient.
Do the following:
1. Open a terminal window as a normal user.
2. Access Geeko's share by entering the following:
smbclient -U geeko //localhost/geeko-dir
3. When prompted for a password, enter novell.
4. Display all available commands of smbclient by entering the following:
help
5. List the content of the share by entering the following:
ls
6. Copy the file my_file to the current directory by entering the following:
get my_file
7. Exit smbclient by pressing Ctrl+D.
8. Verify that the file my_file has been copied to the current directory by entering ls.
(End of Exercise)
Version 1 Copying all or part of this manual, or distributing such copies, is strictly prohibited. WB 3-5To report suspected copying, please call 1-800-PIRATES.
SUSE Linux Enterprise Server 10 Advanced Administration / Workbook
ONLINE VIEW ONLY-NO PRINTING OR DISTRIBUTION ALLOWED
Exercise 3-4 Mount Geeko's Share
In this exercise you mount a Samba share on a Linux system.
Do the following:
1. From the terminal window, su to root.
2. Mount geeko's share in the directory /mnt by entering the following:
mount -t cifs -o username=geeko,password=novell //localhost/geeko-dir /mnt
3. Display the content of the mounted share by entering the following:
ls /mnt/
You should see the file my_file.
4. Umount the share by entering the following:
umount /mnt
5. Close all open terminal windows.
(End of Exercise)
WB 3-6 Copying all or part of this manual, or distributing such copies, is strictly prohibited. Version 1To report suspected copying, please call 1-800-PIRATES.
Configure and Use Samba
ONLINE VIEW ONLY-NO PRINTING OR DISTRIBUTION ALLOWED
Exercise 3-5 Configure Samba as a Print Server
In this exercise, you configure a Samba Print Server.
Do the following:
1. Remove the file /etc/samba/smb.conf by entering
rm /etc/samba/smb.conf
2. Start your favorite text editor and create a new file /etc/samba/smb.conf.
3. Enter the following lines:
[global]netbios name = hostnamesecurity = shareguest ok = yes
4. To create a printer section, add the line [printers].
5. Add the following lines to configure the printer share:
printable = yesprinter = printerpath = /var/tmp
6. Save the file.
7. Restart the smb daemon by entering rcsmb restart.
8. To test your share configuration, enter
smbclient -L localhost
9. When asked for a password, just press Enter.
Your printer share should be listed.
(End of Exercise)
Version 1 Copying all or part of this manual, or distributing such copies, is strictly prohibited. WB 3-7To report suspected copying, please call 1-800-PIRATES.

SUSE Linux Enterprise Server 10 Advanced Administration / Workbook
ONLINE VIEW ONLY-NO PRINTING OR DISTRIBUTION ALLOWED
WB 3-8 Copying all or part of this manual, or distributing such copies, is strictly prohibited. Version 1To report suspected copying, please call 1-800-PIRATES.

Enable Fundamental Network Services
ONLINE VIEW ONLY-NO PRINTING OR DISTRIBUTION ALLOWED
S E C T I O N 4 Enable Fundamental Network Services
In this section of the workbook, you can find the following exercises:
■ “Configure the Internet Daemon (xinetd)” on 4-2
In this exercise, you configure the Internet daemon xinetd.
■ “Configure Anonymous PureFTPd Access” on 4-5
In this exercise, you configure anonymous FTP access with the permission to upload files.
■ “Configure ntpd” on 4-7
In this exercise, you configure your server to get time information from server da1.
■ “Set Up and Manage Network File System (NFS)” on 4-9
In this exercise, you learn how to set up and manage Network File System.
Version 1 Copying all or part of this manual, or distributing such copies, is strictly prohibited. WB 4-1To report suspected copying, please call 1-800-PIRATES.
SUSE Linux Enterprise Server 10 Advanced Administration / Workbook
ONLINE VIEW ONLY-NO PRINTING OR DISTRIBUTION ALLOWED
Exercise 4-1 Configure the Internet Daemon (xinetd)
In the first part of this exercise, use the YaST module Network Services (xinetd) to set up a telnet server on your computer.
In the second part, install vsftp if it is not yet installed, and edit its configuration in /etc/xinetd.d/ to activate the service.
■ Part I: Enable xinetd Services with YaST
■ Part II: Enable xinetd Services Manually
Part I: Enable xinetd Services with YaST
Do the following:
1. Start the YaST Control Center and select Network Services > Network Services (xinetd).
The Network Services Configuration (xinetd) dialog appears.
2. Select Enable.
A list of currently available services becomes active.
3. Scroll down and select the service telnet (Server: /usr/sbin/in.telnetd); then set the service to On by selecting Toggle Status (On or Off).
If the package telnet-server is not yet installed, it will be installed automatically. Insert the appropriate installation CD as needed.
4. Save the configuration to the system by selecting Finish.
5. Test the configuration:
a. Open a terminal window and su - to root (password novell).
b. Telnet to localhost by entering telnet localhost.
c. Log in as geeko (password novell).
d. Log out by entering exit.
WB 4-2 Copying all or part of this manual, or distributing such copies, is strictly prohibited. Version 1To report suspected copying, please call 1-800-PIRATES.

Enable Fundamental Network Services
ONLINE VIEW ONLY-NO PRINTING OR DISTRIBUTION ALLOWED
e. Log in to a partner’s server as geeko by enteringtelnet partner_server_IP_address.
(You may have to wait until the neighbor completes enabling xinetd and Telnet.)
f. Log out by entering exit.
Part II: Enable xinetd Services Manually
Enable the FTP server by doing the following:
1. Install the vsftpd package if it is not yet installed:rpm -qa | grep vsftpd || yast -i vsftpd
2. From the terminal window, edit the file /etc/xinetd.d/vsftpd by entering vim /etc/xinetd.d/vsftpd.
3. At the bottom of the file, change the disable = yes setting to the following:
disable = no
4. Exit vi and save the changes by entering :wq.
5. Restart the service xinetd by entering rcxinetd restart.
6. Test the ftp service by doing the following:
a. Enter ftp localhost.
b. Log in anonymously by entering the following:
❑ Name: ftp
❑ Password: your email address
c. Exit FTP by entering exit.
d. Log in to a partner’s server anonymously by enteringftp partner_server_IP_address.
e. Log out by entering exit.
7. Disable the vsftpd service:
To be able to complete the exercise “Configure Anonymous PureFTPd Access” on 4-5 successfully, you need to disable vsftpd.
Version 1 Copying all or part of this manual, or distributing such copies, is strictly prohibited. WB 4-3To report suspected copying, please call 1-800-PIRATES.
SUSE Linux Enterprise Server 10 Advanced Administration / Workbook
ONLINE VIEW ONLY-NO PRINTING OR DISTRIBUTION ALLOWED
a. Edit the file /etc/xinetd.d/vsftpd by entering vim /etc/xinetd.d/vsftpd.
disable = yes
b. Exit vi and save the file by entering :wq.
c. Restart the service xinetd by entering rcxinetd restart.
8. Close all open windows.
(End of Exercise)
WB 4-4 Copying all or part of this manual, or distributing such copies, is strictly prohibited. Version 1To report suspected copying, please call 1-800-PIRATES.
Enable Fundamental Network Services
ONLINE VIEW ONLY-NO PRINTING OR DISTRIBUTION ALLOWED
Exercise 4-2 Configure Anonymous PureFTPd Access
In this exercise, you configure anonymous FTP access with the permission to upload files. Make sure that the files cannot be downloaded again without the permission from the system administrator. Test your setup by uploading a file and trying to download it again. As a system administrator, allow downloading of the file, and try again to do so.
Do the following:
1. Open a terminal window, su - to root (password novell), and open the file /etc/pure-ftpd/pure-ftpd.conf in an editor of your choice.
2. Allow anonymous users to upload files to the FTP server by changing the AnonymousCantUpload parameter to no, as in the following:
AnonymousCantUpload no
3. Make sure that files that are owned by the user ftp can’t be downloaded by verifying that AntiWarez is set to yes.
4. When you finish, save the file and quit the editor.
5. Restart the PureFTPd server by entering rcpure-ftpd restart.
6. Change the ownership of the directory /srv/ftp to the user ftp by entering chown ftp /srv/ftp.
7. Change to your home directory by entering cd.
8. Log in by entering ftp localhost; log using the name ftp.
9. Verify that you can upload files as the anonymous ftp user:
a. Change to binary transfer mode by entering bin.
b. Upload the file .gnupg/suse_build_key by entering the following:
lcd .gnupgput suse_build_key
c. Try to download the file by entering:
get suse_build_key
Version 1 Copying all or part of this manual, or distributing such copies, is strictly prohibited. WB 4-5To report suspected copying, please call 1-800-PIRATES.
SUSE Linux Enterprise Server 10 Advanced Administration / Workbook
ONLINE VIEW ONLY-NO PRINTING OR DISTRIBUTION ALLOWED
You should see a message that the file has not yet been approved for download.
d. Exit the FTP session by entering bye.
10. Verify that the file was uploaded by entering cd /srv/ftp; then enter ls -al.
The file is listed.
11. Change ownership of the file and make sure that the ftp server can access the file:
chown geeko /srv/ftp/suse_build_key
chmod 444 /srv/ftp/suse_build_key
12. Enter ftp localhost, login with the user name ftp and again try to download suse_build_key. This should succeed now. Close the ftp client by entering bye.
13. Close the terminal window.
(End of Exercise)
WB 4-6 Copying all or part of this manual, or distributing such copies, is strictly prohibited. Version 1To report suspected copying, please call 1-800-PIRATES.

Enable Fundamental Network Services
ONLINE VIEW ONLY-NO PRINTING OR DISTRIBUTION ALLOWED
Exercise 4-3 Configure ntpd
In this exercise, you configure your server to get time information from server da1. First use date and hwclock to view the current settings, then use ntpdate and compare the new settings. Set up an NTP server on you machine that gets its time from da1.
Do the following:
1. From a terminal window, su - to root (password novell).
2. View the system date and time by entering date.
Record the time:
3. View the hardware clock time by entering hwclock.
4. Manually set the system time with the time from the instructor’s computer by entering the following:
ntpdate 10.0.0.254
5. Check the time adjustment for the system date by entering date.
6. Configure the NTP client for your server with YaST:
a. Start the YaST Control Center and select Network Services > NTP Client.
The NTP Client Configuration dialog appears.
b. Under Automatically Start NTP daemon, select During Boot.
c. Confirm the warning dialog.
d. Choose between local and public NTP servers by selecting Select. Choose Local NTP Server and then Lookup. da1.digitalairlines.com should appear in the list.
e. Accept da1.digitalairlines.com by selecting OK.
f. Save the configuration by selecting Finish.
7. From the terminal window, view the status of the NTP time synchronization by entering ntpq -p.
Version 1 Copying all or part of this manual, or distributing such copies, is strictly prohibited. WB 4-7To report suspected copying, please call 1-800-PIRATES.
SUSE Linux Enterprise Server 10 Advanced Administration / Workbook
ONLINE VIEW ONLY-NO PRINTING OR DISTRIBUTION ALLOWED
8. View the changes made to the file /etc/ntp.conf by enteringless /etc/ntp.conf.
Notice that the NTP server is da1.digitalairlines.com.
9. View the hardware clock time by entering hwclock.
10. Set the hardware clock from the system time by entering the following:
hwclock --systohc
11. Check the new hardware clock time by entering hwclock.
12. Close all open windows.
(End of Exercise)
WB 4-8 Copying all or part of this manual, or distributing such copies, is strictly prohibited. Version 1To report suspected copying, please call 1-800-PIRATES.

Enable Fundamental Network Services
ONLINE VIEW ONLY-NO PRINTING OR DISTRIBUTION ALLOWED
Exercise 4-4 Set Up and Manage Network File System (NFS)
In the first part of this exercise, you create a directory /export/sles10 and use it as mountpoint to import the directory /export/sles10 from da1 using NFS. Create an /etc/fstab entry to mount the directory automatically at boot time.
In the second part, you export the directory /export/data2 to others using NFS.
You can use the command line interface or YaST to do this. The following step-by-step description uses YaST.
Do the following:
■ Part I: Add a Remote File System to the NFS Client
■ Part II: Set Up an NFS Server
Part I: Add a Remote File System to the NFS Client
1. Open a terminal window and su - to root (password novell).
2. Create a mountpoint named /export/sles10 for the remote file system to be mounted on your server by entering the following:
mkdir -p /export/sles10
3. Add a remote file system to the NFS Client Configuration:
a. Start the NFS Client Configuration from the terminal window by entering yast2 nfs &.
b. Mount a remote file system by selecting Add.
A dialog appears for adding the remote file system.
c. Enter the following:
❑ Host name of the NFS Server: 10.0.0.254 (this is the address of the instructor’s server)
❑ Remote filesystem: /export/sles10/
❑ Mountpoint (local): /export/sles10/
❑ Options field: defaults,rsize=8192,wsize=8192,soft
Version 1 Copying all or part of this manual, or distributing such copies, is strictly prohibited. WB 4-9To report suspected copying, please call 1-800-PIRATES.
SUSE Linux Enterprise Server 10 Advanced Administration / Workbook
ONLINE VIEW ONLY-NO PRINTING OR DISTRIBUTION ALLOWED
d. Save the configuration by selecting OK.
You are returned to the Configuration of the NFS client dialog where the remote file system is listed.
4. Save the changes to the system by selecting Finish.
5. From the terminal window, verify that the file system is mounted by entering mount.
You see the remote host mounted on /export/sles10.
6. List the files in the mounted file system by enteringls -l /export/sles10.
7. Check the entry entered by YaST in the file /etc/fstab by entering cat /etc/fstab.
This entry ensures that the file system is mounted each time the server boots.
8. Check for any other exports on the instructor’s SLES 10 server by entering the following:
showmount -e 10.0.0.254
Part II: Set Up an NFS Server
1. Open a terminal window and su - to root (password novell).
2. Start the YaST NFS Server Configuration module by entering yast2 nfs_server &.
A NFS Server Configuration dialog appears.
3. Select the Start button in the NFS server section of the dialog, then continue by selecting Next.
A Directories to Export dialog appears.
4. Add the directory /export/data2 to the list of directories:
a. Select Add Directory.
A dialog appears where you have to enter the directory to export.
WB 4-10 Copying all or part of this manual, or distributing such copies, is strictly prohibited. Version 1To report suspected copying, please call 1-800-PIRATES.
Enable Fundamental Network Services
ONLINE VIEW ONLY-NO PRINTING OR DISTRIBUTION ALLOWED
b. Enter /export/data2/; then select OK.
In case the directory does not exist, a message informs you of the fact and asks if you want to create it. After confirmation, a dialog appears with fields for entering a Host Wild Card and Options.
c. Change the preset values by the following:
❑ Hosts Wild Card: *
❑ Options: rw,no_root_squash,sync (make sure you replace “ro” with “rw”)
d. Continue by selecting OK.
The directory is added to the list.
5. Save the changes to the system by selecting Finish.
6. From the terminal window, verify that the file system was exported by entering the following:
showmount -e localhost
7. View the entry made by YaST to the file /etc/exports by entering cat /etc/exports.
These are the settings you entered in YaST.
8. Work with a partner to access the directory /export/data2 of the partner’s server. Mount your partner’s directory entering the following:
mount -t nfs partner_IP:/export/data2 /mnt/share
9. Verify that your partner’s directory is mounted by entering mount.
10. View your NFS export by
showmount -a localhost
11. View your partner’s NFS export by entering the following URL:
showmount -a partner_server_IP_address
12. When you finish, close all open windows and dialogs.
(End of Exercise)
Version 1 Copying all or part of this manual, or distributing such copies, is strictly prohibited. WB 4-11To report suspected copying, please call 1-800-PIRATES.

SUSE Linux Enterprise Server 10 Advanced Administration / Workbook
ONLINE VIEW ONLY-NO PRINTING OR DISTRIBUTION ALLOWED
WB 4-12 Copying all or part of this manual, or distributing such copies, is strictly prohibited. Version 1To report suspected copying, please call 1-800-PIRATES.
Create Shell Scripts
ONLINE VIEW ONLY-NO PRINTING OR DISTRIBUTION ALLOWED
S E C T I O N 5 Create Shell Scripts
Introduction
The exercises of this section have a different format than the other ones you know from in this course.
Developing shell scripts is mainly a creativ task. Therfore you won’t find detailed step-by-step instructions here. Instead more general goals are defined and you are free to find your own sollution.
If you need help at any point, have a look at section 5 of the course manual. The exercises are based on the same course project (Request Tracker). You can also find all example scripts on the course CD.
Some parts of the exercises are marked as optional. These parts are not covered in the course manual, and should be seen as challange and inspiration for further improvements.
Version 1 Copying all or part of this manual, or distributing such copies, is strictly prohibited. WB 5-1To report suspected copying, please call 1-800-PIRATES.
SUSE Linux Enterprise Server 10 Advanced Administration / Workbook
ONLINE VIEW ONLY-NO PRINTING OR DISTRIBUTION ALLOWED
In this section of the workbook, you can find the following exercises:
■ “Prepare your Environment” on 5-3
In this exercise, you prepare your system for the following exercises in this section.
■ “Create a Basic Shell Script” on 5-4
In this exercise, you create your first shell script.
■ “Use Variables and Command Substitution” on 5-5
In this exercise, you learn how to use variables and command substitution.
■ “Use an if Control Structures” on 5-6
In this exercise, your learn how to use control structures.
■ “Use a while Loop” on 5-7
In this exercise, you practice how to iterate through a file with a while loop.
■ “Use Arithmetic Operators” on 5-8
In this exercise, you learn how to use arithmetic operators.
■ “Read User Input” on 5-9
In this exercise, you learn how to read user input and process the input in your script.
■ “Use Arrays” on 5-10
In this exercise, you learn how to use arrays.
■ “Add more Commands” on 5-11
■ In this exercise, you add more command options to the Request Tracker.
■ “Use Shell Functions” on 5-12
In this exercise, you learn how to use shell functions.
WB 5-2 Copying all or part of this manual, or distributing such copies, is strictly prohibited. Version 1To report suspected copying, please call 1-800-PIRATES.
Create Shell Scripts
ONLINE VIEW ONLY-NO PRINTING OR DISTRIBUTION ALLOWED
Exercise 5-1 Prepare your Environment
In this exercise, you prepare your system for the following exercises in this section. If you have performed the exercises in the previous web application section, some of the following steps can be skipped.
Do the following:
1. Check that Apache is installed and running on your system.
2. Check that the packages php5 and apache2-mod_php5 are installed on your system.
3. Make sure, that the rinetd is not running and blocking port 80. This can be done with:rcrinetd stop and then rcapache2 restart.
4. Make sure that you are logged in as the user geeko. You should work on the same system where the webserver is running.
5. Copy the file form_mailer.php from the course DVD (/exercises/section_5/form_mailer.php) to /srv/www/htdocs.
6. Try if you can open http://localhost/form_mailer.php with a web browser.
7. Enter a few test requests.
8. Open the file /var/spool/mail/geeko with a text editor. The file should exist and contain the requests you have entered through the web interface.
(End of Exercise)
Version 1 Copying all or part of this manual, or distributing such copies, is strictly prohibited. WB 5-3To report suspected copying, please call 1-800-PIRATES.
SUSE Linux Enterprise Server 10 Advanced Administration / Workbook
ONLINE VIEW ONLY-NO PRINTING OR DISTRIBUTION ALLOWED
Exercise 5-2 Create a Basic Shell Script
In this exercise, you create your first shell script.
Do the following:
Open a text editor an create a shell script that prints the content of the file /var/spool/mail/geeko to the terminal. The script should also print a welcome message when it’s started.
Make sure, that the script can be directly executed at the command line.
(End of Exercise)
WB 5-4 Copying all or part of this manual, or distributing such copies, is strictly prohibited. Version 1To report suspected copying, please call 1-800-PIRATES.
Create Shell Scripts
ONLINE VIEW ONLY-NO PRINTING OR DISTRIBUTION ALLOWED
Exercise 5-3 Use Variables and Command Substitution
In this exercise, you learn how to use variables and command substitution.
Do the following:
Enhance the script, so that is only displays the lines from /var/spool/mail/geeko that include a # character. Additionally there should be a note in the start message, about how many open requests are found.
Optional: Modify your script, so that it only displays lines that start with the # character (Not only contain the # character). Hint: This can be done with a regular expression in the grep command.
(End of Exercise)
Version 1 Copying all or part of this manual, or distributing such copies, is strictly prohibited. WB 5-5To report suspected copying, please call 1-800-PIRATES.
SUSE Linux Enterprise Server 10 Advanced Administration / Workbook
ONLINE VIEW ONLY-NO PRINTING OR DISTRIBUTION ALLOWED
Exercise 5-4 Use an if Control Structures
In this exercise, your learn how to use an if control structure.
Do the following:
Let your script display a warning message at startup, when there are more than 10 open requests.
Use a loop to display only the fields Subject, Sender and Category of a request.
(End of Exercise)
WB 5-6 Copying all or part of this manual, or distributing such copies, is strictly prohibited. Version 1To report suspected copying, please call 1-800-PIRATES.
Create Shell Scripts
ONLINE VIEW ONLY-NO PRINTING OR DISTRIBUTION ALLOWED
Exercise 5-5 Use a while Loop
In this exercise, you practice how to iterate through a file with a while loop.
Do the following:
Let the script parse the mailbox file with a while loop. The file should be fed into the loop with input redirection. In the while statement, the command read line should be used to process the mailbox file line by line.
See the manual for details and an example script.
(End of Exercise)
Version 1 Copying all or part of this manual, or distributing such copies, is strictly prohibited. WB 5-7To report suspected copying, please call 1-800-PIRATES.
SUSE Linux Enterprise Server 10 Advanced Administration / Workbook
ONLINE VIEW ONLY-NO PRINTING OR DISTRIBUTION ALLOWED
Exercise 5-6 Use Arithmetic Operators
In this exercise, you learn how to use arithmetic operators.
Do the following:
Modify your script so that every request is displayed with an ongoing number. Initialize a variable with the value 1 and output this variable at the beginning of each request line. In the while loop, us an arithmetic expression to raise the value of the variable by one whith each run of the loop.
(End of Exercise)
WB 5-8 Copying all or part of this manual, or distributing such copies, is strictly prohibited. Version 1To report suspected copying, please call 1-800-PIRATES.
Create Shell Scripts
ONLINE VIEW ONLY-NO PRINTING OR DISTRIBUTION ALLOWED
Exercise 5-7 Read User Input
In this exercise, you learn how to read user input and process the input in your script.
Do the following:
Modify your script in the following way: After the requests have been displayed, the user has to enter a command. If the command is “quit”, the script is terminated. Otherwise the requests are listed again.
(End of Exercise)
Version 1 Copying all or part of this manual, or distributing such copies, is strictly prohibited. WB 5-9To report suspected copying, please call 1-800-PIRATES.

SUSE Linux Enterprise Server 10 Advanced Administration / Workbook
ONLINE VIEW ONLY-NO PRINTING OR DISTRIBUTION ALLOWED
Exercise 5-8 Use Arrays
In this exercise, you learn how to use arrays.
Do the following:
Let your script read the request lines from the mailbox file into an array. Then use the array to display all requests. Additionally a consecutive number should be displayed at the beginning of each request.
(End of Exercise)
WB 5-10 Copying all or part of this manual, or distributing such copies, is strictly prohibited. Version 1To report suspected copying, please call 1-800-PIRATES.
Create Shell Scripts
ONLINE VIEW ONLY-NO PRINTING OR DISTRIBUTION ALLOWED
Exercise 5-9 Add more Commands
In this exercise, you add more command options to the Request Tracker.
Do the following:
Add a command that lets the user view the description of a request and a command which deletes a request. The commands should have the format <command>:<request nr>
You should also let the script output a help text, which describes the command usage.
(End of Exercise)
Version 1 Copying all or part of this manual, or distributing such copies, is strictly prohibited. WB 5-11To report suspected copying, please call 1-800-PIRATES.

SUSE Linux Enterprise Server 10 Advanced Administration / Workbook
ONLINE VIEW ONLY-NO PRINTING OR DISTRIBUTION ALLOWED
Exercise 5-10 Use Shell Functions
In this exercise, you learn how to use shell functions.
Do the following:
1. Review the following shell function:
This function asks the user to enter y or n. Depending on the answer, the function returns 0 or 1. If the answer is wrong, an error message is displayed.
The command echo “$*” is used to print a question, which is passed as a parameter to the function.
# Prompt the user to answer with "yes" or "no.# The question itself is supplied as an argument # when calling the function, for example: # "yesno Do you want to continue?"
yesno (){ while true do echo "$*" echo "Please answer by entering (y)es or (n)o:" read ANSWER case "$ANSWER" in [yY] | [yY][eE][sS] ) return 0 ;; [nN] | [nN][oO] ) return 1 ;; * ) echo "I cannot understand you over here." ;; esac done }
WB 5-12 Copying all or part of this manual, or distributing such copies, is strictly prohibited. Version 1To report suspected copying, please call 1-800-PIRATES.
Create Shell Scripts
ONLINE VIEW ONLY-NO PRINTING OR DISTRIBUTION ALLOWED
2. Integrate the above yesno function in the Request Tracker script, so that a warning is displayed, before a request is deleted. The warning should include the subject and the sender of the request + a question if the user really wants to delete this request.
Use the yesno function to interpret the users answer.
Hint: Use an if structure to interpret the return value of the yesno function.
(End of Exercise)
Version 1 Copying all or part of this manual, or distributing such copies, is strictly prohibited. WB 5-13To report suspected copying, please call 1-800-PIRATES.
SUSE Linux Enterprise Server 10 Advanced Administration / Workbook
ONLINE VIEW ONLY-NO PRINTING OR DISTRIBUTION ALLOWED
WB 5-14 Copying all or part of this manual, or distributing such copies, is strictly prohibited. Version 1To report suspected copying, please call 1-800-PIRATES.
Compile Software from Source
ONLINE VIEW ONLY-NO PRINTING OR DISTRIBUTION ALLOWED
S E C T I O N 6 Compile Software from Source
In this section of the workbook, you can find the following exercises:
■ “Compile a Simple C Program” on 6-2
In this exercise, you compile a simple C program.
■ “Compile Software from a Source Package” on 6-3
In this exercise, you compile software from a source package.
Version 1 Copying all or part of this manual, or distributing such copies, is strictly prohibited. WB 6-1To report suspected copying, please call 1-800-PIRATES.
SUSE Linux Enterprise Server 10 Advanced Administration / Workbook
ONLINE VIEW ONLY-NO PRINTING OR DISTRIBUTION ALLOWED
Exercise 6-1 Compile a Simple C Program
In this exercise, you compile a simple C program by doing the following:
Do the following:
1. Open a terminal window su to the root user.
2. Enter yast2 sw_single.
3. From the Filter menu, select Patterns.
4. Check the pattern C/C++ Compiler and Tools.
5. Select Accept and let YaST install the selected packages.
6. Return to a normal user account by pressing Ctrl-D.
7. Insert the 3073 Course DVD in the DVD/CD-ROM drive.
8. Copy the source code package of the example application to the /tmp directory by entering the following:
cp /media/mount_point/exercises/section_6/my_name.c /tmp
(where mount_point is cdrom, cdrecorder, or dvd, depending on your installed hardware)
9. Change to the directory /tmp/ by entering cd /tmp.
10. Compile the C source file by entering the following:
gcc my_name.c -o my_name
11. After the program compiles, start the program by entering the following:
./my_name
12. Verify that the program works properly by entering a name.
13. Close the terminal window and remove the DVD.
(End of Exercise)
WB 6-2 Copying all or part of this manual, or distributing such copies, is strictly prohibited. Version 1To report suspected copying, please call 1-800-PIRATES.
Compile Software from Source
ONLINE VIEW ONLY-NO PRINTING OR DISTRIBUTION ALLOWED
Exercise 6-2 Compile Software from a Source Package
In this exercise, you compile software from a source package.
The exercise consists of the following parts:
■ Part I: Compile a Source Package
■ Part II: Run the Application
Part I: Compile a Source Package
Do the following:
1. Open a terminal window.
2. Insert the 3073 Course DVD in your DVD/CD-ROM drive.
3. Copy the source code package of the example application to the directory /tmp/ by entering the following (on one line):
cp /media/drive/exercises/section_7/xpenguins-2.2.tar.gz/tmp
4. Change to the directory /tmp by entering cd /tmp.
5. Unpack the source archive by entering the following:
tar xzf xpenguins-2.2.tar.gz
6. Change to the source directory by entering cd xpenguins-2.2/.
7. Start the configure script by entering ./configure.
8. The Script will show an error message, that the library Xpm is not installed. If there is no error message, go on with step 21.
9. Insert the SUSE Linux Enterprise Server 10 installation DVD:
10. Wait till the DVD appears on your Desktop.
Version 1 Copying all or part of this manual, or distributing such copies, is strictly prohibited. WB 6-3To report suspected copying, please call 1-800-PIRATES.
SUSE Linux Enterprise Server 10 Advanced Administration / Workbook
ONLINE VIEW ONLY-NO PRINTING OR DISTRIBUTION ALLOWED
11. In the Terminal window, change into the directory /media/SLES*.
12. Enter the command zcat ARCHIVES.gz | grep xpm.h
13. As you can see in the output, is the header file xpm.h included in the xorg-devel package.
14. su to the root user.
15. Enter yast2 sw_single.
16. From the Filter menu, select Search.
17. Enter xorg-x11-devel in the Search field and select Search.
18. Select the package xorg-x11-devel on the right site.
19. Select Accept and let YaST install the package.
20. Switch back to a normal user by pressing Ctrl-D.
21. Start the configure script by entering ./configure.
22. When the configure script finishes, enter make.
23. When the make command finishes, su to root.
24. Change to the source directory by entering the following:
cd /tmp/xpenguins-2.2/
25. Install the compiled application by entering make install.
26. Close the terminal window.
WB 6-4 Copying all or part of this manual, or distributing such copies, is strictly prohibited. Version 1To report suspected copying, please call 1-800-PIRATES.
Compile Software from Source
ONLINE VIEW ONLY-NO PRINTING OR DISTRIBUTION ALLOWED
Part II: Run the Application
To start the application, do the following:
1. Open a terminal window as normal user.
2. Start the application by entering the following:
/usr/local/bin/xpenguins
3. Stop the program by pressing Ctrl+C (from the terminal window).
Have a lot of fun :-).
4. Close the terminal window.
x You can only see the penguins when no window is maximized.
(End of Exercise)
Version 1 Copying all or part of this manual, or distributing such copies, is strictly prohibited. WB 6-5To report suspected copying, please call 1-800-PIRATES.

SUSE Linux Enterprise Server 10 Advanced Administration / Workbook
ONLINE VIEW ONLY-NO PRINTING OR DISTRIBUTION ALLOWED
WB 6-6 Copying all or part of this manual, or distributing such copies, is strictly prohibited. Version 1To report suspected copying, please call 1-800-PIRATES.
Perform a Health Check and Performance Tuning
ONLINE VIEW ONLY-NO PRINTING OR DISTRIBUTION ALLOWED
S E C T I O N 7 Perform a Health Check and Performance Tuning
In this section of the workbook, you can find the following exercises:
■ “Analyze System Performance” on 7-2
In this exercise, you analyze system performance
■ “Reduce Resource Utilization” on 7-7
In this exercise, you learn how to reduce the resource utilization of a SUSE Linux Enterprise Server 10 system.
■ “Tune an IDE Hard Drive with hdparm” on 7-9
In this exercise, you tune your IDE hard drive.
■ “Use Powertweak” on 7-10
In this exercise, you use Powertweak to adjust the tcp keepalive time.
Version 1 Copying all or part of this manual, or distributing such copies, is strictly prohibited. WB 7-1To report suspected copying, please call 1-800-PIRATES.
SUSE Linux Enterprise Server 10 Advanced Administration / Workbook
ONLINE VIEW ONLY-NO PRINTING OR DISTRIBUTION ALLOWED
Exercise 7-1 Analyze System Performance
In this exercise, you analyze system performance by doing the following:
■ Part I: Analyze Processor Utilization
■ Part II: Analyze Memory Utilization
■ Part III: Analyze Hard Disk Utilization
■ Part IV: Analyze Network Utilization
Part I: Analyze Processor Utilization
Do the following:
1. Make sure, that you have installed the software pattern C/C++ Compiler and Tools as well as the package kernel-source.
If these packages are not installed, install them with the YaST software installer.
2. Open a terminal window.
3. Enter top.
Watch the information about the system load and the process list for a few moments.
4. Open a second terminal window and su to root.
5. Enter the following commands:
cd /usr/src/linuxmake cloneconfig
x If the directory /usr/src/linux does not exist, you need to install the package kernel-source.
WB 7-2 Copying all or part of this manual, or distributing such copies, is strictly prohibited. Version 1To report suspected copying, please call 1-800-PIRATES.
Perform a Health Check and Performance Tuning
ONLINE VIEW ONLY-NO PRINTING OR DISTRIBUTION ALLOWED
6. When the second command finishes, start a Linux kernel compilation by entering make bzImage.
The compilation generates a high load on the system:
7. From the first terminal window, watch the load numbers.
Notice that the load values are constantly rising. The 3 values differ as they display the average of three different periods of time.
8. Wait until the load average of the last minute value has reached 1; then quit the compilation process in the second terminal window by pressing Ctrl+C.
9. In the second terminal window, restore the initial state by entering make clean.
10. From the first terminal window, watch the load values for a few moments.
Notice that the values decrease.
11. End the top program by typing q.
Part II: Analyze Memory Utilization
Do the following:
1. Make sure, that the package sysstat is installed.
2. Reboot your system and add the kernel parameter mem=256m at the boot prompt. This reduces the amount of available main memory, so it’s easier to demonstrate swaping.
x If you have Xen installed, select the regular option at the boot prompt and not the Xen system.
3. In the first terminal window, enter vmstat 1.
4. Watch the vmstat output for a few moments, especially the columns si (swap in) and so (swap out).
5. In the second terminal window, enter make -j 20 bzImage.
Version 1 Copying all or part of this manual, or distributing such copies, is strictly prohibited. WB 7-3To report suspected copying, please call 1-800-PIRATES.
SUSE Linux Enterprise Server 10 Advanced Administration / Workbook
ONLINE VIEW ONLY-NO PRINTING OR DISTRIBUTION ALLOWED
6. In the first terminal window, watch the so and si columns for a few minutes.
7. In the second terminal window, stop the make process by pressing Ctrl+C.
8. In the first terminal window, watch as the swap activity declines.
9. Terminate the command vmstat by pressing Ctrl+C.
10. In the second terminal window, enter make clean.
11. Reboot your system without the mem parameter to make the full installed main memory available again.
Part III: Analyze Hard Disk Utilization
Do the following:
1. Using the YaST package manager, install the package sysstat and the filesystem benchmark bonnie
2. In the first terminal window, enter the following:
iostat -x 2 /dev/hda
If your root partition is on a different device than hda (such as hdc), adjust the command accordingly.
3. Watch the output of iostat for a while, particularly the columns await and svctm.
4. In the second terminal window, enter bonnie -s 1024.
5. Watch the iostat values in the columns await and svctm.
Notice that both values are rising due to high disk utilization caused by the command make.
6. In the second terminal window, stop bonnie by pressing Ctrl+C.
7. Watch how the await and svctm times decrease again.
8. End iostat by pressing Ctrl+C.
9. In the second terminal window, enter make clean.
10. Close both terminal windows.
WB 7-4 Copying all or part of this manual, or distributing such copies, is strictly prohibited. Version 1To report suspected copying, please call 1-800-PIRATES.
Perform a Health Check and Performance Tuning
ONLINE VIEW ONLY-NO PRINTING OR DISTRIBUTION ALLOWED
Part IV: Analyze Network Utilization
Do the following:
1. Make sure that the package kdebase is installed on you system.
2. Open a terminal window and su- to root.
3. Enter ksysguard.
4. From the menu bar, select File > New Worksheet.
5. Enter a title of Network.
6. Select 2 rows and 1 columns.
7. Select OK.
8. On the left side of the KDE System Guard window, browse to Network > Interfaces > eth0.
9. Open Receiver and Transmitter.
10. Drag the Packets sensor from the Receiver and drop it in the upper part of the Network worksheet.
11. For the display mode, select Signal Plotter.
12. Drag the Packets sensor from the Transmitter and drop it in the lower part of the Network worksheet.
13. For the display mode, select Signal Plotter.
14. Watch the network activity for a few moments.
15. Open a terminal window and su to root.
16. Wait until a partner has reached this step of the exercise.
17. Produce some network load with the system of your partner by entering the following:
ping -f partner_ip_address
18. Watch the network load rise in the receiver and the transmitter.
19. Terminate the ping command by pressing Ctrl+C.
Version 1 Copying all or part of this manual, or distributing such copies, is strictly prohibited. WB 7-5To report suspected copying, please call 1-800-PIRATES.
SUSE Linux Enterprise Server 10 Advanced Administration / Workbook
ONLINE VIEW ONLY-NO PRINTING OR DISTRIBUTION ALLOWED
20. Close the terminal window.
21. Watch how the network goes down again.
22. Close the KDE System Guard window.
(End of Exercise)
WB 7-6 Copying all or part of this manual, or distributing such copies, is strictly prohibited. Version 1To report suspected copying, please call 1-800-PIRATES.
Perform a Health Check and Performance Tuning
ONLINE VIEW ONLY-NO PRINTING OR DISTRIBUTION ALLOWED
Exercise 7-2 Reduce Resource Utilization
In this exercise, you learn how to reduce the resource utilization of a SUSE Linux Enterprise Server 10 system.
Do the following:
1. Log out of the KDE desktop environment and reboot your system.
2. When the KDM login appears, change to a text console by pressing Ctrl+Alt+F2.
3. Login as root.
4. Enter free.
Notice the amount of free physical memory.
5. Open the file /etc/inittab with the vi editor:
6. Look for the line id:5:initdefault: and change it to the following:
id:3:initdefault:
7. Save and close the file.
8. Reboot your system by entering reboot.
The system boots to runlevel 3.
9. Log in as root; then enter free.
10. Compare the amount of free physical memory with the number you noted earlier.
Notice that runlevel 3 uses less memory than runlevel 5.
x The success of this depends on the amount of free memory you have available on your hardware.
Version 1 Copying all or part of this manual, or distributing such copies, is strictly prohibited. WB 7-7To report suspected copying, please call 1-800-PIRATES.
SUSE Linux Enterprise Server 10 Advanced Administration / Workbook
ONLINE VIEW ONLY-NO PRINTING OR DISTRIBUTION ALLOWED
11. Switch to runlevel 5 by entering init 5.
12. Log in as geeko with a password of N0v3ll.
13. Edit the line id:3:initdefault: in /etc/inittab to change the default runlevel back to 5.
14. Save the file and close the editor.
(End of Exercise)
WB 7-8 Copying all or part of this manual, or distributing such copies, is strictly prohibited. Version 1To report suspected copying, please call 1-800-PIRATES.
Perform a Health Check and Performance Tuning
ONLINE VIEW ONLY-NO PRINTING OR DISTRIBUTION ALLOWED
Exercise 7-3 Tune an IDE Hard Drive with hdparm
In this exercise, you tune your IDE hard drive. It is assumed that the IDE hard disk is /dev/hda. If your IDE hard disk is connected differently (such as hdc), use the correct device name in the following steps.
Do the following:
1. Open a terminal window and su to root.
2. Make sure that the DMA mode is activated by entering the following command:
hdparm -d 1 /dev/hda
3. Run a performance test by entering the following:
hdparm -t /dev/hda
Notice the data throughput in MB/sec.
4. Disable the DMA mode by entering the following:
hdparm -d 0 /dev/hda
5. Run the performance test again by entering the following:
hdparm -t /dev/hda
Compare the result with the DMA enabled throughput.
6. Re-enable DMA by entering the following:
hdparm -d 1 /dev/hda
7. Close the terminal window.
(End of Exercise)
Version 1 Copying all or part of this manual, or distributing such copies, is strictly prohibited. WB 7-9To report suspected copying, please call 1-800-PIRATES.
SUSE Linux Enterprise Server 10 Advanced Administration / Workbook
ONLINE VIEW ONLY-NO PRINTING OR DISTRIBUTION ALLOWED
Exercise 7-4 Use Powertweak
In this exercise, you use Powertweak to adjust the tcp keepalive time.
1. Open the YaST Controll Center.
2. Select System > Powertweak.
3. (conditional) Let YaST install the powertweak and the powertweak-extra package.
4. On the left side of the powertweak module, browse to Networking > TCP >net/ipv4/tcp_keepalive_time
5. Note the current value of the parameter under this line:
6. Change the value to 1800 and select Finish.
7. Select OK in the next dialog.
8. Close all applications and reboot the system.
9. Login to the Desktop.
10. Open terminal window.
11. Enter cat /proc/sys/net/ipv4/tcp_keepalive_time
12. The value should be the one you have configured with Powertweak and differ from the default that you have noted above.
(End of Exercise)
WB 7-10 Copying all or part of this manual, or distributing such copies, is strictly prohibited. Version 1To report suspected copying, please call 1-800-PIRATES.
Manage Hardware
ONLINE VIEW ONLY-NO PRINTING OR DISTRIBUTION ALLOWED
S E C T I O N 8 Manage Hardware
In this section of the workbook, you can find the following exercises:
■ “Manage the Linux Kernel Modules” on 8-2
In this exercise, you load and unload kernel modules.
■ “Add a device symlink with udev” on 8-4
In this exercise, you will create a udev rule that creates a symlink in /dev when a device in plugged in.
■ Explore Hardware Initialization
In this exercise, you learn how to shut down a device with hwdown and how to start it again manually.
■ “Obtain Hardware Configuration Information” on 8-7
In this exercise, you learn how to obtain hardware configuration information on your computer.
Version 1 Copying all or part of this manual, or distributing such copies, is strictly prohibited. WB 8-1To report suspected copying, please call 1-800-PIRATES.
SUSE Linux Enterprise Server 10 Advanced Administration / Workbook
ONLINE VIEW ONLY-NO PRINTING OR DISTRIBUTION ALLOWED
Exercise 8-1 Manage the Linux Kernel Modules
In this exercise, you load and unload kernel modules.
Do the following:
1. From a terminal window, su to root (su -) with a password of novell.
2. View the currently loaded kernel modules by entering lsmod.
3. Scroll through the modules to see if the joystick module (joydev) is loaded.
The 0 in the Used column indicates that the module is not in use.
4. Remove the joystick module from the kernel memory by entering rmmod joydev.
5. Verify that the joydev kernel module was removed from memory by entering lsmod.
Notice that the module joydev is no longer listed.
6. Load the joystick kernel module by entering modprobe joydev.
7. Verify that the joydev kernel module is loaded in memory by entering lsmod.
8. View the kernel modules configuration by entering the following:
modprobe -c | less
9. Scroll through the configuration information by pressing the Spacebar.
10. When you finish, return to the command line by typing q.
11. Create a list of kernel modules dependencies by enteringdepmod -v | less.
It takes a few moments for the information to be generated.
12. Scroll through the dependency information by pressing the Spacebar.
WB 8-2 Copying all or part of this manual, or distributing such copies, is strictly prohibited. Version 1To report suspected copying, please call 1-800-PIRATES.
Manage Hardware
ONLINE VIEW ONLY-NO PRINTING OR DISTRIBUTION ALLOWED
13. When you finish, return to the command line by typing q.
14. Close the terminal window by entering exit twice.
(End of Exercise)
Version 1 Copying all or part of this manual, or distributing such copies, is strictly prohibited. WB 8-3To report suspected copying, please call 1-800-PIRATES.
SUSE Linux Enterprise Server 10 Advanced Administration / Workbook
ONLINE VIEW ONLY-NO PRINTING OR DISTRIBUTION ALLOWED
Exercise 8-2 Add a device symlink with udev
In this exercise, you create a udev rule, that creates a symlink in /dev when a device in plugged in. To perform this exercise, you need a USB mouse.
Do the following:
1. Open a terminal window and su- to the root user.
2. cd to the /dev directory.
3. Make sure that there is no symlink or device geekomouse in the /dev directory. This can be done with the command: ls geekomouse.
4. Open the file /etc/udev/rules.d/60-persistent-input.rules with a text editor.
5. Identify the two rules, which are introduced with the #by-id links comment.
The rule with the matching key KERNEL==”mouse*” creates symlinks of each mouse device under /dev/input/by-id/
The names of these symlinks are generated from hardware parameters like the serial number of the mouse. This way a persistent and unique device name is created.
6. Duplicate the mouse line to create a new rule.
7. In the new rule, change the value of the SYMLINK key to geekomouse (SYMLINK+=”geekomouse”).
8. Save and close the file.
9. Unplug your USB mouse, wait a few seconds and plug it in again.
10. Check again, if the symlink /dev/geekomouse exists.
11. Unplug the mouse again, and see how the symlink is automatically removed by udev.
(End of Exercise)
WB 8-4 Copying all or part of this manual, or distributing such copies, is strictly prohibited. Version 1To report suspected copying, please call 1-800-PIRATES.

Manage Hardware
ONLINE VIEW ONLY-NO PRINTING OR DISTRIBUTION ALLOWED
Exercise 8-3 Explore Hardware Initialization
In this exercise, you learn how to shutdown a device with hwdown and how to start it again manually. The exercise consists of the following parts:
■ Part I: Stop the Ethernet Adapter with hwdown
■ Part II: Unload the Driver Module
■ Part III: Load the Driver Module with a modalias
Part I: Stop the Ethernet Adapter with hwdown
Do the following:
1. Open a terminal window and su- to the root user.
2. Enter the command ip a. You should see a list with your network interfaces. (At least eth0).
3. Enter the command lspci.
4. Look for a device with the description Ethernet controller and note the PCI ID of this device bellow this step. If you have more than one ethernet adapter, choose the first one
------------------------------------------------------------------------
5. Enter the command: hwdown bus-pci-0000:<network_adapter_pci_id>
6. Enter the command ip a again. The interface of the device which has been shutdown with hwdown should not be visible anymore.
Part II: Unload the Driver Module
1. Change into the directory /etc/sysconfig/hardware/.
2. Open the configuration file of the ethernet adapter with a text editor:hwcfg-bus-pci-0000:<network_adapter_pci_id>
Version 1 Copying all or part of this manual, or distributing such copies, is strictly prohibited. WB 8-5To report suspected copying, please call 1-800-PIRATES.
SUSE Linux Enterprise Server 10 Advanced Administration / Workbook
ONLINE VIEW ONLY-NO PRINTING OR DISTRIBUTION ALLOWED
3. From the MODULE option in the configuration file, note the name of the kernel driver module bellow this step .
------------------------------------------------------------------------
4. Enter the command lsmod | grep <module_name>. As you can see, is the module still loaded.
5. Unload the module with the command rmmod <module_name>
6. Verify with lsmod | grep <module_name>, that the module is not loaded anymore.
Part III: Load the Driver Module with a modalias
1. Change into the directory /sys/bus/pci/devices/.
2. Change into the directory 0000:<network_adapter_pci_id>
3. Enter cat modalias to display the modalias of the ethernet adapter.
4. Enter the command modprobe <modalias>. Use copy and paste from the cat output to enter the modalias.
5. Verfy with lsmod | grep <module_name>, that modprobe has detected and loaded the driver for the network adapter.
6. Enter the command ip a, and verify that the network interface is available again.
7. Reboot your system, to restore all network settings.
(End of Exercise)
WB 8-6 Copying all or part of this manual, or distributing such copies, is strictly prohibited. Version 1To report suspected copying, please call 1-800-PIRATES.
Manage Hardware
ONLINE VIEW ONLY-NO PRINTING OR DISTRIBUTION ALLOWED
Exercise 8-4 Obtain Hardware Configuration Information
In this exercise, you learn how to obtain hardware configuration information about your computer.
Do the following:
1. Open the YaST Control Center; then select Hardware > Hardware Information.
Wait until YaST has scanned your hardware.
2. Check the results of the detection.
3. When you finish, close the Hardware info window by selecting Close.
4. Close the YaST Control Center.
(End of Exercise)
Version 1 Copying all or part of this manual, or distributing such copies, is strictly prohibited. WB 8-7To report suspected copying, please call 1-800-PIRATES.

SUSE Linux Enterprise Server 10 Advanced Administration / Workbook
ONLINE VIEW ONLY-NO PRINTING OR DISTRIBUTION ALLOWED
WB 8-8 Copying all or part of this manual, or distributing such copies, is strictly prohibited. Version 1To report suspected copying, please call 1-800-PIRATES.
Prepare for the Novell CLP 10 Practicum
ONLINE VIEW ONLY-NO PRINTING OR DISTRIBUTION ALLOWED
S E C T I O N 9 Prepare for the Novell CLP 10 Practicum
In this section, there are no exercises but scenarios described in the manual.
Version 1 Copying all or part of this manual, or distributing such copies, is strictly prohibited. WB 9-1To report suspected copying, please call 1-800-PIRATES.

SUSE Linux Enterprise Server 10 Advanced Administration / Workbook
ONLINE VIEW ONLY-NO PRINTING OR DISTRIBUTION ALLOWED
WB 9-2 Copying all or part of this manual, or distributing such copies, is strictly prohibited. Version 1To report suspected copying, please call 1-800-PIRATES.