Style Italiano
15
Articles from Style Italiano Composite onlays 2012-04-25 12:04:29 pmanauta Indirect composite restorations in posterior teeth give us advantages to enhance the quality, durability and supreme aesthetics. An Article by… Jordi Manauta Submited: 23/04/2012 On late 90′s and early in 2000′s there was a frenetic trend on replacing amalgams for “aesthetic” restorations. Now, a decade after we are experiencing how these materials are failing because of wrong techniques.
-
Upload
cristian-grigorescu -
Category
Documents
-
view
237 -
download
1
description
Style Italiano
Transcript of Style Italiano

Articles from Style ItalianoComposite onlays2012-04-25 12:04:29 pmanauta
Indirect composite restorations in posterior teeth give us advantages to enhance thequality, durability and supreme aesthetics.
An Article by…
Jordi Manauta
Submited:
23/04/2012
On late 90′s and early in 2000′s there was a frenetic trend on replacing amalgamsfor “aesthetic” restorations. Now, a decade after we are experiencing how thesematerials are failing because of wrong techniques.
The patient came with two old ceramic inlays which presented marginal leakage,aesthetic failure (probably since day 1) and fractures that compromises the toothintegrity.
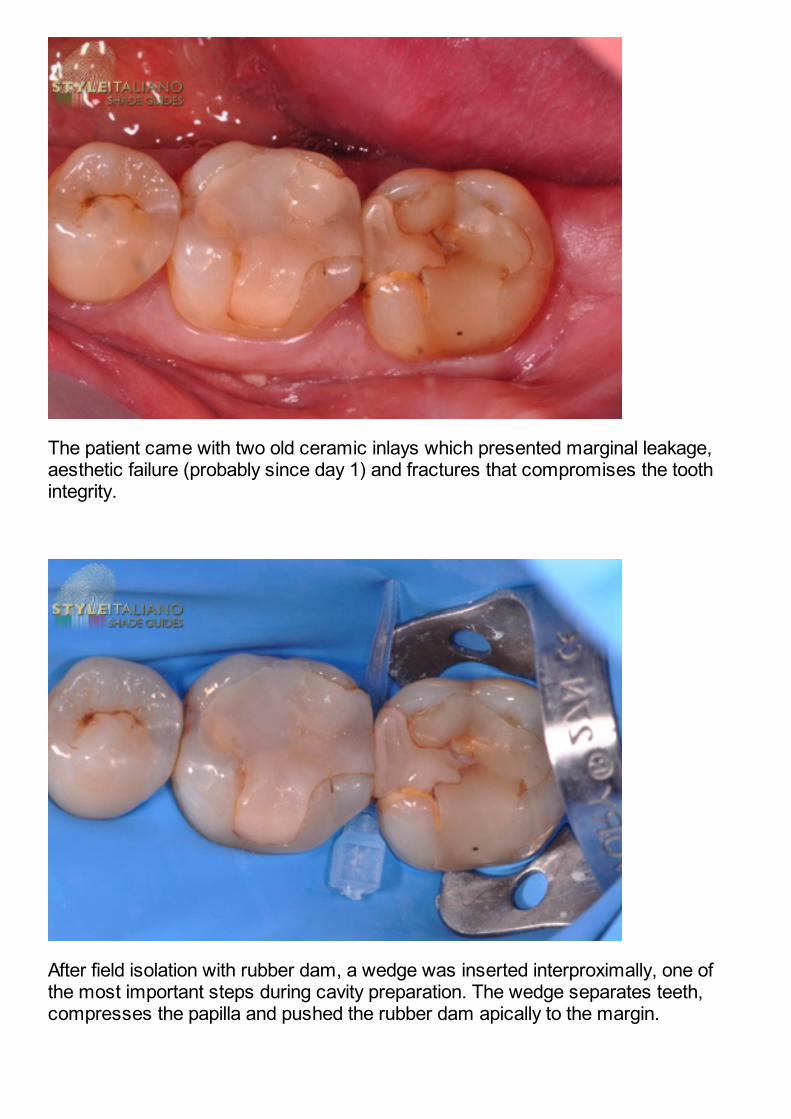
After field isolation with rubber dam, a wedge was inserted interproximally, one ofthe most important steps during cavity preparation. The wedge separates teeth,compresses the papilla and pushed the rubber dam apically to the margin.

Ceramic inlays were removed with diamond burs and generous water. Note how thecavity base is still mixed with composite cement excess which was not perfectlybonded to the old ceramic restoration.
The cavity base was removed with rounded low speed carbide burs and water. Notehow some areas were missed. When the water wets some materials they blendinto the structure and become invisible.

For the final stage of the caries removal, a caries detector was applied for 10seconds and washed. With low speed carbide bur and no water the remainingcaries and old base were removed. Note how the wedge is slightly touched and therubber dam is interfering in the margin area.
Walls that meassure less than 2mm were removed. At his stage a 5% clorhexidineacquous solution is placed in the sound dentin for 5 minutes. A sectional matrix iscarefully placed to ensure a complete visibility of the margin, at the same timeclorhexidine keeps working.

Bonding procedure is carried out and an opaque dentin base is placed for manypurposes. First, to regularize the cavity, second to eliminate retentions, third, to givethe cavity the right thickness, and fourth to make the margin accessible.
After matrix removal, the preparation was finished and polished. Then the rubberdam was removed and an impression was performed.

One week later the case is ready to be cemented. The isolation was performed andthe composite base was sandblasted with 50 microns Aluminum oxide sand. Aftersand blasting chlorhexidine 5% solution was placed for 5 minutes.
The restorations are double checked with the rubber dam to be sure that nointeferences due to the isolation are found.

This image is intended to highlight the importance of composite conditioning. Sandbalsting is the most effectuve surface treatment for bonding to polymerizedcomposite surfaces. After the second trial, the restorations are sand blasted andthoroughly cleaned with alcohol to eliminate sand traces.
Selective enamel etching was done for 15 seconds. Dentin was etched with anespecial self etching primer. And composite base is already treated with the sandmicro retentions.

The same bongind procedures are carried out at the same time in the restorations.Primer is applied to the restorations and to the tooth for one minute and thencompletely removed with air.
Bonding is placed in the restoration and in the tooth. Then thinned carefully with air,and polymerized for a full minute.

The cement is placed in the restoration. A hybrid semi-translucent composite isplaced with the modeling spatula over the whole surface. After this is done, therestoration is heated to 50º in a composite heater, always in dark conditions.
The restoration is carried to the cavity and firmly pushed with the big roundedplugger “condensa”, excesses will start to come out slowly but constantly.

The big excesses are removed immediately with the instrument “fissura”.
Interproximal excess is easily removed due to the “smart” localization of themargins.

A common mistake is to polymerize at this stage. When applying pressure again,composite excess flows again.
After 30 seconds of pressure excess comes out again. When excess is small wecan remove with a brush.

The final excess are removed and the restorations is ready for polymerization.
Important note: Cementation must be done with low light conditions
Initial polymerization is done under mild pressure with the instrument.

Polymerization is carried out under glycerin to polymerize perfectly the oxygeninhibited layer. High power light is applied for 5 minutes.
With a rubber abrasive point, the big excess is trimed. With a goat-hair brush andpolishing paste the final gloss is achieved.

The restorations after polishing show a high-gloss look.
Once removed the rubber dam, occlusion check-up os performed. With a multiblade bur, these interferences are removed. Normally with these kind of burssurface gloss is not damaged.

The case just finished shows a good integration and polishing. Eventual controls willbe done after one month.