Strengthening Existing Reinforced Concrete Beams for Flexure Using Bolted External
79
Structural Engineering Report MUST-98-1 Strengthening Existing Reinforced Concrete Beams for Flexure Using Bolted External Structural Steel Channels by Christopher M. Foley and Evan R. Buckhouse January 1998 Marquette University College of Engineering Department of Civil & Environmental Engineering Research Report
Transcript of Strengthening Existing Reinforced Concrete Beams for Flexure Using Bolted External

Structural Engineering Report MUST-98-1
Strengthening Existing Reinforced ConcreteBeams for Flexure Using Bolted External
Structural Steel Channelsby
Christopher M. Foley and Evan R. Buckhouse
January 1998
Marquette UniversityCollege of EngineeringDepartment of Civil & Environmental EngineeringResearch Report


MUST-97-1: 17
Mult ' { As fy }rebar
d1 &a2
% Tanchor d2 &a2
(13)
As a result, it was decided to design the beams to fail by shearing of the anchor bolts rather than
channel yielding. In this manner, a ‘comfortable’ failure load for the reinforced beams could be set and
the number of anchor bolts designed to achieve this strength. The design of the beam up to this point is
still utilized; but now instead of designing the anchor bolts for the full strength of the retrofitted beam, the
number of anchors is designed for a certain acceptable ultimate load (less than full capacity of the beam
based on channel yielding). This will translate very smoothly into a design procedure where a defined
ultimate load for the retrofitted beam is needed. Thus, the number of anchors can be tailored to match the
design load.
It was (rather arbitrarily) decided to use an applied failure load of twice the capacity of the control
beam, which is P =2(12.4)=24.8 kips. Rounding up, a target load of 25 kips was used to design the
anchors. The first step was to calculate the shear force in the anchors at the desired load of 25 kips.
The shear force in the anchors is the tensile force carried by the external reinforcement, Tanchor, shown in
Figure 3-1. It should be noted that Tanchor is assumed to be developed in the region outside the constant
moment region (central 1/3 portion). This is computed by solving equation (6) for the ultimate
superimposed live load moment that results from the two loads of 25 kips each applied at third points of
the beam. The moment due to the dead load of the beam is added to ML to get the nominal/ultimate
moment applied to the beam.
The next step involves an iterative solution of equation (12) for the tension force required to be
carried by the anchor. An iteration procedure is necessary because the depth of the compression area, a,
is unknown as well as the value of Tanchor. Equation (13) is equation (12) with Tanchor replacing (Asfy)channel,
The value of d2 is now assumed to be at the shear interface of the beam and channel. The depth of the
Whitney rectangular compression block, a, is assumed and equation (13) is then solved for the resulting
value of Tanchor . This value of Tanchor is substituted into equation (11) for a revised value of a,

MUST-97-1: 18
arevised '
{ As fy }rebar
% Tanchor
0.85 fc' b(14)
N 'Tanchor
Vult'(15)
Equation (13) is resolved with arevised for a new value of Tanchor. The above procedure is continued until
arevised converges for a value of Tanchor. This value of Tanchor becomes the shear force that the anchors must
be designed for. Equations (13) and (14) assume the internal reinforcing steel is at ultimate strength even
though for this procedure the design is for shear failure of the anchors with the channel reinforcement not
reaching yield.
The design procedure for the anchor bolts is the same for both Rawl-Stud wedge style expansion
anchors and the Rawl Foil-Fast® epoxy-adhesive anchors. The tables from Rawlplug(1994) are
referenced to obtain shear design values, minimum spacing and edge distance requirements of both types
of anchors. The anchors are designed so the required channel force is achieved within the end five feet of
the beam. These outer thirds of the reinforced beams were chosen as regions for “development” of the
channel forces required. Due to the location of the loads, there is constant shear and linearly decreasing
moment in these regions which makes them ideal for this purpose.
The first step in the anchor design procedure is to determine a size and length of anchor from the
shear load tables based on concrete strength and depth of embedment. The appropriate reductions are
then applied to the ultimate shear capacity based on spacing and edge distance requirements. The result is
a modified shear capacity, Vult!, for the anchor. The tension force at the location of the anchors, Tanchor
calculated from equation (13), divided by the modified shear capacity results in the number of anchors
needed, N,
The anchors are laid out within the end five foot section and the shear capacity must then be modified
again based on the spacing and edge distances that result from the anchor pattern layout. This cycle is
continued until the modified shear capacity converges for the number and layout of anchors used.

MUST-97-1: 19
A larger size bolt may need to be used if the section becomes too congested. The above process is
redone using the new value of ultimate shear capacity for the larger diameter bolt. Once the iterations
converge to a final number of anchors, the design of the externally reinforced beam is complete. The
appropriate design checks must be made for the block shear strength of the steel channel and the yield of
the bolt holes. An example calculation for the design of a beam using the Rawl-Stud wedge style
expansion anchors is included in an example design for an externally reinforced beam in Appendix-A.
The design of the shear reinforcement in the form of stirrups for the 25 k load at third points is
accomplished using the same procedure as was discussed in Section 2.0.
The result of the retrofit design procedure is the specimen given in Figure 3-2. All reinforcement
(rebars) were Grade 60. The stirrups were placed as shown in the figure. Cover to all steel (flexural and
stirrup) was 2 inches. The layout of the anchor bolts for the wedge type expansion anchors and epoxy
adhesive anchors are shown in Figure 3-3. It should be noted that the anchor layout is determined largely
based on edge distance and spacing requirements obtained from RawlPlug (1994). Also, the anchors
were intended to enter the space between the main internal reinforcing steel (3-bars)..
4.0 Construction of Test Specimens
Nine concrete beams were tested to failure for this research. Three were control beams to be used as a
comparison for the remaining six. The remaining beams were externally reinforced with structural steel
channels mounted to the bottom. Three beams used Rawl-Stud wedge style expansion anchors to attach
the channel to the beam. The last three beams to be tested used threaded anchor rods with Rawl Foil-
Fast® epoxy-adhesive to mount the channel. This section discusses the materials used to make the
specimens, as well as the procedures used for externally reinforcing the beams. The experimental testing
method is then described in detail.
Form-work was built of construction grade lumber in the Structural Testing laboratory of the
Haggerty Engineering building. Due to space restrictions and budget considerations, form-work for only

MUST-97-1: 20
three beams was built. As a result, three beams were poured at a time at the loading dock of the
laboratory.
Commercially obtained redi-mix concrete was used for construction of the beams. A basic, non-
air-entrained footing mix of 3000 psi strength was used. The concrete was poured into one end of the
form and then shoveled down the length until the forms were full. A concrete vibrator was used to
eliminate air pockets and insure the concrete flowed into all corners of the form-work and around all
reinforcing bars. Concrete finishing tools were used to smooth the top surface of the beam. The beams
were allowed to cure undisturbed for a period of one week, and then moved into the main lab.
The RC beam specimens were designated as follows. The C, W, and E indicate Control beam,
beam using Wedge style expansion anchors to mount the external channel, and beams using Epoxy-
adhesive anchors to mount the external channel, respectively. The numbers after the C, W, and E
designations correspond to the date of concrete pour for the beam. One, two, and three stand for the first,
second, and third concrete pours, respectively.
Three standard testing cylinders, with 6" diameter and 12" height, were made for each set of beams
to obtain an average 28-day compressive strength for the concrete. The cylinders were cured in the same
environment as the beams. Each cylinder was compression tested using a Forney QC-410-D/TA-0103
digital readout compression loading apparatus. The maximum values for the three cylinders were
averaged together to obtain an average concrete compressive strength for the three sets of beams. The
values of fc! for the three sets of beams are included in Table 4-1.
The internal flexural reinforcement for each beam consisted of 3-#5 bars. The shear reinforcement
for the beams was #3 bars bent in a U-shape and spaced at 7½". The cover to reinforcement was 2", with
plastic rebar chairs used to insure this was met. Grade 60 steel was purchased for both the main and
stirrup steel. Three representative samples were cut from the stock of bars for tension testing to obtain
estimates for the actual yield stress and modulus of elasticity of the steel. The material property results of
the tension testing of the rebar samples are included in Table 4-2.

MUST-97-1: 21
The preliminary design of the beams has been discussed in previous sections. Table 4-3 shows the
actual dimensions of the test beams that were measured at quarter points along the length. The
measurements were averaged for each beam and are included in the table. Grade 36 structural steel
channels were obtained. Shop drawings of the channels were provided to a local fabricator, who
performed the fabrication. The final layout of the channels, as a result of the preliminary design
procedure is shown in Figure 3-3 and the measured material properties for the channels is shown in Table
4-4. Two methods, as discussed previously were used to mount the structural steel channels to the RC
beams. The first method discussed is Rawl-Stud wedge style expansion anchors. Threaded anchor rod
utilizing Foil-Fast® epoxy-adhesive was the second attachment method used. Both are examined in the
following discussion.
Rawl-Stud wedge style expansion anchors made of carbon steel were used as one technique for
mounting the structural steel channels to the bottom of the R.C. beam. The anchors are designed with a
tapered expansion section on the working end. Interlocking wedges at this end are held on by tabs which
grip the anchor firmly to prevent spinning of the anchor during tightening. As the anchor is tightened, the
shaft is pulled upwards causing the tapered expansion section to compress the wedges outwards against
the wall of the anchor hole. Rawlplug(1994), was referenced for the performance data, installation
specifications, and the installation procedures for the anchors used. A ½" by 7" Carbon Steel Rawl-Stud
wedge style expansion anchor was used. The design values were based on an embedment into the
existing concrete beam of 4".
Rawl Foil-Fast® epoxy injection gel with threaded steel anchor rod was the second method used for
mounting the structural steel channels to the bottom of the R.C. beam. The gel is a two component
structural epoxy that comes in a dual-tube cartridge. One tube of the cartridge contains the base resin and
the other a hardener. A special ‘injection gun’ is used to dispense an equal amount of epoxy into a static
mixing nozzle. The mixing nozzle contains a series of mixing elements that progressively divide and
recombine the components, automatically mixing them as they are pumped through. Rawlplug(1994),
was referenced for the performance data, installation specifications, and the installation procedures of the

MUST-97-1: 22
anchors used. A ½" by 6 ½" Grade B7 carbon steel threaded anchor rod was used for this mounting
technique. The design values used were based on an embedment into the concrete of 2". A fast set gel
was used since the laboratory setting consists of ideal conditions.
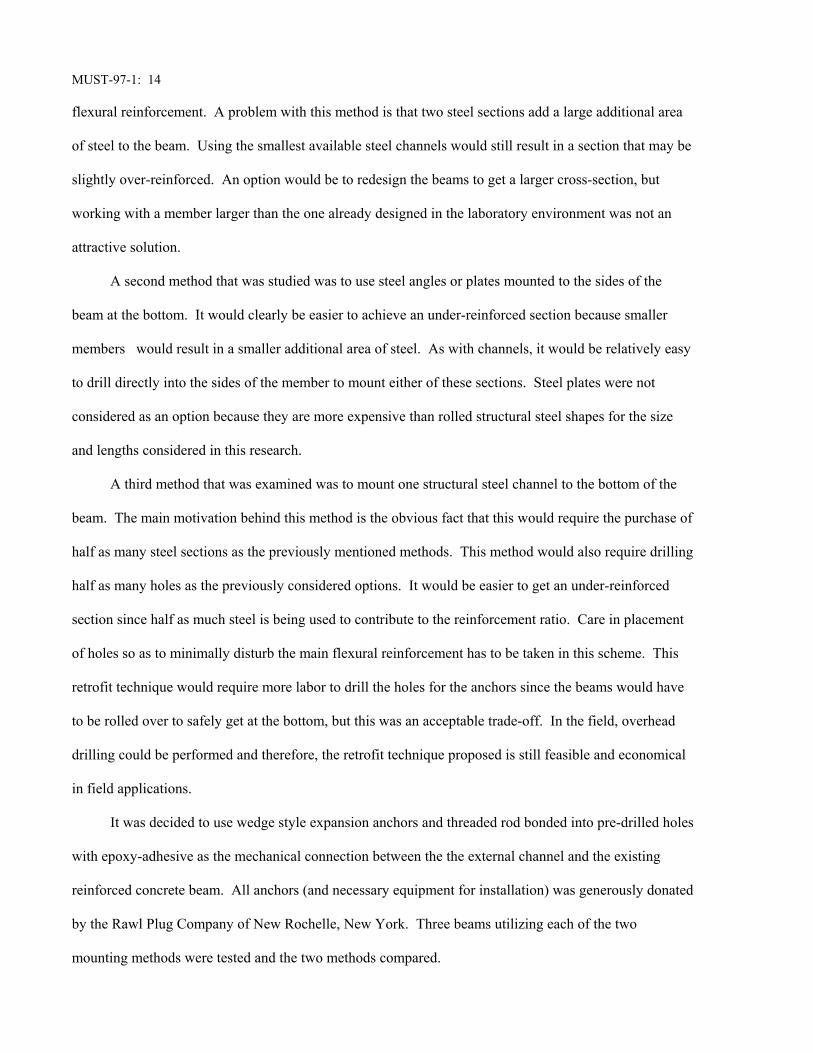
Attaching the structural steel channels to the bottom of the beam created a problem as to the safest
way to drill the holes and mount the channel. It was decided to roll the beams 180E so the bottom was
facing upward. Once the beam was in the correct position, the anchor pattern was laid out using the
channel as a template. The holes were drilled using the appropriate size Rawl SDS-Plus Carbide drill bit
and a Black & Decker rotary hammer drill. A ½" diameter bit was used for the epoxy-adhesive anchor
holes, while a 9/16" diameter bit was used for the holes of the wedge style expansion anchor system, as
recommended in RawlPlug(1994).
While drilling some of the holes, pieces of steel were seen with the concrete dust. It was assumed
this was from the reinforcing steel, whether stirrup or flexural steel is unknown. The fact that this
occurred was noted, but nothing was changed in the analysis due to this decrease in the area of the bar
since it is not known how much material was removed or what bar it came from. This is an acceptable
risk when one blindly drills into a RC beam (a procedure conceivably done in field situations).
The drill had a depth gage mounted to it which could be set to the appropriate depth for the
different anchors. The actual embedment depths of the anchors were measured, and the average
calculated on a per beam basis. The results are summarized in Table 4-3. The wedge-anchors were
designed for an embedment of 4", while the epoxy-adhesive anchors were designed for an embedment of
2". The actual embedment of the wedge-anchors all came close to the required embedment, with those
for beam W2 exceeding 4". The reason that the actual embedment of the epoxy-adhesive anchor was 3½"
larger than the required embedment was because the threaded anchor rod delivered was longer that what
was ordered. The maximum design value for the epoxy-adhesive anchor based on shear only is for a 2"
embedment of the anchor into the concrete. A greater embedment depth may be used, but this has no
effect (increase or decrease) on the shear strength of the connection. Therefore, these anchors were used
with an embedment of 51/2" and no change was made to the design shear value.

MUST-97-1: 23
Installation of the wedge type expansion anchors followed the procedures established in
Rawlplug(1994). The anchors were first set loosely into the holes. The channel was then placed onto the
beam with the anchors directed through the appropriate holes. A 3 lb. hammer was used to drive the
anchors. Pounding was continued until the anchors ‘felt’ like they were all the way into the hole. This
was decided by a solid feeling in the hammer as the anchor was hit indicating it was against the bottom of
the hole. Once all the anchors were driven to their full embedment depth, they were tightened by hand
using a ratchet and socket. The wedge-anchors were first finger tightened and then tightened an
additional 3 to 4 turns of the nut as directed in RawlPlug(1994).
The installation of the epoxy adhesive anchors followed the procedures contained in
Rawlplug(1994). The initial step was to fill the holes approximately half way with epoxy. After a few
holes it was discovered that three and one-half pumps of the injection gun trigger would fill the hole with
enough epoxy. Upon insertion of the threaded rod to the appropriate embedment depth, epoxy would be
forced out of the hole indicating it was full. After insertion of the epoxy, the threaded rod was
immediately pushed into the hole turning it slightly (like one turns a screw) to insure positive distribution
of the epoxy. Once the anchor rods were in place, the channel was placed on the beam. This was not a
good method, because the anchors did not all line up exactly with the holes in the channel. Some
manipulation of the anchors was done to get them through the channel holes. This caused the anchor rods
to be pushed deeper into the holes, which caused excess epoxy to be emitted from the holes. Once all the
anchors were through, there was epoxy between the channel and the beam that could not be removed. It
was not anticipated that this would cause a problem in the testing, but this did cause an unsightly gap
between the channel and the beam. This method was only used for beam E1, with the following revised
procedure used for beams E2 and E3.
The first step of the second procedure was to place the channel onto the beam, lining up the holes.
The channels were then mechanically strapped to the beam eliminating a possible gap between the
channel and the beam that epoxy could seep into. The epoxy was inserted into the holes in the same
manner as used for beam E1. The threaded rod was then pushed into the holes to the appropriate depth,
MUST-97-1: 24
allowing the epoxy to flow out onto the channel where it could be wiped off. The epoxy was then
allowed to cure. This method worked much better. A guide torque was not provided for the epoxy-
anchors, so the nuts were turned as much as could be done by hand with a ratchet and socket. The
tightening of the epoxy-anchors was done after a 24 hour cure period.
5.0 Experimental Program
An experimental program was undertaken to verify the proposed design procedure and to calibrate future
analytical studies. The nine full-scale specimens described in the previous section were instrumented for
deflection, strain, and load measurements. Each specimen was tested to failure in the Marquette
University Structural Testing Laboratory. This section gives an overview of the experimental program
including details of the instrumentation and data acquisition.
5.1 Strain Gage Instrumentation
General purpose strain gages were used to measure strain on the channel and internal reinforcing steel.
The gages had a fully encapsulated grid and exposed copper solder tabs. The preparation and application
of the gages was completed as directed in the instruction bulletins supplied by Measurements Group, Inc.
A bondable terminal was used to insure that tension in the wiring was not applied directly to the strain
gage. A small length of wire was connected between the gage and the bondable terminal. Each main
wire from the data acquisition system was then soldered into the same solder joint on the bondable
terminal as the wire from the gage to complete the circuit. This is illustrated in Figure 5-1.
Before the concrete was poured for the six channel-mounted beams, a strain gage was mounted to
the center reinforcing bar of the group. This was done by grinding and sanding a 4 inch smooth section
over one-half the diameter of the bar at approximately the center. The surface was then cleaned with the
necessary solutions and the gage applied to the bar using epoxy-adhesive. Pressure was applied to the
gage during curing to insure proper bond. After curing 24 hours, wires were soldered to the gage and a

MUST-97-1: 25
protective gel was put over it. This gel covered the entire gage, and once set up, would protect it from the
concrete and the moisture.
The concrete was placed in the formwork taking care not to vibrate in the area of the strain gage.
The wires were allowed to move freely in the concrete, trying not to introduce tension into them which
may pull on the gage. The wires were brought up through the top of the beam to the data acquisition
computer. After the beams were poured, the strain gages were checked with a digital multi-meter to
verify the installed gage resistance. Several of the strain gages mounted to the internal reinforcing steel
were damaged during concrete placement. Ramifications of this will be discussed in later sections.
While the beams were rolled over for mounting of the channels, strain gages were also mounted to
the channels. Two gages were located on the channel flanges (near mid-flange height), while a single
gage was located on the channel web (refer to Figure 5-1). This was done by first grinding and sanding a
4 inch smooth section of the channel. These areas were cleaned with the necessary solutions. Gages were
then mounted to the web of the channel and to each flange at approximately mid-span. Pressure was
applied to the gages during curing to insure proper bond. No special procedure was employed to ensure
the flange gages were located at nearly the same distance from the flange tips.
The mounting of the gages was performed with the intent to determine the distribution of strain
within the external reinforcing channel. A uniform (average) distribution of strain and stress in the
external channel is assumed in the design procedure proposed. Experimental results will shed additional
light on the validity of this assumption. Furthermore, the mounting of strain gages on the internal
reinforcing steel will allow the determination as to whether or not the internal steel has yielded prior to
any yielding of the external channel. This is an additional assumption made in the design procedure
proposed. Lastly, a check of the composite action of the member (fully- or partially-) can be made with
information pertaining to the strain in the internal reinforcing steel and the external channel..

MUST-97-1: 26
.2 Loading Test Frame and Data Acquisition
A loading frame made of structural steel tube-columns and W-section cross-beams was used to load the
beams. The columns were anchored to the floor, with each having a tensile capacity at the floor
connection of 50 kips. A picture of the loading frame is shown in Figure 5-2. As can be seen in the
figure, there are two hydraulic loading rams attached to the W-section cross-member. These rams are
hooked up to an Enerpac hydraulic pump with the ability of producing a load of 50 kips each. Specimens
C1, W1 and E1 were set up with centerline to centerline support distances equal to 15'-0" with loading at
one-third points. The remaining six specimens were set up on a 14'-6" centerline to centerline support
spacing with 4'-6" separating the two loading rams. An explanation of why this was done will be
discussed later in the report.
The Marquette University Department of Civil and Environmental Engineering Daytronic data
acquisition system was used to record loading, beam deflection at the midpoint, strain in internal
reinforcement, and strain in the web and flanges of the external channel. Two 50 kip capacity load cells
were placed under each loading ram, as shown in Figure 5-3. The load cells were hooked up to the
computer to record the amount of applied load.
Two LVDTs, pictured in Figure 5-4, were used to measure vertical displacement of the beam at
mid-span. The LVDTs were placed on two metal tabs that were epoxied to each side of the beam
approximately 5 inches below the top surface. One tab was 3 inches to the left of centerline and the other
was 3 inches to the right of centerline. This was done in case the concrete compression failure occurred
directly at the center of the span. An average of the two deflections was used in the data analysis.
5.3 Testing of Control Beams
Three control beams were constructed as part of the experimental program. Each control beam was white
washed for better detection of cracks. As cracks formed in the concrete member, they were highlighted
with a heavy black marker to make the cracks more visible to the naked eye. This section will highlight

MUST-97-1: 52
(a)
(b)
Figure 5-5: Specimen C1 at Failure Load Condition: (a) Central Region of Flexural Cracking, (b) Zoneof Cracking Near Support(s).

MUST-97-1: 53
Figure 5-6: Zone of Crushing Exhibited in All Control Beam Specimens Located Within the Length ofBeam Bounded by Loading Cylinders.
Figure 5-7: Typical Deflected Shape of Control Beam at Failure Prior to Final Load Removal.

MUST-97-1: 54
Figure 5-8: Typical Wedge Type Anchor Specimen (W1 shown here)in Test Apparatus.
Figure 5-9: Close Up Illustrating Position and Orientation of Wedge Type Expansion AnchorsPrior to Testing for Typical Specimen.

MUST-97-1: 55
Figure 5-10: Permanent Deformation Typical of Wedge Type Expansion Anchor SpecimenSubsequent to Load Removal.
Figure 5-11: Cracking in Central Region of Member Typical of Wedge Type Expansion AnchorSpecimens.
MUST-97-1: 56
Figure 5-12: Cracking at Support where Bolt Failure Occurred Typical of Wedge Type ExpansionAnchor Specimens.
Figure 5-13: Cracking at Opposite Support from Bolt Failure Side Typical of Wedge Type ExpansionAnchor Specimens.

MUST-97-1: 57
Figure 5-14: Reinforcing Channel ‘Delamination’ Typcial of Wedge Type Expansion AnchorSpecimens.
Figure 5-15: Close Up View of Expansion Anchors After Load Removal in Region of Anchor FailureTypical of Wedge Type Expansion Anchor Specimens.

MUST-97-1: 58
Figure 5-16: Wedge Type Expansion Anchor Specimen W2 Displaying Unexpected Shear Failure Near theSupport.
Figure 5-17: Close Up of Shear Failure Near Support Roller for Wedge Type Expansion Anchor SpecimenW2.

MUST-97-1: 59
Figure 5-18: Typical Epoxy Adhesive Specimen in Testing Appratus.
Figure 5-19: Epoxy Adhesive Specimen and Wedge Type Specimen in ‘Rolled Over’ ConfigurationIllustrating the Differences in Bolt Shank Extensions.

MUST-97-1: 60
Figure 5-20: Deformed Shape of Epoxy Adhesive Specimen E2 Typical of all Epoxy Adhesive SpecimensPrior to Load Removal at Failure Condition.
Figure 5-21: Crack Pattern at Support Opposite Bolt Failure Side Typical of Epoxy Adhesive Specimens.

MUST-97-1: 61
Figure 5-22: Cracking Pattern in Central Region of Beam (Between Loading Cylinders) Typical of EpoxyAdhesive Specimens.
Figure 5-23: Cracking Pattern In Region of Bolt Failure Typical of Epoxy Adhesive Specimens.

MUST-97-1: 62
Figure 5-24: Delamination of External Reinforcing Channel Typical of Epoxy Adhesive Specimens.
Figure 5-25: Close Up View of Beam Soffit Showing Failed Bolts Near Support Typical of Epoxy AdhesiveSpecimens.

MUST-97-1: 63
0.0 0.5 1.0 1.5 2.0 2.5 3.0 3.5 4.00
5000
10000
15000
20000
25000
30000
35000
Figure 5-26: Load Deformation Response for Beams Specimens in Group 1.

MUST-97-1: 64
0.0 0.5 1.0 1.5 2.0 2.5 3.0 3.5 4.00
5000
10000
15000
20000
25000
30000
35000
Figure 5-27: Load Deformation Response for Beams Specimens in Group 2.

MUST-97-1: 65
0.0 0.5 1.0 1.5 2.0 2.5 3.0 3.5 4.00
5000
10000
15000
20000
25000
30000
35000
Figure 5-28: Load Deformation Response for Beams Specimens in Group 3.

MUST-97-1: 66
0 200 400 600 800 1000 1200 14000
5000
10000
15000
20000
25000
30000
0 200 400 600 800 1000 1200
0
4000
8000
12000
16000
20000
24000
28000
32000
(a)
(b)
Figure 5-29: Load vs. Microstrain in Wedge type Expansion Anchor Specimens: (a) Specimen W2, (b)Specimen W3.

MUST-97-1: 67
0 100 200 300 400 500 6000
4000
8000
12000
16000
20000
24000
28000
32000
0 100 200 300 400 500 600 7000
5000
10000
15000
20000
25000
30000
35000
(a)
(b)Figure 5-30: Load vs. Microstrain in Epoxy Adhesive Type Expansion Anchor Specimens: (a) Specimen E1,
(b) Specimen E3.

MUST-97-1: 68
0 100 200 300 400 5000
4000
8000
12000
16000
20000
24000
28000
32000
Figure 5-31: Average Load vs. Micro-Strain in External Channel Reinforcement Web as a Function of AnchorType.

MUST-97-1: 69
0.0 0.5 1.0 1.5 2.0 2.5 3.0 3.5 4.00
5000
10000
15000
20000
25000
30000
35000
Figure 6-1: Load Deformation Response for Beam Specimens in Group 1.

MUST-97-1: 70
0.0 0.5 1.0 1.5 2.0 2.5 3.0 3.5 4.00
5000
10000
15000
20000
25000
30000
35000
Figure 6-2: Load Deformation Response for Beam Specimens in Group 2.

MUST-97-1: 71
0.0 0.5 1.0 1.5 2.0 2.5 3.0 3.5 4.00
5000
10000
15000
20000
25000
30000
35000
Figure 6-3: Load Deformation Response for Beam Specimens in Group 3.

MUST-97-1: 72
$1 ' 0.85& 0.05fc'& 4000
1000' 0.85& 0.05 4000& 4000
1000' 0.85
Dbal '0.85 fc' $1
fy
8700087000% fy
'0.85(4000)(0.85)
6000087000
87000% 60000' 0.0285
Dact' Drebar% Dchannel 'As,rebar
bd1
%As,channel
bd2
'3(0.31 in.2 )10'' (15.31'' )
%1.97 in.2
10'' (18.48'' )' 0.0167
0.75Dbal ' 0.75(.0285) ' 0.0214 > Dact ' 0.0167 U ok
Appendix - A: Design Example for Externally Reinforced Beam
This example illustrates the steps necessary for the preliminary design of an externally reinforced
concrete beam used for testing. The design procedure is the same for both types of anchoring systems
used. The concrete and rebar strengths and beam dimensions were assumed, with corrections made in the
final design for the actual values of these variables to get theoretical ultimate strengths. The beams are
the same as the control beams with the addition of a structural steel channel mounted to the bottom.
Data:
b = 10" h = 18" L = 15'-0"
fc! = 4000 psi fy,rebar = 60000 psi fy,stirrup = 60000 psi
cover = 2" d1 = 15.31" (see Figure 3-1) d2 = 18.48" (see Figure 3-1)
As,rebar = 3-#5 bars
Solution:
Part 1
The following is the design procedure to calculate the capacity of the externally reinforced concrete
beams. The first step is to choose a channel section. Try a C5 x 6.7 structural steel channel. To insure an
under-reinforced section, Dact must be less than 0.75Dbal,
Calculate the nominal moment capacity and moment due to superimposed live load,

MUST-97-1: 73
a '
(As fy )rebar
% (As fy )channel
0.85 fc' b
'(0.93 in.2)(60000 psi) % (1.97 in.2)(36000 psi)
0.85(4000 psi)(10'')' 3.73 in.
Mn ' Mult ' (As fy )rebar
d1&a2
% (As fy )channel
d2&a2
'
(0.93 in.2 )(60 ksi ) 15.31''& 3.73''2
12
%
(1.97 in.2 )(36 ksi ) 18.48''& 3.73''2
12' 160.7 k @ft
P '3ML
L'
3(155.4 k @ft )15'
' 31.1 kips
Vc ' 2 fc'bd '2 4000 psi (10'' )(15.31'' )
1000' 19.4 kips
s 'Av fy d
P& Vc
'2(0.11 in.2 )(60 ksi)(15.31'' )
(31.1 k& 19.4 k)' 17.3 in.
Vs' P & Vc ' 31.1&19.4 ' 11.7 kips
4 fc' bd ' 2Vc ' 38.8 kips
The superimposed live load, P, the beam can carry with loads applied at third points is,
The stirrups are designed by first calculating the shear strength of the concrete section,
Since this is less than P, shear reinforcement must be provided. Spacing for #3 stirrups is,
With,
and Vs < , s must be less than,4 fc' bd

MUST-97-1: 74
s 'd2'
15.31''2
' 7.66 in <Av fy
50b'
2(0.11 in.2 )(60000 psi)50(10'')
' 26.4 in. U ok
ML '13
(P)(L) ' 13
(25 kips)(15' ) ' 125.0 kip @ft
Mn ' Mult ' ML% MD
' 125.0 %(0.150 kcf )(10'')(18'')(15' )2
8(144)' 130.3 kip @ft
Tanchor '
Mult& (As fy )rebar
d1&a2
d2&a2
'
12(130.3 k@ft)& (0.93 in.2)(60 ksi) 15.31''& 4''2
18''& 4''2
' 51.3 kips
Thus, a spacing of d/2 controls. Use 7½ in. for a distance of 5 ft. from each support, with the first stirrup
at 3 in. from the end. The center 5 ft. of the beam is not experiencing any shear due to superimposed
loading, but it was decided to put stirrups in this area at 12 in. to have vertical steel in this region to resist
shear from the beam self-weight.
Part 2
In this part, shear failure of the anchors is the controlling mode on which the reinforced strength is based.
It was decided to design the beams to fail by shearing of the bolts at a load corresponding to P = 25 kips.
A concrete strength of 4000 psi and steel yield strength of 60000 psi for reinforcement was assumed for
the preliminary calculations and is used in the following design procedure for the anchor bolts. Note that
the value for d2 is now the distance to the shear interface of the anchors and the beam.
The first step is to calculate the superimposed live load moment due to the point loads using the
equation given below,
The dead weight of the beam is added to this to get the nominal moment capacity of the beam,
Tanchor is computed based on an assumed value of ‘a’ and the assumption that the internal reinforcing steel
is at yield. Try a = 4",
Calculate arevised based on this value of Tanchor using,

MUST-97-1: 75
arevised '
(As fy )rebar
% Tanchor
0.85 fc' b'
(0.93 in.2 )(60 ksi)% 51.3 kips0.85(4 ksi)(10'' )
' 3.15 in.
Tanchor '
Mult& (As fy )rebar
d1&a2
d2&a2
'
12(130.3 k@ft )& (0.93 in.2 )(60 ksi) 15.31''& 3.15''2
18''& 3.15''2
' 48.5 kips
arevised '
(As fy )rebar
% Tanchor
0.85 fc' b'
(0.93 in.2 )(60.0 ksi )% 48.5 kips0.85(4 ksi)(10'')
' 3.07 in.
Calculate a new value of Tanchor and recalculate arevised ,
Continuing the above iterations, the answer converges at Tanchor = 48.3 kips and arevised = 3.06 in..
The anchors will now be designed for a shear of 48.3 kips. Rawlplug (1994), is used to obtain the
design values and spacing requirements for the anchors. A carbon steel Rawl-Stud wedge style expansion
anchor is used. For a ½" diameter anchor, a depth of embedment assumed to be 4 inches, and a concrete
strength of 4000 psi; an ultimate (pure) shear load capacity of 7535 lbs. is obtained from Table A-1
below; taken from the Rawlplug (1994).
Table A-1: Ultimate Shear Capacity for Rawl-Stud Anchors
Anchor
Size (in.)
Embedment
Depth (in.)
Guide
Torque (ft.-lbs)
2000 psi
Concrete (lbs)
4000 psi
Concrete (lbs)
6000 psi
Concrete (lbs)
1/2 2 - 1/4 60 7025 7150 7150
1/2 3 60 7200 7190 7295
1/2 4 60 7280 7535 7710
1/2 6 60 7280 7535 7710
Assuming that spacing and edge distance requirements are adequate, the number of anchors needed, N is,

MUST-97-1: 76
N 'Tanchor
Vult
'48.3 kips7.535 kips
' 6.4 anchors
Figure A-1:: Preliminary Layout for Wedge Style Expansion Anchors
Vult' ' Re Vult ' 0.75(7535 lbs.) ' 5651 lbs.
The anchors are placed within the end five feet of the beam, or in the constant shear zone. One should
round up to 7 or 8, but for a first iteration try 6 anchors within the end 5 feet of the beam on each side. A
preliminary anchor layout gives the following,
To obtain the maximum load in shear, a spacing of 10 anchor diameters (5") between anchors in all
directions should be used. An examination of the layout in Figure A-1 shows that all anchor spacing,
including the diagonal spacing between anchors, is greater than 10d. Therefore no reduction is needed for
spacing requirements.
An edge distance, E, of 12 anchor diameters (6") should also be used to obtain the maximum shear
load. The current layout includes an edge distance of 4¼" (8.5d), which is greater than the minimum
allowed of 5d. The load reduction factor, Re, for E = 8.5d is interpolated from the following table taken
from Rawlplug (1994).
Table A-2: Edge Distance Reductions for 1/2” diam. Rawl-Stud Anchors (shear only)
Edge Distance /
Reduction Factor
Edge Distances - shear only
12d 11d 10d 9d 8d 7d 6d 5d
Edge Distance 6 5 - 1/2 5 4 - 1/2 4 3 - 1/2 3 2 - 1/2
Re 1.00 0.93 0.86 0.79 0.71 0.64 0.57 0.50
A reduction of 0.75 is applied to the ultimate shear load capacity of 7535 lbs. to get,
The number of anchors now needed is,

MUST-97-1: 77
N 'Tanchor
Vult''
48.3 kips5.651 kips
' 8.5 anchors
Figure A-2: Final Layout for Wedge Style Expansion Anchors
Round up to ten anchors and try the layout shown in Figure A-2.
The spacing requirements of 10d is still met in all directions. The edge distance is still 4¼" which gives a
reduction of 0.75, the same reduction that was used the previous calculation. The answer has converged,
therefore use the layout shown in Figure A-2. The final step in the design is to check the channel strength
for block shear, bolt bearing, and yield of the anchor holes. The channel is okay for all of these checks.