Starting out, with a view ahead - au.sagepub.com 2 Starting out, with a view ahead Something in your...
23
24 2 Starting out, with a view ahead Something in your social or working environment excites interest, and investi- gation begins. You might start in the library or by observing ‘the field’, perhaps with some exploratory discussions with relevant people or with reflection on personal experience. Right from the start, you will find tools in NVivo that will support your work as you explore possibilities, refine questions, and think through project design. The tools you use and the habits you develop early will become integral to your work throughout your project. Analysis is as much about reflecting on data and making connections across data as it is about categorizing and manipulat- ing data in codes. You will find, therefore, that journals, memos and links will become essential to the quality of your analysis. In this chapter: x Start to frame your research project. x Start working in the software: create a project with a model, memo, and source document. x Create links in the database using annotations, see also links and hyperlinks. x Discover ways in which these tools might be extended to build a web of data within and across your project items. Exploring the research terrain A research project begins well before you gather data. Thought and planning at this stage will do much to ensure a smoother process of data collection and a deeper and more meaningful interpretation of those data. 02-Bazeley & Jackson_Ch-02_4603.indd 24 27/03/2013 10:05:29 AM
Transcript of Starting out, with a view ahead - au.sagepub.com 2 Starting out, with a view ahead Something in your...
24
2
Starting out, with a view ahead
Something in your social or working environment excites interest, and investi-gation begins. You might start in the library or by observing ‘the field’, perhaps with some exploratory discussions with relevant people or with reflection on personal experience. Right from the start, you will find tools in NVivo that will support your work as you explore possibilities, refine questions, and think through project design.
The tools you use and the habits you develop early will become integral to your work throughout your project. Analysis is as much about reflecting on data and making connections across data as it is about categorizing and manipulat-ing data in codes. You will find, therefore, that journals, memos and links will become essential to the quality of your analysis.
In this chapter:
Start to frame your research project. Start working in the software: create a project with a model, memo, and source
document. Create links in the database using annotations, see also links and hyperlinks. Discover ways in which these tools might be extended to build a web of data
within and across your project items.
Exploring the research terrain
A research project begins well before you gather data. Thought and planning at this stage will do much to ensure a smoother process of data collection and a deeper and more meaningful interpretation of those data.
02-Bazeley & Jackson_Ch-02_4603.indd 24 27/03/2013 10:05:29 AM
STARTING OUT 25
Develop questions
Qualitative research often begins with a vaguely defined question or goal. It may well begin ‘with a bit of interesting “data”’ (Seale, Gobo, Gubrium, & Silverman, 2004: 9). Visualization techniques (concept maps) and thought experiments can help to clarify what might be useful questions (Bazeley, 2013; Maxwell, 2013). Your initial explorations serve to refine your question, so more deliberate (‘purposive’) data gathering can occur. These explorations become part of your data, and can be managed within NVivo.
Record these starting questions as you set out. In NVivo, you create a research journal to record them. They will help you to maintain focus as you work, and then later to evaluate the direction you are taking. Keep notes about any random (or less random) thoughts you have around those questions as you read, discuss, observe, or simply reflect on issues as they arise, and date these. Keeping a record will allow you to keep track of your ideas and to trace the path those ideas have taken from initial, hesitant conceptualization to final, confident realization.
Identify assumptions
Previous knowledge is a prerequisite to gaining understanding:
Qualitative researchers who investigate a different form of social life always bring with them their own lenses and conceptual networks. They cannot drop them, for in this case they would not be able to perceive, observe and describe meaningful events any longer – confronted with chaotic, meaningless and fragmented phenomena they would have to give up their scientific endeavour. (Kelle, 1997: paragraph 4.2)
But previous knowledge brings with it assumptions about what you might find. Rather than deny their existence, you should recognize them, record them, and become aware of how they might be influencing the way you are thinking about your data – only then can you effectively control (or at least, assess) that impact. Maxwell (2013) recommends creating a ‘researcher identity memo’ to explore personal goals, recognize assumptions and draw on experiential knowl-edge. So, add to your research notes, or create a conceptual model that captures what you are expecting to see.
Explore existing data
Data relevant to your project often exist before you make or locate new data. Consider the possibilities of:
02-Bazeley & Jackson_Ch-02_4603.indd 25 27/03/2013 10:05:29 AM
QUALITATIVE DATA ANALYSIS WITH NVIVO26
Starting with observations of yourself and of others – field notes or diary records will play a significant early role. Adapt the instructions for creating a project journal (below) to create documents in which to record your observations.Starting with data already in the public sphere such as newspapers, novels, radio, internet, or archived data (Silverman, 2010). These can provide valuable learning expe-riences as you master both software and analysis strategies.Starting with literature. The belief that an inductive approach to inquiry requires researchers to come to their data without having been influenced by prior reading of the literature in their field and without bringing any theoretical concepts to the research is generally no longer seen as feasible, nor is it broadly supported. Strauss and Corbin (1998: 47) declared: ‘Insights do not happen haphazardly; rather they happen to prepared minds during interplay with the data.’ In many fields, qualitative researchers are expected to gain a firm grasp of the relevant lit-erature, and for university-based research, prior understanding of the literature on the topic is an essential element of a funding application or doctoral research proposal.
Explore the terrain with software
Your project begins from the time you start asking questions – from the thought that X might be something interesting to investigate. This is also a good time to start using software!
Early use of software ensures you don’t lose precious early thoughts. Indeed, sketch-ing ideas and writing even rough notes will help to clarify thinking as you plan your project.Starting early, if you are still learning software, will give you a gentle introduction to it and a chance to gradually develop your skills as your project builds up. This is better than desperately trying to cope with learning technical skills in a rush as you become overwhelmed with data and the deadline for completion is looming.Starting with software early acts as a reminder that data collection and data analysis are not separate processes in qualitative approaches to research. So start now!
Several of NVivo’s tools are useful to most researchers at this beginning point.
Create a model to identify and show what you already know, to point to what you still need to know, and to assist in identifying steps on the pathway to finding out.
Create a new blank document as a project journal within NVivo, to become an ongoing record of questions, ideas, and reflections on the project.
Import some literature or other existing data and annotate it or reflect on it in a journal or memo.
02-Bazeley & Jackson_Ch-02_4603.indd 26 27/03/2013 10:05:29 AM
STARTING OUT 27
Setting up a project
First you need to have a project created in the software!1
Creating a project in NVivo
From the base of the Welcome window that appears when you open the program, select the New Project button.
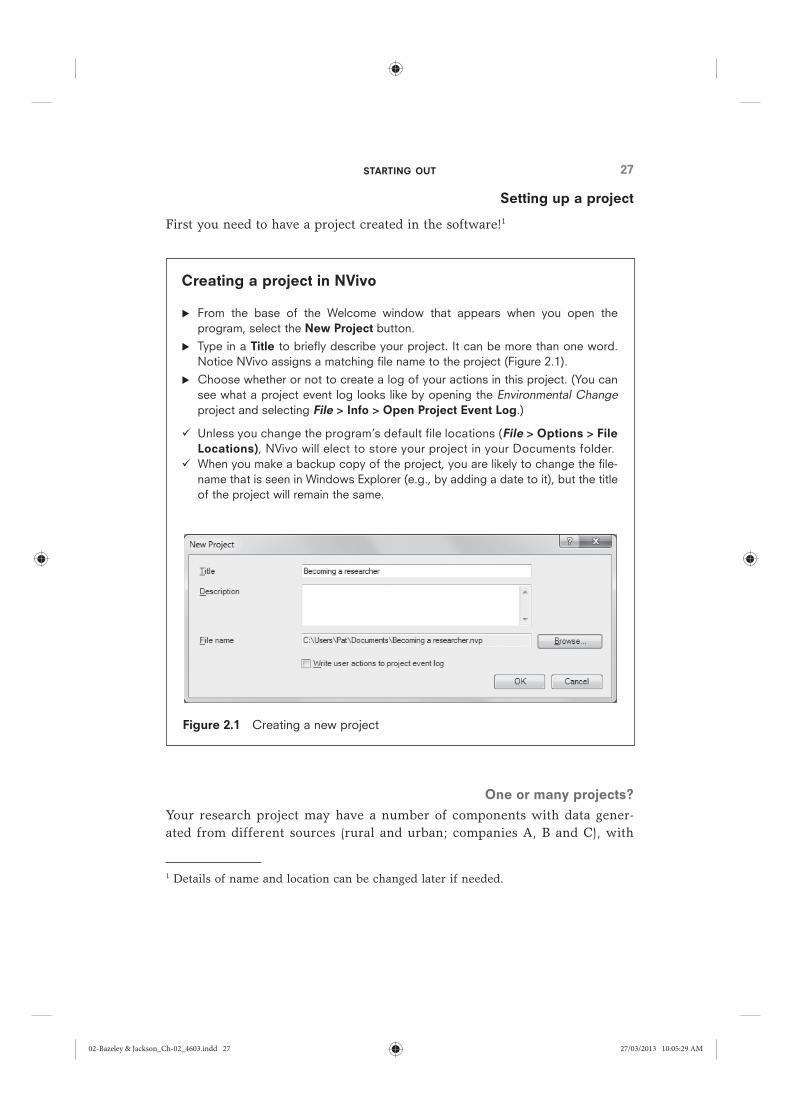
Type in a Title to briefly describe your project. It can be more than one word. Notice NVivo assigns a matching file name to the project (Figure 2.1).
Choose whether or not to create a log of your actions in this project. (You can see what a project event log looks like by opening the Environmental Change project and selecting File > Info > Open Project Event Log.)
Unless you change the program’s default file locations (File > Options > File Locations), NVivo will elect to store your project in your Documents folder.
When you make a backup copy of the project, you are likely to change the file-name that is seen in Windows Explorer (e.g., by adding a date to it), but the title of the project will remain the same.
One or many projects?
Your research project may have a number of components with data gener-ated from different sources (rural and urban; companies A, B and C), with
1 Details of name and location can be changed later if needed.
Figure 2.1 Creating a new project
02-Bazeley & Jackson_Ch-02_4603.indd 27 27/03/2013 10:05:29 AM
QUALITATIVE DATA ANALYSIS WITH NVIVO28
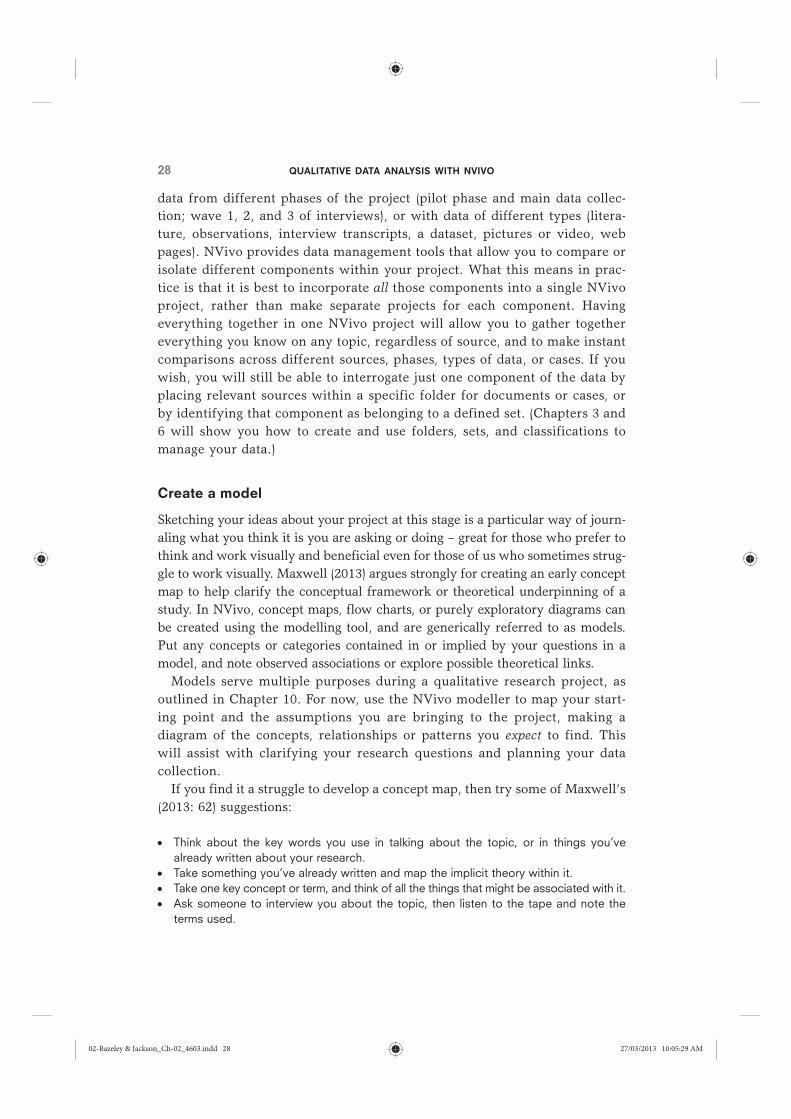
data from different phases of the project (pilot phase and main data collec-tion; wave 1, 2, and 3 of interviews), or with data of different types (litera-ture, observations, interview transcripts, a dataset, pictures or video, web pages). NVivo provides data management tools that allow you to compare or isolate different components within your project. What this means in prac-tice is that it is best to incorporate all those components into a single NVivo project, rather than make separate projects for each component. Having everything together in one NVivo project will allow you to gather together everything you know on any topic, regardless of source, and to make instant comparisons across different sources, phases, types of data, or cases. If you wish, you will still be able to interrogate just one component of the data by placing relevant sources within a specific folder for documents or cases, or by identifying that component as belonging to a defined set. (Chapters 3 and 6 will show you how to create and use folders, sets, and classifications to manage your data.)
Create a model
Sketching your ideas about your project at this stage is a particular way of journ-aling what you think it is you are asking or doing – great for those who prefer to think and work visually and beneficial even for those of us who sometimes strug-gle to work visually. Maxwell (2013) argues strongly for creating an early concept map to help clarify the conceptual framework or theoretical underpinning of a study. In NVivo, concept maps, flow charts, or purely exploratory diagrams can be created using the modelling tool, and are generically referred to as models. Put any concepts or categories contained in or implied by your questions in a model, and note observed associations or explore possible theoretical links.
Models serve multiple purposes during a qualitative research project, as outlined in Chapter 10. For now, use the NVivo modeller to map your start-ing point and the assumptions you are bringing to the project, making a diagram of the concepts, relationships or patterns you expect to find. This will assist with clarifying your research questions and planning your data collection.
If you find it a struggle to develop a concept map, then try some of Maxwell’s (2013: 62) suggestions:
Think about the key words you use in talking about the topic, or in things you’ve already written about your research.Take something you’ve already written and map the implicit theory within it.Take one key concept or term, and think of all the things that might be associated with it.Ask someone to interview you about the topic, then listen to the tape and note the terms used.
02-Bazeley & Jackson_Ch-02_4603.indd 28 27/03/2013 10:05:29 AM
STARTING OUT 29
Creating a simple model
In Navigation View, select Models.
Right-click in the empty space available within the List View > New Model. Provide a Name for the new model > OK. An area for working will be created in Detail View.
To create more working space, in the View ribbon, Window group > uncheck Docked and the Detail View will become a separate window which can be enlarged to fill the screen.
If you want more space, close the Model Groups pane: Model ribbon, Display group > uncheck Model Groups.
In the Model ribbon, click on a Shape to add it to the model. Double-click on the shape to name it > OK.
Move the shapes to where you want them, by dragging them to another location in the grid. Multiple selections can be moved at the same time so their spatial relationships are preserved. Items can be resized, or the shape can be extended in one or other direction by selecting the shape in the model and selecting and dragging the dots on the perimeter.
Modify the font, colour and/or line thickness of a selected shape or line in the Home ribbon, Format group.
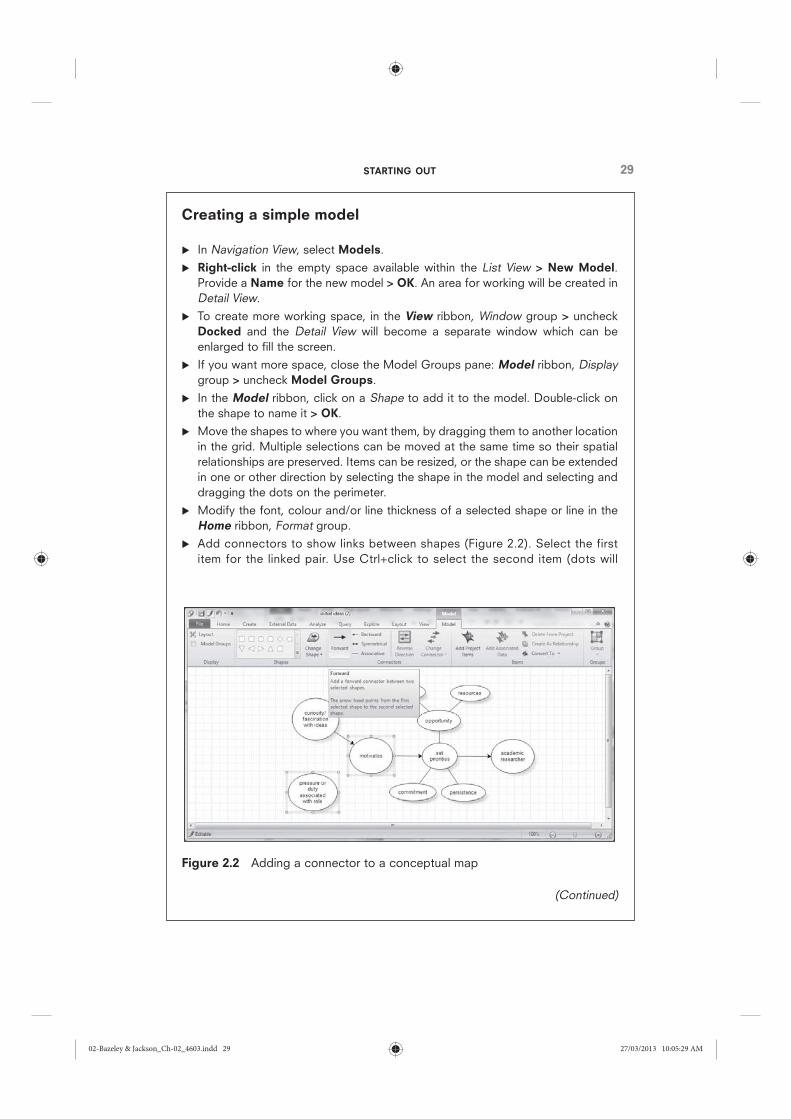
Add connectors to show links between shapes (Figure 2.2). Select the first item for the linked pair. Use Ctrl+click to select the second item (dots will
Figure 2.2 Adding a connector to a conceptual map
(Continued)
02-Bazeley & Jackson_Ch-02_4603.indd 29 27/03/2013 10:05:29 AM
QUALITATIVE DATA ANALYSIS WITH NVIVO30
be visible around the perimeter of both shapes). In the Model ribbon, click on the type of connector that best describes the relationship between the two items. If you create a one-way arrow that is pointing the wrong way, select it and click on Model ribbon, Connectors group > Reverse Direction to fix it.
To archive a copy of the model for your records while you preserve a dynamic copy to keep working on, Right-click > Create As Static Model. Use the same name, but add a date to the end.
! If you return to your dynamic model to add to or change it, you will need to click on Click to edit at the top of the grid to make those changes.
Record in your NVivo journal any insights gained as you were devising the model, such as questions prompted by doing it, or strategies you might need to employ for data-making or analysis. You could find it alerts you to the need to include particular people in your sample, or to explore a broader context. You might also find it useful, as you proceed, to create nodes to reflect the concepts you identified in the process of creating your model (Right-click on a named shape > Convert to > Convert to New Project Item). Later you can review the model to see how far your thinking has moved in response to gathering and working with data.
Create a journal
Qualitative researchers typically keep a journal to document how they have moved from initial forays in their project to arrival at their conclusions; hence some refer to the journal as an audit trail for the project. Lyn Richards (2009) compares the journaling process to keeping a ship’s log with its careful account of a journey, and provides detailed suggestions about what might be recorded there. Without such a record, it will be difficult to keep track of when and how insights were gained and ideas developed, and it may be dif-ficult to pull together the evidence you need to support your conclusions. Without it, precious, fleeting ideas will become forgotten as the data marches in, the next task is upon you, or the complexity of concepts begins to over-whelm you. Unlike the ship’s log, however, the journal can be a private document: you might also record your frustrations and your joys as you work through your project. Perhaps the best advice of all, as you focus on ideas and your responses to them (rather than dry description), is to enjoy the journal-ing task – write freely without worrying about formality of style or ‘correct-ness’ of thoughts. Writing ‘often provides sharp, sunlit moments of clarity or insight – little conceptual epiphanies’ (Miles & Huberman, 1994: 74).
(Continued)
02-Bazeley & Jackson_Ch-02_4603.indd 30 27/03/2013 10:05:29 AM
STARTING OUT 31
In NVivo a journal is simply a document, and it will always be available for modification as you are working in the project. In addition, you will be able to establish links (‘see also’ links) from your written ideas to specific data or other evidence which prompted or supports those thoughts. Addi-tionally, you will be able to code the journal as you write it, making it easy to retrieve the ideas you generate on any topic – and this is something you can do with any other memo or document you create within your project. No more coloured tags hanging off the sides of pages to help you find those insightful ideas!
Use NVivo’s date and time stamp (Ctrl+Shift+T) on journal entries to help with the auditing process.
Creating a journal
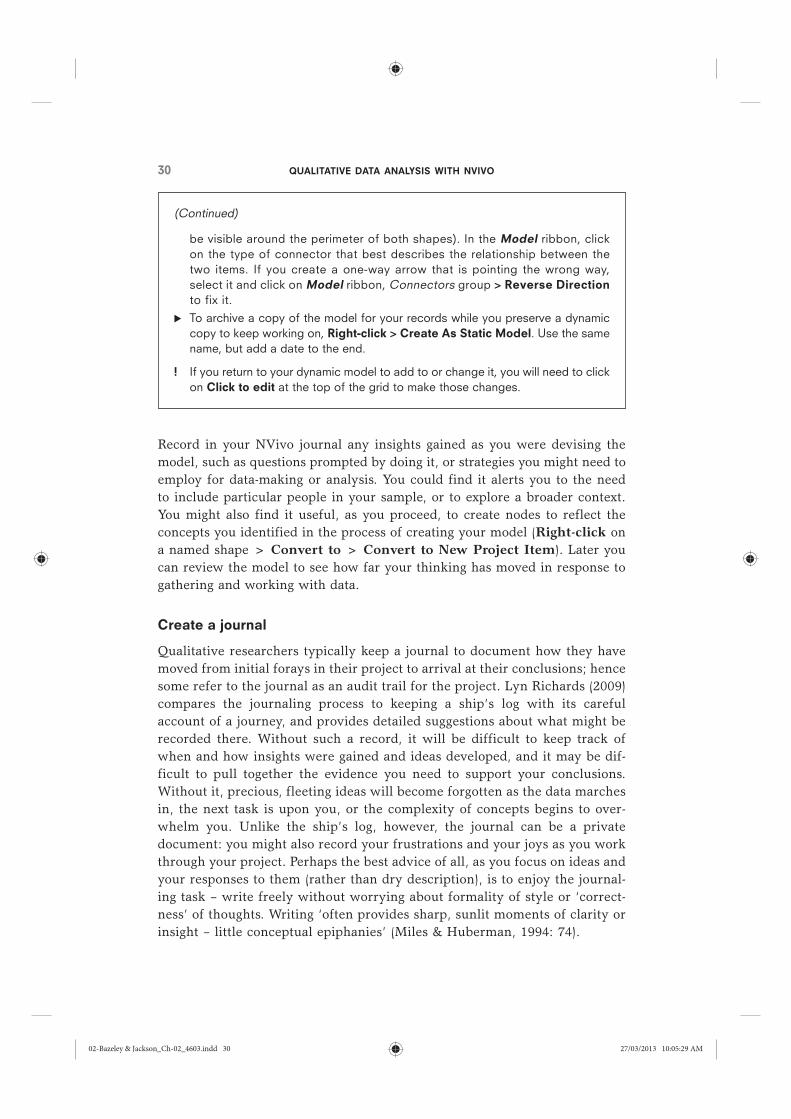
The journal is a working document in the program as a kind of ‘scratch pad’ for ideas and thoughts. Because it stores reflections rather than observed or recorded data, you will create it within the Memos folder.
Open Navigation View > Sources > Memos. In List View (in the white space), Right-click > New Memo (Figure 2.3).
Name the memo, provide a Description and Colour if you wish (both of which can be changed later), and click OK. The name of the memo will now be visible in List View and a new blank document will open in Detail View.
If you place an underscore at the beginning of a document name, for example _Journal, then it will always appear at the top of any alphabetically sorted list.
(Continued)
Figure 2.3 Creating a memo document to use as a journal
02-Bazeley & Jackson_Ch-02_4603.indd 31 27/03/2013 10:05:29 AM
QUALITATIVE DATA ANALYSIS WITH NVIVO32
This is especially useful for facilitating access to something like a project journal to which you will frequently return.
If you have an existing electronic journal, you can import that, rather than creat-ing a new one. In the empty space available in List View, Right-click > Import Memos > Browse to select the memo for importing.
Use colours to group items visually, for example, to quickly identify the journal(s) you create about the project as a whole versus your memos about specific sources or nodes. Because there are only seven to choose from, you will not be able to add a different colour to every different item.
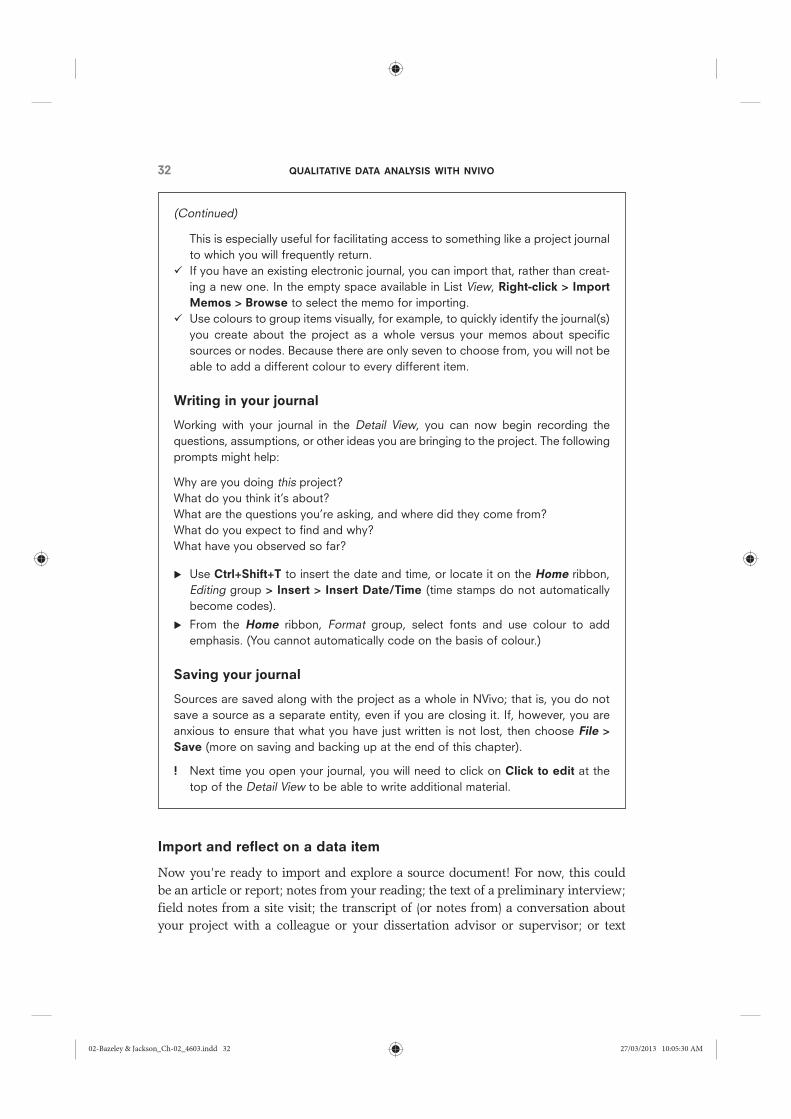
Writing in your journal
Working with your journal in the Detail View, you can now begin recording the questions, assumptions, or other ideas you are bringing to the project. The following prompts might help:
Why are you doing this project?What do you think it’s about?What are the questions you’re asking, and where did they come from?What do you expect to find and why?What have you observed so far?
Use Ctrl+Shift+T to insert the date and time, or locate it on the Home ribbon, Editing group > Insert > Insert Date/Time (time stamps do not automatically become codes).
From the Home ribbon, Format group, select fonts and use colour to add emphasis. (You cannot automatically code on the basis of colour.)
Saving your journal
Sources are saved along with the project as a whole in NVivo; that is, you do not save a source as a separate entity, even if you are closing it. If, however, you are anxious to ensure that what you have just written is not lost, then choose File > Save (more on saving and backing up at the end of this chapter).
! Next time you open your journal, you will need to click on Click to edit at the top of the Detail View to be able to write additional material.
Import and reflect on a data item
Now you’re ready to import and explore a source document! For now, this could be an article or report; notes from your reading; the text of a preliminary interview; field notes from a site visit; the transcript of (or notes from) a conversation about your project with a colleague or your dissertation advisor or supervisor; or text
(Continued)
02-Bazeley & Jackson_Ch-02_4603.indd 32 27/03/2013 10:05:30 AM
STARTING OUT 33
from a web page.2 In Chapter 3 we will explain in more detail the range of source types you can import, and things to be aware of when preparing and importing data for use in NVivo. For now, simply importing a text-based source of some sort will suffice. Text file types that can be imported include *.doc and *.docx (Word files), *.txt (text files), *.rtf (rich text files), and *.pdf (portable data format files).
When you import a source into NVivo, the program makes a copy of that source into its database, leaving the original where it was. Changes you make to the source in NVivo will not be reflected in the original copy, so it remains in the original location as a secure backup.
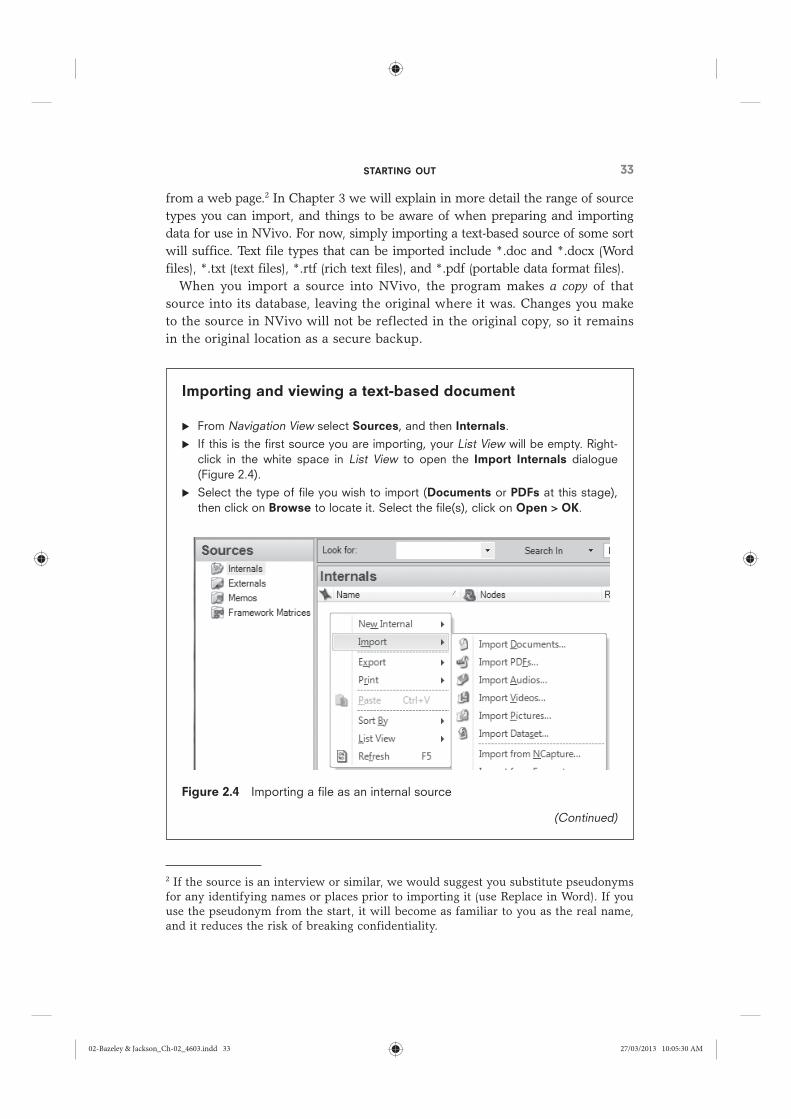
Importing and viewing a text-based document
From Navigation View select Sources, and then Internals.
If this is the first source you are importing, your List View will be empty. Right-click in the white space in List View to open the Import Internals dialogue (Figure 2.4).
Select the type of file you wish to import (Documents or PDFs at this stage), then click on Browse to locate it. Select the file(s), click on Open > OK.
2 If the source is an interview or similar, we would suggest you substitute pseudonyms for any identifying names or places prior to importing it (use Replace in Word). If you use the pseudonym from the start, it will become as familiar to you as the real name, and it reduces the risk of breaking confidentiality.
Figure 2.4 Importing a file as an internal source
(Continued)
02-Bazeley & Jackson_Ch-02_4603.indd 33 27/03/2013 10:05:30 AM
QUALITATIVE DATA ANALYSIS WITH NVIVO34
Use Shift+click or Ctrl+click to select more than one file (of the same type and location) when choosing sources for import.
After you import the item, go to List View, double-click to select the document you imported.3 The text will show in Detail View.
Your first reading of a document should be rapid but purposeful, directed but not bound by your research questions. The idea is to get a sense of the whole, so as you begin to identify specific points or issues in the data, you will see them in the context of the whole (see Bazeley, 2013: Chapter 4). Reading right through before you start coding is especially important if it is some time since you gathered this particular item of data, or if your recent work on it was piecemeal. Many people prefer to scribble on hard copy at this stage, on scrap paper, or in a notebook, but there is a real advantage in making notes on the computer – they don’t get lost, and you have tools to help find particular bits within them.
Mark text with annotations
As you read (or later, as you code) in NVivo, you might annotate words or phrases in the text. Annotations in NVivo work rather like a comments field or a footnote in Word. Whereas the project journal and other memos are more useful for storing (often extensive) reflective thoughts and ideas from the text, annotations are useful for adding (usually brief) comments or reminders about a particular segment of text.4 You might use annotations also to clarify an acro-nym, note the intonation of the voice at a point in the conversation, identify a translation or transcription problem, or comment on some aspect of the dis-course. For example, when a coach referred to a celebrity in her study of sexual abuse in elite swimming, Joy Bringer used an annotation to note the signifi-cance of that reference to the conversation (Bringer, Johnston, & Brackenridge, 2006: 249). Annotations work best as reminders of things you need to be aware of whenever you read this bit of text.
3 We recommend that you acquire the habit of selecting a project item by clicking on its icon rather than its name, to avoid accidentally selecting the name for editing.
4 Annotations are limited to 1,024 characters in length.
(Continued)
02-Bazeley & Jackson_Ch-02_4603.indd 34 27/03/2013 10:05:30 AM
STARTING OUT 35
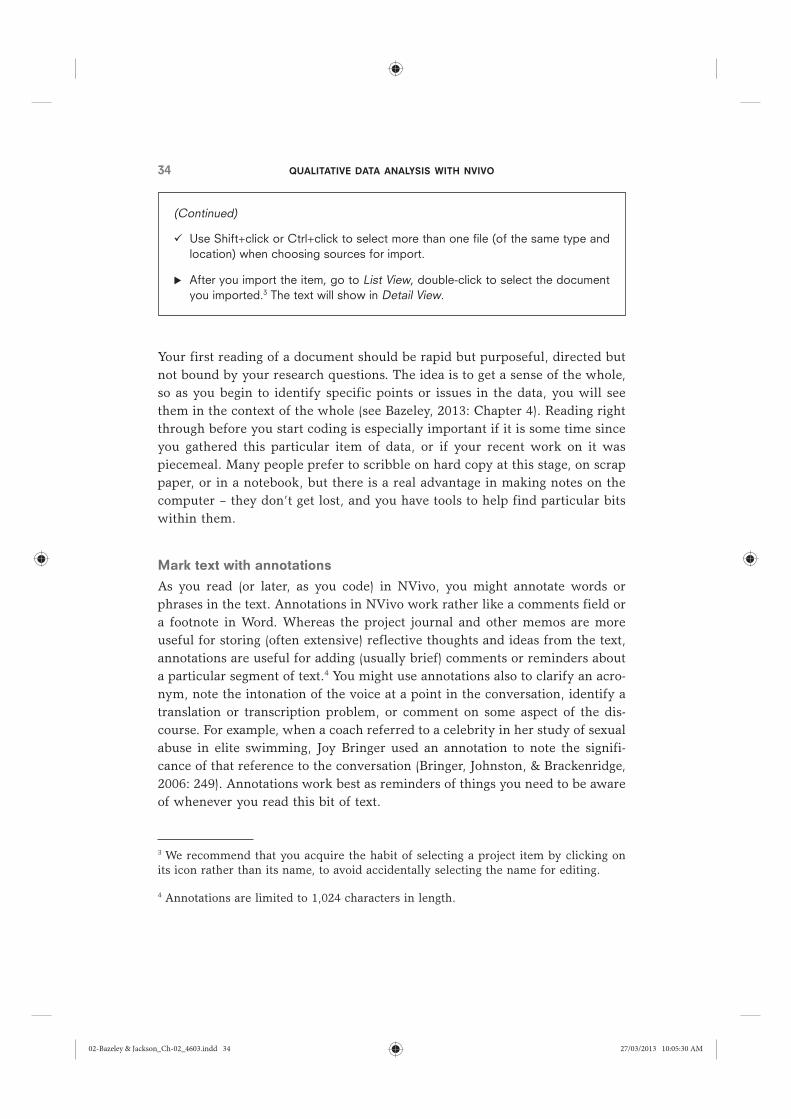
Annotating text
Select the passage to be annotated (usually short).
Right-click (on the area you just highlighted) > Annotations > New Annotation. A space for typing will open at the base of the Detail View (Figure 2.5).
Type your annotation.
Figure 2.5 Creating an annotation
Passages with an annotation will be indicated with a blue highlight. To bring annotations into view or to turn them off, go to the View ribbon, Links group > check or uncheck Annotations.
Click anywhere in the blue highlighted text to see the matching comment at the bottom of the screen, or click on a comment to see the associated highlight in the text turn a darker blue.
When the blue highlighted text that anchors an annotation is coded, the annota-tion will also be visible from the node view.
The text of annotations can be searched for keywords (in a word frequency or text query) but not coded. If you want to find particular comments later, either code the blue anchor for the annotation or include a relevant keyword in the comment.
02-Bazeley & Jackson_Ch-02_4603.indd 35 27/03/2013 10:05:30 AM
QUALITATIVE DATA ANALYSIS WITH NVIVO36
Edit text and mark with colour
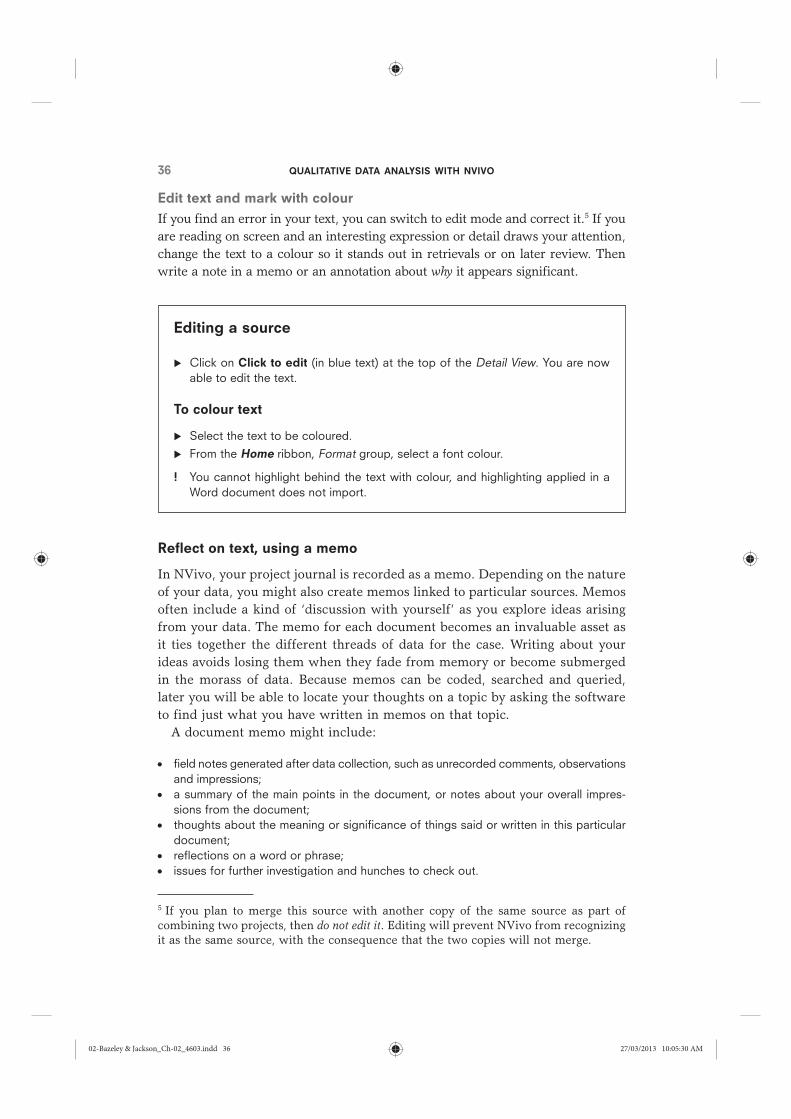
If you find an error in your text, you can switch to edit mode and correct it.5 If you are reading on screen and an interesting expression or detail draws your attention, change the text to a colour so it stands out in retrievals or on later review. Then write a note in a memo or an annotation about why it appears significant.
Editing a source
Click on Click to edit (in blue text) at the top of the Detail View. You are now able to edit the text.
To colour text
Select the text to be coloured.
From the Home ribbon, Format group, select a font colour.
! You cannot highlight behind the text with colour, and highlighting applied in a Word document does not import.
Reflect on text, using a memo
In NVivo, your project journal is recorded as a memo. Depending on the nature of your data, you might also create memos linked to particular sources. Memos often include a kind of ‘discussion with yourself’ as you explore ideas arising from your data. The memo for each document becomes an invaluable asset as it ties together the different threads of data for the case. Writing about your ideas avoids losing them when they fade from memory or become submerged in the morass of data. Because memos can be coded, searched and queried, later you will be able to locate your thoughts on a topic by asking the software to find just what you have written in memos on that topic.
A document memo might include:
field notes generated after data collection, such as unrecorded comments, observations and impressions;a summary of the main points in the document, or notes about your overall impres-sions from the document;thoughts about the meaning or significance of things said or written in this particular document;reflections on a word or phrase;issues for further investigation and hunches to check out.
5 If you plan to merge this source with another copy of the same source as part of combining two projects, then do not edit it. Editing will prevent NVivo from recognizing it as the same source, with the consequence that the two copies will not merge.
02-Bazeley & Jackson_Ch-02_4603.indd 36 27/03/2013 10:05:30 AM
STARTING OUT 37
It doesn’t matter if the typing or the grammar is rough, as long as you get the ideas down. If you can discuss some or all of the document with a colleague, the conversation is likely to strengthen your reflective thinking about the text and its interpretation – then add these thoughts to your notes. You can add further notes to your memo at any time.
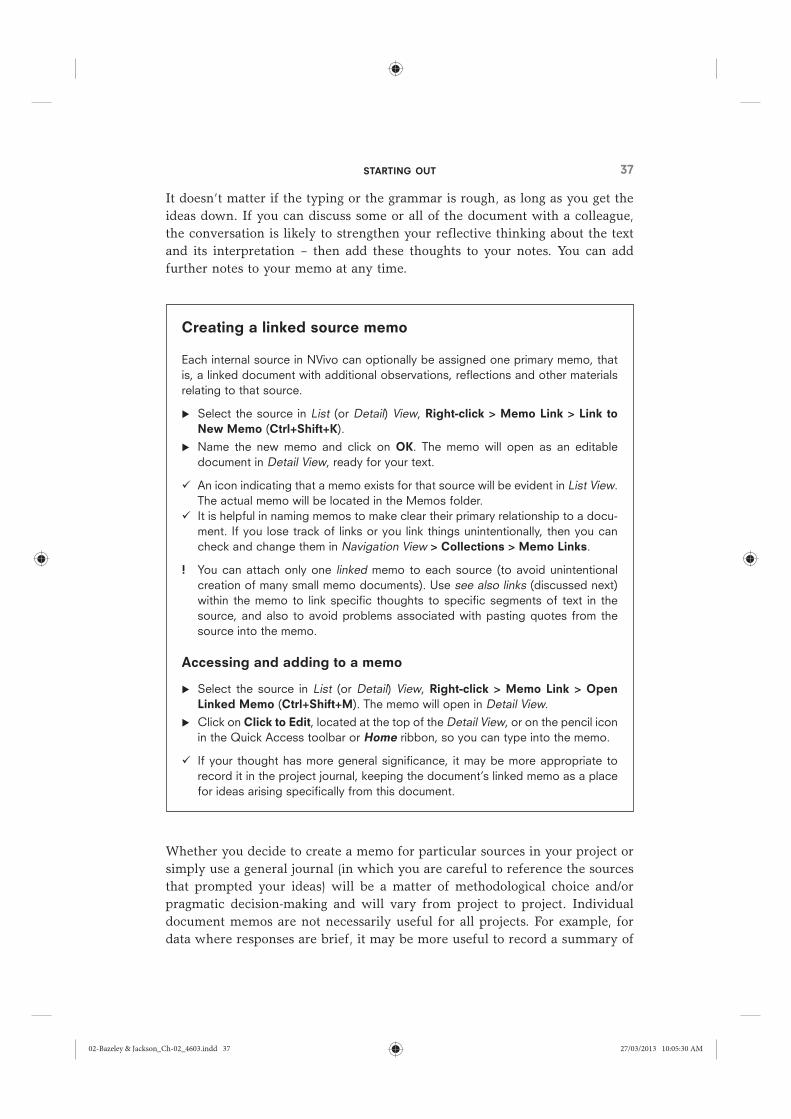
Creating a linked source memo
Each internal source in NVivo can optionally be assigned one primary memo, that is, a linked document with additional observations, reflections and other materials relating to that source.
Select the source in List (or Detail) View, Right-click > Memo Link > Link to New Memo (Ctrl+Shift+K).
Name the new memo and click on OK. The memo will open as an editable document in Detail View, ready for your text.
An icon indicating that a memo exists for that source will be evident in List View. The actual memo will be located in the Memos folder.
It is helpful in naming memos to make clear their primary relationship to a docu-ment. If you lose track of links or you link things unintentionally, then you can check and change them in Navigation View > Collections > Memo Links.
! You can attach only one linked memo to each source (to avoid unintentional creation of many small memo documents). Use see also links (discussed next) within the memo to link specific thoughts to specific segments of text in the source, and also to avoid problems associated with pasting quotes from the source into the memo.
Accessing and adding to a memo
Select the source in List (or Detail) View, Right-click > Memo Link > Open Linked Memo (Ctrl+Shift+M). The memo will open in Detail View.
Click on Click to Edit, located at the top of the Detail View, or on the pencil icon in the Quick Access toolbar or Home ribbon, so you can type into the memo.
If your thought has more general significance, it may be more appropriate to record it in the project journal, keeping the document’s linked memo as a place for ideas arising specifically from this document.
Whether you decide to create a memo for particular sources in your project or simply use a general journal (in which you are careful to reference the sources that prompted your ideas) will be a matter of methodological choice and/or pragmatic decision-making and will vary from project to project. Individual document memos are not necessarily useful for all projects. For example, for data where responses are brief, it may be more useful to record a summary of
02-Bazeley & Jackson_Ch-02_4603.indd 37 27/03/2013 10:05:30 AM
QUALITATIVE DATA ANALYSIS WITH NVIVO38
key issues for each source (or case) in a single combined ‘issues’ journal, and to use a separate journal for reflecting on what you are learning from various cases and for noting common themes to explore. For any project dealing inten-sively with rich data for a small sample, however, the memo for each source becomes a valuable resource holding a reminder of key points learned, inter-pretive thoughts, and ideas to follow up in later analyses.
Keep the memo open as you work through a document, so you can easily tab back and forth between it and the source.
Memos can be combined or split at any time without losing associated information (as can any text-based source).
To avoid anxiety about losing track of where you have recorded your ideas, we recommend you code the content of these memos, preferably as you are making them (once you have a coding system). This will ensure the ideas always turn up whenever you consider those topics in your project.
Link ideas with evidence, using a see also link
More often than not, the ideas you record in your journals or memos will relate to a particular segment of text, rather than a whole source. When you want to record something longer and more detailed and thoughtful than an annotation, and you want to retain the connection with the text that prompted the thought, a see also link will do it for you. A see also link will connect from a point (an anchor) in the text of the memo to selected text within a source document, so you can easily check the basis for the thoughts you are recording. Then, when you review your memo, you can also see the linked segment highlighted within its source context.
The see also link is one of the most useful tools in the program (and it’s Kristi’s favourite)! It provides a far better solution than copying and pasting text directly from a source document into a memo. Pasting text rather than the link is prob-lematic, because (a) the segment has become disconnected from its identifying source and context, and (b) any coding on that text will be pasted with the text, generating double retrievals when you review the coding. A see also link iden-tifies the source, provides context, and can be viewed or printed along with the text of your memo, to help you put together the argument you are developing for your article, report or thesis.
Create and view a see also link
Create the link
In your source document, highlight and copy a passage that has prompted ideas you want to record.
In the memo, write the thoughts related to the passage you have copied.
02-Bazeley & Jackson_Ch-02_4603.indd 38 27/03/2013 10:05:30 AM
STARTING OUT 39
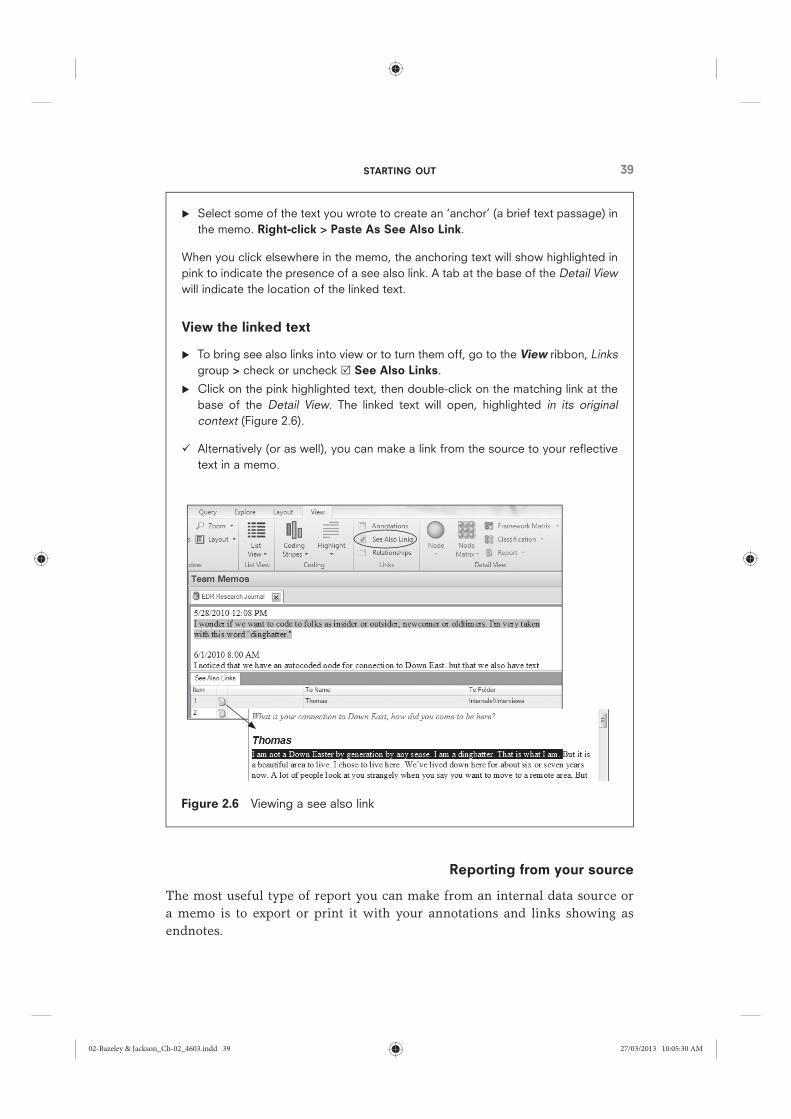
Select some of the text you wrote to create an ‘anchor’ (a brief text passage) in the memo. Right-click > Paste As See Also Link.
When you click elsewhere in the memo, the anchoring text will show highlighted in pink to indicate the presence of a see also link. A tab at the base of the Detail View will indicate the location of the linked text.
View the linked text
To bring see also links into view or to turn them off, go to the View ribbon, Links group > check or uncheck See Also Links.
Click on the pink highlighted text, then double-click on the matching link at the base of the Detail View. The linked text will open, highlighted in its original context (Figure 2.6).
Alternatively (or as well), you can make a link from the source to your reflective text in a memo.
Reporting from your source
The most useful type of report you can make from an internal data source or a memo is to export or print it with your annotations and links showing as endnotes.
Figure 2.6 Viewing a see also link
02-Bazeley & Jackson_Ch-02_4603.indd 39 27/03/2013 10:05:30 AM

QUALITATIVE DATA ANALYSIS WITH NVIVO40
Exporting or printing a source
In List View, select the document or memo you want to print or export. Right-click > Export (or Print) Document (or Memo).
Select the options you want from the Export (Print) dialogue > OK.
Click Browse > Save as if you want it in a file type other than *.docx.
The text of the source will be printed or saved, with the content of see also links and annotations optionally provided as endnotes to the text.
Looking ahead: connecting a web of data
We point to the future here, more than the present, by showing how NVivo’s tools for journaling, memoing, and linking can be extended, so you end up with a comprehensive understanding of your data and an audit trail for your project. The web of links you create in a project (and your reflections on those links) become an important antidote to the segmentation that can occur with coding (Maxwell & Miller, 2008). Some of these suggestions will become more meaning-ful as you learn more of the tools in NVivo, and you progress further in your project. They are relevant to all forms of data – text, pictures, video and audio.
Connecting across your project file – more on see also links
See also links do more than link evidence in source text to comments in memos. They are called see also links because, when you read or see this in a source, you should really check out (see also) that somewhere else in the pro-ject. There are two types of see also links, and each does something slightly different:
1 The first and most commonly used way of creating a see also link is to select a pas-sage of text or part of a media file, copy it, then paste it elsewhere as a see also link – as described above. Use this method when you are linking a specific portion of one source to a specific portion of another source.
2 The second way of creating a see also link is to link a whole project item to an anchor within a source or a memo.
Examples of how you might apply the first type listed above (links to a portion of another source) include:
Link interpretation of text to the passage that gave rise to the interpretation, as described earlier. In the Environmental Change project, this is evident when interpreta-tions of what it means to be local (in the Local identity and knowledge memo) are linked to what was said in interviews.
02-Bazeley & Jackson_Ch-02_4603.indd 40 27/03/2013 10:05:30 AM
STARTING OUT 41
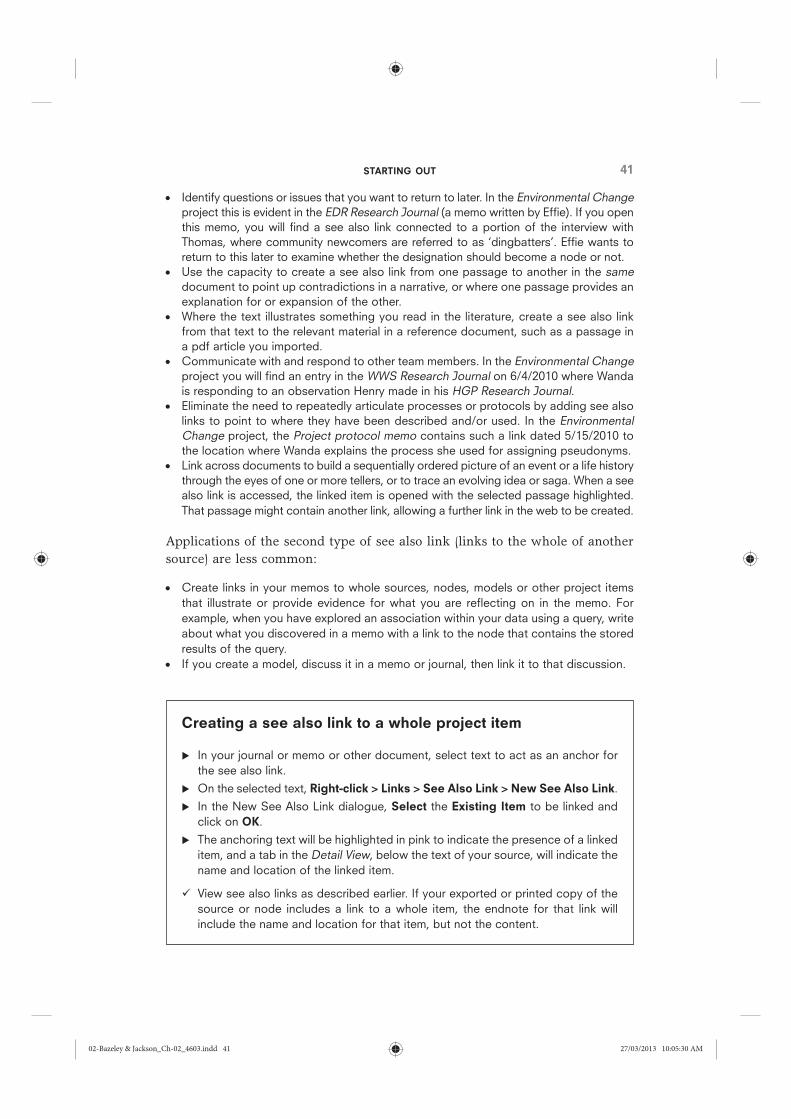
Identify questions or issues that you want to return to later. In the Environmental Change project this is evident in the EDR Research Journal (a memo written by Effie). If you open this memo, you will find a see also link connected to a portion of the interview with Thomas, where community newcomers are referred to as ‘dingbatters’. Effie wants to return to this later to examine whether the designation should become a node or not.Use the capacity to create a see also link from one passage to another in the same document to point up contradictions in a narrative, or where one passage provides an explanation for or expansion of the other.Where the text illustrates something you read in the literature, create a see also link from that text to the relevant material in a reference document, such as a passage in a pdf article you imported.Communicate with and respond to other team members. In the Environmental Change project you will find an entry in the WWS Research Journal on 6/4/2010 where Wanda is responding to an observation Henry made in his HGP Research Journal.Eliminate the need to repeatedly articulate processes or protocols by adding see also links to point to where they have been described and/or used. In the Environmental Change project, the Project protocol memo contains such a link dated 5/15/2010 to the location where Wanda explains the process she used for assigning pseudonyms.Link across documents to build a sequentially ordered picture of an event or a life history through the eyes of one or more tellers, or to trace an evolving idea or saga. When a see also link is accessed, the linked item is opened with the selected passage highlighted. That passage might contain another link, allowing a further link in the web to be created.
Applications of the second type of see also link (links to the whole of another source) are less common:
Create links in your memos to whole sources, nodes, models or other project items that illustrate or provide evidence for what you are reflecting on in the memo. For example, when you have explored an association within your data using a query, write about what you discovered in a memo with a link to the node that contains the stored results of the query.If you create a model, discuss it in a memo or journal, then link it to that discussion.
Creating a see also link to a whole project item
In your journal or memo or other document, select text to act as an anchor for the see also link.
On the selected text, Right-click > Links > See Also Link > New See Also Link.
In the New See Also Link dialogue, Select the Existing Item to be linked and click on OK.
The anchoring text will be highlighted in pink to indicate the presence of a linked item, and a tab in the Detail View, below the text of your source, will indicate the name and location of the linked item.
View see also links as described earlier. If your exported or printed copy of the source or node includes a link to a whole item, the endnote for that link will include the name and location for that item, but not the content.
02-Bazeley & Jackson_Ch-02_4603.indd 41 27/03/2013 10:05:30 AM
QUALITATIVE DATA ANALYSIS WITH NVIVO42
Connecting beyond your project file – hyperlinks
Perhaps your interviewee referred to a report that is on-line, or to an ongoing blog; the group discussion was based around a book or video; the emotion in the distraught mother’s voice is best understood through a ‘sound bite’ from the original tape; or there is a cross-reference from an article you have imported to one that is on file but which you are not importing into your project. For such situations, hyperlinks allow you to make direct connections from a spe-cific location within a source to items that are not in the project (on-line data or any digitally stored material on your computer), such as books or reports, pictures, web pages, video or audio files.6 Use hyperlinks also to link from your journal to records of meetings with advisors, emails from colleagues, and other sources of influence on your developing thinking as well, as part of an audit trail for the project.
Create and view a hyperlink
Click on Click to edit at the top of the Detail View, so the source you are working in can be edited. Select text to act as an anchor for the hyperlink.
Hover over the selected text: Right-click > Links > Hyperlink > New Hyperlink.
Browse the web to locate the URL or your filing system for the object to be linked. Click on OK.
To view the link, Ctrl+click on the underlined blue text that marks the anchor for the link.
Looking ahead: keeping track of emerging ideas
Keeping track with journaling
Develop a routine of journaling as a way of keeping an audit trail of actions, reflections, spontaneous thoughts, and developing ideas relating to the topic of the research as a whole. A comprehensive audit trail, with its reflective content and links to evidentiary data, is a critical element in any qualitative project where the validity of conclusions has to be argued without the support of p-values and the like. The evidence it provides of the journey you have taken to reach your conclusions will therefore help you to argue and to write those conclusions.
6 Many of these items can potentially be imported as data for the project where they can be linked using see also links. Use hyperlinks when you don’t want to import the linked item.
02-Bazeley & Jackson_Ch-02_4603.indd 42 27/03/2013 10:05:30 AM
STARTING OUT 43
Some researchers recommend setting up separate journals for different pur-poses in a project; others find it difficult to separate their random thoughts and so they put everything in one journal. In the Environmental Change project, the team members’ individual journals (Sources > Memos > Team Memos) illus-trate a broad mix of content, including records of changes made and reasons for such changes, reflections on concepts and experimentation with ideas, and reminders of things to do or conversations to have with colleagues (see especially Wanda’s research journal, WWS Research Journal). Separate general memos have been created to document who has done what as each member of the team con-tributed to the project. In some projects you might find it useful to create an additional journal to record reflections on methods, to debate theoretical issues, to note points for a final report or, where there are a lot of brief project items, simply to record a short summary of the main issue(s) raised by each item.
Adding to your journal
Locate your journal in Sources > Memos > [your journal]. Double-click on its name in List View to open the journal.
Click on Click to edit at the top of the Detail View for your journal, so you can write into it.
Add further text, paste in pictures, and create links to other data, as desired or needed.
Reference or link the source of any ideas you are adding, to assist later review. Code your journal so you can easily find and track your thoughts on particular
topics.
Tracking concepts with node memos
When an idea about a category or concept attracts your attention, it can be more appropriate to record those thoughts in a memo that will be linked with the coding for that category or concept, rather than with a source or general journal. Then, as your ideas develop, and later as you assess what you have learned and check how this category relates to others, you can add to the memo, building it in such a way – again, with links to evidence – that it can make a major contri-bution to your writing (part of a chapter, perhaps) for your project.
Creating a memo linked to a node that holds the coding you are writing about is a parallel process to creating a memo linked to a source, that is, by using the right-click menu in either List View or Detail View (see Chapter 4). And again, the memo that is created will be stored in the Memos folder. Like other sources, it can be searched or coded, to track cross-cutting ideas and concepts.
02-Bazeley & Jackson_Ch-02_4603.indd 43 27/03/2013 10:05:30 AM
* H
elp
item
: Ab
out
Lin
ks
Tab
le 2
.1
Mem
os,
ann
ota
tions
and
link
s –
sum
mar
y ta
ble
*
Jou
rna
ls (
wh
ole
p
roje
ct m
em
os)
Me
mo
s lin
ked
to
a s
ou
rce
Me
mo
s lin
ked
to
a
no
de
Se
e a
lso
lin
ks t
o
spe
cifi
c co
nte
nt
Se
e a
lso
lin
ks t
o
en
tire
ite
ms
An
no
tati
on
sH
ype
rlin
ks
Prim
ary
use
Refle
ctiv
e m
emoi
ng
rega
rdin
g th
e pr
ojec
t as
a w
hole
; an
aud
it tr
ail t
hat
trac
es th
e de
velo
pmen
t of
the
proj
ect,
with
lin
ks to
exa
mpl
es
and
evid
ence
No
tes
reg
ard
ing
ke
y is
sues
in a
so
urce
; fie
ld
ob
serv
atio
ns; a
ca
se s
umm
ary;
re
flect
ive
tho
ught
s ab
out
th
e so
urce
or
par
ts o
f it
Ref
lect
ive
tho
ught
s ab
out
th
e co
ncep
t o
r ca
se r
epre
sent
ed
by
the
nod
e;
idea
s fo
r fu
rthe
r an
alys
is; s
umm
ary
of
wha
t ha
s b
een
lear
ned
ab
out
the
co
ncep
t
Link
fro
m a
sp
ecifi
c p
oin
t in
a s
our
ce o
r no
de
to s
pec
ific
cont
ent
in a
noth
er (
or
the
sam
e) s
our
ce o
r no
de;
e.g
., us
e to
tra
ck
evid
ence
, co
ntra
dic
tions
, lin
k to
co
nnec
ting
eve
nts
or
peo
ple
in o
ther
so
urce
s
Link
fro
m a
sp
ecifi
c p
oin
t in
a s
our
ce o
r no
de
to t
he e
ntire
ty
of
oth
er r
elev
ant
pro
ject
item
s,
incl
udin
g o
ther
so
urce
s, n
od
es,
mem
os,
set
s,
mo
del
s, o
r q
uery
re
sults
No
tes
that
ill
umin
ate
or
brie
fly
refle
ct o
n a
spec
ific
part
of
a so
urce
(te
xt, i
mag
e,
aud
io, e
tc.)
; lik
e ‘c
om
men
ts’ i
n M
S
Wo
rd
Link
s fr
om
po
ints
w
ithin
so
urce
s (in
tern
als,
ex
tern
als,
mem
os)
to
no
n-p
roje
ct
on-
line
item
s o
r w
ebsi
tes
Visu
al c
ue o
n th
e sc
reen
List
ed in
Lis
t Vi
ew
> S
our
ces
> M
emo
s
Ico
n ne
xt t
o
sour
ce in
Lis
t Vi
ew
Ico
n ne
xt t
o n
od
e in
Lis
t Vi
ew
Pin
k hi
ghl
ight
on
text
Pin
k hi
ghl
ight
on
text
Blu
e hi
ghl
ight
on
text
Und
erlin
ed b
lue
text
Can
the
co
nten
t b
e co
ded
?
Yes
Yes
Yes
NA
The
linke
d it
em m
ay b
e co
ded
alre
ady.
NA
The
linke
d it
em m
ay
be
cod
ed a
lread
y.
No
If y
ou
cod
e th
e lo
catio
n w
here
the
an
nota
tion
is
anch
ore
d, y
ou
will
se
e th
e an
nota
tion.
No
If y
ou
cod
e th
e an
cho
r fo
r th
e hy
per
link,
yo
u w
ill
have
acc
ess
to t
he
hyp
erlin
ked
item
.
Can
the
co
nten
t o
f th
e lin
ked
mat
eria
l b
e se
arch
ed
for
text
?
Yes
Yes
Yes
No
– o
nly
as p
art
of
the
item
fro
m w
hich
it h
as
com
e
No
– o
nly
as p
art
of
the
item
fro
m
whi
ch it
has
co
me
Yes
No
Ho
w m
any
can
you
have
?U
nlim
ited
One
link
ed
mem
o p
er s
our
ceO
ne li
nked
mem
o
per
no
de
Unl
imite
dU
nlim
ited
Unl
imite
dU
nlim
ited
To c
reat
eC
reat
e rib
bo
n >
Mem
o
Sel
ect
sour
ce o
r no
de:
Rig
ht-c
lick
> M
emo
Lin
k >
Link
to
New
Mem
o;
OR
Ctr
l+S
hift
+K
Cop
y po
rtio
n to
be
linke
d, th
en s
elec
t the
an
chor
poi
nt a
nd P
aste
as
See
Als
o Li
nk.
Hig
hlig
ht t
ext
in a
so
urce
or
nod
e, R
ight
-clic
k >
Lin
ks o
r se
lect
fro
m t
he A
naly
ze r
ibb
on,
Lin
ks o
r A
nno
tatio
ns
gro
ups
To v
iew
List
Vie
w >
sel
ect
the
mem
o a
nd
do
uble
-clic
k
Rig
ht-c
lick
sour
ce >
Mem
o L
ink
> O
pen
Lin
ked
Mem
o; O
R
Ctr
l+S
hift
+M
View
rib
bo
n >
S
ee A
lso
Lin
ksVi
ew r
ibb
on
>
See
Als
o L
inks
View
rib
bo
n >
A
nno
tatio
ns
Ctr
lcl
ick
on
blu
e un
der
lined
tex
t
02-Bazeley & Jackson_Ch-02_4603.indd 44 27/03/2013 10:05:30 AM
STARTING OUT 45
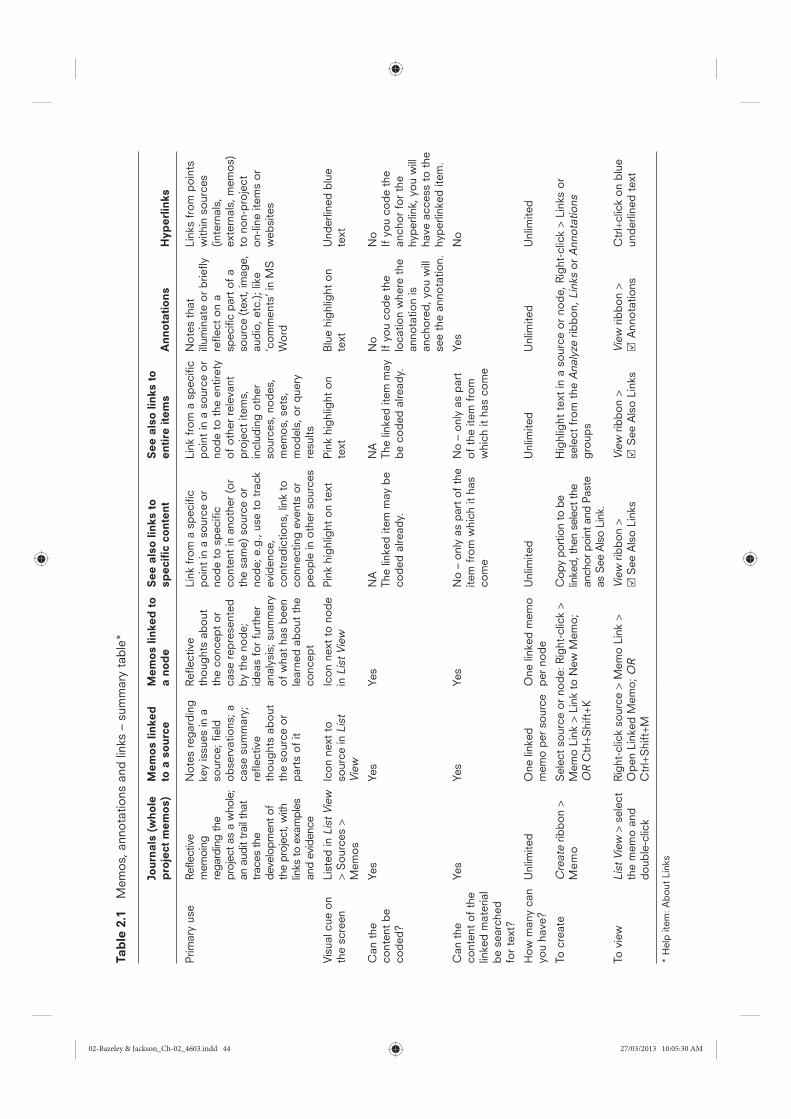
Memos, annotations or links: which should it be?
So you can put things in perspective, Table 2.1 outlines the key features of memos, annotations, see also links, and hyperlinks, to help you gain a sense of when each might be most useful, and of the possibilities and limitations for each.
Saving and backing up your project
As you have been working, NVivo regularly asked if you wanted to save your work. There is no background autosaving in NVivo so, as we noted in Chapter 1, we would strongly recommend that you save each time you are asked, unless you are simply experimenting, do not want to save your changes, or you are in the middle of an Undo operation. Of course, you should always save as you exit the project as well.
For safety, you need backup copies, regularly updated, as a precaution against loss or drastic error. No matter how good your equipment, power failures or human intervention can make the program crash; no matter how confident you are, errors can occur; and no matter how thorough the programmers and testers have been, occasionally projects will become corrupted. Our recommendation is to make a backup on your working computer at the end of each day’s work, and to copy that to another medium (a disk, memory stick, server, or cloud that is independent of that computer) on a regular basis. If you’re cleaning out old files, a good housekeeping principle with backups is to keep the last known good copy – that means keep at least the last two backups, just in case the last one was corrupted as you saved it. You might also want to retain copies from impor-tant transition points, for example, before and after a major node restructuring, before and after combining the work of team members, or when you’ve devel-oped key models or understandings of the project. These copies will help you write up the methods section of your final product. They can also help you prepare your final arguments to support your conclusions, as you can trace how your ideas developed and thus how you might convince a reader.
! Do not rely on automatic daily institutional backups unless you are sure these create a new copy each time – otherwise a good backup might be overwritten by a damaged file.
Backing up your project
While you are working in NVivo:
Go to File > Manage > Copy Project. Locate and name the backup file. Be aware that in the process of copying your project, NVivo will close and then
(Continued)
02-Bazeley & Jackson_Ch-02_4603.indd 45 27/03/2013 10:05:30 AM

QUALITATIVE DATA ANALYSIS WITH NVIVO46
reopen the project you are working on, in contrast to Save As in Word and many other programs (where you end up in the copy rather than the original). In the process, you will be required to save the current project before it closes, and it will reopen in the usual initial Sources view.
Alternatively, after you close your project:
Go into Windows Explorer. Locate and copy the project, and paste it into a backup folder.
So you can keep track of your backup files, always date them (this also over-comes the problem of duplicate names). We use an international date format (yymmdd) added to the name, so they sort in date order (from oldest to newest) in a file list or navigation dialogue.
(Continued)
02-Bazeley & Jackson_Ch-02_4603.indd 46 27/03/2013 10:05:30 AM