WDV 331 Dreamweaver Applications Templates Dreamweaver CS6 Chapter 19.
Upload
duongnguyetCategory
view
213download
0
Practice: Sharks – Part 1 of 5
1. Start Dreamweaver
2. Define A New Sitea. Select Site New Site. The Site Definition dialogue box is displayed.b. Select the Basic tab if it is not already displayed.c. In the What would like to name your site? box type: Sharks
d. Select Next to display more options.e. Select the No, I do not want to use a server technology option:
1

f. Click next to display more options.g. Select Edit local copies on my machine, then upload to server when
ready option:
h. Click the folder icon . A dialogue box is displayed for browsing the local disk.1.Navigate to the Dreamweaver folder in the folder of your name on the
desktop.2.Click the Create New Folder button:
3.A new folder is created. Type: Sharks to replace the New Folder name and press Enter.
4.Select Open. The Sharks folder appears in the Select list.5.Select Select to choose the new folder as the website folder.
2

i. Select Next. More options are displayed.j. In the How do you connect to your remote server? List, Select None:
k. Select Next. A summary is displayed:
l. Select Done to create the site and return to the document window.m. Note that the site root folder is displayed in the Files Panel:
3
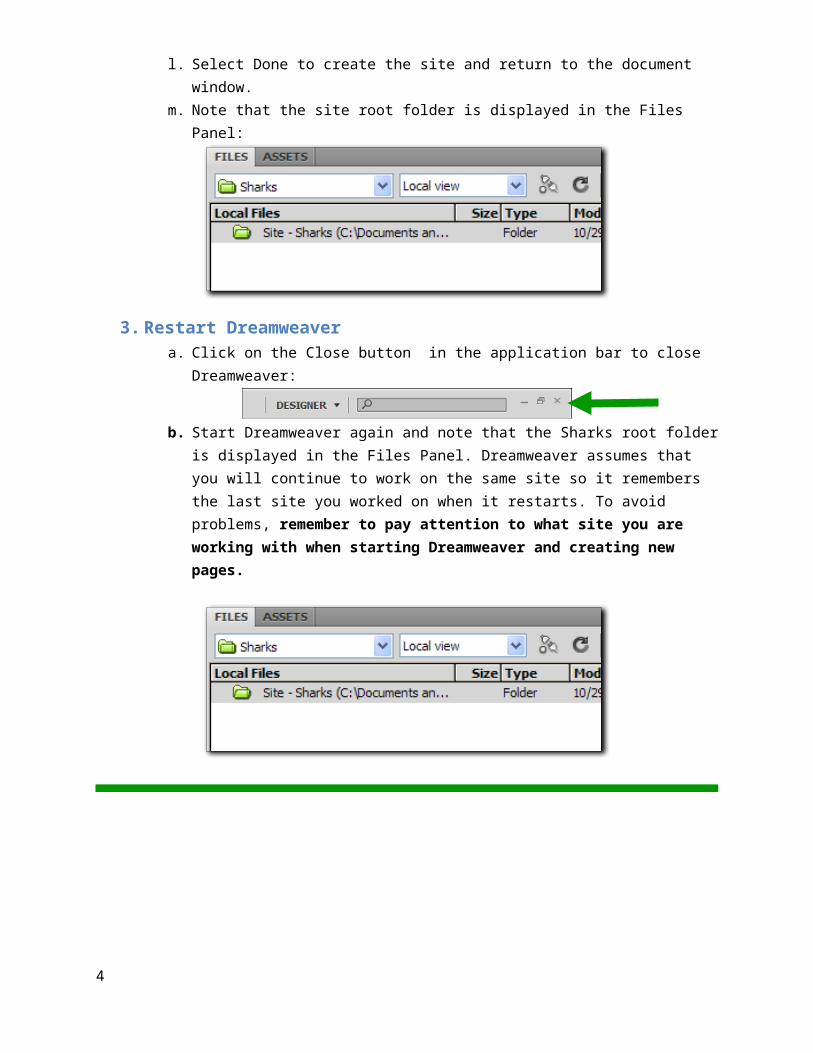
3. Restart Dreamweavera. Click on the Close button in the application bar to close Dreamweaver:
b. Start Dreamweaver again and note that the Sharks root folder is displayed in the Files Panel. Dreamweaver assumes that you will continue to work on the same site so it remembers the last site you worked on when it restarts. To avoid problems, remember to pay attention to what site you are working with when starting Dreamweaver and creating new pages.
4

Practice: Sharks – Part 2 of 5
1. Create A New Web Page Documenta. Select File New. A dialogue box is displayed.b. Click the Blank Page category.c. In the Page Type list, select HTML.d. In the Layout list, select <none>.e. Select Create. A blank page is displayed in the Document window.
2. Save The Document And Designate It As The Site’s Home Pagea. Select file Save. A dialogue box is displayed.
b. Click the Root Folder button to make sure that the file is saved in the Sharks root folder.
c. In the File name box, replace the existing text with: index.htmd. Select Save. The file is saved in the Sharks root folder with the file name
index.htm. The file name is now displayed in the title bar of the Document window and the web page document is listed in the Files panel.
5

3. Change The Page Title And Preview The Document In a Browser a. In the Document toolbar, in the Title box, replace the existing text with: Sharks
and then press Enter.
b. Press F12. A dialogue box is displayed with the message “save changes to the index?”c. Select Yes. The document is displayed in a browser window and the page title is
displayed in the browser’s title bar.
d. Click the Close button to close the browser window.
4. Change Views
a. In the Document toolbar, click on the Code view button . The code for the web page is displayed in the Document window. Note the title tags and the page title on line 5 of the HTML code:
<title>Sharks</title>b. In the Document toolbar, click on the Split button . The document window
is split, with the code displayed in the upper half.c. Select View Split Vertically to display the code on the left hand side of the
Document window.
d. In the Document toolbar, click the Design view button . The web page document is again displayed in the design window.
5. Save The Changes to the Web Page Documenta. Select File Save. The changes are saved.
6

Practice: Sharks – Part 3 of 5
The index.htm page document in the Sharks website should be open.
1. Adding contenta. Click in the index page to place the insertion point at the top of the page.b. Type: Sharks and press Enter.c. Add the following text as seen below; be sure to press Enter after each line.
d. Replace the Name with your name.e. Select File Save.b. Press F12 to view the page in a browser.
c. After viewing the page, click the Close button to close the browser window.
2. Formatting Contenta. Click in the text Shark at the top of the page to place the insertion point.
b. In the Property Inspector, click on the HTML button .
7

c. Select Heading 1 from the Format list.
d. Note how the text changed to a heading 1 tag.
d. In the Document toolbar, click on the Split button to display the code on the left hand side of the Document window.
e. Note how on line 9 of the HTML code, the word shark is now surrounded by the <h1> tag:
<h1>Sharks</h1>
f. Place the insertion point after the closing Paragraph tag </p> on line 11 in code view.g. Press the Backspace key to delete the closing Paragraph tag.h. Delete the opening Paragraph tag before the text Nurse.i. Delete the Paragraph tags surrounding the text Whale shark.j. Delete the Paragraph tags surrounding text Zebra Shark.k. The code should look as displayed below:
l. Place a Break tag <br /> after the text Nurse Shark. Note the closing slash is placed after the br in the closing tag. This is because you created an XHTML page back in Part 1 of the Shark practice exercise.
8

m. Repeat this process for the Whale Shark and Zebra Shark.
n. Click the Refresh button in the Property Inspector. Note how the document updates in Design View.
o. In the Document toolbar, click the Design view button . The web page document is again displayed in the design window.
p. Click in the text Researched by Name at the bottom of the page to place the insertion point.
q. In the Property Inspector, click on the HTML button .r. Select Heading 4 from the Format list.
s. Select File Save.t. Press F12 to view the page in a browser.
u. After viewing the page, click the Close button to close the browser window.
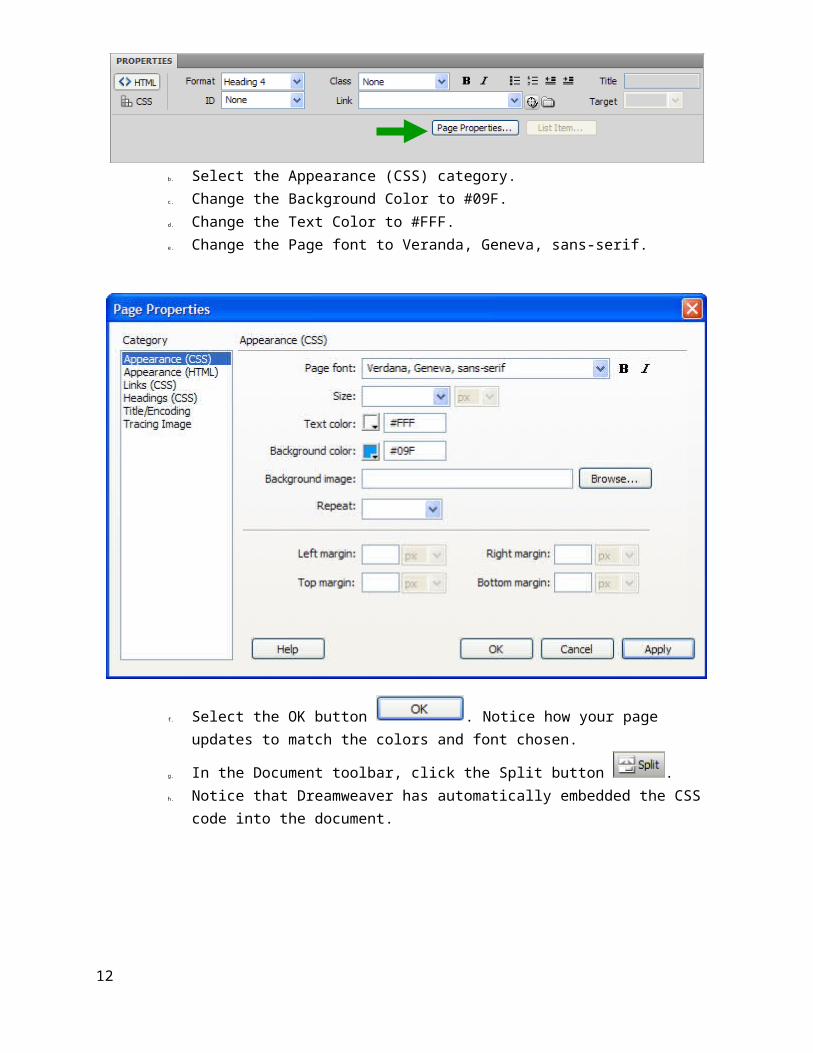
3. Change The Page Propertiesa. Select the Page Properties button in the Property Inspector.
b. Select the Appearance (CSS) category.
9

c. Change the Background Color to #09F.d. Change the Text Color to #FFF.e. Change the Page font to Veranda, Geneva, sans-serif.
f. Select the OK button . Notice how your page updates to match the colors and font chosen.
g. In the Document toolbar, click the Split button .h. Notice that Dreamweaver has automatically embedded the CSS code into the
document.
i. Select File Save.j. Press F12 to view the page in a browser.
k. After viewing the page, click the Close button to close the browser window.
10

l. In the Document toolbar, click on the Code button .m. Find the three break tags that you created earlier and delete them.
n. In the Document toolbar, click the Design view button . The web page document is again displayed in the design window.
o. Notice how the three sharks are now next to each other on one line.p. Find the text Whale Shark in the document. Place the insertion point before the text
Whale and press Enter.q. Repeat this process and move the Zebra Shark down to its own line.
r. In the Document toolbar, click the Split button .s. Notice how Dreamweaver has placed a paragraph tag around each shark.
t. In the document window, select the three paragraphs of the sharks.
u. In the Property Inspector, click on the HTML button .
v. In the Property Inspector, Click on the Unordered list button.
w. Notice how the three different sharks are now presented as a list.x. Click File Save.y. Press F12 to view the page in a browser.
z. After viewing the page, click the Close button to close the browser window.
11
Practice: Sharks – Part 4 of 5
Dreamweaver should be started and the Sharks website should be the working site.
1. Create the Nurse Shark Web Page Documenta. Select File New. A dialogue box is displayed.b. Select the Blank Page category.c. In the Page Type list, select HTML.d. In the Layout list, select <none>.e. Select Create. A blank page is displayed in the Document window.f. Select File Save. A dialogue box is displayed.
g. Select the Root Folder button to make sure that the file is saved in the Sharks root folder.
h. In the File name box, replace the existing text with: nurse.htmi. In the Document toolbar, in the Title box, replace the existing text with: Nurse
Shark and then press Enter.j. Select File Save.k. Enter the following text onto the page:
l. After entering the text select File Save.m. Press F12 to view the page in a browser.
n. After viewing the page, click the Close button to close the browser window.
2. Create the Zebra Shark Web Page Documenta. Repeat the steps listed above in step 1 and create a new web page document titled
Zebra Shark.b. Save the document as zebra.htm
12
Nurse Shark
Scientific Name: Ginglymostoma cirratum
This shark is common particularly in the Caribbean. It is sluggish during the day but active at night. It feeds on bottom-dwelling lobsters and other crustaceans, as well as snails, clams, octopus, squid, and any fish slow enough to be caught by its great gulping and inhaling style of feeding. It is a harmless shark unless it is provoked.
Home

c. Enter the following text:
Zebra Shark
Scientific Name: Stegostoma fasciatum
The zebra shark is found over tropical coral reefs. It is distinctive because of its very long, broad tail and its coloring. The juvenile shark has zebra-like stripes of yellow on black. It takes on a yellowish brown color with dark brown spotting as it reaches adulthood. It has pointed teeth, with each tooth having two smaller points. It poses no harm to humans.
Home
d. After entering the text select File Save.e. Press F12 to view the page in a browser.
f. After viewing the page, click the Close button to close the browser window.
3. Create the Whale Shark Web Page Documenta. Repeat the steps listed above in step 1 and create a new web page document titled
Whale Shark.b. Save the document as whale.htmc. Enter the following text:
Whale Shark
Scientific Name: Rhincodon typus
The whale shark is the world’s largest living fish. It has alternating thin white vertical bars and columns of spots on a dark background. This shark swims slowly near the surface, and it has a huge mouth for consuming small crustacean plankton and small and large fish. The whale shark is found in all tropical and subtropical oceans. Divers and snorkelers can swim with this shark because it is gentle and curious.
Home
d. After entering the text select File Save.e. Press F12 to view the page in a browser.
f. After viewing the page, click the Close button to close the browser window.
13

g. Take note of the Files panel. The shark root folder now contains 4 files; index.htm, nurse.htm, zebra.htm, whale.htm
4. Change The Page Propertiesa. Select the nurse.htm tab in the title bar to select the web page document.b. Click in the text Nurse Shark at the top of the page to place the insertion point.
c. In the Property Inspector, click on the HTML button .d. Select Heading 1 from the Format list.
e. Note how the text changed to a heading 1 tag.f. Click in the text that begins “Scientific name:” to place the insertion point.
g. In the Property Inspector, click on the HTML button .h. Select Heading 4 from the Format list.
i. Select File Save.
14

j. Select the Page Properties button in the Property Inspector.
k. Select the Appearance (CSS) category.l. Change the Background Color to #09F.m. Change the Text Color to #FFF.n. Change the Page font to Veranda, Geneva, sans-serif.
o. Select the OK button . Notice how your page updates to match the colors and font chosen.
p. Select File Save.q. Repeat the steps above (a-p) to the zebra.htm and whale.htm web page
documents. r. When completed, view the index.htm, nurse.htm, zebra.htm, and
whale.htm web page documents in a browser. All four web pages in the shark root folder should have a similar look and feel.
15

5. Adding Images to the Root Foldera. Right click in the Files panel.b. Select New Folder from the menu.c. Name the new folder _images.
d. In the Files Panel toolbar, select the Refresh button .e. Notice how the _images folder has moved to the top of the list in the root folder.
f. Ask your teacher for the appropriate steps to download the three pictures (nurse, zebra, whale) needed for this site.
g. Once you have the three pictures, place them in the _images folder that is located in the sharks root folder.
h. In the Files Panel toolbar, select the Refresh button .i. Select the _images folder if it is not already expanded.j. Notice how the Files panel has updated showing the three images located in the
_images folder.
k. Select File Save.
16

6. Adding An Image To The Nurse.htm Pagea. Select the nurse.htm tab in the title bar to select the web page document.b. Click at the end of the line “Scientific Name: Ginglymostoma cirratum”
to place the insertion point.c. Press Enter once.d. In the Application bar, select Insert Image.e. Navigate to the _images folder in the shark site root folder.f. Select the nurse_shark image.
g. Select the OK button .h. The Image Tag Accessibility Attributes Dialogue box is displayed. i. In the Alternative text: box type: Nurse Shark.
j. Select the OK button .k. The image of the nurse shark is inserted below the Scientific Name heading.l. Select the picture of the nurse Shark.m. Notice how the Property Inspector updates to display options for the image.n. Select File Save.o. Press F12 to view the page in a browser.
p. After viewing the page, click the Close button to close the browser window.
7. Adding An Image To The Whale.htm Pagea. Select the whale.htm tab in the title bar to select the web page document.b. Click at the end of the line “Scientific Name: Rhincodon typus” to place
the insertion point.c. Press Enter once.d. In the Insert panel, select the Images button.
17

e. Select Image from the menu.f. Navigate to the _images folder in the shark site root folder.g. Select the whale_shark image.
h. Select the OK button .i. The Image Tag Accessibility Attributes Dialogue box is displayed. j. In the Alternative text: box type: Whale Shark.
k. Select the OK button .l. The image of the whale shark is inserted below the Scientific Name heading.m. Select File Save.n. Press F12 to view the page in a browser.
o. After viewing the page, click the Close button to close the browser window.
8. Adding An Image To The Zebra.htm Pagea. Select the Zebra.htm tab in the title bar to select the web page document.b. Click at the end of the line “Scientific Name: Stegostoma fasciatum” to
place the insertion point.c. Press Enter once.d. In the Files Panel, select the _images folder if it is not already expanded.e. Select the zebra_shark image in the _images folder and drag it to the empty
space under the Scientific Name.f. The Image Tag Accessibility Attributes Dialogue box is displayed. g. In the Alternative text: box type: Zebra Shark.
h. Select the OK button .i. The image of the zebra shark is inserted below the Scientific Name heading.j. Select File Save.k. Press F12 to view the page in a browser.
l. After viewing the page, click the Close button to close the browser window.m. Select File Save All to save all open web page documents.
18

Practice: Sharks – Part 5 of 5
Dreamweaver should be started and the Sharks website should be the working site.
1. Add Hyperlinks to the index pagea. Display the index.htm web page document.b. Select the text Nurse Shark.c. In the Property Inspector, next to the Link box, click on the Browse for
File icon .d. A dialogue box is displayed.
i. Click the nurse file name.ii. Click OK. The dialogue box is removed.
e. Click anywhere to deselect the text. The linked text is blue and underlined.f. Under the Nurse Shark, select the text Whale Shark.
g. In the Property Inspector, Drag the point to file icon to the whale.htm file name in the Files Panel.
h. Click in the text Whale Shark to place the insertion point. Notice how the Link box in the Property Inspector displays whale.htm.
i. Place the insertion point in the nurse shark hyperlink. Notice how the Link box in the Property Inspector displays nurse.htm.
j. Save the web page document.k. Select the text Zebra Shark.
19

l. In the Insert Panel, select the Hyperlink button.
m. A dialogue box is displayed.
i. Next to the Link box, click on the Browse for File icon .ii. Click the zebra file name.
iii. Click OK to close the select file dialogue box.
iv. Click OK. The dialogue box is removed.n. Save the web page document.
2. Add Hyperlinks To Other Pagesa. Display the nurse.htm web page document.b. Link the text Home, to the index.htm web page document. c. Save the web page document.d. Display the whale.htm web page document.e. Link the text Home, to the index.htm web page document. f. Save the web page document.g. Display the zebra.htm web page document.h. Link the text Home, to the index.htm web page document. i. Save the web page document.
20

3. Create An External Hyperlinka. Display the index.htm web page document. b. At the bottom of the page, select the text Shark Research Institute.c. In the Application Bar, select Insert Hyperlink.d. A dialogue box is displayed.
i. Next to the Link box, type the the following URL: http://sharks.orgii. In the Target box select, _blank. This will make the hyperlinked web page
open in a new browser window.iii. Click OK to close the select file dialogue box.
e. Save the web page document.
4. Test The Hyperlinksa. Press F12 to view the index.htm web page document in a browser.b. Click on the Nurse Shark hyperlink. The Nurse Shark web page is displayed.c. Click on the Home hyperlink. The Index page is displayed again.d. Click on the Whale Shark hyperlink. The Whale Shark web page is displayed.e. Click on the Home hyperlink. The Index page is displayed again.f. Click on the Zebra Shark hyperlink. The Zebra Shark web page is displayed.g. Click on the Home hyperlink. The Index page is displayed again.h. Click on the Shark Research Institute hyperlink. A new browser window or tab is
opened and the Sharks.org web page is displayed in the new browser window.i. Close the web browser.
21