Standardised Work Instruction Template Master€¦ · XLS file · Web view · 2012-09-226 - Feet...
30
Standard Work Instruction Instruction Title Climbing Wooden Poles Issue Date 24-Mar-11 Instruction No. 4 CTS SWI 1002 Division CSS-ENG. Objective Department Power Distribution Section/Area Linemen Total number of Pages 16 Front Control Sheet Page 1 PPE, Permits & Environment Page 2 Work Element Summary Page 3 Work Balance Sheet Page 4 (a or b) Tools and Materials List Page 5 Work Element Sheet's Page 6 + Revision Reason for Change 0 24-Mar-11 Original Version 1/year 1 30-Jan-12 1/year IOC page 1 This Standard Work Instruction has been developed to achieve safe operations for all personnel, while protecting property, the environment and producing quality Table of Contents All printed copies are uncontrolled unless clearly stamped CONTROLLED COPY Sign-off and Document Control (master copy requires original signatures) Effective Date Functional Approvals (Name & Signature) Team Leader / Senior TL Approvals off (Name & Audit Frequency Added Isolation and Testing
-
Upload
vuongxuyen -
Category
Documents
-
view
214 -
download
0
Transcript of Standardised Work Instruction Template Master€¦ · XLS file · Web view · 2012-09-226 - Feet...

Standard Work Instruction
Instruction Title Climbing Wooden Poles Issue Date 24-Mar-11
Instruction No. 4 CTS SWI 1002 Division CSS-ENG.
ObjectiveDepartment Power Distribution
Section/Area Linemen
16Front Control Sheet Page 1
PPE, Permits & Environment Page 2
Work Element Summary Page 3
Work Balance Sheet Page 4 (a or b)
Tools and Materials List Page 5
Work Element Sheet's Page 6 +
Revision Reason for Change
0 24-Mar-11 Original Version 1/year
1 30-Jan-12 1/year
IOC page 1
This Standard Work Instruction has been developed to achieve safe operations for all personnel, while protecting property, the environment and producing quality
Table of Contents Total number of Pages
All printed copies are uncontrolled unless clearly stamped
CONTROLLED COPY
Sign-off and Document Control (master copy requires original signatures)
Effective Date
Functional Approvals (Name & Signature)
Team Leader / Senior TL Approvals
Superintendent Sign off (Name &
Signature)
Audit Frequency
Added Isolation and Testing
G9
Total Number of pages: When Standardised Work doc is complete, hide unused sheets and enter the total number of pages in this field
Standard Work Instruction
Issue Date 24-Mar-11 Instruction Title Climbing Wooden Poles
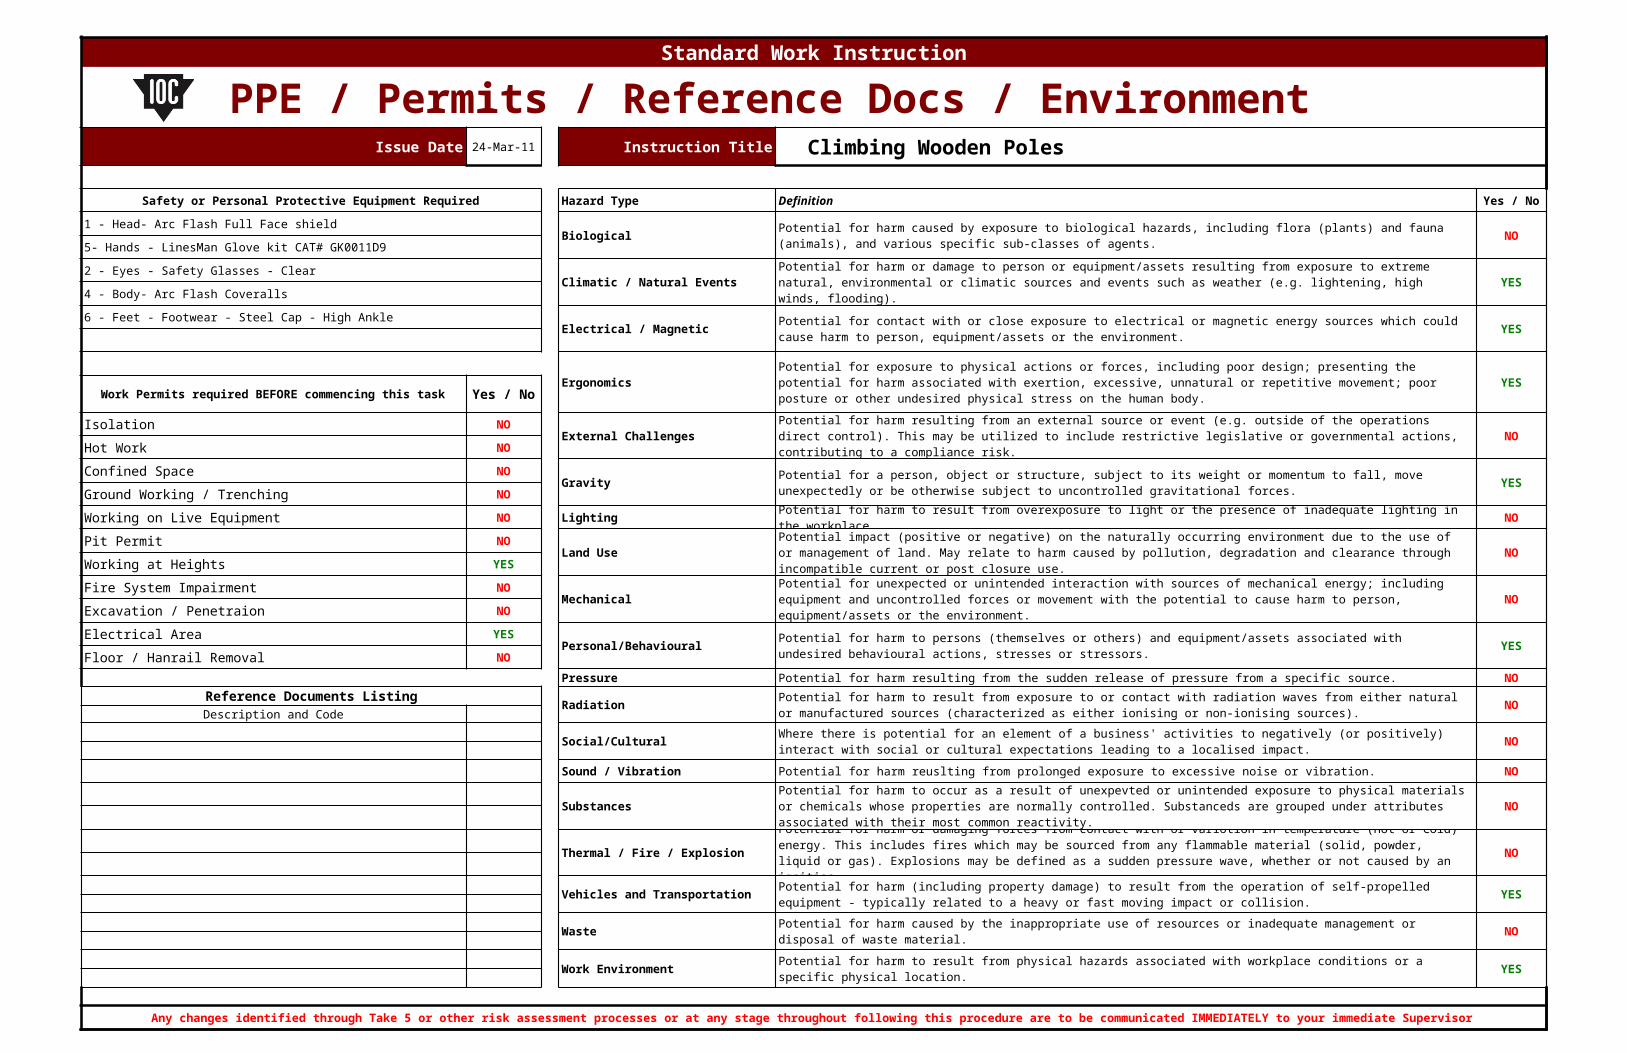
Safety or Personal Protective Equipment Required Hazard Type Definition Yes / No
1 - Head- Arc Flash Full Face shieldBiological NO
5- Hands - LinesMan Glove kit CAT# GK0011D92 - Eyes - Safety Glasses - Clear
Climatic / Natural Events YES4 - Body- Arc Flash Coveralls6 - Feet - Footwear - Steel Cap - High Ankle
Electrical / Magnetic YES
Ergonomics YESYes / No
Isolation NOExternal Challenges NO
Hot Work NO
Confined Space NOGravity YES
Ground Working / Trenching NO
Working on Live Equipment NO Lighting NO
Pit Permit NOLand Use NO
Working at Heights YES
Fire System Impairment NOMechanical NO
Excavation / Penetraion NO
Electrical Area YESPersonal/Behavioural YES
Floor / Hanrail Removal NOPressure Potential for harm resulting from the sudden release of pressure from a specific source. NO
Reference Documents Listing Radiation NODescription and Code
Social/Cultural NO
Sound / Vibration Potential for harm reuslting from prolonged exposure to excessive noise or vibration. NO
Substances NO
Thermal / Fire / Explosion NO
Vehicles and Transportation YES
Waste NO
Work Environment YES
Any changes identified through Take 5 or other risk assessment processes or at any stage throughout following this procedure are to be communicated IMMEDIATELY to your immediate Supervisor
PPE / Permits / Reference Docs / Environment Page 2
Potential for harm caused by exposure to biological hazards, including flora (plants) and fauna (animals), and various specific sub-classes of agents.
Potential for harm or damage to person or equipment/assets resulting from exposure to extreme natural, environmental or climatic sources and events such as weather (e.g. lightening, high winds, flooding).
Potential for contact with or close exposure to electrical or magnetic energy sources which could cause harm to person, equipment/assets or the environment.
Potential for exposure to physical actions or forces, including poor design; presenting the potential for harm associated with exertion, excessive, unnatural or repetitive movement; poor posture or other undesired physical stress on the human body.Work Permits required BEFORE commencing this
taskPotential for harm resulting from an external source or event (e.g. outside of the operations direct control). This may be utilized to include restrictive legislative or governmental actions, contributing to a compliance risk.
Potential for a person, object or structure, subject to its weight or momentum to fall, move unexpectedly or be otherwise subject to uncontrolled gravitational forces.Potential for harm to result from overexposure to light or the presence of inadequate lighting in the workplace.Potential impact (positive or negative) on the naturally occurring environment due to the use of or management of land. May relate to harm caused by pollution, degradation and clearance through incompatible current or post closure use.Potential for unexpected or unintended interaction with sources of mechanical energy; including equipment and uncontrolled forces or movement with the potential to cause harm to person, equipment/assets or the environment.
Potential for harm to persons (themselves or others) and equipment/assets associated with undesired behavioural actions, stresses or stressors.
Potential for harm to result from exposure to or contact with radiation waves from either natural or manufactured sources (characterized as either ionising or non-ionising sources).Where there is potential for an element of a business' activities to negatively (or positively) interact with social or cultural expectations leading to a localised impact.
Potential for harm to occur as a result of unexpevted or unintended exposure to physical materials or chemicals whose properties are normally controlled. Substanceds are grouped under attributes associated with their most common reactivity.Potential for harm or damaging forces from contact with or variotion in temperature (Hot or Cold) energy. This includes fires which may be sourced from any flammable material (solid, powder, liquid or gas). Explosions may be defined as a sudden pressure wave, whether or not caused by an ignition.Potential for harm (including property damage) to result from the operation of self-propelled equipment - typically related to a heavy or fast moving impact or collision.Potential for harm caused by the inappropriate use of resources or inadequate management or disposal of waste material.Potential for harm to result from physical hazards associated with workplace conditions or a specific physical location.

Standard Work Instruction
Instruction No. 4 CTS SWI 1002 Layout
# Work Element Description OPT VA NVA Auto Walk Total
1 Ensure No Power on Overhead Lines 0:00
2 Perform Thorough Take 5 0:00
3 Inspect PPE 0:00
4 Wooden Pole Inspection Before Ascending the Pole 0:00
5 Appropriate Safety PPE 0:00
6 Test Voltage on Overhead Line 0:00
7 Ascending the Wooden Pole 0:00
8 Obstacle while Ascending the Wooden Pole 0:00
9 Descending the Wooden Pole 0:00
10 Obstacle while Descending the Wooden Pole 0:00
11 0:00
12 0:00
19 0:00
20 0:00
21 0:00
22 0:00
23 0:00
24 0:00
25 0:00
Total 0:00 0:00 0:00 0:00 0:00
Work Element Summary Page 3
Cycle Time (HH:MM)
Choker Belt
Gaffs
Safety Harness
Back Biter Lanyard Climbing Belt
J6
For the operator, Auto time is non value added, though the machine may be adding value.
K6
Time to walk from this step to the next.

Standard Work Instruction
Work Balance Sheet Page 4a
0:00
2:24
4:48
7:12
9:36
12:00
14:24
16:48
19:12
21:36
24:00
0:00
0:00
Non Value Added
Value Added
Tim
e (H
H:M
M)

Standard Work Instruction
Tools and Materials ListInstruction Title Climbing Wooden Poles Issue Date 24-Mar-11 Page 5 of 16
Symbols Tool ID # Tool Description Symbol Mat'l ID# Material Description Symbol
Quality Gaffs
HSE
Knack Climbing Belt
Choker Belt
A Line Voltage detector used to determine absence of voltage.
Visuals
Where Used Element/
Step #
Where Used Element/
Step #
Equipped with spurs, they are designed for climbing wooden poles and secure to safety boot with a belt system.
3.1, 5.1, 6.1, 7.1, 8.1, 9.1, 10.1
Safety Harness
A harness worn around a person's body (over the shoulders and around the chest) used for fall arrest.
3.1, 5.1, 6.1, 7.1, 10.1
A belt that postions around the climber's waist and connects to the safety harness.
3.1, 5.1, 6.1, 7.1, 10.1
Safety Equipment by Exception
If the climber falls the strap tightens onto the pole arresting the fall. Attaches to the climbing belt.
3.1, 6.1, 7.1, 8.1, 9.1, 10.1
Back Biter Lanyard
A lanyard with shock absorber and cross-arm anchorage connector.
3.1, 5.1, 7.1, 10.1
Voltage Detector
Q
Safety HarnessGaffs
Choker Belt Back Biter Lanyard
Climbing Belt

Standard Work Instruction
Work Element SheetInstruction Title Climbing Wooden Poles Issue Date 24-Mar-11 Page 6
Element Name Ensure No Power on Overhead Lines Element # 1 0:00
Symbols Step# WORK STEP Symbol KEY POINT / SAFETY HIGHLIGHT REASON WHY
Quality 1.1
HSE 1.2
Knack
Visuals
Element Time
Team leader and crew meet to discuss and develop Isolation Switching Order (when working on or near possibly energized lines).
Refer to Single Point Lesson for Developing Isolation Switching Order.
Crew executes Isolation Switching Order: locks potential sources of energization, tests for absence of voltage, applys grounds and utilizes personal Isolation Locks.
Sources are locked, lines tested and grounded, personal locks applied. Refer to High Voltage Line Testing SWP.
Safety Equipment by Exception
Q

Standard Work Instruction
Work Element SheetInstruction Title Climbing Wooden Poles Issue Date 24-Mar-11 Page 7
Element Name Perform Thorough Take 5 Element # 2 0:00
Symbols Step# WORK STEP Symbol KEY POINT / SAFETY HIGHLIGHT REASON WHY
Quality 2.1 Perform thorough Take 5.
HSE
Knack
Ensure Take 5 is completed on job site.
Visuals
Element Time
Minimum requirement under company policy prior to commencing any task. Your personal risk assessment to identify &
implement controls to assist in reducing risks as is reasonably possible.Ensure Take 5 book available, do not commence
with task until Take 5 completed & any issues addressed.Safety Equipment by
ExceptionTo be able to visually see hazards and inspect area.
Q
1.1 1.1 1.1

Standard Work Instruction
Work Element SheetInstruction Title Climbing Wooden Poles Issue Date 24-Mar-11 Page 8
Element Name Inspect PPE Element # 3 0:00
Symbols Step# WORK STEP Symbol KEY POINT / SAFETY HIGHLIGHT REASON WHY
Quality3.1 Certified personnel required as per IOCC safety standards.
HSE
Knack
Visuals
Element Time
Inspection of climbing equipment prior to use (Safety harness, back biter lanyard, choker belt, climbing belt, gaffs).
Visually inspect the safety harness, lanyard, gaffs, climbing belt and choker belt for any damage. Minimum requirement under company policy prior to commencing any task. Fall arrest and fall protection certified.
Safety Equipment by Exception
Q

Standard Work Instruction
Work Element SheetInstruction Title Climbing Wooden Poles Issue Date 24-Mar-11 Page 9
Element Name Wooden Pole Inspection Before Ascending the Pole Element # 4 0:00
Symbols Step# WORK STEP Symbol KEY POINT / SAFETY HIGHLIGHT REASON WHY
Quality 4.1 Inspect the wooden pole prior to ascending. To ensure pole is safe to climb.
HSE Personal injury may occur.
Knack
Visuals
Element Time
Inspect the wooden pole before climbing . Refer to SPL Wooden Pole Inspection.
Never climb a damaged wooden pole because it may cause injury or fatality to the climber.
Safety Equipment by Exception
Q

Standard Work Instruction
Work Element SheetInstruction Title Climbing Wooden Poles Issue Date 24-Mar-11 Page 10
Element Name Appropriate Safety PPE Element # 5 0:00
Symbols Step# WORK STEP Symbol KEY POINT / SAFETY HIGHLIGHT REASON WHY
Quality 5.1 Put on required safety PPE. Proper training required to reduce the risk of a fall hazard.
HSE Put on gaffs around each safety boot (refer to Picture 5.1a).
Fall arrest equipment to be worn at all times during the climb.Knack Put on safety harness (refer to Picture 5.1b).
Put on the back biter lanyard (refer to Picture 5.1d).
Visuals
Element Time
All workers involved in the climb must have fall arrest training. Minimum requirement under company policy prior to commencing any task. Fall arrest and fall protection certified.
Safety Equipment by Exception
Put on climbing belt and connect to safety harness (refer to Picture 5.1c).
Q
5.1b5.1a
5.1d5.1cBack Biter Lanyard
Safety Harness
Gaff Hook
Gaff Belt
Climbing Belt

Standard Work Instruction
Work Element SheetInstruction Title Climbing Wooden Poles Issue Date 24-Mar-11 Page 11
Element Name Test Voltage on Overhead Line Element # 6 0:00
Symbols Step# WORK STEP Symbol KEY POINT / SAFETY HIGHLIGHT REASON WHY
Quality 6.1 Ascending the wooden pole. Grounds person is a necessity to ensure safe work procedures.
HSE
Knack
Proper body motion required to prevent the risk of falling.
Prevent the risk of falling.
Visuals
Element Time
Each climb requires a grounds person. Use of verbal communication.Loop one end of the choker belt around the base of the wooden pole while the other end is attached to the D-ring on the climbing belt (refer to Picture 6.1a). Proper use of fall arrest equipment required to prevent the risk
of falling.Connect the free end of the choker belt to the other D-ring on the climbing belt (opposite to the one used in previous step). Secure the choker belt around the pole and tighten (refer to Picture 6.1b).
Safety Equipment by Exception
Begin to climb by placing your hand on the pole at the same height as your forehead. Step up on the pole using the foot on the same side as the hand already on the pole. Force the gaff hook on that foot into the pole (refer to Picture 6.1c). Repeat these motions with the opposite side of the body to lift yourself up the pole. With each movement, you need to keep your choker belt with you and therefore must shift the belt upward (above waist level). Make sure you are secure before moving the choker belt (refer to Pictures 6.1d,e&f).
While climbing, you need to keep the choker belt engaged at all times. If you are moving one leg, you need to keep the other leg embedded into the pole and both arms holding the choker belt. Your knees should remain locked throughout the climb.
Q
6.1b6.1a
Choker Belt
Safety Belt D-Ring
Climbing Belt Connection (one side)
Pole Connection
6.1c 6.1d 6.1e 6.1f

Standard Work Instruction
Work Element SheetInstruction Title Climbing Wooden Poles Issue Date 24-Mar-11 Page 12
Element Name Ascending the Wooden Pole Element # 7 0:00
Symbols Step# WORK STEP Symbol KEY POINT / SAFETY HIGHLIGHT REASON WHY
Quality 7.1 Obstacle while ascending the Wooden Pole
HSE
Knack
Preparing to put the climbing belt above the obstacle.
Creates a tie off point above the obstacle using the choker belt.
Visuals
Element Time
If an obstacle is encountered (Refer to Pic 7.1a) during a upward climb, a back biter lanyard must be used to assist in climbing past the obstacle.
Must remain tied off at all times. In order to move past obstacle need to remove choker belt.
Ensure gaff hooks are securely embedded in the pole with knees locked. Disconnect the back biter clamp from the D-ring on the climbing belt and loop the back biter lanyard around the wooden pole, above the obstacle, (refer to Picture 7.1b) then clamp onto the lanyard in front of the pole (refer to Picture 7.1c). Ensure back biter is secure.
Back biter lanyard is designed to bite back on itself. Regular standard lanyards are not. It's used to create a tie off above the obstacle allowing the choker belt to be removed.
Safety Equipment by Exception
Remove the choker belt from one D-ring on the belt around the climbers waist and remove the belt from the pole (refer to Picture 7.1d).
Loop the free end of the choker belt around the wooden pole above the obstacle (refer to Picture 7.1e). Connect to the D-ring on the belt around the climbers waist and connect the belt around the pole (refer to Picture 7.1f). Adjust the belt around the pole (refer to Picture 7.1g). Ensure choker belt is secure.
Remove back biter from around the pole by disconnecting at the connection point in front of pole (refer to Picture 7.1h) and connect to the D-ring on climbing belt.
Choker belt is positioned above the obstacle. Attach the back biter lanyard to the D-ring so it's not dangling.
Q
7.1h
7.1d7.1c
7.1g7.1f7.1e
7.1a
Obstacle example
7.1b
Back Biter Lanyard Clamp on the front Connection around pole
Re-Position Choker Belt Disconnect Back Biter Lanyard

Standard Work Instruction
Work Element SheetInstruction Title Climbing Wooden Poles Issue Date 24-Mar-11 Page 13
Element Name Obstacle while Ascending the Wooden Pole Element # 8 0:00
Symbols Step# WORK STEP Symbol KEY POINT / SAFETY HIGHLIGHT REASON WHY
Quality 8.1 Stabilize Position at Working Height Prevent risk of fall.
HSE
Knack
Visuals
Element Time
Both gaffs are securely embedded into the pole (refer to Picture 8.1) to ensure stable footing.
The choker belt is tightened and secured around the wooden pole (refer to Picture 8.1).
If a fall were to occur the choker belt would "choke" around the wooden pole to prevent a fall.
Safety Equipment by Exception
Q
Back Biter Lanyard
Gaffs
Choker Belt ConnectionChoker Belt
8.1

Standard Work Instruction
Work Element SheetInstruction Title Climbing Wooden Poles Issue Date 24-Mar-11 Page 14
Element Name Descending the Wooden Pole Element # 9 0:00
Symbols Step# WORK STEP Symbol KEY POINT / SAFETY HIGHLIGHT REASON WHY
Quality 9.1 Descending the Wooden Pole.
Proper body motion required to prevent the risk of falling.HSE
Knack
Hands on choker belt allows stability while ascending or descending
Visuals
Element Time
Begin to climb down the pole by placing your hand on the pole at the same height as your forehead. Step down the pole using the foot on the same side as the hand already on the pole. Force the gaff hook on that foot into the pole (refer to Picture 9.1a). Repeat these motions with the opposite side of the body to lower yourself down the pole. With each movement, you need to keep your choker belt with you and therefore must shift the belt downward (to waist level). Make sure you are secure before moving the Choker Belt (refer to Pictures 9.1b,c&d).
Safety Equipment by Exception While climbing, you need to keep at least three points touching the
pole at any time. If you are moving one leg, you need to keep the other leg and both arms holding the pole. Your knees should remain locked throughout the climb.
Three point contact provides stable contact when climbing the wooden pole.
Q
9.1a 9.1d9.1c9.1b
Q

Standard Work Instruction
Work Element SheetInstruction Title Climbing Wooden Poles Issue Date 24-Mar-11 Page 15
Element Name Obstacle while Descending the Wooden Pole Element # 10 0:00
Symbols Step# WORK STEP Symbol KEY POINT / SAFETY HIGHLIGHT REASON WHY
Quality 10.1 Obstacle while descending the wooden pole.
HSE
Knack
Preparing to put the climbing belt above the obstacle.
Creates a tie off point above the obstacle using the choker belt.
Visuals
Element Time
If an obstacle is encountered (Refer to Pic 10.1a) during a downward climb a back biter lanyard must be used to assist in climbing past the obstacle.
Must remain tied off at all times. In order to move past obstacle need to remove choker belt.
Ensure gaff hooks are securely embedded in the pole with knees locked. Disconnect the back biter clamp from the D-ring on the climbing belt and loop the back biter lanyard around the wooden pole, above the obstacle, (refer to Picture 10.1b) then clamp onto the lanyard in front of the pole (refer to Picture 10.1c). Ensure back biter is secure.
Back biter lanyard is designed to bite back on itself. Regular standard lanyards are not. It's used to create a tie off above the obstacle allowing the choker belt to be removed.
Safety Equipment by Exception
Remove the choker belt from one D-ring on the belt around the climbers waist and remove the belt from the pole (refer to Picture 10.1d).
Loop the free end of the choker belt around the wooden pole below the obstacle. Connect to the belt D-ring around the climbers waist and connect the belt around the pole. Adjust the belt around the pole (refer to Picture 10.1e). Ensure choker belt is secure.
Remove back biter from around the pole by disconnecting at the connection point in front of the pole (refer to Picture 10.1f) and connect to D-ring on the climbing belt (refer to Picture 10.1g).
Climbing belt is positioned above the obstacle. Attach the back biter lanyard to the D-ring so it's not dangling.
Q
10.1 10.1b
10.1d 10.1f 10.1g
10.1c
10.1e
Obstacle Example
Back Biter Connection around Pole
Back Biter attached to Climbing Belt Remove Choker Belt Re-Position Choker Belt Disconnect Back Biter

Standard Work Instruction
Work Element SheetInstruction Title Climbing Wooden Poles Issue Date 24-Mar-11 Page 16
Element Name 0 Element # 11 0:00
Symbols Step# WORK STEP Symbol KEY POINT / SAFETY HIGHLIGHT REASON WHY
Quality 11.1
HSE
Knack
Visuals
Element Time
Safety Equipment by Exception
Q

Standard Work Instruction
Work Element SheetInstruction Title Climbing Wooden Poles Issue Date 24-Mar-11 Page 17
Element Name 0 Element # 12 0:00
Symbols Step# WORK STEP Symbol KEY POINT / SAFETY HIGHLIGHT REASON WHY
Quality 12.1
HSE
Knack
Visuals
Element Time
Safety Equipment by Exception
Q
Q

Standard Work Instruction
Work Element SheetInstruction Title Climbing Wooden Poles Issue Date 24-Mar-11 Page 18
Element Name #REF! Element # #REF! #REF!
Symbols Step# WORK STEP Symbol KEY POINT / SAFETY HIGHLIGHT REASON WHY
Quality 13.1
HSE
Knack
Visuals
Element Time
Safety Equipment by Exception
Q

Standard Work Instruction
Work Element SheetInstruction Title Climbing Wooden Poles Issue Date 24-Mar-11 Page 19
Element Name #REF! Element # #REF! #REF!
Symbols Step# WORK STEP Symbol KEY POINT / SAFETY HIGHLIGHT REASON WHY
Quality 14.1
HSE
Knack
Visuals
Element Time
Safety Equipment by Exception
Q

Standard Work Instruction
Work Element SheetInstruction Title Climbing Wooden Poles Issue Date 24-Mar-11 Page 20
Element Name #REF! Element # #REF! #REF!
Symbols Step# WORK STEP Symbol KEY POINT / SAFETY HIGHLIGHT REASON WHY
Quality 15.1
HSE
Knack
Visuals
Element Time
Safety Equipment by Exception
Q
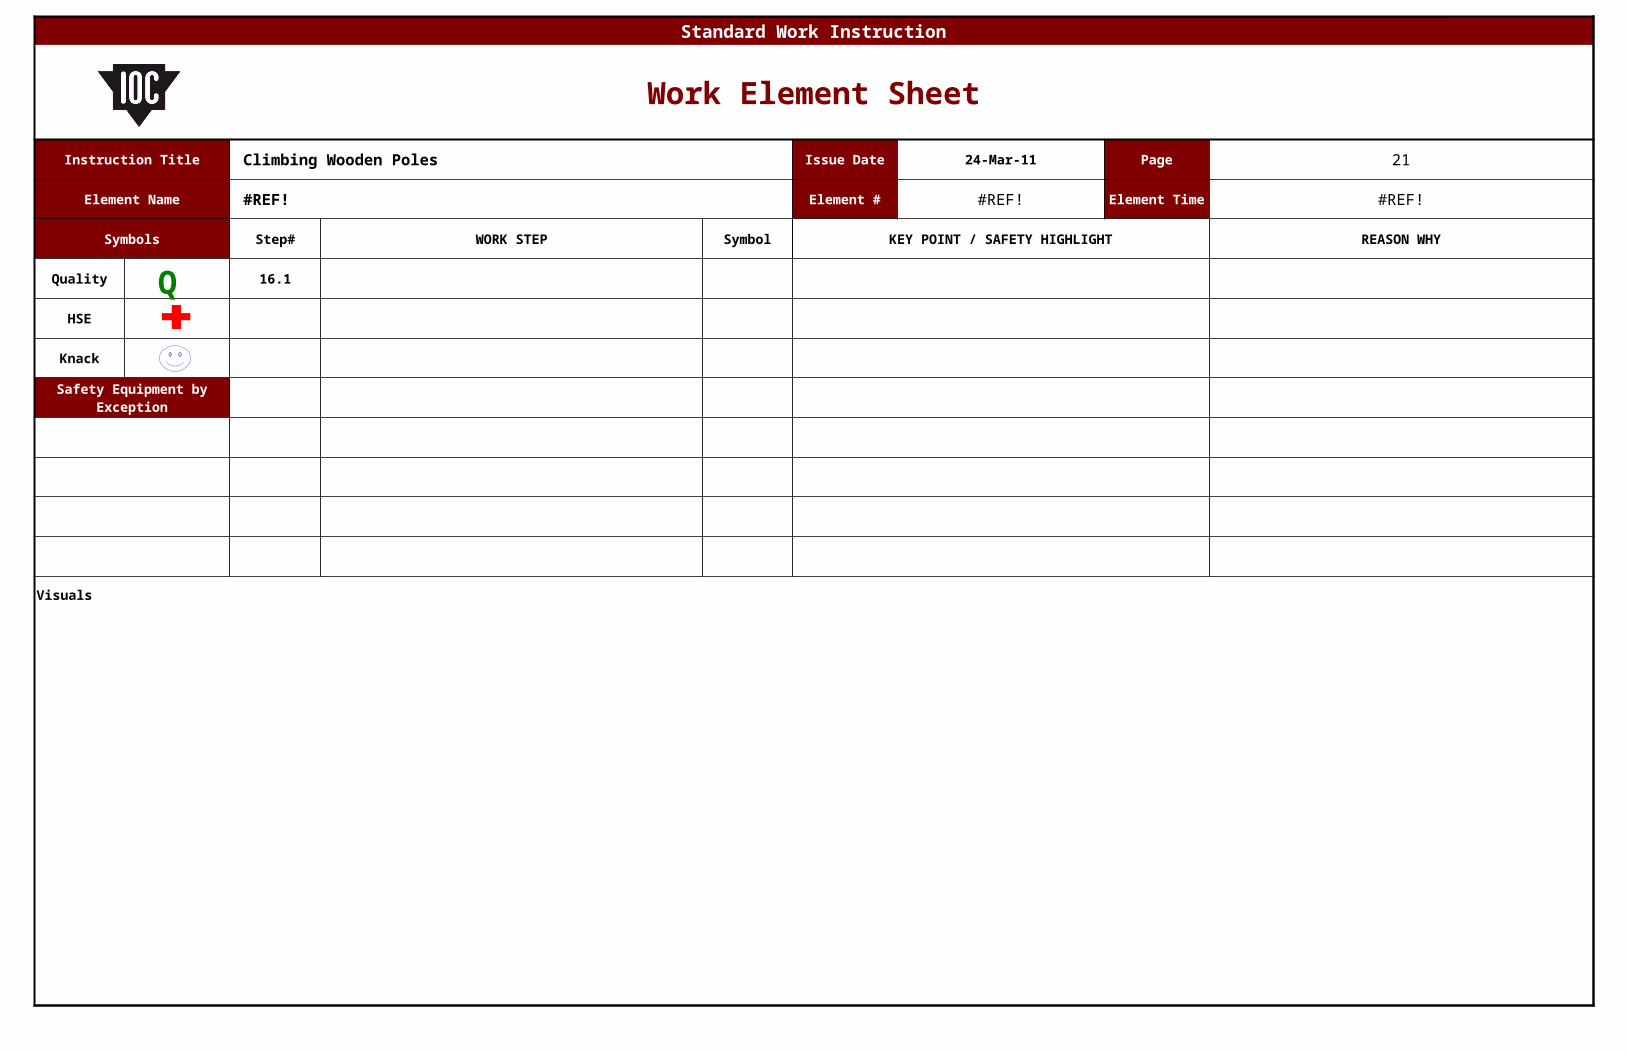
Standard Work Instruction
Work Element SheetInstruction Title Climbing Wooden Poles Issue Date 24-Mar-11 Page 21
Element Name #REF! Element # #REF! #REF!
Symbols Step# WORK STEP Symbol KEY POINT / SAFETY HIGHLIGHT REASON WHY
Quality 16.1
HSE
Knack
Visuals
Element Time
Safety Equipment by Exception
Q

Standard Work Instruction
Work Element SheetInstruction Title Climbing Wooden Poles Issue Date 24-Mar-11 Page 22
Element Name #REF! Element # #REF! #REF!
Symbols Step# WORK STEP Symbol KEY POINT / SAFETY HIGHLIGHT REASON WHY
Quality 17.1
HSE
Knack
Visuals
Element Time
Safety Equipment by Exception
Q

Standard Work Instruction
Work Element SheetInstruction Title Climbing Wooden Poles Issue Date 24-Mar-11 Page 23
Element Name #REF! Element # #REF! #REF!
Symbols Step# WORK STEP Symbol KEY POINT / SAFETY HIGHLIGHT REASON WHY
Quality 18.1
HSE
Knack
Visuals
Element Time
Safety Equipment by Exception
Q

Standard Work Instruction
Work Element SheetInstruction Title Climbing Wooden Poles Issue Date 24-Mar-11 Page 24
Element Name 0 Element # 19 0:00
Symbols Step# WORK STEP Symbol KEY POINT / SAFETY HIGHLIGHT REASON WHY
Quality 19.1
HSE
Knack
Visuals
Element Time
Safety Equipment by Exception
Q

Standard Work Instruction
Work Element SheetInstruction Title Climbing Wooden Poles Issue Date 24-Mar-11 Page 25
Element Name 0 Element # 20 0:00
Symbols Step# WORK STEP Symbol KEY POINT / SAFETY HIGHLIGHT REASON WHY
Quality 20.1
HSE
Knack
Visuals
Element Time
Safety Equipment by Exception
Q

Standard Work Instruction
Work Element SheetInstruction Title Climbing Wooden Poles Issue Date 24-Mar-11 Page 26
Element Name 0 Element # 21 0:00
Symbols Step# WORK STEP Symbol KEY POINT / SAFETY HIGHLIGHT REASON WHY
Quality 21.1
HSE
Knack
Visuals
Element Time
Safety Equipment by Exception
Q

Standard Work Instruction
Work Element SheetInstruction Title Climbing Wooden Poles Issue Date 24-Mar-11 Page 27
Element Name 0 Element # 22 0:00
Symbols Step# WORK STEP Symbol KEY POINT / SAFETY HIGHLIGHT REASON WHY
Quality 22.1
HSE
Knack
Visuals
Element Time
Safety Equipment by Exception
Q

Standard Work Instruction
Work Element SheetInstruction Title Climbing Wooden Poles Issue Date 24-Mar-11 Page 28
Element Name 0 Element # 23 0:00
Symbols Step# WORK STEP Symbol KEY POINT / SAFETY HIGHLIGHT REASON WHY
Quality 23.1
HSE
Knack
Visuals
Element Time
Safety Equipment by Exception
Q

Standard Work Instruction
Work Element SheetInstruction Title Climbing Wooden Poles Issue Date 24-Mar-11 Page 29
Element Name 0 Element # 24 0:00
Symbols Step# WORK STEP Symbol KEY POINT / SAFETY HIGHLIGHT REASON WHY
Quality 24.1
HSE
Knack
Visuals
Element Time
Safety Equipment by Exception
Q

Standard Work Instruction
Work Element SheetInstruction Title Climbing Wooden Poles Issue Date 24-Mar-11 Page 30
Element Name 0 Element # 25 0:00
Symbols Step# WORK STEP Symbol KEY POINT / SAFETY HIGHLIGHT REASON WHY
Quality 25.1
HSE
Knack
Visuals
Element Time
Safety Equipment by Exception
Q