SQL*Plus Getting Started for Windows Release 8.1sqltech.cl/doc/oracle8i/win.817/a82954.pdf ·...
48
SQL*Plus Getting Started Release 8.1.7 for Windows September 2000 Part No. A82954-01
Transcript of SQL*Plus Getting Started for Windows Release 8.1sqltech.cl/doc/oracle8i/win.817/a82954.pdf ·...
SQL*Plus
Getting Started
Release 8.1.7 for Windows
September 2000
Part No. A82954-01
SQL*Plus Getting Started, Release 8.1.7 for Windows
Part No. A82954-01
Copyright © 1996, 2000, Oracle Corporation. All rights reserved.
Primary Author: Simon Watt
Contributors: Alison Holloway, Christopher Jones, Andrei Souleimanian
The Programs (which include both the software and documentation) contain proprietary information of Oracle Corporation; they are provided under a license agreement containing restrictions on use and disclosure and are also protected by copyright, patent, and other intellectual and industrial property laws. Reverse engineering, disassembly, or decompilation of the Programs is prohibited.
The information contained in this document is subject to change without notice. If you find any problems in the documentation, please report them to us in writing. Oracle Corporation does not warrant that this document is error free. Except as may be expressly permitted in your license agreement for these Programs, no part of these Programs may be reproduced or transmitted in any form or by any means, electronic or mechanical, for any purpose, without the express written permission of Oracle Corporation.
If the Programs are delivered to the U.S. Government or anyone licensing or using the programs on behalf of the U.S. Government, the following notice is applicable:
Restricted Rights Notice Programs delivered subject to the DOD FAR Supplement are "commercial computer software" and use, duplication, and disclosure of the Programs, including documentation, shall be subject to the licensing restrictions set forth in the applicable Oracle license agreement. Otherwise, Programs delivered subject to the Federal Acquisition Regulations are "restricted computer software" and use, duplication, and disclosure of the Programs shall be subject to the restrictions in FAR 52.227-19, Commercial Computer Software - Restricted Rights (June, 1987). Oracle Corporation, 500 Oracle Parkway, Redwood City, CA 94065.
The Programs are not intended for use in any nuclear, aviation, mass transit, medical, or other inherently dangerous applications. It shall be the licensee's responsibility to take all appropriate fail-safe, backup, redundancy, and other measures to ensure the safe use of such applications if the Programs are used for such purposes, and Oracle Corporation disclaims liability for any damages caused by such use of the Programs.
Oracle is a registered trademark, and Net8, Oracle8i, PL/SQL and SQL*Plus are trademarks or registered trademarks of Oracle Corporation. Other names may be trademarks of their respective owners.
iii
Contents
Send Us Your Comments .................................................................................................................... v
Preface........................................................................................................................................................... vii
1 Introducing SQL*Plus
Overview .............................................................................................................................................. 1-2Basic Concepts ..................................................................................................................................... 1-2
2 Installing SQL*Plus Help and Demonstration Tables
Installing SQL*Plus............................................................................................................................ 2-2Installing SQL*Plus Online Help.................................................................................................... 2-2
Prerequisites .................................................................................................................................. 2-2Installing SQL*Plus Help............................................................................................................. 2-3Accessing SQL*Plus Help............................................................................................................ 2-3
Accessing Demonstration Tables..................................................................................................... 2-4
3 Using SQL*Plus
Using the Command Line Interface ................................................................................................ 3-2Changing the Command Line Font and Font Size .................................................................. 3-3
Using the Graphical User Interface................................................................................................. 3-4Using the SQL*Plus Application Window................................................................................ 3-5Using the Mouse Buttons to Copy Text to the Command Prompt ....................................... 3-5Using the Command Keys .......................................................................................................... 3-6Using the SQL*Plus Menus......................................................................................................... 3-6
iv
Setting Options and Values Using the Environment Dialog................................................ 3-10Changing the GUI Font and Font Size..................................................................................... 3-11
Exiting SQL*Plus .............................................................................................................................. 3-14
4 Operating System-Specific References
Automatic Login.................................................................................................................................. 4-2TIMING Command ............................................................................................................................ 4-2Interpreting Error Messages ............................................................................................................. 4-2Setting Up Your SQL*Plus Environment ....................................................................................... 4-3Sending Results to a File ................................................................................................................... 4-3@, @@, and START Commands......................................................................................................... 4-3HOST Command................................................................................................................................. 4-4SET NEWPAGE Command ............................................................................................................... 4-4PRODUCT_USER_PROFILE Table................................................................................................. 4-4
A Customizing Operating System Parameters
Using the Registry .............................................................................................................................. A-2SQLPATH Parameter Description ............................................................................................. A-2SQLPLUS_FONT Parameter Description.................................................................................. A-3SQLPLUS_FONT_SIZE Parameter Description ....................................................................... A-3
SQLPLUS Environment Variable .................................................................................................... A-3
Index

v
Send Us Your Comments
SQL*Plus Getting Started, Release 8.1.7 for Windows
Part No. A82954-01
Oracle Corporation welcomes your comments and suggestions on the quality and usefulness of this document. Your input is an important part of the information used for revision.
■ Did you find any errors?■ Is the information clearly presented?■ Do you need more information? If so, where?■ Are the examples correct? Do you need more examples?■ What features did you like most?
If you find any errors or have any other suggestions for improvement, please indicate the document title and part number, and the chapter, section, and page number (if available). You can send com-ments to us in the following ways:
■ Electronic mail: [email protected] ■ FAX: +61 3 9690 0043 Attn: Oracle SQL*Plus Documentation Manager■ Postal service:
Oracle Corporation Oracle SQL*Plus Documentation324 St Kilda RoadMelbourne, VIC 3004Australia
If you would like a reply, please give your name, address, telephone number, and (optionally) elec-tronic mail address.
If you have problems with the software, please contact your local Oracle Support Services Center.

vi
vii
Preface
SQL*Plus Getting Started for Windows provides information about the SQL*Plus product specific to Microsoft Windows 2000, Windows NT 4.0, Windows 98, and Windows 95 operating systems.
Specific topics discussed in this preface are:
■ Prerequisites
■ Intended Audience
■ How This Guide Is Organized
■ Related Documents
■ Obtaining Online Help
■ Documentation and Code Conventions Explained
Notes: In the remainder of this guide, SQL*Plus for Windows, will be referred to as SQL*Plus.

viii
PrerequisitesThis guide assumes that you are familiar with the following:
■ SQL*Plus commands and general features. You should refer to the generic SQL*Plus documentation set before using this guide. See "Related Documents" on page ix.
■ Commands for deleting and copying files and the concepts of the search path, subdirectories, and path names.
■ Fundamentals of the Microsoft Windows 2000, Windows NT or Windows 95/98 operating systems.
Intended AudienceThis guide is for all users who want to use SQL*Plus in the Windows 2000, Windows NT or Windows 95/98 operating environments.
How This Guide Is OrganizedThis guide is organized as follows:
Chapter 1, "Introducing SQL*Plus"
Chapter 2, "Installing SQL*Plus Help and Demonstration Tables"
Chapter 3, "Using SQL*Plus"
Chapter 4, "Operating System-Specific References"
Appendix A, "Customizing Operating System Parameters"
ix
Related DocumentsSQL*Plus Getting Started for Windows provides information specific to SQL*Plus on Windows-based platforms only. For information about SQL*Plus cross-platform support, features, and commands, refer to the generic SQL*Plus documentation set on the product CD-ROM. In addition to the complete documentation for the Oracle Enterprise Edition for Windows product, the following SQL*Plus documentation is available for online viewing:
■ SQL*Plus 8.1.7 Release Bulletin (for late-breaking information not included in the SQL*Plus documentation)
■ SQL*Plus User’s Guide and Reference
■ SQL*Plus Quick Reference
■ SQL*Plus Accessibility Guide for Windows
Obtaining Online HelpOnline help for using SQL*Plus is available from the SQL*Plus command line during a session. The SQL*Plus help tables must be created and populated by the database administrator first. See "Installing SQL*Plus Online Help" in Chapter 2 for information about installing SQL*Plus online help.
Note: Before installing SQL*Plus, refer to the generic SQL*Plus documentation on the CD-ROM, and to the Release Notes and Readme files on the CD-ROM for late-breaking information.
x
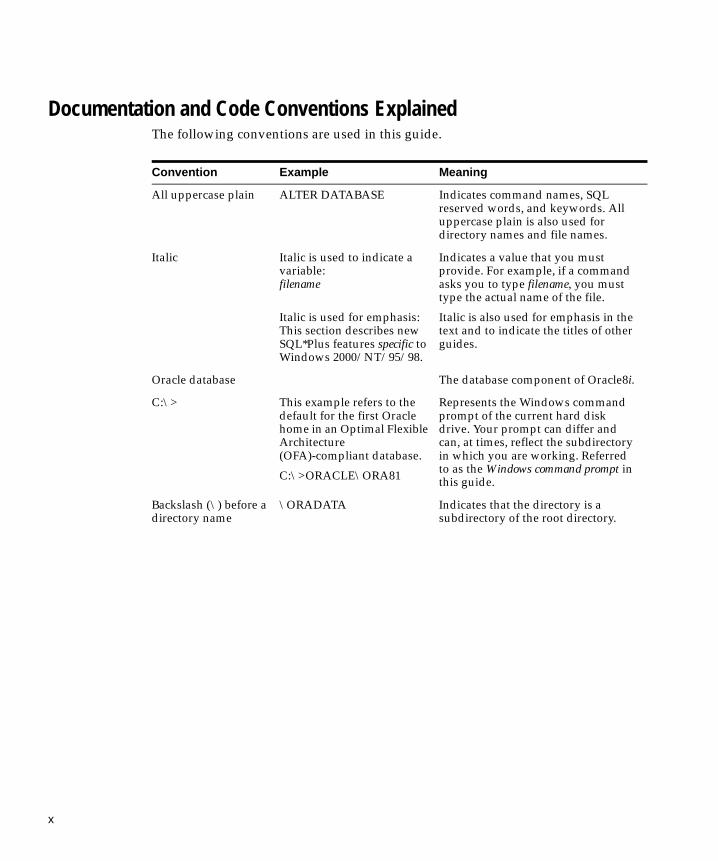
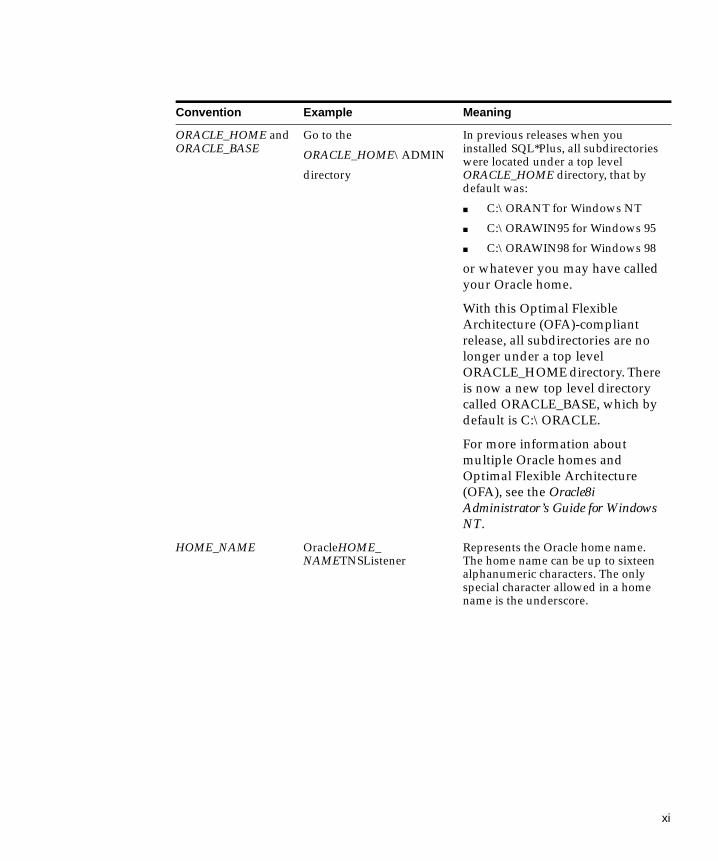
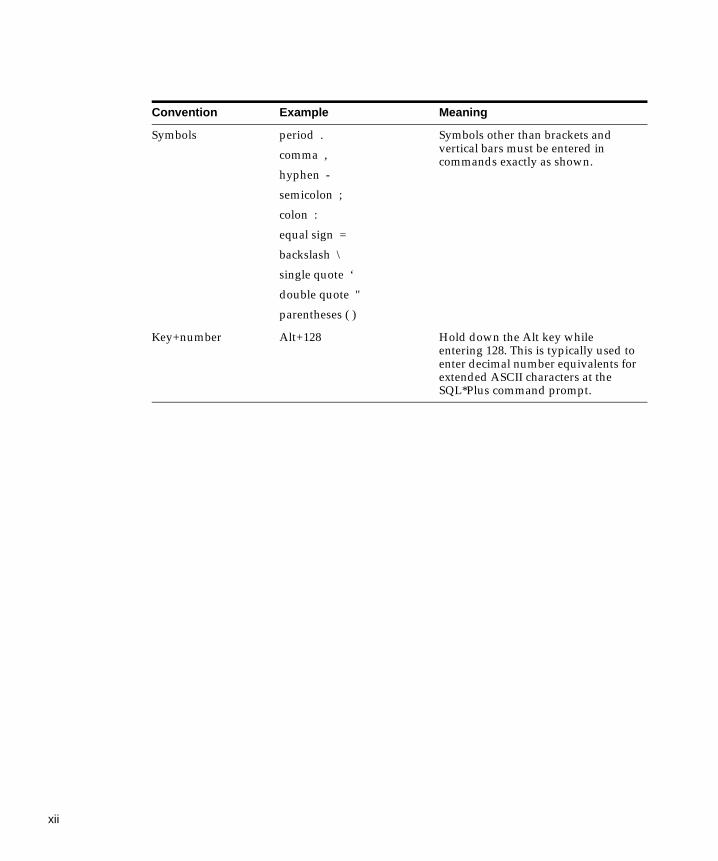
Documentation and Code Conventions ExplainedThe following conventions are used in this guide.
Convention Example Meaning
All uppercase plain ALTER DATABASE Indicates command names, SQL reserved words, and keywords. All uppercase plain is also used for directory names and file names.
Italic Italic is used to indicate a variable:filename
Italic is used for emphasis:This section describes new SQL*Plus features specific to Windows 2000/NT/95/98.
Indicates a value that you must provide. For example, if a command asks you to type filename, you must type the actual name of the file.
Italic is also used for emphasis in the text and to indicate the titles of other guides.
Oracle database The database component of Oracle8i.
C:\> This example refers to the default for the first Oracle home in an Optimal Flexible Architecture (OFA)-compliant database.
C:\>ORACLE\ORA81
Represents the Windows command prompt of the current hard disk drive. Your prompt can differ and can, at times, reflect the subdirectory in which you are working. Referred to as the Windows command prompt in this guide.
Backslash (\) before a directory name
\ORADATA Indicates that the directory is a subdirectory of the root directory.
xi
ORACLE_HOME and ORACLE_BASE
Go to the
ORACLE_HOME\ADMIN
directory
In previous releases when you installed SQL*Plus, all subdirectories were located under a top level ORACLE_HOME directory, that by default was:
■ C:\ORANT for Windows NT
■ C:\ORAWIN95 for Windows 95
■ C:\ORAWIN98 for Windows 98
or whatever you may have called your Oracle home.
With this Optimal Flexible Architecture (OFA)-compliant release, all subdirectories are no longer under a top level ORACLE_HOME directory. There is now a new top level directory called ORACLE_BASE, which by default is C:\ORACLE.
For more information about multiple Oracle homes and Optimal Flexible Architecture (OFA), see the Oracle8i Administrator’s Guide for Windows NT.
HOME_NAME OracleHOME_NAMETNSListener
Represents the Oracle home name. The home name can be up to sixteen alphanumeric characters. The only special character allowed in a home name is the underscore.
Convention Example Meaning
xii
Symbols period .
comma ,
hyphen -
semicolon ;
colon :
equal sign =
backslash \
single quote ‘
double quote "
parentheses ( )
Symbols other than brackets and vertical bars must be entered in commands exactly as shown.
Key+number Alt+128 Hold down the Alt key while entering 128. This is typically used to enter decimal number equivalents for extended ASCII characters at the SQL*Plus command prompt.
Convention Example Meaning
Introducing SQL*Plus 1-1
1Introducing SQL*Plus
This chapter provides introductory information to help you get started with SQL*Plus.
Specific topics discussed are:
■ Overview
■ Basic Concepts
Overview
1-2 SQL*Plus Getting Started
OverviewYou can use the SQL*Plus tool with SQL (Structured Query Language) and its procedural language extension, PL/SQL. These database languages allow you to store and retrieve data in Oracle databases. PL/SQL allows you to link several SQL commands through procedural logic.
SQL*Plus enables you to manipulate SQL commands and PL/SQL blocks, and to perform many additional tasks. With SQL*Plus, you can:
■ Enter, edit, store, retrieve, and run SQL commands and PL/SQL blocks.
■ Format, perform calculations on, store, and print query results in the form of reports.
■ List column definitions for any table.
■ Access and copy data between databases.
■ Send messages to and accept responses from an end user.
■ Perform database administration.
SQL*Plus provides both a command line interface and a graphical user interface (GUI). See Chapter 3, "Using SQL*Plus" for more information.
Basic ConceptsThe following definitions explain concepts central to SQL*Plus:
Note: Although Server Manager is shipped with Release 8.1.7, Oracle Corporation recommends that you migrate to SQL*Plus because Server Manager will not be shipped with future releases.
Concept Definition
command An instruction you give to an operating system, or software such as SQL*Plus or Oracle, to perform a particular task.
SQL command A command to execute SQL statements.
SQL*Plus command A command to execute SQL*Plus statements.
block In PL/SQL, a group of SQL and PL/SQL commands related to each other through procedural logic.
table The basic unit of storage in Oracle.
Basic Concepts
Introducing SQL*Plus 1-3
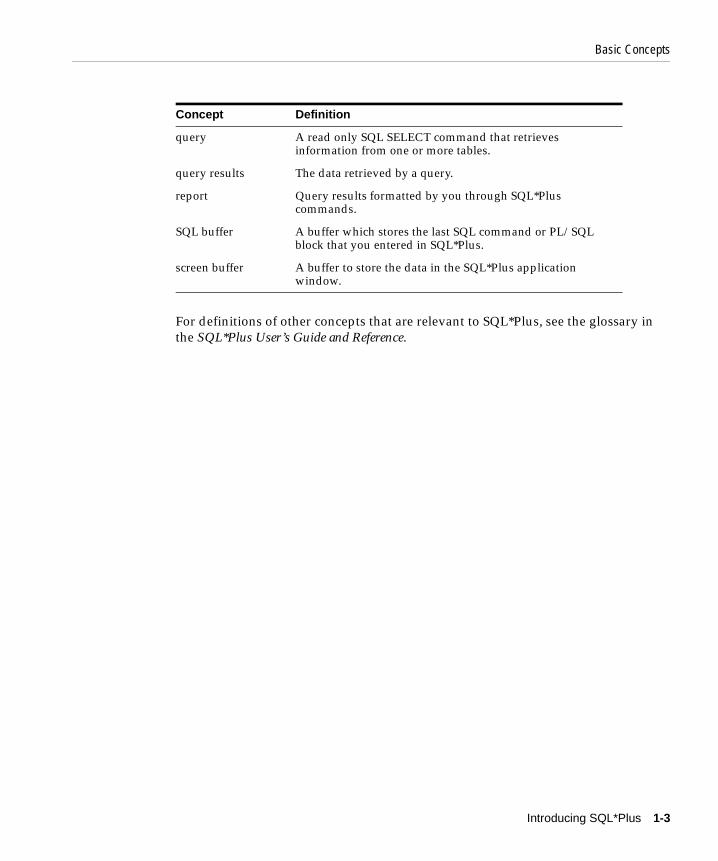
For definitions of other concepts that are relevant to SQL*Plus, see the glossary in the SQL*Plus User’s Guide and Reference.
query A read only SQL SELECT command that retrieves information from one or more tables.
query results The data retrieved by a query.
report Query results formatted by you through SQL*Plus commands.
SQL buffer A buffer which stores the last SQL command or PL/SQL block that you entered in SQL*Plus.
screen buffer A buffer to store the data in the SQL*Plus application window.
Concept Definition

Basic Concepts
1-4 SQL*Plus Getting Started
Installing SQL*Plus Help and Demonstration Tables 2-1
2Installing SQL*Plus Help and
Demonstration Tables
This chapter provides information to help you install SQL*Plus components.
Specific topics discussed are:
■ Installing SQL*Plus
■ Installing SQL*Plus Online Help
■ Accessing Demonstration Tables

Installing SQL*Plus
2-2 SQL*Plus Getting Started
Installing SQL*PlusThe CD-ROM insert that accompanies your product CD-ROM includes the following information about SQL*Plus:
■ System requirements
■ Installation instructions
Installing SQL*Plus Online HelpOnline help is available from the command line of either the graphical user interface or the command line interface while you are using SQL*Plus. The database administrator creates the SQL*Plus help tables and populates them with SQL*Plus help data.
PrerequisitesBefore you can install SQL*Plus help, ensure that:
■ SQL*Plus is installed, otherwise, you cannot create and load the help tables.
■ The default tablespace for the SYSTEM user is large enough to accommodate the help system. You must have at least 128K of free space.
■ The SQL*Plus help script files are available in
%ORACLE_HOME%\SQLPLUS\ADMIN\HELP\
The help script files are:
■ HELPBLD.SQL – to drop and create new help tables.
■ HELPUS.SQL – to populate the help tables with the help data.
■ HELPDROP.SQL – to drop existing SQL*Plus help tables.
■ The Windows command file, HELPINS.BAT, is available in
%ORACLE_HOME%\BIN\
Note: Before installing SQL*Plus, refer to the generic SQL*Plus documentation on the CD-ROM, and to the Release Notes and Readme files on the CD-ROM for late-breaking information.
Installing SQL*Plus Online Help
Installing SQL*Plus Help and Demonstration Tables 2-3
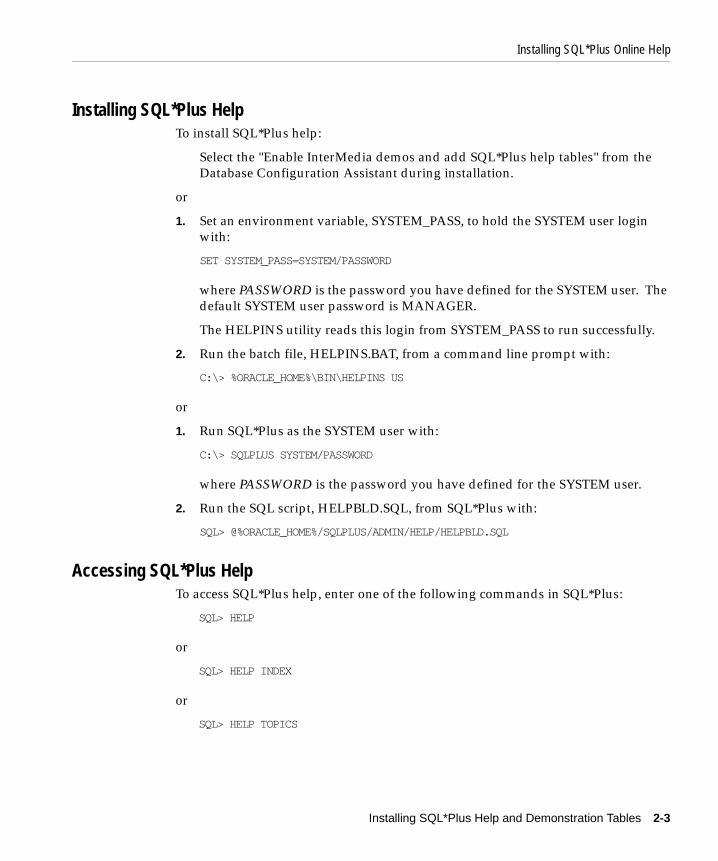
Installing SQL*Plus HelpTo install SQL*Plus help:
Select the "Enable InterMedia demos and add SQL*Plus help tables" from the Database Configuration Assistant during installation.
or
1. Set an environment variable, SYSTEM_PASS, to hold the SYSTEM user login with:
SET SYSTEM_PASS=SYSTEM/PASSWORD
where PASSWORD is the password you have defined for the SYSTEM user. The default SYSTEM user password is MANAGER.
The HELPINS utility reads this login from SYSTEM_PASS to run successfully.
2. Run the batch file, HELPINS.BAT, from a command line prompt with:
C:\> %ORACLE_HOME%\BIN\HELPINS US
or
1. Run SQL*Plus as the SYSTEM user with:
C:\> SQLPLUS SYSTEM/PASSWORD
where PASSWORD is the password you have defined for the SYSTEM user.
2. Run the SQL script, HELPBLD.SQL, from SQL*Plus with:
SQL> @%ORACLE_HOME%/SQLPLUS/ADMIN/HELP/HELPBLD.SQL
Accessing SQL*Plus HelpTo access SQL*Plus help, enter one of the following commands in SQL*Plus:
SQL> HELP
or
SQL> HELP INDEX
or
SQL> HELP TOPICS

Accessing Demonstration Tables
2-4 SQL*Plus Getting Started
If you know the topic for which you want help, enter the following:
SQL> HELP topic
where topic is a SQL*Plus help topic. For example, enter
SQL> HELP COLUMN
for help on the COLUMN command.
If you get a response that help is unavailable, check that you have correctly installed SQL*Plus help in the SYSTEM schema.
For more information about the HELP command, see Chapter 8, "Command Reference" in the SQL*Plus User’s Guide and Reference.
Accessing Demonstration TablesTo load the demonstration tables, start SQL*Plus with the user account that allows you to complete the exercises. The SQL*Plus User’s Guide and Reference refers to the user name SCOTT with the password TIGER, but you can use any account with the same privileges.
Enter the following command at the SQL*Plus prompt:
SQL> @%ORACLE_HOME%\SQLPLUS\DEMO\DEMOBLD.SQL
When you finish working through the examples, you can remove the demonstration tables from the database by entering the following command:
SQL> @%ORACLE_HOME%\SQLPLUS\DEMO\DEMODROP.SQL

Using SQL*Plus 3-1
3Using SQL*Plus
This chapter explains how to start and use SQL*Plus from both the command line interface and the graphical user interface, and describes the graphical user interface menu options.
Specific topics discussed are:
■ Using the Command Line Interface
■ Using the Graphical User Interface
■ Exiting SQL*Plus

Using the Command Line Interface
3-2 SQL*Plus Getting Started
Using the Command Line InterfaceThe SQL*Plus command line interface is standard on all operating systems.
If you are connecting to a remote Oracle database, make sure your Net8/networking software is installed and working properly. For more information, see the Net8 Administrator’s Guide and the Appendix, "Net8 Configuration", in the Oracle8i Administrator’s Guide for Windows NT.
To start the SQL*Plus command line interface:
1. Select Command Prompt from Programs in the Start menu. A Command Prompt window appears.
2. Start SQL*Plus by entering
C:\> SQLPLUS
You can optionally include your login username and password separated by a slash (/), and a remote database name to connect to, for example:
C:\> SQLPLUS username/password@connect_identifier
Otherwise you will be prompted to enter your username and password.
Interpreting Arguments in WindowsThe rules for interpreting arguments in Windows command files are:
■ Arguments are delimited by white space.
■ A string surrounded by double quotation marks, for example, "this string", is interpreted as a single argument.
Using the Command Line Interface
Using SQL*Plus 3-3
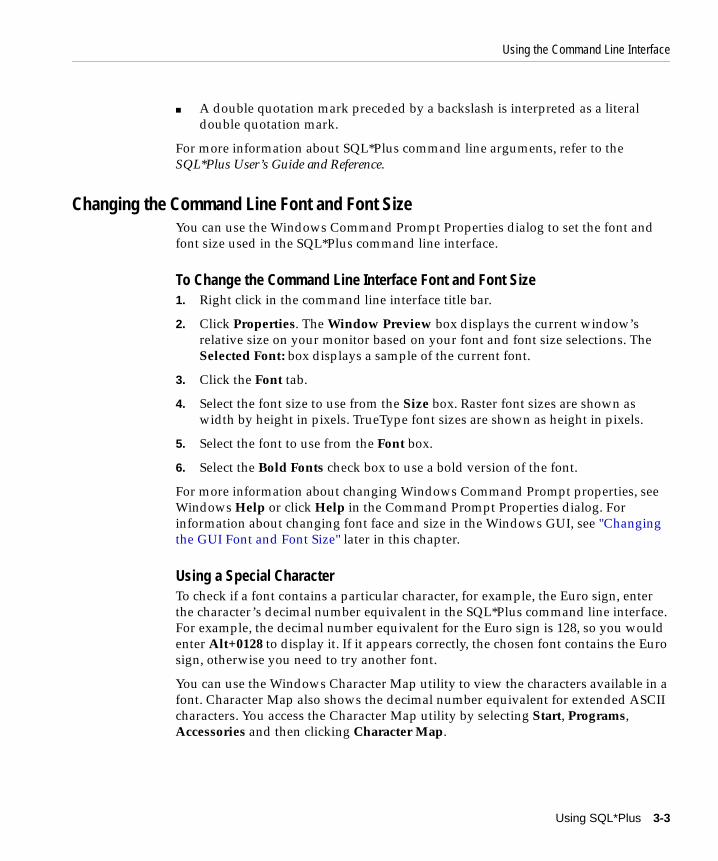
■ A double quotation mark preceded by a backslash is interpreted as a literal double quotation mark.
For more information about SQL*Plus command line arguments, refer to the SQL*Plus User’s Guide and Reference.
Changing the Command Line Font and Font SizeYou can use the Windows Command Prompt Properties dialog to set the font and font size used in the SQL*Plus command line interface.
To Change the Command Line Interface Font and Font Size1. Right click in the command line interface title bar.
2. Click Properties. The Window Preview box displays the current window’s relative size on your monitor based on your font and font size selections. The Selected Font: box displays a sample of the current font.
3. Click the Font tab.
4. Select the font size to use from the Size box. Raster font sizes are shown as width by height in pixels. TrueType font sizes are shown as height in pixels.
5. Select the font to use from the Font box.
6. Select the Bold Fonts check box to use a bold version of the font.
For more information about changing Windows Command Prompt properties, see Windows Help or click Help in the Command Prompt Properties dialog. For information about changing font face and size in the Windows GUI, see "Changing the GUI Font and Font Size" later in this chapter.
Using a Special CharacterTo check if a font contains a particular character, for example, the Euro sign, enter the character’s decimal number equivalent in the SQL*Plus command line interface. For example, the decimal number equivalent for the Euro sign is 128, so you would enter Alt+0128 to display it. If it appears correctly, the chosen font contains the Euro sign, otherwise you need to try another font.
You can use the Windows Character Map utility to view the characters available in a font. Character Map also shows the decimal number equivalent for extended ASCII characters. You access the Character Map utility by selecting Start, Programs, Accessories and then clicking Character Map.
Using the Graphical User Interface
3-4 SQL*Plus Getting Started
Using the Graphical User InterfaceWhile the command line interface is a standard feature of SQL*Plus on all operating system platforms, the graphical user interface is a feature of SQL*Plus for Windows.
If you are connecting to a remote Oracle database, make sure your Net8/networking software is installed and working properly. For more information, see the Net8 Administrator’s Guide and the Appendix, "Net8 Configuration", in the Oracle8i Administrator’s Guide for Windows NT.
To start the SQL*Plus graphical user interface:
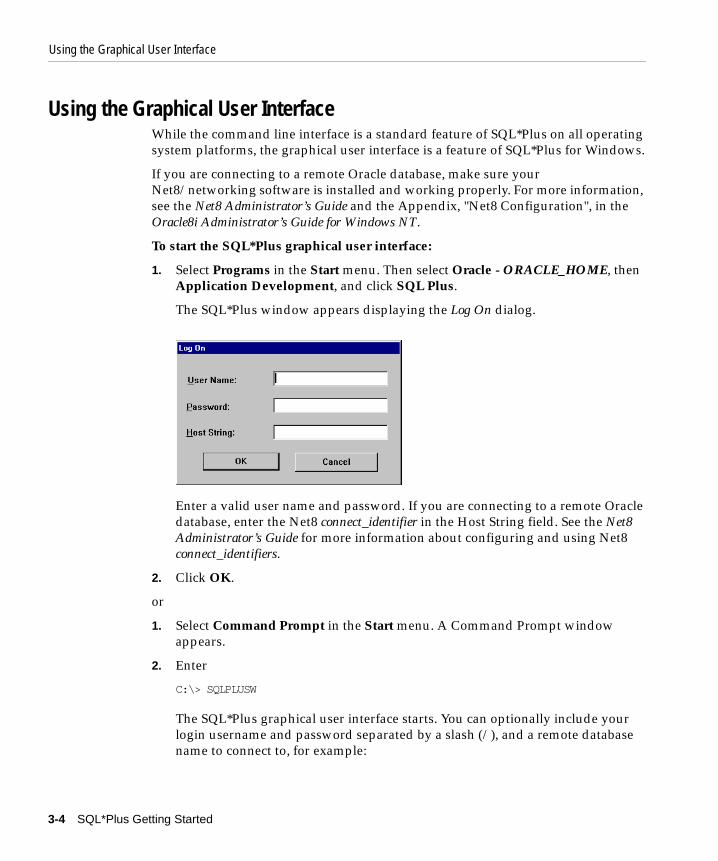
1. Select Programs in the Start menu. Then select Oracle - ORACLE_HOME, then Application Development, and click SQL Plus.
The SQL*Plus window appears displaying the Log On dialog.
Enter a valid user name and password. If you are connecting to a remote Oracle database, enter the Net8 connect_identifier in the Host String field. See the Net8 Administrator’s Guide for more information about configuring and using Net8 connect_identifiers.
2. Click OK.
or
1. Select Command Prompt in the Start menu. A Command Prompt window appears.
2. Enter
C:\> SQLPLUSW
The SQL*Plus graphical user interface starts. You can optionally include your login username and password separated by a slash (/), and a remote database name to connect to, for example:

Using the Graphical User Interface
Using SQL*Plus 3-5
C:\> SQLPLUSW username/password@connect_identifier
Otherwise enter the required information in the login dialog as described above. The Oracle SQL*Plus application window appears.
Using the SQL*Plus Application WindowSQL*Plus displays the SQL command prompt in the application window.
To enter SQL and SQL*Plus commands, type each command at the SQL*Plus prompt and press Enter.
Using the Mouse Buttons to Copy Text to the Command PromptYou can use the mouse buttons to copy text previously entered in SQL*Plus to the SQL*Plus prompt.
To copy text, select the text by clicking and dragging with the left mouse button. While still holding down the left mouse button, click the right mouse button. SQL*Plus copies the selected text to the SQL*Plus prompt.
SQL*Plus command prompt
Using the Graphical User Interface
3-6 SQL*Plus Getting Started
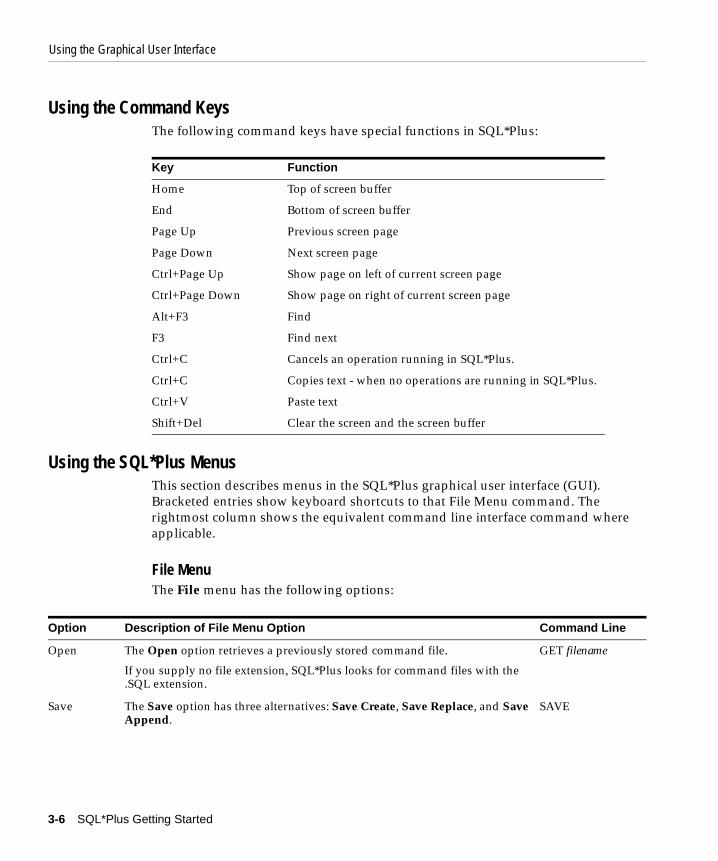
Using the Command KeysThe following command keys have special functions in SQL*Plus: :
Using the SQL*Plus MenusThis section describes menus in the SQL*Plus graphical user interface (GUI). Bracketed entries show keyboard shortcuts to that File Menu command. The rightmost column shows the equivalent command line interface command where applicable.
File MenuThe File menu has the following options:
Key Function
Home Top of screen buffer
End Bottom of screen buffer
Page Up Previous screen page
Page Down Next screen page
Ctrl+Page Up Show page on left of current screen page
Ctrl+Page Down Show page on right of current screen page
Alt+F3 Find
F3 Find next
Ctrl+C Cancels an operation running in SQL*Plus.
Ctrl+C Copies text - when no operations are running in SQL*Plus.
Ctrl+V Paste text
Shift+Del Clear the screen and the screen buffer
Option Description of File Menu Option Command Line
Open The Open option retrieves a previously stored command file.
If you supply no file extension, SQL*Plus looks for command files with the .SQL extension.
GET filename
Save The Save option has three alternatives: Save Create, Save Replace, and Save Append.
SAVE

Using the Graphical User Interface
Using SQL*Plus 3-7
■ Save Create saves the contents of the SQL*Plus buffer in a command file. By default, SQL*Plus assigns the .SQL extension to command files. You can specify a different extension in the File name text box.
■ Save Replace replaces the contents of an existing file with the contents of the SQL*Plus buffer. SQL*Plus creates the file if it does not exist.
■ Save Append adds the contents of the SQL*Plus buffer to the end of the file you specify.
SAVE filename CREATE
SAVE filename REPLACE
SAVE filename APPEND
After you save a command file, you can:
■ Retrieve the file using the Open option on the File menu.
■ Edit the file using the Editor option on the Edit menu.
■ Run the file using the START or RUN commands from the SQL*Plus command prompt.
Save As The Save As option saves the contents of the SQL*Plus buffer in a command file.
By default, SQL*Plus assigns the .SQL extension to command files. You can specify a different extension in the File name text box.
SAVE filename
Spool The Spool option has two alternatives: Spool File and Spool Off. SQL*Plus for Windows does not support the SPOOL OUT clause.
■ Spool File stores query results in a file. By default, SQL*Plus assigns the .LST extension to spool files. You can specify a different extension in the File name text box. You can edit the results with the Editor option on the Edit menu, and print the file from a Windows text editor.
■ Spool Off turns off spooling.
SPOOL filename
SPOOL OFF
Run The Run option lists and executes the SQL command or PL/SQL block currently stored in the SQL buffer.
RUN
Cancel(CTRL+C)
The Cancel option cancels an in-progress operation.
The Cancel keyboard shortcut is only available when a SQL*Plus operation is running in the SQL*Plus session. When no SQL*Plus operation is running, CTRL+C copies selected text.
Ctrl-C
Exit The Exit option commits all pending database changes and closes the SQL*Plus application window.
EXIT
Option Description of File Menu Option Command Line
Using the Graphical User Interface
3-8 SQL*Plus Getting Started
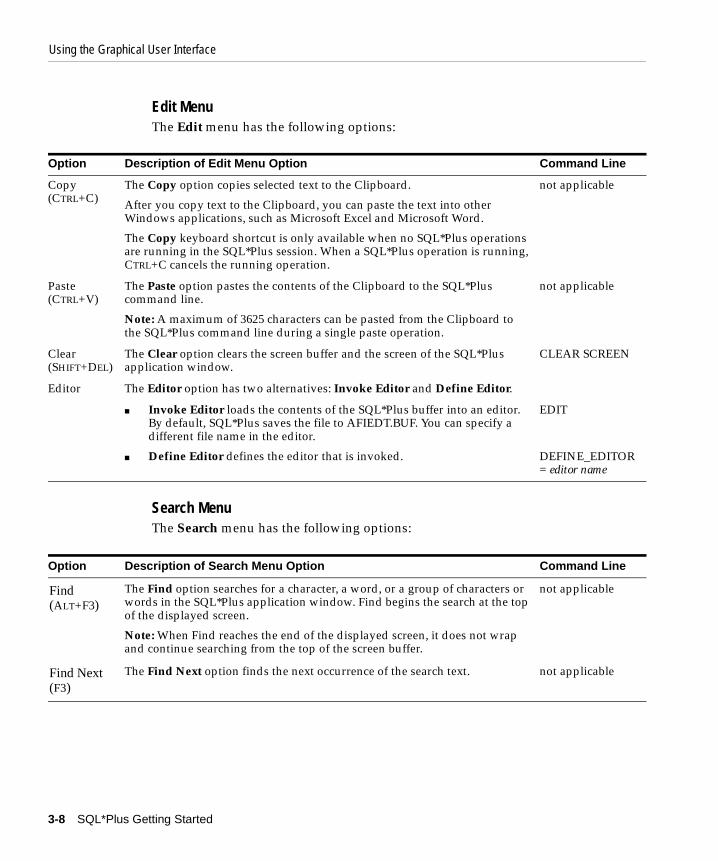
Edit MenuThe Edit menu has the following options:
Search MenuThe Search menu has the following options:
Option Description of Edit Menu Option Command Line
Copy(CTRL+C)
The Copy option copies selected text to the Clipboard.
After you copy text to the Clipboard, you can paste the text into other Windows applications, such as Microsoft Excel and Microsoft Word.
The Copy keyboard shortcut is only available when no SQL*Plus operations are running in the SQL*Plus session. When a SQL*Plus operation is running, CTRL+C cancels the running operation.
not applicable
Paste(CTRL+V)
The Paste option pastes the contents of the Clipboard to the SQL*Plus command line.
Note: A maximum of 3625 characters can be pasted from the Clipboard to the SQL*Plus command line during a single paste operation.
not applicable
Clear(SHIFT+DEL)
The Clear option clears the screen buffer and the screen of the SQL*Plus application window.
CLEAR SCREEN
Editor The Editor option has two alternatives: Invoke Editor and Define Editor.
■ Invoke Editor loads the contents of the SQL*Plus buffer into an editor. By default, SQL*Plus saves the file to AFIEDT.BUF. You can specify a different file name in the editor.
■ Define Editor defines the editor that is invoked.
EDIT
DEFINE_EDITOR= editor name
Option Description of Search Menu Option Command Line
Find(ALT+F3)
The Find option searches for a character, a word, or a group of characters or words in the SQL*Plus application window. Find begins the search at the top of the displayed screen.
Note: When Find reaches the end of the displayed screen, it does not wrap and continue searching from the top of the screen buffer.
not applicable
Find Next(F3)
The Find Next option finds the next occurrence of the search text. not applicable

Using the Graphical User Interface
Using SQL*Plus 3-9
Options MenuThe Options menu has the following options:
Option Description of Options Menu Option Command Line
Environment The Environment option allows you to set system variables to alter the SQL*Plus environment for your current session. This dialog has three areas: Set Options, Value, and Screen Buffer.
Note: See "Setting Options and Values Using the Environment Dialog" on page 3-10 for examples of how these controls interact.
Set Options
This area has a list of variables you can select to establish aspects of the SQL*Plus environment for your current session, such as:
■ Setting the display width for NUMBER data.
■ Setting the display width for LONG data.
■ Enabling or disabling the printing of column headings.
■ Setting the number of lines per page.
See the "Command Reference" chapter in the SQL*Plus User’s Guide and Reference for descriptions of each system variable in the SET command.
SET variable value
Value
The Value area has four options: Default, Custom, On, and Off.
Note: When Custom is selected, the On and Off buttons and the text field may or may not be enabled for user selection. The availability of these fields depends on the item selected in the Set Option.
SET variable value
Screen Buffer
This area has two text boxes: Buffer Width and Buffer Length.
SET variable value
■ In the Buffer Width text box, you set the number of characters that SQL*Plus displays on one line. If you enter a number smaller than the length of output data, SQL*Plus truncates the data to match the buffer width you specified. The default value of the Buffer Width parameter is 100 characters. You can specify from 80 to 1000 characters on one line.
■ In the Buffer Length text box, you set the number of lines that SQL*Plus displays on the screen. If SQL*Plus displays more lines of data than you specify, the remaining lines of data will "wrap around" to the top of the screen buffer. The default value of the Buffer Length parameter is 1000 lines. You can specify from 100 to 2000 lines on one screen.
Notes: When you change the Screen Buffer option, SQL*Plus displays a dialog to alert you that if you shorten the size of your screen buffer, some data may not be displayed on your screen. Click OK to proceed.

Using the Graphical User Interface
3-10 SQL*Plus Getting Started
Help MenuThe Help menu has the following option:
Setting Options and Values Using the Environment DialogChoose Environment from the Options menu to display the Environment dialog which you can use to create a SQL environment statement for the current session.
Choose an item from the Set Options list to begin. You can use the default settings, or you can customize the settings by using the other dialog controls. The available controls vary with the options you choose. You can make multiple changes to options and values. When the text box is available, you can enter appropriate text or appropriate numeric values. Click OK to commit your settings.
Example 3–1
The arraysize is set to 15, the default value. Since the arraysize is a numeric variable, the On and Off buttons are not available.
If you use SET MARKUP to send output to a HTML table, the number of lines specified in the Buffer Length variable specifies the number of HTML table rows. Each HTML table row may contain more than one text line.
Option Description of Help Menu Option Command Line
About SQL*Plus
Displays the SQL*Plus version number and copyright information.
You access SQL*Plus help from the SQL*Plus prompt. See "Accessing SQL*Plus Help" in Chapter 1.
not applicable
Option Description of Options Menu Option Command Line
Because Default is chosen, the text box shows the default value. The default setting cannot be changed.
Click the Default radio buttonto use the default value
Choose one of these options
Because arraysize is a numeric value, these buttons are not available
Using the Graphical User Interface
Using SQL*Plus 3-11
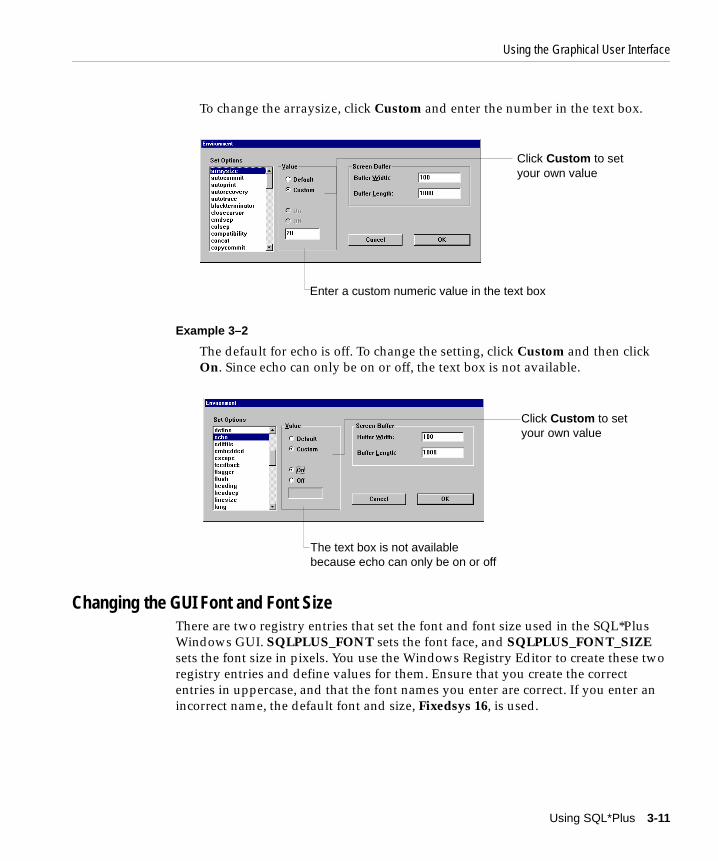
To change the arraysize, click Custom and enter the number in the text box.
Example 3–2
The default for echo is off. To change the setting, click Custom and then click On. Since echo can only be on or off, the text box is not available.
Changing the GUI Font and Font SizeThere are two registry entries that set the font and font size used in the SQL*Plus Windows GUI. SQLPLUS_FONT sets the font face, and SQLPLUS_FONT_SIZE sets the font size in pixels. You use the Windows Registry Editor to create these two registry entries and define values for them. Ensure that you create the correct entries in uppercase, and that the font names you enter are correct. If you enter an incorrect name, the default font and size, Fixedsys 16, is used.
Enter a custom numeric value in the text box
Click Custom to setyour own value
The text box is not availablebecause echo can only be on or off
Click Custom to setyour own value

Using the Graphical User Interface
3-12 SQL*Plus Getting Started
You can choose any fixed-pitch TrueType font available in your Windows system such as Courier New or Lucida Console. If you choose a proportional pitch font such as Arial or Times New Roman, or if you enter an unavailable font, the registry entry is ignored and the default font and size, Fixedsys 16, are used. If you choose an unavailable font size, the default font size, 16, is used.
If you do not create the SQLPLUS_FONT registry entry, or if you do not specify a value for SQLPLUS_FONT, the default font and size, Fixedsys 16, are used.
If you want to use particular characters, such as the Euro sign, you should make sure that the fixed pitch font you choose contains those characters.
To Change the Windows GUI Font and Font Size1. Select Run from the the Start menu and then enter regedit in the Open field.
2. Click OK to start the Registry Editor. The Registry Editor is displayed.
3. Navigate to HKEY_LOCAL_MACHINE\SOFTWARE\ORACLE\HOME0.
4. Click New String Value in the Edit menu. A new string value, with the default name, NewValue #1 is created at the bottom of the right pane of the Registry Editor. The default name of the new string value is selected ready for you to replace with the name you want.
Warning: Microsoft does not recommend modifying the registry. Editing the registry may affect your operating system and software installation. Only advanced users should edit the registry. Oracle takes no responsibility for problems arising from editing the Windows registry.
Note: If you have more than one Oracle installation, you must select the HOME entry associated with the Windows GUI you want to change. HOME0 is the registry entry for an Oracle installation. A subsequent Oracle installation will have the registry entry HOME1 and the next HOME2 and so on.
Changes only affect a SQL*Plus Windows GUI started from the associated Oracle installation, so you can use different settings for each Oracle installation.
Using the Graphical User Interface
Using SQL*Plus 3-13
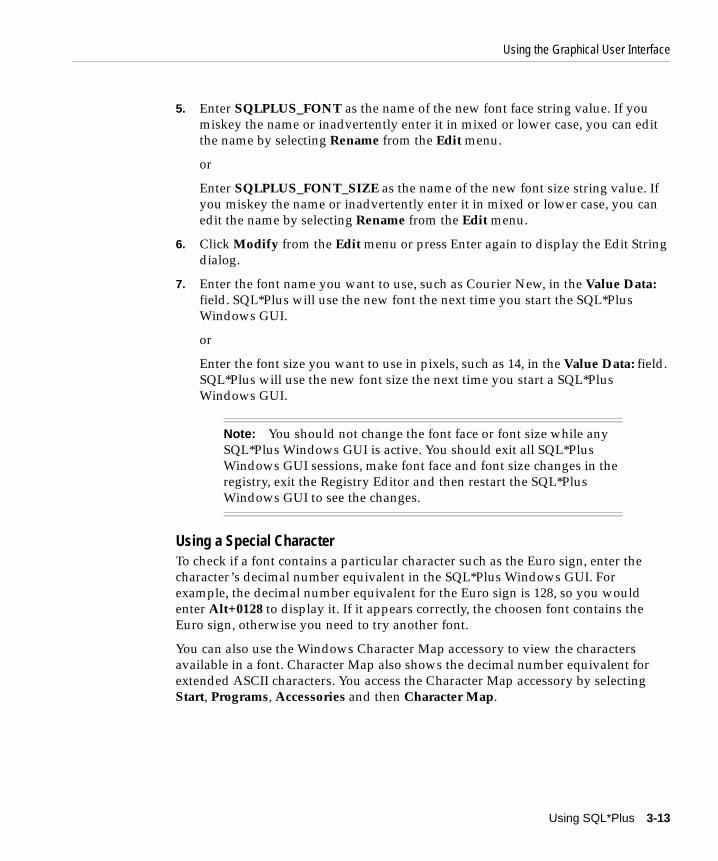
5. Enter SQLPLUS_FONT as the name of the new font face string value. If you miskey the name or inadvertently enter it in mixed or lower case, you can edit the name by selecting Rename from the Edit menu.
or
Enter SQLPLUS_FONT_SIZE as the name of the new font size string value. If you miskey the name or inadvertently enter it in mixed or lower case, you can edit the name by selecting Rename from the Edit menu.
6. Click Modify from the Edit menu or press Enter again to display the Edit String dialog.
7. Enter the font name you want to use, such as Courier New, in the Value Data: field. SQL*Plus will use the new font the next time you start the SQL*Plus Windows GUI.
or
Enter the font size you want to use in pixels, such as 14, in the Value Data: field. SQL*Plus will use the new font size the next time you start a SQL*Plus Windows GUI.
Using a Special CharacterTo check if a font contains a particular character such as the Euro sign, enter the character ’s decimal number equivalent in the SQL*Plus Windows GUI. For example, the decimal number equivalent for the Euro sign is 128, so you would enter Alt+0128 to display it. If it appears correctly, the choosen font contains the Euro sign, otherwise you need to try another font.
You can also use the Windows Character Map accessory to view the characters available in a font. Character Map also shows the decimal number equivalent for extended ASCII characters. You access the Character Map accessory by selecting Start, Programs, Accessories and then Character Map.
Note: You should not change the font face or font size while any SQL*Plus Windows GUI is active. You should exit all SQL*Plus Windows GUI sessions, make font face and font size changes in the registry, exit the Registry Editor and then restart the SQL*Plus Windows GUI to see the changes.
Exiting SQL*Plus
3-14 SQL*Plus Getting Started
Exiting SQL*PlusYou enter EXIT or QUIT at the SQL*Plus prompt to exit SQL*Plus from the command line interface or from the GUI.
You return to the Windows Command Prompt when you exit either the command line interface, or the GUI if you started it from the command line with SQLPLUSW.
The GUI closes and you return to Windows when you exit SQL*Plus from the GUI.

Operating System-Specific References 4-1
4Operating System-Specific References
This chapter provides the operating system-specific information that is referenced in the SQL*Plus User’s Guide and Reference.
Specific topics discussed are:
■ Automatic Login
■ TIMING Command
■ Interpreting Error Messages
■ Setting Up Your SQL*Plus Environment
■ Sending Results to a File
■ @, @@, and START Commands
■ HOST Command
■ SET NEWPAGE Command
■ PRODUCT_USER_PROFILE Table
Automatic Login
4-2 SQL*Plus Getting Started
Automatic LoginWhen connecting to an Oracle database on the same Windows computer, you can set up SQL*Plus to do an automatic login by following these steps:
1. Create an account in the database <PREFIX>USERX for every Windows user (USERX) who needs access to the database. <PREFIX> is the parameter OS_AUTHENT_PREFIX in the inititialization parameter file for the database (the default is OPS$). See the Oracle8i Reference and the Oracle Advanced Security Administrator’s Guide for more information about the OS_AUTHENT_PREFIX initialization parameter.
2. After logging on to Windows as USERX, you can log in to SQL*Plus using / (slash) instead of username/password.
See "Shortcuts to Starting SQL*Plus" in Chapter 2 of the SQL*Plus User’s Guide and Reference which refers you to this guide for information about automatically logging on to SQL*Plus when you log on to your operating system.
TIMING CommandThe SQL*Plus TIMING command displays output in hours, minutes, seconds and hundredths of seconds. For example, 02:31:07.55 is 2 hours, 31 minutes and 7.55 seconds.
See "Collecting Timing Statistics on Commands You Run" in Chapter 2 and the sections "SET" and "TIMING" in Chapter 8 of the SQL*Plus User’s Guide and Reference which discuss how to use the TIMING command and the SET TIMING command to record timing data for an elapsed period.
Interpreting Error MessagesSee "Interpreting Error Messages" in Chapter 2 of the SQL*Plus User’s Guide and Reference and this guide for information about interpreting error messages. See Oracle8i Error Messages to find explanations and actions for error codes beginning with the letters ORA.
If you do not find the error code in Oracle8i Error Messages, see Oracle8i Administrator’s Guide for Windows NT.

@, @@, and START Commands
Operating System-Specific References 4-3
Setting Up Your SQL*Plus EnvironmentWhen you install SQL*Plus, LOGIN.SQL is copied to the DBS subdirectory, and GLOGIN.SQL is copied to the SQLPLUS\ADMIN subdirectory of your Oracle home directory.
If you modify LOGIN.SQL or GLOGIN.SQL, make sure you do not add any ANSI escape sequences.
See "Setting Up Your SQL*Plus Environment" in Chapter 3 of the SQL*Plus User’s Guide and Reference, which describes the LOGIN.SQL and GLOGIN.SQL files.
Sending Results to a FileThe SPOOL command is available from the File menu in the SQL*Plus graphical user interface. See "File Menu" on page 3-6 for more information.
When you use the SPOOL command from the graphical user interface or the command line interface, SQL*Plus adds .LST to the file name if you do not specify an extension.
SQL*Plus does not support the use of the SPOOL OUT clause at the command line.
See "Sending Results to a File" in Chapter 4 and "Spool" in Chapter 8 of the SQL*Plus User’s Guide and Reference, for more information about the SPOOL command.
@, @@, and START CommandsSQL*Plus searches the current default directory for the file name that you specify with the @, @@, or START command. If SQL*Plus cannot find this file, the program searches a path to find the file.
You can specify the path that SQL*Plus searches by modifying the SQLPATH parameter in your registry. For more information about the SQLPATH parameter, see the "SQLPATH Parameter Description" in Appendix A.
See the sections "@ (at sign)", "@@ (double at sign)", and "START" in Chapter 8 of the SQL*Plus User’s Guide and Reference, which describe how SQL*Plus searches for a file when you use the @, @@, or START command.

HOST Command
4-4 SQL*Plus Getting Started
HOST CommandIn SQL*Plus, you can access the Windows command prompt by entering the HOST command or a dollar sign ($) at the SQL*Plus prompt.
To return to SQL*Plus from the Windows command prompt, enter exit.
See "HOST" in Chapter 8 of the SQL*Plus User’s Guide and Reference, which describes how to use the HOST command to execute a host operating system command without leaving SQL*Plus.
SET NEWPAGE CommandThe SET NEWPAGE 0 command does not clear the screen between pages. Instead, a black box appears in the GUI, or another character in the command line interface.
See "SET" in Chapter 8 of the SQL*Plus User’s Guide and Reference, which describes how to set the NEWPAGE system variable, as well as many other system variables. It is recommended that you use SET NEWPAGE NONE.
PRODUCT_USER_PROFILE TableThe PRODUCT_USER_PROFILE (PUP) table provides product-level security that supplements the user-level security provided by the SQL GRANT and REVOKE commands and user roles.
To create the PUP table
Log in to SQL*Plus as the SYSTEM user and run PUPBLD.SQL which is located in the ORACLE_HOME\SQLPLUS\ADMIN directory with:
SQL> @%ORACLE_HOME%\SQLPLUS\ADMIN\PUPBLD.SQL
or
1. Set an environment variable, SYSTEM_PASS, to hold the SYSTEM user login with:
C:\> SET SYSTEM_PASS=SYSTEM/PASSWORD
where PASSWORD is the password you have defined for the SYSTEM user. The default SYSTEM user password is MANAGER.
PUPBLD.BAT reads this login from SYSTEM_PASS to run successfully.
2. Run the batch file, PUPBLD.BAT, from a command line prompt with:

PRODUCT_USER_PROFILE Table
Operating System-Specific References 4-5
C:\> %ORACLE_HOME%\BIN\PUPBLD.BAT
If you are using SQL*Plus with a remote database, you may want to install the PUP table on the remote database. To do this, run PUPBLD.SQL on the server directly, or set the LOCAL parameter in your registry to point to the remote database and then run PUPBLD.SQL.
See the "PRODUCT_USER_PROFILE Table" in Appendix E of the SQL*Plus User’s Guide and Reference for a description of the PUP table.
The PUP table is not used for ODBC connections. The connection identifier for ODBC connections begins with odbc: or oca:.

PRODUCT_USER_PROFILE Table
4-6 SQL*Plus Getting Started

Customizing Operating System Parameters A-1
ACustomizing Operating System Parameters
This chapter describes how to customize your SQL*Plus configuration by changing the SQLPATH parameter in the registry.
Specific topics discussed are:
■ Using the Registry
■ SQLPLUS Environment Variable
Warning: Microsoft does not recommend modifying the registry. Editing the registry may affect your operating system and software installation. Only advanced users should edit the registry. Oracle takes no responsibility for problems arising from editing the Windows registry.
Using the Registry
A-2 SQL*Plus Getting Started
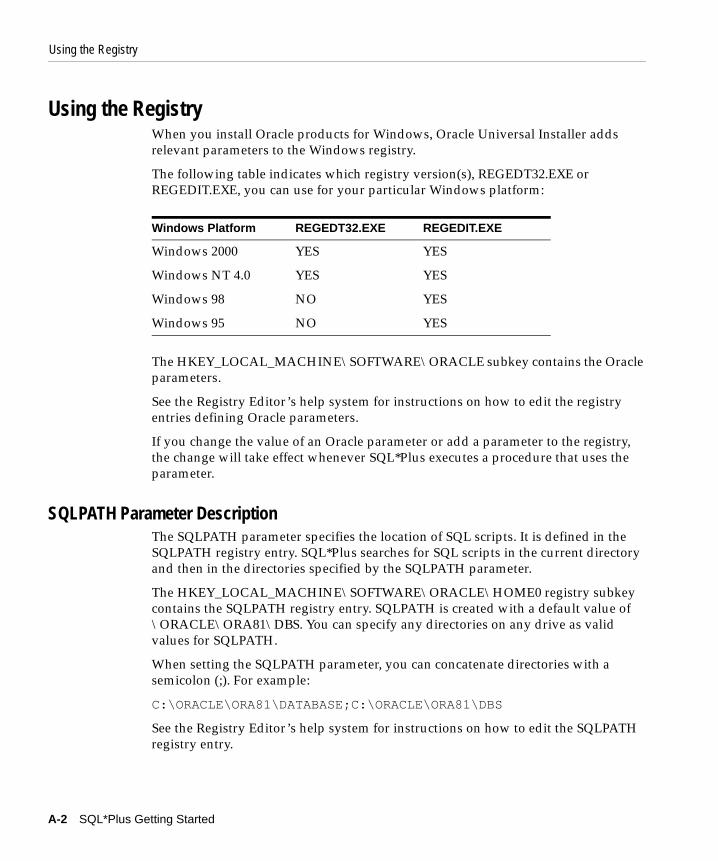
Using the RegistryWhen you install Oracle products for Windows, Oracle Universal Installer adds relevant parameters to the Windows registry.
The following table indicates which registry version(s), REGEDT32.EXE or REGEDIT.EXE, you can use for your particular Windows platform:
The HKEY_LOCAL_MACHINE\SOFTWARE\ORACLE subkey contains the Oracle parameters.
See the Registry Editor’s help system for instructions on how to edit the registry entries defining Oracle parameters.
If you change the value of an Oracle parameter or add a parameter to the registry, the change will take effect whenever SQL*Plus executes a procedure that uses the parameter.
SQLPATH Parameter DescriptionThe SQLPATH parameter specifies the location of SQL scripts. It is defined in the SQLPATH registry entry. SQL*Plus searches for SQL scripts in the current directory and then in the directories specified by the SQLPATH parameter.
The HKEY_LOCAL_MACHINE\SOFTWARE\ORACLE\HOME0 registry subkey contains the SQLPATH registry entry. SQLPATH is created with a default value of \ORACLE\ORA81\DBS. You can specify any directories on any drive as valid values for SQLPATH.
When setting the SQLPATH parameter, you can concatenate directories with a semicolon (;). For example:
C:\ORACLE\ORA81\DATABASE;C:\ORACLE\ORA81\DBS
See the Registry Editor’s help system for instructions on how to edit the SQLPATH registry entry.
Windows Platform REGEDT32.EXE REGEDIT.EXE
Windows 2000 YES YES
Windows NT 4.0 YES YES
Windows 98 NO YES
Windows 95 NO YES

SQLPLUS Environment Variable
Customizing Operating System Parameters A-3
SQLPLUS_FONT Parameter DescriptionThe SQLPLUS_FONT registry entry defines the font face used in the SQL*Plus Windows GUI. It is located in the registry subkey, HKEY_LOCAL_MACHINE\SOFTWARE\ORACLE\HOME0. If the SQLPLUS_FONT entry is not created, or if it has an invalid name or value, the default face, Fixedsys, is used.
See "To Change the Windows GUI Font and Font Size" on page 3-12 for details on how to create the SQLPLUS_FONT registry entry and set the font face. See the Registry Editor’s help system for instructions on how to edit the SQLPATH registry entry.
SQLPLUS_FONT_SIZE Parameter DescriptionThe SQLPLUS_FONT_SIZE registry entry defines the font size used in the SQL*Plus Windows GUI. It is located in the registry subkey, HKEY_LOCAL_MACHINE\SOFTWARE\ORACLE\HOME0. If the SQLPLUS_FONT_SIZE entry is not created, or if it has an invalid name or value, the default size, 16, is used.
See "Changing the GUI Font and Font Size" on page 3-11 for details on how to create the SQLPLUS_FONT_SIZE registry entry and set the font size. See the Registry Editor’s help system for instructions on how to edit the SQLPLUS_FONT_SIZE registry entry.
SQLPLUS Environment VariableThe SQLPLUS environment variable specifies the location of SQL*Plus message files. This environment variable is set during installation and has a default value of
%ORACLE_HOME%/SQLPLUS/MESG
You should not modify or set this environment variable.

SQLPLUS Environment Variable
A-4 SQL*Plus Getting Started

Index-1
Index$ command, 4-4@ command, 4-3@@ command, 4-3
Aaccessing sample tables, 2-4AFIEDT.BUF, 3-8ANSI escape sequences, warning about, 4-3audience, SQL*Plus, viii
Bbasic concepts, 1-2block, defined, 1-2buffer
clearing your screen, 3-8screen, 1-3screen area, 3-9SQL, 1-3, 3-7
Ccancelling an in-progress operation, 3-7CD-ROM contents, ix, 2-2Character Map Windows utility
choosing a font, 3-3, 3-13clearing your screen, 3-8code conventions, used in this guide, xcommand files
opening, 3-6saving, 3-6
command keys, SQL*Plus Windows GUI, 3-6command line interface, 3-2
changing face and size, 3-3Euro sign, 3-3special character, 3-3Windows Character Map utility, 3-3
command, defined, 1-2connect_identifier, 3-4connect_string
See connect_identifiercopying text, 3-5, 3-8
DDEMOBLD.SQL file, 2-4DEMODROP.SQL file, 2-4demonstration tables, 2-4documentation
conventions used in this guide, x
EEdit menu, 3-8editor
defining, 3-8invoking, 3-8
environmentcommand, 3-9setting up SQL*Plus, 3-9, 4-3SQLPLUS variable, A-3
error messages, interpreting, 4-2Euro sign
command line interface, 3-3GUI, 3-12, 3-13
exiting SQL*Plus, 3-14exiting SQL*Plus GUI, 3-7
Index-2
FFile menu, 3-6finding text, 3-8font
changing face and size in CLI, 3-3changing face and size in GUI, 3-11, 3-12changing in GUI, 3-11fixed pitch TrueType, 3-12Oracle Home, 3-12
GGLOGIN.SQL file, 4-3graphical user interface
See GUIGUI
changing face and size, 3-11, 3-12changing font, 3-11menus, 3-6starting, 3-4Windows Character Map utility, 3-13
Hhelp
accessing online help, 2-3installation prerequisites, 2-2installing, 2-2
Help menu, 3-10HOME_NAME, defined, xiHOST command, 4-4host string, 3-4
Iinstalling
SQL*Plus online help, 2-2
LLOCAL parameter, 4-5Log On dialog, 3-4LOGIN.SQL file, 4-3
Mmenus
GUI, 3-6mouse, using to copy commands, 3-5MS-DOS, accessing from SQL*Plus, 4-4multiple Oracle homes
defined, xispecifying font, 3-12
Nnet_service_name
See connect_identifier
Oonline help
accessing online help, 2-3installation prerequisites, 2-2installing, 2-2obtaining for SQL*Plus, ix, 2-2
operating systems, supported by SQL*Plus, viiOptimal Flexible Architecture (OFA), xiOptions menu, 3-9ORA error messages, 4-2Oracle Home
specifying font, 3-12ORACLE_BASE, defined, xiORACLE_HOME, defined, xioverview, 1-2
Pparameter
SQLPATH, 4-3, A-2SQLPLUS_FONT, 3-11, A-3SQLPLUS_FONT_SIZE, 3-11, A-3
pasting text, 3-8PL/SQL, relation to SQL*Plus, 1-2prerequisites
installing online help, 2-2SQL*Plus, viii
PRODUCT_USER_PROFILE table, 4-4PUPBLD.SQL file, 4-4

Index-3
Qquery
defined, 1-3results defined, 1-3
RREGEDIT.EXE, A-2REGEDT32.EXE, A-2registry
editor, 3-11, A-2, A-3SQLPATH entry, 4-3, A-2SQLPLUS_FONT entry, 3-11, A-3SQLPLUS_FONT_SIZE entry, 3-11, A-3
report, defined, 1-3rules, for Windows arguments, 3-2Run menu command
lists and executes SQL and PL/SQL, 3-7
Ssample tables, 2-4saving, command files, 3-6screen buffer area, 3-9Search menu, 3-8security
PRODUCT_USER_PROFILE table, 4-4sending results to a file, 4-3SET NEWPAGE command, 4-4Set Options area, 3-9SET TIMING command, 4-2setting up, using LOGIN and GLOGIN, 4-3shortcuts to starting SQL*Plus, 4-2special characters
choosing a font, 3-3Euro sign, 3-3, 3-12, 3-13using, 3-3, 3-13
SPOOL command, 4-3spool files, 4-3spool menu command, 3-7SPOOL OUT clause, not supported, 4-3SQL*Plus
application window, 3-5basic concepts, 1-2command defined, 1-2
command line interface, 3-2exiting, 3-14installing, 2-2installing online help, 2-2menus, 3-6overview, 1-2prerequisites, viiisetting up environment from command line, 4-3setting up environment from GUI, 3-9shortcuts to starting, 4-2using LOGIN and GLOGIN to setup, 4-3Windows versions supported, vii
SQL*Plus Windows GUIchanging face and size, 3-11, 3-12changing font, 3-11
SQLPATH parameter, 4-3, A-2SQLPLUS Environment Variable, A-3SQLPLUS_FONT parameter, 3-11, A-3SQLPLUS_FONT_SIZE parameter, 3-11, A-3START command, 4-3Start menu location, for SQL*Plus, 3-4starting
SQL*Plus, 3-2SQL*Plus Windows GUI, 3-4
subkey, registry, A-2, A-3system requirements, 2-2system variables, setting, 3-9
Ttables
defined, 1-2demonstration, 2-4
text editordefining, 3-8invoking, 3-8
TIMING command, 4-2
Vvalue area, 3-9value screen area, 3-9
Index-4
WWindows GUI
changing face and size, 3-11, 3-12changing font, 3-11
Windows Operating Systemsversions supported, vii