Splint Adjustment Guide - greatlakesdentaltech.com · SMLI36REV051413 S-221 Splint Adjustment Guide...
12
SMLI36REV051413 S-221 Splint Adjustment Guide Splint Adjustment Guide Full Contact Splint with Anterior Guidance Adjustment Technique Flat Plane Splint Adjustment Technique Using the Leaf Gauge to Obtain Centric Relation PAGE 1 PAGE 8 1 & 8 PAGES
Transcript of Splint Adjustment Guide - greatlakesdentaltech.com · SMLI36REV051413 S-221 Splint Adjustment Guide...

SM
LI36R
EV051413
S-2
21
SplintAdjustmentGuide
SplintAdjustmentGuide
Full Contact Splintwith Anterior Guidance
Adjustment Technique
Flat Plane Splint Adjustment Technique
Using the Leaf Gauge to Obtain Centric Relation
PAGE
1
PAGE
8
1&8PAGES
Adjustment Procedure for a Full Contact Splintwith Anterior Guidance
he following instructions are designed to help you efficiently adjust and seat a full contact splint with anterior guidance.
It is important that the splint is adjusted with the patient in centric relation.
These instructions feature the use of the Leaf Gauge in order to achieve and maintain the centric position throughout the adjustment process. The Leaf Gauge allows the lateral pterygoid to relax and the elevator muscles to contract seating the condyles.
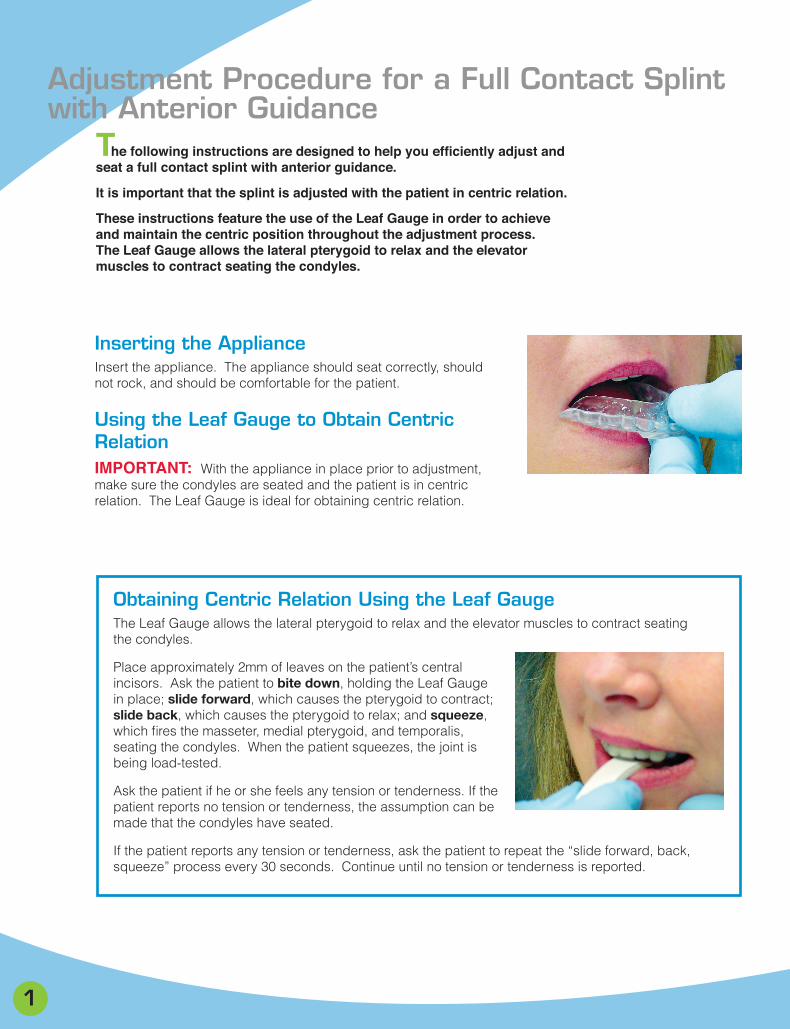
Inserting the ApplianceInsert the appliance. The appliance should seat correctly, should not rock, and should be comfortable for the patient.
Using the Leaf Gauge to Obtain Centric RelationIMPORTANT: With the appliance in place prior to adjustment, make sure the condyles are seated and the patient is in centric relation. The Leaf Gauge is ideal for obtaining centric relation.
Obtaining Centric Relation Using the Leaf GaugeThe Leaf Gauge allows the lateral pterygoid to relax and the elevator muscles to contract seating the condyles.
Place approximately 2mm of leaves on the patient’s central incisors. Ask the patient to bite down, holding the Leaf Gauge in place; slide forward, which causes the pterygoid to contract; slide back, which causes the pterygoid to relax; and squeeze, which fires the masseter, medial pterygoid, and temporalis, seating the condyles. When the patient squeezes, the joint is being load-tested.
Ask the patient if he or she feels any tension or tenderness. If the patient reports no tension or tenderness, the assumption can be made that the condyles have seated.
If the patient reports any tension or tenderness, ask the patient to repeat the “slide forward, back, squeeze” process every 30 seconds. Continue until no tension or tenderness is reported.
1
T

Identifying First Contact(s)With the appliance in place and the patient in centric relation, use the Leaf Gauge to identify the patient’s first contact(s). Place approximately 1mm of leaves on the patient’s centrals. Ask the patient to bite down holding the Leaf Gauge, slide forward, back, and squeeze. Ask the patient if he or she feels any contact.
Begin to eliminate leaves until the first contact(s) have been identified. Continue to ask the patient to bite down, slide forward, back, and squeeze each time leaves are eliminated and the Leaf Gauge is placed back on the centrals.
Marking the Contact(s)When the patient reports the initial contact(s), use articulating paper to mark the contact(s). See tip below. Place the articulating paper between the opposing teeth and the splint. Ask the patient to tap three times to mark the contact(s). The patient may report contact on only one side. Be sure to check both sides as the patient may not be able to feel bilateral contact.
Typically, first contact(s) will appear on the posterior teeth.
TIP: Apply a thin layer of petroleum jelly to the surface of the articulating paper. The petroleum jelly enhances the contact points as they are transferred to the appliance.
2

Splint AdjustmentUse a carbide acrylic bur to gently remove the contact point(s). In order to achieve the flattest appliance possible, hold the bur parallel to the occlusal surface of the appliance to make the adjustment.
IMPORTANT: Do not use the tip of the bur, as it could create divots. Remove just enough acrylic to eliminate the mark.
NOTE: Continuing to use the Leaf Gauge will ensure that the patient remains in centric relation throughout the appliance adjustment process.
Continuing Adjustment – Eliminating Leaves and Trimming ContactsTo obtain additional marks, continue eliminating leaves of the Leaf Gauge and using articulating paper (as described in the Identifying First Contacts section) to identify the next contact points on both sides of the arch.
Use the trimming technique (as described in the Splint Adjustment section) to continue adjusting the appliance. The contact marks should begin to appear more towards the anterior of the appliance as you proceed through the adjustment process.
Discontinuing Use of the Leaf GaugeAfter the adjustment has been made with only one leaf in place, discontinue using the Leaf Gauge. At this point, the patient will remain in centric relation without the Leaf Gauge.
Marking the Entire SplintWith articulating paper in place, continue to adjust the appliance by asking the patient to tap two or three times marking the anterior contacts and the left and right sides.
3
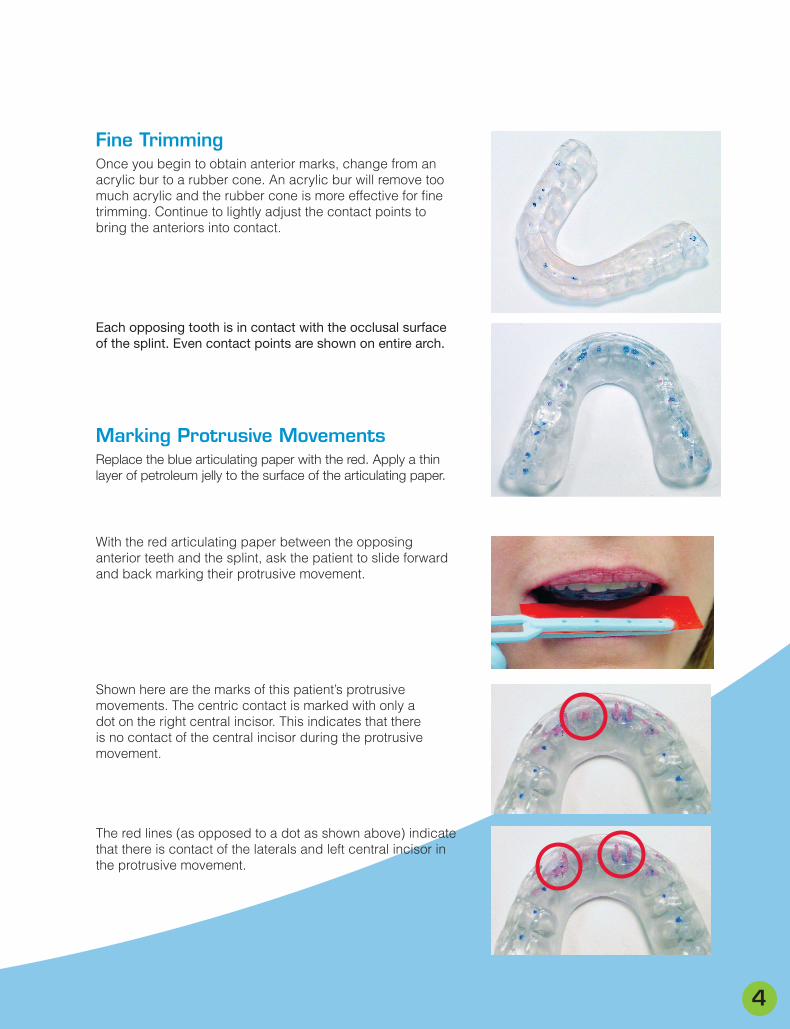
Fine TrimmingOnce you begin to obtain anterior marks, change from an acrylic bur to a rubber cone. An acrylic bur will remove too much acrylic and the rubber cone is more effective for fine trimming. Continue to lightly adjust the contact points to bring the anteriors into contact.
Each opposing tooth is in contact with the occlusal surface of the splint. Even contact points are shown on entire arch.
Marking Protrusive MovementsReplace the blue articulating paper with the red. Apply a thin layer of petroleum jelly to the surface of the articulating paper.
With the red articulating paper between the opposing anterior teeth and the splint, ask the patient to slide forward and back marking their protrusive movement.
Shown here are the marks of this patient’s protrusive movements. The centric contact is marked with only a dot on the right central incisor. This indicates that there is no contact of the central incisor during the protrusive movement.
The red lines (as opposed to a dot as shown above) indicate that there is contact of the laterals and left central incisor in the protrusive movement.
4

Trimming the RampTowards the goal of having all anterior teeth in contact with the ramp during protrusive movement, lightly trim the mesial portion of the red lines created by the laterals and the left central.
With articulating paper in place, ask the patient to slide forward and back marking their protrusive movement to make sure that the right lateral has come into contact with the ramp. Repeat marking and adjusting until acceptable contacts are visible.
NOTE: Teeth not in general alignment with the other anterior teeth may not be intended to contact the ramp. All incisors may not make protrusive marks on the ramp. In this situation, having three anterior teeth in good contact will not affect the functionality of the splint.
The red lines indicate that all anterior teeth are in contact with the ramp during protrusive movement.
Marking Lateral ExcursionsWith red articulating paper in place, ask the patient to move the mandible to the right (shown here) marking their lateral excursions.
NOTE: The patient should complete a full range of motion to make sure there are no interferences.
Refer to chart to interpret marks.
Lightly trim any interferences.
Repeat procedure on opposite side. Refer to chart to interpret marks and continue to eliminate any interferences.
TIP: Hold the bur parallel to the angle of the ramp. Be careful not to trim away the height of the ramp.
5

6
Mark or Area #
Caused by Tooth #
Nature of Contact or Relationship with Splint
Action Required
1 29-31 No contact Lightly trim all visible contacts
2 28 Good contact (if remainder of contacts are acceptable) None
3 27Good contact in left lateral excursion (if remainder of contacts are acceptable) None
4 26Good protrusive contact (if remainder of contacts are acceptable) None
5 23 Protrusive excursion – has skip at beginning of excursion
Lightly trim right central and lateral
6 23 Interference in left lateral excursion Trim left lateral excursion
7 22 Good contact (if remainder of contacts are acceptable) None
8 21 Interference in protrusive Lightly trim the interference
9 20 Interference in protrusive Lightly trim the interference
10 MBC-19 Good contact (if remainder of contacts are acceptable) None
11 DBC-19 Cross-arch balancing interference Lightly trim the interference
12 DLC-19 Cross-tooth balancing interference Lightly trim the interference
13 DBC-18 Interference in right lateral excursion Lightly trim the contact
14 DC-18 Good contact (if remainder of contacts are acceptable) None
Interpreting Contacts & Adjusting a Full Contact Splint with Anterior Guidance
7
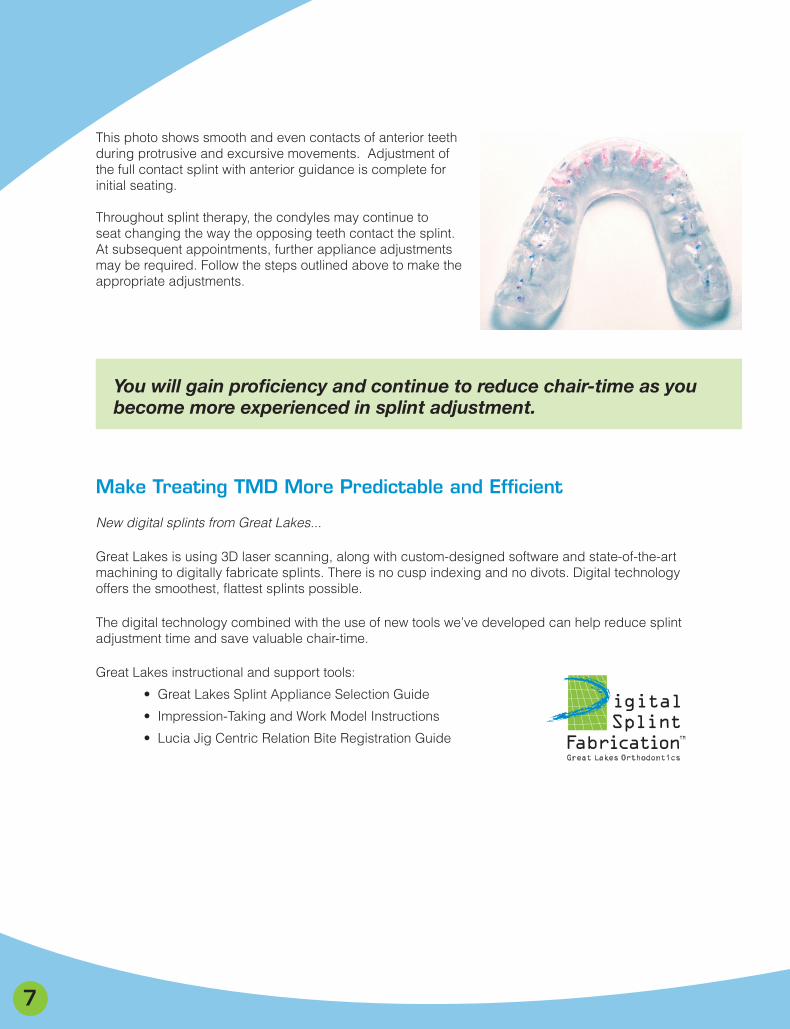
This photo shows smooth and even contacts of anterior teeth during protrusive and excursive movements. Adjustment of the full contact splint with anterior guidance is complete for initial seating.
Throughout splint therapy, the condyles may continue to seat changing the way the opposing teeth contact the splint. At subsequent appointments, further appliance adjustments may be required. Follow the steps outlined above to make theappropriate adjustments.
You will gain proficiency and continue to reduce chair-time as you become more experienced in splint adjustment.
Make Treating TMD More Predictable and Efficient
New digital splints from Great Lakes...
Great Lakes is using 3D laser scanning, along with custom-designed software and state-of-the-art machining to digitally fabricate splints. There is no cusp indexing and no divots. Digital technology offers the smoothest, flattest splints possible.
The digital technology combined with the use of new tools we’ve developed can help reduce splint adjustment time and save valuable chair-time.
Great Lakes instructional and support tools: • Great Lakes Splint Appliance Selection Guide • Impression-Taking and Work Model Instructions • Lucia Jig Centric Relation Bite Registration Guide

Flat Plane Appliance Adjustment Procedure
he following instructions are designed to help you efficiently adjust and seat a flat plane appliance. The objective is to achieve the flattest appliance possible while obtaining even contacts for all opposing teeth.
It is important that the splint is adjusted with the patient in centric relation (CR).
These instructions feature the use of the Leaf Gauge in order to achieve and maintain the centric position throughout the adjustment process. The Leaf Gauge allows the lateral pterygoid to relax and the elevator muscles to contract seating the condyles.
Inserting the ApplianceInsert the appliance. The appliance should seat correctly, should not rock, and should be comfortable for the patient.
Using the Leaf Gauge to Obtain Centric RelationIMPORTANT: With the appliance in place prior to adjustment, make sure the condyles are seated and the patient is in centric relation. The Leaf Gauge is ideal for obtaining centric relation.
8
T
Obtaining Centric Relation Using the Leaf GaugeThe Leaf Gauge allows the lateral pterygoid to relax and the elevator muscles to contract seating the condyles.
Place approximately 2mm of leaves on the patient’s central incisors. Ask the patient to bite down, holding the Leaf Gauge in place; slide forward, which causes the pterygoid to contract; slide back, which causes the pterygoid to relax; and squeeze, which fires the masseter, medial pterygoid, and temporalis, seating the condyles. When the patient squeezes, the joint is being load-tested.
Ask the patient if he or she feels any tension or tenderness. If the patient reports no tension or tenderness, the assumption can be made that the condyles have seated.
If the patient reports any tension or tenderness, ask the patient to repeat the “slide forward, back, squeeze” process every 30 seconds. Continue until no tension or tenderness is reported.

Identifying First Contact(s)With the appliance in place and the patient in centric relation, use the Leaf Gauge to identify the patient’s first contact(s). Place approximately 1mm of leaves on the patient’s centrals. Ask the patient to bite down holding the Leaf Gauge, slide forward, back, and squeeze. Ask the patient if he or she feels any contact.
Begin to eliminate leaves until the first contact(s) have been identified. Continue to ask the patient to bite down, slide forward, back, and squeeze each time leaves are eliminated and the Leaf Gauge is placed back on the centrals.
Marking the Contact(s)When the patient reports the initial contact(s), use articulating paper to mark the contact(s). See tip below. Place the articulating paper between the opposing teeth and the splint. Ask the patient to tap three times to mark the contact(s). The patient may report contact on only one side. Be sure to check both sides as the patient may not be able to feel bilateral contact.
Typically, first contact(s) will appear on the posterior teeth.
TIP: Apply a thin layer of petroleum jelly to the surface of the articulating paper. The petroleum jelly enhances the contact points as they are transferred to the appliance.
9

Splint AdjustmentUse a carbide acrylic bur to gently remove the contact point(s). In order to achieve the flattest appliance possible, hold the bur parallel to the occlusal surface of the appliance to make the adjustment.
IMPORTANT: Do not use the tip of the bur, as it could create divots. Remove just enough acrylic to eliminate the mark.
NOTE: Continuing to use the Leaf Gauge will ensure that the patient remains in centric relation throughout the appliance adjustment process.
Continuing Adjustment – Eliminating Leaves and Trimming ContactsContinue eliminating leaves of the Leaf Gauge and using articulating paper (as described in the Identifying First Contacts section) to identify the next contact points on both sides of the arch.
Use the trimming technique (as described in the Splint Adjustment section) to continue adjusting the appliance. The contact marks should begin to appear more towards the anterior of the appliance as you proceed through the adjustment process.
Discontinuing Use of the Leaf GaugeAfter the adjustment has been made with only one leaf in place and even (uniform) posterior marks are present, discontinue using the Leaf Gauge. At this point, the patient will remain in centric relation without the Leaf Gauge.
Fine AdjustmentsWith articulating paper in place, continue to adjust the appliance by asking the patient to tap two or three times marking the anterior contacts and the left and right sides.
10
Fine TrimmingOnce you begin to obtain anterior marks, change from an acrylic bur to a rubber cone. An acrylic bur will remove too much acrylic and the rubber cone is more effective for fine trimming.
Continue to lightly adjust the contact points to bring the anteriors into contact.
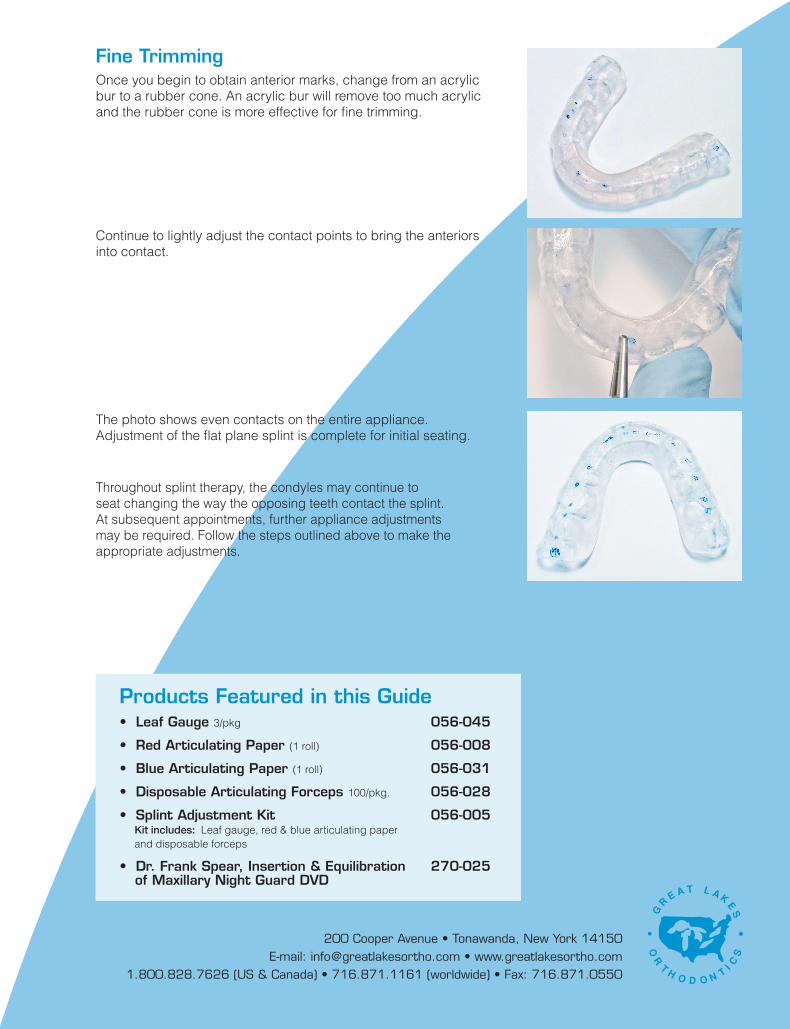
The photo shows even contacts on the entire appliance. Adjustment of the flat plane splint is complete for initial seating.
Throughout splint therapy, the condyles may continue to seat changing the way the opposing teeth contact the splint. At subsequent appointments, further appliance adjustments may be required. Follow the steps outlined above to make the appropriate adjustments.
200 Cooper Avenue • Tonawanda, New York 14150E-mail: [email protected] • www.greatlakesortho.com
1.800.828.7626 (US & Canada) • 716.871.1161 (worldwide) • Fax: 716.871.0550
Products Featured in this Guide• Leaf Gauge 3/pkg 056-045
• Red Articulating Paper (1 roll) 056-008
• Blue Articulating Paper (1 roll) 056-031
• Disposable Articulating Forceps 100/pkg. 056-028
• Splint Adjustment Kit 056-005 Kit includes: Leaf gauge, red & blue articulating paper and disposable forceps
• Dr. Frank Spear, Insertion & Equilibration 270-025 of Maxillary Night Guard DVD