spec.dock BMW e39 v.2 Installation Instructions€¦ · spec.dock BMW e39 v.2 Installation...
14
1 Thank you for your purchase of a spec.dock iPod solution for your vehicle. Audio connections may vary according to your particular setup. For any clarification on your particular vehicle, please email [email protected] or call 770-414-6038 with any further questions. spec.dock BMW e39 v.2 Installation Instructions Begin by using a slim panel tool to pop out the pocket underneath the air conditioning vents at the back of the center console. You will need to pop out one side and then the other, then slide the pocket out with your fingers and set aside.
Transcript of spec.dock BMW e39 v.2 Installation Instructions€¦ · spec.dock BMW e39 v.2 Installation...

1
Thank you for your purchase of a spec.dock iPod solution for your vehicle. Audio connections may vary according to your particular setup. For any clarification on your particular vehicle,
please email [email protected] or call 770-414-6038 with any further questions.
spec.dock BMW e39 v.2 Installation Instructions
Begin by using a slim panel tool to pop out the pocket underneath the air conditioning vents at the back of the center console. You will need to pop out one side and then
the other, then slide the pocket out with your fingers and set aside.
2
Once this pocket is removed, slide the a/c vents down about 1/2”. This will reveal two Philips-head screws at the back edge of the armrest. Remove these and set aside.
With the screws removed, the armrest will lift up and toward you, coming free from the console itself. Set aside.

3
Using only your fingers, unsnap the emergency brake boot by first removing the back edge and sides and then lifting the whole plastic boot trim up out of the console. The boot can be pushed up around the e-brake handle but left attached. Make sure to
lower the e-brake once the boot is moved out of the way.
By inserting your hand into the emergency brake opening, you will be able to press on the back side of the pocket in this area of the center console. By pushing up on the
back of this pocket, you will be able to unsnap and remove it.

4
Pull the pocket out completely and set it aside.
You will notice two Philips-head screws behind this pocket that were revealed when you removed the armrest earlier. These can now be removed and set aside.

5
Next, unsnap the shift boot trim by simply grasping around the boot itself and pulling
Lift up gently on the shift boot trim and you will see two plugs on the left hand side and one plug on the right. These all need to be unplugged so that the boot can be moved
up and out of the way.
6
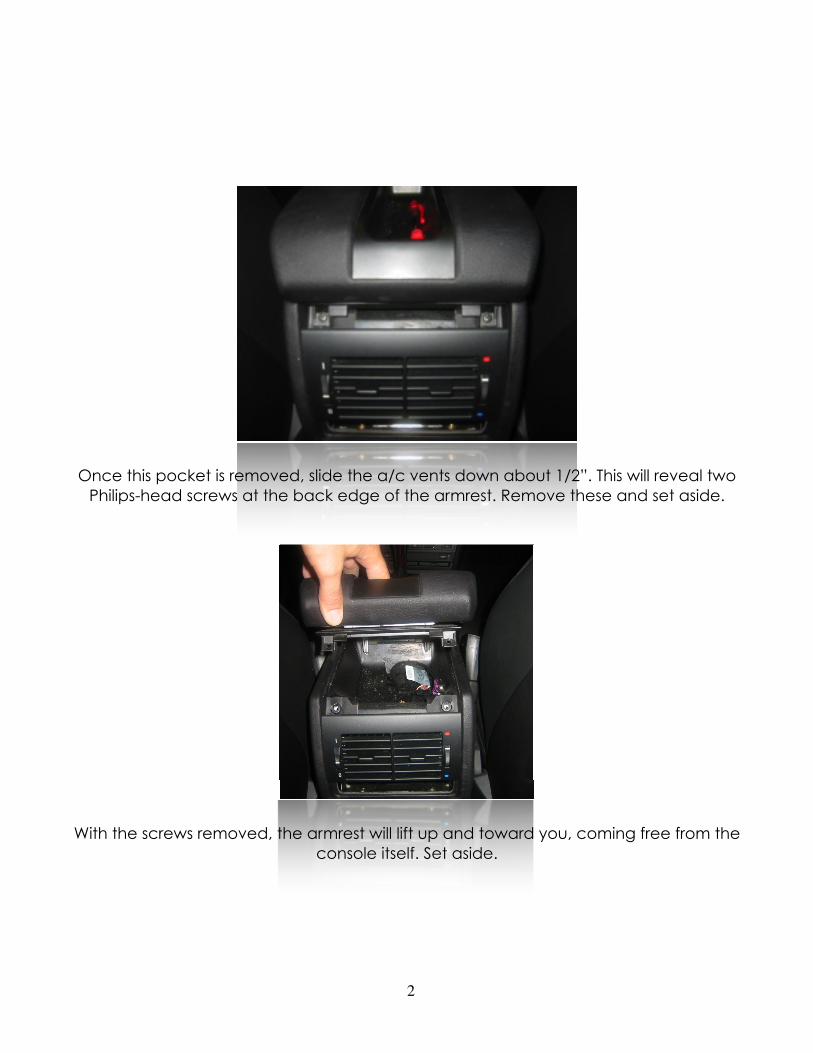
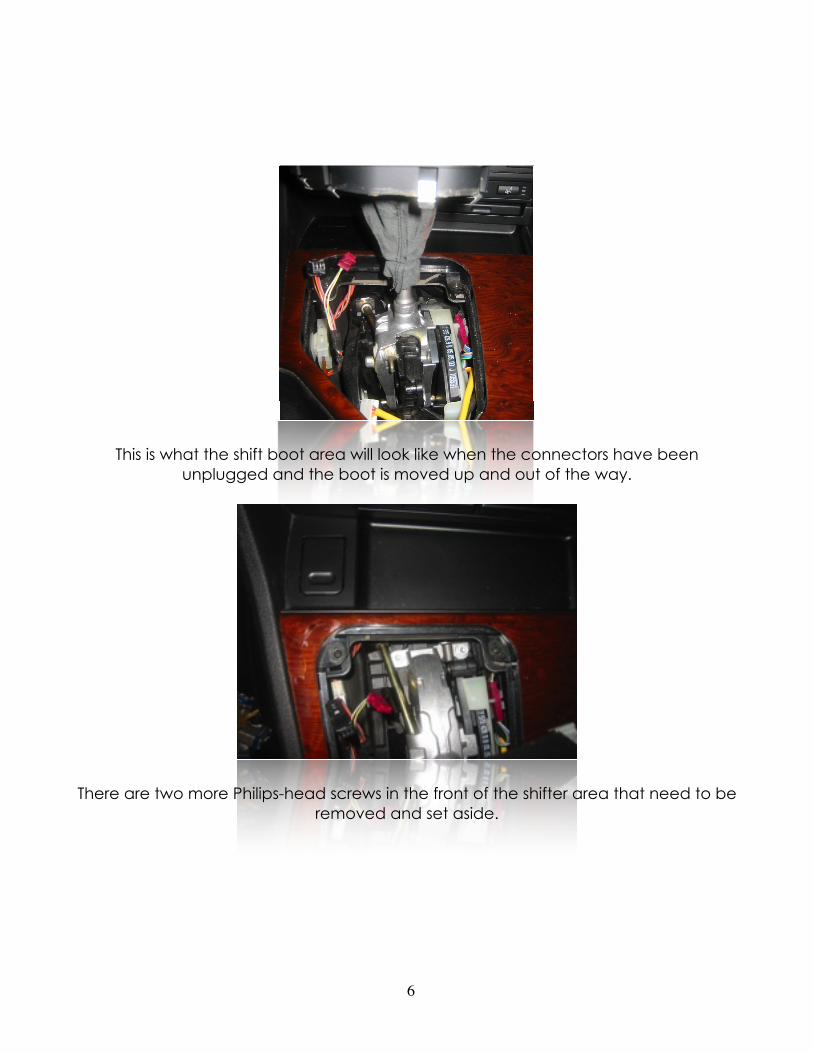
This is what the shift boot area will look like when the connectors have been unplugged and the boot is moved up and out of the way.
There are two more Philips-head screws in the front of the shifter area that need to be removed and set aside.
7
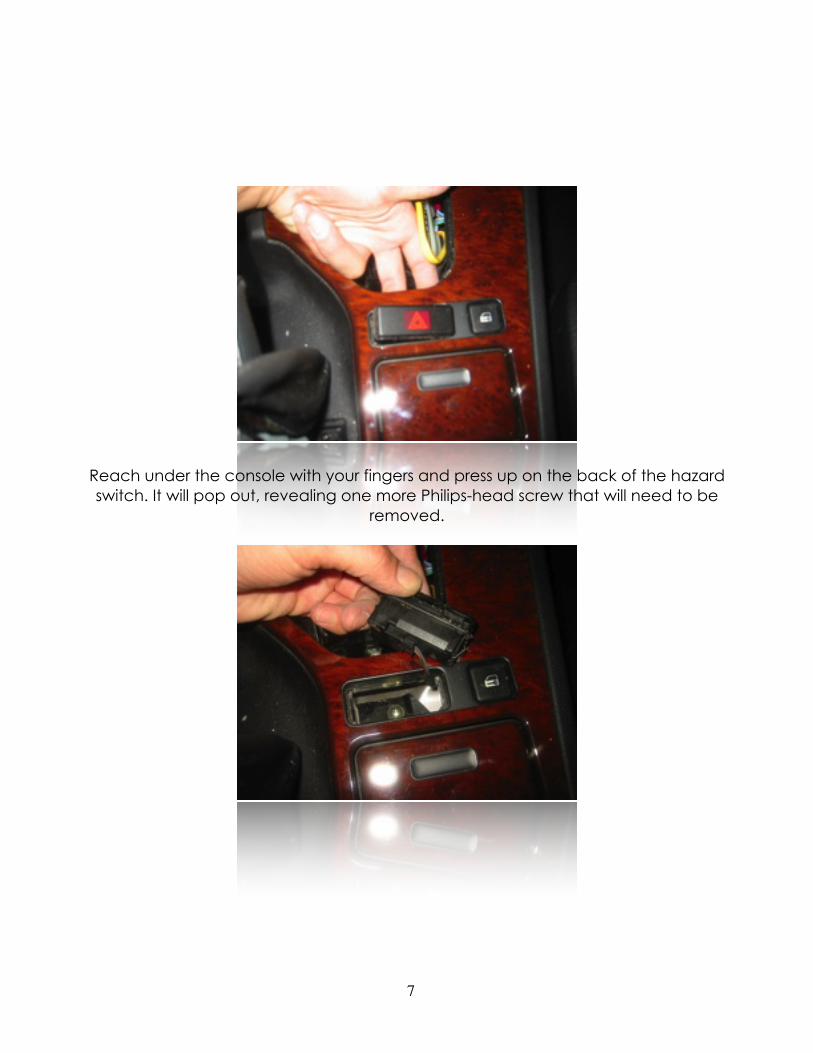
Reach under the console with your fingers and press up on the back of the hazard switch. It will pop out, revealing one more Philips-head screw that will need to be
removed.
8
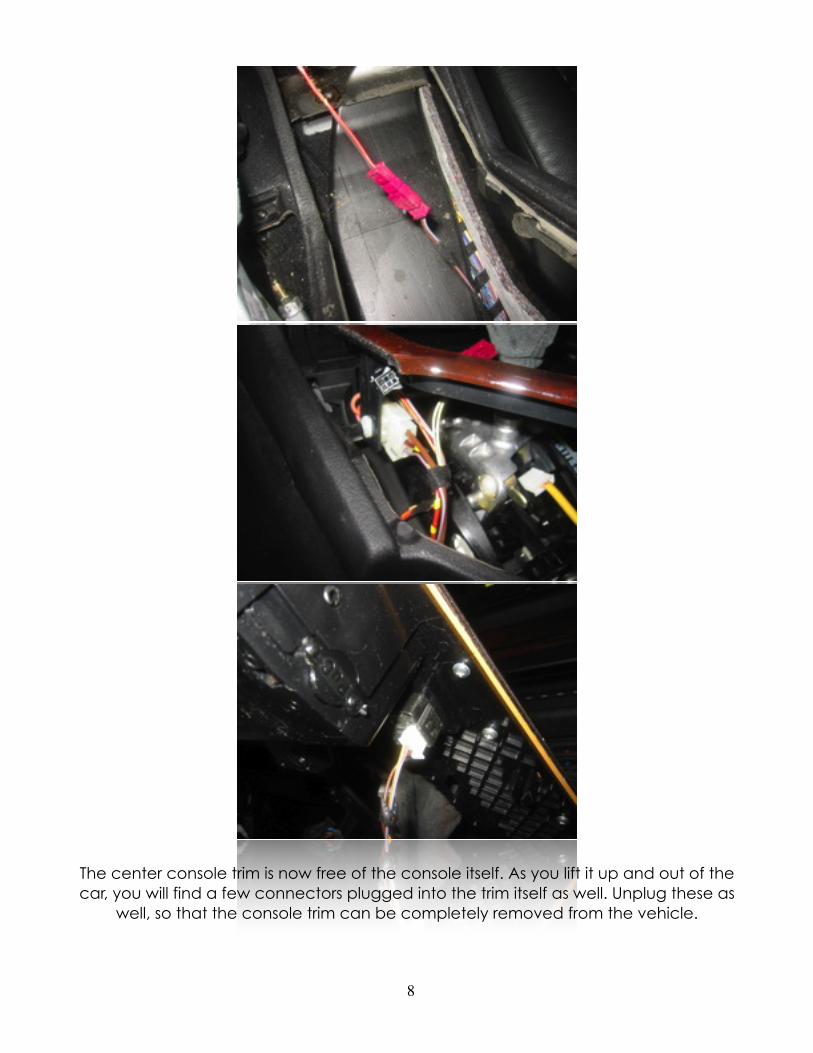
The center console trim is now free of the console itself. As you lift it up and out of the car, you will find a few connectors plugged into the trim itself as well. Unplug these as
well, so that the console trim can be completely removed from the vehicle.

9
Set the de-installed trimpiece on a well-lighted work surface.
Press back on the ashtray door to remove the original astray insert and set aside.

10
Close the ashtray door (this is very important) and the measure 2” from the front and the side of the ashtray housing as shown to mark the center point of the wiring access
hole you will be drilling (shown here as a white dot).
11
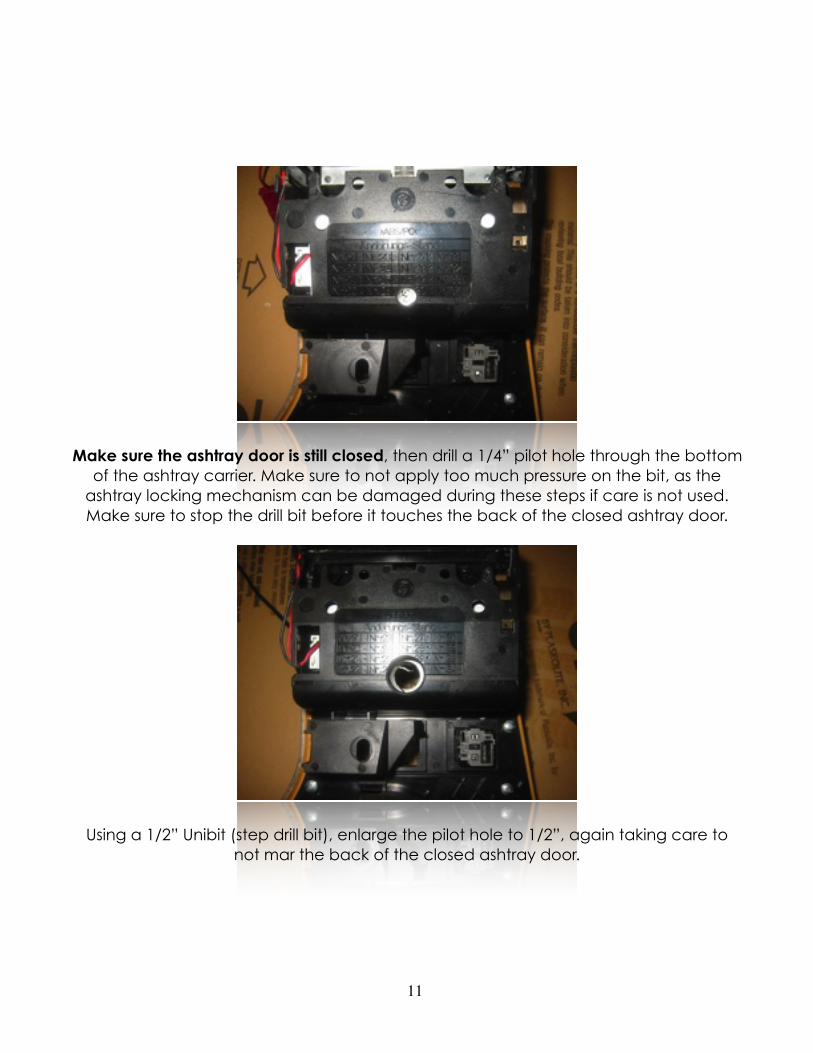
Make sure the ashtray door is still closed, then drill a 1/4” pilot hole through the bottom of the ashtray carrier. Make sure to not apply too much pressure on the bit, as the
ashtray locking mechanism can be damaged during these steps if care is not used.Make sure to stop the drill bit before it touches the back of the closed ashtray door.
Using a 1/2” Unibit (step drill bit), enlarge the pilot hole to 1/2”, again taking care to not mar the back of the closed ashtray door.
12
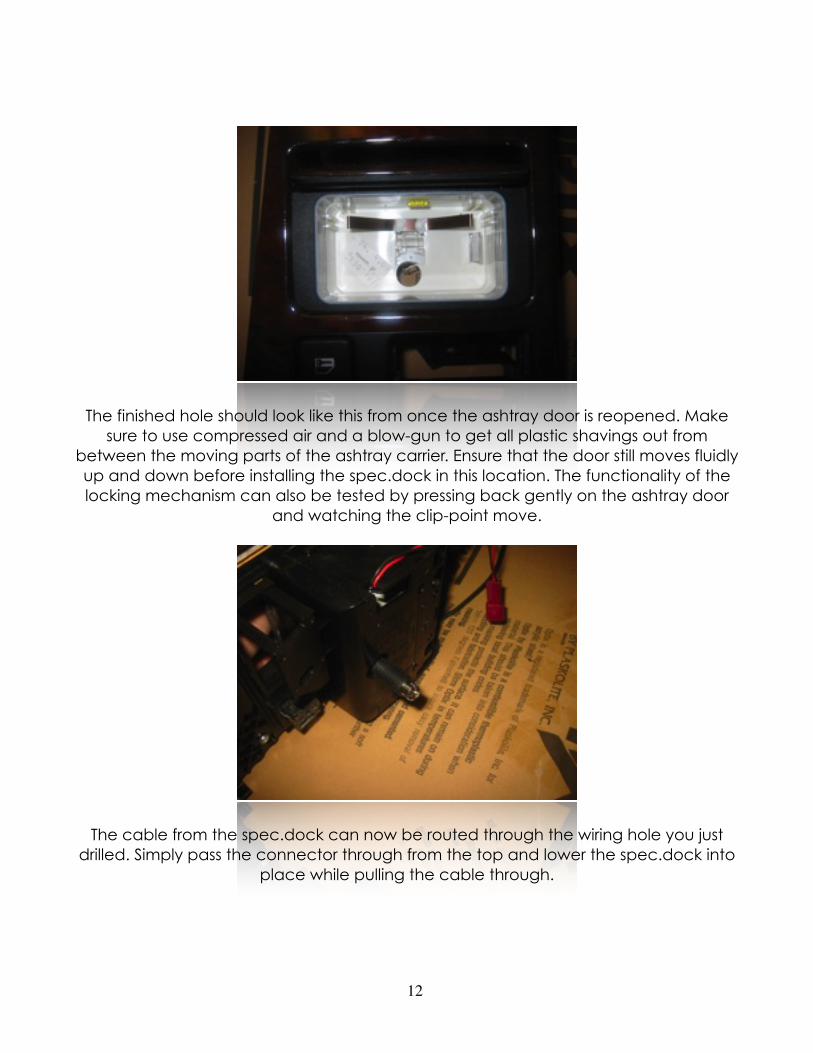
The finished hole should look like this from once the ashtray door is reopened. Make sure to use compressed air and a blow-gun to get all plastic shavings out from
between the moving parts of the ashtray carrier. Ensure that the door still moves fluidly up and down before installing the spec.dock in this location. The functionality of the locking mechanism can also be tested by pressing back gently on the ashtray door
and watching the clip-point move.
The cable from the spec.dock can now be routed through the wiring hole you just drilled. Simply pass the connector through from the top and lower the spec.dock into
place while pulling the cable through.

13
Use a high-quality degreaser such as denatured alcohol to thoroughly clean the ashtray well before removing the backing from the double-sided tape on the
spec.dock and lowering it into place.
The wiring should pass cleanly through the hole with the spec.dock in place. Ensure that the ashtray door still opens and closes smoothly before re-installing the console
trim into the car.

14
As the console trim is being reinstalled in the vehicle, simply pass the wiring from the spec.dock out the side of the center console, ensuring that no slack gets left
underneath the emergency brake gearing or the ashtray area itself.
The center console trim can now be reinstalled and the wiring routed to the necessary location. Reassembly of the rest of the console is the opposite of disassembly. Make
sure to test all functionality before fully reassembling the vehicle.