
PDF - Object-oriented programming in C++ - MIT OpenCourseWare

SoundGate Mic
User GuideFor use with SoundGate 3
www.sonici.com


03
Congratulations on the purchase of your new SoundGate Mic. The SoundGate Mic is intended to be used to improve communication by sending the speaker’s voice directly to the hearing aids of the user. This allows the hearing aid user to hear the speaker better even in difficult listening environments.
This guide offers the instructions necessary to get you on your way to better communication. Please read the entire contents of this booklet before using your SoundGate Mic. It contains instructions and important information about its use and handling.

04
General Warnings and Safety Guidelines 5
Introduction 10
SoundGate Mic Overview 11
How the SoundGate Mic Works 12
Wearing the SoundGate Mic 13
Charging the SoundGate Mic for Use 14
Power Indication 15
Table of Contents

05
Pairing to SoundGate 3 16
Setting Up the SoundGate Mic 19
Pause/Re-start Sound from the SoundGate Mic 22
Turn Off the SoundGate Mic 23
Important Additional Information 24
06
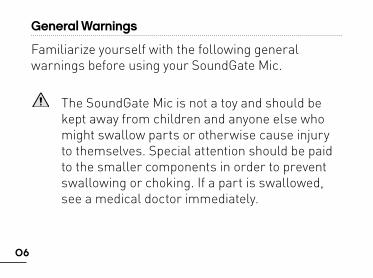
General Warnings
Familiarize yourself with the following general warnings before using your SoundGate Mic.
The SoundGate Mic is not a toy and should be kept away from children and anyone else who might swallow parts or otherwise cause injury to themselves. Special attention should be paid to the smaller components in order to prevent swallowing or choking. If a part is swallowed, see a medical doctor immediately.

07
Never expose the SoundGate Mic to excessive heat, such as putting it in an oven, microwave, burning it or leaving it inside a parked car in the sun. There is a risk in these events that it will explode and cause serious injury.
If by accident the neck strap should get caught on something while the user is wearing it, the neck strap is constructed to break automatically. Therefore, never try to shorten or modify the neck strap in an unauthorized way. The neck strap should not be used for children who weigh less than 24 lbs (11 kg).

08
The SoundGate Mic should not be used in an aircraft unless specifically permitted by the flight personnel
The SoundGate Mic is designed to comply with the most stringent Standards of International Electromagnetic Compatibility. However, the SoundGate Mic might cause interference with other medical devices such as defibrillators and pacemakers.
· Please contact the manufacturer of your implantable device for information about the risk of disturbance
09
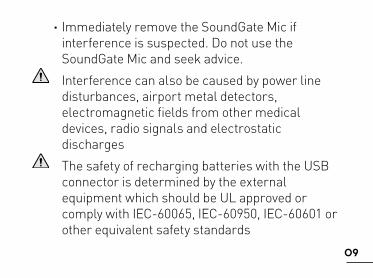
· Immediately remove the SoundGate Mic if interference is suspected. Do not use the SoundGate Mic and seek advice.
Interference can also be caused by power line disturbances, airport metal detectors, electromagnetic fields from other medical devices, radio signals and electrostatic discharges
The safety of recharging batteries with the USB connector is determined by the external equipment which should be UL approved or comply with IEC-60065, IEC-60950, IEC-60601 or other equivalent safety standards

10
Introduction
The following items are included in your SoundGate Mic package:
Power adapter (charger)
User Guide
Neck strap SoundGate MicModel: MIC-110
SoundGate Mic User GuideFor use with SoundGate 3
www.sonici.com

11
SoundGate Mic Overview
ON/OFF button
Noise detector (do not cover)
LED indicator Power indicator

12
How the SoundGate Mic Works
The SoundGate Mic will transmit speech from the speaker directly to the hearing aid wearer. A microphone will only work with one SoundGate at a time.
Microphone
Up to 49 feet (15 meters)

13
Wearing the SoundGate Mic
The SoundGate Mic should be in direct line with the speaker’s mouth within a distance of 4 to 8 inches (10 to 20 cm).
Wearing with clip Wearing with neck strap
14
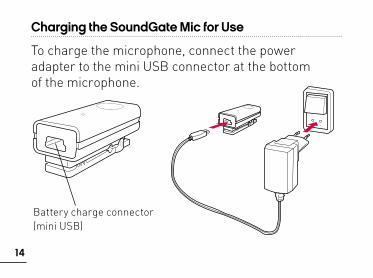
Charging the SoundGate Mic for Use
To charge the microphone, connect the power adapter to the mini USB connector at the bottom of the microphone.
Battery charge connector (mini USB)

15
Charging Fully chargedAfter approx. 1.5 hours of charging, device will operate for up to 5 hours
Constant red light Blinking green light Constant green light
Low batteryMaximum 20 minutes speaking time remaining
Power Indication
The power indicator on the top of the SoundGate Mic will help you monitor the status of your battery life and/or charging.
16
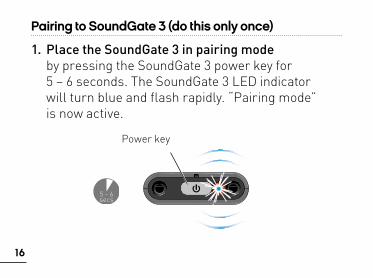
Pairing to SoundGate 3 (do this only once)
1. Place the SoundGate 3 in pairing mode by pressing the SoundGate 3 power key for 5 – 6 seconds. The SoundGate 3 LED indicator will turn blue and flash rapidly. “Pairing mode” is now active.
SN2_ILLU_TopLedFlashingBlue_HI30
Power key
5 – 6 secs
17
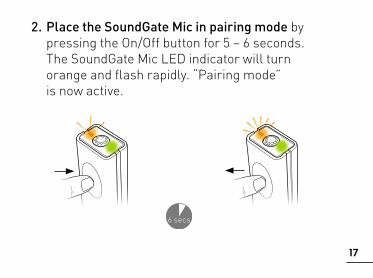
2. Place the SoundGate Mic in pairing mode by pressing the On/Off button for 5 – 6 seconds. The SoundGate Mic LED indicator will turn orange and flash rapidly. “Pairing mode” is now active.
6 secs

18
3. Wait up to 1 minute. The SoundGate 3 auxiliary input key and the SoundGate Mic LED indicator will turn orange. Pairing is now complete.
SN2_ILLU_SoundgateProfile_HI1
SN2_ILLU_AuxKeyOrange_HI32

19
Setting Up the SoundGate Mic
1. Ensure SoundGate 3 is turned on by giving a 1 – 2 second press of the power key. The SoundGate 3 LED indicator will illuminate green.
SN2_ILLU_GreenLed_HI12
1 – 2 secs

20
2. Turn on the SoundGate Mic by giving a short press to the On/Off key. The power indicator will illuminate green and the LED indicator will blink orange until it locates the paired SoundGate 3 device. The LED indicator will then illuminate orange (steady).
21
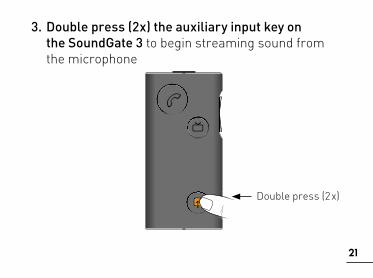
3. Double press (2x) the auxiliary input key on the SoundGate 3 to begin streaming sound from the microphone
SN2_ILLU_SoundgateProfile_HI1
SN2_ILLU_AuxKeyOrange_HI32
Double press (2 x)

22
Pause/Re-start Sound from the SoundGate Mic
1. Give one short press of the auxiliary input key on the SoundGate 3 to pause sound from the microphone
2. Double press (2x) the auxiliary input key on the SoundGate 3 to resume sound from the microphone
SN2_ILLU_AuxKeyOrange_HI32
One press (1 x)
SN2_ILLU_AuxKeyOrange_HI32
Double press (2 x)

23
Turn Off the SoundGate Mic
Press and hold the SoundGate Mic On/Off key for 2 – 3 seconds until the power indicator is off.
2 – 3 secs

24
Important Additional Information
The SoundGate Mic contains a radio transmitter using a frequency hopping technology working in the ISM-band at 2.4 GHz.
The peak conducted output power of the transmitter is less than 6 dBm and the antenna is a small PCB antenna with a directional gain of less than 2 dBi (dB over an isotropical or omni-directional antenna).

25
The emission power from the SoundGate Mic is below international emission limits for Human Exposure. The SoundGate Mic complies with inter national standards concerning Electromagnetic Compatibility.

26
USA and CanadaDue to the limited size available on the device, many of the relevant approval markings are found in this document. This instrument is certified under:
FCC ID: 2ACAHMIC110IC: 11936A-MIC110
The device complies with Part 15 of the FCC rules and RSS-210 of Industry Canada.

27
Operation is subject to the following two conditions:This device may not cause harmful interference. This device must accept any interference received, including interference that may cause undesired operation. Note: This equipment has been tested and found to comply with the limits for a Class B digital device, pursuant to Part 15 of the FCC Rules. These limits are designed to provide reasonable protection against harmful interference in a residential installation.

28
This equipment generates, uses and can radiate radio frequency energy and, if not installed and used in accordance with the instructions, may cause harmful interference to radio communi cations. However, there is no guarantee that interference will not occur in a particular installation. If this equipment does cause harmful interference to radio or television reception, which can be determined by turning the equipment off and on, the user is encouraged to try to correct the interference by one or more of the following measures:

29
· Reorient or relocate the receiving antenna · Increase the separation between the equipment and receiver
· Connect the equipment into an outlet on a circuit different from that to which the receiver is connected
· Consult the dealer or an experienced radio/TV technician for help

30
Caution:Changes or modifications not expressly approved by the party responsible for compliance could void the user’s authority to operate the equipment.
SBO Hearing A/S hereby declares that this SoundGate Mic is in compliance with the essential requirements and other relevant provisions of Directive 1999/5/EC.
Declaration of conformity is available at:SBO Hearing A/SKongebakken 9DK-2765 Smørum, Denmark

< 15 mm >
< >
8,15 mm
< >
9.0
mm
<
19 m
m
>
Placeholder for FSC logo

ManufacturerSBO Hearing A/SKongebakken 9DK-2765 Smørum, Denmarkwww.sbohearing.com
N14144
www.sonici.com
0000152633000001
04.15 | 152633 | UK


