
smartDEN IP-16R...SmartDEN IP-16R User Manual 28 Sep 2018-5- 3. Technical parameters Table 1....
43
SmartDEN IP-16R User Manual 28 Sep 2018 -1- SmartDEN IP-16R Web enabled 16 Relay Module User Manual Date: 28 Sep 2018 For firmware version: v1.20 / May 2017
Transcript of smartDEN IP-16R...SmartDEN IP-16R User Manual 28 Sep 2018-5- 3. Technical parameters Table 1....

SmartDEN IP-16R User Manual
28 Sep 2018
-1-
SmartDEN IP-16R
Web enabled 16 Relay Module
User Manual Date: 28 Sep 2018
For firmware version: v1.20 / May 2017

SmartDEN IP-16R User Manual
28 Sep 2018
-2-
Content
1. Features ....................................................................................................................... 3 2. Application examples.................................................................................................... 4 3. Technical parameters ................................................................................................... 5 4. Connectors, ports and led indicators ............................................................................ 6 5. Installation .................................................................................................................... 7 6. Default Settings ...........................................................................................................14 7. Web access .................................................................................................................16 8. HTTP/XML/JSON access ............................................................................................32 9. SNMP access ..............................................................................................................38 10. Security considerations ...........................................................................................41 11. PCB mechanical drawing ........................................................................................42 12. DIN Rail BOX dimensions .......................................................................................43

SmartDEN IP-16R User Manual
28 Sep 2018
-3-
1. Features
SmartDEN IP-16R is a LAN relay module with 16 SPDT relays for remote control with integrated web server for set-up, snmp-v1 and http/xml support for embedding in other systems. The built-in real time clock allows to organize schedule stand-alone work without connection to computer. From firmware ver. 1.20 the module is able to act like network watch-dog in order to monitor and reboot network equipment automatically.
10 Mb Ethernet interface with Link/Activity Led;
Auto-MDIX;
16 SPDT relays (with NO and NC contacts);
Led for each relay;
Pulse function (timer) for every relay;
Built-in hardware Real Time Clock (RTC) for schedule (calendar) stand-alone work;
Weekly schedule table with up to 30 events;
Web server with secure login authorization;
SNMPv2 for configuration/monitoring (snmpset, snmpget, snmpbulk, snmpgetnext, snmptable, snmpwalk);
Secure HTTP/XML/JSON API protocols support for read/write relays status;
Supported protocols: ARP, IP, ICMP (ping), DHCP, DNS;
Watch-Dog Auto-Reboot ICMP (outgoing) function;
Access protection (by IP and MAC address);
Option for relays states saving and loading on reset.

SmartDEN IP-16R User Manual
28 Sep 2018
-4-
2. Application examples
Remote control of electrical appliances
Industrial automation
Home automation
Watchdog monitoring of network equipment and auto-reboot

SmartDEN IP-16R User Manual
28 Sep 2018
-5-
3. Technical parameters
Table 1. Technical parameters
Parameter Value Box size, mm 210 x 85 x 58 PCB size, mm 203 x 82 Box weight, g 420 PCB weight, g 285 Power supply voltage,VDC 12 or 24 (depends on the model) ±2 Maximum current consumption at 12VDC (when all relays are ON), mA
600
Maximum current consumption at 24VDC (when all relays are ON), mA
400
Operating temperature, °C 0 to 70 Relays maximum switchable current / voltage
10A / 250VAC, 15A / 120VAC, 10A / 28VDC

SmartDEN IP-16R User Manual
28 Sep 2018
-6-
4. Connectors, ports and led indicators
Bellow is shown a picture with the device connectors, ports and led indicators.
Figure 1. Device overview

SmartDEN IP-16R User Manual
28 Sep 2018
-7-
5. Installation
This device must be installed by qualified personnel;
This device must not be installed directly outdoors;
Installation consists of mounting the device, connecting to an IP network, connecting the relays, providing power and configuring via a web browser.
5.1. Box mounting
Figure 2. Mounting the device to DIN rail
SmartDen IP-16R can be mounted to a standard (35mm by 7.55mm) DIN rail.
Attach the module to the DIN rail by hooking the hook on the back of the enclosure to the DIN rail and then snap the bottom hook into place.

SmartDEN IP-16R User Manual
28 Sep 2018
-8-
5.2. Power supply
Figure 3. SmartDen IP-16R power supply
Depending on the selected model during purchase the power supply source for
SmartDen IP-16R must be with voltage either 12VDC or 24VDC stabilized and filtered. After power on, the power led must be on and Led1 indicator must start blinking in 5 seconds which means the controller is running normally.
Figure 4. Connecting a LAN cable
Please keep the polarity and supply voltage range!
SmartDen IP-16R does not accept AC supply voltage. It is highly recommended to check the power supply source parameters before supply the module.
The power supply equipment shall be resistant to short circuit and overload in secondary circuit.
When in use, do not place the equipment so that it is difficult to disconnect the device from the power supply.

SmartDEN IP-16R User Manual
28 Sep 2018
-9-
5.3. Relay connection
Figure 5. Connecting a lamp to relay
SmartDen IP-16R has 16 SPDT relays with parameters specified in the technical
parameters section. Every relay channel has normally open (NO) and normally closed (NC) contacts connected directly to the terminals.
If you are connecting inductive loads to the relays an extra measures must be taken in order to ensure the proper work of the device. For more information please refer to this link: http://denkovi.com/controlling-inductive-devices

SmartDEN IP-16R User Manual
28 Sep 2018
-10-
5.4. Network connection
SmartDen IP-16R supports AUTO-MDIX so either "crossover" or "straight-through" network cable can be used.
Figure 6. Connecting SmartDen IP-16R to a computer directly. This is the
recommend initial connection.
Figure 7. Connecting SmartDen IP-16R to a wireless router.

SmartDEN IP-16R User Manual
28 Sep 2018
-11-
5.5. Communication setup
SmartDen IP-16R is shipped with the following default parameters:
IP address: 192.168.1.100
Subnet mask: 255.255.255.0
Gateway: 192.168.1.1
Web password: admin
Initially it is recommended to connect the module directly to the computer. Next you have to change your PC’s IP address.
You can google how to change you computer IP settings or just visit this web page: http://www.howtochangeipaddress.com/changeip.php
For Windows 7 OS for example you can do that in the following way: Navigate to Control Panel -> Network and Internet -> View network and status
tasks -> Change adapter settings Then just select the local area connection with right click and select Properties:
Figure 8. LAN card properties

SmartDEN IP-16R User Manual
28 Sep 2018
-12-
The next step is to enter into IPv4 properties.
Figure 9. Enter in IPv4 properties section
Set the IP address of your PC to be in the same network.
Figure 10. Set the IP address
SmartDEN IP-16R User Manual
28 Sep 2018
-13-
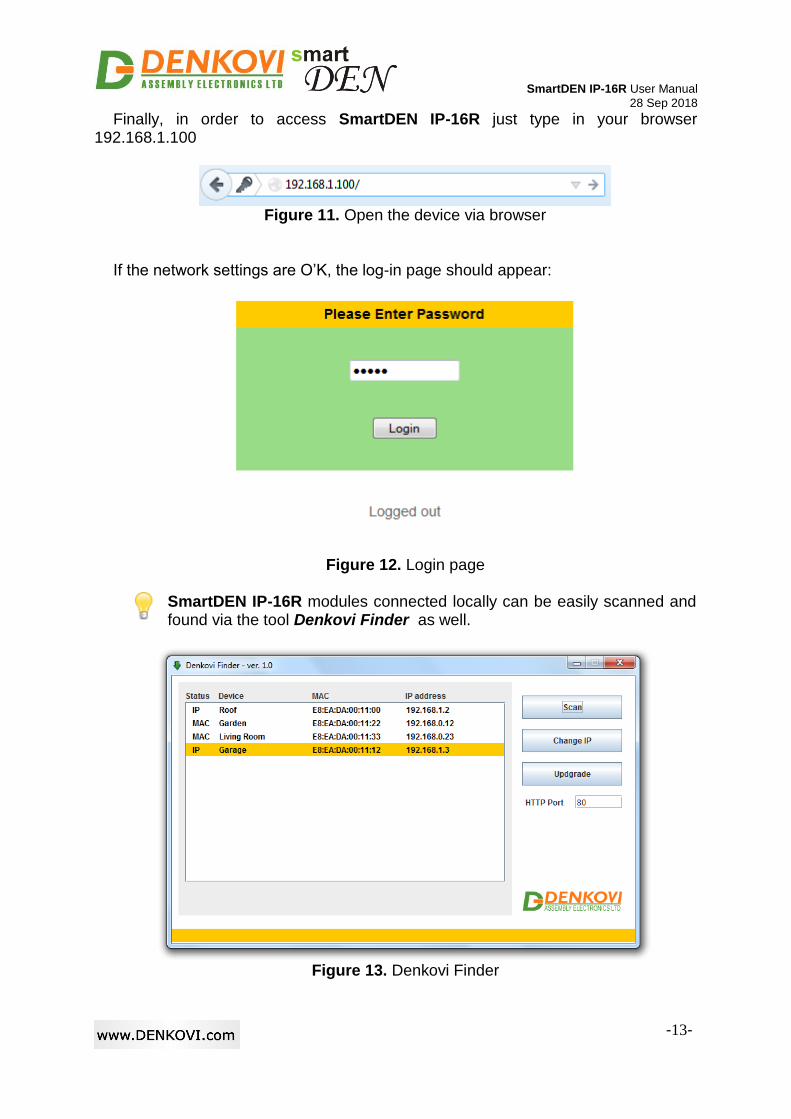
Finally, in order to access SmartDEN IP-16R just type in your browser 192.168.1.100
Figure 11. Open the device via browser
If the network settings are O’K, the log-in page should appear:
Figure 12. Login page
SmartDEN IP-16R modules connected locally can be easily scanned and found via the tool Denkovi Finder as well.
Figure 13. Denkovi Finder

SmartDEN IP-16R User Manual
28 Sep 2018
-14-
6. Default Settings
6.1. Table with default settings
The SmartDen IP-16R module is shipped with default (factory) settings shown in Table 2. The default settings can be reloaded, if necessary (see point 6.2).
Table 2. Default settings
Settings group Parameter (according Web pages)
Value
General Settings Device Name SMARTDEN-IP-16R
Save Outputs No
Password admin Network Settings DHCP Disabled
IP Address 192.168.1.100 Gateway 192.168.1.1 Subnet Mask 255.255.255.0 Primary DNS 192.168.1.1 Secondary DNS 0.0.0.0
HTTP/XML/JSON Access
HTTP Port 80 Access IP Address 192.168.1.0
Access Mask 0.0.0.0 Access MAC Address 00:00:00:00:00:00
Session Timeout, min 3
Enable Access Yes
Encrypt Password No
Multiple Access Yes
SNMP Agent Enable SNMP Yes
SNMP Port 161 Read-only Community1 public
Read-only Community2 read
Read-write Community1 private
Read-write Community2 write

SmartDEN IP-16R User Manual
28 Sep 2018
-15-
6.2. Steps for loading default settings
When necessary, the factory (default settings) may be applied so the module parameters will be returned back as those in point 6.1 from the current document.
Figure 14. Loading the default settings
Turn off the power supply of the device;
Press and hold the default button;
Turn on the power supply of the device;
Wait for until both led indicators (led1 and led2) become ON (approximately 10 sec);
Release the default button;
The module is configured with default settings.

SmartDEN IP-16R User Manual
28 Sep 2018
-16-
7. Web access
Figure 15. Web access
To access the setup pages, run a web browser (Internet Explorer, Mozilla Firefox or similar), and enter the SmartDEN IP-16R IP address, for example: http://192.168.1.100
Figure 16. Open via browser
Note: You will need to have JavaScript enabled in your browser.

SmartDEN IP-16R User Manual
28 Sep 2018
-17-
7.1. Login
Figure 17. Login page
Enter the password and click "Login" button. This will bring you to the SmartDEN IP-16R main configuration page which contains details for the current firmware version and build date and provides buttons and links to obtain further details. Note: The default password is admin (passwords are case sensitive). Note: When the password is entered, it is transmitted across the network in encrypted form, so eavesdropping on the data transmission will not reveal the password. Note: In order to prevent setup/control conflicts, at any given moment, only one user can be logged in. Note: If there is no data traffic between the Web-browser and the SmartDEN IP-16R for time, specified by Session Timeout parameter, the session "times out" and a new login is required.

SmartDEN IP-16R User Manual
28 Sep 2018
-18-
7.2. Menu
The main menu consists of the following items, located in the left window frame:
Figure 18. Navigation menu
7.3. General Settings
Figure 19. General settings
Device Name: The name of the module (max 15 symbols). Every module can
have different name in your network so they can be distinguished;

SmartDEN IP-16R User Manual
28 Sep 2018
-19-
Save Outputs: When checked, each time the relays state is changed, it will be saved in non-volatile memory (EEPROM), so after reboot/restart it will be restored;
This option should be used with care in dynamic systems because of restriction in maximum write cycles of the EEPROM (usually 100 000 write/erase cycles).
Password: The password used for logging into the web admin and XML operation (max. 10 chars);
When typed. the password in this screen is not hidden. Only in this case, when the password is being changed, it is transmitted across the network "in the open". Therefore, set passwords in a secure environment where you can make sure that no one is "eavesdropping". Subsequent transmissions of the password to "login" onto the device are encrypted and "safe".
Save button: Once you have changed the settings as required, click this button.
7.4. Network settings
Figure 20. Network settings
This menu lets you configure the network settings of SmartDEN IP-16R relay
module:

SmartDEN IP-16R User Manual
28 Sep 2018
-20-
Enable DHCP: This option allows DHCP to be enabled or disabled. If DHCP is set to Enabled, the Network page must be saved and SmartDEN IP-16R must be rebooted before obtaining an IP address;
IP address: This is the IP address of the SmartDEN IP-16R. It needs to be manually assigned only if DHCP is disabled. With DHCP enabled, this field displays the currently assigned address;
Gateway: This specifies the IP address of the gateway router. It is used for accessing public time servers for automatic time synchronization;
Subnet Mask: This is the subnet mask for the network on which the SmartDEN IP-16R is installed;
Primary DNS: Primary DNS (Domain Name Service) address;
Secondary DNS: Secondary DNS address;
Save button: Once you have changed the settings as required, click this button.
You have to reboot the device for these settings to apply.

SmartDEN IP-16R User Manual
28 Sep 2018
-21-
7.5. Date and Time Settings
Figure 21. Date/Time settings
This page lets you configure the following parameters related with the real time
clock built-in the module:
Date (dd/mm/yyyy): Enter the current date here in specified format;
Time (hh:mm): Enter the current time here in 24-hour format;
Time Zone: Select the time zone for your geographic location.
Auto Synchronization: This option enables or disables automatic synchronization with the SNTP (Simple Network Time Protocol) server with period specified by Synchronization Period;
Time Sever: This is the SNTP server, used for synchronizing the time automatically;
Server Port: SNTP server port;
Synchronization Period, min: This option sets the period in which automatic synchronization will take place, if enabled;
Save button: Once you have changed the settings as needed, click "Save". These settings apply immediately and do not require a reboot.

SmartDEN IP-16R User Manual
28 Sep 2018
-22-
7.6. HTTP/XML/JSON Settings
Figure 22. HTTP/XML/JSON Settings
These settings let you configure the HTTP, XML and JSON access parameters of
SmartDEN IP-16R:
HTTP Port: Port that the Web server listens for HTTP requests (default port is 80). You have to reboot the device for a new port setting to apply;
Access IP Address/Access Mask: These fields can be used to restrict the HTTP/XML/JSON access by specifying the IP address and subnet mask of the HTTP client;
Access MAC Address: This field can be used to restrict the HTTP/XML/JSON access by specifying the MAC address of the HTTP client;
Session Timeout, min: Specifies the timeout period for HTTP, XML and JSON sessions in minutes;
Enable Access: This option enables or disables XML/JSON access to the SmartDEN IP-16R;
Encrypt Password: When XML/JSON access is enabled, this option adds additional security level by encrypting the login password;
Multiple Access: This option enables simultaneous access from several HTTP/JSON clients;
Save button: Once you have changed the settings as required, click this button.

SmartDEN IP-16R User Manual
28 Sep 2018
-23-
Note: When Encrypt Password mode is enabled, the Multiple Access option is not taken into account and, at any given moment, only one user can be logged-in.
Note: When Multiple Access mode is enabled, any XML/JSON request will
always reset the current HTTP session. Note: When Multiple Access mode is disabled, whether Encrypt Password is
enabled or not, it is possible to access the module via XML/JSON only after login for the specified session timeout.
You have to reboot the device for these settings to apply.
It is highly recommended to log out from the web server after finishing the parameters setup.
If you don’t want to restrict the HTTP/XML/JSON access by IP address, set the Access Mask to 0.0.0.0.
If you don’t want to restrict the HTTP/XML/JSON access by MAC address, set the MAC Address to 00:00:00:00:00:00.
Setting the Access Mask to 255.255.255.255 allows the HTTP/XML/JSON access only from the exactly specified Access IP Address.
You can allow the HTTP/XML/JSON access to a range of IP addresses by setting an appropriate value for Access Mask. For example setting the Access IP Address to 192.168.1.0 and Access Mask to 255.255.255.0 allows the access from IP addresses in range from 192.168.1.0 to 192.168.1.255.

SmartDEN IP-16R User Manual
28 Sep 2018
-24-
7.7. SNMP Agent Configuration
Figure 23. SNMP settings
These settings let you configure the SNMPv1 (Simple Network Management
Protocol Version 1) access to the SmartDEN IP-16R:
Enable SNMP: This option enables or disables SNMP access to the SmartDEN IP-16R;
SNMP Port: UDP port number the SNMP agent receives requests on (default port is 161);
Read-only Community1/2: Community string for client’s authentication, used in read operations;
Read-write Community1/2: Community string for client’s authentication, used in read/write operations.
Save button: Once you have changed the settings as required, click this button.
You have to reboot the device for these settings to apply.

SmartDEN IP-16R User Manual
28 Sep 2018
-25-
7.8. Relays Settings
Figure 24. Relays names
This page configures the following parameters for the relays:
Description: Relay identification string (max 7 chars).
Pulse, ms (x100): Determines if the relay works in pulse mode and if so what is the duration of the single pulse (in milliseconds x 100 - for example value of 10 means 1 second). This parameter can accept values between 0 and 65535. If it is 0, then the pulse mode is disabled. If it is between 1 and 65535, then the pulse mode for this relay is activated and it will be hold in high level (ON) for the specified time by this parameter. During this time, the relay can be set in low level (OFF) via week schedule, SNMP, web browser control, HTTP/XML/JSON:

SmartDEN IP-16R User Manual
28 Sep 2018
-26-
o If the relay is set to high level (ON) via browser manually, SNMP or HTTP/XML/JSON it will be in high level (ON) for the determined time by this parameter and then set back to low level;
o If the output is controlled by weekly schedule, then when the output becomes in high level, it will be set to high level for time, specified by this parameter and then will be set to low;

SmartDEN IP-16R User Manual
28 Sep 2018
-27-
7.9. Auto-reboot Settings
SmartDEN IP-16R can be used for Auto-rebooting of IP devices (servers, PC hosts, switches, cameras etc.). In this mode SmartDEN IP-16R checks the working state of the device at regular intervals by sending ping requests. After preset number of successive ping failures SmartDEN IP-16R performs a predefined reset/reboot sequence of the monitored device connected to one of the 16 relays.
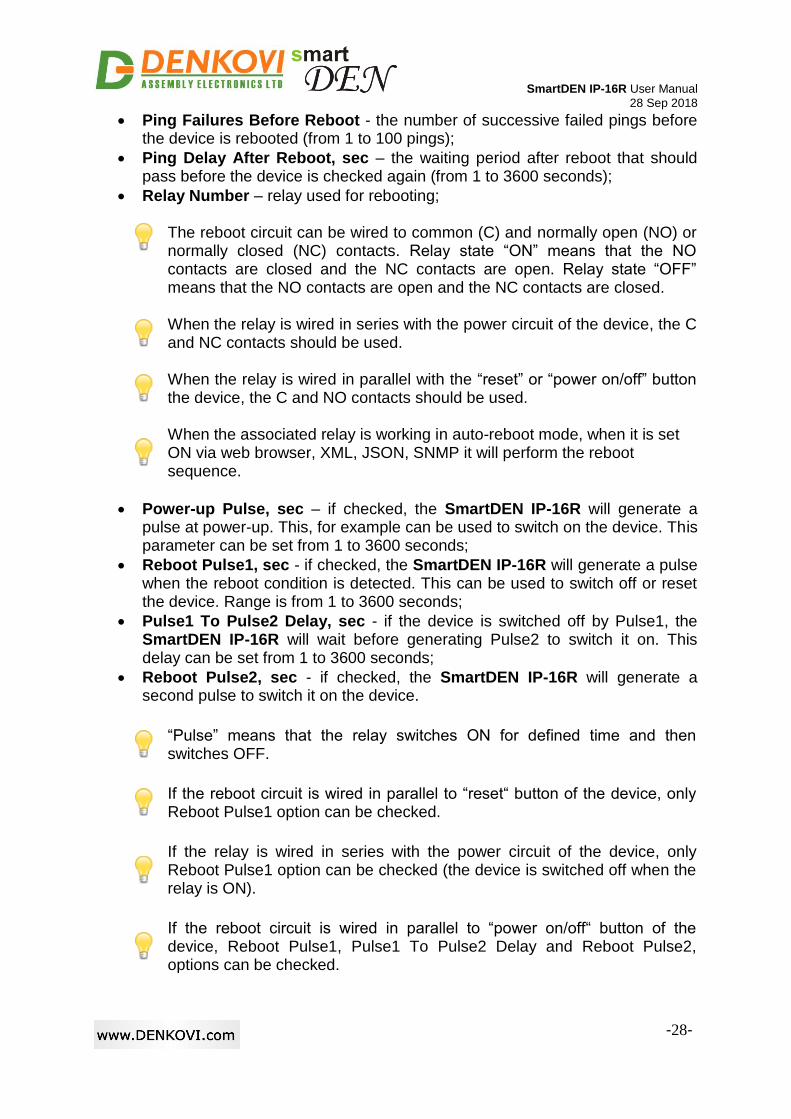
Figure 25. Auto-reboot configuration page
One of SmartDEN IP-16R channels can be configured to work in Auto-reboot
mode: Auto-reboot Mode Enable - activate this mode;
IP Address To Ping - the IP address of the device to be rebooted when pings will fail;
Interval Between Pings, sec – the time interval between two sequential ping requests sent to IP address of the monitored device (from 1 to 3600 seconds);
SmartDEN IP-16R User Manual
28 Sep 2018
-28-
Ping Failures Before Reboot - the number of successive failed pings before the device is rebooted (from 1 to 100 pings);
Ping Delay After Reboot, sec – the waiting period after reboot that should pass before the device is checked again (from 1 to 3600 seconds);
Relay Number – relay used for rebooting;
The reboot circuit can be wired to common (C) and normally open (NO) or normally closed (NC) contacts. Relay state “ON” means that the NO contacts are closed and the NC contacts are open. Relay state “OFF” means that the NO contacts are open and the NC contacts are closed.
When the relay is wired in series with the power circuit of the device, the C and NC contacts should be used.
When the relay is wired in parallel with the “reset” or “power on/off” button the device, the C and NO contacts should be used.
When the associated relay is working in auto-reboot mode, when it is set ON via web browser, XML, JSON, SNMP it will perform the reboot sequence.
Power-up Pulse, sec – if checked, the SmartDEN IP-16R will generate a pulse at power-up. This, for example can be used to switch on the device. This parameter can be set from 1 to 3600 seconds;
Reboot Pulse1, sec - if checked, the SmartDEN IP-16R will generate a pulse when the reboot condition is detected. This can be used to switch off or reset the device. Range is from 1 to 3600 seconds;
Pulse1 To Pulse2 Delay, sec - if the device is switched off by Pulse1, the SmartDEN IP-16R will wait before generating Pulse2 to switch it on. This delay can be set from 1 to 3600 seconds;
Reboot Pulse2, sec - if checked, the SmartDEN IP-16R will generate a second pulse to switch it on the device.
“Pulse” means that the relay switches ON for defined time and then switches OFF.
If the reboot circuit is wired in parallel to “reset“ button of the device, only Reboot Pulse1 option can be checked.
If the relay is wired in series with the power circuit of the device, only Reboot Pulse1 option can be checked (the device is switched off when the relay is ON).
If the reboot circuit is wired in parallel to “power on/off“ button of the device, Reboot Pulse1, Pulse1 To Pulse2 Delay and Reboot Pulse2, options can be checked.

SmartDEN IP-16R User Manual
28 Sep 2018
-29-
7.10. Monitoring and control
Figure 26. Monitoring and control
This page provides monitoring and control of the SmartDEN IP-16R relays. From
here you can control/monitor the relays. There is also provided information about how many reboots are performed and
when was the last reboot and button for immediate reboot.

SmartDEN IP-16R User Manual
28 Sep 2018
-30-
7.11. Week Schedule
Figure 27. Week schedule
This page configures the Week Schedule table for switching Relays ON or OFF
at specific times. You can add up to 30 items to the list. The top table of this page allows you to define a new item, while the bottom table shows the already defined list:
Outputs: Select a group of relays that should be switched;
State: Defines the state (ON/OFF) for the selected group of relays;
Hour: Time the group of relays will be switched at;
WeekDays: Select the days the defined switching should take place;
Start Date (dd/mm/yyyy): The start date for the Week Schedule table.
Once you have defined a new item, click "Add". This item will be added as a new row in a Week Schedule table.
SmartDEN IP-16R User Manual
28 Sep 2018
-31-
This feature allows you to turn on/off specific relays upon certain date and time or weekday without the need of LAN connection between the computer and the module.
To delete an item, select it in Existing Items table and click on "Delete Selected" button.
To set a new start date, click on "Update Start Date" button.
The module has back-up supply source for the RTC in order to keep the current date/time for several days during power off.
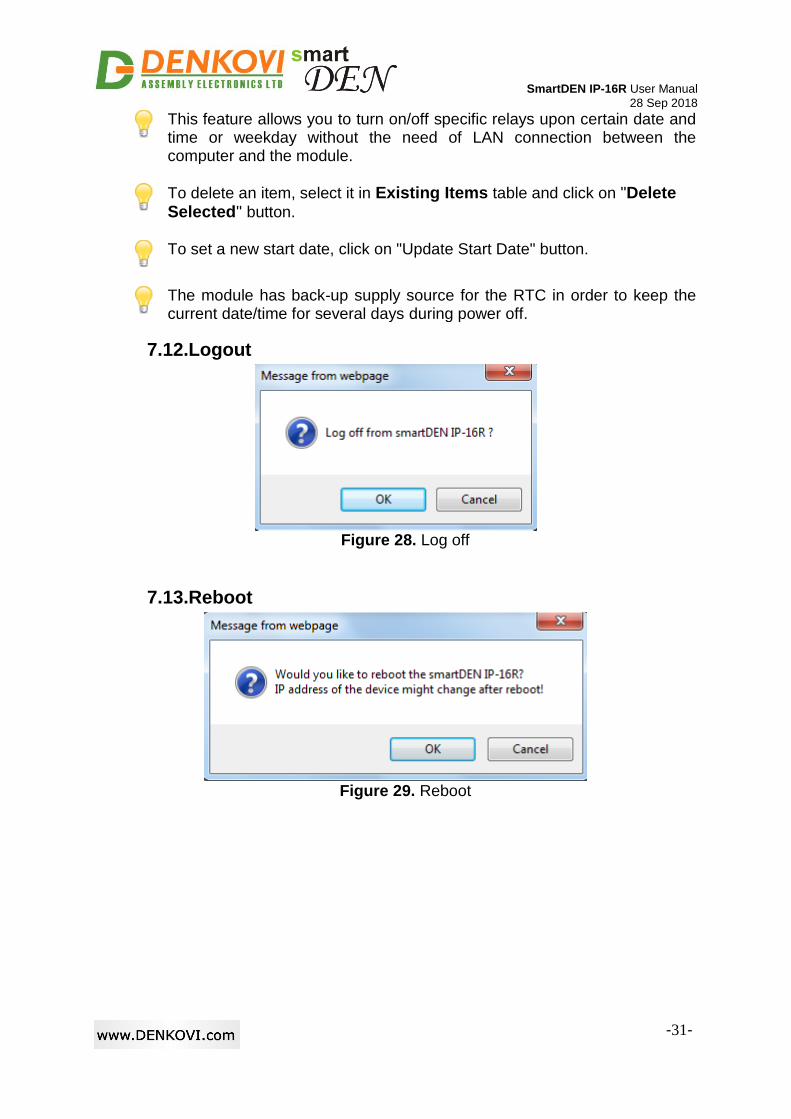
7.12. Logout
Figure 28. Log off
7.13. Reboot
Figure 29. Reboot

SmartDEN IP-16R User Manual
28 Sep 2018
-32-
8. HTTP/XML/JSON access
This operation mode allows custom applications to control the SmartDEN IP-16R without using a Web-browser. The custom application acts as a HTTP client, sending HTTP GET requests to the SmartDEN IP-16R.
To receive the current state of the SmartDEN IP-16R, the application requests the
page current_state.xml (current_state.json), for example: http://192.168.1.100/current_state.xml http://192.168.1.100/current_state.json The custom application can also control the SmartDEN IP-16R by sending
parameters (name/value pairs) with the HTTP/XML/JSON GET request, for example: http://192.168.1.100/current_state.xml?Relay=1&Relay2=0&Relay3=1 http://192.168.1.100/current_state.json?Relay=1&Relay2=0&Relay3=1 The XML/JSON login process differs depending on the selected Encrypt
Password option.
8.1. Login (Encrypted Password)
In this mode a two-step login sequence is provided as a protection against unauthorized access. The first time the custom application requests the page current_state.xml / current_state.json, a random login key is issued in the reply. Next the custom application uses this key to encrypt the password. The encrypted password is sent as a parameter with the next request to the page current_state.xml / current_state.json.
Bellow is an example of login process: Step 1: Request http://192.168.1.100/current_state.xml Reply (login required): <CurrentState> <LoginKey>65156</LoginKey> </CurrentState>
http://192.168.1.100/current_state.json Reply (login required): {"CurrentState": {"LoginKey": "65156"}}

SmartDEN IP-16R User Manual
28 Sep 2018
-33-
Step 2: Request (password is sent as a parameter) http://192.168.1.100/current_state.xml?pw=28237099263eabfd88626124a822c
64c Reply (password is O’K, login accepted):
or
http://192.168.1.100/current_state.json?pw=28237099263eabfd88626124a822c64c

SmartDEN IP-16R User Manual
28 Sep 2018
-34-
Password encryption algorithm to be implemented in custom application is available upon request.
8.2. Login (Non-Encrypted Password)
In this mode the password is passed as non-encrypted parameter with the request:
http://192.168.1.100/current_state.xml?pw=admin http://192.168.1.100/current_state.json?pw=admin Getting the <LoginKey> in the answer in this mode means only that the provided
password is wrong or the login session has been expired.
If there is no data traffic between the custom application and the
SmartDEN IP-16R for time, specified by Session Timeout parameter, the session "times out" and a new login is required.

SmartDEN IP-16R User Manual
28 Sep 2018
-35-
8.3. Getting the current state
After a login the custom application can obtain the SmartDEN IP-16R current state
by a request to the page current_state.xml / current_state.json : http://192.168.1.100/current_state.xml The reply contains page in XML format:
http://192.168.1.100/current_state.json The reply contains page in JSON format:

SmartDEN IP-16R User Manual
28 Sep 2018
-36-

SmartDEN IP-16R User Manual
28 Sep 2018
-37-
8.4. Multiple XML Access
In this mode the password should be passed as non-encrypted parameter with each request:
http://192.168.1.100/current_state.xml?pw=admin&Relay1=1 http://192.168.1.100/current_state.json?pw=admin&Relay1=1
Multiple XML/JSON Access is not allowed when Encrypt Password option is enabled.
8.5. Parameters
After a login the custom application can also control the SmartDEN IP-16R by sending parameters (name/value pairs) with the HTTP GET request.
Valid parameters and values are shown in the bellow table.
Table 3. Valid HTTP parameters Name Value Description
Relayi 0...1 Relayi value (i=1...16)
SetAll 0...65535 Set all the relays with single command
Pulsei 1...65535 Generate pulse to an output (i=1...16)
pw password Required at login

SmartDEN IP-16R User Manual
28 Sep 2018
-38-
9. SNMP access
SmartDEN IP-16R supports SNMPv1 protocol – snmpget and snmpset. Most of the parameters can be configured/read via these commands. Read-only community string is used for reading and Read-Write Community String is used for changing the parameters. Note that it is not possible using of snmpwalk. Parameters that can be changed, are grouped according to their functions in the tables below. To obtain a valid OID number it is necessary to replace the "x" symbol with the prefix ".1.3.6.1.4.1.42505". Also all the snmp commands are described in the MIB file.
During SNMP access, it must be used snmpget and snmpset only to one OID and not to group of OIDs. Other commands (snmpwalk for instance) are not supported.
9.1. Product
Table 4. Product parameters
OID Name Access Description Syntax x.6.1.1.0 Name read-only Description of the module DISPLAYSTR
ING
x.6.1.2.0 Version read-only Current firmware version DISPLAYSTRING
x.6.1.3.0 Date read-only Current firmware version build date
DISPLAYSTRING
9.2. Setup
Table 5. Setup
Start OID End OID Name Access Description Syntax x.6.2.1.0 ... SystemDate read-
write System Date (dd/mm/yyyy)
DISPLAYSTRING
x.6.2.2.0 ... SystemTime read-write
System Time (hh:mm)
DISPLAYSTRING
x.6.2.3.1.2.0 x.6.2.3.1.2.15 RelayName read-write
Relay Name (maxlen=7)
DISPLAYSTRING (SIZE (0..7))
x.6.2.3.1.3.0 x.6.2.3.1.3.15 RelayState read-write
Relay State (off-0, on-1)
INTEGER {off(0), on(1) }
x.6.2.3.1.4.0 x.6.2.3.1.4.15 RelaySetPulsePeriod
read-write
Relay Set Pulse Period (0..65535), ms(x100)
INTEGER32 (0..65535)
x.6.2.3.1.5.0 x.6.2.3.1.5.15 RelayStartPulse
read-write
Relay Start Pulse (0..65535), ms(x100)
INTEGER32 (0..65535)
9.3. Control
Table 6. Control

SmartDEN IP-16R User Manual
28 Sep 2018
-39-
OID Name Access Description Syntax x.6.3.1.0 RelaysStat
e read-write Access all the relays
with single command INTEGER32 (0..65535)
x.6.3.2.0 Reboot read-write Reboot the device INTEGER (0..255)
x.6.3.3.0 sysUpTime read-only The time (in hundredths of a second) since the device was last re-initialized.
TIMETICKS
9.4. Week Schedule
Table 7. Week schedule parameters
Start OID End OID Name Access Description Syntax x.6.4.1.0 ... WeekSchedu
leStartDate read-write
Week Schedule Start Date (dd/mm/yyyy)
DISPLAYSTRING
x.6.4.2.1.2.0 x.6.4.2.1.2.29 Enabled read-write
Week Schedule Row Enable Flag (Disabled-0, Enabled-1)
INTEGER { no(0),yes(1) }
x.6.4.2.1.3.0 x.6.4.2.1.3.29 Outputs read-write
Outputs Code (0..65535), Output1 - bit 0, ..., Output16 - bit 15
INTEGER32 (0..65535)
x.6.4.2.1.4.0 x.6.4.2.1.4.29 OutputsState read-write
Outputs Code (0..65535), Output1 - bit 0, ..., Output16 - bit 15
Outputs State (off-0, on-1)
x.6.4.2.1.5.0 x.6.4.2.1.5.29 Hour read-write
Hour (hh:mm) DISPLAYSTRING
x.6.4.2.1.6.0 x.6.4.2.1.6.29 WeekDays read-write
WeekDays Code (0..127), Sunday - bit 0, ..., Saturday - bit 6
INTEGER (0..127)
To reboot the device via SNMP, set the Reboot value to the ASCII code of the first char of your Web password. For example, if this is the char 'a', code in decimal is 97.

SmartDEN IP-16R User Manual
28 Sep 2018
-40-
9.5. Auto-reboot
Table 7. Auto-reboot settings
Start OID Name Access Description Syntax x.6.5.1.0 AutorebootMod
eEnable read-write
Auto-reboot Mode Enable (Disabled-0, Enabled-1)
INTEGER {no(0),yes(1) }
x.6.5.2.0 IPAddressToPing
read-write
IP Address To Ping DISPLAYSTRING (SIZE (0..23))
x.6.5.3.0 IntervalBetweenPings
read-write
Interval Between Pings, sec (1..3600)
INTEGER32 (1..3600)
x.6.5.4.0 PingFailuresBeforeReboot
read-write
Ping Failures Before Reboot (1..100)
INTEGER32 (1..100)
x.6.5.5.0 PingDelayAfterReboot
read-write
Ping Delay After Reboot, sec (1..3600)
INTEGER32 (1..3600)
x.6.5.6.0 RelayNumber read-write
Relay Number (1..16) INTEGER32 (1..16)
x.6.5.7.0 PowerUpPulseEnable
read-write
Power-up Pulse Enable (Disabled-0, Enabled-1)
INTEGER {no(0),yes(1) }
x.6.5.8.0 PowerUpPulse read-write
Power-up Pulse, sec (1..3600)
INTEGER32 (1..3600)
x.6.5.9.0 RebootPulse1Enable
read-write
Reboot Pulse1 Enable (Disabled-0, Enabled-1)
INTEGER {no(0),yes(1) }
x.6.5.10.0 RebootPulse1 read-write
INTEGER32 (1..3600) Reboot Pulse1, sec (1..3600)
x.6.5.11.0 Pulse1ToPulse2DelayEnable
read-write
Pulse1 To Pulse2 Delay Enable (Disabled-0, Enabled-1)
INTEGER {no(0),yes(1) }
x.6.5.12.0 Pulse1ToPulse2Delay
read-write
Pulse1 To Pulse2 Delay, sec (1..3600)
INTEGER32 (1..3600)
x.6.5.13.0 RebootPulse2Enable
read-write
Reboot Pulse2 Enable (Disabled-0, Enabled-1)
INTEGER {no(0),yes(1) }
x.6.5.14.0 RebootPulse2 read-write
Reboot Pulse2, sec (1..3600)
INTEGER32 (1..3600)
x.6.5.15.0 AutoRebootsNumber
read-only Auto-reboots Number INTEGER32
x.6.5.16.0 LastAutoRebootTime
read-only Last Auto-reboot Time DISPLAYSTRING

SmartDEN IP-16R User Manual
28 Sep 2018
-41-
10. Security considerations
The SmartDEN IP-16R runs a special firmware and do not have a general-purpose operating system. There are no extraneous IP services found on general-purpose operating systems (e.g. fingerd, tcp_wrapper, etc.) that can possibly be exploited by an unauthorized agent. In particular, the SmartDEN IP-16R does not run protocols such as Telnet and FTP which may have the potential for security breech. The only exception from this is the SNMPv1 protocol, that can be disabled. Web-browser access A challenge-response authentication is used in login process. When the password is entered, it is transmitted across the network in encrypted form, so eavesdropping on the data transmission will not reveal the password. Subsequent transmissions of the password to "login" onto the device are encrypted and "safe". The only case when the password is transmitted across the network "in the open", is when it is being
changed and submitted in General Setting form. Therefore, you must set passwords in the secure environment where you can make sure that no one is "eavesdropping". SNMP communication SNMPv1 does not implement encryption. Authentication of clients is performed only by a "community string", which is transmitted in clear text. SNMP communication should be used in trusted networks and disabled if not used. XML/JSON operation A challenge-response authentication can be used in login process. The password can be transmitted by custom application across the network in encrypted form.
Web and XML/JSON access can be restricted by IP Address (range of IP Addresses) or by MAC Address.

SmartDEN IP-16R User Manual
28 Sep 2018
-42-
11. PCB mechanical drawing
Figure 30. PCB drawings

SmartDEN IP-16R User Manual
28 Sep 2018
-43-
12. DIN Rail BOX dimensions
Figure 31. Box dimensions