SMART Document Camera 330 User's Guide - Smarttech
58
PLEASE THINK BEFORE YOU PRINT SMART Document Camera 330 User’s Guide
Transcript of SMART Document Camera 330 User's Guide - Smarttech

PLEASE THINK BEFORE YOU PRINT
SMART Document Camera 330User’s Guide

Product registration
If you register your SMART product, we’ll notify you of new features and software upgrades.
Register online at smarttech.com/Product+Registration.
Keep the following information available in case you need to contact SMART Technical Support.
Serial Number: ________________________________________________
Date of Purchase: ________________________________________________
FCC warningThis equipment has been tested and found to comply with the limits for a Class B digital device, pursuant to Part 15 of the FCC Rules. These limits are designed to provide reasonable protection against harmful interference in a residential installation. This equipment generates, uses, and can radiate radio frequency energy and, if not installed and used in accordance with the instructions, may cause harmful interference to radio or television reception. However, there is no guarantee that interference will not occur in a particular installation. If this equipment does cause interference to radio and television reception, which can be determined by turning the equipment off and on, the user is encouraged to try to correct the interference by one or more of the following measures.• Reorient or relocate the receiving antenna.• Increase the separation between the equipment and receiver.• Connect the equipment into an outlet on a circuit different from that to which the receiver is connected.• Consult the dealer or an experienced radio/TV technician for help.
User installer cautionYour authority to operate this FCC verified equipment could be voided if you make changes or modifications not expressly approved by the party responsible for compliance to Part 15 of the FCC rules.
Trademark noticeThe SMART logo, SMART Board, SMART Notebook and smarttech are trademarks or registered trademarks of SMART Technologies ULC in the U.S. and/or other countries. All third-party product and company names may be trademarks of their respective owners.
Copyright notice©2010 SMART Technologies ULC. All rights reserved. No part of this publication may be reproduced, transmitted, transcribed, stored in a retrieval system or translated into any language in any form by any means without the prior written consent of SMART Technologies ULC. Information in this manual is subject to change without notice and does not represent a commitment on the part of SMART.
Patent noticePatents pending.
11/2010

Important informationWARNING– Failure to follow the installation instructions shipped with your SMART product
can result in personal injury and damage to the product.
– Ensure that any cables extending across the floor to your SMART product are properly bundled and marked to avoid a trip hazard.
– Do not push foreign objects into the openings on your document camera.
– Do not open or disassemble your SMART product. You risk electrical shock from high voltage. Opening the casing also voids your warranty.
– The camera arm on your SMART product has joints that present a pinch hazard when you move the camera arm. Keep clear of the pinch points.
– Do not stare into the lamp or shine the lamp directly into someone’s eyes. Turn off the lamp when displaying or capturing images of people.
– Do not overload power outlets or extension cords as this can result in a fire or electric shock.
– Turn off and disconnect your SMART product before a thunderstorm. During a thunderstorm, do not touch your SMART product or the power plug because there is a risk of electrical shock.
– To reduce the risk of fire or electric shock, do not expose your SMART product to rain or moisture.
CAUTION– Place your SMART product on a solid surface to prevent it from falling.
– If you have a security cable attached to your SMART product, do not carry or swing your SMART product by the security cable.
– Do not connect non-shielded interface cables to your SMART product and do not leave cables connected to unused connectors because this can cause interference levels that exceed FCC regulations.
– Do not set up and use your SMART product in an area with excessive levels of dust, humidity or smoke or near heat sources.
– Do not block or cover the openings or slots on your SMART product. These slots provide ventilation, ensure reliable operation and protect your SMART product from overheating.
i i |
– Do not carry your SMART product by the camera arm. Carry it by the base of the unit.
– Disconnect your SMART product from the power outlet before cleaning it. Use a clean damp cloth and do not use liquid or aerosol cleaners or solvents when cleaning your SMART product.
– Only use your SMART product with the type of power source that is written on the power supply and do not modify the plug.
– Do not aim the camera lens at the sun.
– When replacing parts in your document camera, ensure your service technician uses only replacement parts specified by the manufacturer or parts with the same characteristics as the original part. Unauthorized substitutions may result in fire, electric shock or other hazards.

Contents
Important information........................................................................................i
1 Overview ............................................................................................................... 1
About your SMART Document Camera 330................................................... 1
Parts of the document camera........................................................................ 3
Document camera software............................................................................ 6
2 Setting up your document camera ........................................................................ 7
Document camera basic connection............................................................... 8
Setup configurations for Camera view and SD Card view.............................. 9
Connecting your document camera to an external display........................... 10
Downloading software .................................................................................. 12
3 Using your document camera ............................................................................. 13
Understanding Computer, Camera and SD Card views ............................... 14
Performing basic operations ......................................................................... 16
Using your document camera with SMART Notebook software................... 19
4 Using your document camera in Computer view ................................................ 21
About Computer view ................................................................................... 21
5 Using your document camera in Camera view ................................................... 23
About Camera view ...................................................................................... 23
Setting Camera view..................................................................................... 24
Using the Camera view’s on-screen display menu....................................... 25
Saving images to an SD or SDHC memory card.......................................... 35
6 Using your document camera in SD Card view .................................................. 37
Using the SD Card view display ................................................................... 38

iv | – CONTENTS
Using the SD Card view on-screen display menu.........................................38
7 Troubleshooting ...................................................................................................45
A Hardware environmental compliance ..................................................................47
Waste Electrical and Electronic Equipment regulations (WEEE directive)....47
Restriction of Certain Hazardous Substances (RoHS directive) ...................47
Packaging .....................................................................................................48
China’s Electronic Information Products Regulations (EIP) ..........................48
U.S. Consumer Product Safety Improvement Act .........................................48
B Customer support ................................................................................................49
Online information and support .....................................................................49
Training .........................................................................................................49
Technical support ..........................................................................................49
Shipping and repair status ............................................................................49
General inquiries ...........................................................................................50
Warranty........................................................................................................50
Registration ...................................................................................................50

Chapter 1
OverviewAbout your SMART Document Camera 330Your SMART Document Camera 330 allows you to display 3D objects, printed documents and microscope slides on your computer, projector or television. You can capture images and save them to a SMART Notebook™ collaborative learning software file or to an SD or SDHC memory card.
Your document camera integrates with SMART Notebook software and SMART Board™ interactive whiteboards, creating an interactive presentation environment.
Topics in this chapter include:
• Document camera features on page 2
• Document camera views on page 2
• Parts of the document camera on page 3
– Adjustable camera arm and camera head on page 3
– Control panel on page 4
– Rear connection panel on page 4
– Side connection panel on page 5
– NTSC/PAL switch on page 5
– Power supply on page 5
– USB cable on page 5
– VGA cable on page 5
– Anti-glare sheet on page 6
• Document camera software on page 6
– SMART Notebook software and SMART Product Drivers on page 6
– Image Mate software (Windows only) on page 6

2 | CHAPTER 1 – OVERVIEW
Document camera features
Camera• High resolution 1.3 MP CMOS sensor
• 5.2× optical zoom, 8.0× digital zoom
• Up to 30 frames per second
• Automatic or manual focus
• Microscope mode that doesn’t require adapters
Output• SXGA, WXGA, 720p or XGA resolution
• DVI-D output
Physical construction• Security lock slot
• Collapsible design for easy transport and storage
• Bright LED camera lamp
Software• SMART Notebook software
• SMART Product Drivers
• Image Mate® software
Image storage• Supports SD or SDHC memory cards with a built-in SD slot
• Supports USB memory sticks with a built in USB hub
• Supports image storage on connected computer
Document camera viewsYour document camera has three views you can use to control how it sends data to a computer, projector or television.
• Computer view displays images from your document camera only in a SMART Notebook file on your computer.
• Camera view controls your document camera from the camera’s control panel and displays images on a projector or television. You can also view images through SMART Notebook.

3 | CHAPTER 1 – OVERVIEW
• SD Card view controls your document camera from the camera’s control panel and displays images from an SD or SDHC memory card on a connected projector or television.
See Understanding Computer, Camera and SD Card views on page 14 for more information on these views.
Parts of the document camera
Adjustable camera arm and camera headYou can unfold and adjust the camera arm. You can also rotate the camera head to display objects at range of angles. The camera head has a zoom dial, auto focus button and an LED camera light with a light switch.
Camera Lens Zoom Dial
Auto Focus Button
LED Light Switch
LED Light
Camera Head
Camera Arm

4 | CHAPTER 1 – OVERVIEW
Control panelYou can use the control panel to switch between Computer, Camera and SD Card view, capture an image to an SD or SDHC memory card and adjust brightness settings. You can also use it to control features and settings in the Camera view or the SD Card view’s on-screen display menu.
Use the control panel to select Computer, Camera or SD Card view. For information on views, see Understanding Computer, Camera and SD Card views on page 14.
Rear connection panelThe rear connection panel has 12V DC, DVI-D Out, VGA Out, VGA In, Composite video out and USB-B connectors.
Menu
Camera View*
SD Card View
Computer ViewIncrease Brightness
Decrease Brightness
Power
On-Screen Display Menu
Enter
Capture
Navigation Arrow
*On some cameras, Camera View is represented by a symbol.
12V DCUSB-BVGA In
VGA OutDVI-D Out
Composite

5 | CHAPTER 1 – OVERVIEW
Side connection panelThe side connection panel has a security lock slot, an SD or SDHC memory card slot, a USB-A connector, a switch for selecting VGA, DVI-D or composite video output, and a switch to select either SXGA, WXGA, 720p or XGA resolution.
NTSC/PAL switchThe NTSC/PAL switch is located on the bottom of your document camera. This switch enables you to change the format of composite video output for your television. See Switching between NTSC and PAL on page 11.
Power supplyYour document camera comes with a power supply and a country-specific power cable.
USB cableUse the USB cable to connect your document camera to your computer. You can display objects, capture images to SMART Notebook files and control your document camera from SMART Notebook software.
VGA cableUse the VGA cable to connect your document camera to a projector or display. You can display objects, capture images to an SD or SDHC memory card and use the features in the on-screen display menus.
K SD
VGA
DVI-D
Com
posi
te
SXG
A
WXG
A
720P
XGA
Security Lock Slot
SD or SDHC Memory Card Slot
USB-A Connector
VGA DVI-D / Composite Switch
SXGA / WXGA / 720p / XGA Switch

6 | CHAPTER 1 – OVERVIEW
Anti-glare sheetPlace the anti-glare sheet over printed documents to reduce glare.
Document camera softwareYour document camera includes software downloads that will help you present images from your document camera.
SMART Notebook software and SMART Product DriversYour document camera uses SMART Notebook collaborative learning software and SMART Product Drivers. SMART Notebook is presentation software designed to work with SMART Document Cameras and the touch features of SMART Board interactive whiteboards.
You can download SMART Notebook and SMART Product Drivers at smarttech.com/software.
You can find system requirements for your computer in the SMART Notebook 10 release notes smarttech.com/kb/126571.
Image Mate software (Windows only)You can use your document camera with Image Mate® software. Visit SMART’s download page at smarttech.com/software to download Image Mate software.

Chapter 2
Setting up your document cameraThis chapter describes the following set up tasks for your document camera:
• Document camera basic connection on page 8
• Setup configurations for Camera view and SD Card view on page 9
– The document camera and computer use different displays on page 9
– The document camera and computer share a display on page 9
• Connecting your document camera to an external display on page 10
– Connecting to a projector or flat-panel display on page 10
– Connecting your document camera to a television on page 11
– Connecting to a digital projector or HD display with DVI-D on page 11
– Setting output resolution on page 12
• Downloading software on page 12
– Installing SMART Notebook software and SMART Product Drivers on page 12
– Installing Image Mate software (Windows only) on page 12

8 | CHAPTER 2 – SETTING UP YOUR DOCUMENT CAMERA
Document camera basic connectionConnect your document camera to a power supply and your computer to use your document camera with SMART Notebook software.
IMPORTANTThis configuration requires SMART Notebook to use your document camera. Connect your document camera directly to an external display to use Camera view or SD Card view.
To connect thepower supply
1. Connect the power supply cable to the 12V DC receptacle on the rear connection panel.
2. Connect a country-specific power cable to the power supply, and then connect the plug to a power outlet.
CAUTIONEnsure you connect the power cable to the power supply before connecting the power plug to a power outlet.
To connect yourdocument camera to your
computer
Connect the USB-B plug of your USB cable to your document camera, and then connect the USB-A plug to your computer.
USB-A USB-B

9 | CHAPTER 2 – SETTING UP YOUR DOCUMENT CAMERA
Setup configurations for Camera view and SD Card viewAfter you complete the basic connection procedure (see page 8), you can connect your document camera to an external display. This enables you to use the document camera in Camera view and SD Card view. See page 14.
You can connect your computer and your document camera to different displays or they can share a display.
The document camera and computer use different displaysIn this configuration your document camera images appear on one display, and your computer’s desktop appears on the other display. You can also access document camera images through SMART Notebook on your computer.
To connect yourdocument camera and
computer to differentdisplays
1. Complete the basic connection steps (see page 8).
2. Connect your computer or laptop to the projector of an interactive display.
NOTEThis is the normal configuration for using interactive whiteboards.
3. Connect your document camera to another external display. See page 10.
The document camera and computer share a displayIn this configuration your document camera is connected to your computer with both a USB and a VGA cable. Your document camera is connected to an external display.
To connect yourdocument camera andcomputer to a shared
display
1. Complete the basic connection steps (see page 8).
2. Connect your computer’s VGA Out port to your document camera’s VGA In port with a VGA cable.
3. Connect your document camera to an external display with a VGA cable. See page 10.
NOTEDVI-D or composite video displays will not display your computer view. A VGA display is required.
This configuration will permit easy transition from Computer view to Camera view or SD Card view, using the same projector or display for all three views.

10 | CHAPTER 2 – SETTING UP YOUR DOCUMENT CAMERA
Connecting your document camera to an external displayYou can connect your document camera directly to an external display to enable the following functions:
• Use Camera view to view the camera image in full-screen on the external display.
• Use SD Card view to view a full-screen slide show on the external display.
• Access the Camera view’s or SD Card view’s on-screen display menus.
Connecting to a projector or flat-panel display
You can connect your document camera to a projector or display with the VGA cable.
To connect to aprojector or display
1. Connect the VGA cable to the VGA Out connector on the back of your document camera.
2. Connect the other end of the VGA cable to the VGA In connector on your projector or display.
CAUTIONEnsure your projector or display is not connected to a power outlet when connecting it to your document camera.
Switching between VGA - DVI-D and Composite outputIf you’re using a projector or computer display with a VGA or DVI-D cable, switch your document camera to VGA DVI-D mode. If you’re using a television with the Composite video cable, switch your document camera to Composite mode.
To switch toDVI-D-VGA mode
Switch the VGA DVI-D/Composite switch on the side panel to VGA DVI-D.
To switch tocomposite mode
Switch the VGA DVI-D/Composite switch on the side panel to Composite.
11 | CHAPTER 2 – SETTING UP YOUR DOCUMENT CAMERA
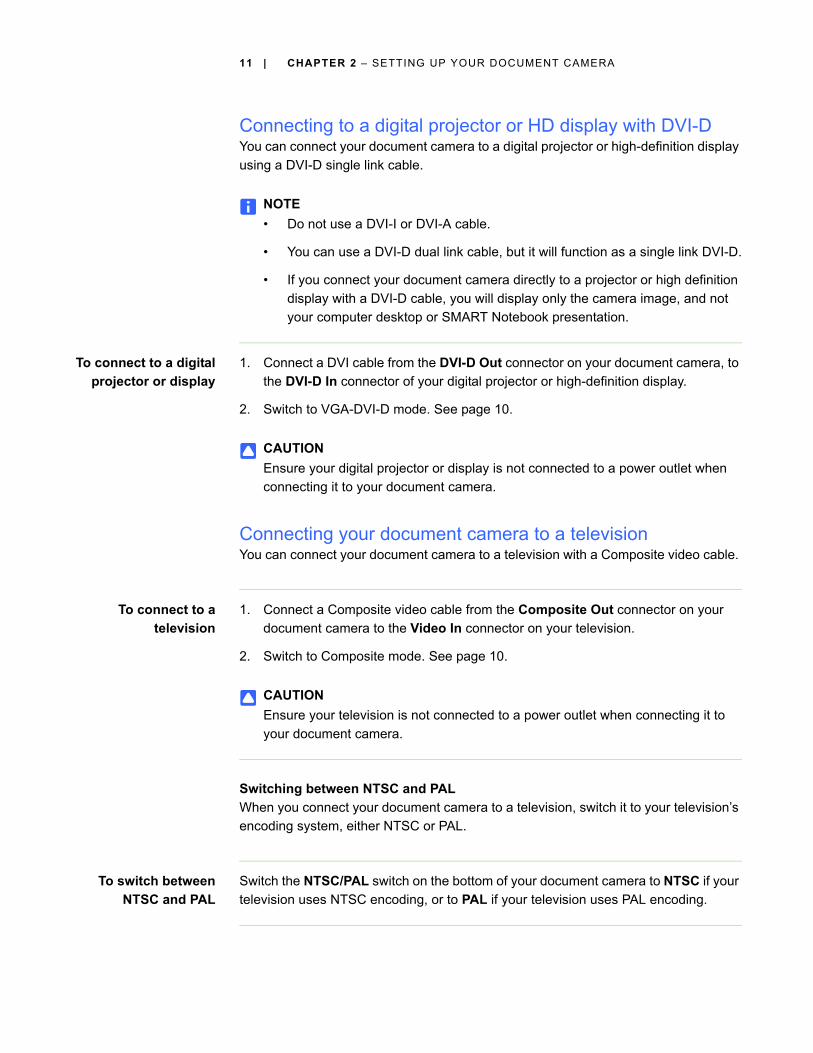
Connecting to a digital projector or HD display with DVI-DYou can connect your document camera to a digital projector or high-definition display using a DVI-D single link cable.
NOTE• Do not use a DVI-I or DVI-A cable.
• You can use a DVI-D dual link cable, but it will function as a single link DVI-D.
• If you connect your document camera directly to a projector or high definition display with a DVI-D cable, you will display only the camera image, and not your computer desktop or SMART Notebook presentation.
To connect to a digitalprojector or display
1. Connect a DVI cable from the DVI-D Out connector on your document camera, to the DVI-D In connector of your digital projector or high-definition display.
2. Switch to VGA-DVI-D mode. See page 10.
CAUTIONEnsure your digital projector or display is not connected to a power outlet when connecting it to your document camera.
Connecting your document camera to a televisionYou can connect your document camera to a television with a Composite video cable.
To connect to atelevision
1. Connect a Composite video cable from the Composite Out connector on your document camera to the Video In connector on your television.
2. Switch to Composite mode. See page 10.
CAUTIONEnsure your television is not connected to a power outlet when connecting it to your document camera.
Switching between NTSC and PALWhen you connect your document camera to a television, switch it to your television’s encoding system, either NTSC or PAL.
To switch betweenNTSC and PAL
Switch the NTSC/PAL switch on the bottom of your document camera to NTSC if your television uses NTSC encoding, or to PAL if your television uses PAL encoding.

12 | CHAPTER 2 – SETTING UP YOUR DOCUMENT CAMERA
Setting output resolutionYou can set your document camera’s output resolution to match the projector or display you’re using.
To set theoutput resolution
Set the SXGA/WXGA/720p/XGA switch to match the resolution of your display. Refer to the chart below to determine the output resolution you need.
Downloading softwareYour document camera includes software downloads that you can use to create more effective presentations.
Installing SMART Notebook software and SMART Product Drivers
To install SMARTNotebook software and
SMART Product Drivers
1. Visit SMART’s download page at smarttech.com/software.
2. Scroll to SMART Notebook collaborative learning software.
3. Under Choose a product, select SMART Notebook software for Windows or Mac computers, and then follow the on-screen instructions.
Installing Image Mate software (Windows only)
To download and installImage Mate software
1. Visit SMART’s download page at smarttech.com/software.
2. Scroll to Image Mate software for SMART Document Cameras.
3. Under Choose a product, click Image Mate 2.0 software for SMART Document Camera 330, and then follow the on-screen instructions.
Setting Resolution
SXGA 1280 × 1024
WXGA 1280 × 800
720p 1280 × 720
XGA 1024 × 768

Chapter 3
Using your document cameraThis chapter describes how to use your document camera and perform the following tasks:
• Understanding Computer, Camera and SD Card views on page 14
– Identifying view features on page 15
– Setting document camera views on page 16
• Performing basic operations on page 16
– Positioning your document camera on page 16
– Turning your document camera on and off on page 16
– Using the LED light on page 17
– Using your document camera with SMART Notebook software on page 19
– Displaying printed documents on page 17
– Inserting and removing an SD or SDHC memory card on page 18

14 | CHAPTER 3 – USING YOUR DOCUMENT CAMERA
Understanding Computer, Camera and SD Card viewsYou can use your document camera in Computer, Camera and SD Card views. Each view allows you do different things and requires a specific connection to either a display, projector or computer.
Computer view
Connect your document camera to your computer with the included USB 2.0 cable, and then set your document camera to Computer view to view document camera images only in SMART Notebook collaborative learning software.
You can then save images to your SMART Notebook file for later presentation, or if your computer is connected to an interactive whiteboard, projector or television, you can deliver your SMART Notebook presentation with live images from your document camera.
See Using your document camera in Computer view on page 21.
Camera view
Connect your document camera to a projector or television, and then set your document camera to Camera view. You can then view full-screen images from your document camera using a projector or high-definition display, even without a computer. You can still view images through SMART Notebook software.
You can use the Camera view on-screen display menu for greater control of the image, using Microscope mode, highlight boxes, screen masks and more.
See Using your document camera in Camera view on page 23.
SD Card view
Connect your document camera to a projector or television, place an SD or SDHC memory card in your document camera, and then set your document camera to SD Card view. You can then view full-screen images and slide shows from the SD or SDHC memory card directly to a projector or high definition display, even without a computer.
You can use the SD Card view’s on-screen display menu for greater control of the image, using highlight boxes, screen masks and more.
See Using your document camera in SD Card view on page 37.

15 | CHAPTER 3 – USING YOUR DOCUMENT CAMERA
Identifying view features
The following table describes the differences between each view:
Outputs when your document camera is connected to a display with VGA DVI-D or Composite Video Out
1. Only when USB-B mode is set to Application. See page 34.
2. Only when USB-B mode is set to SD Storage. See page 35.
Feature descriptionComputer
view Camera view
SD Card view
View computer input (VGA In) Yes (VGA Out only)
No No
View document camera image Yes (DVI-D Out only)
Yes No
View pictures from an SD or SDHC card No No Yes
Access SD or SDHC memory card from computer with a USB cable
Yes2 Yes2 Yes2
Control document camera from computer Yes1 Yes1 No
Capture to SMART Notebook or Image Mate software
Yes1 Yes1 No
Capture to an SD or SDHC memory card Yes1 Yes1 No
Access related on-screen display menu No Yes Yes
Feature descriptionComputer
view
Camera view
SD Card view
Connect to projector or display (VGA Out) VGA In Camera image
Memory card images
Connect to high-definition projector or display (DVI-D Out)
Camera image
Camera image
Memory card images
Connect to television (Composite Video Out)
N/A Camera image
Memory card images

16 | CHAPTER 3 – USING YOUR DOCUMENT CAMERA
Setting document camera views
To set Computer view Press the Computer view button on the control panel. For more information, see page 21.
To set Camera view Press the Camera view button on the control panel. For more information, see page 24.
To set SD Card view Press the SD Card view button on the control panel. For more information, see page 37.
Performing basic operationsUse the following operations when your document camera is in any view.
Positioning your document cameraThe camera arm unfolds and the camera head rotates so you can position your document camera to display objects.
To unfold and positionyour document camera
1. Place a hand on the base to stabilize it, and then pull the camera arm upward and forward.
2. Rotate the camera head and aim the lens at your subject.
Turning your document camera on and off
To turn yourdocument camera on
Press the power button on the control panel.
The power light turns from amber to flashing green. When the light becomes solid green, your document camera will be operational.
To turn yourdocument camera off
Press the power button on the control panel.
The power light turns from green to amber.

17 | CHAPTER 3 – USING YOUR DOCUMENT CAMERA
Using the LED lightYou can use the LED light on the camera head to illuminate your subject.
To turn the LED light on Switch the LED light switch to the left. See page 3.
WARNINGDo not stare into the lamp or shine the lamp directly into someone’s eyes. Turn the light off when displaying or capturing images of people.
Displaying printed documentsWhen you set your document camera to Computer view or Camera view, you can display printed documents, use the anti-glare sheet to reduce glare, optimize the image for text documents with Text modes and optimize the image for documents with graphics with Graphics modes.
To displayprinted documents
1. Place your documents on the table.
2. Adjust the document camera and aim the camera lens at your documents.
3. Rotate the zoom dial to adjust the zoom magnification.
4. Press the auto focus button to adjust the focus.
To reduce glare withthe anti-glare sheet
If glare makes it difficult for you to read printed documents that you’re displaying, place the anti-glare sheet on top of the printed materials.
To optimize the imagefor text documents
1. When your document camera is in Camera view, press Menu on the control panel.
The on-screen display menu appears.
2. Select Image Setting, and then press Enter .
3. Select Image mode, and then press Enter .
4. Select either Text 1, Text 2 or Text 3, and then press Enter . See page 28 for an explanation of the settings.
To optimize the image fordocuments with graphics
1. When your document camera is in Camera view, press Menu on the control panel.
The on-screen display menu appears.

18 | CHAPTER 3 – USING YOUR DOCUMENT CAMERA
2. Select Image Setting, and then press Enter .
3. Select Image mode, and then press Enter .
4. Select either Graphics 1 or Graphics 2, and then press Enter . See page 28 for an explanation of the settings.
Inserting and removing an SD or SDHC memory card
Your document camera has an SD or SDHC memory card slot allowing you to save document camera images (when your document camera is in Computer view or Camera view) or display previously captured images (when your document camera is in SD Card view).
CAUTIONAvoid static electricity near an SD or SDHC memory card because it can damage the card.
To insert an SD orSDHC memory card
1. Press the Camera view button on the control panel.
2. Insert an SD or SDHC memory card into the card slot on the side panel.
IMPORTANT– Set your document camera to Application mode (see page 34) if you want
to capture images to the SD or SDHC card.
– Ensure the label on the SD or SDHC memory card is facing up.
To remove an SD orSDHC memory card
1. Press the Camera view button on the control panel and wait until your document camera displays a live image.
2. Push the SD or SDHC memory card in to eject it, and then remove the card.
CAUTIONTo prevent SD or SDHC memory card damage, do not remove the SD or SDHC memory card when capturing or deleting images.

19 | CHAPTER 3 – USING YOUR DOCUMENT CAMERA
Using your document camera with SMART Notebook softwareYour document camera integrates with SMART Notebook software, allowing you to control your document camera from your computer or a SMART Board interactive whiteboard. You can display objects, capture an image and your annotations on an image to a SMART Notebook page, zoom, focus and adjust brightness settings.
To display objects 1. Press the power button on the control panel.
2. Set your document camera to Computer view (see page 21) or Camera view (see page 24).
3. Start SMART Notebook software.
4. Place the object you want to display under your document camera.
5. Rotate the camera head and aim the lens at your subject.
6. In SMART Notebook software, press the document camera icon.
OR
Select Insert > Picture From SMART Document Camera from the menu.
The SMART Document Camera object appears displaying your subject.
IMPORTANTIf you can’t control your document camera from SMART Notebook, ensure that your document camera is set to Application mode. See page 34.
To adjust the zoommagnification
Press the zoom plus or minus buttons in SMART Notebook software to increase or decrease the zoom magnification.
OR
Use the zoom dial on your document camera.
To adjust the focus 1. Press the auto focus button in SMART Notebook to focus automatically.
2. If necessary, press the focus plus or minus buttons to adjust the focus.
To adjust the brightness Press the brightness plus or minus buttons to either increase or decrease subject brightness.

20 | CHAPTER 3 – USING YOUR DOCUMENT CAMERA
To capture to the currentSMART Notebook page
In the SMART Document Camera window, press Capture and close.
OR
Press the capture button on the control panel.
The image in the SMART Document Camera window and any annotations you make on the image become separate objects on your current SMART Notebook page.
NOTEIf you have an SD or SDHC memory card in your document camera, the capture button on the control panel will save the image there also. See page page 18.
To capture to a newSMART Notebook page
In the SMART Document Camera window, press Capture to new page.
The image in the SMART Document Camera window becomes an object on a new page.

Chapter 4
Using your document camera in Computer viewTopics in this chapter include:
• About Computer view on page 21
• Setting Computer view on page 21
• Using Computer view on page 22
About Computer viewThis view is for presenting images from your document camera through your SMART Notebook software or Image Mate software. Connect your computer to both your document camera and your projector, and then set your document camera to Computer view.
The interactive whiteboard or projector will display your computer desktop or SMART Notebook file, and you can view or capture images from the camera.
Computer view is accessible in all computer, projector, and document camera setup configurations.
Setting Computer view
To set Computer view 1. Ensure your document camera is connected to your computer with the included USB 2.0 cable.
2. Ensure your computer is connected to a projector or display.

22 | CHAPTER 4 – USING YOUR DOCUMENT CAMERA IN COMPUTER VIEW
3. Press the Computer view icon on the control panel.
IMPORTANTYour document camera must be in Application mode. See Setting USB-B Application mode on page 34.
Using Computer viewComputer view allows you to bring images from your document camera into SMART Notebook.
To use computer view Refer to Using your document camera with SMART Notebook software on page 19.
Chapter 5
Using your document camera in Camera viewThis chapter contains the following information on Camera view.
• About Camera view on page 23
• Setting Camera view on page 24
• Using Microscope mode on page 25
• Using the Camera view’s on-screen display menu on page 25
– Camera view Image Settings on-screen display menu on page 27
– Camera view Special Tools on-screen display menu on page 29
– Camera view Function Settings on-screen display menu on page 33
• Saving images to an SD or SDHC memory card on page 35
– Capturing images to an SD or SDHC memory card on page 35
– Transferring images from a memory card to your computer on page 36
About Camera viewConnect your document camera to an external display to see a full-screen image from your document camera.
You can use your document camera in Camera view to perform the following tasks:
• Display objects
• Capture images to an SD or SDHC memory card
• Capture images to SMART Notebook or Image Mate software
• Use the features and settings in the on-screen display menu
• Use Microscope mode to use your document camera with a standard microscope eyepiece without additional adapters

24 | CHAPTER 5 – USING YOUR DOCUMENT CAMERA IN CAMERA VIEW
Setting Camera viewSwitch your document camera to Camera view to display images on a projector, flat-panel display or television.
IMPORTANTYour document camera must be connected directly to an external display. See Connecting your document camera to an external display on page 10.
To switch to Camera view 1. Connect your document camera to a projector or flat-panel display with the appropriate cable (see page 10).
2. Press the Camera view button on the control panel.
To display objects 1. Press the power button on the control panel.
2. Press the Camera view button on the control panel.
3. Place the object you want to display under the camera.
4. Rotate the camera head to aim the lens at your subject.
To adjust the zoommagnification
Rotate the zoom dial on the camera head to increase or decrease the zoom magnification.
To automaticallyadjust the focus
Press the auto focus button on the camera head to automatically focus the image.
To adjust brightnesssettings
On the control panel, press the brighten or the darken buttons.

25 | CHAPTER 5 – USING YOUR DOCUMENT CAMERA IN CAMERA VIEW
Using Microscope modeThe SMART Document Camera allows you to view the microscope stage through the document camera without additional attachments.
To display amicroscope slide
1. Place a slide or object on the stage of the microscope.
2. Focus the microscope so that the subject is in sharp focus.
3. Position the microscope under your document camera so the camera lens is aligned with the microscope eyepiece.
CAUTIONEnsure you do not hit your document camera lens with the microscope. This could damage your document camera’s lens.
4. Press the Camera button on the control panel.
5. Press Menu on the control panel.
6. Select the Image Setting menu.
7. Use the up or down arrow buttons to select Microscope mode, and then press Enter .
8. Use the up or down arrow buttons to select On, and then press Enter .
Using the Camera view’s on-screen display menuYou use the on-screen display menu to adjust several settings for your document camera.
To open the Cameraview’s on-screen display
menu
1. Set your document camera to Camera view.
2. Press the Menu button on the control panel.
The on-screen display menu appears.
3. Press the up and down arrows on the control panel to navigate to a menu item.
4. Press the left and right arrow keys to navigate forward or backward through menu items.
5. Press Enter to select a menu item.
26 | CHAPTER 5 – USING YOUR DOCUMENT CAMERA IN CAMERA VIEW
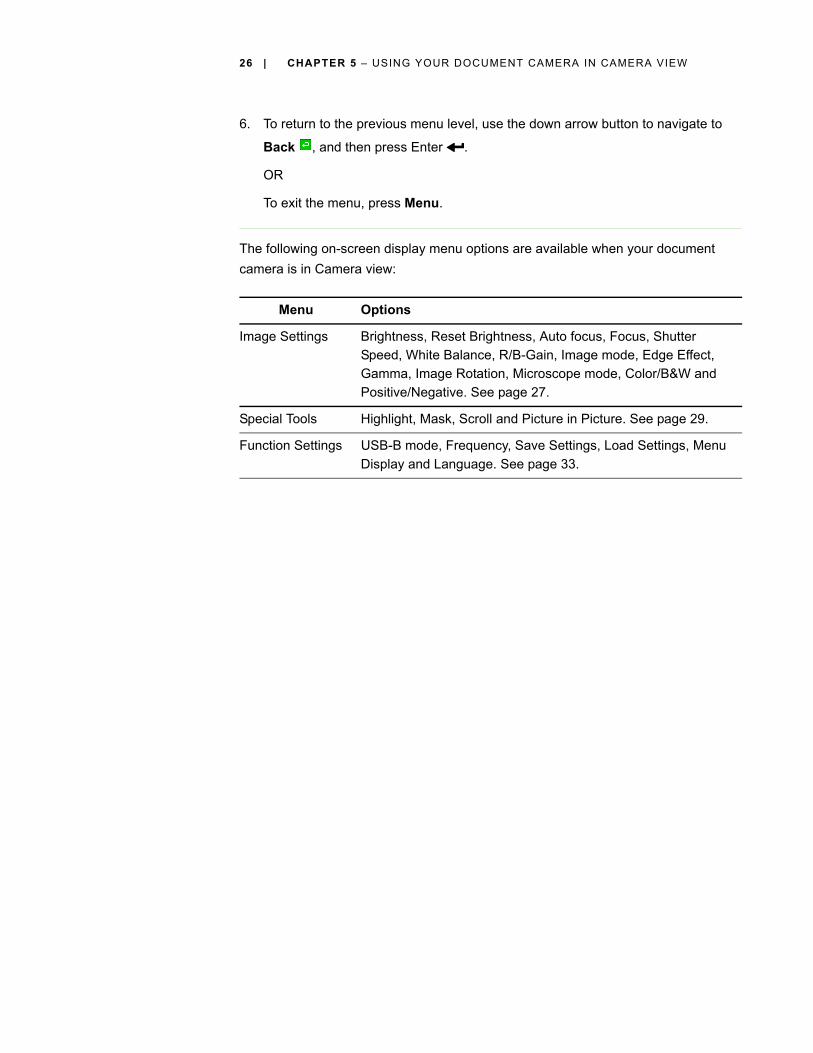
6. To return to the previous menu level, use the down arrow button to navigate to
Back , and then press Enter .
OR
To exit the menu, press Menu.
The following on-screen display menu options are available when your document camera is in Camera view:
Menu Options
Image Settings Brightness, Reset Brightness, Auto focus, Focus, Shutter Speed, White Balance, R/B-Gain, Image mode, Edge Effect, Gamma, Image Rotation, Microscope mode, Color/B&W and Positive/Negative. See page 27.
Special Tools Highlight, Mask, Scroll and Picture in Picture. See page 29.
Function Settings USB-B mode, Frequency, Save Settings, Load Settings, Menu Display and Language. See page 33.

27 | CHAPTER 5 – USING YOUR DOCUMENT CAMERA IN CAMERA VIEW
Camera view Image Settings on-screen display menu
To access the ImageSettings menu
Select Camera view > Menu > Image Settings .
Image Setting menu options Description
Brightness Auto Adjusts image brightness automatically
Manual Allows you to manually adjust image brightness
Reset Brightness . Yes Resets image brightness
No Cancels resetting
(Only visible when Brightness is set to Auto)
AF mode Push Sets the focus when you press the auto
focus button
Zoom Sync Automatically sets the focus when you adjust the zoom
Focus Allows you to manually adjust focus
Shutter Speed Slow Sets a slow shutter speed, resulting in a brighter image, but with more blur
Fast Sets a fast shutter speed, resulting in a darker image, but with less blur
White Balance Auto Sets white balance automatically
One-Push Sets white balance when you press the
auto focus button
Manual Allows you to manually set the White Balance, using Red Grain and Blue grain
R-Grain Manually sets red grain
(Only visible when White Balance is set to Manual)
B-Grain Manually sets blue grain
(Only visible when White Balance is set to Manual)

28 | CHAPTER 5 – USING YOUR DOCUMENT CAMERA IN CAMERA VIEW
Image mode Text 1 Optimizes image for displaying text documents by emphasizing contrast. Setting is low at Text 1 and high at Text 3.
Text 2
Text 3
Graphics 1 Optimizes image for displaying graphics.
Displays Edge Effect and Gamma icons.
Graphics 2 Optimizes image from DLP projector
Edge Effect Emphasizes image outlines. Set to Low, Middle or High.
(Only visible when Image mode is set to Graphics 1)
Gamma Sets Gamma for the image. Set to Low, Middle or High.
(Only visible when Image mode is set to Graphics 1)
Image Rotation Off Displays normal image rotation
On Rotates image 180°
Microscope mode On Turns on Microscope mode
Off Turns off Microscope mode
Color/ B&W Color Displays color images
B&W Displays black and white images
Positive/ Negative Positive Displays normal image
Negative Displays film negative image
Image Setting menu options Description

29 | CHAPTER 5 – USING YOUR DOCUMENT CAMERA IN CAMERA VIEW
Camera view Special Tools on-screen display menu
To access the SpecialTools menu
Select Camera view > Menu > Special Tools .
Using the Highlight settingWhen you use the Highlight setting, a square in the center of the displayed image highlights your subject. You can change the size, transparency and position of the highlight box.
NOTEThe Highlight feature is display only. If you capture an image while the highlight box is on, the image doesn’t include the highlight.
Special Tools menu options
Description
Highlight Highlights a center square on the displayed image. Settings include:
• Highlight On
• Adjust Transparency
• Adjust Size
Mask Covers the displayed image with an adjustable screen mask. Settings include:
• Mask On
• Adjust Transparency
Scroll Zooms in on the displayed images and allows you to move the zoomed area with the up, down, left and right buttons on the control panel. Settings include:
• Scroll on
• ×2
• ×3
• ×4
PiP Takes a picture, and then displays that picture in a corner of the screen while you move or zoom the camera.

30 | CHAPTER 5 – USING YOUR DOCUMENT CAMERA IN CAMERA VIEW
To use theHighlight setting
1. Display an object in Camera view, and then press Menu on the control panel.
The on-screen display menu appears.
2. Press the up and down arrow buttons to select Special Tools , and then press Enter .
3. Use the up and down arrow keys to select Highlight > Highlight On, and then press Enter .
Your document camera highlights a square in the center of the image and obscures the edges of the image.
To move thehighlight square
Use the up, down, right and left arrows to move the highlight square.
To change Highlighttransparency
1. Press Menu.
The on-screen display menu appears.
2. Press the up and down arrow buttons to select Special Tools , and then press Enter .
3. Press the up and down arrow buttons to select Highlight On, and then press Enter .
4. Press the up and down arrows to select Highlight transparency.
5. Press Enter to save your settings.
To change the highlightarea size
1. Press the Menu button on the control panel.
The on-screen display menu appears.
2. Press the up and down arrow buttons to select Special Tools , and then press Enter .
3. Press the up and down arrow buttons to select Highlight, and then press Enter .
4. Select Adjust size, and then press Enter .
5. Press the up, down, left and right arrow buttons to change the Highlight area size.
6. Press Enter to save your settings.
To turn off theHighlight setting
Press Enter .
31 | CHAPTER 5 – USING YOUR DOCUMENT CAMERA IN CAMERA VIEW
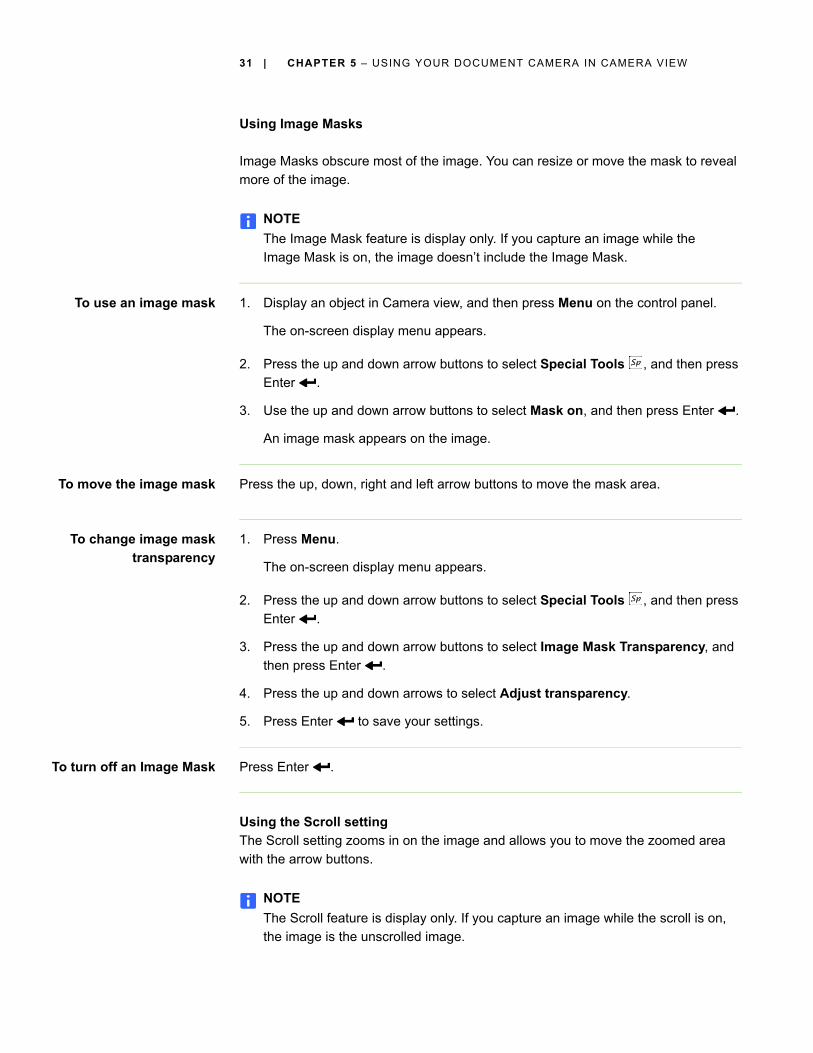
Using Image Masks
Image Masks obscure most of the image. You can resize or move the mask to reveal more of the image.
NOTEThe Image Mask feature is display only. If you capture an image while the Image Mask is on, the image doesn’t include the Image Mask.
To use an image mask 1. Display an object in Camera view, and then press Menu on the control panel.
The on-screen display menu appears.
2. Press the up and down arrow buttons to select Special Tools , and then press Enter .
3. Use the up and down arrow buttons to select Mask on, and then press Enter .
An image mask appears on the image.
To move the image mask Press the up, down, right and left arrow buttons to move the mask area.
To change image masktransparency
1. Press Menu.
The on-screen display menu appears.
2. Press the up and down arrow buttons to select Special Tools , and then press Enter .
3. Press the up and down arrow buttons to select Image Mask Transparency, and then press Enter .
4. Press the up and down arrows to select Adjust transparency.
5. Press Enter to save your settings.
To turn off an Image Mask Press Enter .
Using the Scroll settingThe Scroll setting zooms in on the image and allows you to move the zoomed area with the arrow buttons.
NOTEThe Scroll feature is display only. If you capture an image while the scroll is on, the image is the unscrolled image.

32 | CHAPTER 5 – USING YOUR DOCUMENT CAMERA IN CAMERA VIEW
To display theScroll setting
1. Display an object in Camera view, and then press Menu on the control panel.
The on-screen display menu appears.
2. Press the up and down arrow buttons to select Special Tools, and then press Enter .
3. Press the up and down arrow buttons to select Scroll, and then press Enter .
4. Press the up and down arrow buttons to select Scroll On, and then press Enter .
Your document camera displays a zoomed area of the image.
To move the zoomedScroll area
Use the up, down, right and left arrows to move the zoomed scroll area.
To change the scroll areamagnification
When setting the Scroll function, Select either ×2, ×3 or ×4, and then press Enter .
Using the Picture in Picture (PiP) feature
The Picture in Picture (PiP) feature captures a temporary image from your document camera, and then displays it in one corner of the display. You can then change what is under the camera without the temporary image changing.
NOTEThe PiP feature is display only. If you capture an image while the PiP is on, the image doesn’t include the PiP.
To display the PiP image 1. Display an object in Camera view, and then press Menu on the control panel.
The on-screen display menu appears.
2. Press the up and down arrow buttons to select Special Tools, and then press Enter .
3. Press the up and down arrow buttons to select PiP, and then press Enter .
Your document camera displays a picture in picture image.
To move the PiP image When displaying the PiP image, press the up, down, left and right arrow buttons on the control panel to move the image.

33 | CHAPTER 5 – USING YOUR DOCUMENT CAMERA IN CAMERA VIEW
To turn off the PiP setting Press Enter on the control panel.
Camera view Function Settings on-screen display menu
To access the FunctionsSettings menu
Select Camera view > Menu > Function Settings .
Function Settings menu options Description
USB-B mode SD Storage Allows you to copy or view your SD or SDHC memory card from your computer. See page 34.
Application Use SMART Notebook to control your document camera, and more. See page 34.
Frequency 60 Hz Sets frequency at 60 Hz
50 Hz Sets frequency at 50 Hz
Save Setting 1 Saves presets for setting 1
2 Saves presets for setting 2
3 Saves presets for setting 3
4 [Power On] Saves presets for when you turn your document camera on
Cancel Cancels preset save
Load Setting 1 Loads preset 1
2 Loads preset 2
3 Loads preset 3
Default Loads default settings
4 [Power On] Loads preset for when you turn your document camera on
Cancel Cancels load setting
Menu Display On Turns on menu display
Off Turns off menu display

34 | CHAPTER 5 – USING YOUR DOCUMENT CAMERA IN CAMERA VIEW
Setting USB-B modeUSB-B mode sets how your document camera, your computer and an SD or SDHC card interact.
To access the USB-Bmode setting
Select Camera view > Menu > Function Settings > USB-B mode .
USB-B mode settings overview
Setting USB-B Application mode
To use your document camera with your computer, you must set it to Application mode in the Camera view on-screen display menu.
IMPORTANTYour document camera must be in Camera view to set it to Application mode. It can’t be in Computer view or SD Card view.
Language English Sets language to English
Français Sets language to French
Deutch Sets language to German
Español Sets language to Spanish
Function Settings menu options Description
ActionSD Storagemode
Application mode
See the SD or SDHC card from your computer Yes No
View and use your document camera from SMART Notebook or Image Mate software
No Yes
Capture image to the SD or SDHC memory card in both Computer view and Camera view
No Yes
SD Card view menu includes SD Settings No Yes

35 | CHAPTER 5 – USING YOUR DOCUMENT CAMERA IN CAMERA VIEW
To set yourdocument camera to
Application mode
1. Connect your document camera to a projector or flat-panel display with the VGA cable (see page 10).
2. Turn on your computer, and set it to Camera view.
3. Press Menu on the control panel.
The on-screen display menu appears.
4. Press the up and down arrows on the control panel to select Function Setting, and then press Enter .
5. Select USB-B mode, and then press Enter .
6. Select Application and then press Enter .
Setting USB-B SD Storage mode
This mode allows you to see the contents of your SD or SDHC memory card from your computer.
To set SD Storage mode 1. Connect your document camera to a projector, flat-panel display or television. See page 10.
2. Press Menu on the control panel.
The on-screen display menu appears.
3. Press the up and down arrows on the control panel to select Function Setting, and then press Enter .
4. Select USB-B mode, and then press Enter .
5. Select SD Storage and then press Enter .
Saving images to an SD or SDHC memory cardYou can capture images to an SD or SDHC memory card when your document camera is in Camera view.

36 | CHAPTER 5 – USING YOUR DOCUMENT CAMERA IN CAMERA VIEW
Capturing images to an SD or SDHC memory card
To capture images to anSD or SDHC memory card
1. Set your document camera to Camera view. See page 24.
2. Position your document camera.
3. Make any camera settings you require using the Camera view’s on-screen display menu.
4. Press the Capture button on the document camera control panel.
The camera capture icon appears, indicating a photo is being taken.
IMPORTANTIf you do not see the camera capture icon, ensure your document camera’s USB-B mode is set to Application. See page 34.
Transferring images from a memory card to your computerYou can transfer images from an SD or SDHC memory card to your computer.
To transfer images toyour computer
1. Set your document camera to SD Storage mode. See page 35.
2. Connect your document camera to your computer with the USB cable (see page 8).
Your computer recognizes your document camera and SD or SDHC memory card as a removable disk.
3. Navigate to the removable disk on your computer, and then transfer the images to your computer.

Chapter 6
Using your document camera in SD Card viewTopics in this chapter include the following:
• Setting your document camera to SD Card view on page 37
• Using the SD Card view display on page 38
• Using the SD Card view on-screen display menu on page 38
– SD Card view’s on-screen display menu settings on page 38
– SD Settings on-screen display menu on page 38
– Special Tools on-screen display menu on page 41
– Slideshow Settings on-screen display menu on page 42
When you set your document camera to SD Card view, your document camera acts as an SD or SDHC memory card reader, displaying previously captured images either individually or as a slide show. Your computer is not used in an SD Card presentation.
Setting your document camera to SD Card view
To set SD Card view 1. Ensure your document camera is connected directly to a projector or another display. For connection information, see page 9.
2. Place an SD or SDHC memory card in your document camera.
3. Press the SD Card view button on the control panel.
38 | CHAPTER 6 – USING YOUR DOCUMENT CAMERA IN SD CARD VIEW
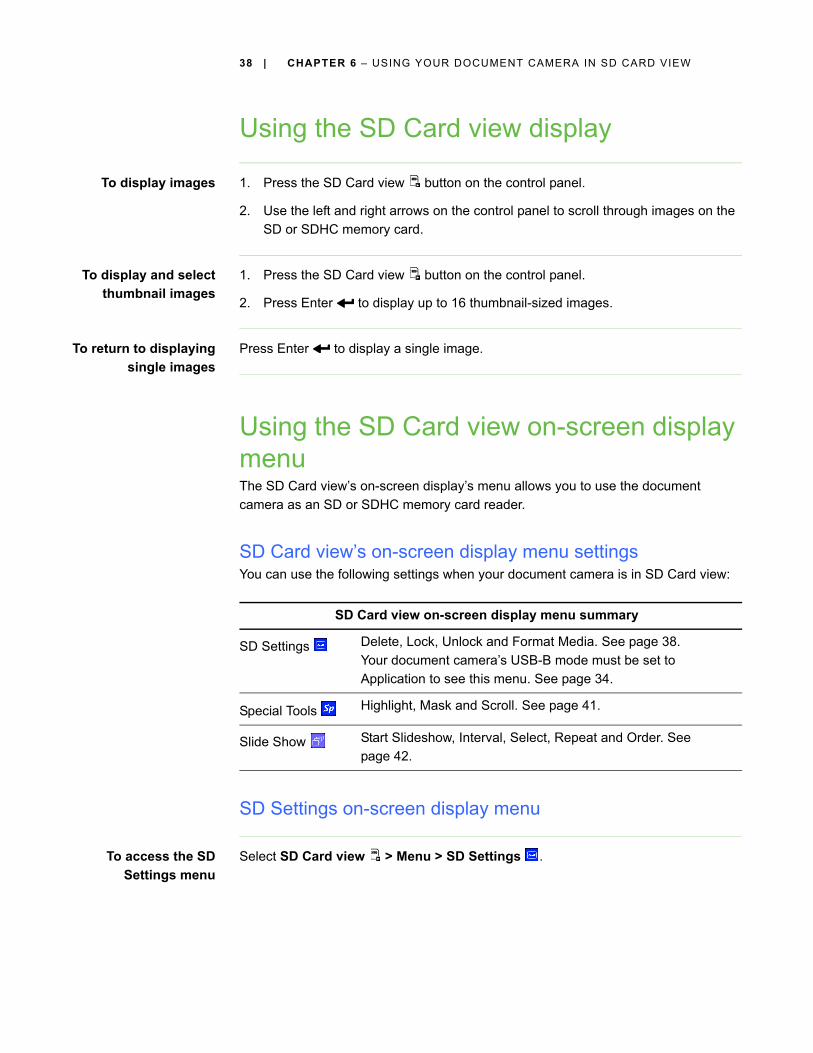
Using the SD Card view display
To display images 1. Press the SD Card view button on the control panel.
2. Use the left and right arrows on the control panel to scroll through images on the SD or SDHC memory card.
To display and selectthumbnail images
1. Press the SD Card view button on the control panel.
2. Press Enter to display up to 16 thumbnail-sized images.
To return to displayingsingle images
Press Enter to display a single image.
Using the SD Card view on-screen display menuThe SD Card view’s on-screen display’s menu allows you to use the document camera as an SD or SDHC memory card reader.
SD Card view’s on-screen display menu settingsYou can use the following settings when your document camera is in SD Card view:
SD Settings on-screen display menu
To access the SDSettings menu
Select SD Card view > Menu > SD Settings .
SD Card view on-screen display menu summary
SD Settings Delete, Lock, Unlock and Format Media. See page 38.Your document camera’s USB-B mode must be set to Application to see this menu. See page 34.
Special Tools Highlight, Mask and Scroll. See page 41.
Slide Show Start Slideshow, Interval, Select, Repeat and Order. See page 42.

39 | CHAPTER 6 – USING YOUR DOCUMENT CAMERA IN SD CARD VIEW
IMPORTANTThe SD Settings are only available if you have your document camera set to Application mode in the Camera view on-screen display menu. See page 34.
Deleting images from an SD or SDHC memory cardYou can delete images from an SD or SDHC memory card in your document camera using the on-screen display menu.
IMPORTANT• Your document camera must be set to Application mode. See page 34.
• You can’t delete images from your computer, only the from document camera’s SD or SDHC card.
To delete images 1. Press the SD Card view button on the control panel.
You see the current saved image from the SD or SDHC card.
2. Use the left and right arrow buttons on the control panel to select the image you want to delete.
3. Press Menu on the control panel.
The on-screen display menu appears.
SD Settings menu options Description
Delete Current Deletes current image
All Deletes all images in the current folder
Cancel Cancels image delete
Lock Current Locks current image
All Locks all images
Cancel Cancels image lock
Unlock Current Unlocks current image
All Unlocks all images
Cancel Exits Unlock settings
Format Media No Cancels SD or SDHC memory card formatting
Yes Formats SD or SDHC memory card

40 | CHAPTER 6 – USING YOUR DOCUMENT CAMERA IN SD CARD VIEW
4. Select SD, and then press Enter .
5. Select Delete, and then press Enter .
6. Select Current, and then press Enter to delete the current image.
OR
Select All, and then press Enter to delete all images in the viewed folder.
The deleting image icon displays briefly while your document camera deletes images.
Locking and Unlocking imagesYou can lock images to include them in slideshows set to Select > Lock in the Slideshow menu.
IMPORTANTIf you can’t access the SD Menu, you must set your document camera’s USB-B mode to Application mode. This is a Camera view menu setting. See page 34.
To lock images fora slideshow
1. Press the SD Card view button, and then press Menu.
2. Use the arrow buttons on the control panel to select the image you want to lock, and press the Menu button.
The on-screen display menu appears.
3. Select SD > Lock, and then press Enter .
4. Select Current, and then press Enter .
OR
Select All to lock all images.
Repeat steps one to three to lock other images for your slideshow.
To unlock images fora slideshow
1. In SD Card view, use the arrow buttons on the control panel to select the image you want to unlock, and press the Menu button.
The on-screen display menu appears.
2. Select SD > Unlock, and then press Enter .
3. Select Current, and then press Enter .
OR
Select All to unlock all images.

41 | CHAPTER 6 – USING YOUR DOCUMENT CAMERA IN SD CARD VIEW
4. Repeat steps one to three to unlock other images for your slideshow.
Special Tools on-screen display menu
To access the SpecialTools menu
Select SD Card view > Menu > Special Tools .
The SD Card view’s Special Tools menu includes the same tools as the Camera view’s Special Tools menu, except that the SD Card view does not have the Picture in Picture (PiP) feature.
• For information on how to use the Highlight feature, see page 29.
• For information on how to use the Mask feature, see page 31.
• For information on how to use the Scroll feature, see page 31.
Special Tools menu options
Description
Highlight Highlights a center square on the displayed image. Settings include:
• Highlight On
• Adjust Transparency
• Adjust Size
Mask Covers the displayed image with an adjustable screen mask. Settings include:
• Mask On
• Adjust Transparency
Scroll Zooms in on the displayed images and allows you to move the zoomed area with the up, down, left and right buttons on the control panel. Settings include:
• Scroll on
• ×2
• ×3
• ×4

42 | CHAPTER 6 – USING YOUR DOCUMENT CAMERA IN SD CARD VIEW
Slideshow Settings on-screen display menu
To access the SlideshowSettings menu
Select SD Card view > Menu > Slideshow .
Showing slideshows
To start a slideshow 1. Access the Slideshow menu.
2. Select Slideshow, and then press Enter .
3. Select Start Slideshow, and press Enter .
Your document camera displays a slideshow of images on the SD or SDHC memory card.
To stop a slideshow Press Enter or any of the arrow buttons on the control panel.
The image slideshow stops and the on-screen display menu appears.
Slideshow menu Options Description
Start Slideshow Starts a slideshow of images
Interval 5 sec Sets image interval to 5 seconds
10 sec Sets image interval to 10 seconds
15 sec Sets image interval to 15 seconds
30 sec Sets image interval to 30 seconds
Select All Selects all images for slideshow
Lock Sets so only locked images display in a slideshow
Repeat Off Turns off slideshow repeat
On Turns on slideshow repeat
Order Forward Sets slideshow order to forward
Backward Sets slideshow order to backward

43 | CHAPTER 6 – USING YOUR DOCUMENT CAMERA IN SD CARD VIEW
Displaying specific images in a SlideshowYou can set your document camera to display only images that you select.
To set SD settings todisplay selected
images only
1. In SD Card view, press Menu on the control panel.
The on-screen display menu appears.
2. Select Slideshow > Select, and then press Enter .
3. Select Lock, and then press Enter so that only locked images display in a slideshow.
IMPORTANTWhen you set the slideshow to Lock, it will include only images that are locked. You will lock images in the SD Card view, SD menu, not the Slideshow menu.
To lock images See Locking and Unlocking images on page 40.
To unlock images See Locking and Unlocking images on page 40.

44 | CHAPTER 6 – USING YOUR DOCUMENT CAMERA IN SD CARD VIEW

Chapter 7
Troubleshooting Document camera issuesUse the following table to troubleshoot issues with your document camera.
Issue Solution
No image displays or appears.
• Turn off your document camera (see page 16). Securely connect all cables and connect the camera’s AC adapter to a power outlet. Turn on your document camera.
• Adjust the zoom dial. The camera may be on a blank section of your document.
• Ensure the output switches on the side panel are set to the proper image output:
– VGA DVI-D or Composite on the side panel
– NTSC or PAL on the bottom of your document camera
No image displays after you restart your computer. Document camera is connected through a USB hub.
1. Turn off your document camera, and then wait several seconds.
2. Turn on your document camera again.
The image is out of focus. • Press the auto focus button.
• Use the manual focus.
• Move the camera further away from the object.
The image is scrambled or black and white when a television is the display device.
Ensure the NTSC/PAL switch beneath the projector is set correctly.

46 | CHAPTER 7 – TROUBLESHOOTING
SD Card view issues
The image is too dark. • Press the brightness buttons on your document camera.
• If the object is not well lit, turn on your document camera LED.
• Adjust the shutter speed. See page 27.
The image is broken apart by lines.
• Adjust the distance between the object and the camera.
• Adjust your projector settings.
Issue Solution
No image appears when you press the SD Card view button.
• Check the connection between your Document camera and the projector, television or display. See Setup configurations for Camera view and SD Card view on page 9.
• Ensure your document camera, projector or television is turned on.
A crossed out, red SD Card icon appears when you press the SD Card view button.
Place an SD or SDHC memory card in your document camera SD Card slot.
OR
There are no images on the SD or SDHC memory card.
The SD Card view menu does not include SD
Settings .
In Camera view, set USB-B mode to Application. See Setting USB-B Application mode on page 34.
Slideshow doesn’t start, and there are images in the SD or SDHC memory card.
Your slideshow is set to Lock, and you don’t have any locked images.
Set the slideshow to All. See page 43.
OR
Lock some or all of the images in the SD or SDHC memory card. See page 40.
Issue Solution

Appendix A
Hardware environmental complianceSMART Technologies supports global efforts to ensure that electronic equipment is manufactured, sold and disposed of in a safe and environmentally friendly manner.
Waste Electrical and Electronic Equipment regulations (WEEE directive)Waste Electrical and Electronic Equipment regulations apply to all electrical and electronic equipment sold within the European Union.
When you dispose of any electrical or electronic equipment, including SMART Technologies products, we strongly encourage you to properly recycle the electronic product when it has reached end of its life. If you require further information, please contact your reseller or SMART Technologies for information on which recycling agency to contact.
Restriction of Certain Hazardous Substances (RoHS directive)This product meets the requirements of the European Union’s Restriction of Certain Hazardous Substances (RoHS) Directive 2002/95/EC.
Consequently, this product also complies with other regulations that have arisen in various geographical areas, and that reference the European Union’s RoHS directive.

48 | APPENDIX A – HARDWARE ENVIRONMENTAL COMPLIANCE
PackagingMany countries have regulations restricting the use of certain heavy metals in product packaging. The packaging used by SMART Technologies to ship products complies with applicable packaging laws.
China’s Electronic Information Products Regulations (EIP)China regulates products that are classified as EIP (Electronic Information Products). SMART Technologies products fall under this classification and meet the requirements for China’s EIP regulations.
U.S. Consumer Product Safety Improvement ActThe United States has enacted the Consumer Product Safety Improvement Act which limits the lead (Pb) content in products used by children. SMART Technologies is committed to complying with this initiative.

Appendix B
Customer supportOnline information and supportVisit www.smarttech.com/support to view and download user’s guides, how-to and troubleshooting articles, software and more.
TrainingVisit www.smarttech.com/trainingcenter for training materials and information about our training services.
Technical supportIf you experience difficulty with your SMART product, please contact your local reseller before contacting SMART Technical Support. Your local reseller can resolve most issues without delay.
NOTETo locate your local reseller, visit www.smarttech.com/where+to+buy.
All SMART products include online, telephone, fax and e-mail support:
Shipping and repair statusContact SMART’s Return of Merchandise Authorization (RMA) group, Option 4, +1.866.518.6791, for shipping damage, missing part and repair status issues.
Online smarttech.com/contactsupport
Telephone +1.403.228.5940 orToll Free 1.866.518.6791 (U.S./Canada)(Monday to Friday, 5 a.m. – 6 p.m. Mountain Time)
Fax +1.403.806.1256
E-mail [email protected]

50 | APPENDIX B – CUSTOMER SUPPORT
General inquiries
WarrantyProduct warranty is governed by the terms and conditions of SMART’s “Limited Equipment Warranty” that shipped with the SMART product at the time of purchase.
RegistrationTo help us serve you, register online at smarttech.com/Product+Registration.
Address SMART Technologies3636 Research Road NWCalgary, AB T2L 1Y1CANADA
Switchboard +1.403.228.5940 orToll Free 1.866.518.6791 (U.S./Canada)
Fax +1.403.228.2500
E-mail [email protected]