Slicer3 Training Tutorial ARCTIC (v1.2) · Slicer3 Training Compendium. ... This tutorial requires...
67
-1- National Alliance for Medical Image Computing Slicer3 Training Tutorial ARCTIC (v1.2) (Automatic Regional Cortical ThICkness) University of North Carolina, Chapel Hill: Neuro Image Research and Analysis Lab Neurodevelopmental Disorders Research Center Cedric Mathieu, Clement Vachet, Martin Styner, Heather Cody Hazlett Contact : [email protected] / [email protected] Slicer3 Training Compendium
-
Upload
trinhhuong -
Category
Documents
-
view
233 -
download
0
Transcript of Slicer3 Training Tutorial ARCTIC (v1.2) · Slicer3 Training Compendium. ... This tutorial requires...

-1-National Alliance for Medical Image Computing
Slicer3 Training Tutorial
ARCTIC (v1.2) (Automatic Regional Cortical ThICkness)
University of North Carolina, Chapel Hill:
Neuro Image Research and Analysis Lab
Neurodevelopmental Disorders Research Center
Cedric Mathieu, Clement Vachet, Martin Styner, Heather Cody HazlettContact : [email protected] / [email protected]
Slicer3 Training Compendium

-2-National Alliance for Medical Image Computing
Learning Objective
Following this tutorial, you will be able to perform an individual analysis of
regional cortical thickness.
You will learn how to load input volumes, run the end-to-end module
ARCTIC to generate cortical thickness information and display output
volumes.
Cortical thickness on WM surface Cortical thickness on GM surface

-3-National Alliance for Medical Image Computing
Prerequisites
This tutorial assumes that you have already completed the tutorial Data
Loading and Visualization.
Tutorials for Slicer3 are available at the following location:
Slicer3• tutorials
http://www.na-mic.org/Wiki/index.php/Slicer3.2:Training
-4-National Alliance for Medical Image Computing
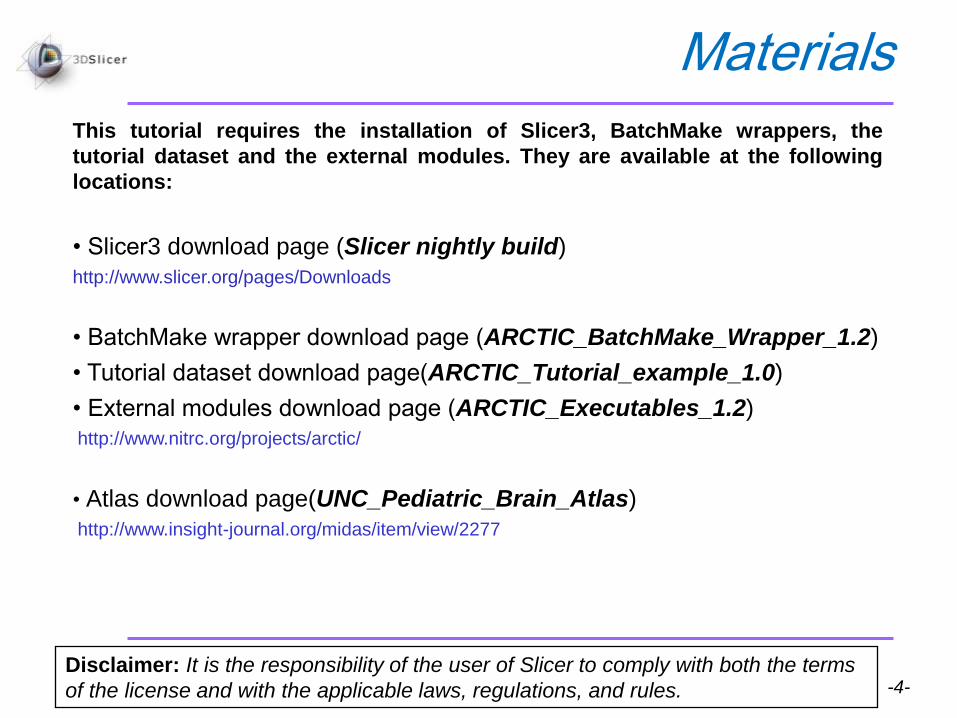
Materials
This tutorial requires the installation of Slicer3, BatchMake wrappers, the
tutorial dataset and the external modules. They are available at the following
locations:
Slicer3 download page (Slicer nightly build)•
http://www.slicer.org/pages/Downloads
(ARCTIC_BatchMake_Wrapper_1.2)pagedownloadwrapperBatchMake•
page(ARCTIC_Tutorial_example_1.0)downloaddatasetTutorial•
(ARCTIC_Executables_1.2)pagedownloadmodulesExternal•
http://www.nitrc.org/projects/arctic/
Atlas download page(UNC_Pediatric_Brain_Atlas)•
http://www.insight-journal.org/midas/item/view/2277
Disclaimer: It is the responsibility of the user of Slicer to comply with both the terms
of the license and with the applicable laws, regulations, and rules.

-5-National Alliance for Medical Image Computing
Materials: Tutorial dataset
The tutorial dataset (ARCTIC_Tutorial_example_1.0) is a ZIP file.
Unzip this file somewhere in your computer.
An “ARCTIC_Tutorial_example_1.0” folder will be created,
containing:
• A pediatric case: T1-weighted and T2-weighted images.
• An “ARTIC-Results/” directory, in which results of the tutorial
example will be saved.

-6-National Alliance for Medical Image Computing
Materials: External modules
The executables are in a ZIP file : ARCTIC_Executables_1.2_linux32/64/Mac
Unzip this file somewhere in your computer.
An “ARCTIC_Executables_1.2” folder will be created, containing executables
needed to perform the cortical thickness analysis.
To add the executables as Slicer3 external modules:
- Open Slicer3
- Go to View → Application Settings →Module Settings
- Click on the “add a preset” button
- Select the “ARCTIC_Executables_1.2” folder and confirm
- Close Slicer3

-7-National Alliance for Medical Image Computing
Materials: Atlas
The atlas and its related files are in a ZIP file (UNC_Pediatric_Brain_Atlas).
Create a “pediatric-atlas-4years-sym-T1-RAI” folder somewhere in your
computer.
Unzip the ZIP file in this new folder.
The “pediatric-atlas-4years-sym-T1-RAI” folder will thus contain the atlas
and its related files.
You can then unzip all the images (gunzip command).
-8-National Alliance for Medical Image Computing
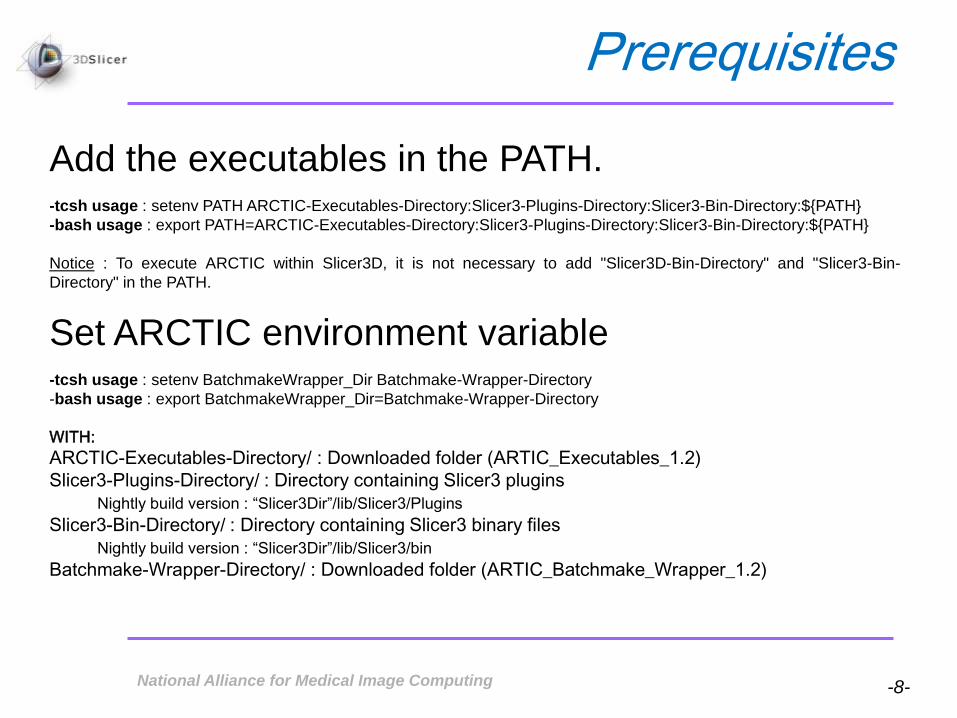
Add the executables in the PATH.-tcsh usage : setenv PATH ARCTIC-Executables-Directory:Slicer3-Plugins-Directory:Slicer3-Bin-Directory:${PATH}
-bash usage : export PATH=ARCTIC-Executables-Directory:Slicer3-Plugins-Directory:Slicer3-Bin-Directory:${PATH}
Notice : To execute ARCTIC within Slicer3D, it is not necessary to add "Slicer3D-Bin-Directory" and "Slicer3-Bin-
Directory" in the PATH.
Set ARCTIC environment variable-tcsh usage : setenv BatchmakeWrapper_Dir Batchmake-Wrapper-Directory
-bash usage : export BatchmakeWrapper_Dir=Batchmake-Wrapper-Directory
WITH:
ARCTIC-Executables-Directory/ : Downloaded folder (ARTIC_Executables_1.2)
Slicer3-Plugins-Directory/ : Directory containing Slicer3 plugins
Nightly build version : “Slicer3Dir”/lib/Slicer3/Plugins
Slicer3-Bin-Directory/ : Directory containing Slicer3 binary files
Nightly build version : “Slicer3Dir”/lib/Slicer3/bin
Batchmake-Wrapper-Directory/ : Downloaded folder (ARTIC_Batchmake_Wrapper_1.2)
Prerequisites

-9-National Alliance for Medical Image Computing
Set Slicer libraries variable (only for command line)-tcsh usage : setenvSLICERLIBPATH“Slicer-nightly-build”/lib
setenv LD_LIBRARY_PATH
${LD_LIBRARY_PATH}:${SLICERLIBPATH}/BatchMake:${SLICERLIBPATH}/bmModuleDescriptionParser:${SLICERLIB
PATH}/FreeSurfer:${SLICERLIBPATH}/GenerateCLP:${SLICERLIBPATH}/GenerateLM:${SLICERLIBPATH}/IGT:${SLIC
ERLIBPATH}/igtl:${SLICERLIBPATH}/InsightToolkit:${SLICERLIBPATH}/ITKCommandIO:${SLICERLIBPATH}/KWWidget
s:${SLICERLIBPATH}/LoadableModule:${SLICERLIBPATH}/MGHImageIO:${SLICERLIBPATH}/ModuleDescriptionParse
r:${SLICERLIBPATH}/MRML:${SLICERLIBPATH}/MRMLIDImageIO:${SLICERLIBPATH}/OpenIGTLink:${SLICERLIBPAT
H}/Python/lib:${SLICERLIBPATH}/Qdec:${SLICERLIBPATH}/RemoteIO:${SLICERLIBPATH}/Slicer3:${SLICERLIBPATH}/
SlicerIO:${SLICERLIBPATH}/tclap:${SLICERLIBPATH}/TclTk/lib:${SLICERLIBPATH}/Teem-
1.10.0:${SLICERLIBPATH}/vtk-5.2:${SLICERLIBPATH}/vtkITK:${SLICERLIBPATH}/vtkTeem
-bash usage : exportSLICERLIBPATH=“Slicer-nightly-build”/lib
export
LD_LIBRARY_PATH=${LD_LIBRARY_PATH}:${SLICERLIBPATH}/BatchMake:${SLICERLIBPATH}/bmModuleDescriptio
nParser:${SLICERLIBPATH}/FreeSurfer:${SLICERLIBPATH}/GenerateCLP:${SLICERLIBPATH}/GenerateLM:${SLICER
LIBPATH}/IGT:${SLICERLIBPATH}/igtl:${SLICERLIBPATH}/InsightToolkit:${SLICERLIBPATH}/ITKCommandIO:${SLICE
RLIBPATH}/KWWidgets:${SLICERLIBPATH}/LoadableModule:${SLICERLIBPATH}/MGHImageIO:${SLICERLIBPATH}/M
oduleDescriptionParser:${SLICERLIBPATH}/MRML:${SLICERLIBPATH}/MRMLIDImageIO:${SLICERLIBPATH}/OpenIG
TLink:${SLICERLIBPATH}/Python/lib:${SLICERLIBPATH}/Qdec:${SLICERLIBPATH}/RemoteIO:${SLICERLIBPATH}/Slic
er3:${SLICERLIBPATH}/SlicerIO:${SLICERLIBPATH}/tclap:${SLICERLIBPATH}/TclTk/lib:${SLICERLIBPATH}/Teem-
1.10.0:${SLICERLIBPATH}/vtk-5.2:${SLICERLIBPATH}/vtkITK:${SLICERLIBPATH}/vtkTee
WITH:
“Slicer-nightly-build” : path of Slicer nightly build in your computer
Prerequisites

-10-National Alliance for Medical Image Computing
1- Pipeline overview
2- Input images
3- Pipeline description
4- Ouput images and organisation
5- Execution within Slicer
6- Example with tutorial dataset
7- Command line execution
Overview

-11-National Alliance for Medical Image Computing
1- Pipeline overview
2- Input images
3- Pipeline description
4- Ouput images and organisation
5- Execution within Slicer
6- Example with tutorial dataset
7- Command line execution
Overview

-12-National Alliance for Medical Image Computing
Pipeline Overview
All the tools used in the current pipeline are Slicer3 modules, some of
them being UNC external modules. The user can thus perform a regional
cortical thickness analysis on an individual subject within Slicer3.
Two different modes can be used, depending on the input images:
• Raw images (T1-weighted, T2-weighted, PD)
• Tissue segmentation label image

-13-National Alliance for Medical Image Computing
1- Pipeline overview
2- Input images
3- Pipeline description
4- Ouput images and organisation
5- Execution within Slicer
6- Example with tutorial dataset
7- Command line execution
Overview

-14-National Alliance for Medical Image Computing
Input images
Whatyouneed…
Raw images
T1-weighted image
Tissue segmentation atlas directory
OptionalT2-weighted image
PD-weighted image
Atlas raw image + its parcellation
Case parcellation image
Segmented image
Raw image
Tissue segmentation label image
OptionalAtlas raw image + its parcellation
Case parcellation image

-15-National Alliance for Medical Image Computing
1- Pipeline overview
2- Input images
3- Pipeline description
4- Ouput images and organisation
5- Execution within Slicer
6- Example with tutorial dataset
7- Command line execution
Overview

-16-National Alliance for Medical Image Computing
Pipeline Description
Tissue SegmentationitkEMS
Input Volumes
Deformable RegistrationSegPostProcess
RegisterImages
ResampleVolume2Sparse Cortical ThicknessCortThick
If Tissue Segmentation Label Image
If no Parcellation
If T1-weighted Image
If Case
Parcellation
If Atlas Parcellation
Sparse Cortical ThicknessCortThick (w. Parcellation option)
Sparse Cortical ThicknessCortThick (w. Parcellation option)
StatisticsImageMath/ImageStat
Mesh creationModelMaker
Mrml scene creation(for quality control)

-17-National Alliance for Medical Image Computing
1. Tissue segmentation
Module : itkEMS (UNC Slicer3 external module)
2. Regional atlas deformable registration3.1. Skull stripping
Module : SegPostProcess (UNC Slicer3 external module)
3.2. Deformable registration of T1-weighted atlas
Module : RegisterImages (Slicer3 module)
3.3. Applying transformation to its parcellation map
Module : ResampleVolume2 (Slicer3 module)
3. Sparse and asymmetric Cortical ThicknessModule : CortThick (UNC Slicer3 module)
4. Statistics Modules : ImageMath, ImageStat (UNC Slicer3 external modules)
5. Mesh CreationModule : ModelMaker (Slicer3 module)
6. Mrml scene Creation
Pipeline Description

-18-National Alliance for Medical Image Computing
Tissue segmentation (itkEMS external module)
Probabilistic atlas-based automatic tissue segmentation via an
Expectation-Maximization scheme. ItkEMS also performs an
intensity inhomogeneity correction of the input image that removes
gradual variations in the image intensities mainly due to RF coil
imperfection
Pipeline Description
Image_corrected_EMS.nrr
d
Image_labels_EMS.nrrdInput_T1-Image.nrrd

-19-National Alliance for Medical Image Computing
Skull Stripping (SegPostProcess external module)
This step is performed using the previously computed tissue
segmentation label image.
Pipeline Description
Image_corrected_EMS.nrr
dImage_corrected_EMS_stripped.nrrd

-20-National Alliance for Medical Image Computing
Deformable registration of T1-weighted atlas
(RegisterImages module)
B-spline pipeline registration.
A transformation file is created and will be used by the next step.
Module linkhttp://www.na-mic.org/Wiki/index.php/ITK_Registration_Optimization#Pipeline_Registration
Pipeline Description
AtlasRegistered_Image_corrected_EMS_stripped.nrrdAtlas.nrr
d
TransformFile.txt

-21-National Alliance for Medical Image Computing
Applyingtransformationtotheatlas’parcellationmap
(ResampleVolume2 module)
Module link :http://slicer.spl.harvard.edu/slicerWiki/index.php/Modules:ResampleVolume2-Documentation
Pipeline Description
TransformFile.txt
ParcellationRegistered_Image_corrected_EMS_stripped.nrrdParcellation.nrrd

-22-National Alliance for Medical Image Computing
Cortical Thickness (CortThick external module)
Sparse and asymmetric local cortical thickness
Pipeline Description
Image_labels_EMS.nrrd
Regional Cortical Thickness
information
WM_AvgBoundary.nrrd
GM_AvgBoundary.nrrd
Optional Outputs

-23-National Alliance for Medical Image Computing
Statistics (ImageStat and ImageMath modules)
Both modules are used to generate volume information in the
following files :
- TissueSegmentationVolumes.csvWhite matter, gray matter and CSF volumes.
- ParcellationMapVolumes.csv (if the parcellation image is provided)
White matter, gray matter and CSF volumes per lobe.
Notice : values are in mm
Pipeline Description

-24-National Alliance for Medical Image Computing
Mesh creation (ModelMaker module)
Module link :http://www.slicer.org/slicerWiki/index.php/Modules:Modelmaker-Documentation-3.2
Two meshes are created :
- WM_Surface.vtkWhite matter mesh.
- GM_Surface.vtkGray matter mesh.
Pipeline Description

-25-National Alliance for Medical Image Computing
Mrml scene creation
A Mrml scene is created to display all the steps of the pipeline.
There is one snapshot per step.
This Mrml scene is created to make a quality control.
Pipeline Description

-26-National Alliance for Medical Image Computing
1- Pipeline overview
2- Input images
3- Pipeline description
4- Output images and organization
5- Execution within Slicer
6- Example with tutorial dataset
7- Command line execution
Overview

-27-National Alliance for Medical Image Computing
2 BatchMake Scripts
Input Files Directory/
Input images
ARCTIC/
TissueSegmentation/
Registration/
CorticalThickness/
InputVolumes_corrected_EMS.nrrd
InputVolume_labels_EMS.nrrd
WM/GM/CSF_Map.nrrd
Image_corrected_EMS_stripped.nrrd
AtlasRegistered_Image_corrected_EMS_stripped.nrrd
AtlasTransform_Image_corrected_EMS_stripped.txt
ParcellationRegistered_Image_corrected_EMS_stripped.nrrd
If the parcellation image is not provided:
Image_labels_EMS_WhiteMatDistanceMap.csv
If the parcellation image is provided:
Image_labels_EMS_WhiteMatDistanceMap_par.csv
Image_labels_EMS_WhiteMatDistanceMap_par_array.csv
Output and Organisation
TissueSegmentationVolumes.csv
ParcellationMapVolumes.csv
Stat/
Mesh/WM_Surface.vtk
GM_Surface.vtk

-28-National Alliance for Medical Image Computing
1- Pipeline overview
2- Input images
3- Pipeline description
4- Ouput images and organisation
5- Execution within Slicer
6- Example with tutorial dataset
7- Command line execution
Overview

-29-National Alliance for Medical Image Computing
Execution within Slicer
• Load input images
• Demonstration with « Raw Images »
• Demonstration with « Segmented Image »

-30-National Alliance for Medical Image Computing
Demonstration : Load the input images
How to load raw images (case and atlas)?
1- Select the image in the browser
2- Set the image origin as « centered »
3- Click on « Apply » to load
How to load parcellation and label images?
1- Select the image in the browser
2- Set the image origin as « centered »
3- Check the « label map » button
4- Click on « Apply » to load
1
1
2
2
3
3
4

-31-National Alliance for Medical Image Computing
Demonstration in Slicer
• Load input images
• Demonstration with « Raw Images »
• Demonstration with « Segmented Image »
• Parcellation option
• Advanced parameters

-32-National Alliance for Medical Image Computing
Demonstration : “Raw Images”
1- Select the « ARCTIC » module (in All Modules)
2- Add the T1-weighted image
3- Set the Tissue Segmentation Atlas Directory for the
tissue segmentation
4- Set the output directory
5- Set a prefix which will be added to all the outputs
6- Click on the « Apply » button to process the data
Input 1
1
2
3
4
6
5

-33-National Alliance for Medical Image Computing
Demonstration : “Raw Images”
2Verifications / Options
1- If available, set the T2 and/or PD-weighted
images to improve the tissue segmentation
2- Check the tissue segmentation atlas type (T1-
weighted or T2-weighted image)
3- Set the output images to be displayed in Slicer
(« Create a new volume » instead of « None («
Input 1
1
3

-34-National Alliance for Medical Image Computing
Demonstration in Slicer
• Load input images
• Demonstration with « Raw Images »
• Demonstration with « Segmented Image »
• Parcellation option
• Advanced parameters

-35-National Alliance for Medical Image Computing
Demonstration : “Segmented Image”Input 2
1- Select the « ARCTIC » module (in All Modules)
2- Set the tissue segmentation label image and check
the related tissue labels
3- Set its raw image (T1-weighted, T2-weighted, PD-
weighted)and change the orientation if necessary
4- Set the output directory
5- Set a prefix which will be added to all the outputs
6- Click on the « Apply » button to process the data
1
6
2
3
45

-36-National Alliance for Medical Image Computing
Demonstration : “Segmented Image”Input 2
Options
1- Set the output images to be displayed in Slicer
(« Create a new volume » instead of « None («
1
Cortical Thickness on WM
Boundary
Cortical Thickness on GM
Boundary

-37-National Alliance for Medical Image Computing
Demonstration in Slicer
• Load input images
• Demonstration with « Raw Images »
• Demonstration with « Segmented Image »
• Parcellation option
• Advanced parameters

-38-National Alliance for Medical Image Computing
Parcellation options
Parcellation optionsIf you want to perform a lobar cortical thickness analysis, choose between the two
possibilities
a- Add a parcellation image which is defined in the input coordinate space (« Case
Parcellation Image («
b- Add the atlas raw image and its parcellation, defined in the atlas coordinate space
(« Atlas Parcellation Image («
a
b
-39-National Alliance for Medical Image Computing
Demonstration in Slicer
• Load input images
• Demonstration with « Raw Images »
• Demonstration with « Segmented Image »
• Parcellation option
• Advanced parameters

-40-National Alliance for Medical Image Computing
Advanced parametersTissue segmentation parameters
a- Filter options: specifies smoothing parameters prior to
the segmentation
b- Priors weighting the tissue classes for the segmentation
c- Atlas warping options:
- No atlas warping:
- Unchecked by default: atlas to subject B-Spline
registration is performed
- Checked: atlas to subject affine registration is performed
instead of the warping
- Grid size X,Y,Z: grid controls points for atlas warping
Skull stripping parameters
a- Check to apply a dilation of the mask (necessary if the
tissue segmentation has a low quality)
Cortical Thickness parameters
a- To remove the interpolation of the cortical thickness or
set the threshold used to match the cortical thickness map
with the parcellation
Atlas registration parameters
a- Different initialization methods
a
b
c
a
a
a

-41-National Alliance for Medical Image Computing
1- Pipeline overview
2- Input images
3- Pipeline description
4- Ouput images and organisation
5- Execution within Slicer
6- Example with tutorial dataset
7- Command line execution
Overview

-42-National Alliance for Medical Image Computing
Example with tutorial dataset
• Load input images
• Run ARCTIC

-43-National Alliance for Medical Image Computing
In Slicer, select the module
« Volumes » to load the input
images.
Then click on the « Select Volume
File » button to load the images.
Load input images

-44-National Alliance for Medical Image Computing
A new window „Open Volume File‟ is now open. Select the
« ARCTIC_Tutorial_example» directory. Select the « pediatric_T1_RAI.nrrd »
file in the Data directory and click on « Open ».
Load input images

-45-National Alliance for Medical Image Computing
Now, select the Image Origin as
« Centered ».
And click on « Apply ».
Load input images
-46-National Alliance for Medical Image Computing
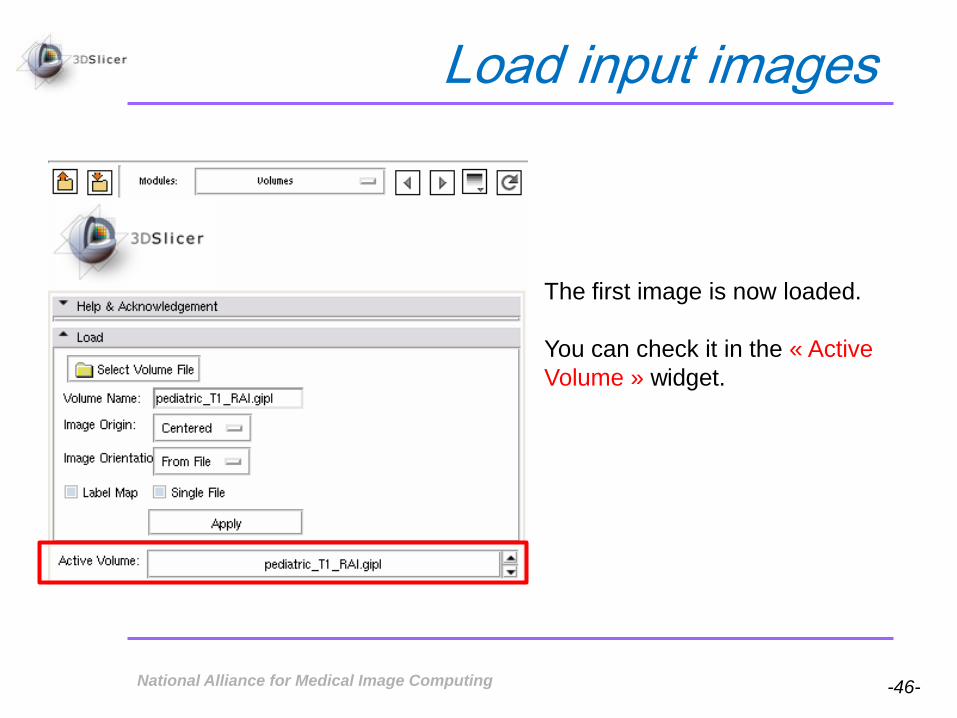
The first image is now loaded.
You can check it in the « Active
Volume » widget.
Load input images

-47-National Alliance for Medical Image Computing
Apply the same steps to load the T2-weighted and atlas images.
One can find the T2-weighted image in the same directory than the T1-
weighted one.
The atlas image, named « template-stripped.nrrd » is in the « pediatric-
atlas-4years-sym-T1-RAI » directory.
Load input images

-48-National Alliance for Medical Image Computing
Now we will load the parcellation
image.
Click on the « Select Volume File »
button to load the parcellation.
Load input images

-49-National Alliance for Medical Image Computing
Anewwindow„OpenVolumeFile‟isnowopen.Selectthe« pediatric-atlas-
4years-sym-T1-RAI » directory . Select the « Parcellation.nrrd » file and click
on « Open » .
Load input images

-50-National Alliance for Medical Image Computing
Now, select the Image Origin as
« Centered ».
Then, check the « Label Map »
case to load the parcellation as a
label image.
And click on « Apply ».
Load input images

-51-National Alliance for Medical Image Computing
The dataset is now loaded.
You can check it in the « Active
Volume » widget while displaying
the 4 images.
Load input images

-52-National Alliance for Medical Image Computing
Example with tutorial dataset
• Input images loading
• ARCTIC execution

-53-National Alliance for Medical Image Computing
1- Select the « ARCTIC » module (in All
Modules)
2- Set the T1-weighted images
(pediatric_T1_RAI.gipl)
3- Click on the « Tissue Segmentation
Atlas Directory » button
1
2
3
Module execution

-54-National Alliance for Medical Image Computing
A new window is now open to
select the tissue segmentation
atlas.
Search and select the
« pediatric-atlas-4years-sym-
T1-RAI/» folder.
Click on the « OK » button to
confirm.
Module execution

-55-National Alliance for Medical Image Computing
Module execution
1- Select « Create a new volume » to
display output images
2- Click on the « Cortical Thickness Results
Directory » button
1
2
-56-National Alliance for Medical Image Computing
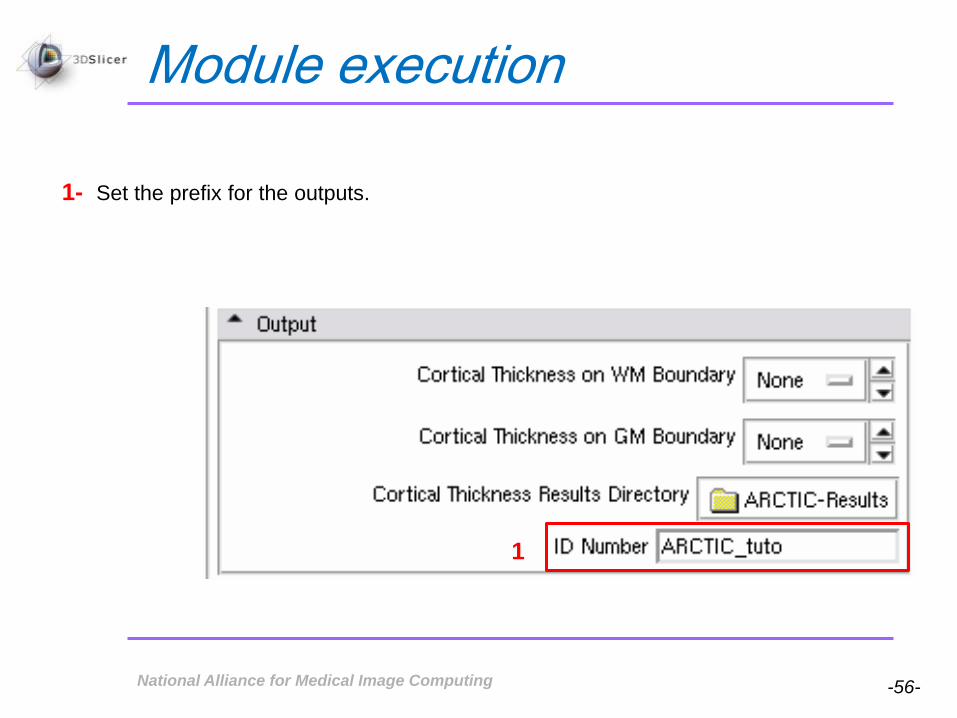
Module execution
1- Set the prefix for the outputs.
1

-57-National Alliance for Medical Image Computing
Select the « ARCTIC-Results » folder in
the ARCTIC_Tutorial_Example directory
Click on the « Save » button to confirm
your choice.
Module execution

-58-National Alliance for Medical Image Computing
1- Add the « Parcellation.gipl » as Atlas Parcellation
Image, and the « template-stripped.gipl » as Atlas
Image
2- Click on the « Apply » button to start the process.
1
2
Module execution

-59-National Alliance for Medical Image Computing
Once the execution is finished, several images are displayed within Slicer. You
can compare your images with the following ones to perform a quick quality
control.
Module execution
Cortical Thickness on WM Boundary Cortical Thickness on GM Boundary
-60-National Alliance for Medical Image Computing
1- Pipeline overview
2- Input images
3- Pipeline description
4- Ouput images and organisation
5- Execution within Slicer
6- Example with tutorial dataset
7- Command line execution
Overview

-61-National Alliance for Medical Image Computing
Use the command line
« Raw Images » Mode
Global analysis
ARCTIC --T1 Image_T1.nrrd --segAtlasDir TissueSegmentationAtlasDirectory/
Lobar cortical thickness analysis
If the atlas raw image and its parcellation are provided:
ARCTIC --T1 Image_T1.nrrd --segAtlasDir TissueSegmentationAtlasDirectory/
--atlas Atlas.nrrd --atlasParcellation Parcellation.nrrd
If the case parcellation image is provided:
ARCTIC --T1 Image_T1.nrrd --segAtlasDir TissueSegmentationAtlasDirectory/
--caseParcellation CaseRegisteredParcellation.nrrd

-62-National Alliance for Medical Image Computing
Use the command line« Raw Images » Mode
Complementary flags
--T2 Image_T2.gipl / --pd Image_PD.gipl : T2 and/or Pd-weighted image(s) can be added to
improve tissue segmentation
--atlasOrientation RAI : if the orientation of your atlas/parcellation is different than the default
value (RAI), add this flag to set the right orientation
--atlasType T1 : if the type of your tissue segmentation atlas is different than T1 (default value)
--outputDir output_directory/ : if you want to select the output directory, add this flag and indicate
the path an existing folder
--IDNumber prefix : if you want to add a prefix before all the outputs generated by the pipeline
--SaveWM WMCorticalThicknessMap.gipl / --SaveGM GMCorticalThicknessMap.gipl : those
flags are used to save a volume with information of the average cortical thickness on WM/GM
boundary(ies), the fileName needed is a path with the name of the output volume

-63-National Alliance for Medical Image Computing
Use the command line
« Segmented Image » Mode
Global analysis
ARCTIC --label TissueSegmentationImage.nrrd --rawImage Image_T1.nrrd
Lobar cortical thickness analysis
If the atlas raw image and its parcellation are provided:
ARCTIC --label TissueSegmentationImage.nrrd --rawImage Image_T1.nrrd
--atlas Atlas.nrrd --atlasParcellation Parcellation.nrrd
If the case parcellation image is provided:
ARCTIC --label TissueSegmentationImage.nrrd --rawImage Image_T1.nrrd
--caseParcellation CaseRegisteredParcellation.nrrd

-64-National Alliance for Medical Image Computing
Use the command line
« Segmented Image » Mode
Complementary flags
--WMLabel 1 / --GMLabel 2 / --CSFLabel 3 : if your label are different than the default value
--outputDir output_directory/ : if you want to select the output directory, add this flag and
indicate the path an existing folder
--IDNumber prefix : if you want to add a prefix before all the outputs generated by the pipeline
--SaveWM WMCorticalThicknessMap.gipl / --SaveGM GMCorticalThicknessMap.gipl : those
flags are used to save a volume with information of the average cortical thickness on WM/GM
boundary(ies), the fileName needed is a path with the name of the output volum

-65-National Alliance for Medical Image Computing
Slicer3 toolkit provides an accessible and versatile platform to
conduct image processing of MRI data, in this case, regional
cortical thickness analysis using ARCTIC.
Thanks to this tutorial you are now ready to perform a regional
cortical thickness analysis on your own dataset.
Conclusion
-66-National Alliance for Medical Image Computing
National Alliance for Medical Image Computing
NIH U54EB005149
Acknowledgements
UNC Chapel Hill
Neurodevelopmental Disorders Research Center
Neuro Image Research Analysis Laboratories

-67-National Alliance for Medical Image Computing
Acknowledgements
• Nicole Aucoin, Surgical Planning Lab, Boston (ModelMaker)
• Steven Aylward, Kitware Inc. (RegisterImages)
• François Budin, Psychiatry Neuroimaging Laboratory, Boston (ResampleVolume2)
• Julien Jomier, Kitware Inc. (Batchmake)
• Steve Pieper, Isomics Inc.
•Joseph Piven, Neurodevelopmental Disorders Research Center, UNC Chapel Hill
• Marcel Prastawa, Scientific Computing and Imaging Institute, Utah (itkEMS)
• Delphine Ribes, Sylvain Gouttard , Cassian Marc, NIRAL, UNC (CortThick)