Simply Marvelous Machines - Scientists in School · The Inclined Plane Family . Inclined Planes ....
24
Transcript of Simply Marvelous Machines - Scientists in School · The Inclined Plane Family . Inclined Planes ....
www.scientistsinschool.ca 1
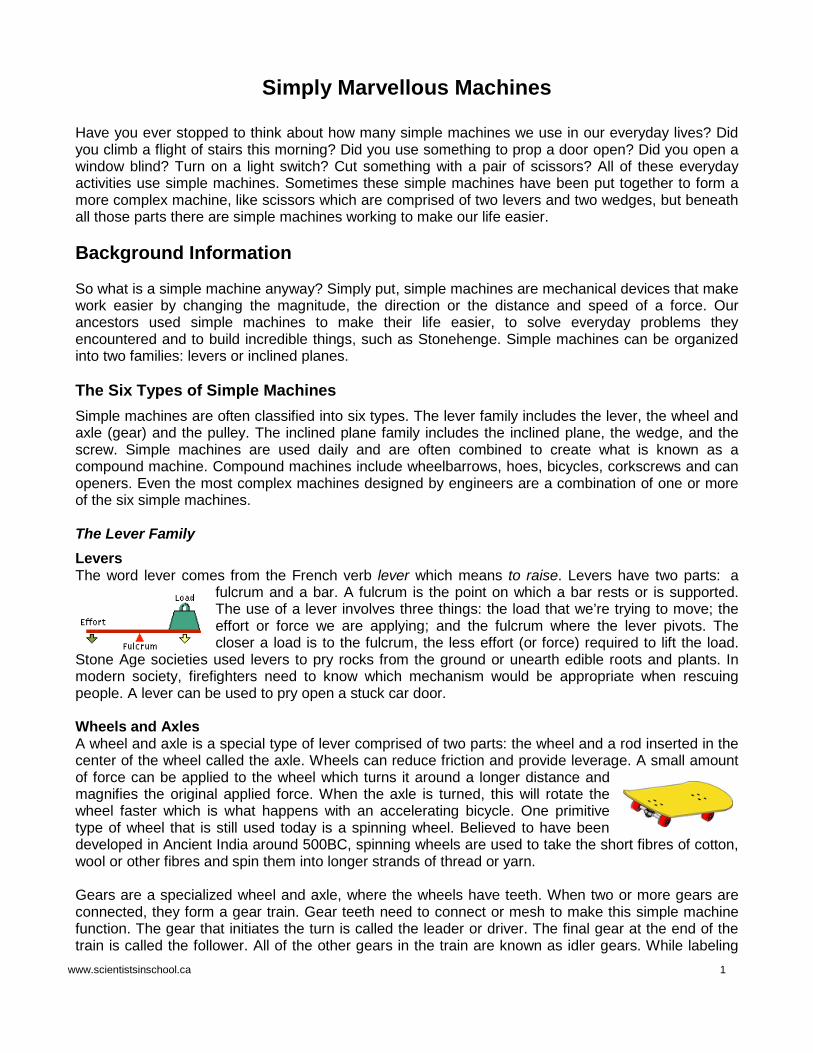
Simply Marvellous Machines Have you ever stopped to think about how many simple machines we use in our everyday lives? Did you climb a flight of stairs this morning? Did you use something to prop a door open? Did you open a window blind? Turn on a light switch? Cut something with a pair of scissors? All of these everyday activities use simple machines. Sometimes these simple machines have been put together to form a more complex machine, like scissors which are comprised of two levers and two wedges, but beneath all those parts there are simple machines working to make our life easier. Background Information So what is a simple machine anyway? Simply put, simple machines are mechanical devices that make work easier by changing the magnitude, the direction or the distance and speed of a force. Our ancestors used simple machines to make their life easier, to solve everyday problems they encountered and to build incredible things, such as Stonehenge. Simple machines can be organized into two families: levers or inclined planes. The Six Types of Simple Machines Simple machines are often classified into six types. The lever family includes the lever, the wheel and axle (gear) and the pulley. The inclined plane family includes the inclined plane, the wedge, and the screw. Simple machines are used daily and are often combined to create what is known as a compound machine. Compound machines include wheelbarrows, hoes, bicycles, corkscrews and can openers. Even the most complex machines designed by engineers are a combination of one or more of the six simple machines. The Lever Family Levers The word lever comes from the French verb lever which means to raise. Levers have two parts: a
fulcrum and a bar. A fulcrum is the point on which a bar rests or is supported. The use of a lever involves three things: the load that we’re trying to move; the effort or force we are applying; and the fulcrum where the lever pivots. The closer a load is to the fulcrum, the less effort (or force) required to lift the load.
Stone Age societies used levers to pry rocks from the ground or unearth edible roots and plants. In modern society, firefighters need to know which mechanism would be appropriate when rescuing people. A lever can be used to pry open a stuck car door. Wheels and Axles A wheel and axle is a special type of lever comprised of two parts: the wheel and a rod inserted in the center of the wheel called the axle. Wheels can reduce friction and provide leverage. A small amount of force can be applied to the wheel which turns it around a longer distance and magnifies the original applied force. When the axle is turned, this will rotate the wheel faster which is what happens with an accelerating bicycle. One primitive type of wheel that is still used today is a spinning wheel. Believed to have been developed in Ancient India around 500BC, spinning wheels are used to take the short fibres of cotton, wool or other fibres and spin them into longer strands of thread or yarn. Gears are a specialized wheel and axle, where the wheels have teeth. When two or more gears are connected, they form a gear train. Gear teeth need to connect or mesh to make this simple machine function. The gear that initiates the turn is called the leader or driver. The final gear at the end of the train is called the follower. All of the other gears in the train are known as idler gears. While labeling
www.scientistsinschool.ca 2
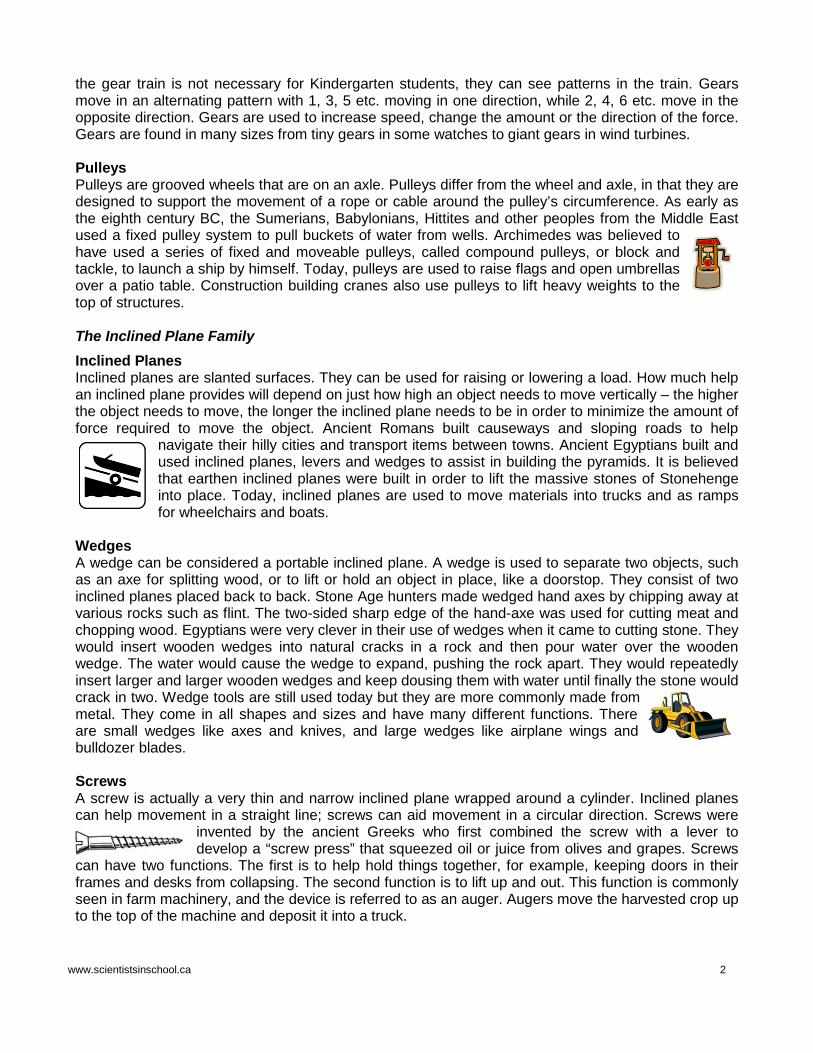
the gear train is not necessary for Kindergarten students, they can see patterns in the train. Gears move in an alternating pattern with 1, 3, 5 etc. moving in one direction, while 2, 4, 6 etc. move in the opposite direction. Gears are used to increase speed, change the amount or the direction of the force. Gears are found in many sizes from tiny gears in some watches to giant gears in wind turbines. Pulleys Pulleys are grooved wheels that are on an axle. Pulleys differ from the wheel and axle, in that they are designed to support the movement of a rope or cable around the pulley’s circumference. As early as the eighth century BC, the Sumerians, Babylonians, Hittites and other peoples from the Middle East used a fixed pulley system to pull buckets of water from wells. Archimedes was believed to have used a series of fixed and moveable pulleys, called compound pulleys, or block and tackle, to launch a ship by himself. Today, pulleys are used to raise flags and open umbrellas over a patio table. Construction building cranes also use pulleys to lift heavy weights to the top of structures. The Inclined Plane Family Inclined Planes Inclined planes are slanted surfaces. They can be used for raising or lowering a load. How much help an inclined plane provides will depend on just how high an object needs to move vertically – the higher the object needs to move, the longer the inclined plane needs to be in order to minimize the amount of force required to move the object. Ancient Romans built causeways and sloping roads to help
navigate their hilly cities and transport items between towns. Ancient Egyptians built and used inclined planes, levers and wedges to assist in building the pyramids. It is believed that earthen inclined planes were built in order to lift the massive stones of Stonehenge into place. Today, inclined planes are used to move materials into trucks and as ramps for wheelchairs and boats.
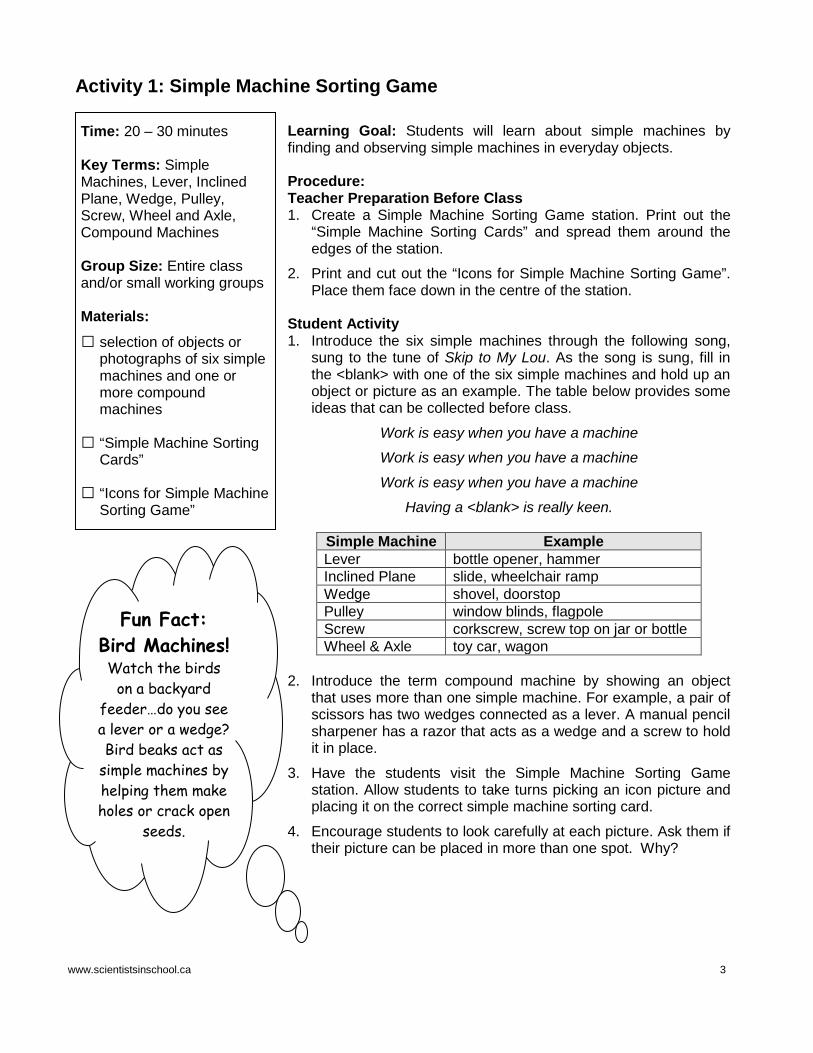
Wedges A wedge can be considered a portable inclined plane. A wedge is used to separate two objects, such as an axe for splitting wood, or to lift or hold an object in place, like a doorstop. They consist of two inclined planes placed back to back. Stone Age hunters made wedged hand axes by chipping away at various rocks such as flint. The two-sided sharp edge of the hand-axe was used for cutting meat and chopping wood. Egyptians were very clever in their use of wedges when it came to cutting stone. They would insert wooden wedges into natural cracks in a rock and then pour water over the wooden wedge. The water would cause the wedge to expand, pushing the rock apart. They would repeatedly insert larger and larger wooden wedges and keep dousing them with water until finally the stone would crack in two. Wedge tools are still used today but they are more commonly made from metal. They come in all shapes and sizes and have many different functions. There are small wedges like axes and knives, and large wedges like airplane wings and bulldozer blades. Screws A screw is actually a very thin and narrow inclined plane wrapped around a cylinder. Inclined planes can help movement in a straight line; screws can aid movement in a circular direction. Screws were
invented by the ancient Greeks who first combined the screw with a lever to develop a “screw press” that squeezed oil or juice from olives and grapes. Screws
can have two functions. The first is to help hold things together, for example, keeping doors in their frames and desks from collapsing. The second function is to lift up and out. This function is commonly seen in farm machinery, and the device is referred to as an auger. Augers move the harvested crop up to the top of the machine and deposit it into a truck.
www.scientistsinschool.ca 3
Activity 1: Simple Machine Sorting Game
Time: 20 – 30 minutes Key Terms: Simple Machines, Lever, Inclined Plane, Wedge, Pulley, Screw, Wheel and Axle, Compound Machines Group Size: Entire class and/or small working groups Materials: □ selection of objects or
photographs of six simple machines and one or more compound machines
□ “Simple Machine Sorting Cards”
□ “Icons for Simple Machine Sorting Game”
Learning Goal: Students will learn about simple machines by finding and observing simple machines in everyday objects. Procedure: Teacher Preparation Before Class 1. Create a Simple Machine Sorting Game station. Print out the
“Simple Machine Sorting Cards” and spread them around the edges of the station.
2. Print and cut out the “Icons for Simple Machine Sorting Game”. Place them face down in the centre of the station.
Student Activity 1. Introduce the six simple machines through the following song,
sung to the tune of Skip to My Lou. As the song is sung, fill in the <blank> with one of the six simple machines and hold up an object or picture as an example. The table below provides some ideas that can be collected before class.
Work is easy when you have a machine
Work is easy when you have a machine
Work is easy when you have a machine
Having a <blank> is really keen.
Simple Machine Example Lever bottle opener, hammer Inclined Plane slide, wheelchair ramp Wedge shovel, doorstop Pulley window blinds, flagpole Screw corkscrew, screw top on jar or bottle Wheel & Axle toy car, wagon
2. Introduce the term compound machine by showing an object
that uses more than one simple machine. For example, a pair of scissors has two wedges connected as a lever. A manual pencil sharpener has a razor that acts as a wedge and a screw to hold it in place.
3. Have the students visit the Simple Machine Sorting Game station. Allow students to take turns picking an icon picture and placing it on the correct simple machine sorting card.
4. Encourage students to look carefully at each picture. Ask them if their picture can be placed in more than one spot. Why?
Fun Fact: Bird Machines! Watch the birds
on a backyard feeder…do you see a lever or a wedge? Bird beaks act as
simple machines by helping them make holes or crack open
seeds.
www.scientistsinschool.ca 4
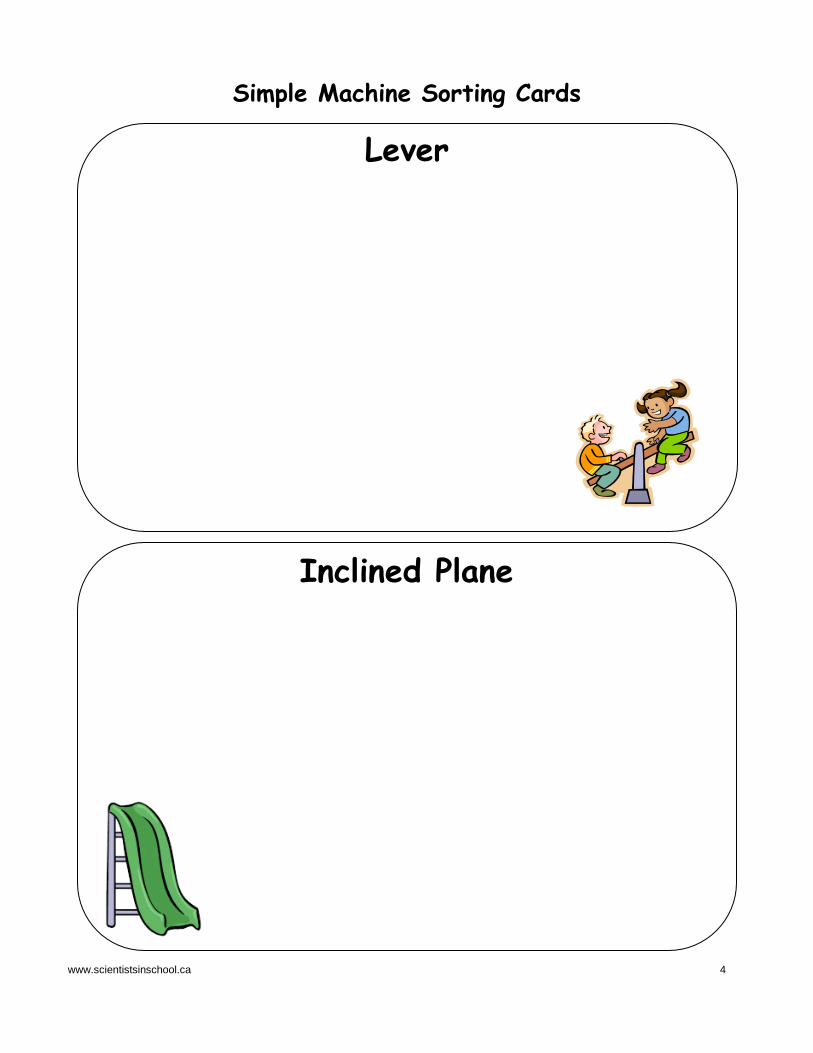
Simple Machine Sorting Cards
Lever
Inclined Plane
www.scientistsinschool.ca 5
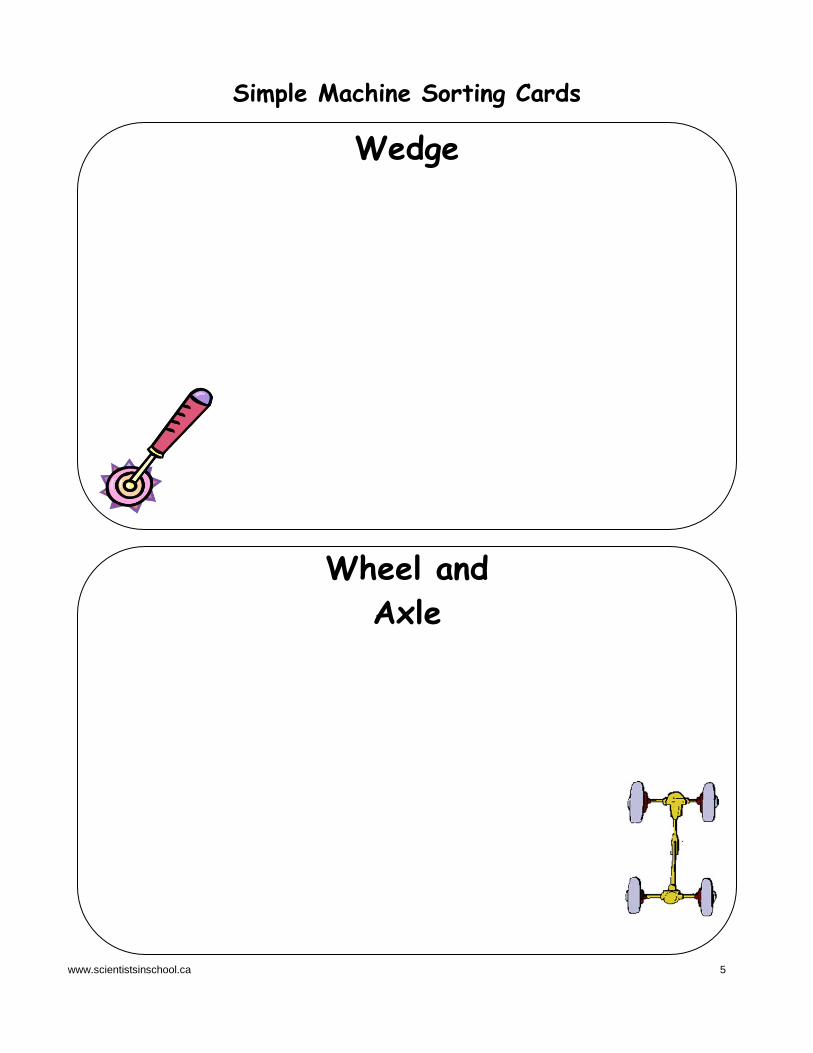
Simple Machine Sorting Cards
Wedge
Wheel and Axle
www.scientistsinschool.ca 6
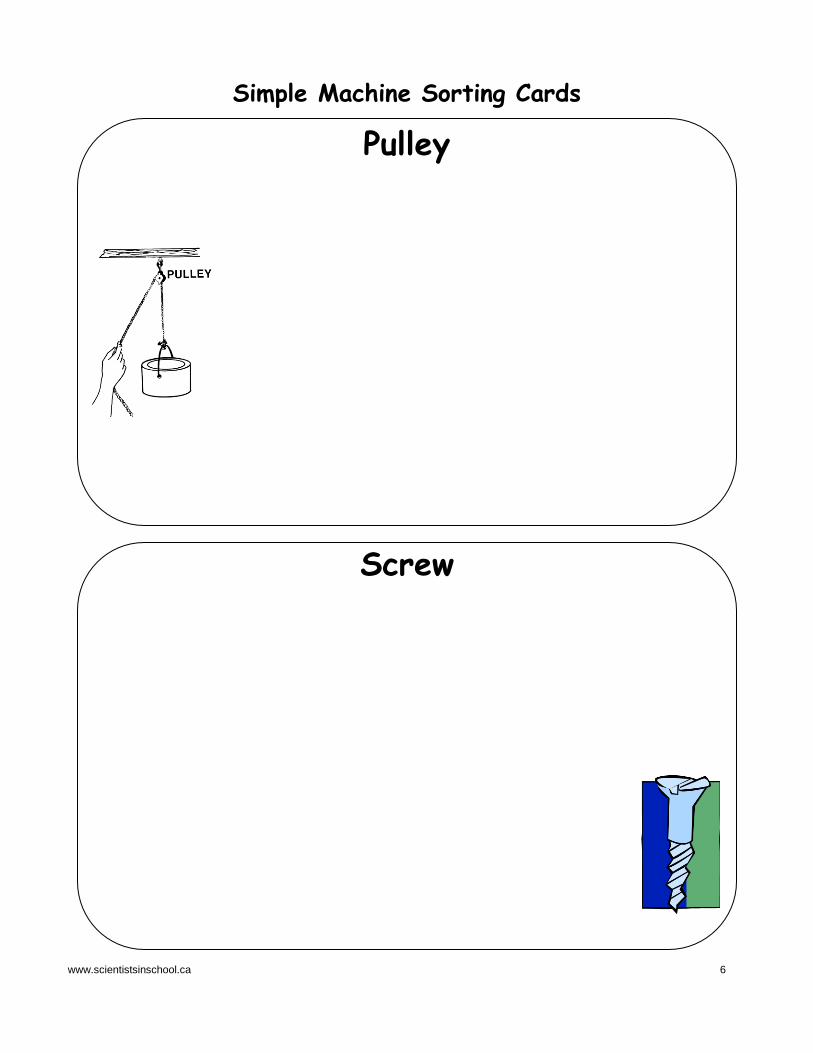
Simple Machine Sorting Cards
Pulley
Screw
www.scientistsinschool.ca 7
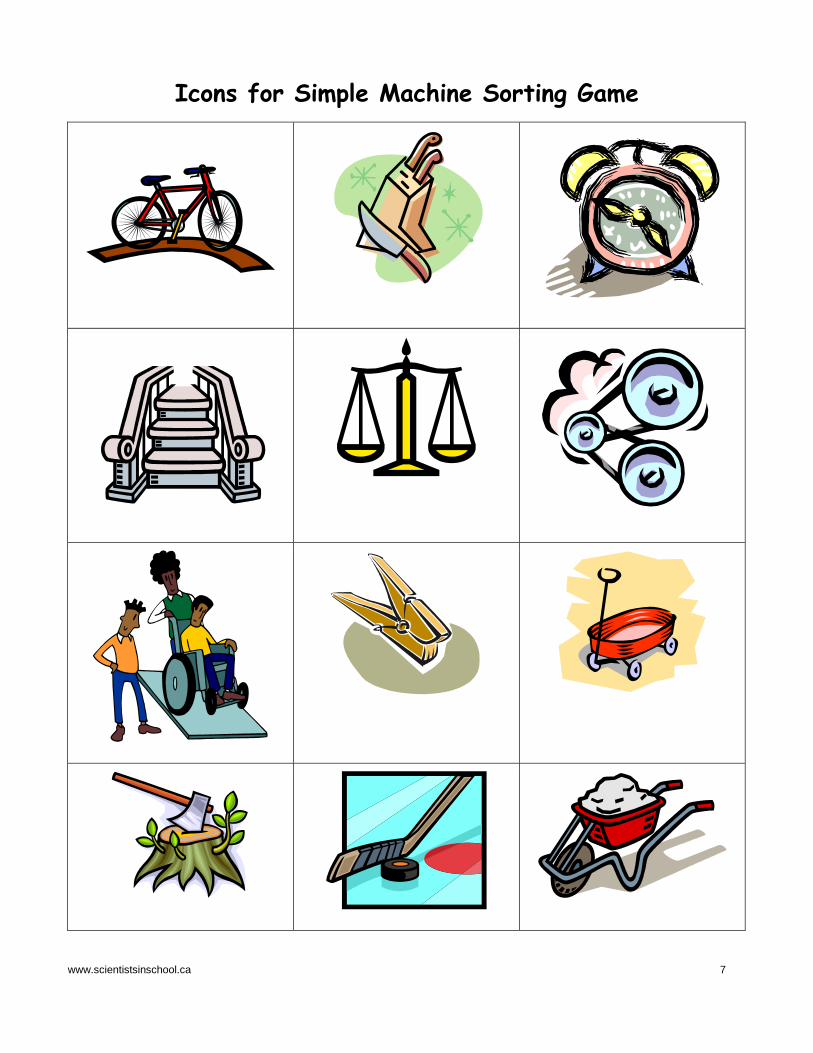
Icons for Simple Machine Sorting Game
www.scientistsinschool.ca 8
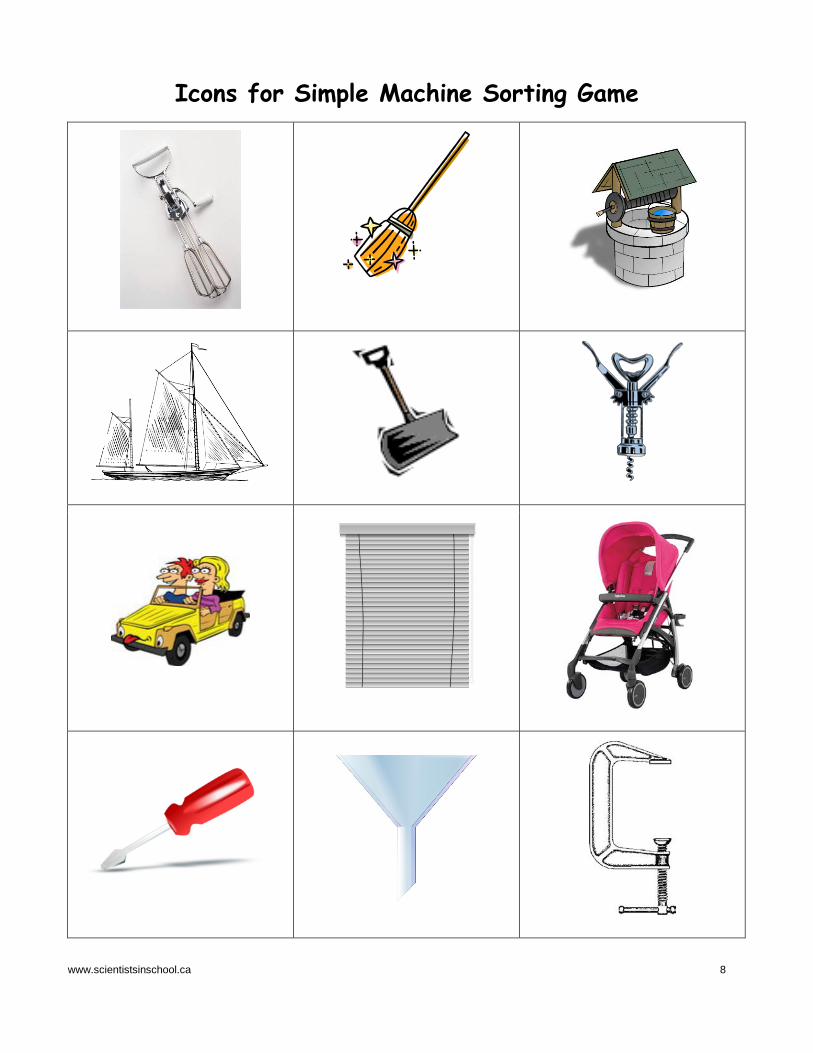
Icons for Simple Machine Sorting Game
www.scientistsinschool.ca 9
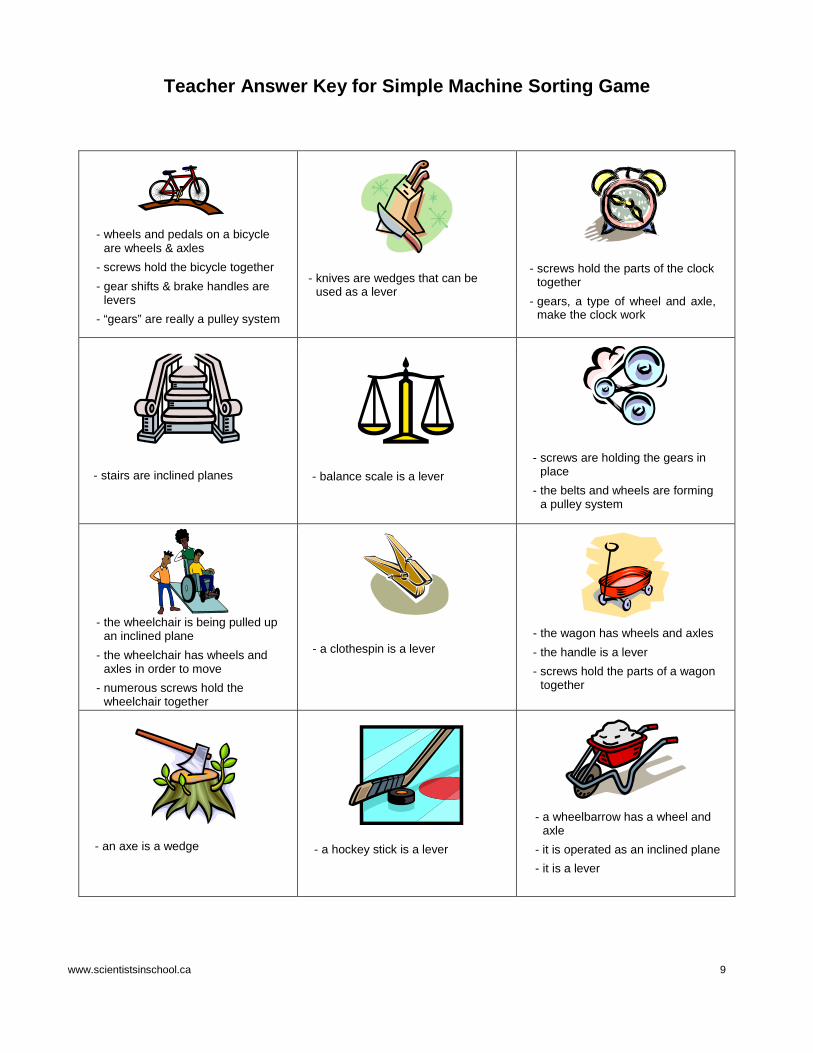
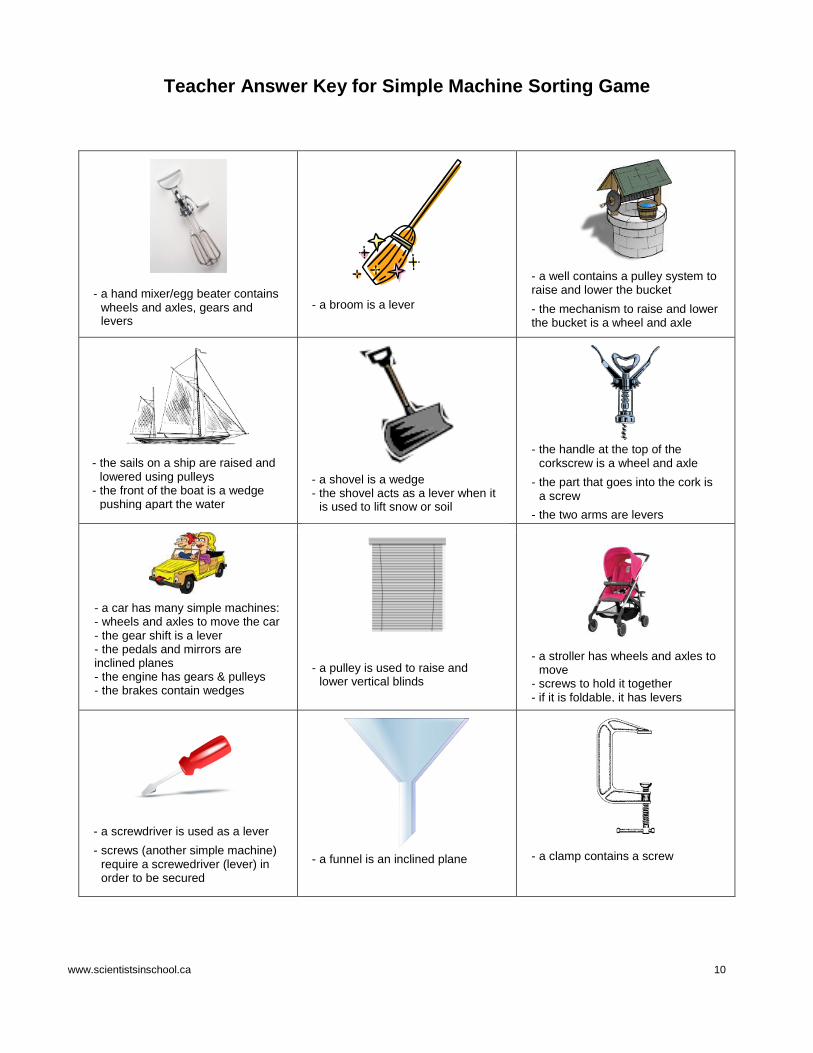
Teacher Answer Key for Simple Machine Sorting Game
- wheels and pedals on a bicycle are wheels & axles
- screws hold the bicycle together - gear shifts & brake handles are
levers - “gears” are really a pulley system
- knives are wedges that can be used as a lever
- screws hold the parts of the clock together
- gears, a type of wheel and axle, make the clock work
- screws are holding the gears in place
- the belts and wheels are forming a pulley system
- stairs are inclined planes - balance scale is a lever
- the wheelchair is being pulled up an inclined plane
- the wheelchair has wheels and axles in order to move
- numerous screws hold the wheelchair together
- a clothespin is a lever - the wagon has wheels and axles - the handle is a lever - screws hold the parts of a wagon
together
- an axe is a wedge - a hockey stick is a lever
- a wheelbarrow has a wheel and axle
- it is operated as an inclined plane - it is a lever
www.scientistsinschool.ca 10
Teacher Answer Key for Simple Machine Sorting Game
- a clamp contains a screw - a funnel is an inclined plane
- a screwdriver is used as a lever - screws (another simple machine)
require a screwedriver (lever) in order to be secured
- a stroller has wheels and axles to move
- screws to hold it together - if it is foldable, it has levers
- a pulley is used to raise and lower vertical blinds
- a car has many simple machines: - wheels and axles to move the car - the gear shift is a lever - the pedals and mirrors are inclined planes - the engine has gears & pulleys - the brakes contain wedges
- a shovel is a wedge - the shovel acts as a lever when it
is used to lift snow or soil
- the sails on a ship are raised and lowered using pulleys
- the front of the boat is a wedge pushing apart the water
- the handle at the top of the corkscrew is a wheel and axle
- the part that goes into the cork is a screw
- the two arms are levers
- a well contains a pulley system to raise and lower the bucket - the mechanism to raise and lower the bucket is a wheel and axle
- a broom is a lever - a hand mixer/egg beater contains
wheels and axles, gears and levers
www.scientistsinschool.ca 11
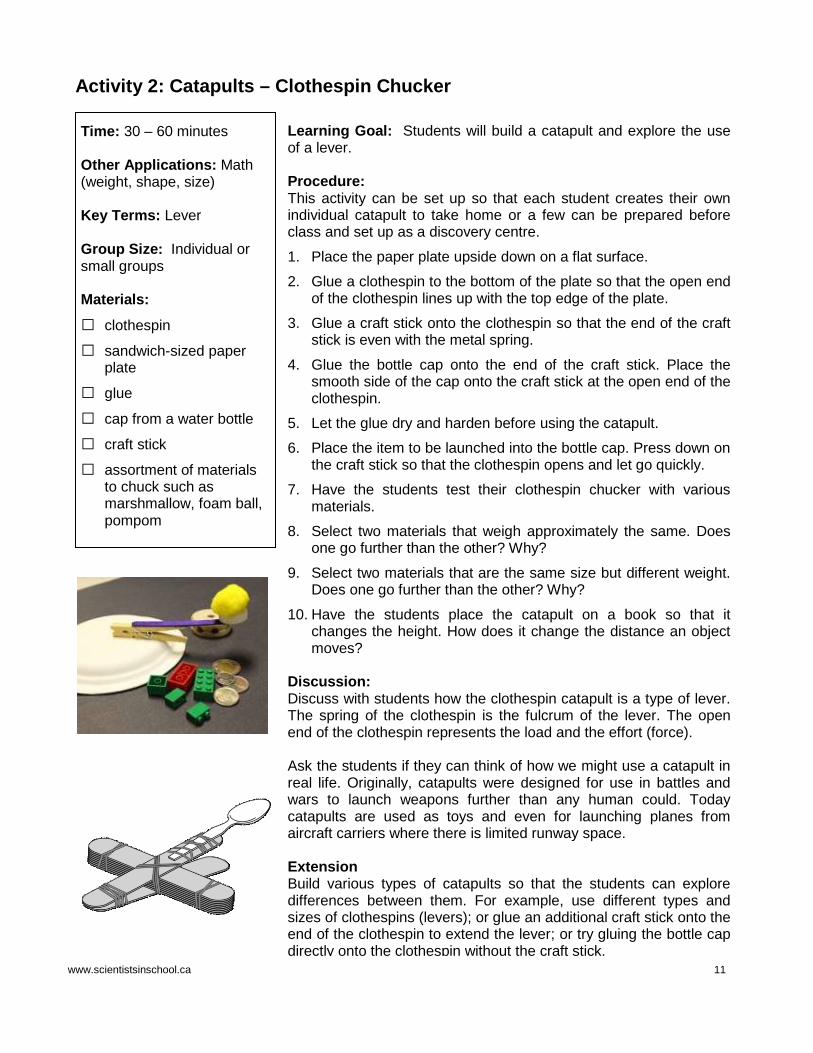
Activity 2: Catapults – Clothespin Chucker
Time: 30 – 60 minutes Other Applications: Math (weight, shape, size) Key Terms: Lever Group Size: Individual or small groups Materials: □ clothespin
□ sandwich-sized paper plate
□ glue
□ cap from a water bottle
□ craft stick
□ assortment of materials to chuck such as marshmallow, foam ball, pompom
Learning Goal: Students will build a catapult and explore the use of a lever. Procedure: This activity can be set up so that each student creates their own individual catapult to take home or a few can be prepared before class and set up as a discovery centre. 1. Place the paper plate upside down on a flat surface. 2. Glue a clothespin to the bottom of the plate so that the open end
of the clothespin lines up with the top edge of the plate. 3. Glue a craft stick onto the clothespin so that the end of the craft
stick is even with the metal spring. 4. Glue the bottle cap onto the end of the craft stick. Place the
smooth side of the cap onto the craft stick at the open end of the clothespin.
5. Let the glue dry and harden before using the catapult. 6. Place the item to be launched into the bottle cap. Press down on
the craft stick so that the clothespin opens and let go quickly. 7. Have the students test their clothespin chucker with various
materials. 8. Select two materials that weigh approximately the same. Does
one go further than the other? Why? 9. Select two materials that are the same size but different weight.
Does one go further than the other? Why? 10. Have the students place the catapult on a book so that it
changes the height. How does it change the distance an object moves?
Discussion: Discuss with students how the clothespin catapult is a type of lever. The spring of the clothespin is the fulcrum of the lever. The open end of the clothespin represents the load and the effort (force). Ask the students if they can think of how we might use a catapult in real life. Originally, catapults were designed for use in battles and wars to launch weapons further than any human could. Today catapults are used as toys and even for launching planes from aircraft carriers where there is limited runway space. Extension Build various types of catapults so that the students can explore differences between them. For example, use different types and sizes of clothespins (levers); or glue an additional craft stick onto the end of the clothespin to extend the lever; or try gluing the bottle cap directly onto the clothespin without the craft stick.
www.scientistsinschool.ca 12
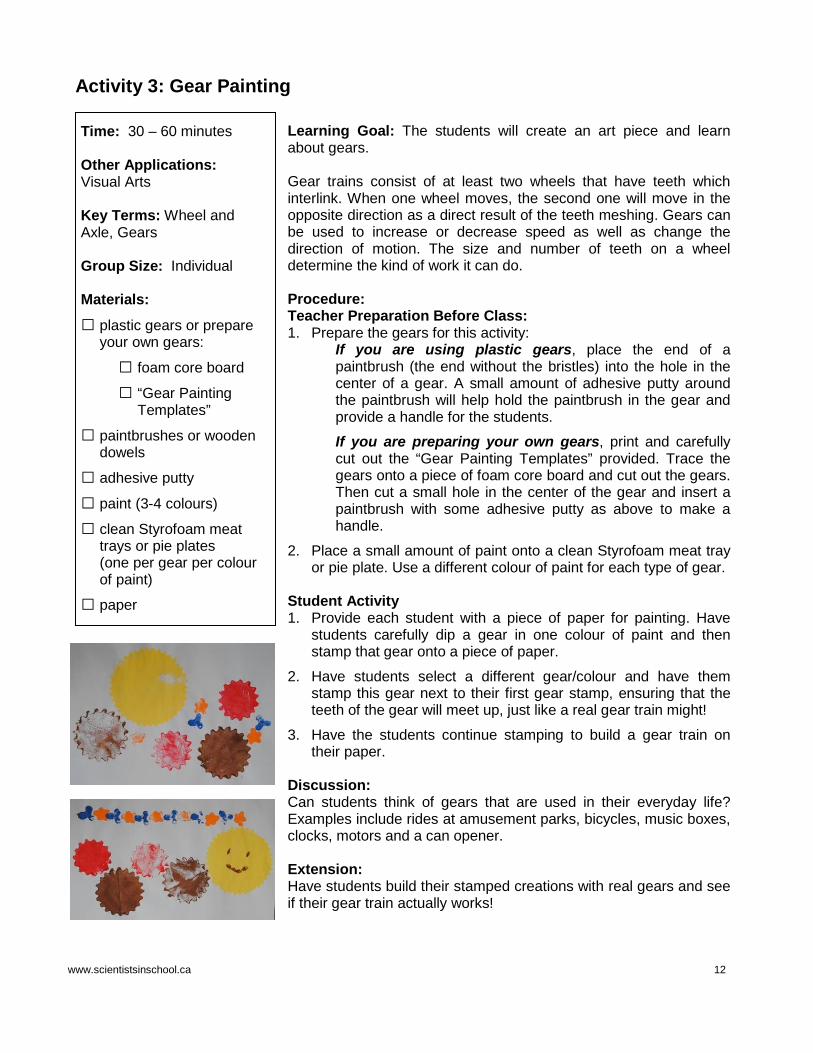
Activity 3: Gear Painting
Time: 30 – 60 minutes Other Applications: Visual Arts Key Terms: Wheel and Axle, Gears Group Size: Individual Materials: □ plastic gears or prepare
your own gears:
□ foam core board
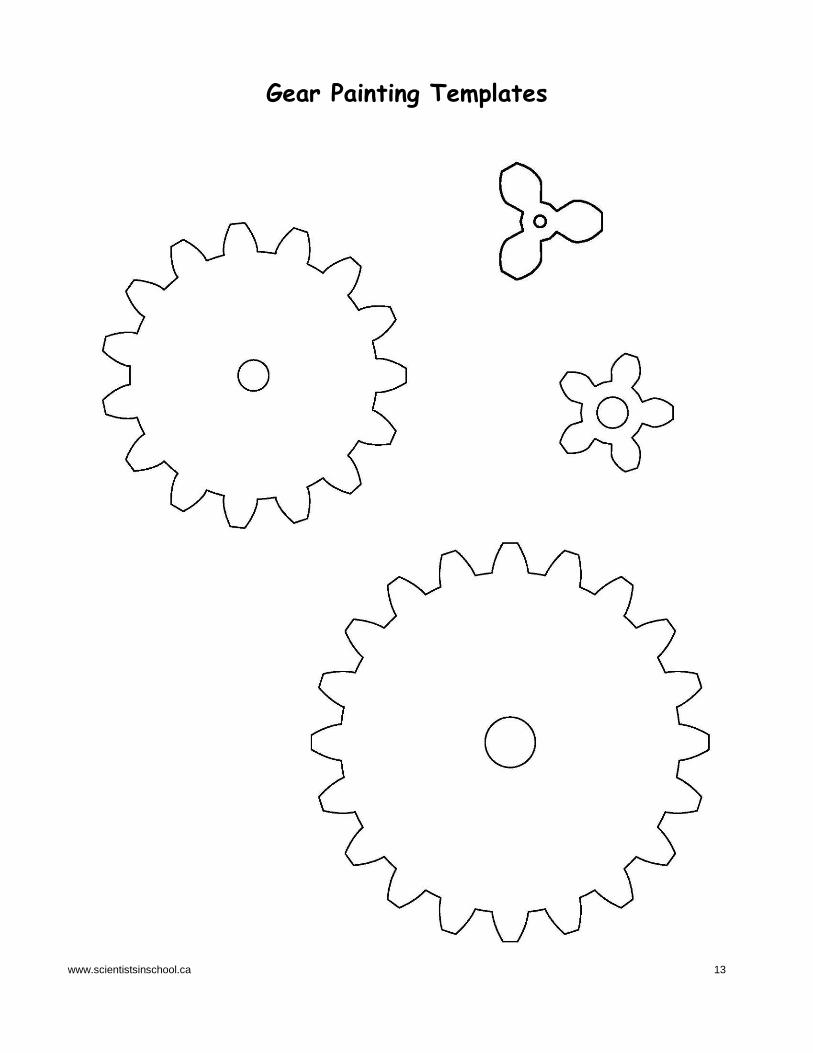
□ “Gear Painting Templates”
□ paintbrushes or wooden dowels
□ adhesive putty
□ paint (3-4 colours)
□ clean Styrofoam meat trays or pie plates (one per gear per colour of paint)
□ paper
Learning Goal: The students will create an art piece and learn about gears. Gear trains consist of at least two wheels that have teeth which interlink. When one wheel moves, the second one will move in the opposite direction as a direct result of the teeth meshing. Gears can be used to increase or decrease speed as well as change the direction of motion. The size and number of teeth on a wheel determine the kind of work it can do. Procedure: Teacher Preparation Before Class: 1. Prepare the gears for this activity:
If you are using plastic gears, place the end of a paintbrush (the end without the bristles) into the hole in the center of a gear. A small amount of adhesive putty around the paintbrush will help hold the paintbrush in the gear and provide a handle for the students. If you are preparing your own gears, print and carefully cut out the “Gear Painting Templates” provided. Trace the gears onto a piece of foam core board and cut out the gears. Then cut a small hole in the center of the gear and insert a paintbrush with some adhesive putty as above to make a handle.
2. Place a small amount of paint onto a clean Styrofoam meat tray or pie plate. Use a different colour of paint for each type of gear.
Student Activity 1. Provide each student with a piece of paper for painting. Have
students carefully dip a gear in one colour of paint and then stamp that gear onto a piece of paper.
2. Have students select a different gear/colour and have them stamp this gear next to their first gear stamp, ensuring that the teeth of the gear will meet up, just like a real gear train might!
3. Have the students continue stamping to build a gear train on their paper.
Discussion: Can students think of gears that are used in their everyday life? Examples include rides at amusement parks, bicycles, music boxes, clocks, motors and a can opener. Extension: Have students build their stamped creations with real gears and see if their gear train actually works!
www.scientistsinschool.ca 13
Gear Painting Templates
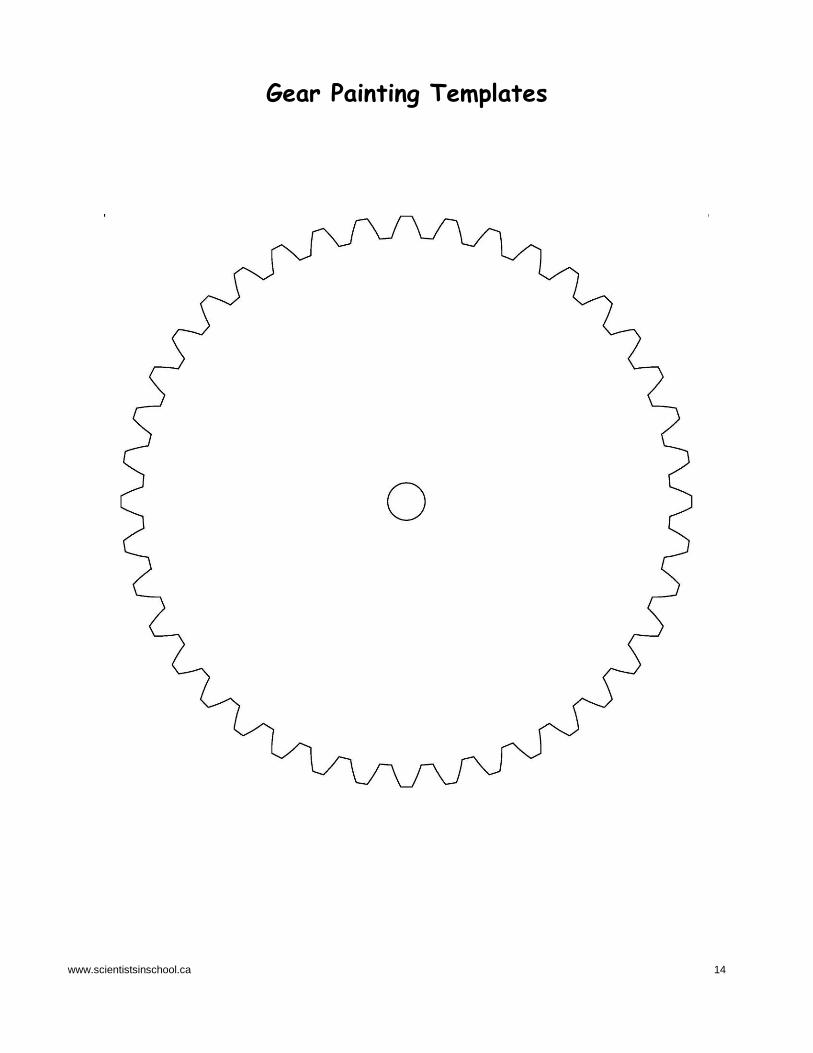
www.scientistsinschool.ca 14
Gear Painting Templates
www.scientistsinschool.ca 15
Activity 4: Jumping Jack
Time: 30 – 60 minutes Other Applications: Art Key Terms: Lever Group Size: Individual Materials: □ “Jumping Jack
Templates”
□ 3 colours of cardstock
□ scissors
□ hole punch
□ brass fasteners (5 per student)
□ assorted decorating materials (e.g. construction paper shapes, crayons, eyes, hair, pompoms, glitter glue etc.)
□ glue
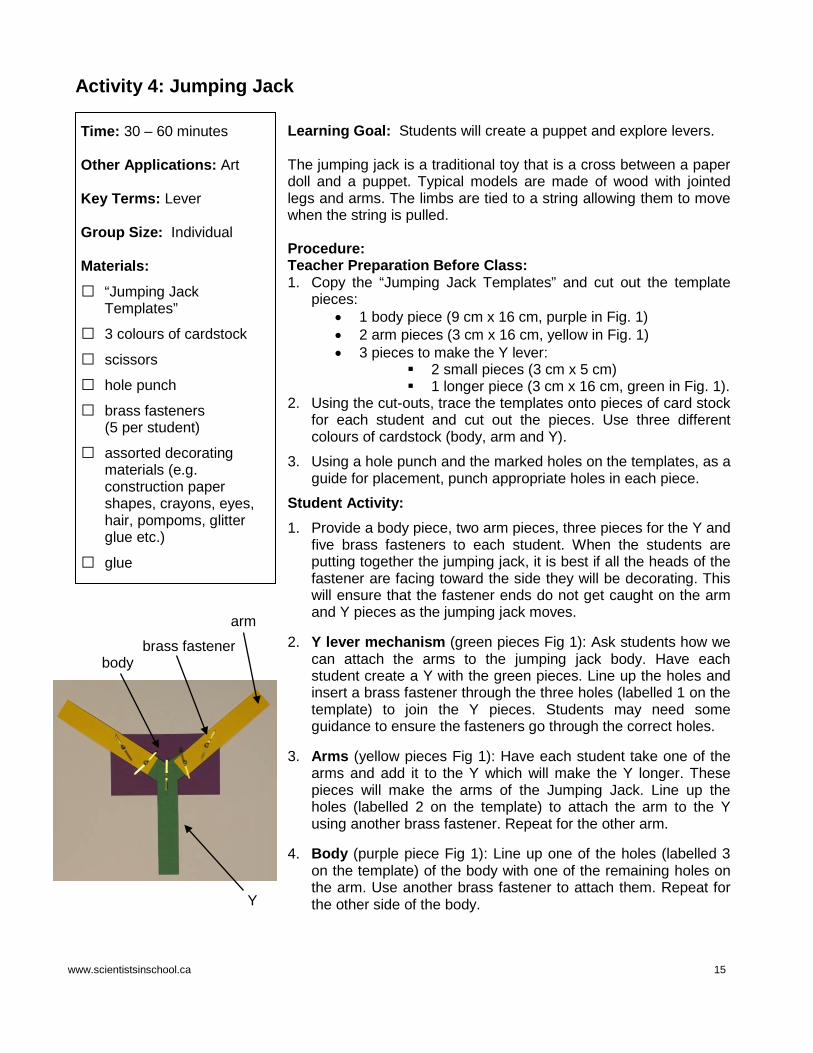
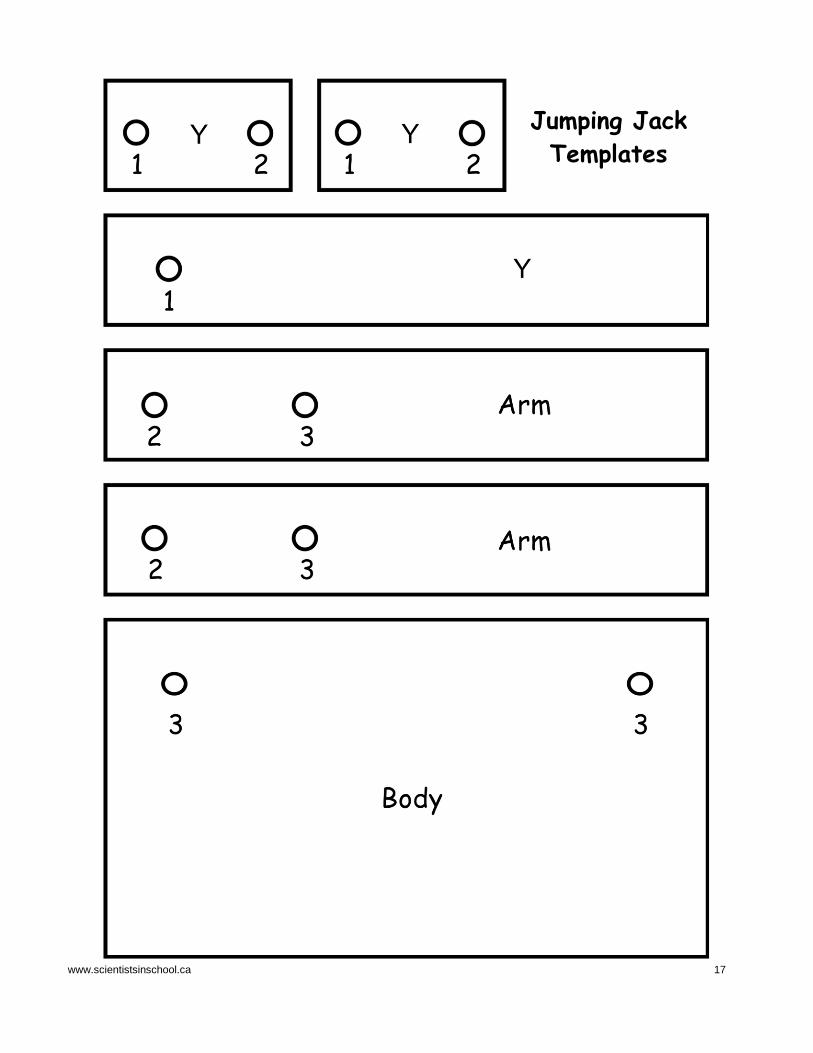
Learning Goal: Students will create a puppet and explore levers. The jumping jack is a traditional toy that is a cross between a paper doll and a puppet. Typical models are made of wood with jointed legs and arms. The limbs are tied to a string allowing them to move when the string is pulled. Procedure: Teacher Preparation Before Class: 1. Copy the “Jumping Jack Templates” and cut out the template
pieces: • 1 body piece (9 cm x 16 cm, purple in Fig. 1) • 2 arm pieces (3 cm x 16 cm, yellow in Fig. 1) • 3 pieces to make the Y lever:
2 small pieces (3 cm x 5 cm) 1 longer piece (3 cm x 16 cm, green in Fig. 1).
2. Using the cut-outs, trace the templates onto pieces of card stock for each student and cut out the pieces. Use three different colours of cardstock (body, arm and Y).
3. Using a hole punch and the marked holes on the templates, as a guide for placement, punch appropriate holes in each piece.
Student Activity: 1. Provide a body piece, two arm pieces, three pieces for the Y and
five brass fasteners to each student. When the students are putting together the jumping jack, it is best if all the heads of the fastener are facing toward the side they will be decorating. This will ensure that the fastener ends do not get caught on the arm and Y pieces as the jumping jack moves.
2. Y lever mechanism (green pieces Fig 1): Ask students how we can attach the arms to the jumping jack body. Have each student create a Y with the green pieces. Line up the holes and insert a brass fastener through the three holes (labelled 1 on the template) to join the Y pieces. Students may need some guidance to ensure the fasteners go through the correct holes.
3. Arms (yellow pieces Fig 1): Have each student take one of the arms and add it to the Y which will make the Y longer. These pieces will make the arms of the Jumping Jack. Line up the holes (labelled 2 on the template) to attach the arm to the Y using another brass fastener. Repeat for the other arm.
4. Body (purple piece Fig 1): Line up one of the holes (labelled 3 on the template) of the body with one of the remaining holes on the arm. Use another brass fastener to attach them. Repeat for the other side of the body.
body
arm brass fastener
Y
www.scientistsinschool.ca 16
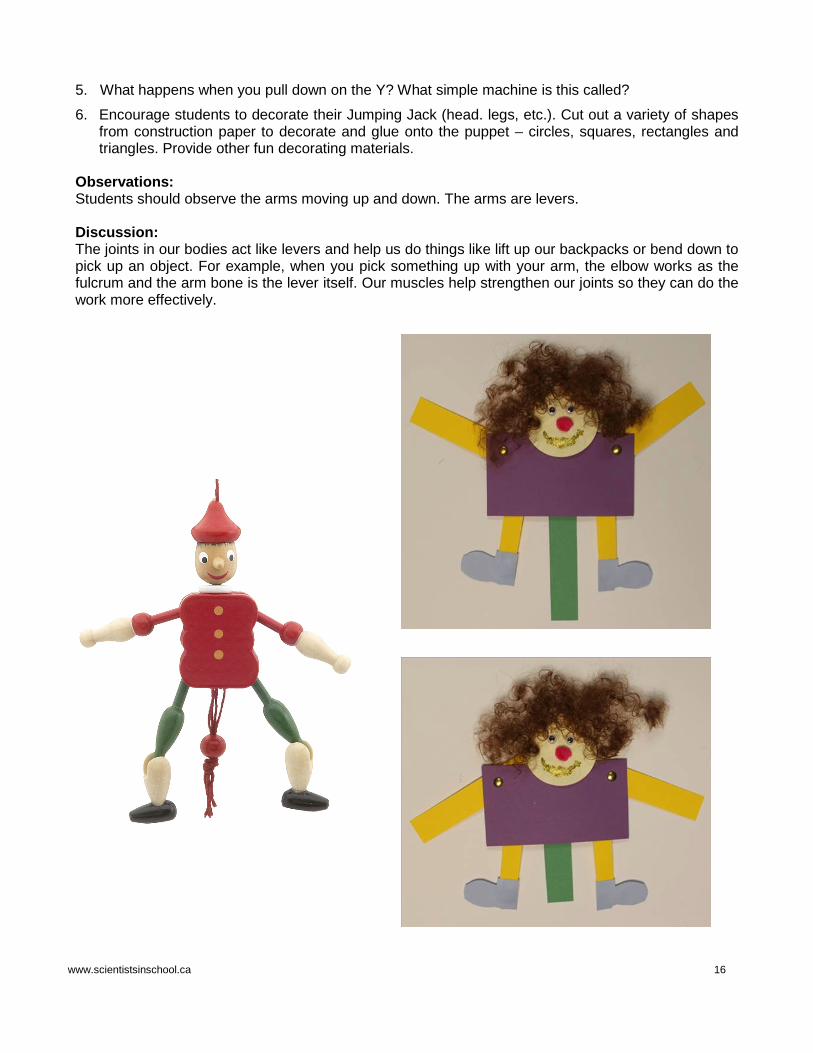
5. What happens when you pull down on the Y? What simple machine is this called? 6. Encourage students to decorate their Jumping Jack (head. legs, etc.). Cut out a variety of shapes
from construction paper to decorate and glue onto the puppet – circles, squares, rectangles and triangles. Provide other fun decorating materials.
Observations: Students should observe the arms moving up and down. The arms are levers. Discussion: The joints in our bodies act like levers and help us do things like lift up our backpacks or bend down to pick up an object. For example, when you pick something up with your arm, the elbow works as the fulcrum and the arm bone is the lever itself. Our muscles help strengthen our joints so they can do the work more effectively.
www.scientistsinschool.ca 17
Jumping Jack
Templates
www.scientistsinschool.ca 18
Activity 5: Inventor’s Workshop
Time: Multiple days/1 hour Group Size: Small groups Materials: First Stage:
□ Styrofoam insulation
□ cardboard tubes (paper towel & toilet paper rolls)
□ spoons
□ empty paint can and opener
□ blocks, marbles or small balls
Second Stage: □ skewers
□ bottlecaps (with holes punched in centre)
□ spools or bobbins
□ yarn/string
□ cups (apple sauce, yogurt)
□ cereal boxes and/or other small boxes
□ rolling pin Third Stage: □ hammer & nails
□ butter knife
□ nuts/bolts
□ screws & screwdriver
Learning Goal: Students will learn how to use and build with simple machines as well as create a compound machine. Procedure: The “Inventor’s Workshop” is intended to be set up for an extended period and added to as appropriate. It is an open-ended workspace for students to experiment, play and build with simple machines. First Stage: 1. Create an “Inventor’s Workshop” area in the classroom that
can be visited on a regular basis by students. Provide a variety of materials, as listed under first stage materials, which will introduce inclined planes and levers.
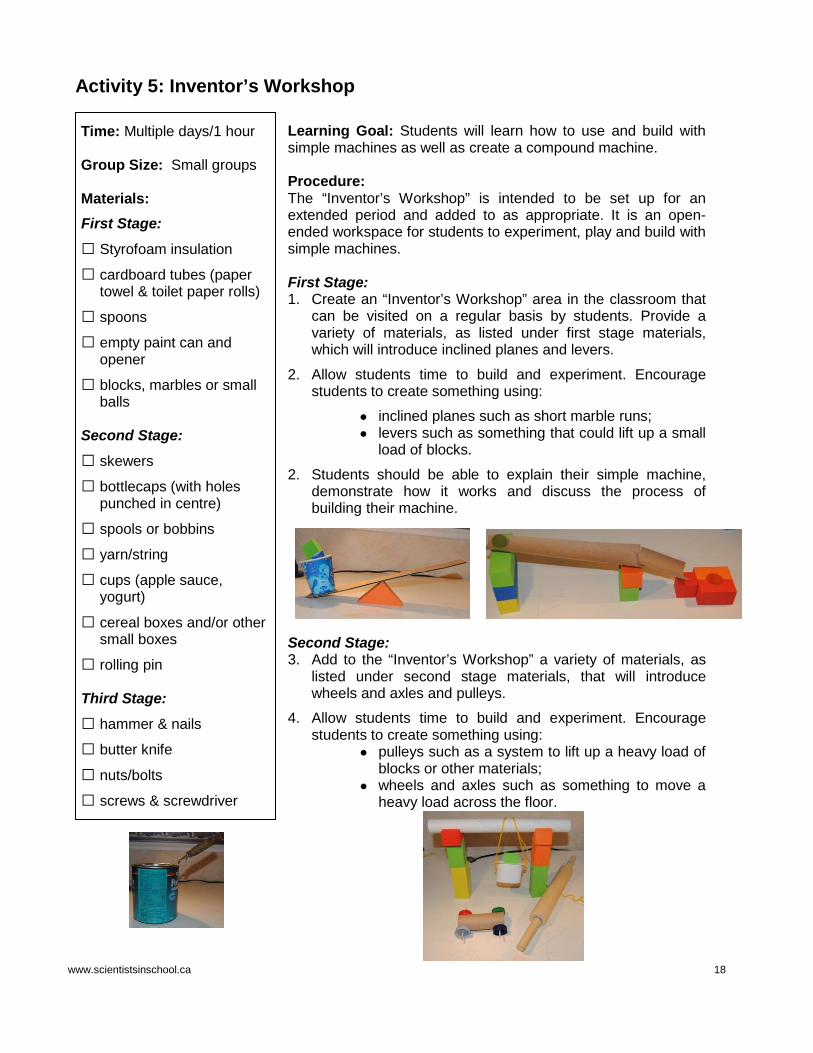
2. Allow students time to build and experiment. Encourage students to create something using:
● inclined planes such as short marble runs; ● levers such as something that could lift up a small
load of blocks. 2. Students should be able to explain their simple machine,
demonstrate how it works and discuss the process of building their machine.
Second Stage: 3. Add to the “Inventor’s Workshop” a variety of materials, as
listed under second stage materials, that will introduce wheels and axles and pulleys.
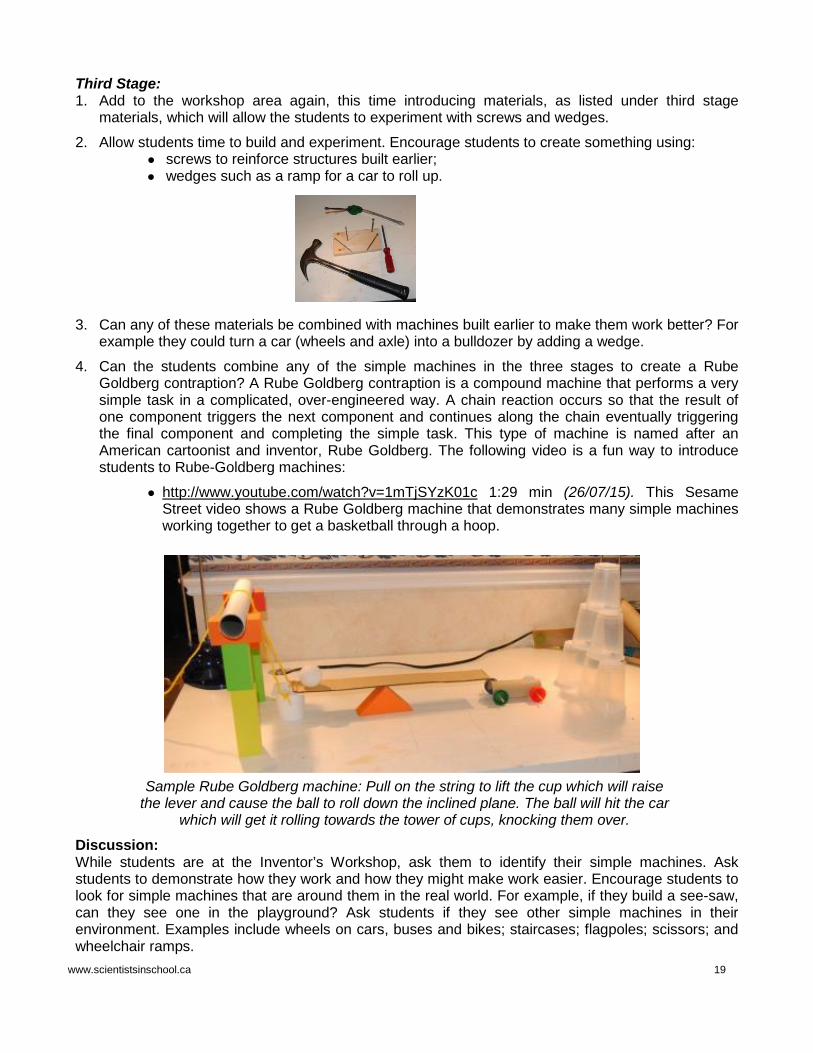
4. Allow students time to build and experiment. Encourage students to create something using:
● pulleys such as a system to lift up a heavy load of blocks or other materials;
● wheels and axles such as something to move a heavy load across the floor.
www.scientistsinschool.ca 19
Third Stage: 1. Add to the workshop area again, this time introducing materials, as listed under third stage
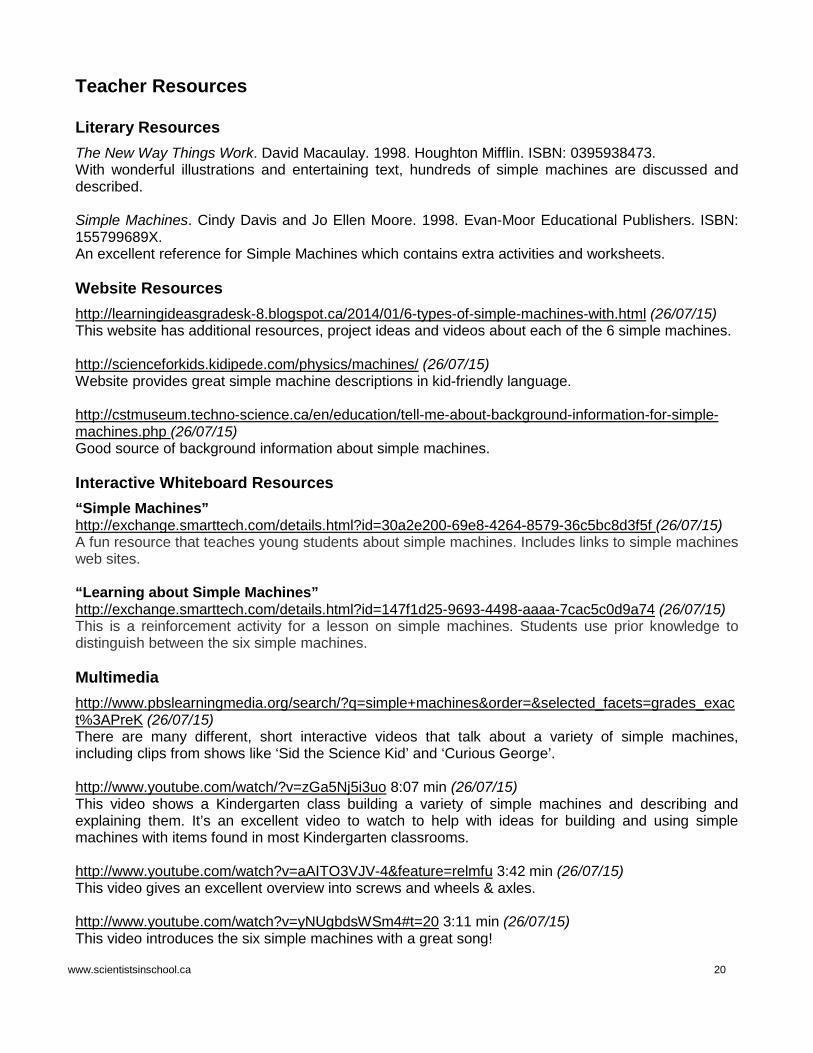
materials, which will allow the students to experiment with screws and wedges. 2. Allow students time to build and experiment. Encourage students to create something using:
● screws to reinforce structures built earlier; ● wedges such as a ramp for a car to roll up.
3. Can any of these materials be combined with machines built earlier to make them work better? For example they could turn a car (wheels and axle) into a bulldozer by adding a wedge.
4. Can the students combine any of the simple machines in the three stages to create a Rube Goldberg contraption? A Rube Goldberg contraption is a compound machine that performs a very simple task in a complicated, over-engineered way. A chain reaction occurs so that the result of one component triggers the next component and continues along the chain eventually triggering the final component and completing the simple task. This type of machine is named after an American cartoonist and inventor, Rube Goldberg. The following video is a fun way to introduce students to Rube-Goldberg machines:
● http://www.youtube.com/watch?v=1mTjSYzK01c 1:29 min (26/07/15). This Sesame Street video shows a Rube Goldberg machine that demonstrates many simple machines working together to get a basketball through a hoop.
Discussion: While students are at the Inventor’s Workshop, ask them to identify their simple machines. Ask students to demonstrate how they work and how they might make work easier. Encourage students to look for simple machines that are around them in the real world. For example, if they build a see-saw, can they see one in the playground? Ask students if they see other simple machines in their environment. Examples include wheels on cars, buses and bikes; staircases; flagpoles; scissors; and wheelchair ramps.
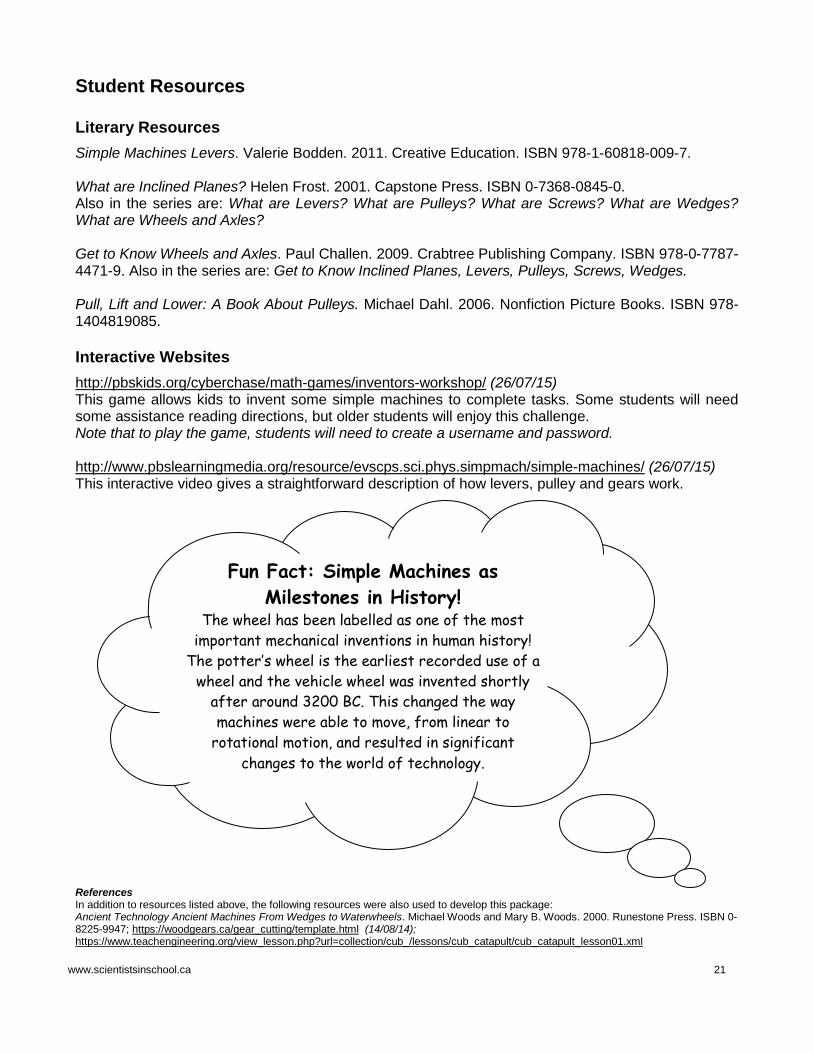
Sample Rube Goldberg machine: Pull on the string to lift the cup which will raise the lever and cause the ball to roll down the inclined plane. The ball will hit the car
which will get it rolling towards the tower of cups, knocking them over.
www.scientistsinschool.ca 20
Teacher Resources Literary Resources The New Way Things Work. David Macaulay. 1998. Houghton Mifflin. ISBN: 0395938473. With wonderful illustrations and entertaining text, hundreds of simple machines are discussed and described. Simple Machines. Cindy Davis and Jo Ellen Moore. 1998. Evan-Moor Educational Publishers. ISBN: 155799689X. An excellent reference for Simple Machines which contains extra activities and worksheets. Website Resources http://learningideasgradesk-8.blogspot.ca/2014/01/6-types-of-simple-machines-with.html (26/07/15) This website has additional resources, project ideas and videos about each of the 6 simple machines. http://scienceforkids.kidipede.com/physics/machines/ (26/07/15) Website provides great simple machine descriptions in kid-friendly language. http://cstmuseum.techno-science.ca/en/education/tell-me-about-background-information-for-simple-machines.php (26/07/15) Good source of background information about simple machines. Interactive Whiteboard Resources “Simple Machines” http://exchange.smarttech.com/details.html?id=30a2e200-69e8-4264-8579-36c5bc8d3f5f (26/07/15) A fun resource that teaches young students about simple machines. Includes links to simple machines web sites. “Learning about Simple Machines” http://exchange.smarttech.com/details.html?id=147f1d25-9693-4498-aaaa-7cac5c0d9a74 (26/07/15) This is a reinforcement activity for a lesson on simple machines. Students use prior knowledge to distinguish between the six simple machines. Multimedia http://www.pbslearningmedia.org/search/?q=simple+machines&order=&selected_facets=grades_exact%3APreK (26/07/15) There are many different, short interactive videos that talk about a variety of simple machines, including clips from shows like ‘Sid the Science Kid’ and ‘Curious George’. http://www.youtube.com/watch/?v=zGa5Nj5i3uo 8:07 min (26/07/15) This video shows a Kindergarten class building a variety of simple machines and describing and explaining them. It’s an excellent video to watch to help with ideas for building and using simple machines with items found in most Kindergarten classrooms. http://www.youtube.com/watch?v=aAITO3VJV-4&feature=relmfu 3:42 min (26/07/15) This video gives an excellent overview into screws and wheels & axles. http://www.youtube.com/watch?v=yNUgbdsWSm4#t=20 3:11 min (26/07/15) This video introduces the six simple machines with a great song!
http://www.pbslearningmedia.org/search/?q=simple+machines&order=&selected_facets=grades_exact%3APreK
www.scientistsinschool.ca 21
Student Resources Literary Resources Simple Machines Levers. Valerie Bodden. 2011. Creative Education. ISBN 978-1-60818-009-7. What are Inclined Planes? Helen Frost. 2001. Capstone Press. ISBN 0-7368-0845-0. Also in the series are: What are Levers? What are Pulleys? What are Screws? What are Wedges? What are Wheels and Axles? Get to Know Wheels and Axles. Paul Challen. 2009. Crabtree Publishing Company. ISBN 978-0-7787-4471-9. Also in the series are: Get to Know Inclined Planes, Levers, Pulleys, Screws, Wedges. Pull, Lift and Lower: A Book About Pulleys. Michael Dahl. 2006. Nonfiction Picture Books. ISBN 978-1404819085. Interactive Websites http://pbskids.org/cyberchase/math-games/inventors-workshop/ (26/07/15) This game allows kids to invent some simple machines to complete tasks. Some students will need some assistance reading directions, but older students will enjoy this challenge. Note that to play the game, students will need to create a username and password. http://www.pbslearningmedia.org/resource/evscps.sci.phys.simpmach/simple-machines/ (26/07/15) This interactive video gives a straightforward description of how levers, pulley and gears work.
References In addition to resources listed above, the following resources were also used to develop this package: Ancient Technology Ancient Machines From Wedges to Waterwheels. Michael Woods and Mary B. Woods. 2000. Runestone Press. ISBN 0-8225-9947; https://woodgears.ca/gear_cutting/template.html (14/08/14); https://www.teachengineering.org/view_lesson.php?url=collection/cub_/lessons/cub_catapult/cub_catapult_lesson01.xml
Fun Fact: Simple Machines as Milestones in History!
The wheel has been labelled as one of the most important mechanical inventions in human history!
The potter’s wheel is the earliest recorded use of a wheel and the vehicle wheel was invented shortly
after around 3200 BC. This changed the way machines were able to move, from linear to
rotational motion, and resulted in significant changes to the world of technology.
Get kids excited about science
Science Education Through Partnership Scientists in School is a leading science education charity that reaches more Kindergarten to Grade 8 youth than any other science non-profit in Canada – 670,000 in the 2016-17 school year. Through our hands-on, inquiry-based science, technology, engineering, math (STEM) and environmental classroom and community workshops, we strive to ignite scientific curiosity in children so that they question intelligently; learn through discovery; connect scientific knowledge to their world; get excited about science, technology, engineering and math; and have their interest in careers in those fields piqued. By making science a verb - something you do - our workshops allow children’s natural curiosity to reign, inspire kids to see themselves as scientists and engineers, and make connections between science and the world around them. This sets the stage for a scientifically-literate future generation who will fuel Canada’s economic prosperity and think critically about the scientific challenges facing our society. Scientists in School relies upon corporate, community, government and individual donors, as well as school board partners for support to develop new programs, continuously improve our existing programs, reach new geographic areas, provide complimentary workshops to less-privileged schools, and subsidize the cost of every one of our 24,800 annual classroom workshops.
Our Partners Catalyst Level:
Natural Sciences and Engineering Research Council (NSERC), TD Friends of the Environment Foundation, Toronto Pearson International Airport
Innovation Level:
Google Canada, John and Deborah Harris Family Foundation, Nuclear Waste Management Organization, RBC Foundation
Imagination Level:
Amgen Canada, Amgen Foundation, McMillan LLP, Ontario Power Generation Superior Glove Works Ltd., TELUS
Discovery Level:
Cameco, Celestica, Community Foundation of Ottawa, J.P. Bickell Foundation Isherwood Associates, MilliporeSigma, Purdue Pharma, Syngenta, Systematix Inc., The J.W. McConnell Family Foundation,
The Maurice Price Foundation, The McLean Foundation
Exploration Level: Ajax Community Fund at Durham Community Foundation, Consulting Engineers of Ontario, Huronia
Community Foundation Isherwood Associates, Lee Valley Tools, Meridian Credit Union, Rotary Club of Lethbridge, Siemens Milltronics Process Instruments,
The Optimist Club of Ajax, Veridian Connections, Whitby Mayor’s Community Development Fund
[email protected] – www.scientistsinschool.ca Scientists in School is a registered Canadian charity: #867139537RR0001


![GE 6152-ENGINEERING GRAPHICS · PROJECTION OFSTRAIGHTLINESAND PLANES[FIRSTANGLE] Projectionofstraightlines,situated infirstquadrantonly,inclined to bothhorizontaland vertical planes–](https://static.fdocuments.in/doc/165x107/600d027cf05f710b9a778984/ge-6152-engineering-graphics-projection-ofstraightlinesand-planesfirstangle-projectionofstraightlinessituated.jpg)
