Shower Tray - Timber Floors - Wetroom, Wetrooms, Shower ......
7
Shower Tray - Timber Floors Assembly information
-
Upload
phungthien -
Category
Documents
-
view
218 -
download
1
Transcript of Shower Tray - Timber Floors - Wetroom, Wetrooms, Shower ......

Shower Tray - Timber Floors
Assembly information

1
2a
3
45
6
7
89
2b
2c
Assembly informationJACKOBOARD Shower unit
System components Shower element
Drain as ordereda. Horizontal drain, 0.85 l/sb. Horizontal �at drainc. Vertical drain
Sealing washer Ferrule Thread screwsInsert ringTop piece with stainless steel rim (100 x 100 mm)Back pressure sealing washer (not required for this system)Stainless steel grid
Assembly information The JACKOBOARD shower unit consists of a �oor panel and a drainage system. Both components are coordinated with each other and form one unit. For the �oor panel, there are 3 di�erent drainage systems to choose from.
2
Planning the ProjectJACKOBOARD Shower Tray - Timber Floors
3
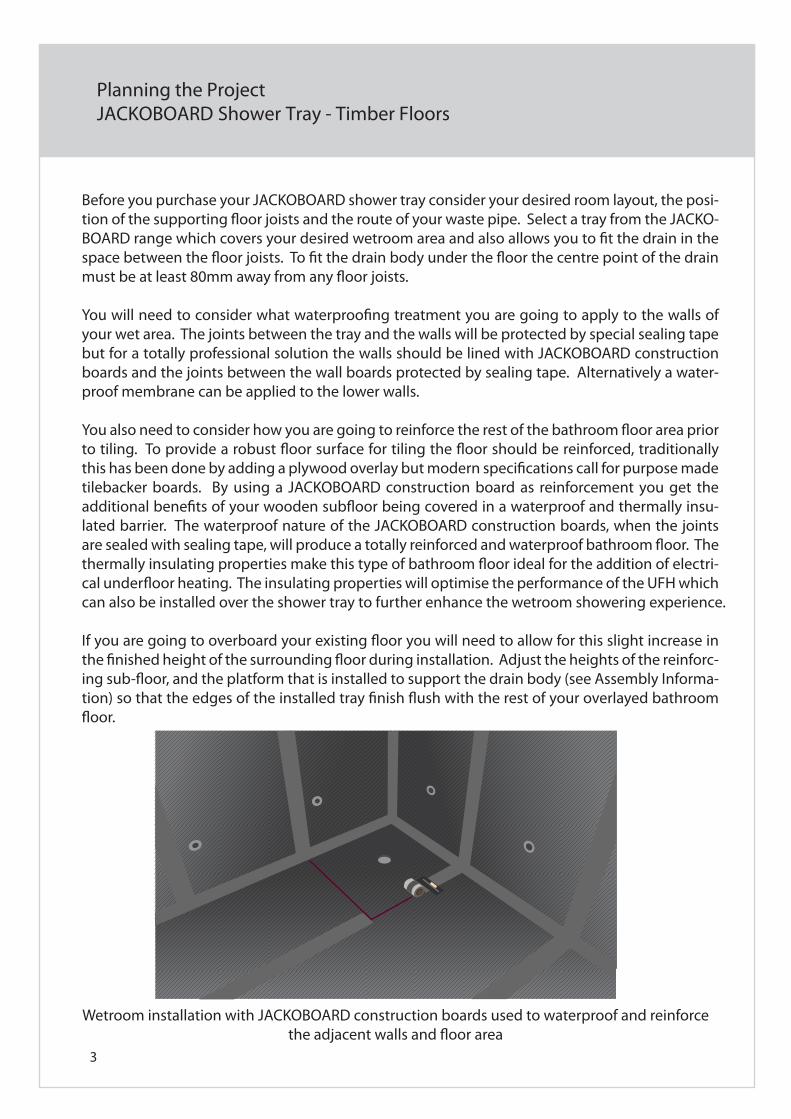
Before you purchase your JACKOBOARD shower tray consider your desired room layout, the posi-tion of the supporting �oor joists and the route of your waste pipe. Select a tray from the JACKO-BOARD range which covers your desired wetroom area and also allows you to �t the drain in the space between the �oor joists. To �t the drain body under the �oor the centre point of the drain must be at least 80mm away from any �oor joists.
You will need to consider what waterproo�ng treatment you are going to apply to the walls of your wet area. The joints between the tray and the walls will be protected by special sealing tape but for a totally professional solution the walls should be lined with JACKOBOARD construction boards and the joints between the wall boards protected by sealing tape. Alternatively a water-proof membrane can be applied to the lower walls.
You also need to consider how you are going to reinforce the rest of the bathroom �oor area prior to tiling. To provide a robust �oor surface for tiling the �oor should be reinforced, traditionally this has been done by adding a plywood overlay but modern speci�cations call for purpose made tilebacker boards. By using a JACKOBOARD construction board as reinforcement you get the additional bene�ts of your wooden sub�oor being covered in a waterproof and thermally insu-lated barrier. The waterproof nature of the JACKOBOARD construction boards, when the joints are sealed with sealing tape, will produce a totally reinforced and waterproof bathroom �oor. The thermally insulating properties make this type of bathroom �oor ideal for the addition of electri-cal under�oor heating. The insulating properties will optimise the performance of the UFH which can also be installed over the shower tray to further enhance the wetroom showering experience.
If you are going to overboard your existing �oor you will need to allow for this slight increase in the �nished height of the surrounding �oor during installation. Adjust the heights of the reinforc-ing sub-�oor, and the platform that is installed to support the drain body (see Assembly Informa-tion) so that the edges of the installed tray �nish �ush with the rest of your overlayed bathroom �oor.
Wetroom installation with JACKOBOARD construction boards used to waterproof and reinforce the adjacent walls and �oor area

Planning the Project & New Assembly InfomationJACKOBOARD Shower Tray - Timber Floors
4
Remove the �oorboards in the area where the shower tray is tobe �tted.
Construct a platform to support the waste at a depth of 80mm below the bottom surface of the tray. If you are not adding an over-lay to the rest of your bathroom �oor the top of this platform will be 80mm below the top of the �oor joists. If you are adding an overlay reduce this dimension accordingly.
Connect the waste to your waste pipe. The supplied waste accom-modates a DN 50mm compression �tting but adaptors are included to connect this waste to 2” or 1½” waste pipes by solvent weld. Lay the tray over the drain to ensure that they are correctly aligned. Ensure that all joints are watertight as it will not be possi-ble to return to them once the tray has been installed.
Construct a sub-�oor between the joists by �xing battens to the sides of the �oor joists and �lling the spaces between the joists with plywood, nominally 18mm thick. As above, if you are not adding an overlay to the rest of your bathroom �oor the top of this sub-�oor will be �ush with the top of the �oor joists.
If you are adding an overlay raise up the sub-�oor so that the edges of the installed tray �nish �ush with the rest of your overlayed bathroom �oor. The battens and sub-�oor must be securely screwed to the �oor joists to create a rigid structure.
The sub-�oor section where the waste is to be �tted needs a 160mm diameter clearance hole cut out for the waste. Check to make sure the shower tray and waste are correctly aligned and adjust as necessary.

Assembly informationJACKOBOARD Shower unit
The sealing washer is inserted into the shower unit. Here, the thin sealing lip lies over the plastic �ange and the thick sealing lip under the �ange.
An appropriate adhesive (e.g. rapid set, �exible tiling adhesive) is
applied all over the underside of the shower unit using a notched trowel.
The JACKOBOARD shower unit is inserted into the �oor opening so that the sealing washer lies centrally on the drain.
5

Assembly informationJACKOBOARD Shower unit
All joints should be sealed using anappropriate waterproo�ng systemof tapes and sealing compound.
The drain is then �rmly screwed to the shower unit using the ferrule and the 3 threaded screws.The edges of the tray should bechecked with a spirit level.
For better adhesion, the JACKO-BOARD shower unit should then be evenly weighted.
The insert ring is inserted into the shower panel.
6
Assembly informationJACKOBOARD Shower unit
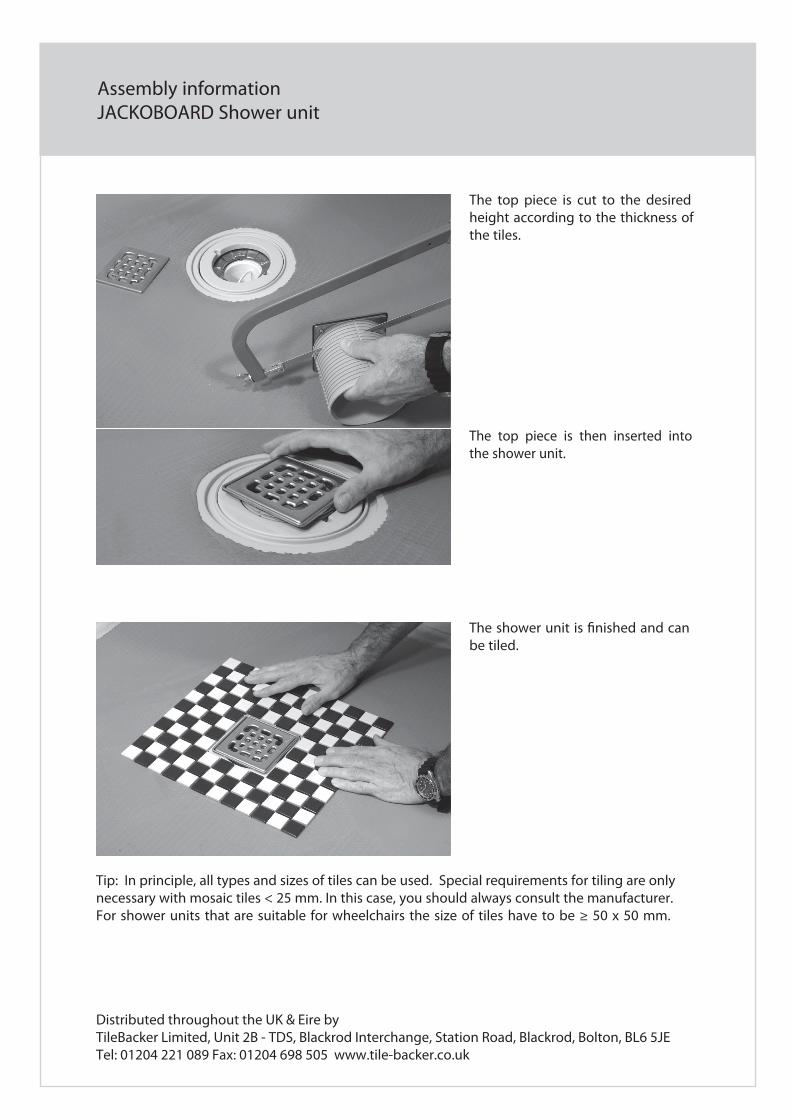
The shower unit is �nished and can be tiled.
The top piece is cut to the desired height according to the thickness of the tiles.
The top piece is then inserted into the shower unit.
Tip: In principle, all types and sizes of tiles can be used. Special requirements for tiling are only necessary with mosaic tiles < 25 mm. In this case, you should always consult the manufacturer. For shower units that are suitable for wheelchairs the size of tiles have to be ≥ 50 x 50 mm.
Distributed throughout the UK & Eire byTileBacker Limited, Unit 2B - TDS, Blackrod Interchange, Station Road, Blackrod, Bolton, BL6 5JETel: 01204 221 089 Fax: 01204 698 505 www.tile-backer.co.uk