Shadow Mapping with Today’s OpenGL Hardware
104
Shadow Mapping Shadow Mapping with Today’s OpenGL with Today’s OpenGL Hardware Hardware Mark J. Kilgard Mark J. Kilgard NVIDIA Corporation NVIDIA Corporation SIGGRAPH 2002 Course 31: Interactive Geometric Computations Using Graphics Hardware
-
Upload
kyra-rogers -
Category
Documents
-
view
40 -
download
2
description
SIGGRAPH 2002 Course 31: Interactive Geometric Computations Using Graphics Hardware. Shadow Mapping with Today’s OpenGL Hardware. Mark J. Kilgard NVIDIA Corporation. Problems with Common Shadow Techniques. Various limitations Projected planar shadows Well works only on flat surfaces - PowerPoint PPT Presentation
Transcript of Shadow Mapping with Today’s OpenGL Hardware
Shadow MappingShadow Mappingwith Today’s OpenGL with Today’s OpenGL
HardwareHardware
Shadow MappingShadow Mappingwith Today’s OpenGL with Today’s OpenGL
HardwareHardware
Mark J. KilgardMark J. Kilgard
NVIDIA CorporationNVIDIA CorporationMark J. KilgardMark J. Kilgard
NVIDIA CorporationNVIDIA Corporation
SIGGRAPH 2002 Course 31: Interactive Geometric Computations Using Graphics Hardware
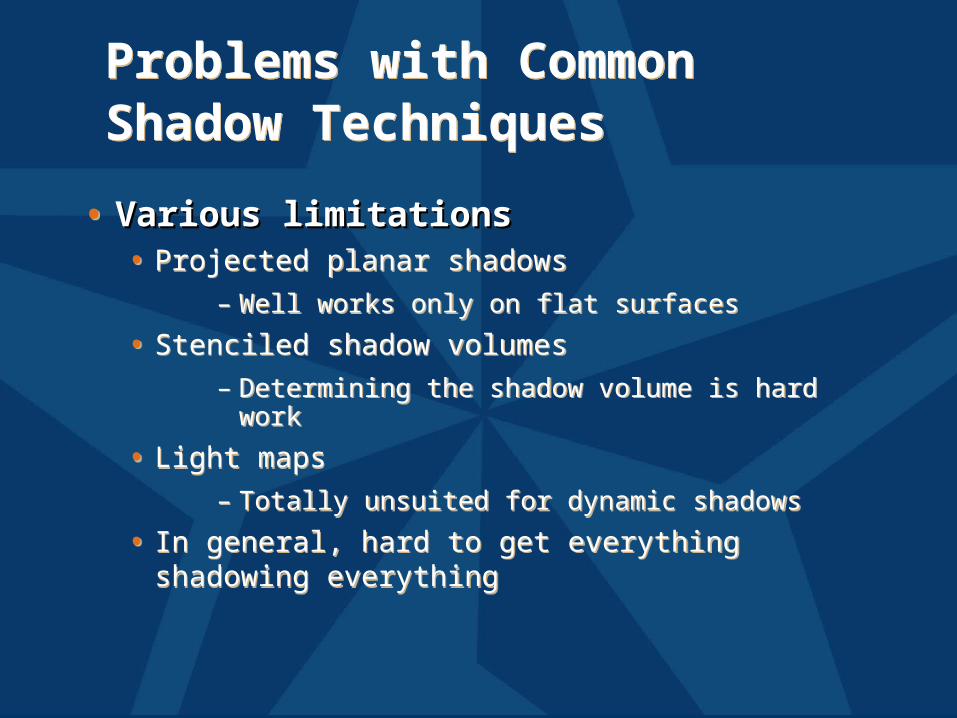
Problems with CommonShadow TechniquesProblems with CommonShadow Techniques
• Various limitationsVarious limitations• Projected planar shadows
– Well works only on flat surfaces
• Stenciled shadow volumes– Determining the shadow volume is hard work
• Light maps– Totally unsuited for dynamic shadows
• In general, hard to get everything shadowing everything
• Various limitationsVarious limitations• Projected planar shadows
– Well works only on flat surfaces
• Stenciled shadow volumes– Determining the shadow volume is hard work
• Light maps– Totally unsuited for dynamic shadows
• In general, hard to get everything shadowing everything
Another Technique:Shadow MappingAnother Technique:Shadow Mapping
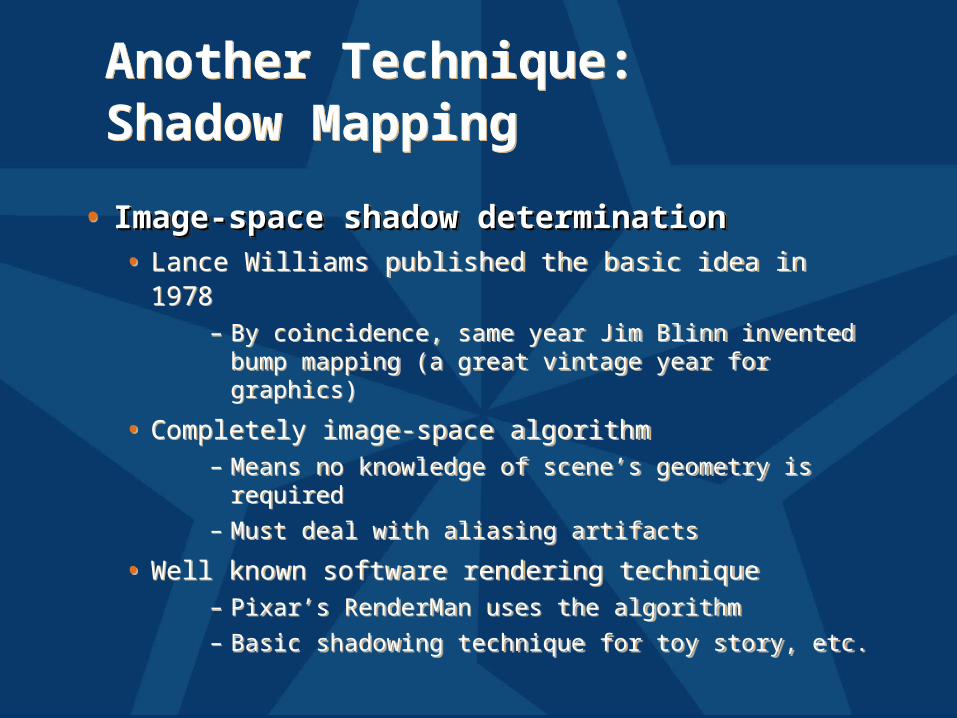
• Image-space shadow determinationImage-space shadow determination• Lance Williams published the basic idea in 1978
– By coincidence, same year Jim Blinn invented bump mapping (a great vintage year for graphics)
• Completely image-space algorithm– Means no knowledge of scene’s geometry is
required– Must deal with aliasing artifacts
• Well known software rendering technique– Pixar’s RenderMan uses the algorithm– Basic shadowing technique for toy story, etc.
Shadow MappingReferencesShadow MappingReferences
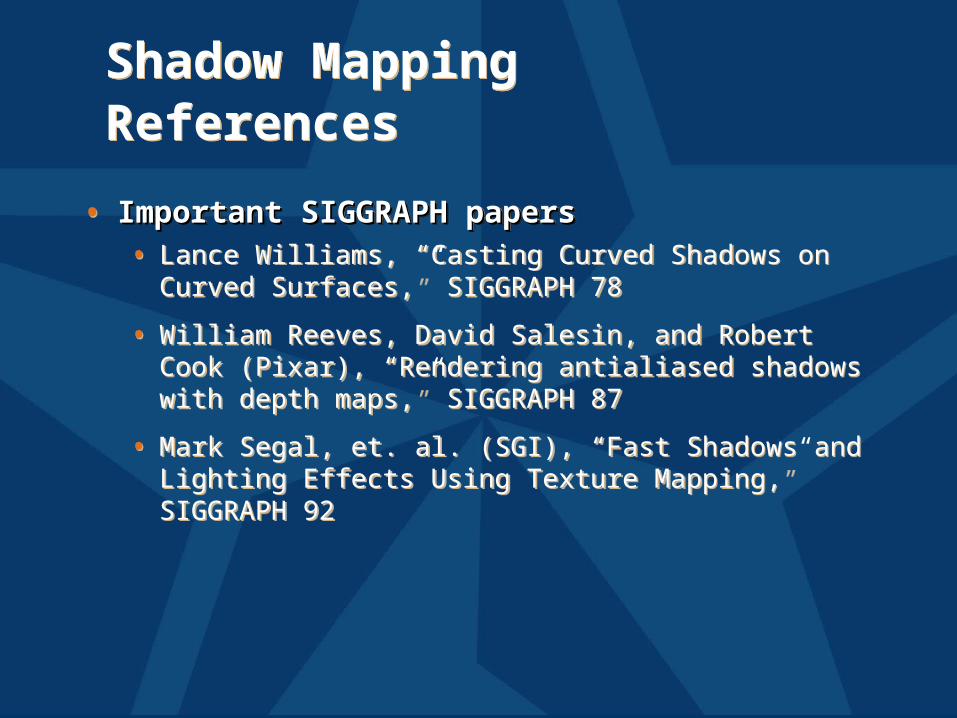
• Important SIGGRAPH papersImportant SIGGRAPH papers• Lance Williams, “Casting Curved Shadows on Curved
Surfaces,” SIGGRAPH 78
• William Reeves, David Salesin, and Robert Cook (Pixar), “Rendering antialiased shadows with depth maps,” SIGGRAPH 87
• Mark Segal, et. al. (SGI), “Fast Shadows and Lighting Effects Using Texture Mapping,” SIGGRAPH 92
The Shadow MappingConcept (1)The Shadow MappingConcept (1)
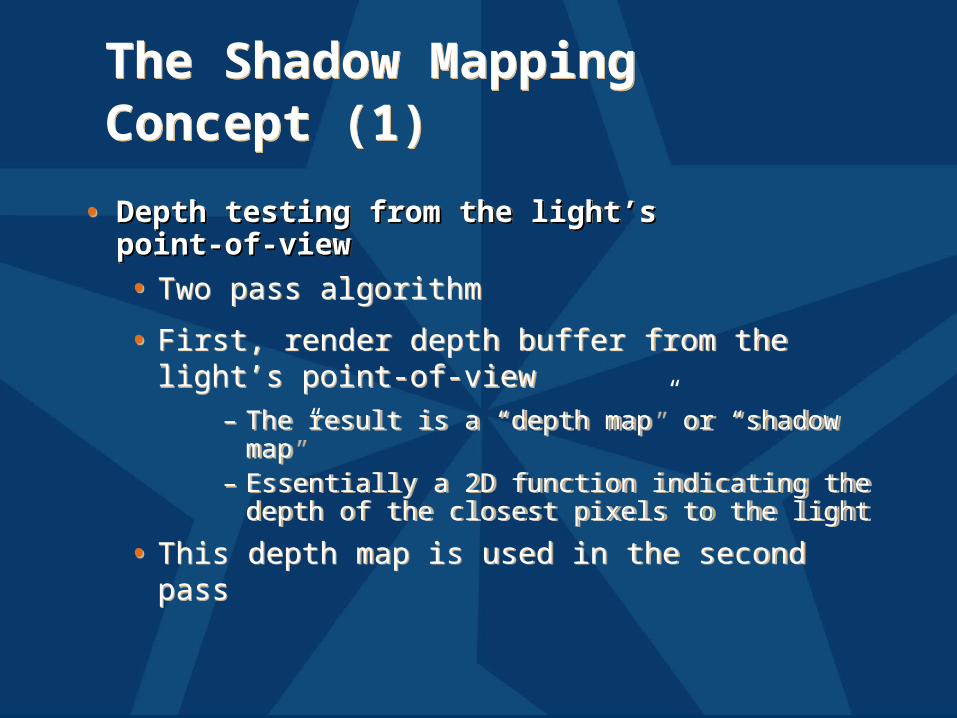
• Depth testing from the light’sDepth testing from the light’spoint-of-viewpoint-of-view
• Two pass algorithm
• First, render depth buffer from the light’s point-of-view
– The result is a “depth map” or “shadow map”– Essentially a 2D function indicating the depth
of the closest pixels to the light
• This depth map is used in the second pass
The Shadow MappingConcept (2)The Shadow MappingConcept (2)
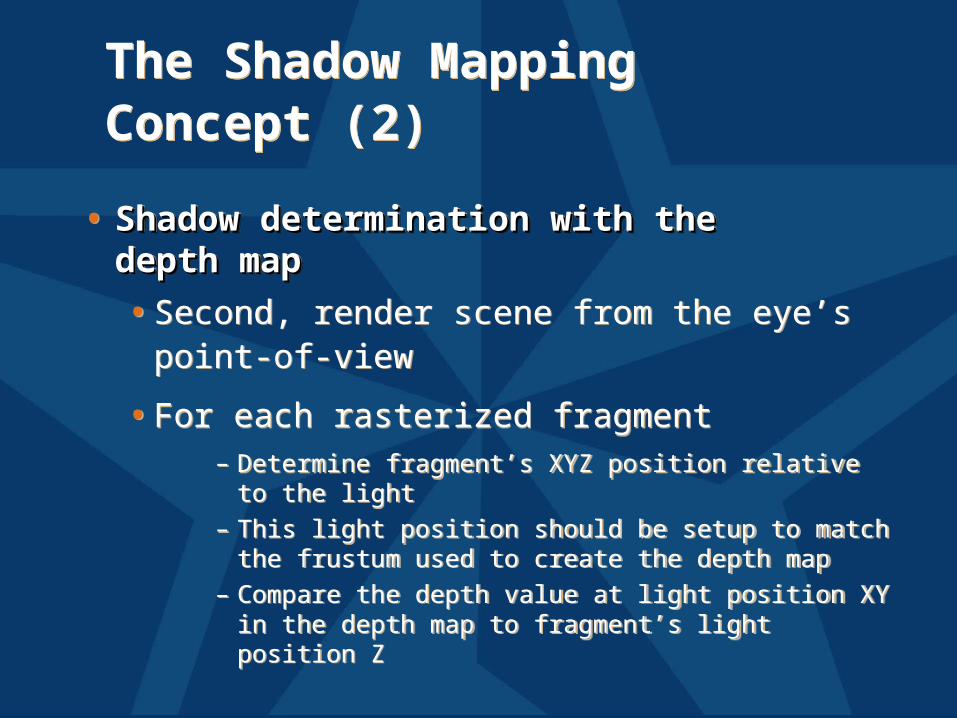
• Shadow determination with theShadow determination with thedepth mapdepth map
•Second, render scene from the eye’s point-of-view
•For each rasterized fragment– Determine fragment’s XYZ position relative to
the light– This light position should be setup to match the
frustum used to create the depth map– Compare the depth value at light position XY in
the depth map to fragment’s light position Z
The Shadow MappingConcept (3)The Shadow MappingConcept (3)
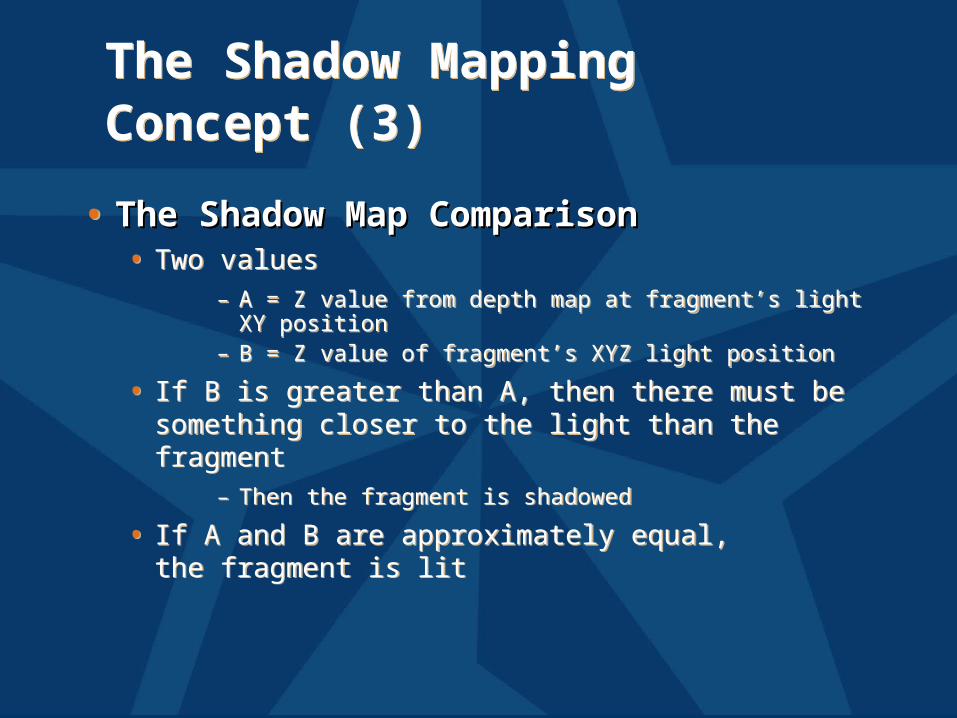
• The Shadow Map ComparisonThe Shadow Map Comparison• Two values
– A = Z value from depth map at fragment’s light XY position
– B = Z value of fragment’s XYZ light position
• If B is greater than A, then there must be something closer to the light than the fragment
– Then the fragment is shadowed
• If A and B are approximately equal,the fragment is lit
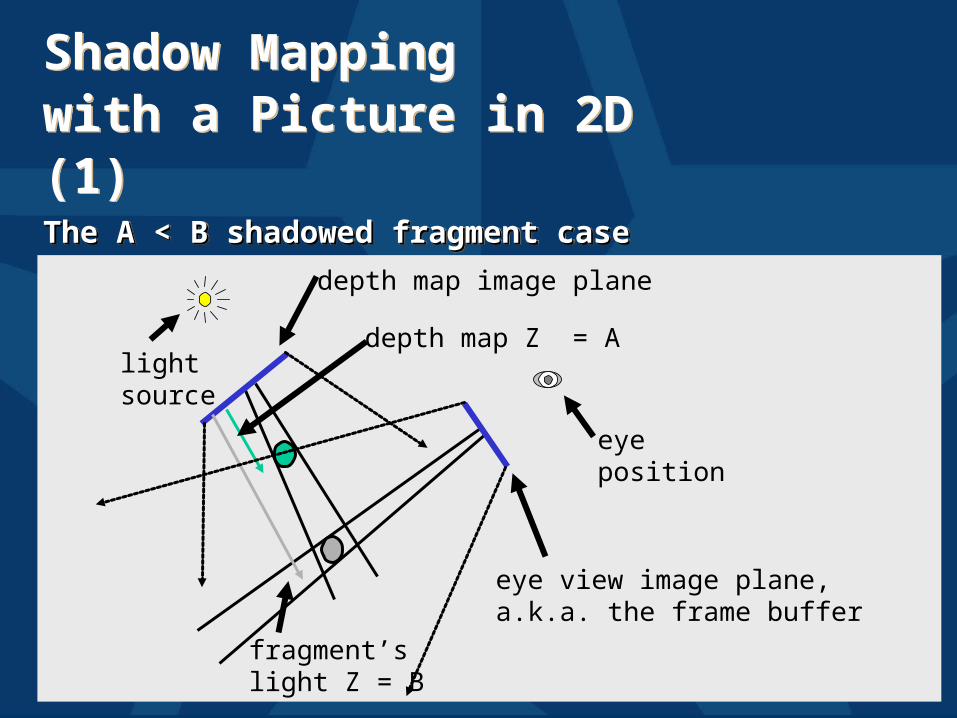
Shadow Mappingwith a Picture in 2D (1)Shadow Mappingwith a Picture in 2D (1)
The A < B shadowed fragment caseThe A < B shadowed fragment caseThe A < B shadowed fragment caseThe A < B shadowed fragment case
lightsource
eyeposition
depth map Z = A
fragment’slight Z = B
depth map image plane
eye view image plane,a.k.a. the frame buffer

The A The A B unshadowed fragment case B unshadowed fragment case
Shadow Mappingwith a Picture in 2D (2)Shadow Mappingwith a Picture in 2D (2)
lightsource
eyeposition
depth map Z = A
fragment’slight Z = B
depth map image plane
eye view image plane,a.k.a. the frame buffer
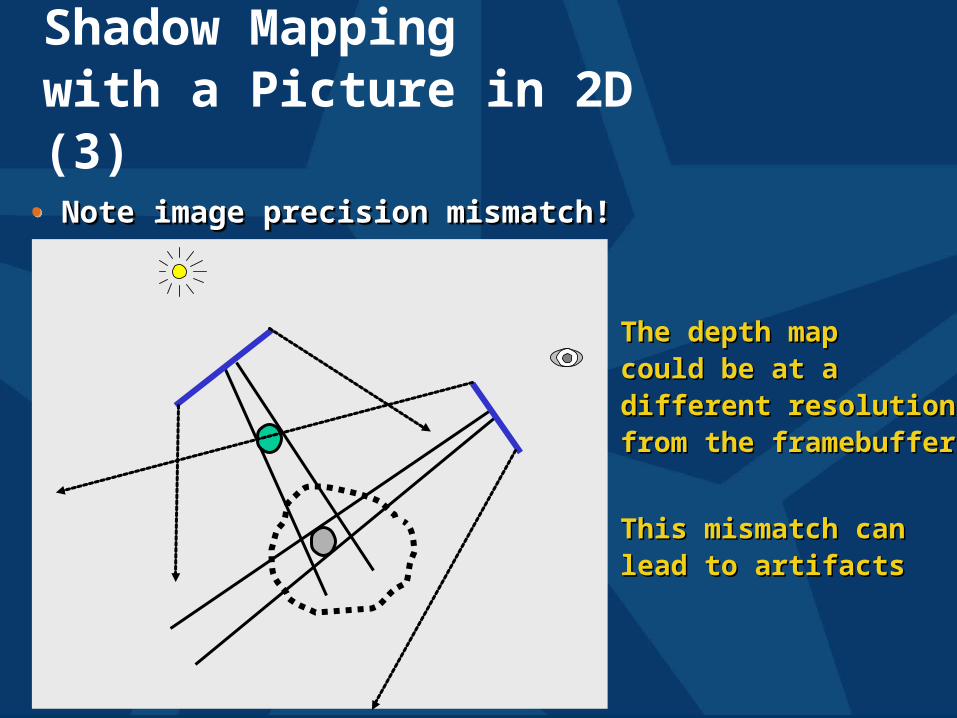
The depth mapThe depth mapcould be at acould be at adifferent resolutiondifferent resolutionfrom the framebufferfrom the framebuffer
This mismatch canThis mismatch canlead to artifactslead to artifacts
Shadow Mappingwith a Picture in 2D (3)
• Note image precision mismatch!Note image precision mismatch!• Note image precision mismatch!Note image precision mismatch!
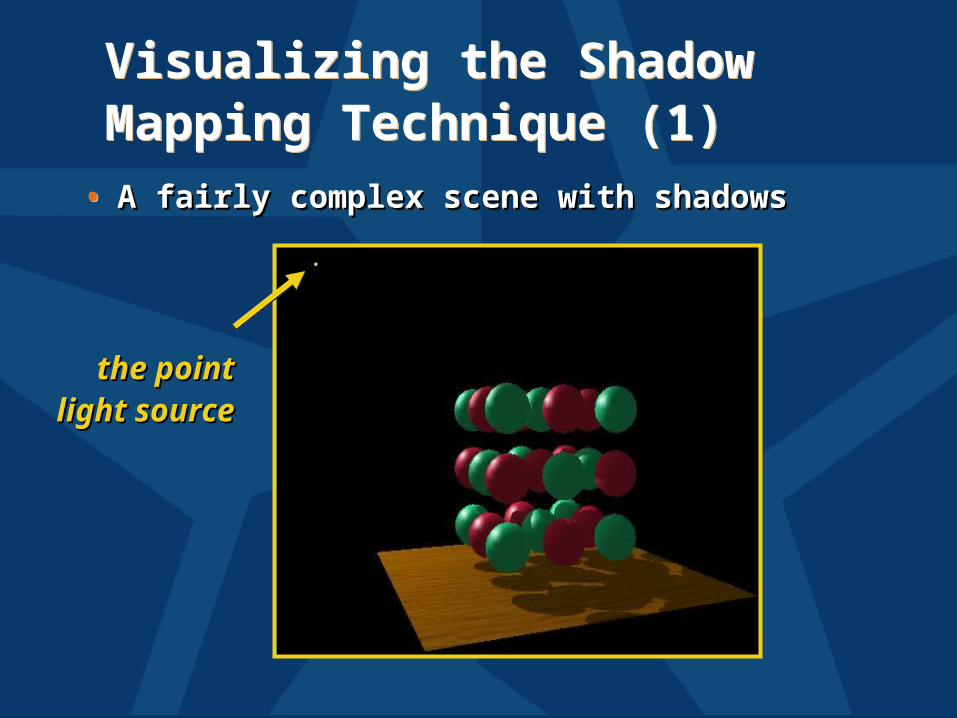
Visualizing the ShadowMapping Technique (1)Visualizing the ShadowMapping Technique (1)
• A fairly complex scene with shadowsA fairly complex scene with shadows• A fairly complex scene with shadowsA fairly complex scene with shadows
the pointthe pointlight sourcelight source
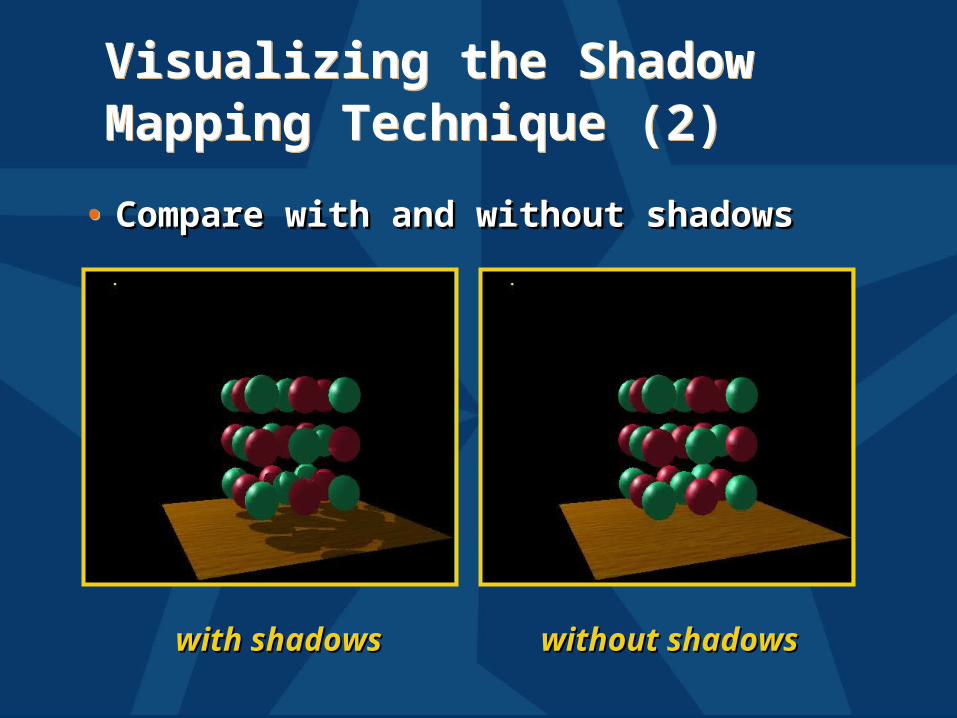
Visualizing the ShadowMapping Technique (2)Visualizing the ShadowMapping Technique (2)
• Compare with and without shadowsCompare with and without shadows• Compare with and without shadowsCompare with and without shadows
with shadowswith shadows without shadowswithout shadows
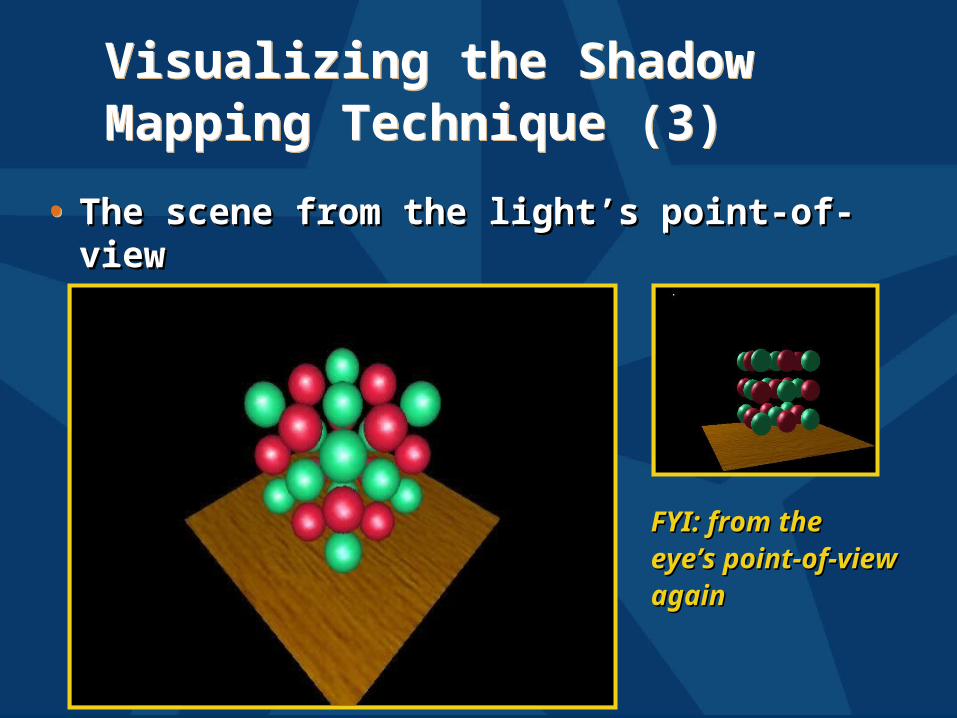
Visualizing the ShadowMapping Technique (3)Visualizing the ShadowMapping Technique (3)
• The scene from the light’s point-of-viewThe scene from the light’s point-of-view• The scene from the light’s point-of-viewThe scene from the light’s point-of-view
FYI: from theFYI: from theeye’s point-of-vieweye’s point-of-viewagainagain
Visualizing the ShadowMapping Technique (4)Visualizing the ShadowMapping Technique (4)
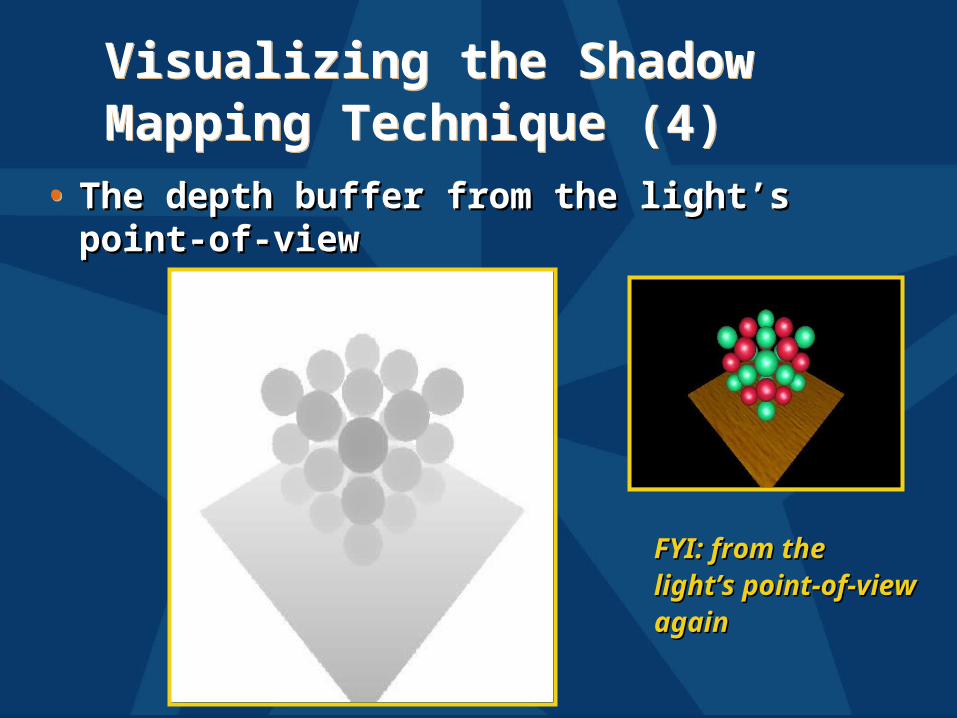
• The depth buffer from the light’s point-The depth buffer from the light’s point-of-viewof-view
• The depth buffer from the light’s point-The depth buffer from the light’s point-of-viewof-view
FYI: from theFYI: from thelight’s point-of-viewlight’s point-of-viewagainagain
Visualizing the ShadowMapping Technique (5)
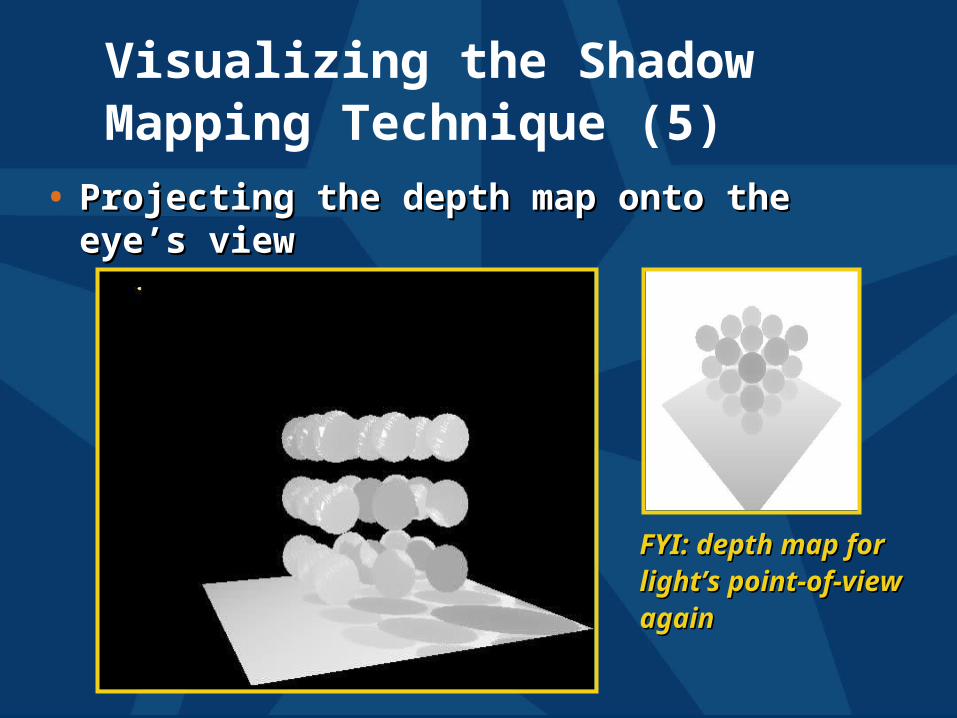
• Projecting the depth map onto the eye’s Projecting the depth map onto the eye’s viewview
FYI: depth map forFYI: depth map forlight’s point-of-viewlight’s point-of-viewagainagain
Visualizing the ShadowMapping Technique (6)Visualizing the ShadowMapping Technique (6)
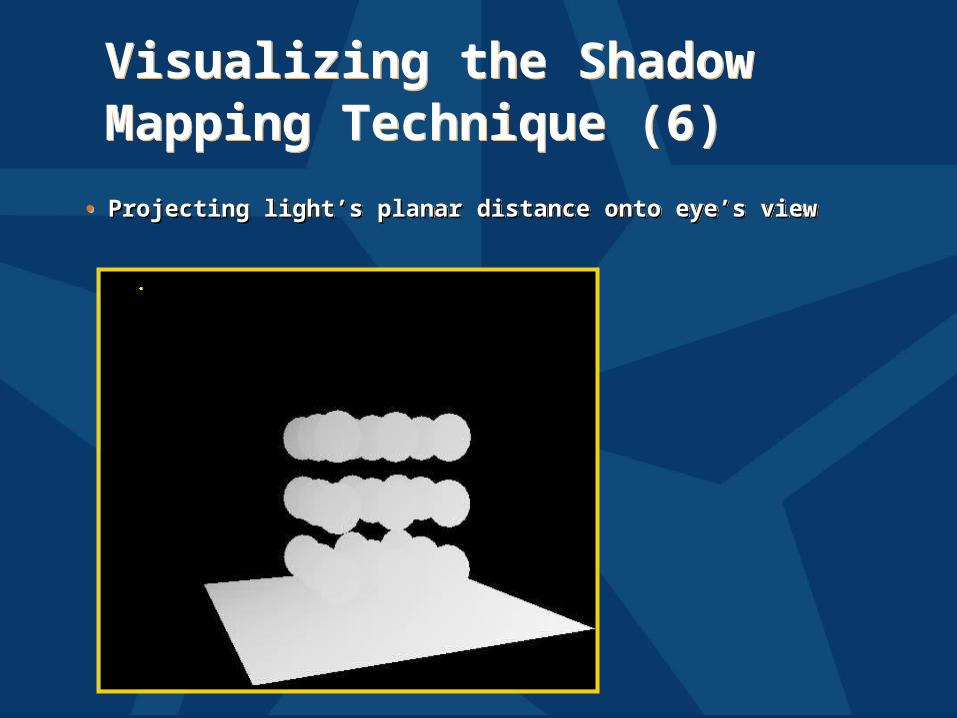
• Projecting light’s planar distance onto eye’s viewProjecting light’s planar distance onto eye’s view• Projecting light’s planar distance onto eye’s viewProjecting light’s planar distance onto eye’s view

Visualizing the ShadowMapping Technique (6)Visualizing the ShadowMapping Technique (6)
• Comparing light distance to light depth map Comparing light distance to light depth map • Comparing light distance to light depth map Comparing light distance to light depth map
Green is Green is where the where the
light planar light planar distance and distance and
the light the light depth map depth map
are are approximatelapproximatel
y equaly equal
Non-green Non-green is where is where shadows shadows should beshould be
Visualizing the ShadowMapping Technique (7)Visualizing the ShadowMapping Technique (7)
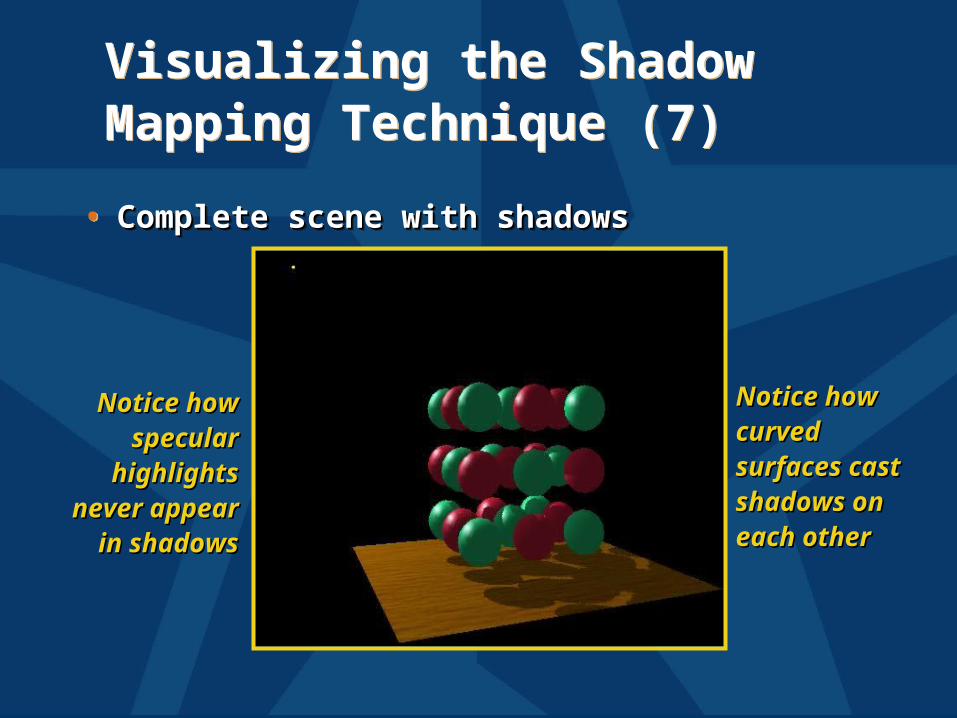
• Complete scene with shadowsComplete scene with shadows• Complete scene with shadowsComplete scene with shadows
Notice how Notice how specular specular
highlights highlights never never
appear in appear in shadowsshadows
Notice how Notice how curved curved surfaces surfaces cast cast shadows on shadows on each othereach other
ConstructLight View Depth MapConstructLight View Depth Map
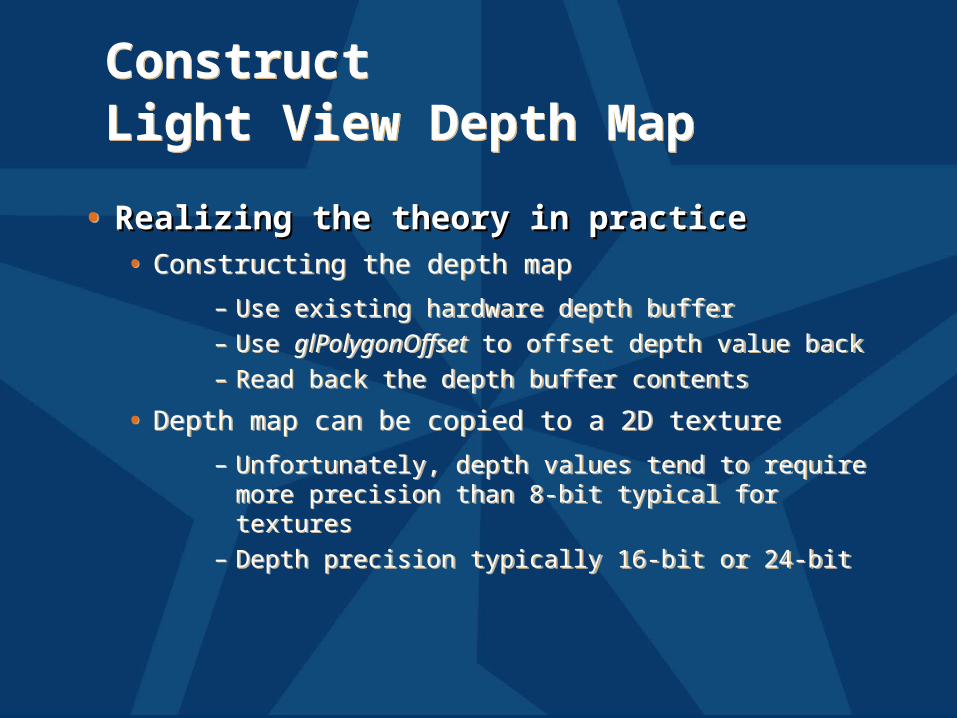
• Realizing the theory in practiceRealizing the theory in practice• Constructing the depth map
– Use existing hardware depth buffer– Use glPolygonOffset to offset depth value back– Read back the depth buffer contents
• Depth map can be copied to a 2D texture
– Unfortunately, depth values tend to require more precision than 8-bit typical for textures
– Depth precision typically 16-bit or 24-bit
Why glPolygonOffset When Making Shadow Maps?
Why glPolygonOffset When Making Shadow Maps?
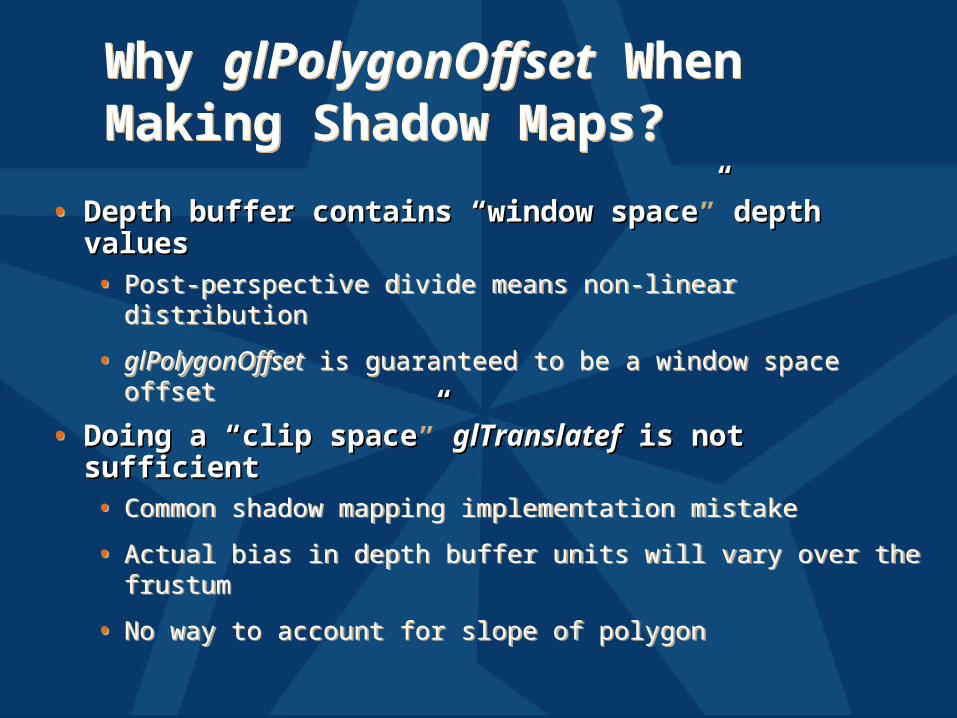
• Depth buffer contains “window space” depth Depth buffer contains “window space” depth valuesvalues• Post-perspective divide means non-linear distribution
• glPolygonOffset is guaranteed to be a window space offset
• Doing a “clip space” Doing a “clip space” glTranslatefglTranslatef is not is not sufficientsufficient• Common shadow mapping implementation mistake
• Actual bias in depth buffer units will vary over the frustum
• No way to account for slope of polygon
Sampling a Polygon’s Depthat Pixel Centers (1)Sampling a Polygon’s Depthat Pixel Centers (1)
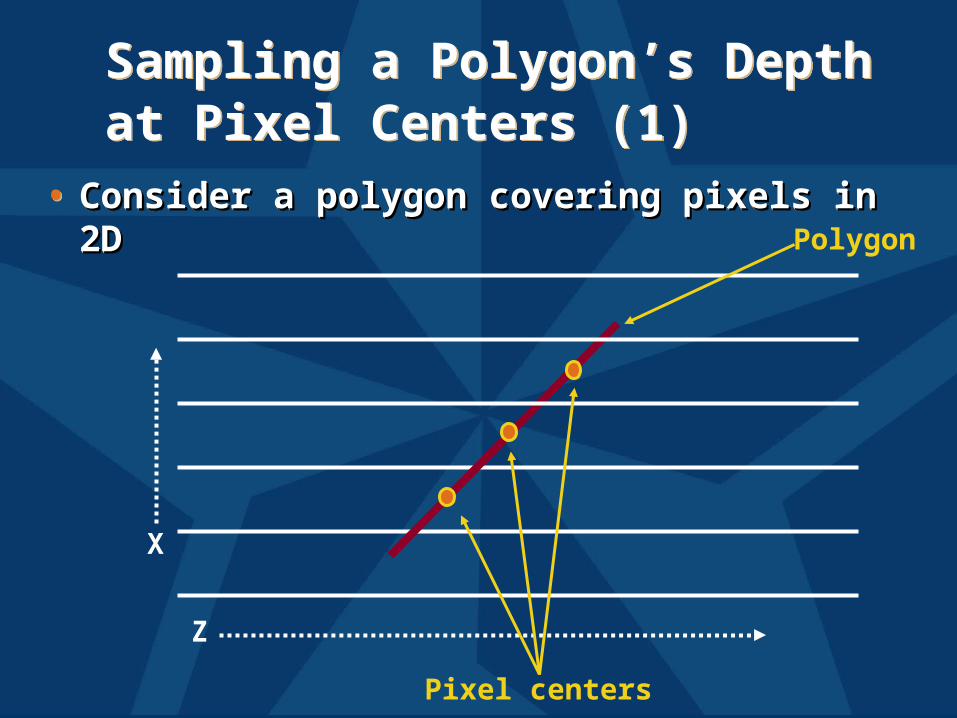
• Consider a polygon covering pixels in 2DConsider a polygon covering pixels in 2D• Consider a polygon covering pixels in 2DConsider a polygon covering pixels in 2D
X
Z
Pixel centers
Polygon
Sampling a Polygon’s Depthat Pixel Centers (2)Sampling a Polygon’s Depthat Pixel Centers (2)
X
Z
X
Z
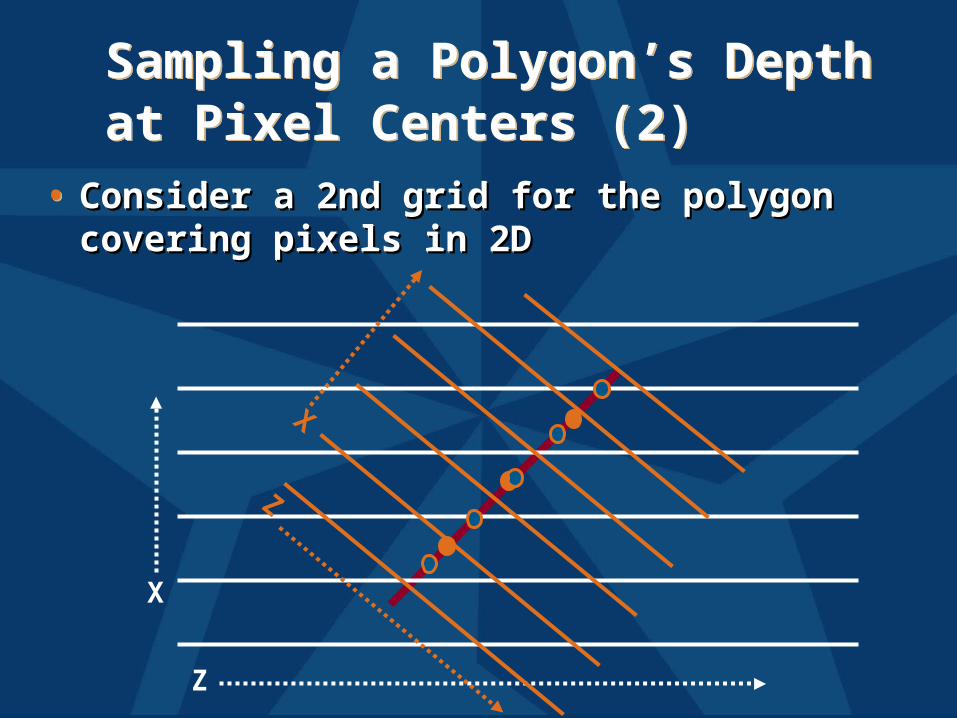
• Consider a 2nd grid for the polygon Consider a 2nd grid for the polygon covering pixels in 2Dcovering pixels in 2D
• Consider a 2nd grid for the polygon Consider a 2nd grid for the polygon covering pixels in 2Dcovering pixels in 2D
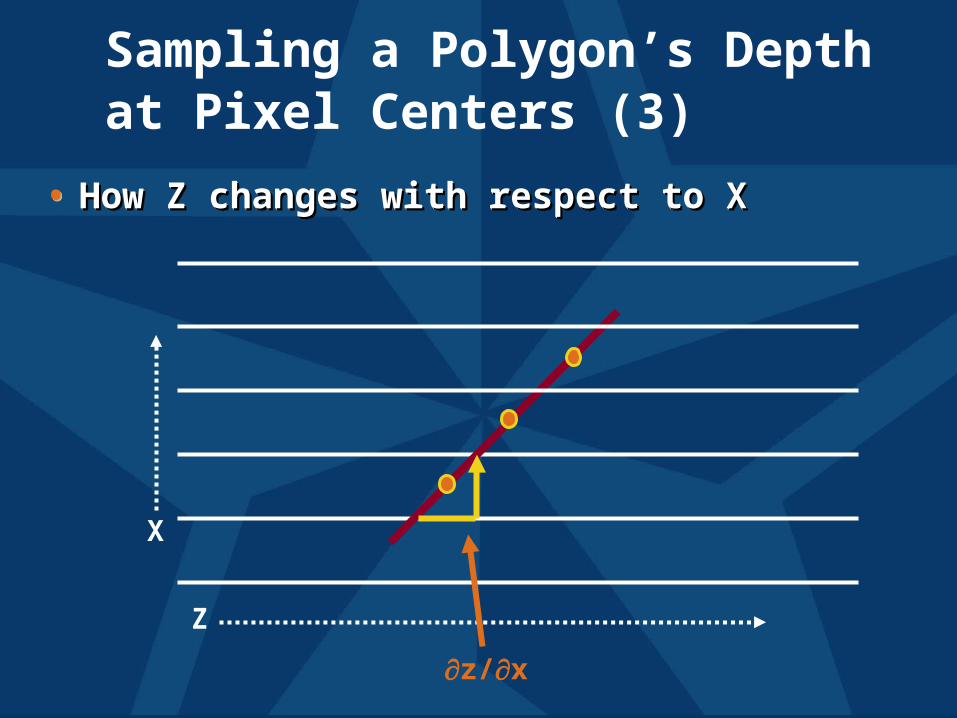
Sampling a Polygon’s Depthat Pixel Centers (3)
X
Z
z/x
• How Z changes with respect to XHow Z changes with respect to X• How Z changes with respect to XHow Z changes with respect to X
Why You NeedglPolygonOffset’s SlopeWhy You NeedglPolygonOffset’s Slope
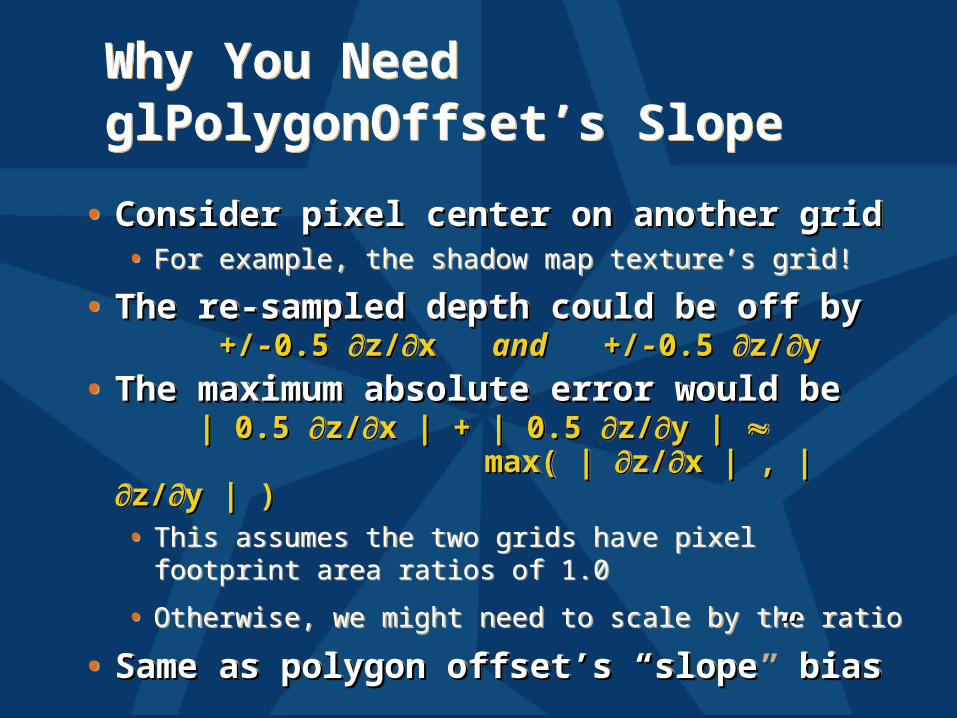
• Consider pixel center on another gridConsider pixel center on another grid• For example, the shadow map texture’s grid!
• The re-sampled depth could be off byThe re-sampled depth could be off by +/-0.5 +/-0.5 z/z/x x andand +/-0.5 +/-0.5 z/z/yy
• The maximum absolute error would beThe maximum absolute error would be | 0.5 | 0.5 z/z/x | + | 0.5 x | + | 0.5 z/z/y | y | max( | max( | z/z/x | , | x | , | z/z/y | )y | )• This assumes the two grids have pixel footprint area
ratios of 1.0
• Otherwise, we might need to scale by the ratio
• Same as polygon offset’s “slope” biasSame as polygon offset’s “slope” bias
Depth Map BiasIssues
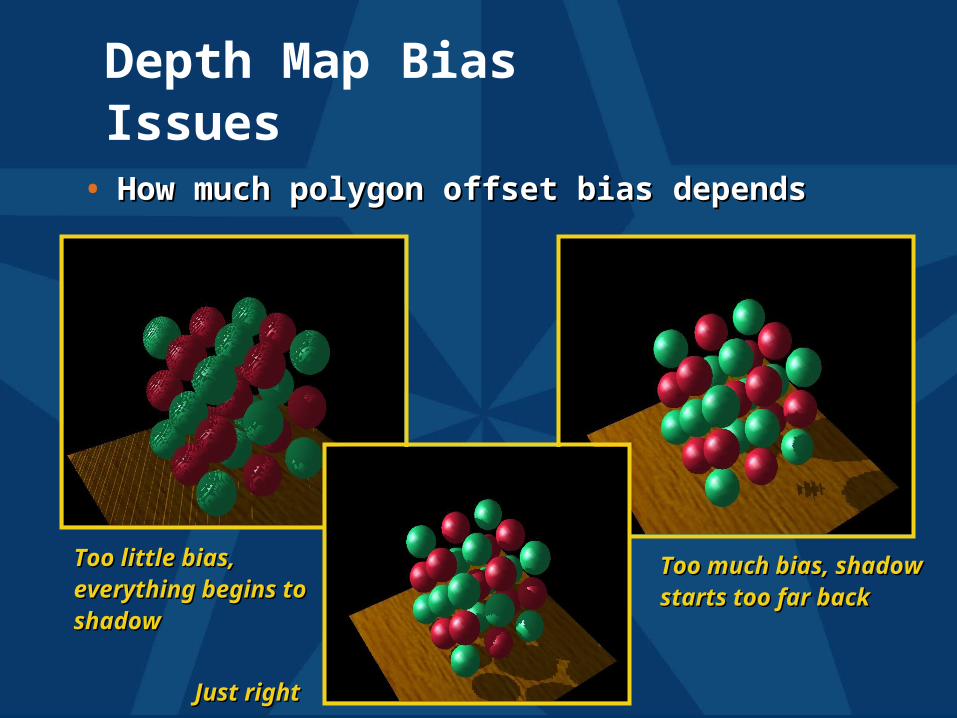
• How much polygon offset bias dependsHow much polygon offset bias depends
Too little bias,Too little bias,everything begins toeverything begins toshadowshadow
Too much bias, shadowToo much bias, shadowstarts too far backstarts too far back
Just rightJust right
Selecting theDepth Map BiasSelecting theDepth Map Bias
• Not that hardNot that hard• Usually the following works well
– glPolygonOffset(scale = 1.1, bias = 4.0)
• Usually better to error on the side of toomuch bias
– adjust to suit the shadow issues in your scene
• Depends somewhat on shadow map precision
– more precision requires less of a bias
• When the shadow map is being magnified, a larger scale is often required
Render Scene andAccess the Depth TextureRender Scene andAccess the Depth Texture
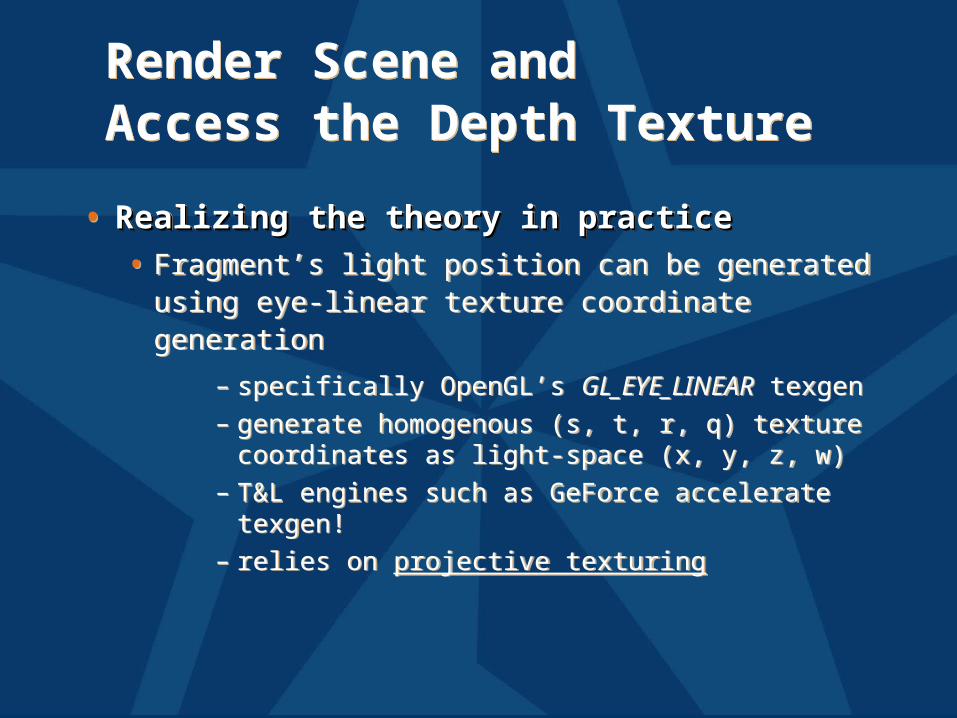
• Realizing the theory in practiceRealizing the theory in practice• Fragment’s light position can be generated
using eye-linear texture coordinate generation
– specifically OpenGL’s GL_EYE_LINEAR texgen– generate homogenous (s, t, r, q) texture
coordinates as light-space (x, y, z, w)– T&L engines such as GeForce accelerate
texgen!– relies on projective texturing
What isProjective Texturing?What isProjective Texturing?
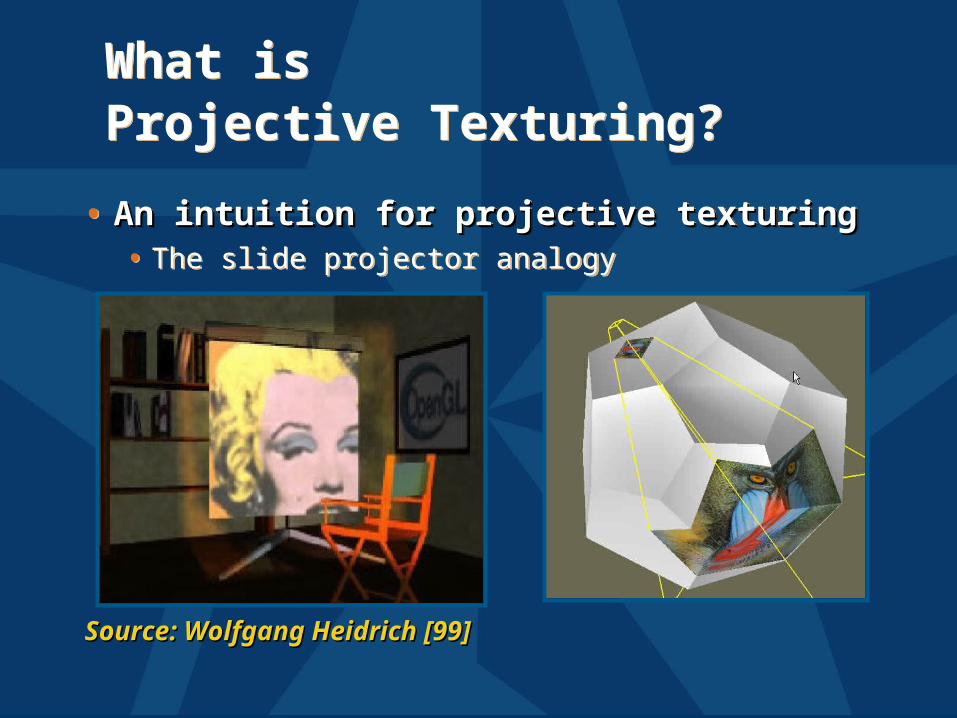
• An intuition for projective texturingAn intuition for projective texturing• The slide projector analogy
• An intuition for projective texturingAn intuition for projective texturing• The slide projector analogy
Source: Wolfgang Heidrich [99]Source: Wolfgang Heidrich [99]
AboutProjective Texturing (1)AboutProjective Texturing (1)
• First, what is perspective-correct First, what is perspective-correct texturing?texturing?• Normal 2D texture mapping uses (s, t) coordinates
• 2D perspective-correct texture mapping
– Means (s, t) should be interpolated linearly in eye-space
– So compute per-vertex s/w, t/w, and 1/w– Linearly interpolated these three parameters over
polygon– Per-fragment compute s’ = (s/w) / (1/w) and
t’ = (t/w) / (1/w)– Results in per-fragment perspective correct (s’, t’)

AboutProjective Texturing (2)AboutProjective Texturing (2)
• So what is projective texturing?So what is projective texturing?• Now consider homogeneous texture coordinates
– (s, t, r, q) --> (s/q, t/q, r/q)– Similar to homogeneous clip coordinates where
(x, y, z, w) = (x/w, y/w, z/w)
• Idea is to have (s/q, t/q, r/q) be projected per-fragment
• This requires a per-fragment divider– Yikes, dividers in hardware are fairly expensive
AboutProjective Texturing (3)AboutProjective Texturing (3)
• Hardware designer’s view of texturingHardware designer’s view of texturing• Perspective-correct texturing is a practical
requirement– Otherwise, textures “swim”– Perspective-correct texturing already requires
the hardware expense of a per-fragment divider
• Clever idea [Segal, et.al. ‘92]– Interpolate q/w instead of simply 1/w– So projective texturing is practically free if you
already do perspective-correct texturing!
AboutProjective Texturing (4)AboutProjective Texturing (4)
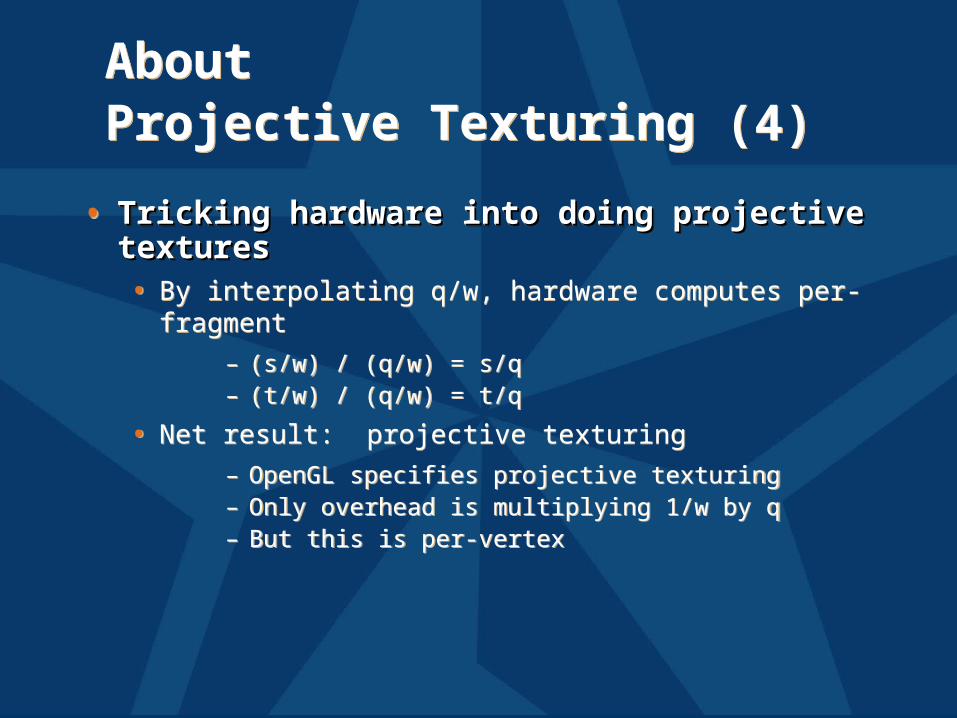
• Tricking hardware into doing projective Tricking hardware into doing projective texturestextures• By interpolating q/w, hardware computes per-
fragment
– (s/w) / (q/w) = s/q– (t/w) / (q/w) = t/q
• Net result: projective texturing
– OpenGL specifies projective texturing– Only overhead is multiplying 1/w by q– But this is per-vertex
Back to the ShadowMapping Discussion . . .Back to the ShadowMapping Discussion . . .
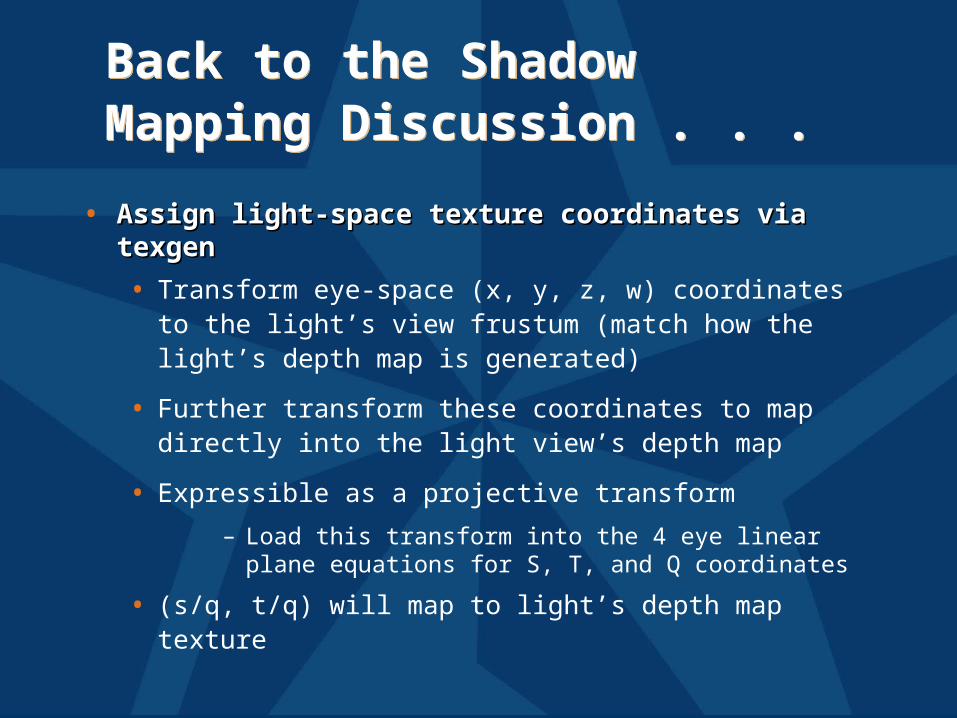
• Assign light-space texture coordinates via Assign light-space texture coordinates via texgentexgen
• Transform eye-space (x, y, z, w) coordinates to the light’s view frustum (match how the light’s depth map is generated)
• Further transform these coordinates to map directly into the light view’s depth map
• Expressible as a projective transform
– Load this transform into the 4 eye linear plane equations for S, T, and Q coordinates
• (s/q, t/q) will map to light’s depth map texture
OpenGL’s StandardVertex Coordinate Transform
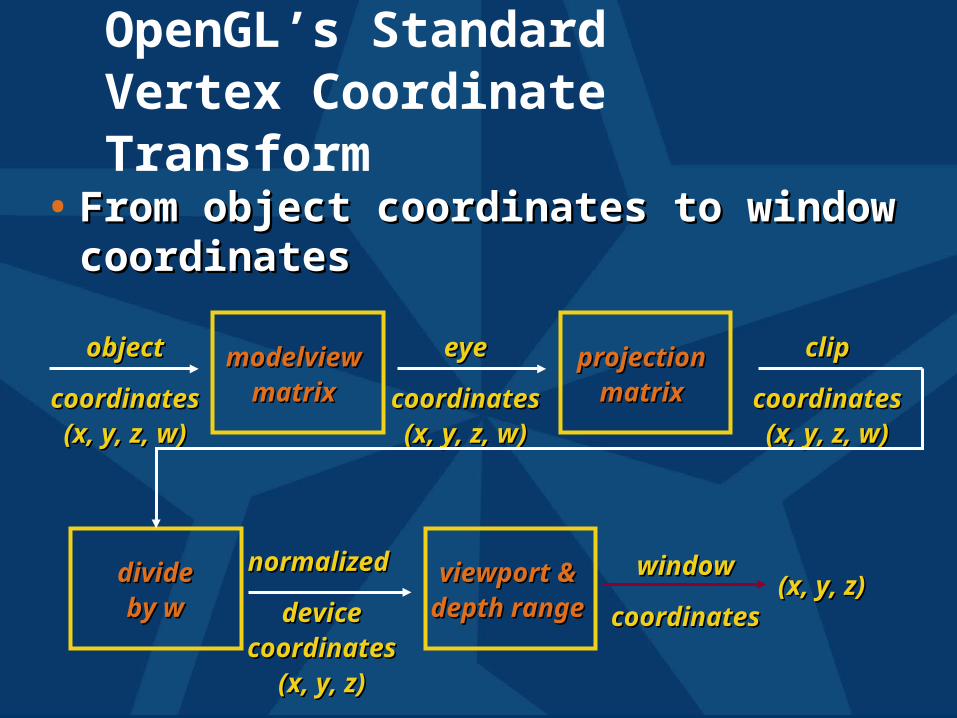
• From object coordinates to window From object coordinates to window coordinatescoordinates
objectobject
coordinatescoordinates(x, y, z, w)(x, y, z, w)
eyeeye
coordinatescoordinates(x, y, z, w)(x, y, z, w)
modelviewmodelviewmatrixmatrix
projectionprojectionmatrixmatrix
dividedivideby wby w
viewport &viewport &depth rangedepth range
normalized normalized
devicedevicecoordinatescoordinates
(x, y, z)(x, y, z)
clipclip
coordinatescoordinates(x, y, z, w)(x, y, z, w)
windowwindow
coordinatescoordinates(x, y, z)(x, y, z)
Eye Linear TextureCoordinate Generation
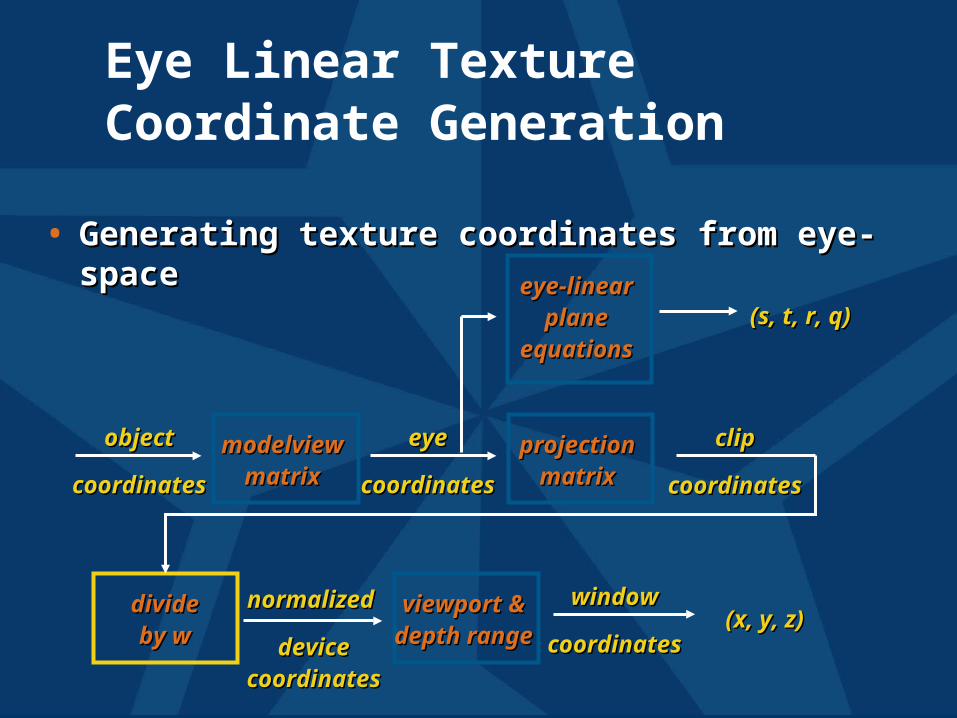
• Generating texture coordinates from eye-Generating texture coordinates from eye-spacespace
objectobject
coordinatescoordinates
eyeeye
coordinatescoordinates
modelviewmodelviewmatrixmatrix
projectionprojectionmatrixmatrix
dividedivideby wby w
viewport &viewport &depth rangedepth range
normalized normalized
devicedevicecoordinatescoordinates
clipclip
coordinatescoordinates
windowwindow
coordinatescoordinates
eye-lineareye-linearplaneplane
equationsequations(s, t, r, q)(s, t, r, q)
(x, y, z)(x, y, z)
Setting UpEye Linear TexgenSetting UpEye Linear Texgen
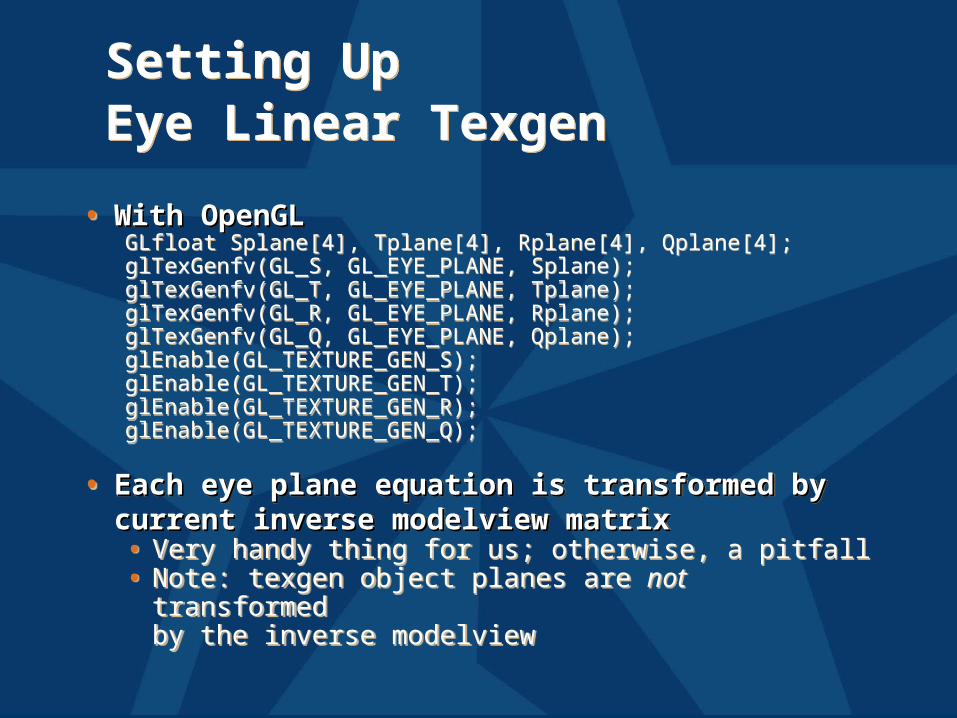
• With OpenGLWith OpenGLGLfloat Splane[4], Tplane[4], Rplane[4], Qplane[4];glTexGenfv(GL_S, GL_EYE_PLANE, Splane);glTexGenfv(GL_T, GL_EYE_PLANE, Tplane);glTexGenfv(GL_R, GL_EYE_PLANE, Rplane);glTexGenfv(GL_Q, GL_EYE_PLANE, Qplane);glEnable(GL_TEXTURE_GEN_S);glEnable(GL_TEXTURE_GEN_T);glEnable(GL_TEXTURE_GEN_R);glEnable(GL_TEXTURE_GEN_Q);
• Each eye plane equation is transformed Each eye plane equation is transformed by current inverse modelview matrixby current inverse modelview matrix• Very handy thing for us; otherwise, a pitfall• Note: texgen object planes are not transformed
by the inverse modelview
Eye LinearTexgen Transform
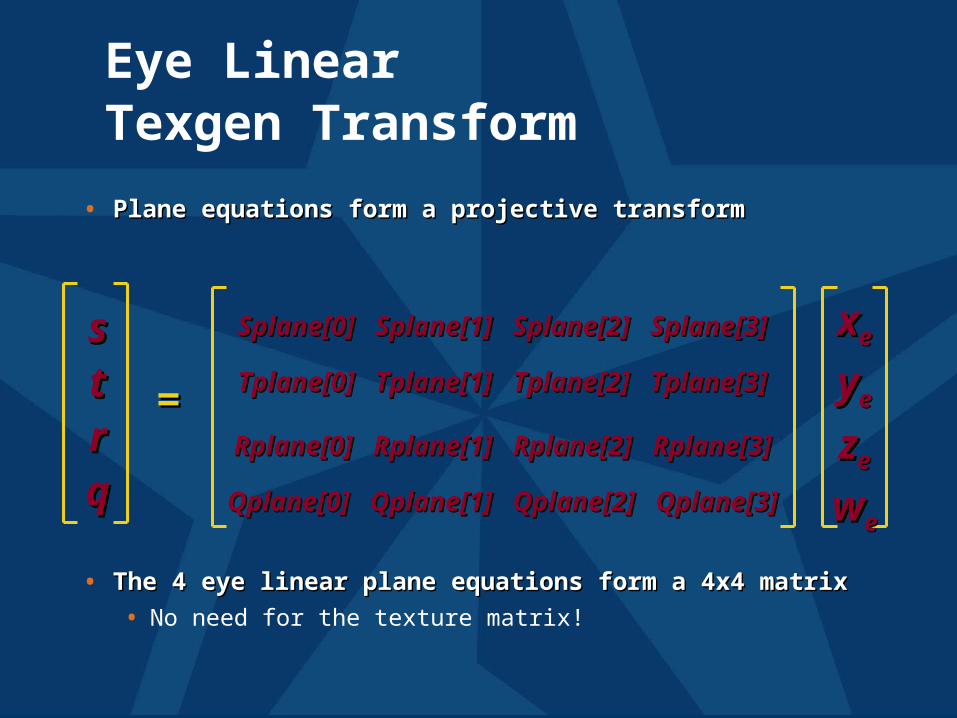
• Plane equations form a projective transformPlane equations form a projective transform
• The 4 eye linear plane equations form a 4x4 matrixThe 4 eye linear plane equations form a 4x4 matrix
• No need for the texture matrix!
ssttrrqq
Splane[0] Splane[1] Splane[2] Splane[3]Splane[0] Splane[1] Splane[2] Splane[3]
Tplane[0] Tplane[1] Tplane[2] Tplane[3]Tplane[0] Tplane[1] Tplane[2] Tplane[3]
Rplane[0] Rplane[1] Rplane[2] Rplane[3]Rplane[0] Rplane[1] Rplane[2] Rplane[3]
Qplane[0] Qplane[1] Qplane[2] Qplane[3]Qplane[0] Qplane[1] Qplane[2] Qplane[3]
==
xxee
yyee
zzee
wwee
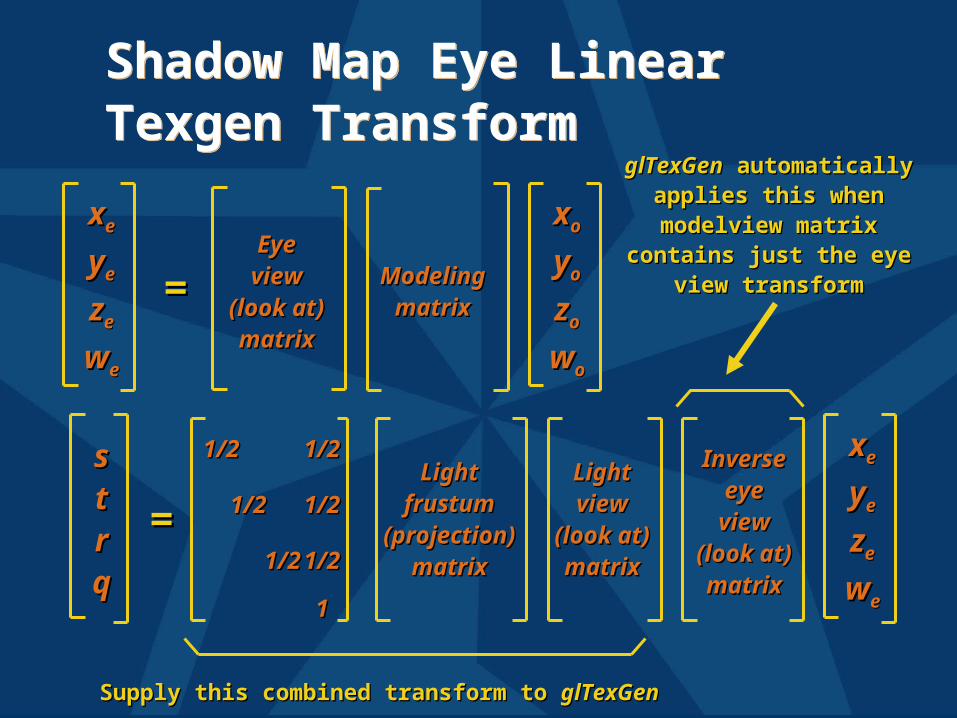
Shadow Map Eye LinearTexgen TransformShadow Map Eye LinearTexgen Transform
1/21/2
1/21/2
1/21/2
11
1/21/2
1/21/2
1/21/2LightLight
frustumfrustum(projection)(projection)
matrixmatrix
LightLightviewview
(look at)(look at)matrixmatrix
InverseInverseeyeeyeviewview
(look at)(look at)matrixmatrix
EyeEyeviewview
(look at)(look at)matrixmatrix
ModelingModelingmatrixmatrix
xxoo
yyoo
zzoo
wwoo
xxee
yyee
zzee
wwee
==
==
xxee
yyee
zzee
wwee
ssttrrqq
glTexGenglTexGen automatically automatically applies this when applies this when modelview matrix modelview matrix
contains just the eye contains just the eye view transformview transform
Supply this combined transform to Supply this combined transform to glTexGenglTexGen
Shadow MapOperationShadow MapOperation
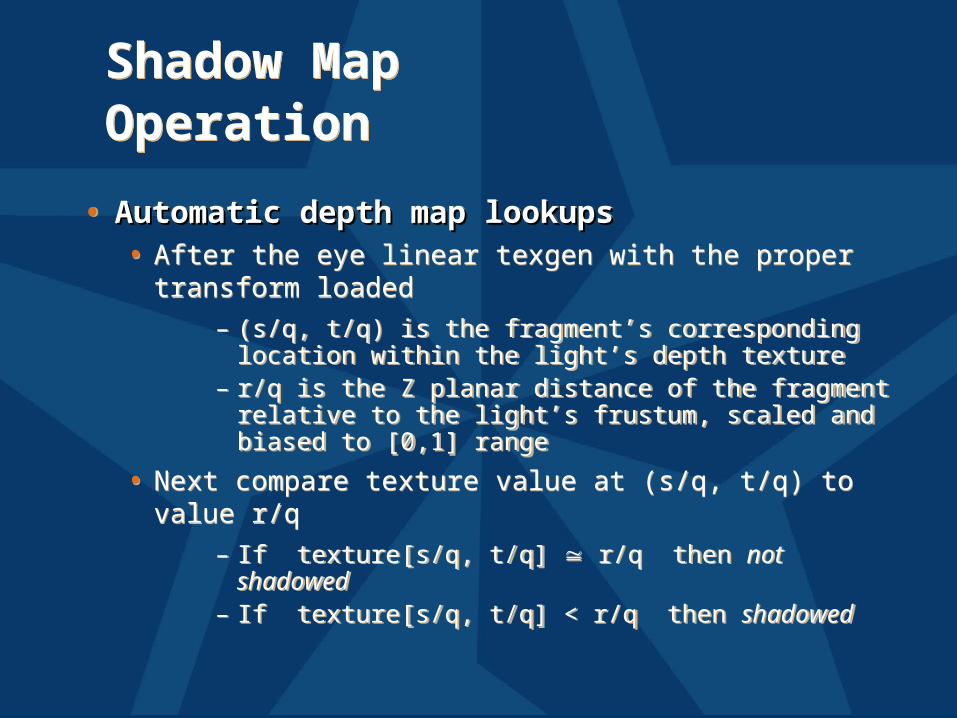
• Automatic depth map lookupsAutomatic depth map lookups• After the eye linear texgen with the proper
transform loaded – (s/q, t/q) is the fragment’s corresponding
location within the light’s depth texture– r/q is the Z planar distance of the fragment
relative to the light’s frustum, scaled and biased to [0,1] range
• Next compare texture value at (s/q, t/q) tovalue r/q
– If texture[s/q, t/q] r/q then not shadowed– If texture[s/q, t/q] < r/q then shadowed
Shadow Mapping Hardware Support (1)Shadow Mapping Hardware Support (1)
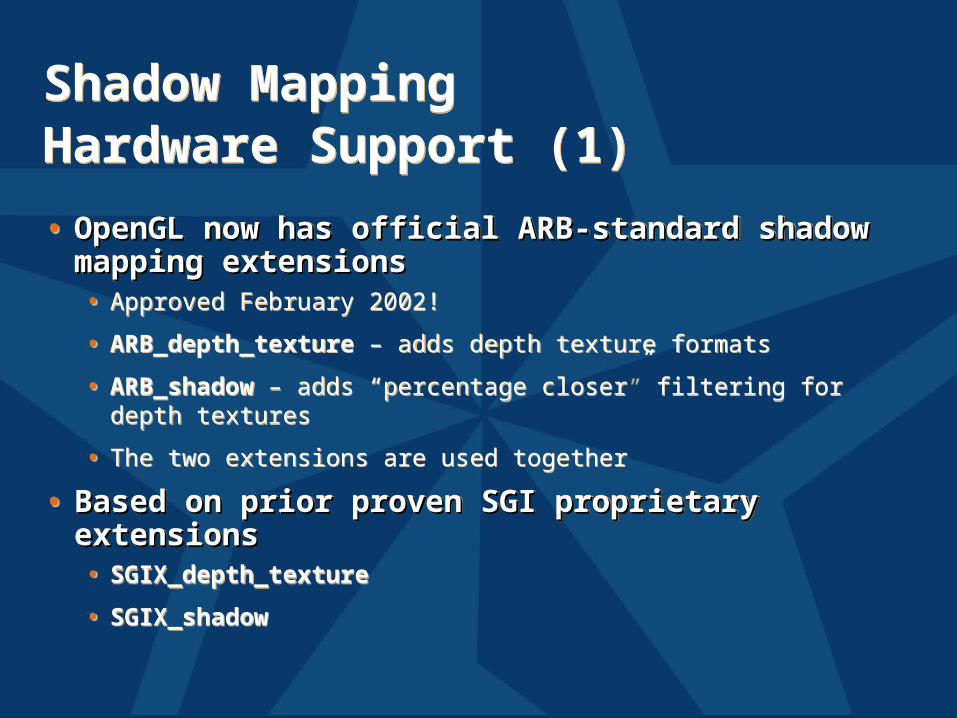
• OpenGL now has official ARB-standard OpenGL now has official ARB-standard shadow mapping extensions shadow mapping extensions • Approved February 2002!
• ARB_depth_texture – adds depth texture formats
• ARB_shadow – adds “percentage closer” filtering for depth textures
• The two extensions are used together
• Based on prior proven SGI proprietary Based on prior proven SGI proprietary extensionsextensions• SGIX_depth_texture
• SGIX_shadow
Shadow Mapping Hardware Support (2)Shadow Mapping Hardware Support (2)
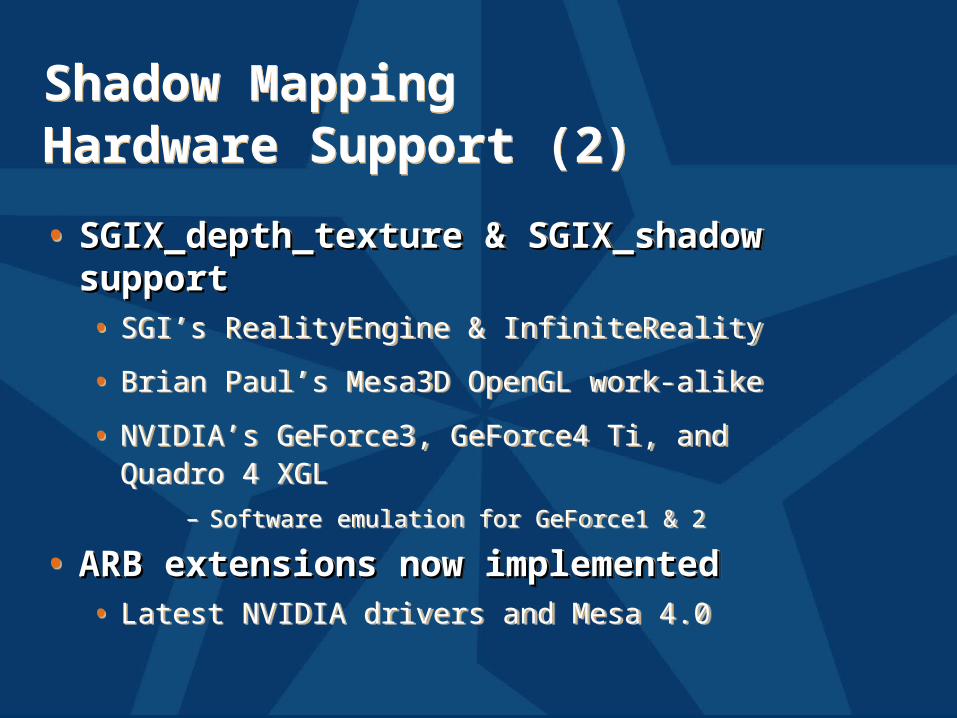
• SGIX_depth_texture & SGIX_shadow SGIX_depth_texture & SGIX_shadow supportsupport• SGI’s RealityEngine & InfiniteReality
• Brian Paul’s Mesa3D OpenGL work-alike
• NVIDIA’s GeForce3, GeForce4 Ti, andQuadro 4 XGL
– Software emulation for GeForce1 & 2
• ARB extensions now implementedARB extensions now implemented• Latest NVIDIA drivers and Mesa 4.0
ARB_shadow Filtering ModeARB_shadow Filtering Mode
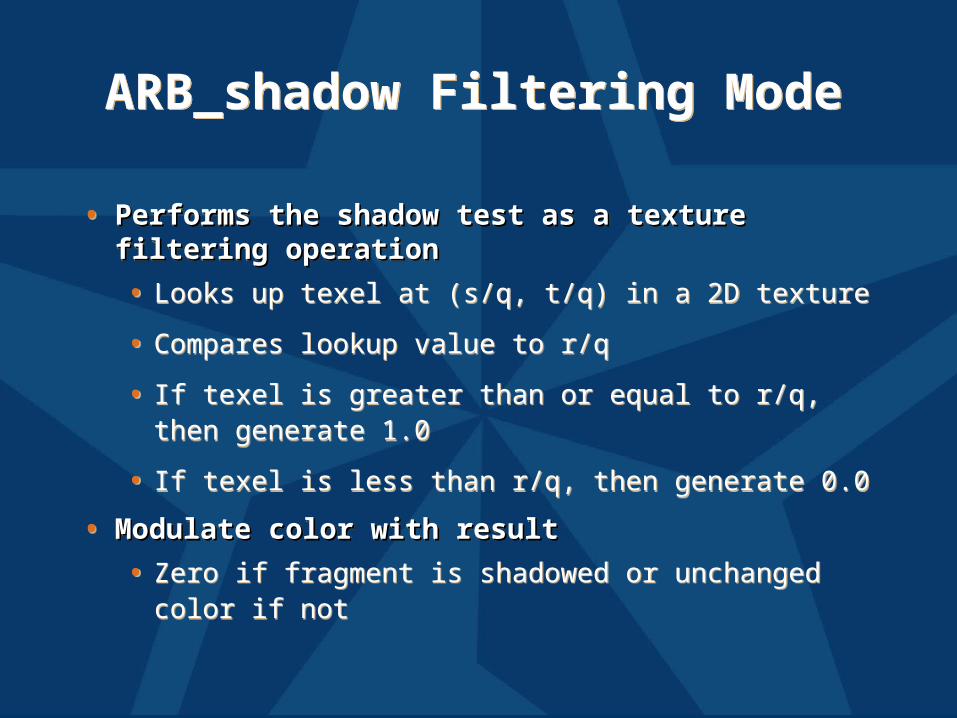
• Performs the shadow test as a texture Performs the shadow test as a texture filtering operationfiltering operation
• Looks up texel at (s/q, t/q) in a 2D texture
• Compares lookup value to r/q
• If texel is greater than or equal to r/q, then generate 1.0
• If texel is less than r/q, then generate 0.0
• Modulate color with resultModulate color with result
• Zero if fragment is shadowed or unchanged color if not
ARB_shadow API UsageARB_shadow API Usage
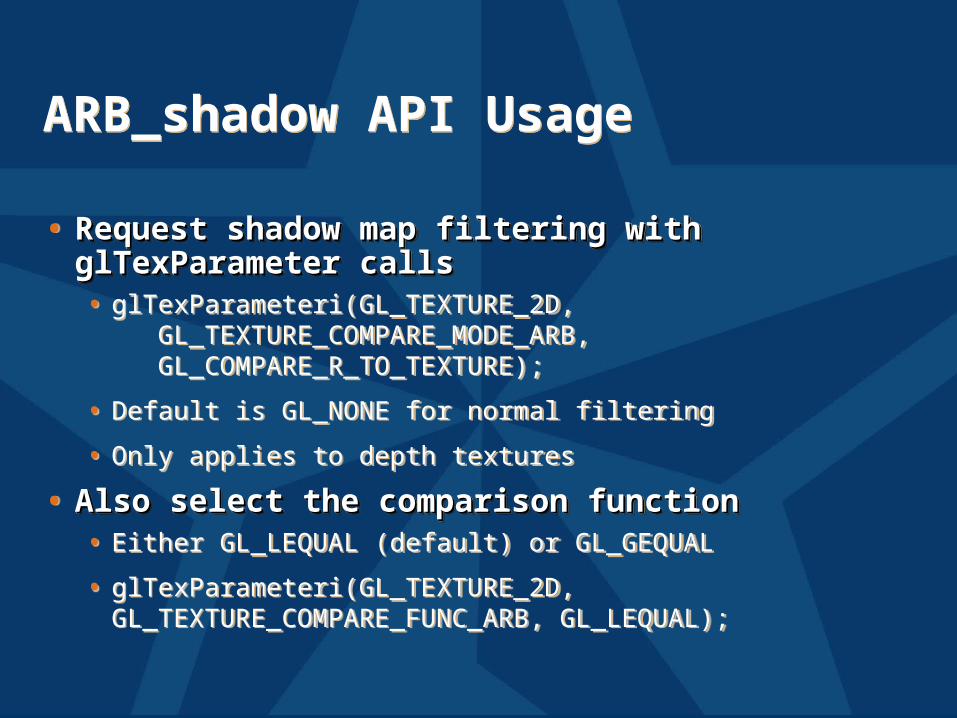
• Request shadow map filtering with Request shadow map filtering with glTexParameter callsglTexParameter calls• glTexParameteri(GL_TEXTURE_2D,
GL_TEXTURE_COMPARE_MODE_ARB, GL_COMPARE_R_TO_TEXTURE);
• Default is GL_NONE for normal filtering
• Only applies to depth textures
• Also select the comparison functionAlso select the comparison function• Either GL_LEQUAL (default) or GL_GEQUAL
• glTexParameteri(GL_TEXTURE_2D, GL_TEXTURE_COMPARE_FUNC_ARB, GL_LEQUAL);
New Depth TextureInternal Texture FormatsNew Depth TextureInternal Texture Formats
• ARB_depth_texture supports textures ARB_depth_texture supports textures containing depth values for shadow mappingcontaining depth values for shadow mapping
• Three new internal formatsThree new internal formats• GL_DEPTH_COMPONENT16_ARB
• GL_DEPTH_COMPONENT24_ARB
• GL_DEPTH_COMPONENT32_ARB(same as 24-bit on GeForce3/4/Xbox)
• Use GL_DEPTH_COMPONENT for your external Use GL_DEPTH_COMPONENT for your external formatformat
• Work with glCopySubTexImage2D for fast Work with glCopySubTexImage2D for fast copies from depth buffer to texturecopies from depth buffer to texture• NVIDIA optimizes these copy texture paths
Depth Texture DetailsDepth Texture Details• Usage example:Usage example:glCopyTexImage2D(GL_TEXTURE_2D, level=0,glCopyTexImage2D(GL_TEXTURE_2D, level=0, internalfmt=GL_DEPTH_COMPONENT24_ARB, internalfmt=GL_DEPTH_COMPONENT24_ARB, x=0, y=0, w=256, h=256, border=0); x=0, y=0, w=256, h=256, border=0);
• Then use glCopySubTexImage2D for faster Then use glCopySubTexImage2D for faster updates once texture internal format initially updates once texture internal format initially defineddefined
• Hint: use GL_DEPTH_COMPONENT for your Hint: use GL_DEPTH_COMPONENT for your texture internal formattexture internal format• Leaving off the “n_ARB” precision specifier tells the
driver to match your depth buffer’s precision
• Copy texture performance is optimum when depth buffer precision matches the depth texture precision
• Usage example:Usage example:glCopyTexImage2D(GL_TEXTURE_2D, level=0,glCopyTexImage2D(GL_TEXTURE_2D, level=0, internalfmt=GL_DEPTH_COMPONENT24_ARB, internalfmt=GL_DEPTH_COMPONENT24_ARB, x=0, y=0, w=256, h=256, border=0); x=0, y=0, w=256, h=256, border=0);
• Then use glCopySubTexImage2D for faster Then use glCopySubTexImage2D for faster updates once texture internal format initially updates once texture internal format initially defineddefined
• Hint: use GL_DEPTH_COMPONENT for your Hint: use GL_DEPTH_COMPONENT for your texture internal formattexture internal format• Leaving off the “n_ARB” precision specifier tells the
driver to match your depth buffer’s precision
• Copy texture performance is optimum when depth buffer precision matches the depth texture precision
Depth Texture Copy PerformanceDepth Texture Copy Performance
• The more depth values you copy, the The more depth values you copy, the slower the performanceslower the performance• 512x512 takes 4 times longer to copy than 256x256
• Tradeoff: better defined shadows require higher resolution shadow maps, but slows copying
• 16-bit depth values copy twice as fast as 16-bit depth values copy twice as fast as 24-bit depth values (which are contained 24-bit depth values (which are contained in 32-bit words)in 32-bit words)• Requesting a 16-bit depth buffer (even with 32-bit
color buffer) and copying to a 16-bit depth texture is faster than using a 24-bit depth buffer
• Note that using 16-bit depth buffer usuallyrequires giving up stencil
Hardware ShadowMap FilteringHardware ShadowMap Filtering
• ““Percentage Closer” filteringPercentage Closer” filtering• Normal texture filtering just averages color
components
• Averaging depth values does NOT work
• Solution [Reeves, SIGGARPH 87]
– Hardware performs comparison for each sample– Then, averages results of comparisons
• Provides anti-aliasing at shadow map edges
– Not soft shadows in the umbra/penumbra sense
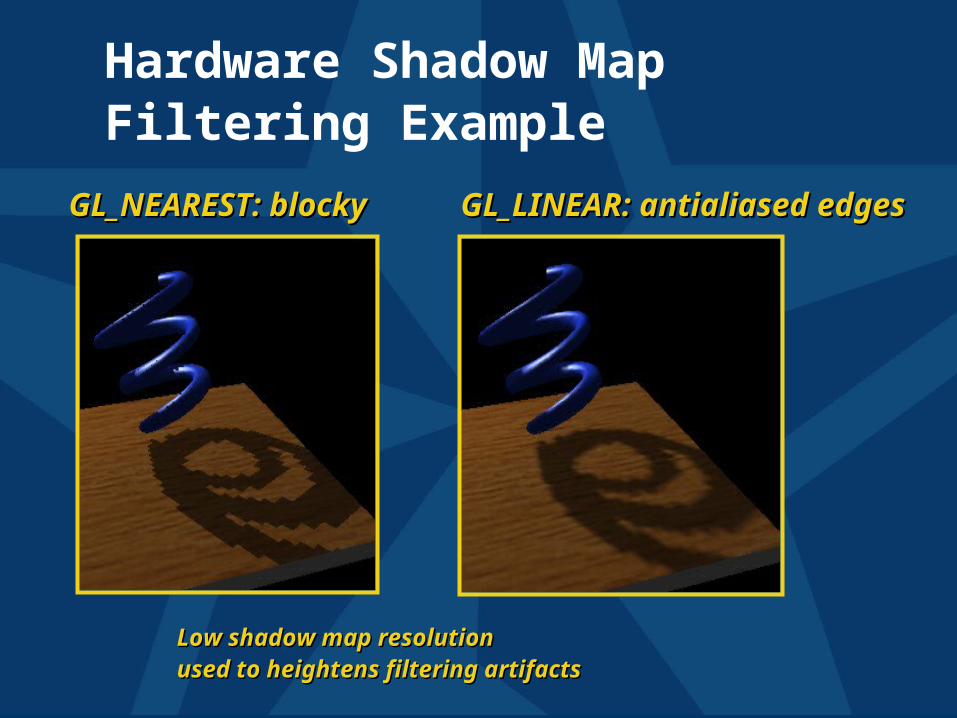
Hardware Shadow MapFiltering Example
GL_NEAREST: blockyGL_NEAREST: blocky GL_LINEAR: antialiased edgesGL_LINEAR: antialiased edges
Low shadow map resolutionLow shadow map resolutionused to heightens filtering artifactsused to heightens filtering artifacts
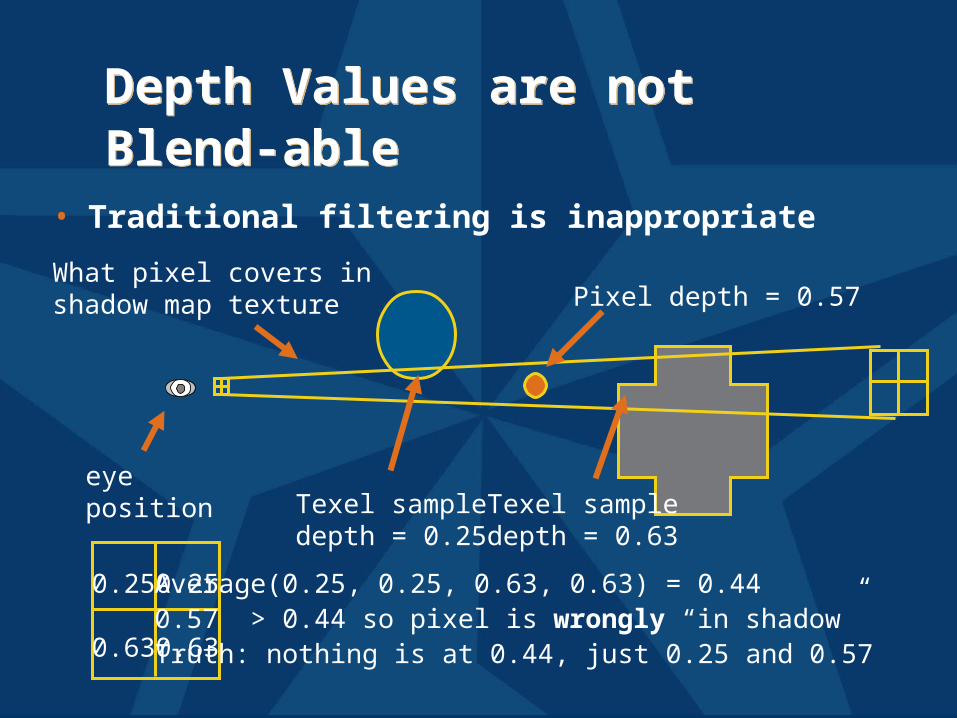
Depth Values are not Blend-ableDepth Values are not Blend-able
• Traditional filtering is inappropriate
eyeposition
What pixel covers inshadow map texture
Texel sampledepth = 0.25
Texel sampledepth = 0.63
0.63
0.25 0.25
0.63
Average(0.25, 0.25, 0.63, 0.63) = 0.440.57 > 0.44 so pixel is wrongly “in shadow”Truth: nothing is at 0.44, just 0.25 and 0.57
Pixel depth = 0.57
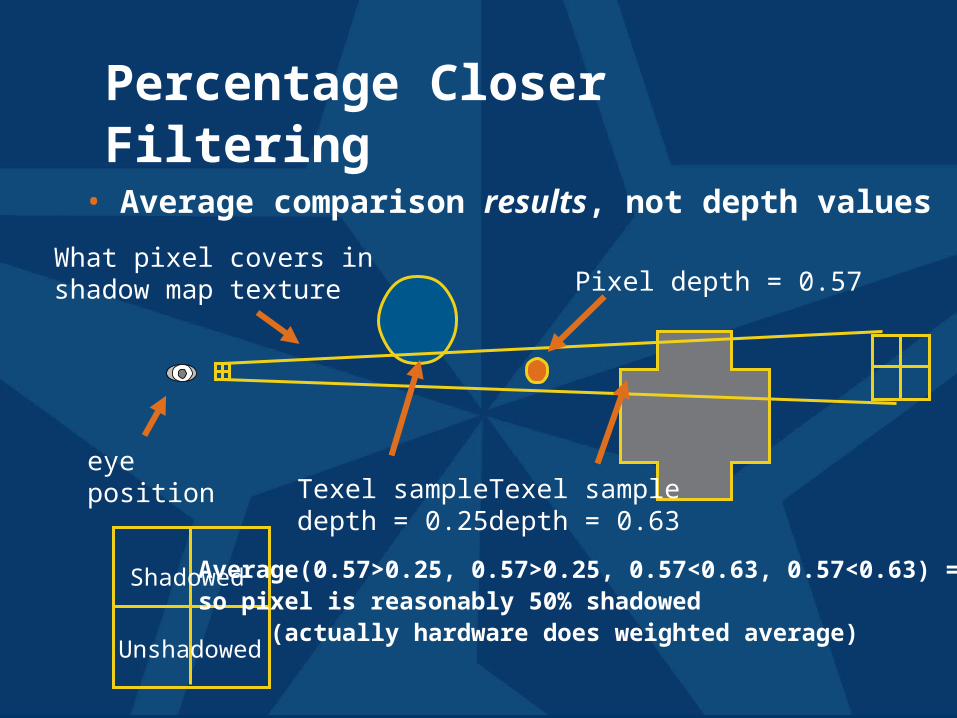
Percentage Closer Filtering
eyeposition
What pixel covers inshadow map texture
Texel sampledepth = 0.25
Texel sampledepth = 0.63
Shadowed Average(0.57>0.25, 0.57>0.25, 0.57<0.63, 0.57<0.63) = 50%so pixel is reasonably 50% shadowed (actually hardware does weighted average)
Pixel depth = 0.57
Unshadowed
• Average comparison results, not depth values
Mipmapping for Depth Textures with Percentage Closer Filtering (1)
Mipmapping for Depth Textures with Percentage Closer Filtering (1)
• Mipmap filtering worksMipmap filtering works• Averages the results of comparisons form the one
or two mipmap levels sampled
• You You cannotcannot use gluBuild2DMipmaps to use gluBuild2DMipmaps to construct depth texture mipmapsconstruct depth texture mipmaps• Again, because you cannot blend depth values!
• If you do want mipmaps, the best If you do want mipmaps, the best approach is re-rendering the scene at approach is re-rendering the scene at each required resolutioneach required resolution• Usually too expensive to be practical for all mipmap
levels
• OpenGL 1.2 LOD clamping can help avoid rendering all the way down to the 1x1 level
Mipmapping for Depth Textures with Percentage Closer Filtering (2)
Mipmapping for Depth Textures with Percentage Closer Filtering (2)
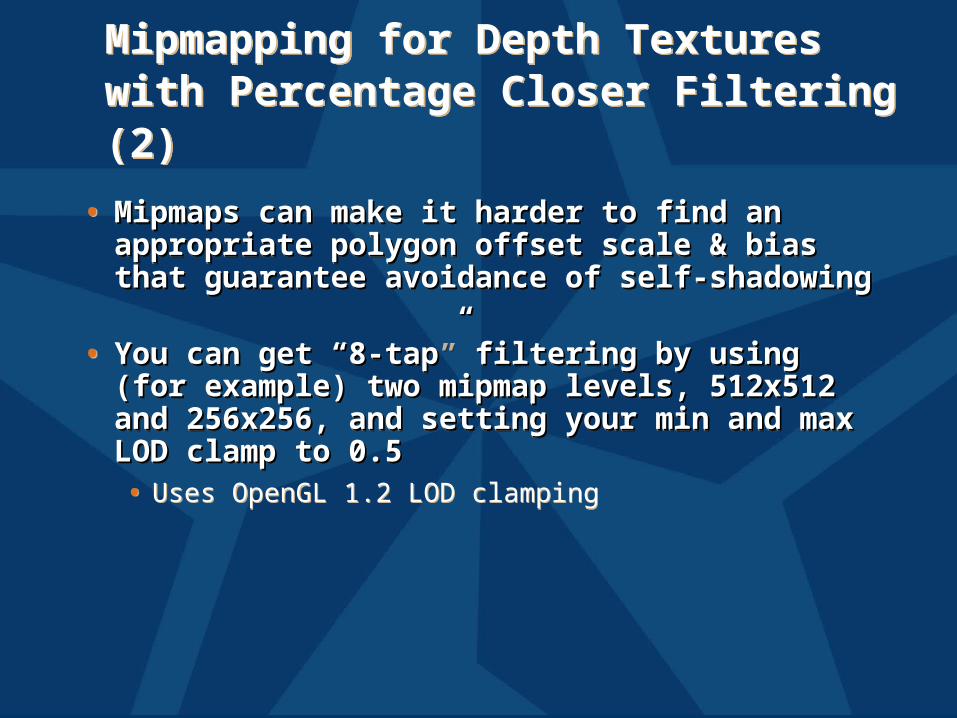
• Mipmaps can make it harder to find an Mipmaps can make it harder to find an appropriate polygon offset scale & bias that appropriate polygon offset scale & bias that guarantee avoidance of self-shadowingguarantee avoidance of self-shadowing
• You can get “8-tap” filtering by using (for You can get “8-tap” filtering by using (for example) two mipmap levels, 512x512 and example) two mipmap levels, 512x512 and 256x256, and setting your min and max 256x256, and setting your min and max LOD clamp to 0.5LOD clamp to 0.5• Uses OpenGL 1.2 LOD clamping
Advice for ShadowedIllumination Model (1)Advice for ShadowedIllumination Model (1)
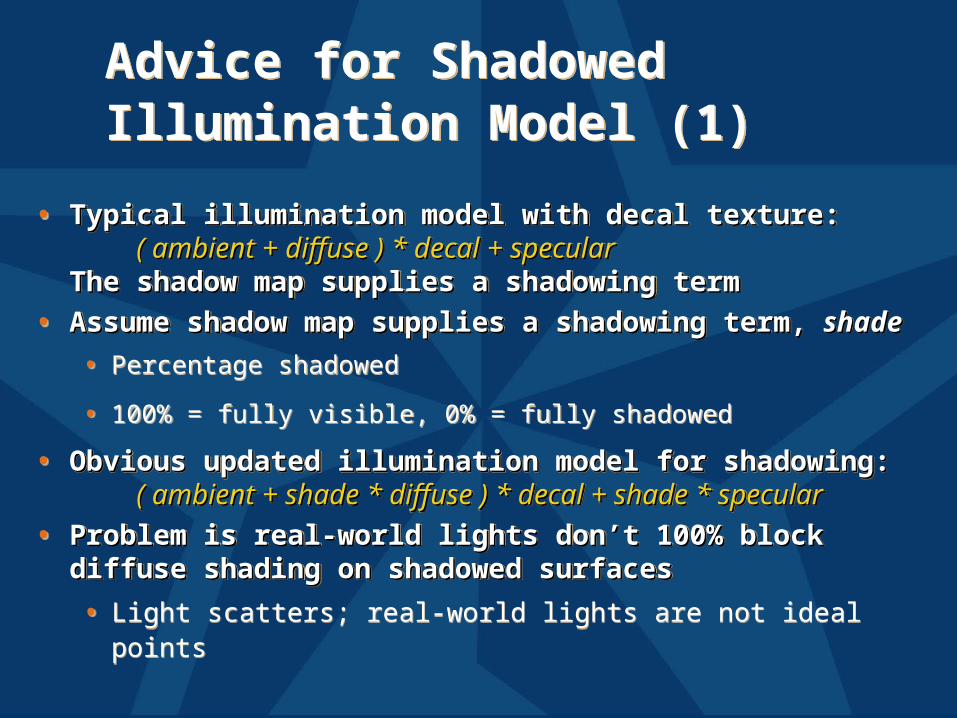
• Typical illumination model with decal texture:Typical illumination model with decal texture: ( ambient + diffuse ) * decal + specular( ambient + diffuse ) * decal + specularThe shadow map supplies a shadowing termThe shadow map supplies a shadowing term
• Assume shadow map supplies a shadowing term, Assume shadow map supplies a shadowing term, shadeshade
• Percentage shadowed
• 100% = fully visible, 0% = fully shadowed
• Obvious updated illumination model for shadowing:Obvious updated illumination model for shadowing: ( ambient + shade * diffuse ) * decal + shade * specular( ambient + shade * diffuse ) * decal + shade * specular
• Problem is real-world lights don’t 100% block diffuse Problem is real-world lights don’t 100% block diffuse shading on shadowed surfacesshading on shadowed surfaces
• Light scatters; real-world lights are not ideal points
The Need forDimming DiffuseThe Need forDimming Diffuse
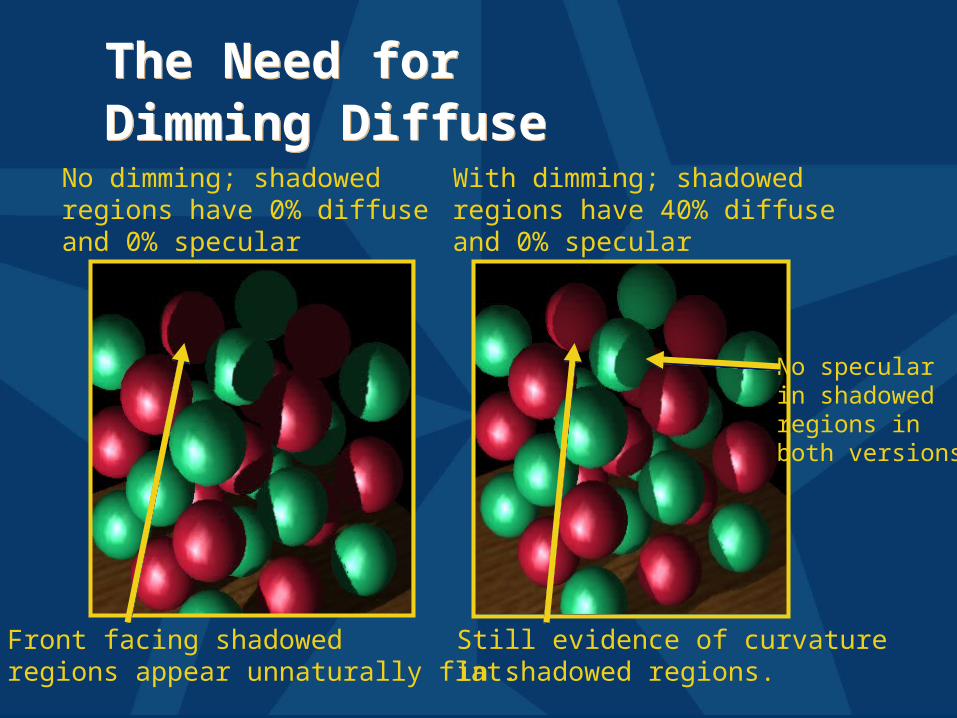
No dimming; shadowedregions have 0% diffuseand 0% specular
With dimming; shadowedregions have 40% diffuseand 0% specular
Front facing shadowedregions appear unnaturally flat.
Still evidence of curvaturein shadowed regions.
No specularin shadowedregions inboth versions.
Advice for ShadowedIllumination Model (2)Advice for ShadowedIllumination Model (2)
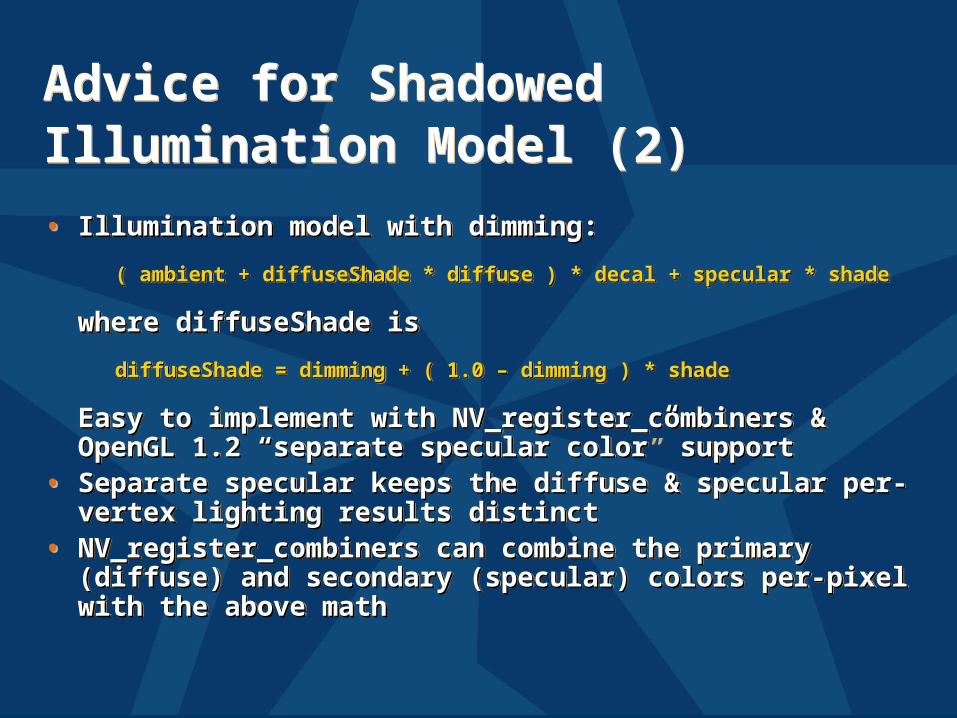
• Illumination model with dimming: Illumination model with dimming:
( ambient + diffuseShade * diffuse ) * decal + specular * shade ( ambient + diffuseShade * diffuse ) * decal + specular * shade
where diffuseShade iswhere diffuseShade is
diffuseShade = dimming + ( 1.0 – dimming ) * shade diffuseShade = dimming + ( 1.0 – dimming ) * shade
Easy to implement with NV_register_combiners & Easy to implement with NV_register_combiners & OpenGL 1.2 “separate specular color” supportOpenGL 1.2 “separate specular color” support
• Separate specular keeps the diffuse & specular per-Separate specular keeps the diffuse & specular per-vertex lighting results distinctvertex lighting results distinct
• NV_register_combiners can combine the primaryNV_register_combiners can combine the primary(diffuse) and secondary (specular) colors per-pixel(diffuse) and secondary (specular) colors per-pixelwith the above mathwith the above math
Careful about Back Projecting Shadow Maps (1)Careful about Back Projecting Shadow Maps (1)
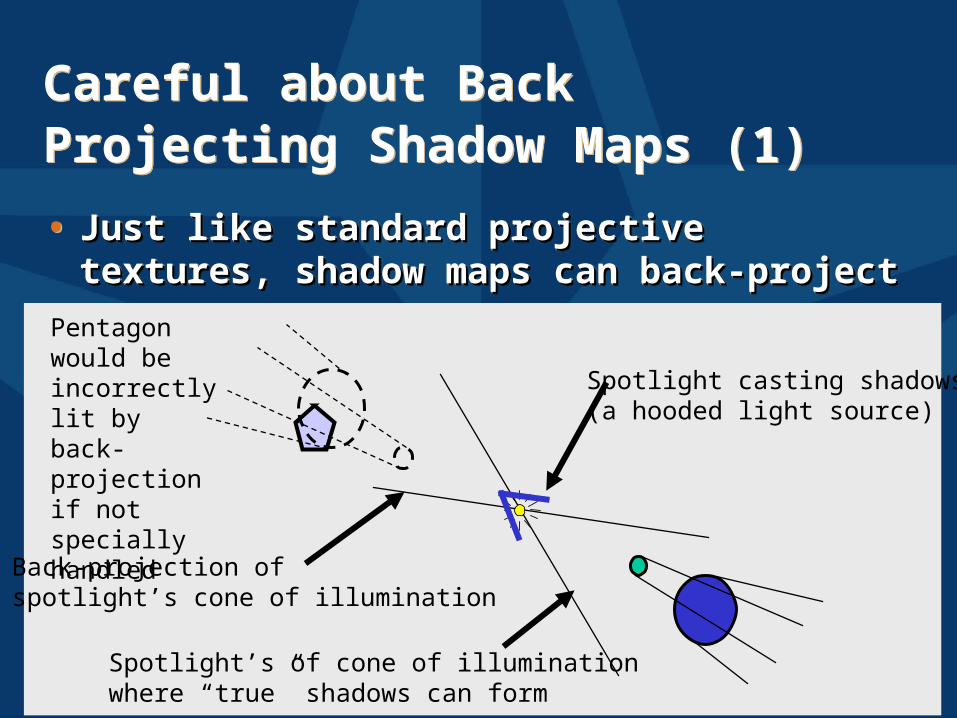
• Just like standard projective textures, Just like standard projective textures, shadow maps can back-projectshadow maps can back-project
• Just like standard projective textures, Just like standard projective textures, shadow maps can back-projectshadow maps can back-project
Spotlight casting shadows(a hooded light source)
Back-projection ofspotlight’s cone of illumination
Pentagon would be incorrectlylit by back-projectionif not specially handled
Spotlight’s of cone of illuminationwhere “true” shadows can form
Careful about Back Projecting Shadow Maps (2)Careful about Back Projecting Shadow Maps (2)
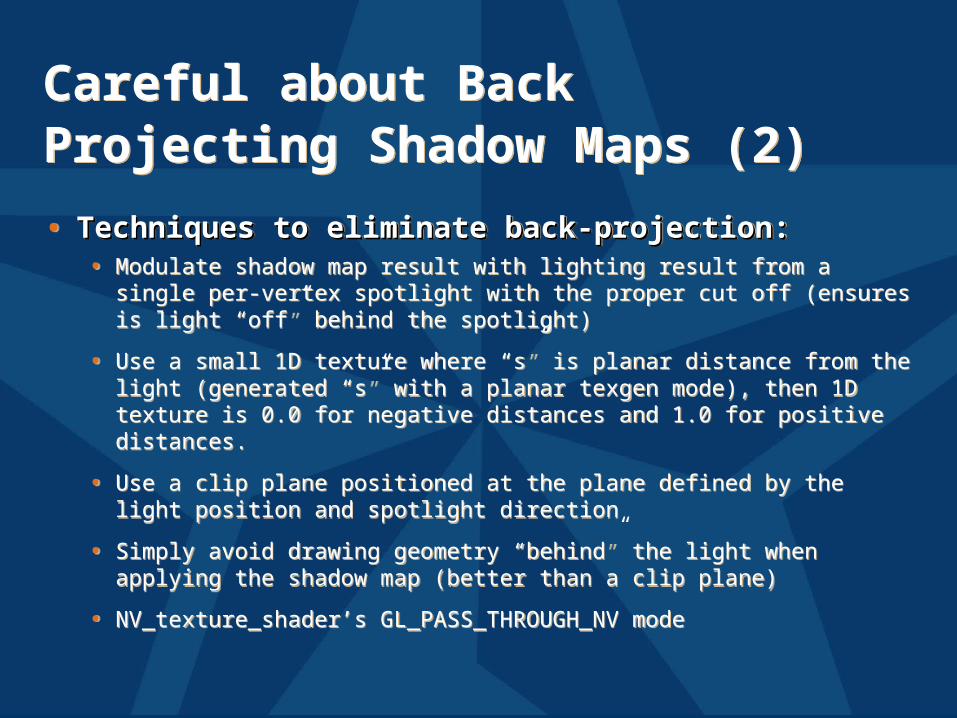
• Techniques to eliminate back-projection:Techniques to eliminate back-projection:• Modulate shadow map result with lighting result from a single
per-vertex spotlight with the proper cut off (ensures is light “off” behind the spotlight)
• Use a small 1D texture where “s” is planar distance from the light (generated “s” with a planar texgen mode), then 1D texture is 0.0 for negative distances and 1.0 for positive distances.
• Use a clip plane positioned at the plane defined by the light position and spotlight direction
• Simply avoid drawing geometry “behind” the light when applying the shadow map (better than a clip plane)
• NV_texture_shader’s GL_PASS_THROUGH_NV mode
Other OpenGL Extensions for Improving Shadow Mapping
Other OpenGL Extensions for Improving Shadow Mapping
• ARB_pbufferARB_pbuffer – create off-screen rendering surfaces for – create off-screen rendering surfaces for rendering shadow map depth buffersrendering shadow map depth buffers• Normally, you can construct shadow maps in your back
buffer and copy them to texture
• But if the shadow map resolution is larger than your window resolution, use pbuffers.
• NV_texture_rectangleNV_texture_rectangle – new 2D texture target that – new 2D texture target that does not require texture width and height to be powers does not require texture width and height to be powers of twoof two• Limitations
– No mipmaps or mipmap filtering supported– No wrap clamp mode– Texture coords in [0..w]x[0..h] rather than
[0..1]x[0..1] range.
• Quite acceptable for for shadow mapping
Combining Shadow Mappingwith other TechniquesCombining Shadow Mappingwith other Techniques
• Good in combination with techniquesGood in combination with techniques• Use stencil to tag pixels as inside or outside of
shadow
• Use other rendering techniques in extra passes
– bump mapping– texture decals, etc.
• Shadow mapping can be integrated into more complex multi-pass rendering algorithms
• Shadow mapping algorithm does not Shadow mapping algorithm does not require access to vertex-level datarequire access to vertex-level data• Easy to mix with vertex programs and such

An Alternative to DedicatedShadow Mapping HardwareAn Alternative to DedicatedShadow Mapping Hardware
• Consumer 3D hardware solutionConsumer 3D hardware solution• Proposed by Wolfgang Heidrich in his 1999 Ph.D.
thesis
• Leverages today’s consumer multi-texture hardware
– 1st texture unit accesses 2D depth map texture
– 2nd texture unit accesses 1D Z range texture
• Extended texture environment subtracts 2nd texture from 1st
– shadowed if greater than zero, unshadowed otherwise
– use alpha test to discard shadowed fragments

Issues with ShadowMapping (1)Issues with ShadowMapping (1)
• Not without its problemsNot without its problems• Prone to aliasing artifacts
– “percentage closer” filtering helps this– normal color filtering does not work well
• Depth bias is not completely foolproof
• Requires extra shadow map rendering pass and texture loading
• Higher resolution shadow map reduces blockiness
– but also increase texture copying expense
Issues with ShadowMapping (2)Issues with ShadowMapping (2)
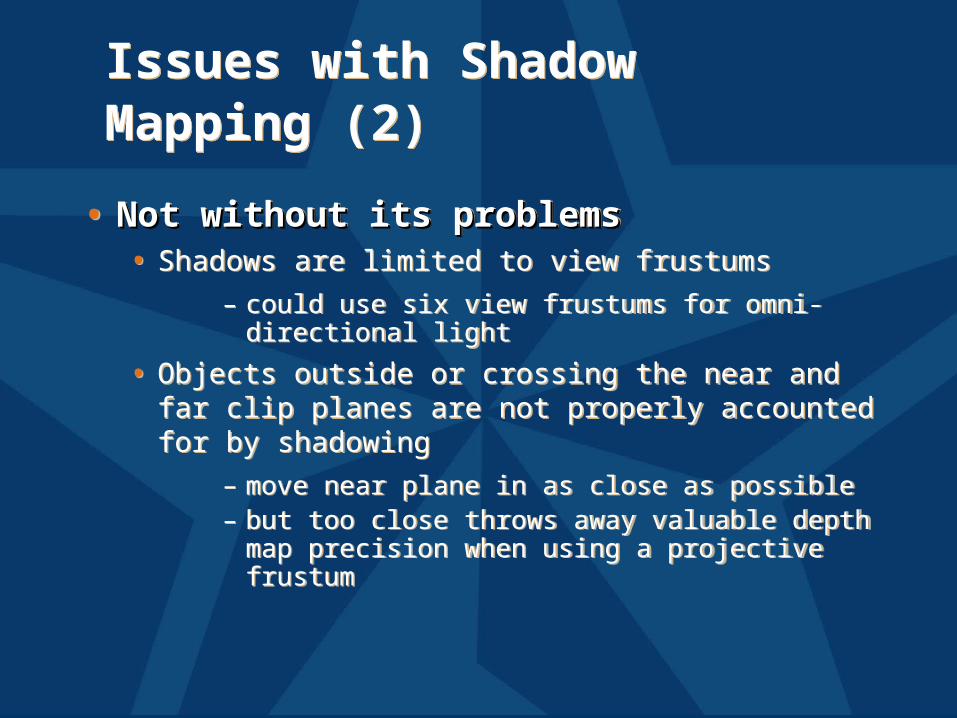
• Not without its problemsNot without its problems• Shadows are limited to view frustums
– could use six view frustums for omni-directional light
• Objects outside or crossing the near and far clip planes are not properly accounted for by shadowing
– move near plane in as close as possible– but too close throws away valuable depth map
precision when using a projective frustum
Some Theory for Determining Shadow Map Resolution (1)
Some Theory for Determining Shadow Map Resolution (1)
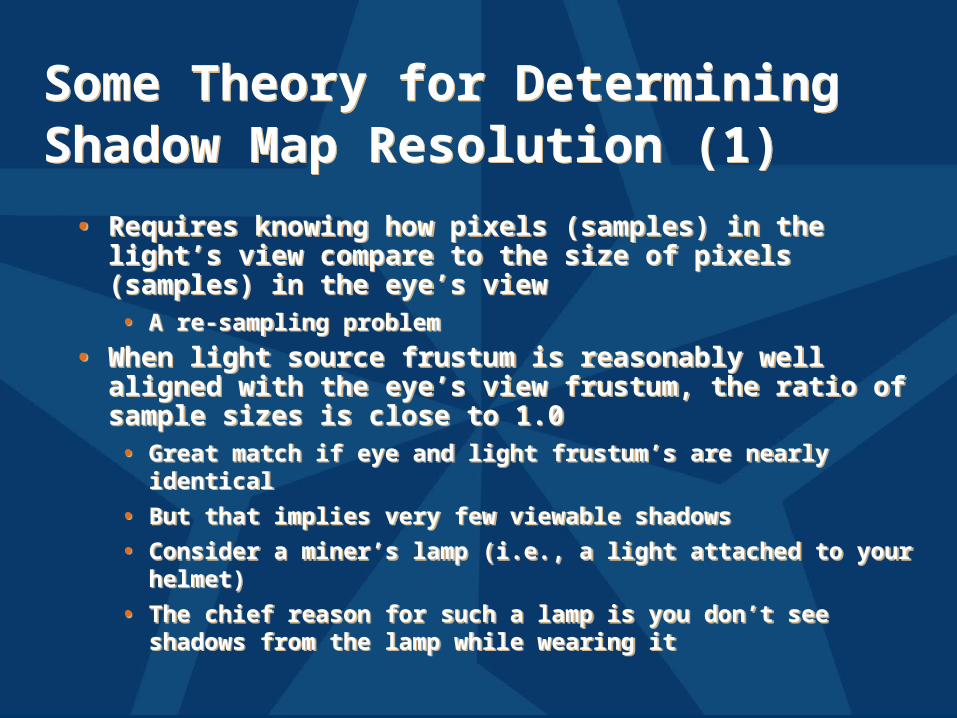
• Requires knowing how pixels (samples) in the light’s view compare to the size of pixels (samples) in the eye’s view• A re-sampling problem
• When light source frustum is reasonably well aligned with the eye’s view frustum, the ratio of sample sizes is close to 1.0• Great match if eye and light frustum’s are nearly
identical
• But that implies very few viewable shadows
• Consider a miner’s lamp (i.e., a light attached to your helmet)
• The chief reason for such a lamp is you don’t see shadows from the lamp while wearing it

Some Theory for Determining Shadow Map Resolution (2)
Some Theory for Determining Shadow Map Resolution (2)
• So best case is miner’s lampSo best case is miner’s lamp• Worst case is shadows from light shining Worst case is shadows from light shining
at the viewerat the viewer• “that deer in the headlights” problem – definitely
worst case for the deer
• Also known as the “dueling frusta” problem(frusta, plural of frustum)
• Let’s attempt to visualize what’s Let’s attempt to visualize what’s happens…happens…
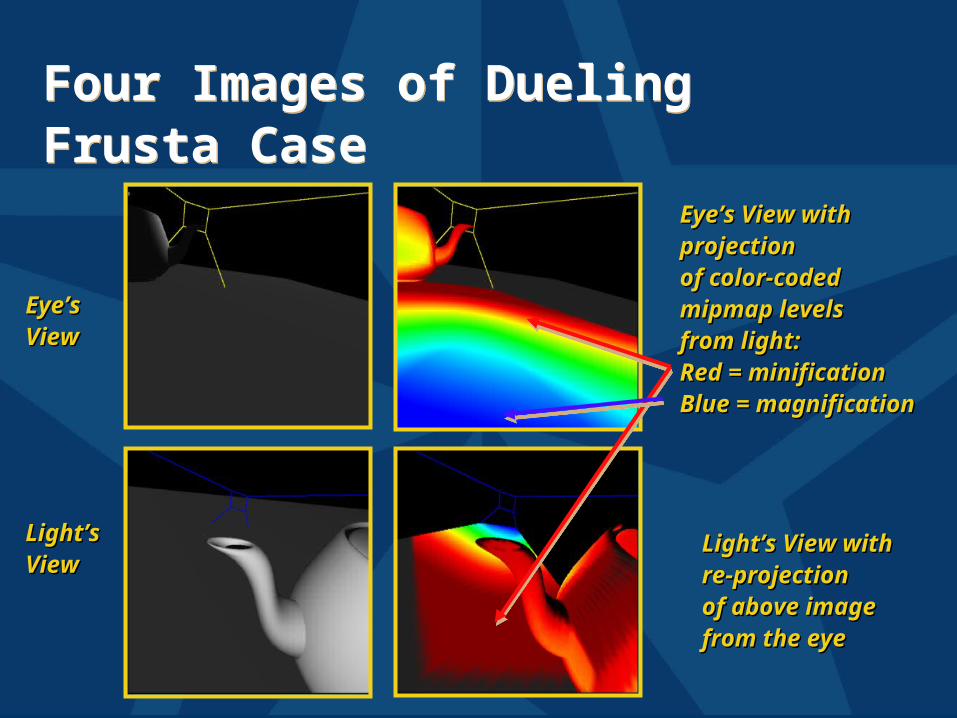
Four Images of Dueling Frusta CaseFour Images of Dueling Frusta Case
Eye’sEye’sViewView
Light’sLight’sViewView
Eye’s View with Eye’s View with projectionprojectionof color-codedof color-codedmipmap levelsmipmap levelsfrom light:from light:Red = minificationRed = minificationBlue = Blue = magnificationmagnification
Light’s View Light’s View withwithre-projectionre-projectionof above imageof above imagefrom the eyefrom the eye
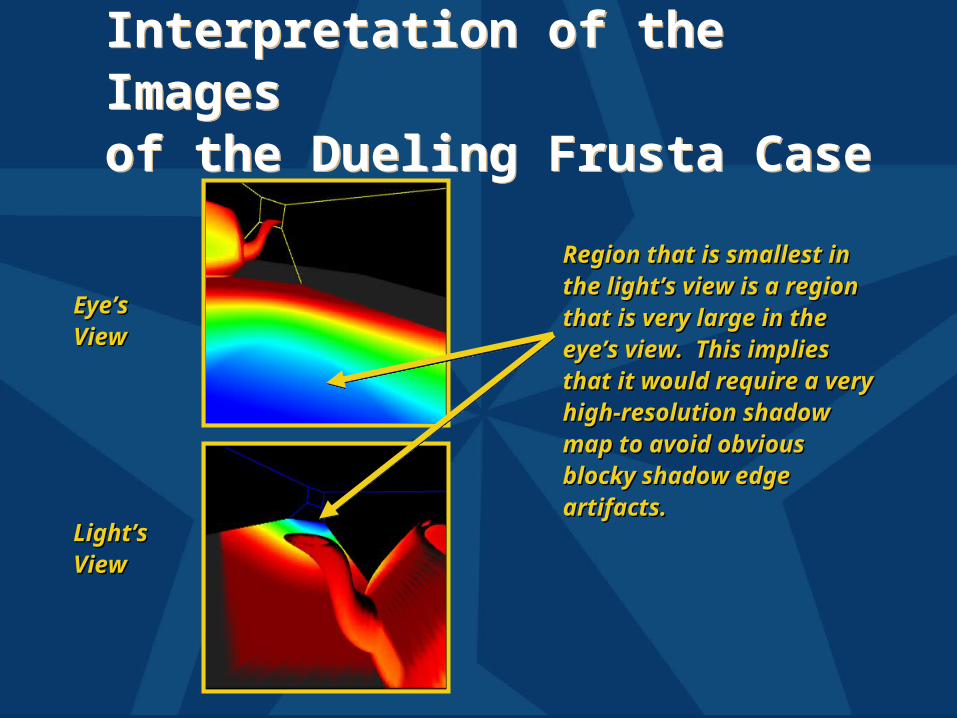
Interpretation of the Imagesof the Dueling Frusta CaseInterpretation of the Imagesof the Dueling Frusta Case
Eye’sEye’sViewView
Light’sLight’sViewView
Region that is smallest Region that is smallest in the light’s view is a in the light’s view is a region that is very region that is very large in the eye’s large in the eye’s view. This implies that view. This implies that it would require a very it would require a very high-resolution high-resolution shadow map to avoid shadow map to avoid obvious blocky shadow obvious blocky shadow edge artifacts.edge artifacts.

Dueling Frusta Blocky Shadow Edge ArtifactsDueling Frusta Blocky Shadow Edge Artifacts
Light position Light position out here out here pointing pointing towards the towards the viewer.viewer.Blocky Blocky shadow shadow edge edge artifacts.artifacts.
Notice that Notice that shadow shadow edge is well edge is well defined in defined in the the distance.distance.
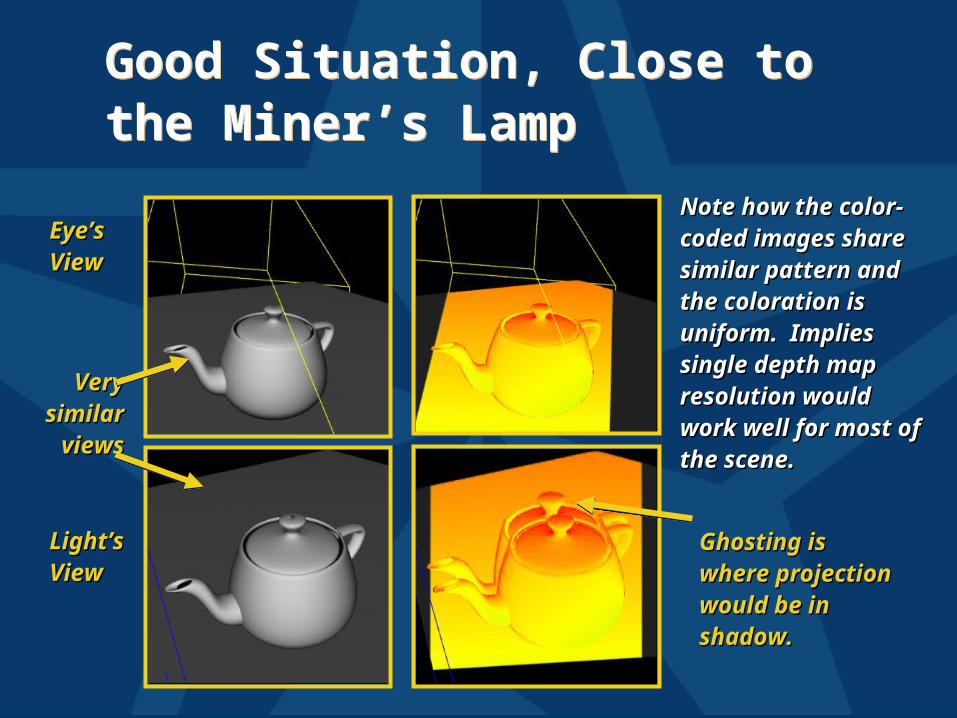
Good Situation, Close to the Miner’s LampGood Situation, Close to the Miner’s Lamp
Eye’sEye’sViewView
Light’sLight’sViewView
Very Very similar similar viewsviews
Note how the Note how the color-coded color-coded images share images share similar pattern similar pattern and the coloration and the coloration is uniform. is uniform. Implies single Implies single depth map depth map resolution would resolution would work well for most work well for most of the scene.of the scene.
Ghosting is Ghosting is where where projection projection would be in would be in shadow.shadow.
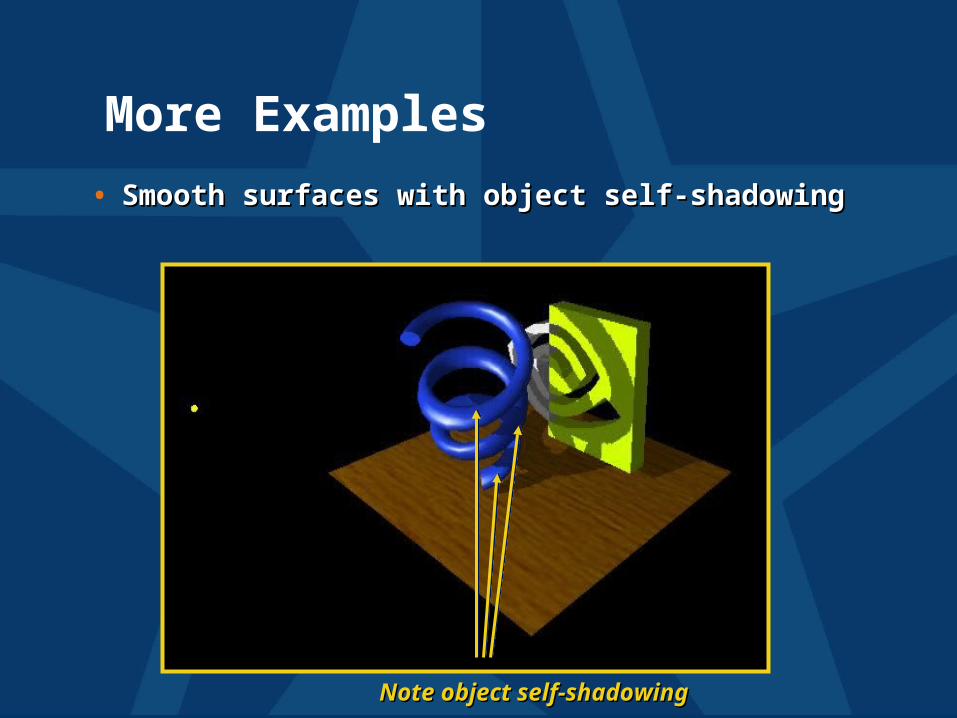
More Examples
• Smooth surfaces with object self-shadowingSmooth surfaces with object self-shadowing
Note object self-shadowingNote object self-shadowing
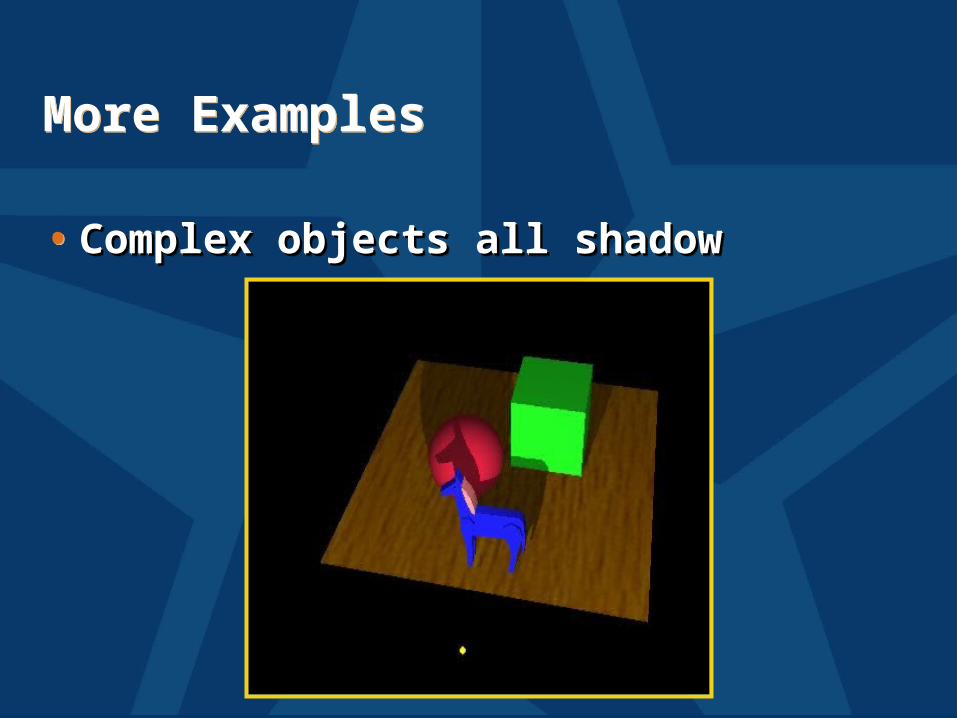
More ExamplesMore Examples
• Complex objects all shadowComplex objects all shadow• Complex objects all shadowComplex objects all shadow
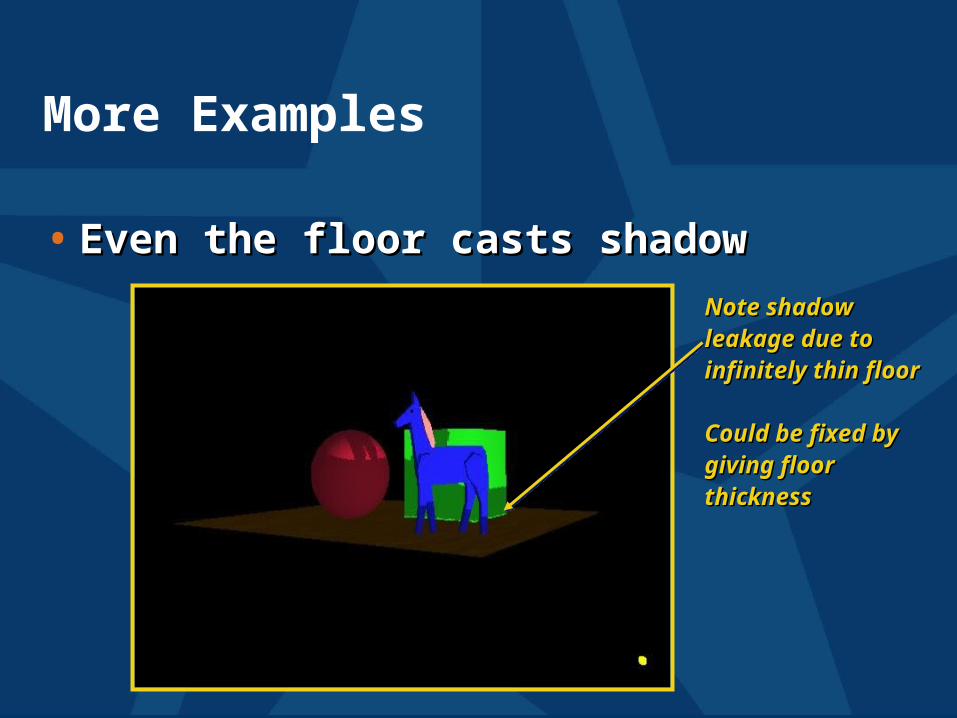
More Examples
• Even the floor casts shadowEven the floor casts shadowNote shadow Note shadow leakage due toleakage due toinfinitely thin infinitely thin floorfloor
Could be fixed Could be fixed by giving floor by giving floor thicknessthickness
Combining Projective Texturing for SpotlightsCombining Projective Texturing for Spotlights
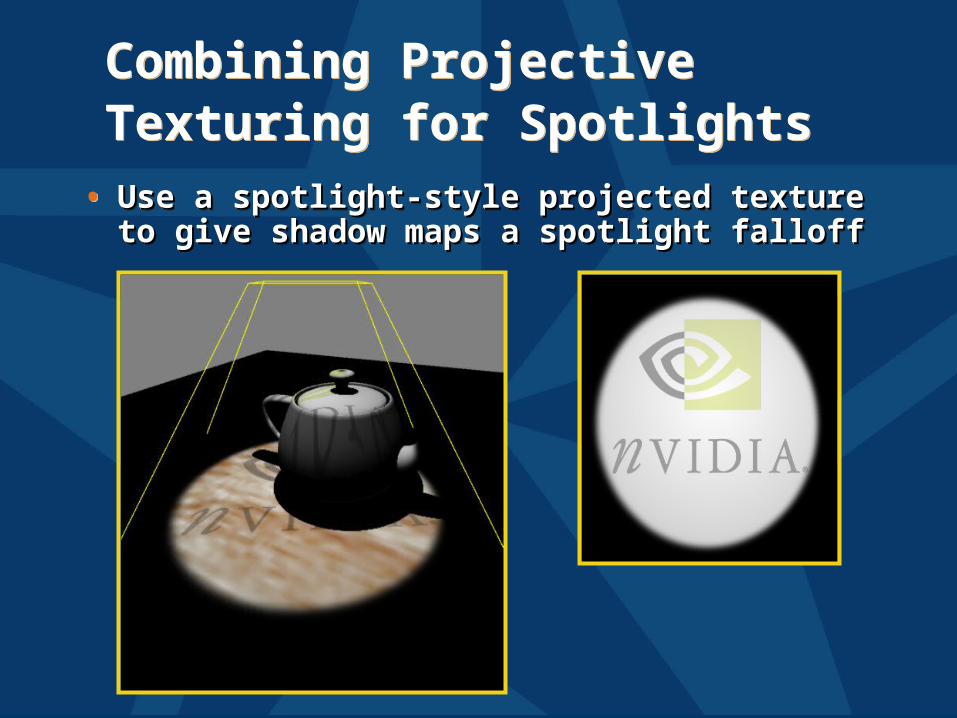
• Use a spotlight-style projected texture to Use a spotlight-style projected texture to give shadow maps a spotlight falloffgive shadow maps a spotlight falloff
• Use a spotlight-style projected texture to Use a spotlight-style projected texture to give shadow maps a spotlight falloffgive shadow maps a spotlight falloff
Combining Shadows withAtmospherics
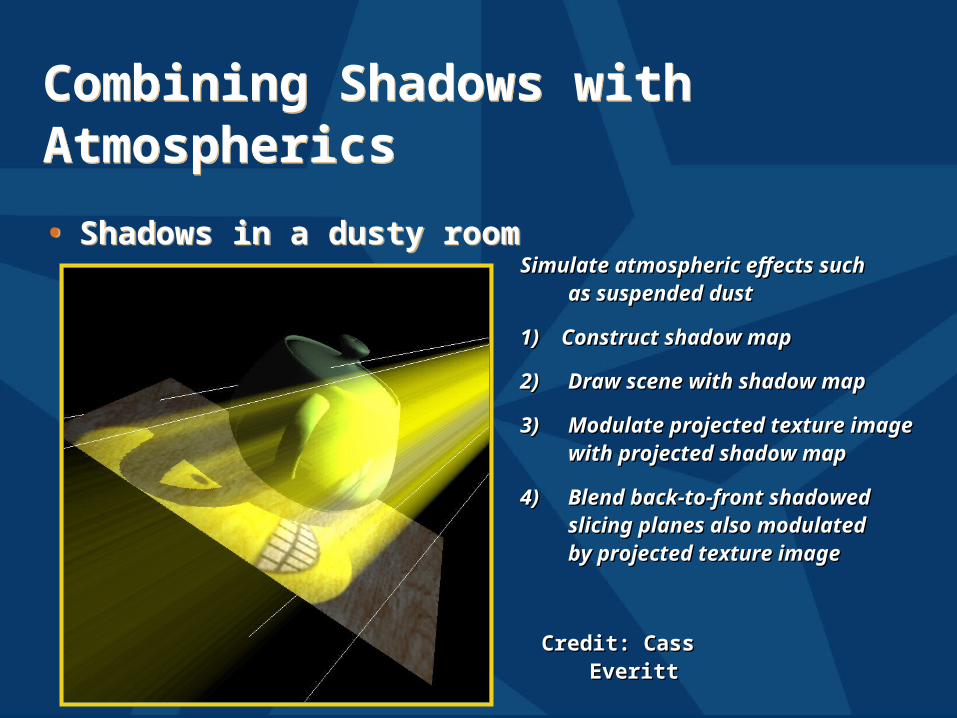
Combining Shadows withAtmospherics• Shadows in a dusty room• Shadows in a dusty room
Simulate atmospheric effects Simulate atmospheric effects suchsuchas suspended dustas suspended dust
1) Construct shadow map1) Construct shadow map
2)2) Draw scene with shadow Draw scene with shadow mapmap
3)3) Modulate projected texture Modulate projected texture imageimagewith projected shadow mapwith projected shadow map
4)4) Blend back-to-front Blend back-to-front shadowedshadowedslicing planes also slicing planes also modulatedmodulatedby projected texture imageby projected texture image
Credit: Cass EverittCredit: Cass Everitt
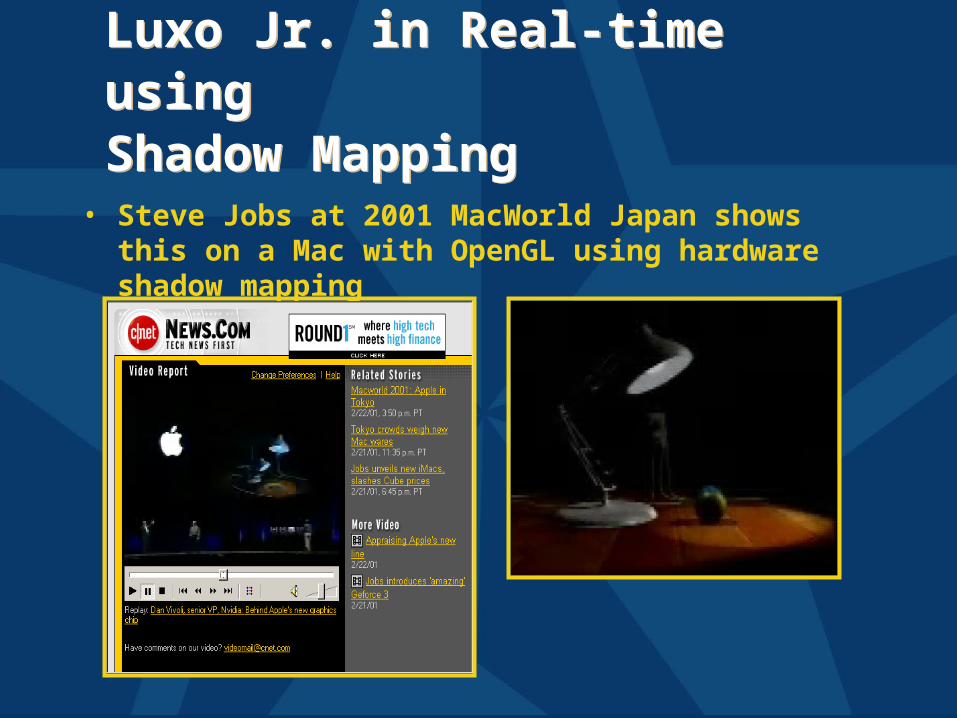
Luxo Jr. in Real-time usingShadow MappingLuxo Jr. in Real-time usingShadow Mapping
• Steve Jobs at 2001 MacWorld Japan shows this on a Mac with OpenGL using hardware shadow mapping
Luxo Jr. Demo DetailsLuxo Jr. Demo Details
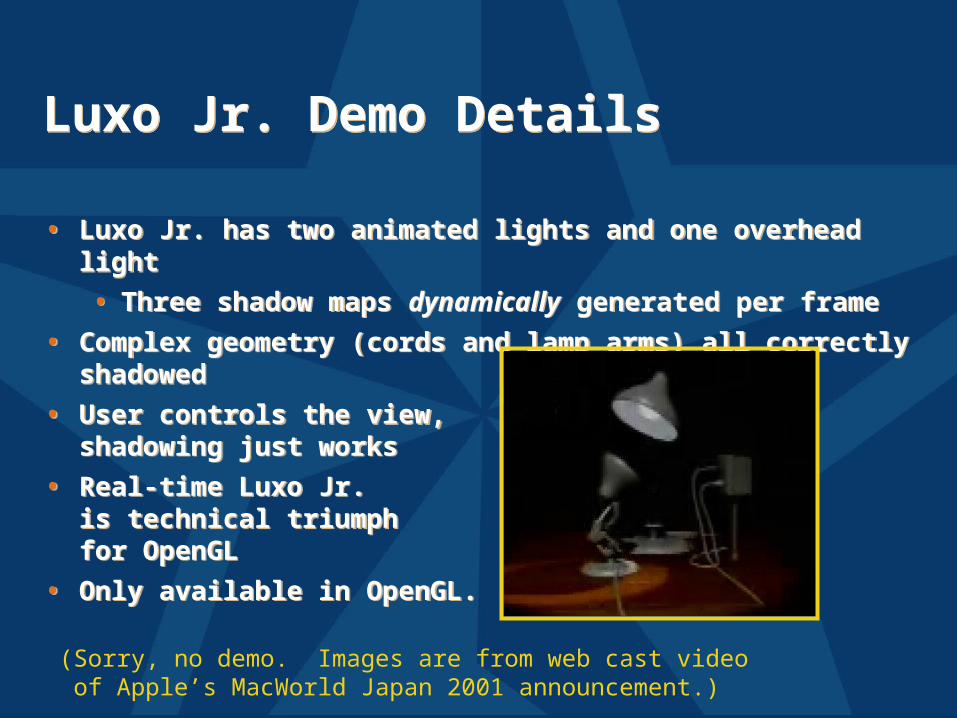
• Luxo Jr. has two animated lights and one overhead light
• Three shadow maps dynamically generated per frame
• Complex geometry (cords and lamp arms) all correctly shadowed
• User controls the view,shadowing just works
• Real-time Luxo Jr.is technical triumphfor OpenGL
• Only available in OpenGL.
• Luxo Jr. has two animated lights and one overhead light
• Three shadow maps dynamically generated per frame
• Complex geometry (cords and lamp arms) all correctly shadowed
• User controls the view,shadowing just works
• Real-time Luxo Jr.is technical triumphfor OpenGL
• Only available in OpenGL.(Sorry, no demo. Images are from web cast video of Apple’s MacWorld Japan 2001 announcement.)
Shadow MappingSource CodeShadow MappingSource Code
• Find it on the NVIDIA web siteFind it on the NVIDIA web site• The source code
– “shadowcast” in OpenGL example code– Works on TNT, GeForce, Quadro, & GeForce3
using best available shadow mapping support– And vendors that support
EXT_texture_env_combine
• NVIDIA OpenGL Extension Specifications
– documents EXT_texture_env_combine, NV_register_combiners, SGIX_depth_texture, & SGIX_shadow
• http://www.nvidia.com
CreditsCredits
• The inspiration for these ideasThe inspiration for these ideas• Wolfgang Heidrich, Max-Planck Institute for
Computer Science
– original dual-texture shadow mapping idea– read his thesis High-quality Shading and
Lighting for Hardware-accelerated Rendering
• Michael McCool, University of Waterloo
– suggested idea for multi-digit shadow comparisons
ConclusionsConclusions• Shadow mapping offers real-time shadowing effectsShadow mapping offers real-time shadowing effects
• Independent of scene complexity
• Very compatible with multi-texturing– Does not mandate multi-pass as stenciled shadow volumes do
• Ideal for shadows from spotlights
• Consumer hardware shadow map support here todayConsumer hardware shadow map support here today• GeForce3, GeForce4 Ti, Xbox
• Dual-texturing technique supports legacy hardware
• Same basic technique used by Pixar to generate Same basic technique used by Pixar to generate shadows in their computer-generated moviesshadows in their computer-generated movies
• Shadow mapping offers real-time shadowing effectsShadow mapping offers real-time shadowing effects• Independent of scene complexity
• Very compatible with multi-texturing– Does not mandate multi-pass as stenciled shadow volumes do
• Ideal for shadows from spotlights
• Consumer hardware shadow map support here todayConsumer hardware shadow map support here today• GeForce3, GeForce4 Ti, Xbox
• Dual-texturing technique supports legacy hardware
• Same basic technique used by Pixar to generate Same basic technique used by Pixar to generate shadows in their computer-generated moviesshadows in their computer-generated movies
AppendixAppendixAppendixAppendix
Simulating Shadow Mapping Simulating Shadow Mapping For Legacy Graphics For Legacy Graphics
Hardware With Dual-TexturingHardware With Dual-Texturing
Simulating Shadow Mapping Simulating Shadow Mapping For Legacy Graphics For Legacy Graphics
Hardware With Dual-TexturingHardware With Dual-Texturing

An Alternative to DedicatedShadow Mapping HardwareAn Alternative to DedicatedShadow Mapping Hardware
• Consumer 3D hardware solutionConsumer 3D hardware solution• Proposed by Wolfgang Heidrich in his 1999 ph.D.
Thesis
• Leverages today’s consumer multi-texture hardware
– 1st texture unit accesses 2D depth map texture
– 2nd texture unit accesses 1D Z range texture
• Extended texture environment subtracts 2nd texture from 1st
– Shadowed if greater than zero, un-shadowed otherwise
– Use alpha test to discard shadowed fragments
Dual-texture ShadowMapping ApproachDual-texture ShadowMapping Approach
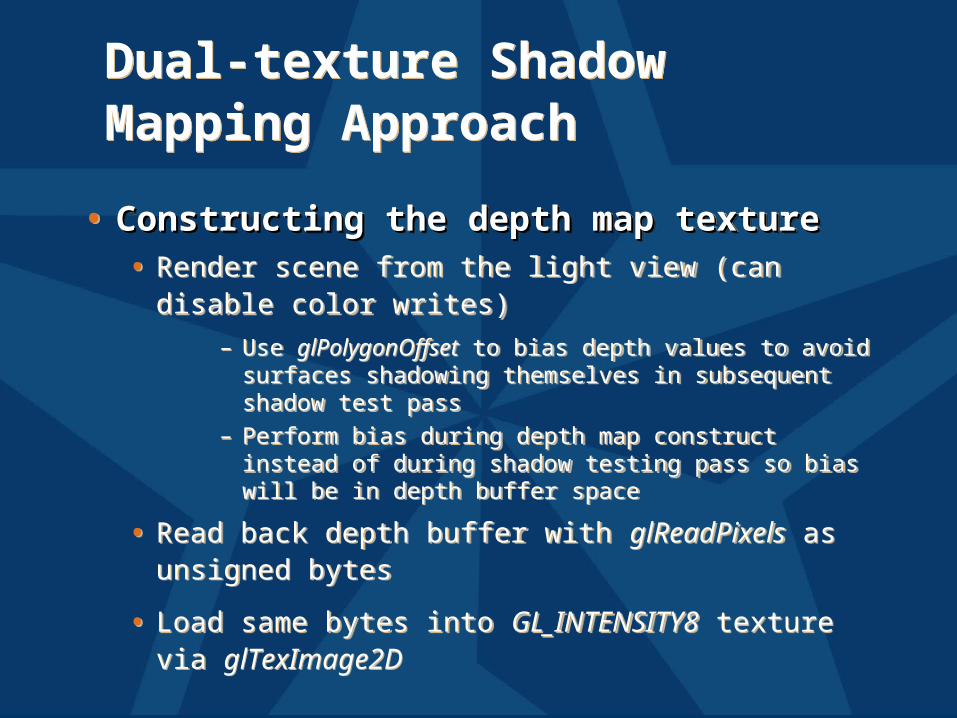
• Constructing the depth map textureConstructing the depth map texture• Render scene from the light view (can disable
color writes)– Use glPolygonOffset to bias depth values to avoid
surfaces shadowing themselves in subsequent shadow test pass
– Perform bias during depth map construct instead of during shadow testing pass so bias will be in depth buffer space
• Read back depth buffer with glReadPixels as unsigned bytes
• Load same bytes into GL_INTENSITY8 texture via glTexImage2D
Dual-texture ShadowMapping ApproachDual-texture ShadowMapping Approach
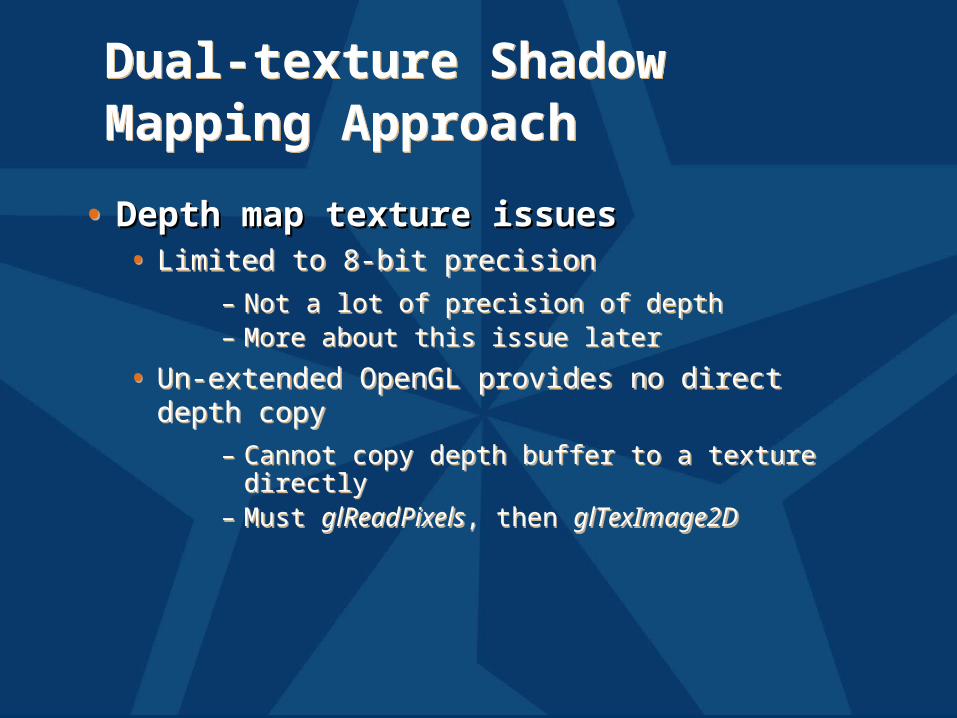
• Depth map texture issuesDepth map texture issues• Limited to 8-bit precision
– Not a lot of precision of depth– More about this issue later
• Un-extended OpenGL provides no direct depth copy
– Cannot copy depth buffer to a texture directly– Must glReadPixels, then glTexImage2D
• Depth map texture issuesDepth map texture issues• Limited to 8-bit precision
– Not a lot of precision of depth– More about this issue later
• Un-extended OpenGL provides no direct depth copy
– Cannot copy depth buffer to a texture directly– Must glReadPixels, then glTexImage2D
Dual-texture ShadowMapping ApproachDual-texture ShadowMapping Approach
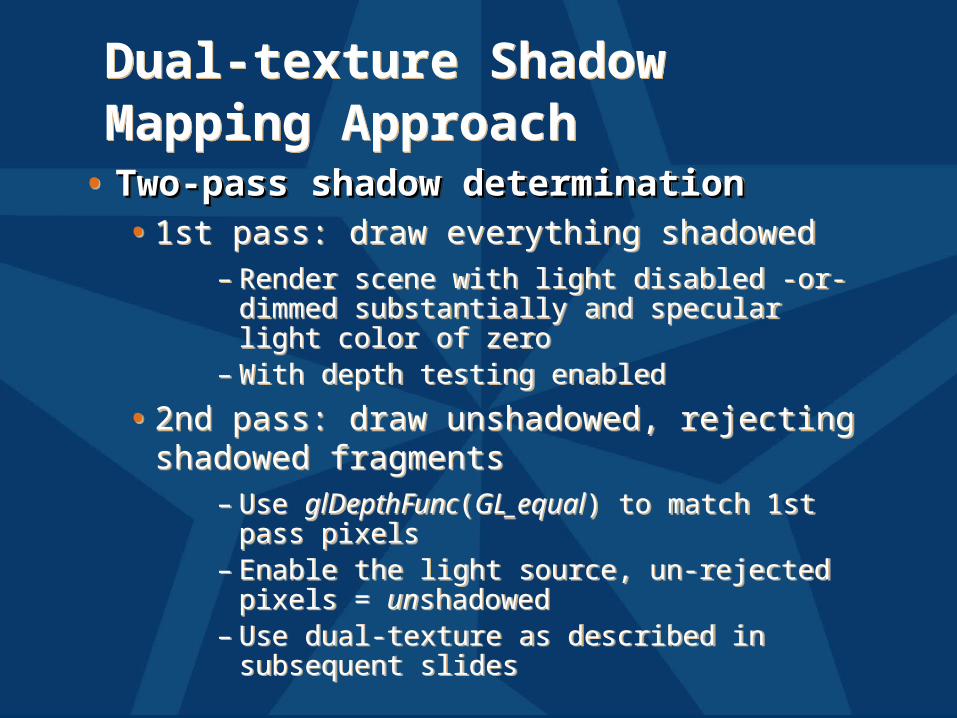
• Two-pass shadow determinationTwo-pass shadow determination•1st pass: draw everything shadowed
– Render scene with light disabled -or- dimmed substantially and specular light color of zero
– With depth testing enabled
•2nd pass: draw unshadowed, rejecting shadowed fragments
– Use glDepthFunc(GL_equal) to match 1st pass pixels
– Enable the light source, un-rejected pixels = unshadowed
– Use dual-texture as described in subsequent slides

Dual-texture ShadowMapping ApproachDual-texture ShadowMapping Approach
• Dual-texture configurationDual-texture configuration•1st texture unit
– Bind to 2D texture containing light’s depth map texture
– Intensity texture format (same value in RGB and alpha)
•2nd texture unit– Bind to 1D texture containing a linear
ramp from 0 to 1– Maps S texture coordinate in [0, 1] range
to intensity value in [0, 1] range
Dual-texture ShadowMapping Approach
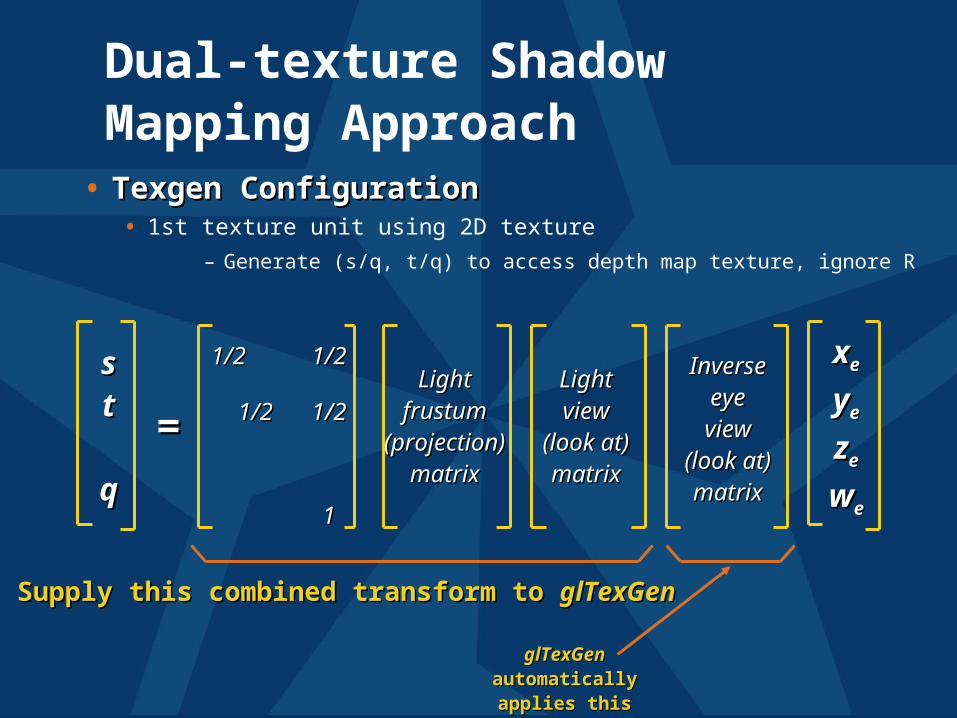
• Texgen ConfigurationTexgen Configuration• 1st texture unit using 2D texture
– Generate (s/q, t/q) to access depth map texture, ignore R
1/21/2
1/21/2
11
1/21/2
1/21/2LightLight
frustumfrustum(projection)(projection)
matrixmatrix
LightLightviewview
(look at)(look at)matrixmatrix
InverseInverseeyeeyeviewview
(look at)(look at)matrixmatrix
==
xxee
yyee
zzee
wwee
sstt
Supply this combined transform to Supply this combined transform to glTexGenglTexGen
glTexGenglTexGenautomaticallyautomaticallyapplies thisapplies this
Dual-texture ShadowMapping Approach
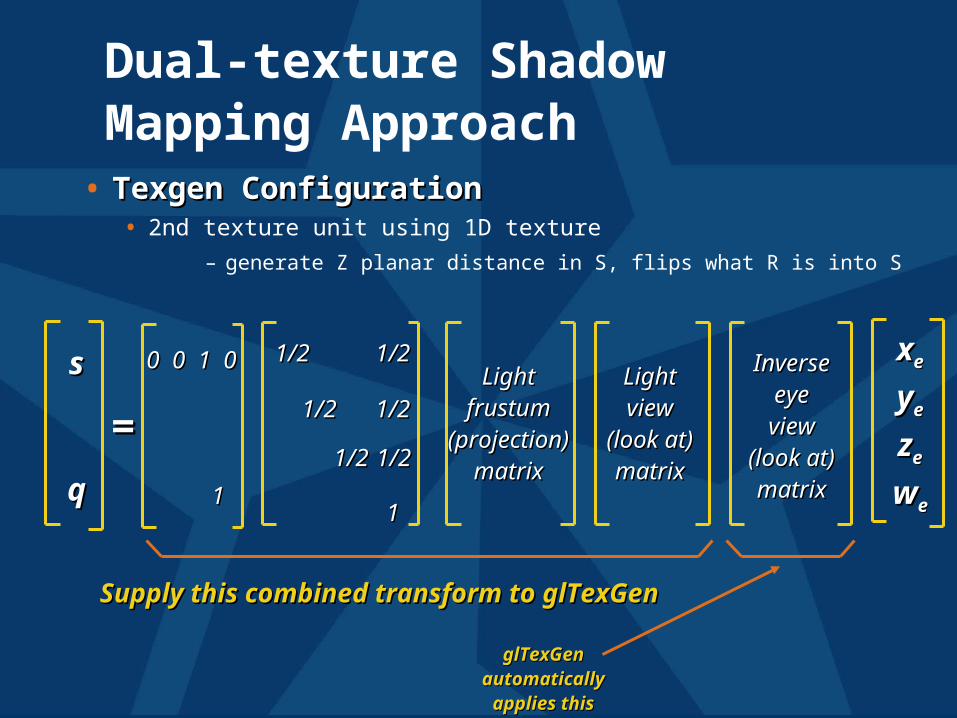
• Texgen ConfigurationTexgen Configuration• 2nd texture unit using 1D texture
– generate Z planar distance in S, flips what R is into S
1/21/2
1/21/2
11
1/21/2
1/21/2LightLight
frustumfrustum(projection)(projection)
matrixmatrix
LightLightviewview
(look at)(look at)matrixmatrix
InverseInverseeyeeyeviewview
(look at)(look at)matrixmatrix
==
xxee
yyee
zzee
wwee
ss
Supply this combined transform to glTexGenSupply this combined transform to glTexGen
glTexGenglTexGenautomaticallyautomaticallyapplies thisapplies this
0 0 1 00 0 1 0
11
1/21/21/21/2

Dual-texture ShadowMapping ApproachDual-texture ShadowMapping Approach
• Texture environment (texenv) configurationTexture environment (texenv) configuration• Compute the difference between Tex0 from Tex1
– un-extended OpenGL texenv cannot subtract
• But can use standard EXT_texture_env_combine extension
– add signed operation– compute fragment alpha as
alpha(Tex0) + (1 - alpha(Tex1)) - 0.5– result is greater or equal to 0.5 when Tex0 >=
Tex1result is less than 0.5 when Tex0 < Tex1
Dual-texture ShadowMapping ApproachDual-texture ShadowMapping Approach
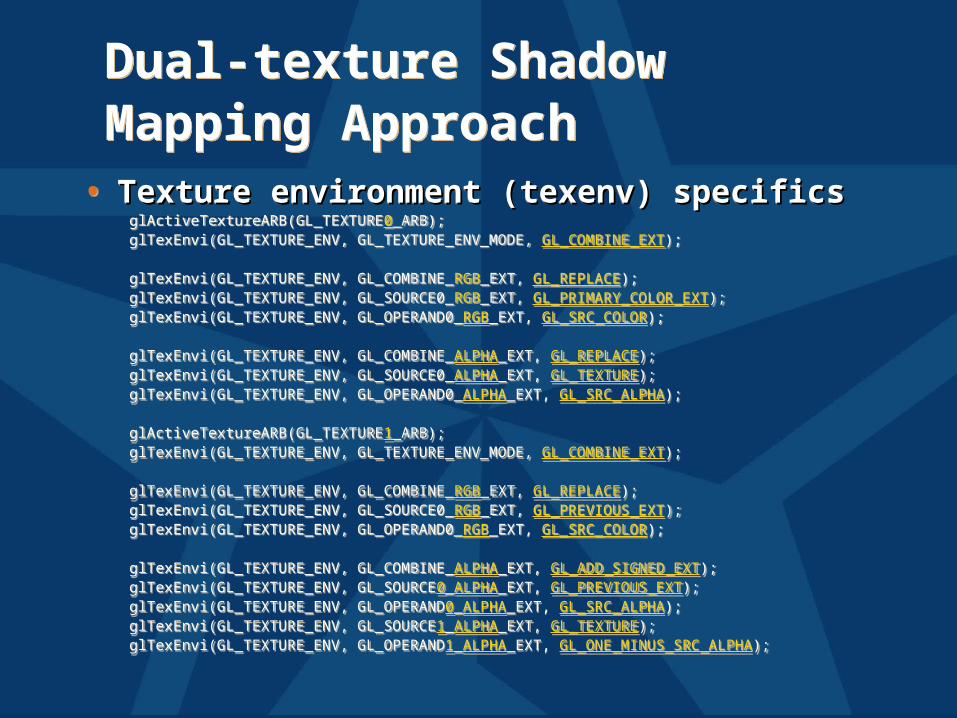
• Texture environment (texenv) specificsTexture environment (texenv) specificsglActiveTextureARB(GL_TEXTURE0_ARB);glTexEnvi(GL_TEXTURE_ENV, GL_TEXTURE_ENV_MODE, GL_COMBINE_EXT);
glTexEnvi(GL_TEXTURE_ENV, GL_COMBINE_RGB_EXT, GL_REPLACE);glTexEnvi(GL_TEXTURE_ENV, GL_SOURCE0_RGB_EXT, GL_PRIMARY_COLOR_EXT);glTexEnvi(GL_TEXTURE_ENV, GL_OPERAND0_RGB_EXT, GL_SRC_COLOR);
glTexEnvi(GL_TEXTURE_ENV, GL_COMBINE_ALPHA_EXT, GL_REPLACE);glTexEnvi(GL_TEXTURE_ENV, GL_SOURCE0_ALPHA_EXT, GL_TEXTURE);glTexEnvi(GL_TEXTURE_ENV, GL_OPERAND0_ALPHA_EXT, GL_SRC_ALPHA);
glActiveTextureARB(GL_TEXTURE1_ARB);glTexEnvi(GL_TEXTURE_ENV, GL_TEXTURE_ENV_MODE, GL_COMBINE_EXT);
glTexEnvi(GL_TEXTURE_ENV, GL_COMBINE_RGB_EXT, GL_REPLACE);glTexEnvi(GL_TEXTURE_ENV, GL_SOURCE0_RGB_EXT, GL_PREVIOUS_EXT);glTexEnvi(GL_TEXTURE_ENV, GL_OPERAND0_RGB_EXT, GL_SRC_COLOR);
glTexEnvi(GL_TEXTURE_ENV, GL_COMBINE_ALPHA_EXT, GL_ADD_SIGNED_EXT);glTexEnvi(GL_TEXTURE_ENV, GL_SOURCE0_ALPHA_EXT, GL_PREVIOUS_EXT);glTexEnvi(GL_TEXTURE_ENV, GL_OPERAND0_ALPHA_EXT, GL_SRC_ALPHA);glTexEnvi(GL_TEXTURE_ENV, GL_SOURCE1_ALPHA_EXT, GL_TEXTURE);glTexEnvi(GL_TEXTURE_ENV, GL_OPERAND1_ALPHA_EXT, GL_ONE_MINUS_SRC_ALPHA);
Dual-texture ShadowMapping ApproachDual-texture ShadowMapping Approach
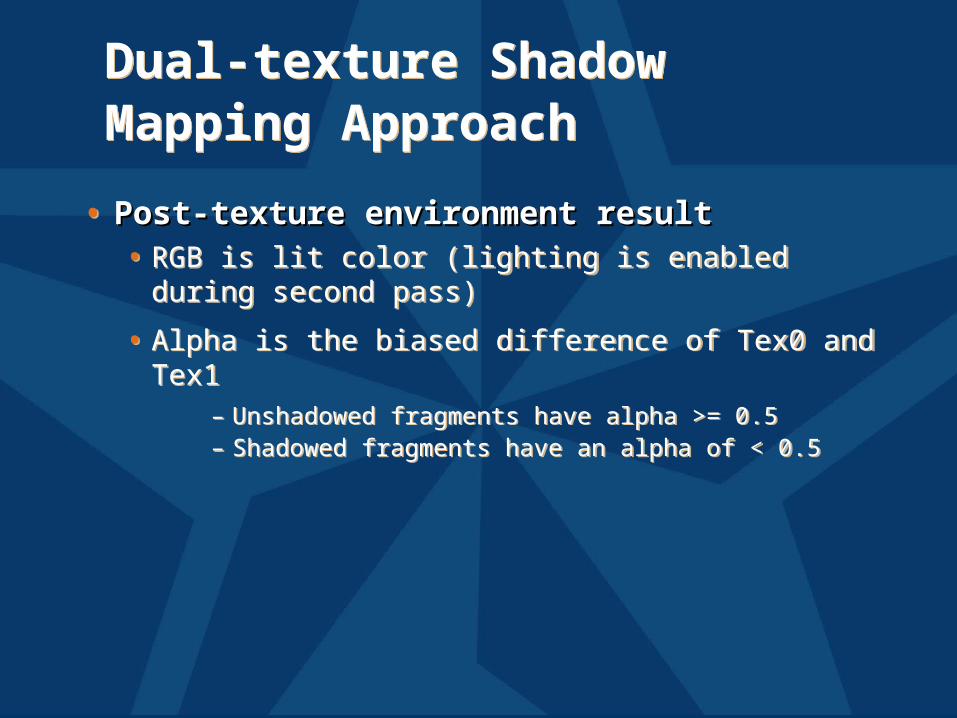
• Post-texture environment resultPost-texture environment result• RGB is lit color (lighting is enabled during
second pass)
• Alpha is the biased difference of Tex0 and Tex1– Unshadowed fragments have alpha >= 0.5– Shadowed fragments have an alpha of < 0.5
• Post-texture environment resultPost-texture environment result• RGB is lit color (lighting is enabled during
second pass)
• Alpha is the biased difference of Tex0 and Tex1– Unshadowed fragments have alpha >= 0.5– Shadowed fragments have an alpha of < 0.5
Dual-texture ShadowMapping ApproachDual-texture ShadowMapping Approach
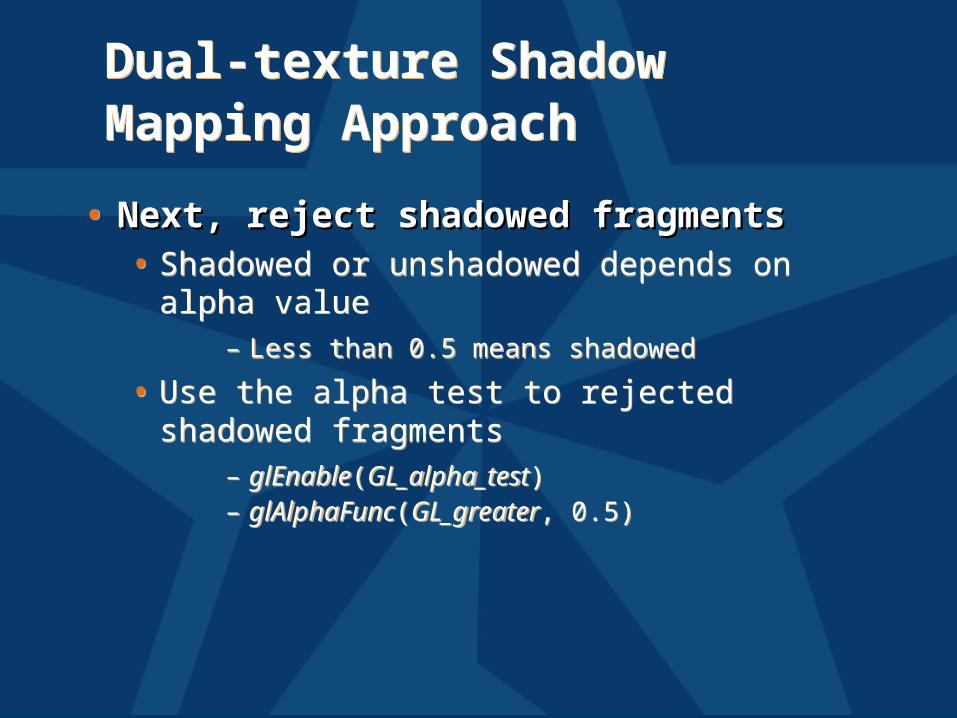
• Next, reject shadowed fragmentsNext, reject shadowed fragments• Shadowed or unshadowed depends on
alpha value– Less than 0.5 means shadowed
• Use the alpha test to rejected shadowed fragments
– glEnable(GL_alpha_test)– glAlphaFunc(GL_greater, 0.5)
• Next, reject shadowed fragmentsNext, reject shadowed fragments• Shadowed or unshadowed depends on
alpha value– Less than 0.5 means shadowed
• Use the alpha test to rejected shadowed fragments
– glEnable(GL_alpha_test)– glAlphaFunc(GL_greater, 0.5)
Dual-texture ShadowMapping Approach
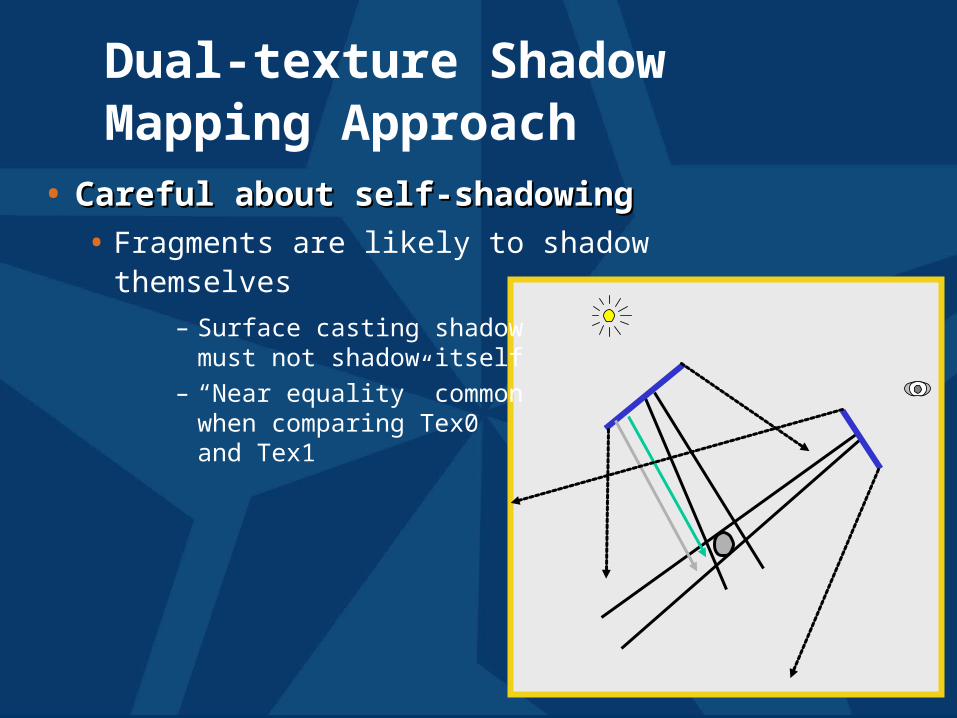
• Careful about self-shadowingCareful about self-shadowing• Fragments are likely to shadow themselves
– Surface casting shadowmust not shadow itself
– “Near equality” commonwhen comparing Tex0and Tex1
Dual-texture ShadowMapping ApproachDual-texture ShadowMapping Approach
• Biasing values in depth map helpsBiasing values in depth map helps• recall glPolygonOffset suggestion during the
depth map construction pass
• this bias should be done during depth map construction
– biases in the texgen transform do not work– problem is depth map has non-linear
distribution due to projective frustum
• polygon offset scale keeps edge-on polygons from self-shadowing
Dual-texture ShadowMapping PrecisionDual-texture ShadowMapping Precision
• Is 8-bit precision enough?Is 8-bit precision enough?• Yes, for some simple scenes
– When the objects are relatively distant from the light, but still relatively close together
• No, in general
– An 8-bit depth buffer is not enough depth discrimination
– And the precision is badly distributed because of perspective
Dual-texture ShadowMapping Precision
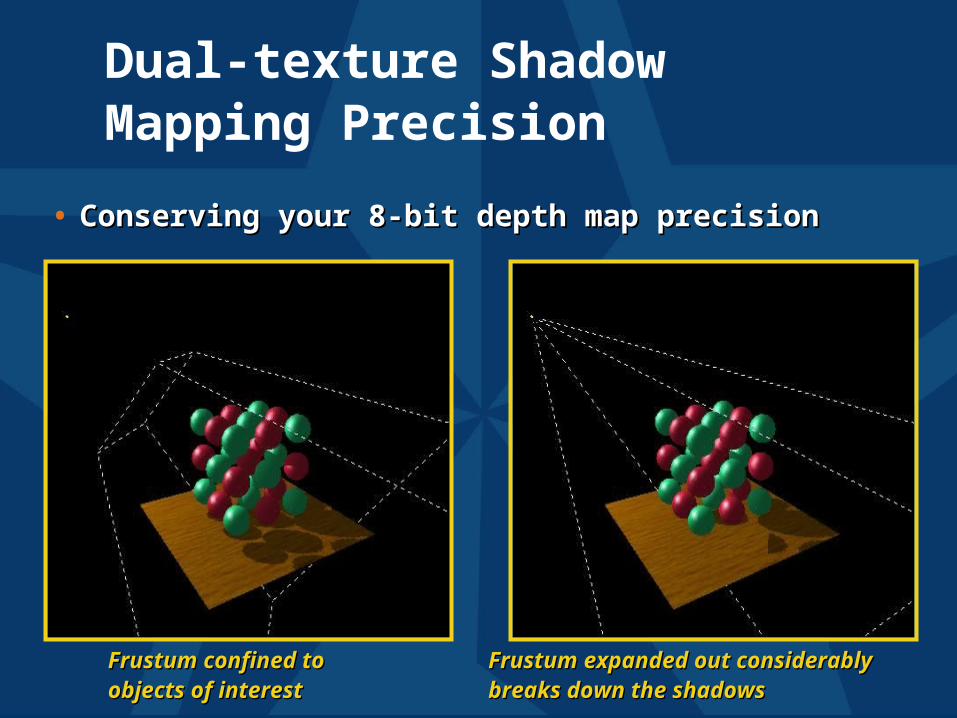
• Conserving your 8-bit depth map precisionConserving your 8-bit depth map precision
Frustum confined toFrustum confined toobjects of interestobjects of interest
Frustum expanded out considerablyFrustum expanded out considerablybreaks down the shadowsbreaks down the shadows
Improving Depth MapPrecisionImproving Depth MapPrecision
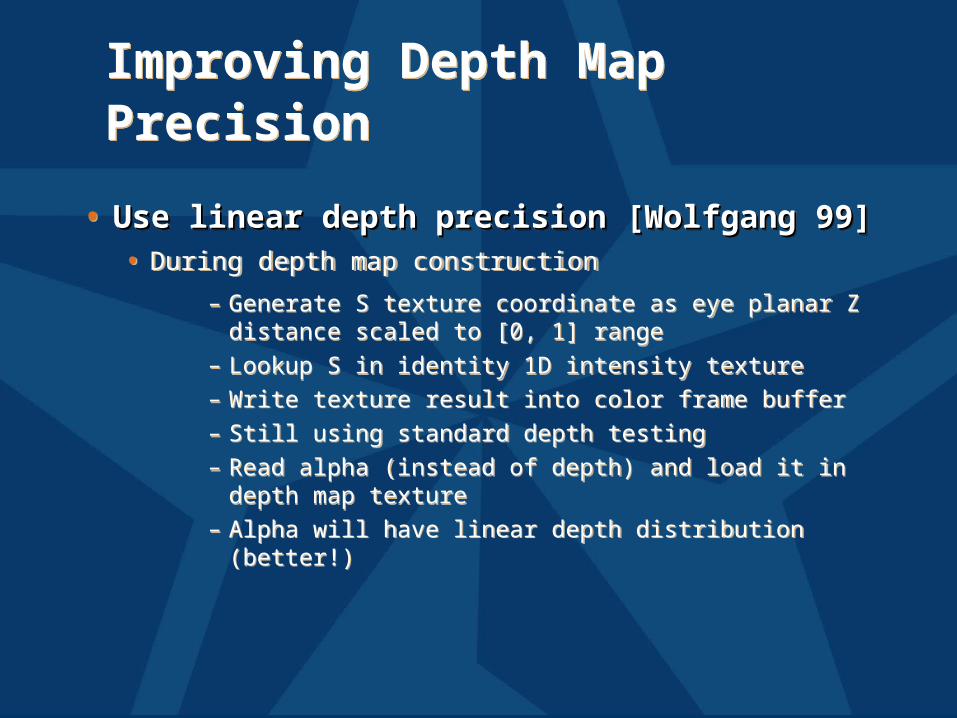
• Use linear depth precision [Wolfgang Use linear depth precision [Wolfgang 99]99]• During depth map construction
– Generate S texture coordinate as eye planar Z distance scaled to [0, 1] range
– Lookup S in identity 1D intensity texture– Write texture result into color frame buffer– Still using standard depth testing– Read alpha (instead of depth) and load it in
depth map texture– Alpha will have linear depth distribution (better!)
Improving Depth MapPrecisionImproving Depth MapPrecision
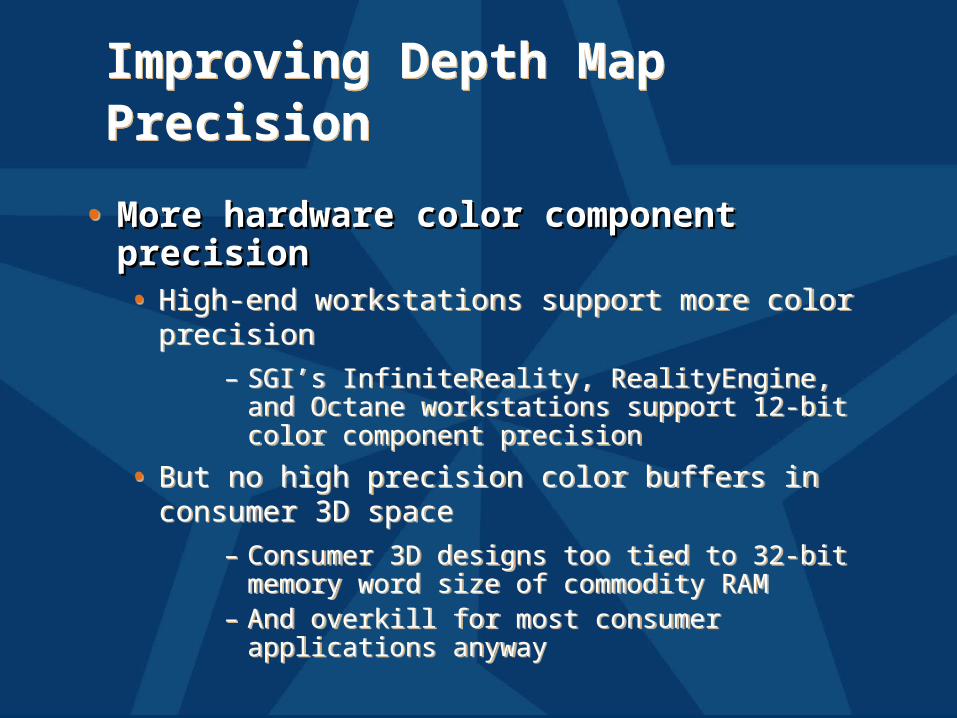
• More hardware color component More hardware color component precisionprecision• High-end workstations support more color
precision– SGI’s InfiniteReality, RealityEngine, and
Octane workstations support 12-bit color component precision
• But no high precision color buffers in consumer 3D space
– Consumer 3D designs too tied to 32-bit memory word size of commodity RAM
– And overkill for most consumer applications anyway
Improving Depth MapPrecisionImproving Depth MapPrecision
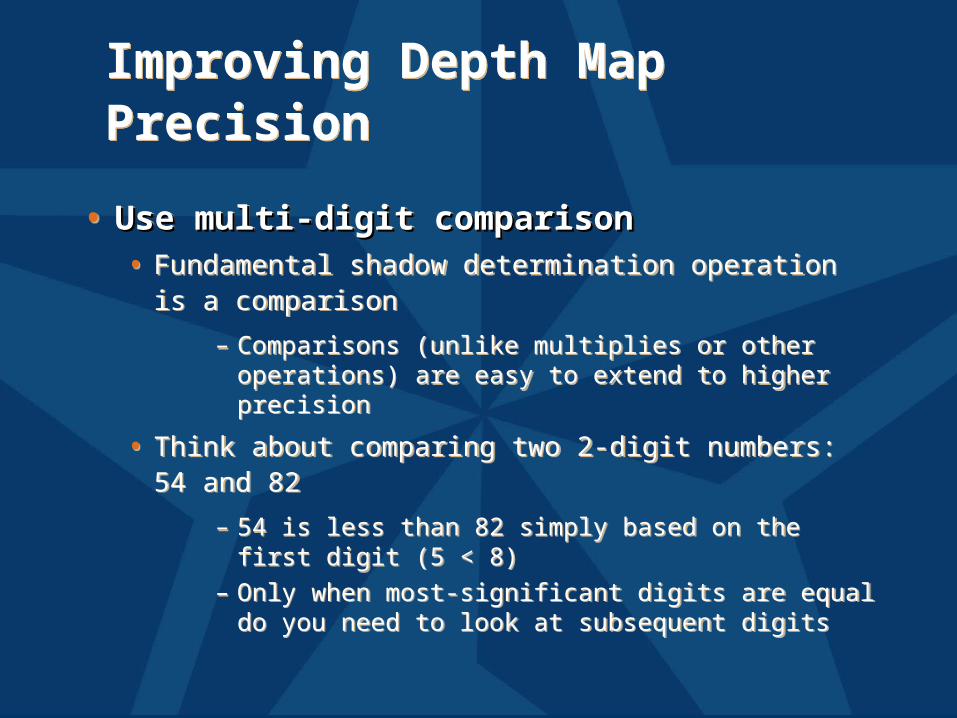
• Use multi-digit comparisonUse multi-digit comparison• Fundamental shadow determination operation is
a comparison
– Comparisons (unlike multiplies or other operations) are easy to extend to higher precision
• Think about comparing two 2-digit numbers: 54 and 82
– 54 is less than 82 simply based on the first digit (5 < 8)
– Only when most-significant digits are equal do you need to look at subsequent digits
More Precision AllowsLarger Lights Frustums
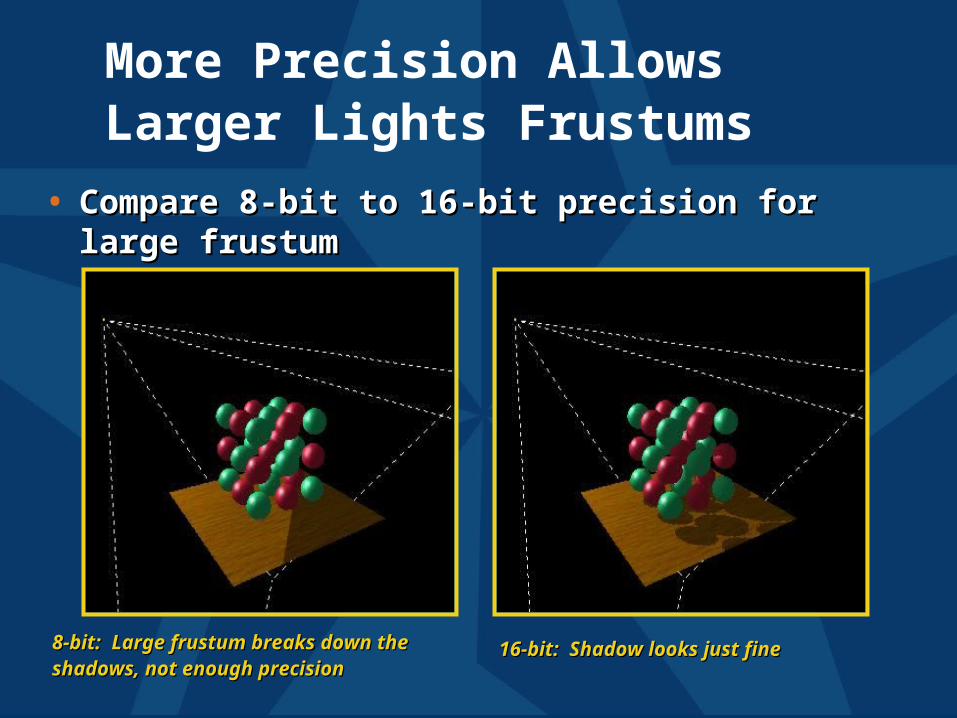
• Compare 8-bit to 16-bit precision for large Compare 8-bit to 16-bit precision for large frustumfrustum
8-bit: Large frustum breaks down the 8-bit: Large frustum breaks down the shadows, not enough precisionshadows, not enough precision
16-bit: Shadow looks just fine16-bit: Shadow looks just fine
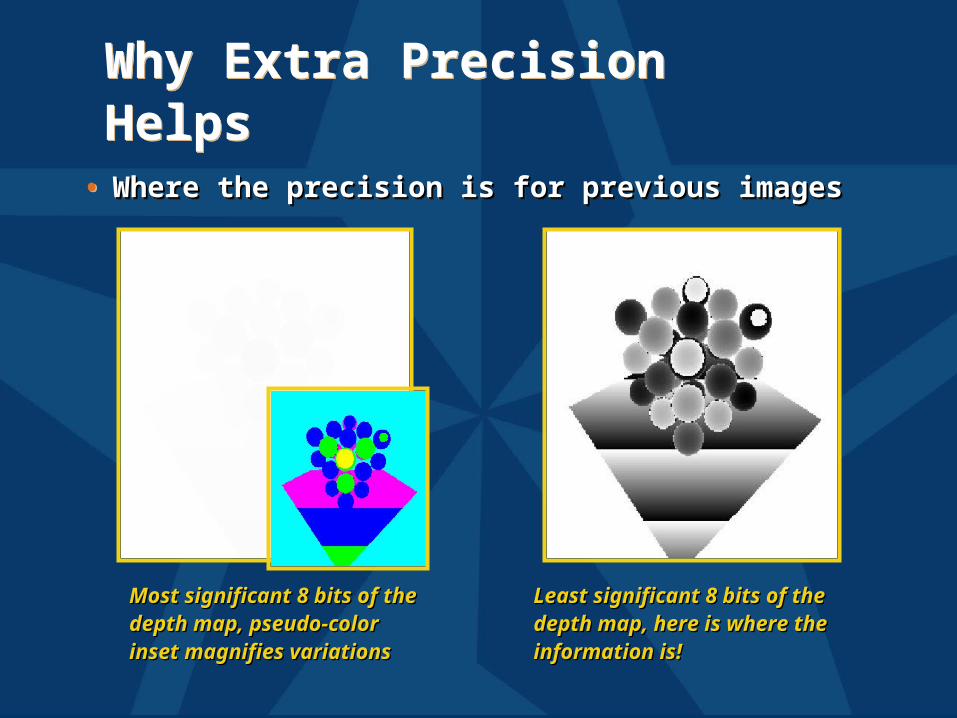
Why Extra PrecisionHelpsWhy Extra PrecisionHelps
• Where the precision is for previous imagesWhere the precision is for previous images• Where the precision is for previous imagesWhere the precision is for previous images
Most significant 8 bits of the Most significant 8 bits of the depth map, pseudo-color depth map, pseudo-color inset magnifies variationsinset magnifies variations
Least significant 8 bits of the Least significant 8 bits of the depth map, here is where the depth map, here is where the information is!information is!
GeForce1 & 2Precision ExtensionGeForce1 & 2Precision Extension
• Application of multi-digit comparison Application of multi-digit comparison ideaidea• Read back depth buffer as 16-bit unsigned short
values
• Load these values into GL_LUMINANCE8_ALPHA8 texture
– Think of depth map as two 8-bit digits
• Two comparison passes
• Uses NV_register_combiners extension– Signed math and mux’ing helps– Enough operations to test equality and
greater/less than
GeForce1 & 2Precision ExtensionGeForce1 & 2Precision Extension
• Multi-digit comparison passesMulti-digit comparison passes• during clear, clear stencil buffer to 0
• 1st pass draws unshadowed scene as before
• 2nd pass draws unshadowed
– alpha = bigDigit(Tex0) < bigDigit(Tex1)– alpha test with glAlphaFunc(GL_GREATER, 0.0)– and write 1 into stencil buffer when alpha test
passes
• needs 3rd pass for when bigDigit(Tex0) = bigDigit(Tex1)
GeForce/QuadroPrecision ExtensionGeForce/QuadroPrecision Extension
• Third pass picks up the extra 8 bits of Third pass picks up the extra 8 bits of precisionprecision• Use NV_register_combiners to assign alpha as
follows– if bigDigit(Tex1) > bigDigit(Tex0) then
alpha = 0else alpha = littleDigit(Tex0) - littleDigit(Tex1)
• Use alpha test with glAlphaFunc(GL_GREATER, 0.0)
• Also reject fragment if the stencil value is 1– Meaning the 2nd pass already updated the pixel
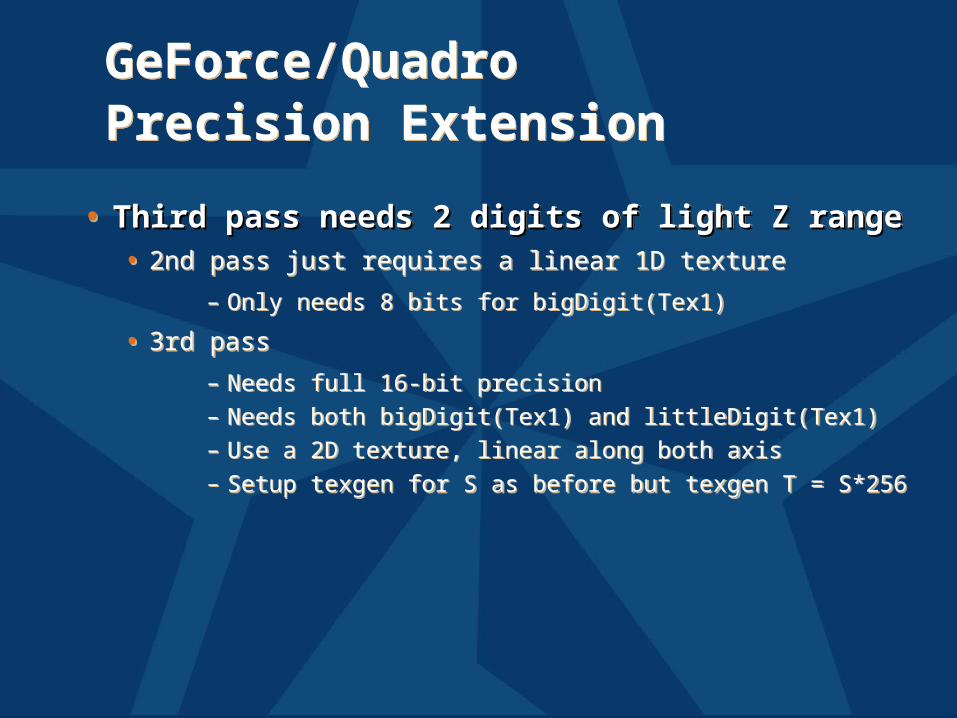
GeForce/QuadroPrecision ExtensionGeForce/QuadroPrecision Extension
• Third pass needs 2 digits of light Z rangeThird pass needs 2 digits of light Z range• 2nd pass just requires a linear 1D texture
– Only needs 8 bits for bigDigit(Tex1)
• 3rd pass
– Needs full 16-bit precision– Needs both bigDigit(Tex1) and littleDigit(Tex1)– Use a 2D texture, linear along both axis– Setup texgen for S as before but texgen T = S*256
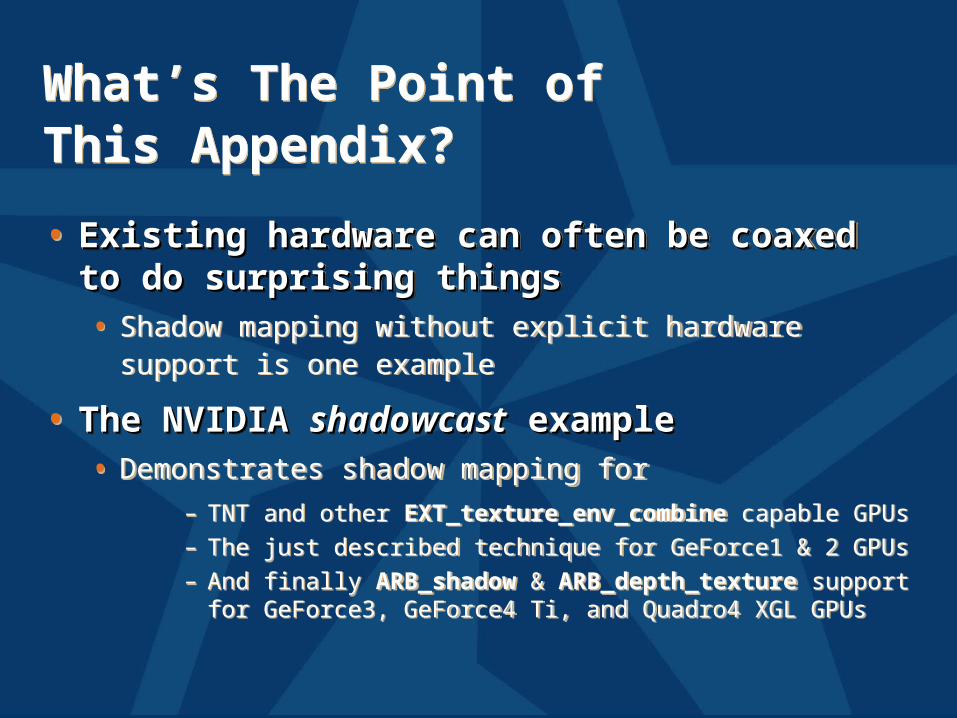
What’s The Point of This Appendix?What’s The Point of This Appendix?
• Existing hardware can often be coaxed Existing hardware can often be coaxed to do surprising thingsto do surprising things• Shadow mapping without explicit hardware support is
one example
• The NVIDIA The NVIDIA shadowcastshadowcast example example• Demonstrates shadow mapping for
– TNT and other EXT_texture_env_combine capable GPUs– The just described technique for GeForce1 & 2 GPUs– And finally ARB_shadow & ARB_depth_texture support
for GeForce3, GeForce4 Ti, and Quadro4 XGL GPUs