Setup DNS Server on Server 2008worldclasscad.com/networking_pdf/2008 Server/Setup DNS...Server 2008...
25
Setup DNS Server on Server 2008 August 16, 2010 Copyright © 2010 by World Class CAD, LLC. All Rights Reserved.
Transcript of Setup DNS Server on Server 2008worldclasscad.com/networking_pdf/2008 Server/Setup DNS...Server 2008...
Setup DNS Server on Server 2008
August 16, 2010
Copyright © 2010 by World Class CAD, LLC. All Rights Reserved.

Server 2008 DesktopTo start the process of making a DNS Server, we select the Start button to open the Start Menu. We choose Administrative Tools and then we pick Server Manager.

Server Manager
The Server Manager window will open. We highlight Roles in the left pane and select Add Roles in the right pane.

Select Server Roles
The Add Roles Wizard window shows the multitude of functions a 2008 server can provide. We annotate the DNS Server checkbox and press the Next button.

DNS Server
The DNS Server window will explain the DNS deployment and Active Directory.

Confirm Installation Selections
We confirm that we want to set the machine up as a DNS server, so we pick the Install button to proceed.

InstallationWe can watch the computer progress through the installation.

Installation Results
Finally, the server DNS installation is completed.
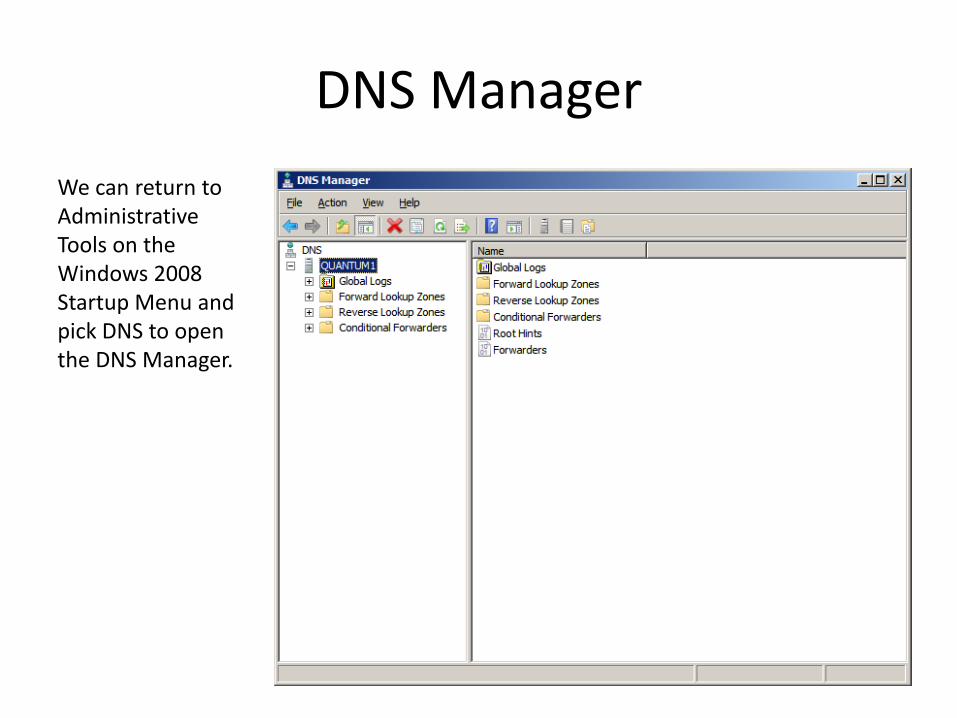
DNS Manager
We can return to Administrative Tools on the Windows 2008 Startup Menu and pick DNS to open the DNS Manager.

Forward Lookup Zone
To add a Forward Lookup Zone we select that term in the left pane. Click on the Add a New Zone icon to start that wizard.
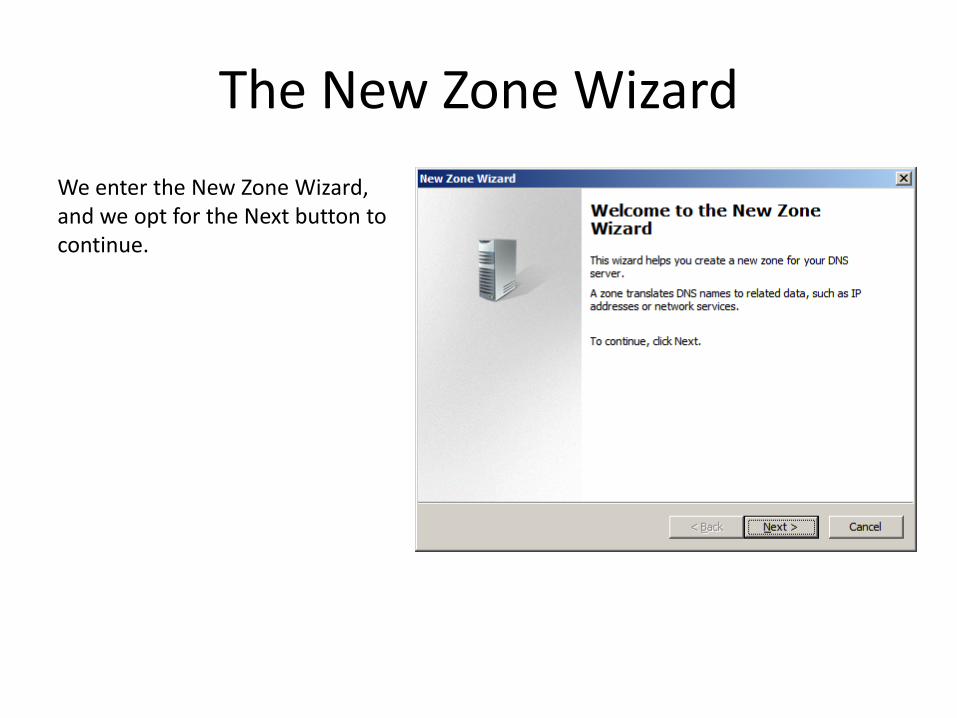
The New Zone Wizard
We enter the New Zone Wizard, and we opt for the Next button to continue.
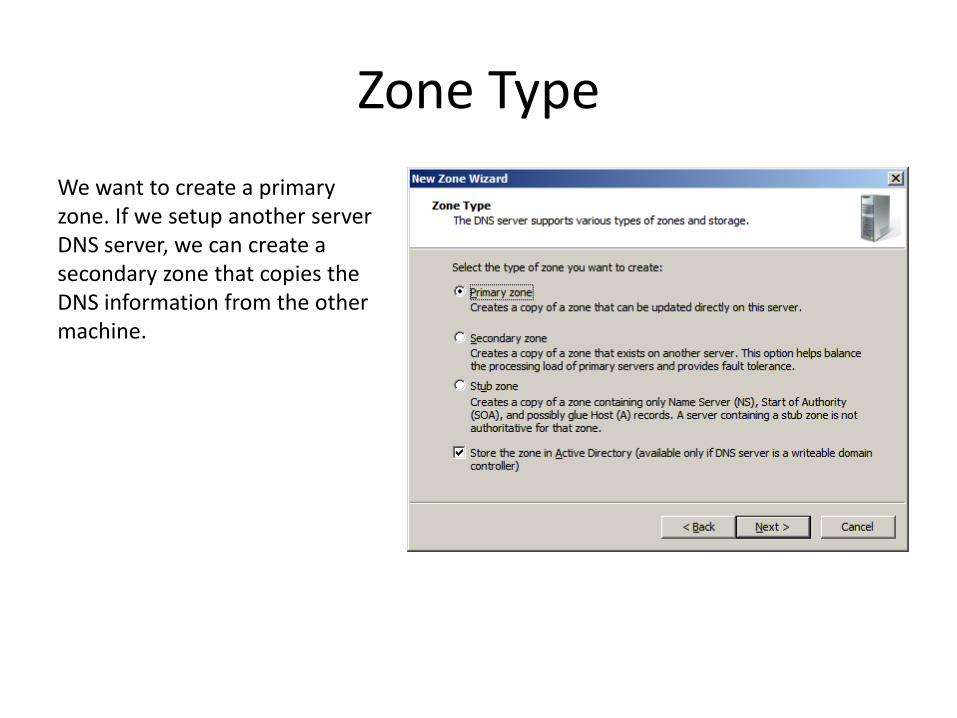
Zone Type
We want to create a primary zone. If we setup another server DNS server, we can create a secondary zone that copies the DNS information from the other machine.

Active Directory Zone Replication
We opt to replicate data to all servers in this domain. Our domain for the project is domain2.local.

Zone Name
We are calling our zone, “Zone1” and we will press the Next button to continue.

Dynamic Update
We want to allow only secure dynamic updates. We could opt to allow both non‐secure and secure dynamic updates or resource records, but we need to consider the security threat to a server farm when picking this option.

Completing the New Zone Wizard
This window tells the wizard is complete. To continue with our work, such as adding reverse lookup zones and more, we will open the DNS Manager.
After setting up the Forward Lookup Zone, we want to go through the DNS server properties.
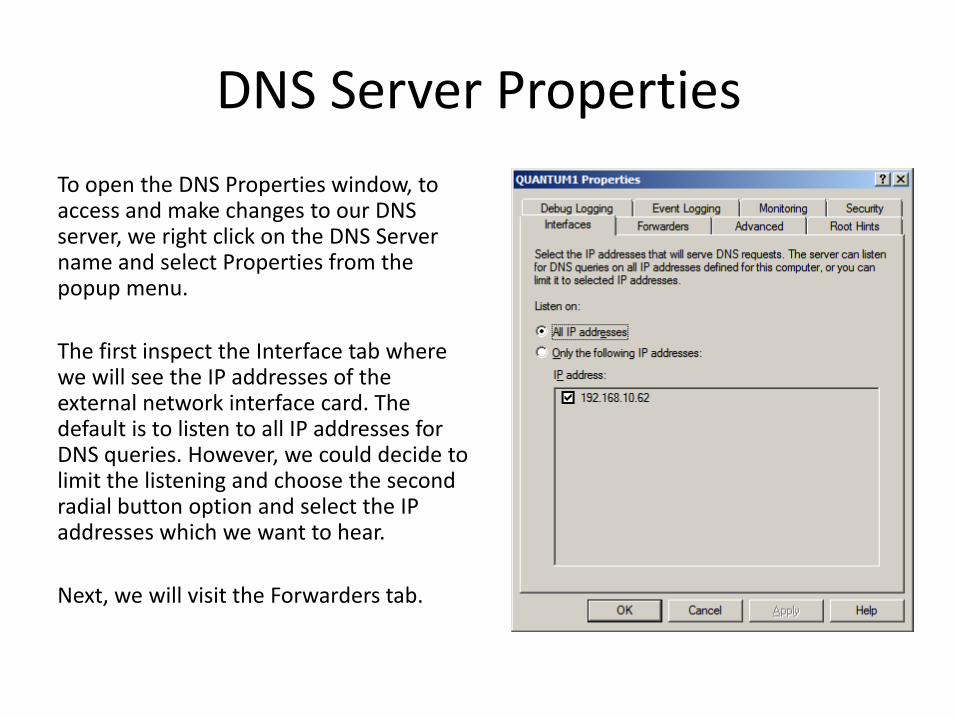
DNS Server PropertiesTo open the DNS Properties window, to access and make changes to our DNS server, we right click on the DNS Server name and select Properties from the popup menu.
The first inspect the Interface tab where we will see the IP addresses of the external network interface card. The default is to listen to all IP addresses for DNS queries. However, we could decide to limit the listening and choose the second radial button option and select the IP addresses which we want to hear.
Next, we will visit the Forwarders tab.

The Forwarders TabThe Forwarders tab shows the server that resolve DNS request not answered by our DNS server. We can edit our two DNS addresses supplied by the ISP.
For home networks that do not have static IP addresses and do not have primary and secondary IP addresses assigned by the ISP, we can use two DNS servers provided by Google.com for public DNS resolution.

Advanced Tab
The Advanced tab will allow us to view the server options. We will not change any settings at this time.

The Root Hints Tab
Root Hints are IP addresses that are linked to Full Qualified Domain Names (FQDN). We can copy a list from another server by selecting the Copy from Server button. We can add more FQDNs and IP addresses by selecting the Add button.

Adding a New Resource Record
After selecting the Add button, the New Resource Record window appears. We type a real URL such as google.com into the textbox and press the Resolve button. A list of IP addresses appears that is associated with the Yahoo domain. Press the OK button and at the Root Hints tab press the Apply button to make the changes.
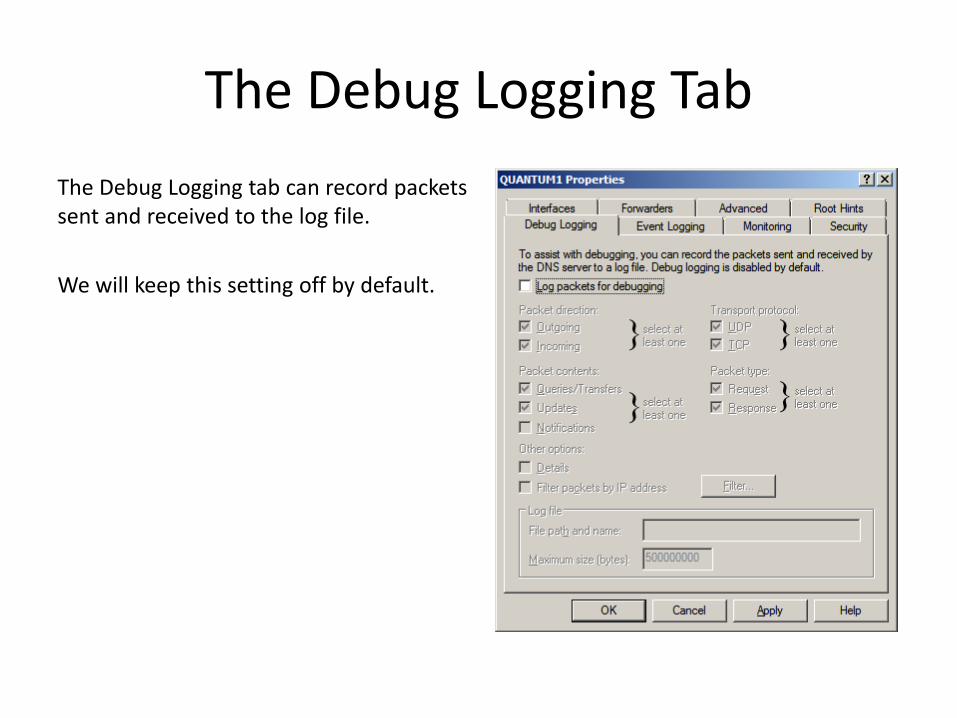
The Debug Logging Tab
The Debug Logging tab can record packets sent and received to the log file.
We will keep this setting off by default.

The Event Logging Tab
The Event Logging Tab is presently set for recording all events. However, we can select no events, errors only and errors and warnings.
We choose to log all events.

The Monitoring Tab
The Monitoring Tab will tell us if our DNS server is resolving requests.
We check the simple query against the DNS server and a recursive query to other DNS servers checkboxes. We then press the Test Now button and both tests should pass. We can set the interval for the test to whatever seconds, minutes or hours we wish.

Security Tab
The security tab will allow us to set the permissions for access and control of the DNS server. Presently, the administrators can change the DNS Server settings. We press the Apply button and close the DNS Server properties window.