Sensor Web Enablement · Sensor Web Enablement Installation Guide for Sensor Planning Service...
25
Sensor Web Enablement Installation Guide for Sensor Planning Service version 1-00-00
Transcript of Sensor Web Enablement · Sensor Web Enablement Installation Guide for Sensor Planning Service...
Sensor Web Enablement
Installation Guidefor
Sensor Planning Service version 10000

Working Group Sensor Web/Simulation Lab SPS Installation Guide
Document Change Control
Revision Number
Date Of Issue Author(s) Brief Description Of Changes
0.1 20060226 Johannes Echterhoff initial version
0.2 20080205 Henning Bredel OWS5 CITE process
0.3 20080505 Henning Bredel IzPack Installation
0.4 20080527 Henning Bredel SVN information
1.0 20080716 Henning Bredel Release version (links, format etc.)
Editors
Johannes Echterhoff
Institute for GeoinformaticsWeseler Straße 253D48141 Muenster
Phone: +49 (0)251 - 83 39761
Email: echterhoff@ 52north.org
Henning Bredel
Institute for GeoinformaticsWeseler Straße 253D48151 Muenster
Phone: +49 (0)251 - 83 300 98
Email: henning.bredel@unimuenster.de
20081010 2
Working Group Sensor Web/Simulation Lab SPS Installation Guide
20081010 3
LicenceCopyright (C) 2008by 52 North Initiative for Geospatial Open Source Software GmbH
Contact: Andreas Wytzisk
52 North Initiative for Geospatial Open Source Software GmbHMartinLutherKingWeg 2448155 Muenster, Germany
mailto:[email protected]
This program is free software; you can redistribute and/or modify it under the terms of the GNU General Public License version 2 as published by the Free Software Foundation.
This program is distributed WITHOUT ANY WARRANTY; even without the implied WARRANTY OF MERCHANTABILITY or FITNESS FOR A PARTICULAR PURPOSE. See the GNU
General Public License for more details.
You should have received a copy of the GNU General Public License along with this program (see gnugplv2.txt). If not, write to the Free SoftwareFoundation, Inc., 59 Temple Place Suite 330, Boston, MA 021111307, USA or visit the Free Software Foundation web page, http://www.fsf.org.

Working Group Sensor Web/Simulation Lab SPS Installation Guide
Table of Contents
1 Introduction......................................................................................................5
1.1 Scope................................................................................................................................5
1.2 What you are doing following the installation procedure................................................5
1.3 Some words on the 52°North SPS framework.................................................................5
2 Requirements....................................................................................................7
3 Installation Procedure.....................................................................................7
3.1 Get the programs..............................................................................................................7
3.2 Using the installer wizard.................................................................................................8
3.2.1 Deploying.................................................................................................................8
4 Administration of the SPS...............................................................................9
4.1 Set up the SPS's capabilities...........................................................................................10
4.2 Some words about the sensorID.....................................................................................11
4.3 Installing, registering and testing the CITEtestplugin.................................................11
4.4 Installing, registering and testing with an AXIS camera plugin....................................12
4.5 SPS Client......................................................................................................................12
5 Developer version (eclipse WTP)..................................................................13
5.1 Building from scratch.....................................................................................................13
5.1.1 Get the sources........................................................................................................13
5.1.2 Directory structure..................................................................................................13
5.1.3 Build the SPS installer............................................................................................15
6 Bugreport & Troubleshooting......................................................................15
7 Appendix.........................................................................................................15
7.1 Service Exception codes.................................................................................................15
7.2 Install the database.........................................................................................................15
7.2.1 Download and install eXist.....................................................................................16
7.2.2 Download and install postgreSQL database...........................................................17
7.3 Example Requests..........................................................................................................18
20081010 4

Working Group Sensor Web/Simulation Lab SPS Installation Guide
7.3.1 Capabilities.............................................................................................................19
7.3.2 Installing a plugin...................................................................................................22
7.3.3 Registering a plugin................................................................................................22
8 References.......................................................................................................27
1 Introduction
1.1 Scope
This document describes the install process of the Sensor Planning Service.
1.2 What you are doing following the installation procedure
The distribution you have downloaded contains the distribution of the 52°North SPS framework. The following sections describe how to
1. install the SPS as one or three web application(s) in a preinstalled servlet container (e.g. Apache Tomcat)
2. install the SPS as a developer version in your eclipse WTP IDE as a dynamic web project for further developing (either SPS itself or your own plugins)
3. checkout the SPS from scratch and build your own SPS installer
1.3 Some words on the 52°North SPS framework
According to (Simonis, 2007), the Sensor Planning Service (SPS) is intended to provide a standard interface to collection assets (i.e., sensors and other information gathering assets) and to support systems that surround them. An SPS not only has to support different kinds of assets with differing capabilities, but also different kinds of request processing systems, which may or may not provide access to the different stages of planning, scheduling, tasking, collection, processing, archiving, and distribution of resulting observation data.
The 52°North SPS is a framework, it does not provide the SPS interface for only certain kinds of collection assets – one cannot implement an SPS suitable for every purpose. Rather, it is designed to enable development of plugins which – once integrated into the framework – provide the SPS interface for a certain type of collection asset.
The framework consists of three components: the AssetManager (AM), the ProfileManager (PM) and the Controller. Together they form the SPS. Several service operations have been defined for the AM and PM to support managing the 52°North SPS. The Controller component of the service does not need such operations. It is rather used as a central communication endpoint for all requests defined in the SPS specification, current version 10000.
While the AM is responsible for the instance management of a sensor (registering, deregistering, delegating submits, etc), the PMs job is to handle the static meta information of the service and of each plugin. The Controller serves as frontend to these modules – the
20081010 5

Working Group Sensor Web/Simulation Lab SPS Installation Guide
Controller represents the interface of the SPS specification. Figure 1.1 illustrates the communication between these three modules.
The functionality provided by the framework facilitates the work of an SPS developer. For example it offers components for performing communication via a Web Notification Service (WNS) and automatically handles all requests that ask for static information (GetCapabilities, DescribeTasking and DescribeResultAccess – even the retrieval of the SensorML (Botts, 2007) description of an asset).
A plugin developer only has to implement a well defined interface and can rely upon the framework and the handlers which will automatically be provided to each plugin instance. Such an instance will be created when a new collection asset is registered at the service.
Note: Since the WNS is currently not yet an official standard of the OGC the SPS uses the current best practice version 0.0.9.
The framework becomes fully functional – i.e. OGC SPS enabled clients can make use of it – once its capabilities are set and at least one plugin instance is registered at the AM.
Two example plugins have been implemented to exemplarily show how a plugin implementation looks like. One of these plugins is the CITEtest plugin, which comes with this framework as example plugin. It simulates the behaviour of a sensor which can move from a basestation to two locations and do measurements. A more detailed description of taskable parameters and the general behaviour of the CITE plugin can be found on the 52°North SPS Twiki.
The other one is an AXIS(tm) PTZ camera plugin which allows more sophisticated tasking. You will also find the camera plugin at the 52°North SVN. Details are described in section 4.4.
Other plugins will follow. To keep up to date, refer to the plugin section of the 52°North SPS Twiki1.
1 https://52north.org/twiki/bin/view/Sensornet/SPSv10000#Plugins
20081010 6
Figure 1.1.: the internal communication of the SPS modules. (in addition, the external communication with a WNS is shown.)

Working Group Sensor Web/Simulation Lab SPS Installation Guide
2 Requirements
• Windows 2000 or higher [tested with Windows XP SP2; Linux (Ubuntu Gutsy,
Debian etch)]
• JRE/JDK 1.6.0 [1.6.0_03b05]
• Apache Jakarta Tomcat 5.5.x or higher [5.5.25]
• This product includes software developed by the XML:DB Initiative
(http://www.xmldb.org/), so you need an XML:DB enabled database management
system (DBMS) [tested with eXist1.1.1newcore, release: 20061024]. A
postgreSQL DBMS could be used instead (but this is not fully tested right now)
[version 8.1.11 was used for developing]
• An OGC WNS version 0.0.9 [tested with a 52Nswewns20000]
3 Installation Procedure
3.1 Get the programs
• Apache Tomcat is needed to run the SPS in. If you only want to build the SPS, you can skip the download and installation of Tomcat.
• If you plan to use a postgreSQL DMBS, you can skip this step. Download an XML:DB enabled DBMS. XML:DB is an API for XML DBMS (http://xmldborg.sourceforge.net/xapi/). Example implementations are eXist (http://www.existdb.org/index.html) and xindice (http://xml.apache.org/xindice/).
However, as xindice does not seem to be developed any further, we have chosen eXist for testing the framework. Download the latest war file and deploy it to your tomcat. A detailed description of the installation process is given in the appendix 7.2.
• If you do not want to use an XML DBMS, you need a postgreSQL DBMS. This is not fully tested but should work in the most cases (bugreports are welcome). You will get it from http://www.postgresql.org/ftp/binary/v8.1.11/. With the postgres DBMS comes the neat pgAdmin tool which you can use to set up the SPS database and its user profiling.
• For now the framework requires a WNS implementation of the OGC WNS best practice paper2 version 0.0.9. On the 52°North homepage you may download this WNS3 implementation (Note that the WNS is a version under development).
3.2 Using the installer wizard
Using Windows with default .jar linking you can start the installer simply by double
2 http://portal.opengeospatial.org/files/index.php?artifact_id=187763 http://52north.org/download/sensorweb/wns/52Nswewns2.0.0.zip
20081010 7
Working Group Sensor Web/Simulation Lab SPS Installation Guide
clicking the SPS.jar.
Alternatively start the installation procedure on a console by running
java -jar SPS.jar
For a more verbose output during installation process type
java -DTRACE=true -jar SPS.jar
Follow the wizard and make your parameter choices.
Anyhow, some targets may run into a java heap space error. Since we want to avoid to set systemvariables for a build process, you can use one of the install scripts laying in the same directory as the SPS.jar. Depending on your system, run either install-sps.sh or install-sps.bat.
Note that you need a correct installation of a Java JDK (>= 1.6) to build the SPS. Asure, that the $JAVA_HOME variable points to your JDK and if your system path contains the $JAVA_HOME/bin folder.
3.2.1 Deploying
You will need an installed Apache Tomcat version 5.5.x or higher (installed locally or remotely) where to deploy the SPS as a webapplication(s). You can download it from http://tomcat.apache.org. Follow the installation instructions given on the Apache website.
For those who are interested in developing plugins or the SPS itself: Section 5 decribes the developer version in more detail.
4 Administration of the SPS
The SPS framework comes with three interfaces to test and administer the service, one for each module (amTestClient.html, spsTestClient.html and pmTestClient.html).
The Controller is the frontend of the SPS which validates and delegates all the requests which are defined in the SPS specification. To administer the service (install or register new plugins) the other test clients can be used. An example of such a client interface can be seen in figure 4.1.
To test the correct installation of the SPS you first have to set its capabilities and register a plugin instance. These steps are described in the following sections. You can choose which plugin you want to register:
1. Registering the CITEtestplugin which comes with the service (virtual sensor which only simulates predefined behaviour). You can retrieve more information on this at the SPS Twiki4.
4 https://52north.org/twiki/bin/view/Sensornet/SPSv10000
20081010 8

Working Group Sensor Web/Simulation Lab SPS Installation Guide
2. Registering an AXIS camera plugin which controls an AXIS network camera. This does not come with the framework but can be downloaded as well from the 52°North website 5 . Required is an AXIS(TM) PTZ camera to which you have access to.
In the following steps we assume that you have set up the SPS as one webapplication on localhost port 8080, so the service URL would be:
http://localhost:8080/SPS/SPS
All examples we refer to are stored in the /xml/examples/ folder of the distribution or listed in the Appendix on page 14 of this document. Alternatively you may find some predefined requests linked under the URL above.
Note, that these interfaces can be accessed without user authentication. Please refer to the tomcat user guide how to set up security contraints for these pages!6
We also would like to point out that more sophisticated security mechanisms can be put in place with open source software from 52North's Web Security and GeoRights Management working group.
4.1 Set up the SPS's capabilities
Before you can begin testing the service, make sure it is running and that its capabilities are set properly. If so, you can skip this step. If you didn't set the capabilities yet, do the following:
● The SPS implemented by the framework needs the CapabilitiesBasicInformation to be set up for answering GetCapabilities requests. It contains information about ServiceIdentification, ServiceProvider and OperationsMetadata.
5 http://52north.org/download/sensorweb/sps/52Nsweaxisplugin1.0.0.zip6 or have a quick look here: http://www.cafesoft.com/products/cams/tomcatsecurity.html
20081010 9
Figure 4.1.: an interface to send XMLPOST requests (here: the PM's test client)

Working Group Sensor Web/Simulation Lab SPS Installation Guide
These elements are contained in the OWS CapabilitiesBaseType. Most OGC implementations extend this base type in their Capabilities, so does the SPS.
● As this information is rather static you as the 52°North SPS operator can simply set it by sending a SetCapabilitiesBase request to the PM:
http://localhost:8080/SPS/pm_SetCapabilities.html
● The response from the SPS should contain a success status element. (Note that the SPS is not operational until at least one plugin ist installed and registered to the service. This will be done in the next steps.)
● You can find an example capabilities instance in appendix 7.3.1.
4.2 Some words about the sensorID
The sensorID is unique for each sensor instance registered at an SPS. While registering (or later) our implementation allows to define your own alias of the sensor to have a name of your choice for the sensor. The service will automatically generate an ID for each new sensor instance, thus facilitating plugandplay of sensors.
Currently you can retrieve sensor information with a unified resource name (urn). The urn serves as external sensorID, while the automatically generated internal sensorID is just for an easier handling of the registered sensors in the framework. All internal ids begin with an 'SID' with a following timestamp denoting the time when the sensor was registered (in milliseconds, from 1970).
1. urn:ogc:object:feature:Sensor:IFGI:CITE_Test-Plugin:the external sensorID is contructed from two parts: First the provider prefix which in this example is 'urn:ogc:object:feature:Sensor:IFGI' and the alias of the sensor, (which may have been provided during registration but may have been given through a later SetAlias request – which is an additional service operation defined for the AM component of the 52°North SPS framework).
2. SID1195425696358333276211349795:This ID appears in the response of the registration request. It also appears in the external sensorID if you haven't set an Alias for the sensor yet. The external sensorID (the qualifiedAlias) should then look like
urn:ogc:object:feature:Sensor:IFGI:SID1195425696358333276211349795
Both sensorIDs are unique and point to the same sensor instance.
4.3 Installing, registering and testing the CITEtestplugin
The CITEtestplugin comes with the framework. Its libraries are already included in the AM component of the framework, so you can easily test your running SPS instance.
Install and register the plugin
● The libs of the test plugin are already included in the AM, but you have to introduce it to the SPS by installing the plugin to the AssetManager. (Actually 'installing' means to
20081010 10

Working Group Sensor Web/Simulation Lab SPS Installation Guide
make an internal mapping from pluginType to class name, since initializing a sensor is done via Java's reflection mechanism.)
● To install the CITEplugin you have to call the amTestClient.html. Do this by calling http://localhost:8080/SPS/am_TestClient.html.
● For convenience you can find each example request in the test client under http://localhost:8080/SPS/sps_examples.html.
You may also send these (or your own) requests by copy/pasting them into an empty testClient (see the next steps).
● Register a concrete instance of the plugin by copy/pasting the register document from Listing 4 from appendix 7.3.3 into the amTestClient.html. Again, click on send and receive the internal and external sensorIds of the registered instance.
● Send a getCapabilities request to the SPS to asure the service knows about the plugin from now on (scroll down to the Contents element). Click on
http://localhost:8080/SPS/sps_GetCapabilities.html
Test the sensor
● To test the sensor you can use the example requests in the /xml/examples/ folder. If you have deployed the SPS on a webserver which can be requested remotely, you can choose to test the plugin and the SPS itself with the OGC CITE test engine (TEAM7 engine). Please refer to the Compliance Test Suite 8 for more information what will be tested.
4.4 Installing, registering and testing with an AXIS camera plugin
Download the AXIS camera plugin
● The AXIS plugin can be checked out from the 52North SVN by typing
svn co https://52north.org/svn/swe/main/SPS/Plugins/Axis/
● or can be downloaded as distribution file from
https://52north.org/download/sensorweb/sps/52N-swe-axisplugin-1.0.0.zip
● Build process as well as registering and testing the AXIS camera plugin as described within the plugin's documentation.
4.5 SPS Client
• Right now we have two SPS clients for demonstrating the functionality of the AXIS plugin. Both clients can be found in the 52°North SVN repository. A packed distribution file of one client can be downloaded from http://52north.org/download/sensorweb/sps/52Nswespsaxisclient1.0.0.zip
7 The Test, Evaluation, And Measurement (TEAM) Engine is a test script interpreter. It executes test scripts written using the Compliance Test Language (CTL) to verify that an implementation of a specification complies with the specification.More infos can be found at http://cite.geoenterpriselab.com/teamengine/docs/ctl/ctl.html
8 http://cite.geoenterpriselab.com/teamengine/docs/sps/1.0/
20081010 11

Working Group Sensor Web/Simulation Lab SPS Installation Guide
• Please check the 52°North SPS Twiki for planned releases.
5 Developer version (eclipse WTP)
If you have installed the SPS as developer version further settings have to be done within eclipse to declare it as a Dynamic Web Project.
● Import the built SPS as „existing project“ in your workspace.
● Go to the projects properties and choose Project Facets
● Click Modify Project and choose Java and Dynamic Web Module.
● Click finish
● Choose your Targeted Runtime – maybe you have to create a new one. Click New and and choose your installed servlet engine (e.g. Apache Tomcat).
5.1 Building from scratch
5.1.1 Get the sources
• The distribution contains all framework sources and required libraries. You may only need to download further plugins from 52°Northe or create your own ones.
• However, if you want to build the 52°North SPS from scratch you need to check out the sources from 52°North's SVN repository first. Just typesvn co https://52north.org/svn/swe/SPS/tags/ 52Nswesps1.0.0
to checkout the current release.
• You can browse the repository athttps://52north.org/cgi-bin/viewvc.cgi/main/SPS/Services/?root=swe
• Note that the SPS can only be installed with the SPS installer, so you have to build the installer first (Take a look at section 5.1.3 for that).
5.1.2 Directory structure
This section describes the project structure of the SPS. This might be of interest for those who have downloaded the SPS from SVN or built it as a developer version.
The tagged SPS version (version 1.0.0) within the SVN and the developer version built from the installer are quite similar. The developer version has fresh built xml bindings while the version from SVN needs to build the bindings with ant:
ant all-bindings
The developer version comes with a directory structure containing some build scripts, configuration files and templates which will be filtered and copied during the install process. Please read the following explanations before changing parameters in there.
Table 1: Directory structure of the SPS distribution
20081010 12

Working Group Sensor Web/Simulation Lab SPS Installation Guide
Directory name Content.settings/ Contains files needed for deploying an eclipse WTP project.
conf/ Specific configuration files and template files lay in here.
● build.properties: set the build parameters here
conf/exist/ The configtemplates for the exist database (do not change)
conf/postgres/ The configtemplates for the postgreSQL database (do not change the @@filters and 'database.dbconfig' filename)
conf/templates/ The general templates for the framework. (do not change)
doc/ The documentationfiles like this one.
● HowToInstall_SPS: installing the SPS (this file)● HowToPlugins_SPS: developing plugins (draft)
installer/ Files to build the IzPack SPS installer (IzPack framework not included! See http://izpack.org)
lib/
lib/bindings/lib/database/
lib/misc/
The libraries needed to build and run the SPS. When deploying into webapps only the needed libs will be copied.
● The XML bindings generated with XMLBeans.● Libraries in subdirs needed for the chosen DB. (do not
change)● Libs not needed for every module (if deploying into 3
webapps). Results in an easier ant buildfile. (do not change)
scripts/ Ant scripts (accessed from build.xml) (do not change)
src/ Source files
WebContent/ Directory of eclipse WTP project, containing all files and libraries to run the SPS as webapp within eclipse.
xml/examples/ Contains example requests, e.g. the setCapabilitiesBase for making the SPS operational.
xml/schemata/ Contains the official OGC schemata needed from the SPS and the schemata of the frameworks service operations. (do not change)
5.1.3 Build the SPS installer
If you plan to build the SPS installer, you need to have the IzPack installation framework installed on your machine. You can get IzPack from http://dist.codehaus.org/izpack/releases/. We built the current installer with IzPack version 3.11.
To build the installer, you have to set your IzPack home path property in
20081010 13

Working Group Sensor Web/Simulation Lab SPS Installation Guide
/scripts/build-installer.xml
Then run ant with command
ant build-installer.xml
You will find the installer within /installer/dist/. Please refer to Section 3.2 for installing the SPS.
6 Bugreport & Troubleshooting
If you have any question concerning the installation process, feel free to contact Johannes Echterhoff, email: [email protected], or Henning Bredel, email: henning.bredel@unimuenster.de.
When you think you found a bug, please ereport it on the 52°North SWE mailinglist ([email protected]) or enter it directly in 52°North's bugzilla: http://52north.org/bugzilla.
7 Appendix
7.1 Service Exception codes
A complete list of all exception codes defined for the 52°North SPS can be found in the javadoc for the ExceptionCode enum of class ServiceException.
7.2 Install the database
The AM and PM both need to persist information. The framework therefore defines DAOs which are used to access the database. The distribution contains an implementation for accessing an XML database that implements the XML:DB API. We are using the eXist XML database and will describe the installation process in the following.
However, currently there is another implemenation of the DAO interfaces for a postgresql database. You can choose it but be aware that this is not fully tested. Section 7.2.2 gives you a quick guide to prepare a postgresql database.
7.2.1 Download and install eXist
● Download the eXist database as .war file from http://exist.sourceforge.net/download
● Since there is a wrong mapping to the webapp when clicking the webapp in the tomcat manager, rename the downloaded eXist war file to exist.war.
● Start tomcat and deploy the war file via the tomcat manager.
Configure eXist
● Configuring eXist is easy, nevertheless we provide minimum guidance on configuration of the database, because full documentation of the eXist database is not part of this distribution.
● For starting the client to manage the database, type
20081010 14

Working Group Sensor Web/Simulation Lab SPS Installation Guide
http://localhost:8080/exist/webstart/exist.jnlp
or you can click on the launch button at the left bottom of the webapplications description page accessible at:
http://localhost:8080/exist/index.xml
● After launching the client (a java webstart application, see figure 7.1) you can connect to the database with an empty password. (Change it later.)
Figure 7.1.: eXist client login screenFigure 7.2.: screen after first login
Now create a new collection by clicking the Create new collection button. (See figure 7.3.)
Figure 7.3.: creating a new collection Figure 7.4.: collection 'sps' created
● You are prompted to insert a name for the new collection. Type in sps and click ok. (See figure 7.4.)
● The rest should be done through the framework.
● If you have special wishes concerning users, roles, etc. refer to the eXist hompage.
20081010 15

Working Group Sensor Web/Simulation Lab SPS Installation Guide
7.2.2 Download and install postgreSQL database
The postgreSQL implementation of the DAO interface is currently a test version. But we appreciate every bugreport (Refer to section 6where to report bugs).
● Download the postgresql database from http://www.postgresql.org/ftp/binary/v8.3.1/
● Follow the installation process described at http://pginstaller.projects.postgresql.org or/and http://www.postgresql.org/docs/faqs.FAQ_windows.html
Create database
● For this description we use the pgAdmin3 tool (http://www.pgadmin.org/download/)
● Connect to the database server (here on localhost:5432) and create a new database for the SPS
Figure 7.5.: pgAdminIII interface
● To initialize the database tables and user management use the SQL documents contained in the lib/database/postgres directory.
● To initialize the DB for an allinone SPS, use the init_SPS_DB.SQL
● For a distributed version you must run am.SQL, pm.SQL and user_management.SQL individually on the appropriate system.
20081010 16
Working Group Sensor Web/Simulation Lab SPS Installation Guide
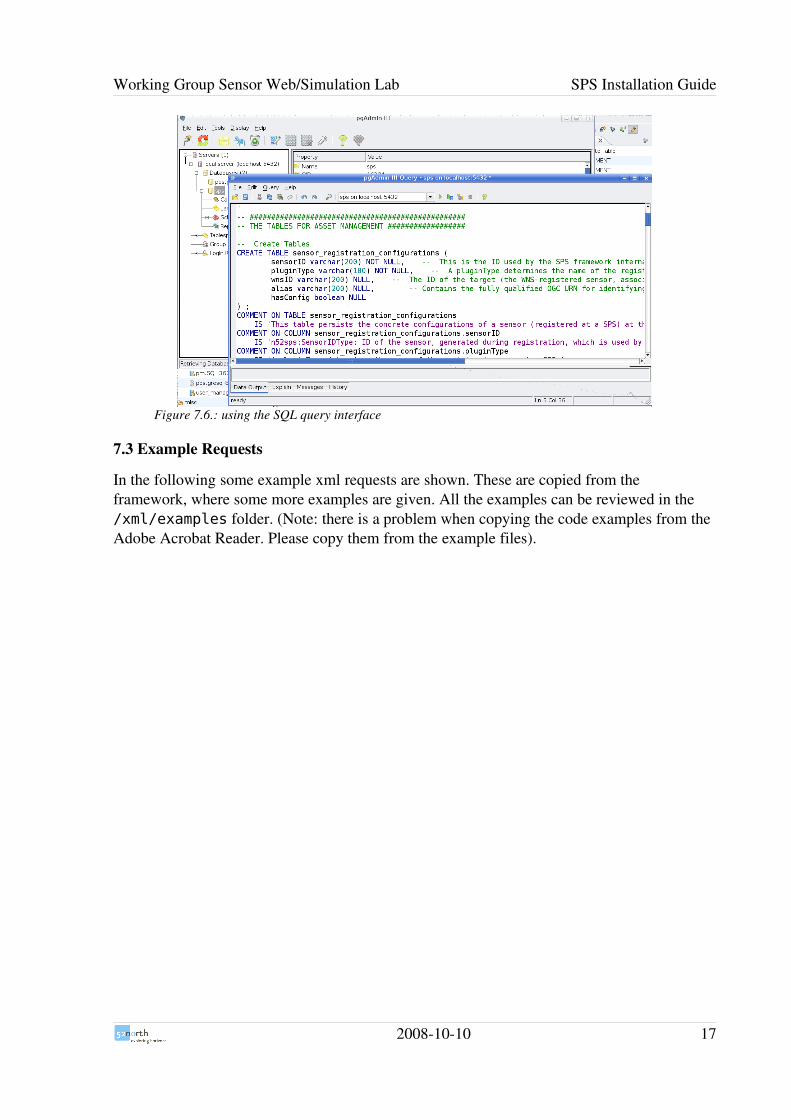
Figure 7.6.: using the SQL query interface
7.3 Example Requests
In the following some example xml requests are shown. These are copied from the framework, where some more examples are given. All the examples can be reviewed in the /xml/examples folder. (Note: there is a problem when copying the code examples from the Adobe Acrobat Reader. Please copy them from the example files).
20081010 17
Working Group Sensor Web/Simulation Lab SPS Installation Guide
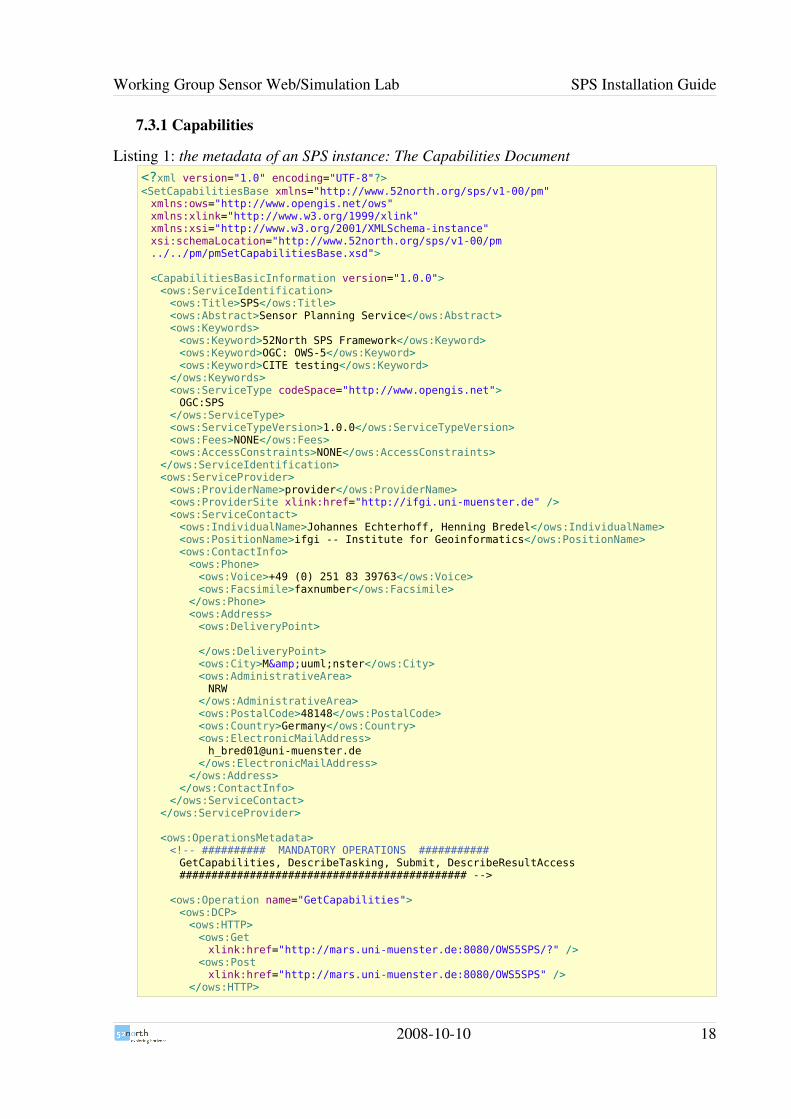
7.3.1 Capabilities
Listing 1: the metadata of an SPS instance: The Capabilities Document<?xml version="1.0" encoding="UTF-8"?><SetCapabilitiesBase xmlns="http://www.52north.org/sps/v1-00/pm"xmlns:ows="http://www.opengis.net/ows"xmlns:xlink="http://www.w3.org/1999/xlink"xmlns:xsi="http://www.w3.org/2001/XMLSchema-instance"xsi:schemaLocation="http://www.52north.org/sps/v1-00/pm ../../pm/pmSetCapabilitiesBase.xsd">
<CapabilitiesBasicInformation version="1.0.0"><ows:ServiceIdentification><ows:Title>SPS</ows:Title><ows:Abstract>Sensor Planning Service</ows:Abstract><ows:Keywords><ows:Keyword>52North SPS Framework</ows:Keyword><ows:Keyword>OGC: OWS-5</ows:Keyword><ows:Keyword>CITE testing</ows:Keyword>
</ows:Keywords><ows:ServiceType codeSpace="http://www.opengis.net">OGC:SPS
</ows:ServiceType><ows:ServiceTypeVersion>1.0.0</ows:ServiceTypeVersion><ows:Fees>NONE</ows:Fees><ows:AccessConstraints>NONE</ows:AccessConstraints>
</ows:ServiceIdentification><ows:ServiceProvider><ows:ProviderName>provider</ows:ProviderName><ows:ProviderSite xlink:href="http://ifgi.uni-muenster.de" /><ows:ServiceContact><ows:IndividualName>Johannes Echterhoff, Henning Bredel</ows:IndividualName><ows:PositionName>ifgi -- Institute for Geoinformatics</ows:PositionName><ows:ContactInfo><ows:Phone><ows:Voice>+49 (0) 251 83 39763</ows:Voice><ows:Facsimile>faxnumber</ows:Facsimile>
</ows:Phone><ows:Address><ows:DeliveryPoint>
</ows:DeliveryPoint><ows:City>M&uuml;nster</ows:City><ows:AdministrativeArea>NRW
</ows:AdministrativeArea><ows:PostalCode>48148</ows:PostalCode><ows:Country>Germany</ows:Country><ows:ElectronicMailAddress>[email protected]
</ows:ElectronicMailAddress></ows:Address>
</ows:ContactInfo></ows:ServiceContact>
</ows:ServiceProvider>
<ows:OperationsMetadata><!-- ########## MANDATORY OPERATIONS ########### GetCapabilities, DescribeTasking, Submit, DescribeResultAccess############################################# -->
<ows:Operation name="GetCapabilities"><ows:DCP><ows:HTTP><ows:Getxlink:href="http://mars.uni-muenster.de:8080/OWS5SPS/?" />
<ows:Postxlink:href="http://mars.uni-muenster.de:8080/OWS5SPS" />
</ows:HTTP>
20081010 18

Working Group Sensor Web/Simulation Lab SPS Installation Guide
</ows:DCP><ows:Parameter name="Sections"><!-- use="optional" --><ows:Value>All</ows:Value><ows:Value>ServiceIdentification</ows:Value><ows:Value>ServiceProvider</ows:Value><ows:Value>OperationsMetadata</ows:Value><ows:Value>Contents</ows:Value>
</ows:Parameter></ows:Operation><ows:Operation name="DescribeTasking"><ows:DCP><ows:HTTP><ows:Postxlink:href="http://mars.uni-muenster.de:8080/OWS5SPS" />
</ows:HTTP></ows:DCP><ows:Parameter name="notificationTarget"><!-- use="required" --><ows:Value />
</ows:Parameter><ows:Parameter name="sensorID"><!-- use="optional" --><ows:Value />
</ows:Parameter></ows:Operation><ows:Operation name="Submit"><ows:DCP><ows:HTTP><ows:Postxlink:href="http://mars.uni-muenster.de:8080/OWS5SPS" />
</ows:HTTP></ows:DCP><ows:Parameter name="notificationTarget"><!-- use="required" --><ows:Value />
</ows:Parameter><ows:Parameter name="parameters"><!-- use="optional" --><ows:Value />
</ows:Parameter><ows:Parameter name="feasibilityID"><!-- use="optional" --><ows:Value />
</ows:Parameter><ows:Parameter name="timeFrame"><!-- use="optional" --><ows:Value />
</ows:Parameter></ows:Operation><ows:Operation name="DescribeResultAccess"><ows:DCP><ows:HTTP><ows:Postxlink:href="http://mars.uni-muenster.de:8080/OWS5SPS" />
</ows:HTTP></ows:DCP><ows:Parameter name="notificationTarget"><!-- use="required" --><ows:Value />
</ows:Parameter><ows:Parameter name="parameters"><!-- use="optional" --><ows:Value />
</ows:Parameter><ows:Parameter name="feasibilityID"><!-- use="optional" --><ows:Value />
</ows:Parameter><ows:Parameter name="timeFrame"><!-- use="optional" --><ows:Value />
</ows:Parameter></ows:Operation>
<!-- ########## OPTIONAL OPERATIONS ########### GetFeasibility, Update, GetStatus############################################# -->
20081010 19

Working Group Sensor Web/Simulation Lab SPS Installation Guide
<ows:Operation name="GetFeasibility"><ows:DCP><ows:HTTP><ows:Postxlink:href="http://mars.uni-muenster.de:8080/OWS5SPS" />
</ows:HTTP></ows:DCP><ows:Parameter name="notificationTarget"><!-- use="required" --><ows:Value />
</ows:Parameter><ows:Parameter name="sensorID"><!-- use="required" --><ows:Value />
</ows:Parameter><ows:Parameter name="parameters"><!-- use="required" --><ows:Value />
</ows:Parameter><ows:Parameter name="timeFrame"><!-- use="required" --><ows:Value />
</ows:Parameter></ows:Operation><ows:Operation name="Update"><ows:DCP><ows:HTTP><ows:Postxlink:href="http://mars.uni-muenster.de:8080/OWS5SPS" />
</ows:HTTP></ows:DCP><ows:Parameter name="taskID"><!-- use="required" --><ows:Value />
</ows:Parameter><ows:Parameter name="notificationTarget"><!-- use="optional" --><ows:Value />
</ows:Parameter><ows:Parameter name="parameters"><!-- use="required" --><ows:Value />
</ows:Parameter></ows:Operation><ows:Operation name="GetStatus"><ows:DCP><ows:HTTP><ows:Postxlink:href="http://mars.uni-muenster.de:8080/OWS5SPS" />
</ows:HTTP></ows:DCP><ows:Parameter name="notificationTarget"><!-- use="optional" --><ows:Value />
</ows:Parameter><ows:Parameter name="taskID"><!-- use="required" --><ows:Value />
</ows:Parameter></ows:Operation><ows:Operation name="Cancel"><ows:DCP><ows:HTTP><ows:Postxlink:href="http://mars.uni-muenster.de:8080/OWS5SPS" />
</ows:HTTP></ows:DCP><ows:Parameter name="taskID"><!-- use="required" --><ows:Value />
</ows:Parameter></ows:Operation>
</ows:OperationsMetadata></CapabilitiesBasicInformation>
</SetCapabilitiesBase>
20081010 20

Working Group Sensor Web/Simulation Lab SPS Installation Guide
7.3.2 Installing a plugin
Listing 2: the document updates the AM configuration to let it know a new plugin type<?xml version="1.0" encoding="UTF-8"?><UpdateAMConfiguration xmlns="http://www.52north.org/sps/v1-00/am" xmlns:n52sps="http://www.52north.org/sps/v1" xmlns:xsi="http://www.w3.org/2001/XMLSchema-instance" xsi:schemaLocation="http://www.52north.org/sps/v1-00/am../../am/amUpdateAMConfiguration.xsd"> <CreateTypeMapping><PluginType>CITE-Plugin</PluginType><Class>org.n52.sps.plugintype.cite.TestPlugin</Class>
</CreateTypeMapping></UpdateAMConfiguration>
7.3.3 Registering a plugin
Note: The CITE compliance test suite contains a test that checks, if there is a unique identifier in the sensorML document and if it matches to the id given in the sensor offerings of the capabilities of the SPS.
The id which is tested is the qualifiedAlias of the sensor. Since the SPS is not fix to a special SensorML version, it does not check if there are matching ids. The consequence is that it is up to the provider to set the right uniqueId in the sensorML document. This might happen in two ways:
1. Define an Alias in the Register document and set the uniqueId with the provider prefix as seen in the example document below. Another possibility is to register the sensor first (maybe without an Alias) and then update the sensor profile with the adapted sensorML document.
2. If you have only a URL to the sensorML document, you have to add the uniqueId there.
The correlating element in the SensorML is in Listing 3.
20081010 21

Working Group Sensor Web/Simulation Lab SPS Installation Guide
Listing 3: the unique identifier of a sensor in SensorML docuement
<identification><IdentifierList><identifier><Term definition="urn:ogc:def:identifier:OGC:uniqueID"><value>urn:ogc:object:feature:Sensor:IFGI:CITE-Plugin
</value></Term>
</identifier></IdentifierList>
</identification>
Listing 4: this document contains the CITEtestplugins registration information<Register xmlns="http://www.52north.org/sps/v1-00/am"xmlns:n52sps="http://www.52north.org/sps/v1"xmlns:xsi="http://www.w3.org/2001/XMLSchema-instance"xsi:schemaLocation="http://www.52north.org/sps/v1-00/am
../../schemata/am/amRegister.xsd">
<PluginType>CITE-Plugin</PluginType><n52sps:Alias>CITE-Plugin</n52sps:Alias>
<n52sps:SensorConfiguration>
<testconfig:TestPluginConfigurationxmlns:testconfig="http://www.52north.org/sps/plugin/testconfig"xmlns:n52sps="http://www.52north.org/sps/v1"xmlns:gml="http://www.opengis.net/gml"xmlns:sps="http://www.opengis.net/sps/1.0"xmlns:swe="http://www.opengis.net/swe/1.0"xmlns:ows="http://www.opengis.net/ows"xmlns:xlink="http://www.w3.org/1999/xlink"xmlns:xsi="http://www.w3.org/2001/XMLSchema-instance"xsi:schemaLocation="http://www.52north.org/sps/plugin/testconfig
../../schemata/plugins/cite-plugin/testpluginConfiguration.xsd"><testconfig:InstanceConfig><testconfig:Phenomenon>urn:ogc:feature:phenomenon:AOI
</testconfig:Phenomenon><testconfig:DefaultDataServices><n52sps:Service><n52sps:ServiceType>SOS</n52sps:ServiceType><n52sps:ServiceURL>http://mars.uni-muenster.de:8080/OWS5SOS/sos
</n52sps:ServiceURL></n52sps:Service>
</testconfig:DefaultDataServices><testconfig:SensorDescription><n52sps:SensorMLdoc><SensorMLxmlns="http://www.opengis.net/sensorML/1.0"xmlns:xsi="http://www.w3.org/2001/XMLSchema-instance"xmlns:xlink="http://www.w3.org/1999/xlink"><identification><IdentifierList><identifier><Termdefinition="urn:ogc:def:identifier:OGC:uniqueID"><value>urn:ogc:object:feature:Sensor:IFGI:CITE-Plugin
</value></Term>
</identifier></IdentifierList>
</identification><member>
20081010 22

Working Group Sensor Web/Simulation Lab SPS Installation Guide
<ContactList><ResponsibleParty><individualName>52North
</individualName></ResponsibleParty><ResponsibleParty><individualName>ifgi
</individualName></ResponsibleParty>
</ContactList></member>
</SensorML></n52sps:SensorMLdoc>
</testconfig:SensorDescription><testconfig:AreaOfService><ows:WGS84BoundingBox><!-- BB of the whole world, ows says to use infinity --><ows:LowerCorner>-180 -90</ows:LowerCorner><ows:UpperCorner>180 90</ows:UpperCorner>
</ows:WGS84BoundingBox></testconfig:AreaOfService><testconfig:TaskAccess><testconfig:DataServices><n52sps:TaskService><n52sps:ServiceType>SOS</n52sps:ServiceType><n52sps:ServiceURL>http://mars.uni-muenster.de:8080/OWS5SOS/sos
</n52sps:ServiceURL></n52sps:TaskService>
</testconfig:DataServices></testconfig:TaskAccess><testconfig:MaxDurationUntilResponse>PT5M
</testconfig:MaxDurationUntilResponse></testconfig:InstanceConfig>
<testconfig:InputDescription><sps:InputDescriptor parameterID="measurementFrequency"use="optional" updateable="true"><sps:definition><sps:commonData><swe:Quantity><swe:uom code="Hz"xlink:href="urn:x-ogc:def:uom:OGC:Hz" />
</swe:Quantity></sps:commonData>
</sps:definition></sps:InputDescriptor><sps:InputDescriptor parameterID="measurementLocation"use="required" updateable="false"><sps:definition><sps:commonData><swe:PositionreferenceFrame="urn:ogc:def:crs:EPSG:6.14:4326"definition="urn:ogc:def:phenomenon:measurement_location"><swe:location><swe:Vector><swe:coordinatename="Geodetic latitude"><swe:QuantityaxisID="Lat"><swe:uom code="deg" /><swe:constraint><swe:AllowedValues><swe:interval>-90 90
</swe:interval>
20081010 23

Working Group Sensor Web/Simulation Lab SPS Installation Guide
</swe:AllowedValues></swe:constraint>
</swe:Quantity></swe:coordinate><swe:coordinatename="Geodetic longitude"><swe:QuantityaxisID="Long"><swe:uom code="deg" /><swe:constraint><swe:AllowedValues><swe:interval>-180 180
</swe:interval></swe:AllowedValues>
</swe:constraint></swe:Quantity>
</swe:coordinate></swe:Vector>
</swe:location></swe:Position>
</sps:commonData></sps:definition>
</sps:InputDescriptor><sps:InputDescriptor parameterID="measurementCount"use="optional" updateable="false"><sps:definition><sps:commonData><swe:Count><swe:constraint><swe:AllowedValues><swe:max>10</swe:max>
</swe:AllowedValues></swe:constraint>
</swe:Count></sps:commonData>
</sps:definition></sps:InputDescriptor><sps:InputDescriptor parameterID="measurementPurpose"use="optional" updateable="false"><sps:definition><sps:commonData><swe:Text />
</sps:commonData></sps:definition>
</sps:InputDescriptor><sps:InputDescriptor parameterID="measurementPriority"use="required" updateable="false"><sps:definition><sps:commonData><swe:Category><swe:constraint><swe:AllowedTokens><swe:valueList>low medium high
</swe:valueList></swe:AllowedTokens>
</swe:constraint></swe:Category>
</sps:commonData></sps:definition>
</sps:InputDescriptor><sps:InputDescriptor parameterID="shallMeasure"use="required" updateable="true"><sps:definition><sps:commonData><swe:Boolean />
</sps:commonData></sps:definition>
</sps:InputDescriptor>
20081010 24

Working Group Sensor Web/Simulation Lab SPS Installation Guide
<sps:InputDescriptor parameterID="maxMissionDuration"use="optional" updateable="false"><sps:definition><sps:commonData><swe:Time><swe:constraint><swe:AllowedTimes><swe:interval>1990-01-01 2009-01-01
</swe:interval></swe:AllowedTimes>
</swe:constraint></swe:Time>
</sps:commonData></sps:definition>
</sps:InputDescriptor></testconfig:InputDescription>
</testconfig:TestPluginConfiguration>
</n52sps:SensorConfiguration>
<registerAtWNS>false</registerAtWNS></Register>
8 References
● Botts, M. (2007): Sensor Model Language (SensorML) Implementation Specification, version 1.0.0, OGC document 07000
● Simonis, I. (2007): Sensor Planning Service Implementation Specification, version 1.0.0, OGC document 07014r3
● Simonis, I., Echterhoff, J. (2007), Web Notification Service (WNS), OGC document 06095
20081010 25