Securing Database Accesscastle.eiu.edu/~pingliu/tec5323_summer/Text/text_5... · "User Account...
28
Class Note: Chapter 9 Securing Database Access (Updated May 17, 2016) [The “class note” is the typical material I would prepare for my face-to-face class. Since this is an Internet based class, I am sharing the notes with everyone assuming you are in the class.] With any multiuser computer system, security is a particularly important issue to address. Oracle database systems are certainly no exception. Without adequate security controls, malicious users might invade an Oracle database, view confidential information, and make unauthorized changes to database information. This class/chapter explains the basic security features of Oracle that you can use to control user access to database resources. User management and authentication Privilege management and roles Database resource limits User password management More detailed and advanced database security and management are dealt in a separate course, TEC 5363 Database Security and Reliability. Chapter Prerequisites To practice the hands-on exercises in this chapter, you need to start SQL*Plus and run the following command script at SQL> prompt location\Sql\chap09.sql Where location is the file directory where you expanded the supplemental files downloaded from course web site. For example, after starting SQL*Plus and connecting as SCOTT, you can run this chapter's SQL command script using the SQL*Plus command @, as in the following example (assuming that your chap09.sql file is in C:\temp\Sql). SQL> @C:\temp\Sql\chap09.sq1; Once the script completes successfully, leave the current SQL*Plus session open and use it to perform this chapter's exercises in the order that they appear. 9.1. User Management
Transcript of Securing Database Accesscastle.eiu.edu/~pingliu/tec5323_summer/Text/text_5... · "User Account...
Class Note: Chapter 9
Securing Database Access
(Updated May 17, 2016)
[The “class note” is the typical material I would prepare for my face-to-face class. Since
this is an Internet based class, I am sharing the notes with everyone assuming you are in
the class.]
With any multiuser computer system, security is a particularly important issue to
address. Oracle database systems are certainly no exception. Without adequate security
controls, malicious users might invade an Oracle database, view confidential information,
and make unauthorized changes to database information. This class/chapter explains the
basic security features of Oracle that you can use to control user access to database
resources.
User management and authentication
Privilege management and roles
Database resource limits
User password management
More detailed and advanced database security and management are dealt in
a separate course, TEC 5363 Database Security and Reliability.
Chapter Prerequisites
To practice the hands-on exercises in this chapter, you need to start SQL*Plus and
run the following command script at SQL> prompt
location\Sql\chap09.sql
Where location is the file directory where you expanded the supplemental files
downloaded from course web site. For example, after starting SQL*Plus and connecting
as SCOTT, you can run this chapter's SQL command script using the SQL*Plus
command @, as in the following example (assuming that your chap09.sql file is in
C:\temp\Sql).
SQL> @C:\temp\Sql\chap09.sq1;
Once the script completes successfully, leave the current SQL*Plus session open
and use it to perform this chapter's exercises in the order that they appear.
9.1. User Management

The first line of defense against unwanted database access is controlling who can
access the system in the first place. As you already know from previous chapters in this
book, to connect to an Oracle database, a user must have a username in the database. The
following sections explain more about managing database user accounts.
9.1.1. User Authentication
For each database user, you must indicate how you want Oracle to authenticate
use of the new account. When someone attempts to connect to a database with a
username, Oracle authenticates that the person utilizing the username is authorized to use
the account. Oracle can authenticate users via three different techniques: password
authentication, operating system authentication, and global user authentication.
9.1.1.1. Password Authentication
Oracle can authenticate a username with a password. When a user starts an
application, the application prompts for a username and associated password. Oracle then
authenticates the connection request using the user account information managed by the
database. Password authentication is common in distributed processing environments
when users work with client PCs and connect to an Oracle database server across a
network.
When you decide to use password authentication, it's important to have a policy in
place that ensures passwords have a certain degree of complexity and that users routinely
change them. For more information about managing user passwords, see the section
"User Account Management" later in this chapter.
9.1.1.2. Operating System Authentication
Oracle can authenticate a username using the operating system of the computer
that's running the database server. When a user starts an application, the application does
not request connection information from the user. Instead, the application forwards to
Oracle the operating system account information of the user. Oracle then authenticates
the connection request by making sure that the operating system user is registered as a
user in the database. Operating system authentication is common in Oracle host-based
environments when users connect to Oracle using terminals that are directly connected to
the database server.
9.1.1.3. Global User Authentication
Oracle can authenticate a global username using an external network service.
When a user starts an application and makes a connection request, Oracle authenticates
the request with user information managed by an external security service. Oracle
includes its own security service, Oracle Security Server, that you can use to manage
global database users. Global user authentication is common in network environments

where users require access to several Oracle databases, and the network is not necessarily
secure.
EXERCISE 9.1 : Creating a User with Password Authentication
You create a database user using the SQL command CREATE USER. The
following is an abbreviated syntax listing of the CREATE USER command.
CREATE USER user
IDENTIFIED BY password [DEFAULT TABLESPACE tablespace]
[TEMPORARY TABLESPACE tablespace] [PASSWORD EXPIRE] [ACCOUNT {LOCK|UNLOCK}]
Notice that the CREATE USER command lets you create a user with a password,
as well as specify various other settings for the new user account that subsequent sections
of this chapter will explain. For now, just enter the following CREATE USER statement
to create a database user account for a new application developer named Larry Ellison
with an initial password of changethisnow.
CREATE USER lellison IDENTIFIED BY changethisnow;
EXERCISE 9.2: Changing the Password for a User
Any user can change his/her own password using the following form of the SQL
command ALTER USER.
ALTER USER user IDENTIFIED BY newpassword
If you have the necessary privileges as a database administrator, you can also
change another user's password with the same command. For example, enter the
following ALTER USER statement to change the password for the new LELLISON
account.
ALTER USER lellison IDENTIFIED BY newpassword;
9.1.2. A User's Default Tablespace
A tablespace is a logical storage division of a database that organizes the physical
storage of database information. (See Chapter 10 for more information about
tablespaces.) For each database user, you can set a default tablespace. When the user
creates a new database object, such as a table or index, and does not explicitly indicate a
tablespace for the object, Oracle stores the new database object in the user's default

tablespace. Unless you specify otherwise, a user's default tablespace is the SYSTEM
tablespace.
9.1.3. A User's Temporary Tablespace
Often, SQL statements require temporary work space to complete. For example, a
query that joins and sorts a large amount of data might require temporary work space to
build the result set. When necessary, Oracle allocates temporary work space for a user's
SQL statements in the user's temporary tablespace. Unless you specify otherwise, a user's
temporary tablespace is the SYSTEM tablespace.
EXERCISE 9.3: Altering a User's Tablespace Settings
When you create a user with the CREATE USER command, you can explicitly
set the user's default and temporary tablespace settings. Subsequently, you can alter a
user's default and temporary tablespace settings using the following form of the SQL
command ALTER USER.
ALTER USER user DEFAULT TABLESPACE tablespace
TEMPORARY TABLESPACE tablespace
Exercise 9.1 created the user LELLISON without specifying settings for the user's
default and temporary tablespaces; therefore, LELLISON's default and temporary
tablespaces are set to the SYSTEM tablespace. As you'll learn subsequently in Chapter
12 of this book, typical database users should not have their default and temporary
tablespaces set to the SYSTEM tablespace for performance reasons. Therefore, enter the
following ALTER USER statement to change LELLISON's tablespace settings.
ALTER USER lellison
DEFAULT TABLESPACE users TEMPORARY TABLESPACE temp;
9.1.4. Locked and Unlocked User Accounts
Oracle lets you lock and unlock a user account at any time so that you can control
database access through the account without having to drop and recreate it. A user cannot
connect to Oracle after you lock the user's account. To subsequently allow a user access
through an account, you must unlock the account. Why would you want to lock and
unlock user accounts?
You might want to lock a user's account when the user takes a temporary
leave of absence from work, but plans on returning in the future.
When a person leaves your company, you might want to lock the user's
account rather than drop the account, especially if the user's schema
contains tables and other objects that you want to preserve.

You typically lock a user account that functions only as a schema for
logically organizing all of an application's database objects.
When you create a new database user, the new account is unlocked by default.
NOTE Later in this chapter, you'll see how to configure Oracle so that it locks a
user account automatically after a user's password expires or following a
consecutive number of failed connection attempts.
EXERCISE 9.4: Locking and Unlocking a User Account
In Exercise 9.1, the example CREATE USER statement created the new user
without specifying whether to lock or unlock the account. Therefore, Oracle creates the
user with the default UNLOCK option for the ACCOUNT parameter. For practice, enter
the following two ALTER USER statements to lock and then unlock the LELLISON
account.
ALTER USER lellison
ACCOUNT lock;
ALTER USER lellison ACCOUNT unlock;
9.1.5. Default Database Users
This course on Oracle database would be remiss if it did not mention that every
Oracle database has two default database user accounts: SYS and SYSTEM.
The SYS account owns the database's data dictionary objects. You should never
connect to Oracle using the SYS account unless it is absolutely necessary to
install supplemental data dictionary objects owned by SYS. The default password
for the SYS account is CHANGE_ON_INSTALL (This might not be true for
Oracle 11g or 12c where it forces the user to specify passwords during
installation).
The SYSTEM account is the default database administrator account that you can
use to get started with a new database. For accountability, it's best to create
distinct user accounts capable of database administration rather than use the
default SYSTEM account. The default password for the SYSTEM account is
MANAGER. (This might not be true for Oracle 11g or 12c where it forces the
user to specify passwords during installation).
Both the SYS and SYSTEM accounts are all-powerful database administrator
accounts that can perform any database operation. Therefore, it is very important to
change the default passwords for the SYS and SYSTEM accounts soon after database
creation to prevent malicious users from using these accounts.

NOTE For backward compatibility, Oracle8i also supports the special alias INTERNAL
for the SYS account. This “internal” account was desupported after Oracle9i.
9.2. Privilege Management
After you create the users for an Oracle database system, they cannot connect to
the database server nor do anything of consequence unless they have the privileges to
perform specific database operations. For example, consider the following limitations:
A user cannot connect to an Oracle database unless the user has the CREATE
SESSION system privilege.
A user cannot create a table in his or her corresponding schema unless the user
has the CREATE TABLE system privilege.
A user cannot delete rows from a table in a different schema unless the user has
the DELETE object privilege for the table.
This short list reveals just some of the different privileges that you can use to
control access to operations and data within an Oracle database. The following sections
explain more about the different types of database privileges, as well as how to grant
them to and revoke them from users.
9.2.1. Types of Database Privileges
If you read the list in the previous section closely, you'll notice that there are two
different kinds of privileges that control access to an Oracle database: system privileges
and object privileges.
9.2.1.1. System Privileges
A system privilege is a powerful privilege that gives a user the ability to perform
some type of system-wide operation. For example, the following examples are just a few
of almost 100 system privileges in Oracle:
A user with the CREATE SESSION system privilege can connect to the
database server and establish a database session.
A user with the CREATE TABLE system privilege can create a table in
his or her own schema.
A user with the CREATE ANY TABLE system privilege can create a
table in any schema of the database.
A user with the CREATE ANY TYPE system privilege can create types
and associated type bodies in any schema of the database.
A user with the SELECT ANY TABLE system privilege can query any
table in the database.

A user with the EXECUTE ANY PROCEDURE system privilege can
execute any stored procedure, stored function, or packaged component in
the database.
A user with the EXECUTE ANY TYPE system privilege can reference
and execute methods of any type in the database.
Because system privileges are very powerful privileges that can affect the security
of the entire database system, carefully consider what types of users require system
privileges. For example:
A database administrator is the only type of user that should have the
powerful ALTER DATABASE system privilege, a privilege that allows
someone to alter the physical structure and availability of the database
system.
Developers typically require several system privileges, including the
CREATE TABLE, CREATE VIEW, and CREATE TYPE system
privileges to build database schemas that support front-end applications.
Every user in the system typically has the CREATE SESSION system
privilege, the privilege that allows a user to connect to the database server.
At first, the overwhelming number of system privileges might appear
intimidating. However, because each system privilege is a focused access right for a
specific database operation, it's easy to provide each type of database user with just the
right amount of privileges--no more or less power than what is necessary to accomplish
their work.
9.2.1.2. Object Privileges
An object privilege is a privilege that gives a user the ability to perform a specific
type of operation on a specific database object, such as a table, view, or stored procedure:
A user with the SELECT object privilege for the CUST view can query
the view to retrieve information.
A user with the INSERT object privilege for the CUSTOMERS table can
insert new rows into the table.
A user with the EXECUTE privilege for the partType object type can use
the type when building other database objects and execute the type's
methods.
These examples are just a few of the object privileges that are available for tables,
views, sequences, procedures, functions, packages, object types, and server file
directories. Depending on how an application is designed, users might require object
privileges for the underlying database objects that the application uses. For example, in a
typical order-entry application, a user might need the SELECT, INSERT, UPDATE, and
DELETE privileges for the CUSTOMERS, ORDERS, and ITEMS tables, as well as the
SELECT and UPDATE privileges for the PARTS table. Because each object privilege is

focused on the operation that it permits, you can manage database access with absolute
control.
9.2.2. Granting and Revoking Users' Privileges
You can give a user a system or object privilege by granting the privilege to the
user with the SQL command GRANT. To withdraw a privilege from a user, you revoke
the privilege from the user with the SQL command REVOKE. Oracle does not let just
anyone grant and revoke privileges to and from users. Consider the following
requirements when managing individual system and object privileges for database users:
You can grant a user a system privilege only if you have the system
privilege with the administrative rights to grant the privilege to other
users.
You can grant a user a database object privilege only if you own the
associated database object or if you have the object privilege with the
administrative rights to grant the privilege to other users.
The following practice exercises provide you with more information about using
the GRANT and REVOKE commands.
EXERCISE 9.5: Granting a System Privilege to a User
You can grant a system privilege to a user, with or without administrative rights
for the privilege, using the following form of the SQL command GRANT.
GRANT privilege [, privilege] ...
TO user [, user] ... [WITH ADMIN OPTION]
For example, a typical application developer requires the ability to connect to the
database and then create tables, views, sequences, and other types of schema objects
necessary to support an application. Considering this, enter the following GRANT
statement to grant several system privileges to LELLISON.
GRANT CREATE SESSION, CREATE TABLE, CREATE VIEW, CREATE ANY INDEX, CREATE SEQUENCE, CREATE TYPE
TO lellison WITH ADMIN OPTION;
NOTE To grant a system or object privilege to every user in the database, grant the
privilege to the keyword PUBLIC rather than to a specific user. PUBLIC is a
special group in an Oracle database that you can use to make a privilege
available quickly to every user in the system. However, use this feature carefully
so that you do not open up security holes in your database.

EXERCISE 9.6: Revoking a System Privilege from a User
If you make a mistake while granting a user some privileges, or later decide that a
user should no longer have a system privilege as part of their privilege domain (set of
available privileges), you can revoke the system privilege using the following form of the
SQL command REVOKE.
REVOKE privilege [, privilege] ...
FROM user [, user] ...
For example, the GRANT statement in the previous practice exercise grants the
user LELLISON several system privileges with the ADMIN option. Consequently,
LELLISON can use the system privileges to perform database work and can grant the
same system privileges to other users at his discretion. Typical application developers
should not have the ability to grant system privileges to other database users. Therefore,
enter the following REVOKE statement to revoke LELLISON's access to the system
privileges granted in the previous exercise.
REVOKE CREATE SESSION, CREATE TABLE, CREATE VIEW, CREATE ANY INDEX,
CREATE SEQUENCE, CREATE TYPE FROM lellison;
Next, regrant the system privileges to LELLISON, but this time without the
ADMIN option.
GRANT CREATE SESSION, CREATE TABLE, CREATE VIEW, CREATE ANY INDEX, CREATE SEQUENCE, CREATE TYPE
TO lellison;
EXERCISE 9.7: Granting an Object Privilege to a User
You can grant an object privilege for a specific schema object to a user, with or
without the right to grant the privilege to other users, using the following form of the
SQL command GRANT.
GRANT { privilege [, privilege] ...
| ALL [PRIVILEGES] }} ON {[schema.]object|DIRECTORY directory }
TO user [, user] ... [WITH GRANT OPTION]
NOTE To grant an object privilege, you must own the object or have been granted the
object privilege with the GRANT option.
Table 9-1 contains a list of the privileges available for the most common types of
schema objects. For example, your current practice schema (PRACTICE09) contains the
familiar CUSTOMERS, ORDERS, ITEMS, PARTS, and SALESREPS tables (in other

words, your current schema owns these tables). Enter the following statements to grant
the user LELLISON various privileges for the tables in your schema.
GRANT INSERT, UPDATE, DELETE, SELECT ON customers TO lellison;
GRANT ALL PRIVILEGES ON orders TO lellison
WITH GRANT OPTION;
GRANT SELECT, INSERT (id, lastname, firstname),
UPDATE (lastname, firstname), REFERENCES (id)
ON salesreps TO lellison;
The first statement grants the INSERT, UPDATE, DELETE, and SELECT
privileges for the CUSTOMERS table to LELLISON. The second statement uses the
ALL PRIVILEGES shortcut to grant all object privileges for the ORDERS table to
LELLISON with the option to grant the table privileges for the ORDERS table to other
users. The final statement grants the SELECT, INSERT, UPDATE, and REFERENCES
privileges for the SALESREPS table to LELLISON--notice that the INSERT, UPDATE,
and REFERENCES privileges are granted for specific columns only.
Type of Object Object Privileges Special Notes
Table
SELECT, INSERT,
UPDATE, DELETE,
ALTER, INDEX,
REFERENCES
The INDEX privilege lets the grantee create an
index for the table. The REFERENCES privilege lets
the grantee reference the table when declaring a
referential integrity constraint. You can grant
column-selective privileges for the INSERT, UPDATE,
and REFERENCES privileges.
View SELECT, INSERT,
UPDATE, DELETE
You can grant column-selective privileges for
the INSERT and UPDATE privileges.
Sequence SELECT, ALTER
The SELECT privilege lets the grantee use the sequence
to generate and reuse sequence numbers with the
sequence's NEXTVAL and CURRVAL pseudo-columns.
Procedure,
Function,
Package,
Object Type
EXECUTE
The EXECUTE privilege for an object type lets the
grantee use the object type when building other
schema objects and types, and lets the grantee
execute the type's methods.

TABLE 9-1. The Object Privileges for the Most Common Types of
Schema Objects in an Oracle Database
EXERCISE 9.8: Revoking an Object Privilege from a User
You can revoke an object privilege from a user with the following form of the
SQL command REVOKE.
REVOKE { privilege [, privilege] ...
ALL [PRIVILEGES] } ON {[schema.]object|DIRECTORY directory }
FROM user [,user] ... [CASCADE CONSTRAINTS] [FORCE]
The CASCADE CONSTRAINTS option indicates that you want to drop all
referential integrity constraints created using a REFERENCES object privilege that is
being revoked. The FORCE option is necessary when revoking the EXECUTE object
privilege for an object type that has table dependencies.
For example, enter the following statement to revoke some of the privileges you
granted to LELLISON in the previous practice exercise.
REVOKE UPDATE, DELETE ON customers FROM lellison;
REVOKE ALL PRIVILEGES ON orders
FROM lellison;
REVOKE REFERENCES ON salesreps FROM lellison CASCADE CONSTRAINTS;
9.2.3. Privilege Management with Roles
The system and object privileges necessary to use a typical database application
can be numerous. When a database application supports a large user population, privilege
management can become a big job quickly if you manage each user's privileges with
individual grants. To make security administration an easier task, you can use roles. A
role is a collection of related system and object privileges that you can grant to users and
other roles. For example, when you build a new database application, you can create a
new role that has the database privileges necessary to run the program. After you grant
the role to an application user, the user can start the application to connect to the database
and accomplish work. If the privileges necessary to run the application change, all that's
necessary is a quick modification of the role's set of privileges. All grantees of the role
see the change in the role automatically and continue to have the privileges necessary to
use the application.

9.2.3.1. Predefined Database Roles
Oracle has many predefined roles that you can use to quickly grant privileges to
common types of database users. The following is a short list of the five most commonly
used predefined database roles that you might use.
CONNECT
A basic user role that lets the connect to the
database and then create tables, views,
synonyms, sequences, and a few other
types of objects in the associated schema.
RESOURCE
Intended for a typical application
developer, this role lets the grantee create
tables, sequences, data clusters, procedures,
functions, packages, triggers, object types,
function-based indexes, and user-defined
operators in the associated schema.
DBA
Intended for administrators, this role lets
the grantee perform any database function,
as it includes every system privilege.
Furthermore, a grantee of the DBA role can
grant any system privilege to any other
database user or role.
SELECT CATALOG_ROLE
Lets the grantee query administrator
(DBA_) data dictionary views.
EXECUTE CATALOG_ROLE
Lets the grantee execute the prebuilt
DBMS utility packages.
CAUTION Although Oracle provides predefined roles to help manage privileges for typical
database users, an application that relies on these roles might not necessarily
function correctly. That's because you can change a predefined role's privilege set
or even drop the role altogether.
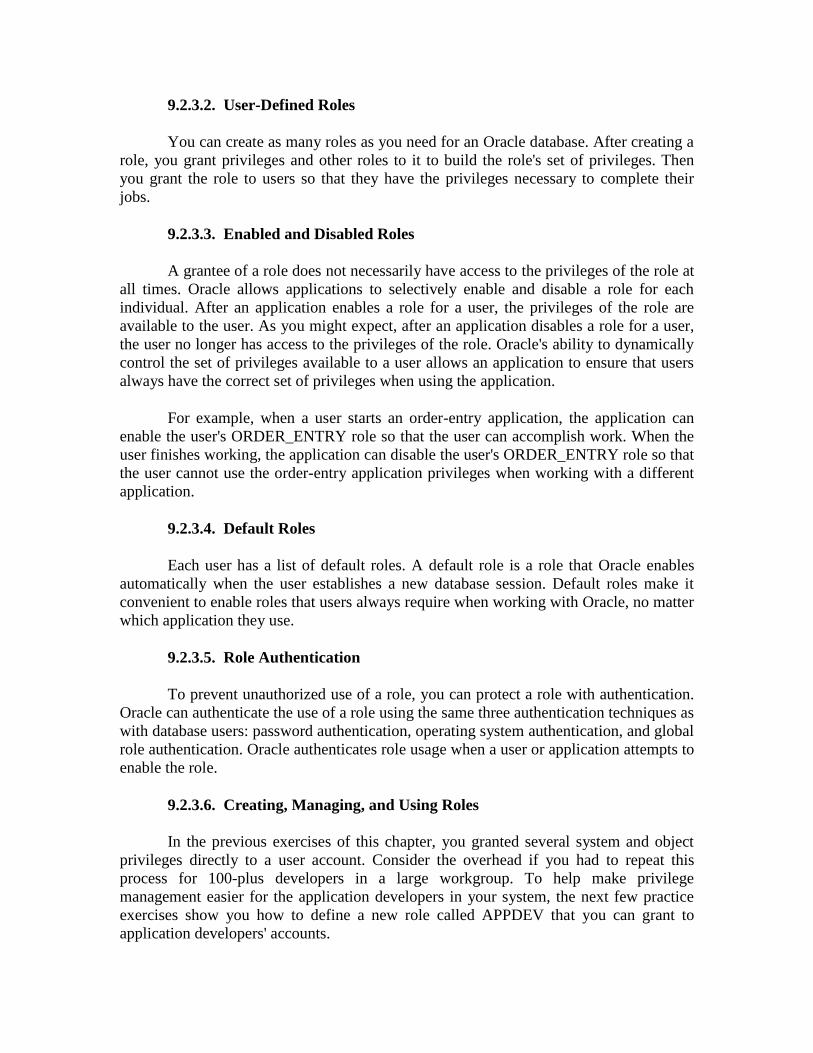
9.2.3.2. User-Defined Roles
You can create as many roles as you need for an Oracle database. After creating a
role, you grant privileges and other roles to it to build the role's set of privileges. Then
you grant the role to users so that they have the privileges necessary to complete their
jobs.
9.2.3.3. Enabled and Disabled Roles
A grantee of a role does not necessarily have access to the privileges of the role at
all times. Oracle allows applications to selectively enable and disable a role for each
individual. After an application enables a role for a user, the privileges of the role are
available to the user. As you might expect, after an application disables a role for a user,
the user no longer has access to the privileges of the role. Oracle's ability to dynamically
control the set of privileges available to a user allows an application to ensure that users
always have the correct set of privileges when using the application.
For example, when a user starts an order-entry application, the application can
enable the user's ORDER_ENTRY role so that the user can accomplish work. When the
user finishes working, the application can disable the user's ORDER_ENTRY role so that
the user cannot use the order-entry application privileges when working with a different
application.
9.2.3.4. Default Roles
Each user has a list of default roles. A default role is a role that Oracle enables
automatically when the user establishes a new database session. Default roles make it
convenient to enable roles that users always require when working with Oracle, no matter
which application they use.
9.2.3.5. Role Authentication
To prevent unauthorized use of a role, you can protect a role with authentication.
Oracle can authenticate the use of a role using the same three authentication techniques as
with database users: password authentication, operating system authentication, and global
role authentication. Oracle authenticates role usage when a user or application attempts to
enable the role.
9.2.3.6. Creating, Managing, and Using Roles
In the previous exercises of this chapter, you granted several system and object
privileges directly to a user account. Consider the overhead if you had to repeat this
process for 100-plus developers in a large workgroup. To help make privilege
management easier for the application developers in your system, the next few practice
exercises show you how to define a new role called APPDEV that you can grant to
application developers' accounts.

EXERCISE 9.9: Creating a Role
To create a new role, you use the SQL command CREATE ROLE. The following
is an abbreviated version of this command's syntax.
CREATE ROLE role
[NOT IDENTIFIED |IDENTIFIED BY password]
Enter the following SQL command to create a new role for application developers
in our system.
CREATE ROLE appdev IDENTIFIED BY yeRtw;
NOTE When you create a role, Oracle automatically grants you the role with the
administrative rights to alter, drop, and grant the role to other roles and users.
Additionally, a role is owned by the creator of the role.
EXERCISE 9.10: Granting System Privileges and Roles to a Role
The syntax of the SQL command GRANT for granting system privileges and
other roles to a role is basically the same as in Exercise 9.5.
GRANT privilege|role [, privilege|role] ...
TO role [, role] ... [WITH ADMIN OPTION]
For example, enter the following statement to grant several system privileges to
the new APPDEV role.
GRANT CREATE SESSION, CREATE TABLE, CREATE VIEW, CREATE ANY INDEX, CREATE SEQUENCE, CREATE TYPE
TO appdev;
NOTE If you grant the ADMIN option for a role, the grantee can grant, alter, or drop the
role, and can grant the role to other users and roles. To prevent security holes in
your system, it is not wise to grant system privileges and roles with administrative
rights to other roles.
EXERCISE 9.11: Granting Object Privileges to a Role
The syntax of the SQL command GRANT for granting object privileges to a role
is basically the same as in Exercise 9.7--just specify the name of one or more roles rather
than one or more users. For example, enter the following statements to grant several
object privileges to the new APPDEV role.
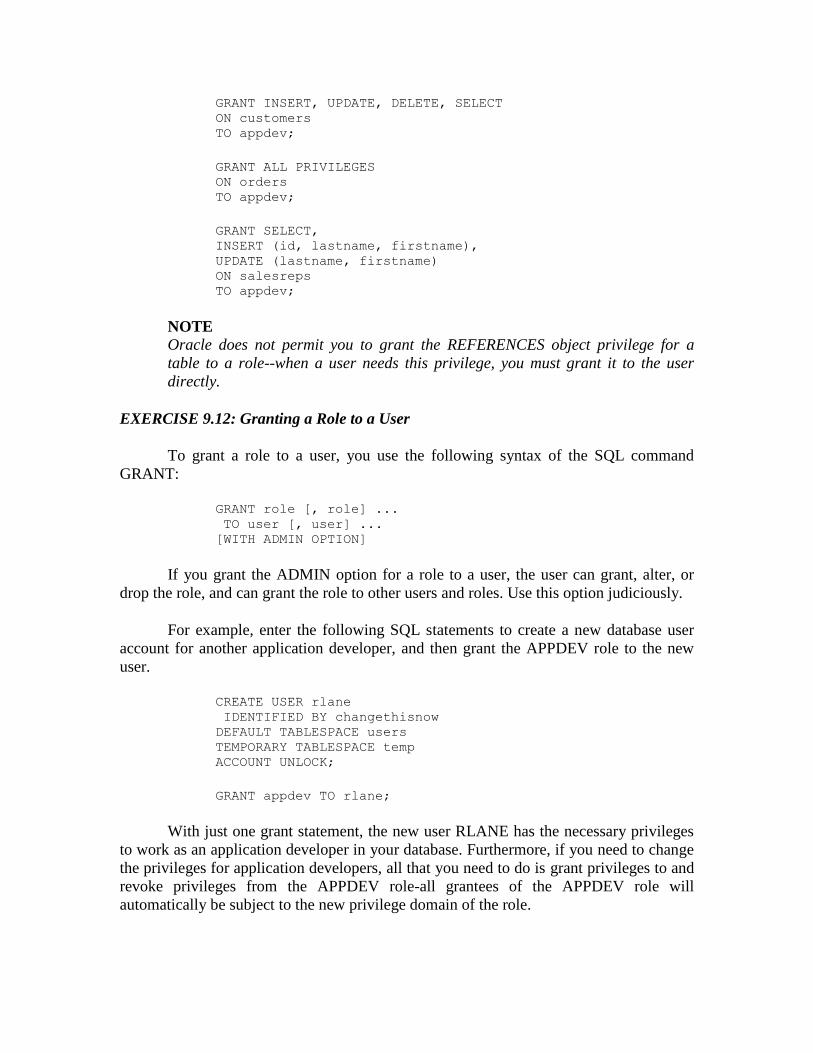
GRANT INSERT, UPDATE, DELETE, SELECT ON customers
TO appdev;
GRANT ALL PRIVILEGES ON orders
TO appdev;
GRANT SELECT, INSERT (id, lastname, firstname),
UPDATE (lastname, firstname) ON salesreps TO appdev;
NOTE Oracle does not permit you to grant the REFERENCES object privilege for a
table to a role--when a user needs this privilege, you must grant it to the user
directly.
EXERCISE 9.12: Granting a Role to a User
To grant a role to a user, you use the following syntax of the SQL command
GRANT:
GRANT role [, role] ...
TO user [, user] ... [WITH ADMIN OPTION]
If you grant the ADMIN option for a role to a user, the user can grant, alter, or
drop the role, and can grant the role to other users and roles. Use this option judiciously.
For example, enter the following SQL statements to create a new database user
account for another application developer, and then grant the APPDEV role to the new
user.
CREATE USER rlane
IDENTIFIED BY changethisnow DEFAULT TABLESPACE users
TEMPORARY TABLESPACE temp ACCOUNT UNLOCK;
GRANT appdev TO rlane;
With just one grant statement, the new user RLANE has the necessary privileges
to work as an application developer in your database. Furthermore, if you need to change
the privileges for application developers, all that you need to do is grant privileges to and
revoke privileges from the APPDEV role-all grantees of the APPDEV role will
automatically be subject to the new privilege domain of the role.

EXERCISE 9.13: Setting a User's Default Role
When you grant a role to a user, Oracle automatically adds the role to the user's
list of default roles. You can explicitly set a user's list of default roles using the following
syntax of the SQL command ALTER USER.
ALTER USER user
[DEFAULT ROLE
{role [, role] ...
|ALL [EXCEPT role [, role] ...]
| NONE }} }
You can specify a role as a user's default role after the user has been granted the
role directly (you cannot specify roles received indirectly through other roles).
Furthermore, you cannot specify a role as a user's default role if the role is authenticated
by the operating system or by a security service--roles authenticated by passwords require
no passwords at connect time. Notice that you can specify individual roles, use the ALL
clause to specify all or all but a list of roles, or specify no default roles for the user.
NOTE If a user does not have any default roles with the CREATE SESSION system
privilege, you must grant the CREATE SESSION system privilege directly to the
user, or else the user will not be able to establish a database session.
Enter the following ALTER USER statement to modify the list of default roles for
the new RLANE user account.
ALTER USER rlane DEFAULT ROLE appdev;
Subsequently, when RLANE connects to your database, Oracle will automatically
make available the privileges granted to the APPDEV role.
EXERCISE 9.14: Enabling and Disabling a Role
You can explicitly enable and disable access to the privileges of a role using the
SQL command SET ROLE. As discussed earlier in this section of the chapter,
applications commonly use this command to make sure that application sessions have the
appropriate set of privileges for using the application. The syntax of the SET ROLE
command is as follows:
SET ROLE
{ role [IDENTIFIED BY password] [, role [IDENTIFIED BY password] ... ] | ALL [EXCEPT role [, role] ... ] | NONE }
There are several important points to understand before you use the SET ROLE
command:

Your session can use the SET ROLE command with the ALL option to enable all
roles granted to your account. However, when you want to enable a role that
requires a password, you must specify the role and its password using the
IDENTIFIED BY parameter.
You can disable all roles for your session using the NONE option of the SET
ROLE command.
Oracle automatically disables any role granted to you that you do not enable with
the SET ROLE command.
To illustrate the way that the SET ROLE command functions, consider that your
current user account (PRACTICE09) has been granted the following roles: CONNECT,
RESOURCE, SELECT_CATALOG_ROLE (which has been granted the HS_ADMIN_
ROLE), and APPDEV. To display the list of the roles currently enabled by your session,
enter the following query of the SESSION_ROLES data dictionary view.
SELECT * FROM session_roles;
The result set is as follows:
ROLE
-------------- CONNECT
RESOURCE SELECT_CATALOG_ROLE HS_ADMIN_ROLE
Now enter the following SET ROLE statement to enable the APPDEV role and
disable all other roles for your current SQL*Plus session.
SET ROLE appdev IDENTIFIED BY yeRtw;
Next, requery the SESSION_ROLES view, and you should see the following
result set:
ROLE -------------
APPDEV
To enable all of your roles for your current session (CONNECT, RESOURCE,
and APPDEV), you must enter the following SET ROLE statement.
SET ROLE
CONNECT, RESOURCE,
SELECT_CATALOG_ROLE, appdev IDENTIFIED BY yeRtw;

Notice that this SET ROLE statement does not list the HS_ADMIN_ROLE,
which is part of the SELECT CATALOG_ROLE's privilege domain. That's because
Oracle automatically enables the roles granted to a role that you explicitly enable.
9.3. Resource Limitation
In a multiuser database system, it's prudent to limit each user's access to system
resources. Otherwise, one user might consume an inordinate amount of database resource
at the expense of other users. For example, when Oracle automatically terminates all
database sessions that remain idle for an extended period of time, the server can eliminate
unnecessary overhead and provide more memory, CPU cycles, and other system
resources to sessions that are performing real work. The following sections explain the
features of Oracle that you can use to limit access to several different system resources.
9.3.1. Tablespace Quotas
A user cannot create objects such as tables and indexes in a tablespace unless the
user has a quota for the tablespace. A tablespace quota limits how much space a user's
database objects can consume in the tablespace. A user can have a quota for zero, one, or
all tablespaces in the database--it's entirely up to you. When you
create or alter a user and give the user a tablespace quota, you set the quota as a specific
number of bytes in the tablespace or as an unlimited amount of space in the tablespace.
EXERCISE 9.15: Providing Specific Tablespace Quotas for a User
To give a current user a quota for one or more tablespaces in the system, you can
use the following form of the SQL command ALTER USER.
ALTER USER user
[QUOTA (integer [K|M] | UNLIMITED} ON tablespace] ...
For example, enter the following statement to provide the user LELUSON with
the right to use 5MB of space in the USERS tablespace.
ALTER USER lellison
QUOTA 5M ON users;
Now enter the following statement to provide the user RLANE with the right to
an unlimited amount of space in the USERS tablespace.
ALTER USER rlane
QUOTA UNLIMITED ON users;
EXERCISE 9.16: Granting Unlimited Quota for all Tablespaces
When a user must have an unlimited quota for every tablespace in the database,
you can grant the user the UNLIMITED TABLESPACE system privilege, rather than

giving the user an unlimited quota for each tablespace in the system. For example, enter
the following statement to grant the user RLANE the UNLIMITED TABLESPACE
system privilege.
GRANT UNLIMITED TABLESPACE TO rlane;
NOTE Oracle does not let you grant the UNLIMITED TABLESPACE system privilege to
a role.
9.3.2. Resource Limit Profiles
To control the consumption of several other types of system resources, you can
use resource limit profiles. A resource limit profile is a set of specific resource limit
settings that you assign to one or more database users. Using a resource limit profile, you
can limit consumption of the following system resources:
CPU time (in hundredths of a second), per session or per statement
Logical disk I/Os, per session or per statement
Concurrent database sessions per user
The maximum amount of connect time and idle time (in minutes) per session
The maximum amount of server memory available to a multithreaded server
session
9.3.2.1. User Account Management
You can use resource limit profiles to enforce several other security policies for
database users. Using a resource limit profile, you can control the following settings for
each user account that is assigned the profile:
The number of consecutive failed connection attempts to allow before
Oracle locks the account
The lifetime of the account's password, in days, after which the password
expires
The number of days (grace period) that a user can use an expired password
before locking the account
The number of days that must pass, or the number of times that an
account's password must be changed, before the account can reuse an old
password
Whether or not to check an account's password for sufficient complexity
to prevent an account from using an obvious password
9.3.2.2. The Default Profile
Every Oracle database has a default resource limit profile. When you create a new
database user and do not indicate a specific profile for the user, Oracle automatically

assigns the user the database's default profile. By default, all resource limit settings of the
database's default profile are set to unlimited; account management settings vary.
When you create a resource limit profile, you can set specific resource limit
settings or defer to the corresponding setting of the database's default profile. At any
time, you can alter the settings of a database's default profile just like user-defined
profiles.
9.4. Managing Resource Limit Profiles
Several steps are necessary to configure and enforce resource limitation using
profiles in an Oracle database.
1. Enable resource limitation for the database instance.
2. Create one or more profiles.
3. Assign each user's profile.
The following practice exercises teach you how to complete these steps for
managing resource limitation, and more.
EXERCISE 9.17: Enabling Resource Limitation
By default, resource limitation is not enforced for your starter database.
Therefore, the first step necessary to limit user access to server resources is to enable the
enforcement of resource limitation at the instance level. You can enable and disable the
enforcement of resource limitation without having to shut down and restart the Oracle
service by using the following form of the SQL command ALTER SYSTEM.
ALTER SYSTEM
SET RESOURCE_LIMIT = {TRUE|FALSE}
To enable the enforcement of resource limitation for the current database instance,
enter the following ALTER SYSTEM statement.
ALTER SYSTEM
SET RESOURCE_LIMIT = TRUE;
NOTE The example ALTER SYSTEM statement in this exercise enables the enforcement
of resource limitation only for the life of the current database instance--if you
shut down and restart Oracle, the enforcement of resource limitation is subject to
the setting of the RESOURCE_LIMIT parameter in your server's initialization
parameter file. If you plan to use resource limitation permanently, edit your
server's parameter file and include the following parameter: RESOURCE_LIMIT
= TRUE.
EXERCISE 9.18: Creating a Profile
In this exercise, you will create a resource limit profile that you can use with the
new application developers in your practice database. To create a new profile, you use the
SQL command CREATE PROFILE, which has the following syntax:
CREATE PROFILE profile LIMIT
(SESSIONS_PER_USER {integer| UNLIMITED | DEFAULT}]
[CPU_PER_SESSION {integer| UNLIMITED | DEFAULT}]
[CPU_PER_CALL {integer| UNLIMITED | DEFAULT}]
[CONNECT TIME {integer| UNLIMITED | DEFAULT}]
[IDLE_TIME {integer| UNLIMITED | DEFAULT}]
[LOGICAL_READS_PER_SESSION {integer| UNLIMITED | DEFAULT}]
[LOGICAL_READS_PER_CALL {integer| UNLIMITED | DEFAULT}]
[COMPOSITE_LIMIT {integer| UNLIMITED | DEFAULT}]
[PRIVATE_SGA {integer [KIM]| UNLIMITED | DEFAULT}]
[FAILED_LOGIN_ATTEMPTS {integer| UNLIMITED | DEFAULT}]
[PASSWORD_LIFE_TIME {integer| UNLIMITED | DEFAULT}]
[PASSWORD _REUSE_TIME {integer| UNLIMITED | DEFAULT}]
[PASSWORD_REUSE_MAX {integer| UNLIMITED | DEFAULT}]
[PASSWORD_LOCK_TIME {integer| UNLIMITED | DEFAULT}]
(PASSWORD_GRACE_TIME {integer| UNLIMITED | DEFAULT}]
[PASSWORD_VERIFY_FUNCTION {NULL| function | DEFAULT}]
Enter the following statement to create a new resource limit profile:
CREATE PROFILE appdev LIMIT
SESSIONS_PER_USER 5
CPU_PER_SESSION UNLIMITED
CPU_PER_CALL 3000
CONNECT_TIME UNLIMITED
IDLE_TIME 30
LOGICAL_READS_PER_SESSION UNLIMITED
LOGICAL_READS_PER_CALL 1000
PRIVATE_SGA 200K;
Note the following settings in our new APPDEV profile:
A profile user can have at most five concurrent database sessions open.
A profile user session can use an unlimited amount of CPU time, but only
30 seconds (set as 3,000 hundredths of a second) of CPU time per
database request. If a call reaches this CPU limit, Oracle stops the
operation to prevent further consumption of CPU time by the session.
A profile user session can remain connected to the instance for an
unlimited amount of time without being disconnected, but can remain idle
for only 30 minutes before being automatically disconnected.
A profile user session can perform an unlimited number of logical reads
(data block reads from either disk or server memory), but only 1,000
logical block reads per database request. If a call reaches this limit, Oracle
stops the operation to prevent further consumption of logical reads by the
session.

A profile user session that connects to the instance using a multithreaded
server can allocate and use up to 200K of private memory for the MTS
session.
EXERCISE 9.19: Altering Profile Settings
You alter the settings of a profile using the SQL command ALTER PROFILE.
ALTER PROFILE profile LIMIT
[SESSIONS_PER_USER {integer| UNLIMITED | DEFAULT}] [CPU_PER_SESSION {integer| UNLIMITED | DEFAULT}]
[CPU_PER_CALL {integer| UNLIMITED | DEFAULT}] [CONNECT_TIME {integer| UNLIMITED | DEFAULT}]
[IDLE_TIME {integer| UNLIMITED | DEFAULT}] [LOGICAL READS_PER_SESSION {integer| UNLIMITED | DEFAULT}] [LOGICAL_READS_PER_CALL (integer| UNLIMITED | DEFAULT}]
[COMPOSITE_LIMIT {integer| UNLIMITED | DEFAULT}] [PRIVATE_SGA {integer [KIM]| UNLIMITED | DEFAULT}]
[FAILED_LOGIN_ATTEMPTS {integer| UNLIMITED | DEFAULT}] (PASSWORD_LIFETIME {integer| UNLIMITED | DEFAULT}] [PASSWORD_REUSE_TIME {integer| UNLIMITED | DEFAULT}]
[PASSWORD_REUSE_MAX {integer| UNLIMITED | DEFAULT}] [PASSWORD_LOCK_TIME {integer| UNLIMITED | DEFAULT}]
[PASSWORD_GRACE_TIME {integer| UNLIMITED | DEFAULT}] [PASSWORD_VERIFY_FUNCTION {NULL| function| DEFAULT}]
For example, when you created the new APPDEV profile in the previous exercise,
you did not specify any of the password management settings. Enter the following
ALTER PROFILE statement to specify the basic password management settings for the
new profile.
ALTER PROFILE appdev LIMIT FAILED_LOGIN_ATTEMPTS 3 PASSWORD_LOCK_TIME 1
PASSWORD_LIFE_TIME 30 PASSWORD_GRACE_TIME 5
PASSWORD_REUSE_TIME UNLIMITED PASSWORD_REUSE_MAX UNLIMITED;
The previous statement sets the following password management features.
A profile user can attempt three consecutive logins without success,
after which Oracle automatically locks the account.
If Oracle locks a profile user's account because of three consecutive failed
login attempts, Oracle keeps the account locked for one full day and then
automatically unlocks the account.
The lifetime of a profile user's password is 30 days, plus a grace period of
5 days, after which the user must change the password or else Oracle locks
the account.
A profile user cannot reuse an old password.

NOTE Oracle enforces all password management features that you set with a user's profile,
whether or not you enable resource limitation with the ALTER SYSTEM command or
the RESOURCE_LIMIT server parameter.
EXERCISE 9.20: Manually Forcing a User's Password to Expire
You can manually force a user's password to expire and require that the user
change the password during his or her next session. To accomplish this task, use the
following form of the SQL command ALTER USER.
ALTER USER user PASSWORD EXPIRE
For example, enter the following statement to manually expire RLANE's
password.
ALTER USER rlane
PASSWORD EXPIRE;
EXERCISE 9.21: Using Password Complexity Checking
In the previous exercise, you specified the basic password management settings
for a profile. You can also check the complexity of a profile user's password using the
PASSWORD_VERIFY_FUNCTION parameter of the SQL commands CREATE
PROFILE and ALTER PROFILE. To disable password complexity checking for all
profile users, set the profile's PASSWORD_VERIFY_FUNCTION parameter to NULL.
To enable password complexity checking for all profile users, set the profile's
PASSWORD_VERIFY_FUNCTION parameter to the name of a function that is
designed to check password complexity. Oracle supplies a default function that you must
create using the UTLPWDMG.SQL command script located in the
Oracle_Home\Rdbms\Admin directory, where Oracle_Home is your Oracle home
location. To run this script, start a different instance of SQL*Plus (leave your other
SQL*Plus session intact) and connect as the user SYS. Once you are connected as SYS,
run the UTLPWDMG.SQL command script. For example, the following command runs
the UTLPWDMG.SQL script assuming that the Oracle home location is
O:\Oracle\Ora81:
@O:\Oracle\Ora81\Rdbms\Admin\utlpwdmg.sql;
As of Oracle 11g installed on my computer (in 2015), the location of the above
UTLPWDMG.SQL file is at:
G:\app\pliu\product\11.1.0\db_1\RDBMS\ADMIN
The UTLPWDMG.SQL command script creates a PL/SQL stored function named
VERIFY_FUNCTION and enables the password management features for the default

database profile, including complexity checking with the VERIFY_FUNCTION function.
VERIFY_FUNCTION includes some standard checks for password complexity,
including the following:
An account's username and password cannot match.
A password must be at least four characters in length.
A password cannot be one of the following common strings: "welcome",
"database", "account", "user", "password", "oracle", "computer", or
"abcd".
A password must contain at least one character, one digit, and one
punctuation mark.
A new password must differ from the current password by at least three
characters.
After you run the UTLPWDMG.SQL script, exit this SQL*Plus session and
return to your original SQL*Plus session.
Using your original SQL*Plus session (connected as PRACTICE09), alter the
new APPDEV profile to enable password complexity checking for all of the profile's
users. The following statement alters the APPDEV profile to use the setting of the
PASSWORD_VERIFY_FUNCTION parameter of the database's default profile (which
is SYS.VERIFY_FUNCTION).
ALTER PROFILE appdev LIMIT
PASSWORD_VERIFY_FUNCTION DEFAULT;
NOTE When you configure Oracle to check the complexity of user passwords, users
should not use the ALTER USER command to change their passwords. See your
Oracle documentation for more information about changing user passwords in
this setting.
EXERCISE 9.22: Setting a User's Profile
By default, all users are assigned to use the database's default profile. To set a
user's profile to another profile, you can use the following form of the SQL command
ALTER USER.
ALTER USER user PROFILE profile
For example, using your original SQL*Plus session, enter the following ALTER
USER statements to assign the users LELLISON and RLANE to the APPDEV resource
limit profiles.
ALTER USER lellison PROFILE appdev;

ALTER USER rlane PROFILE appdev;
EXERCISE 9.23: Experimenting with Password Management Settings
At this point, all users in your practice database are subject to various password
management checks because the default database profile and the new APPDEV profile
have set password management options. In this exercise, let's see what happens when you
try to change the password for LELLISON to a very simple password. Enter the
following statement:
ALTER USER lellison IDENTIFIED BY password;
When Oracle tries to execute this statement, it should return the following errors:
ORA-28003: password verification for the specified password
failed ORA-20002: Password too simple
Now enter the following statement to set an acceptably complex password for
LELLISON.
ALTER USER lellison IDENTIFIED BY new_password0l;
EXERCISE 9.24: Altering the Default Database Profile
If you plan to use the default database profile to limit resources or enforce
password management, you should pay close attention to the default limits and password
management options set for this profile (see Exercise 9.28). You can adjust the default
database profile's settings using an ALTER PROFILE statement.
For example, you must disable the password management features of the default
database profile so that you can run the SQL command scripts for subsequent chapters
without being prompted to change the SYSTEM account's password. To disable
password management for the default database profile, enter the following ALTER
PROFILE statement.
ALTER PROFILE default LIMIT PASSWORD_LIFE_TIME UNLIMITED
PASSWORD_REUSE_TIME UNLIMITED PASSWORD_REUSE_MAX UNLIMITED
PASSWORD_LOCK_TIME UNLIMITED PASSWORD_GRACE_TIME UNLIMITED PASSWORD_VERIFY_FUNCTION NULL;
NOTE Once you enable the password management features for a profile, Oracle keeps
track of when each profile users' password expires, and so on, even after you
disable password management features for the profile. Consequently, in 30 days,

Oracle might request that you change the password for existing database
accounts such as SYS, SYSTEM, and SCOTT.
9.5. Displaying Security Information
The following exercises demonstrate some useful queries that you can use to
display information about users, roles, and profiles from your database's data dictionary.
EXERCISE 9.25: Displaying Information about Users
To display information about the users in your database, you can query the
DBA_USERS data dictionary view. For example, enter the following statement to reveal
the account settings for the LELLISON and RLANE user accounts in the practice
database.
SELECT username, account_status, default_tablespace,
temporary_tablespace, profile FROM dba_users
WHERE username IN ('LELLISON','RLANE');
The result set is as follows:
USERNAME ACCOUNT_STATUS DEFAULT_TABLESPACE TEMPORARY_TABLESPACE PROFILE
-------- -------------- ------------------ -------------------- -------- RLANE EXPIRED USERS TEMP DEFAULT
LELLISON OPEN USERS TEMP DEFAULT
EXERCISE 9.26: Displaying Information About Roles
To display information about the roles in your database, you can query the DBA
ROLES data dictionary view. For example, enter the following statement to list
information about the CONNECT, RESOURCE, DBA, and APPDEV roles in your
database.
SELECT * FROM dba_roles
WHERE role IN ('CONNECT','RESOURCE','DBA','APPDEV');
The result set is as follows:
ROLE PASSWORD
--------------- ---------
APPDEV YES
DBA NO
RESOURCE NO
CONNECT NO
EXERCISE 9.27: Displaying Information about Tablespace Quotas
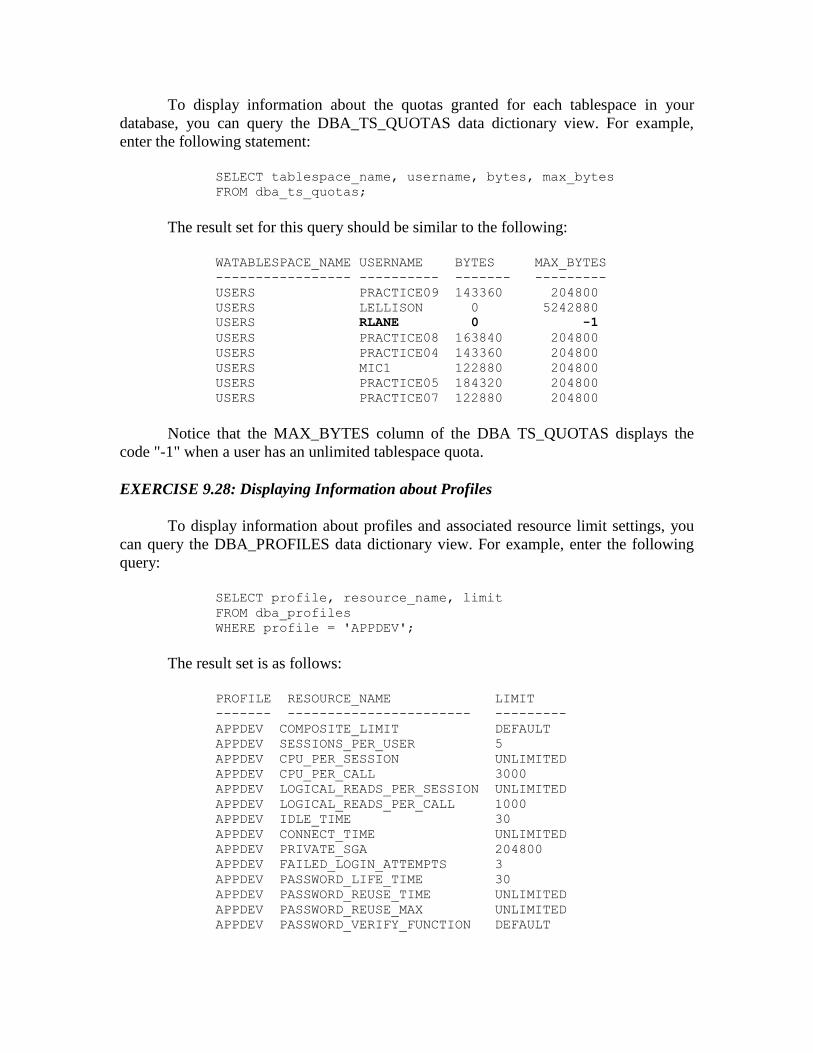
To display information about the quotas granted for each tablespace in your
database, you can query the DBA_TS_QUOTAS data dictionary view. For example,
enter the following statement:
SELECT tablespace_name, username, bytes, max_bytes
FROM dba_ts_quotas;
The result set for this query should be similar to the following:
WATABLESPACE_NAME USERNAME BYTES MAX_BYTES
----------------- ---------- ------- ---------
USERS PRACTICE09 143360 204800
USERS LELLISON 0 5242880
USERS RLANE 0 -1
USERS PRACTICE08 163840 204800
USERS PRACTICE04 143360 204800
USERS MIC1 122880 204800
USERS PRACTICE05 184320 204800
USERS PRACTICE07 122880 204800
Notice that the MAX_BYTES column of the DBA TS_QUOTAS displays the
code "-1" when a user has an unlimited tablespace quota.
EXERCISE 9.28: Displaying Information about Profiles
To display information about profiles and associated resource limit settings, you
can query the DBA_PROFILES data dictionary view. For example, enter the following
query:
SELECT profile, resource_name, limit
FROM dba_profiles
WHERE profile = 'APPDEV';
The result set is as follows:
PROFILE RESOURCE_NAME LIMIT
------- ----------------------- ---------
APPDEV COMPOSITE_LIMIT DEFAULT
APPDEV SESSIONS_PER_USER 5
APPDEV CPU_PER_SESSION UNLIMITED
APPDEV CPU_PER_CALL 3000
APPDEV LOGICAL_READS_PER_SESSION UNLIMITED
APPDEV LOGICAL_READS_PER_CALL 1000
APPDEV IDLE_TIME 30
APPDEV CONNECT_TIME UNLIMITED
APPDEV PRIVATE_SGA 204800
APPDEV FAILED_LOGIN_ATTEMPTS 3
APPDEV PASSWORD_LIFE_TIME 30
APPDEV PASSWORD_REUSE_TIME UNLIMITED
APPDEV PASSWORD_REUSE_MAX UNLIMITED
APPDEV PASSWORD_VERIFY_FUNCTION DEFAULT

APED PASSWORD_LOCK_TIME 1
APED PASSWORD_GRACE_TIME 5
Chapter Summary
This chapter explained the security features of Oracle that you can use to limit and
monitor access to a database.
Only a registered database user can access a database once Oracle authenticates a
connection request. You create and manage users with the SQL commands
CREATE USER and ALTER USER, respectively.
Once connected to a database, a user can perform only those operations that the
user is privileged to execute. You can grant users individual system and object
privileges or use roles to group related sets of privileges and more easily manage
user privileges. You create roles using the SQL command CREATE ROLE and
then grant and revoke privileges to users or roles using the SQL commands
GRANT and REVOKE, respectively.
Resource limit profiles let you limit a user's access to system resources, such as
CPU time, disk I/Os, and sessions. You create profiles using the SQL command
CREATE PROFILE, and then assign each user to a profile with the SQL
commands CREATE USER or ALTER USER.