Science/Grade 6/ Session 3 of 8 Using Google Earth tools to become Hurricane Detectives.
18
Science/Grade 6/ Session 3 of 8 Using Google Earth tools to become Hurricane Detectives
-
Upload
roy-campbell -
Category
Documents
-
view
215 -
download
1
Transcript of Science/Grade 6/ Session 3 of 8 Using Google Earth tools to become Hurricane Detectives.

Science/Grade 6/ Session 3 of 8
Using Google Earth tools to become Hurricane
Detectives

Focusing Questions
• What are hurricanes?• How can we locate a hurricane using the
hurricane tracker?• How can we identify the intensity of a
hurricane?

Instruction

Framing The Session
• Last session - learned how to download Google Earth Weather Application Tools
• Today, you’ll learn how to use Hurricane Live Position to track the path of a current hurricane.
• Hurricane Live Position provides further information on hurricanes (for example, intensity or wind speed or direction).

Teaching• Today, we are going to
use the weather application tool called the “Hurricane Live Positions”.
• Find the folder entitled Weather Apps.
• Inside the folder, look for “Hurricane Live Positions” and check the box to activate the application.

Teaching• Double click on the Globe. • Move the globe until a hurricane is found. If there is a live hurricane taking place at this time, you will see data points in that area.
• The starting point and the path of the hurricane will be shown.
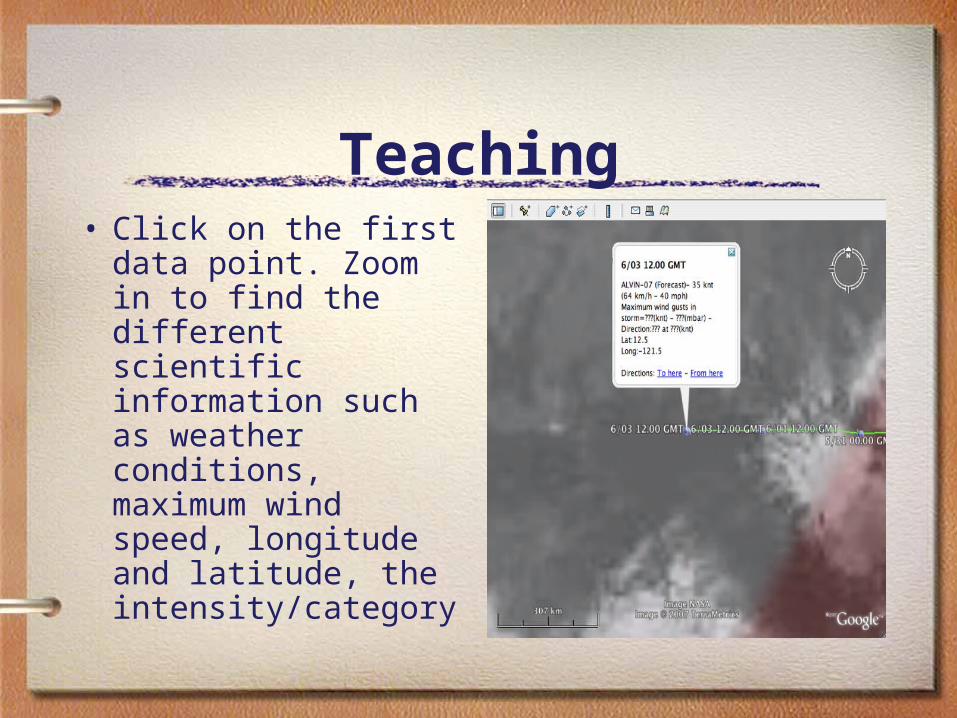
Teaching• Click on the first
data point. Zoom in to find the different scientific information such as weather conditions, maximum wind speed, longitude and latitude, the intensity/category

Guided PracticeDo not try to manipulate the data because your IP will
be permanently blocked by Google.• Step 1 - Open up the Hurricane Tracking Table weather document, into which all hurricane data point data will be entered. Hurricane Tracker Table
• Step 2 Open up Weather Apps folder listed in your “My Places” task pane.
• Step 3 - Activate "Hurricane Live Positions Tool" by placing a checkmark in the box next to it.
•

Guided Practice
• Step 4 - Double click on the Globe to take you to where the live hurricane is located. It shows you the starting point and the path of the hurricane.
• Step 5 - Zoom in to make sure all of the data points are visible.
• Step 6 - Click on the second point to find the different scientific information such as weather conditions, maximum wind speed, longitude and latitude,and the intensity/category.
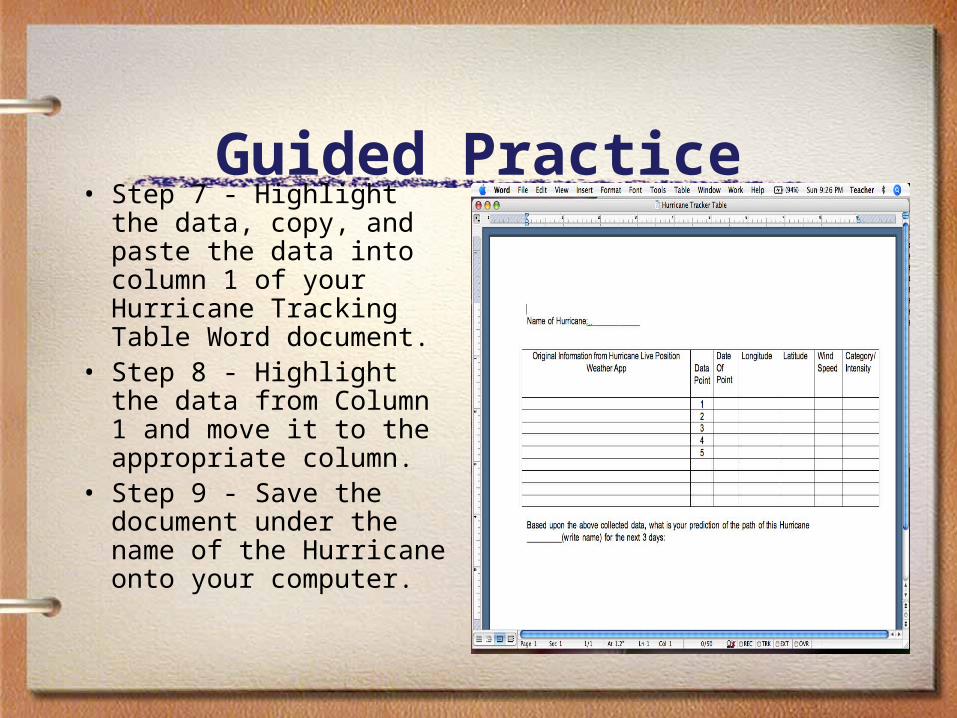
Guided Practice• Step 7 - Highlight the data, copy, and paste the data into column 1 of your Hurricane Tracking Table Word document.
• Step 8 - Highlight the data from Column 1 and move it to the appropriate column.
• Step 9 - Save the document under the name of the Hurricane onto your computer.

Work Time
Getting Started
• Now that we’ve done the second point of the hurricane together, you are going to begin your career as a hurricane detective.
• Find the rest of the points on this hurricane’s path and record your data on the Hurricane Tracker Table Word document.

Work Time
• Click on the third data point and copy and paste the scientific information into Hurricane Tracking Table document.
• Copy and paste the information into the appropriate column.
• Repeat the above steps for the rest of the data points.
• Save the document under the Hurricane’s name on your computer.

Work Time• Step 5 - Record your
data on the Hurricane Tracker Table Word document. Save the document.
• Step 6 - If time permits, you can locate another live hurricane and record the data on a blank Hurricane Tracker Table.

Share

• Ask selected participants to share examples of their work.
• How do we use the Hurricane Live Position tracking tool to enhance student knowledge?
• What are some other uses of this tool that you can foresee in your instruction?
• Do you anticipate any problems in implementing this application in your classroom?
Share
• What are some other ideas you have fo using these weather application tools?
Share

How does this work address the questions that began the session?
• Answers