Scale Basic 220 - Industrial Data · Double-click on the EZ220 Icon to start the EZ Link program....
47
Scale Basic 220 Reference and Tutorial Version B Date 10/10/2005
Transcript of Scale Basic 220 - Industrial Data · Double-click on the EZ220 Icon to start the EZ Link program....

Scale Basic 220 Reference and Tutorial
Version B Date 10/10/2005

Scale Basic 220 version B Table of Contents
Table of Contents Introduction .........................................................................................................1
EZ Link .................................................................................................................2 EZ Link Installation .................................................................................................................... 2 EZ Link Configuration ................................................................................................................ 2 EZ Link Test............................................................................................................................... 3
Event Driven Programming ................................................................................5 Program Design......................................................................................................................... 5 Event Driven Programming........................................................................................................ 6
Scale Basic Tutorial ............................................................................................9 Getting Started........................................................................................................................... 9 Arithmetic and Registers............................................................................................................ 9 Setpoint Monitors ..................................................................................................................... 13 Timers...................................................................................................................................... 15 Timer5, If/Else/End if, Flags .................................................................................................... 16 Tutorial Conclusion .................................................................................................................. 17
Reference...........................................................................................................18 Instruction Reference............................................................................................................... 18 Condition Codes ...................................................................................................................... 32 Built in Functions...................................................................................................................... 34 Events ...................................................................................................................................... 36
Keyboard Events ............................................................................................................... 36 Setpoint Monitors .............................................................................................................. 36 Timer Events ..................................................................................................................... 37 TTL Input Events............................................................................................................... 38 Serial Communications Port 1 Input.................................................................................. 39 Serial Communications Port 2 Input.................................................................................. 39
Registers.................................................................................................................................. 42 Error Codes ............................................................................... Error! Bookmark not defined.
Appendix A: Design Template..........................................................................45

Scale Basic 220 version B Introduction
Introduction Scale Basic in a programming language that is used to modify the functions of a weight DT220. This makes it possible for the weight DT220 to be customized to fit a wide variety of weighing applications
The first section of this manual describes how to use EZ Link, a computer program that runs on a PC computer under Microsoft’s ‘Windows’ operating system. EZ Link connects the DT220 to a PC computer. It is used to configure the weight DT220’s parameters and to enter Scale Basic functions using the Windows graphical interface. Use the EZ Link section to learn how to connect the DT220 to a PC computer and how to use EZ Link to configure, program, and test the weight DT220.
The Event Driven Programming section of the manual begins with a discussion of program design and then goes on to describe event driven programming. Scale Basic functions are controlled by a computer operating system called an “event driven executive”. This means that the operation of the DT220 is controlled by a combination of ‘events’ and ‘functions’. The operating system scans for events. When an event is detected the operating system activates a scale basic function.
The Scale Basic Tutorial section is a tutorial on the Scale Basic language. It is a step by step demonstration on how to implement programs in Scale Basic.
The last section is a Reference on Scale basic. This section describes the Scale Basic instructions, built in functions, condition codes, and event types.

Scale Basic 220 version B Tutorial
EZ Link 220 EZ Link is a Microsoft Windows compatible program that you can use to configure, program, and test the DT220. The Windows graphical user interface makes it easy to enter and view setup parameters and Scale Basic programs. The setup data can be saved to disk and it can be written to and read from the DT220.
EZ Link Requirements
• IBM PC compatible computer/laptop
• Microsoft Windows (95, 98, XP, 2000, 2003)
• An available serial communications port on the PC
• A cable to connect the PC to the DT220.
EZ Link Installation
1. Insert the EZ Link CD into CD drive.
2. Run the Startup.exe program from the CD.
3. Follow the instructions on the screen.
Connect a cable between the DT220 ( Port 2 ) and the PC. Use the following diagram for signal connections. NOTE: There are 2 types of PC communications port connectors; 25pin female (left hand diagram) and 9pin female (right hand diagram).
EZ Link Configuration
The DT220’s communications port 2 [Com Port 2] defaults to 9600 baud, 8 bits, no parity. The EZ Link program defaults to the same values. If the defaults have not been changed, then configuration is not required. Check the DT220’s Com Port 2 parameters.
!! NOTE: configuration download only works at 9600 baud or less !!
T X D
R X D
G N D
T X D R X D
G N D
C a b le d ia g ra m P C to D T 2 2 0 P C C o m P o rt
2 3
7
4 5 6 2 0
8
2 5 p in fe m a le P C C o m P o rt 9 p in fe m a le
2 3 4 5 6
7 8
1
3 T X D
2 R X D
5 G N D
3 T X D
2 R X D
5 G N D

Scale Basic 220 version B Tutorial
Press the Shift key then press the Func 9 key. Select “Com & Printer Ports” from the menu. Select “Com 2” from the menu. Enter the communication parameters (baud rate, mode, Station ID [255])
Configure the EZ Link communication parameters to the same values as the DT220’s communication parameters.
1. Double-click on the EZ220 Icon to start the EZ Link program.
2. Click on the Setup button on the top right of the EZ Link screen. The PC Com Port Setup menu is activated.
3. Select the port number that the communications cable is attached to.
4. Select the same baud rate, parity, data bits, and stop bits that are set into the DT220.
5. Enter the setup parameters below.
Com Port________ Baud Rate ________ Data Bits _________ Parity _________
!! NOTE: configuration download only works at 9600 baud or less !!
PC to DT220 Communications Test
Use this procedure to test the connection between the DT220 and the PC.
On the PC: Click on the Setup button in the EZ Link screen. Click on the Com Test button on the Configure Com Port screen.
On the DT220: Press Func. 9 key. Select Com 2 test.
Press the Enter key on the DT220. A text string should appear in the EZ Link, Communications Test data box. Click the “Transmit Test Data” button in the EZ Link Communications Test screen. A text string should appear on the DT220’s display screen.
If there is no change on the DT220’s display:
1. Is the EZ Link configured for the correct PC Com Port (the one your communications cable is plugged into)? Check the Com port number used in EZ Link and confirm that it is the same port that the cable is plugged into at the back of your computer.
2. Is the DT220 receiving the data? Use a volt meter between pins 2 and 5 on the DT220s port 2 terminal . The volt meter should indicate a negative voltage (approximately -5V to -12V). Type data on the PC keyboard. The volt meter should deviate when data is typed. If not, then the cable is wired incorrectly.

Scale Basic 220 version B Tutorial
If all data being received is unintelligible: Are the configuration parameters for PC Terminal program the same as the parameters for the DT220 (baud rate, data bits, and parity)?
On the PC:
Click on the Is the DT220 sending the data? Use a volt meter between pins 2 and 5 on the DT220s terminal port 2. The volt meter should indicate a negative voltage (approximately -5V to -12V). Press the ENTER key on the DT220 (while diagnostic 4 is active). The volt meter should deviate when data is transmitted. If not, the DT220’s RS232 transmitter is defective. Try changing the transmitter IC (U1).
Is the PC receiving the data? Check the cable wiring.

Scale Basic 220 version B Tutorial
Event Driven Programming This section provides an introduction to event driven, computer program design.
Program Design
The first step in computer programming is to create a ‘program design’. The first mistake that a programmer can make is to give insufficient attention to designing a program. Give extra attention to this phase of programming; you will be well rewarded for your effort. Programming will be easier and it will be less likely that you will have to start over again because the program doesn’t do what the customer wants.
There are many books written on program design. This manual uses the following program design process:
1. describe the application. Many times this will be provided by your customer.
2. list the results (outputs) are to be accomplished.
3. list the inputs are needed to get the results.
4. describe the program functions that are needed.
The above process should be done with close consultation with the user of the program (your customer). Usually, the customer describes the problem and the programmer takes notes and asks questions. Then the programmer writes a draft of the program design asking the customer questions as they occur. Then the customer is given a copy of the program design for approval. At this time, the programmer should go over the design with the customer to make sure that everything is covered.
Example: a customer presents the following application: Application Description
The operator places containers on the scale and fills them with resin. An ‘Under-weight’ light turns on while the container weight is below the target weight. There are 3 sizes of container, each is filled with a different amount of resin. If the container is filled with too much resin, turn on an ‘Overweight’ light until enough resin is removed for the container to be within specifications.
Results / Outputs
Container filled with the proper amount of resin (3 sizes of container). An ‘Under-weight’ light. An ‘Over-weight’ light. Inputs
Target weights (3). Target weight select. Start operation.

Scale Basic 220 version B Tutorial
Sequence of operation
Enter target weight data: Use 3 of the DT220’s 3 decimal registers. Use the configure function to set the target weights into registers 1, 2, and 3 for containers 1, 2, and 3.
Select a target weight. Use the F1 key to initiate target weight selection. The display prompts “Enter Container Size”. The operator enters the container number (1, 2, or 3) that will be filled.
Monitor weight for over/under: use Power On Start to initiate underweight scan by activating user function1. Function 1 turns on Setpoint Monitor 1, and turns Under-weight light (relay 1). Setpoint 1 triggers when the scale is no longer under weight. It activates function 2. Function2 turns on Setpoint Monitor 2 (overweight scan) and turns on relay2, and turns off relay 1. Setpoint 2 triggers when the scale is no longer over weight. It activates function 1. REVIEW: It is unlikely that the operator can fill to the exact target weight. (neither over or under). After consulting with the customer, it is determined that the fill tolerance should be within 2% of the target weight.
MODIFIED DESIGN:
Application Description
The operator places containers on the scale and fills them with resin. An ‘Under-weight’ light turns on while the container weight is more than 2% below the target weight. There are 3 sizes of container, each is filled with a different amount of resin. If the container is filled with too much resin (more than 2% over target weight), turn on an ‘Overweight’ light until enough resin is removed for the container to be within specifications.
Sequence of operation
Select a target weight. Use the F1 key to initiate target weight selection. The display prompts “Enter Container Size”. The operator enters the container number (1, 2, or 3) that will be filled. The over weight setpoint and underweight setpoints are calculated by adding/subtracting 2% from the target weight.
COMMENTS: The changes to the design are shown above in bold lettering. Notice how each step in the program design is a refinement of the previous step.
Also note that often, missing specifications and other problems don’t become apparent until well into the design process. Many times the approach will have to be changed.
Event Driven Programming
Event Driven programming is useful for ‘real time’ applications. Real time applications are those which depend on real events that happen when they happen. For example, a start switch
Scale Basic 220 version B Tutorial
closure, setpoint trip level, process monitoring, are real events that the computer monitors but the timing of the events are not controlled by the computer.
The most widely available programming model is the ‘sequential programming’ method. Sequential programs work best in applications where actions take place in a step by step manner. The next step in the process follows from the previous step.
In sequential programs for real time systems, the program structure starts with a main loop which scans for selected events. An event then activates a subroutine. The subroutine will execute while scanning for events that may occur while the subroutine is active. If an event occurs in a subroutine, then another subroutine is activated and whatever events that need scanning are scanned.
In an Event Driven Programming environment, events are automatically scanned for by the operating system. When an event is detected it triggers a program function. For example: part of the DT220’s event loop is to scan the keyboard. Each key is assigned a Scale Basic function to execute when the event scanner detects a key-press. Each Scale Basic function is short and executes quickly. Thus, the structure of an event driven program is: event - action, event - action, event - action, ….
In event driven program design, the program structure is centered around event-action pairs. The event scanning is taken care of in the operating systems event scanner.
The tutorial that follows uses the techniques described above for program design, and then completes the programs, using techniques of program implementation.
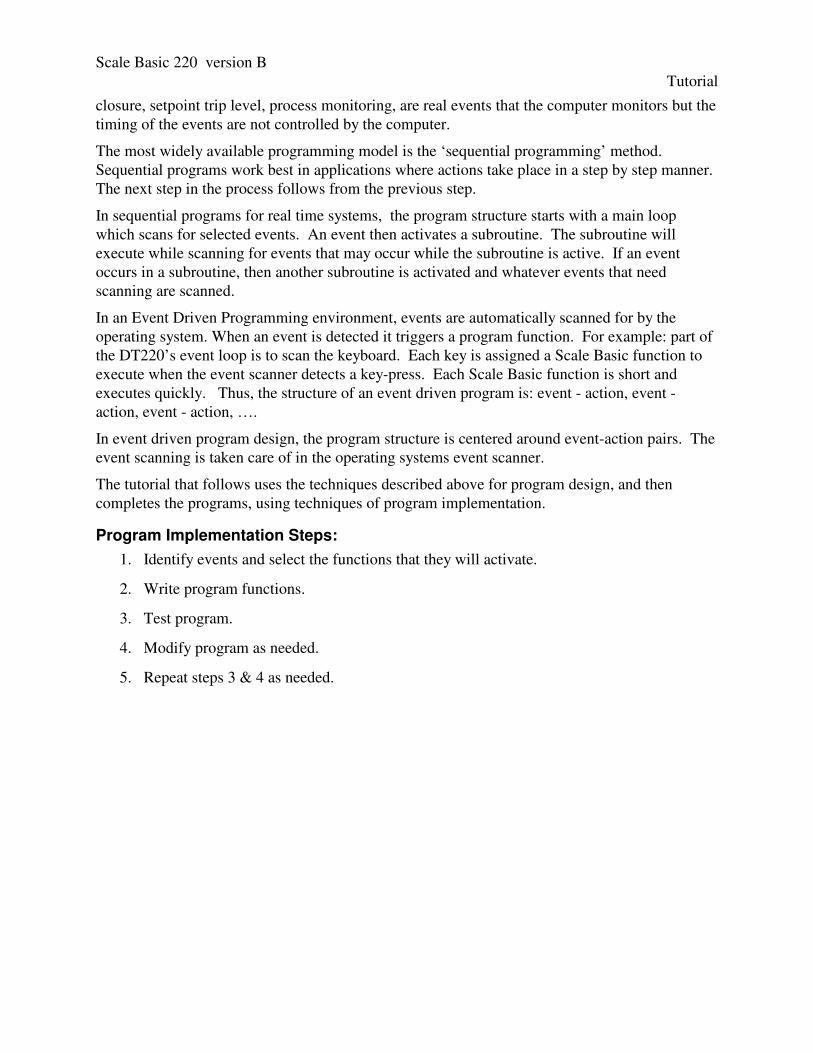
Program Implementation Steps: 1. Identify events and select the functions that they will activate.
2. Write program functions.
3. Test program.
4. Modify program as needed.
5. Repeat steps 3 & 4 as needed.

Scale Basic 220 version B Tutorial
Design Template
To help in the design process, we will use the following design template. The first 4 sections (Application Description, Outputs, Inputs, Sequence of operation are used in program design. The remaining sections are used in program implementation.
[Application Title]
Application Description. This is a general description as given by the customer.
Outputs
list the outputs that will be produced by this application.
Inputs
list the inputs required by this application.
Sequence of operation
describe the sequence of operation of this application.
Event Function Comments
list the events used (keyboard keys, setpoint monitors, timers, communications ports)
Function Instructions Comments
write the scale basic functions needed by this application.
Parameter Used for
list resources used by this program (include Reg registers and configuration parameters).

Scale Basic 220 version B Tutorial
Scale Basic Tutorial The following section assumes that the DT220 is connected to a PC computer using EZ Link. If you are not connected, then use the keyboard entry techniques described in the user’s manual.
Some of the examples used in the tutorial use the TTL Outputs (Relay outputs). Use the following circuit to view the results of the Relay out commands.
Arithmetic and Registers
There are 4 types of registers: general purpose numeric registers (Reg1…31), general purpose text registers (Text1…32), ID registers, and special purpose registers (Gross, Tare, Net, … ).
The general purpose numeric registers (Reg1…31) are used for temporary storage and for calculations. They are initialize on power up to values configured using the Configure/Registers function. Scale Basic instructions Add, Sub, Mul, Div, Copy, Sign, Compare, Dp adjust, Set, and Get data can use the general purpose numeric registers.
The general purpose text registers (Text1…31) are used for text messages used in printing and display. They are initialize on power up to values configured using the Configure/Registers function. Scale Basic instructions Add, Copy, Sign, Compare, Print, Display, and Get data can use the general purpose text registers.
The ID registers are initialized on power up to blank (text regs) or 0 (numeric registers). They are written to when an ID record is read from ID storage. The instructions for numeric registers can be used on ID numeric registers and the instructions for text registers can be used on ID text registers.
Getting Started
Most instruction books on computer languages start off with the most simple of programs: how to display “HELLO WORLD” on the computer screen.
Application Description
Display “Hello World” on the DT220s display.
Results / Outputs
“Hello World” message displayed on the DT220 display.
Inputs
TB1 1
TB2 7 470 ohm LED
Test Circuit for Relay output 1 +5V
TTL out #1

Scale Basic 220 version B Tutorial
F1 key to initiate program.
Sequence of operation
Press the F1 key. The DT220 displays Hello World.
Use the above design criteria to define the events than need to be configured. The Inputs section of the design lists the F1 key as the event that starts the Hello program.
Event Function Comments
F1 key User Function 1 The F1 key initiates the program by starting function1.
The F1 key event triggers a function that displays “HELLO”. From the list of Scale Basic Instructions we find the Prompt instruction is used to display messages.
Function Instructions Comments
F1: Instruction Operand1 Operand2 Operand3 Comment _ Prompt HELLO Display HELLO End End of function
Use the template above to enter and test the program. The program can be extracted from the Event and Function sections of the template. Invoke the EZ Link program.
1. In the Keyboard Events section: Set F1 key = User1
2. In the Scale Basic section: Select User 1 and click the Edit button. Enter the following: Instruction Operand1 Operand2 Operand3 Comment _ Prompt HELLO Display HELLO End End of function Click on the OK button. Click the Close button.
3. On the main EZ Link menu click the Save File button. Save As, then type in “test1” for the file name then click OK. This saves the program onto disk.
4. On the main EZ Link menu click the Send Cfg button.. Click on file “test1.sf” then click on OK. Click the Begin button. If the upload function is not working, make sure that the DT220 is in idle mode (not in configure mode). Try pressing the CLEAR key several times then try again. If it still doesn’t work, then do the EZ Link test procedure described in this manual.
5. Press the F1 key on the DT220. “Hello World” should appear on the display.
6. Press the Clear key. The “Hello World” message should disappear.
The above program presents the programmer with a decision. The program ‘works’ but the user of the program may get stuck, not knowing to press the Clear key. Good programming practice assumes that the user will always do the wrong thing. To fix the above program, use the Get key command to wait for any key press, then force the display to a known state. Use the Display [register] instruction to display the gross weight after the Get key instruction.
Modify the function in step 3 above:
Instruction Operand1 Operand2 Operand3 Comment _ Prompt HELLO Display HELLO

Scale Basic 220 version B Tutorial
Get key Wait for key-press Display Gross Display gross weight. End End of function
Do steps 4 through 7 above.
The next program prompts the operator for 2 numbers, adds the numbers together, and displays the sum. It uses registers Reg1 and Reg2 to store the operator’s input, and Reg3 to store the sum.
Application Description
Enter 2 numbers from the keyboard, add them together, display the sum.
Results / Outputs
Display the sum of 2 numbers.
Inputs
F1 key to begin program Operator data entry of 2 numbers.
Sequence of operation
Press the F1 key to begin program Enter up to 6 digits, then press the Enter key. Enter up to 6 digits, then press the Enter key. Add inputs to obtain sum. The sum is displayed.
The Inputs section lists the F1 key to start the program and the input of 2 numbers. The input of the 2 numbers will be done in Scale Basic, the F1 key is an event that can be configured. The Output section lists the sum of 2 numbers. There should also be a label for the output such as “The sum is”. Configure the Text1 register for the ‘sum’ message.
Event Function Comments
F1 key User1 begin summing program.
The F1 key event triggers a function that requires entry of 2 numbers. From the list of Scale Basic Instructions we find the Get Data [r] instruction is used to enter data. The next step is to add the 2 numbers together. The Add [r] [a] [b] instruction is used. Finally, the result is displayed. The Display [l][r] instruction is used.
NOTE: the program listing that follows is formatted in a more compact form than the HELLO program above. Instead of listing the instructions under Instruction, Operand 1, Operand 2, and Operand 3, the instructions and operands are listed together separated by commas.
Function Instructions Comments
User1 Get data, Reg1 Reg1 = Get operator input

Scale Basic 220 version B Tutorial
Get data, Reg2 Reg2 = Get operator input Add, Reg3, Reg1, Reg2 Reg3 = Reg1 + Reg2 Dispmode, 3 Display mode = display data Display, 3, Text1 Display sum message Display, 0, Reg3 Display sum End End of function The above function uses Text1, Reg1, 2, and 3. The Text and Regx registers used are listed in the Parameters section of the design template. This section of the template is used to manage resources such as Regx registers, and to list parameters that need to be configured such as Text1 register..
Parameter Used for
Func1 initiate program execution of User1 function Text1 result label Reg1 operator input 1 Reg2 operator input 2 Reg3 sum
Use the template above to enter the program (configure F1 key and User1 function). Upload the program, then press the F1 key to execute the program.
1. Invoke the EZ Link program.
2. Click on Reset to Defaults to clear previous example.
3. Set Keyboard Events / F1 key = User1
4. Set Registers / Text Registers 1 – 8 / Text1 = The sum is:
5. In EZ Link select File, Save As, then type in “test2” then click OK. This saves the program onto disk.
6. In EZ Link select the UP (Upload) button. Click on file “test2.sf” then click on OK.
7. Press the F1 key on the DT220.
This program could be improved by changing the display to Gross mode after the operator presses a key. The same Display instruction can be used to change the display from Reg3 to the Gross register. However, if the Display Gross instruction immediately follows the Display Reg 3 instruction, the operator will not see the sum because it will be replaced by the Gross weight. The Get key instruction can be used to pause the program until a key is pressed.
Function Instructions Comments
User1 Get data, Reg1 Reg1 = Get operator input Get data, Reg2 Reg2 = Get operator input Add, Reg3, Reg1, Reg2 Reg3 = Reg1 + Reg2 Dispmode, 3 Display mode = display data Display, 3, Text1 Display sum message Display, 0, Reg3 Display sum Get key Wait for key-press

Scale Basic 220 version B Tutorial
Dispmode Display Gross weight End End of function Try changing the Add instruction to Sub, Mul, and Div. Also, try more complex math functions. The math functions work on any register. Try using other registers (Gross, Tare, Net, Fixed… ).
Setpoint Monitors
Purpose1: to monitor 2 registers and activate a scale basic function when the lower register is greater than or equal to the upper register ( trigger when: lower register >= upper register ).
Purpose2: to monitor a condition code and activate a scale basic function when the condition is true or false. Set the upper register to True or False then the lower register to a condition code.
Remarks: Setpoint monitors are activated using the Scale Basic instruction: Setpoint On [x]. There are 16 setpoint monitor records that contain the following data:
Upper register the upper value register, setpoint triggers when lower >= upper Lower register the lower value register Scale Basic Function the scale basic function to execute when lower >= upper
The next program uses 2 events: F1 key to start things off, and a setpoint monitor. This program also uses a TTL output (Relay 1). NOTE: use test circuit shown at beginning of this section.
Application Description
Drums are placed on the scale. Tare the scale, and then fill drums with material. The fill amount is fixed at 500 lb.
Outputs
Relay output 1 used to fill valve.
Inputs
F1 key - starts operation Reg1 - setpoint amount (500 lb) Setpoint1 – scale monitor Sequence of operation
Operator presses F1 key [Keyboard Event] Tare the weight on the scale. Turn on fill valve. Monitor weight until Net >= setpoint amount [Setpoint Event] Turn off fill valve. From the Inputs section above fill in the Events section of the design template. The F1 key is used to start the fill process. Use it to activate User function 1. Also we use Reg1 to store the setpoint amount.

Scale Basic 220 version B Tutorial
The Setpoint1 presents us with a new type of event, the Setpoint Monitor. Recall from the previous section of this manual titled “Event Driven Programming” that the program structure is event, action, event, action….
The first event is the F1 key. The action is to begin the fill process (tare the scale, turn on fill valve, turn on setpoint monitor). When the setup is complete, the process must wait for the next event (Net weight >= setpoint amount).
The Setpoint Monitor is used to generate the next event. When the setpoint event occurs, it activates user function 2 which turns off the fill valve.
Event Function Comments
F1 key User 1 Start Fill operation Setpoint 1 User 2, trigger when Net >= Reg1 (setpoint amount) Configure the Setpoint 1 event with the Upper register = Reg1 and the Lower register = Net weight register. This will cause the setpoint to trigger when the Net weight >= (greater than or equal to) the value in Reg1. Configure the Setpoint 1 function to execute = User 2.
Function Instructions Comments
User 1 Copy, Tare, Gross Tare the scale Relay on, 1 Turn on fill valve Set pt on, 1 Turn on setpoint monitor 1 End End of function User 2 Relay off, 1 Turn off fill valve End End of function Parameter Used for
Reg1 setpoint amount. Use the template above to enter the program. 1. Invoke the EZ Link program.
2. Click on Reset to Defaults to clear previous program.
3. Set Keyboard Events / F1 key = User1
4. In Setpoint Events / Setpoint 1 set Upper = Reg1, Lower = Net, Function = User2
5. In Registers / Numeric/Reg1 enter 500.
6. Scale Basic / User 1 enter the following program: Function Instructions Comments
User 1 Copy, Tare, Gross Tare the scale Relay on, 1 Turn on fill valve Set pt on, 1 Turn on setpoint monitor 1 End End of function

Scale Basic 220 version B Tutorial
5. Scale Basic / User 2 enter the following program: Function Instructions Comments User 2 Relay off, 1 Turn off fill valve
End End of function 6. In EZ Link select File, Save As, then type in “test3” then click OK. This saves the program onto disk.
7. In EZ Link select the UP (Upload) button. Click on file “test3.sf” then click on OK. 8. Press the F1 key on the DT220. Press the Gross/Net key to verify that the tare weight has
been read. The test LED connected to the DT220 should be on (Relay out 1). Add 1000 lb. to the scale using the scale simulator. The LED light should turn off.
The first improvement for this program is to automatically change the display mode to Gross/Tare/Net display.
Function Instructions Comments
User 1 Copy, Tare, Gross Tare the scale Relay on, 1 Turn on fill valve Set pt on, 1 Turn on setpoint monitor 1 Dispmode, 2 Display gross/tare/net weight End End of function The next improvement is to get the target weight from the keyboard.
Event Function Comments
F1 key User 1 Start Fill operation Setpoint 1 User 2, trigger when Net >= Reg1 (setpoint amount) Modify function User 1: Function Instructions Comments
User 1 Get data, Reg1 Get target weight Copy, Tare, Gross Tare the scale
Relay on, 1 Turn on fill valve Set pt on, 1 Turn on setpoint monitor 1 Display, Net Display net weight End End of function
Timers
Purpose 1: to trigger a scale basic function after a set time interval. Purpose 2: to wait an interval of time inside a scale basic function. Remarks: Timer event monitors are activated using the Scale Basic instruction: Timer on [t].
When a timer is activated, the time interval is set into the timers countdown register. The countdown register decrements by 1 every 0.1 seconds. When the countdown reaches 0 the

Scale Basic 220 version B Tutorial
Scale Basic function is executed. There are 9 timer records that contain the following data: Time interval time interval in tenths of a second (x0.1sec). Max = 1,677,000.0 seconds.
Scale Basic Function the scale basic function to execute when time-out occurs. Timers 1-4 and 7-9 must be reactivated with a Timer on instruction to begin again. Timers 5 & 6 are auto-reload timers. They automatically restart after timing out and are only stopped by a Timer off instruction.
Example: As often happens when developing an application, the customer or the programmer notices that something has been left out. In the case of the Setpoint Monitors application above, the customer wants an automatic printout of the Gross, Tare, and Net weights of the batch. If the print instruction is placed after the Relay off instruction in User function 2, the printout will be inaccurate. The scale will be in motion. What we need is a time-out to allow the scale to settle. Configure Timer 1 by clicking the Timer Events button in EZ Link.
Timer 1 Time 50 Resume set timer 1 = 5.0 seconds, execute Resume function.
The timer activates the Resume function after a 5 second time-out. Modify User 2 function as follows:
User 2 Relay off, 1 Turn off fill valve Timer on, 1 Turn on timer 1 Suspend Wait until Resume (from timer 1) Print 2 Print page format 2 End End of function The new User 2 function uses the Suspend instruction in combination with Timer1’s Resume function.. The purpose of the Suspend/Resume combination is to provide a suspension of a scale basic function until an event occurs. In this case, User function 2 turns off relay 2, turns on timer 1, and then suspends processing until timer 1 times-out and executes the Resume function.
Timer5, If/Else/End if, Flags
Timer5 automatically reloads after it counts down to 0. This provides more accurate timing of repetitive events (such as pulse outputs, speed calculations, interval timing, etc.). Timer5 continues cycling until the Timer off, 5 instruction is executed.
The If/Else/End if instructions are used to test condition codes. If the condition code is true, then the instructions after the If instruction are executed. If the condition code in not true, then the instructions after the If instruction are skipped until an Else or End if instruction is encountered.
The Flags are condition codes that programmer can set or reset. The Flags are used to reflect a user defined state or status. In this case, Flag1 is used to indicate the state of the LED (on/off).
Example Timer 5:
1. Set Keyboard Events / F1 key = User1
2. In Timer Events / Timer5 set time = 2, function = User2

Scale Basic 220 version B Tutorial
3. Scale Basic enter the following program: Function Instructions Comments
User 1 Timer on, 5 turn on timer 5. End end of function User 2 If, Flag1 if LED flag Flag off, 1 turn off LED flag Relay off, 1 turn off LED Else Else Flag on, 1 turn on LED flag Relay on, 1 turn on LED End if End if End End of function
4. Upload the program to the DT220. Press the F1 key. The LED flashes at 0.2 second intervals.
In the above program, the F1 key activates User 1 function, which turns on Timer 5. When timer5 times out, it simultaneously reactivates itself and activates User 2 function. The result is that User 2 function is continuously activated every 0.2 seconds. User 2 function turns the LED on if it was off, or turns the LED off if it was on.
Tutorial Conclusion
The tutorial is intended to get you started in Scale Basic programming. The next steps to take to become proficient in Scale Basic programming are:
• Read through the Reference section of this manual. Become familiar with the scale basic instructions.
• Try modifying the example programs used in the tutorial. Use instructions that were not used in the tutorial.
• Become familiar with the programs in the Application Library. Use the Application Library programs as starting points for your own program.
• Practice modifying the Application Library programs.
• Use the Scale Basic Design Template (see the appendix) to create your own application programs.
Scale Basic 220 version B Appendix A: Design Template
Reference The reference is divided into 3 sections:
1. Instruction Reference: details each Scale Basic instruction and provides examples. 2. Condition Codes: details the condition codes and how they are used. 3. Built in Functions: the built in functions that can be used with Gosub and Goto instructions.
Instruction Reference
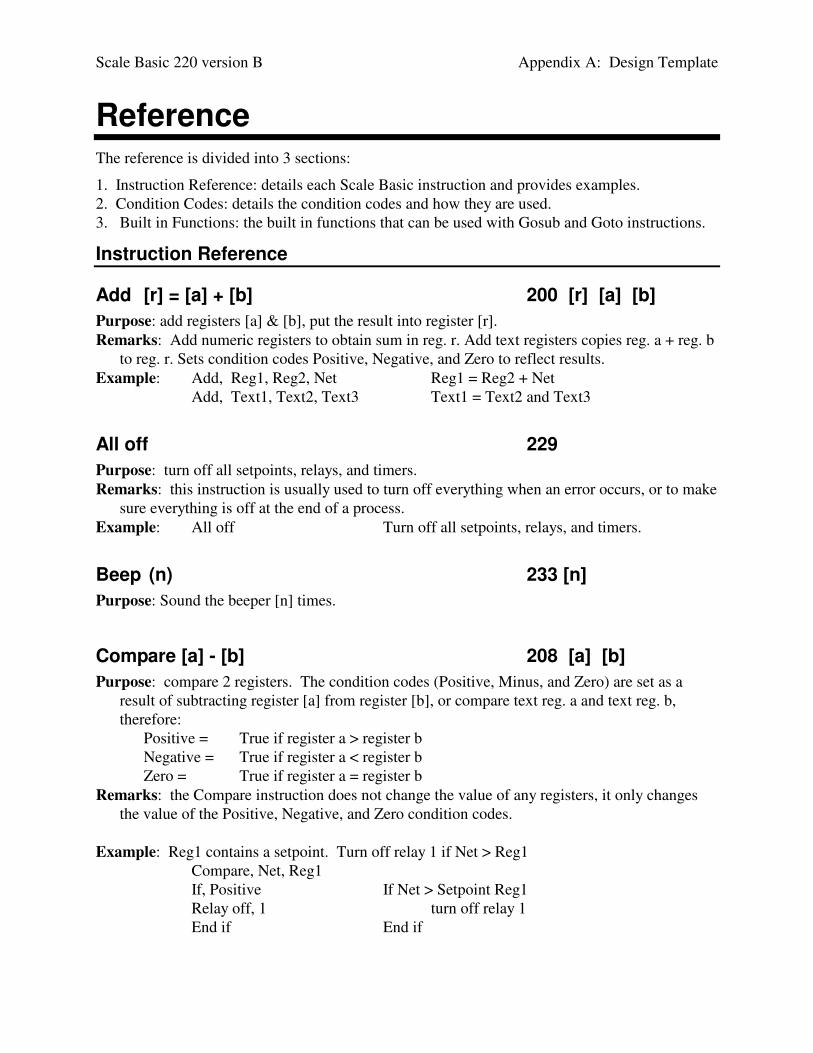
Add [r] = [a] + [b] 200 [r] [a] [b] Purpose: add registers [a] & [b], put the result into register [r]. Remarks: Add numeric registers to obtain sum in reg. r. Add text registers copies reg. a + reg. b
to reg. r. Sets condition codes Positive, Negative, and Zero to reflect results. Example: Add, Reg1, Reg2, Net Reg1 = Reg2 + Net Add, Text1, Text2, Text3 Text1 = Text2 and Text3
All off 229 Purpose: turn off all setpoints, relays, and timers. Remarks: this instruction is usually used to turn off everything when an error occurs, or to make
sure everything is off at the end of a process. Example: All off Turn off all setpoints, relays, and timers.
Beep (n) 233 [n] Purpose: Sound the beeper [n] times.
Compare [a] - [b] 208 [a] [b] Purpose: compare 2 registers. The condition codes (Positive, Minus, and Zero) are set as a
result of subtracting register [a] from register [b], or compare text reg. a and text reg. b, therefore:
Positive = True if register a > register b Negative = True if register a < register b Zero = True if register a = register b Remarks: the Compare instruction does not change the value of any registers, it only changes
the value of the Positive, Negative, and Zero condition codes. Example: Reg1 contains a setpoint. Turn off relay 1 if Net > Reg1 Compare, Net, Reg1 If, Positive If Net > Setpoint Reg1 Relay off, 1 turn off relay 1 End if End if

Scale Basic 220 version B Appendix A: Design Template
Test for Text1 = Id1key Compare, Text1, Id1key If Zero If Text 1 = ID 1 key End end search End if End if
Copy [To] [From] 206 [to] [from] Purpose: copy the contents of register [from] to register [to] Remarks: copy does not affect the condition codes. Example: Copy, Reg1, Gross Copy the gross weight into Reg register 1 Example: Copy, Text1, Id1key Copy the ID 1 key to text register 1 Example: Copy, Stime, Reg1 Copy the stored time and date to stime register for printing. For more on time and date storage see page 49.
Dec [r] 205 [r] Purpose: subtract 1 from a register. Set condition codes Positive, Negative, and Zero. Remarks: the decimal point is ignored. If Reg1 = 0.05, then Dec Reg1 = 0.04 This instruction
is useful in creating loops that must be executed a fixed number of times. Example: the following is an example of using the Dec instruction to implement a For/Next
Set, Reg1, 25 For loop count = 25 Loop1 Do : <Do loop stuff here> :
Dec, Reg1 loop count = loop count - 1 If, Positive While loop count > 0 Next1 Next loop End if End of For/Next loop
Delete id [dir] Purpose: delete currently open id in directory [dir].
Display [r] [line] 218 [r][line] Purpose: to display the contents of a register on display line 1..8. Use line 0 to display at the
current display position. Remarks: Example: Display, Id1 Display ID register 1 (normally used for totals)

Scale Basic 220 version B Appendix A: Design Template
Dispmode [mode] Purpose: to set the display to a mode:
1 = Big Gross display 2 = Small Gross/Tare/Net display 3 = Data display
Div [r] = [a] / [b] 203 [r] [a] [b] Purpose: divide register [a] by register [b], put results into register [r]. Remarks: sets condition codes Positive, Negative, and Zero to reflect results. The decimal
position of the result before the divide determines the decimal position of the result after the divide. Divide by 0 sets the result to 0. NOTE: it is preferable to do a multiply instead of a divide (see Mul example).
Example: convert net weight pounds to tons. Reg2 is set to 2000. Dp adjust, Reg2, 2 Set Register 1 decimal position = 0.00 Div, Reg1, Net, Reg2 Reg1 = Net / Reg2
Dp adjust [r] 212 [r] Purpose: set the decimal position of a register. Remarks: if the new decimal position is less than the previous decimal position, the result is
rounded up by adding 5 to the most significant digit being dropped. Do not use a decimal position greater than 9.
Example: Reg1 contains 0.425
Dp adjust, Reg1, 2 Set decimal position to 2 (0.00) The result = (0.425 + 0.005) / 10 = 0.43
Else (see if instruction) 251
End if (see If instruction) 240
End 255 Purpose: to end a function. Remarks: every function should have an End statement Example: Relay off, 1 Turn off relay 1 End End of function.
Erase id [dir][r] 236 [r] Purpose: erase an Id record. Use the Id number in the register to find the Id and erase it. Remarks: condition code Positive is set true if the Id is found, condition code Zero is set true if
the Id is not found.

Scale Basic 220 version B Appendix A: Design Template
Example: Get an Id number from the keyboard, then erase the ID. Prompt, “Erase ID: ” Prompt the user to enter an Id number Get data, Reg1 Get an Id number. Put it into Reg1 Erase id, Reg1 Find the Id record pointed to by Reg1. Erase it.
Error msg [text] 239 [ascii coded text] Purpose: to display an error message form “Error error msg”. Remarks: Use this instruction to alert the operator that an error condition has occurred. The
message is displayed until the operator presses any key. Example: register Reg1 is set to the maximum weight allowed in a weigh hopper. Compare, Gross, Reg1 If, Positive If Gross weight > Maximum All off turn off all setpoint monitors, relays, and timers Error msg, Scale overweight display error message End Exit function End if End if over-weight error
Flag on / Flag off (flag no.) 210 [n] Purpose: to turn on/off a general-purpose or ID flag. NOTE: Flag off, 0 = turn off all flags. Remarks: there are 9 general-purpose flags and 6 ID flags that can be set on/off using Flag on /
Flag off instructions. The status of the flags can be tested using the Flag[x] condition code. Flags 1..9 are useful for communicating between functions. Flags 11..16 are ID flags of the current ID in directory 1..6.
Example: Use the F1 key to start a timer, use the F2 key to stop the timer and display the
elapsed time in seconds. The F1 key activates user function1.
Flag on, 1 Turn on general purpose flag 1 Set pt on, 1 Turn on setpoint monitor 1 Set, Reg1, 0 Reg1 = 0 End End of function The F2 key activates user function 2. Flag off, 1 Turn off general-purpose flag 1. Set Reg2, 60 Reg2 = 60 Div Reg3,Reg1,Reg2 Reg3 = time / 60 Display, Reg3, 7 Display Reg3 on line 7 End End of function Setpoint monitor 1 trips every scan cycle (60 times a second) and activates function3. Inc, Reg1 Reg1 = Reg1 + 1 If, Flag1 If general flag 1 is on

Scale Basic 220 version B Appendix A: Design Template
Set pt on, 1 re-activate setpoint monitor 1 End if End if End End of function
Get data [r] 231 [r] Purpose: get data from the keyboard and put it into a register. Remarks: if the instruction immediately preceding the Get data instruction was the Prompt
instruction, the prompt is used for prompting, otherwise “ENTER” is used for prompting. The prompt and the current contents of the register data are displayed. If the register is numeric, then only the numeric keypad is active. Condition codes Positive, Negative, and Zero are set to reflect data input. Press the Clear key to abort data entry and leave the register unchanged.
Example: get the percent of moisture. The Get data instruction automatically prompts “Enter”: Set, Reg1, 0 Reg1=0. . Get data, Reg1 Get the kg/liter into Reg1 To use a prompt other than ENTER, use the prompt instruction. Prompt, “Percent: ” display “Percent:” Get data, Reg1 get the percentage.
Get key 230 Purpose: stop processing until the operator presses a key. Remarks: this instruction is usually used when displaying a message that requires operator
acknowledgment before proceeding. Example: Prompt, START display “START” Get key wait for any key-press
Get id [dir][r] 234 [dir][r] Purpose: use the data in register [r] to open an Id into Reg. Remarks: Condition code Positive is set true if the Id is found, condition code Zero is set true if
the Id is not found. Example: Get data, Text1 Enter ID key into Text1 register Get id, Text1 Open Id If, Zero If the Id was not found Error msg, ID not found display error message End if End if End End of function

Scale Basic 220 version B Appendix A: Design Template
Gosub (function no.) 243 [nnn] Purpose: to execute a function (subroutine) from within a function and return to the calling
function at the instruction after the Gosub instruction. Remarks: a subroutine can be called from within a subroutine (this is called nesting). The
maximum level of nesting is 8; i.e. function1 → function6 → function7 → function2 … maximum = 8 levels.
Example: in a bulk-weigh function the scale is zeroed, the display is set to Net mode, and relay1
is turned on. Gosub, Zero Zero the scale Gosub, Set net Set the display to net mode Relay on, 1 Turn on relay 1 End End of function
Goto (function no.) 244 [nnn] Purpose: transfer execution from one function to another. Remarks: Example: If, Flag4 If flag4 is on Goto, 7 Go to function 7 End if End if Set pt, On, 2 Turn on setpoint 2. This instruction is not
executed if Goto was executed.
If (condition) / Else / End if 241 [nnn] / 251 / 240 Purpose: to control program flow using a condition code. Remarks: the instructions after the if statement are executed if the condition code is true, the
instructions after the Else statement are executed if the condition code is false. The Else part of the instruction is optional. The End if statement ends the If statement.
Example: the F1 key (activates function1) is used to toggle the display between Big Gross
display mode and Gross/Tare/Net mode.. If, Flag1 If current mode = G/T/N Flag off, 1 turn off flag 1 Dispmode, 1 set to display Big Gross Else Else <current mode Big Gross> Flag on, 1 turn on flag 1 Dispmode 2 set to display G/T/N mode End if End if End End of function
If not (condition) / Else / End if 242 [nnn] / 251 / 240 Purpose: to control program flow using a condition code.

Scale Basic 220 version B Appendix A: Design Template
Remarks: sometimes it is more meaningful or more convenient to test for a false condition rather than a true condition. In these situations, use the If not instruction.
Example: If not, Centerz If the scale is not at center of zero Gosub Zero Zero the scale End if End if
Inc [r] 204 [r] Purpose: add 1 to a register. Set condition codes Positive, Negative, and Zero to reflect results. Remarks: the decimal point is ignored. If Reg1 = 0.05, then Inc Reg1 = 0.06 This instruction
is useful for counting the number of times something occurs.
Keybd off / Keybd on 227 / 226 Purpose: to prohibit access to the keyboard when running a critical function. The Clear Entry
key will turn the keyboard on if it has been turned off. Remarks: the Keyboard off instruction is used to prevent accidental operator interference during
a critical function. The Keyboard on instruction restores access to the keyboard functions. The Clear key is a fail-safe, in case the keyboard is disabled and accidentally not re-enabled.
Example: setpoint 1 is set to trip continuously (upper register = lower register) and activate
function 1. Function 1 turns off the keyboard and reactivates setpoint 1. This effectively disables the Clear key from re-enabling the keyboard because the keyboard is turned off 60 times a second.
Keybd off disable the keyboard Set pt on, 1 re-arm setpoint monitor 1 End End of function
Loop1 / Next1 Loop2 / Next2 245 / 246 : 247 / 248 Purpose: the loop instruction is used to make Do/Until, Do/While, and For/Next loops. Remarks: to have a loop within a loop, use loop1…. loop2…..next2….next1 Example: The following is an example of a Do/Until loop. Loop1 Do Gosub Update Update weight display and scan events If, Motion Next1 Until Scale is NOT in motion End if End End of function The following is an example of a Do/While: Loop1 Do If, Motion While scale is in motion

Scale Basic 220 version B Appendix A: Design Template
Gosub Update Update weight display and scan events Next1 End if End Do While End End of Function The following is an example of a For/Next loop: Set Reg1, 20 Loop1 For Reg1 = 20 down-to 0 Beep Dec Reg1 If Positive Next1 End if End For … End End of function
Make id [dir][r] 235 [r] Purpose: to open an ID record. If the ID key in register [r] in not found, open a new ID record
and assign ID key [r] to it. Remarks: condition code Positive is set true if the Id is made or found, condition code Zero is
set true if the Id could not be made (Reg full). Example: Get an ID number from the keyboard, open/make the ID, get tare from keyboard, save
the data. Get data, Text1 Get an ID number from the keyboard If not, Clear key If NOT Clear key Make id, 1,Text1 Open/Make ID in directory 1 Get data, Id1r2 put keyboard tare into ID register 2 Write id, 1 Save ID data End if End if End End of function
Mul [r] = [a] * [b] 202 [r] [a] [b] Purpose: multiply register [a] by register [b], put results into register [r]. Remarks: sets condition codes Positive, Negative, and Zero to reflect results. The decimal
position of the result = decimal position of register a + decimal position of register b. NOTE: it is preferable to use a multiply in place of a divide (see Div instruction example)
Example: convert net weight pounds to tons. Scale is calibrated x10 lb. Set Reg1, 5 Dp adjust, Reg1, 4 Reg1 = 0.0005 Mul, Reg2, Net, Reg1 Reg2 = Net * 0.0005 Dp adjust, Reg2, 2 set result to 2 decimal positions

Scale Basic 220 version B Appendix A: Design Template
Display, Reg2, 7 display tons End End of function
Next1 (see Loop1 / Loop2 instruction) 246
Next2 (see Loop1 / Loop2 instruction) 248
Nop 254 Purpose: no-operation, this instruction does nothing. Remarks: rarely used in scale basic.
Open id [dir] 190 [dir] Purpose: prompts user for ID key, reads ID if found, displays error if not found. Remarks: condition code Positive is true if a record was read, Zero is true if not found.
Open new [dir] 191 [dir] Purpose: prompts user for ID key. If the ID is not in ID memory, creates a new ID record. Remarks: condition code Positive is set true if a record was created, Zero is true if already exists
Prompt (nnn) (nnn) (nnn)… 232 [nnn] [nnn]…[0] Purpose: display a message on the numeric display. Remarks: this instruction is used to display status or to prompt the user for data input. If the Get
data instruction immediately follows the Prompt instruction, then the prompt is used for data input.
Example: prompt the user for target weight using the prompt “SETPT”. Prompt, “Enter Setpoint” setup get data prompt Get data, Reg1 get setpoint data.
Read first [dir] 193 [dir] Purpose: to read the first ID record from the specified directory. Remarks: condition code Positive is true if a record was read, Zero is true if not read (empty
directory). the Read first / Read next commands can be use to traverse all records in the directory.
Read next [dir] 194 [dir] Purpose: to read the next ID record from the specified directory. Remarks: condition code Positive is set true if a record was read, Zero is true if not read
Relay off / Relay on (relay no.) 223 [n] / 222 [n] Purpose: to turn off / on relay outputs.

Scale Basic 220 version B Appendix A: Design Template
Remarks: the TTL output signals are labeled Relay1, Relay2, …. The Relay off instruction sets the TTL output signal to TTL high, the Relay on instruction sets the TTL output signal to TTL low. When the TTL output is connected to a solid state relay, the TTL low level turns ON the relay. NOTE1: Relay off, 0 turns off all relays. NOTE2: Relay on/off, 10 gets relay number from register 10. For example
Set Reg10, 4 set Reg10 = 4 Relay on, 10 turn relay number contained in Reg10 on Example: turn off all relays. If scale is at center of zero, turn on relay 3. Relay off, 0 turn off all relays If, Centerz If scale is at center of zero Relay on, 3 turn on relay 3 End if End if End End of function
Resume (see Suspend instruction) 250
Set [r] (nnn) 209 [r] [nnn] Purpose: set a register to a value between 0 and 255. Remarks: values greater than 255 are replaced by the modulo of 255. Example: Set, Reg1, 0 Set, Tare, 100 Set, Id1r1, 299 ERROR, the maximum number is 255
Set pt off / Set pt on (nn) 221 [nn] / 220 [nn] Purpose: to deactivate / activate a setpoint monitor. Remarks: the active setpoint monitors are scanned by the event monitor, the inactive setpoint
monitors are not scanned. When the setpoint condition is reached in an active setpoint monitor, it activates a scale basic function, and de-activates itself. The Set pt on instruction must be executed to reactivate a setpoint monitor. Set pt off 0 turns off all setpoint monitors.
Example: a filling operation uses relay output 1 to open a fill valve. Setpoint monitor 1
monitors for overweight conditions, Setpoint monitor 2 is set to activate function 2 when the net weight on the scale > Reg1. Function key 1 activates function 1 which begins the fill operation.
Fn1 Get data, Reg1 Get the fill amount If not, Clear key If Clear key NOT pressed Gosub Tare Tare the scale Relay on, 1 Turn on fill valve Set pt on, 1 Turn on over-weight monitor

Scale Basic 220 version B Appendix A: Design Template
Set pt on, 2 Turn on setpoint monitor 2 End if End if End End of function Fn2 Relay off, 1 Turn off relay1 Set pt off, 0 Turn off all Setpoint monitors End End of function
Sign [r] 207 [r] Purpose: to set condition codes based on the value in register [r]. Positive is set if the register is
greater than 0, Negative is set if the register is less than 0, Zero is set if the register is zero. For text registers, Zero is set if register is empty, Positive is set if register in not empty.
Remarks: Example: Check for scale below zero. Sign, Gross set condition codes using the Gross weight register If, Negative If Gross weight < 0 End Exit End if End if
Sub [r] = [a] - [b] 201 [r] [a] [b] Purpose: subtract register[b] from register [a], put the result into register [r]. Remarks: sets condition codes Positive, Negative, and Zero to reflect results. Example: Sub, Reg1, Reg2, Reg3 Reg1 = Reg2 - Reg3
Suspend / Resume 249 / 250 Purpose: Suspend stops a function from executing until a Resume is executed. Remarks: the Suspend instruction is executed in a scale basic function, the Resume instruction
is executed in an event monitor. Example: A filling operation stops, waits 4 seconds, then stores the gross weight in Reg1.
Timer 1 is configured for 4 second time-out and execute function Resume. Timer1: Time: 40
Function: Resume. Fn. 1: Relay off, 1 turn off fill relay Timer on, 1 turn on settle timer Suspend wait for scale to settle. Timer1 executes Resume Copy, Reg1, Gross Reg1 = Gross weight The above example could use motion detect to wait for scale stable condition.

Scale Basic 220 version B Appendix A: Design Template
Set pt 1: Upper register False Lower register Motion Execute function Resume
Fn. 1: Relay off, 1 turn off fill relay
Set pt on, 1 turn on motion detect monitor Suspend Setpoint monitor 1 executes Resume Copy, Reg1, Gross Reg1 = Gross weight
Timer off / Timer on (n) 225 [n] / 224 [n] Purpose: to activate / de-activate a timer. Remarks: the active timers are scanned by the event monitor. When an active timer counts
down to 0 (times out) it activates a scale basic function and de-activates itself. Timer off 0 turns off all timers. NOTE: timers 5 & 6 are special timers. They are ‘auto-reload’ timers. When they time out, they automatically restart, and then execute a scale basic function. The Timer off instruction must be executed to turn off timers 5 & 6.
Example: keyboard key F1 activates function 1. Function 1 starts a relay output cycle where
relay 1 turns on and off in 5 second intervals. The toggle turns off based on the number of seconds entered into Reg1.
Timer1: Time: 1 toggle time Function User3 execute function 3: turn off toggle . Timer5: Time: 50 time interval = 5.0 seconds
Function: User2 turn on relay1, turn on timer 1 Fn. 1: All off Begin with all setpoints, timers, and relays off. Dp adjust, Reg1, 1 set Reg1 for 1 decimal position Prompt “Enter toggle time” prompt for on time data entry. Get data, Reg1 get toggle time If not Clear key if NOT Clear key Timer on 5 turn on timer 5 (auto-reload timer) Timer on 1 turn on count down timer Relay on, 1 turn on relay 1 Flag on, 1 turn on flag for relay 1 End if end if End End of function Fn. 2: If Flag1 if flag 1 on Flag off, 1 turn flag 1 off Relay off, 1 turn relay 1 off Else else Flag on, 1 turn flag 1 on

Scale Basic 220 version B Appendix A: Design Template
Relay on, 1 Turn relay 1 on End if end if
End End of function: note timer 5 restarts itself. Fn. 3: Dec Reg1 subtract 1 from toggle time interval If Positive If ON time > 0 Timer on, 1 re-activate timer 1 Else Else
All off turn everything off End if End if End End of function
Txmsg [port][register] 237 [port][reg] Purpose: to transmit register data from serial communications ports 1, 2, or 3. Remarks: The text registers can be embedded with other register data. Embedded Code EZ Link Entry Keyboard Entry Comments any ASCII code <nnn> nnn nnn = any number 0 - 255 register, min. size <reg. name> 253, rr rr = register number register, 7 char. field size [reg. name] 254, rr 7 char field, right justified NOTE1: The DT220 waits for COM port 1 to complete its transmission i.e. nothing else is
processed. If COM port 1 is unable to transmit, press the Clear key to exit. NOTE2: COM port 2 transmits each message using interrupts (the DT220 continues
operation while the message is sent in the background). If a second message is sent, COM port 2 waits up to 2 seconds for the first message to complete. Message 2 aborts after waiting for 2 seconds. Use ‘Tx2ready’ status check before sending if all messages must be sent or if sending only if not busy.
Example: all messages sent: Loop1 If not, Tx2ready Next1 End if Txmsg, 2, Text1 Example: send only if not busy: If, Tx2ready Txmsg, 2, Reg1 End if Example: use Text1 to transmit ASCII -STX, Net weight, ASCII-CR. Print Net in 7 character
field, right justified. Configure Text1: <02>[Net]<13> keyboard entry = 02, 254, 66, 13, 0 F1: Txmsg, 1, Text1 transmit Text1 out serial communications port 1. End end of function.

Scale Basic 220 version B Appendix A: Design Template
Valid wt 219 Purpose: wait for valid, printable (hb44) weight. Reads scale and updates display. Remarks: this instruction takes a minimum of 3 A/D conversion cycles. Press the Clear key to
abort Valid wt command; also aborts the scale basic function using this instruction, and all calling functions (unwinds subroutine stack).
Example: Valid wt wait for valid weight. Abort all if Clear key pressed. Gosub Print1 print format 1
Write id [dir] 228 [dir] Purpose: write ID data back to ID memory. Remarks: ID data is read into the ID registers by the Make id, Get id, and Index id instructions
or by the Open id, Open new, Read first, and Read next functions. If any ID data is modified, it must be written back to ID memory to make the change permanent. The ID registers are cleared after a Write id instruction.
Example: Get an ID number from the keyboard, open/make the ID, get tare from keyboard, save
the data. Get data, Reg1 Get an ID number from the keyboard If not, Clear key If NOT Clear key Make id, 1, Reg1 Open/Make ID Get data, Id1r2 put keyboard tare into ID[1] register 2 Write id, 1 Save ID data End if End if End End of function

Scale Basic 220 version B Appendix A: Design Template
Condition Codes
The condition codes are used in the IF instruction to determine if the instructions following the IF are to be executed. The arithmetic condition codes are set every time a calculation instruction is performed. The Setpoint monitor condition codes are true if the monitor corresponding to the condition code is active. The following table lists the condition codes.
0key...9key 120…129 Purpose: true if last key pressed was 0…9.
Altunits 109 Purpose: true if display is in alt-units mode.
Barcode 111 Purpose: true if bar-code message has been received on Com Port 1
Centerz 104 Purpose: true if scale is at center of zero
Clear key 106 Purpose: true if last key pressed was the Clear key Remarks: the Clear key is used to abort an operation. Test for this key after data entry. Example: Get data, Reg1 Get the fill amount If not, Clear key If Clear key NOT pressed Gosub Tare Tare the scale
Enter key 105 Purpose: true if last key pressed was the Enter key. Remarks: the Enter key is used to complete data entry or to continue to the next operation.
Flag 1…10 51…60 Purpose: true if FlagX is ON. Remarks: the flags are used to remember a state or condition.
Flags 11 –16 71…76 Purpose: true if ID flag is ON Remarks: each ID has a flag that can be used to record a true/false condition. Flag 11 tests the
status of directory 1 ID record.

Scale Basic 220 version B Appendix A: Design Template
Input 1..7 61…67 Purpose: true if TTL input is idle (TTL high) Remarks: the TTL inputs are normally high. They are often used to detect a switch closure
which connects the TTL input to Ground (TTL low). The TTL inputs use negative logic! Example: If, Input5 test for input 5 idle If not, Input5 test for input 5 ON
Ktare / Wtare 112 / 113 Purpose: true if the tare register data was entered from the keyboard (Ktare) or read from the
scale (Wtare).
Minus 102 Purpose: true if previous calculation result was negative.
Motion 107 Purpose: true if the scale is in motion.
Netmode 103 Purpose: true if display is in Net mode.
Overload 115 Purpose: true if scale status = Overload
Positive 101 Purpose: true if previous calculation result was Positive. Remarks: Also set by Get id, Make id, Open id, Open new, Read first, Read next to signal that
the instruction was successful.
Printable 108 Purpose: true if the weight registers (Gross/Net) contain printable (handbook 44) weight.
Qstatus 110 Purpose: true if communications port 2 receives an ‘I’ status from a previous status request or if
communications port 2 receives a ‘V’ (valid weight) from a previously sent RQ message. Remarks: Qstatus is used when multiple DT220s are connected together in a network. The
networks are normally setup in a Master/Slave configuration. The Master unit sends out status inquires [S] to the slave units. The slave units send back an [I]
if they are idle (Qstatus is turned ON) or a [B] if they are busy (Qstatus is turned OFF).

Scale Basic 220 version B Appendix A: Design Template
The Master units sends out an RT request to automatically read a slave units data registers (including Gross and Net registers). The Qstatus flag is set if the slave units weight registers contain printable (handbook44) weight.
Setpoint 1…15 1…15 Purpose: true if SetpointX is active.
Timer 1…9 41…49 Purpose: true if TimerX is active.
Tx2ready 114 Purpose: true if Com port 2 transmit is ready (not busy sending a previous message).
Zero 100 Purpose: true if previous calculation result was Zero. Remarks: Also set by Get id and Make id to signal that the instruction was un-successful.
Built in Functions
Gross/net 128 Purpose: toggle between Gross display and Net display modes. Remarks: this is the default function for the Gross/Net key.
Print mode 136 Purpose: to send formatted print pages to the printer. Send page 1 if the display is in gross
mode, send page 2 if the display is in net mode. Remarks: this is the default function for the Print key.
Resume 250 Purpose: used by Setpoints and Timers to resume processing a function that has been
suspended. Remarks: the Suspend instruction stops a Scale Basic function from executing, thus allowing
the Event Monitor to scan for events. The Resume function reactivates the function that suspended, at the instruction following the Suspend instruction.
Example: Timer1 is set for 4 second delay, then it activates the Resume function.
Timer on, 1 Turn on timer 1 Suspend Suspend until Resume executed Relay off, 6 Turn off relay 6

Scale Basic 220 version B Appendix A: Design Template
Set gross 131 Purpose: to set the display to the Gross mode. Remarks: this function is equivalent to the instruction Display Gross
Set net 132 Purpose: to set the display to Net mode. Remarks: this function is equivalent to the instruction Display Net
Set seq 147 Purpose: allows keyboard entry of the sequence number.
Tare 129 Purpose: put the gross weight into the tare register. Change to Net display mode. Remarks: Condition code Positive is true if successful. The scale must be stable (no motion) and
above zero for the Tare function to succeed.
Txmap 144 Purpose: transmit formatted data (see parameter 28) out communications port 2. Remarks: configuration parameter 28 (see operation parameters) selects a format (AND,
Condec, etc.) for transmission via communications port 2. If configuration parameter 27 is set to 0, then the format selected by parameter 28 is continuously transmitted. Do not use function Tx data if parameter 28 is set to 0.
Units 127 Purpose: toggle display mode between primary weight units and alternate weight units. Remarks: this is the default function for the Units key.
Update 137 Purpose: update weight registers, update display, and scan for events. Remarks: Scale Basic functions should execute quickly and terminate to allow the event
scanner to process all events that occur. If you write a function that does not terminate quickly, or depends on scale status to continue, use the Update function if you need updated weight data or if a critical event might be pending.
Example: a function waits for stable weight (motion = false) before issuing a print command. Loop1 While - If Motion Motion on scale Update Update scale readings Next1 End -

Scale Basic 220 version B Appendix A: Design Template
End if While Motion Gosub Print1 Print page 1
Update alt 145 Purpose: update alternate weight units registers. Remarks: the DT220 is designed provide weights in 2 units of measure: primary and alternate
units. The all weight calculations are performed in the primary weight units. The alternate unit weights are only calculated as needed. If you use alternate units in Scale Basic functions, the Gosub Update alt before using the alternate weight registers.
Update seq Purpose: increments sequence number and puts number into the Sequence register.
User1…User15 1…15 Purpose: provide user programmable functions.
Zero 130 Purpose: to zero the weight on the scale. Remarks: condition code Positive is true if successful. The gross weight must be within the
configured zero range and the scale must be stable for this function to succeed. This is the default function for the Zero key.
Events
Keyboard Events Purpose: to execute a Scale Basic function when a key is pressed. A key-press event occurs
when a function key (PRINT, UNITS, GROSS/NET, TARE, F1…F8) is pressed.
Setpoint Monitors Purpose 1: to monitor 2 registers and activate a scale basic function when the lower register is
greater than or equal to the upper register ( trigger when: lower register >= upper register ). Purpose 2: to monitor a condition code and activate a scale basic function when the condition is
true or false. Set the upper register to True or False then the lower register to a condition code.
Remarks: Setpoint monitors are activated using the Scale Basic instruction: Setpoint On [x]. There are 15 setpoint monitor records that contain the following data:
Upper register [P0] the upper value register, setpoint triggers when lower >= upper Lower register [P1] the lower value register Scale Basic Function [P2] the scale basic function to execute when lower >= upper
Use the EZ Link button ‘Setpoint Events’ or the DT220 configuration function to enter setpoint parameters.

Scale Basic 220 version B Appendix A: Design Template
Example Purpose1:
trigger user function 1 when gross weight is greater than Reg register 12 (weight above setpoint).
Upper register Reg12 Lower register Gross Execute Function User1 trigger user function 2 when Reg register 12 is greater than Gross weight (weight below
setpoint). Upper register Gross Lower register Reg12 Execute Function User2 Example Purpose2:
trigger user function 6 when scale is stable (motion false) Upper register False Lower register Motion Execute Function User6 trigger user function 9 when TTL input 3 is high (true, inactive) Upper register True Lower register Input3 Execute Function User9
Timer Events Purpose 1: to trigger a scale basic function after a set time interval. Purpose 2: to wait an interval of time inside a scale basic function. Remarks: Timers are activated using the Scale Basic instruction: Timer on [t]. When a timer is
activated, the time interval is set into the timers countdown register. The countdown register decrements by 1 every 0.1 seconds. When the countdown reaches 0 the Scale Basic function is executed. There are 9 timer records that contain the following data: Time interval [nnn] time interval in tenths of a second (x0.1sec). Max = 1,677,000.0 sec.
Execute Function[P1] the scale basic function to execute when time-out occurs. Timers 1-4 and 7-9 must be reactivated with a Timer on instruction to begin again. Timer 5 & 6 are auto-reload timers.
Timer5 & 6: automatically reloads after it counts down to 0. This provides more accurate
timing of repetitive events (such as pulse outputs, speed calculations, interval timing, etc.). Timers 5 & 6 continue cycling until the Timer off, 5/6 instruction is executed.
Example Purpose 1: trigger user function 7 after a 1 minute time-out. Configure timer 1: Time interval 600 1 minute = 60.0 seconds Execute Function User7 execute user function 6

Scale Basic 220 version B Appendix A: Design Template
Example Purpose 2: display a message for 2 seconds then display Gross weight. Configure timer 1:
Time interval 20 set for 2.0 seconds Execute Function do not execute a function Fn. 1 Dispmode, 3 Display mode = data display
Display, 4, Text5 Display text reg 5 on line 4 Timer on, 1 turn on timer 1 Loop1 While If Timer1 Timer 1 is on Next1 Wait End if End While Dispmode, 1 Display Gross weight Example Timer5: Pulse relay output 1 at 0.2 second intervals. Configure F1 key to execute user function 10. Configure Timer5 to execute function 10 after a 0.2 second time-out. Time interval 2 set for 0.2 seconds Execute Function User10 execute user function 10 Fn10 If, Flag1 if Flag 1 is on Flag off, 1 turn off flag 1 Relay off, 1 turn off relay 1 Else Else Flag on, 1 turn on flag 1 Relay on, 1 turn on relay 1 End if End if This example will cause relay output 1 to continuously turn on and off in 0.2 second intervals.
TTL Input Events Purpose: execute a scale basic function when a TTL input is activated (shorted to ground). Remarks: TTL inputs 1 through 4 execute scale basic functions 1 through 4. The TTL inputs
trigger when the input signal goes from TTL high to TTL low. The TTL input will not re-trigger until the TTL input returns to TTL high. NOTE: TTL inputs must be enabled by setting parameter Cfg Event – TTL input enable = Y. In EZLink set in I/O Ports function. The automatic scan of TTL inputs 1 thru 4 is useful for events that must be constantly monitored such as a STOP switch used in bulk weigh or an overload limit switch. For conditions where the TTL input is monitored on a temporary basis (such as a GO switch) use the ability of the Setpoint Monitor to trigger on a condition code.
TTL input 6: Pulse Count Input - TTL input 6 is scanned for signal pulses. The maximum
pulse rate is 450 pulses / second, each pulse must be low a minimum 1.1 ms, and high a minimum of 1.1 ms. The pulses are accumulated in the Count register [57]. Each second,

Scale Basic 220 version B Appendix A: Design Template
the number of pulses that occurred in that second is stored in the Rate register [55] (pulses/second).
Events - Serial Communications Input: Port 1 & Port 2
Serial Communications Port 1 Input Purpose: receive data input. Remarks: port 1 receives data into a buffer until an ACCII carriage return (13) is received. The
condition code, Barcode, is set true when a message is received. The data is copied to a message buffer where it is held for the next data input command. Data input commands include any command where the operator would key in data and then press the Enter key. This includes ID number entry and Get data [r] instructions.
Example1: a bar code reader is connected to Port 1. The operator presses the F1 key which
activates function 1. Fn. 1 Open new, 1 open an ID (id key is read from barcode buffer) Copy Id2, Gross Id2 (the ID’s tare register) = weight on the scale Close id, 1 Save ID data to Reg End End of function Using this program, the operator presses the F1 key. The DT220 prompts “Id”. The operator
scans a bar code label. The bar code data is used for the ID number. Example2: a bar code reader is used to read the tare weight for the scale. Setpoint 1 is
configured to trigger when a bar-code message is received. Function 1 reads the bar-code data into the Tare register.
Setpoint1: Upper register = True, Lower register = Barcode, Function = User1. Fn. 1: Get data, Tare read bar-code data into the tare register. End End of function
Serial Communications Port 2 Input Purpose: execute commands received by communications port 2. Remarks: Communications port 2 operates by it’s own event scanner. It operates in the
background (unnoticed by the operator). The following commands are recognized by communications port 2: NOTE: xxx = 3 digit number(1..255), nnnn = up to 10 digit number, <cr> = ASCII carriage return (13)
CR, CU, CV, CW Purpose: Read and write configuration data. These commands are used by EZ Link only.

Scale Basic 220 version B Appendix A: Design Template
Fxxx<cr> Purpose: execute scale basic function xxx. Remarks: this instruction provides remote control of any DT220 function by way of scale basic
functions. Example: the DT220 receives F130<cr>. Function 130 is executed (Zero the scale). The DT220 receives F2<cr>. User function 2 is executed.
Nxxx<cr> Purpose: select station number xxx. Remarks: Port 2 can be assigned a station ID (EZ Link: I/O Ports / Station ID. Configuration
parameter 27). If the station ID is between 1 and 254 then port 2 powers up in network mode. In network mode, the port 2 transmitter is turned off and no commands are accepted until a station select is received.
Example: Station ID is 125. The following commands are received: N120<cr>F2<cr> The DT220 does nothing because its station ID has not been selected. N125<cr>F5<cr>N110<cr>F10<cr>
The DT220 is selected, executes function 5 and is then deselected when it receives the N110<cr> command.
RRxxx<cr> Purpose: transmit contents of register xxx. Remarks: xxx can be any valid register number. The data is transmitted in the form:
nnnnnnnnn<cr> where nnnnnnnnn is the contents of register xxx (numeric registers in a 9 character field, zero blanked).
Example: the net weight is 1945 lb. The DT220 receives R66<cr> then it transmits the contents of the Net weight register in the form <sp><sp><sp><sp><sp>1945<cr>.
RTxxx<cr> / RQ<status>nnnn<cr> Purpose: automatic transfer of register data from the recipient of RT command to the sender of
the RT command. Remarks: network systems are normally setup in a master/slave configuration. The master units
sends an RT command to the slave unit. The slave unit returns an RQ reply (RQ<scale status><contents of register xxx><cr>) to the master unit. The RQ command sets the Qflag true if scale weight is printable (handbook 44), stores the nnnn data into register 15, , and then executes Scale Basic function 15.
Example: transfer the Net weight from station 25 to the master unit. In the Master unit configure the following: Set print label 32 = N<M10><13>RT66<13>
Note: this uses Reg10 for station ID. If Reg10 contains 25 then the following would be sent: N25<cr>RT66<13> which translates into, select station 25, Request Transmit of register 66 (Net weight).

Scale Basic 220 version B Appendix A: Design Template
Fn. 1: Set Reg10, 25 Reg10 = station ID 25 Txcom2, Label32 Transmit RT request to station 25 End End of function The receipt of an RQ reply from the slave unit causes the slave’s Net weight to be stored in
register Reg15 and function 15 is automatically invoked. Fn. 15: If, Qstatus If received data is printable weight Copy Reg1, Reg15 Reg1 = Unit25’s Net weight Else Else Set Reg1, 0 Reg1 = 0 End if End if End End of function NOTE: On the slave station, only the station ID needs to be configured. All other functions
in the slave operate automatically and in the background.
RWxxx<cr>nnnn<cr> Purpose: write nnnn data into register xxx. Remarks: xxx can be any valid register number. Example: the DT220 receives: RW5<cr>150.00<cr>. The result is that register Reg5 now
contains 150.00.
S / I Purpose: Status / Idle pairs are used to verify that a remote station is available to accept
commands. Remarks: network systems are normally setup in a master/slave configuration. The master units
sends ‘S’ command to the slave unit. The slave replies with an ‘I’ status if it is on line and available. The Master receives the ‘I’ as a command to execute user function 14.
Example: scan all network addresses for available stations. 1. Reg10 is used as the current station ID register. 2. Text1 = N<R10><13>S<13> : Select station (Register 10) then send ‘S’ command. 3. Timer1 is used to determine that a station is not responding. If it times out it activates
function 2. 4. Function 2 decrements Reg10 and checks for end of scan. 5. F1 activates function 1 which starts the station scan.
Timer1: 2, 2 Set for 0.2 sec time-out, activate function 2 Fn. 1: Set Reg10, 0=255 Set current station ID = 255 Goto User2 Goto user function 2 End End of function Fn. 2: Dec Reg10 current station ID = current station ID - 1 If positive If not end of scan Timer on, 1 reset timer 1

Scale Basic 220 version B Appendix A: Design Template
Txmsg, 2 , Text1 transmit next station request Else Else Timer off, 1 turn off timer 1 Txmsg, 2, Text1 deselect all stations by selecting station 0
End if End if End End of function Fn. 14: Make id, Reg10 Make a new ID with station ID as the ID number Goto User2 Goto user function 2 End End of function NOTE: On the slave stations, only parameter 27 (station ID) needs to be configured. All
other functions in the slave operate automatically and in the background.
X0 / X1 / X2 Purpose: to turn off continuous transmit, transmit TX2 data 1 time, or turn on continuous
transmit of TX2 data. Remarks: EZ Link, I/O Ports, TX Format (Parameter 28) selects a data format that can be sent
out communications port 2. Parameter 27=0 or serial input command X0 turns off continuous transmit of TX2 data. Parameter 27 = 255 or serial input command X2 turns on continuous transmit of TX2 data. Serial input command X1 transmits TX2 data 1 time.
Registers
There are 5 types of registers: numeric registers, text registers, scale registers, ID registers and special purpose registers. The numeric and text registers are initialize at power-up by the values configured into flash memory. The ID registers are set every time a new ID is read. To view the contents of the registers, press Func 9 key and select “2 Register data Display”
Numeric Registers There are 31 general purpose numeric registers [1-31]. The following registers have special purpose uses: Reg 10: used for indirect relay control. The number in register 10 can be used to turn on/off a relay.
example: Set Reg10, 7 Set Reg register 10 = 7 Relay on, 10 Turn on Relay in register 10 = Turn on relay 7 Reg 15: used for networking (serial input RQ command). When communications port 2 receives
an RQ command, the data received is automatically put into register 15.
Text Registers There are 32 general purpose text registers [128-159].

Scale Basic 220 version B Appendix A: Design Template
Scale Registers The scale registers are the gross, tare, and net weights on the scale and the alternate units registers. The alternate units are not calculated until needed. If the Alt units registers are used in scale basic, use the Update alt instruction to calculate the current value of the alternate weights.
Reg. Number Register Name 81 Gross Weight 82 Tare Weight 83 Net Weight 84 Alt units - Gross weight 85 Alt units - Tare weight 86 Alt units - Net weight
ID Registers Each ID record has 8 numeric registers and 8 text registers. The register data for an ID is available when it is "opened" (instructions Get id, Make id, functions Open id and Open new). The register data is written to an ID record when it is "closed" (instruction Write id and function Close id). The Id key register contains the ID of the currently open ID record. This register is read only, it should not be written to.
Other Registers The True and False registers are used by the Setpoint Monitors to enable triggering on condition codes. If a setpoints upper register is set to true, and the lower register is set to Motion, then the setpoint will trigger when the scale is in motion.

Scale Basic 220 version B Appendix A: Design Template
Registers 1-31 Reg 1...31 Numeric Registers 1..31 32-39 Id1r1...8 ID 1 numeric registers 1 to 8 40-47 Id2r1...8 ID 2 numeric registers 1 to 8 48-55 Id3r1...8 ID 3 numeric registers 1 to 8 56-63 Id4r1...8 ID 4 numeric registers 1 to 8 64-71 Id5r1...8 ID 5 numeric registers 1 to 8 72-79 Id6r1...8 ID 6 numeric registers 1 to 8
Text Registers 128/159 Text 1...32 Text Registers 1..32
ID registers 160 Id1key ID 1 key register 161-167 Id1t2...8 ID 1 text registers 2 to 8 168 Id2key ID 2 key register 169-175 Id22...8 ID 2 text registers 2 to 8 176 Id3key ID 3 key register 177-183 Id3t2...8 ID 3 text registers 2 to 8 184 Id4key ID 4 key register 185-192 Id4t2...8 ID 4 text registers 2 to 8 193 Id5key ID 5 key register 194-200 Id5t2...8 ID 5 text registers 2 to 8 201 Id6key ID 6 key register 202-208 Id6t2...8 ID 6 text registers 2 to 8
Special Purpose Registers 81 Gross Gross weight on the scale 82 Tare Tare weight 83 Net Net weight on the scale 84 Alt Gross Gross weight in alternate units 85 Alt Tare Tare weight in alternate units 86 Alt Net Net weight in alternate units 87 Sequence Sequence number 210 Time\date Time and Date 211 Time Time 212 Date Date 213 Stime Stored time 214 Sdate Stored date 255 Exit Setpoint always trips

Scale Basic 220 version B Appendix A: Design Template
Appendix A: Design Template Application Description. This is a general description as given by the customer.
Outputs
list the outputs that will be produced by this application.
Inputs
list the inputs required by this application.
Sequence of operation
describe the sequence of operation of this application.
Event Function Comments
list the events used (keyboard keys, setpoint monitors, timers, communications ports)
Function Instructions Comments
write the scale basic functions needed by this application.
Parameter Used for
list resources used by this program (include Reg registers and configuration parameters).
Operators Manual Application Description. Begin with design description.
Installation
list parameters that are required to be setup list cable requirements (TTL inputs, TTL outputs, Com ports)
Setup Parameters
list parameters that the supervisor is required to setup.
Operators Functions
describe how to use this application.