Sava air bags. The new equipment Air Bags Kevlar reinforcing w/ thick, multi-layer rubber shell...
17
Sava air bags
-
Upload
libby-hail -
Category
Documents
-
view
220 -
download
0
Transcript of Sava air bags. The new equipment Air Bags Kevlar reinforcing w/ thick, multi-layer rubber shell...

Sava air bags

The new equipmentAir Bags
Kevlar reinforcing w/ thick, multi-layer rubber shell
24” x 24” positive grip surface w/ safety straps
Max load: 27.7 tons
Max lift height: 11.8”
Specs also listed on the bag
18” x 18” positive grip surface w/ no safety strapsMax load: 14.2 tonsMax lift height: 8.6”Specs also listed on the bag
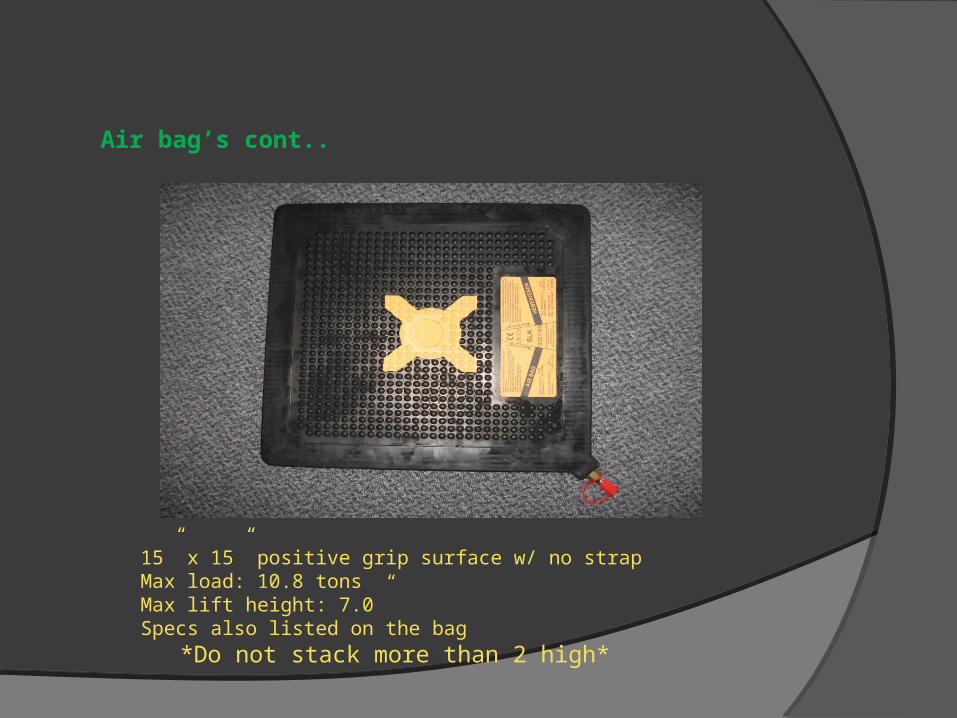
Air bag’s cont..
15” x 15” positive grip surface w/ no strapMax load: 10.8 tonsMax lift height: 7.0”Specs also listed on the bag
*Do not stack more than 2 high*

Inflation Accessories

Inflation Accessories

Accessories
30 min Scba bottle (4500 psi)
Single-stage Piston Regulator (0-116 psi)

Accessories
• Yellow supply line• Red, Blue and Green
working lines• All lines are:
• 20’ • oil resistant,
neoprene rubber• Integrated inline
shut-off w/ overpressure relief valve

Accessories
• Hand help dual control valve• Wye’s
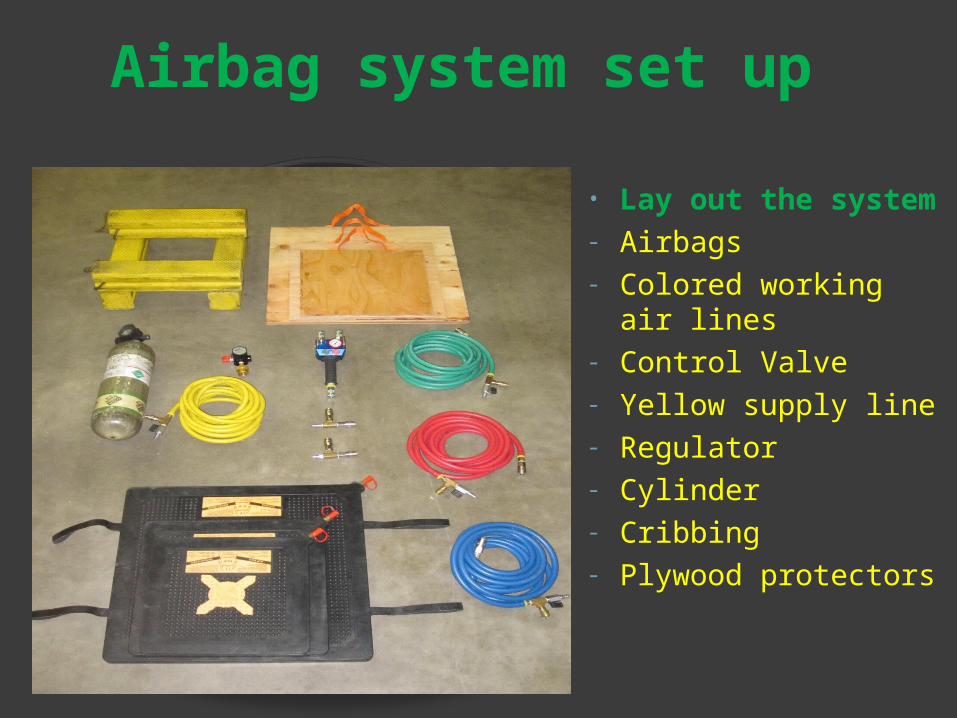
Airbag system set up
• Lay out the system- Airbags- Colored working air
lines- Control Valve - Yellow supply line- Regulator- Cylinder- Cribbing - Plywood protectors

Airbag System Set-up Connect regulator to Scba bottle Attach yellow supply line to
regulator Connect dual head control valve
to yellow supply line
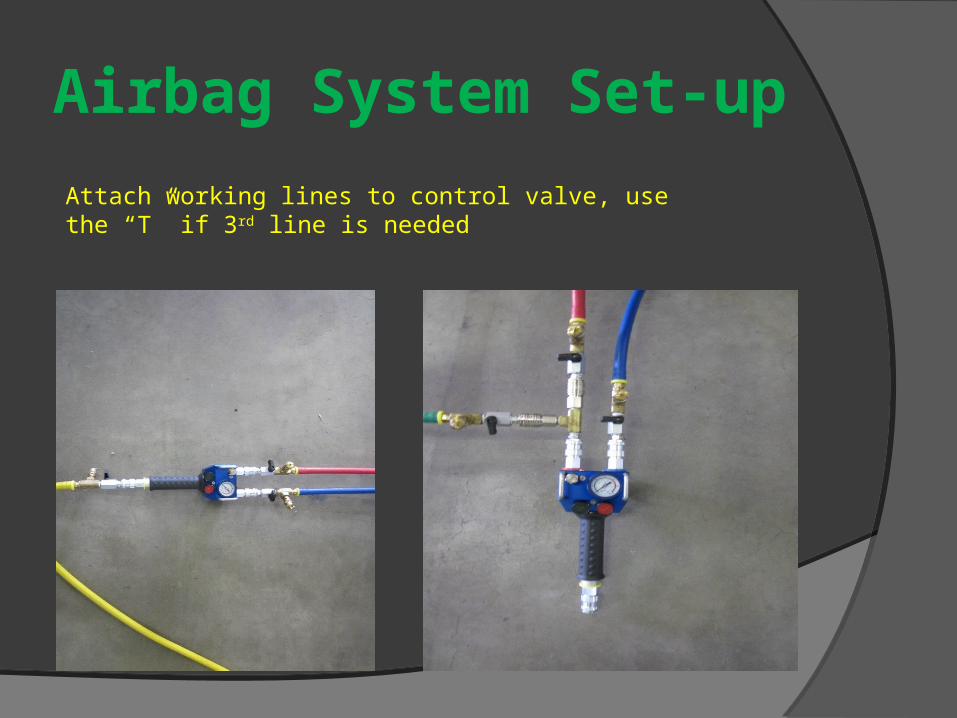
Airbag System Set-up
Attach working lines to control valve, use the “T” if 3rd line is needed
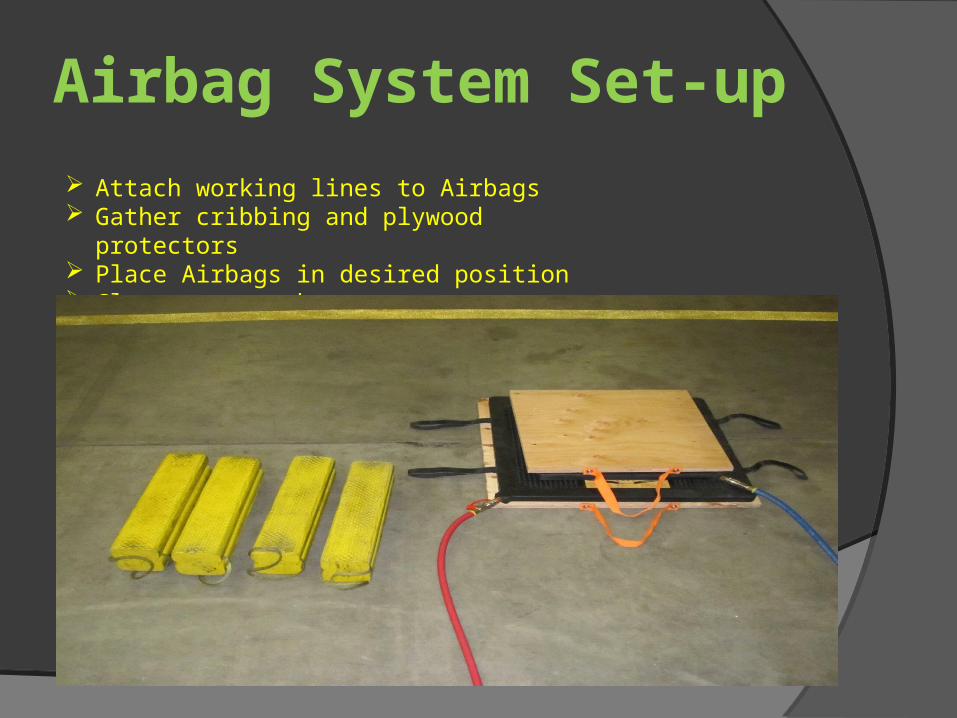
Airbag System Set-up
Attach working lines to Airbags Gather cribbing and plywood protectors Place Airbags in desired position Clear your work area
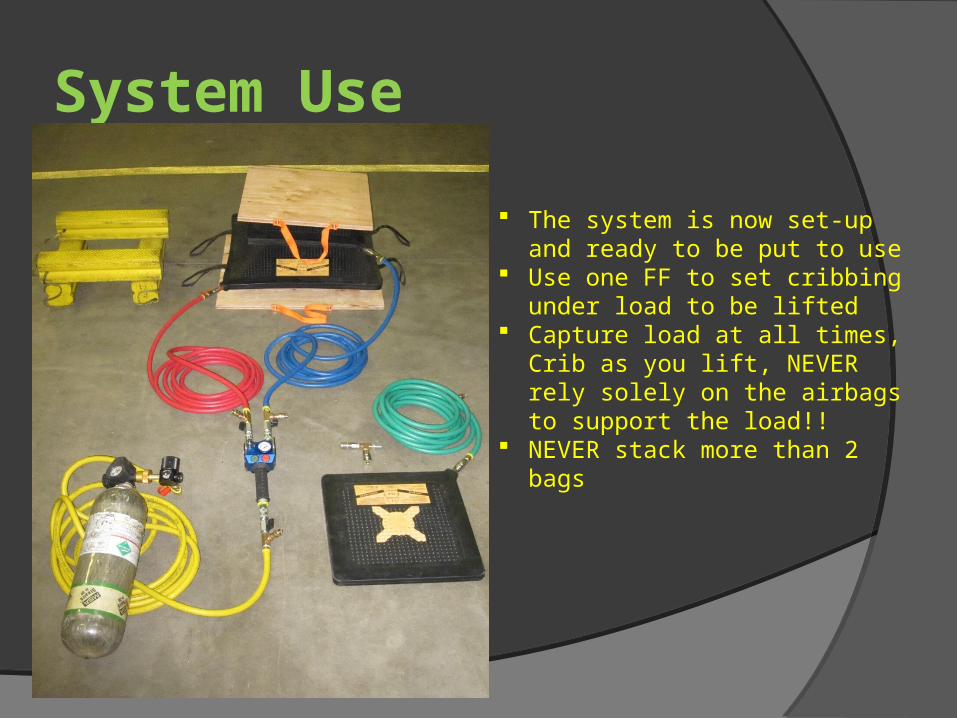
System Use
The system is now set-up and ready to be put to use
Use one FF to set cribbing under load to be lifted
Capture load at all times, Crib as you lift, NEVER rely solely on the airbags to support the load!!
NEVER stack more than 2 bags

System Use Lifting the load: Select the colored line that feeds the BOTTOM bag Turn the in-line valve to the ON position Press the + (plus) button to inflate Lift bag/ bags to the require height or 116psi max If utilizing 2 bags stagger lifting bottom bag and top
bag This creates more surface area contact, thus greater
stability
Lowering the Load
Ensure that the load is stable enough to be lowered
Lift slightly off the cribbing
Remove the first level of cribbing and continue
removing as the load is slowly lowered to the
ground
Use common sense when placing and removing
cribbing and airbags, Watch Out for Pinch Points!!

Lower the load
• Use the – (minus) button on the controller to lower the airbags
• Remember to open in-line valves if you have them closed
• Lower the top bag first- then the bottom bag

Returning the System to ‘ready’
Once the airbags are drained and no longer needed, close the SCBA
cylinder
Bleed remaining air from the system with the + or – buttons
Disconnect the lines, controller and regulator
Tightly coil airlines
Replace all equipment in the grey toolbox
Return airbags to the original position on Engine 71