SAS Enterprise Miner 12.1: Administration and...
74
SAS ® Enterprise Miner ™ 12.1: Administration and Configuration SAS ® Documentation
Transcript of SAS Enterprise Miner 12.1: Administration and...
SAS® Enterprise Miner™ 12.1: Administration and Configuration
SAS® Documentation

The correct bibliographic citation for this manual is as follows: SAS Institute Inc. 2012. SAS® Enterprise Miner™ 12.1: Administration and Configuration. Cary, NC: SAS Institute Inc.
SAS® Enterprise Miner™ 12.1: Administration and Configuration
Copyright © 2012, SAS Institute Inc., Cary, NC, USA
All rights reserved. Produced in the United States of America.
For a hardcopy book: No part of this publication may be reproduced, stored in a retrieval system, or transmitted, in any form or by any means, electronic, mechanical, photocopying, or otherwise, without the prior written permission of the publisher, SAS Institute Inc.
For a Web download or e-book:Your use of this publication shall be governed by the terms established by the vendor at the time you acquire this publication.
The scanning, uploading, and distribution of this book via the Internet or any other means without the permission of the publisher is illegal and punishable by law. Please purchase only authorized electronic editions and do not participate in or encourage electronic piracy of copyrighted materials. Your support of others' rights is appreciated.
U.S. Government Restricted Rights Notice: Use, duplication, or disclosure of this software and related documentation by the U.S. government is subject to the Agreement with SAS Institute and the restrictions set forth in FAR 52.227–19 Commercial Computer Software-Restricted Rights (June 1987).
SAS Institute Inc., SAS Campus Drive, Cary, North Carolina 27513.
1st electronic book, August 2012
SAS® Publishing provides a complete selection of books and electronic products to help customers use SAS software to its fullest potential. For more information about our e-books, e-learning products, CDs, and hard-copy books, visit the SAS Publishing Web site at support.sas.com/publishing or call 1-800-727-3228.
SAS® and all other SAS Institute Inc. product or service names are registered trademarks or trademarks of SAS Institute Inc. in the USA and other countries. ® indicates USA registration.
Other brand and product names are registered trademarks or trademarks of their respective companies.

ContentsChapter 1 • SAS Enterprise Miner Administration and Configuration Guide Overview . . . . . . . 1
SAS Enterprise Miner . . . . . . . . . . . . . . . . . . . . . . . . . . . . . . . . . . . . . . . . . . . . . . . . . . . . 1Intended Audience . . . . . . . . . . . . . . . . . . . . . . . . . . . . . . . . . . . . . . . . . . . . . . . . . . . . . . 2Organization of This Document . . . . . . . . . . . . . . . . . . . . . . . . . . . . . . . . . . . . . . . . . . . . 2SAS Information Online . . . . . . . . . . . . . . . . . . . . . . . . . . . . . . . . . . . . . . . . . . . . . . . . . . 3Related SAS Software . . . . . . . . . . . . . . . . . . . . . . . . . . . . . . . . . . . . . . . . . . . . . . . . . . . 3
Chapter 2 • The SAS Enterprise Miner Architecture . . . . . . . . . . . . . . . . . . . . . . . . . . . . . . . . . . . 5Overview of the SAS Enterprise Miner Architecture . . . . . . . . . . . . . . . . . . . . . . . . . . . . 5SAS Enterprise Miner Components . . . . . . . . . . . . . . . . . . . . . . . . . . . . . . . . . . . . . . . . . 7SAS Enterprise Miner Deployment . . . . . . . . . . . . . . . . . . . . . . . . . . . . . . . . . . . . . . . . . 8
Chapter 3 • System Requirements . . . . . . . . . . . . . . . . . . . . . . . . . . . . . . . . . . . . . . . . . . . . . . . . 11System Requirements Overview . . . . . . . . . . . . . . . . . . . . . . . . . . . . . . . . . . . . . . . . . . . 11Supported Operating Systems . . . . . . . . . . . . . . . . . . . . . . . . . . . . . . . . . . . . . . . . . . . . . 12Software for SAS Enterprise Miner . . . . . . . . . . . . . . . . . . . . . . . . . . . . . . . . . . . . . . . . 13Data Access Requirements . . . . . . . . . . . . . . . . . . . . . . . . . . . . . . . . . . . . . . . . . . . . . . . 14System Setup and Performance . . . . . . . . . . . . . . . . . . . . . . . . . . . . . . . . . . . . . . . . . . . 14
Chapter 4 • Migrating to SAS Enterprise Miner 12.1 . . . . . . . . . . . . . . . . . . . . . . . . . . . . . . . . . . 15Migration Overview . . . . . . . . . . . . . . . . . . . . . . . . . . . . . . . . . . . . . . . . . . . . . . . . . . . . 15Project Migration Macros . . . . . . . . . . . . . . . . . . . . . . . . . . . . . . . . . . . . . . . . . . . . . . . . 15
Chapter 5 • SAS Enterprise Miner Server Installation and Configuration . . . . . . . . . . . . . . . . . 17Installation Overview . . . . . . . . . . . . . . . . . . . . . . . . . . . . . . . . . . . . . . . . . . . . . . . . . . . 17Pre-Installation Tasks . . . . . . . . . . . . . . . . . . . . . . . . . . . . . . . . . . . . . . . . . . . . . . . . . . . 19Install and Configure SAS Enterprise Miner . . . . . . . . . . . . . . . . . . . . . . . . . . . . . . . . . 23Deployment Errors and Warnings . . . . . . . . . . . . . . . . . . . . . . . . . . . . . . . . . . . . . . . . . 33Verify the Installation . . . . . . . . . . . . . . . . . . . . . . . . . . . . . . . . . . . . . . . . . . . . . . . . . . . 34
Chapter 6 • SAS Enterprise Miner Workstation Installation and Configuration . . . . . . . . . . . . 43SAS Enterprise Miner Workstation Deployment . . . . . . . . . . . . . . . . . . . . . . . . . . . . . . 43
Chapter 7 • Post-Installation Information . . . . . . . . . . . . . . . . . . . . . . . . . . . . . . . . . . . . . . . . . . . 45About Post-Installation Tasks . . . . . . . . . . . . . . . . . . . . . . . . . . . . . . . . . . . . . . . . . . . . . 45Configuration Guidelines and Details . . . . . . . . . . . . . . . . . . . . . . . . . . . . . . . . . . . . . . 45Check for Current Hot Fixes . . . . . . . . . . . . . . . . . . . . . . . . . . . . . . . . . . . . . . . . . . . . . . 46Configure SAS Enterprise Miner in SAS Management Console . . . . . . . . . . . . . . . . . . 46Define Additional SAS Enterprise Miner Users . . . . . . . . . . . . . . . . . . . . . . . . . . . . . . . 50Create a SAS Environment File . . . . . . . . . . . . . . . . . . . . . . . . . . . . . . . . . . . . . . . . . . . 54
Chapter 8 • Administrative Tasks and Information . . . . . . . . . . . . . . . . . . . . . . . . . . . . . . . . . . . 55SAS Enterprise Miner Overview for Administrators . . . . . . . . . . . . . . . . . . . . . . . . . . . 55Publishing Extension Tools . . . . . . . . . . . . . . . . . . . . . . . . . . . . . . . . . . . . . . . . . . . . . . 56Troubleshooting . . . . . . . . . . . . . . . . . . . . . . . . . . . . . . . . . . . . . . . . . . . . . . . . . . . . . . . 57Adding a New Workspace Server for SAS Enterprise Miner . . . . . . . . . . . . . . . . . . . . 60SAS Enterprise Miner Model Package Registration . . . . . . . . . . . . . . . . . . . . . . . . . . . 64SAS Enterprise Miner Start Code . . . . . . . . . . . . . . . . . . . . . . . . . . . . . . . . . . . . . . . . . . 66Defining Migrated Projects in SAS Enterprise Miner . . . . . . . . . . . . . . . . . . . . . . . . . . 67Configuring the Locale for Multi-Language Environments . . . . . . . . . . . . . . . . . . . . . . 70

iv Contents

Chapter 1
SAS Enterprise Miner Administration and Configuration Guide Overview
SAS Enterprise Miner . . . . . . . . . . . . . . . . . . . . . . . . . . . . . . . . . . . . . . . . . . . . . . . . . . 1Overview of SAS Enterprise Miner . . . . . . . . . . . . . . . . . . . . . . . . . . . . . . . . . . . . . . 1Key Benefits of SAS Enterprise Miner . . . . . . . . . . . . . . . . . . . . . . . . . . . . . . . . . . . 1
Intended Audience . . . . . . . . . . . . . . . . . . . . . . . . . . . . . . . . . . . . . . . . . . . . . . . . . . . . . 2
Organization of This Document . . . . . . . . . . . . . . . . . . . . . . . . . . . . . . . . . . . . . . . . . . 2
SAS Information Online . . . . . . . . . . . . . . . . . . . . . . . . . . . . . . . . . . . . . . . . . . . . . . . . . 3Current Documentation . . . . . . . . . . . . . . . . . . . . . . . . . . . . . . . . . . . . . . . . . . . . . . . 3SAS Notes . . . . . . . . . . . . . . . . . . . . . . . . . . . . . . . . . . . . . . . . . . . . . . . . . . . . . . . . . . 3SAS Technical Support Services . . . . . . . . . . . . . . . . . . . . . . . . . . . . . . . . . . . . . . . . 3Product Help . . . . . . . . . . . . . . . . . . . . . . . . . . . . . . . . . . . . . . . . . . . . . . . . . . . . . . . . 3
Related SAS Software . . . . . . . . . . . . . . . . . . . . . . . . . . . . . . . . . . . . . . . . . . . . . . . . . . . 3Base SAS . . . . . . . . . . . . . . . . . . . . . . . . . . . . . . . . . . . . . . . . . . . . . . . . . . . . . . . . . . 3SAS Credit Scoring for SAS Enterprise Miner . . . . . . . . . . . . . . . . . . . . . . . . . . . . . 3SAS Text Miner . . . . . . . . . . . . . . . . . . . . . . . . . . . . . . . . . . . . . . . . . . . . . . . . . . . . . 4SAS Enterprise Guide . . . . . . . . . . . . . . . . . . . . . . . . . . . . . . . . . . . . . . . . . . . . . . . . . 4SAS/STAT . . . . . . . . . . . . . . . . . . . . . . . . . . . . . . . . . . . . . . . . . . . . . . . . . . . . . . . . . 4SAS/GRAPH . . . . . . . . . . . . . . . . . . . . . . . . . . . . . . . . . . . . . . . . . . . . . . . . . . . . . . . 4
SAS Enterprise Miner
Overview of SAS Enterprise MinerSAS Enterprise Miner is a flexible and powerful data mining package designed to streamline the data mining process. SAS Enterprise Miner creates highly accurate predictive and descriptive models based on vast amounts of data that is gathered by an organization. It offers a rich, easy-to-use set of integrated capabilities to create and share insights that are used to drive decisions faster and more accurately.
Key Benefits of SAS Enterprise MinerThe following are just a few of the benefits that are provided by SAS Enterprise Miner:
• improved model performance and accuracy through superior analytic data preparation techniques and innovative algorithms
• an easy-to-use interface that helps both business analysts and statisticians build better models in less time
1

• the ability to derive and share insights that improve the quality and precision of the resulting decisions
• a broad set of tools to support an efficient, integrated data mining process
Intended AudienceThis administrator’s guide describes the recommended system architecture and requirements, installation and post-installation tasks, ongoing system administration, and troubleshooting. The SAS Enterprise Miner Administrator’s Guide is for administrators who need to install, configure, and optimize SAS Enterprise Miner. No programming experience, SAS or otherwise, is necessary to administer SAS Enterprise Miner.
The administration duties are divided into two roles, a system administrator and a SAS Enterprise Miner administrator. These need not be the same person.
• The system administrator must be familiar with the hardware, operating system, file system, installed applications, maintenance, and operation of the computer system that will house SAS Enterprise Miner.
• The SAS Enterprise Miner administrator must be familiar with the installation, configuration, and maintenance of all parts of the SAS system, including the SAS Metadata Server. One such duty is the maintenance of the metadata server, which regulates traffic between servers, users, and other global resources required by SAS Enterprise Miner.
Organization of This DocumentThis administrator’s guide is organized in the following manner:
• Overview — introduces you to your SAS solution, explains how the guide is organized and presented, and provides additional resources for you to explore, should you need more information about your SAS solution software. It also provides a quick overview of the SAS Intelligence Platform and how your SAS solution integrates into the SAS Intelligence Platform.
• System Requirements — describes the environment, hardware, software, data, and network requirements for implementing your SAS solution.
• Installation and Configuration — provides an overview of the planned installations and software index installations. It also provides post installation tasks and a process for verifying a successful installation and configuration of your SAS solution.
• Administration — discusses the necessary system administration tasks, such as administration security that your SAS solution requires.
• Glossary — contains terminology related to SAS Enterprise Miner.
2 Chapter 1 • SAS Enterprise Miner Administration and Configuration Guide Overview

SAS Information Online
Current DocumentationFor the most current installation and configuration information for SAS Enterprise Miner, see http://support.sas.com/documentation/onlinedoc.
SAS NotesFor additional information and support fixes, you should check the SAS Notes that are available on the SAS Technical Support Web site. You can search for available SAS Notes for SAS Enterprise Miner at http://support.sas.com/software/products/miner/index.html.
SAS Technical Support ServicesThe SAS Technical Support staff is available to respond to problems and answer technical questions.
Product HelpFor in-depth information about how to operate your software and its features, select the Help menu item from within SAS Enterprise Miner.
Related SAS Software
Base SASBase SAS delivers a highly flexible and extensible fourth-generation programming language that is specially designed for data access, transformation, and reporting. It includes a rich library of encapsulated programming procedures for data manipulation, information storage and retrieval, descriptive statistics, and report writing.
SAS Credit Scoring for SAS Enterprise MinerSAS Credit Scoring for SAS Enterprise Miner supports the process of building credit scoring models inside the SAS Enterprise Miner environment. The end result is a credit scorecard that assigns points based on customer attributes. The total number of points is used to determine the credit policy that a lender will offer. SAS Credit Scoring for SAS Enterprise Miner includes new add-in nodes: Interactive Grouping, Scorecard, Reject Inference, and Credit Exchange. SAS Credit Scoring for SAS Enterprise Miner is also a component of the larger BIS Credit Risk Management solution, including SAS Risk Dimensions, which can read credit scorecard models as input to the risk optimization models.
The SAS Credit Scoring for SAS Enterprise Miner solution is not included with the base version of SAS Enterprise Miner. If your site has not licensed SAS Credit Scoring for
Related SAS Software 3

SAS Enterprise Miner, the credit scoring node tools do not appear in your SAS Enterprise Miner software.
SAS Text MinerSAS Text Miner provides tools that enable you to extract information from a collection of text documents and uncover the themes and concepts that are revealed therein. In addition, because you can embed SAS Text Miner nodes in a SAS Enterprise Miner process flow diagram, you can combine quantitative variables with unstructured text in the mining process and thereby incorporate text mining with other traditional data mining techniques.
SAS Text Miner is not included with the base version of SAS Enterprise Miner. If your site has not licensed SAS Text Miner, then the text mining nodes do not appear in your SAS Enterprise Miner software.
SAS Enterprise GuideSAS Enterprise Guide is an easy-to-use, project-oriented Windows application that provides access to the analytic power of SAS. Business analysts, statisticians, and SAS programmers can gather and manage the data that they need, and perform meaningful analyses quickly. The point-and-click interface guides users through the analytical process and makes it easy to create reports, graphs and charts, and to deliver the results throughout the organization.
SAS/STATSAS/STAT software provides organizations with access to the most up-to-date statistical techniques including extensive capabilities for both specialized and enterprise-wide analytic needs.
It is designed to handle vast amounts of disparate data from a variety of sources, all with the aim of providing the most reliable analysis available. In delivering these capabilities, SAS/STAT provides extensive statistical capabilities for both specialized and enterprise-wide analytical needs, helping you analyze data and make informed decisions for research, engineering, manufacturing, medical, government, academic, and business applications.
SAS/GRAPHSAS/GRAPH provides high-impact visuals to all levels of your organization, giving customers a quick and easy understanding of information and empowering them to make informed, timely decisions. SAS/GRAPH software extends the power of data management, business intelligence, and analytic tools, enabling customers turn data into eye-catching, full-color graphs and charts in seconds.
4 Chapter 1 • SAS Enterprise Miner Administration and Configuration Guide Overview

Chapter 2
The SAS Enterprise Miner Architecture
Overview of the SAS Enterprise Miner Architecture . . . . . . . . . . . . . . . . . . . . . . . . . 5Architecture . . . . . . . . . . . . . . . . . . . . . . . . . . . . . . . . . . . . . . . . . . . . . . . . . . . . . . . . 5The SAS Intelligence Platform: SAS Metadata Server . . . . . . . . . . . . . . . . . . . . . . . 6The SAS Intelligence Platform: SAS Workspace Server . . . . . . . . . . . . . . . . . . . . . . 6The SAS Intelligence Platform: The SAS Object Spawner . . . . . . . . . . . . . . . . . . . . 6SAS Web Infrastructure Platform . . . . . . . . . . . . . . . . . . . . . . . . . . . . . . . . . . . . . . . . 6SAS Framework Data Server . . . . . . . . . . . . . . . . . . . . . . . . . . . . . . . . . . . . . . . . . . . 7
SAS Enterprise Miner Components . . . . . . . . . . . . . . . . . . . . . . . . . . . . . . . . . . . . . . . 7SAS Enterprise Miner Server . . . . . . . . . . . . . . . . . . . . . . . . . . . . . . . . . . . . . . . . . . . 7SAS Enterprise Miner Middle Tier . . . . . . . . . . . . . . . . . . . . . . . . . . . . . . . . . . . . . . . 7SAS Enterprise Miner Client . . . . . . . . . . . . . . . . . . . . . . . . . . . . . . . . . . . . . . . . . . . 7SAS Enterprise Miner Workstation . . . . . . . . . . . . . . . . . . . . . . . . . . . . . . . . . . . . . . 7SAS Enterprise Miner Plug-in for SAS Management Console . . . . . . . . . . . . . . . . . 7
SAS Enterprise Miner Deployment . . . . . . . . . . . . . . . . . . . . . . . . . . . . . . . . . . . . . . . 8Overview . . . . . . . . . . . . . . . . . . . . . . . . . . . . . . . . . . . . . . . . . . . . . . . . . . . . . . . . . . . 8SAS Enterprise Miner Client/Server Deployment . . . . . . . . . . . . . . . . . . . . . . . . . . . 8SAS Enterprise Miner Client-Only Deployment . . . . . . . . . . . . . . . . . . . . . . . . . . . . 8SAS Enterprise Miner Workstation Deployment . . . . . . . . . . . . . . . . . . . . . . . . . . . . 9
Overview of the SAS Enterprise Miner Architecture
ArchitectureSAS Enterprise Miner is integrated with the SAS Intelligence Platform. The SAS Intelligence Platform architecture is designed to efficiently access large amounts of data, while simultaneously providing timely intelligence to a large number of users. The platform uses an n-tier architecture that enables you to distribute functionality across computer resources, so that each type of work is performed by the resources that are best suited to the job. For more information about the SAS Intelligence Platform, see SAS 9.3 Intelligence Platform: Overview.
5

The following is an overview of the SAS Intelligence Platform.
The SAS Intelligence Platform: SAS Metadata ServerThe SAS Metadata Server controls access to a central repository of metadata that is shared by all of the SAS applications in the deployment. The SAS Metadata Server enables centralized control so that all users access consistent and accurate data. SAS Enterprise Miner stores metadata concerning users, data mining projects, and other resources in the repository. Administrators use SAS Management Console to administer the SAS Metadata Server, including SAS server configurations. SAS Enterprise Miner can also use the SAS Metadata Server to obtain metadata about SAS libraries, SAS Workspace Servers, and the SAS Object Spawner and to authenticate users.
The SAS Intelligence Platform: SAS Workspace ServerThe SAS Workspace Server enables client applications to submit SAS code to a SAS session using an application programming interface (API). SAS Enterprise Miner generates the SAS code necessary to perform the processing and submits it to a workspace server. You can run as many instances of workspace servers as are needed to support your workload.
The SAS Intelligence Platform: The SAS Object SpawnerThe SAS Object Spawner is the process that SAS Enterprise Miner uses to run the workspace server. It listens for requests for a server, authenticates the requesting client, and launches the server process as needed. The SAS Object Spawner connects to the SAS Metadata Server to obtain information about the servers that it manages.
SAS Web Infrastructure PlatformThe SAS Web Infrastructure Platform (or WIP) provides the primary middle-tier components for the SAS platform. It supports n-tier architectures built around HTTP-
6 Chapter 2 • The SAS Enterprise Miner Architecture
based technologies. The middle-tier components in WIP not only provide for common infrastructure, but also support distributed deployments and configurations that support enterprise requirements.
SAS Framework Data ServerThe SAS Framework Data Server is a database server that is used by the SAS Web Infrastructure Platform as the default location for middle-tier data. This data includes alerts, comments, and workflows.
SAS Enterprise Miner Components
SAS Enterprise Miner ServerThe SAS Enterprise Miner Server offers an extensive and extensible set of tools. These tools streamline the data mining process and create highly accurate predictive and descriptive models based on the analysis of vast amounts of data from across an enterprise. SAS Enterprise Miner enables you to develop data mining flows that consist of data exploration, data transformations, and modeling tools to predict or classify business outcomes. It is accessible through both the SAS Enterprise Miner client and SAS Enterprise Miner batch processing.
SAS Enterprise Miner Middle TierThe middle tier of SAS Enterprise Miner provides an environment through which the SAS Enterprise Miner client can send and receive data through standard Web protocols (that is, HTTP or HTTPS). This data is routed via the SAS Web Infrastructure Platform to and from servers on the SAS server tier. On the SAS server tier, the data is processed, queried, and analyzed.
SAS Enterprise Miner ClientThe SAS Enterprise Miner client is a powerful and intuitive user interface that streamlines access to the data mining tools available in the SAS Enterprise Miner server.
SAS Enterprise Miner WorkstationThe SAS Enterprise Miner Workstation is a stand-alone component that is a combination of parts of the server, middle tier, and client components that provides much of the functionality of the other components, but requires no configuration. It is applicable only to a single-user Windows system.
SAS Enterprise Miner Plug-in for SAS Management ConsoleThe SAS Enterprise Miner Plug-in for SAS Management Console enables you to browse and customize some of the metadata objects that SAS Enterprise Miner uses. The SAS Enterprise Miner Plug-in provides access to attributes of the Logical Workspace server and server-specific project entries. The SAS Enterprise Miner Plug-in also provides access to the list of mining result packages that have been registered via SAS Enterprise Miner.
SAS Enterprise Miner Components 7

SAS Enterprise Miner Deployment
OverviewThere are two basic types of deployment for SAS Enterprise Miner: workstation and client/server.
Workstation deployments are available only for Microsoft Windows systems and are strictly single-user configurations. This deployment does not require the deployment plan or a configuration step of the SAS Deployment Wizard. The workstation mode configuration does not require the SAS Metadata Server or the SAS Application Server. This configuration is intended for SAS Enterprise Miner Desktop, SAS Enterprise Miner Classroom, and SAS Enterprise Miner Workstation licenses.
In client/server mode, SAS Foundation 9.3 and SAS Enterprise Miner 12.1 server can be installed on a local or remote system for multi-user access. The SAS Web Infrastructure Platform is installed for the SAS Enterprise Miner 12.1 middle tier. In previous releases, the middle tier used the SAS Analytics Platform. In this release, that support is provided by the SAS Web Infrastructure Platform and one of the supported third-party application servers. The SAS Enterprise Miner middle tier can be installed either on either a local or remote machine, but it requires a 64-bit system. The SAS Enterprise Miner 12.1 client can be installed on a Microsoft Windows system, or it can be started through Java Web Start by connecting through your Internet browser to the SAS Enterprise Miner 12.1 middle tier.
SAS Enterprise Miner Client/Server DeploymentThis deployment serves the needs of a multi-user server, and a single user requiring a full SAS Intelligence Platform environment.
The client/server deployment requires the following:
• the Java Development Kit (JDK)
• a Java Web application server such as JBOSS, WebSphere, or WebLogic
• SAS Web Infrastructure Platform, and its requirements
This includes, but is not limited to, the following:
• SAS Metadata Server
• SAS Object Spawner
• SAS Framework Data Server
• SAS Enterprise Miner, which includes the SAS Enterprise Miner server, SAS Enterprise Miner middle tier, and SAS Enterprise Miner client
The server deployment does not support the SAS Enterprise Minter 4.3 client, unless SAS is installed on a Windows platform.
SAS Enterprise Miner Client-Only DeploymentThis deployment serves the needs of an end user who needs to connect to a remote server, but chooses not to use Java Web Start.
8 Chapter 2 • The SAS Enterprise Miner Architecture

The client-only deployment requires the following:
• the Java Development Kit (JDK)
• SAS Enterprise Miner client
It does not require the following:
• SAS Deployment Wizard configuration
• local metadata services
SAS Enterprise Miner Workstation DeploymentThis deployment serves the needs of the following users:
• those that do not require the full SAS Intelligence Platform environment
• full SAS Enterprise Miner client users
• SAS Enterprise Miner Desktop users
• SAS Enterprise Miner Classroom users
The Workstation deployment requires the following:
• the Java Development Kit (JDK)
• SAS Enterprise Miner Workstation, Desktop, or Classroom, each of which includes the SAS Enterprise Miner client
The workstation configuration does not require installation or configuration for a Java Web application server, SAS Object Spawner, SAS Framework Data Server, or SAS Metadata Server. However, the workstation configuration does not support SAS grid processing or operating systems other than Windows.
The workstation configuration supports the following:
• connections to a SAS Metadata Server for model registration, browsing, and deletion
• running the SAS Enterprise Miner 4.3 client through the SAS DMS session
• Windows 7, both 32- and 64-bit versions; Windows Vista; and Windows XP
SAS Enterprise Miner Deployment 9

10 Chapter 2 • The SAS Enterprise Miner Architecture

Chapter 3
System Requirements
System Requirements Overview . . . . . . . . . . . . . . . . . . . . . . . . . . . . . . . . . . . . . . . . . 11Overview . . . . . . . . . . . . . . . . . . . . . . . . . . . . . . . . . . . . . . . . . . . . . . . . . . . . . . . . . . 11Hard Disk Space . . . . . . . . . . . . . . . . . . . . . . . . . . . . . . . . . . . . . . . . . . . . . . . . . . . . 11RAM . . . . . . . . . . . . . . . . . . . . . . . . . . . . . . . . . . . . . . . . . . . . . . . . . . . . . . . . . . . . . 12CPU . . . . . . . . . . . . . . . . . . . . . . . . . . . . . . . . . . . . . . . . . . . . . . . . . . . . . . . . . . . . . . 12
Supported Operating Systems . . . . . . . . . . . . . . . . . . . . . . . . . . . . . . . . . . . . . . . . . . . 12
Software for SAS Enterprise Miner . . . . . . . . . . . . . . . . . . . . . . . . . . . . . . . . . . . . . . 13Third-Party Software Requirements . . . . . . . . . . . . . . . . . . . . . . . . . . . . . . . . . . . . . 13Included SAS Software . . . . . . . . . . . . . . . . . . . . . . . . . . . . . . . . . . . . . . . . . . . . . . . 13Optional SAS Software . . . . . . . . . . . . . . . . . . . . . . . . . . . . . . . . . . . . . . . . . . . . . . . 13
Data Access Requirements . . . . . . . . . . . . . . . . . . . . . . . . . . . . . . . . . . . . . . . . . . . . . . 14
System Setup and Performance . . . . . . . . . . . . . . . . . . . . . . . . . . . . . . . . . . . . . . . . . . 14
System Requirements Overview
OverviewThe following system requirements are generalized estimates for SAS Enterprise Miner. For a more accurate description of the requirements for your specific system and software use the documentation found at http://support.sas.com/resources/sysreq.
Hard Disk SpaceThe SAS Enterprise Miner server installation uses approximately 12 GB of hard disk space. The SAS Enterprise Miner client installation uses approximately 515 MB of hard disk space. The SAS Enterprise Miner Workstation installation uses approximately 12 GB of hard disk space.
Disk space requirements for data should be analyzed for both the client and server machines.
In addition to the amount of disk space needed to install SAS Enterprise Miner, you will need adequate disk space to store the following:
• the data to be mined. You must provide space for the source data, whether it is SAS data sets or RDBMS tables.
11

• the work data that is generated during SAS Enterprise Miner processing on the server. A general rule of thumb is for each project to allow for 4 to 7 times the amount of the data file being analyzed.
The SAS Enterprise Miner Sample, Data Partition, and Memory-Based Reasoning nodes create work files that are as large as the input data files during execution. If your data analyses use these nodes regularly, plan your disk space allocation accordingly.
You should create a detailed assessment of how you expect SAS to interact with your I/O subsystems. You can use this assessment to optimize your I/O throughput. Information about SAS I/O requirements is available at http://support.sas.com/rnd/papers/sgf07/sgf2007-iosubsystem.pdf and http://support.sas.com/resources/papers/proceedings10/FAQforStorageConfiguration.pdf.
RAMThe SAS Enterprise Miner server and workstation usually require a minimum of 2 GB of available RAM, plus an additional 2 GB or more for each concurrent client. The minimum recommended configuration for a single user is 4 GB. The required Java Web application server such as JBOSS, WebSphere, or WebLogic will also require memory, and can total 2 GB or more. Check your provider’s requirements for specific recommendations.
The SAS Enterprise Miner client requires a minimum of 2 GB of available RAM.
CPUIn general, you should have one or more CPUs or processor cores available per user. More specifically, if you expect to take advantage of SAS Enterprise Miner’s parallel processing or multithreading capabilities, a minimum of one processor core is required per running node. System performance degrades precipitously when nodes compete for CPU resources. Beyond that, the number of CPUs or processor cores needed to optimize performance for SAS Enterprise Miner on your system is difficult to specify. Factors such as the size of your data, I/O subsystems, the number of concurrent users, the CPU make and model, and your network infrastructure can affect the apparent performance of any system.
Supported Operating SystemsThe SAS Enterprise Miner server, middle tier, and workstation components are supported on the following operating systems:
• 32- and 64-bit Windows systems, including Windows XP, Windows Vista, Windows 7, Windows Server 2003, and Windows Server 2008
• AIX (power)
• HP-UX for x64
• HP-UX IPF
• Linux for x86 and x64
• Solaris (SPARC)
• Solaris for x64
12 Chapter 3 • System Requirements

The SAS Middle-Tier is supported on all of the 64-bit systems listed above except for the HP-UX for x64.
The SAS Enterprise Miner client is an application based on Java that can be installed only on Windows workstations, 32- or 64-bit. However, the SAS Enterprise Miner client is accessible via Java Web Start on any of the supported operating systems listed above.
Software for SAS Enterprise Miner
Third-Party Software RequirementsIn addition to the licensed SAS products required to support SAS Enterprise Miner, some third-party software is required. The SAS Enterprise Miner middle tier requires both the Java Runtime Environment (JRE) and a Web application server, such as JBoss Server, IBM WebSphere Application Server, or Oracle WebLogic. The SAS Enterprise Miner client and the SAS Enterprise Miner Workstation require only the Java Runtime Environment (JRE). For information about third-party software and to access downloads of the software, see http://support.sas.com/resources/thirdpartysupport/v93/index.html.
Included SAS SoftwareThe software installed with the SAS Enterprise Miner server includes licenses for the following powerful SAS products that can be useful in your organization for data analysis, sharing, scoring, and reporting:
• Base SAS
• SAS/CONNECT
• SAS/GRAPH
• SAS Integration Technologies
• SAS/STAT
• SAS Enterprise Guide
Optional SAS SoftwareA large number of SAS products and components are not part of the basic software bundle can be used in conjunction with SAS Enterprise Miner.
Some of the more popular optional products include the following:
• Credit Scoring for SAS Enterprise Miner
• SAS/ACCESS product for your database
• SAS Analytics Accelerator for Teradata
• SAS Accelerator Publishing Agent for Aster nCluster, DB2, Greenplum, Netezza, or Teradata
• SAS Model Manager
• SAS Data Integration Studio
• SAS BI Server
Software for SAS Enterprise Miner 13

Data Access RequirementsMost organizations have data strewn across a large number of heterogeneous data sources. SAS Enterprise Miner leverages the extremely powerful data access, manipulation, and management capabilities of the SAS 9.3 Intelligence Platform. The SAS 9.3 Intelligence Platform provides data access that is unmatched in the number of sources and the ease with which data can be accessed and assembled in one environment.
Integrated network connections can be made between SAS Enterprise Miner Server, SAS Enterprise Data Integration Server, and SAS and third-party databases with SAS/ACCESS for your database. For more information about SAS/ACCESS, see http://www.sas.com/software/data-management/enterprise-data-access/index.html.
System Setup and PerformanceFor information about preparing your system and improving system performance, see the SAS 9.3 Intelligence Platform: System Administration Guide. Pay particular attention to the section about best practices for configuring the middle tier in the Web Application Administration Guide of the SAS Intelligence Platform documentation at http://support.sas.com/documentation.
14 Chapter 3 • System Requirements

Chapter 4
Migrating to SAS Enterprise Miner 12.1
Migration Overview . . . . . . . . . . . . . . . . . . . . . . . . . . . . . . . . . . . . . . . . . . . . . . . . . . . 15
Project Migration Macros . . . . . . . . . . . . . . . . . . . . . . . . . . . . . . . . . . . . . . . . . . . . . . 15
Migration OverviewSAS Enterprise Miner projects are composed primarily of physical files and metadata about the projects and data sources. If you are upgrading your current system, you need to migrate only the metadata from your previous system to your new system. If you are changing operating systems, you also need to migrate the physical files for your projects and data sources.
Migrating to a new server, a new operating system, or a new SAS topology requires more care and planning. You should review your goals for upgrading and develop an upgrade plan that best fits your enterprise environment. The SAS 9.3 Intelligence Platform: Migration Guide explains the options available, defines the steps required both before and after installation of your new software. For metadata migration, follow the SAS 9.3 Intelligence Platform: Migration Guide.
For more information about system migration, see the SAS Technical Support’s focus area for Migration at http://support.sas.com/rnd/migration.
Using the SAS Migration Utility with the SAS Deployment Wizard to migrate to SAS 9.3 has the advantage of being the most automated process available.
If circumstances prevent you from migrating your old system’s metadata during the installation of your new SAS system, you can manually define new metadata for migrated projects. See Defining Migrated Projects in SAS Enterprise Miner on page 67for more information.
Project Migration MacrosThe physical files and folders that make up a SAS Enterprise Miner project can be numerous and complicated in structure. When moving the project files, the hierarchy of folders and files needs to be maintained. If you are migrating to an operating system with a different word size (32-bit to 64-bit), a different locale or encoding, or different byte order, you need to convert the SAS Enterprise Miner project files to a format compatible with your new operating system.
15

On the previous system, the EM_MigrateProject macro can be used to prepare SAS Enterprise Miner project directories and files for movement between different operating environments. For example, moving SAS Enterprise Miner projects to or from 32-bit and 64-bit systems (such as moving from Windows Server 2003 32-bit environment to a Windows Server 2008 64-bit environment) requires the EM_MigrateProject macro. If you are changing to a system with a different locale and encoding from your previous system, you need the EM_MigrateProject macro. If you are changing from one operating system to a different SAS Enterprise Miner supported operating systems, such as moving HP-UX files to a Red Hat Linux operating environment, the EM_MigrateProject macro is needed.
On the new system, the EM_MigrateProject macro restores prepared projects to a usable form after the directories and files are moved to the new system. The EM_MigrateProject macro and its user’s guide are available from the SAS Technical Support’s Download site, http://support.sas.com/demosdownloads/sysdep_t1.jsp?packageID=000726.
Information about migrating your other SAS files to a new system is available in the SAS System Help under Strategies for Moving and Accessing SAS Files.
16 Chapter 4 • Migrating to SAS Enterprise Miner 12.1

Chapter 5
SAS Enterprise Miner Server Installation and Configuration
Installation Overview . . . . . . . . . . . . . . . . . . . . . . . . . . . . . . . . . . . . . . . . . . . . . . . . . . 17Introduction . . . . . . . . . . . . . . . . . . . . . . . . . . . . . . . . . . . . . . . . . . . . . . . . . . . . . . . . 17Deployment Outline . . . . . . . . . . . . . . . . . . . . . . . . . . . . . . . . . . . . . . . . . . . . . . . . . 18SAS Intelligence Platform Documentation . . . . . . . . . . . . . . . . . . . . . . . . . . . . . . . 18Default File Locations . . . . . . . . . . . . . . . . . . . . . . . . . . . . . . . . . . . . . . . . . . . . . . . 19
Pre-Installation Tasks . . . . . . . . . . . . . . . . . . . . . . . . . . . . . . . . . . . . . . . . . . . . . . . . . 19Overview . . . . . . . . . . . . . . . . . . . . . . . . . . . . . . . . . . . . . . . . . . . . . . . . . . . . . . . . . . 19Deployment Plan . . . . . . . . . . . . . . . . . . . . . . . . . . . . . . . . . . . . . . . . . . . . . . . . . . . 20Create a SAS Software Depot . . . . . . . . . . . . . . . . . . . . . . . . . . . . . . . . . . . . . . . . . . 20Additional Documentation . . . . . . . . . . . . . . . . . . . . . . . . . . . . . . . . . . . . . . . . . . . . 20System Preparations . . . . . . . . . . . . . . . . . . . . . . . . . . . . . . . . . . . . . . . . . . . . . . . . . 21Designate Ports . . . . . . . . . . . . . . . . . . . . . . . . . . . . . . . . . . . . . . . . . . . . . . . . . . . . . 21The SAS Environment File . . . . . . . . . . . . . . . . . . . . . . . . . . . . . . . . . . . . . . . . . . . . 21Third-Party Software Required for SAS Enterprise Miner Server . . . . . . . . . . . . . . 22SAS Text Miner and the SAS Document Conversion Service . . . . . . . . . . . . . . . . . 22
Install and Configure SAS Enterprise Miner . . . . . . . . . . . . . . . . . . . . . . . . . . . . . . 23Overview . . . . . . . . . . . . . . . . . . . . . . . . . . . . . . . . . . . . . . . . . . . . . . . . . . . . . . . . . . 23SAS Enterprise Miner Server Multiple Machine Deployment . . . . . . . . . . . . . . . . . 23
Deployment Errors and Warnings . . . . . . . . . . . . . . . . . . . . . . . . . . . . . . . . . . . . . . . 33Error Status . . . . . . . . . . . . . . . . . . . . . . . . . . . . . . . . . . . . . . . . . . . . . . . . . . . . . . . . 33Warning Status . . . . . . . . . . . . . . . . . . . . . . . . . . . . . . . . . . . . . . . . . . . . . . . . . . . . . 34
Verify the Installation . . . . . . . . . . . . . . . . . . . . . . . . . . . . . . . . . . . . . . . . . . . . . . . . . . 34Overview . . . . . . . . . . . . . . . . . . . . . . . . . . . . . . . . . . . . . . . . . . . . . . . . . . . . . . . . . . 34Starting SAS Enterprise Miner . . . . . . . . . . . . . . . . . . . . . . . . . . . . . . . . . . . . . . . . . 34Run SAS Enterprise Miner Client 12.1 . . . . . . . . . . . . . . . . . . . . . . . . . . . . . . . . . . 35
Installation Overview
IntroductionThere are two basic modes of operation in SAS Enterprise Miner: the SAS Enterprise Miner server and the SAS Enterprise Miner workstation. For large enterprises with multiple users, SAS Enterprise Miner server provides the scalability and connectivity needed. For situations where a server-based installation is not required, the SAS Enterprise Miner workstation installation supports a single-user, single-machine installation.
17

In server mode, SAS Intelligence Platform 9.3 and the SAS Enterprise Miner 12.1 server can be installed on a local or remote system for multi-user access. The SAS Web Infrastructure Platform is installed as a mid-tier server. The SAS Enterprise Miner 12.1 client can be installed on a Microsoft Windows system, or can be started through Java Web Start by connecting your Internet browser to the SAS middle tier.
In workstation mode, SAS Intelligence Platform 9.3 and SAS Enterprise Miner 12.1 are deployed on a Microsoft Windows system in a single-user configuration. This configuration is indicated for SAS Enterprise Miner Desktop, SAS Enterprise Miner Classroom, and SAS Enterprise Miner workstation licenses. This deployment does not require a plan file, a Web application server, or the configuration step required in a server installation. Customers with workstation, Desktop, or Classroom licenses use the non-planned installation by default. Customers with a server license who want to take advantage of the workstation installation can install SAS Foundation and related products and will then be on the same path.
Deployment OutlineTo install and deploy the SAS Enterprise Miner server, you must perform the following tasks:
1. Work with your SAS representative to develop a plan and designate the host machines for your deployment of SAS Enterprise Miner.
2. If you are upgrading from a previous release, read the Upgrade and Migration Information in the preceding chapter.
3. Read the SAS Intelligence Platform documentation, and complete the pre-installation tasks.
4. Complete the pre-installation tasks for SAS Enterprise Miner.
5. Install SAS Intelligence Platform and SAS Enterprise Miner on each host machine as outlined in your plan.xml file that you developed with your SAS representative.
6. Complete the post-installation tasks for SAS Enterprise Miner.
SAS Intelligence Platform DocumentationBecause SAS Enterprise Miner is integrated with the SAS Intelligence Platform, it is recommended that you read the SAS Intelligence Platform documentation before you install SAS Enterprise Miner. This documentation is located at http://support.sas.com/documentation. The supporting documentation provides pre-installation tasks and instructions to guide you through a typical installation of the SAS Intelligence Platform. Referenced in this document are the following:
• SAS Deployment Wizard User’s Guide — http://support.sas.com/documentation/installcenter/en/ikdeploywizug/62130/PDF/default/user.pdf
• SAS 9.3 Intelligence Platform: Migration Guide
• Third-Party Software for SAS 9.3
• SAS 9.3 Intelligence Platform: Installation and Configuration Guide
• SAS® 9.3 Intelligence Platform Security Administration Guide
18 Chapter 5 • SAS Enterprise Miner Server Installation and Configuration

Default File LocationsThe SAS Deployment Wizard installs and configures your SAS software. The application installation files are installed in a default location referred to as SAS_HOME. For example, on a Windows system,, SAS_HOME is C:\Program Files\SAS.
The configuration files are stored in a default location referred to as the <config-dir>. For example, on a Windows system, the <config-dir> is C:\SAS\Config\Lev<number>.
Note: You can deploy up to 10 configurations of the SAS products. The SAS Deployment Wizard specifies each configuration under a Lev<number> folder. For example, if you deploy a level-2 configuration, then the default configuration directory is C:\SAS\Config\Lev2.
The table below shows the default location of the installation and configuration files for SAS Enterprise Miner.
Locations Windows Systems UNIX Systems
SAS_HOME C:\Program Files\SASHome
/usr/local/SASHome
!SASROOT C:\Program Files\SASHome\SASFoundation\9.3
/usr/local/SASHome/SASFoundation/9.3
config-dir C:\SAS\Config\Lev1 /usr/local/config/Lev1
Pre-Installation Tasks
OverviewBefore you begin your installation of SAS Enterprise Miner, you must complete the following tasks:
1. Create the Deployment Plan files.
2. Create a SAS Software Depot.
3. Review additional documentation.
4. Prepare your computer systems.
5. Designate ports.
6. Define the SAS Environment File.
7. Install required third-party software.
8. Prepare for SAS Text Miner and the SAS Document Conversion Service.
Pre-Installation Tasks 19

Deployment PlanWhen you and your SAS representative initially plan the deployment SAS Enterprise Miner, your SAS representative will record your decisions about which software you will deploy and on which hardware that software will be installed. This information is used to generate a deployment plan file.
A deployment plan is an XML file that is used as input to the SAS Deployment Wizard. There are two types of deployment plans: standard and custom. A standard deployment plan describes a common configuration. Standard deployment plans are stored by default in the SAS Software Depot. A custom deployment plan is created by a SAS representative specifically for a site.
If your environment requires a custom plan, SAS sends you an e-mail message with either a set of files or a ZIP file that has a set of files. Those files include the following:
• The Deployment file (plan.xml) — This is one of the key files in the SAS Project Directory that is used throughout the rest of the deployment process to customize your installation and configuration experience. The plan.xml file serves as input to the SAS Deployment Wizard. Copy this set of files to the plan_files folder in the top level of the SAS Software Depot.
• The Pre-Installation Checklist (checklist.pdf or checklist.rtf) — This is where you record information such as the credentials for special SAS users, machine names, ports, and the installation locations of third-party products relevant to your deployment.
• The Index file (index.html) — This file provides some high-level guidance through the remainder of the process. The index.html file includes a reference to a pre-installation checklist, which is a checklist for the items that you need to know for the remainder of the process. Information that you enter in the checklist is requested in later stages of the installation process. It is important that you record the information for later use as an aid in consistency and documentation of decisions that you made.
The SAS 9.3 Intelligence Platform: Installation and Configuration Guide provides detailed information about deployment plans and pre-installation tasks.
Create a SAS Software DepotWhen you download a SAS order, the SAS Download Manager automatically creates a SAS Software Depot on your system. For more details about creating your software depot, see “Creating a SAS Software Depot” in the SAS 9.3 Intelligence Platform: Installation and Configuration Guide.
Additional DocumentationThe SAS 9.3 Intelligence Platform: Installation and Configuration Guide provides detailed information related to all installations that include all or part of the SAS 9.3 Intelligence Platform, including SAS Enterprise Miner. SAS Enterprise Miner is bundled with several other SAS products that are not covered in detail by this guide. It is important that you become familiar with the SAS 9.3 Intelligence Platform: Installation and Configuration Guide.
You should also familiarize yourself with the following:
• Quick Start Guides — http://support.sas.com/documentation/installcenter/93/index.html
20 Chapter 5 • SAS Enterprise Miner Server Installation and Configuration

• SAS 9.3 System Requirements — http://support.sas.com/documentation/installcenter/93/index.html
• Alert-level SAS Notes — http://support.sas.com/kb/?ct=51000, click Search Problem Notes in the left navigation pane
System PreparationsAs a pre-installation task, you must designate or create a domain account that will act as the SAS Installer. This account will require administrative operating system privileges on each machine that hosts the SAS Enterprise Miner server, a SAS Workspace server, or SAS Enterprise Miner project files. On a Windows system, this account also requires the permissions log on as a batch job and Access this computer from the network. The first permits the user to be logged on by means of a batch-queue. You can configure this security setting by opening the appropriate policy and adding each account. Generally, it is recommended that you create a user group, and give the group the Log on as a batch job, and, if necessary, the Access this computer from the network permission. Then, add each account to that group. For UNIX, the SAS Installer account should not be the root account.
The Access this computer from the network privilege is also required in order to connect to SAS servers. Typically, this right is already granted to the Windows group Everyone. To confirm, check the Windows local policy settings.
The SAS Enterprise Miner server uses both regular user accounts and product administrative user accounts. You can create regular user accounts for the SAS Enterprise Miner as a post-installation task. For more information, see Define Additional Enterprise Miner Users on page 50 in Chapter 7.
Note that a product administrator account is not the same as a SAS internal administrator account, such as the SAS Administrator (sasadm@saspw).
Designate PortsThe communications between the components of SAS Enterprise Miner require a number of ports that must be designated during the installation process. Consult the pre-installation checklist provided by your SAS representative for a complete list of ports that you must designate. The SAS 9.3 Intelligence Platform: Installation and Configuration Guide has more information about port requirements and selection in the “Setting Up Users, Groups, and Ports.”
The SAS Environment FileA SAS environment file defines the available set of SAS environments for the SAS Enterprise Miner server’s client applications, and is generated during the configuration of the SAS Web Infrastructure Platform, which is one of the steps carried out by the SAS Deployment manager when you install the SAS Enterprise Miner server. The SAS Logon Manager includes a servlet that provides default information for the initial deployment.
When you have validated that your client applications work successfully with a deployment, it is recommended that you deploy the sas-environment.xml file to an HTTP server. This step ensures that you can customize the sas-environment.xml file to specify the name that you want to use and to account for the IT topology at your site. Your site might require that application clients interact with separate development, test, and production environments. Or, you might elect to have separate SAS deployments to
Pre-Installation Tasks 21

support distinct business units. In either scenario, when multiple environments are required, you can customize and deploy the sas-environment.xml file as needed.
Before starting the SAS Enterprise Miner server installation, you need to determine the URL needed to access the default installation sas-environment.xml. The URL to access the default environment definition would be http://<host>:<port>/SASLogon/sas-environment.xml. For example, if you are running a SAS application server on your desktop, you can deploy the default sas-environment.xml file at http://localhost:8080/SASLogon/sas-environment.xml.
For the SAS Enterprise Miner server the default URL would resemble http://myserver.mynet.mycompany.com:8080/SASLogon/sas-environment.xml.
For more details about the SAS environment file and how to configure SAS environments pre- or post-installation see the SAS 9.3 Intelligence Platform: Middle-Tier Administration Guide.
Third-Party Software Required for SAS Enterprise Miner ServerBefore you start to install SAS Enterprise Miner, you must first install or locate on each host machine the appropriate version of the Java Development Kit (JDK). On the machine that will host the SAS Enterprise Miner server’s mid-tier component, a Web Application server or HTTP server is required, such as JBoss server, IBM WebSphere Application Server, or Oracle WebLogic Server. Record the file paths for the software locations for both the JDK and your Web Application server. The specific Web Application server or HTTP server will be specified in the deployment plan file.
When installing SAS Enterprise Miner, you must provide valid paths to the required third-party software, or the SAS Deployment Wizard will not let you continue with the SAS Enterprise Miner server installation. For information about required versions of third-party software, see the Third-Party Software for SAS 9.3 available from the SAS Support Install Center, located at http://support.sas.com/resources/thirdpartysupport/.
SAS Text Miner and the SAS Document Conversion ServiceInstallations that include SAS Text Miner will be prompted for the host and port for SAS Document Conversion service. Since you cannot proceed with your deployment until that information is provided, it is best to have determined where you will be installing SAS Document Conversion before starting an installation that includes SAS Text Miner.
SAS Text Miner uses the Document Conversion server to extract plain text from proprietary file formats such as PDF and Microsoft Word so that the text can be analyzed by SAS Text Miner. The SAS Text Miner components communicate with the document conversion service over the network.
SAS Document Conversion runs on any version of Microsoft Windows that supports Microsoft .NET Framework and that can run 32-bit applications. This includes versions of Microsoft Windows for x64 running in compatibility mode. If you are installing SAS Enterprise Miner with SAS Text Miner on a Windows machine, then SAS Document Conversion will be automatically included for installation on the same Windows machine.
If, however, you plan to install a SAS Enterprise Miner server with SAS Text Miner on a UNIX machine, it is recommended that before you install SAS Enterprise Miner server with SAS Text Miner, you use the SAS Deployment Wizard to install Document Conversion on a Windows machine. In order to do that, when you are asked to select a deployment type, choose Install Additional Software. Then in Select Products, choose
22 Chapter 5 • SAS Enterprise Miner Server Installation and Configuration

the Install.dialog box, select only SAS Document Conversion. In the Specify SAS Text Analytics Document Conversion Host and Port dialog box, the host value will default to the machine on which you are installing the service. The default port value is 7111. Be sure to record the Host and Port number that you choose. Both the Host and the Port will be required for the SAS Enterprise Miner server installation.
Install and Configure SAS Enterprise Miner
OverviewFor the best overall explanation of the installation and configuration of the numerous combinations of products and environments, see the SAS 9.3 Intelligence Platform Installation and Configuration Guide.
Use the SAS Deployment Wizard to install and configure your software. For more information about the wizard, see the SAS Deployment Wizard User’s Guide, located at http://support.sas.com/documentation/installcenter/en/ikdeploywizug/62130/PDF/default/user.pdf.
In the following sections, step-by-step examples of both server and workstation mode deployments are provided to give you a better idea about what to expect when you install SAS Enterprise Miner.
SAS Enterprise Miner Server Multiple Machine DeploymentA server deployment of SAS Enterprise Miner begins when you and your SAS representative decide which software you need, determine which machines to install the software on, and develop your installation plan. Each server deployment requires a plan. In this example, one of the standard deployment plans included in your SAS software is used to illustrate some of the options available during a SAS Enterprise Miner server deployment.
The plan “Enterprise Miner and Text Miner, three machines, JBoss” will install the server, mid-tier, and client on three separate network machines and requires JBoss as the Application server on the mid-tier machine. For this example, you need three separate machines on your network. You need to prepare all three systems and complete the pre-installation tasks on each machine.
Three Machine Setup Step 1, Server Install
1. Log on to the computer that will be the SAS Enterprise Miner server machine. Start the SAS Deployment Wizard from the highest-level directory in your SAS Software Depot with the setup application that is appropriate to your operating system. For this example, on a 64–bit Windows system, double click the setup.exe file located in the SAS Software Depot folder.
2. Selected your preferred language for the SAS Deployment Wizard.
3. The SAS Deployment Wizard opens.
Enter the following information on each screen:
a. Select Deployment Task. Select Install SAS Software ð Next.
b. Specify SAS Home — Choose a file system location to use as the home folder for your SAS software. On Windows systems, the home folder location defaults
Install and Configure SAS Enterprise Miner 23

to C:\Program Files\SASHome. You can use the Browse button to navigate to an alternate location for the SASHome folder. Click Next.
c. Select Deployment Type — Select Perform a Planned Deployment ð Install SAS Software ð Configure SAS Software. Click Next.
d. Specify Deployment Plan — Choose Select a standard deployment plan and select Enterprise Miner and Text Miner, three machines, JBoss. If your SAS representative provided you with a custom plan file, select Specify the full path to a customized deployment plan. This is the plan.xml file. Typically, the deployment plan is stored in the plan_files folder of the SAS Software Depot. If necessary, click Browse to navigate to your plan.xml file. Click Next.
e. Specify SAS Installation Data File — This is where you enter the path to your SID file. By default, the SID file is located in the SAS Software Depot, under the sid_files folder. If necessary, click Browse to navigate to this file. Click Next.
f. Select Language Support — Select the languages to install for the products that are listed. Only those languages that work with your locale are installed. Click Next.
g. Select Region Settings — This setting enables you to determine the format and display of language, region, and locale-specific information. You can choose to configure SAS as a Unicode server, and force SAS to use the UTF-8 encoding in all data sets, catalogs, and text that is written by SAS. This can be useful if you need to share such files with computers that have different language representations. Click Next.
h. Select Java Runtime Environment — If you have special requirements for a version of the Java Runtime Environment (JRE), you can choose Select an existing JRE and use the Browse button to navigate to your preferred JRE location. It is recommended that you use the default JRE. Click Next.
i. Specify SAS Text Analytics Document Conversion Host and Port — If you are installing SAS Enterprise Miner server with SAS Text Miner on a Windows machine, then SAS Document Conversion will be installed automatically on the same Windows machine. The default value for the host name is the name of the machine on which you are installing SAS Enterprise Miner server. The default port number is 7111. If you are installing SAS Enterprise Miner server with SAS Text Analytics on a UNIX machine, enter the host and Port from the Document Conversion installation from SAS Text Miner and the SAS Document Conversion Service on page 22 . This example uses the default values. Click Next.
j. Checking System — Finally, the SAS Deployment Wizard checks to make sure the system has enough disk space to perform the installation. In addition, the SAS Deployment Wizard checks to see whether all of the necessary files and folders that it will write are accessible. The installation cannot proceed until access is enabled or granted to any listed files. When the examination of your file system is complete and the number of unwritable files is 0, click Next.
4. The following information is needed to configure your SAS software.
a. Select Configuration Prompting Level — Select Typical to display the basic set of configuration settings. To accept most defaults and for fewer options, select Express. For more granular configuration options, select Custom. To configure the SAS Enterprise Miner server, the Typical setting is recommended. Click Next.
24 Chapter 5 • SAS Enterprise Miner Server Installation and Configuration
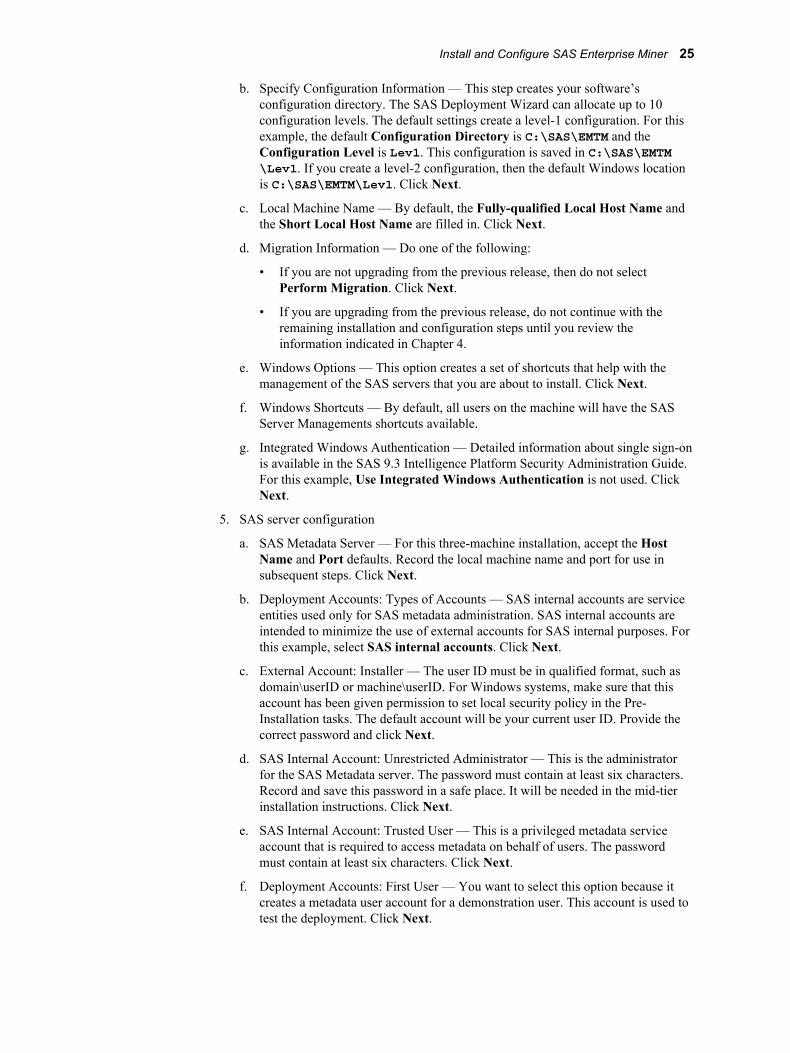
b. Specify Configuration Information — This step creates your software’s configuration directory. The SAS Deployment Wizard can allocate up to 10 configuration levels. The default settings create a level-1 configuration. For this example, the default Configuration Directory is C:\SAS\EMTM and the Configuration Level is Lev1. This configuration is saved in C:\SAS\EMTM\Lev1. If you create a level-2 configuration, then the default Windows location is C:\SAS\EMTM\Lev1. Click Next.
c. Local Machine Name — By default, the Fully-qualified Local Host Name and the Short Local Host Name are filled in. Click Next.
d. Migration Information — Do one of the following:
• If you are not upgrading from the previous release, then do not select Perform Migration. Click Next.
• If you are upgrading from the previous release, do not continue with the remaining installation and configuration steps until you review the information indicated in Chapter 4.
e. Windows Options — This option creates a set of shortcuts that help with the management of the SAS servers that you are about to install. Click Next.
f. Windows Shortcuts — By default, all users on the machine will have the SAS Server Managements shortcuts available.
g. Integrated Windows Authentication — Detailed information about single sign-on is available in the SAS 9.3 Intelligence Platform Security Administration Guide. For this example, Use Integrated Windows Authentication is not used. Click Next.
5. SAS server configuration
a. SAS Metadata Server — For this three-machine installation, accept the Host Name and Port defaults. Record the local machine name and port for use in subsequent steps. Click Next.
b. Deployment Accounts: Types of Accounts — SAS internal accounts are service entities used only for SAS metadata administration. SAS internal accounts are intended to minimize the use of external accounts for SAS internal purposes. For this example, select SAS internal accounts. Click Next.
c. External Account: Installer — The user ID must be in qualified format, such as domain\userID or machine\userID. For Windows systems, make sure that this account has been given permission to set local security policy in the Pre-Installation tasks. The default account will be your current user ID. Provide the correct password and click Next.
d. SAS Internal Account: Unrestricted Administrator — This is the administrator for the SAS Metadata server. The password must contain at least six characters. Record and save this password in a safe place. It will be needed in the mid-tier installation instructions. Click Next.
e. SAS Internal Account: Trusted User — This is a privileged metadata service account that is required to access metadata on behalf of users. The password must contain at least six characters. Click Next.
f. Deployment Accounts: First User — You want to select this option because it creates a metadata user account for a demonstration user. This account is used to test the deployment. Click Next.
Install and Configure SAS Enterprise Miner 25

g. External Account: First User — Enter a valid external user ID. For a Windows account, you must provide the user ID in qualified formation, such as domain\userID or machine\userID. Click Next.
h. E-mail Server — Enter the host name and port number for the SMTP mail server from which alert messages should be sent to a system administrator. These messages are sent if the metadata server encounters problems. Click Next.
i. E-mail Address — The Sender E-mail Address is listed in the From field of the e-mail messages that are sent to the system administrator. Click Next. The Recipient E-mail Address specifies where the alert e-mail will be sent. Check the box for E-mail Server Requires Authentication if your e-mail server requires credentials for authentication. The e-mail server user ID and password will be entered on a subsequent page. For this example, this option is not check. Click Next.
j. SAS Object Spawner — Enter the port number used by the SAS Object Spawner to listen for operator connections. If you choose not to accept the default value, refer to your completed Pre-Installation Checklist for the value that you should enter. Click Next.
k. SAS Object Spawner: Port Bank — For this example, accept the default values. In deployments that support pooled workspace servers, these ports are used by the SAS Object Spawner as dynamic listening ports for the pooled workspace servers. Click Next.
l. SAS Application Server: Server Context — Enter the name of the server context for the application server definition. The server context name is prefixed automatically to all server names defined in the server context. A server context is a SAS IOM server concept that describes how SAS application servers manage client requests. A SAS application server has an awareness of (or context for) how it is being used and makes decisions based on that awareness. The default value of SASApp is recommended for this example. Click Next.
m. SAS Workspace Server — This is the port where the SAS Object Spawner will listen for client requests to launch workspace servers. If you choose not to accept the default value, refer to your completed Pre-Installation Checklist for the value that you should enter. Click Next.
n. Metadata Utility Workspace Server — Use of this server is limited to members of the SAS Administrators group. It is used only for metadata server administration tasks such as replication, promotion, and backup. Enter the port where the SAS Object Spawner will listen for client requests to launch the workspace server. If you choose not to accept the default value, refer to your completed Pre-Installation Checklist for the value that you should enter. Click Next.
o. Metadata Utility SAS/CONNECT Spawner — Access to this server is limited to members of the SAS Administrators group, and its use is limited to metadata server replication. Enter the port number to access the metadata utility SAS/CONNECT Spawner. If you choose not to accept the default value, refer to your completed Pre-Installation Checklist for the value that you should enter. Click Next.
p. SAS Framework Data Server — Enter the TCP/IP port number that is used by the SAS Web Infrastructure Platform to communicate with the SAS Framework Data server. If you choose not to accept the default value, refer to your completed Pre-Installation Checklist for the value that you should enter. Click Next.
26 Chapter 5 • SAS Enterprise Miner Server Installation and Configuration

q. SAS Framework Data Server: Transactional Database Files — This field specifies a local machine path where the database files are kept. The directory path specified here must be on the machine that is hosting the SAS Framework Data server. The directory path cannot be on a network location such as an NFS path or a shared network drive in Windows. Operating system permissions on the path must permit the server process user full control. Click Next.
r. SAS Data Step Batch Server — Enter the path to the deployment directory from the associated SAS programs. Click Next.
s. Metadata Utility SAS DATA Step Batch Server — Access to this server is limited to members of the SAS Administrators group. Its use is limited to metadata server backup. Click Next.
t. Operating System Services Scheduling Server — Enter the port number where the operating system services scheduling server will listen for the associated SAS Workspace Server. If you choose not to accept the default value, refer to your completed Pre-Installation Checklist for the value that you should enter. Click Next.
u. SAS Deployment Tester Server — The Deployment Tester tests other products, not SAS Enterprise Miner. Some of those other products use JUnit for validation. These products can operate properly without JUnit. However, you will not be able to validate them using the SAS Deployment Tester. If you want to validate other products with the Deployment Tester, enter the location of the JUnit.jar file. The JUnit.jar file is available from the Third Party Software Requirements Web page, located at http://support.sas.com/resources/thirdpartysupport/index.html. If you choose not to accept the default port value, refer to your completed Pre-Installation Checklist for the value that you should enter. Click Next.
v. IP Multicast Version — Select the IP version that is appropriate for your environment. IPv6 requires the network and all machines that contain SAS products to be IPv6 enabled. For this example, accept the default value of IPv4. Click Next.
w. IP Multicast — The multicast group communication includes all information needed to bootstrap SAS mid-tier applications. Because this includes sending the SAS environment credentials (such as the sasadm account name and its password), scoping and encryption options are provided. The default values are most appropriate for deployments in a firewall-isolated data center environment. The Deployment Wizard help documentation contains more information about these choices. Click Next.
x. Deployment Summary — Review the software selected before starting the installation process. If this information is correct, Click Next.
6. Deployment Complete — The SAS Deployment Wizard checks all stages for errors or warnings. Click Next.
• Additional Resources — It is suggested that you record these links for future reference. Click Next.
7. Configuration Guidelines and Details
• The information found on this page is specific to your installation and is kept in your configuration directory. In this example, that would be C:\SAS\EMTM\Lev1\Documents\Instructions.html.
8. Reboot — This step is required for Windows systems so that the user account’s Local Security Policy changes will take effect.
Install and Configure SAS Enterprise Miner 27

Three Machine Setup Step 2, Mid-Tier
1. Log on to the computer that will be used as the SAS Enterprise Miner mid-tier machine. Start the SAS Deployment Wizard from the highest level directory in your SAS Software Depot with the setup application that is appropriate for your operating system. For example, on a Windows system, that file is setup.exe, and is located in the SAS Software Depot folder.
2. Select your preferred language for the SAS Deployment Wizard.
3. After the SAS Deployment Wizard opens, enter the following information in each screen.
a. Select Deployment Task — Select Install SAS software. Click Next.
b. Specify SAS Home — This is where you choose a file system location for the home folder for your SAS software. On a Windows system, this will default to C:\Program Files\SASHome. You can use the Browse button to navigate to an alternate location for your SAS Home. Click Next.
c. Select Deployment Type — Select Perform a Planned Deployment ð Install SAS Software ð Configure SAS Software. Click Next.
d. Specify Deployment Plan — For this example, select Select a standard deployment plan ð Enterprise Miner and Text Miner, three machines, JBoss. If your SAS representative provided you with a custom plan file, select Specify the full path to a customized deployment plan. You must specify the plan.xml file. Typically, the deployment plan is stored in the plan_files folder of the SAS Software Depot. If necessary, click Browse to navigate to your plan.xml file. Click Next.
e. Select Deployment Step and Products to Install — The deployment plan determines the products to install and what order they are installed in. In the Deployment Step field, select Step 2: Middle Tier. Click Next.
f. Specify SAS Installation Data File — This is the path for your SID file. By default, the SID file is located in the SAS Software Depot under the sid_files folder. If necessary, click Browse to navigate to it. Click Next.
g. Select Region Settings — Specify how you want your SAS Software to format language, region, and locale-specific information. Also, you can configure SAS as a Unicode server, and force SAS to use the UTF-8 encoding in all data sets, catalogs, and text output. This can be useful if you need to share such files with computers that use different language representations. Click Next.
h. Select Java Runtime Environment — If you have special requirements for a version of the Java Runtime Environment (JRE), use Select an Existing JRE and use the Browse button to navigate to your preferred JRE location. It is recommended that you use the default JRE. Click Next.
i. Checking System — The SAS Deployment Wizard checks to ensure that the system has enough disk space and that the files and folders it will write are accessible.
4. The following information is needed to configure the software:
a. Review Required Software — This specifies the third-party software that will be required to continue the installation. In this example, the JBoss Web Application Server was required by the plan file that was chosen previously. You must select the check box for The Web Application Server and the Java Development Kit will be installed on another machine. Click Next.
28 Chapter 5 • SAS Enterprise Miner Server Installation and Configuration

b. Specify Software Location — In general, this is the complete file path for the Web Application server or HTTP server that was specified in the preceding dialog box, titled Review Required Software. For this example, enter the path to your JBoss files location. In Windows, that path will resemble C:\Program Files(x86)\EnterprisePlatform-4.3.0.GA_CP08\iboss-as. Click Next.
c. Specify Software Location — This is the complete file path for the Java Development Kit that was specified in the Review Require Software dialog box. In Windows, that path will resemble C:\Program Files\Java\jdk1.6.0_24. Click Next.
d. Select Configuration Prompting Level — Select Typical to display the basic set of configuration settings. To accept most defaults and for fewer options, select Express. For more granular configuration options, select Custom. To configure the SAS Enterprise Miner server, the Typical setting is recommended. Click Next.
e. Specify Configuration Information — This step creates your software configuration directory. The SAS Deployment Wizard can allocate up to 10 configuration levels. The default settings create a level–1 configuration. For this example, the default configuration directory will be C:\SAS\EMTM, and the configuration level will be Lev1. This configuration is saved in C:\SAS\EMTM\Lev1. If you create a level–2 configuration, the default location in Windows systems is C:\SAS\EMTM\Lev2. Click Next.
f. Local Machine Name — By default, the Fully-Qualified Local Host Name and the Short Local Host Name are given. Click Next.
g. Migration Information — Do one of the following:
• If you are not upgrading from the previous release, then do not select Perform Migration. Click Next.
• If you are upgrading from the previous, then do not continue with the remaining installation and configuration until you review the information in Chapter 4.
h. Windows Options — This option creates a set of shortcuts that help with the management of the SAS servers that you are ready to install. Click Next.
i. Windows Shortcuts — By default, all users on the machine will have the SAS Server Management shortcuts available. Click Next.
j. Integrated Windows Authentication — Detailed information about single sign-on is available in the SAS 9.3 Intelligence Platform Security Administration Guide. In this example, the box for Use Integrated Windows Authentication is not checked. Click Next.
5. Server Connection and Accounts
a. SAS Metadata Server — Enter theHost Name and Port used for the SAS Metadata Server in the first step of these instructions. Click Next.
b. Deployment Accounts: Type of Accounts — SAS internal accounts are service entities exclusively used for SAS metadata administration. SAS internal accounts are intended to minimize the use of external accounts for SAS internal purposes. For this example, select Use SAS internal accounts when appropriate. Click Next.
c. SAS Internal Account: Unrestricted Administrator — This is the administrator for the SAS Metadata server. You must use the same password that was specified in the first step of these instructions. Click Next.
Install and Configure SAS Enterprise Miner 29

d. SAS Internal Account: Trusted User — This is a privileged metadata service account required to access metadata on behalf of users. You must use the same password that was specified in the first step of these instructions. Click Next.
e. Anonymous Web Access — Deselect the option Enable Anonymous Web Access (optional), because it is not required for this example. Click Next.
f. E-mail Server — Enter the host name and port number for the SMTP mail server that will send messages to the system administrator when the metadata server encounters a problem. Click Next.
g. E-mail Address — The Sender E-mail Address is the address that is used to send e-mail messages to the system administrator. The Recipient E-mail Address is the address that will receive the server warnings. If your e-mail server requires logon credentials, enable the option E-mail Server Requires Authentication. The e-mail server user ID and password are entered on a subsequent page if you select this option. However, this example does not enable this option. Click Next.
h. SAS Deployment Tester Server — The Deployment Tester checks others products that use JUnit for validation. Without JUnit, these products can operate properly, but you will not be able to validate them with the Deployment Tester. If you want to validate this installation, enter the location of the JUnit jar file. The JUnit jar file is available from the Third-Party Software Requirements Web page, located at http://support.sas.com/resources/thirdpartysupport/index.html. If you choose not to accept the default port value, refer to your completed Pre-Installation Checklist for the value that you need to enter. Click Next.
6. Mid-Tier Configuration
a. SAS Remote Services Application — SAS mid-tier applications use this information to communicate with other SAS applications. For this example, accept the defaults. Click Next.
b. Event Broker Ports — The SAS Mid-Tier Event Broker listens for both HTTP and administrative events on these ports. Accept the defaults, or refer to your completed Pre-Installation Checklist for the values that you need to enter. Click Next.
c. Web Application Server: Automatic Configuration — By default, your Web application server will be configured to work with your SAS products. If you forgo automatic configuration of your Web application server, you will still be prompted for Web application server information and deployment stages. Deployment stages such as Configure Products, Deploy Web Applications, and Start Web Application Servers will execute to create instructions for manual deployment. When configuration is complete, follow these manual instructions on how to configure your server and deploy you Web applications. For this example, accept the default values. Click Next.
d. Web Application Server: Scripting Configuration — If enabled, your SAS Configuration will generate a scripting tool and a set of configuration files that can be used for manual application server configuration. By default, this option is not selected. This example uses the default setting. Click Next.
e. Web Application Server: Managed Server — This is the logical name that will be used for your managed server. For this example, accept the default, SASServer1. Click Next.
f. Web Application Server: Managed Server Ports — If you choose not to accept the default values, refer to your completed Pre-Installation Checklist for the
30 Chapter 5 • SAS Enterprise Miner Server Installation and Configuration

values that you should enter. For this example, accept the default values. Click Next.
g. Web Application Server: Automatic Deployment — If you choose not to automatically deploy Web applications, manual deployment instructions will be written to Instructions.html during the Web application deployment stage. For this example, choose to have Web applications automatically deployed to the Web application server. Accept the default values. Click Next.
h. Web Application Themes — Enter the host name to use when accessing themes. The default value is the name of the host where the configuration is performed. The port number provided here must be the same as the HTTP port of your managed server. If you choose not to accept the default values, refer to your completed Pre-Installation Checklist for the values that you should enter. The Configured Protocol is the communication protocol that is used when you access the installed themes. Accept the default value, which is HTTP Protocol. Click Next.
i. IP Multicast Version — Select the IP version that is appropriate for your environment. IPv6 requires that your network and all machines that contain SAS products be IPv6 enabled. For this example, IPv4 is selected. Click Next.
j. SAS Distributed In-Process Scheduling Server — These are the UDP ports and do not conflict with any previous TCP port definitions, such as the metadata server. Accept the default values. Click Next.
k. SAS Content Server: Repository Directory — The SAS Content Server stores application objects, such as registered SAS Enterprise Miner Model Packages. Enter the location on your disk for the files of this repository. The SAS Content Server will work with a DBMS for persistence. For information about working with a DBMS, see “Administering the SAS Content Server” in SAS Intelligence Platform: Middle-Tier Administration Guide. Accept the default values. Click Next.
l. SAS Web Infrastructure Platform: Database Type — To accept the recommended database for the SAS Web Infrastructure Platform, click Next.
m. SAS Web Infrastructure Database JDBC Properties — Specify the user ID and password that are used to access the database that contains your SAS Web Infrastructure Database tables. If you have chosen automatic configuration of a database for the SAS Web Infrastructure Database, this user ID must have the ability to create tables and insert records. If you have not chosen automatic configuration, this user ID must have the ability to create tables, insert records, and delete records. Accept the default values. Click Next.
7. Deployment Summary — Review the software selections before starting the installation process. If everything is correct, click Start.
8. Deployment Complete — Check all stages for errors or warnings. Click Next.
9. Additional Resources — Record these links for future reference. These links will be needed in the post-installation process. Click Finish.
10. Configuration Guidelines and Details — This page of information is specific to your installation and is kept in your configuration directory. In this example, that would be C:\SAS\EMTM\Lev1\Documents\Instructions.html.
Three Machine Setup Step 3, Client
1. For the client installation, log on to the computer that will be used as the SAS Enterprise Miner client machine. Start the SAS Deployment Wizard from the highest-level directory in your SAS Software Depot using the setup application that
Install and Configure SAS Enterprise Miner 31

is appropriate for your operating system. For example, on a Windows system, this is the file setup.exe, located in the SAS Software Depot folder.
2. Select your preferred language for the SAS Deployment Wizard.
3. After the SAS Deployment Wizard opens, enter the following information:
a. Select Deployment Task — Select Install SAS Software. Click Next.
b. Specify SAS Home — Choose a file system location for the home folder for your SAS software. On Windows systems, this will default to C:\Program Files\SASHome. You can use the Browse button to navigate to an alternate location for your SAS Home. Click Next.
c. Select Deployment Type — Select Perform a Planned Deployment ð Install SAS Software ð Configure SAS Software. Click Next.
d. Specify Deployment Plan — For this example, choose Select a standard deployment plan ð Enterprise Miner and Text Miner, three machines, JBoss. If your SAS representative provided you with a custom plan file, select Specify the full path to a customized deployment plant. This is the plan.xml file. Typically, the deployment plan is stored in the plan_files folder of the SAS Software Depot. If necessary, click Browse to navigate to your plan.xml file. Click Next.
e. Select Deployment Step and Products to Install — The deployment plan determines which products to install and in what order. In the Deployment Step field, select Step 3: Client. Click Next.
f. Specify SAS Installation Data File — This is the path to your SID file. By default, the SID file is located in the SAS Software Depot under the sid_files folder. If necessary, click Browse to navigate to this file. Click Next.
g. Select Language Support — Select the languages that you want to install for the products that are listed. Only those languages that work with your locale are installed. Click Next.
h. Select Regional Settings — Specify how you want your SAS Software to format and display language, region, and locale-specific information. Also, you can configure SAS as a Unicode server and force SAS to use UTF-8 encoding in all data sets, catalogs, and text output. This can be useful if you need to share these files with computers that use different language representations. Click Next.
i. Select Java Runtime Environment — If you have special requirements for a version of the Java Runtime Environment (JRE), choose Select an existing JRE and use the Browse button to navigate to your preferred JRE location. It is recommended that you use the default JRE. Click Next.
j. SAS Environments URL — Enter the URL for the SAS Environment File that you decided on in the Pre-Installation Tasks for SAS Enterprise Miner. This step lets you avoid manually creating and deploying a sas-environment.xml before using SAS Enterprise Miner. The default URL will resemble http://myserver.mynet.mycompany.com:8080/SASLogon/sas-environment.xml. For this example, the network machine name myserver.mynet.mycompany.com would be replaced with the name of the machine that contains the SAS middle tier, installed in Step 2 of these instructions. Click Next.
k. Checking System — The SAS Deployment Wizard checks to ensure that the system has enough disk space and that all files and folders it needs to write are accessible. The installation cannot proceed until access is granted to any listed
32 Chapter 5 • SAS Enterprise Miner Server Installation and Configuration

files. When the examination of your file system is complete and there are no unwriteable files, click Next.
l. Select Configuration Prompting Level — Select Typical to display the basic set of configuration settings. To accept most defaults, and for fewer options, select Express. For more granular configuration options, select Custom. To configure the SAS Enterprise Miner server, the Typical setting is recommended. Click Next.
m. Specify Configuration Information — This step creates your software’s configuration directory. The SAS Deployment Wizard allocates up to 10 configuration levels. The default settings create a level–1 configuration. For this example, the default configuration directory is C:\SAS\EMTM, and the configuration level is Lev1. This configuration is saved in C:\SAS\EMTM\Lev1. If you create a level–2 configuration, it will be saved in C:\SAS\EMTM\Lev2. Click Next.
n. Local Machine Name — By default, the Fully-Qualified Local Host Name and the Short Local Host Name are provided. Click Next.
o. Migration Information — Do one of the following:
• If you are not upgrading from the previous release, then do not select Perform Migration. Click Next.
• If you are upgrading from the previous release, do not continue with the remaining installation and configuration until you have reviewed the information indicated in Chapter 4.
p. Integrated Windows Authentication — Detailed information about single sign-on is available in the SAS 9.3 Intelligence Platform Security Administration Guide. In this example, do not select the check box for Use Integrated Windows Authentication. Click Next.
q. SAS Metadata Server — Enter the host name and port that is used for the SAS Metadata Server, specified in Step 1 of these instructions. Click Next.
r. Deployment Summary — Review the software selections before starting the installation process. If everything is correct, Click Next.
s. Deployment Complete — Check all stages of the installation for errors or warnings. Click Next.
t. Additional Resources — Record these links for future reference. Click Finish.
4. Configuration Guidelines and Details
• This page of information is specific to your installation and is kept in your configuration directory. In this example, that directory is C:\SAS\EMTM\Lev1\Documents\Instructions.html.
Deployment Errors and Warnings
Error StatusWhen an error status is returned to the SAS Deployment Wizard, it displays the message describing the problem that was encountered, and asks what further action to perform.
Deployment Errors and Warnings 33

The SAS Deployment Wizard offers a choice of actions. They include stopping, continuing, or retrying.
If you select No, the SAS Deployment Wizard ends the deployment at that point. If you choose Yes to continue, the SAS Deployment Wizard will start the next configuration step in the list. If the error message indicates a correctable problem, you might be able to handle the problem outside the SAS Deployment Wizard. In such a case, you can then choose to Retry, and the SAS Deployment Wizard will try to start the step over.
Warning StatusIf a situation is detected that indicates a step was only partially successful but can be handled outside the SAS Deployment Wizard post-installation, the SAS Deployment Wizard sets the warning status flag and continues as if it were successful.
The SAS Deployment Wizard does not ask whether you want to cancel, continue, or retry. However, information about the warning is written to a special section in Instructions.html. The Instructions.html is located in your config-dir in the Documents folder.
Verify the Installation
OverviewAfter the installation and configuration is complete, you will want to verify your deployment. To verify that SAS Enterprise Miner is operational, start the SAS Enterprise Miner client, create a project, create a diagram, and run a node.
Starting SAS Enterprise MinerFor an installed client on the Windows operating system, the Start menu will contain a SAS folder that includes a shortcut to SAS Enterprise Miner Client 12.1 or SAS Enterprise Miner Workstation 12.1.
To start the SAS Enterprise Miner 12.1 client using Java Web Start, open the SAS Enterprise Miner Status page. If your deployment uses JBoss as the application server, the default address will be similar to http://myserver.mynet.mycompany.com:8080/SASEnterpriseMinerJSW/Status.
Note: You will replace myserver.mynet.mycompany with the URL to the server that SAS Enterprise Miner was installed on.
34 Chapter 5 • SAS Enterprise Miner Server Installation and Configuration
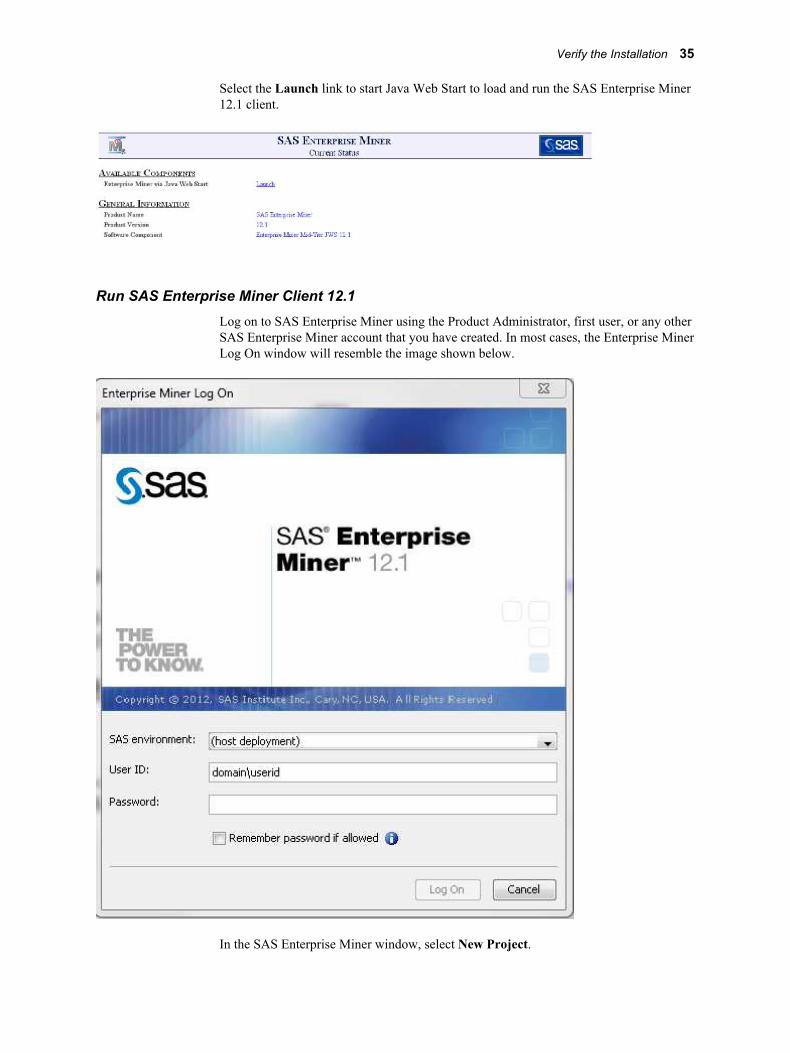
Select the Launch link to start Java Web Start to load and run the SAS Enterprise Miner 12.1 client.
Run SAS Enterprise Miner Client 12.1Log on to SAS Enterprise Miner using the Product Administrator, first user, or any other SAS Enterprise Miner account that you have created. In most cases, the Enterprise Miner Log On window will resemble the image shown below.
In the SAS Enterprise Miner window, select New Project.
Verify the Installation 35

In the Create New Project window, accept the default SAS Server and click Next.
In the Project Name text box, enter Test1. In the SAS Server Directory text box, enter the path to a folder that is accessible by your account from the server machine. This folder will contain your project folders and files. For testing and verification, you can use C:\Temp. You can use the Browse button to navigate to your file system and choose a more appropriate folder. For example, you can use C:\EMProjects\userid. Click Next.
36 Chapter 5 • SAS Enterprise Miner Server Installation and Configuration

The SAS Folder Location is where the project metadata is saved. For verification purposes, accept the default location and click Next.
The final step of the New Project Wizard displays the New Project Information, which reviews the information given in the previous windows. Click Finish. For a more in-depth tutorial on how to create a new project, see the SAS Enterprise Miner help documentation.
Verify the Installation 37

In the Enterprise Miner — Test 1 window, select Help ð Generate Sample Data Sources.
In the Generate Sample Data Sources window, click OK.
In the Project Panel, you should see the data sources that were created.
38 Chapter 5 • SAS Enterprise Miner Server Installation and Configuration

In the Project Panel, right-click Diagrams ð Create Diagram . In the Create New Diagram window, enter TestA and click OK. A new project diagram opens.
After creating a new diagram, the project workspace for that diagram will open automatically. In the Project Panel, select the Home Equity data source. Click and drag this data source into the Diagram Workspace, as shown in the image below.
Verify the Installation 39
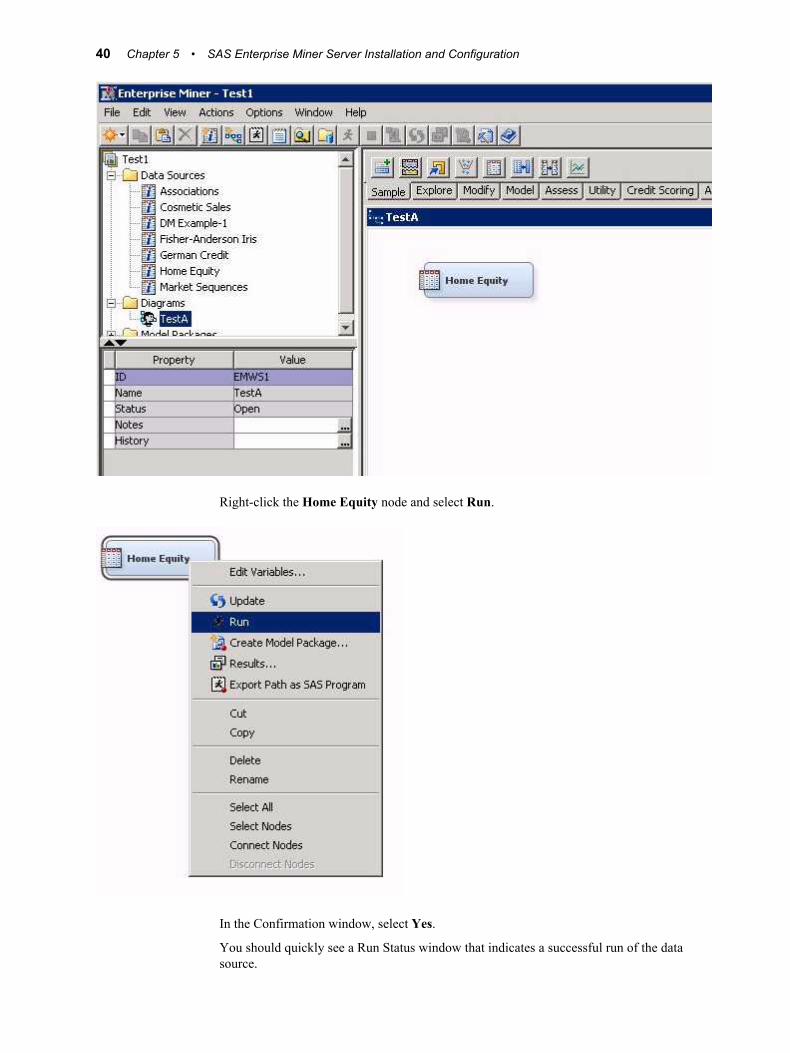
Right-click the Home Equity node and select Run.
In the Confirmation window, select Yes.
You should quickly see a Run Status window that indicates a successful run of the data source.
40 Chapter 5 • SAS Enterprise Miner Server Installation and Configuration

Click OK to close the Run Status window.
At this point, the verification is complete, and you have successfully installed and run all the major components of SAS Enterprise Miner. To close SAS Enterprise Miner, you can close the Enterprise Miner window, or select File ð Exit. At the Confirmation window, select Yes.
Verify the Installation 41

42 Chapter 5 • SAS Enterprise Miner Server Installation and Configuration

Chapter 6
SAS Enterprise Miner Workstation Installation and Configuration
SAS Enterprise Miner Workstation Deployment . . . . . . . . . . . . . . . . . . . . . . . . . . . 43
SAS Enterprise Miner Workstation DeploymentFor environments where a server-based installation is not required, the SAS Enterprise Miner Workstation installation supports a single-user, single-machine installation. The single-user Workstation installation is not a planned installation and is a simpler process than the Server installation. It can be installed on any Microsoft Windows operating system (32 or 64 bit) that is supported by SAS.
Note: The SAS Enterprise Miner Workstation, SAS Enterprise Miner Desktop, and SAS Enterprise Miner Classroom releases are virtually identical installations.
1. For the SAS Enterprise Miner Workstation installation, no Web application server is required after your system is prepared and the pre-installation tasks are complete. You need to log on to the target machine with Administrator privileges. Start the SAS Deployment Wizard from the highest-level directory in your SAS Software Depot using the setup application that is appropriate for your operating system. For example, on a Windows system, that file is setup.exe and is located in the SAS Software Depot folder.
2. Select your preferred language for the SAS Deployment Wizard.
3. Enter the following information:
a. Select Deployment Task — Select Install SAS Software. Click Next.
b. Specify SAS Home — Choose a file system location for the home folder for your SAS software. On Windows systems, this will default to C:\Program Files\SASHome. You can use the Browse button to navigate to an alternate location for your SAS Home. Click Next.
c. Select Deployment Type — Select Install SAS Foundation and Related Software. Click Next.
d. Select Products to Install — All of the products in your order are listed on this page. The default values that are selected are those that are typically installed with SAS Enterprise Miner Workstation. Click Next.
e. Select SAS Foundation Products — The defaults that are selected are all of the SAS Foundation products in your order. Generally, you will want all of the products in your order. Click Next.
43

f. Specify SAS Installation Data File — This is the path to your SID file. By default, the SID file is located in the sid_files folder of your SAS Software Depot. If necessary, click Browse to navigate to this file. Click Browse.
g. Select Language Support — Select the languages that you want to install for the products that are listed. Only those languages that work with your locale are installed. Click Next.
h. Select Regional Settings — Specify how you want your SAS Software to format and display language, region, and locale-specific information. Also, you can choose to configure SAS as a Unicode server and force SAS to use UTF-8 encoding in all data sets, catalogs, and text output. This can be useful if you need to share these files with computers that use different language representations. Click Next.
i. Select Java Runtime Environment — If you have special requirements for a version of the Java Runtime Environment (JRE), you can choose Select an existing JRE and use the Browse button to navigate to your preferred JRE. It is recommended that you use the default JRE. Click Next.
j. Specify SAS Text Analytics Document Conversion Host and Port — If you are installing SAS Enterprise Miner with SAS Text Miner on a Windows machine, then SAS Document Conversion will be installed automatically on the same machine. The host name will default to the machine name, and the default port value is 7111. If you are installing SAS Enterprise Miner Server with SAS Text Analytics on a UNIX machine, enter the host name and port number from the Document Conversion installation from the SAS Text Miner and the SAS Document Conversion Service on page 22 section earlier in this chapter. Click Next.
k. Checking System — The SAS Deployment Wizard checks to ensure that the system has enough disk space and the files and folders that it will write are accessible. The installation cannot proceed until access is granted for any listed files. When the examination is complete, click Next.
l. Deployment Summary — Review the software that is selected before starting the installation. If everything is correct, Click Next.
m. Deployment Complete — Check all stages for errors or warnings. Click Next.
n. Additional Resources — Record these links for future reference. Click Finish.
44 Chapter 6 • SAS Enterprise Miner Workstation Installation and Configuration

Chapter 7
Post-Installation Information
About Post-Installation Tasks . . . . . . . . . . . . . . . . . . . . . . . . . . . . . . . . . . . . . . . . . . . 45
Configuration Guidelines and Details . . . . . . . . . . . . . . . . . . . . . . . . . . . . . . . . . . . . . 45
Check for Current Hot Fixes . . . . . . . . . . . . . . . . . . . . . . . . . . . . . . . . . . . . . . . . . . . . 46
Configure SAS Enterprise Miner in SAS Management Console . . . . . . . . . . . . . . . 46Overview . . . . . . . . . . . . . . . . . . . . . . . . . . . . . . . . . . . . . . . . . . . . . . . . . . . . . . . . . . 46Starting SAS Management Console . . . . . . . . . . . . . . . . . . . . . . . . . . . . . . . . . . . . . 46SAS Enterprise Miner Plug-in . . . . . . . . . . . . . . . . . . . . . . . . . . . . . . . . . . . . . . . . . 46Logical Workspace Server Customizations . . . . . . . . . . . . . . . . . . . . . . . . . . . . . . . 47
Define Additional SAS Enterprise Miner Users . . . . . . . . . . . . . . . . . . . . . . . . . . . . 50
Create a SAS Environment File . . . . . . . . . . . . . . . . . . . . . . . . . . . . . . . . . . . . . . . . . 54
About Post-Installation TasksBecause installation environments and preferences vary, there are tasks that you will want to perform after you have deployed SAS Enterprise Miner successfully. This chapter offers some guidelines and recommendations to customize the installed software for your needs. After the installation and configuration is complete, you need to verify your deployment, adjust the various customizations available, and configure any other SAS Enterprise Miner accounts that you might need.
Configuration Guidelines and DetailsReview the manual configuration instructions for each installation. Information specific to each installation is kept in the configuration directory on each machine in a file named Instructions.html. This file is saved to the configuration folder during deployment (for example, C:\SAS\EMTM\Lev1\Documents\Instructions.html).
On Windows systems, there are required tasks for installations that include SAS Text Miner. If you are installing on multiple machines, the post-installation steps for the SAS Text Miner Client are in the Iinstructions.html file for the mid-tier component.
45

Check for Current Hot FixesTo locate hot fixes for all SAS products, use the SAS Technical Support Hot Fix site at http://ftp.sas.com/techsup/download/hotfix/hotfix.html. For hotfixes specific to SAS Enterprise Miner, use http://ftp.sas.com/techsup/download/hotfix/op_home.html. Any hot fix that you deem suitable can be applied now.
Hot fix announcements and other important news from SAS Technical Support are posted to the listserv TSNEWS-L. For more information, and to subscribe, visit http://support.sas.com/techsup/news/tsnews.html.
Configure SAS Enterprise Miner in SAS Management Console
OverviewSAS Management Console has a plug-in for SAS Enterprise Miner. This plug-in enables you to browse and customize some of the features of SAS Enterprise Miner. And it provides access to attributes of the Logical Workspace server and a server-specific list of projects. The SAS Enterprise Miner plug-in provides access to the list of mining result packages that have been registered via SAS Enterprise Miner. For more information about SAS Management Console, see SAS 9.3 Management Console Guide to Users and Permissions.
Starting SAS Management ConsoleIn Windows, you can start SAS Management Console from the SAS shortcuts located in your Start menu. In UNIX systems, navigate to SASHOME, which is similar to /SASHome/SASManagementConsole/9.3, and run the command ./sasmc &. After SAS Management Console has started, connect as a SAS administrator (for example, sasadm@saspw).
SAS Enterprise Miner Plug-inUnder the Plugins tab of SAS Management Console, expand the Application Management folder. Next, expand the Enterprise Miner Plug-in. Expand the Projects folder to display a list of all of the SAS Enterprise Miner servers. When you select the icon for SASApp — Logical Workspace Server, a list of all the projects created by that server is displayed in the adjacent pane on the right. Expand the Models folder to access the list of model results packages that are registered from SAS Enterprise Miner to this server.
You can view and customize Logical Workspace Servers, even if you do not have any registered SAS Enterprise Miner projects. Servers recognize custom project settings when new projects are created on the servers.
46 Chapter 7 • Post-Installation Information

Logical Workspace Server CustomizationsThe behavior of each Logical Workspace Server definition can be customized for SAS Enterprise Miner in the following ways:
• By specifying default locations for new projects on a server.
• By specifying whether users can modify the default location for new projects on a server.
• By specifying the maximum number of concurrent tasks that are allowed on a particular server. The maximum concurrent tasks setting affects the extent of parallel processing that SAS Enterprise Miner can use in a data mining process flow. You can use this setting to tune your symmetric multiprocessor server environment for optimal performance.
• By specifying SAS initialization code that is run when a project is opened, or when process flow diagram results or model result packages are generated. SAS initialization code is similar to the Project Start-up Code feature of SAS Enterprise Miner projects, except that SAS initialization code can initialize all SAS sessions for all projects that are associated with a particular server.
• By providing an alternate command to launch any SAS/CONNECT sessions that are called by nodes in a data mining process flow.
After you navigate to the SAS Enterprise Miner plug-in, you can customize the properties for a SAS Enterprise Miner server with the following steps:
1. Expand the Projects folder to display a list of all of the SAS Enterprise Miner Servers. Select the icon for SASApp — Logical Workspace Server.
2. Right-click the icon for a server under the Projects folder, and then select Properties from the pop-up menu.
Configure SAS Enterprise Miner in SAS Management Console 47

3. When the Logical Workspace Server Properties window appears, select the Options tab.
48 Chapter 7 • Post-Installation Information

You can perform the following tasks in the Options tab:
• Set Default Project Location — You can customize the Default Location for New Projects by entering a path. All new SAS Enterprise Miner projects that are created on this server default to the path that you specify. If you want to prevent users who create projects from changing the default project location, click Do not allow users to change this location.
• Set Maximum Concurrent Nodes — In Max. Concurrent Nodes, specify the maximum number of concurrently running nodes that you want to allow in project process flow diagrams.
• Set Initialization Code — In the Initialization Code box, enter the path (on this server) to a project start-up file, if you want to use one. A project start-up file is a text file that contains SAS code that is run when a project is opened, a process flow diagram is run, or when result reports are generated.
Configure SAS Enterprise Miner in SAS Management Console 49

• Set MPCONNECT Launch Command — In the MPCONNECT launch command box, you can enter an alternate command to use when you launch MPCONNECT sessions. Normally, it is safe to leave the MPCONNECT launch command box blank. There might be cases when you would like to modify some SAS system defaults for sessions that are used when running process flow diagrams. The following default command is used when this box is left blank:!sascmdv -noobjectserver -nosyntaxcheck -noasynchio.
This command has the same effect as using the SAS command that was used to launch the SAS workspace session at the time the project was opened.
• Set WebDAV URL — (optional) In the WebDAV URL field, you can enter the URL to your WebDAV server. If you specify a WebDAV server, the SAS Enterprise Miner model result packages that you save are copied to the WebDAV server location when the model packages are registered.
4. Click OK to save your changes.
Define Additional SAS Enterprise Miner UsersLogging on to a client/server installation of SAS Enterprise Miner requires an operating system user ID and a SAS Enterprise Miner account. This section provides instructions on how a SAS Administrator can create a new SAS Enterprise Miner account in SAS Management Console.
Each user of the SAS Enterprise Miner Server needs a domain account that has enabled the user with rights to Log on as batch job. See your operating system help for specific information about configuring this security setting. For systems with multiple users, a system group with all appropriate rights and permissions is recommended. On Windows systems, that would include the Log on as batch job security setting.
To simplify adding multiple accounts in SAS Management Console, it is possible to create a custom group. For more information about SAS Management Console and creating custom groups, see the SAS 9.3 Management Console Guide to Users and Permissions.
Each SAS Enterprise Miner system account must be registered in SAS Management Console. SAS Management Console provides a single interface for easier management of many SAS administrative tasks. To create a new SAS Enterprise Miner identity in SAS Management Console, use domain (or machine name) credentials and a user account that already exists on the machine. The user ID must exist on the operating system before the user ID can be registered via SAS Management Console.
Follow the instructions below to create an identity within SAS Management Console. After you create the new identity, users can log in to SAS Enterprise Miner using these credentials.
1. On the server, log in to SAS Management Console as Administrator (sasadm@saspw).
2. On the Plugins tab of SAS Management Console, expand the Environment Management folder.
3. Right-click the User Manager plug-in and select New ð User.
50 Chapter 7 • Post-Installation Information

4. On the General tab of the New User Properties window, enter a value for Name. All of the other fields are optional.
Define Additional SAS Enterprise Miner Users 51

5. Select the Groups and Roles tab. In the Available Groups and Roles pane, select SAS System Services. Move them to the Member of: pane with the arrow button that is between the two panes. You can apply any other group membership or roles by repeating this process.
52 Chapter 7 • Post-Installation Information

6. Select the Accounts tab. On the right, select the New button. In the New Login Properties window, enter the new user’s domain account. If the user ID is for a Windows account, it must be stored in a qualified format (such as windows-domain\user, machine-name\user, or [email protected]). A password is optional, but can be useful for a login that provides access to a third-party database server that uses proprietary authentication. Authentication Domain can be used to assign the login to a category within the SAS metadata. The Authentication Domain for SAS Enterprise Miner login accounts must be DefaultAuth.
Note: On a Windows system, this account also requires the account permissions Log on as a batch job and Access this computer from the network. These permissions enable the user to be logged on by means of a batch-queue and access to the SAS Metadata server. You can configure these security settings by opening the appropriate policy and adding each account. Generally, it is recommended that you create a user group, and give the group Log on as a batch job permission, and if required Access this computer from the network, permission. Then, add each account to that group. For more information about required security policies see http://support.sas.com/documentation/cdl/en/bisecag/61133/HTML/default/a003181427.htm.
Define Additional SAS Enterprise Miner Users 53
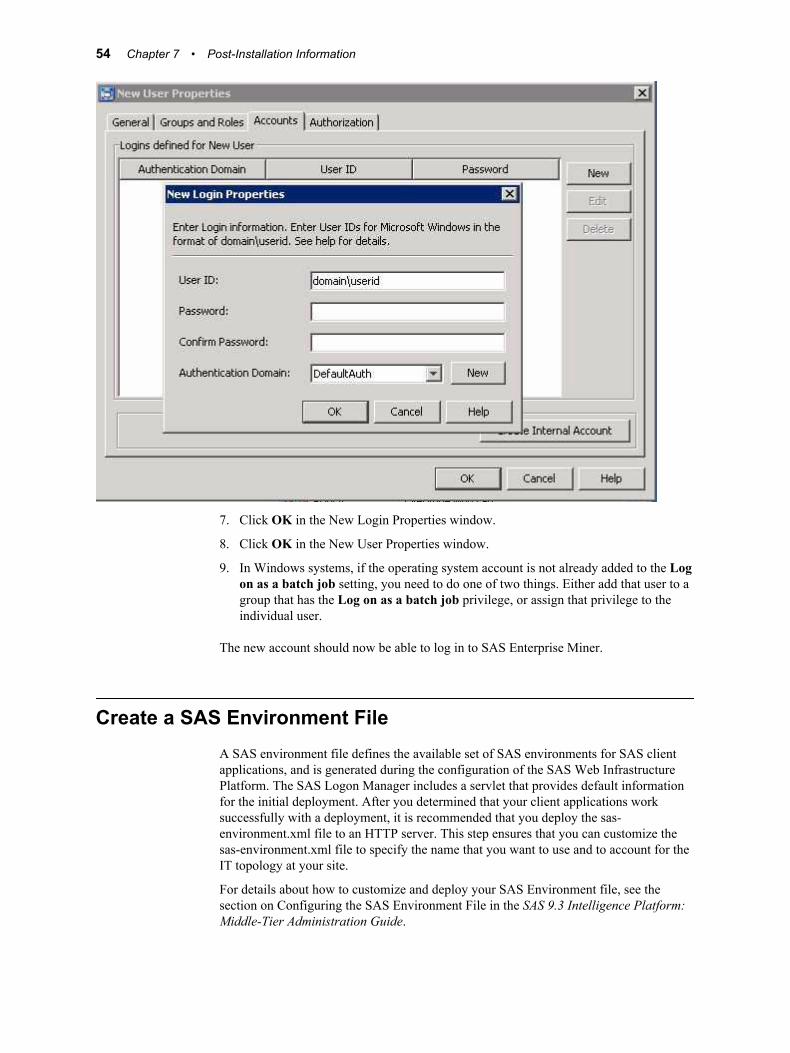
7. Click OK in the New Login Properties window.
8. Click OK in the New User Properties window.
9. In Windows systems, if the operating system account is not already added to the Log on as a batch job setting, you need to do one of two things. Either add that user to a group that has the Log on as a batch job privilege, or assign that privilege to the individual user.
The new account should now be able to log in to SAS Enterprise Miner.
Create a SAS Environment FileA SAS environment file defines the available set of SAS environments for SAS client applications, and is generated during the configuration of the SAS Web Infrastructure Platform. The SAS Logon Manager includes a servlet that provides default information for the initial deployment. After you determined that your client applications work successfully with a deployment, it is recommended that you deploy the sas-environment.xml file to an HTTP server. This step ensures that you can customize the sas-environment.xml file to specify the name that you want to use and to account for the IT topology at your site.
For details about how to customize and deploy your SAS Environment file, see the section on Configuring the SAS Environment File in the SAS 9.3 Intelligence Platform: Middle-Tier Administration Guide.
54 Chapter 7 • Post-Installation Information

Chapter 8
Administrative Tasks and Information
SAS Enterprise Miner Overview for Administrators . . . . . . . . . . . . . . . . . . . . . . . . 55
Publishing Extension Tools . . . . . . . . . . . . . . . . . . . . . . . . . . . . . . . . . . . . . . . . . . . . . 56Overview . . . . . . . . . . . . . . . . . . . . . . . . . . . . . . . . . . . . . . . . . . . . . . . . . . . . . . . . . . 56Workstation Extension . . . . . . . . . . . . . . . . . . . . . . . . . . . . . . . . . . . . . . . . . . . . . . . 57Server Extensions . . . . . . . . . . . . . . . . . . . . . . . . . . . . . . . . . . . . . . . . . . . . . . . . . . . 57
Troubleshooting . . . . . . . . . . . . . . . . . . . . . . . . . . . . . . . . . . . . . . . . . . . . . . . . . . . . . . 57Overview . . . . . . . . . . . . . . . . . . . . . . . . . . . . . . . . . . . . . . . . . . . . . . . . . . . . . . . . . . 57Operating System Environmental and Configuration Information . . . . . . . . . . . . . 58Problem Description . . . . . . . . . . . . . . . . . . . . . . . . . . . . . . . . . . . . . . . . . . . . . . . . . 58Sample Test Data . . . . . . . . . . . . . . . . . . . . . . . . . . . . . . . . . . . . . . . . . . . . . . . . . . . 59Log Files . . . . . . . . . . . . . . . . . . . . . . . . . . . . . . . . . . . . . . . . . . . . . . . . . . . . . . . . . . 59SAS Enterprise Miner Client Message Logging . . . . . . . . . . . . . . . . . . . . . . . . . . . 59
Adding a New Workspace Server for SAS Enterprise Miner . . . . . . . . . . . . . . . . . 60
SAS Enterprise Miner Model Package Registration . . . . . . . . . . . . . . . . . . . . . . . . . 64Overview . . . . . . . . . . . . . . . . . . . . . . . . . . . . . . . . . . . . . . . . . . . . . . . . . . . . . . . . . . 64Set Up the SAS Content Server . . . . . . . . . . . . . . . . . . . . . . . . . . . . . . . . . . . . . . . . 64Configure the Workspace Server for Model Package Registration . . . . . . . . . . . . . 65Verify the Model Package Registration . . . . . . . . . . . . . . . . . . . . . . . . . . . . . . . . . . 65Deleting Registered Model Packages . . . . . . . . . . . . . . . . . . . . . . . . . . . . . . . . . . . . 65
SAS Enterprise Miner Start Code . . . . . . . . . . . . . . . . . . . . . . . . . . . . . . . . . . . . . . . . 66
Defining Migrated Projects in SAS Enterprise Miner . . . . . . . . . . . . . . . . . . . . . . . 67
Configuring the Locale for Multi-Language Environments . . . . . . . . . . . . . . . . . . . 70
SAS Enterprise Miner Overview for Administrators
SAS Enterprise Miner uses process flows to analyze enterprise data, create predictive and descriptive models, and interpret the models. The process flows are generated in a graphical user interface that enables interaction between statistical analysts, IT professionals, and business analysts. Full details about the administration of the SAS servers used by SAS Enterprise Miner are available in the SAS 9.3 Intelligence Platform: System Administration Guide.
55

Publishing Extension Tools
OverviewExtension nodes provide a mechanism for extending the functionality of SAS Enterprise Miner. Extension nodes can be developed to perform almost any essential data mining activity. In SAS Enterprise Miner, the essential data mining activities are divided into the following five groups: Sample, Explore, Modify, Model, and Assess (known as SEMMA). Although SAS Enterprise Miner is designed to satisfy the needs of a diverse audience, extension nodes provide you a means to develop custom solutions.
Each extension node consists of four files.
• <extention_name>.sas7bcat — SAS code for the extension node.
• <extention_name>.xml — Definition of the extension node for the graphical user interface.
• <extention_name>_16.gif — A small, 16–bit gif file that serves as the extension node’s icon on the node toolbar.
• <extention_name>_32.gif — A large, 32–bit gif file that serves as the extension node’s image in the diagram workspace.
The extension node files must be available to the SAS Server. It is recommended you create a folder accessible by everyone that will use the extension tool (for example EMEXT). You must add the XML file to the extension node folder and create two subdirectories in this folder named gif16 and gif32 to hold the 16- and 32-bit icons, respectively.
The SAS code for the extension node must be available to the SAS server. It is recommended that you put your code in catalog source entries. The path to the SAS code is stored in the extensions.xml file. If you add the path for your EMEXT folder to the SASHELP concatenation in the SAS system configuration file, then the catalogs in the EMEXT folder will be found by the server. Since the path to the SAS code is stored in the extensions.xml file, when creating your own extension node, you need to edit your extensions.xml file to specify your catalog and source entry.
An example extension node (EXT Demo) is part of SAS Enterprise Miner. See the SAS Help for SAS Enterprise Miner for details about EXT Demo.
For client/server configurations, the four files in the EXT Demo node are
• SASHELP.EMUTIL.EXTDEMO.SOURCE
• C:\Program Files\SASHome\SASEnterpriseMinerMidTier\12.1\Static\wars\sas.enterpriseminer.svcs\WEB-INF\classes\components\ExtDemo.xml
• C:\Program Files\SASHome\SASEnterpriseMinerMidTier\12.1\Static\wars\sas.enterpriseminer.svcs\WEB-INF\classes\components\gif16\ExtDemo.gif
• C:\Program Files\SASHome\SASEnterpriseMinerMidTier\12.1\Static\wars\sas.enterpriseminer.svcs\WEB-INF\classes\components\gif32\ExtDemo.gif
For workstation configurations, the four files in the EXT Demo node are
56 Chapter 8 • Administrative Tasks and Information

• SASHELP.EMUTIL.EXTDEMO.SOURCE
• C:\Program Files\SASHome\SASEnterpriseMinerWorkstationConfiguration\12.1\WEB-INF\classes\components\ExtDemo.xml
• C:\Program Files\SASHome\SASEnterpriseMinerWorkstationConfiguration\12.1\WEB-INF\classes\components\gif16\ExtDemo.gif
• C:\Program Files\SASHome\SASEnterpriseMinerWorkstationConfiguration\12.1\WEB-INF\classes\components\gif32\ExtDemo.gif
Workstation ExtensionFor Workstation configurations, if the EMEXT folder is created under User Home on Windows 7 (for example C:\User\<userid>\EMEXT), it will be found automatically. For any other location, define a system environment variable named dminemid.components.extra.dir that contains the path for the directory that contains the extension xml file. It can be any directory accessible from the machine.
Server ExtensionsFor a server configuration, specify the location of the extensions folder by adding a definition in the SAS Management Console. To add a definition, follow the steps below.
1. Log on to the SAS Management Console as a SAS administrator.
2. On the Plug-ins tab, select Application Management ð Configuration Manager ð SAS Application Infrastructure. Right-click Enterprise Miner Mid-tier Services 12.1 ð Properties.
3. On the Advanced tab, locate the property named dminemd.components.extra.dir. In the Property Value field, enter the directory path to your extensions folder.
4. Restart the SAS Enterprise Miner client to see the new node. There is no need to restart the middle-tier server.
For more information about the extension tools and the EXT Demo node, see the SAS Enterprise Miner Help documentation.
Troubleshooting
OverviewWhen you are troubleshooting unexpected application behavior, it is important to isolate and describe the problem and the context in which it occurs. The following are the general classes of information that can expedite resolution of a technical problem:
• operating system environmental and configuration information
• detailed problem description
• sample test data
• log files
Troubleshooting 57

• client message logs
• other files or screen shots
Operating System Environmental and Configuration InformationIf you are going to request help from SAS Technical Support, providing the following information about your installation on each machine involved can expedite the processing of your report:
• your hardware platform
• your operating system name, version, word size, and service level
• the overall system load, including the amount of physical memory available and processor utilization
• the amount of disk space available and the location of the SAS Work folder and the SAS Enterprise Miner project root folder
• the number of processors
• the approximate number of SAS users
• the Java Development Kit version
• the Java Runtime Environment version
• the SAS version and SAS service pack or patch level, including any hotfixes
• the SAS Enterprise Miner version number and patch level
• your server language and locale
• whether a firewall exists between the client and server that regulates configuration information, port availability, and communication direction
Note: You need to provide the preceding information only once, unless it has changed since previous reports.
Problem DescriptionIn order to get the best help, provide a scenario description that includes as much information as possible on how to reproduce the problem. Include a description of the general task that you are trying to accomplish, your role and permissions, and the state of your session before the problem is observed. It is also helpful to provide the complete process flow diagram, model package, or EM Batch code that was used when the problem was encountered.
Provide details such as the following:
• Is this a client/server environment or a single machine?
• If client/server, are you connecting to the server via Java Web Start through the Internet browser?
• Are you working with new data or updating existing data?
• Have you tried different data?
• What browser and version are you using?
• Is the problem locale-specific? If so, which locales are having problems?
58 Chapter 8 • Administrative Tasks and Information

Sample Test DataSince problems can often only be reproduced with specific data, a small sample of the data is often critical to diagnosing the problem.
Log FilesThere are logs kept for the project, the diagram, and each node in the flow. Additional logging can be turned on by defining the macro variable EM_DEBUG. See the SAS Enterprise Miner Help for more information.
The following logs are available in SAS Enterprise Miner:
• For the project log, select View ð Project Log.
• For the diagram log, select the Log tab at the bottom of the diagram.
• For a node’s log, right-click the node and select Results. In the Results window, select View ð SAS Results ð Log.
When SAS Enterprise Miner Server catches and logs problems, it attempts to log as much information as it can under the circumstances. The log often captures detailed exception information that you can send to SAS Technical Support.
Note: It is helpful to send the complete text of the Java stack trace that surfaced on the application error page. SAS Technical Support prefers that you do not send a screen shot of this information because often the screen shots do not include the full text of the trace.
SAS Enterprise Miner Client Message LoggingWhen reporting a problem to SAS Technical Support, you need to enable the Java Console in order to get the maximum information available from the SAS Enterprise Miner Client. The Java Console is enabled from the Java Control Panel.
To open the Java Control Panel in Windows, open the Windows Control Panel and select Java. In the Java Control Panel select the Advanced tab, expand the Java console item, select Show console, and click Apply.
Troubleshooting 59

You can get more information about the Java Console and its capabilities from the Java Console documentation available at http://download.oracle.com/javase/6/docs/technotes/guides/deployment/deployment-guide/console.html.
Adding a New Workspace Server for SAS Enterprise Miner
First, familiarize yourself with the following documentation:
• In the SAS 9.3 Intelligence Platform: Application Server Administration Guide, see the section Add a New Logical Server in an Existing SAS Application Server, located at http://support.sas.com/documentation/cdl/en/biasag/62612/HTML/default/viewer.htm#n10005intelplatform00srvradm.htm.
• In the SAS 9.3 Intelligence Platform: Middle-Tier Administration Guide, see the section Job Execution Services, located at http://support.sas.com/documentation/cdl/en/bimtag/64207/HTML/default/viewer.htm#n08w66tf7khiu0n15tgt8rsow99u.htm.
Complete the following steps to add a new workspace server to your SAS Enterprise Miner installation:
1. Start the SAS Deployment Wizard from the highest-level directory in your SAS Software Depot using the command that is appropriate for your operating system. On Windows systems that file is setup.exe. For UNIX systems, use setup.sh.
2. Select Install SAS Software. Click Next.
3. Select Perform a Planned Deployment, deselect Install SAS Software, and check only Configure SAS Software. Click Next.
60 Chapter 8 • Administrative Tasks and Information

4. You must use the same deployment plan that was used when you installed the original server component. This example uses one of the standard deployment plants. Choose Select a standard deployment plan, and from the drop-down menu select Enterprise Miner and Text Miner, one Machine, JBoss. Click Next.
5. Checking System should already be complete. Click Next.
6. In Select User Account Mode, you will most likely want to choose Multiple-User Mode. Click Next.
7. In Select Configuration Prompting Level, select Typical. Click Next.
8. In Specify Configuration Information, you must choose the same options as your original installation. For this example, use the default settings. Click Next.
9. The SAS Deployment Wizard warns you that the configuration directory and level specified contain existing files. Select Yes.
10. In Select Products to Configure check SAS Workspace Server. Click Next.
11. In Local Machine Name, accept the defaults. Click Next.
12. In Migration Information, no migration should be performed. Click Next.
13. In Integrated Windows Authentication, accept the default settings. Click Next.
14. In SAS Metadata Server, accept the default settings. Click Next.
15. In Deployment Accounts: Type of Accounts, select Use SAS internal accounts when appropriate. Click Next.
16. In SAS Internal Account: Unrestricted Administrator, enter the same password that was used in the original installation. Click Next.
17. In Deployment Accounts: First User, there is no need to set up a first user ID. Click Next.
18. In Create SAS Application Server Context, select Create a SAS Application Server Context. Click Next.
19. In SAS Application Server: Server Context, enter SASApp_2 in the field SAS Application Server Context Name. Click Next.
20. In SAS Server Dependencies, confirm that the value of SAS Application Server Context is SASApp_2. Click Next.
21. In SAS Workspace Server, enter the workspace server port. This example uses the default value, 8592. Click Next.
22. Check the deployment summary and click Start. Once the SAS Deployment Wizard is finished, note the additional resources and click Finish.
Adding a New Workspace Server for SAS Enterprise Miner 61
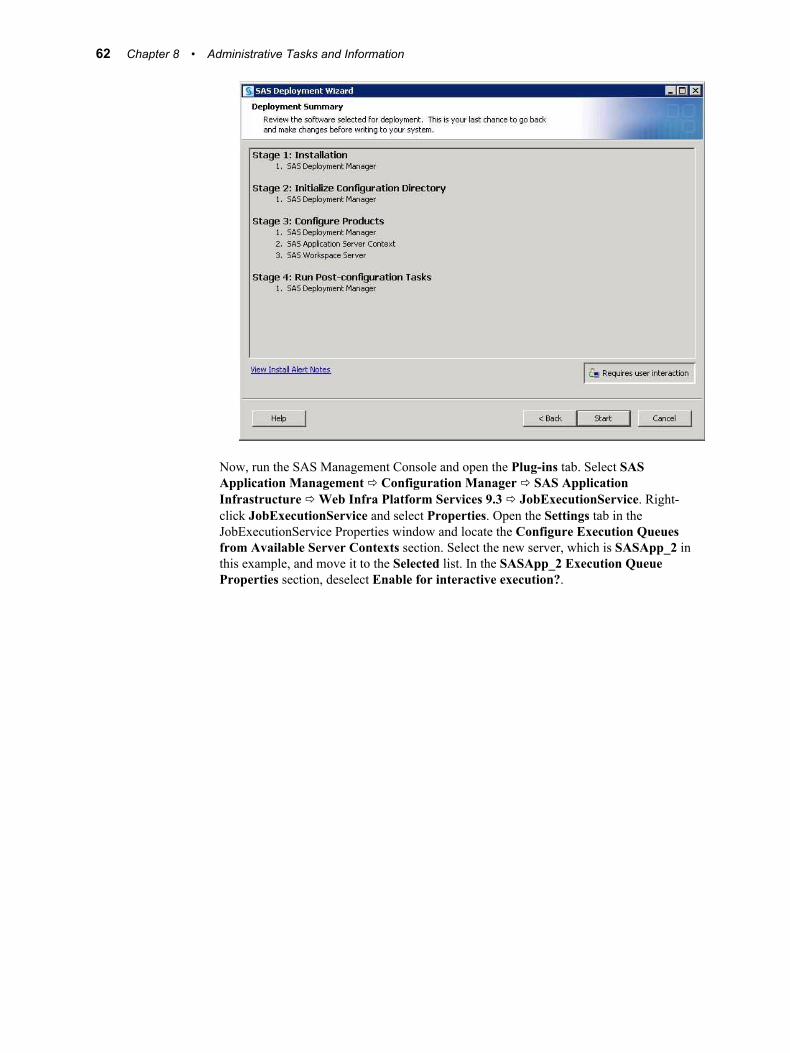
Now, run the SAS Management Console and open the Plug-ins tab. Select SAS Application Management ð Configuration Manager ð SAS Application Infrastructure ð Web Infra Platform Services 9.3 ð JobExecutionService. Right-click JobExecutionService and select Properties. Open the Settings tab in the JobExecutionService Properties window and locate the Configure Execution Queues from Available Server Contexts section. Select the new server, which is SASApp_2 in this example, and move it to the Selected list. In the SASApp_2 Execution Queue Properties section, deselect Enable for interactive execution?.
62 Chapter 8 • Administrative Tasks and Information

Click OK.
Next, restart the Web application server service. For example, in a default Windows install this can be done from the Windows Management console for Services by restarting the Service name, JBoss — SASServer1.
To verify your new server from SAS Enterprise Miner, log on to SAS Enterprise Miner and create a new project that uses the new logical workspace server, create a diagram, create a data source, place the data source on your diagram, and run the diagram. You can select the new logical workspace server in Step 1 of the New Project Wizard.
Important information about managing and configuring your workspace server can be found under Managing Workspace Servers and Stored Process Servers in the SAS 9.3 Intelligence Platform Application Server Administration Guide.
Adding a New Workspace Server for SAS Enterprise Miner 63

SAS Enterprise Miner Model Package Registration
OverviewOne of the ways SAS Enterprise Miner data mining models can be deployed is as a Model Package. A model package is a snapshot of a process flow from the perspective of the reporting node. Model Package files enable you to save results and settings for an entire process flow. Instructions for creating a Model Package are in the SAS Enterprise Miner 12.1 Reference Help. To access the SAS Enterprise Miner 12.1 Reference Help start the SAS Enterprise Miner client and select Help ð Contents
By default, model packages are stored within the SAS Enterprise Miner Reports subdirectory of your project directory. You can also set up a Model Repository and register you model packages there.
The Model Repository enables you to store and access models conveniently from numerous projects and diagrams in a centralized location. Models are exported from SAS Enterprise Miner to the Model Repository through the SAS Metadata Server. Models and their associated metadata are stored in the repository and can be searched and used by analysts and applications throughout your organization.
The model repository is implemented by a combination of the SAS Metadata Server and the SAS Content Server. The SAS Content Server is included in each Client Server deployment of SAS Enterprise Miner. SAS Enterprise Miner stores registered model package files in the SAS Content Server using the WebDAV ("Web-based distributed authoring and versioning") interface.
Set Up the SAS Content ServerTo enable registration of SAS Enterprise Miner model packages, you must first access the SAS Content Server and create a public directory for SAS Enterprise Miner.
1. Access the SAS Content Server Administration Console by navigating to http://hostname:port/SASContentServer/dircontents.jsp in a Web browser. The value of hostname:port depends on your network structure, but an example of hostname:port is localhost:8080. Log in using the SAS Administrator account (for example, sasadm) that you defined during the SAS installation process.
2. In the Add folder field, enter a folder name, such as EM_Models.
3. Click Add folder.
4. The EM_Models folder is displayed in the Item name column.
5. Click the Permissions icon that is associated with the EM_Models folder.
6. In the Add principal field, enter the value jcr:all. Change all of the permissions to Yes.
7. Click Save Changes.
8. Log off from the SAS Content Server Administration Console.
64 Chapter 8 • Administrative Tasks and Information

Configure the Workspace Server for Model Package RegistrationEach SAS Enterprise Miner Workspace Server that will be used to register model packages needs to be given the URL for the location in the SAS Content Server where the package files will be stored. In the SAS Management Console, on the Plug-ins tab, expand Application Management. Expand the Enterprise Miner plug-in to reveal the subfolders.
1. Expand the Projects folder.
2. Right-click the SAS Workspace Server that is associated with your SAS Enterprise Miner installation and select Properties. For example, you might see SASApp — Logical Workspace Server.
3. Open the Options tab.
4. In the WebDAV URL field, enter http://hostname:port/SASContentServer/repository/default/EM_Models/. Note that hostname must be a fully qualified machine name.
5. Click OK.
Verify the Model Package RegistrationDetailed instructions for the creation and registration of a model package are available in the SAS Enterprise Miner Help. The following steps provide an outline of model package registration process, not an example of that process.
1. Launch SAS Enterprise Miner.
2. Open a project on the workspace server that was configured for registration.
3. Open a process flow diagram.
4. Run any process flow within that diagram.
5. Create a model package.
6. Register the model package that you just created.
To check the metadata for the registered model, select Client View ð Metadata and then navigate to the folder that contains the model package. You might need to specify that value in the Look in field. Registered model packages have a type of MiningResults.
To ensure that the model package file was successfully deployed to in the SAS Content Server, navigate to the WebDAV URL for the Workspace Server that was used to register the model package. The registered model package should present.
Note that a model package, which has a .SPK extension, is a compressed file. Whenever you send a compressed file to SAS Technical Support, please make sure the filename begins with the letters ZQJ (for example, zqj_myfilename.zip) to avoid it being stripped by our e-mail filters. The model package contains the settings, logs, and results from the flow.
Deleting Registered Model PackagesThe metadata entries for registered model packages can be deleted using the SAS Enterprise Miner Client’s View Metadata utility. Access it from the SAS Enterprise
SAS Enterprise Miner Model Package Registration 65

Miner Client’s main menu. Select View ð Metadata. Navigate to the MiningResults that you want to delete, if you plan to delete the model package file from the SAS Content Server it is recommended you note the file path in the properties of your target. To display the properties right-click your target and select Open. To delete the entry, right-click your target and select Delete.
The associated model package files in the SAS Content Server can be deleted with the SAS Content Server Administration Console. For details see the SAS(R) 9.3 Intelligence Platform: Middle-Tier Administration Guide section titled Using the SAS Content Server Administration Console.
SAS Enterprise Miner Start CodeYou can enter SAS code that you want to run before any SAS Enterprise Miner processing. This code can include any SAS system options, titles, and footnotes, libref and filename statements, or SAS Enterprise Miner macro variables. Use this code to customize your SAS Enterprise Miner session. You should not enter code that runs SAS procedures or other potentially time-consuming operations. In particular, you should avoid the creation of unneeded SAS libraries, which can slow the creation of SAS Enterprise Miner sessions and thus reduce system responsiveness.
There are three types of start code.
• Workspace Server Autoexec Code — The default search path used by the SAS system for autoexec.sas is not used by the workspace server. Instead, any SAS statements that you want executed immediately after the Workspace server initializes can be added to autoexec_usermods.sas. This file can be found in your configuration directory, for example C:\SAS\EMTM\Lev1\SASApp\WorkspaceServer\autoexec_usermods.sas. Other options for workspace server configuration are available in the SAS 9.3 Intelligence Platform Application Server Administration Guide.
• Server Start Code — Your server administrator manages this code that is executed for all SAS Enterprise Miner users for any server. This code is stored in a SAS code file accessible on the SAS server. The filename and location is entered as Initialization Code on the Options tab of the Logical Workspace Server Properties in the SAS Enterprise Miner plug-in for the SAS Management Console.
• Project Start Code — Users can enter code that is executed for any process within the current project. This code is stored in the SAS Enterprise Miner project and is edited through the dialog box for the project.
The order of execution of SAS Enterprise Miner session start code is:
1. Workspace Server Autoexec Code
2. Server Start Code
3. Project Start Code
For details about the available SAS Enterprise Miner macro variables, see the SAS Enterprise Miner 12.1 Reference Help in the SAS Enterprise Miner Client.
66 Chapter 8 • Administrative Tasks and Information

Defining Migrated Projects in SAS Enterprise Miner
Note: Your SAS Administrator can provide the location of your SAS Enterprise Miner project, which is required for step 3 below.
To define a migrated project, follow the steps below:
1. Log on to SAS Enterprise Miner.
2. Select New Project.
3. Select the SAS Server where the project is accessible and click Next.
4. Enter the Project Name and SAS Server Directory for your project. For example, if the project name on the old system is Test, then the project name on the new system must be Test. The project must be copied to /home/<userid>/em_projects and the SAS Server Directory must be the restored project root directory. This scenario is displayed in the image below.
Click Next.
5. Click Yes when the Project Exist window appears.
Defining Migrated Projects in SAS Enterprise Miner 67

Select a location for the project metadata and click Next.
6. In the Create New Project — Step 4 of 4 New Project Information window, click Finish.
Your previously created diagram should appear in SAS Enterprise Miner, as shown below.
68 Chapter 8 • Administrative Tasks and Information

7. Click the ellipsis button in the Project Start Code property to open the Project Start Code window. Verify that your library references (LIBNAME statements) are correct. Close the Project Start Code window.
You are now able to run any diagrams in your project.
Defining Migrated Projects in SAS Enterprise Miner 69

Configuring the Locale for Multi-Language Environments
In some multi-language environments, it might be necessary to configure the SAS Web Infrastructure Platform to start each workspace in the locale that is used by the Enterprise Miner client. This is accomplished using the SAS Preferences Manager. The SAS Preferences Manager is a web application that provides a central facility for individual users to manage their preferences and settings. For more information, see Preferences Manager in the Administering the SAS Web Infrastructure Platform chapter of SAS 9.3 Intelligence Platform: Middle-Tier Administration Guide, located at http://support.sas.com/documentation/cdl/en/bimtag/64862/PDF/default/bimtag.pdf.
You can start the SAS Preferences Manager from your web browser by using a URL address similar to the following: http://server:port/SASPreferences. For example, http://test.na.sas.com:8080/SASPreferences.
Log on to the SAS Preferences Manager with your SAS Enterprise Miner account information. In the left selection panel, select Regional. This opens the Regional preferences on the right side. In the Regional preferences, under User Locale select your preferred locale. At the bottom of the page select OK to save your settings and exit the SAS Preferences Manager.
70 Chapter 8 • Administrative Tasks and Information