SunSystems, SAP Business One (Business 1), SAP Business ByDesign, Proactis from Sapphire Systems UK
Upload
rajusampathiraoCategory
view
354download
8description

User's Guide■ SAP BusinessObjects Data Quality Management, version for SAP Solutions 4.0 SP01
2012-05-02

© 2012 SAP AG. All rights reserved.SAP, R/3, SAP NetWeaver, Duet, PartnerEdge, ByDesign, SAPBusinessObjects Explorer, StreamWork, SAP HANA and other SAP products and services mentioned
Copyright
herein as well as their respective logos are trademarks or registered trademarks of SAP AG inGermany and other countries.Business Objects and the Business Objects logo, BusinessObjects,Crystal Reports, Crystal Decisions, Web Intelligence, Xcelsius, and other Business Objects productsand services mentioned herein as well as their respective logos are trademarks or registeredtrademarks of Business Objects Software Ltd. Business Objects is an SAP company.Sybase andAdaptive Server, iAnywhere, Sybase 365, SQL Anywhere, and other Sybase products and servicesmentioned herein as well as their respective logos are trademarks or registered trademarks of Sybase,Inc. Sybase is an SAP company. Crossgate, m@gic EDDY, B2B 360°, B2B 360° Services areregistered trademarks of Crossgate AG in Germany and other countries. Crossgate is an SAPcompany. All other product and service names mentioned are the trademarks of their respectivecompanies. Data contained in this document serves informational purposes only. National productspecifications may vary.These materials are subject to change without notice. These materials areprovided by SAP AG and its affiliated companies ("SAP Group") for informational purposes only,without representation or warranty of any kind, and SAP Group shall not be liable for errors oromissions with respect to the materials. The only warranties for SAP Group products and servicesare those that are set forth in the express warranty statements accompanying such products andservices, if any. Nothing herein should be construed as constituting an additional warranty.
2012-05-02

Contents
Introduction...........................................................................................................................11Chapter 1
About this guide.....................................................................................................................111.1Assumed audience.................................................................................................................111.2SAP BusinessObjects information resources.........................................................................111.3
Security.................................................................................................................................13Chapter 2
Overview................................................................................................................................132.1Recommendations for data protection and privacy.................................................................132.2Security and this product.......................................................................................................132.3Security information specific to the RFC Server.....................................................................142.3.1Data protection......................................................................................................................142.3.2Authorizations........................................................................................................................152.3.3Logging..................................................................................................................................152.3.4Communication interfaces......................................................................................................152.3.5Network setup.......................................................................................................................162.3.6Network ports........................................................................................................................162.3.7Data storage..........................................................................................................................172.3.8
Installation overview and requirements................................................................................19Chapter 3
Installation overview...............................................................................................................193.1System Requirements............................................................................................................193.2Required SAP Notes for your system....................................................................................203.2.1Requirements for the Data Services machine.........................................................................203.2.2Requirements for the RFC Server..........................................................................................213.2.3Requirements for the BAdIs...................................................................................................213.2.4Installation checklist...............................................................................................................223.3Data Services........................................................................................................................223.3.1Data Services Components...................................................................................................223.3.2Assign SAP authorizations.....................................................................................................233.3.3RFC Server............................................................................................................................233.3.4BAdIs.....................................................................................................................................243.3.5Installation scenarios..............................................................................................................243.4
2012-05-023

Previous version already installed...........................................................................................243.4.1Fresh installation....................................................................................................................253.4.2
Install Data Services and the Data Services Components....................................................27Chapter 4
Install Data Services..............................................................................................................274.1Data Services previously installed..........................................................................................274.1.1Data Services security settings..............................................................................................274.1.2Install the address directories.................................................................................................284.1.3Set the Data Services code page to work with custom functions...........................................284.1.4Data Services must be running..............................................................................................284.1.5Install the Data Services Components...................................................................................284.2Data Services Components checklist.....................................................................................294.2.1Data Services Components installation..................................................................................324.2.2Configure jobs as services.....................................................................................................344.2.3Configure Web Services........................................................................................................374.2.4
Assign SAP authorizations....................................................................................................39Chapter 5
Assign SAP authorizations to the RFC User...........................................................................395.1Creating the RFC User Name................................................................................................395.1.1RFC User Type......................................................................................................................395.1.2To use the RFC Server Role Template...................................................................................395.1.3Authorizations........................................................................................................................405.1.4
Install the BAdIs for new (non-upgrade) installation.............................................................41Chapter 6
Do not perform this installation if you are upgrading from version 4.0.....................................416.1Step 1: Import the Data Quality Management package on client 000.....................................416.1.1Step 2: Link MDG or CRM 7 EnhP1 (or higher) IMG structure to your SAP Reference IMGstructure................................................................................................................................43
6.1.2
Step 3: Activate the Business Configuration Sets on each target client ................................456.1.3For IC or CRM WebClient, re-activate the BSP Business Configuration Sets........................466.1.4Load supported country codes...............................................................................................476.1.5Activate duplicate check index pools......................................................................................486.1.6Quarterly Adjustment Reports................................................................................................486.1.7Run the Initial Match Code (Index) Setup program.................................................................526.1.8Install and configure into the WebClient for CRM 7.0 and CRM 2007....................................546.1.9Install and configure into the IC WebClient for CRM 5.0........................................................576.1.10
Install the BAdIs support package........................................................................................61Chapter 7
Install the BAdIs support package..........................................................................................617.1Step 1: Import the Data Quality Management support package on client 000 ........................617.1.1
2012-05-024
Contents

Step 2: Activate or re-activate the Business Configuration Sets on each target client............627.1.2
Install the RFC Server...........................................................................................................65Chapter 8
Install the RFC Server............................................................................................................658.1Number of RFC Servers to install...........................................................................................658.1.1Installing an RFC Server as a Windows Service.....................................................................668.1.2Replacing a previous RFC Server version..............................................................................678.1.3RFC Server Checklist............................................................................................................678.1.4Understanding the monitor services settings..........................................................................688.1.5RFC Server installation...........................................................................................................698.1.6Start the RFC Server.............................................................................................................728.1.7How to stop the RFC Server..................................................................................................738.1.8Creating the SAP handshake with RFC Servers.....................................................................738.1.9
Configuring geocoding..........................................................................................................77Chapter 9
Configure geocoding (optional)..............................................................................................779.1Configure the geocoding job as a service...............................................................................779.1.1Configure the RFC Server to enable geocoding.....................................................................789.1.2Register the geocoding program in the SAP system..............................................................789.1.3Configure each country for geocoding....................................................................................799.1.4Designate fields to use for geocoding....................................................................................799.1.5
Configuring through the IMG................................................................................................81Chapter 10
Overview................................................................................................................................8110.1To locate the IMG activities....................................................................................................8110.2Creating the SAP handshake with RFC servers.....................................................................8210.3Maintain Supported Countries................................................................................................8210.4To remove a country code......................................................................................................8310.4.1Maintain exception table of transaction codes........................................................................8310.5To add a transaction code to the exception table...................................................................8410.5.1Maintain table to activate SAP postal code check before postal validation.............................8410.6To add a country to the table to activate SAP postal code check before postal validation......8510.6.1Maintain fields for address reviewer.......................................................................................8510.7Fields and order for standard street addresses......................................................................8510.7.1Fields and order for P.O. Box addresses................................................................................8610.7.2To change the fields or order of the fields displayed in the address reviewer..........................8610.7.3Maintain fields for duplicate hit list displays............................................................................8610.8Fields and order for error tolerant search...............................................................................8710.8.1Fields and order for duplicate hit list.......................................................................................8710.8.2To make changes in the error tolerant search or duplicate hit list display ...............................8710.8.3
2012-05-025
Contents

Maintain operating parameters...............................................................................................8810.9Operating parameters............................................................................................................8810.9.1Maintain map of objects to transaction for Quarterly Error report...........................................9210.10Defining mappings..................................................................................................................9210.10.1Predefined mappings..............................................................................................................9310.10.2To add a mapping for an Address Type Code.........................................................................9310.10.3Activate/Deactivate postal validation functionality..................................................................9410.11Activate/Deactivate duplicate check and error tolerant search functionality...........................9410.12Identify Search Fields.............................................................................................................9410.13To identify search fields..........................................................................................................9510.13.1Maintain DQM Region Mappings...........................................................................................9510.14Understanding regions...........................................................................................................9510.14.1Correct region mapping..........................................................................................................9510.14.2Maintain Customer Address Reviewer Labels........................................................................9710.15Maintain Suggestion List Labels.............................................................................................9710.16To change a Suggestion List label..........................................................................................9810.16.1Maintain settings to switch off the Address Reviewer screen.................................................9810.17
Configuring the RFC Server................................................................................................101Chapter 11
Overview of RFC Server configurations...............................................................................10111.1Configuring through flrfcsrv.xml............................................................................................10111.2Editing flrfcsrv.xml................................................................................................................10111.2.1Enable DPV..........................................................................................................................10211.2.2Enable geocoding.................................................................................................................10211.2.3
Postal address validation....................................................................................................103Chapter 12
Overview of postal address validation..................................................................................10312.1Interactive cleansing.............................................................................................................10312.2Using interactive cleansing ..................................................................................................10312.2.1Batch cleansing with Quarterly Adjustment Reports.............................................................10412.3
Duplicate check and error tolerant search..........................................................................105Chapter 13
Overview of duplicate check and error tolerant search.........................................................10513.1Duplicate check...................................................................................................................10513.1.1Error tolerant search............................................................................................................10513.1.2Break keys (match codes)....................................................................................................10513.2Understanding break keys (match codes) and data fields.....................................................10613.2.1To change the match code (break key).................................................................................10713.2.2Configuring the break key settings.......................................................................................10813.2.3Match on name data............................................................................................................11113.2.4
2012-05-026
Contents

Using duplicate check..........................................................................................................11113.3Interactive mode..................................................................................................................11113.3.1Batch mode.........................................................................................................................11313.3.2Using error tolerant search...................................................................................................11613.4The hit list............................................................................................................................11613.4.1Fields displayed....................................................................................................................11613.4.2
Using duplicate check with SAP MDG...............................................................................119Chapter 14
About duplicate check with SAP MDG.................................................................................11914.1Preparing your Data Services installation to work with MDG for generic duplicate check.....11914.2Configure MDG jobs as services.........................................................................................11914.2.1Specify which work processes to use..................................................................................12014.2.2Disable session security for function Get_RTService_List....................................................12014.2.3Activate/Deactivate MDG Search Functionality...................................................................12114.3Maintain services for MDG generic duplicate check.............................................................12114.4To set /FLDQ/ namespace to Modifiable.............................................................................12114.4.1To assign the services..........................................................................................................12114.4.2To configure fields for duplicate check.................................................................................12214.4.3Define Match Code Fields....................................................................................................12314.4.4Configure MDG to use this product for duplicate checking..................................................12414.4.5Add a custom match code (break key) function....................................................................12514.5To create the function in Data Services................................................................................12514.5.1To configure the MDG system for custom functions............................................................12614.5.2
External List Management...................................................................................................127Chapter 15
Overview of External List Management................................................................................12715.1Using this product with ELM................................................................................................12715.2Specify which work processes to use..................................................................................12715.2.1Cleansing the external list prior to loading through ELM.......................................................12815.2.2ELM functionality for different versions of SAP CRM...........................................................12815.2.3Records with only name data...............................................................................................12815.2.4Error: Index pool BUT000 PARTNER not set up completely.................................................12915.2.5Matching on the Marketing Attributes field...........................................................................12915.3Platform requirement for matching on the Marketing Attributes field....................................12915.3.1Configure ELM jobs as services...........................................................................................12915.3.2Activate/Deactivate Extended Search Functionality..............................................................13015.3.3Maintain Matching on Marketing Attributes..........................................................................13015.3.4Customizing the number and weights of fields......................................................................13115.3.5
2012-05-027
Contents

Data Services jobs and options..........................................................................................133Chapter 16
Data Services jobs...............................................................................................................13316.1Memory footprint of jobs......................................................................................................13516.1.1Combine house num and PMB option..................................................................................13616.2To set the combine house num and PMB option .................................................................13716.2.1
Tips and troubleshooting.....................................................................................................139Chapter 17
Installation troubleshooting...................................................................................................13917.1Enable or disable an address cleanse engine........................................................................13917.1.1Disable address cleans engines using global variables ........................................................13917.1.2There was an error while importing the .atl files....................................................................14017.1.3There was an error while executing the batch job DQCreateStageTables to generate the RDBMSstaging tables.......................................................................................................................141
17.1.4
Postal validation and duplicate check/error tolerant search troubleshooting.........................14117.2Using the sample input files to test jobs...............................................................................14217.2.1Inability to save addresses for which the postal code cannot be completed..........................14217.2.2Records created without break keys (match codes) due to downtime of RFC Server...........14217.2.3Include records with empty break keys (match codes).........................................................14317.2.4Customizing the batch match report.....................................................................................14317.2.5Suggestion list configuration................................................................................................14417.2.6Using wild card characters to query and produce suggestion lists with the Global Addressengine..................................................................................................................................144
17.2.7
Duplicate check and the substitution parameter $$DQ_SAP_Match_Engine........................14617.2.8DPV processing locked........................................................................................................14617.2.9Region code incorrect or missing.........................................................................................14617.3Displaying missing region data.............................................................................................14717.3.1Reconciling regions..............................................................................................................14717.3.2RFC Server troubleshooting.................................................................................................15117.4Removing a Windows service for an RFC Server.................................................................15117.4.1RFC Server fails to start: Partner not reached......................................................................15117.4.2RFC Server fails to start: cannot find the log file..................................................................15217.4.3Output manifest information.................................................................................................15217.4.4Understanding High Availability for the RFC Server for network outage ..............................15217.4.5Java OutofMemoryError.......................................................................................................15317.4.6Startup status messages.....................................................................................................15417.4.7Do not configure the RFC Server through Data Services Management Console..................15417.4.8Product component version report.......................................................................................15417.5Customizing error messages................................................................................................15517.6To customize an error message...........................................................................................15517.6.1Diagnosing problems that cause data quality processing to cease.......................................15517.7
2012-05-028
Contents

Using the Break Key Profiler...............................................................................................157Chapter 18
Understanding the Break Key Profiler ..................................................................................15718.1Break Key Profiler job..........................................................................................................15718.2Concepts for the Break Key Profiler.....................................................................................15818.3Noise words.........................................................................................................................15818.3.1First and Last Name Selection.............................................................................................15818.3.2Address only selection.........................................................................................................15918.3.3Installation of the Break Key Profiler.....................................................................................15918.4To install the dataflow without this product...........................................................................16018.4.1Run the job..........................................................................................................................16118.5Performance........................................................................................................................16118.6Change the Degree of Parallelism setting.............................................................................16118.6.1Disable noise word generation.............................................................................................16218.6.2Interpret the Break Key Profiler results.................................................................................16318.7The Break Key Profiler output files.......................................................................................16318.7.1Settings that can be optimized based on the output.............................................................16518.7.2Best practices match codes (break keys).............................................................................16618.7.3Creating custom match codes (break keys).........................................................................16818.8To change the code used for the match codes (break keys).................................................16818.8.1
Index 171
2012-05-029
Contents

2012-05-0210
Contents

Introduction
1.1 About this guide
This guide provides a general overview of SAP BusinessObjects Data Quality Management, versionfor SAP Solutions as well as specific information for installing and integrating this product into your SAPenvironment.
1.2 Assumed audience
This guide assumes that the people responsible for installing and configuring this product are experiencedadministrators and users of the SAP platform on which you are integrating it. If you are implementingthe CRM IC WebClient or CRM WebClient postal validation and search capabilities, this guide alsoassumes that you are aware of any settings and customizations you have made to your CRM ICWebClient or CRM WebClient configuration before installing this product.
This guide does not explain basic operation of the SAP environment. For questions about the SAPenvironment, see the appropriate SAP documentation or SAP Business User Support.
1.3 SAP BusinessObjects information resources
A global network of SAP BusinessObjects technology experts provides customer support, education,and consulting to ensure maximum information management benefit to your business.
Useful addresses at a glance:
2012-05-0211
Introduction

ContentAddress
Information about SAP Business User Support pro-grams, as well as links to technical articles, down-loads, and online forums. Consulting services canprovide you with information about how SAP Busines-sObjects can help maximize your information manage-ment investment. Education services can provide in-formation about training options and modules. Fromtraditional classroom learning to targeted e-learningseminars, SAP BusinessObjects can offer a trainingpackage to suit your learning needs and preferredlearning style.
Customer Support, Consulting, and Educationservices
http://service.sap.com/
SAP BusinessObjects product documentation.Product documentation
http://help.sap.com/businessobjects/
Get information about supported platforms for SAPBusinessObjects Data Services.
Use the search function to search for Data Services.Click the link for the version of Data Services you aresearching for.
Supported Platforms (Product Availability Ma-trix)
https://service.sap.com/PAM
2012-05-0212
Introduction

Security
2.1 Overview
This section provides an introduction to security with this product, including recommendations and bestpractices for installing and configuring the components of this product to best protect your data.
2.2 Recommendations for data protection and privacy
Data security requirements differ among organizations based on government or corporate policies andother factors.
This product has access only to firm/customer name and address information. It does not process orarchive any associated financial or Social Security/Insurance Numbers identifiers. You may choose notto encrypt data transfers between the RFC Server and Data Services components for either of thefollowing scenarios:• Installation of the RFC Server and Data Services are on the same physical computer, meaning data
moved between these two components does not move across a network• The installation of this product is behind a secure firewall and you have no concerns with name and
address information flowing unencrypted across the local network
Related Topics• To install the RFC Server
2.3 Security and this product
This section provides an overview of the security-relevant information that applies to this product.
Data security is an important aspect of the installation and configuration described elsewhere in thisdocument. The installation and configuration steps are designed to minimize unauthorized access to
2012-05-0213
Security

your data. This product only has access to firm/customer name and address information. It does notprocess or archive any associated financial or Social Security/Insurance Numbers identifiers.
2.3.1 Security information specific to the RFC Server
Keep in mind the following security-related attributes of the RFC Server that is installed with this product.• The RFC Server connects to the SAP Application Server to obtain table metadata (for example, the
table structure definition). This connection requires that a connection user (non-dialog only user)account be created on the SAP system. The RFC Server installation routine prompts the user forthis password and encrypts it in the flrfcsrv.xml configuration file. A key file is also generatedand written to the RFC Server configuration folder. Access to the RFC Server installation folder andits contents should be restricted by the operating system.
• The RFC Server should be behind a firewall to prevent unwanted remote access.• On Windows, the RFC Server can be executed as a Windows service. Windows services can be
started/stopped by anyone who has access to the system.• The RFC Server can be manually configured to log data as it flows between the system components.
This capability potentially exposes name and address information. This functionality is useful introubleshooting problems related to data.
• The RFC Server does not implement roles or responsibility concepts. The RFC Server functions asa thin application transforming data formats between the SAP and Data Services systems.
• Configuration of the RFC Server is performed by modification of the flrfcsrv.xml configurationfile. Therefore, any user that can modify this configuration file can affect the behavior of this product.If your operating system supports file journaling, you can enable this capability and allow it to trackany changes to flrfcsrv.xml.
Related Topics• Overview of RFC Server configurations
2.3.2 Data protection
This product uses two mechanisms to protect data in the system:• An ability to have data transferred between the RFC Server and Data Services encrypted, which is
configured at the installation of the RFC Server• The assigning of authorization groups to Business Partners and Customers to prevent unauthorized
users from viewing unauthorized duplicate records
Related Topics• To install the RFC Server
2012-05-0214
Security

2.3.3 Authorizations
Authorizations for the components of this product are handled in the following manners.
Authorizations handlingComponent
Authorizations and roles are configured by the operating system user access.The RFC Server does not implement an authorization or roles concept
RFC Server
Authorizations and role administration are configured by the Data Services admin-istration tools.
Data ServicesComponents
Authorizations and role administration are configured by the SAP platform's ad-ministration tools.
BAdIS
2.3.4 Logging
Security logging for the components of this product are handled in the following manners.
Authorizations handlingComponent
The logging of security related events (for example, an invalid password) isperformed in the SAP configuration ID log file. The RFC server does not providethe capability to analyze security related events.
RFC Server
The logging of security related events is configured by the Data Services admin-istration tools.
Data Services Com-ponents
The logging of security related events is configured by the SAP platform's ad-ministration tools.
BAdIS
2.3.5 Communication interfaces
Data is transferred between components of this product using different communication interfaces. Thefollowing table shows the method or limitation of these communication interfaces.
2012-05-0215
Security

Communication interfaceComponents
Uses the SAP Java Connectivity 3.0 (SAPJCO3)library. The data transmitted over this interface isnot encrypted.
RFC Server and SAP gateway/Application Server(provided by the BAdIS installed with this product)
Uses these methods:• Web service calls at startup from the RFC
server to Data Services to obtain job schemainformation, such as the field names
• Realtime interface calls over a temporarysocket to send data to be processed or to re-trieve product version/job name informationfrom the Data Services system
RFC Server and Data Services
2.3.6 Network setup
The following table shows options for a network setup between components of this product.
Communication interfaceComponents
Because data between these components can notbe encrypted, this communication channel shouldbe placed behind a firewall.
RFC Server and SAP gateway/Application Server(provided by the BAdIS installed with this product)
Encryption can be configured during the installationof the RFC Server.
RFC Server and Data Services
For a discussion of best practices related to network setup, see the section Recommendations for datasecurity and privacy.
Related Topics• Recommendations for data protection and privacy• To install the RFC Server
2.3.7 Network ports
The following table identifies and describes the network ports used for communication betweencomponents of this product.
2012-05-0216
Security

PortDescriptionComponents
For example,the RFC Server us-es port 3352 to communicate withsapgw52 (both concluding withthe digits 52).
The port number uses the lasttwo digits of the SAP gatewaynumber to create the port number33xx.
RFC Server and SAP gate-way/Application Server (providedby the BAdIS installed with thisproduct)
Port 8080/8443This setting applies only forcommunication using Data Ser-vices Web Services.
RFC Server and Data Servicesvia Web Services
Port 4000, by defaultThis port must match the DataServices installed port number.If you did not accept the default,you must change the port num-ber.
RFC Server and Data Servicesvia the real-time interface
2.3.8 Data storage
Data handled by this product is stored on the SAP platform in the SAP database /fldq/ namespacetables, provided by the BAdIS installed with this product.
Data is saved, accessed, or updated when the BAS interface invokes the functionality of this productor when one of the reports provided with this product is executed.
2012-05-0217
Security

2012-05-0218
Security

Installation overview and requirements
3.1 Installation overview
This section explains the requirements and procedures for installing SAP BusinessObjects Data QualityManagement, version for SAP Solutions.
The installation for this product includes installing the following components:• SAP BusinessObjects Data Services - Data Quality Management Premium license, including the
Data Services Address Directories for Postal Validation• Data Quality Mgmt for SAP Data Services Components• Data Quality Mgmt for SAP RFC Server• Data Quality Mgmt for SAP Business Add-Ins (BAdIs)
The details of these steps vary depending on whether you have the previous version of this productalready installed. For details on installation scenarios, see the section Installation scenarios.
This version requires the following software packages, which you can download from the SupportPackages area of the SAP Service Marketplace:• SBOP Data Services XI 4.0 SP01 or greater• SBOP DQM for SAP Solutions XI 4.0.1, consisting of the following components:
• SBOP DQM FOR SAP SOL. 4.0.1 ABAP ADD ON (PV/DES BAdIs)• SBOP DQM FOR SAP 4.0.1 DS COMP (Data Services Component)• SBOP DQM FOR SAP 4.0.1 RFC SERV [operating system] (RFC Server)
Related Topics• Installation scenarios
3.2 System Requirements
This section contains the requirements for your SAP system, the RFC Server, and the BAdIs.
2012-05-0219
Installation overview and requirements

3.2.1 Required SAP Notes for your system
You must have installed the following SAP Notes (sometimes called Online Service System or OSSNotes), as appropriate for your SAP system.
DescriptionSAP Note #
Collective note: Errors in interface for duplicate check196958
During batch input in foreground pop ups will not occur.1091535
Long time processing when executing CUSTOMER_GET_INDEX_EXCEPTIONS.This Note is to help resolve a performance issue in the SAP function ADDR_EX-TRACT_FOR_DUPL_INDEX, resulting in faster batch match processing.
1472502
Performance improvements on ADDR_EXTRACT_FOR_DUPL_INDEX. This Noteis to help resolve a performance issue in the SAP function ADDR_EX-TRACT_FOR_DUPL_INDEX, resulting in faster batch match processing.
1512042
Running the report SIC_BAS_RSADRINI to index already existing BusinessPartners to begin work with checking duplicates, the report runs an endless loopand/or times out.
1677509
In addition, you should review any other SAP Support Notes for any content related to Data QualityManagement applicable to your SAP platform.
For a list of SAP Notes related to the IC WebClient, see the section Requirements for running in aWebClient profile.
Related Topics• Requirements for running in a WebClient profile
3.2.2 Requirements for the Data Services machine
You can install Data Services on the same machine as the RFC Server, on a different machine, or evenon a machine with a different operating system than the one that contains your installation of the RFCServer. However, installing Data Services and the RFC Server on the same machine reduces networktraffic, slightly increases performance, and reduces the number of ports that must be exposed andenabled.
Using Data Services as part of this product requires greater system requirements for the machine thanthe minimums described in the Data Services documentation.
2012-05-0220
Installation overview and requirements

For this product:• The machine must have a minimum of 4 CPU cores.• In addition to the RAM required for all the other software running—the operating system, Data
Services (used with this product or stand-alone), Information platform services, databases, databaseservers, and so on—the machine must have at minimum another 8 GB of available RAM free.
Related Topics• Network ports• RFC Server Checklist
3.2.3 Requirements for the RFC Server
The RFC Server requires one of the following 64-bit operating systems.• IBM AIX 5.2, 5.3, and 6.1• Red Hat Linux Enterprise Server 4 and 5• Solaris 9 and 10• SuSE Enterprise Server 9 SP3 and 10• Windows Server 2003 SP2• Windows Server 2003 R2 SP2• Windows Server 2008• Windows Server 2008 SP2• Windows Server 2008 R2
3.2.4 Requirements for the BAdIs
The BAdIs portion of this product supports the following environments:• SAP Customer Relationship Management (SAP CRM) solutions 5.0, 2007, and 7.0• SAP R/3 v4.7 (Basis 6.40 only), SAP ECC 5.0 (ERP2004), and ECC 6.0• SAP ERP 6.0 Enh Pack 4 or greater• SAP Banking Services 6.0• SAP Master Data Governance – Supplier – Add-on to ERP 6 Enh Pack 5 (Postal Validation only)• SAP Master Data Governance – Add-on to ERP 6 Enh Pack 6 (Supports Postal Validation for Supplier
Data Model and Matching for all data models)
Interactive (real-time) postal address validation, duplicate check, and error-tolerant search are supportedwithin these client user interfaces:• SAP CRM WebClient and CRM IC WebClient: CRM 2007 and greater CRM versions• SAP GUI and IC WebClient: CRM 5.0
2012-05-0221
Installation overview and requirements

• SAP GUI only: ECC 5.0, ECC 6, and R/3 4.7• SAP Master Data Governance – Supplier WebClient: ERP 6 Enh Pack 5 (Postal Validation only)• SAP Master Data Governance – WebClient: ERP 6 Enh Pack 6 (Supports Postal Validation for
Supplier Data Model and Matching for all data models)
3.3 Installation checklist
This section is a brief overview of the installation of this product, designed to provide a summary of theinstallation packages you must use and the information you must provide as part of the installationroutines.
3.3.1 Data Services
You must install and configure SAP BusinessObjects Data Services 4.0 SP01 or higher according tothe instructions in the Data Services documentation. Consider also the items described in this documentregarding the installation of Data Services in the section Install Data Services.
Related Topics• Install Data Services
3.3.2 Data Services Components
Before installing the Data Services Components, make certain that you have installed the correct versionof Data Services for this product, including any Address Directories for the countries you have purchased.You must have the Data Services Job Server configured and running, and have an Access Serverconfigured. On the machine on which you are performing this installation, you must have already loggedin to the Data Services Designer that is connected to the Data Services Repository to be used.
The Data Services Components installation routine asks the following information about yourconfiguration. You should prepare this information before beginning the installation.• Data Services Repository database connection parameters: user name and password• Database information for the creation of the staging tables
The procedures for installing the Data Services Components are in the section Install the Data ServicesComponents.
2012-05-0222
Installation overview and requirements

Related Topics• Install the Data Services Components
3.3.3 Assign SAP authorizations
To prepare your SAP system to communicate with the RFC Server, you must assign SAP authorizationsto allow the RFC User to interact with the ABAP stack of SAP systems.
The procedures assigning SAP authorizations are in the section Assign SAP authorizations to the RFCUser.
Related Topics• Assign SAP authorizations to the RFC User
3.3.4 RFC Server
The RFC Server installation routine asks the following information about your configuration. You shouldprepare this information before beginning the installation.• Gateway Connection information of your SAP system – three-letter System ID, Gateway Server
Host Name, Gateway Service ID, Transaction Program ID (FLRFCSRV), and Batch Program ID(FLRFCBTC)
• Application Server connection information – Host Name, System Number, Client, User Name,Password, and optional language
• Data Services security settings – path to the Data Services trusted certificate folder (if you enableWeb Service SSL communication), and the CMS User Name, Password, system name, andauthentication type (if you enable session security)
• Data Services Access Server connection information – Host Name, Port Number, and URL for theWSDL
• Your email system settings – Host, Port, a sender email address, and recipient email addresses (incomma-delimited format), used by the RFC Server to send email notifications if it terminates
• The BusinessObjects Enterprise (BOE) Central Management Service (CMS) username, password,system name, and authentication type (if you intend to enable session security)
The procedures for installing the RFC Server are in the section To install the RFC Server.
Related Topics• To install the RFC Server
2012-05-0223
Installation overview and requirements

3.3.5 BAdIs
The procedures for installing the BAdIs are in the section Install the BAdIs.
Related Topics• Do not perform this installation if you are upgrading from version 4.0
3.4 Installation scenarios
This section discusses scenarios for installing this product as an upgrade or a fresh installation.
3.4.1 Previous version already installed
If you have the previous version of this product already installed, your installation steps require care inproperly uninstalling components of that previous version while preserving any customizations you havemade so that those customizations can be manually applied to this version.
3.4.1.1 Upgrade Data Services
You must upgrade your version of Data Services to Data Services 4.0 SP01 or higher, and then installthe version-specific Data Services Components portion of this product. You must manually duplicateany customizations made to the Data Services Components jobs from the previous version that youwant to reproduce in this version. For information about upgrading Data Services and customizing jobs,see the Data Services documentation.
For further information on installing Data Services to use with this product, see the section Install DataServices.
For information on installing the Data Services Components of this product, see the section Install theData Services Components.
2012-05-0224
Installation overview and requirements

Related Topics• Install Data Services• Install the Data Services Components
3.4.1.2 Install the BAdIs support package only
If you are upgrading from version 4.0, you do not need to re-install the BAdIs from that version. Youmust install only the BAdIs support package
For further information on applying the BAdIs support package, see the section Install the BAdIs supportpackage.
Related Topics• Install the BAdIs support package
3.4.1.3 Install new RFC Server
This version requires a new version of the RFC Server portion of this product. The RFC Server doesnot upgrade directly. You must uninstall the previous version and install the new. If you have madeconfiguration changes to your previous version of the RFC Server, you must manually apply them tothe new configuration from backup copies of the RFC Server configuration files.
For further information on replacing a previous version of the RFC Server and installing this componentfor this version, see the section Install the RFC Server.
Related Topics• Install the RFC Server
3.4.2 Fresh installation
This section gives an overview of the steps required for a fresh installation of this product. These stepsare detailed later in this section.
2012-05-0225
Installation overview and requirements

3.4.2.1 Outside your SAP system
1. Install Data Services and the Address Directories (for Postal Validation).2. Install Data Services Components.3. Install the RFC Server.
3.4.2.2 On your SAP system
1. Install the BAdIs from the 4.0 version of this product.2. Run the post-installation tasks required of a new installation of the BAdIs.3. Install the BAdIs support package from this version.4. Activate the IC WebClient, CRM WebClient, and MDG WebClient, if desired.
2012-05-0226
Installation overview and requirements

Install Data Services and the Data Services Components
4.1 Install Data Services
This product relies on Data Services for performing data quality operations, so you must install DataServices before installing the components of this product. For instructions on installing, configuring,and running Data Services, see the Data Services Installation Guide.
This section contains considerations to help you successfully install Data Services for use with thisproduct.
4.1.1 Data Services previously installed
If you are already a Data Services customer (as a stand-alone product or because you are upgradingfrom a previous version of this product) and therefore have already installed a version of Data Services,you must upgrade to Data Services 4.0 SP01 or higher.
You should take note of any customizations you have made to this product's components, as the upgraderequires that you manually recreate them in this version.
See the Data Services documentation for details of how to upgrade.
4.1.2 Data Services security settings
You can configure the following security settings in Data Services:• Access Server SSL communication• Web Service SSL Communication• Session security
When you install the RFC Server, you are asked if you enabled these settings.
2012-05-0227
Install Data Services and the Data Services Components

Unless you require encryption and session security, we recommend that you do not enable these optionsin your Data Services configuration. A preferred network security strategy is to have your Data Servicesinstallation and RFC Server behind a firewall.
4.1.3 Install the address directories
For Data Services to perform Postal Validation operations, you must install the Data Services AddressDirectories. The Address Directories are a separate download from the Data Services installation media.See the Data Services documentation for information on downloading and installing the AddressDirectories.
4.1.4 Set the Data Services code page to work with custom functions
To use the custom functions provided with the installation of this product, you must use the Data ServicesLocale Selector to set the code page to utf-8.
For information on the Data Services Locale Selector, see the Data Services documentation.
4.1.5 Data Services must be running
You must have Data Services running during the remaining installation procedures of this product, andduring its operation.
4.2 Install the Data Services Components
After you install the latest version of Data Services and the Address Directories, you install the DataServices Components specific to this product and then perform configuration tasks. The Data ServicesComponents installation configures database connection information, and then copies supporting filesand imports .atl files specific to the operation of this product into your Data Services configuration.This section describes installing the Data Services Components for both Windows and UNIX/Linux,and then the configuration steps required after the installation.
2012-05-0228
Install Data Services and the Data Services Components

Caution:If you have previously installed this version or any past version of this product and made customizationsto the Data Services job Job_Realtime_DQ_SAP_Create_Break_Keys or the custom functionCF_DQ_SAP_Calculate_Match_Code_Custom, installing the Data Services Components will overwritethe customized version of the files. You should back up or rename the job or custom function if youwant to keep any customizations. You can then apply the customizations to the new version.
4.2.1 Data Services Components checklist
Before installing the Data Services Components, make certain that you have installed the correct versionof Data Services for this product, including any Address Directories for the countries you have purchased.You must have the Data Services Job Server configured and running, and have an Access Serverconfigured. On the machine on which you are performing this installation, you must have already loggedin to the Data Services Designer that is connected to the Data Services Repository to be used.
The installation routine asks for the user name and password for the Data Services Repository database.
In addition, you must have a database prepared to use for the creation of batch RDBMS staging tables.This database may or may not be the same as used for the Data Services Repository database. Theinformation required varies depending on the type of supported database used and whether on MSSQL you use Windows Authentication for security of the database.
Here are the database types, guidelines, and sample values that you could use during the installationof the Data Services Components to choose a database type and provide connection information.
Sybase RDBMS staging tableThe following are the Sybase Connection Parameters input screen specifications:
GuidelinesText
No defaultDatabase Tables Owner
Cannot be blank, no defaultDatabase Server Name
Cannot be blank, no defaultDatabase Name
Cannot be blank, no defaultUser Name
Cannot be blank, no defaultPassword
The following are the Sybase Connection Parameters sample values.
2012-05-0229
Install Data Services and the Data Services Components

Sample valueText
DBODatabase Tables Owner
\\myserverDatabase Server Name
MYDBDatabase Name
dbuserUser Name
dbpassPassword
Oracle RDBMS staging tableThe following are the Oracle Connection Parameters input screen specifications:
GuidelinesText
No defaultOracle Tables Owner/Schema
Cannot be blank, no defaultOracle TNS Name/Service
Cannot be blank, no defaultOracle User Name
Cannot be blank, no defaultOracle User Password
The following are the Oracle Connection Parameters sample values:
Sample valueText
DBUSEROracle Tables Owner/Schema
MYDB.BYDBHOST.MYCOMPANY.NET or MYDBOracle TNS Name/Service
DBUSEROracle User Name
DBPASSOracle User Password
DB2 RDBMS staging tableThe following are the DB2 Connection Parameters input screen specifications:
GuidelinesText
No defaultDB2 Tables Owner/Schema
Cannot be blank, no defaultDatabase Name
Cannot be blank, no defaultDB2 User ID
Cannot be blank, no defaultDB2 User Password
The following are the DB2 Connection Parameters sample values:
2012-05-0230
Install Data Services and the Data Services Components

Sample valueText
DBUSERDB2 Tables Owner/Schema
MYDBDatabase Name
dbuserDB2 User ID
dbpassDB2 Password
MS SQL Server RDBMS staging tableThe following are the MS SQL Server Connection Parameters input screen specifications:
GuidelinesText
No defaultDatabase TablesOwner
Cannot be blank, no defaultDatabase ServerName
Cannot be blank, no defaultDatabase Name
Cannot be blank, no default (only shown if Windows Authentication is not used)User Name
Cannot be blank, no default (only shown if Windows Authentication is not used)User Password
Note:The installation routine asks whether you use Windows Authentication. If so, the User Name and UserPassword are not asked.
The following are the MS SQL Server Connection Parameters sample values:
Sample valueText
DBODatabase Tables Owner
\\myserverDatabase Server Name
MYDBDatabase Name
dbuser (only shown if Windows Authentication is not used)User Name
dbpass (only shown if Windows Authentication is not used)User Password
MySQL 5.0 RDBMS staging tableThe following are the MySQL 5.0 Connection Parameters input screen specifications:
2012-05-0231
Install Data Services and the Data Services Components

GuidelinesText
Cannot be blank, no defaultData Source Name (DSN)
No defaultDatabase Tables Owner
Cannot be blank, no defaultUser Name
Cannot be blank, no defaultUser Password
The following are the MySQL 5.0 Connection Parameters sample values:
Sample valueText
DataServicesData Source Name (DSN)
dataservicesDatabase Tables Owner
dbuserUser Name
dbpassUser Password
4.2.2 Data Services Components installation
Install the Data Services Components on the machine you installed the Data Services Designer.
The Designer is always installed on a Windows machine, but even Unix installations of the Data ServicesComponents must be installed on that machine.
Note:If you run the installation routine on a machine that does not have the Data Services Designer, youmust manually import the .atl files, use the Designer to set the DQ_SAP_DS datastore password (thepassword is DQMSAP), and then create the batch RDBMS staging tables.
Related Topics• There was an error while importing the .atl files• There was an error while executing the batch job DQCreateStageTables to generate the RDBMSstaging tables
4.2.2.1 To install the Data Services Components
2012-05-0232
Install Data Services and the Data Services Components

If any previous or current version of the Data Services Components is already installed, you mustuninstall it before conducting this installation. You should save a backup of any customizations youhave made to help you reproduce them in after this installation.1. Locate the SAP BusinessObjects Data Quality Management, version for SAP Solutions - Data
Services Components media and launch setup.exe.The "Confirmation Requested" window appears.
2. Click Yes to confirm that you have first installed the correct version of Data Services.3. In the "Welcome" window, click Next.4. Read the license agreement and, if you accept the license agreement terms, choose "I accept the
terms of the license agreement" and click Next.5. In the "Choose Destination Location" window, accept the default installation location or specify a
different location. Click Next.Though you can use the Browse button to change the destination folder, we recommend that youinstall to the default directory, and you must install to a path that finishes with [your_path]\SAPBusinessObjects\Data Quality Mgmt for SAP Solutions. If you choose another locationand run the Break Key Profiler job, you must make manual changes to files within that job. For moreinformation, see the section Installation of the Break Key Profiler.
6. In the "Address Engine Selection" window, uncheck the box for any address engines that you didnot purchase. Click Next.
7. In the "Data Services Repository Connection Parameters" window, enter the connection details.Click Next.
8. In the "RDBMS Selection" window, choose the database type you intend to use for the creation ofstaging tables, and click Next.The window that follows this step varies, depending on which database type you chose. Eachdatabase type requires different connection information. For reference information on databasessupported for staging tables, see the section Data Services Components checklist.
9. In the "Connection Parameters" window that appears for your database type, enter the databaseconnection information, and click Next.
10. In the "Ready to Install the Program" window, click Install to launch begin the installation.11. Click Finish after the installation has completed.
The Data Services Components are now installed to your Data Services system, but you must performpost-installation steps to configure Data Services jobs as services and to configure Web Services.
If error messages occurred during the installation process, you may have to import the .atl filesmanually (the passphrase is DQMSAP), use the Designer to set the DQ_SAP_DS datastore password,or manually create the batch RDBMS staging tables.
Related Topics• Break Key Profiler job• Data Services Components checklist• Installation of the Break Key Profiler• There was an error while importing the .atl files
2012-05-0233
Install Data Services and the Data Services Components

• There was an error while executing the batch job DQCreateStageTables to generate the RDBMSstaging tables
4.2.3 Configure jobs as services
When you install the Data Services Components, a group of Data Services jobs are copied to your DataServices installation. You must configure these jobs as services.
4.2.3.1 Sample input files
Before configuring jobs as services, we strongly recommend you run the sample input files to test DataServices jobs. Though running the sample input files is not required as part of installation, the installationis now at a point in which the files can be run. For information on verifying the Data Quality jobs, seethe section Using the sample input files to test jobs. The remaining information in this section is requiredas part of the installation of this product.
Related Topics• Using the sample input files to test jobs
4.2.3.2 List of jobs and their service names
Configure jobs as services for all of the jobs listed in the table by following the steps in the section Toconfigure jobs as services. This table also lists the value to enter for the Recycle request count maxand processing timeout value for each service. For the serviceService_Realtime_Batch_DQ_SAP_Name_And_Address_Match, enter a very large number (such as2147483647) to prevent a very large batch match job from timing out during processing.
2012-05-0234
Install Data Services and the Data Services Components

Recycle RequestCount Max
ProcessingTimeoutService NameJob
1000800Service_Real-time_Batch_DQ_SAP_Ad-dress_Cleanse
Job_Real-time_Batch_DQ_SAP_Ad-dress_Cleanse
40002147483647Service_Real-time_Batch_DQ_SAP_Name_And_Ad-dress_Match
Job_Real-time_Batch_DQ_SAP_Name_And_Address_Match
4000800Service_Realtime_DQ_SAP_Ad-dress_Cleanse
Job_Realtime_DQ_SAP_Ad-dress_Cleanse
10000800Service_Realtime_DQ_SAP_Ad-dress_Cleanse_Suggestions
Job_Realtime_DQ_SAP_Ad-dress_Cleanse_Suggestions
4000800Service_Realtime_DQ_SAP_Cre-ate_Break_Keys
Job_Realtime_DQ_SAP_Cre-ate_Break_Keys
10000800Service_Real-time_DQ_SAP_Name_And_Ad-dress_Match
Job_Real-time_DQ_SAP_Name_And_Ad-dress_Match
10000800Service_Realtime_DQ_SAP_Prod-uct_Version
Job_Realtime_DQ_SAP_Prod-uct_Version
10000800Service_Realtime_DQ_SAP_Re-trieve_Country_Purchased
Job_Realtime_DQ_SAP_Re-trieve_Country_Purchased
10000800Service_Realtime_DQ_SAP_Re-gion_Upgrade
Job_Realtime_DQ_SAP_Re-gion_Upgrade
10000800Service_Real-time_DQ_SAP_Get_Region_Data
Job_Realtime_DQ_SAP_Get_Re-gion_Data
10000800Service_Real-time_DQ_SAP_Name_And_Ad-dress_Ext_Match
Job_Real-time_DQ_SAP_Name_And_Ad-dress_Ext_Match
10000800Service_Real-time_DQ_SAP_Name_And_Ad-dress_Ext_Match_Weights
Job_Real-time_DQ_SAP_Name_And_Ad-dress_Ext_Match_Weights
4.2.3.3 To configure jobs as services
Before configuring jobs as services, you must have configured a Data Services Access Server as partof the installation of Data Services. If you have not configured an Access Server, see the Data Servicesdocumentation for instructions.
2012-05-0235
Install Data Services and the Data Services Components

You must perform this procedure for each job listed in the table of jobs and their service names.1. Open the Data Services Management Console and login.2. Click "Administrator".3. In the file tree expand Real-Time and select the server that you set up when you installed Data
Services.4. Select "Real-Time Services" from the file tree on the left and open the "Real-Time Service
Configuration" tab on the right.5. Click Add.6. In the "Service Configuration" window, click Browse Jobs.7. Select a job name (listed in the preceding table). For example, select
Job_Realtime_Batch_DQ_SAP_Address_Cleanse. If the Management Console is connected to morethan one repository, make sure you select the dataflows from the repository that contains the jobsimported in the previous steps.
8. Enter the service name for the job. For example, enter Service_Realtime_Batch_DQ_SAP_Address_Cleanse (exact case is required).
9. Enter a processing timeout value for the service, as shown in this table. For the service Service_Realtime_Batch_DQ_SAP_Name_And_Address_Match, enter a very large number (such as 2147483647)to prevent a very large batch match job from timing out during processing. For all other services,enter 800 for the Processing Timeout value.
Processing Timeout ValueService
2147483647Service_Realtime_Batch_DQ_SAP_Name_And_Address_Match
800All other Services
10. Enter the Recycle request count max for the service, as shown in this table:
Recycle Request CountMaxService
1000Service_Realtime_Batch_DQ_SAP_Address_Cleanse
4000Service_Realtime_Batch_DQ_SAP_Name_And_Address_Match
4000Service_Realtime_DQ_SAP_Address_Cleanse
10,000Service_Realtime_DQ_SAP_Address_Cleanse_Suggestions
4000Service_Realtime_DQ_SAP_Create_Break_Keys
10,000Service_Realtime_DQ_SAP_Name_And_Address_Match
10,000Service_Realtime_DQ_SAP_Product_Version
10,000Service_Realtime_DQ_SAP_Retrieve_Country_Purchased
10,000Service_Realtime_DQ_SAP_Region_Upgrade
2012-05-0236
Install Data Services and the Data Services Components

Recycle Request CountMaxService
10,000Service_Realtime_DQ_SAP_Get_Region_Data
10,000Service_Realtime_DQ_SAP_Name_And_Address_Ext_Match
10.000Service_Realtime_DQ_SAP_Name_And_Ad-dress_Ext_Match_Weights
11. Under "Service Provider", click Add and select the correct JobServer to run this service.12. Enter the same number for both the Max Instances and Min Instances for the service, as shown in
this table:
Max Instances and Min InstancesService
1Service_Realtime_Batch_DQ_SAP_Address_Cleanse
1Service_Realtime_Batch_DQ_SAP_Name_And_Ad-dress_Match
2Service_Realtime_DQ_SAP_Address_Cleanse
2Service_Realtime_DQ_SAP_Address_Cleanse_Sugges-tions
2Service_Realtime_DQ_SAP_Create_Break_Keys
2Service_Realtime_DQ_SAP_Name_And_Address_Match
1Service_Realtime_DQ_SAP_Product_Version
1Service_Realtime_DQ_SAP_Retrieve_Country_Purchased
1Service_Realtime_DQ_SAP_Region_Upgrade
1Service_Realtime_DQ_SAP_Get_Region_Data
(any value)Service_Realtime_DQ_SAP_Name_And_Ad-dress_Ext_Match
(any value)Service_Realtime_DQ_SAP_Name_And_Ad-dress_Ext_Match_Weights
13. Click Apply.14. Repeat the configuration task for each of the Real-time jobs listed in the table of jobs and their
service names.
4.2.4 Configure Web Services
2012-05-0237
Install Data Services and the Data Services Components

You must next configure Web Services.
4.2.4.1 To configure Web Services
1. Keep the "Data Services Management Console" open from the previous steps, or open and loginto the" Data Services Management Console" and click Administrator.
2. Select "Web Services" from the file tree at left and open the" Web Services Configuration" tab onthe right.
3. Select "Add Real-Time Service" from the drop-down menu and click Apply. All of the service namesthat you entered in the section To configure jobs as services appear in the list.
4. Choose "Select All" and click Add.
Related Topics• To configure jobs as services
4.2.4.2 To start the services
After you have configured both the jobs and Web Services, you must start the services.
Tip:If you start services for functionality you did not purchase, such as geocoding or DPV, the product logserrors during runtime. To prevent those error messages, do not start the serviceService_Realtime_DQ_SAP_Address_Global_GEO (for geocoding), orService_Realtime_DQ_SAP_US_DPV_Address_Cleanse_Suggestions (for DPV) if you did not purchasethese options. You should disable them to prevent them from starting after Data Services is restarted.
1. Keep the "Data Services Management Console" open from the previous steps, or open and loginto the "Data Services Management Console" and click Administrator.
2. Select Real-Time Services from the file tree and open the "Real-Time Services Status" tab on theright.
3. Select all of the services that you created and click Start.
It may take a few minutes for the services to start.
After you have performed the automatic services start, you must shutdown and restart the servicesmanually if you change the configurations.
2012-05-0238
Install Data Services and the Data Services Components

Assign SAP authorizations
5.1 Assign SAP authorizations to the RFC User
Before performing a fresh installation of the RFC Server, you must assign SAP authorizations to allowthe RFC User to interact with the ABAP stack of your SAP systems by using the role template providedwith this installation.
Note:Both new and upgrade installations require that you assign SAP authorizations to the RFC User.
5.1.1 Creating the RFC User Name
We recommend that the RFC User Name combines the SID and COM as follows: <SID>COM. Forexample, if you have a D22 system RFC Server, the name would be D22COM.
5.1.2 RFC User Type
The RFC User Type is Communications.
5.1.3 To use the RFC Server Role Template
After you have created a user for the RFC Server, use the provided Role Template to help ensure thatproper security authorizations are used for the RFC Server user.1. Invoke transaction PFCG.2. Enter /FLDQ/DQM_COMM_USER in Role.3. From the Role menu, enter a new role name (such as ZDQM_COMM_USER).
2012-05-0239
Assign SAP authorizations
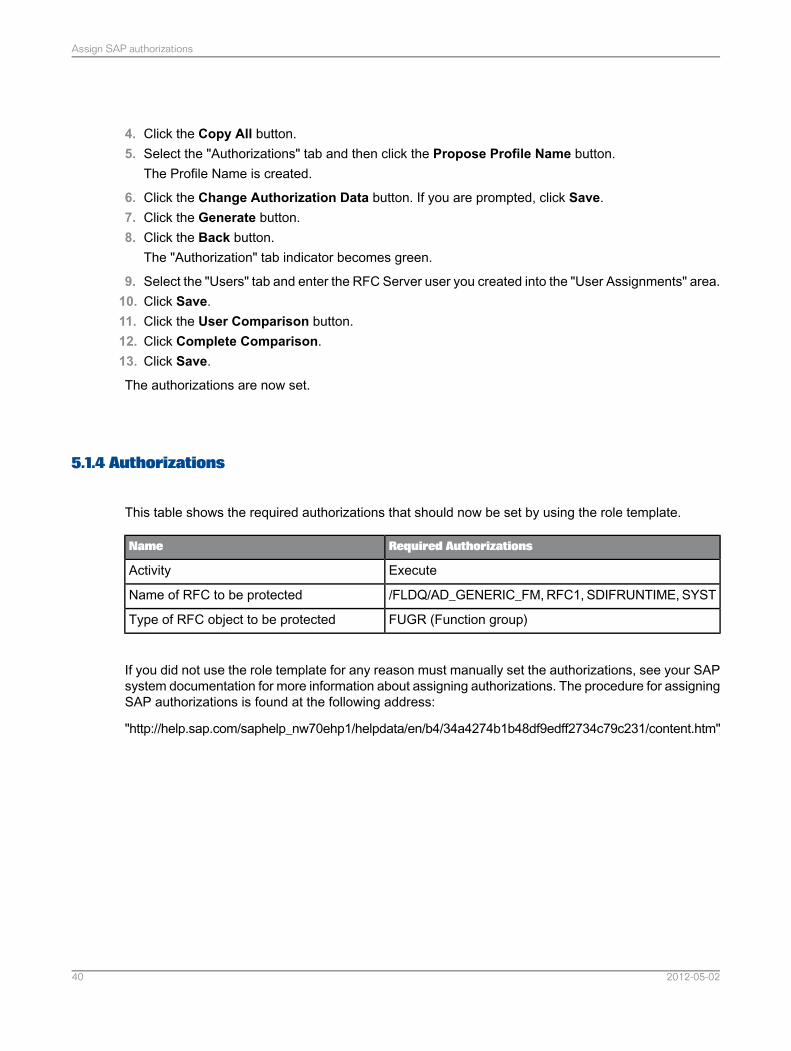
4. Click the Copy All button.5. Select the "Authorizations" tab and then click the Propose Profile Name button.
The Profile Name is created.
6. Click the Change Authorization Data button. If you are prompted, click Save.7. Click the Generate button.8. Click the Back button.
The "Authorization" tab indicator becomes green.
9. Select the "Users" tab and enter the RFC Server user you created into the "User Assignments" area.10. Click Save.11. Click the User Comparison button.12. Click Complete Comparison.13. Click Save.
The authorizations are now set.
5.1.4 Authorizations
This table shows the required authorizations that should now be set by using the role template.
Required AuthorizationsName
ExecuteActivity
/FLDQ/AD_GENERIC_FM, RFC1, SDIFRUNTIME, SYSTName of RFC to be protected
FUGR (Function group)Type of RFC object to be protected
If you did not use the role template for any reason must manually set the authorizations, see your SAPsystem documentation for more information about assigning authorizations. The procedure for assigningSAP authorizations is found at the following address:
"http://help.sap.com/saphelp_nw70ehp1/helpdata/en/b4/34a4274b1b48df9edff2734c79c231/content.htm"
2012-05-0240
Assign SAP authorizations

Install the BAdIs for new (non-upgrade) installation
6.1 Do not perform this installation if you are upgrading from version 4.0
Caution:This section applies only if you have not previously installed SAP BusinessObjects Data QualityManagement, version for SAP Solutions 4.0. If you are upgrading from that version and installing onlythe BAdIs support package, you must proceed to the section Install the BAdIs support package.
Before you proceed with these steps, make sure that your SAP system complies with all of theprerequisites.
If you are doing a new (non-upgrade) installation, you must procede with the section Step 1: Import theData Quality Management package on client 000.
Related Topics• Requirements for the BAdIs• Install the BAdIs support package
6.1.1 Step 1: Import the Data Quality Management package on client 000
You must have the latest Support Package Manager (SPAM) update/patch installed on your SAPsystem. (For more information, see SAP Note 822379.)
If this installation is new or an upgrade from a previous version of this product, choose an applicable.SAR package for your Basis version from the following table. You must import the Data QualityManagement package on the reference client (client 000), and then activate (or reactivate) BC Set/FLDQ/47U6X to import new customizing data.
.SAR file for new installations and upgrades of this productNetWeaver/Basis Release
2012-05-0241
Install the BAdIs for new (non-upgrade) installation

.SAR file for new installations and upgrades of this productNetWeaver/Basis Release
…\DATA_UNITS\FLDQ_440_640_INST\DATA\K-446AGINFLDQ.SARNW 640
…\DATA_UNITS\FLDQ_440_700_INST\DATA\K-447AGINFLDQ.SARNW 700/701
…\DATA_UNITS\FLDQ_440_702_INST\DATA\K-448AGINFLDQ.SARNW 702
…\DATA_UNITS\FLDQ_440_710_INST\DATA\K-449AGINFLDQ.SARNW 710
…\DATA_UNITS\FLDQ_440_731_INST\DATA\K-450AGINFLDQ.SARNW 731
If this installation is a SAPehpi/SAPup system upgrade (not an upgrade of this product), perform theupgrade by choosing an applicable .SAR package for your Basis version from the following table. Youmust import the Data Quality Management package on the reference client (client 000), and then activate(or reactivate) BC Set /FLDQ/47U6X to import new customizing data.
.SAR file for system upgradesNetWeaver/Basis Release
…\DATA_UNITS\FLDQ_440_640_UPGR\DATA\K-446GGINFLDQ.SARNW 640
…\DATA_UNITS\FLDQ_440_700_UPGR\DATA\K-447GGINFLDQ.SARNW 700/701
…\DATA_UNITS\FLDQ_440_702_UPGR\DATA\K-448GGINFLDQ.SARNW 702
…\DATA_UNITS\FLDQ_440_710_UPGR\DATA\K-449GGINFLDQ.SARNW 710
…\DATA_UNITS\FLDQ_440_710_UPGR\DATA\K-450GGINFLDQ.SARNW 731
Note:On systems running ECC 6.0 (Basis version 7.00), postal validation, duplicate check, and error tolerantsearch are by default deactivated. You must after completing all installation and configuration proceduresin this section use the IMG activities “Activate/Deactivate postal validation functionality” and“Activate/Deactivate duplicate check and error tolerant search functionality” to activate these capabilities.On all other SAP platforms supported by this product, these capabilities are by default activated.
Related Topics• Activate/Deactivate postal validation functionality• Activate/Deactivate duplicate check and error tolerant search functionality
6.1.1.1 To import the Data Quality Management support package
Caution:This section applies only if you have not previously installed SAP BusinessObjects Data QualityManagement, version for SAP Solutions 4.0. If you are upgrading from that version and installing onlythe BAdIs support package, you must proceed to the section Install the BAdIs support package.
1. Enter the transaction SAINT to open the "Add-On Installation Tool" window.
2012-05-0242
Install the BAdIs for new (non-upgrade) installation

2. Click the "Installation Package" menu and choose Load packages > From Frontend.3. In the "Select CAR/SAR archive" window, browse to the location of and select the applicable .SAR
file. If the path is long and the system generates an error, copy the file to a local directory locationand load it from there.
4. Click Open and then click Yes to load the .SAR file. The contents of the compressed .SAR fileappears.
5. Click Decompress.6. Continue with standard Add-On Package process for component /FLDQ/. (For further instructions
on importing a Add-On Package, see the documentation for your SAINT tool.)7. Click Continue, and then Complete to close the tool.
Related Topics• Install the BAdIs support package
6.1.2 Step 2: Link MDG or CRM 7 EnhP1 (or higher) IMG structure to your SAP ReferenceIMG structure
After you import the BAdIs, this product's IMG (Implementation Management Guide) structure(/FLDQ/AD_IMG) is linked to the Reference IMG structure of your SAP system. You should verify thatthe added IMG structure is in place.
Users of MDG or CRM 7 EnhP1 or greater systems must manually link the appropriate IMG structureto your SAP Reference IMG structure using these steps.
6.1.2.1 To link MDG or CRM 7 EnhP1 (or higher) IMG structure to your SAPReference IMG structure
Note:Users of MDG must perform this procedure to link the option /FLDQ/AD_IMGMDG. Users of CRM 7EnhP1 or greater systems must perform this procedure to link the option /FLDQ/AD_IMGCRM. If youare not using MDG or CRM 7 EnhP1 or greater, skip this step.
1. Log on to client 000 of your system.2. Type S_IMG_EXTENSION into the "Command" field and click Enter.3. In the "Edit IMG Structure" window, click the Possible Entries icon located next to the "IMG Structure"
field.4. In the "Find Structure" window, enter Address Management for the "Title" and click Execute.
A confirmation appears that the Address Management structure exists.
2012-05-0243
Install the BAdIs for new (non-upgrade) installation

5. Double-click the Address Management node to return to S_IMG_EXTENSION.6. Click the Possible Entries icon in the "Enhancement ID" field and double-click the option you are
linking in these steps, as shown in this table.
DescriptionOption
Used for MDG systems/FLDQ/AD_IMGMDG
Used for CRM 7 EnhP1 or greater systems/FLDQ/AD_IMGCRM
The "Edit IMG Structure" window opens.
7. Click Enhance Structure.One or more "Information" windows appear.
8. Click Enter in each Information dialog to clear the dialog boxes.9. Select the last of the Address Management sub-nodes and choose Edit > Nodes > Insert IMG
Structure > On Same Level .10. Click Find in the Reference to a Structure window, and type in the "Title" either BusinessObjects
(for MDG systems) or DQM (for CRM systems). Click Execute.A table of found options is displayed.
11. Double-click the option appropriate for your system, as shown in this table.
DescriptionOption
Used for MDG systemsBusinessObjects : Global Data Quality Connector :MDG Extension
Used for CRM 7 EnhP1 or greater sys-tems
DQM : Global Data Quality Adapter : CRM7 Extension
12. Enter the text appropriate for your system, as shown in this table, to name the IMG node.
DescriptionOption
Used for MDG systemsSAP BusinessObjects Data Quality Management :MDG Extension
Used for CRM 7 EnhP1 or greater sys-tems
SAP BusinessObjects Data Quality Management :CRM Extension
The "Reference to a Structure" window opens.
13. Copy the text from the "The node refers to the structure" field and paste it into the "Node Name"field.
14. Click Enter and then click Save.The "Change Request" window appears.
15. Click Create in the "Change Request" window.16. Enter a name for the change request and click Save.
2012-05-0244
Install the BAdIs for new (non-upgrade) installation

17. Click Enter to clear the task dialog.
Users of MDG must perform this procedure a second time to link the option /FLDQ/AD_IMGMDG. Usersof CRM 7 EnhP1 or greater systems must perform this procedure a second time to link the option/FLDQ/AD_IMGCRM.
6.1.2.1.1 To locate the IMG activities
After installation, the IMG activities for this product are embedded within the IMG of your SAP application.The path to locate the IMG activities depends on the Basis version of your SAP application, as shownin this table.
PathBasis version
SAP NetWeaver > SAP Web Application Server > Basis Services >Address Management
6.40 (ECC 5.0)
SAP Web Application Server > Application Server > Basis Services> Address Management
7.00 (ECC 6.0 and CRM5.0)
SAP NetWeaver > Application Server > Basis Services > AddressManagement
7.01 (CRM 7.0 and ERP6.0)
SAP NetWeaver > Application Server > Basis Services > AddressManagement
7.02 (ERP 6.0 Enh Pack 5)
SAP Web Application Server > Application Server > Basis Services> Address Management
7.10 (Banking Services6.0)
SAP NetWeaver > Application Server > Basis Services > AddressManagement
7.31
To find this product's IMG activities, follow this procedure.1. Use the transaction SPRO to access the IMG structure.2. Navigate to the SAP BusinessObjects : Data Quality Management node. The navigation to this node
path depends on the Basis version that you use.
The activities that are linked during the installation of this product are the nodes at the bottom level ofthis structure.
6.1.3 Step 3: Activate the Business Configuration Sets on each target client
Activate the Business Configuration Sets on each of the target clients (non-000 logon clients) that youwant to configure for use. Repeat these steps for each target client that you want to configure for usewith this product.
2012-05-0245
Install the BAdIs for new (non-upgrade) installation

6.1.3.1 To activate the Business Configuration Sets on each target client
1. From one of the target clients, use /nSCPR20 to navigate to the "Business Configuration Sets :Activation" transaction.
2. Type /FLDQ/47U6X in the "BC Set input" field and click Enter.The following Short text appears: Business Configuration Set for BusinessObjects 06-21-11. (Thedate varies.)
3. Click Activate or select Activate from the "BC Set" menu.4. Create a new change request. (Dismiss any caution that may appear.)5. In the "Activation Options" window click Continue Activation (Enter).
An "Activation completed" message appears at the bottom of the window.
6.1.4 For IC or CRM WebClient, re-activate the BSP Business Configuration Sets
If you use the IC or CRM WebClient, you must also re-activate the BSP Business Configuration sets.To re-activate the BSP Business Configuration Sets, open the target client (the one that you want toconfigure for use with this product) and follow these steps.
6.1.4.1 To activate the MDG Business Configuration Sets
1. Enter transaction /nSCPR20 in the target client to navigate to the Business Configuration Sets :Activate transaction.
2. Type /FLDQ/MDG_SDQ_MSG in the "BC set input" field and click Enter.3. Click Activate.4. Create a new change request when the window appears. (Dismiss any "Caution" that may appear.)5. Click Continue Activation (Enter) in the "Activation Options" window.
An Activation completed message appears at the bottom of the window.
6. Repeat these steps for each target client that you want to configure MDG for use with this product.
2012-05-0246
Install the BAdIs for new (non-upgrade) installation

6.1.5 Load supported country codes
This activity is a post-installation configuration for first-time installations of this product. It can beperformed at any time necessary, but if you are upgrading from a full installation of a previous versionof this product, this step would have been a part of the installation of that previous version. Usersperforming a fresh installation must perform this task.
When you perform this activity, you must load into each target (non-000) client the supported countrieson which this product can perform postal validation.
6.1.5.1 To load supported country codes
1. On a target (non-000) client, run transaction SA38. The "ABAP: Execute Program" window appears.2. In the "Program" field, type /FLDQ/AD_REPT_LOAD_COUNTRIES.3. Click Execute.
The supported countries are loaded into a table that you can maintain from the IMG activity MaintainSupported Countries.
4. Repeat these steps on each target client that you want to configure for use with this product.
After loading the country codes with this step, you can optionally configure Data Quality for SAP byremoving country codes for which you have not purchased support by using the Maintain SupportedCountries IMG activity.
Related Topics• Maintain Supported Countries
6.1.5.1.1 Region Reconciliation
The region information provided with this installation must be consistent with the information in the DataServices address directories. (The mostly likely causes for inconsistency would be if this installation isan upgrade, you are using a version of Data Services older than this product, or if the Data ServicesGlobal Address Cleanse address directories have been updated since the release of this product.)
To ensure that the region information provided with the installation is consistent with Data Service'saddress directories, you can reconcile your region information as described in the section Reconcilingregions.
Related Topics• Reconciling regions
2012-05-0247
Install the BAdIs for new (non-upgrade) installation

6.1.6 Activate duplicate check index pools
This IMG activity creates the standard SAP index pools: BUT052 (all SAP platforms), BUT000 (all SAPplatforms), and KNA1 (all SAP platforms except CRM). These index pools are useful when this productsearches for duplicate data. Initially, the index pools are not active.
Though this IMG activity is part of the standard functionality of your SAP system and not addedspecifically by the installation of this product, it is required for the proper functioning of this product.You must perform this procedure on each target (non-000) client. This product relies on these duplicatecheck index pools to perform its duplicate check processes.
When you run this activity, you must run it on each target (non-000) client.
See the documentation for your SAP platform to find the location of this IMG activity node. If you arerunning R/3 or CRM, the node is labeled as "Activate duplicate check index pools".
6.1.6.1 To activate the standard SAP index pools
1. In the IMG, click on the activity "Activate duplicate check index pools".The "Customizing Settings For Logical Search Pools: Overview" window appears.
2. Type 90 in the "Threshold" field for index pool BUT000, and select "Index Active".A checked box activates the index pool.
3. Type 90 in the "Threshold" field for index pool BUT052, and select "Index Active".A checked box activates the index pool.
4. For non-CRM platforms only: Type 90 in the "Threshold" field for index pool KNA1, and select "IndexActive". (Skip this step on CRM systems.)A checked box activates the index pool.
5. Save the settings.6. Repeat the entire process for each target (non-000) client.
6.1.7 Quarterly Adjustment Reports
Your SAP system provides standard reports for Quarterly Adjustments, which allow you to validate allthe addresses in your database in a three-step batch process. You may want to run Quarterly Adjustmentsother times after this installation on a regular, pre-determined schedule and you should run Quarterly
2012-05-0248
Install the BAdIs for new (non-upgrade) installation

Adjustments after installing new Data Services address directories from SAP BusinessObjects to validatedata that may have changed due to the renaming of streets, the development of new areas, and so on.
If you did not have this product installed, to run a Quarterly Adjustment Report you would execute thedefined SAP reports RSADRQU1, RSADRQU2, and RSADRQU3. Installing this product allows you tosubstitute the second of these standard reports, RSADRQU2, with the custom report /FLDQ/RSADRQU2,and take advantage of the postal validation capabilities provided by this product.
The running of these reports exchanges records between SAP and the RFC Server. Then the validatedand updated addresses are committed to the SAP database.
You must repeat the entire procedure for running Quarterly Adjustments for each target (non-000) clientas part of this installation.
6.1.7.1 To run report RSADRQU1
You use report RSADRQU1 to select the addresses that are to be cleansed.1. On a target (non-000) client, start the report RSADRQU1 by running the transaction code SA38.
The "ABAP Execute Program" window appears.
2. In the "Program" field, enter RSADRQU1 and click the Execute button (F8).The "Create an address index for the quarterly adjustment" window appears, presenting severaloptions.
3. Specify the countries for which the quarterly adjustment is to be performed. This field is required bydefault.
4. Specify the cities within the selected country or countries for which the quarterly adjustment is to beperformed. This field is optional.
5. Specify the postal code or range of postal codes for which the Quarterly Adjustment is to beperformed. This field is optional.
6. Change the packet size only if you have experienced problems in running Quarterly AdjustmentReports previously.We recommend that you maintain the default setting for packet size of 1000 records. This numberdetermines how many records are processed and stored at one time. All addresses that meet theselection conditions are read, regardless of the packet size. The setting should be adjusted only inresponse to performance issues previously encountered.
7. Select the radio button to Exclude, Check additionally, or Check separately addresses that havenot previously been subjected to postal validation. This setting is not relevant to this product’sfunctionality, so the setting does not affect the results of postal validation.
8. Select the appropriate radio button either to Cancel the Quarterly Adjustment if INDX exists orto Overwrite the existing INDX. If the Quarterly Adjustment is terminated for some reason and youwant to start it again, you must select Overwrite existing INDX .Running RSADRQU1 creates a temporary table called INDX, which is used by the other two QuarterlyReports and deleted when the process completes successfully. If the Quarterly Adjustment Reportsprocess did not complete successfully, the INDX table from the failed attempt may still be available.
2012-05-0249
Install the BAdIs for new (non-upgrade) installation

This option allows you to cancel the Quarterly Adjustment process rather than overwrite the existingdata, or to proceed creating INDX with the current parameters.
9. Click the Execute button (F8) to run RSADRQU1.
The report runs and a confirmation window appears.
6.1.7.2 To run report /FLDQ/RSADRQU2
Prior to this step, you have run report RSADRQU1.
Instead of the defined SAP report RSADRQU2, you next execute the report /FLDQ/RSADRQU2. Youuse this report to read the addresses stored temporarily in INDX and update INDX.1. Start the report /FLDQ/RSADRQU2 by running the transaction code SA38.
The "ABAP Execute Program" window appears.
2. In the "Program" field, enter /FLDQ/RSADRQU2 and click the Execute button (F8).The "Check and update address data in quarterly adjustment" window appears.
3. Check the "Clear Previous Error Codes" box to clear error codes from previous runs or uncheck thebox to have the new error codes appended.
4. Check the "Skip D records during the Quarterly adjustment process" box only if you want to runpostal validation without checking D records.A D record is a record that has its check status set to D. There are three possible check statusvalues.
DescriptionOption
Postal or address data is known and does not contain any errorC
Postal or address data may have errorsD
Postal Validation has not been run" "
If a record has a check status set to D, the address in that record has previously been checked andthe user selected to save the address without cleansing it. Records with a check status of D maycontain faulty address data as a result. When running report /FLDQ/RSADRQU2, you may want toskip D records because a user has already made the decision to save the address without cleansingit.
A confirmation window appears. If any records failed during validation, those records are shown here.
6.1.7.2.1 Postal Validation error logs from /FLDQ/RSADRQU2
The system uses the "Clear Previous Error Codes" check box to determine whether the report savesvalidation errors logged from previous runs of the Quarterly Adjustments, or errors only from this run.
2012-05-0250
Install the BAdIs for new (non-upgrade) installation

"Clear Previous Error Codes" affects the content of the report displayed as a result of running the customerror report /FLDQ/AD_REPT_DISP_QTRERRORLOG. It does not affect the content of the error logthat appears automatically after you run the final Quarterly Adjustment Report.
6.1.7.3 To run report RSADRQU3
Prior to this step, you have run reports RSADRQU1 and /FLDQ/RSADRQU2.
You use report RSADRQU3 to commit updates to the SAP database with the validations performed in/FLDQ/RSADRQU2.
Caution:If execution errors occur when you run the report /FLDQ/RSADRQU2, you must not run the reportRSADRQU3 next. All three of the Quarterly Adjustment reports must be run successfully in sequence.Running RSADRQU3 on data resulting from a failed run of /FLDQ/RSADRQU2 can compromise theintegrity of the data written back to the SAP system.
1. Start the report RSADRQU3 by running the transaction code SA38.The "ABAP Execute Program" window appears.
2. In the "Program" field, enter RSADRQU3 and click the Execute button (F8).A confirmation window appears, indicating that the addresses have been removed from postal checkand committed to the database. If the Quarterly Adjustment process finds that any records areincorrect, the window displays a list of those records. You should next run a Quarterly Adjustmentcustom error report, which provides you a hyperlink to each of these records so that you can directlyedit each record as necessary.
If the report terminates or is terminated prematurely for any reason, it can be started again at any time.When this report has finished, the system displays an error log of all addresses that could not be updatedon this run of Quarterly Adjustments.
Though report RSADRQU3 is an SAP-system report, you must have the RFC Server running to processrecords from the pending update table.
Caution:While RSADRQU3 is in process or not started, the Quarterly Adjustment remains active. If addressesare changed using other SAP business transactions while the quarterly adjustment is in process, theseaddresses can not be updated by report RSADRQU3. You must complete the Quarterly Adjustmentprocess before making other changes to the postal address data if you want the new data included inthe adjustments.
6.1.7.4 To run the Quarterly Adjustment custom error report
2012-05-0251
Install the BAdIs for new (non-upgrade) installation

This product provides a custom error report, /FLDQ/AD_REPT_DISP_QTRERRORLOG, which you canuse to display the address validation errors that occurred during all Quarterly Adjustment runs sincethe last time you cleared the previous error codes.1. Start the report /FLDQ/AD_REPT_DISP_QTRERRORLOG by running the transaction code SA38.
The ABAP Execute Program window appears.
2. In the "Program" field, enter /FLDQ/AD_REPT_DISP_QTRERRORLOG and click the Execute button(F8).The "Display Address Errors generated during Quarterly Adjustment" window appears. At this windowyou can set limits to filter and sort the displayed results.
3. Set any filters and click the Execute button (F8).An error log is displayed showing a list of records on which postal validation errors occurred. Eachfield item is a hyperlink to the record itself, which you can use to go to the record for direct editing.
6.1.8 Run the Initial Match Code (Index) Setup program
The last step to prepare this product for use is to run the Initial Match Code (Index) Setup program oneach target (non-000) client. This step is required for all installations of this product that use DuplicateCheck — Error Tolerant search.
The Initial Match Code (Index) Setup program prepares your existing data for matching with duplicatecheck and error tolerant search. You must run the initial setup program before using this product, andagain if you make changes to the match expression that controls the parameters of duplicate checkand error tolerant search.
Caution:Before running the initial setup program, you must run Quarterly Adjustments to perform postal validationon the data that already exists in your SAP system. This process is required even if you are upgradingthis product from a previous version because having correct address data increases the effectivenessof finding duplicate data.
Note:The window from which you execute the Initial Match Code (Index) Setup program also contains theoptions to perform batch match. You need not perform batch match to prepare this product for use.You can optionally run batch match any time later. For information on running batch match, see thesection Using duplicate check in batch mode.
6.1.8.1 Creating match codes while users are on the system
2012-05-0252
Install the BAdIs for new (non-upgrade) installation

You should execute the /FLDQ/RSADRINI program only when users are not updating records in thesystem, such as during the initial setup.
If you want to configure the match code options while users are on the SAP system and updatingrecords, use instead the /FLDQ/RSMTCCODE program (Match Code Creation Program). This programalso configures match code options but simultaneously locks records as it runs so that you can run itwhile users are updating records in the system.
However, /FLDQ/RSMTCCODE is not optimized to use multiple threads and therefore processes recordsmore slowly than /FLDQ/RSADRINI. The report processes all records in the active index pools andcontains a filter that you can set at the start to limit which records are sent to Data Services to havematch codes generated.
Note:When you run the match code creation program /FLDQ/RSMTCCODE for a range of records but norecord exists in that range, the system displays an error message that states, “Report executioncompleted successfully. No updates done to break keys table.”
6.1.8.1.1 To run the Initial Match Code (Index) Setup program1. Invoke the transaction SA38 in the command box.
The "ABAP: Execute Program" window appears.
2. In the "Program" field, enter /FLDQ/RSADRINI and click the Execute button (F8).The "Initial Match Code (Index) Setup and Batch Match" window appears.
3. For the "Multi-process settings based on available resources", configure these options.
DescriptionOption
How many are runningAvailable Batch RFCServers
How many work processes on the SAP system are availableAvailable work pro-cesses
Sets the limit on how many work processes this report can use; loweringthe number can hinder performance but conserve resources
Maximum concurrenttasks
You must have more available work processes than available batch RFC Servers because the poolof work processes is used to make each RFC Server call. You should have a few additional serversthat can be used by other processes.
4. If you want to set "Batch Match Options", configure these options.
2012-05-0253
Install the BAdIs for new (non-upgrade) installation

DescriptionOption
A lower number produces more potential matchesThreshold
The number of records in a packetPacket size
For information about the functionality to create acleansing case on your SAP platform, see the documen-tation for your SAP platform.
Use the SAP functionality to create acleansing case to combine records
5. Check the box for "Perform Initialization" and click the Execute button (F8).The program executes. Installation and setup are complete in this target (non-000) client.
6. Repeat these steps on each target client that you want to configure for use with this product.
6.1.9 Install and configure into the WebClient for CRM 7.0 and CRM 2007
This section describes the requirements and procedures to install the functionality of this product intoa CRM IC WebClient or CRM WebClient environment.
6.1.9.1 Requirements for running in a WebClient profile
Refer to these SAP Support Notes to determine if additional configuration or support packages arenecessary for your SAP CRM 2007 or CRM 7.0 configuration.
DescriptionNote #
Postal Validation for Business Partner Address.1250600
CRM WEB UI: Country gets erased on saving.1286002
Postal Validation: Saving of correct address.1299693
CRM WebUI : Country gets erased on saving.1300236
Address validation: address not taken over from popup.1340952
Address validation: address not taken over from popup (regarding double save).1351582
In the Account Identification, when trying to create and save a duplicate record,the save is not possible. A unique record, however, can be saved.
1356120
Account/Contact Creation: Address Validation + Direct Save.1359568
Exception saving related partner.1384111
2012-05-0254
Install the BAdIs for new (non-upgrade) installation

DescriptionNote #
Duplicate Check on Create Contact Person screen.1376561
At End: Database update failed. Rollback has been triggered.1384877
Address validation & duplicate check on More Fields.1378301
Address Validation & Duplicate Check.1371528
6.1.9.2 Summary of configuration tasks
To install the functionality of this product into your CRM IC WebClient or CRM WebClient environment,you must add a Component Usage to the Component to which you want to add Postal Validation. Youadd the Component Usages using the Enhancement Framework. You must complete the followingprocedures:1. Activate the BSP Business Configuration (BC) Sets2. Create an Enhancement Set3. Find the name of the Component to enhance4. Enhance the Component
Note:Make sure that you have imported the correct .SAR files provided as part of the installation of thisproduct into your SAP system. For information on importing .SAR files, see the section Install the BAdIs.
Related Topics• Do not perform this installation if you are upgrading from version 4.0
6.1.9.3 To activate the BSP BC Sets
If you are upgrading a current WebClient installation, delete the contents of the /FLDQ/AD_FORMMAPtable prior to activating the BC set.1. In the target client (the one that you want to configure for use with this product), enter transaction
/nSCPR20 to navigate to the Business Configuration Sets : Activate transaction.2. Enter /FLDQ/BSP_PV in the BC Set input field and click Enter.
The following text appears: BC Set for SAP BusinessObjects BSP_PV Product 06/08/11. (The datevaries.)
3. Click Activate.
2012-05-0255
Install the BAdIs for new (non-upgrade) installation

4. Create a new change request when the window appears. (Dismiss any caution message that mayappear.)
5. Click Continue Activation (Enter) in the "Activation Options" window.An “Activation completed” message appears at the bottom of the window.
6. Repeat these steps for each target client that you want to configure.
6.1.9.4 To create an Enhancement Set
An SAP client can only have one Enhancement Set active at one time. If the SAP client already hasan Enhancement Set, you can skip this procedure.1. Go to transaction SM34.
The "View Cluster Maintenance" window appears.
2. Enter View Cluster name BSPWDVC_CMP_EXT.3. Click the Maintain button. (Dismiss any caution message that may appear.)4. Click the New Entries button.
The "Change View Enhancement Set Definition" window appears.
5. Enter an Enhancement Set name and a description for it.6. Save the record.7. Invoke transaction SM30.
The Maintain Table Views window appears.
8. Enter table name BSPWDV_EHSET_ASG.9. Click Maintain.10. Click New Entries.11. Enter the client number for which you want to create the Enhancement and the Enhancement Set
name that you created in this procedure.12. Save the record.
A new Enhancement Set is created and assigned to the client.
6.1.9.5 To find the name of the Component to enhance
If you do not already know the name of the Component, you can find the name with this procedure.1. From any window in which you can enter address data, click one of the address fields to assign it
focus.2. Press F2 on your keyboard.
2012-05-0256
Install the BAdIs for new (non-upgrade) installation

A "Technical Data" window appears, containing among its fields the Component name used foraddressing, UI_Component.
6.1.9.6 To enhance the Component
1. Go to transaction BSP_WD_CMPWB.2. Enter the names of the Component and the Enhancement Set.3. Click Display.4. Click on the "Runtime Repository Editor" tab.5. Click Edit.6. Expand the "Component Usages" menu item.7. Click the Change button.8. Right-click on "Component Usages" and select "Add Component Usage".9. In the "Create Component Usage" window, enter PostalValidation in the "ID" field.10. In the "Create Component Usage" window, enter /FLDQ/DQXI_PV in the "Used Component" field.11. In the "Create Component Usage" window, enter /FLDQ/DQXI_PV/DQXI_PV in the "Interface View"
field.12. Save and exit.
The Component is now enhanced.
6.1.10 Install and configure into the IC WebClient for CRM 5.0
To install and configure the functionality of this product into the IC WebClient for CRM 5.0, you mustperform the following procedures:1. Activate the BSP Business Configuration (BC) Sets2. Configure IC WebClients to use views and controlliers3. Activate the /FLDQ/BSP_DQ service4. Activeate search functionality
6.1.10.1 Activate the BSP Business Configuration (BC) Sets (CRM 5.0)
The BSP BC Sets are already activated as part of the installation of the BAdIs.
2012-05-0257
Install the BAdIs for new (non-upgrade) installation

If you are upgrading a current IC WebClient installation, delete the contents of the /FDLQ/AD_FORMMAPtable prior to activating the BC set.
6.1.10.2 To configure IC WebClients to use views and controllers (CRM 5.0)
1. Invoke transaction SPRO and navigate to Customer Relationship Management > InteractionCenter WebClient > Customer-Specific System Modifications.
2. Run Define IC WebClient Runtime Framework Profiles.3. Select the correct profile.4. Double-click Controller Substitutes on the left side of the "Dialog Structure" panel, and add the
following values to the "Controller Substitutes" grid on the right side:
DescriptionOption
CRM_ICBSP Application
BuPaCreateReplaced Controller
/FLDQ/BSP_DQBSP Application
BOBJ_BuPaCreateReplacement Controller
5. Save and exit.
6.1.10.3 To activate the /FLDQ/BSP_DQ service (CRM 5.0)
1. Enter transaction SICF. The" Maintain Services" window appears.2. Click Execute.3. Navigate through the services hierarchy to default host > sap > bc > bsp > FLDQ.4. Right-click on FLDQ, and select "Activate Service" from the context-sensitive menu.5. Click the recursive Yes button to activate the service.6. Exit the window.
Caution:If you click the regular Yes button instead of the recursive Yes, the service will not be activated.
2012-05-0258
Install the BAdIs for new (non-upgrade) installation

6.1.10.4 To activate search functionality within the IC WebClient (CRM 5.0)
Use these steps to activate search functionality.1. Navigate the IMG structure to the following location: CRM Cross-Application Components >
Generic Interaction Layer/Object Layer >Component-Specific Settings > ExtendObject Modelfor Business Partner.
2. In the "New Entries: Overview of Added Entries" window, select the "Implementation Class Definition"folder.
3. For the Implementation Class Definition, add the following values:
DescriptionOption
BuilHeaderExternal Object Name
/FLDQ/CL_BOBJ_BUIL_HEADERImplementation Class
Search functionality is now activated.
6.1.10.5 Disable Postal Validation BAdI for the IC WebClient (CRM 5.0)
To use Postal Validation within your IC WebClient environment, you must disable the standard BusinessObjects Postal Validation BAdI through the IMG activity Maintain exception table of transaction codes.
You must add the Program SAPMHTTP and suppress validation, search, and suggestions for it.
Related Topics• Maintain exception table of transaction codes
2012-05-0259
Install the BAdIs for new (non-upgrade) installation

2012-05-0260
Install the BAdIs for new (non-upgrade) installation

Install the BAdIs support package
7.1 Install the BAdIs support package
This version requires that you have the BAdIs from the previous version of this product (Data QualityManagement, version for SAP Solutions XI 4.0) installed. The BAdIs portion of this product upgradesthe BAdIs from those versions, and cannot be installed without.
Caution:If you are doing a fresh installation of this product, you must install the BAdIs portion of the previousversion of this product, according to the instruction found in Install the BAdIs for a new (non-upgrade)installation , before proceeding with the installation of this BAdIs support package.
Related Topics• Do not perform this installation if you are upgrading from version 4.0
7.1.1 Step 1: Import the Data Quality Management support package on client 000
Choose an applicable .SAR or .CAR package for your Basis version from the following table.
You must import the Data Quality Management package on the reference client (client 000), and thenactivate (or reactivate) the applicable BC Sets to import new customizing data.
.SAR file for new installations and upgrades of this productNetWeaver/Basis Release
2012-05-0261
Install the BAdIs support package

.SAR file for new installations and upgrades of this productNetWeaver/Basis Release
SAPK-44601INFLDQ.CARNW 640
SAPK-44701INFLDQ.SARNW 700/701
SAPK-44801INFLDQ.SARNW 702
SAPK-44901INFLDQ.SARNW 710
SAPK-45001INFLDQ.SARNW 731
7.1.1.1 To import the Data Quality Management package
1. Enter the transaction SPAM to open the "Support Package Manager" window.2. Click the "Support Package" menu and choose Load packages > From Frontend.3. In the "Select CAR/SAR archive" window, browse to the location of and select the applicable .SAR
file. If the path is long and the system generates an error, copy the file to a local directory locationand load it from there.
4. Click Open and then click Yes to load the .SAR file. The contents of the compressed .SAR fileappears.
5. Click Decompress.6. Continue with standard Support Package process for component /FLDQ/. (For further instructions
on importing a Support Package, see the documentation for your SPAM tool.)7. Click Continue, and then Complete to close the tool.
7.1.2 Step 2: Activate or re-activate the Business Configuration Sets on each targetclient
Re-activate the applicable Business Configuration Sets on each of the target clients (non-000 logonclients) that you want to configure for use. Repeat these steps for each target client that you want toconfigure for use with this product.
The Business Configuration Sets are as follows:
2012-05-0262
Install the BAdIs support package

ExplanationBC Set
Must be re-activated for every support package installation./FLDQ/47U6X
Used for extended search capabilities. It is activated for the first timewith this installation.
/FLDQ/EXT_SEARCH
Used for WebClient installations only./FLDQ/BSP_PV
Used for MDG installations only./FLDQ/MDG_SDQ_MSG
Used for CRM 5.0 only./FLDQ/BSP_PV_CRM_5
7.1.2.1 To activate or re-activate the Business Configuration Sets on each targetclient
1. From one of the target clients, use /nSCPR20 to navigate to the "Business Configuration Sets :Activation" transaction.
2. Type the name of the Business Configuration Set (for example, /FLDQ/47U6X) in the "BC Set input"field and click Enter.The following Short text appears: Business Configuration Set for BusinessObjects 06-21-12. (Thedate varies.)
3. Click Activate or select Activate from the "BC Set" menu.4. Create a new change request. (Dismiss any caution that may appear.)5. In the "Activation Options" window click Continue Activation (Enter).
An "Activation completed" message appears at the bottom of the window.
Repeat these steps for all applicable Business Configuration Sets on each target client.
2012-05-0263
Install the BAdIs support package

2012-05-0264
Install the BAdIs support package

Install the RFC Server
8.1 Install the RFC Server
You can install the RFC Server on the same machine as Data Services, on a different machine, or evenon a machine with a different operating system than the one that contains your installation of DataServices. However, installing Data Services and the RFC Server on the same machine reduces networktraffic, slightly increases performance, and reduces the number of ports that must be exposed andenabled.
At minimum, you must install one instance of the RFC Server for transactional processing to make thisproduct operational, but you can install more. In addition, performing batch processing requires one ormore RFC Servers dedicated to batch processing.
You must install the RFC Server from a user account that has permissions to install software on themachine.
Related Topics• Network ports
8.1.1 Number of RFC Servers to install
You must minimally install one instance of the RFC Server, and if you use duplicate search in batchmode (called batch match) you must install one or more instances of the RFC Server dedicated to batchmatch. Installing more instances of the RFC Server can increase performance.
For real-time transactions, we recommend the following based on the number of concurrent users.
2012-05-0265
Install the RFC Server

Number of RFC Server instancesNumber of concurrent users
350
6100
13200
19300
25400
31500
If your transactional usage is predictable and consistent (that is, there are no significant peak times ofusage), we recommend the following based on the number of records your organization creates ormodifies in a day.
Number of RFC Server instancesRecords
212,000
324,000
648,000
1396,000
19144,000
25192,000
31240,000
A common scenario for the number of transactional RFC Servers is 6.
The resources footprint of an RFC Server instance is relatively small. Installing additional instances ofthe RFC Server often increases performance.
8.1.2 Installing an RFC Server as a Windows Service
During an installation of the RFC Server on Windows, the installation routine allows you to install theRFC Server as a Windows Service. The RFC Server functions the same whether you install it as aWindows Service or not, but installing the RFC Server as a Windows Service allows you to administerit through the Services console.
The first instance of the RFC Server has the Service name BusinessObjects DQM for SAP xxx yyy 1(where xxx is the System ID and yyy is the Program ID). Other instances of the RFC Server are namedBusinessObjects DQM for SAP xxx yyy 2, BusinessObjects DQM for SAP xxx yyy 3, and so on.
2012-05-0266
Install the RFC Server

The first instance of the RFC Server for batch duplicate search has the service name BusinessObjectsDQM for SAP Batch xxx yyy 1 (where xxx is the System ID and yyy is the Program ID). Other instancesof the RFC Server are named BusinessObjects DQM for SAP Batch xxx yyy 2, BusinessObjects DQMfor SAP Batch xxx yyy 3, and so on.
If you chose not to install the RFC Server as a Windows Service but want to add this functionality, youmust run the installer again and select the additional Windows Services option.
8.1.3 Replacing a previous RFC Server version
You cannot install this version of the RFC Server over a previous version. If you intend to use a machinethat has the RFC Server from a previous version of this product, you must uninstall the previous version.On Windows, run the installation routine from the previous version of this product on a machine thatholds the RFC Server. The installation routine gives the option to uninstall the instance of the RFCServer it finds. On UNIX/Linux, simply delete the files of the RFC Server to uninstall.
If you are upgrading from a previous version of this product and made customizations to the RFC Serversettings, before uninstalling you should make copies of the previous version’s files flrfcsrv.xml touse as a reference to those customizations. You must manually apply any customizations to this versionof the product to reproduce those changes from the default settings. For information on the locationand settings of these files, see the section Overview of RFC Server configurations.
Related Topics• Overview of RFC Server configurations
8.1.4 RFC Server Checklist
The RFC Server installation routine asks the following information about your configuration. You shouldprepare this information before beginning the installation.• Gateway Connection information of your SAP system – three-letter System ID, Gateway Server
Host Name, Gateway Service ID, Transaction Program ID (FLRFCSRV), and Batch Program ID(FLRFCBTC)
• Application Server connection information – Host Name, System Number, Client, User Name,Password, and optional language
• Data Services security settings – path to the Data Services trusted certificate folder (if you enableWeb Service SSL communication), and the CMS User Name, Password, system name, andauthentication type (if you enable session security)
• Data Services Access Server connection information – Host Name, Port Number, and URL for theWSDL
2012-05-0267
Install the RFC Server

• Your email system settings – Host, Port, a sender email address, and recipient email addresses (incomma-delimited format), used by the RFC Server to send email notifications if it terminates
• The BusinessObjects Enterprise (BOE) Central Management Service (CMS) username, password,system name, and authentication type (if you intend to enable session security)
Note:On Windows 2008 Server and later systems that use the User Account Control (UAC), the RFC Servermay not be able to run if that user does not have appropriate privileges. The error is caused by theinability at access the flrfcsrv_log.txt log file. You must ensure that the user has appropriateprivileges to access the log file.
The procedures for installing the RFC Server are in the section To install the RFC Server.
8.1.5 Understanding the monitor services settings
The RFC Server can monitor the services you configured as part of the installation of the Data ServicesComponents. If one or more of those monitored services stops running, the RFC Server hibernatesuntil it detects that those services are running again. If email notifications are enabled, the RFC Serversends a notification email to the designated recipients before hibernating.
During the installation of the RFC Server, you are prompted to select which services you want the RFCServer to monitor, grouped by four categories. The categories and the services in each category areas follows:
Postal Validation real-time services• Service_Realtime_DQ_SAP_Address_Cleanse• Service_Realtime_DQ_SAP_Address_Cleanse_Suggestions• Service_Realtime_Batch_DQ_SAP_Address_Cleanse
Duplicate Check real-time services• Service_Realtime_DQ_SAP_Create_Break_Keys• Service_Realtime_DQ_SAP_Create_Break_Keys_With_FirstName• Service_Realtime_DQ_SAP_Create_Break_Keys_No_PV• Service_Realtime_DQ_SAP_Create_Break_Keys_With_FirstName_No_PV• Service_Realtime_Batch_DQ_SAP_Name_And_Address_Match• Service_Realtime_DQ_SAP_Name_And_Address_Match
Extended search real-time services (For CRM 7 Ehp1 or greater)• Service_Realtime_DQ_SAP_Name_And_Address_Ext_Match• Service_Realtime_DQ_SAP_Name_And_Address_Ext_Match_Weights
Note:These services for extended search real-time services are optional for the installation of this product,even on CRM 7 Ehp1 or greater systems. You should not configure the RFC Server to monitor theseservices unless you have configured them.
2012-05-0268
Install the RFC Server

Add-on non-essential supportive real-time services• Service_Realtime_DQ_SAP_Address_Global_GEO• Service_Realtime_DQ_SAP_Retrieve_Country_Purchased• Service_Realtime_DQ_SAP_Product_Version• Service_Realtime_DQ_SAP_Get_Region_Data• Service_Realtime_DQ_SAP_Region_Upgrade
Related Topics• Configure jobs as services
8.1.6 RFC Server installation
Install the RFC Server on a machine that meets the system requirements.
Related Topics• Requirements for the RFC Server
8.1.6.1 To install the RFC Server
The procedure in this section is specific to Windows. Installing the RFC Server on UNIX or Linux requiresyou to input the same information, without any parallel to the step of installing the RFC Server as aWindows Service.1. Locate the SAP BusinessObjects Data Quality Management, version for SAP Solutions - RFC Server
media and launch setup.exe.2. In the "Welcome" screen, click Next.3. Read the license agreement and, if you accept the license agreement terms, choose "I accept the
terms of the license agreement" and click Next.4. If you want to install the RFC Server as a Windows Service, click Yes, then in the next screen enter
the number of Services you want to create for Transactional and Batch processing, and click Next.Otherwise, click No.
5. In the "Choose Destination Locations" window, accept the default installation location or specify adifferent location. Click Next.
Note:By default, the installation routine installs the RFC Server to the folder C:\Program Files\SAPBusinessObjects\Data Quality Mgmt for SAP Solutions.
6. In the "SAP Information" windows, enter the following information and click Next:
2012-05-0269
Install the RFC Server

Note:These options appear in more than one window.
• SAP System ID (a maximum of three characters in length)• Gateway Server Host Name (use the name of the SAP central instance gateway)• Gateway Service ID (typically “sapgwxx,” where xx is the central instance number)• Application Server Host Name• Application Server System Number (a maximum of two numbers in length)• Application Server Client (a maximum of three characters in length)• Application Server User Name• Application Server Password (entered twice)
Note:Each SAP systems password is encrypted and stored in the configuration file flrfcsrv.xml.You can reset the password by executing the start_password_reset script from within a shell.The startup script is in the RFC Server installation folder. When run, it prompts for the SAPcommunication username and password.
• Application Server Language (optional)
7. In the "Data Communication Security Settings" window, if these Data Services settings are enabledcheck the Yes box before clicking Next:
2012-05-0270
Install the RFC Server

DescriptionOption
This setting is configured though the Data Services Access Serverand uses a set of supplied certificates for connection. Enablingthis setting encrypts all data but does not authenticate the user.If you enable this feature, you must supply the path to the DataServices Certificate.
IsAccessServer SSLcommu-nication enabled?
This setting enables a SSL connection through the Web Servicehosting the Data Services Management Console. This connectionis controlled by the supported interface in the Web Service (forexample, through a Web server, such a Tomcat). Enabling thissetting encrypts all data but does not authenticate the user. If youenable this feature, you must supply the path to the Data ServicesCertificate.
Is Web Service SSL Commu-nication enabled?
This setting applies to the Web Service. Enabling this setting forcesmost calls to the Web Service (except ping and login/logout) tolog in with a valid BusinessObjects Enterprise (BOE) CentralManagement Service (CMS) username/password before accessingWeb Service functions. It does not encrypt data. If you enable thisfeature, you must supply the following information about the CMSsystem.• CMS username• CMS password (entered twice)• CMS system name• CMS authentication type
Is session security enabled?
Note:For information about data communication security, see the section Recommendations for dataprotection and privacy.
8. In the "Data Services Connection" window, enter the Data Services Access Server hostname, portnumber (default is 4000), and the URL of the Data Services Web server. Click Next.The default is either http://<hostname>:8080/DataServices/servlet/webservices?ver=2.0&wsdlxmlor, if you use SSL,https://<hostname>:28080/DataServices/servlet/webservices?ver=2.0&wsdlxml.
9. In the" Email Server Connection Parameters" window, provide the following information:• Email host. If you leave this field blank, the RFC Server does not send email notifications if the
RFC Server terminates or hibernates, or if the SAP gateway disconnects.• Email Port. The default email port is 25.• Sender Email Address.• Recipient Email Addresses. Each of the recipient email addresses must be separated by a
comma.The email transport protocol is SMTP. The installation routine does not validate the email addressesyou provide. You can change these parameters later in the RFC Server configuration file. For moreinformation, see the section Configuring through flrfcsrv.xml.
2012-05-0271
Install the RFC Server

10. Click Next.11. In theMonitor Services Settingswindow, select which groups of services you want the RFC Server
to monitor. Click Next.12. In the "Ready to Install the Program" window, click Install.
The installation proceeds.
13. Click Finish when the installation has completed.
If you run the installer again on a system that already has the RFC Server installed, the installationroutine detects the previous installation and offers steps to create additional Windows Services (forWindows only), configure a new SAP system, or uninstall. When you uninstall the RFC Server onWindows, the routine uninstalls all RFC Servers on the system.
Related Topics• Recommendations for data protection and privacy• Configuring through flrfcsrv.xml
8.1.7 Start the RFC Server
If you installed the RFC Server on Windows as a Windows Service, you can start the RFC Server asyou would any Windows Service. The name of the Service for the first instance of the RFC Server, forexample, is BusinessObjects DQM for SAP xxx 1 (where xxx is the System ID). You must start allinstances of the RFC Server, interactive and batch, in this manner.
You can also use the configuration features available for any Service, such as the ability to automaticallyrestart the Service after failure. For details on configuring Windows Services, see your Windowsdocumentation.
If you did not install the RFC Server as a Windows Service, you can find the batch files to start the RFCServer in the install directory of the machine on which you installed the RFC Server.
For Windows:
install_directory\start_<SAP systemID>_<SAP programID>_trans.bat
install_directory\start_<SAP systemID>_<SAP programID>_batch.bat
For UNIX/Linux:
install_directory/start_<SAP systemID>_<SAP programID>_trans
install_directory/start_<SAP systemID>_<SAP programID>_batch
Where <SAP systemID> represents the SAP System ID and <SAP programID> represents the SAPProgram ID specified at installation.
2012-05-0272
Install the RFC Server

Note:When the RFC Server starts, it looks for the SAP Gateway and your installation of Data Services.Therefore, you should have both the SAP Gateway and Data Services running before starting the RFCServer.
When the RFC Server starts, it displays status messages about its progress and any technologies (suchas Extended Search or MDG) not supported by the SAP Basis version to which it connects.
8.1.8 How to stop the RFC Server
If you installed the RFC Server on Windows as a Windows Service, you can stop the RFC Server asyou would any Windows Service.
If you did not install the RFC Server as a Windows Service, you must on the machine that hosts theRFC Server use Ctrl-C in the RFC Server console to terminate the RFC Server process. This methodmay on rare occasion cause SAP to show a connection to the RFC Server after the RFC Server hasstopped.
Note:If you use transaction SMGW from within your SAP system in an attempt to stop the RFC Server andyou are running multiple RFC Servers with the same TP name, this method may simultaneously stopall RFC Servers with that TP name (for more information, see SAP Note 923248). Further, if you usetransaction SMGW to stop the RFC Server that has been installed as a Windows Service, and the RFCServer fails to restart properly, the Windows Services Console would not reflect that the RFC Serveris not running until the Console is refreshed.
8.1.9 Creating the SAP handshake with RFC Servers
This activity is a post-installation configuration for first-time installations of this product. It can beperformed at any time necessary, but if you are upgrading from a previous version of this product, thisstep would have been a part of the installation of that previous version. Users performing a freshinstallation must perform this task.
This activity allows you to define the RFC destination and test whether the components of Data Qualityfor SAP are able to communicate by invoking a TCP/IP handshake.
The first time this activity is invoked, you must define the RFC destination.
8.1.9.1 Define the RFC destinations
2012-05-0273
Install the RFC Server

The RFC Server is used to perform postal validation and duplicate check functions on data sent by theSAP system. To communicate with the RFC Server from within the IMG, you must define the RFCdestinations for the server.
You must define the following RFC destinations:• FL_GDQC_SERVER• FL_GDQC_BATCH
Note:The RFC Server must be running in order to complete this activity.
8.1.9.1.1 To define the RFC destination FL_GDQC_SERVER1. From the IMG on a target (non-000) client, click on the activity named "SAP handshake with the
RFC server".
Note:On SAP versions that use Basis 7.00, this window is named "Configuration of RFC Connections".
The "Display and Maintain RFC Destinations" window appears.
2. Click Create.The "RFC Destination" window appears.
3. Fill in the fields of the "RFC Destination" window as follows:
DataField
FL_GDQC_SERVERRFC Destination
TConnection type
Connection to Data Quality Mgmt for SAP - RFC ServerDescription
Note:By default, this product expects the name of the RFC destination to be FL_GDQC_SERVER. If youchoose not to use the name FL_GDQC_SERVER, you must go to the activity Maintain operatingparameters and ensure that the value of the RFC_DEST parameter is the name of the chosen RFCdestination.
4. Press Ctrl+S to save the settings.5. Click Registration (in R/3) or choose Registered Server Program (CRM) to make the Activation
Type Registration.This setting is necessary because the RFC Server for this product is registered on the SAP gatewayas an RFC Server.
6. Input the Program ID as FLRFCSRV.
Note:By default, this product expects the Program ID to be FLRFCSRV. If you choose not to use theProgram ID FLRFCSRV, you must edit the <sap_progid> setting in the configuration file flrfcsrv.xml. For details on editing this configuration file, see the section Configuring through flrfcsrv.xml.
2012-05-0274
Install the RFC Server

7. If you are installing this product on a Unicode system:a. Select the "Special Options" tab (on SAP versions that use Basis 7.00 and above, this tab is
labeled "MDMP & Unicode").b. Select the option "Unicode in the Character Width" in the "Target System" field.c. Press Ctrl+S to save the settings and exit the activity.
Note:The final steps of this procedure apply to all users.
8. Click the Connection Test button.If the RFC Server is running and the connection is successful, a confirmation appears.
9. Click Back.The previous window returns.
10. Press Ctrl+S to save the settings.
Related Topics• Maintain operating parameters• Configuring through flrfcsrv.xml
8.1.9.1.2 To define the RFC destination FL_GDQC_BATCH1. From the IMG on a target (non-000) client, click on the activity named "SAP handshake with the
RFC server".
Note:On SAP versions that use Basis 7.00, this window is named "Configuration of RFC Connections".
The "Display and Maintain RFC Destinations" window appears.
2. Click Create.The "RFC Destination" window appears.
3. Fill in the fields of the "RFC Destination" window as follows:
DataField
FL_GDQC_BATCHRFC Destination
TConnection type
Connection to Data Quality Mgmt for SAP - Batch RFC ServerDescription
Note:By default, this product expects the name of the RFC destination to be FL_GDQC_BATCH. If youchoose not to use the nameFL_GDQC_BATCH, you must go to the activity Maintain operatingparameters and ensure that the value of the RFC_DEST parameter is the name of the chosen RFCdestination.
4. Press Ctrl+S to save the settings.
2012-05-0275
Install the RFC Server

5. Click Registration (in R/3) or choose Registered Server Program (CRM) to make the ActivationType Registration.This setting is necessary because the RFC Server for this product is registered on the SAP gatewayas an RFC Server.
6. Input the Program ID as FLRFCBTC.
Note:By default, this product expects the Program ID to be FLRFCBTC. If you choose not to use theProgram ID FLRFCBTC, you must edit the <sap_progid> setting in the configuration file flrfcsrv.xml. For details on editing this configuration file, see the section Configuring through flrfcsrv.xml.
7. If you are installing this product on a Unicode system:a. Select the "Special Options" tab.b. Select the option "Unicode in the Character Width" in the "Target System" field.c. Press Ctrl+S to save the settings and exit the activity.
Note:The final steps of this procedure apply to all users.
8. Click the Connection Test button.If the RFC Server is running and the connection is successful, a confirmation appears.
9. Click Back.The previous window returns.
10. Press Ctrl+S to save the settings.
Related Topics• Maintain operating parameters• Configuring through flrfcsrv.xml
2012-05-0276
Install the RFC Server

Configuring geocoding
9.1 Configure geocoding (optional)
If you have purchased the Geocoding option and directories, you can make configurations to enablethis product to return latitude, longitude, and relevant status information for an address record.
To configure geocoding for your business partner records, you must perform the following actionsdescribed in this section.
9.1.1 Configure the geocoding job as a service
In Data Services, you must configure the geocoding job as a service, as you did with the other jobs aspart of the installation of the Data Services Components.
The geocoding job name is Job_Realtime_DQ_SAP_Address_Global_GEO.
Make the geocoding service name Service_Realtime_DQ_SAP_Address_Global_GEO.
For instructions on configuring a job as a service, see the section Configure jobs as services.
Related Topics• Configure jobs as services
9.1.1.1 To start real-time service for geocoding
To use geocoding, you must start the service in the Data Services Management Console.1. Open and login to the Data Services "Management Console" and click "Administrator".2. Select "Real-Time Services" from the file tree at left and open the "Real-Time Services Status" tab
on the right.3. Select the geocoding service click Start.
2012-05-0277
Configuring geocoding

Note:You can also disable the geocoding service with this procedure if it is not needed. Select thegeocoding service you want to disable and click Disable.
It may take a few minutes for the services to start. If you are not certain the services started, check thatthe Address Server is started. In Windows, look in the "Services" window to see the status of all services.
9.1.2 Configure the RFC Server to enable geocoding
By default, the RFC Server is not configured to handle geocoding.
To configure the RFC Server for use with geocoding, edit the main configuration file of the RFC Server,flrfcsrv.xml, to uncomment the setting. You can find information on editing flrfcsrv.xml in thesection Editing flrfcsrv.xml.
To configure the RFC Server to enable geocoding, change the line
<!--address_geo>Service_Realtime_DQ_SAP_Address_Global_GEO</address_geo-->
to
<address_geo>Service_Realtime_DQ_SAP_Address_Global_GEO</address_geo>
Save the file and restart the RFC Server for this change to take effect.
Related Topics• Editing flrfcsrv.xml
9.1.3 Register the geocoding program in the SAP system
You must register the geocoding program in your SAP system.
9.1.3.1 To register the geocoding program in the SAP system
This task requires you to enter the values into the fields, as found in this table.
2012-05-0278
Configuring geocoding

ValueField
SAP1Source ID
/FLDQ/CL_GEOCODER_GENERIC_RFCClass
ADDR_GEOFunction Module
FL_GDQC_SERVERDestination
Note:The default value for the Destination is FL_GDQC_SERVER.
1. From the IMG, navigate toGeneral Settings > Set Geo-Coding >Register Geo-Coding Programin the System .The "Geo-Coder Mapping Table" window appears.
2. Enter the values for the fields, as found in the preceding table.3. Save the entry.
9.1.4 Configure each country for geocoding
You must configure each country for geocoding.
9.1.4.1 To configure a country for geocoding
1. From the IMG, navigate to General Settings > Set Geo-Coding > Assign Geo-Coding Programto Countries.
2. Create a new line for the country (for example US).3. For the Source ID, enter SAP1.4. Enter a value for the sequence. If a line already exists for that country code, select a number smaller
than the existing line.5. Set the exclusive flag.6. Repeat for each country for which you want to configure geocoding.7. Save the entry.
9.1.5 Designate fields to use for geocoding
2012-05-0279
Configuring geocoding

When attempting to determine the latitude and longitude of an address, the SAP system passes alladdress fields of the address record to the geocoding program. When a user makes a change to anaddress record, the new data is sent to the geocoding program. However, only certain fields of anaddress record are relevant to determining latitude and longitude.
9.1.5.1 To designate default fields to use for geocoding
In this procedure, you designate the fields to use for geocoding, which allows the non-designated fieldsto be changed without re-sending data to the geocoding program.1. From the IMG, navigate to General Settings > Set Geo-Coding > Assign Relevant Address
Fields for Geo-Coding.2. In the Address Fields Relevant for a Geo-Coder table, enter for the Source ID SAP1 and enter a
field to use as a default field for geocoding (for example, COUNTRY).3. Repeat to create other entries for any additional fields you want to use as a default field for geocoding
(for example, REGION or STREET).4. Save the entry.
2012-05-0280
Configuring geocoding

Configuring through the IMG
10.1 Overview
After you have installed all components of this product, you can configure it to handle postal validationand/or duplicate searching with settings appropriate for your business.
You can customize many aspects of this product through the activities it adds to the SAP ImplementationManagement Guide (IMG).
Note:IMG activities that are specific to Master Data Governance (MDG) and External List Management (ELM)are described in their respective chapters in this manual.
Related Topics• Maintain services for MDG generic duplicate check• To configure matching on Marketing Attributes fields
10.2 To locate the IMG activities
After installation, the IMG activities for this product are embedded within the IMG of your SAP application.The path to locate the IMG activities depends on the Basis version of your SAP application, as shownin this table.
2012-05-0281
Configuring through the IMG
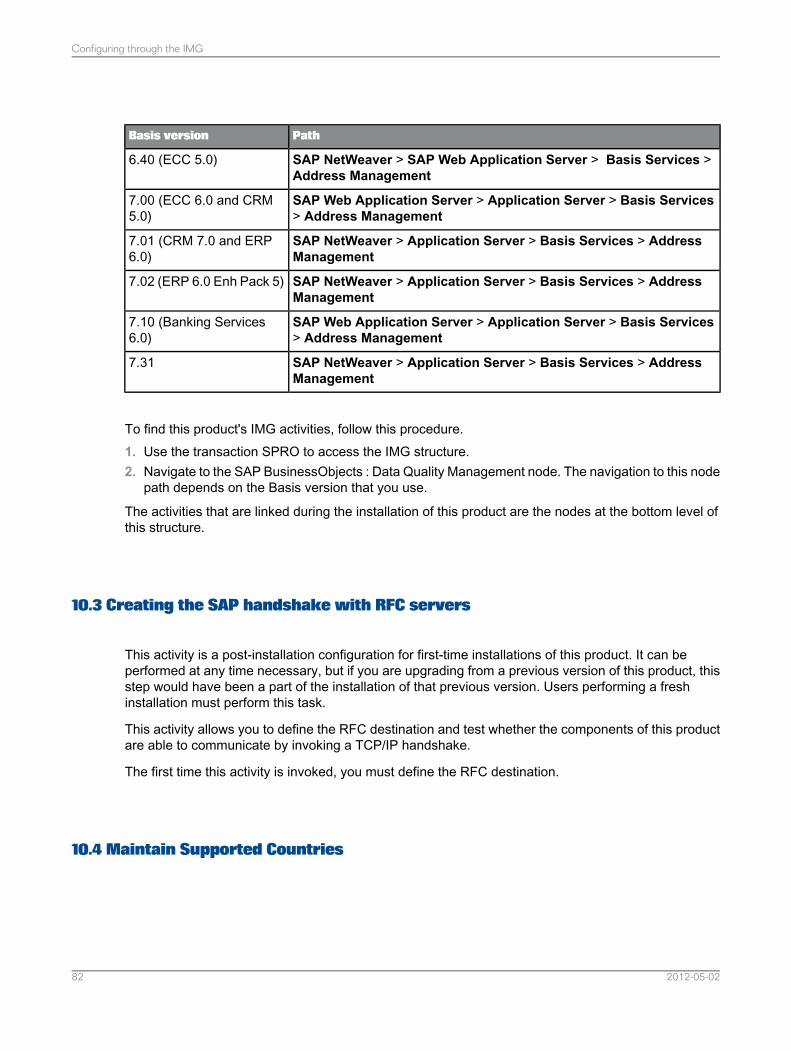
PathBasis version
SAP NetWeaver > SAP Web Application Server > Basis Services >Address Management
6.40 (ECC 5.0)
SAP Web Application Server > Application Server > Basis Services> Address Management
7.00 (ECC 6.0 and CRM5.0)
SAP NetWeaver > Application Server > Basis Services > AddressManagement
7.01 (CRM 7.0 and ERP6.0)
SAP NetWeaver > Application Server > Basis Services > AddressManagement
7.02 (ERP 6.0 Enh Pack 5)
SAP Web Application Server > Application Server > Basis Services> Address Management
7.10 (Banking Services6.0)
SAP NetWeaver > Application Server > Basis Services > AddressManagement
7.31
To find this product's IMG activities, follow this procedure.1. Use the transaction SPRO to access the IMG structure.2. Navigate to the SAP BusinessObjects : Data Quality Management node. The navigation to this node
path depends on the Basis version that you use.
The activities that are linked during the installation of this product are the nodes at the bottom level ofthis structure.
10.3 Creating the SAP handshake with RFC servers
This activity is a post-installation configuration for first-time installations of this product. It can beperformed at any time necessary, but if you are upgrading from a previous version of this product, thisstep would have been a part of the installation of that previous version. Users performing a freshinstallation must perform this task.
This activity allows you to define the RFC destination and test whether the components of this productare able to communicate by invoking a TCP/IP handshake.
The first time this activity is invoked, you must define the RFC destination.
10.4 Maintain Supported Countries
2012-05-0282
Configuring through the IMG

This activity maintains the ISO country codes for the countries for which this product provides postalvalidation by making changes to the table /FLDQ/AD_VAL_CNT. The list of countries that are supporteddepends on the postal directories that you have licensed.
If you did not purchase support for all countries or if you do not want postal validation enabled for someof the supported countries for which you purchased support, you can remove those ISO country codesfrom the filter using this activity.
10.4.1 To remove a country code
When you click the Maintain supported countries activity, the table /FLDQ/AD_VAL_CNT is displayed,showing the list of supported countries. From this display, you can remove from the filter those ISOcountry codes for which you do not want postal validation enabled.1. Select the country code from the list of supported countries.2. Click the Delete button.3. Save the changes.
10.5 Maintain exception table of transaction codes
This activity allows you to control postal validation per transaction, search, and duplicate check. Youcan also disable suggestion lists, preventing them from being displayed for specific transactions.
During postal validation, this product takes ambiguous, incomplete, or inaccurate address data andoffers the user a list of address data choices that fit the content of official postal directories. The list iscalled a suggestion list. The user must select the item from the suggestion list containing the appropriateaddress data in order for postal validation to continue.
There may be some transactions for which you do not want the user to be presented with a suggestionlist and you may disable suggestion lists for those transactions.
By default, suggestion lists are enabled for all transactions. In the default window, there is a transactioncode for DEFAULT that controls transactions but the check boxes are unmarked. By checking theSuppress Suggestions box for DEFAULT, you suppress suggestion lists for all transactions.
You can instead add transaction codes and suppress suggestion lists only for that code.
You can turn off postal validation or duplicate check by checking the appropriate box.
Note:On systems running CRM 2007 (Basis version 7.00), you should uncheck the box for"SAPHTTP—Suppress Validation, Suppress Search, Suppress Suggestions" to allow postal validationin the CRM WebClient or CRM IC Web Client. On all other SAP platforms supported by this product,this setting should be active.
2012-05-0283
Configuring through the IMG

10.5.1 To add a transaction code to the exception table
Caution:Besides its main purpose, this activity lets you disable both postal validation and error tolerantsearch/duplicate check on a transaction basis. However, we do not recommend disabling this capabilitybecause doing so would allow invalid address data and duplicates to be stored in your SAP system.Essentially, suppressing these capabilities turns off certain functionality of this product without removingit from your SAP system. Suppressing only the suggestions without suppressing validation or searchesensures that invalid data is not stored.
1. From the IMG, click on the activity "Maintain exception table of transaction codes".The "Maintain exception table of transaction codes" window appears.
2. Click the New Entries button.The "New Entries: Overview of Added Entries" window appears.
3. Enter a Transaction code to specify the transactions for which you do not want suggestion lists toappear.
4. Check the Suppress Validation box if you want to prevent postal validation for that transaction (notrecommended).
5. Check the Suppress Search box if you want to prevent both error tolerant search and duplicatechecking for that transaction (not recommended).
6. Check the Suppress Dialog box to prevent suggestion lists from appearing in dialog boxes.7. Exit the window to save the changes and return to the "Maintain exception table of transaction codes"
window.
Additionally, you can select and deselect the suppression check boxes directly from the "Change View‘Maintain exception table of transaction codes’: Overview" window.
10.6 Maintain table to activate SAP postal code check before postal validation
This activity lets you to define countries for which you want the SAP postal code check to be performedbefore this product validates the rest of the address data.
This product can validate addresses even if the addresses do not contain a postal code. Therefore, bydefault, this product disables a postal code check that SAP normally performs on the address beforethis product validates the rest of the address data. Disabling the SAP postal code check allows thisproduct to perform postal validation on the data as it was entered by the user.
By default, this table is blank because there are no countries for which this product needs a valid postalcode before processing. You need to change this setting only if you want the SAP postal code checkto be performed for a certain country.
2012-05-0284
Configuring through the IMG

10.6.1 To add a country to the table to activate SAP postal code check before postalvalidation
This activity exists only in case future versions of this product support additional countries for which apostal check must occur for proper address validation. This activity does not assist this version inperforming address validation.1. From the IMG, select the activity "Maintain table to activate SAP postal code check before postal
validation".The "Maintain table to activate SAP postal code check before postal validation" window appears.
2. Click the New Entries button.The "New Entries: Overview of Added Entries" window appears.
3. Enter in the "ISO Country code field" the two-letter ISO code for the country for which you want apostal check performed before complete address validation occurs.
4. Save the changes and exit the window.The "Maintain table to activate SAP postal code check before postal validation" window returns.
10.7 Maintain fields for address reviewer
This activity allows you to define which fields are displayed in the address reviewer window and theorder of those fields.
During postal validation, the system may modify the address data to make the address data conformmore completely to the data in official postal directories. If the system modifies the address data, itdisplays a window containing both the original and modified address data. The user can choose eitherto keep the original data or to accept the modified data.
Because standard street address data and P.O. Box data require different sets of fields for postalvalidation, you must define the fields for both address types.
10.7.1 Fields and order for standard street addresses
By default, the following fields are displayed for standard street addresses and given the following order.1. BUILDING2. HOUSE_NUM13. STREET
2012-05-0285
Configuring through the IMG

4. CITY5. REGION6. POST_CODE17. COUNTRY
10.7.2 Fields and order for P.O. Box addresses
By default, the following fields are displayed for P.O. Box addresses and given the following order.1. PO_BOX2. POST_CODE23. PO_BOX_LOC4. CITY15. PO_BOX_REG6. REGION7. PO_BOX_CTY8. COUNTRY
10.7.3 To change the fields or order of the fields displayed in the address reviewer
1. From the IMG, select the activity "Maintain fields for address reviewer".The "Maintain fields for address reviewer" window appears.
2. Check or uncheck boxes in the "Display for Street Addr" and "Display for PO Box "columns.The fields checked in the address review dialog are displayed.
3. Type sequential numbers for all the checked fields in the "Sequence Number" fields to indicate theorder of the fields for street address data and P.O. Box data.
Note:You must number both the street address data and P.O. Box data in sequence from 1 to the totalnumber of displayed fields.
4. Save the changes and exit the window.
10.8 Maintain fields for duplicate hit list displays
2012-05-0286
Configuring through the IMG

In this activity, you can define which fields are displayed in the hit list and their order for error tolerantsearch or duplicate check. You must define the fields for both hit list types.
Note:SAP Basis 6.40 shows an additional window in this activity that other SAP versions do not show. Thiswindow is generated by the SAP system and not this product, and therefore is not documented here.
10.8.1 Fields and order for error tolerant search
By default, the following fields are displayed in this order for error tolerant search.1. Score2. Customer or Vendor or BusPartner3. Name4. Name25. Street6. City7. Region8. Postal Code9. Country
10.8.2 Fields and order for duplicate hit list
By default, the following fields are displayed in this order for duplicate hit list.1. Score2. Last nameFirst name3. House number4. Street5. City6. Region7. Postal Code8. Customer9. Vendor10. BusPartner
10.8.3 To make changes in the error tolerant search or duplicate hit list display
2012-05-0287
Configuring through the IMG

1. From the IMG, click on the activity "Maintain fields for duplicate hit list display".The "Maintain fields for duplicate hit list display" window appears.
2. Check or uncheck boxes in the "Display Flag (Search)" and "Display Flag (Dup. Check)" columns.The fields checked appear in the duplicate check or error tolerant search dialog.
3. Type sequential numbers for all the checked fields in the "Sequence (Search)" and "Sequence (Dup.Check)" fields to indicate the order of the fields for duplicate check or error tolerant search data.
Note:Both the duplicate check and error tolerant search data are to be numbered in sequence from 1 tothe total number of displayed fields.
4. Save the changes and exit the window.
10.9 Maintain operating parameters
In this activity, you can modify one of the several operating parameters that affect the behavior of thisproduct.
10.9.1 Operating parameters
This table shows the operating parameters, the default values, and a description of each.
2012-05-0288
Configuring through the IMG

DescriptionDefaultParameter Value
Flag to determine whether a dialog is displayedthat allows the user to review the original andmodified address during postal validation. Validvalues are X to receive this confirmation dialogor a space not to receive the dialog.
XADD_REVIEW_FLAG
Used to allow the creation of a custom functionmodule, that can be called by the RFC Serverwhen a match code is created to add data tothe match code data structure.
noneAD_ADDRESS_FIN-ISHED_FUNC_NM
Used to allow the creation of a custom functionmodule that can be called by the RFC Serverduring address search and duplicate checkingto add data to the match code data structure.
noneAD_AD-DRESS_SEARCH_FUNC_NM
Width by number of characters of the validatedaddress column in the "Postal Validation – Re-view Changes" window, allowing you to adjustthe column size if addresses are too long to fit.
35AD_REVIEW_NEW_WIDTH
Width by number of characters of the originaladdress column in the "Postal Validation – Re-view Changes" window, allowing you to adjustthe size of the column if addresses are too longto fit.
25AD_REVIEW_ORIG_WIDTH
Dedicated RFC Server for handling duplicatesearch functionality in batch mode (called batchmatch). This value is also called the ProgramID of the RFC Server.
FL_GDQC_BATCHBATCH_MATCH_RFC_DEST
By default, this product ignores driver namematch codes if the driver address is present.To reverse this behavior, make the parametervalue blank.
XDRVR_ADDR_IG-NORE_NAME_MATCH_CODE
Administrator-specified function to enable/dis-able this product's duplicate error tolerantsearch (DES). A possible value is the name ofa function module to call before executing thisproduct’s DES. The interface for the functionmodule specified here must have one EXPORTparameter named VALID of type FLAG “passby value”. After the function call, if VALID is“X”, postal validation processing occurs usingthis product. If VALID is space, then only theSAP enterprise application's standard DESchecks occur.
noneENABLE_DES_FUN_NM
2012-05-0289
Configuring through the IMG

DescriptionDefaultParameter Value
Administrator-specified function to enable/dis-able this product's postal validation. A possiblevalue is the name of a function module to callbefore executing this product’s postal valida-tion. The interface for the function modulespecified here must have one EXPORT param-eter named VALID of type FLAG “pass by val-ue”. After the function call, if VALID is “X”,postal validation processing occurs using thisproduct. If VALID is space, then only the SAPenterprise application's standard addresschecks occur.
noneENABLE_PV_FUNC_NM
Maximum number of actual duplicates dis-played to the user.
100MAX_ACT_DUPS
Maximum time allowed in seconds to find dupli-cates. The value must be 1 second or greater.
5 secondsMAX_ELP_TM_DUPS
Maximum number of records per packagepassed to the RFC Server during the quarterlyadjustment report.
10000MAX_REC_QU2
Maximum number of records that may bepending for update to the RFC Server whenthe RFC Server is unavailable. If the numberof records pending exceeds this maximum,then the records are not updated automaticallyand require the pending record update reportto be run.
100MAX_UPD_PEND
Toggles whether system messages are to bedisplayed in non-dialog mode. Valid values are“X” to enable passing of system error mes-sages in non-dialog mode for postal validationor a space not to receive the system message.
spaceNON_DIALOG_ERR_MSG
Name of the process group to be shared bythe processes for this product that supportmulti-threading. If no process group is speci-fied, processes from the dialog pool are used.The following programs and functions sharethe work processes:• /FLDQ/RSADRINI, both the batch match
and initialization options.• ELM duplicate check• MDG match code initialization
nonePARALLEL_PROCESS_GROUP
2012-05-0290
Configuring through the IMG

DescriptionDefaultParameter Value
Used to specify the number of work processesto be used in the ELM process. Use this settingwhen the number of processes to be used isless than the number of available processes.
nonePARALLEL_NUM_WORK_PRO-CESSES
Package size for passing candidate duplicatesto the RFC Server.
1000PKG_SIZE_DUPS
Name of the RFC Server contacted through aRemote Function Call. This name must corre-spond to a valid destination that describes afunctioning RFC Server.
FL_GDQC_SERV-ER
RFC_DEST
Name of a user defined function module thatis called whenever a technical error occurs.
noneTECH_ERR_FUNC_NM
“X” indicates that parallel processing should beused during extended search and match codeinitialization.
noneUSE_PARALLEL_PROCESS
10.9.1.1 Operating parameters used only by the CRM IC WebClient or CRMWebClient configuration
The following table shows the operating parameters, the default values, and a description of each foroperating parameters used only by the CRM IC WebClient or CRM WebClient.
DescriptionDefaultParameter Value
The threshold value for BSP duplicate errorsearch. This parameter is not applicable to CRM7 or CRM 2007 systems. Users of these systemscan change the threshold in the "Activate Dupli-cate Check and Determine Limit for BAPIs"section of the IMG, under the "Duplicate Check"node.
70BSP_DES_THRESHOLD
Height of child window for range queries in BSPPostal Validation.
225BSP_RANGE_HEIGHT
Width of child window for range queries in BSPPostal Validation.
400BSP_RANGE_WIDTH
Height of address review BSP page.320BSP_REVIEW_HEIGHT
2012-05-0291
Configuring through the IMG

DescriptionDefaultParameter Value
Width of address review BSP page.700BSP_REVIEW_WIDTH
Height of child window for suggestion lists in BSPPostal Validation and Duplicate Check/Error tol-erant Search.
475BSP_SUGG_LIST_HEIGHT
Width of child window for suggestion lists in BSPPostal Validation and Duplicate Check/Error tol-erant Search.
700BSP_SUGG_LIST_WIDTH
10.9.1.2 To make changes to operating parameters
1. From the IMG, click on the activity "Maintain operating parameters".The "Maintain operating parameters" window appears.
2. Change the "Parameter Value" field for any of the parameters.3. Save the changes and exit the window.
10.10 Maintain map of objects to transaction for Quarterly Error report
This product provides the custom error report /FLDQ/AD_REPT_DISP_QTRERRORLOG to log invalidaddresses found by this product during the execution of Quarterly Adjustment Reports.
This activity allows you to make each item in the list of invalid addresses a hyperlink that takes the userdirectly to the appropriate transaction to edit the incorrect address. Allowing the user to access thetransaction and address in this manner saves the user the effort of manually entering the transactionand locating each invalid address for editing.
10.10.1 Defining mappings
The report /FLDQ/AD_REPT_DISP_QTRERRORLOG lists the Address Type, Address Key, and AddressType Code for each address.
The Address Key can serve as a hyperlink that calls the appropriate transaction to edit the addressonly if the Address Type Code and Parameter ID for this Address Type are defined in table
2012-05-0292
Configuring through the IMG

/FLDQ/AD_QTR_OBJ. If the mapping for a particular Address Type does not exist in this table, clickingon the "Address Key" field has no effect.
For each Address Type in the error report /FLDQ/AD_REPT_DISP_QTRERRORLOG, an edit transactionand the Parameter ID must be defined in order for the key field to serve as a hyperlink. Some of thesemappings are predefined in this product as shipped, but you must add mappings for all other AddressTypes for which you want to create hyperlinks. For example, when linking to a Customer record, fortransaction XD02 you would define the Parameter ID as KUN.
10.10.2 Predefined mappings
This product ships with transaction mappings for the following Address Types:• KNA1 - Customer• LFA1 - Vendor• BUS0010 - Functional Location• BUS1006 - Business Partner• BUS1006001 - Business Partner Employee• BUT052 - Person within Organization• USRCOMPANY - Company
You must perform the activity described in the following section to add a mapping for any other AddressTypes.
10.10.3 To add a mapping for an Address Type Code
1. Run the /FLDQ/AD_REPT_DISP_QTRERRLOG report.2. Write down the Address details for an entry for which the hyperlink does not work, noting these three
items:• Address Type• Address Key• Address Type Code
3. Use the Address Type and Address Key to determine which SAP transaction should be used to editthe address record.
4. Navigate to the Edit transaction.5. Place your cursor in the "Key" field (for example, Customer in transaction XD02).6. Press the F1 key.7. Click the Technical Information button on the "Performance Assistant" window's menu bar.8. Note the Parameter ID value in the Field Data section.
2012-05-0293
Configuring through the IMG

9. Use the IMG activity “Maintain map of objects to transaction for Quarterly Error Report.”10. Click the New Entries button and fill in all three columns using the data you have collected:
FieldEntry
Object TypeAddress Type Code
Transaction for EditTransaction Code
Object Parameter IDParameter ID
11. Save.12. Repeat as necessary for each address that does not have a working hyperlink.13. Create a Customizing Request.
10.11 Activate/Deactivate postal validation functionality
This activity allows you activate or deactivate the postal validation capabilities of this product. You maywant to temporarily deactivate the postal validation capabilities for troubleshooting or maintenance.
Note:On systems running ECC 6.0 (Basis version 7.00), postal validation is by default deactivated. You mustuse this activity to activate these capabilities. On all other SAP platforms supported by this product, itis by default activated.
10.12 Activate/Deactivate duplicate check and error tolerant search functionality
This activity allows you to activate or deactivate the duplicate check and error tolerant search capabilitiesof this product. You may want to temporarily deactivate the duplicate check and error tolerant searchcapabilities for troubleshooting or maintenance.
Note:On systems running ECC 6.0 (Basis version 7.00), duplicate check and error tolerant search are bydefault deactivated. You must use this activity to activate these capabilities. On all other SAP platformssupported by this product, they are by default activated.
10.13 Identify Search Fields
2012-05-0294
Configuring through the IMG

This activity allows you to identify the region and country fields to use for error tolerant search by makingchanges to the TSAD10 table.
10.13.1 To identify search fields
1. From the IMG, click on the activity "Identify Search Fields".The "Identify Search Fields" window appears, showing the TSAD10 table.
2. In the TSAD10 table, check all six (6) boxes for the fields "Region" and "Country" to activate themfor use.
3. Save your changes.
The region and country fields are now available for the data quality operations of this product.
10.14 Maintain DQM Region Mappings
This activity allows you to maintain the region mappings for this product through the Region MappingTable.
10.14.1 Understanding regions
Regions are data fields that could be states for U.S. addresses, provinces for Canadian addresses,and so on.
The mappings between the SAP system and Data Services reside in the table /FLDQ/AD_REGIONS.This table holds a default configuration that provides mappings for many regions of many countries,allowing you to reconcile differences between the SAP system’s region data and Data Service’s regiondata
10.14.2 Correct region mapping
A complete and correct region mapping consists of the following characteristics:• There is an entry in the T005S table for the region.• There is a corresponding entry in the Regions table with the same region code.
2012-05-0295
Configuring through the IMG

• The SAP system’s DQ (Data Quality) name for the region in the Regions table maps to the regionData Services provides.
A correct mappings is one in which the value of BLAND (Region code) in the T005S has an equal valuein the SAP_REGIONCODE field of the Regions table. In addition, the value of the DQ_L_REGIONNAMEin Regions table holds the correct value from Data Services.
In the Regions table, each section consists of four possible entries:
DescriptionEntry
This is the 2-character ISO country code for the entry, according to the T005Stable (T005S-LAND1).
COUNTRY CODE
This is the 2-character SAP region code for the entry, according to the T005Stable (T005S-BLAND).
SAP REGIONCODE
This is the SAP region name, according to the T005S table (T005S-BEZEI).SAP REGIONNAME
This is the name of the region as it is known to Data Services.DQ REGIONNAME MAPPING
Example:
A complete mapping for the state of Wisconsin in the United States would have these elements.
In the T005S table, the entry would be similar to this example.
BEZEIHERBLFPRCDBLANDLAND1MANDT
Wisconsin55WIUS100
The relevant fields for this table are these:• LAND1: Country• BLAND: Region Code
In the Regions table, the entry would be similar to this example.
DQ_L_REGIONNAMESAP_REGIONCODECOUNTRYCODE
WisconsinWIUS
The relevant fields for this table are these:• COUNTRYCODE: Country• SAP_REGIONCODE: Should match the entry in the T005S table in the column BLAND• DQ_L_REGIONNAME: Name as it is returned from Data Services
2012-05-0296
Configuring through the IMG

Note:The casing of these entries is important. In some SAP systems, an entry for “wi” is not the same asthe entry “WI”.
All of the maintenance for region mappings occurs in these two tables. In all cases, either an entry ismissing from one of these tables, or an entry must be corrected. Often, the choice depends on existingentries.
The report provides a description of where the entries exist and are not present for each section.
You must correct only the mappings for regions that are relevant to your business needs. For example,if your organization does not perform business with a region in a certain country, you do not need tocorrect the mappings regions in that country. The report displays a list of all possible regions that couldbe mapped for your system’s Support Countries.
Related Topics• Region code incorrect or missing
10.15 Maintain Customer Address Reviewer Labels
In this activity, you can customize the wording of the labels on the address reviewer screen.
Customized labels are maintained in the table /FLDQ/AD_RVW_CUS. In this table, you specify thefollowing:• Language• Table Name• Field Name• Medium field label
The standard labels are stored in the /FLDQ/AD_RVW_LBL table. You can look at this table to discoverthe table name and field name of the label you want to replace.
To determine which label to display, the system reads labels in the following order to determine the textto display:• Customized label from /FLDQ/AD_RVW_CUS in current logged on language• Customized label from /FLDQ/AD_RVW_CUS in the default language (English)• Standard label provided by default with this product as defined in the table /FLDQ/AD_RVW_LBL
10.16 Maintain Suggestion List Labels
2012-05-0297
Configuring through the IMG

In this activity, you can change the text displayed for Suggestion Lists labels. Prior to making anymodifications, you must identify the following fields:
DescriptionField
Either a postal address, a street address, or a dual address (both street and P.O.Box in one address).
Address
Language setting to which this field applies.Lang
The type of Suggestion List to which the label applies. Refer to table/FLDQ/AD_SUGLIST for a description of each SUGG_LIST_ID.
SuggListId
The name of the Suggestion List to which the label applies.Field Name
The text to be displayed for a particular Lang, SuggListId, and Field Name com-bination.
Field Label
10.16.1 To change a Suggestion List label
1. Locate the desired field to be changed for the Suggestion List type.2. Change the Field Label field.3. Click Save.
10.17 Maintain settings to switch off the Address Reviewer screen
This activity allows you to control when the system displays the Address Reviewer screen, based onchanges to an address's components. The default behavior is to display the Address Reviewer screenwhen an address is created or altered and one or more components of the address triggers postalvalidation and requires review.
You may not want the Address Reviewer screen to appear when users change certain components ofan address. You can control this behavior by entering the appropriate output status code (which explainswhat part of an address changed during processing) and country code for the Data Services GlobalAddress Cleanse transform.
You can find information on the composition of output status codes in the Data Services ReferenceGuide.
2012-05-0298
Configuring through the IMG

Example: Deactivating the Address Reviewer screen
To suppress the Address Reviewer screen for changes to the postal code for only US addresses, youwould make the following entry:
CtyStatus Code
USS2000
To suppress the Address Reviewer screen for changes to postal code for all addresses, regardlessof the country, you would make the following entry:
CtyStatus Code
S2000
2012-05-0299
Configuring through the IMG

2012-05-02100
Configuring through the IMG

Configuring the RFC Server
11.1 Overview of RFC Server configurations
Through the installation process, one or more RFC Servers for this product are created. By default, allof the necessary files on each RFC Server are configured to properly run this product. You may, however,change items after installation.
11.2 Configuring through flrfcsrv.xml
The main configuration file of the RFC Server is flrfcsrv.xml. Through the parameters of this file,you control several aspects of of this product, such as how it handles logging and variousperformance-related settings. This section discusses certain critical settings of this configuration file.
The file is located on your system at <install_directory>\config\flrfcsrv.xml.
Caution:You should not make changes to flrfcsrv.xml without a full understanding of the implications ofthose changes. Errors in this configuration file could disable this product.
11.2.1 Editing flrfcsrv.xml
Edit flrfcsrv.xml as you would any other XML file. If you have an XML editing program that youare familiar with, you can use that program.
On Windows systems, we recommend that you do not use Notepad when editing the configuration files.If you do use Notepad, the data will display all in one line, making it difficult to read.
When you edit a value in flrfcsrv.xml, make sure that you alter configurable values but do notchange the structure or required parameters of the file. Be sure to make a backup of flrfcsrv.xmlto preserve its original state in case you later want to discard your changes.
2012-05-02101
Configuring the RFC Server

11.2.2 Enable DPV
Within flrfcsrv.xml, the key <address_suggestion> defines the dataflow used for addresssuggestions. The default is Service_Realtime_DQ_SAP_Address_Cleanse_Suggestions.
If you have installed the Delivery Point Validation (DPV) directories in Data Services and configuredJob_Realtime_DQ_SAP_US_DPV_Address_Cleanse_Suggestions as a service, you can enable DPVaddress suggestions by changing the value of this key toService_Realtime_DQ_SAP_US_DPV_Address_Cleanse_Suggestions.
11.2.3 Enable geocoding
Within flrfcsrv.xml, the key <address_geo> defines the dataflow used for geocoding. The defaultis Service_Realtime_DQ_SAP_Address_Cleanse_Suggestions and this key is commented out. If youhave purchased, installed, and configured geocoding for US addresses, uncomment this key.
If you have purchased, installed, and configured geocoding for only non-US addresses, you shouldchange the setting from the default to Service_Realtime_DQ_SAP_Address _Global_Geo.
2012-05-02102
Configuring the RFC Server

Postal address validation
12.1 Overview of postal address validation
Postal address validation standardizes and corrects address data, protecting the integrity of that datain your SAP system.
Postal address validation takes place in real time as users enter data and in a batch mode as part ofthe SAP Quarterly Adjustment Report. In real time, this product validates and standardizes addressdata before the data is saved to the SAP database. During Quarterly Adjustment, this product replacesone of the SAP reports to standardize and correct the data that already exists.
12.2 Interactive cleansing
This product's interactive, real-time postal address cleansing capability lets your SAP users cleanseaddress data at the point of entry and before the data is written into your SAP database.
12.2.1 Using interactive cleansing
For interactive address cleansing, the SAP user needs to take no unusual action. The data is cleansedautomatically when the user saves the record or clicks the Check Address button.
When the user creates a record that contains invalid data and attempts to save the record, the cleansingtakes place in real time.
If this product discovers one corrected address to suggest, the user is offered a window to review thechanges that this product made to the address. This window presents the following button options:
2012-05-02103
Postal address validation

ActionButton
The previous window returns to focus with the corrected data populating thefields.
Accept ValidatedAddress
The previous window returns to focus with the data as originally entered popu-lating the fields.
Use Original Ad-dress
The previous window returns to focus and the process is cancelled.Cancel
If this product discovers two or more corrected addresses to suggest, the user is offered a windowcontaining the multiple suggestions. This window presents the following button options:
ActionButton
The previous window returns to focus with the selected data populating the fields.Select
The previous window returns to focus with the data as originally entered populatingthe fields.
Use Original Ad-dress
The Review Address Validation screen is displayed showing the address compo-nents that have been validated up to this step. This option is available only foraddresses that are validated up to a primary or secondary range, and is notavailable for addresses that are input with a wildcard (*) character.
Skip
The previous window returns to focus and the process is cancelled.Cancel
12.3 Batch cleansing with Quarterly Adjustment Reports
This product accomplishes batch cleansing of postal addresses through Quarterly Adjustments. Youfirst run Quarterly Adjustments with this product’s custom report as part of the installation andconfiguration steps.
After installation, you may want to run Quarterly Adjustments on a regular, pre-determined schedule.Also, you should run Quarterly Adjustments after installing new address directories from SAPBusinessObjects to validate data that may have changed due to the renaming of streets, the developmentof new areas, and so on.
After you run Quarterly Adjustments, you should run the Initial Match Code (Index) Setup program.
You may also want to further customize the display of the report by making each address listed in thereport a hyperlink to the editable address entry.
Related Topics• Run the Initial Match Code (Index) Setup program• Maintain map of objects to transaction for Quarterly Error report
2012-05-02104
Postal address validation

Duplicate check and error tolerant search
13.1 Overview of duplicate check and error tolerant search
This product's duplicate check and error tolerant search capabilities allow users to prevent the creationof duplicate customer records in the SAP database and also to search for customer records usinginformation that may contain misspellings, omitted or transposed characters, and so on.
13.1.1 Duplicate check
Duplicate check is the process that assures that duplicate addresses are not entered into the SAPsystem when users create a new address record or update an existing one. During the check, if thereare duplicates, the user is presented with the list of possible duplicates and allowed to select an existingcustomer and open that record, or to continue the process of adding the new customer, or to cancelthe operation.
13.1.2 Error tolerant search
Error tolerant search allows users to find customer records using partial information. Based on thepartial information provided by the user, this product presents a list of possible matches to the user.The user then can choose to select a record from the search hit list of matches for further processingor can cancel out of the search hit list.
13.2 Break keys (match codes)
A break key is the search index for each record that this product uses for discovering similar, possiblymatching, candidate records. A break key is made up of search terms that are arranged in a specific
2012-05-02105
Duplicate check and error tolerant search

order. The search terms can be customized so that this product can determine that certain existingrecords have no realistic probability of being duplicates and should be ignored.
Note:In some in some aspects of this product the term match code is used instead of break key. The termsare interchangeable in this product, but Data Services always uses the term break key.
13.2.1 Understanding break keys (match codes) and data fields
When given input data during duplicate check and error tolerant search, this product limits the numberof records used in the search by determining a break key for the data. It then considers only storedrecords with the same break key value as the input data when searching for duplicates.
Note:This process is altered when this product is configured to include records with empty break key values.For more information about the implications of configuring this product to include records with emptybreak keys and the process to do so, see the section Include records with empty break keys.
Included in this product are five best practices break keys that you can use to create the match codesto be used in finding similar records. You can change the match code to alter the matching resultsproduced.
Installing the Data Services Components of this product places in your Data Services installation thejob DQ_SAP_Break_Key_Profiler. This job can process the data in your SAP system and recommendwhat match code would give the best results along with other configuration recommendations. Forinformation about DQ_SAP_Break_Key_Profiler, see the section Understanding the Break Key Profiler.
By default, this product uses a moderate break key that offers good performance and completeness ofresults for a wide set of data. The default break key uses the two character country code, the first fivealphanumeric characters of the postal code and the first letter of the street field to generate the breakkey value. To improve the results during a search, this product requires data for the street and postalcode fields so that the appropriate records can be used in the matching process.
For example, to search for a customer who you know lives on Main Street in La Crosse, Wisconsin,you would enter the following information in the search window:
DataField
Main StStreet
54601Postal Code
The break key value for this input data is US54601M. The search process selects all of the recordsfrom the SAP system that have the break key value US54601M. The search process then comparesthe input data to each record selected using the matching rules set up on the RFC Server.
To illustrate the importance of providing data in the two fields used to determine a break key, imaginethat you entered the following information in the search window:
2012-05-02106
Duplicate check and error tolerant search

DataField
<blank>Street
54601Postal Code
The break key value would be US54601 and only records with a break key value of US54601 wouldbe selected for searching. This result would not include the record you were searching for because thatrecord has a break key value of US54601M.
Note:During duplicate search, this product performs postal validation on the input data before performing thesearch. If this example had been for duplicate search specifically, the postal code left blank, but street,city, and region data were complete, then this product could validate the data and determine the postalcode. The corrected data would then be assigned the appropriate break key of US54601M, even thoughyou did not directly enter the postal code.
Related Topics• Include records with empty break keys (match codes)• Understanding the Break Key Profiler
13.2.2 To change the match code (break key)
You can change the match code to one of the others provided.1. In the Data Services Designer, select Tools > Substitution Parameter Configurations.
The "Substitutions Parameter Editor" opens.
2. In the "Substitution Parameter Editor", update substitution value $$DQ_SAP_Match_Function. Validentries are the following.• MatchCode1• MatchCode2• MatchCode3• MatchCode4• MatchCode5• MatchCodeCustomFor a description of these best practices match codes, see the section Best practices match codes.
If you change the match code, you must run the initialization program to update the match code entriesin this product’s match code table. For information on running the initialization program, see the sectionRun the Initial Match Code (Index) Setup program.
2012-05-02107
Duplicate check and error tolerant search

Related Topics• Best practices match codes (break keys)• Run the Initial Match Code (Index) Setup program
13.2.3 Configuring the break key settings
The regular break key settings can be configured in the Data Services jobJob_Realtime_DQ_SAP_Create_Break_Keys. This job does not use first names in the creation of breakkeys, and is both the default and recommended method of creating break keys. It is set to run whenyou install this product. If you want to use this job with extra data fields, you can configure it to do so.
This product provides an additional job that uses first names in the creation of break keys,Job_Realtime_DQ_SAP_Create_Break_Keys_With_FirstName. Because first names are typicallycommon, this job is suited only to special circumstances for duplicate check operations, probably usinga smaller and more relevant candidate set than with the default job.
Further, you can change the default break key calculation by using a custom function.
For general information on configuring a Data Services job, see the Data Services documentation.
13.2.3.1 Substitute jobs if you have not purchased postal validation capabilities
If you did not purchase the postal validation capabilities of this product but intend to perform duplicatecheck and error-tolerant search, you must substitute the two standard Data Services jobs involvingbreak keys with versions that are designed to be used in this scenario. If you use postal validation, youneed not perform this substitution.
Substitute the following standard jobs involving break keys with these alternative versions.
Alternative for no postal validationBreak key job with postal validation
Job_Realtime_DQ_SAP_Create_Break_ Keys_No_PVJob_Realtime_DQ_SAP_Create_Break_ Keys
Job_Realtime_DQ_SAP_Create_Break_Keys_With_Firstname_No_PV
Job_Realtime_DQ_SAP_Create_Break_Keys_With_Firstname
You must map these jobs for customers that do not use postal validation to the same services normallyused by the jobs they replace.
2012-05-02108
Duplicate check and error tolerant search

Service NameJob
Service_Realtime_DQ_SAP_Create_ Break_KeysJob_Realtime_DQ_SAP_Create_Break_Keys_No_PV
Service_Realtime_DQ_SAP_Create_Break_Keys_With_Firstname
Job_Realtime_DQ_SAP_Create_Break_Keys_With_Firstname_No_PV
For the procedure to configure a Data Services job as a service, see the section To configure jobs asservices.
Related Topics• To configure jobs as services
13.2.3.2 Configure break key setting with extra fields
You can use additional fields for matching by modifying the $$DQ_SAP_Match_Function substitutionparameter to the value MatchCodeCustom. The custom match code has preconfigured logic to includedata such as telephone numbers, email addresses, and two other extra, customizable fields.
To use the extra, customizable fields in Job_Realtime_DQ_SAP_Create_Break_Keys, you must createtwo function modules for your SAP system.
The system calls the first function module when a match code is created for a new or updated record.This process allows you to put additional data into the table that is sent down to this product’sGET_MATCH_CODES RFC Server method. Creating this module allows you to use the additional datain a match code. Also, since the data is saved in the match code table, the data can be used informulating a match score.
The system calls the second function module during address search and duplicate checking. This allowsyou to fill the additional data fields for the driver record during match.
Both of these function modules must have one table parameter named im_driver with a structure of/FLDQ/AD_MTCCODE. The following code block shows how the function modules must be structured:
FUNCTION Z_AD_FINISHED_EXAMPLE.*"---------------------------------------------------------------*"*"Local interface:*" TABLES*" IM_DRIVER STRUCTURE /FLDQ/AD_MTCCODE*"---------------------------------------------------------------data: wa_match_codes type /fldq/ad_mtccode.loop at im_driver into wa_match_codes.
** Here’s where you put your own logic to get the additional data.*
modify im_driver from wa_match_codes index sy-tabix.endloop.
ENDFUNCTION.
2012-05-02109
Duplicate check and error tolerant search

Finally, you must configure the names of these function modules in the IMG activity Maintain operatingparameters, using the parameters AD_ADDRESS_FINISHED_FUNC_NM for the function module calledwhen a match code is created, and AD_ADDRESS_SEARCH_FUNC_NM for the function module calledduring address search and duplicate checking. For information on the IMG activity Maintain operatingparameters, see the section Maintain operating parameters.
Related Topics• Maintain operating parameters
13.2.3.2.1 To create break keys using first names: change the RFC Server configuration
Next, you must make changes to the RFC Server configuration. For detailed information about thisconfiguration file, see the section Configuring through flrfcsrv.xml.1. In the RFC Configuration file <install_directory>\config\flrfcsrv.xml, comment the
tag <break_key>Service_Realtime_DQ_SAP_Create_Break_Keys </break_key>.The tag should now appear as follows: <!-- <break_key>Service_Realtime_DQ_SAP_Create_Break_Keys</break_key> -->.
2. Uncomment the tag<!--<break_key>Service_Realtime_DQ_SAP_Create_Break_Keys_With_FirstName-->.The tag should now appear as follows: <break_key>Service_Realtime_DQ_SAP_Create_Break_Keys_With_FirstName</break_key>
3. Save your changes and restart the RFC Server.
The method of restarting the RFC Server varies depending on your operating system and, withinWindows, whether you run the RFC Server as a Windows Service. For information on how to restartthe RFC Server for your configuration, see the section Start the RFC Server.
Related Topics• Configuring through flrfcsrv.xml• Start the RFC Server
13.2.3.2.2 Change the default break key (match code) calculations with a custom function
You can change the default break key calculations by modifying custom functionCF_DQ_SAP_Calculate_Match_Code_Custom in the Data Services Designer.
Within DF_Realtime_DQ_SAP_Create_Break_Keys, go to the Build_Address_Match_Codes transform,which is where the Match_Code1 is created. The function CF_DQ_SAP_Calculate_Match_Code_Customis where the custom match code is calculated, and this function uses the extra five fields available tothis dataflow in its expression.
The sample code below shows a scenario of changing the default break key calculations. This exampleuses six digits from telephone number, four digits from the extension, and six characters of the domainname from the email address. It then sends the data through the double_metaphone function to get the
2012-05-02110
Duplicate check and error tolerant search

output and combines the data to make the match code. In similar fashion, the extra1 and extra2 fieldscould instead be used to make the break key.
# Sample logic to add telephone number, telephone extension, email # address, extra1, extra2 (extra1 & extra2may be different fields # coming from SAP based on your business requirement).
if (length(ltrim_blanks_ext(rtrim_blanks_ext($input_tel_number))) > 0)# take first 3 (long dist code) + next 3 (which identified region?)$tmpMatchCode = $tmpMatchCode || substr($input_tel_number,1,6);if (length(ltrim_blanks_ext(rtrim_blanks_ext($input_tel_extens))) > 0
# take first 4 digits of extension$tmpMatchCode = $tmpMatchCode || substr($input_tel_extens,1,4);
if (length(ltrim_blanks_ext(rtrim_blanks_ext($input_smtp_addr))) > 0)
# Take characters after @ and send it to through phonetic function and get a 6 character code out of it.# This way misspelled domains length / short ones .com/.net will have something in common
$tmp_phonetic = double_metaphone(substr($input_smtp_addr,index($input_smtp_addr,'@',1)+1, length($input_smtp_addr)- index($input_smtp_addr,'@',1)),0,0);$tmpMatchCode = $tmpMatchCode || $tmp_phonetic;
# Add extra1 and extra2 logic if required.# End of sample to add additional fields for Creating break keys.
if( ltrim_blanks_ext(rtrim_blanks_ext($tmpMatchCode)) = '')$tmpMatchCode = null;
return $tmpMatchCode;
13.2.4 Match on name data
You can also perform a search with data from the name field. This product creates special break keyvalues based on name information. This ability allows you to perform a name-only search. However,the name break keys are not configurable.
If you enter data into both the name field and address fields, then both the name and address breakkey values are used to select records.
13.3 Using duplicate check
You can use duplicate check in interactive mode and, for Business Partner data, in batch mode.
13.3.1 Interactive mode
2012-05-02111
Duplicate check and error tolerant search

When you create a new entry in the SAP database for a customer, vendor, or business partner, thisproduct performs postal validation on the entry to complete and standardize the data, then checksexisting data to find records that might be duplicates of the new, validated entry.
In response to your attempt to save a new record, this product processes the data and, if it finds arecord for which the new record may be a duplicate, presents a hit list of candidates from which youcan select an entry.
If one of the results on the hit list is a match of the record you are entering, select the record by clickingit. You can then click a button to cause the desired action:
ActionButton
The previous window returns to focus showing the current address that the useraccepted from the previous address reviewer window.
Continue
The previous window returns to focus with the data from the selected recordpopulating the fields.
Switch to Duplicate
Shows the master record, but keeps the duplicate hit list.Display Partner
(SAP GUI only) Creates a cleansing case for any of the duplicates identified andflags the record for saving.
Cleansing Case
The previous window returns to focus and the process is cancelled.Cancel
Note:SAP Basis 6.40 shows additional GUI elements in this window that other SAP versions do not show.These additional elements are created by the SAP application and not this product, and therefore arenot documented in this guide.
The window for the IC WebClient presents these button options:
ActionButton
Chooses the selected duplicate record.Choose
(CRM WebClients only) Calls a new window to allow you to merge the duplicaterecord with the master record.
Merge
The previous window returns to focus and the record the user entered is saved.Ignore
The previous window returns to focus and the process is cancelled.Cancel
You can customize the data fields displayed in the SAP GUI version of the duplicate check hit list, aswell as the order of those fields. See the section Maintain fields for duplicate hit list display for informationabout the default settings and the procedure for making changes to the fields displayed within the SAPGUI.
Related Topics• Maintain fields for duplicate hit list displays
2012-05-02112
Duplicate check and error tolerant search

13.3.2 Batch mode
If you are running one or more batch RFC Servers, you can use duplicate search in batch mode (calledbatch match) to find duplicate records in your Business Partners database. The default configurationof this product is suited to run a single batch RFC Server, but running multiple batch RFC Serversallows you to take advantage of multithreading for increased performance.
Running multiple batch RFC Servers requires adjustments to the default configuration.
13.3.2.1 Configuration settings for multiple batch RFC Servers
Configuring a system with multiple batch RFC Servers for optimal performance requires making decisionsregarding some other settings.
For however many batch RFC Servers you run, you ideally should run a larger number of work processesin the SAP system. Also, use the PARALLEL_PROCESS_ GROUP configuration option to specify thework process group to use. For more information about the PARALLEL_PROCESS_ GROUPconfiguration option, see the section Maintain operating parameters.
In Data Services, setting the maximum instances for Service_Realtime_DQ_SAP_Create_Break_Keysto the number of batch RFC Servers often provides optimal performance. However, the higher thenumber of work processes and maximum instances you allow, the more computing resources areconsumed on those systems. Finding the optimal balance among these configuration settings mayrequire some testing.
For example, consider these sample results from one series of tests. (Your results will vary dependingon your system and configuration).
2012-05-02113
Duplicate check and error tolerant search

Performance ResultsService Maxi-mum Instances
Work Pro-cesses
Batch RFCServers
Data Services is where the performance bottleneck islocated because it can process only one instance.
143
Batch RFC Server is where the performance bottleneckis located because only one server must handle all pro-cessing.
341
Not enough work processes, causing the performancebottleneck. One work process is sending information tothree different batch RFC Servers.
313
Each of these options produces a performance bottleneck because one of the components can onlyprocess one packet at a time, giving little performance increase.
Instead, you might try three batch RFC Servers and five work processes. A good estimate would probablybe to use three maximum instances for for Service_Realtime_DQ_SAP_Create_Break_Keys. The bestresult can be found only by testing.
You can also increase the maximum instances inService_Realtime_Batch_DQ_SAP_Name_And_Address_Match from the default of one to two if youhave ample resources on the Data Services machine. Doing so would give limited performance increasesif you have running the batch match option in this job.
In addition to these settings, you must also decide how to set the maximum concurrent tasks on theSAP system. The maximum concurrent taks defines the limit on how many work processes this matchreport can use. The report sets the highest value that can be supported, but you can change that valueif you prefer to reduce the demands on the system (perhaps because there are other processes thathave to share these resources).
Tip:You must assure that the RFC Servers are dedicated to the proper SAP Gateway for batch mode towork.
Related Topics• Maintain operating parameters
13.3.2.2 To prepare Data Services to work with multiple batch RFC Servers
For Data Services to operate in a configuration of multiple batch RFC Servers, you must increase thenumber of minimum and maximum instances of the break key service,Service_Realtime_DQ_SAP_Create_Break_Keys to equal the number of batch RFC servers. To setthis option:
2012-05-02114
Duplicate check and error tolerant search

1. In the Data Services Administrator, navigate to Real-Time > [machine name] > Real-TimeServices.
2. Select the "Real-Time Services Configuration" tab.3. Select Service_Realtime_DQ_SAP_Create_Break_Keys.4. Set the minimum instances and maximum instances values to the number of batch RFC Servers
you intend to run.
When you save the configuration, the services restarts. You must adjust this setting each time youchange the number of batch RFC Servers.
13.3.2.3 To use duplicate search in batch mode
1. Invoke the transaction SA38 in the command box.The "ABAP: Execute Program" window appears.
2. In the "Program" field, enter /FLDQ/RSADRINI and click the Execute button (F8).The "Initial Match Code (Index) Setup and Batch Match Report" window appears.
Note:The window used to run batch match is also used to run the initialization program as part of therequired setup of this product. If you have already run the initialization program, you need not runit again unless you have made changes to your match code configuration. For information aboutthe initialization program, see the section Run the Initial Match Code (Index) Setup program.
3. Check the box for the Program Option "Perform Batch Match".The window displays fields for configuring batch match.
4. For the Multi-process settings based on available resources, set the number of "Available BatchRFC Servers" (how many are running), "Available work processes" (how many work processes onthe SAP system are available), and "Maximum concurrent tasks" (sets the limit on how many workprocesses this report can use; lowering the number can hinder performance but conserve resources).You must have more available work processes than available batch RFC Servers because the poolof work processes is used to make each RFC Server call and you should have a few additionalservers that can be used by other processes.
5. For the Batch Match Options, set the "Threshold" (a lower number produces more potential matches)and the "Packet size" (defined as the number of records in a packet), and choose whether to usethe SAP functionality to create a cleansing case to combine records.
Note:For more information about the functionality to create a cleansing case on your SAP platform, seethe documentation for your SAP platform.
6. Click the Execute button (F8).
After the system finishes processing, the number of matches are shown. To see the results, run thereport /FLDQ/AD_DISPL_BATCH_MATCH.
2012-05-02115
Duplicate check and error tolerant search

Note:For information about customizing the batch match report /FLDQ/AD_DISPL_BATCH_MATCH, see thesection Customizing the batch match report.
Related Topics• Run the Initial Match Code (Index) Setup program• Customizing the batch match report
13.4 Using error tolerant search
When users perform a search for a customer, vendor, or business partner using SAP error tolerantsearch functionality (often called fuzzy search or rough search), this product takes even partial data orerroneous data that you entered and provides a hit list of logical record matches between your searchterms and existing data.
The searches can take place on address fields or name fields. You can customize this product todetermine which fields are presented in the hit list to help you decide which record fulfills your search.
13.4.1 The hit list
In response to a search request, this product processes the data, creates a list of possible matches,and presents a hit list of candidates from which you can select an entry.
A hit list window gives these options.
ActionButton
A window appears that gives the data for confirmation. If this record is the desiredrecord, you can accept it by clicking Enter. The previous window returns with theentered data populating the fields. The duplicate matches are discarded.
Select
The search window returns, populated by the data you entered.New Search
The standard SAP search window is displayed.Cancel
13.4.2 Fields displayed
2012-05-02116
Duplicate check and error tolerant search

You can customize the data fields displayed in the error tolerant search hit list, as well as the order ofthose fields.
See the section Maintain fields for duplicate hit list display for information on the default settings andthe procedure for making changes to the fields displayed.
Related Topics• Maintain fields for duplicate hit list displays
2012-05-02117
Duplicate check and error tolerant search

2012-05-02118
Duplicate check and error tolerant search
Using duplicate check with SAP MDG
14.1 About duplicate check with SAP MDG
This section describes how to configure this product to provide duplicate check with SAP Master DataGovernance (MDG).
MDG generic duplicate check is only applicable to ECC 6.0 Ehp6 and later systems.
14.2 Preparing your Data Services installation to work with MDG for generic duplicatecheck
As part of any installation of this product, you must configure the Data Services jobs that are installedby this product’s Data Services Components as services. For information on the procedure of configuringjobs as services, see the section To configure jobs as services.
Related Topics• To configure jobs as services
14.2.1 Configure MDG jobs as services
In addition to the jobs listed in the section List of jobs and their service names, you must configure thesetwo more jobs as services to use this product to provide generic duplicate check with MDG:• Job_Realtime_DQ_SAP_MDG_Match• Job_Realtime_DQ_SAP_MDG_Create_Match_Codes
You must create multiple services for each job to accomodate each data model on which you intend touse this product’s search capability.
To distinguish the jobs and services, append to the name the data model ID to avoid having multipledata modes sharing a service.
2012-05-02119
Using duplicate check with SAP MDG

For example, you could name the match services Service_Realtime_DQ_SAP_MDG_Match_BP,Service_Realtime_DQ_SAP_MDG_Match_MM, and so on. You could name the create match codeservices Service_Realtime_DQ_SAP_MDG_Create_Match_Codes_BP,Service_Realtime_DQ_SAP_MDG_Create_Match_Codes_MM, and so on.
Tip:To get a list of all the data models on the SAP system, look at the contents of view V_USMD001C.
Related Topics• List of jobs and their service names
14.2.2 Specify which work processes to use
Use the PARALLEL_PROCESS_ GROUP configuration option to specify the work process group touse. For more information about the PARALLEL_PROCESS_ GROUP configuration option, see thesection Maintain operating parameters.
Related Topics• Maintain operating parameters
14.2.3 Disable session security for function Get_RTService_List
For the Data Services function Get_RTService_List, you must disable session security. Having sessionsecurity enabled (which is the default) produces an error and causes session validation to fail.
14.2.3.1 To disable session security on Get_RTService_List
1. In the Data Services Administrator, navigate to the Web Services > Web Services configuration.2. Select Get_RTService_List, and then from the drop-down list select "Disable session security".3. Click Apply to make the change.
2012-05-02120
Using duplicate check with SAP MDG

14.3 Activate/Deactivate MDG Search Functionality
This IMG activity allows you to activate or deactivate the MDG Duplicate Check implementation on thissystem.
By default, the MDG Duplicate Check implementation is activated.
14.4 Maintain services for MDG generic duplicate check
Maintaining services for MDG generic duplicate check requires several steps described in this sectioninvolving the IMG activity Maintain services for MDG generic duplicate check. For general informationabout the IMG activities used by this product, see the section Configuring through the IMG: Overview.
Caution:When you perform the tasks in this section and save the generic duplicate check configuration, theprocess recreates the search index for the data model. Therefore, these procedures should be doneduring a system maintenance window, if possible.
Related Topics• Overview
14.4.1 To set /FLDQ/ namespace to Modifiable
Before configuring generic duplicate check on the SAP MDG system, you must set this product’snamespace to Modifiable.1. Go to the option SE03 > Set System Change and set /FLDQ/ to Modifiable in both lower panes.2. Save the change.
14.4.2 To assign the services
Next, you must assign the services.1. From the IMG, click the Maintain services for MDG generic duplicate check.
2012-05-02121
Using duplicate check with SAP MDG

The "Determine Work Area Entry" window appears.
2. Enter the data model for which you want to configure duplicate check.The "Service Assignment: Overview" screen appears.
3. Assign a Duplicate Check Service and a Match Code Service to the data model by selecting oneservice from the selection list for both the Duplicate Check Service Name and Match Code ServiceName selection lists.For example, you could assign a Data Services service calledServiceRealtime_DQ_SAP_MDG_Match1 to the Duplicate Check Service and a Data Servicesservice called ServiceRealtime_DQ_SAP_MatchCode1 to the Match Code Service for the MaterialsData Model.
Each service can be assigned to only one data model. This procedure can be used to create additionalMatch and Match Code services.
14.4.3 To configure fields for duplicate check
After assigning the services, you next configure which fields to use for duplicate check. Data modelsare made up of several Entity Types. Each Entity Type can have several attributes and each is assigneda weight for matching. You configure the fields one-by-one with this procedure, repeating the steps onthe "New Entries" screen as necessary.1. In the "Service Assignment" screen, select the data model line.2. Double-click the Fields for duplicate check folder in the dialog structure pane.
The "New Entries" screen appears. Here you can choose an Entity Type and Attributes for thoseEntity Types, as well as specifying other conditions.
3. Select the "Entity Type" field.The "Entity Type" screen appears.
4. Select the Entity Type, and then continue.The "Attribute" screen appears.
5. Select an Attribute for that Entity Type, and then continue.The Entity Type and Attribute populate the New Entries screen.
6. Type a number in the "Weight" field to assign priority of this Entity Type and Attribute when findingmatches.
Note:The weights of the various Entity Types and Attributes are compared to each other to set prioritiesin finding duplicates.
7. If desired, check the boxes in the fields "Remove Noise Words,""Remove Punctuation", and "RemoveDiacriticals" to prevent those items from consideration during duplicate check.
8. If desired, check the box in the "Mandatory" field to make this Entity Type and Attribute mandatoryfor consideration in matching.
2012-05-02122
Using duplicate check with SAP MDG

14.4.4 Define Match Code Fields
Next, define the Match Code Fields. For each field, you must choose the type of corresponding matchcode.
This product provides the following match code (break key) functions within Data Services, each withthese configurable options:
Option 2Option 1
MatchCodeFunction
NoneNoneSoundex
A flag to determine whether to return null orthe input string when there is no encoding.When input as 0, return null. Otherwise, re-turn the input string when there is no encod-ing. When the parameter is null or invalid(non-numeric), it is defaulted to 1.
When input is empty, there is no primary orsecondary encodings. When Option2 =0,then return null. When Option2 =1, then re-turn the empty string.
A flag to control how encoded strings arereturned. When input as 0, return the primaryencoding. If there is no primary encoding,then return null or the input string, dependingon how Option2 is set.
When the input is not 0, return the alternateencoding. If there is no alternate encoding,then return null or the input string, dependingon how Option2 is set.
Phonetic
Length: The number of characters in the re-sulting string. If length is 0 or negative, thefunction returns an empty string. If length isgreater than the number of characters remain-ing in input_string after start , the functionreturns only the remaining characters.
The function keeps the trailing blanks in theremaining input_string after start .
Start: The position of the first character in thenew string. The function counts charactersfrom the beginning of input_string . In normaldataflows, the first character is positionnumber 1. If start is 0, the new string beginswith the first character (position 1).
If start is negative, the function counts char-acters from the end of input_string . The newstring begins with the character in that posi-tion from the end of the string.
If start is greater than the number of charac-ters in input_string , the function returns anempty string.
Substring
In addition, you can create custom match code (break key) functions that will be available to use in thisprocedure. For information on creating custom match code (break key) functions, see the section Adda custom match code (break key) function.
2012-05-02123
Using duplicate check with SAP MDG

Related Topics• Add a custom match code (break key) function
14.4.4.1 To define the Match Code Fields
1. In the "Service Assignment" screen, select the data model line.2. Double-click the "Match Code Fields" folder in the dialog structure pane.
The "New Entries" screen appears.
3. Select the "Entity Type" field.The "Entity Type" screen appears.
4. Select the Entity Type, and then continue.The "Attribute" screen appears.
5. Select an Attribute for that Entity Type, and then continue.The Entity Type and Attribute populate the "New Entries" screen.
6. Select the "Data Services Function Name" field.The screen listing the Data Services Function Names appears.
7. Select the Data Services function to assign, and continue.The function populates the "Data Services Function Name" field.
8. Supply the options in the "Option 1" and "Option 2" fields for that Data Services function.9. If desired, check the boxes in the fields "Remove Noise Words", "Remove Punctuation", and "Remove
Diacriticals" to prevent those items from consideration during maching.
When you save the configuration, the values are sent to the Date Services jobs and the jobs arerestarted. The match code (break key) tables for this data model are created dynamically and eachtable is initialized with records already in the data model.
14.4.5 Configure MDG to use this product for duplicate checking
Next, you must configure MDG to use this product for duplicate checking.
14.4.5.1 To configure MDG
2012-05-02124
Using duplicate check with SAP MDG

1. Within the SAP client, invoke transaction SM30.The "Maintain Table Views: Initial Screen" appears.
2. Edit the V_USMD204c. Table View.The "Search Applications" screen appears.
3. Create an entry with the following values.
ValueField
Z1Find
/FLDQ/CL_MDG_DUPL_CHECKAccess Class
CheckedFree Text
CheckedFuzzy
DQM ImplementationDescription
4. Edit the V_USMD_DPCHK_MOD Table View.The "Maintainence View for Duplicate Check Mode of Data Model" screen appears.
5. Enter a Threshold value for each Data Model/Entity Type with a find of Z1.
After these changes are saved, users of this MDG system have a Duplicate Check button on theirscreen. When a duplicate is found, the user is presented a list of duplicates. When a record is savedor updated within MDG, a record in the match code table is created or updated.
14.5 Add a custom match code (break key) function
In addition to the match code (break key) functions provided with this product (soundex, phonetic, andsubstring), you can create and add a custom function that will be available when you define the MatchCode Fields. Creating a custom function requires configuration on the MDG system and in Data Services.
14.5.1 To create the function in Data Services
For full instructions on creating functions in Data Services, see the Data Services documentation.1. In the Data Services Designer, create a new custom function that will generate the break key. You
can view the custom function CF_DQ_SAP_MDG_Phonetic_Match_Code_Metaphone as an example.2. Open the custom function CF_DQ_SAP_MDG_Match_Code_Controller. Inside this function are
instructions on how to add a new function. The name you give the function must be exactly the sameas the name you will enter in the SAP view /fldq/ad_funcs.
2012-05-02125
Using duplicate check with SAP MDG

3. Save the function and restart the Real-Time ServiceService_Realtime_DQ_SAP_MDG_Create_Match_Codes.
The custom function will be available when you define the Match Code Fields in MDG.
14.5.2 To configure the MDG system for custom functions
1. From the IMG, click the activity Maintain Data Services Custom Functions.
Note:The table that appears stores the valid match code (break key) functions that can be used in theMDG Match Code Fields screen. It is used to link the available match code (break key) functions inData Services to the items the SAP match code field screen allows the user to enter. The first columnof the table is the Function field that is passed down to Data Services and used by theCF_DQ_SAP_MDG_Match_Code_Controller function to route data to the correct custom functionfor generating match codes (break keys).This name must be identical to the one used in that function.
The validate_func field is used to associate an ABAP function that validates two options that can beused for each break key function. This function is run when the data on the MDG Match Code Fieldsscreen is saved to verify that the options are valid for that break key function.
2. Add a new row in this table for your new custom break key function. For an example of a validate_func,examine the function /FLDQ/VALIDATE_SUBSTRING_OPT.
This function will be available for selection on the "SAP Data Model" setup screen. The field"validate_func" is the ABAP function that validates options for the function.
Tip:For an example of a configuration, examine the function /FLDQ/VALIDATE_SUBSTRING_OPT.
2012-05-02126
Using duplicate check with SAP MDG

External List Management
15.1 Overview of External List Management
External List Management (ELM) is SAP CRM functionality that allows users to import data into theSAP database from an external list. To prevent the creation of duplicate data in the database, SAPoffers functionality that allows the external list to be matched against the SAP database so that duplicatescan be identified.
This product further enhances this standard SAP functionality by providing the postal validation andmatching capabilities of this product. You can use the Data Quality portion of this product to run postalvalidation and duplicate check on the data in the list itself prior to importing the list into your SAPdatabase. Then upon import of the list, the ELM process uses this technology to perform postal validationand duplicate check of the list data against the SAP database.
15.2 Using this product with ELM
To achieve optimal data quality when using ELM with this product, users should do the following.• If you have a stand-alone version of Data Services, cleanse (through postal validation) and
de-duplicate the external list using Data Services. For information on using Data Quality for thesetasks, see the Data Services documentation.
• Using the SAP ELM functionality, load the external list into the SAP system. The ELM process usesthe technology of this product to match the cleansed and de-duplicated list data against the SAPdatabase. Duplicates in the list are marked as duplicates and are not imported. For information onusing ELM within your SAP CRM system, consult the SAP system documentation.
15.2.1 Specify which work processes to use
Use the PARALLEL_PROCESS_ GROUP configuration option to specify the work process group touse. For more information about the PARALLEL_PROCESS_ GROUP configuration option, see thesection Maintain operating parameters.
2012-05-02127
External List Management

Related Topics• Maintain operating parameters
15.2.2 Cleansing the external list prior to loading through ELM
If the external list is not cleansed by Data Services prior to being loaded through ELM, any records thatSAP considers to be invalid postal addresses are automatically excluded from the de-duplication processand are not loaded into the database. Therefore, some records in the external list would be ignored.Examples of addresses that SAP considers to be invalid postal addresses are incomplete addressesor addresses that have the city, country, or region in lower case.
Pre-cleansing the list using a stand-alone version of Data Services corrects and standardizes postaldata, allowing the data to become valid if enough information is included in the record. This processallows the user to get the most value from the external list.
In addition, the SAP system does not check the list against itself for duplicates unless the records areB2B data. Records that are B2C data are not checked.
If the list is de-duplicated against itself using a stand-alone version of Data Services prior to beingloaded through ELM, the SAP system then considers all records in the list for de-duplication, insteadof only the B2B records.
15.2.3 ELM functionality for different versions of SAP CRM
In versions prior to SAP CRM 5, records that contained a P.O. Box address but no street address arenot correctly compared against the database for de-duplication because the P.O. Box was excludedfrom the field mapping in ELM, causing the creation of an incorrect break key within this product. Thisissue has been fixed by SAP in CRM 5 and higher.
15.2.4 Records with only name data
In SAP’s ELM implementation, records in the external list that contain only name data (no address data)are not compared against the database for de-duplication because SAP does not call duplicate checkand error tolerant search (DES) if the phone number or postal code is blank.
2012-05-02128
External List Management

15.2.5 Error: Index pool BUT000 PARTNER not set up completely
If there are any records in the pending updates table, the system may generate the following errormessage: Search index for index pool BUT000 PARTNER not set up completely. If you encounter thiserror, make sure you do not have any records in the pending updates table /FLDQ/AD_PUPDATE. Ifthere are records in the pending update table, run the pending updates report/FLDQ/AD_REPT_UPDATE_PEND_RECS.
15.3 Matching on the Marketing Attributes field
This product supports the use of Marketing Attributes fields in matching, and allows you to makecustomizations to enable matching on other fields. You configure this product to perform this taskthrough the IMG activity Maintain Matching on Marketing Attributes.
For general information about the IMG activities used by this product, see the section Configuringthrough the IMG: Overview.
Related Topics• Overview
15.3.1 Platform requirement for matching on the Marketing Attributes field
To use matching on Marketing Attributes fields, you must use SAP CRM 7.0, Enhancement Pack 1 orlater.
15.3.2 Configure ELM jobs as services
In addition to the jobs listed in the section List of jobs and their service names, you must configure thesetwo more jobs as services to use this product to work with ELM extended search on marketing attributesfields:• Job_Realtime_DQ_SAP_Name_And_Address_Ext_Match• Job_Realtime_DQ_SAP_Name_And_Address_Ext_Match_Weights
2012-05-02129
External List Management

Name the services:• Service_Realtime_DQ_SAP_Name_And_Address_Ext_Match• Service_Realtime_DQ_SAP_Name_And_Address_Ext_Match_Weights
Related Topics• List of jobs and their service names
15.3.3 Activate/Deactivate Extended Search Functionality
This IMG activity allows you to activate or deactivate the Extended Search BAdI for ELM. You mustactivate extended search functionality if you are using the extended search ELM jobs.
15.3.4 Maintain Matching on Marketing Attributes
This IMG activity allows you to configure matching on Marketing Attributes fields. After configuration,the CRM business user can run ELM and invoke the data matching capabilities of this product onMarketing Attributes fields.
15.3.4.1 To configure matching on Marketing Attributes fields
1. From the IMG, click the activity Maintain Matching on Marketing Attributes.The "Marketing Attributes for Use During Duplicate Check" screen appears.
2. Click the New Entries button.A drop-down list shows the available Marketing Attributes fields.
3. Choose from the list the Marketing Attributes field on which you want to perform matching.4. Repeat this process for up to five different Marketing Attributes fields. By default, this product accepts
a maximum of five fields.5. For each Marketing Attributes field, assign a "Weight" percentage. The "Weight" percentages must
add to 100, regardless of the number of Marketing Attributes fields.
Note:By default, the weight of 100% for Marketing Attributes fields represents 20% of the total weight offields used in performing matching operations. This 20% or total figure can be changed, as describein the section Customizing the number and weights of fields.
2012-05-02130
External List Management

6. Save your changes.
Saving the changes automates a request to the RFC Server. When the request from the SAP systemreaches the RFC Server, the RFC Server restarts the Data Services match Job, creating in the Jobnew substitution parameter values to reflect the changes you made in the SAP system.
If after completion of this activity the RFC Server did not automatically restart, you must manually restartthe RFC Server to make the changes take effect.
Related Topics• Customizing the number and weights of fields
15.3.5 Customizing the number and weights of fields
To increase the number of available Marketing Attributes fields from the default five, you must makechanges within Data Services.
Note:Consult the Data Services documentation for further details about how to edit dataflows.
15.3.5.1 To add a new marketing attribute field
1. In the Data Services Designer, open the dataflowDF_Realtime_DQ_SAP_Name_And_Address_Ext_Match.
2. In the transform RowsToColumns, add a new field GenericFieldx (where x is the next sequentialnumber). There are five fields before any more are added.
3. Copy the function call from the GenericField5 field and replace the 5 with the x value that is the nextsequential number. The function has this sytax:CF_DQ_SAP_Get_Generic_Field([$$DQ_SAP_ATTRx],MA
4. Create the following new substitution parameters:• $$DQ_SA_ATTRx• $$DQ_SAP_WTx (where x is the same number as above)
15.3.5.2 To add a Generic Field to the input of the matching transform
2012-05-02131
External List Management

After you have added a new marketing attribute field, you can add the GenericFieldx to the input of thematching transform1. Create a new Match Criteria called Market_attrib_x.2. Copy the options from Market_attrib_5 and replace the substitution parameter $$DQ_SAP_WT5
with $$DQ_SAP_WTx. Make sure that both fields’ blank score is set to 0.
By default the marketing attributes are set to 20% of the match score. You can change this level byaltering the substitution parameter fields that end with _WT (but not DQ_SAP_WTx ). This product thenrecalculates the percent for the marketing attributes by adding the _WT fields (standard match fieldslike name, address, and so on) together and subtracting that sum from 100.
15.3.5.3 To adjust the weight of an existing substitution parameter
1. In the "Substitution Parameter Editor" window, double-click the field that contains the weight valuefor the substitution parameter you want to change
2. Change the integer to the desired weight value.3. Click OK to save the changes and close the Substitution Parameter Editor.
For each additional transform and corresponding substitution parameter, you can choose in your SAPsystem an additional Marketing Attribute field in the Marketing Attributes for Use During Duplicate Checkscreen.
2012-05-02132
External List Management

Data Services jobs and options
16.1 Data Services jobs
This section describes the Data Services jobs and options that are specific to this product. These jobsare located in the Data Services Designer after you install the Data Services Components. Consult theData Services documentation for general procedures for working with Data Services jobs and options.
DescriptionJob
This job is used for quarterly adjustment reports and producesthe same results as the results from the interactive addressvalidation process.
Job_Realtime_Batch_DQ_SAP_Ad-dress_Cleanse
This job handles batch mode processing. It performs the follow-ing functions:• Clears the records of a batch processing run from the staging
tables (both input and output tables).• Loads the staging tables with records from the RFC Server
request for duplicate check in batch mode (batch match)processing.
• Processes records from input staging table for a specificBATCH_ID. The job matches driver record with candidaterecords to find potential duplicated names and addresses.It then loads the results into the output staging table. It usesthe substitution parameter DQ_SAP_BATCH_ID to identifythe records of a specific batch processing run and is passedfrom the RFC Server request by default.
• Fetches the duplicate check results in batch mode from theoutput staging table of a specific batch ID and sends backthe results to the RFC Server.
Job_Real-time_Batch_DQ_SAP_Name_And_Ad-dress_Match
This job is used when the IMG setting is configured so that theSuggestion List is disabled during the Address Validation.
Job_Realtime_DQ_SAP_Ad-dress_Cleanse
This job is used when the IMG setting is configured so that theSuggestion List is enabled during the Address Validation.
Job_Realtime_DQ_SAP_Ad-dress_Cleanse_Suggestions
This job is used if you have purchased the geocoding option forthis product. It processes latitude and longitude for US addressesand other countries based on the reference data available.
Job_Realtime_DQ_SAP_Ad-dress_GEO
2012-05-02133
Data Services jobs and options

DescriptionJob
This job is used if you have purchased the geocoding option forthis product. It processes latitude and longitude for supportedglobal country addresses.
Job_Realtime_DQ_SAP_Ad-dress_Global_GEO
This job is the default job for determining break keys. It doesnot use first names.
Job_Realtime_DQ_SAP_Cre-ate_Break_Keys
This job uses first names for the creation of break keys.Job_Realtime_DQ_SAP_Cre-ate_Break_Keys_With_Firstname
This job retrieves the list of all the possible regions that can bereturned by Data Services and sends them to the SAP system.This is used during table maintenance of the /FLDQ/AD_RE-GIONS table.
Job_Realtime_DQ_SAP_Get_Re-gion_Data
This job creates match codes (break keys) for duplicate checkin an MDG system.
Job_Realtime_DQ_SAP_MDG_Cre-ate_Match_Codes
This job allows duplicate check in an MDG system.Job_Realtime_DQ_SAP_MDG_Match
This job matches a driver record with candidate records to findpotential duplicate names and addresses for the External ListManagement (ELM) process. It contain five marketing attributesfields that can be dynamically set from the SAP system to bepart of the match score, in addition to standard name and ad-dress matching criteria.
Job_Real-time_DQ_SAP_Name_And_Ad-dress_Ext_Match
This job retrieves the match weights that are set in Job_Real-time_DQ_SAP_Name_And_Address_Ext_Match. These valuesare used on the SAP system to set the marketing attribute valuescorrectly.
Job_Real-time_DQ_SAP_Name_And_Ad-dress_Ext_Match_Weights
This job matches a driver record with candidate records to findpotential duplicate names and addresses. It uses the Job-levelGlobal Variable “$SAP_MATCH_THRESHOLD” as the defaultthreshold if an invalid threshold is passed from the RFC Serverrequest.
Job_Real-time_DQ_SAP_Name_And_Ad-dress_Match
This job retrieves the versions of the Data Services jobs thatare installed and running.
Job_Realtime_DQ_SAP_Product_Ver-sion
This job compares the currently defined regions on the SAPsystem with that of Data Services to determine if there are re-gions that could be mapped.
Job_Realtime_DQ_SAP_Region_Up-grade
2012-05-02134
Data Services jobs and options

DescriptionJob
This job retrieves the list of countries for which you can performpostal validation.
Job_Realtime_DQ_SAP_Re-trieve_Country_Purchased
This optional job processes US records through the USA Regu-latory Address Cleanse transform and non-US records throughthe Global Address Cleanse transform. If the collection containsmultiple records (pending update case), all records must be ofUS origin to receive USA Regulatory Address Cleanse DPVprocessing.
Job_Realtime_DQ_SAP_US_DPV_Ad-dress_ Cleanse_Suggestions
This job generates statistics on Customer and Business Partnerdata to discover the best options to be set for this product.
DQ_SAP_Break_Key_Profiler
16.1.1 Memory footprint of jobs
This section lists the size the Data Services jobs on a Windows system, and the number of instancesof each job required during installation.
Total Size (MB)InstancesSize per instance(MB)Job
405014050Job_Realtime_Batch_DQ_SAP_Ad-dress_Cleanse
86186Job_Real-time_Batch_DQ_SAP_Name_And_Ad-dress_Match
14602730Job_Realtime_DQ_SAP_Ad-dress_Cleanse
16002800Job_Realtime_DQ_SAP_Ad-dress_Cleanse_Suggestions
5502275Job_Realtime_DQ_SAP_Cre-ate_Break_Keys
65165Job_Realtime_DQ_SAP_Get_Region_Da-ta
(any)102Job_Realtime_DQ_SAP_MDG_Cre-ate_Match_Codes
(any)77Job_Realtime_DQ_SAP_MDG_Match
(any)82Job_Realtime_DQ_SAP_Name_And_Ad-dress_Ext_Match
2012-05-02135
Data Services jobs and options

Total Size (MB)InstancesSize per instance(MB)Job
(any)62Job_Realtime_DQ_SAP_Name_And_Ad-dress_Ext_Match_Weights
170285Job_Realtime_DQ_SAP_Name_And_Ad-dress_Match
62162Job_Realtime_DQ_SAP_Product_Version
95195Job_Realtime_DQ_SAP_Region_Upgrade
70170Job_Realtime_DQ_SAP_Retrieve_Coun-try_Purchased
8608Total
16.2 Combine house num and PMB option
The combine_house_num_and_pmb option of each job allows you to determine how this product handleshouse number and PMB (postal mail box) data for that job. The following table explains the eight optionsthat you can set for all address cleanse jobs to the global variable $gAddrCombineOption for each job.
DescriptionOption
This option separates the house num1, house num2, and street data in the housenum1, house num2, and street fields, respectively. It also appends the PMB datain the street supple2 field.
1 (default)
This option separates the house num1, house num2, and street data in the housenum1, house num2, and street fields, respectively. It also appends the PMB datain the street field.
2
This option combines the house num1 and house num2 with street data in thestreet field and append the PMB data in the street suppl2 field.
3
This option combines the house num1, house num2, and PMB data with the streetdata in the street field.
4
This option combines the house num2 data with street data in the street field andappends the PMB data in the street suppl2 field.
5
2012-05-02136
Data Services jobs and options

DescriptionOption
This option combines the house num2 and PMB data with the street data in thestreet field.
6
This option combines the house num1 data with the street data in the street fieldand appends the PMB data in the street suppl2 field.
7
This option combines the house num1 and PMB data with the street data in thestreet field.
8
16.2.1 To set the combine house num and PMB option
1. For any address cleanse job, choose Properties > Global Variables.2. Change the value of $gAddrCombineOption from 1 to any value described in the table.3. Click Apply to activate your changes and then save the job.4. Repeat these steps for any other jobs.
2012-05-02137
Data Services jobs and options

2012-05-02138
Data Services jobs and options

Tips and troubleshooting
17.1 Installation troubleshooting
This section offers tips and troubleshooting solutions related to the installation of this product.
17.1.1 Enable or disable an address cleanse engine
You can enable or disable an address engine for a particular service in the Data Services ManagementConsole, which would be useful if you wanted to apply a change to corresponding job.
17.1.1.1 To enable or disable an address cleanse engine
1. In the Data Services Management Console, navigate to the "Real-Time Service Configuration" tab,select the appropriate Service, and then navigate to the "Add" screen. Click Add OverriddenParameter.
2. Select the override parameter for the engine that you want to enable or disable. For example, toenable or disable the Canada engine, select $$DQ_SAP_EngineCanada.
3. Type Yes to enable or No to disable the engine.
Changes to parameters cannot take effect until the services that uses the parameters are restarted.Therefore, you must restart the job for this change to take effect.
17.1.2 Disable address cleans engines using global variables
During installation, you specified which address engines were purchased. If the engines specified wereinaccurate, you can change this setting manually to disable the address cleanse engines for countries
2012-05-02139
Tips and troubleshooting

for which you did not purchase the address directory. See the Data Services documentation forinformation on which countries’ address data is supported by which engine.
This table lists the country engine substitution parameters.
DescriptionSubstitution parameter
Enable or disable the USA engine$$DQ_SAP_EngineUsa
Enable or disable the Canada engine$$DQ_SAP_EngineCanada
Enable or disable the Global Address engine$$DQ_SAP_EngineGlobalAddress
17.1.2.1 To disable an address cleanse engine using global variables
If you have created your own substitution parameter configurations, make sure that you include themin this process. You must perform the steps to disable unpurchased address cleanse engines for allthe $$DQ_SAP_* substitution parameters in any configuration you use with this product.1. In the Data Services Designer, go to Tools > Substitution Parameter Configurations.2. In the "Substitution Parameter Editor", select one of the country engine substitution variables from
the list that represents a country address cleanse engine that you did not purchase.3. Set the parameter to NO to disable the engine for every address cleanse engine represented by a
Data Services address directory that you have not purchased. You must perform this step for everyconfiguration you use. If you did not purchase an address cleanse address directory, and thecorresponding value is set to YES or is blank, this product cannot function properly.
4. After you have set the appropriate value for all the Substitution Parameters, click OK.
17.1.3 There was an error while importing the .atl files
If the installation routine notifies you that it was unable to import the .atl files, you must manuallyperform these operations. This installation routine by default copies the files to the directory <install_path>\SAP BusinessObjects\Data Quality Mgmt for SAPSolutions\integration\.
To manually perform the file import and copy operations:
According to the directions in the Data Services documentation, import the .atl files to Data Servicesthrough the Data Services Designer. When importing the files, you will be prompted for a passphrase.The passphrase is DQMSAP. You must import them manually in the following order (as described bythe STEP_x notation in the file name):• DQ_SAP_DS_STG_TBL_STEP_1.atl
2012-05-02140
Tips and troubleshooting

• DQ_SAP_DS_STEP_2.atl• DQ_SAP_DS_SYS_CFG_STEP_3.atl• DQ_SAP_DS_SUB_PARAM_STEP_4.atl
After you import the first file, you may receive a Warning message that “Passwords of objects from<the file> are set to empty as the passphrase <DQMSAP> is invalid.” This message is expected,and you can dismiss it by clicking OK without taking any of the actions mentioned in the warningmessage.
Further, you must verify that the DQ_SAP_DS datastore connection information is correct. See the DataServices documentation for instructions on setting a datastore's connection information.
17.1.4 There was an error while executing the batch job DQCreateStageTables togenerate the RDBMS staging tables
During the installation of the Data Services Components, the installation routine attempts to run theDQCreateStageTables job to automatically create the RDBMS staging tables. If the installation wasunable to create the staging tables, you must run the job manually in the Data Services Designer tocreate them.
Note:You must have an appropriate database client installed and a connection (such as an Oracle TNS entry)to the database created.
1. In the Data Services Designer, go to the "Jobs" tab of the Local Object Library. In the Batch Jobshierarchy, select the job DQCreateStageTables.The job DQCreateStageTables is now visible in the Designer.
2. With the job DQCreateStageTables active, select Execute (or press F8) to execute the job, andthen accept the default settings in the "Execution Properties" confirmation window.
This error is typically the result of incorrect database connection information provided during installation.To see this information, open the DQ_SAP_DS datastore and verify the connection information. Whenyou close the window, Data Services validates the connection. See the Data Services documentationfor instructions on setting a datastore's connection information.
17.2 Postal validation and duplicate check/error tolerant search troubleshooting
This section offers tips and troubleshooting solutions related to the postal validation and duplicatecheck/error tolerant search capabilities of this product.
2012-05-02141
Tips and troubleshooting

17.2.1 Using the sample input files to test jobs
During the installation of the Data Services Components, the installation routine installs sample inputfiles to your Data Services configuration at <installpath>\SAP BusinessObjects\Data QualityMgmt for SAP Solutions\extra\SampleInputfiles. You can use these input data files as atemplate to run data through this product.
For example, if you want to customize a job, you could add records to a sample input file and send thedata through the job to see if you receive the expected results. This process can help you makeconfigurations to jobs.
For instruction on how to run jobs, see the Data Services documentation.
17.2.2 Inability to save addresses for which the postal code cannot be completed
If you were not running this product on your SAP system and you entered an address without using thepostal code, the SAP system would return a standard SAP error indicating that you need to enter avalid postal code.
This product attempts to fill in the correct postal code based on the other address information youprovided. If, however, this product cannot determine a postal code, it does not offer you an option tosave the address without correcting. This restriction is necessary because if you attempted to save theaddress without the postal code, the SAP system would return its standard error indicating that youneed to enter a valid postal code.
Therefore, instead of creating a scenario in which this product allows you to save the address withoutthe postal code only to have the SAP system disallow it, this product instead gives an error and doesnot allow you to save the address.
17.2.3 Records created without break keys (match codes) due to downtime of RFCServer
During any time that the RFC Server is not functioning, this product cannot give a break key to newlycreated records or changed records. When the RFC Server again functions and the first record iscreated or changed, this product checks a list of pending records to determine which records have notbeen assigned break keys, and assigns break keys to those records. The size of that list is configurablethrough the IMG activity Maintain operating parameters.
2012-05-02142
Tips and troubleshooting

If the number of pending records exceeds the size configured in that parameter, this product cannotassign break keys to the records. Instead, you must run the custom report/FLDQ/AD_REPT_UPDATE_PEND_RECS.
Related Topics• Maintain operating parameters
17.2.4 Include records with empty break keys (match codes)
A break key (match code) is the search index for each record that this product uses for finding similar,possibly matching, candidate records. A break key consists of search terms that are arranged in aspecific order. The search terms can be customized so that this product can determine that certainexisting records have no realistic probability of being duplicates and should be ignored.
Some records may not have a break key associated with them; that is, some records have an emptybreak key. Some may have break keys for name data but not address data, or vice versa.
On one hand, including records that have empty break keys during postal validation or duplicate searchslows processing because there are more records to examine. On the other hand, including recordsthat have empty break keys helps this product return appropriate records.
Related Topics• Break keys (match codes)
17.2.5 Customizing the batch match report
You can customize the batch match report /FLDQ/AD_DISPL_BATCH_MATCH to display differentinformation.
The following fields are available for display in this table, but are not enabled by default:• STR_SUPPL1• FLOOR• HOUSE_NUM2• SMTP_ADDR
The fields STR_SUPPL1, FLOOR, and HOUSE_NUM2 must first be activated in the TSAD10 table forthem to be populated with data. For information about activating fields in the TSAD10 table, see thesection Identify Search Fields.
To display these fields once, manually select them in the report.
2012-05-02143
Tips and troubleshooting

To display the fields each time without selecting them, create a variant of the report.
Related Topics• Identify Search Fields
17.2.6 Suggestion list configuration
The configuration of suggestion lists is held in tables integrated into your SAP system by the installationof this product. Through these tables, you can changes to the appearance and content of suggestionlists.
You can edit these tables to configure suggestion lists.
DescriptionTable
This table configures which fields are displayed on a suggestion list. You canhave different configurations for different countries. The records with an emptycountry field are the default records. Use the transaction SE16 to configure thistable.
/FLDQ/AD_SUG-FLD
This table assigns labels to the suggestion list fields. The suggestion lists firsttries to find records using the language of the user who is logged in. If the systemis not able to use that language, it next tries to find records with the system'sback-up language. If the system is not able to use that language either, it usesEnglish. Use the transaction SM30 to configure this table.
/FLDQ/AD_SUG-LBL
17.2.7 Using wild card characters to query and produce suggestion lists with theGlobal Address engine
Using the Global Address engine to produce suggestion lists creates a unique circumstance of how tobest attain accurate suggestions, depending on whether the data is mostly correct and standardized,or whether the data is mostly unstandardized or missing fields.
The suggestion list results produced by the Global Address engine are optimized to provide accuratesuggestions for input addresses that are standardized and mostly correct. However, this optimizationhampers the ability to produce suggestions for address data that require much correction or has missingdata. In such circumstances, you would get better results by broadening the scope of the suggestionwith the use of wild card characters in certain fields.
Wild card characters are most useful at the end of a substring. Though wild card characters can beused at the beginning of a string, such use is not supported for all countries and is generally less likely
2012-05-02144
Tips and troubleshooting

to produce good suggestion list results. Using wild card characters in the middle of a string is notsupported.
Example: U. S. address
Consider the following address data.
ValueField
WilliamstownCity
MAState
01267Postcode
Because of the way suggestion list creation is optimized, the suggestion list is unlikely to show anyresults because there is no street number or name. Instead, you could get better results by using awild card character to broaden the scope of the suggestions lists.
We recommend the following.
For the city, use the first two to four characters, followed by the wild card character *. If the suggestionlist result is still unsatisfactory, use only the first character and the wild card character.
Will* or W*
For the post code, use the first three characters, followed by the wild card character *.
012*
For most countries, the first three characters of a post code identifies the region or sectional post officelocation, and that is always true for U.S. addresses (where even the first two characters identify thestate for the postcode).
Wild card characters are not used for region or country fields. Those fields should be fully populatedor left blank.
Note:When using wild card characters, you should generally start with the higher number of alphabeticalcharacters. If no suggestions are generated or the address you are looking for is missing, shorten thenumber of alphabetical characters in the input until you find the address.
Example: Swiss address
To improve querying, the Global Address engine removes all the primary type data from the primaryname data. For example in a Swiss address, street types like Rue, Digue, Impasse, should not beattached as these street types result in the correct street not being found.
Consider the following address.
57Rue Du RhoneGenevaSwitzerland
2012-05-02145
Tips and troubleshooting

You would get better suggestion list results by inputting the address as follows.
57Du*GenevaSwitzerland
17.2.8 Duplicate check and the substitution parameter $$DQ_SAP_Match_Engine
Duplicate check occurs in the following Data Services match transforms:• Job_Realtime_Batch_DQ_SAP_Name_And_Address_Match• Job_Realtime_DQ_SAP_Name_And_Address_Ext_Match• Job_Realtime_DQ_SAP_Name_And_Address_Match• Job_Realtime_DQ_SAP_MDG_Match• Job_Realtime_DQ_SAP_Region_Upgrade
These transforms use the substitution parameter $$DQ_SAP_Match_Engine. The default setting isJAPANESE, because the JAPANESE setting provides the same latin1 data matching as the othersettings, and includes additional Unicode character matching and special Japanese charactersearch/replace/standardization. Therefore, we recommend that you leave this setting to JAPANESE.
For information about the Data Services match engine and its substitution parameters, see the DataServices documentation.
17.2.9 DPV processing locked
Delivery Point Validation (DPV) processing is provided as a for sale add-on to this product. If you runDPV and receive an error message that a record has locked DPV processing, you must obtain a DPVUnlock Code from SAP Business User Support to unlock DPV functionality. See the Data Servicesdocumentation for information on DPV and DPV locking, as well as instructions to unlock DPV processing.
17.3 Region code incorrect or missing
If you find when running postal validation the region code is incorrect or missing, you can try to correctthis problem by reconciling any differences between the mappings of regions between the SAP systemand Data Services. This section gives an overview of regions, how they are mapped to work with thisproduct, and how you can make changes to those mappings.
2012-05-02146
Tips and troubleshooting

17.3.1 Displaying missing region data
During postal validation, when a record has missing region data, the record is logged to the table/FLDQ/ERRLOG.
You can display only these missing regions in the error log table by entering FZ23 in the ERR_CODEfield prior to examining the table contents. Each missing entry displays the information it has, as wellas what it was missing.
Example:
An entry might be similar to the following:
Missing DQ Region Name. Countrycode: PL SAP Region Code: SLS.
This information shows that the region name is missing, and that the region code for the SAP systemis SLS.
17.3.2 Reconciling regions
To reconcile region differences between your SAP installation and those of Data Services, run thefollowing reports in this order:1. /FLDQ/AD_MAP_REGIONS2. /FLDQ/RSREGIONRPT
Related Topics• Maintain DQM Region Mappings
17.3.2.1 To run report /FLDQ/AD_MAP_REGIONS
Before running this job, ensure that you have performed the tasks in the section Maintain SupportedCountries. Running those tasks ensures that the results have no extraneous data that has no relevanceto your business needs.
The report /FLDQ/AD_MAP_REGIONS populates the tables.
2012-05-02147
Tips and troubleshooting

Tip:This job may take a long time to complete, resulting in one transactional RFC Server being busy untilthe completion of this job. You should run this job when this potential resource usage has minimal effect.
1. Invoke SAP transaction SE38.The ABAP Editor: Initial Screen window appears.
2. In the "Program" field, enter /FLDQ/AD_MAP_REGIONS.3. Click the Execute button.
At the conclusion of this job, the database tables needed for the reconciliation are populated.
Related Topics• Maintain Supported Countries
17.3.2.2 To run report /FLDQ/RSREGIONRPT
The report /FLDQ/RSREGIONRPT indicates differences between the region data of the SAP systemand that of Data Services.1. Invoke SAP transaction SE38.
The ABAP Editor: Initial Screen window appears.
2. In the "Program" field, enter /FLDQ/RSREGIONRPT .3. Click the Execute button.
The initial selection screen appears.
4. Click the matchcode object (or press F4).The list of countries that have region differences between your SAP system and Data Servicesappears.
Note:You can select multiple countries by selecting the check box next to each country that you wantdisplayed. If you want to display the report for all countries with region differences, you can leavethe field blank, or select ALL COUNTRIES from the matchcode object.
5. Click Execute.
A report showing region differences is displayed. The differences are grouped by country and the typeof difference. In each country section, and for new difference types within a country, the report displaysa short description of the action required to map each section’s regions.
Tip:This report sometimes shows a large amount of information. You could print the report and use it as areference.
2012-05-02148
Tips and troubleshooting

17.3.2.3 Example: region exists only in Data Services
In this example, you get the following message after displaying the missing region data.
“These entries only exist in Data Services. Add, or correct, entries in the /FLDQ/AD_REGIONS and/orT005S tables.”
This message indicates that there are no entries for these regions for the country specified in the T005Sor Regions table.
This could mean that an entry in the Regions table has the incorrect value for the DQ_L_REGIONNAMEand must be corrected (possibly the name in Data Services has changed), or an entry needs to beadded to the Regions table and possibly the T005S table.
17.3.2.3.1 To determine the cause of the error and whether you need to add or modify entries1. Invoke the IMG activity to insert regions. See the documentation specific to your SAP system for
instructions.2. Look for an existing entry.3. If an entry exists, ensure that the region "Description" matches that of the region report and note
the Region code used.4. If there is not an existing entry, follow the instructions in your SAP system documentation to add the
region. Ensure that the region "Description" matches that of the region report and note the Regioncode you used.
5. Use the SAP transaction code SM30 to invoke the "Maintain Table Views: Initial Screen".6. In the "Table/View" field, enter /FLDQ/V_AD_RGNS and click the Maintain button.
You may receive the warning “Caution: The table is cross-client.” If so, click Continue.
The Change View "Maintenance View for AD_REGIONS table: Overview " is displayed.
17.3.2.3.2 To add new entries to the /FLDQ/AD_REGIONS table
If needed, in the Change View "Maintenance View for AD_REGIONS table: Overview", you can addnew entries.1. Click the "COUNTRY CODE" field.2. Use Request Help to invoke a list of SAP Country codes.3. Select the appropriate entry.4. Click the "SAP REGION CODE" field.5. Use Request Help to invoke the Search Help.6. Enter the applicable Country Code and SAP REGION CODE if you know it. Otherwise, clickContinue
to display a list of SAP REGION CODES for the country.7. Select the appropriate entry.
2012-05-02149
Tips and troubleshooting

8. Click the "DQ LONG REGION NAME" field.9. Use Request Help to invoke the Search Help.10. Enter the applicable Country Code and DQ Long Region Name if you know it. Otherwise, click
Continue to display a list of DQ Long Region Name for the country.11. Click the "DQ SCRIPT" field.12. Enter the applicable Country Code and DQ Long Region Name and click Continue.
A list of Scripts for that name is displayed. (In most cases, LATN is the value used for this field.)
13. Select the appropriate entry that maps to the DQ Long Region Name you entered earlier.14. Save the entries.
You may be prompted to create a change request, which could be used to transport these changes toother systems, if needed.
17.3.2.3.3 To modify an entry in the /FLDQ/AD_REGIONS table
If needed, in the Change View "Maintenance View for AD_REGIONS table: Overview", you can modifyan entry.1. Click on the field to be changed.2. Determine the appropriate entry, using the instructions in this section.3. Select the appropriate entry.4. Save the entries.
Related Topics• Reconciling regions
17.3.2.4 Example: region exists only in SAP system
In this example, you get the following message after displaying the missing region data.
“These entries only exist in /FLDQ/AD_REGIONS and T005S tables. These entries do not exist in DataServices. Add, or correct, an entry in the /FLDQ/AD_REGIONS table.”
This message indicates that there are no entries for these regions for the country specified in DataServices. Therefore, Data Services can not return these entries during postal validation. This could bebecause a region has changed names or been consolidated into another region.
You must now add or correct a region entry in the /FLDQ/AD_REGIONS table.
17.3.2.4.1 To add or correct a region entry in the /FLDQ/AD_REGIONS table1. Use the SAP transaction code SM30 to invoke the "Maintain Table Views: Initial Screen".2. In the "Table/View" field, enter /FLDQ/V_AD_RGNS and click the Maintain button.
2012-05-02150
Tips and troubleshooting

3. If you receive the warning “Caution: The table is cross-client,” click Continue.The "Change View Maintenance View for AD_REGIONS table: Overview" is displayed.
4. Find the appropriate entry and click Request Help.
Tip:Look at the list for an appropriate entry. Keep in mind that the names in Data Services do notnecessarily correspond to those on your SAP system.
5. If no suitable entry exists, delete this entry.6. If a suitable entry is found, correct the entry and click Save.
17.4 RFC Server troubleshooting
This section offers tips and troubleshooting solutions related to the RFC Server portion of this product.
17.4.1 Removing a Windows service for an RFC Server
If you have installed the RFC Server as a Windows service, you can use the tool remove_rfc_service.bat to remove any RFC Server services that are no longer used on that Windows system. Thetool is located at <install_path>\bin.
Start the tool either from a Windows command prompt with Administrator privileges. Once the programhas been started, you are asked for the SAP System ID used by the RFC Server, and then you canchoose to remove Batch or Transactional RFC services, or both.
For information about installing the RFC Server as a Windows service, see Installing an RFC Serveras a Windows Service.
Related Topics• Installing an RFC Server as a Windows Service
17.4.2 RFC Server fails to start: Partner not reached
If the RFC Server fails to start and displays the message “Partner not reached – Connection refused,”verify that the RFC Server’s network port 33xx is open (where xx is the central instance number).Having this port closed is often the cause of this error.
2012-05-02151
Tips and troubleshooting

17.4.3 RFC Server fails to start: cannot find the log file
On Windows 2008 Server and later systems that use the User Account Control (UAC), the RFC Servermay not be able to run if that user does not have appropriate privileges. The error is caused by theinability at access the flrfcsrv_log.txt log file. You must ensure that the user has appropriateprivileges to access the log file.
This error may produce the following message:
Error: Unable to locate the Log file (%2). Please check the command line, configuration file options,and account privileges, with %2 being the log path similar to C:\Program Files (x86)\SAPBusinessObjects\Data Quality Mgmt for SAP Solutions\logs\flrfcsrv_log.txt .
17.4.4 Output manifest information
Upon startup, the RFC Server console outputs the manifest information, which is the vendor’s name,name of the product, and the version of the product. Then, after the log file is initialized, it writes thisinformation to the log file.
The format of this string is:
<vendor>’s <product> v<version>
DescriptionField
The value assigned as the specification vendor in the manifest file.<vendor>
The value assigned as the specification title in the manifest file.<product>
The value of the specification version in the manifest file.<version>
This information can be displayed only if the manifest information is available to the program. If thisinformation cannot be loaded, the RFC Server displays the following warning:
Warning: Unable to access the manifest file to display version and vendor information.
The program continues processing normally after displaying this message to the console.
17.4.5 Understanding High Availability for the RFC Server for network outage
2012-05-02152
Tips and troubleshooting

If a network outage between the RFC Server and the SAP Gateway occurs, then the RFC Serverautomatically re-connects to the SAP Gateway with a new connection once the outage has beenresolved.
By default, the previous, inactive connection remains present on the SAP Gateway for 300 seconds.After 300 seconds, the SAP Gateway pings this connection. Because the connection is invalid, the SAPGateway removes this inactive connection.
If during that time a call is made to that connection from this product, an error results and the connectionis removed from the SAP Gateway.
You can set a different interval via SAP transaction code RZ10. Set the gw/reg_keepalive parametervalue. Note that the value entered results in a ping to all registered programs on the SAP Gateway. Forexample, if you have 10 registered programs connected to the SAP Gateway, and set thegw/reg_keepalive parameter to 30, The result is 10 pings every 30 seconds.
See your SAP system documentation for more information about transaction code RZ10 and thegw/reg_keepalive parameter.
17.4.6 Java OutofMemoryError
If you receive the error “java.lang.OutOfMemoryError: Java heap space” while running the RFC Server,you have two options:1. Increase the value of the maximum heap size (“-Xmx”). The RFC Server is pre-configured to use a
maximum Hheap size of 256 MB of memory to conserve system resources.2. Remove the “–Xmx” parameter. If system memory resources are not an issue, you can remove this
parameter altogether. Note that the RFC Server memory footprint may grow to over 1 GB of RAM.
The procedure to modify the “–Xmx” parameter depends on whether the RFC Server is being run fromthe batch file or as a Windows service.
17.4.6.1 To modify the parameter when running the RFC Server as a batch file
1. Locate this line in the appropriate batch file: %JAVA_EXE% -Xmx256m -classpath%FL_CLASSPATH%
2. Modify the –Xmx parameter.For example, to increase the maximum heap size to 512 MB the new parameter would read:-“Xmx512m”.
2012-05-02153
Tips and troubleshooting

17.4.6.2 To modify the parameter when running the RFC Server as a Windowsservice
You must modify the Windows Registry.1. Locate the appropriate RFC Server service located in the Registry node
HKEY_LOCAL_MACHINE\SYSTEM\ControlSet001\services\2. Double-click on the ImagePath value.3. Modify the value of the “–Xmx256m” parameter to the required value. (You could also remove it and
allow the memory footprint to grow without limit.)4. Click OK.
17.4.7 Startup status messages
During startup, the console shows startup status messages, indicating the steps of the process. Thefollowing messages appear only if their functionality is not supported by your Basis version:• Extended Search functionality is not available on this system• MDG functionality is not available on this system
17.4.8 Do not configure the RFC Server through Data Services Management Console
The Data Services Management Console allows for configuration of connected RFC Servers. Thisproduct does not use this capability, and attempting to configure the RFC Server for this product throughData Services can cause errors.
All configuration of the RFC Server for this product is described in this document.
If you have configured the RFC Server for this product in Data Services, use the Management Console’sSAP Connections window to delete the interface with this product’s RFC Server.
17.5 Product component version report
2012-05-02154
Tips and troubleshooting

You can create a report to show the version numbers of the BAdIs, RFC Server, and Data Servicesjobs. To create a report, run /FLDQ/RSPRODVER.
These reports are intended to provide SAP Business User Support the ability to verify that all of thecomponents of this product are the same or identify possible incompatibilities caused by versionmismatches. Running these reports is not otherwise required.
17.6 Customizing error messages
This section describes how the system chooses the order of precedence for customized error messages,which you should know when you customize error messages.
When an error is produced, the system reads error messages in the following order to determine thetext to display:1. Customized message for the language of the current login2. Customized message in the default language (English)3. Standard error message provided by default with this product
17.6.1 To customize an error message
1. Use the SAP transaction code SM30 to invoke the "Maintain Table Views: Initial Screen".2. Enter table name /FLDQ/AD_ERRCUST.3. Click the Maintain link in the "Maintain Table Views" window.4. Click New Entries (F5) in the Change View "Customer defined error messages: Overview" window.5. Specify an error code number, a language code (for example, EN for English), and the text of the
message to be displayed with that error.If the error occurs, the text represents how the error is logged.
6. Save your changes.
17.7 Diagnosing problems that cause data quality processing to cease
If this product ceases data quality processing for no obvious reason, consider these tips to diagnosethe problem.• To check the error log for this product, run the report /FLDQ/AD_REPT_DISPLAY_ERRLOG.
2012-05-02155
Tips and troubleshooting

• Verify whether the appropriate Data Services Web Services jobs are all started and running withinthe Data Services Management Console. See the Data Services documentation for informationabout the Web Services jobs.
• Check the logs within the Data Services Management Console for any errors. See the Data Servicesdocumentation for information on the logs and responses to issues found there.
• Do not ignore the logs for a Data Services service simply because the indicator light for that serviceis green. Sometimes the service indicator light is green even though processing has stopped. Examinethe individual logs under each service, as the green indicator light may indicate only that the real-timeservices are active. The cause of the problem with data quality processing may be found in the logs.
• Try running the individual real-time jobs from within the Data Services Designer if real-time servicesdo not work from within this product. This test may reveal problems within Data Services.
• Verify that the communication between the SAP Gateway and the RFC Server is active by usingthe transaction SMGW. See the documentation for your SAP platform for more information aboutthis transaction.
• If you are licensed for geocoding and get an error related to geocoding, ensure that in Data Servicesthe GEO job has been set up as a real-time Web Service. See the Data Services documentationfor information about configuring jobs as a Web Service. Examples of the error messages includethe following:• An internal error occurred during geocoding or in a related geocoding program• Internal error in SAP1, US. RFC: Connection error Destination: FL_GDQC_SERVER
• If you are licensed for geocoding and the RFC Server fails, the system still allows the address to besaved but logs an error in the /FLDQ/AD_REPT_DISPLAY_ERRLOG table.
Related Topics• Configure geocoding (optional)
2012-05-02156
Tips and troubleshooting

Using the Break Key Profiler
18.1 Understanding the Break Key Profiler
The Break Key Profiler is a dataflow that allows you to show the performance of various settings forduplicate check (matching) within this product. You can then use the results to customize the optionsto best match the data in your system, finding the optimal balance between getting full results or therapid response time that is needed.
18.2 Break Key Profiler job
The Data Services job DQ_SAP_Break_Key_Profiler is installed as part of the Data Services Componentsportion of this product. It can be connected to the SAP system to generate statistics on Customer andBusiness Partner data to discover the best options to be set for this product. You can run this jobimmediately after installing the product or later to diagnose possible solutions to performance issues.
This job can also be installed to Data Services before installing the rest of this product to predictperformance.
The job checks the SAP index pools BUT000 and KNA1. If you install the job to Data Services beforeinstalling the rest of this product, you must assure that you have activated these index pools beforerunning the job. For information on activating the index pools, see the section Activate duplicate checkindex pools.
Running this job provides the following benefits:• Shows the different results for the five best practice match codes that are used for searching on
address information. For information on the match codes, see the section Best practices matchcodes (break keys).
• Allows matching the best function to your unique data to get the best results and response time.• Tests custom match codes that use extra fields against the best practice match codes supplied with
this product.• Finds noise words that can be removed from the matching process to get better matches.• Compares certified name selection against last name only selection to decide what type of name
selection process will be used.• Compares address only selection to name and address selection to decide if address only selection
should be activated.
2012-05-02157
Using the Break Key Profiler

Related Topics• Activate duplicate check index pools• Best practices match codes (break keys)
18.3 Concepts for the Break Key Profiler
This section provides some information to help you understand the terms and techniques of the BreakKey Profiler.
18.3.1 Noise words
Noise words are words that are part of the organization name1 or name2 field that do not have anyrelevance. For example, words such as “of,”“the,” and “Inc.” are common words that, if used whenprocessing matches, result in much larger candidate groups.
Candidates selected on these noise words are of little use in matching. This product already has manycommon English noise words configured. You can add new words that you consider to be noise wordsin your data. By removing the noise words from the matching process, you can improve performance.
If possible, you can improve the quality of matching results by removing noise words from your dataprior to creating the break keys.
18.3.2 First and Last Name Selection
This product offers two types of dataflows to create break keys:• Last name only• First and last name
Last name candidates usually provide better matches, as matching with first name often leads to falsepositive results. However, for backwards compatibility, this product offers both types of matches.
This dataflow shows the results for a random selection of records in the file DQ_SAP_LastNameCompare.The results show the difference in size that the last name only versus first and last name generate.
Name Candidates are only one part of the selection. When optimizing, you should consider the addressselection process to get better results. When looking at the data, keep in mind that this product canprocess approximately 1000 records per second. For example, for a candidate group of 2000 records
2012-05-02158
Using the Break Key Profiler

the processing time will be roughly two seconds, meaning that the user must wait that long to seeresults.
There is a default five-second processing limit for each transaction. For groups over 5000 to 6000records, there can be records that do not get processed and a five second response time.
18.3.3 Address only selection
You can select match candidates using address information only. With this option enabled, the softwareignores name information when selecting match candidates. However, if address information is missing,normal selection with name information occurs instead.
The matching process itself still uses name and address information. Only the selection of the recordsprior to matching is based on address information.
The default matching setup for organizations and individuals are 70 percent based on addresses makingthis a valid way of selecting candidates. The output in file DQ_SAP_NameAddressCompare looks at arandom selection of records from the data and compares the candidate groups based on selecting onaddress information, on only name information and on both address and name information.
This show the performance you would get based on the selection process that is used. When lookingat the data, keep in mind that this product can process roughly 1000 records per second. For example,for a candidate group of 2000 records the processing time will be roughly two seconds, meaning thatthe user must wait that long to see results.
This product has a default five-second processing limit for each transaction. For groups over 5000 to6000 records, there can be records that will not get processed and a five second response time.
18.4 Installation of the Break Key Profiler
The configuration dataflow, datastores, and options are installed when you install the Data ServicesComponents portion of this product.
After installation, the Data Services datastore DQ_SAP_BP_CONFIG is set to point to the SAP systemthat contains the Customers and Business Partners records from which to pull the data. Settings suchas turning on or off address engines and configuring the DQ_SAP_DS datastore are configured duringthe installation.
However, if you did not install the Data Services Components to the default location, you must makechanges to operate the Break Key Profiler.
The flat files in the dataflow DF_Generate_Statistics_sql assume a root directory based on the defaultlocation of the Data Services Components installation. If you did not install to that default location, you
2012-05-02159
Using the Break Key Profiler

must update those files with the correct root directory information before running theDQ_SAP_Break_Key_Profiler job.
You must update the following flat files:• DQ_SAP_NoiseWords• DQ_SAP_NameAddressCompare• DQ_SAP_LastNameCompare• DQ_SAP_MatchGroupComposite• DQ_SAP_MatchCodeStats• DQ_SAP_MatchCode1• DQ_SAP_MatchCode2• DQ_SAP_MatchCode3• DQ_SAP_MatchCode4• DQ_SAP_MatchCode5• DQ_SAP_MatchCodeCustom• DQ_SAP_MatchCode_PO_BOX
18.4.1 To install the dataflow without this product
You can also install this dataflow to a Data Services configuration without installing the rest of thisproduct, perhaps because you want to install the dataflow to a separate Data Services configuration.1. In the installation materials for the Data Services Components portion of this product, locate the file
DQ_SAP_Break_Key_Profiler_Tool.zip.2. Unzip this file in a location accessible to your Data Services installation.3. Open the Data Services Designer and import the file <Data Services install>\ Data
Quality Mgmt for SAP Solutions\integration\Break_Key_Profiler.atl.
Note:When you import the file, the system prompts for a passphrase.The passphrase is DQMSAP. If youreceive a Warning message, dismiss it as this is the expected behavior.
4. Open the data store tab and configure the DQ_SAP_DS and DQ_SAP_BP_CONFIG datastores.a. Use the DQ_SAP_DS datastore to connect to a MSSQL, Oracle, MySQL, DB2, or Sybase
database to store temporary files used by this Data Services job.b. Use DQ_SAP_BP_Config to connect to the SAP system to pull the data that is to be processed.
You must provide the application server, username, password, client number, and system numberto connect.
5. Open Tools > Substitution Parameter Configurations, and enable the address engines that youhave purchased for this product. Disable any that you have not purchased. The following are thesubstitution values to be modified.• DQ_SAP_EngineUsa• DQ_SAP_EngineCanada• DQ_SAP_EngineGlobalAddress
2012-05-02160
Using the Break Key Profiler

Note:For detailed directions on disabling address engines, see the section Create the batch RDBMSstaging tables.
You can now run the Batch Key Profiler on this Data Services system.
18.5 Run the job
There are two ways to run the job. Choose the method you prefer from these two options:• Start the dataflow through the Data Services Designer as you would any dataflow. Navigate to Jobs
> Batch Jobs, and select DQ_SAP_Break_Key_Profiler. Click the Execute button.• In the Data Services Management Console selectAdministrator >Batch >Batch JobConfiguration
tab, and then select "Execute" for DQ_SAP_Break_Key_Profiler. You can leave all the settings asdefault in the "Execution Options" screen. Click the Execute button.
Note:If you are running the Break Key Profiler on a Sybase database, you must have the Sybase configurationsetting “ddl in tran” set to true.
18.6 Performance
Having the dataflow perform address and name correction, along with generating statistics, is aCPU-intensive task. Because a single CPU would not perform well under these tasks, this dataflow isconfigured under the assumption that your machine has two CPUs.
This section describes suggestions for improving performance when you run the job for the Break KeyProfiler.
18.6.1 Change the Degree of Parallelism setting
If the machine on which you run Data Services has more than two CPUs, you can change the Degreeof Parallelism (DOP) setting to get better performance of the Break Key Profiler job.
Based on the number of CPUs of your machine, set the DOP in this range.
2012-05-02161
Using the Break Key Profiler

Recommended DOP settingCPUs
1 to 22
3 to 44
4 to 66
18.6.1.1 To change the Degree of Parallelism setting
1. Open the batch job DQ_SAP_Break_Key_Profiler and right click on DF_DQ_SAP_Create_Break_Keys.2. Select "Properties", and then change the Degree of Parallelism (DOP) to the recommended setting
for the number of CPUs your machine runs.
Tip:If the database server is also on the same machine, you might improve performance by dropping theDOP one or two levels to leave CPU resources for exclusive database processing
18.6.2 Disable noise word generation
Disabling noise word generation increases performance of the Break Key Profiler job. For informationabout noise words, see the section Noise words.
Related Topics• Noise words
18.6.2.1 To disable noise word generation
1. Open Data Services Designer and navigate to Tolls > Substitution Parameter Configurations.2. In the Substitution Parameter Editor, set to NO the the substitution value
$$DQ_SAP_Profiler_Noise_Words.The value should now be $$DQ_SAP_Profiler_Noise_Words = NO.
You must restart the Real-time job for the new setting to be used.
2012-05-02162
Using the Break Key Profiler

18.7 Interpret the Break Key Profiler results
This batch job is split into several dataflows and scripts. After the job runs, you can find the results inthe final dataflow, DF_Generate_Statistics.
Running the job also sends ten .csv output files to [install_path]\SAP BusinessObjects\DataQuality Mgmt for SAP Solutions\extras\SampleInputFiles.
You can view the first 1000 records from within the dataflow, but you must open the .csv output filesto see the all the records. You may want to do so for any of the match codes (calledDQ_SAP_Match_Code1 through DQ_SAP_Match_Code5) if you want to see all the records. However,the first few hundred records are the most important.
Note:You can graph the data from the match codes by opening the .csv file in a data reporting tool or aspreadsheet program and using its graphing capabilities.
18.7.1 The Break Key Profiler output files
This table provide descriptions for each of the output files.
2012-05-02163
Using the Break Key Profiler

DescriptionFile
The dataflow generates statistics on the words in the organization namefields The output contains a row for each word, along with the number oftimes it appears in the database and the percentage. The results are sortedso that the most common words are first.
When you look through the results, look for words that occur frequently butdo not add value. For example, the abbreviation “Inc.” appears in many or-ganizations’ names but does not provide assistance with the matching pro-cess. You could add this word to the noise word list so that it is removedbefore generating the break keys for candidate selection.
Adding words to the noise word list shrinks the candidate groups and limitsthe number of false positives that this product processes through thedataflows, thereby improving performance.
The dataflow provides some noise words. To add noise words, in the DataServices Designer open the CF_DQ_SAP_REMOVE_ORG_NOISE_WORDScustom function and follow the instructions at the top of the function.
DQ_SAP_NOISE_WORDS
This output file shows the different candidate groups that are generatedbased on using the default break key dataflow or the secondary dataflowthat incorporates first names in the selection. The first record in the outputis the average of all the other records.
The output contrasts the last name selection with the first and last nameselection, and shows the difference in number between the groups and howmany times larger one of the groups is compared to the other.
For any but a very small database, you should use the last name only. Lastname only generates much smaller candidate set groups because first namesare typically common and add many false positives to the matching results.Using first names provides few new matches that would not be found byselecting only on last name.
DQ_SAP_LastName-Compare
This output file shows the differences among three methods for selectingcandidates: address only, address and last name, and last name only. Thesethree results are displayed to help contrast an option in this product that al-lows for address-only candidate selection when address data is available toimprove performance. The first record in the output is the average of all theother records.
Address fields comprise 70 percent of the matching process, so by basingthe candidate selection on addresses (where available) results in highquality matches and improved performance.
DQ_SAP_NameAddress-Complare
DQ_SAP_Match_Code1-5
2012-05-02164
Using the Break Key Profiler

DescriptionFile
In this output, there are six match group tables, numbered 1-5, and also acustom table. This product can generate five different best-practice matchcodes based on the address, along with a custom match code that can bedeveloped for special requirements.
Each of these tables allows you to see the match codes that are generatedfor the associated match code, along with a count and percent of the recordsin the database that have that match code. Use these fields to find the bestmatch code function to be used on your data.
This output shows an overview of all the match codes: the average groupsize, maximum group size, and median group size for the five best practicematch codes and the custom match code. This product uses this output,along with the DQ_SAP_Match_Code1-5 outputs, for picking the best matchcode to implement.
DQ_SAP_Match-CodeStats
This output is a combination of DQ_SAP_Match_Code1-5 and the customtables. The purpose of this combination is to allow you to easily comparethe output.
You can compare the largest match groups by examining the top 10 to 25percent of the data.
DQ_SAP_MatchGroup-Composite
18.7.2 Settings that can be optimized based on the output
The most important aspect in improving response time for data quality processing is to select the bestmatch code for your data and the size of your database. Ideally, you find the match code that givesboth the smallest average break group, but also has the best distribution.
To help find that ideal, use the MATCH_GROUP tables and MATCH_GROUP_STATS to compare theresults and pick the best one. The match codes are numbered 1-5.
The following tips can also help you use the output to optimize break key settings:• You can look at the actual match codes, their size, and percentage of all records in the
MATCH_GROUP1-5 tables. For larger tables, however, you should use the MATCH_GROUP_STATStables. These tables show the average, median, number of match groups, and max fields. You canalso find in the tables the median group size to help you better understand how the data is distributed,because the median group size data is not unduly influenced by the top and bottom few percent,which can skew the average value.
• By comparing the average and median, you can get a better understanding of how the data isarranged. For best performance, strive for results in which the data is spread as evenly as possible
2012-05-02165
Using the Break Key Profiler

over the highest number of match codes. You should limit the number of match codes that aresignificantly larger.
• If processing seems slow or you get incomplete results returned, you should use a different matchcode.
• If there is a problem with your data, such as missing or incomplete data in the fields that the matchcode is using, then cleanse and standardize the data with Data Services. Address information mustbe complete, as the break keys are generated off the postal code and street name data fields.
• Using tighter break keys results in smaller break groups, which increases the possibility of excludinga possible match. Picking the best match code requires you to balance response time versus thehighest probability of finding all matches. As the data set increases in size, the tighter match groupsmust be used to keep performance within required boundaries. The five best practice fields aredesigned to handle the different sized data sets by giving a range of loose to tight match codes.
18.7.3 Best practices match codes (break keys)
This product provides five best practice match codes. All match codes contain the country data field.
Tighter match codes work well for address data. All address data are pre-processed through GlobalAddress Cleanse transform that standardizes the information and places the data into the correct fieldsbefore generating the match codes. This limits misspellings, transposed letters, and invalid addresscomponents, which would require fuzzy matching to find all possible matches.
There is also a custom match code that can be modified to select on extra fields such as email, phonenumbers or other fields if required.
2012-05-02166
Using the Break Key Profiler

DescriptionMatch code
This has loose postcode and loose street name selection. It is created by usingtwo-character ISO country code, plus the first three characters of the postcode,plus the first character of street name.
For the United States and most other countries, the ISO country code and threecharacters of the postcode narrow the location to the sectional center facility. Thefirst character of the street further limits the match code to streets with the samestarting letter. This was the match code previously used by this product. It gener-ates the most possible matches that will have to be processed through thematching process, and as a result is the slowest at processing, on average.
Match Code 1
This has loose postcode and tight street name selection. It is created by usingthe two-character ISO country code, plus the first three characters of postcode,plus the first three characters of street name. This match code is a modificationof Match Code 1, with a tighter selection of the street field by using three charactersinstead of only one. This match code gives fast performance but still selects ad-dresses in a larger postal area.
Match Code 2
This has tight postcode and loose street name selection. It is created by usingthe two-character ISO country code, plus the first five characters of the postcode,plus the first character of street name.
Using the first five characters of the postcode narrows the location to the area ofthe city or town for the United States, with similar accuracy for other countries. Ituses the first character for the street, which results in small candidate groups andfast performance, but still allows for variance in the street name. This match codegives similar performance to Match Code 2.
Match Code 3
This has tight postcode and tight street name selection. It is created by using thetwo-character ISO country code, plus the first five characters of the postcode,plus the first 3 characters of street name.
It has narrow postcode selection but increases the street tightness by using thefirst three characters of that field. In most data sets, this generates the smallestnumber of records to be sent to the matching process. This should result in thefastest response time for large databases, especially if the lower numbered matchcodes return too many false positives that have to be processed.
Match Code 4
Match Code 5
2012-05-02167
Using the Break Key Profiler

DescriptionMatch code
This has tight region, tight city, and tight street matching. It is created by usingthe two-character ISO country code, plus the two-character region code, plus thefirst ten characters of city, plus the first three characters of the street name.
Postcodes are only loosely tied to cities and do not truly represent geographicalregions. They are artificial constructs. This match code uses region and city insteadof postcode to offer a different logical way to group the addresses.
This match code uses the three characters of the street to partition the largercities. The city field is standardized so that matching on larger sets of data canhelp narrow the records selected to be matched against, but does not removeany records that have a chance to match. This match code should result inslightly slow response time compared to Match Code 4, but much faster thanMatch Code 2 or Match Code 3.
This is a placeholder. It is to be created for special cases in which the defaultmatch code based on the best practice address data does not result in the candi-date groups that is needed.
Match Code Cus-tom
18.8 Creating custom match codes (break keys)
If you have special search cases (such as searches on phone number, email address, or on an extrafield that is not address information ), you may prefer to create a custom match code rather than usethe provided best practices match codes.
The best method to create a custom match code is by updating the provided custom functionCF_DQ_SAP_Calculate_Match_Code_Custom. This function already has most of the common fieldsthat can be used for creating a match code, along with a few common ways of combining them intomatch codes. You can modify the function and test it within the DQ_SAP_Break_Key_Profiler job.
If you have to modify the input to the CF_DQ_SAP_Calculate_Match_Code_Custom custom function,you must modify the transform Build_Address_Match_Codes in DF_DQ_SAP_Create_Break_Keys whentesting and in the same transform in DF_Realtime_DQ_SAP_Create_Break_Key for production.
After you have finished testing the custom function, you must set the custom function to be used in theDF_Realtime_DQ_SAP_Create_Break_Key dataflow.
18.8.1 To change the code used for the match codes (break keys)
2012-05-02168
Using the Break Key Profiler

1. Open Data Services Designer and navigate to Tools > Substitution Parameter Configurations.2. In the Substitution Parameter Editor, set the substitution value $$DQ_SAP_Match_Function to
MatchCodeCustom.
You must restart the Real-time job for the new match code (break key) to be used.
For more information on changing break keys, see the section Configuring the break key settings.
Related Topics• Configuring the break key settings
2012-05-02169
Using the Break Key Profiler

2012-05-02170
Using the Break Key Profiler

Index/FLDQ/47U6X 62/FLDQ/AD_DISPL_BATCH_MATCH
143/FLDQ/AD_ERRCUST 155/FLDQ/AD_FORMMAP 55/FLDQ/AD_FUNCS 125/FLDQ/AD_MAP_REGIONS 147/FLDQ/AD_MKTGDUP 130/FLDQ/AD_QTR_OBJ 92/FLDQ/AD_REGIONS 95, 133/FLDQ/AD_REPT_DISP_QTRERRORLOG
52/FLDQ/AD_REPT_DISPLAY_ERRLOG
155/FLDQ/AD_REPT_LOAD_COUNTRIES
47/FLDQ/AD_REPT_UPDATE_PEND_RECS
129, 142/FLDQ/AD_RVW_CUS 97/FLDQ/AD_RVW_LBL 97/FLDQ/AD_SUGFLD 144/FLDQ/AD_SUGLBL 144/FLDQ/AD_SUGLIST 98/FLDQ/AD_VAL_CNT 82/FLDQ/BSP_PV 62/FLDQ/BSP_PV_CRM_5 62/FLDQ/DQXI_PV 57/FLDQ/DQXI_PV/DQXI_PV 57/FLDQ/ERRLOG 147/FLDQ/EXT_SEARCH 62/FLDQ/MDG_SDQ_MSG 62/FLDQ/RSADRINI 52, 53, 115/FLDQ/RSADRQU2 50/FLDQ/RSMTCCODE 52/FLDQ/RSPRODVER 154/FLDQ/RSREGIONRPT 147/FLDQ/V_AD_RGNS 149/FLDQ/VALIDATE_SUBSTRING_OPT
126
A
activate duplicate check index pools48
AD_REPT_UPDATE_PEND_RECSprogram 129
address cleanse enginedisable using global variables 139enable or disable 139
address directories 28
address reviewerfields 85
atl fileserror importing 140
B
BAdIsinstallation 41installation requirements 21
batch matchdefined 113options 53report 143
break keychange to another provided 107custom for MDG 125
Break Key Profilerinstall 159noise words 158
disable 162understanding 157
break keys 105best practices 166change default calculation 110configuring 108custom 168record created without 142
Business Configuration Sets 62activate BSP 55WebClients 46
C
check statusD record 50
CRM IC WebClient or CRM WebClientinstall 54
customer address reviewer labels 97
D
D records 50data encryption 16Data Services
install 27jobs
reference 133sample input file 142
logging 155
Data Services (continued)machine requirements 20security 27, 69Web Services 38, 155
Data Services Componentserror executing
DQCreateStageTables 141error importing .atl 140install 28jobs 34
databaseRDBMS staging tables 29
Delivery Point Validation 146RFC Server 102
DQCreateStageTables 141duplicate check 48
activate/deactivate 94hit list 86overview 105SAP Master Data Governance
(MDG) 119suppressing 84troubleshooting 141using 111
E
encryption 16, 27, 69Enhancement Set 56error messages
customizing 155error tolerant search
activate/deactivate 94hit list 86overview 105suppressing 84troubleshooting 141using 116
External List Management 127Marketing Attributes field 129
F
flrfcsrv.xml 101
G
geocoding 77error 155RFC Server 78, 102
2012-05-02171

global address enginesuggestion lists 144
H
handshake with RFC Server 73, 82hit list 116
I
Implementation Management Guide(IMG) 81link to SAP Reference IMG 43
index pools 48information resources 11Initial Match Code (Index) Setup 52
/FLDQ/RSADRINI 53installation
BAdIs 41Break Key Profiler 159checklist 22Data Services 27Data Services Components 28overview 19RFC Server 69scenarios 24WebClient 54
ISO country codesmaintain 82to load 47
J
jobsData Services 133
L
load supported country codes 47logging
Data Services 155security 15
M
match codecustom for MDG 125
match codes 105best practices 166change default calculation 110change to another provided 107custom 168record created without 142
N
network setupsecurity 16
O
operating parameters 88OSS Notes
requirements 20requirements for WebClient 54
P
PARALLEL_PROCESS_ GROUPconfigure for ELM 127configure for multiple batch RFC
Servers 113postal validation
activate SAP postal code checkbefore 84
activate/deactivate 94batch cleansing 104interactive cleansing 103suppressing 84troubleshooting 141
product component version report 154
Q
quarterly adjustment reports 48/FLDQ/RSADRQU2 50batch cleansing 104custom error 52, 92
R
RDBMS staging tables 29error creating 141
region mappings 95
RFC Serverconfiguring 101downtime 142geocoding 78handshake 73install 69manifest information 152number of instances 65removing Windows service 151requirements 21Role Template 39security 14starting 72stopping 73
RFC UserSAP authorizations 39
S
SAP authorizations 39SAP Master Data Governance (MDG)
duplicate check 119search fields 95security
Data Services 27logging 15network setup 16
session security 27, 69suggestion list
configuration 144labels 98
system requirements 19
T
transactionSMGW 73
transaction codesexception table 83
transaction SMGW 155TSAD10 table 95
W
Web ServicesData Services 38, 155
WebClientinstall for 54
2012-05-02172
Index