Safety Requirements for Work On or Adjacent to the Distribution ... · o Excavations & Underground...
52
Safety Requirements for Work On or Adjacent to the Distribution & Transmission Network HSE-12-011 Nov 2016
Transcript of Safety Requirements for Work On or Adjacent to the Distribution ... · o Excavations & Underground...

0
Safety Requirements for Work On or
Adjacent to the Distribution &
Transmission Network HSE-12-011
Nov 2016
1
Foreword
This booklet demonstrates SP Energy Networks commitment to protect your health and safety at work.
The Health and Safety at Work Act 1974, indicates ‘It shall be the duty of every employer to ensure, as far as is practicable, the health, safety and welfare at work of all their employees’.
Within the UK there are a number of regulations that support the Health and Safety at Work Act 1974, these are compulsory and apply in all situations to which the original Act applies. The two key regulations in this case are The Electricity at Work Regulations 1989 and the Electricity Safety Quality and Continuity Regulations 2002.
Please Note :- This booklet is not a substitute for any Regulations, Codes of Practice, or Health and Safety Policies.
You play an important role When it comes to establishing and maintaining a safe working environment.
By law, working safely is one of your responsibilities. The Health and Safety at Work Act 1974, indicates ‘It shall be
the duty of every employee while at work to take reasonable care
of the health and safety of themselves and other persons who may
be affected by their acts or omissions at work’
SP Energy Networks, its contractors and your co-
workers are counting on you to: Follow all safety rules that relate to your duties and
responsibilities.
Work within the limits of the Authorisation`s issued
Minimise the risk of injury to yourself and others.
Minimise the risk of damage to property.
Use protective clothing and safety equipment.
Co-operate with your employer and any other person to ensure
health and safety obligations are met.

2
Index
Forward
General Information
Authorisation Categories
Demarcation
o Substations
o Tower Working
o Excavations
o Wood Pole
Signage
o SP Energy Networks
o Safety Signs & Signals
o Signing and Guarding
Isolation
Earthing - Primary/Drain/Fixed Drain/Field Equipment
Safety Documents
Safety Distances
Responsibilities
Safety Rule Structure
Risk Assessment
Trade Specific
o Substations
o Towers & Wood Poles
Lightning Risk Warning
o Tree Cutting
o Excavations & Underground Cable
o HV Cable Identification
Tools and Test Equipment
Interview Preparation Guide
Emergency Arrangements
Safety Checklist
For “Further Testing Procedures” Refer to Metered &
Unmetered Supplies Booklet HSE-12-005
6
14
16
19
21
22
23
26
27
27
30
34
36
37
46
47
This document shall be reviewed as dictated by business change or at
a period no longer than 5 years from date of issue
5
3

3
General Information
What is Insulation?
Insulation can be formed from a
range of material’s such as:
Paper, plastic, rubber, neoprene shrouding,
porcelain, glass, insulating Oil or SF6 gas
(sulphur hexafluoride) and vacuum. These
materials and substances form a barrier
between the live conductors and
earthed metalwork to ensure
separation is maintained. They
can also protect operatives
from making contact with live
components which could result in electric shock fire or
explosion.
What are Protection Devices?
Protection Devices can be - Circuit
Breakers, Auto-reclosers, Smart Links and
Fuses both LV and HV. When any of
these devices are tripped or operated
they create a sufficient gap between
the Live source and the part of the
system being protected.
What is Restriction of Access?
Demarcation within Scottish Power Substation
(PSSI 6) is one method of restricting access
and controlling the safe work area (see page 6
and 7). Defining the limits of a work area with
Danger Live apparatus notices is another method
of restricting access.

4
Establishing a physical barrier between live
components and the safe area of work will ensure
safe performance of the work. Clear and
unambiguous communication is crucial to establishing
the above. Access can also be restricted by use of road
barriers around excavations, securing or locking off
cabinets or specific switches, use of castell key
arrangements, anti vandal and anti climbing devices.
What is an Electrical Short Circuit?
An Electrical Short Circuit can be caused by two
electrical Live conductors making contact with
each other, or a Live conductor making contact
with earthed metalwork resulting in a release of
fault energy, flash over or explosion.
What is a Competent Person?
A Competent Person is a person with the relevant
training, knowledge & experience to carry out their
duties safely who are then issued with the
appropriate Authorisation levels required by the
company policies and procedures. Competency is
maintained by attending and successful completing
refresher training and the subsequent re-issue of the
appropriate Authorisations.
When Scottish Power deems an individual to be
Competent they will issue a specific level of
Authorisation with the appropriate limitations or
exclusion applied at the required voltage levels.
ScottishPower Safety Rules
& Procedures

5
AUTHORISATION CATEGORIES
Listed here is a brief description of some of the authorisation categories required for the more
common and routine types of operational activity undertaken on and around the SP Network. Authorisation categories may be applied to one, or more, of five voltage levels (LV; 11kV; 33kV;
132kV; 275/400kV) and may also be adapted for operational purposes by applying Limitations or
Exclusions to the particular category at the particular voltage level. Refer to MSP 5.1 (OPSAF-13-001) for further information on Authorisation Procedures including all available
Authorisation C ategories, Limitations and Exclusions.
Working on or adjacent to the System
WI-1 Allows the holder to work on Isolated Plant and Apparatus including work adjacent to Live Apparatus
WI-2 Allows the holder to do Non-electrical work adjacent to Live Apparatus
WI-3 Allows the holder to work on Isolated Protection/Telecoms/Metering equipment
WI-PS Allows the holder to work under Personal Supervision only to the limit of accompanying Persons "WI"
authorisation (primarily for the purpose of training)
WL-1 Allows the holder to work on, or near to, Live Apparatus as specified on the accompanying Live Work
Certificate
WL-2 Allows the holder to work as the Accompanying Person for work on, or near to, Live Apparatus
WL-PS Allows the holder to work under Personal Supervision only to the limit of accompanying Persons "WL"
authorisation for training purposes
Substation Access
AME-SS or EN-1/2 Allows the holder independent entry to Substations with exposed Live Bus Bars and is the equivalent to
EN-1 and WI-2
Standby
SB-1 Allows the holder to Standby Personnel & Work/Access Equipment in accordance with PSSI-6 & 8
SB-2 Allows the holder to Standby Personnel & Work at ground level excluding long objects
Drain Earth Application
DE-1 Allows the holder to apply and remove Drain Earth following testing
DE-PS Allows the holder under Personal Supervision to apply Drain Earth (Training Purposes)
Switching
OP-1 Switching (Without Limitation or Exclusion within Voltage Level)
OP-2 Switching (With Limitations)
OP-3 Insert & Remove LV Cut-out fuses
Safety Documents Issue & Receive
SI-1 Allows the holder, a Senior Authorised Person (SAP), to prepare, issue, receive, clear and cancel all Safety
Documents, without Limitation or Exclusion within Voltage Level
SI-2 Allows the holder, a Senior Authorised Person (SAP), to prepare, issue and cancel, PFW, SFT, LWC
SI-3 Allows the holder, a Senior Authorised Person (SAP), to prepare, issue and cancel PFW, LWC
SR-3 Allows the holder receive and clear PFW, LWC
SR-4 Allows the holder to receive and clear LWC
PFW = Permit for Work - LWC = Limited Work Certificate - SFT = Sanction for Test

6
Demarcation
Open Bus Bar Substations
Equipment used to designate a safe work area and access
route within a Substation.
Safe Working Area - Red Cones (up to
7m apart), two orange ropes (10mm)
used on each side of the yellow angled
cross arm and Green Cones (up to 6m
apart), define the safe working area
within the roped perimeter. Only
Authorised work may be conducted in
these areas, with the approval of the
safety document holder.
The higher side of the cross arm defines
the safe side.
Cones should be weighted with loose gravel
for stability where appropriate.
Access Route to Safe Working Area -
Red Cones (up to 10m apart), used to
define the access route, only one
orange rope (10mm) on the high side
of the yellow cross arm. .
Further procedures/information are
contained in the ScottishPower Safety
Rule, PSSI 6 Access Route

7
Defined Safe Work Area Various markers and signs define which areas are safe to work in
and which are not. Here are some items to look for:
Two Orange ropes on
Yellow angled crossarms,
mounted on Red Cones This along with the Green
Cones designates a safe
work area and is established
by the SAP prior to the
issue of the Permit for
Work. Authorised work may
be conducted in these
areas-only with the approval
of the Safety Document
holder.
Green cones These are placed
within the safe
work area. They
indicate that the
demarcated area
is safe.
Danger Notices These are wrapped
around or fixed to
adjacent Live
structures, which are
positioned outside the
safe work areas, to
warn you it is unsafe.
8
Transmission OHL`s
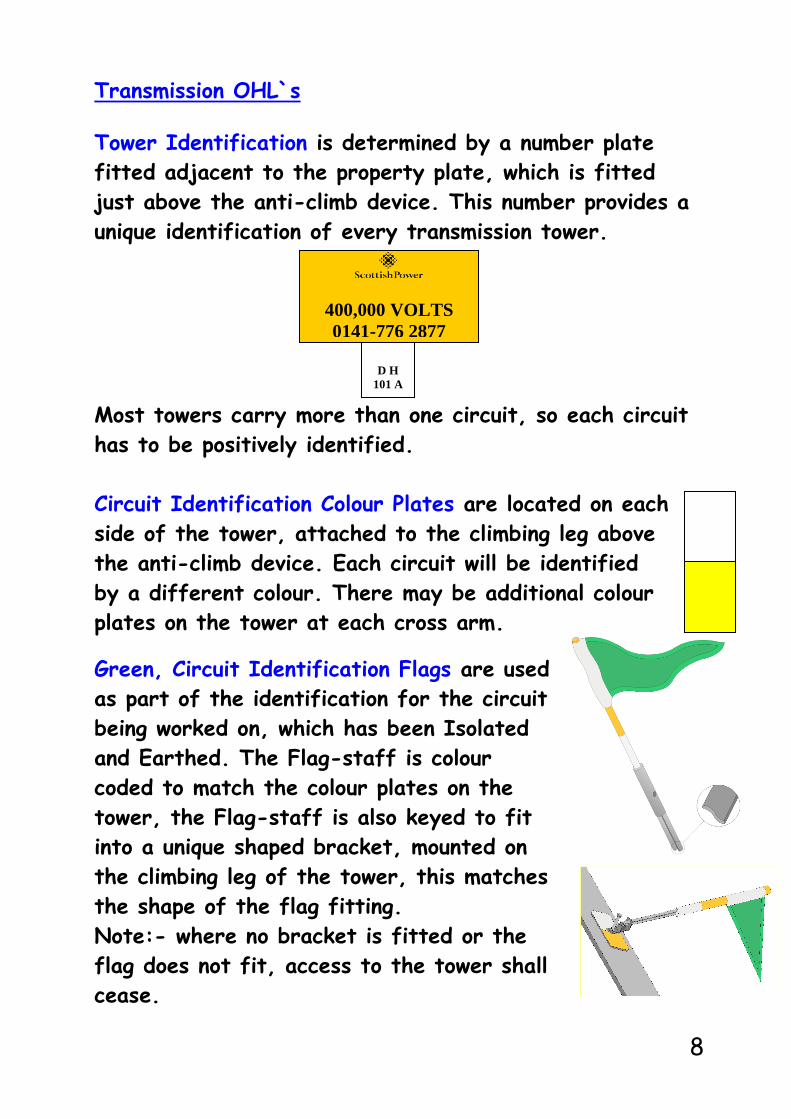
Tower Identification is determined by a number plate
fitted adjacent to the property plate, which is fitted
just above the anti-climb device. This number provides a
unique identification of every transmission tower.
Most towers carry more than one circuit, so each circuit
has to be positively identified.
Circuit Identification Colour Plates are located on each
side of the tower, attached to the climbing leg above
the anti-climb device. Each circuit will be identified
by a different colour. There may be additional colour
plates on the tower at each cross arm.
Green, Circuit Identification Flags are used
as part of the identification for the circuit
being worked on, which has been Isolated
and Earthed. The Flag-staff is colour
coded to match the colour plates on the
tower, the Flag-staff is also keyed to fit
into a unique shaped bracket, mounted on
the climbing leg of the tower, this matches
the shape of the flag fitting.
Note:- where no bracket is fitted or the
flag does not fit, access to the tower shall
cease.
D H
101 A
400,000 VOLTS
0141-776 2877
9
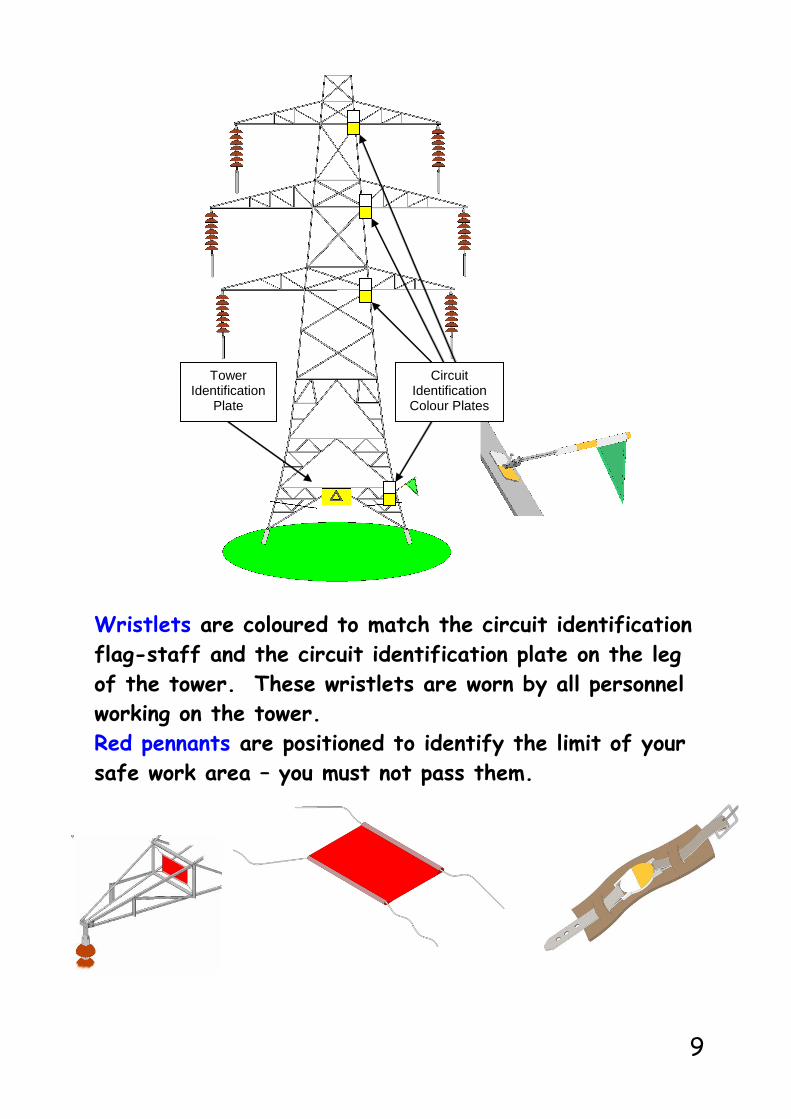
Wristlets are coloured to match the circuit identification
flag-staff and the circuit identification plate on the leg
of the tower. These wristlets are worn by all personnel
working on the tower.
Red pennants are positioned to identify the limit of your
safe work area – you must not pass them.
Live
Tower Identification
Plate
Circuit Identification Colour Plates

10
The Red Pennants are installed within the tower on the
Live circuit(s) at the junction of the cross-arm and body
of the tower (example of a double circuit tower)
Within PSSI 4 there is instruction on the demarcation
arrangement and controls to be established prior to work
commencing, it also provides a range of earthing schemes
(contained in Attachment “A” Section 5) associated with
certain types of work for example:
Example :- Scheme 1B Painting and Inspection of Towers
This describes the requirements for application of Drain
Earths to carry out this type of work.
“Drain earths shall be applied not more than 10 span apart and will be positioned each side of the point of work. Access will be within the safety distance but no closer than 1 metre.”

11
Exclusion, Danger or Hazard Zone
Establishing and controlling an exclusion zone around the
base of any structure being worked on, will prevent staff
or third parties from injury due to falling objects, this is
also considered demarcation. The demarcated area shall
be physically controlled (minimum of continuous rope,
chain or tape).
All items being moved to and from the work position on
the structure above the exclusion zone including lifting
equipment shall be securely attached prior to movement.
No entry to be permitted into the demarcated area
without permission and verbal confirmation from the
nominated person that all works and movement above
have stopped
Road Works
Installation and maintenance of
the road and street works
barrier including signage are a
crucial part of the demarcation
arrangements to protect yourself
12
and members of the public while working on the public
footpath.
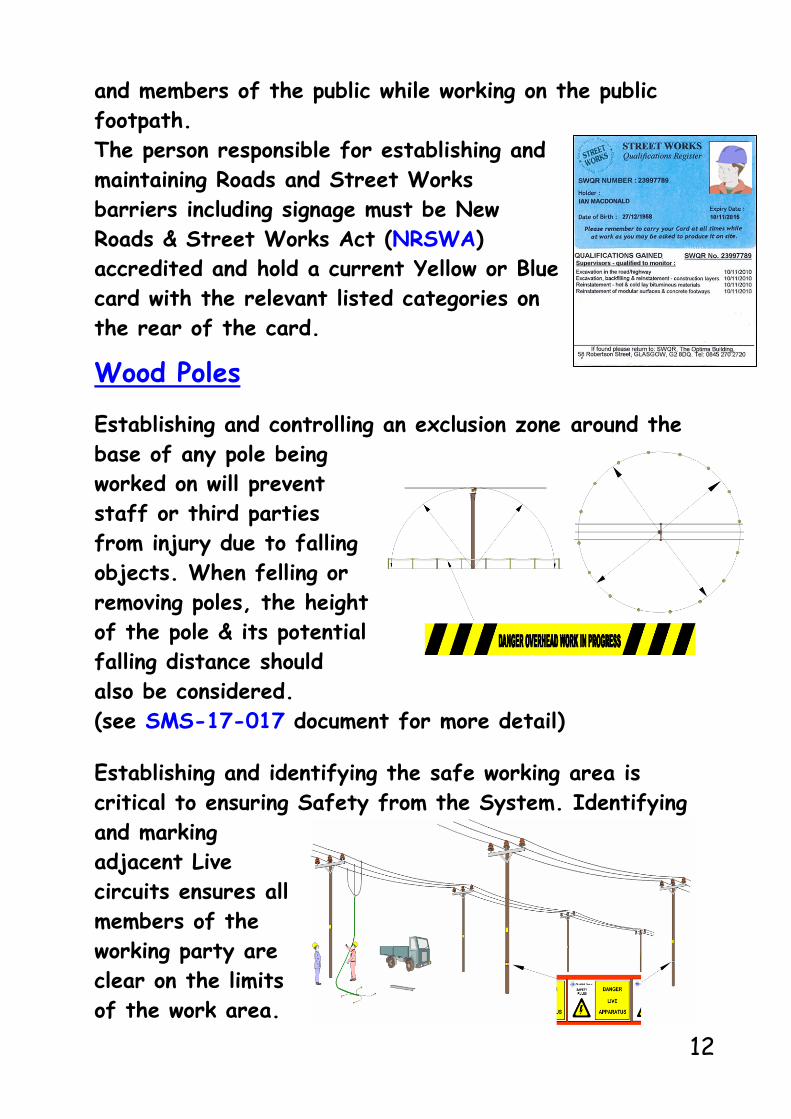
The person responsible for establishing and
maintaining Roads and Street Works
barriers including signage must be New
Roads & Street Works Act (NRSWA)
accredited and hold a current Yellow or Blue
card with the relevant listed categories on
the rear of the card.
Wood Poles
Establishing and controlling an exclusion zone around the
base of any pole being
worked on will prevent
staff or third parties
from injury due to falling
objects. When felling or
removing poles, the height
of the pole & its potential
falling distance should
also be considered.
(see SMS-17-017 document for more detail)
Establishing and identifying the safe working area is
critical to ensuring Safety from the System. Identifying
and marking
adjacent Live
circuits ensures all
members of the
working party are
clear on the limits
of the work area.

13
Accessing poles, which have a potential to be affected
by excavations.
Considered in the following order of preference:
• Where reasonably practicable, do not access
any pole with an open excavation within 1.5m
from the base of the structure if that
excavation depth is one third or more of the
planting depth.
• Where reasonably practicable, plan work to
enable all pole access to be completed prior to
creating any excavations in close proximity to
the base of the pole.
• Where reasonably practicable, complete excavations,
reinstate and compact before pole is climbed. Further
information can be found in current version of OHL-17-
003.
When excavating a pole hole the table below gives a few
examples of the depth the pole should be planted, more
information can be found in current version of OHL-15-001.
Construction Pole Length
(Metres)
Planting Depth
(Metres)
L30/ABC Up to 10.5 inc
11.0 and above
1.5
1.8
L10/L15 Up to 10.5 inc
11.0 to 14.0 inc
15.0 and above
1.8
2.1
2.4 All wood poles must be tested prior to climbing, excavate
300mm of soil at the base of the pole and test pole below
and above ground level at various stages, this will establish
if the pole is showing signs of decay, which could result in
the pole breaking when additional load is applied.
See the current version of OHL-17-001 “Inspection &
Testing Wood Poles” for further information.

14
General Safety Signage
Look out for and always obey the safety signs. They are
there to protect you and your colleagues. All signs like
the ones below comply with the Safety Signs and Signals
Regulations.
Prohibition (red and white)
They mean 'Do not Do'.
Safe condition (green and
white)
They tell you the safe way to go
in the event of an emergency or
provide first aid information.
Hazard / Warning (yellow and black)
They warn you that a danger or
hazard exists. The danger tape is
used to designate a Safety Exclusion
Zone for example, when removing or
replacing poles.
Mandatory (blue and white)
They instruct you to observe the
safety precautions shown.
DANGER OPEN
EXCAVATION
15
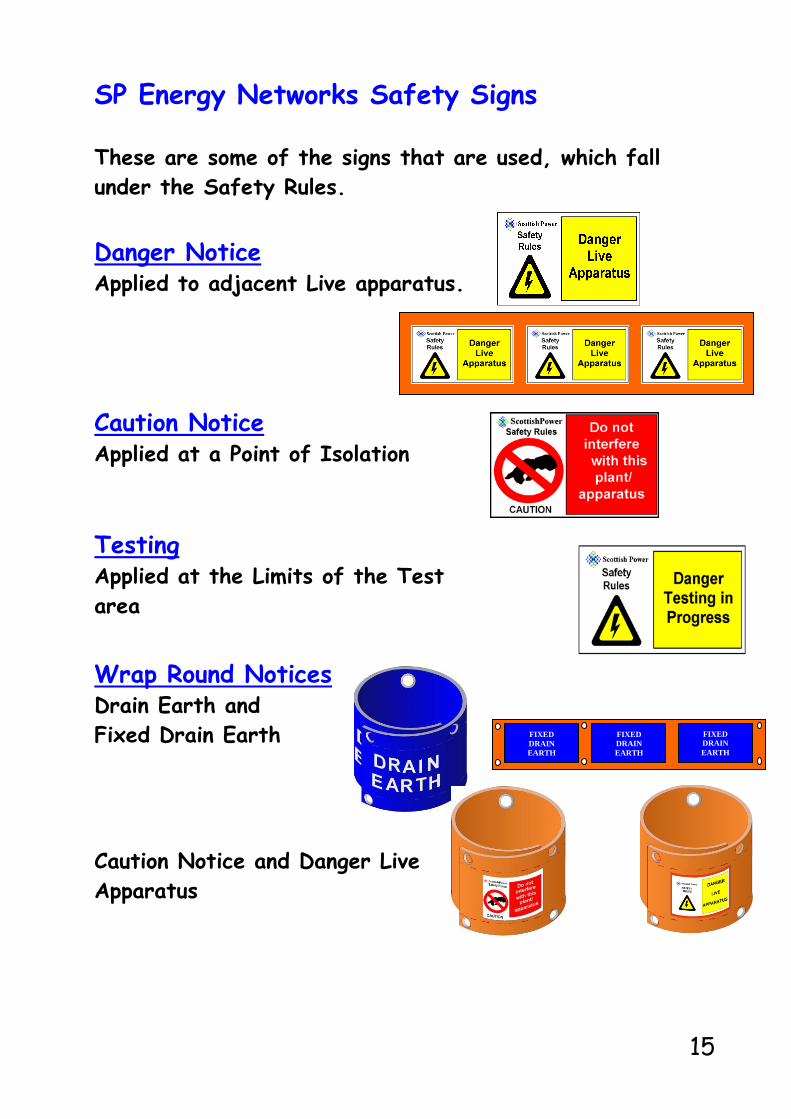
SP Energy Networks Safety Signs
These are some of the signs that are used, which fall
under the Safety Rules.
Danger Notice Applied to adjacent Live apparatus.
Caution Notice Applied at a Point of Isolation
Testing Applied at the Limits of the Test
area
Wrap Round Notices
Drain Earth and
Fixed Drain Earth
Caution Notice and Danger Live
Apparatus
Caution
FIXED
DRAIN
EARTH
FIXED
DRAIN
EARTH
FIXED
DRAIN
EARTH

16
Roads and Street Works Signage
All excavations on the public highway must comply with
the New Roads and Street Works Act (NRSWA).
Isolation and Earthing
What is Isolation?
Definition (D-16) in Red Tab “D” within the
Safety Rules “Disconnected from associated plant or apparatus by means
of an isolating device in the isolating position and or adequate physical separation or sufficient gap”

17
Isolation Devices
Circuit Open & Isolated
Work Isolated
Safety Locks & Caution Notices
applied @ Point of Isolation
Primary Earths Applied
(Prove Not Live where applicable)
SAP Prepares Safety Document
Establish or Prepare
Demarcation Arrangements
SAP Communicates and Issues Safety
Document to Authorised Person
(Demarcation arrangements communicated
and Drain Earth arrangements agreed)
Authorised Person communicates
requirements of the Safety Document to
Working Party including Demarcation and
Drain Earth arrangements were applicable
Demarcation and Drain Earth
Arrangements are Established and
Work Commences
OHL S/S
Work Commences Within Demarcated
Area.
18
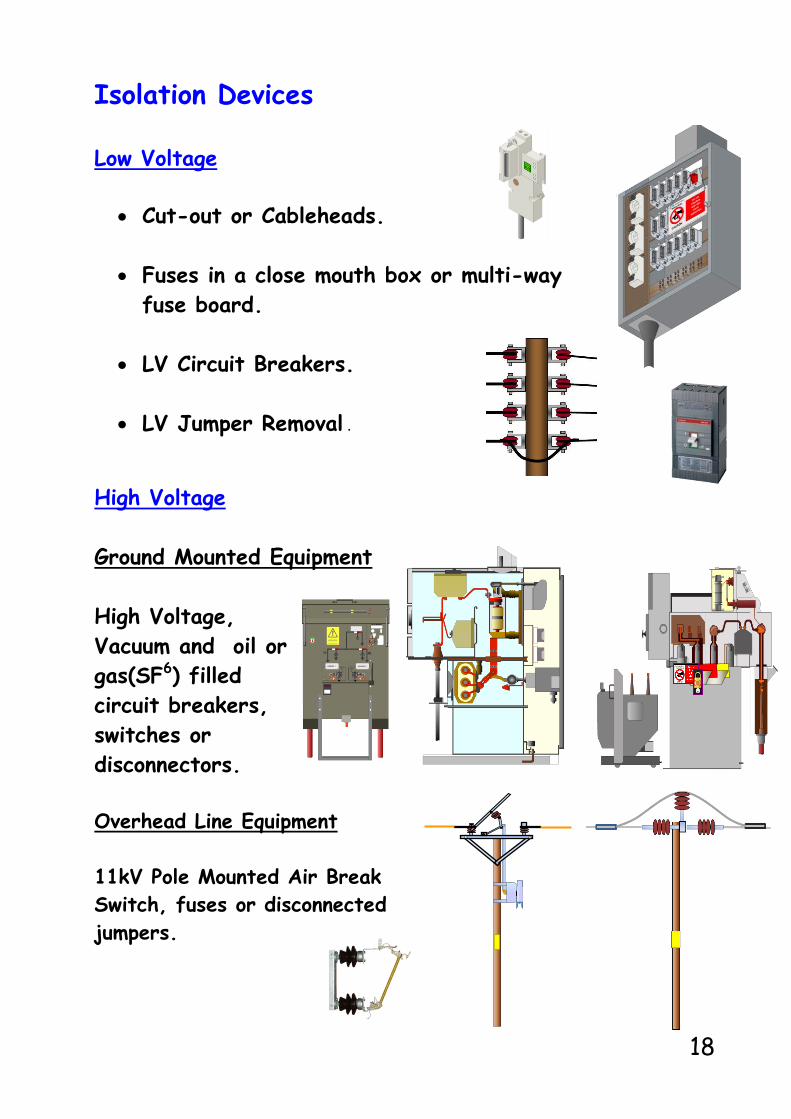
Isolation Devices Low Voltage
Cut-out or Cableheads.
Fuses in a close mouth box or multi-way
fuse board.
LV Circuit Breakers.
LV Jumper Removal .
High Voltage
Ground Mounted Equipment
High Voltage,
Vacuum and oil or
gas(SF6) filled
circuit breakers,
switches or
disconnectors.
Overhead Line Equipment
11kV Pole Mounted Air Break
Switch, fuses or disconnected
jumpers.

19
Earthing
Primary Earths - The purpose of a Primary Earth is to
protect against a failure of a Point of Isolation. A
Primary Earth can be either portable or mechanical via
a switch or circuit breaker, with the latter being the
preferred method. (portables are either Clear or Orange in
colour with 120mm2 shorting conductor and 50mm2 down
leads). Transmission Portable Primary Earths have a larger
conductor size, 150mm2
Drain Earths - The purpose of a Drain Earth is to protect
against Induced Voltages from adjacent Live Circuits,
Impressed Voltages for example lightning and or Inadvertent
Backfeeds from generation or the network (Blue in colour
with 50mm2 conductors).
A Fixed Drain Earth is applied under Permit
conditions specifically to prevent inadvertent
removal by other working parties.
Field Equipment Earth - A Field Equipment Earth
is applied to mobile plant or constructed access
equipment to protect against Induced or Impressed
voltages and can be applied by an Authorised Person
identified by the SAP.(Clear insulation with 150mm2
conductor)
When applying Portable Primary or Drain Earths the Earth Rod
or Cluster shall require to be driven into the ground a minimum
of 500mm.
During the application of Primary, Drain or Field Equipment
Earths it is imperative that the Earth End Clamp is applied
first i.e. earth mat, cluster or steelwork.
Shorts or Bonds - For Low Voltage (LV) overhead
line conductors which have been isolated for work,
LV Shorts or Bonds shall be applied to conductors
either side of the point of work.
Always inspect earthing and shorting equipment
before use, checking the PVC sheathing for cuts or
damage, broken strands on the cables, all clamps are in
FIXED
DRAIN
EARTH
FIXED
DRAIN
EARTH
FIXED
DRAIN
EARTH
20
working order and no worn or missing parts. Check
for a current inspection label.
When applying distribution Portable Primary Earths
to the Isolated conductors, you must test the
tester, test the circuit and test the tester prior to applying
the earth to the conductors.
When applying tower earths you must maintain a minimum
distance from the unearthed conductor of 1.5m and the
general sequence for application is Top, Middle, Bottom and
the reverse for removal.
At the tower peak the minimum distance to be maintained
from an unearthed, earth wire is 1.0m
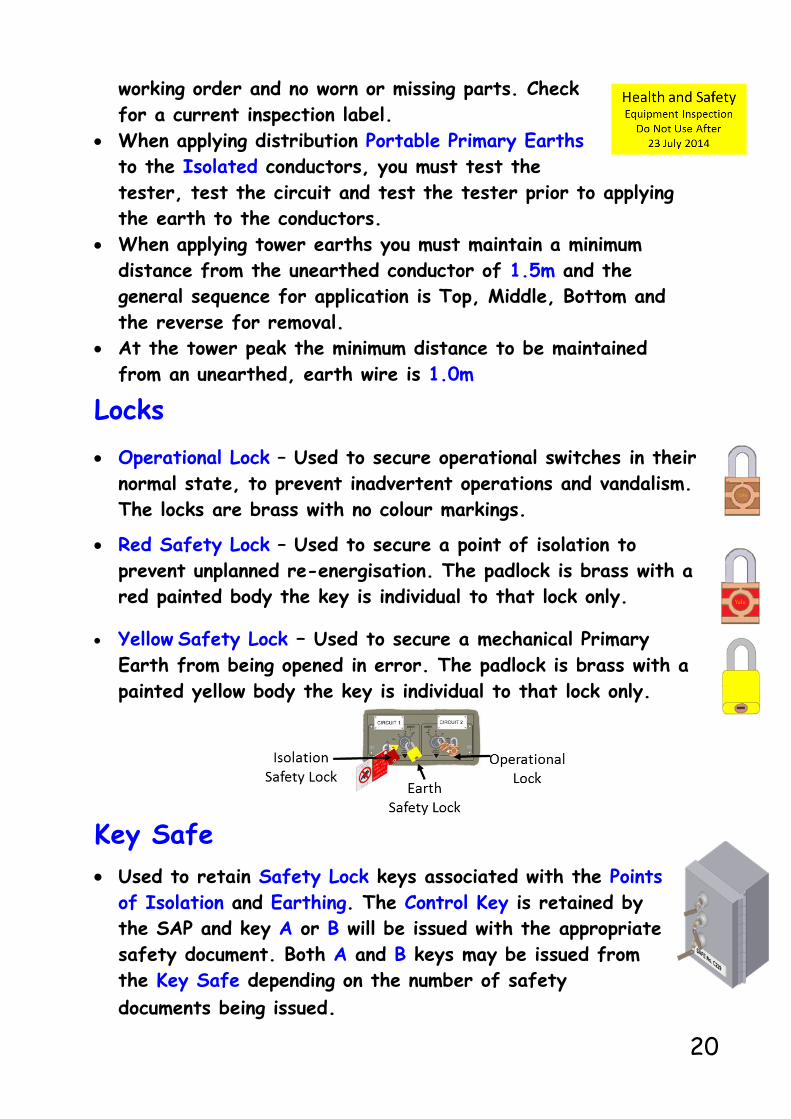
Locks
Operational Lock – Used to secure operational switches in their
normal state, to prevent inadvertent operations and vandalism.
The locks are brass with no colour markings.
Red Safety Lock – Used to secure a point of isolation to
prevent unplanned re-energisation. The padlock is brass with a
red painted body the key is individual to that lock only.
Yellow Safety Lock – Used to secure a mechanical Primary
Earth from being opened in error. The padlock is brass with a
painted yellow body the key is individual to that lock only.
Key Safe
Used to retain Safety Lock keys associated with the Points
of Isolation and Earthing. The Control Key is retained by
the SAP and key A or B will be issued with the appropriate
safety document. Both A and B keys may be issued from
the Key Safe depending on the number of safety
documents being issued.

21
Safety Documents
Permit for Work – Is issued where work is to be
completed Inside the Minimum safety distance (Safety
Rule A2) and the circuit has been Isolated and Primary
Earths applied.
Know the Safety Document and what you would
expect to be recorded within each section.(Guidance
in OPSAF-11-026 & 031)
Ensure you comply with any Demarcation
arrangements that have been established (sect 2.1
PFW) or you have been asked to establish (sect 2.2
PFW).
OPSAF Updates:
Permits for Work can now be prepared in advance of switching
being completed, providing the SAP confirms on the day of issue
the isolation and earthing matches the precautions taken to ensure
Safety from the System in Section 2.1 of the Permit for Work
A Safety document can now have unlimited minor changes
prior to it being issued, as long as the document
remains legible & unambiguous, both parties SAP &
Recipient shall agree and initial all the changes before
signing / accepting the safety document.
The document look is also changing as per drawings.
Limited Work Certificate – Where work is to be
completed Outside the safety distance. e.g. Where
limiting the work or the work area is the means of
achieving Safety from the System or where oral
instructions are not considered sufficient.
Know the limits of the work you are carrying out
and limits of the work area. Ensure all working party are
correctly Authorised and fully briefed on the details
contained in the Safety Document.

22
Sanction For Test – This document is produced by
the Senior Authorised Person (SAP) when testing
and or confirmation of identification is required on
Isolated and Earth Plant or Apparatus, for example
cable identification and spiking.
Under the Sanction for Test
the Primary Earths can be
removed to allow test
equipment and test voltages to
be applied to the Plant or
Apparatus.
Selected Persons Report – A report compiled by a
person with specific technical knowledge and
experience (see Red Tab C). This report can take
the form of a method statement, providing a clear
outline of the activity and the controls which are
to be applied, for instance a crane operations
Safety Distances
Identifying the voltage of the plant or apparatus you
are going to be working on or adjacent to, is crucial
to maintaining your safety, no matter what type of
equipment you are working on, Substations, Overhead
or Underground Equipment:-
Know your safety distance for the various
voltages.
Always maintain a minimum of 300mm from the
base of any insulator carrying Live conductors.
It should be noted that within PSSI 8 it indicates:- Before a vehicle can be taken into any live open bus bar
compound the SAP shall be contacted for permission and
guidance on entering the HV compound.
Vehicles above 2.3 metres shall have their movement
Personally Supervised by an Authorised Person.

23
Cranes, mobile access equipment or their loads above 2
metres shall have their route and final position agreed by the
SAP and shall be Personally Supervised by an Authorised
Person.
At no time shall the Safety Distances be infringed, but in
addition, before any part of a crane, it’s load or mobile access
equipment infringe the following
distances to exposed Live conductors,
they shall be electrically bonded to
earth.(Field Equipment Earths)
Responsibilities As an Authorised Person (Safety Document Holder)
before you allow work to commence: Confirm your working party are holding the correct
Authorisation Levels and Limitations on their certificate.
Identify the level of supervision required for your working
party
Immediate Supervision, Continuously
Available at the work location, contactable
& Sight & Sound where reasonably
practicable, the responsibility for
determining the means of supervision will be
decided by the SAP and the person in
charge of the working party e.g. Document
holder.
Personal Supervision Continually Observing
the individual with the ability to Directly Intervene in the
activity, where an issue is identified.
24
Where there is no Safety Document in force the lead person
in the working party will agree who is in charge of ensuring
general safety.
A Site Specific Risk Assessment shall be completed prior to
commencement of work and clearly communicated to the
working party. The Risk Assessment shall be reviewed and
regularly updated, with any changes in site conditions and the
associated controls. A Risk Assessment will be completed
regardless of any Safety Document requirements.
Make sure that you are familiar with the work to be done and
the equipment to be utilised, including winches, cranes,
ladders, mobile elevated work platforms (MEWP`s) or other
specialist vehicles.
No work shall commence until you have received the Safety
Document and or had the limits of the work
communicated to you.
A daily briefing and setting to work of the working
party should be undertaken by the Supervisor to cover
the work to be done and any hazards, controls and
limitations, this is crucial to ensuring the safe
performance of the work.
Before the Safety Document is issued
The SAP will ensure that the Safety Document holder &
working party are correctly authorised and fully conversant with
the details of the Work Location, Plant or Apparatus
Identification, Work to be done and any Limitations and
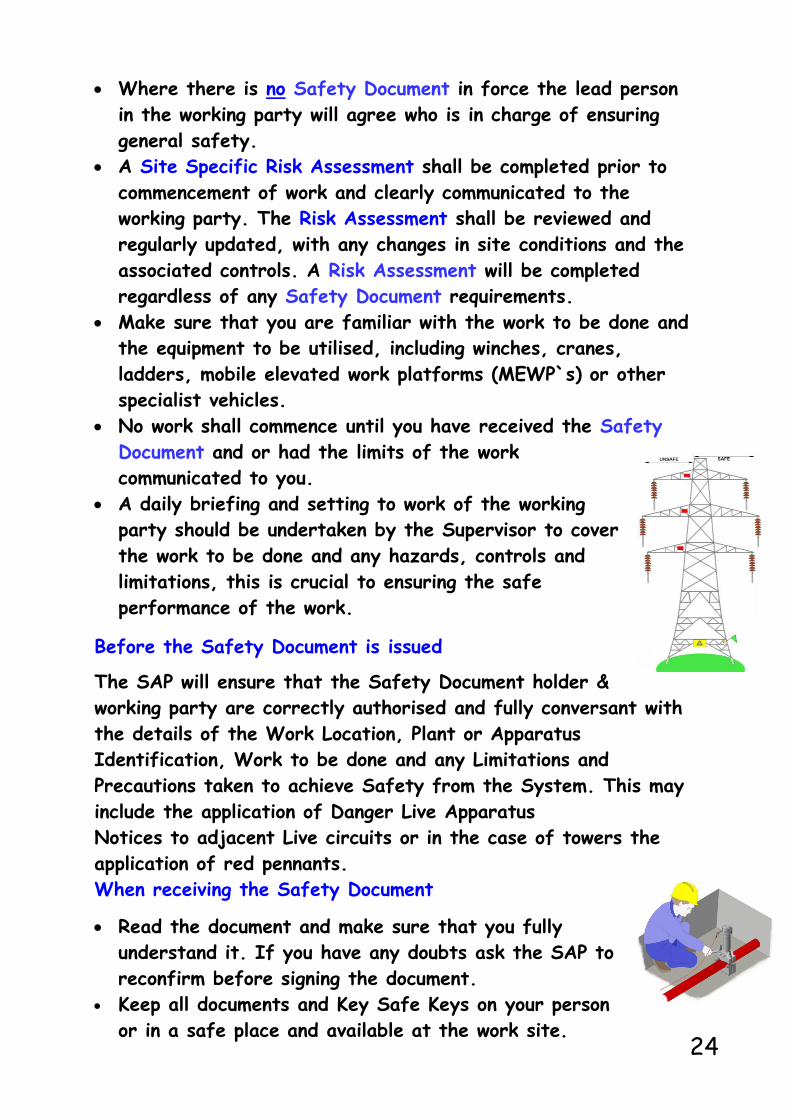
Precautions taken to achieve Safety from the System. This may
include the application of Danger Live Apparatus
Notices to adjacent Live circuits or in the case of towers the
application of red pennants. When receiving the Safety Document
Read the document and make sure that you fully
understand it. If you have any doubts ask the SAP to
reconfirm before signing the document.
Keep all documents and Key Safe Keys on your person
or in a safe place and available at the work site.

25
Provide the working party with Immediate Supervision at all
times.
Communicate clearly the details recorded within the safety
document to the working party. This will include the controls
established, the work to be done and the limits of the work
area.
If more work needs to be carried out than is specified on the
Safety Document, the SAP must be notified and a new Safety
Document will be issued.
If you need to transfer your document
• Instruct all working party members to
cease all work and leave the work area.
Complete the transfer section of the
Safety Document.
• Give the Safety Document and other
relevant items to the SAP. If You Are Receiving a Transferred Document
Receive the briefing on the original scope of work, precaution
taken to achieve safety from the
system (sect 2.1) and the outstanding
works, also any additional precautions
taken (sect 2.2) from the SAP. The
transfer record will be signed in the
relevant sections. Following this
procedure will help ensure a smooth
transition of leadership and help
protect everyone’s health and safety.
SAP SAP to Safety Document Recipient Safety Document Recipient to Working Party

26
Clearing the Safety Document When work is complete and you need to clear the Safety
Document
• Ensure all tools and equipment are cleared off the work site.
• Ladders must be removed from site or secured and where ropes are
being left on towers they shall be secured to the tower leg and tied
above the anti-climber and the tower access gate locked.
• Communicate to all members of the working party that all work has
now ceased and recover any items issued in Sect 3 of the PFW.
(flags, wristlets, Drain Earths etc.)
• Any items issued in Sect 3 of the Permit for Work must be
returned with the Safety Document to the SAP.
• Sign the clearance section of the Safety Document. Declare any
exceptions, such as ropes that have been left in position and or
details of work that has not been completed.
Return the Safety Document and other relevant items e.g. key safe
keys, flags and wristlets etc. to the SAP.
Remember the Key Safe is used to retain the Safety Lock
Keys associated with the points of Isolation and Earthing.
The Key Safe “control key” is retained by the SAP and one
of the remaining (A or B ) will be issued with the Permit for
Work. This is only one part of the Safe System of Work.
Safety Rule Structure
Foreword
General Provisions:-
o GP 1 General Safety
o GP 2 Safety Rules, Codes of Practice,
Instructions and Procedures
o GP 3 Special Instructions
o GP 4 Objections on Safety Grounds (This may result in the formal
arbitration procedure being invoked)
o GP 5 Reporting of Accidents and Dangerous Occurrences
27
Section A, contains the 8 Basic Safety Rules, these are the corner stone of
all operational documents or procedures produced.
Section B, details the Procedure for Safety Documents and Keys
Section C, outlines the Responsibilities of Persons :- Competent,
Authorised, Senior Authorised, Control Persons and Selected Persons
Section D, details the definitions of key words used within the Safety
Rules, these are always highlighted in bold text within any operational
document or procedure e.g. Isolated, Caution Notice etc. Company Safety Instructions “CSI & SPs” Outlines the Company Safety
Instructions CSI 1 to 6 and Specialised Procedures SP1 to 5
Power Systems Safety Instructions “PSSI” Contains all the Safety
Instructions relating to work on or adjacent to the Electrical System, PSSI
1 to 36
Your Safety Rules must be kept up to date and available on the site you are
working on.
Note :- A copy of your current ScottishPower Authorisations shall be
available at the work location for inspection and verification, failure to
comply with this requirement could result in you being excluded for the work
activity.
Risk Assessment Prior to starting any work, an on-site risk assessment must be completed
and recorded to identify any risks or hazards. Where risks or hazards are
identified a suitable control measure must be implemented and communicated
to any person affected. The risk assessment must be reviewed and updated
regularly to identify any change in site conditions. Any changes and
subsequent modification of control measures must also be communicated to
the persons affected.
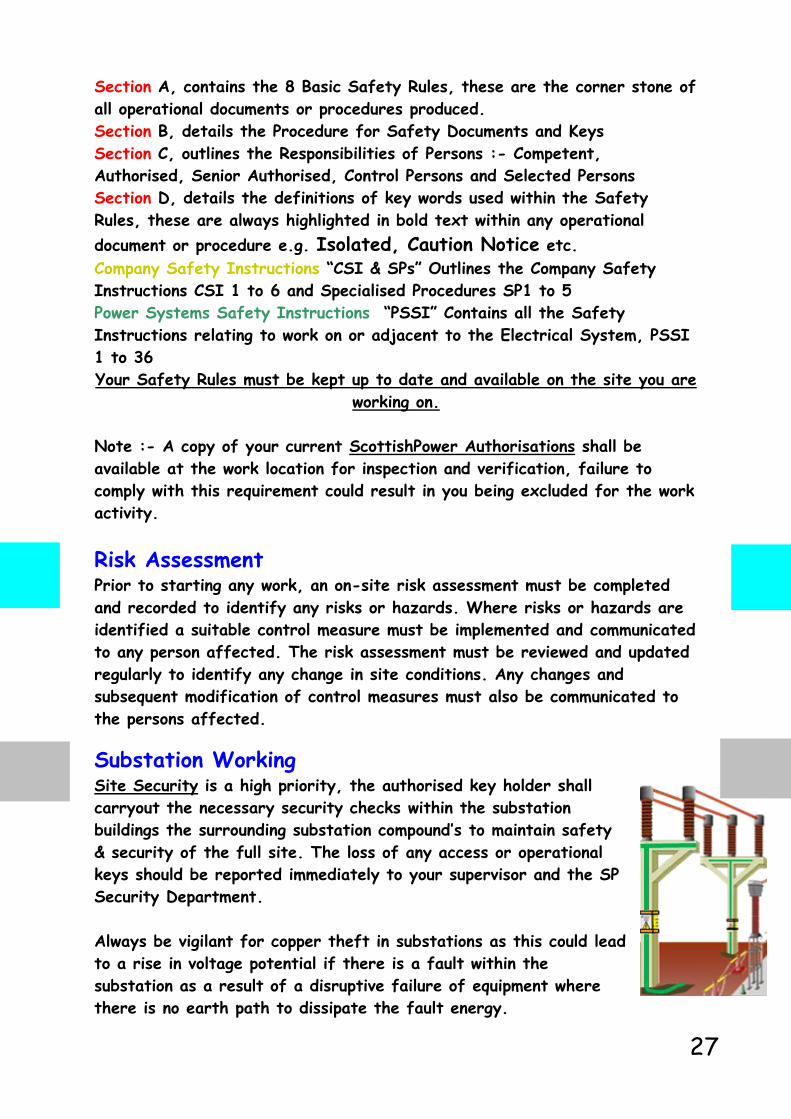
Substation Working Site Security is a high priority, the authorised key holder shall
carryout the necessary security checks within the substation
buildings the surrounding substation compound’s to maintain safety
& security of the full site. The loss of any access or operational
keys should be reported immediately to your supervisor and the SP
Security Department.
Always be vigilant for copper theft in substations as this could lead
to a rise in voltage potential if there is a fault within the
substation as a result of a disruptive failure of equipment where
there is no earth path to dissipate the fault energy.

28
Prior to accessing any operational site, you must first confirm
the Substation name and potential voltages. This information
can be found on the Property Notice on the front gate and or
Substation door. Other appropriate signage should be fitted
i.e. Danger of Death, SF6 and possibly PPE requirements.
The condition of the fence and access gates must be assessed
to confirm they meet the statutory requirements under the
ESQC Regs. Any defects or significant deterioration must be
reported. Following access to the site the internal area of the site
should be assessed for signs of trespass or damage, also access gate
should locked once in the substation to prevent un-authorised access.
Long Objects A long object is any item which has the potential to breech
the minimum safety distances at the various voltage levels.
The movement of ladders, mobile access & lifting equipment
which has been approved for use in the substation must
comply with PSSI 8.
Scaffolding Scaffolding (Portable) must be of the approved type &
erected by a suitably trained person who holds a current
PASMA certificate. Scaffolding (Fixed) should be erected &
inspected at regular intervals by a trained person and fitted
with a Scaftag. All scaffoldings should be suitably earthed in
accordance with PSSI 8. The movement and construction of
scaffold may require supervision by a Standby Man, this will
be determined by the SAP.
M.E.W.P. (Mobile Elevated Work Platforms) &
Cranes This type of equipment should only be used by trained
and competent personnel and the movement strictly
controlled, in accordance with the SAP’s instructions.
The equipment must be inspected prior to use and
confirmed as being fit for purpose. Further guidance on
this plant can be found in PSSI 8 including the requirement
for fitting of Field Equipment Earths.

29
Fire Fighting Systems. There are a range of different
types of fire fighting systems. One
of the most common types uses
CO2, which is an automatic gas
filled system used for suppressing
fires in substations. CO2 will
replace the oxygen from within the
switch room, which could be fatal to anyone working in that area.
Any Live CO2 systems must be isolated when work is carried out
in the area the system protects and
controls established as per PSSI 35.
There are a range of methods for
isolating the system, here are some
examples.
Insulating Mediums High Voltage switchgear uses a number of different
insulating mediums, ranging from insulating oil, vacuum
bottles and SF6. Most new equipment uses SF6 gas and/or a
combination of vacuum bottles and SF6. Indication of a
disruptive failure may be a smell of rotten eggs (Sulphur)
and a small deposit of fine white powder which becomes
corrosive when mixed with moisture i.e. respiratory system & skin
contact. Further information can be found in PSSI 10.
Inspecting Substation Compounds An inspection of the substation must take place to maintain
the security of the site & protect the public. Check the
fences & gates for signs of damage and climbing aids which
might allow access to the compound. Check for damage to
plant and apparatus such as smashed insulators, signs of
distress or missing earthing. Check for damage to the buildings such
as broken windows, leaking roofs, graffiti etc. Beware of
sharps that have been thrown into the substation. Danger
of Death notices should be fixed around the perimeter
fence approximately every 10 metres. Where any of these
defects are found they must be reported and dealt with
accordingly (record in the Substation logbook)
Signing In on Arrival
30
When entering the substation building, you must confirm if
there is an intruder alarm system in operation, as this must
be deactivated prior to contacting Control. Contact Control
to let them know that you are on site and the type of work
you are there to carry out. You must complete the
substation logbook, recording your name and work details.
When entering the HV switch room, any CO2 systems in operation must be
Isolated, Caution Notice applied and, if a locking point is available “Safety
Locked”.
Equipment Inspection All equipment being used on site should have the necessary inspection
certification fitted, i.e. PAT testing for electrical equipment, Calibration
for instrumentation, Colour coding or some form of identification for
Ladders, Scaffolding (Scaftag), Slings, Shackles etc. should all be inspected
within the prescribed time intervals. Any identified with out of date testing
or inspection labels shall be removed from service immediately.
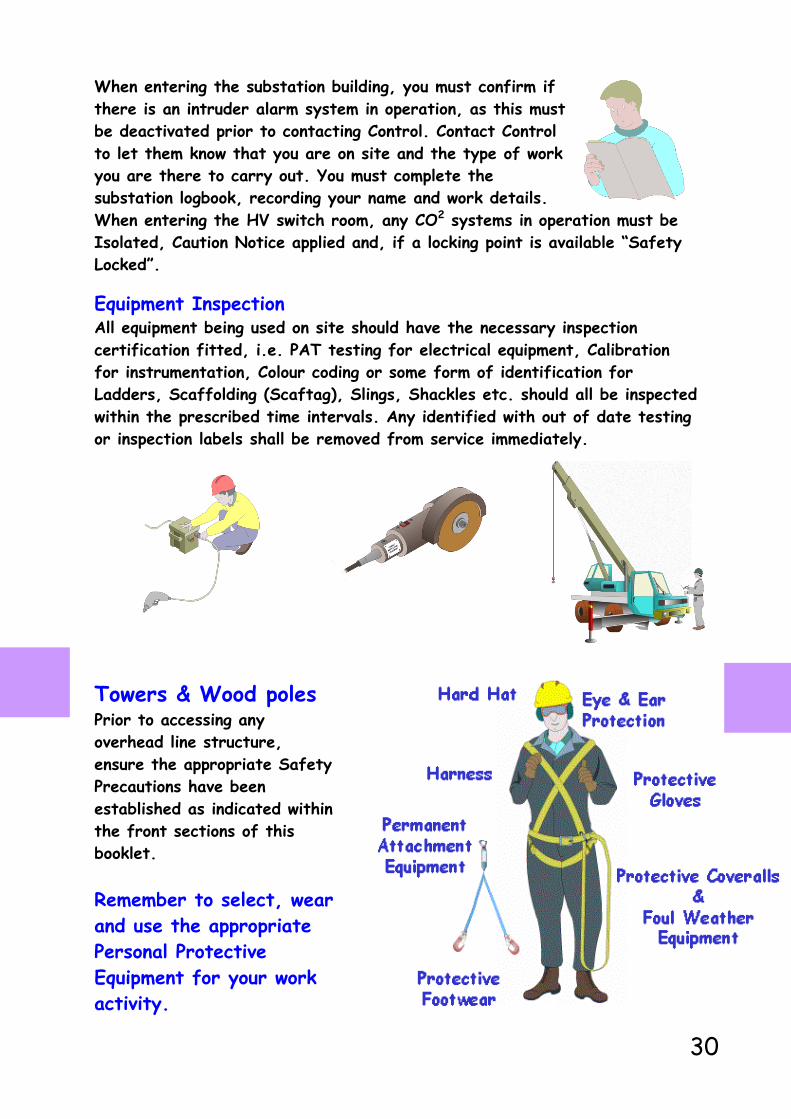
Towers & Wood poles Prior to accessing any
overhead line structure,
ensure the appropriate Safety
Precautions have been
established as indicated within
the front sections of this
booklet.
Remember to select, wear
and use the appropriate
Personal Protective
Equipment for your work
activity.

31
Access equipment and PPE may differ depending on the work activity
or the Plant & Apparatus being worked on.
Ensure all members of the working party wear and use the appropriate
personal protective equipment (PPE).
If you have any
doubts about
what PPE you
need to wear at a
particular site,
ask the site
supervisor. It is the responsibility of the wearer to inspect all PPE
before use and obtain a replacement if any item is found to be
defective.
Click Clacks are used for clipping to step bolts on transmission
towers for permanent attachment. These are used by the first
man going up the tower who installs a climbing rope for subsequent
climbers.
Once a Climbing Rope has been installed and secured the
Running Chuck can be applied to the rope to ensure
permanent attachment while accessing the tower.
Large Karabiner`s used for clipping to
steel work while working and moving
around on the tower.
Safe Access to and From the Point
of Work.
Ensure a means of access and egress is
agreed with the landowner prior to
commencement of work. Protect the area at
the base of the tower / pole to prevent un-
authorised access. Where painting is being
carried out, protect the ground below the
work area to prevent damage. Damage to property must be avoided at
all times, any damage must be reported to the supervisor.

32
Requirements Prior to Commencement of Work.
It is essential before any work is undertaken on a tower / pole that you:
Assess the weather conditions
Assess the condition of structure, for example:-
Step bolt security
General condition of structure, excessive rust, cross members fixings
etc.
Sound pole, check fittings, jumpers secure, signs of damage or
deterioration, binders secure and earthing intact.
Assess the condition of any Portable Primary earths applied to the
conductors and where conductors have been tied back onto the
steelwork, check for security.
Assess the condition of any Drain Earths on the equipment prior to
accessing the tower or pole. Report any disconnected or damaged Drain
Earths to the Document Holder.
Control the area directly below the pole, tower and or conductors being
worked on.
Check all appropriate equipment for a current inspection date or colour
code, visually inspect equipment prior to use and verify the equipment is
suitable for the work and the environment.
Where ropes are being used to access towers or to transport materials
up the work position, the ropes must be controlled to prevent them
infringing the safety distance on adjacent live circuits.
Ensure Emergency Procedures are in place i.e Tower rescue and
spacer chair kits
Accessing a Tower
The first person accessing the tower should use click clacks as their
permanent attachment to climb and install a climbing rope for the
remaining members of the working party to apply a running chuck.
33
Before and During Work
• Ensure that the working party are fully aware of the hazards and control
measures and the limitations of work specified in the Safety Document.
The Document Holder shall provide Immediate Supervision at all times to
the Authorised Persons in the working party
• It is the responsibility of the Competent/Authorised Person (Safety
Document Holder) to ensure that all of the working party are
accounted for at all times.
• Make sure all members of the working party know which
equipment is to be worked on and that it is correctly
identified to them.
• Be sure working conditions are as expected and that the
necessary work can be completed within the limits of the
Safety Document.
• Only carry out the work described on the Safety Document.
• Ensure that a safe working environment and work methods are maintained
at all times. Use the correct tools and equipment for the job.
• Make sure people in the vicinity are not put in Danger from your work
activity. Make sure safe means of access and egress are identified and
utilised.
• For steel tower works all hand tools shall be tethered when in use or
captive when not in use.
• Working above or below another activity which is in progress is
prohibited, unless for justified unavoidable specified OHL activities.
Clearing the work area
Stop all work and instruct the working party to leave the work area if:
The document holder needs to leave the site.
Any hazards or other conditions arise that are not covered by the
Safety Document.
The work is completed or the Safety Document is about to be 'Cleared'.
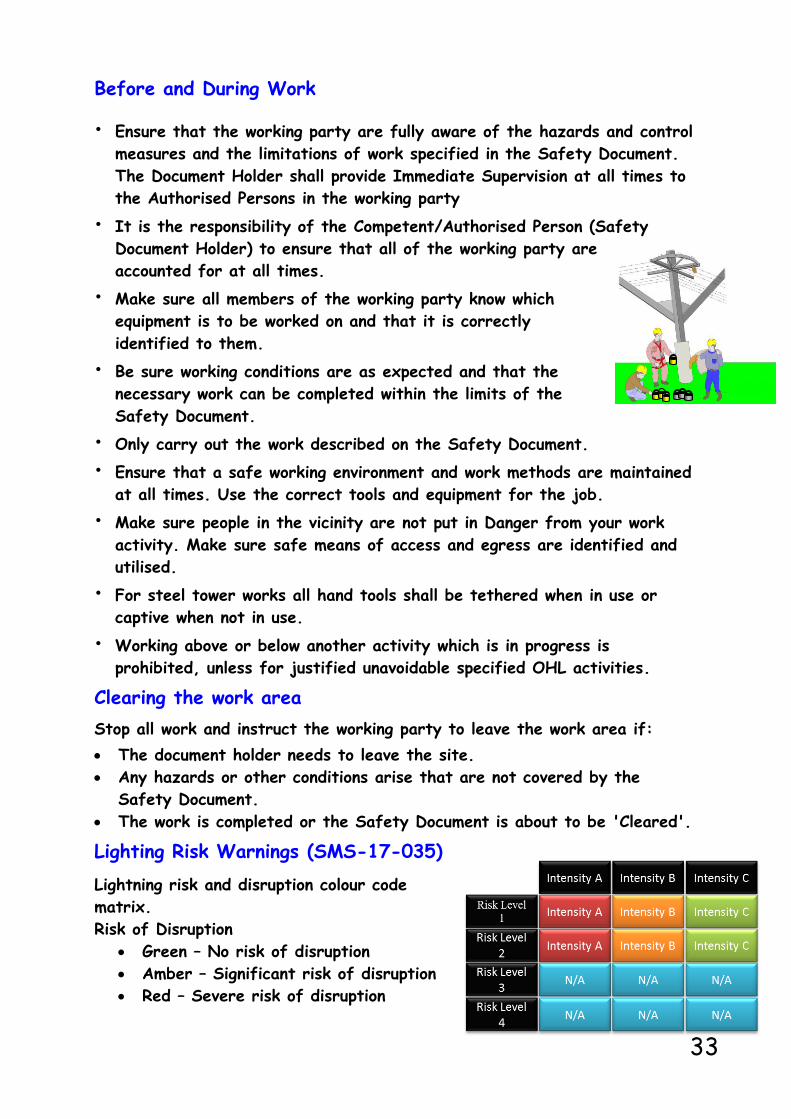
Lighting Risk Warnings (SMS-17-035)
Lightning risk and disruption colour code
matrix.
Risk of Disruption
Green – No risk of disruption
Amber – Significant risk of disruption
Red – Severe risk of disruption

34
Lightning Risk Categories
1- Lightning will almost certainly occur across the region or is currently
occurring.
2- Lightning is likely across the region
3- Lightning is unlikely across the region, although convective activity or
an active weather front is forecast
4- Lightning is not expected to occur across the region
Lightning Intensity Index
A. Very frequent lightning strikes
B. Frequent lightning strikes
C. Infrequent lightning strikes Communications
Action to be taken on declaration of Lightning Risk 1 or 2.
Once Lightning Risk 1 or 2 is declared, the respective Control Centre should
record this information. A message should then be issued using an SMS
message to all interested parties.
Action to be taken on relaxation of Lightning Risk from Lightning Risk 1 or 2.
When the control centres reduce the declared Lightning Risk to category 3 or
4 for a Network(s) that was previously at Lightning Risk 1 or 2, a message
shall then be issued using the SMS system detailing the end of the enhanced
Lightning Risk period. Be vigilant and review weather conditions at the work
location, if conditions change and you consider there is a risk of lightning,
cease work and contact your SAP.
Tree Cutting A method statement shall be produced prior to any tree cutting operation
and shall take into consideration any Isolation or Live Work requirements. Assess work and distance to the OHL.
Confirm the voltage of the OHL.
Live Line work can only be carried out by suitably
trained and Authorised Persons (WL-1.29 & WL-
1.100). Remember Live Work requires accompaniment
(Min WL-2)
When carrying out Live Line tree cutting adjacent to
HV OHL conductors & equipment, Auto Reclose
Settings must be set to non automatic “one shot to
lock out”.
Assess the condition of the OHL (poles, stays, insulators, conductors etc).

35
Poles being climbed shall be sounded to establish condition prior to
climbing. Report any defects identified in accordance with the I.U.P. Hazard
Management Policy.
Assess the falling distance of tree or trees to be felled from the OHL.
Confirm Drain Earths are visible from the point of work on Isolated
Overhead Lines
Live Line Tree
Cutting Shall be carried out in
accordance with Live
Working Manual 5.6
(OPSAF-12-18). Only
trained Authorised
Persons can carry out
this activity. Check for
document updates as
voltage ranges and
procedures may be
updated.
Live and Vicinity
Zone Distances The table below provides the
Live Zone and Vicinity Zone
distances to be complied with
during Live tree cutting
operations.
Storm condition working. Where grounded conductors are
identified or trees are in
contact with the OHL
conductors, NO work shall be
carried out until confirmation by
an SAP that the circuit has
been Isolated and, in the case
of HV, Earthed, and a Safety
Document issued.
Metres Metres

36
When using equipment on or working adjacent to OHL networks. When carrying out excavations, cable records shall be used to identify
the location of underground services.
There may be a requirement to apply field
equipment earths to mobile equipment which
is working adjacent to Live conductors, to
discharge any induced voltages. This will be
determined by the SAP
Consider other utilities in the vicinity of the
work and use a Cable Avoidance Tool (Cat &
Genny) to confirm the location of
underground services.
Follow safe digging practices in accordance
with “Avoiding danger from underground services” HSG 47.
Clearly identify any adjacent Live Apparatus and establish suitable controls for height restriction of mobile plant. (Mechanical or Electronic)
Only use excavators following agreement
with the SAP.
Where work is to be carried out in close
proximity to Live Apparatus, application of
Danger Live Apparatus wrap round notices
shall be considered. Consider the requirements of “Avoidance of
Danger from Overhead Power Lines” GS 6
Excavations and Underground Cables
Prior to any excavation work commencing, the following requirements shall be
met.
Clear work
instructions and
multi-utility
records are
issued.
Confirm actual
location of work
site using work
instructions and
utility records provided.

37
Consideration should also be given to the location or position of other
utilities.
Assess the area to identify inspection covers, water valve covers and
other electrical service pillars.
Haldo pillar (for bus shelter supply)
Water valve & BT inspection covers in pavement
All excavation work shall comply with HSG 47. Hand digging shall be carried
out to ensure that the excavation area is clear of obstructions. Up to 150mm of the top surface shall be broken using a road-breaker / any
disk cutters used, require water suppression. Use of this type of equipment
beyond 150mm carries the risk of damaging cables or other utilities,
possibly resulting in operator injury.
Excavators and Portable Plant
When excavating for a cable fault using a mini excavator, working
within the 500mm limit from the live cable can proceed with caution
where risk assessment has shown that there is an increased risk to
persons hand digging near the cables. A banksman shall be in a
position to observe and control the excavations at all times.
A calibrated cable avoidance tool (C.A.T) shall be available on site.
A signal generator may also be used in conjunction with the C.A.T to
track the position of underground services. Use of excavation equipment for example mini excavator shall be
carried out with the aid of an appointed banksman.
Note:- All equipment that generates
vibration, for example vibro-plates,
whackers, road-breakers etc must be fitted
with anti vibration suppression which must
comply with the “Hand Arm Vibration Regs”.
This type of equipment will have a time
limited operation due to the vibration effects
on the body.

38
Shoring Where a Risk Assessment has identified
the requirement for supporting the
excavation, a trained competent person
shall install the appropriate shoring.
Consider soil conditions, depth of
excavation and proximity of any
watercourse.
Excavated materials shall be positioned
clear of the open excavation or removed
from site as this will contribute to the depth of excavation and
represent a risk of trench collapse.
While carrying out excavations check for:- Cable types, whether Paper Insulated Lead Covered (PILC) or polymeric.
Presence of pilot cables, possible indication of HV cables.
Tiles or marker tapes indicating the presence of utilities.
Confirm cable records match the cables exposed at the point of work
(types and sizes).
Ensure all cables related
to the work area are
exposed to assist in
identification.
If required, track to the
nearest service mains joint
to identify the LV cable
to be worked on.
Never excavate straight
down onto a suspected
cable fault position Check for the smell of
burning or carbon.
Check for steam or smoke.
Leave at least 1.5 Metre (Min) of undisturbed
excavation between the suspected cable fault
position and the work position. In the event of a damaged cable or fault being
exposed during the excavation, the area should be
cleared and a supervisor contacted to arrange
Isolation.
39
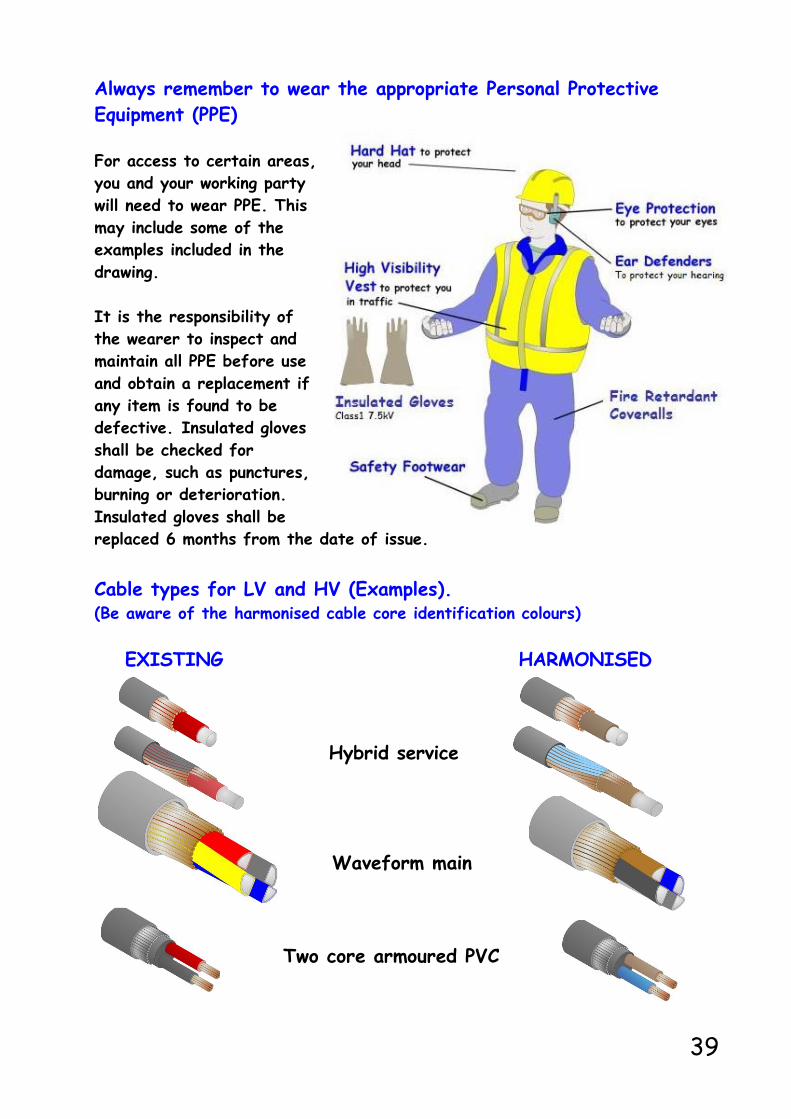
Always remember to wear the appropriate Personal Protective
Equipment (PPE)
For access to certain areas,
you and your working party
will need to wear PPE. This
may include some of the
examples included in the
drawing.
It is the responsibility of
the wearer to inspect and
maintain all PPE before use
and obtain a replacement if
any item is found to be
defective. Insulated gloves shall be checked for
damage, such as punctures,
burning or deterioration.
Insulated gloves shall be
replaced 6 months from the date of issue.
Cable types for LV and HV (Examples). (Be aware of the harmonised cable core identification colours)
EXISTING HARMONISED
Hybrid service
Waveform main
Two core armoured PVC

40
Polymeric and Paper Insulated HV Cable Construction
Paper Insulated Lead Covered Cables (PILC) Types
Wire Armour
Tape Armour
Corrugated
Aluminium
(Coral)

41
Typical LV and HV Cable Joints Old Colour LV waveform cable to
New Colour waveform.
New Colour LV waveform cable to
PILC type cable
HV Single core polymeric to single core
PILC
HV three core polymeric to three
core Paper Insulated with Faraday
cage applied.
Continuity Strap
This is applied to ensure the earth
continuity and potential is maintained
throughout the work and protects both
the operative and customers installations
in the event of fault current flowing or
circulating currents. The continuity strap
shown is for an LV cable with only two cable earth clamps, there
are other types with multiple cable earth clamps when jointing
single core cable to three core cable.

42
Service Position Cables
Double Insulated Earth Cables
LV Cable Terminations
Street Lighting & Series 7 Cutout Industrial Cutout
Operations Prior to any operations on the LV or HV network all equipment shall be
assessed for:-
Signs of burning
Deterioration
Damage
Water ingress
Any Point of Isolation shall be clearly
identified with a Caution Notice
Link box Where work or operations are to be carried
out on a link box, all items that have a
potential to cause a short circuit or flashover
shall be removed from the operative’s
pockets. (i.e. pens, keys, glasses etc)
43
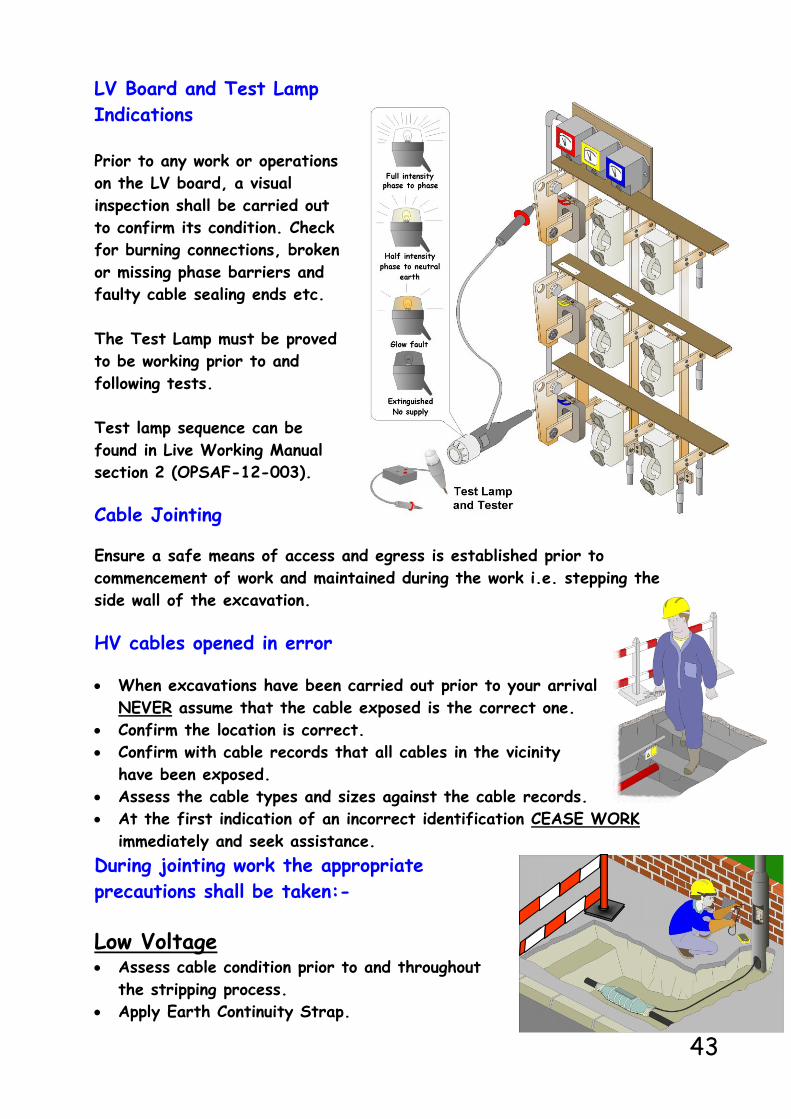
LV Board and Test Lamp
Indications
Prior to any work or operations
on the LV board, a visual
inspection shall be carried out
to confirm its condition. Check
for burning connections, broken
or missing phase barriers and
faulty cable sealing ends etc.
The Test Lamp must be proved
to be working prior to and
following tests.
Test lamp sequence can be
found in Live Working Manual
section 2 (OPSAF-12-003).
Cable Jointing
Ensure a safe means of access and egress is established prior to
commencement of work and maintained during the work i.e. stepping the
side wall of the excavation.
HV cables opened in error
When excavations have been carried out prior to your arrival
NEVER assume that the cable exposed is the correct one.
Confirm the location is correct.
Confirm with cable records that all cables in the vicinity
have been exposed.
Assess the cable types and sizes against the cable records.
At the first indication of an incorrect identification CEASE WORK
immediately and seek assistance. During jointing work the appropriate
precautions shall be taken:-
Low Voltage Assess cable condition prior to and throughout
the stripping process.
Apply Earth Continuity Strap.

44
Carry out work using only approved Live Working Procedures, Approved
insulated tools and materials.
High Voltage The cable is Isolated and Earthed prior to
the SAP preparing a Sanction for Test.
Cable insulation resistance and condition
established prior to spiking and re-
established following spiking of the cable.
Any actions carried out by the jointer at
this stage are under the personal
supervision of the SAP i.e. application and
removal of the spiking tool and establishing
phasing,
Only on receipt of a Permit for Work shall the agreed jointing works
commence . Brief the working party on the contents of the Permit for Work and the
controls established.
Street Lighting Networks
Fifth core supply using mains distributor in conjunction with street
lighting equipment.
45
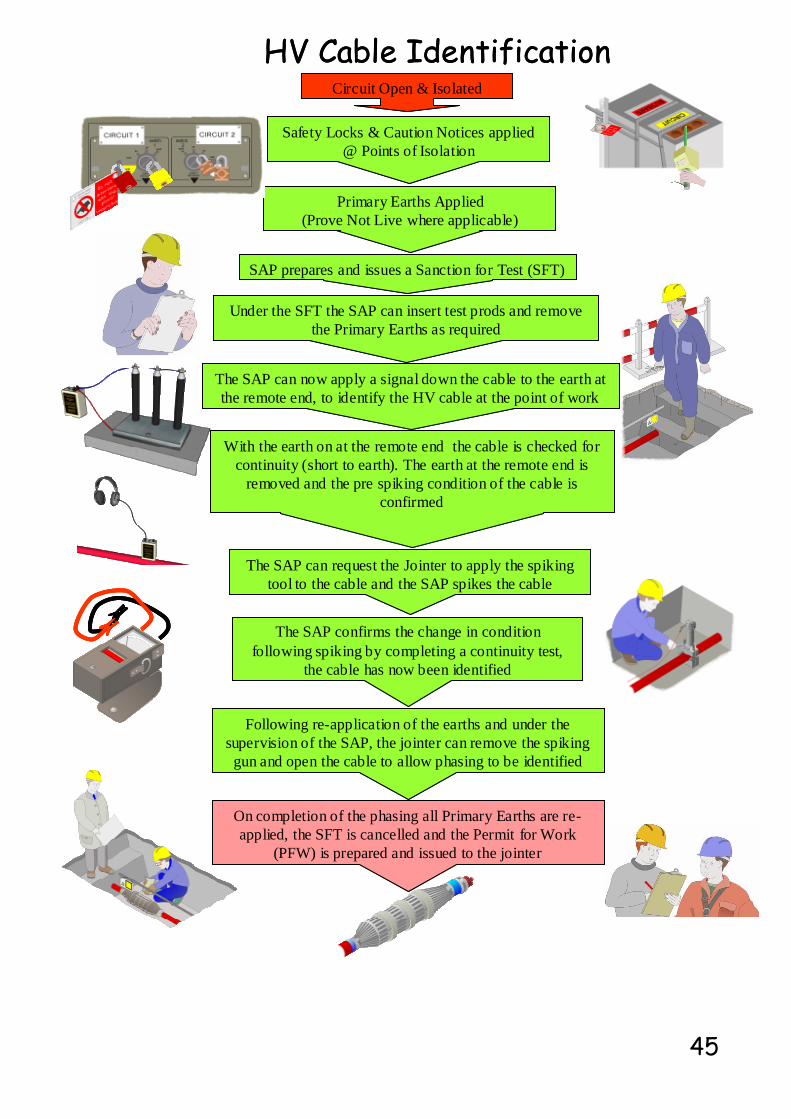
Circuit Open & Isolated
HV Cable Identification
Safety Locks & Caution Notices applied
@ Points of Isolation
Primary Earths Applied
(Prove Not Live where applicable)
Under the SFT the SAP can insert test prods and remove
the Primary Earths as required
SAP prepares and issues a Sanction for Test (SFT)
The SAP can now apply a signal down the cable to the earth at
the remote end, to identify the HV cable at the point of work
The SAP can request the Jointer to apply the spiking
tool to the cable and the SAP spikes the cable
The SAP confirms the change in condition
following spiking by completing a continuity test,
the cable has now been identified
With the earth on at the remote end the cable is checked for
continuity (short to earth). The earth at the remote end is
removed and the pre spiking condition of the cable is
confirmed
Following re-application of the earths and under the
supervision of the SAP, the jointer can remove the spiking
gun and open the cable to allow phasing to be identified
On completion of the phasing all Primary Earths are re-
applied, the SFT is cancelled and the Permit for Work
(PFW) is prepared and issued to the jointer
46
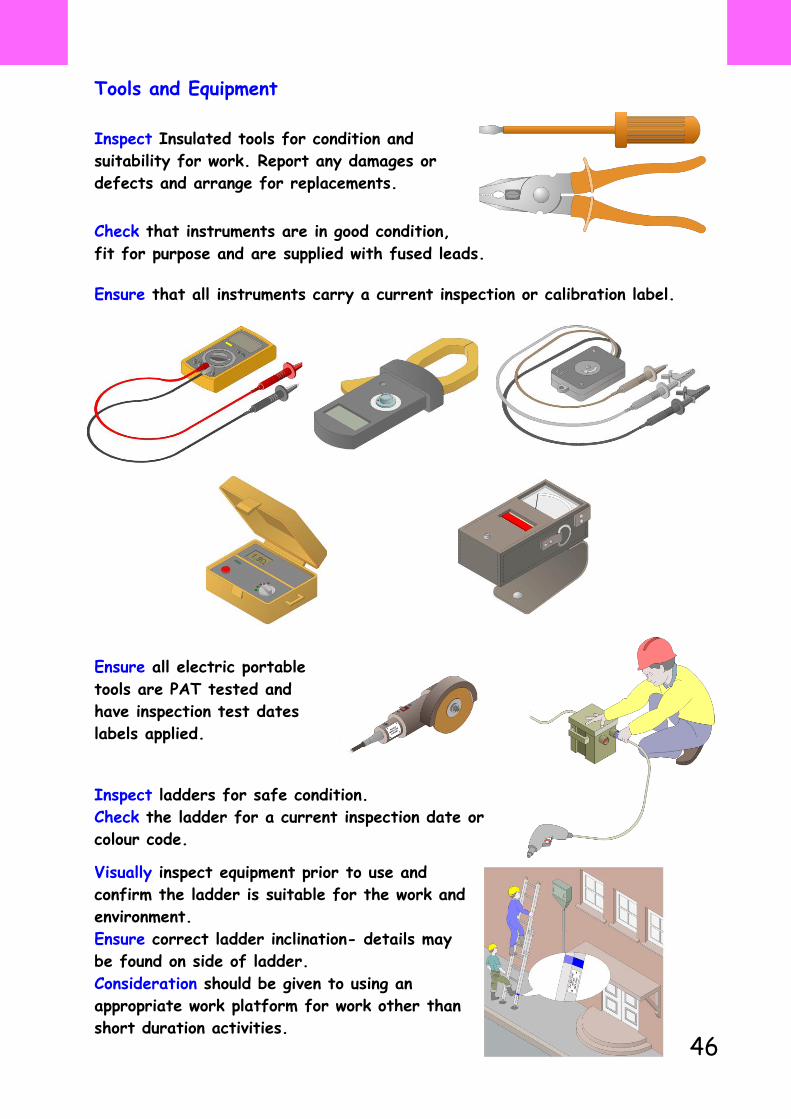
Tools and Equipment
Inspect Insulated tools for condition and
suitability for work. Report any damages or
defects and arrange for replacements.
Check that instruments are in good condition,
fit for purpose and are supplied with fused leads.
Ensure that all instruments carry a current inspection or calibration label.
Ensure all electric portable
tools are PAT tested and
have inspection test dates
labels applied.
Inspect ladders for safe condition.
Check the ladder for a current inspection date or
colour code.
Visually inspect equipment prior to use and
confirm the ladder is suitable for the work and
environment.
Ensure correct ladder inclination- details may
be found on side of ladder. Consideration should be given to using an
appropriate work platform for work other than
short duration activities.

47
Interview Preparation Guide
The table below provides a guide to some of the key areas you need to be
familiar with before you attend an Authorisation Course (Initial or refresher)
and any subsequent interview.
The supporting material described above can be found in the Safety Rules and
Procedures, Live Working Manual, Management Safety Procedures and Health
and Safety Guidance Notes. Your manager or company representative will have
access to these materials either via the SP Website .
48
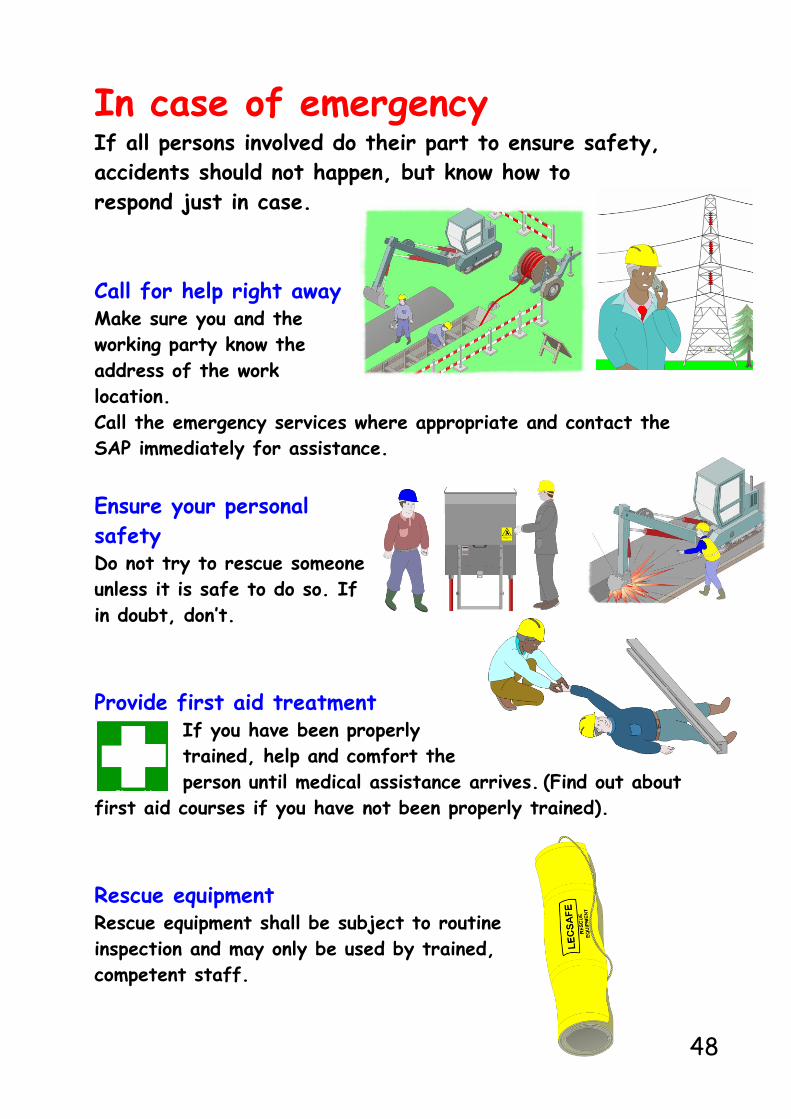
In case of emergency If all persons involved do their part to ensure safety,
accidents should not happen, but know how to
respond just in case.
Call for help right away Make sure you and the
working party know the
address of the work
location.
Call the emergency services where appropriate and contact the
SAP immediately for assistance.
Ensure your personal
safety Do not try to rescue someone
unless it is safe to do so. If
in doubt, don’t.
Provide first aid treatment If you have been properly
trained, help and comfort the
person until medical assistance arrives. (Find out about
first aid courses if you have not been properly trained).
Rescue equipment Rescue equipment shall be subject to routine
inspection and may only be used by trained,
competent staff.

49
Secure the site Limit access to the site until the SAP/Site Supervisor arrives
and takes control of the emergency. Prior to giving access to the
site, provide information to the Emergency Service of the
hazards and controls on site. Ensure safe and controlled access
is provided for Emergency Services at all times.
Report the incident to SP Energy Networks staff as soon
as possible Provide the following information:
The address and site location.
The name of the injured person and his or her employer, if
known.
When the ambulance, fire brigade, etc.
arrived.
Specific details about the accident.
Emergency Telephone numbers OCC Scotland 0141 776 2877
NMC Manweb 0151 609 4999
50
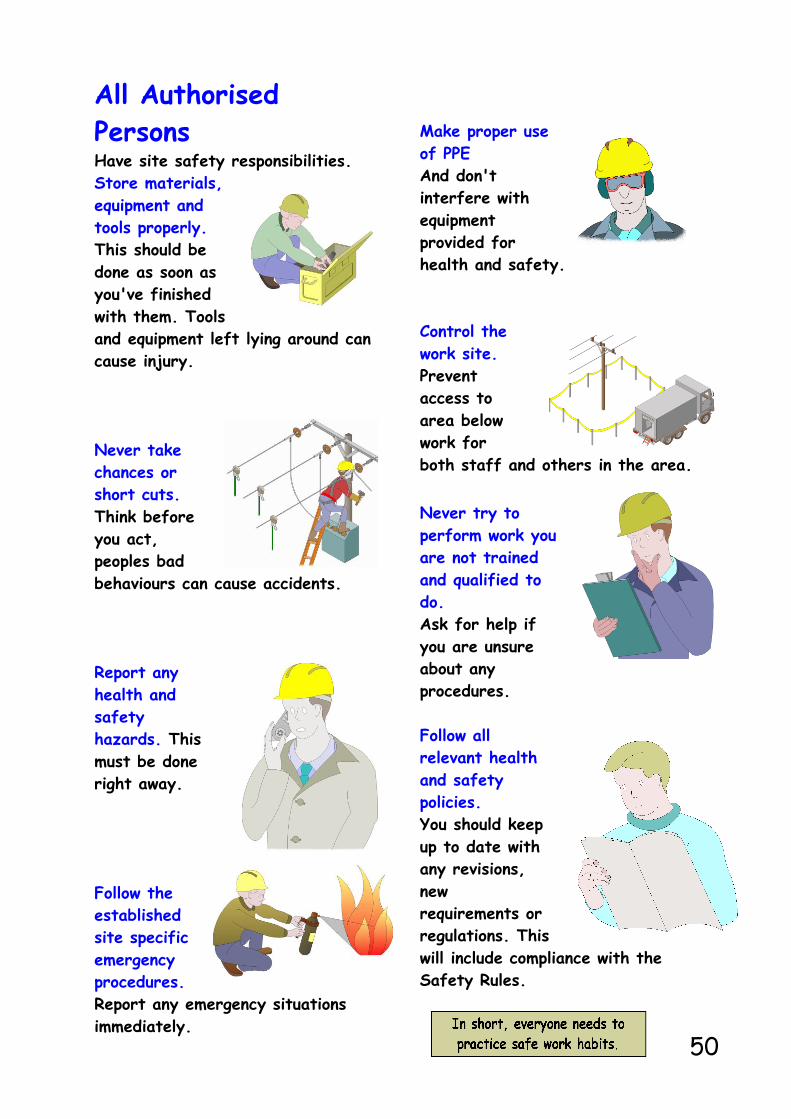
All Authorised
Persons Have site safety responsibilities.
Store materials,
equipment and
tools properly.
This should be
done as soon as
you've finished
with them. Tools
and equipment left lying around can
cause injury.
Never take
chances or
short cuts.
Think before
you act,
peoples bad
behaviours can cause accidents.
Report any
health and
safety
hazards. This
must be done
right away.
Follow the
established
site specific
emergency
procedures.
Report any emergency situations
immediately.
Make proper use
of PPE
And don't
interfere with
equipment
provided for
health and safety.
Control the
work site.
Prevent
access to
area below
work for
both staff and others in the area. Never try to
perform work you
are not trained
and qualified to
do.
Ask for help if
you are unsure
about any
procedures.
Follow all
relevant health
and safety
policies.
You should keep
up to date with
any revisions,
new
requirements or
regulations. This
will include compliance with the
Safety Rules.
51
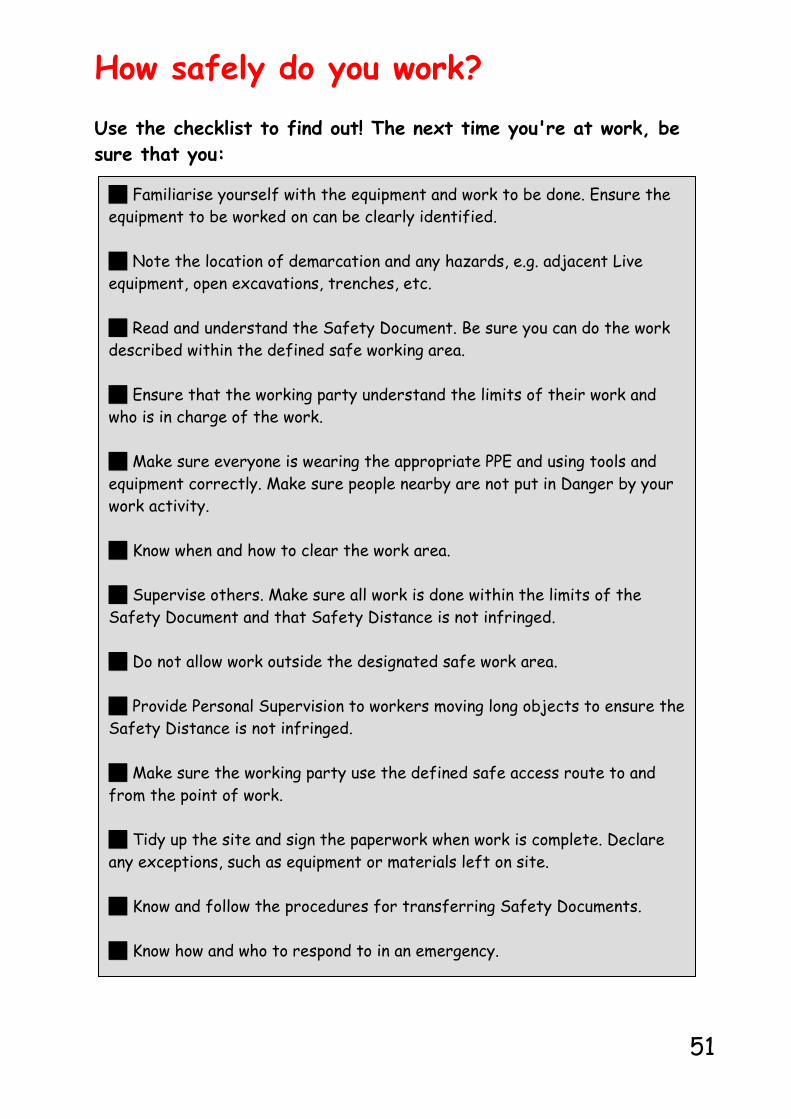
How safely do you work?
Use the checklist to find out! The next time you're at work, be
sure that you:
Familiarise yourself with the equipment and work to be done. Ensure the
equipment to be worked on can be clearly identified.
Note the location of demarcation and any hazards, e.g. adjacent Live
equipment, open excavations, trenches, etc.
Read and understand the Safety Document. Be sure you can do the work
described within the defined safe working area.
Ensure that the working party understand the limits of their work and
who is in charge of the work.
Make sure everyone is wearing the appropriate PPE and using tools and
equipment correctly. Make sure people nearby are not put in Danger by your
work activity.
Know when and how to clear the work area.
Supervise others. Make sure all work is done within the limits of the
Safety Document and that Safety Distance is not infringed.
Do not allow work outside the designated safe work area.
Provide Personal Supervision to workers moving long objects to ensure the
Safety Distance is not infringed.
Make sure the working party use the defined safe access route to and
from the point of work.
Tidy up the site and sign the paperwork when work is complete. Declare
any exceptions, such as equipment or materials left on site.
Know and follow the procedures for transferring Safety Documents.
Know how and who to respond to in an emergency.