ROTEGÉ F - Steadfast Telecommunications
76
PROTEGÉ ® Digital Hybrid Key System Keyset User Guide—without Display Item Number 699030
Transcript of ROTEGÉ F - Steadfast Telecommunications

PROTEGÉ®
Digital Hybrid Key System
Keyset User Guide—without DisplayItem Number 699030
QUICK GUIDE TO FEATURE CODESFeature CodeACCOUNT CODE ENTRY F71AGENT LOG OFF/ON F91 (OFF)
F*91 (ON)AUTHORITY CODE F55AUTO ANSWER F6*AUTO TRANSFER MODE F54AUTOMATIC BUSY REDIAL F78AUTOMATIC LINE SELECTION F95 (ON)
F*95 (OFF)CALLBACK 5CALLBACK - CANCEL F*#5 (INDIV.)
F*#5* (ALL)CALL FORWARD F2X
F20 (CANX ALL) CALL PICKUP F53CAMP ON 4CANCEL OPERATIONS F69*DISTINCTIVE RINGING F#7DND OVERRIDE 3DO NOT DISTURB (DND) F4DUAL FUNCTION KEY PROGRAMMING F#1EXTINGUISH LIT VOICE MAIL LED F*64FEATURE KEY PROGRAMMING F#3FLASH - INSERT A F3FORCED RELEASE (CONFERENCE) F74HEADSET OPERATION F9# (ON)
F*9# (OFF)HOLD (AUTOMATIC) F94 (ON)
F*94 (OFF)HOLD (EXCLUSIVE) FHOLD (ON)
(TO RETRIEVE CALL) F7* HOLD (SYSTEM) HOLD
(TO RETRIEVE CALL) F7*HOT KEYPAD F93 (ON)
F*93 (OFF)HOTLINE F9* (ON)
F*9* (OFF) INTERCOM ACCESS F65
Feature CodeINTRUSION 8LAST NUMBER REDIAL (LNR) F8LEAST COST ROUTING (LCR) F67LOCK/UNLOCK F97MESSAGES - DELETING F*#9 (INDIV.)
F*#9*(ALL)MESSAGES - SENDING F96
9MUTE F76OHVA 0PAGING - ANSWER F59PAGING - RECEIVE SELECTION F*99 (ON)
F99 (OFF)PASSWORD CHANGE F97PAUSE - INSERT A F70PRIVATE TALK (CONFERENCE) F57PULSE TO TONE CONVERSION *REMINDER SERVICE F92 (ON)
F*92 (OFF)SAVED NUMBER REDIAL (SNR) F51SPEED DIAL NUMBER PROGRAMMING F1TRANSFER HOLD
XFR/CONFTRANSFER (NO RING), PLACING A F73
(TO RETRIEVE CALL) F53 UCD AGENT HELP F61UCD MONITOR F58UCD ROUTE OVERRIDE F6#
F*6# (CANCEL)UNSUPERVISED CONFERENCE F77USER SAVED NUMBER REDIAL (USNR) F5*VOICE CALLS F98 (ON)
F*98 (OFF)VOICE MAIL FROM BUSY OR
UNATTENDED EXTENSION 7VOICE TO RING INTERCHANGE 2WAIT-FOR-DIAL-TONE - INSERT A F79
User Guide 699030.qxd 8/9/00 1:47 PM Page 1

Copyright © 2000 North Supply Company. All Rights Reserved.Sprint and the diamond logo are registered trademarks of Sprint Communications Company L.P., used under license.
QUICK GUIDE TO NUMBERING
DEFAULT PROTEGÉ YOUR COMPANY’SRESOURCE DIRECTORY NUMBERS DIRECTORY NUMBERS
Extension Numbers 200 - 399 _______________Trunk Numbers 700 - 799 _______________Trunk Groups 100 - 129 _______________Page Groups 400 - 429 _______________External Paging 820 - 829 _______________Pickup Groups 460 - 489 _______________System Speed Dial Numbers 600 - 699 _______________Individual Speed Dial Numbers 500 - 599 _______________Hunt Groups 430 - 459 _______________Background Music 800 - 801 _______________Loud Bell 810 - 811 _______________Virtual Numbers 830 - 859 _______________Voice Mail Access _______________Night Ring Pick Up _______________Least Cost Routing _______________
INDIVIDUAL SPEED DIAL NUMBERS
NUMBER ACTUAL DETAIL
500 ______ ____________________________________501 ______ ____________________________________502 ______ ____________________________________503 ______ ____________________________________504 ______ ____________________________________505 ______ ____________________________________506 ______ ____________________________________507 ______ ____________________________________508 ______ ____________________________________509 ______ ____________________________________
SPRINT PRODUCTS GROUP HAS MADE EVERY EFFORT TO ENSURE THE TECHNICAL
ACCURACY OF THIS GUIDE. FEATURES AND TECHNICAL DATA ARE SUBJECT TO CHANGE
WITHOUT NOTICE.
User Guide 699030.qxd 8/9/00 1:47 PM Page 2

Contents
iProtegé® Keyset User Guide - without display
1. How To Use This Guide . . . . . . . .1
2. Your Keyset’s Parts . . . . . . . . . . . .2
3. Understanding the Lights . . . . . . .6
4. Understanding the Tones . . . . . . .7
5. Care Of Your Keyset . . . . . . . . . . .7
6. Your Protegé Phone System . . . . .8
1. Answering Calls . . . . . . . . . . . . . .9
2. Call Pickup . . . . . . . . . . . . . . . . .10
3. Call Forward . . . . . . . . . . . . . . . .11
4. Avoiding Calls . . . . . . . . . . . . . . .16
1. Placing Intercom Calls . . . . . . . .19
2. Off-Hook Voice Announce . . . . . .21
3. Placing Outside Calls . . . . . . . . .22
4. Redialing . . . . . . . . . . . . . . . . . .23
5. Dialing Speed Dial Numbers . . . .25
6. Special Dialing . . . . . . . . . . . . . .26
7. Callback . . . . . . . . . . . . . . . . . . .27
8. Camp On . . . . . . . . . . . . . . . . . .29
9. Authority Code . . . . . . . . . . . . . .30
1. Hold . . . . . . . . . . . . . . . . . . . . . .31
2. Transferring Calls . . . . . . . . . . . .33
3. Conference . . . . . . . . . . . . . . . . .36
1. Paging . . . . . . . . . . . . . . . . . . . .39
2. Messaging . . . . . . . . . . . . . . . . .41
Answering Callschapter
2
Introductionchapter
1
Making Callschapter
3
Call Handlingchapter
4
Paging AndMessaging
chapter
5
Contents
ii Protegé® Keyset User Guide - without display
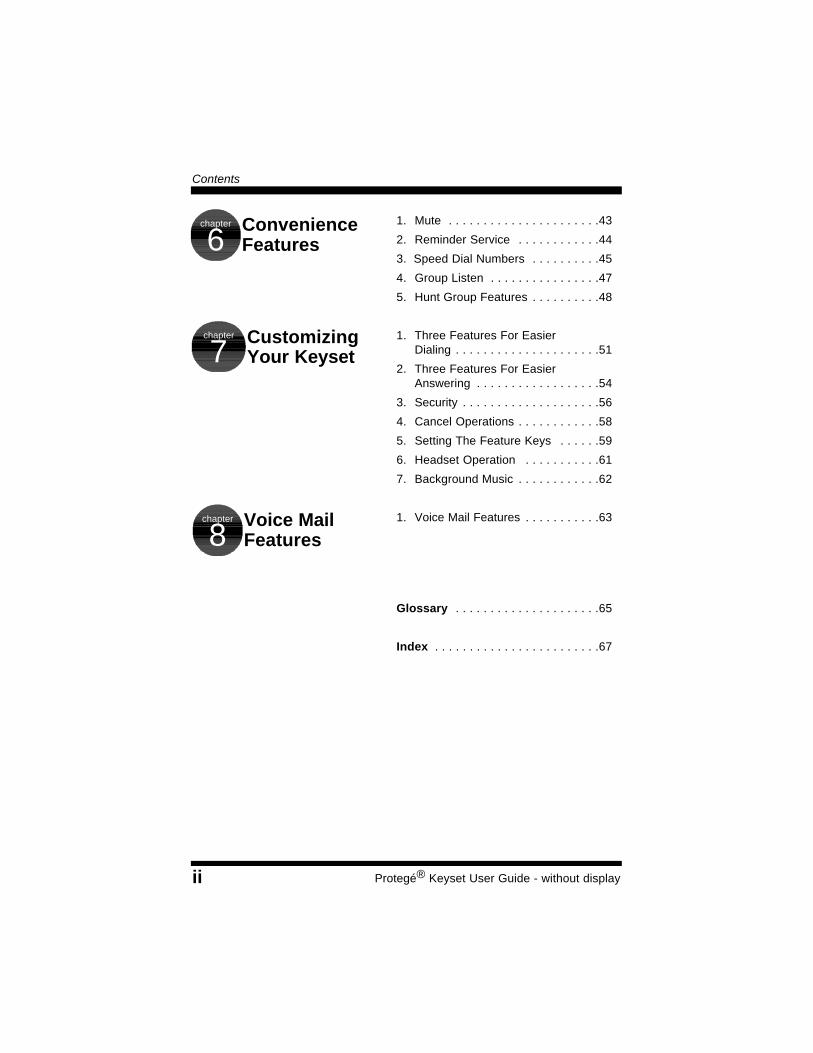
1. Mute . . . . . . . . . . . . . . . . . . . . . .43
2. Reminder Service . . . . . . . . . . . .44
3. Speed Dial Numbers . . . . . . . . . .45
4. Group Listen . . . . . . . . . . . . . . . .47
5. Hunt Group Features . . . . . . . . . .48
1. Three Features For EasierDialing . . . . . . . . . . . . . . . . . . . . .51
2. Three Features For EasierAnswering . . . . . . . . . . . . . . . . . .54
3. Security . . . . . . . . . . . . . . . . . . . .56
4. Cancel Operations . . . . . . . . . . . .58
5. Setting The Feature Keys . . . . . .59
6. Headset Operation . . . . . . . . . . .61
7. Background Music . . . . . . . . . . . .62
1. Voice Mail Features . . . . . . . . . . .63
Glossary . . . . . . . . . . . . . . . . . . . . .65
Index . . . . . . . . . . . . . . . . . . . . . . . .67
Voice MailFeatures
chapter
8
ConvenienceFeatures
chapter
6
Customizing Your Keyset
chapter
7

1Protegé® Keyset User Guide - without display
1. How to Use this GuideYour Protegé keyset is the perfect tool for today’s workplace. This guide showsyou how to set and use the many advanced and labor-saving features availableto you. Some features are only available with specific software versions. If youare not sure whether a feature is available to you, please see your systemadministrator.
Getting StartedRead this chapter carefully; it contains some important safety instructions.Then, flip through the rest of the guide to become familiar with howinformation is organized. Study the features you will use on a daily basis. Keepthis guide handy so you can quickly refer to it as you need.
How to Locate Information
If You Want Then Refer To
General information on using your keyset Chapter 1, Introduction
To use a specific feature Index to point you to the page
A definition of a telecommunications term Glossary
Information on taking and avoiding calls Chapter 2, Answering Calls
Information on placing internal and Chapter 3, Making Callsoutside calls
Information on holding and transferring Chapter 4, Call Handlingcalls, and on making conferences
Information on paging and messaging Chapter 5, Paging and Messaging
Information on labor-saving features Chapter 6, Convenience Featuressuch as programming speed dial numbers
Information on performing keyset-specific Chapter 7, Customizing your functions keyset
Information on using voice mail features Chapter 8, Voice Mail Features
chapter
one Introduction

1 2 3
4 5 6
7 8 9
0OPER
ABC DEF
GHI JKL MNO
PRS TUV WXY
HOLD VOL VOL SPEAKER
XFR/CONF
REDIAL
CLEAR
FUNCTION[[ #
SprintR
1 / Introduction
2. Your Keyset’s Parts
Xfr/Conf key
Redial key
Clear key
Function key
Headset Jack (not all models)
Dual FunctionFeature keys
Speakerphone
Dial pad
Pull out tray
Hold key
Volume keys
Speaker keyand light
2 Protegé® Keyset User Guide - without display

1 / Introduction
3Protegé® Keyset User Guide - without display
Clear KeyPress the Clear key to cancel any task you are in the middle of performing, andto terminate a call. Do not press the Clear key to cancel a programming task ifyou are active on a call, as this will also disconnect you from your call.
Dial PadUse the dial pad to dial telephone numbers, and to enter feature codes.
Dual Function Feature Keys These keys and their associated dual colored LEDs (Light Emitting Diode)give you speedy access to outside lines, other extensions, frequently usedfeatures, and speed dial numbers.
At default, the nine dual function feature keys are assigned as follows:
u Four outside line keys (labeled Line 1, Line 2, Line 3, and Line 4).
u One overflow key (labeled Overflow) for additional outside lines.
u One intercom key (labeled ICM) for dialing internal numbers.
u Three feature keys; Direct Call Forward, Do Not Disturb, and Mute(labeled FWD, DND, and Mute)
However, each key can be reprogrammed as any one of the following:
u An outside line key. Press this for direct access to that line or group oflines.
u A Direct Station Selection key. Press this to call a specific internalresource, instead of dialing manually. A DSS key can connect with aspecific keyset, hunt group, paging group or voice mail general number.
u A frequently used feature such as Call Forward, Do Not Disturb or aMessage Waiting light. Press the key to activate and cancel the feature.
u A speed dial number. Press the key to dial the stored number.
See page 6 for a guide to what the associated LEDs signify.
Dual Function Feature keys have a second “level” of capacity. This upper levelcan store speed dial numbers. Press the Function key followed by theappropriate Feature key to dial these stored speed dial numbers.

1 / Introduction
4 Protegé® Keyset User Guide - without display
Function KeyMost feature codes are set and cancelled by pressing this key followed bydialing one to four digits. Also use this key to access the speed dial numbersstored in the “upper” level of the dual function feature keys.
Headset Jack (not all models)
Enables you to connect a headset to your telephone.
Hold KeyPress this key to place a call on hold. Also use this key to concludeprogramming certain features.
Pull Out TrayContains a card for you to note frequently dialed numbers, or contents of dualfunction feature keys.
Redial KeyThe Redial key is programmable. It is usually programmed to redial the lastoutside number dialed. For more information, see page 23.
Speaker Key and LightThe speaker key turns your speakerphone on and off. Use it to disconnect ahands-free call. Your speakerphone is active when the light is lit.
This key also activates the Group Listen feature.
Pressing the Speaker key will answer or release a call on the spearkerphone.Switching from the handset to the speakerphone is easy. Press the Speaker key(it will light red) and then hang up the handset. To return to the handset, simplylift it up and the speaker will automatically turn off.

1 / Introduction
5Protegé® Keyset User Guide - without display
SpeakerphoneThe speakerphone enables you to make hands-free calls. If your company doesnot have external paging equipment, pages may be broadcast over keysetspeakerphones.
Volume KeysUse the volume keys to regulate the volume of the ringer, the speaker, thehandset, the headset, and of the group listen feature.
Xfer/Conf KeyUse this key when transferring calls, and when forming three- or four-partyconference calls.
1 / Introduction
6 Protegé® Keyset User Guide - without display
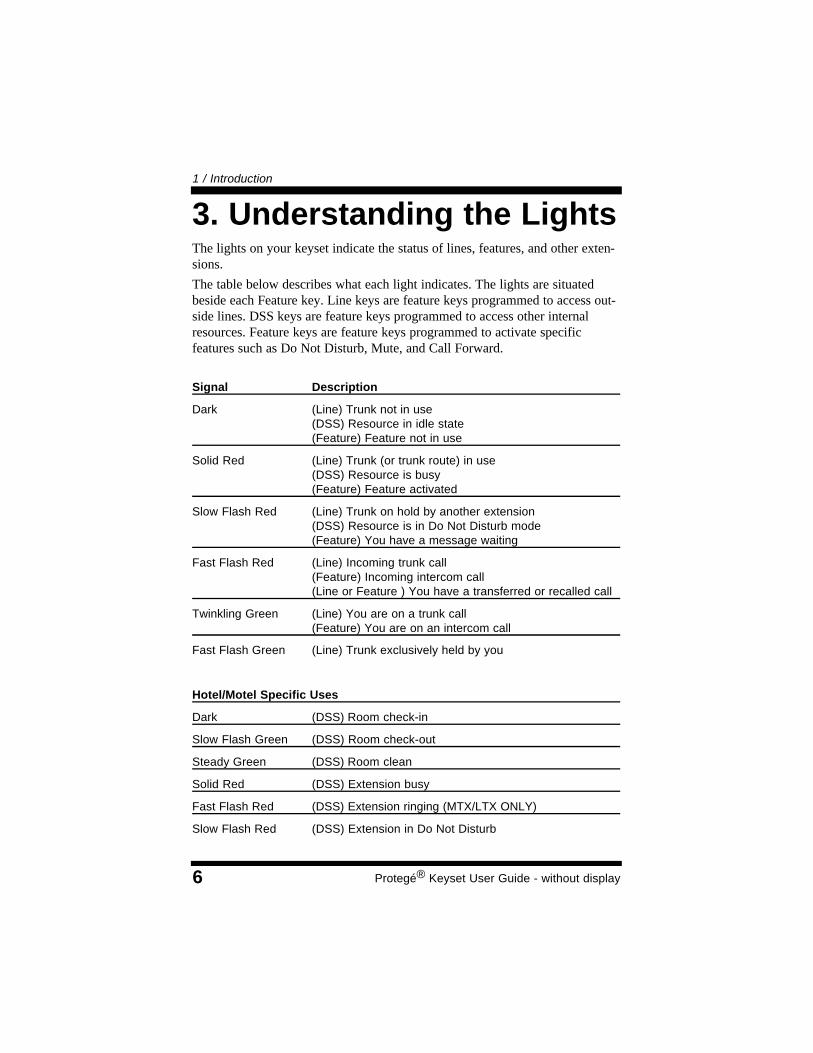
3. Understanding the Lights The lights on your keyset indicate the status of lines, features, and other exten-sions.
The table below describes what each light indicates. The lights are situatedbeside each Feature key. Line keys are feature keys programmed to access out-side lines. DSS keys are feature keys programmed to access other internalresources. Feature keys are feature keys programmed to activate specificfeatures such as Do Not Disturb, Mute, and Call Forward.
Signal Description
Dark (Line) Trunk not in use(DSS) Resource in idle state(Feature) Feature not in use
Solid Red (Line) Trunk (or trunk route) in use(DSS) Resource is busy(Feature) Feature activated
Slow Flash Red (Line) Trunk on hold by another extension(DSS) Resource is in Do Not Disturb mode(Feature) You have a message waiting
Fast Flash Red (Line) Incoming trunk call(Feature) Incoming intercom call(Line or Feature ) You have a transferred or recalled call
Twinkling Green (Line) You are on a trunk call(Feature) You are on an intercom call
Fast Flash Green (Line) Trunk exclusively held by you
Hotel/Motel Specific Uses
Dark (DSS) Room check-in
Slow Flash Green (DSS) Room check-out
Steady Green (DSS) Room clean
Solid Red (DSS) Extension busy
Fast Flash Red (DSS) Extension ringing (MTX/LTX ONLY)
Slow Flash Red (DSS) Extension in Do Not Disturb

1 / Introduction
7Protegé® Keyset User Guide - without display
4. Understanding the TonesThis table will help you distinguish between the different ring tones you hearon your keyset. When setting and canceling features, listen carefully: a singlering (confirmation tone) confirms that you have completed a task; a double ring(error tone) alerts you that you have made a mistake.
Signal Description
Single ring Hold reminder toneConfirmation tone
Two short rings (Once) Error tone(Twice) Callback
Continued single ring Incoming outside callTrunk recall
Continued double ring Incoming intercom call
WarningTo prevent fire or shock hazard, do not expose this telephone to rain or any
type of excess moisture. If accidentally dropped in water, immediately unplugthis telephone from the wall outlet.
5. Care of Your KeysetCare for your keyset as you would a precision instrument. Keep it clean, andplace it on a firm level surface, or affix it securely to a wall, to protect it frombeing dropped. Periodic cleaning with a soft cloth dampened with glass cleaneror mild solution of non-abrasive detergent will keep your telephone lookingnew for years. Do not spray aerosol cleaner or pour any liquid directly into thekeyset. Doing so may cause severe damage to your telephone.

1 / Introduction
8 Protegé® Keyset User Guide - without display
6. Your Protegé Phone SystemAccess To FeaturesYou may not be able to operate all the features in this guide exactly as written.If your company’s telephone system uses an early version of software, somefeatures may offer fewer or different options, others may not be available at all.
Also, a particular feature option may be included in your company’s system,but may not be programmed to operate at your extension.
If you attempt to use a feature that is not available to you, or make a mistake inusing the feature, you will hear an error signal. See your telephone systemadministrator for further details regarding feature access.
Feature InteractionWhen you are setting a feature, please read the introductory paragraphs care-fully. They describe what the feature does, and, if applicable, how it interactswith other features.
Protegé FlexibilityThe Protegé phone system is highly flexible and can be customized to fit manybusiness needs. This guide has been written to accommodate the structure ofmost companies. Your system administrator can tell you the numbers assignedto resources such as hunt groups, and speed dial numbers. Write in this guideany additional information that is relevant to your working environment.
Following the InstructionsThe instructions in this guide often ask you to “press” a key. Throughout theseinstructions, the word “press” means press and release, not press and hold. Youmay be instructed to “dial” which means to press the desired numbers on thedial pad. You may be required to dial [ (star) or # (pound) on the dial pad toaccess certain features.
You should hear a confirmation tone when you have successfully set mostfeatures. Consult with your telephone system administrator if you want thistone disabled or reinstated.

9Protegé® Keyset User Guide - without display
1. Answering CallsAnswering Internal and Outside CallsAnswering internal and outside calls is as easy as picking up the handset orpressing the Speaker key, if you have the Auto Answer feature set to “on” (seepage 54). Otherwise, to answer a call you will need to press a feature keyappropriate to the type of call: a line, line group, or overflow key for an outsidecall; an intercom key for an internal call.
Intercom KeyA feature key programmed as an intercom key (labeled “ICM”) is useful forprocessing internal calls. If you do not have an ICM key already allocated, youcan create one. The feature code is Function key, dial 65. For more informationon setting the feature keys, see page 59.
Your ICM key flashes when an internal party has “camped on” to yourextension while you are on an outside call. Press this key to speak to theinternal caller. Be sure to place the first call on hold if you do not have theAutomatic Hold feature enabled at your keyset or you will disconnect theoutside caller. See page 29 for more information on the Camp On feature, andpage 31 for more information on the Automatic Hold feature.
chapter
two Answering Calls
2 / Answering Calls
10 Protegé® Keyset User Guide - without display
Loud Bell Call Pickup1. Keyset is in idle state.2. Dial the ringing loud bell (810 or 811).3. Call is connected. Pick up the handset or use
the keyset speaker to talk to the caller.
Directed Call Pickup1. Press the Function key and then dial 53.
2. Dial extension number ringing.- or -Dial virtual number ringing (830-859).
3. Call is connected. Pick up the handset or usethe keyset speaker to talk to caller.
Group Call Pickup1. Dial your pickup group number.
2. Call is connected. Pick up the handset or usethe keyset speaker to talk to caller.
2. Call PickupCall Pickup lets you answer calls that are ringing at another location. Simplydial the loud bell directory number to answer a call at a ringing loud bell.
Use Directed Call Pickup to pick up another ringing extension or a ringingvirtual number. You specify (“direct”) the ringing location by dialing the direc-tory number of the ringing extension or virtual number.
Use Group Call Pickup to pick up a ringing extension that is within your workgroup. You do not specify the location. Your system administrator can tell youif your extension is part of a work group, and what number to dial to pick upcalls.
FUNCTION
5 3
8 1
x x x
x x x
2 / Answering Calls
11Protegé® Keyset User Guide - without display
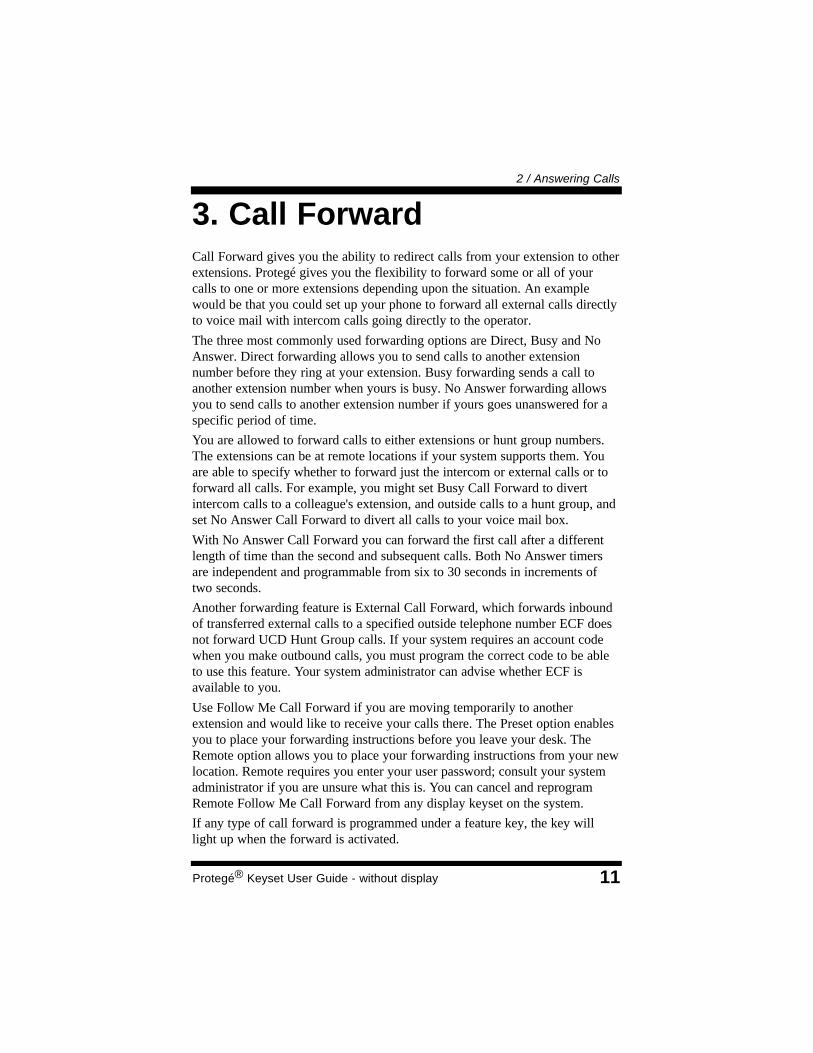
3. Call ForwardCall Forward gives you the ability to redirect calls from your extension to otherextensions. Protegé gives you the flexibility to forward some or all of yourcalls to one or more extensions depending upon the situation. An examplewould be that you could set up your phone to forward all external calls directlyto voice mail with intercom calls going directly to the operator.
The three most commonly used forwarding options are Direct, Busy and NoAnswer. Direct forwarding allows you to send calls to another extensionnumber before they ring at your extension. Busy forwarding sends a call toanother extension number when yours is busy. No Answer forwarding allowsyou to send calls to another extension number if yours goes unanswered for aspecific period of time.
You are allowed to forward calls to either extensions or hunt group numbers.The extensions can be at remote locations if your system supports them. Youare able to specify whether to forward just the intercom or external calls or toforward all calls. For example, you might set Busy Call Forward to divertintercom calls to a colleague's extension, and outside calls to a hunt group, andset No Answer Call Forward to divert all calls to your voice mail box.
With No Answer Call Forward you can forward the first call after a differentlength of time than the second and subsequent calls. Both No Answer timersare independent and programmable from six to 30 seconds in increments oftwo seconds.
Another forwarding feature is External Call Forward, which forwards inboundof transferred external calls to a specified outside telephone number ECF doesnot forward UCD Hunt Group calls. If your system requires an account codewhen you make outbound calls, you must program the correct code to be ableto use this feature. Your system administrator can advise whether ECF isavailable to you.
Use Follow Me Call Forward if you are moving temporarily to anotherextension and would like to receive your calls there. The Preset option enablesyou to place your forwarding instructions before you leave your desk. TheRemote option allows you to place your forwarding instructions from your newlocation. Remote requires you enter your user password; consult your systemadministrator if you are unsure what this is. You can cancel and reprogramRemote Follow Me Call Forward from any display keyset on the system.
If any type of call forward is programmed under a feature key, the key willlight up when the forward is activated.
2 / Answering Calls
12 Protegé® Keyset User Guide - without display
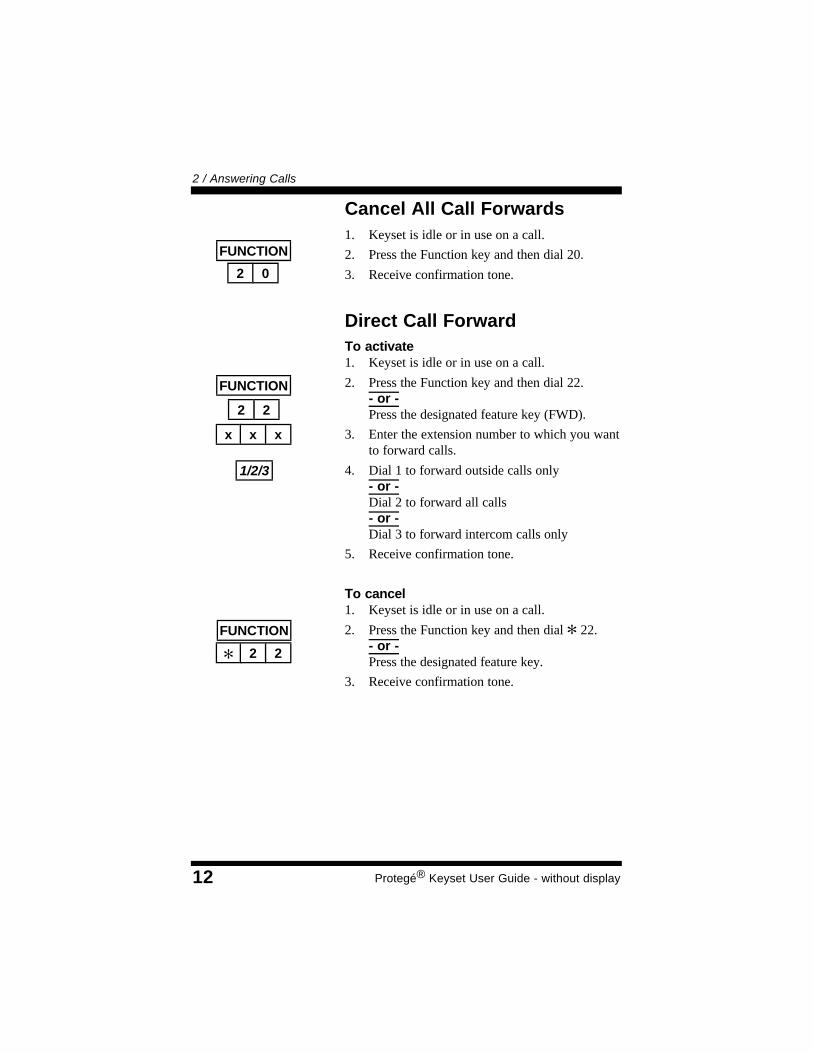
Cancel All Call Forwards1. Keyset is idle or in use on a call.
2. Press the Function key and then dial 20.
3. Receive confirmation tone.
Direct Call ForwardTo activate 1. Keyset is idle or in use on a call.
2. Press the Function key and then dial 22.- or -Press the designated feature key (FWD).
3. Enter the extension number to which you wantto forward calls.
4. Dial 1 to forward outside calls only- or -Dial 2 to forward all calls- or -Dial 3 to forward intercom calls only
5. Receive confirmation tone.
To cancel1. Keyset is idle or in use on a call.
2. Press the Function key and then dial [ 22.- or -Press the designated feature key.
3. Receive confirmation tone.
FUNCTION
FUNCTION
1/2/3
x x x
[ 2 2
FUNCTION
2 0
2 2

2 / Answering Calls
13Protegé® Keyset User Guide - without display
Busy Call ForwardTo activate 1. Keyset is idle or in use on a call.
2. Press the Function key and then dial 21.
3. Enter the extension number to which you wantto forward calls.
4. Dial 1 to forward outside calls only- or -Dial 2 to forward all calls- or -Dial 3 to forward intercom calls only
5. Receive confirmation tone.
To cancel1. Keyset is idle or in use on a call.
2. Press the Function key and then dial [ 21.
3. Receive confirmation tone.
No Answer Call ForwardTo activate 1. Keyset is idle or in use on a call.
2. Press the Function key and then dial 24.
3. Enter the extension number to which you wantto forward calls.
4. Dial 1 to forward outside calls only- or -Dial 2 to forward all calls- or -Dial 3 to forward intercom calls only
5. Enter a time for the first No Answer CallForward. For example, “08” is 8 seconds (tworing cycles).
7. Enter a time for the second No Answer CallForward. For example, “08” is 8 seconds (tworing cycles).
8. Receive confirmation tone.
FUNCTION
FUNCTION
x x x
2 1
1/2/3
[ 2 1
FUNCTION
x x x
2 4
1/2/3
x x
x x
2 / Answering Calls
14 Protegé® Keyset User Guide - without display
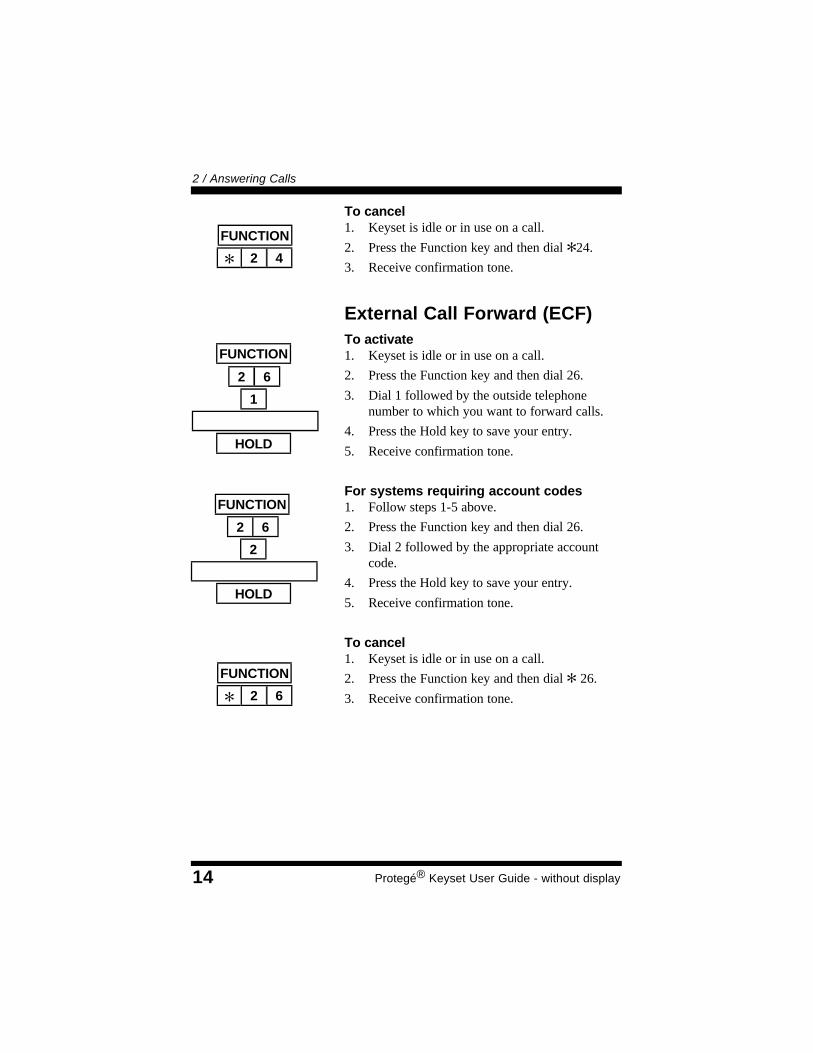
To cancel1. Keyset is idle or in use on a call.
2. Press the Function key and then dial [24.
3. Receive confirmation tone.
External Call Forward (ECF)To activate 1. Keyset is idle or in use on a call.
2. Press the Function key and then dial 26.
3. Dial 1 followed by the outside telephonenumber to which you want to forward calls.
4. Press the Hold key to save your entry.
5. Receive confirmation tone.
For systems requiring account codes1. Follow steps 1-5 above.
2. Press the Function key and then dial 26.
3. Dial 2 followed by the appropriate accountcode.
4. Press the Hold key to save your entry.
5. Receive confirmation tone.
To cancel1. Keyset is idle or in use on a call.
2. Press the Function key and then dial [ 26.
3. Receive confirmation tone.
FUNCTION
[ 2 4
1
FUNCTION
HOLD
FUNCTION
2 6
2
FUNCTION
HOLD
2 6
[ 2 6

2 / Answering Calls
15Protegé® Keyset User Guide - without display
FUNCTION
x x x
2 3
1/2/3
FUNCTION
x x x
[ 2 3
Follow Me Call Forward - PresetTo activate 1. Keyset is idle or in use on a call.
2. Press the Function key and then dial 25.
3. Enter the extension number to which you wantto forward calls.
4. Dial 1 to forward outside calls only.- or -Dial 2 to forward all calls.- or -Dial 3 to forward intercom calls only.
5. Receive confirmation tone.
To cancel1. Keyset is idle or in use on a call.
2. Press the Function key and then dial [ 25.
3. Receive confirmation tone.
Follow Me Call Forward - RemoteTo activate 1. Keyset is idle or in use on a call.
2. Press the Function key and then dial 23.
3. Enter your normal extension number.
4. Enter your user password.
5. Dial 1 to forward outside calls only.- or -Dial 2 to forward all calls.- or -Dial 3 to forward intercom calls only.
6. Receive confirmation tone.
To cancel1. Keyset is idle or in use on a call.
2. Press the Function key and then dial [ 23.
3. Enter your normal extension number.
4. Enter your user password.
5. Receive confirmation tone.
FUNCTION
x x x
FUNCTION
2 5
1/2/3
[ 2 5

2 / Answering Calls
16 Protegé® Keyset User Guide - without display
Do Not DisturbTo activate DND at your extension1. Keyset is idle or in use on a call.
2. Press the Function key and then dial 4. - or -Press the designated feature key (DND).
3. Receive confirmation tone.
To cancel1. Keyset is idle or in use on a call.
2. Press the Function key and then dial 4.- or -Press the designated feature key (DND).
3. Receive confirmation tone.
3. Avoiding CallsAt times you may want to work at your desk without phone interruptions. Inaddition to Call Forward, you can choose from the following features to blocksome or all calls.
Do Not Disturb (DND) blocks all calls to your telephone, making it appear tobe busy to outside callers, and internal callers without display keysets. Internalusers with display keysets will see that you are in DND mode. Some users,such as the attendant, may have the authority to override DND and force callsthrough. Your system administrator can tell you if anyone has overrideauthority. If you set both DND and Call Forward at your station, calls will for-ward as if your extension is busy.
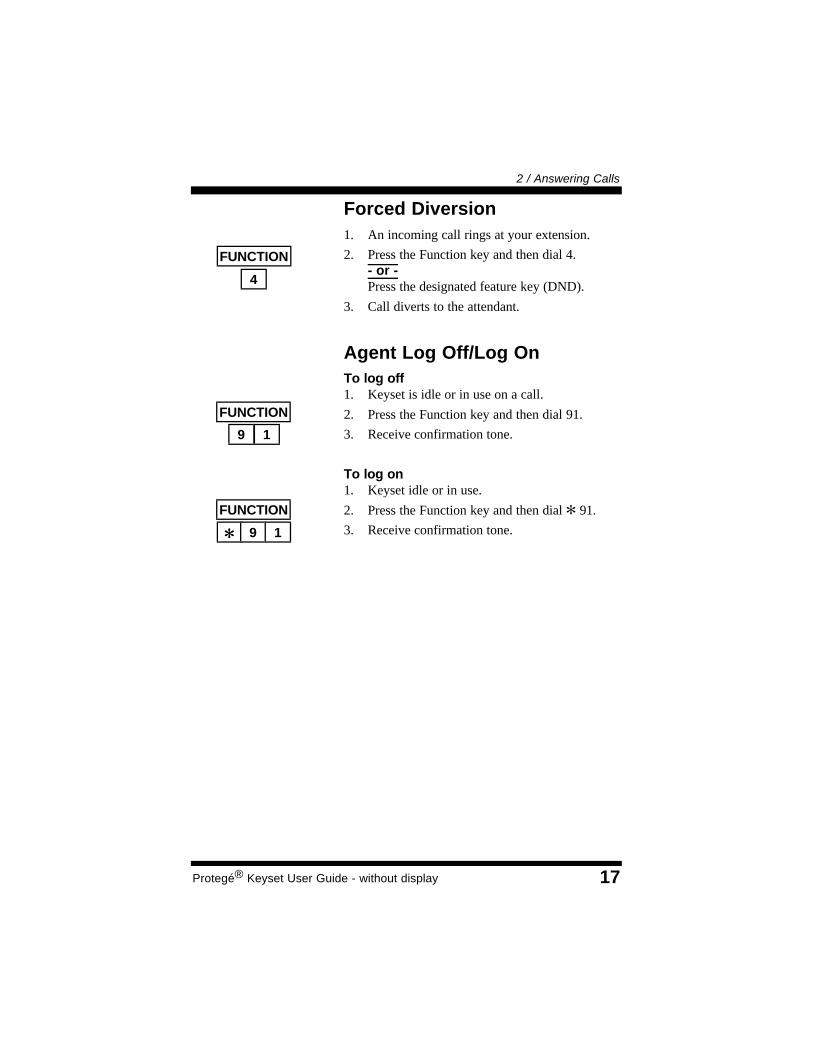
Use the Forced Diversion feature to deflect an incoming call to the attendant.
If you are a member of a hunt group, you can use the Agent Log Off/Log Onfeature to temporarily remove your extension from the hunt group. While youare logged off, calls directed to the hunt group will not ring at your extension.However, outside and intercom calls directed specifically to your extensionnumber will still ring through.
FUNCTION
4
FUNCTION
4
2 / Answering Calls
17Protegé® Keyset User Guide - without display
Forced Diversion1. An incoming call rings at your extension.
2. Press the Function key and then dial 4.- or -Press the designated feature key (DND).
3. Call diverts to the attendant.
Agent Log Off/Log OnTo log off1. Keyset is idle or in use on a call.
2. Press the Function key and then dial 91.
3. Receive confirmation tone.
To log on1. Keyset idle or in use.
2. Press the Function key and then dial [ 91.
3. Receive confirmation tone.[[ 9 1
FUNCTION
4
FUNCTION
9 1
FUNCTION

2 / Answering Calls
18 Protegé® Keyset User Guide - without display

19Protegé® Keyset User Guide - without display
Calling an Extension1. Dial the extension number.
Calling a Virtual Number1. Dial the virtual number.
Calling the Attendant 1. Dial 0.
Calling a Hunt Group1. Dial the hunt group number.
1. Placing Intercom CallsYou can reach any individual extension or group of extensions by dialing theappropriate directory number.
Use the Voice to Ring Interchange feature to force an extension that is in VoiceCall mode to ring. This is particularly useful in situations when the calledextension is unattended, as it enables you to use any available messagingoptions, and to follow any No Answer Call Forwarding instructions that mayhave been set. See page 54 for more information on the Voice Call feature.
If the extension you call is busy you may be able to intrude on the call. Yourability to use this feature depends on your class of service, and that of the desti-nation extension.
If the person you call has their keyset in Do Not Disturb mode, you may beable to use the DND Override feature to force your call to ring through. Yourability to use this feature depends on your class of service.
If your call to a specific extension goes unanswered, you can request aCallback on page 27, or leave a “Call Me” message on page 41.
x x x
8
chapter
three Making Calls
0
x x x

3 / Making Calls
20 Protegé® Keyset User Guide - without display
Voice to Ring Interchange (VRI)1. Dial the extension number.
2. Receive confirmation “click” - no ring tone.
3. Dial 2. Your call overrides the Voice CallAllow setting and rings through to the exten-sion.
Intrusion1. Dial an extension. Receive busy tone.
2. Dial 8. You intrude on the other extension’scall. You can speak to and hear both parties.
Do Not Disturb Override1. Dial an extension. Receive busy tone.
2. Dial 3. Your call overrides DND and ringsthrough to the extension.
2
8
3
x x x
x x x
x x x

3 / Making Calls
21Protegé® Keyset User Guide - without display
Placing an OHVA call1. Dial the extension number.
2. Receive busy tone.
3. Dial 0.
4. You are connected through the speaker of thecalled party.
2. Off-Hook Voice Announce(OHVA)
Use the OHVA feature when you want to interrupt a busy extension. To be ableto perform an OHVA the called party must meet the following criteria:
1. The called extension must be an Executive or Executive Data keyset.
2. The called party must be using the handset. Your OHVA call will be con-nected through the speakerphone.
3. The called party’s keyset must be programmed to permit OHVA calls.Your system administrator can advise if this is the case.
OHVA is programmed at the system level to connect immediately or after aspecified period of time. This gives the called party time to reject the callbefore being interrupted.
Note, therefore, that the called party may reject your OHVA. If this occurs, youwill receive an error tone.
If you attempt to place an OHVA call to a Business keyset or a plain single linetelephone, you will receive an error tone.
x x x
0
3 / Making Calls
22 Protegé® Keyset User Guide - without display
FUNCTION
7
[
1
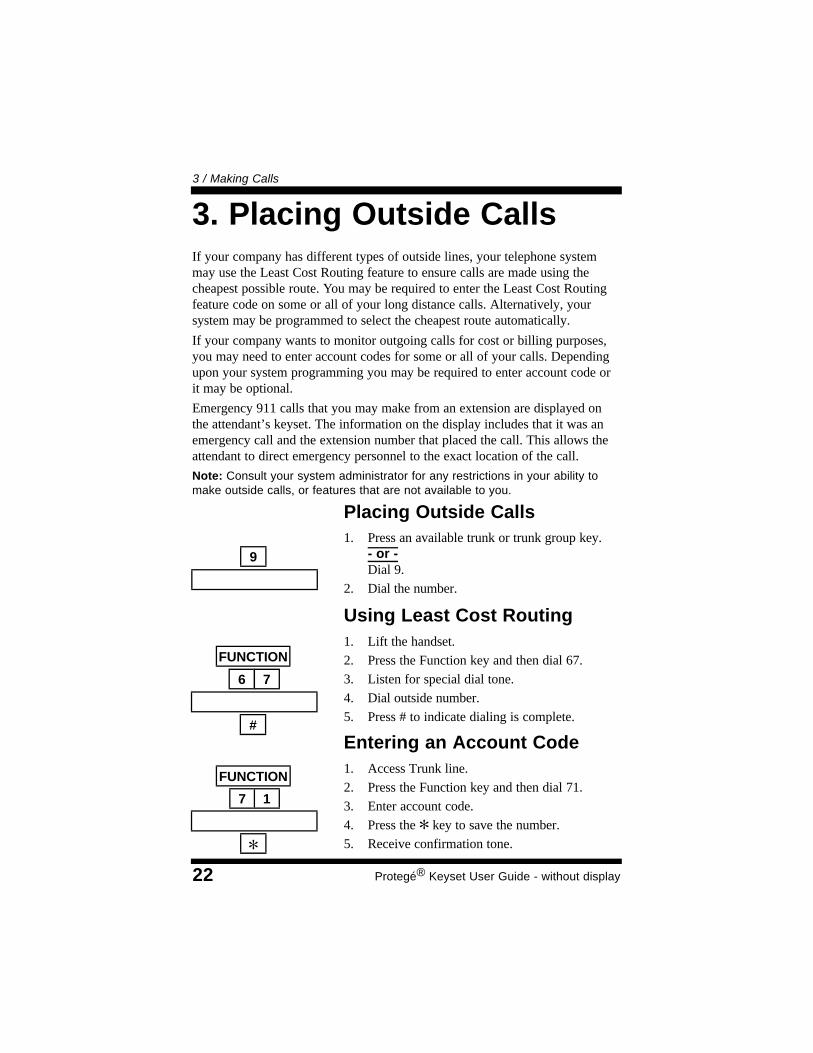
Placing Outside Calls1. Press an available trunk or trunk group key.
- or -Dial 9.
2. Dial the number.
Using Least Cost Routing1. Lift the handset.
2. Press the Function key and then dial 67.
3. Listen for special dial tone.
4. Dial outside number.
5. Press # to indicate dialing is complete.
Entering an Account Code1. Access Trunk line.
2. Press the Function key and then dial 71.
3. Enter account code.
4. Press the [ key to save the number.
5. Receive confirmation tone.
3. Placing Outside CallsIf your company has different types of outside lines, your telephone systemmay use the Least Cost Routing feature to ensure calls are made using thecheapest possible route. You may be required to enter the Least Cost Routingfeature code on some or all of your long distance calls. Alternatively, yoursystem may be programmed to select the cheapest route automatically.
If your company wants to monitor outgoing calls for cost or billing purposes,you may need to enter account codes for some or all of your calls. Dependingupon your system programming you may be required to enter account code orit may be optional.
Emergency 911 calls that you may make from an extension are displayed onthe attendant’s keyset. The information on the display includes that it was anemergency call and the extension number that placed the call. This allows theattendant to direct emergency personnel to the exact location of the call.
Note: Consult your system administrator for any restrictions in your ability tomake outside calls, or features that are not available to you.
9
#
FUNCTION
6 7

3 / Making Calls
23Protegé® Keyset User Guide - without display
4. RedialingFour redialing options are available to you; Last Number Redial, AutomaticBusy Redial, Saved Number Redial and User Saved Number Redial.
Last Number Redial (LNR) simply redials the last outside number dialed outfrom your keyset. By default, the Redial key is programmed for LNR.
Automatic Busy Redial (ABR) also redials the last outside number dialed outfrom your keyset. It does it repeatedly for a specified number of attempts, oruntil it connects, whichever is shorter. Note that ABR will disconnect if youoperate any telephone feature while this function is invoked.
The Saved Number Redial (SNR) feature redials a telephone number whichyou stored during an earlier call to that number. The saved number remainsstored until you save another number in its place. This is useful for occasionswhen you need to make other outside calls between calls to a particular num-ber. Note that to store a telephone number using SNR, you must have initiatedthe call.
The User Saved Number Redial (USNR) feature redials a telephone numberwhich you stored during an earlier call. It offers a paper-free way of recordinga telephone number you want to dial at a later time. Press just three keys torecall the number and dial it. The saved number remains stored until you saveanother in its place.
8
REDIAL
FUNCTION
CLEAR
Last Number Redial (LNR) To activate1. Keyset is idle.
2. Press the Redial key.- or -Press the Function key and then dial 8.
To cancel1. Press the Clear key.

3 / Making Calls
24 Protegé® Keyset User Guide - without display
Automatic Busy Redial (ABR) To activate1. Keyset is idle.
2. Press the Function key and then dial 78.
To cancel1. Press the Clear key.
2. Receive confirmation tone.
Saved Number Redial (SNR) To save a number1. Keyset is in use on a call.
2. Press the Function key and then dial 51.
To dial the saved number1. Keyset is idle.
2. Press the Function key and then dial 51.
User Saved Number Redial(USNR) To save a number1. Keyset is in use on a call.
2. Press the Function key and then dial 5 [.
3. Dial the number to be stored.
4. Press the Hold key to save the number.
5. Receive confirmation tone.
To dial the saved number1. Keyset is idle.
2. Press the Function key and then dial 5 [.
7 8
FUNCTION
CLEAR
5 [[
FUNCTION
5 [[
FUNCTION
HOLD
5 1
FUNCTION
5 1
FUNCTION

3 / Making Calls
25Protegé® Keyset User Guide - without display
To Dial on Any Available Outside Line1. Dial the speed dial number.
- or -Press the Function key followed by the desig-nated feature key.
To Dial on a Specific Trunk or Trunk Route,Or With LCR1. Dial the trunk number or trunk route number.
- or -Press the specific line key.
2. Press the Function key and then dial 1, fol-lowed by the speed dial number.- or -Press the Function key followed by the desig-nated feature key.
5. Dialing Speed Dial NumbersAny frequently dialed telephone number can be stored as a Speed DialNumber. Speed dial numbers are similar to the directory numbers you dial toaccess hunt groups, and other extensions. When you dial a speed dial number,Protegé dials out the corresponding telephone number.
System speed dial numbers are shared by many extension users. Individualspeed dial numbers are specific to your keyset. You can program speed dialnumbers on both “levels” of dual function feature keys. See Speed DialNumbers on page 45 for instructions on how to store individual speed dialnumbers, and Setting the Feature Keys on page 59 for how to program themunder feature keys.
x x x
1
FUNCTION
x x x

3 / Making Calls
26 Protegé® Keyset User Guide - without display
Pulse to Tone Conversion1. Access an outside line key.
2. Dial telephone number (in pulse).
3. Dial [.
4. Dial additional required digits (in tone).
Inserting Special DialCharactersTo dial a pause1. Press the Function key and then dial 70.
2. Dial the remaining digits.
To insert a flash1. Press the Function key and then dial 3.
2. Dial the remaining digits.
To insert a wait-for-dial-tone1. Press the Function key and then dial 79.
2. Dial the remaining digits.
6. Special DialingYour system administrator can confirm if your system uses pulse dialing, andwhether you need to add any of the special dial characters (pause, flash, andwait-for-dial-tone).
If your system uses pulse dialing for outside calls, you may need to use thePulse to Tone Conversion feature to access remote equipment such as voicemail systems.
7 0
[[
FUNCTION
7 9
FUNCTION
3
FUNCTION

3 / Making Calls
27Protegé® Keyset User Guide - without display
Placing a Callback to a BusyOr Unattended ExtensionTo activate 1. Dial the extension number.
2. Receive busy tone.- or -Receive no answer.
3. Dial 5.
4. Receive confirmation tone.
To delete individual callback1. Press the Function key and then dial [ # 5.
2. Dial the extension number.
3. Receive confirmation tone.
To delete all callbacks1. Press the Function key and then dial [ # 5 [.
2. Receive confirmation tone.
7. CallbackWhen you place an intercom call to a busy or unattended extension, you canrequest a callback and hang up. You then receive a callback when the busyextension becomes available, or when the unattended extension is next used(goes off-hook and back on-hook).
You may also request a callback on a busy trunk or trunk route. Again, youreceive a callback when the trunk or trunk route becomes available.
The callback signal is two double rings.
Several parties may activate the callback feature on the same extension, trunkor trunk route. Callers receive callbacks in the order in which they requestedthem.
FUNCTION
FUNCTION
[[ [[# 5
5
x x x
[[ # 5
x x x

3 / Making Calls
28 Protegé® Keyset User Guide - without display
Responding to a CallbackTo activate1. Your extension rings.
2. Lift the handset.- or -Press the Speaker key.
3. The call rings through to the extension.
To cancel1. Press the Clear key.
Placing a Callback to a BusyTrunk or Trunk RouteTo activate 1. Dial the outside line number.
- or -Dial the trunk route number.
2. Receive busy tone.
3. Dial 5.
4. Receive confirmation tone.
Responding to a TrunkCallback1. Your extension rings. The LED for the appro-
priate line key flashes red.
2. Press the line key. Receive dial tone.
3. Dial the outside number.
5
CLEAR
x x x

3 / Making Calls
29Protegé® Keyset User Guide - without display
To activate1. Keyset is in idle state.
2. Dial extension number. Receive busy tone.
3. Dial 4.
4. Receive confirmation tone.
5. Music on Hold plays until the called extensionhangs up.
6. The call rings through.
To cancel while waiting for extension tobecome available1. Hang up.
To cancel while ringing1. Press the Clear key.
8. Camp OnWhen you call a busy extension, you can choose to use the Camp On feature,remain off-hook, and wait for the busy extension to become available. You willhear music on hold while waiting if your system is equipped with a musicsource.
Only one extension can camp on to another at any one time. If you hear awarning tone another extension user has already camped on to the busy exten-sion. You can still use the Callback Busy feature, which will alert you when theline becomes free.
Camp On is a useful feature for urgent calls. If two parties are competing forthe same busy extension, Camp On overrides Callback Busy even if theCallback Busy feature was activated first.
CLEAR
4
x x x
3 / Making Calls
30 Protegé® Keyset User Guide - without display
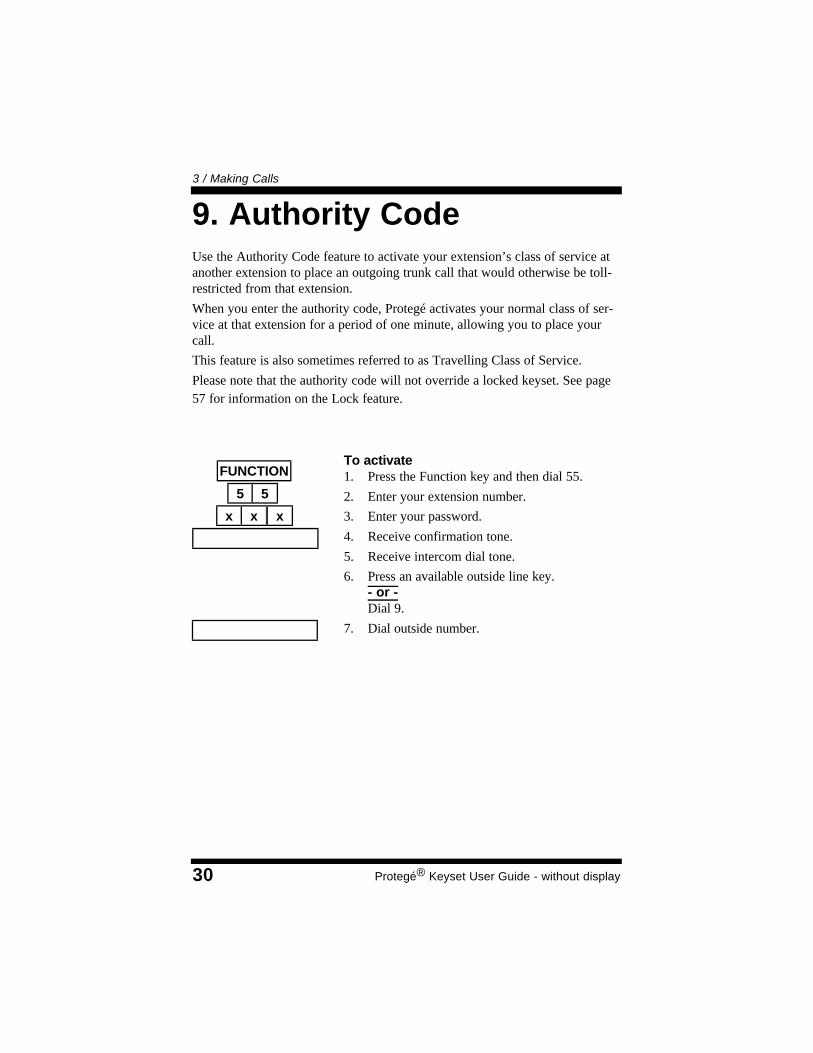
To activate1. Press the Function key and then dial 55.
2. Enter your extension number.
3. Enter your password.
4. Receive confirmation tone.
5. Receive intercom dial tone.
6. Press an available outside line key.- or -Dial 9.
7. Dial outside number.
9. Authority CodeUse the Authority Code feature to activate your extension’s class of service atanother extension to place an outgoing trunk call that would otherwise be toll-restricted from that extension.
When you enter the authority code, Protegé activates your normal class of ser-vice at that extension for a period of one minute, allowing you to place yourcall.
This feature is also sometimes referred to as Travelling Class of Service.
Please note that the authority code will not override a locked keyset. See page57 for information on the Lock feature.
5 5
FUNCTION
x x x

31Protegé® Keyset User Guide - without display
System HoldPlacing a trunk call on system hold1. Keyset is in use on an active call.
2. Press the Hold key.
Retrieve1. Press held outside line key (flashing green).
- or -Press the Function key and then dial 7 [.
1. HoldYou can place a trunk call on one of two types of hold; System or Exclusive.
A trunk call placed on System Hold is held at the system level. Any extensionkeyset can retrieve the call.
A trunk call placed on Exclusive Hold is held specifically at your station. Atother extensions that held trunk will still appear busy. This prevents any otherextension from inadvertently picking up that call and gives you a certain levelof privacy on trunk calls. Calls placed on Exclusive Hold can be retrieved froma different extension by using the Directed Call Pickup feature. After a timeperiod, a call placed on Exclusive Hold will revert to System Hold status.
You can place several different calls on both types of hold. Use the HoldRetrieve function code to retrieve successive held calls. Calls are retrieved inthe order in which they were placed on hold; the first call held is the first oneretrieved.
The Protegé phone system generates a periodic tone over your keyset’s speakerto remind you of a call you have placed on hold.
If you enable Automatic Hold on your keyset you can skate from one call toanother, automatically placing the first call on exclusive hold. This methodshortens the transfer process by allowing you to transfer an active trunk call toanother extension via a preprogrammed DSS key without first pressing theHold key.
7 [[
FUNCTION
HOLD
chapter
four Call Handling

4 / Call Handling
32 Protegé® Keyset User Guide - without display
Exclusive HoldPlacing a trunk call on exclusive hold1. Keyset is in use on an active call.
2. Press the Function key followed by the Holdkey.
To retrieve1. Press held outside line key (flashing green)
- or -Press Function key and then dial 7 [.
Holding an Intercom Call1. Press the Hold key .
To retrieve1. Hang up, and return to idle state.
2. Pick up handset.- or -Press the Speaker key.
Automatic HoldTo activate1. Keyset is idle or in use.
2. Press the Function key and then dial 94.
3. Dial 1 to hold outside calls only.- or -Dial 2 to hold all calls.- or -Dial 3 to hold intercom calls only.
4. Receive confirmation tone.
To cancel1. Keyset is idle or in use.
2. Press the Function key and then dial [ 94.
3. Receive confirmation tone.[[ 9 4
7 [[
9 4
FUNCTION
FUNCTION
HOLD
HOLD
FUNCTION
FUNCTION
1/2/3

4 / Call Handling
33Protegé® Keyset User Guide - without display
Auto Transfer ModeTo enable1. Keyset is idle or in use on a call.
2. Press the Function key and then dial 54.
To disable1. Keyset is idle or in use on a call.
2. Press the Function key and then dial 54.
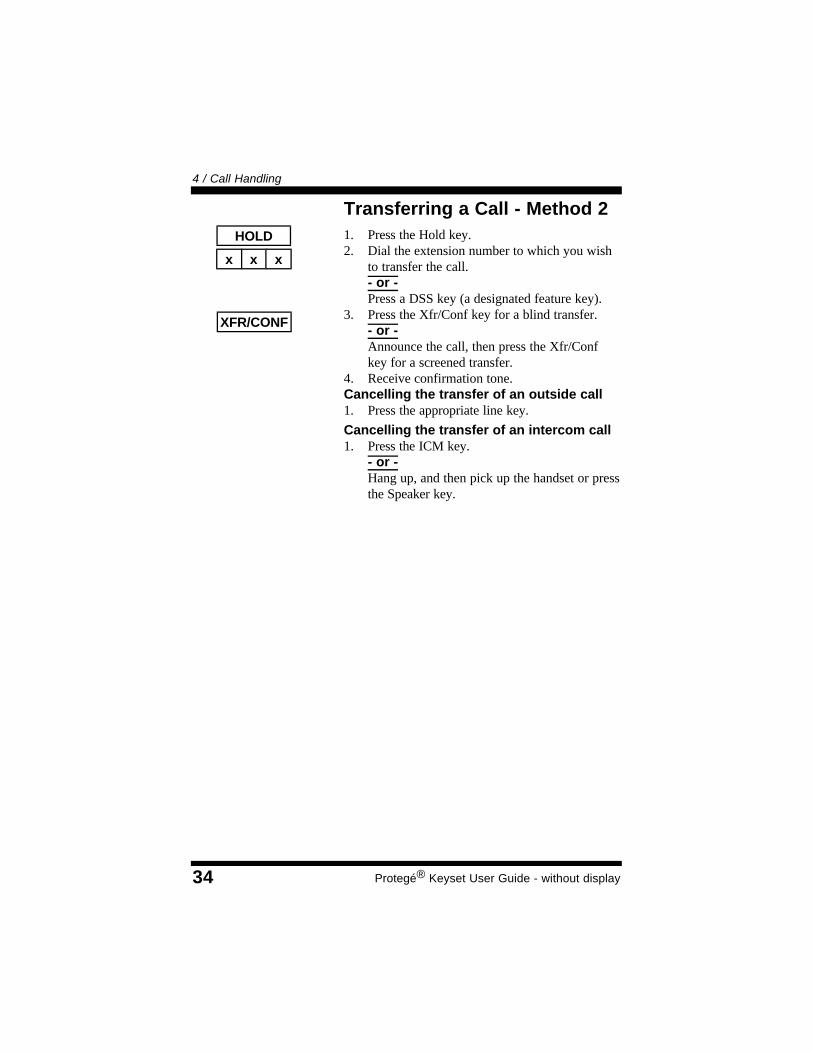
Transferring A Call - Method 1 1. Keyset is active on a call.
2. Press the Xfr/Conf key.
3. Dial the destination extension.
4. Hang up to perform a blind transfer.- or -Stay off-hook to screen the transfer.
To cancel the transfer1. Press the Xfr/Conf key.
2. Transferring CallsUse the Auto Transfer Mode to speed up transfers via a DSS key. Press theDSS key to transfer the call immediately. Your keyset returns to idle stat. Whentransferring to a voice mail hunt group number, you have the option to dial amailbox.
All transfers recall to your keyset automatically if they are unanswered.Perform a blind transfer when you do not wish to notify the target extension orhunt group member prior to redirecting a call. A screened transfer is when younotify the target extension or hunt group member prior to redirecting the call.
The No Ring Transfer feature offers you a way to “park” a call so anotherextension user can pick it up. Calls can be parked on a valid extension numberor on a number used exclusively for parked calls, if one has been assigned. Thecall is placed on exclusive hold at both extensions when performing a No RingTransfer. Parked calls are retrieved using the Call Pickup feature.
XFR/CONF
x x x
XFR/CONF
5 4
FUNCTION
5 4
FUNCTION
4 / Call Handling
34 Protegé® Keyset User Guide - without display
Transferring a Call - Method 21. Press the Hold key.2. Dial the extension number to which you wish
to transfer the call.- or -Press a DSS key (a designated feature key).
3. Press the Xfr/Conf key for a blind transfer.- or -Announce the call, then press the Xfr/Confkey for a screened transfer.
4. Receive confirmation tone.Cancelling the transfer of an outside call1. Press the appropriate line key.
Cancelling the transfer of an intercom call1. Press the ICM key.
- or -Hang up, and then pick up the handset or pressthe Speaker key.
x x x
HOLD
XFR/CONF
4 / Call Handling
35Protegé® Keyset User Guide - without display
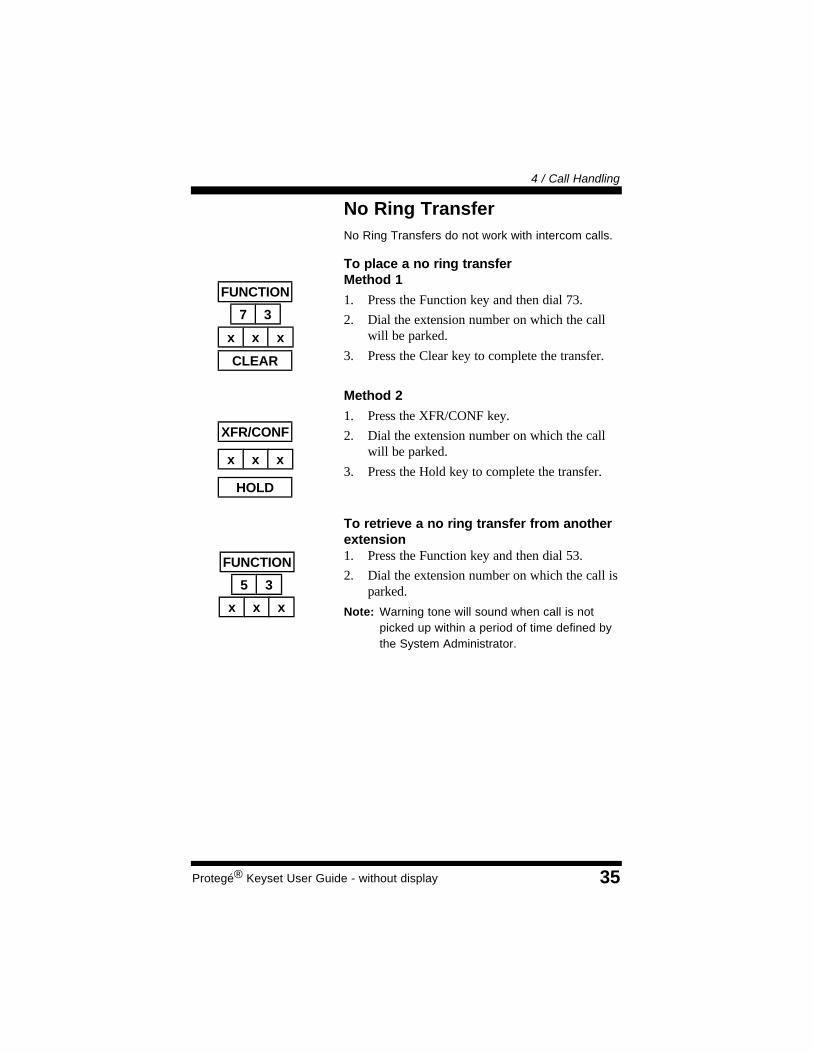
No Ring TransferNo Ring Transfers do not work with intercom calls.
To place a no ring transferMethod 1
1. Press the Function key and then dial 73.
2. Dial the extension number on which the callwill be parked.
3. Press the Clear key to complete the transfer.
Method 2
1. Press the XFR/CONF key.
2. Dial the extension number on which the callwill be parked.
3. Press the Hold key to complete the transfer.
To retrieve a no ring transfer from anotherextension1. Press the Function key and then dial 53.
2. Dial the extension number on which the call isparked.
Note: Warning tone will sound when call is notpicked up within a period of time defined bythe System Administrator.
x x x
x x x
7 3
5 3
FUNCTION
FUNCTION
x x x
XFR/CONF
HOLD
CLEAR

4 / Call Handling
36 Protegé® Keyset User Guide - without display
Forming a Conference1. While active on a call.
2. Press the Hold key.
3. Dial the extension number to be added to con-ference.- or -Access an outside line, dial the telephonenumber.
4. Press the Function key followed by theXfr/Conf key.
5. Receive confirmation tone.
6. To add a fourth party, repeat steps 2 and 3.
3. ConferenceThe Conference feature allows you to connect up to three additional parties in asingle conversation. The three additional parties can be any combination oftrunk or intercom callers.
Use the Private Talk feature to break out of the conference and talk with one ofthe parties privately. Use the Forced Release feature to disconnect each of thedistant parties from the conference.
As the Conference Controller (the person who set up the conference), you canexit the call at any time. If you are leaving a single inside party connected totwo external parties, simply hang up and control of the conference passes tothat internal party. If you want to leave two inside parties with an externalparty, hang up and control of the conference passes to the first internal partyyou brought into the conference. If you leave a three-way conference, the con-ference reverts to being a simple two-way call.
Use the Unsupervised Conference feature to connect two external parties toeach other. First form a three party conference and then remove yourself byentering the Unsupervised Conference feature code. You can rejoin the confer-ence.
Note that an unsupervised conference disconnects automatically after a presettime. See your telephone system administrator for the exact time length allocat-ed in your system. A warning tone will be given 10 seconds prior to the calldisconnecting. Participants can extend the talk time by entering a code.
x x x
HOLD
FUNCTION
XFR/CONF

4 / Call Handling
37Protegé® Keyset User Guide - without display
7 7
FUNCTION
xx x
x x x
FUNCTION
FUNCTION
XFR/CONF
5 7
FUNCTION
7 4
Putting the Conference on Hold1. Press the Hold key.
To return to the conference1. Press the Function key and then dial 7 [.
- or -Press the held trunk key.- or -Press the ICM key if the conference is withinternal parties only.
Private TalkTo activate1. Press the Function key and then dial 57.
2. Dial the trunk number with which you wish tospeak privately.- or -Dial the extension number with which youwish to speak privately.
To release and resume conference1. Press the Function key followed by the
Xfr/Conf key.
Forced Release1. Press the Function key and then dial 74.
2. Dial the trunk or extension number to bereleased.
3. Receive confirmation tone.
Unsupervised ConferenceTo conference two outside lines1. Press the Function key and then dial 77.
2. Receive confirmation tone.
To intrude on an unsupervised conference1. Press the Function key and then dial 77.
2. Receive confirmation tone.
FUNCTION
HOLD
7 [
7 7
FUNCTION

4 / Call Handling
38 Protegé® Keyset User Guide - without display

39Protegé® Keyset User Guide - without display
Pagingand Messaging
Group Page1. Lift the handset.
- or -Press the Speaker key.
2. Dial the group paging number.- or -Press the designated feature key.
3. Receive confirmation tone.
External Page1. Lift the handset.
2. Dial the external page number.
3. Receive confirmation tone.
chapter
five
1. PagingYou can initiate a page from your keyset by dialing a paging group directorynumber. The Protegé system will broadcast the page over the speakers of allidle Protegé keysets within that group.
If your system is connected to any paging speakers, you can access externalpaging equipment by dialing the appropriate directory number.
The Page Answer feature enables you to answer a page in progress. Dialing thefeature code will connect you immediately to the paging extension. Note thatthis feature only works while the page is still in progress.
By using the Page Receive function, you can prevent pages from being broad-cast over your keyset speakerphone. You can still answer a page using the PageAnswer feature code, even if your keyset is in “page deny” mode.

5 / Paging and Messaging
40 Protegé® Keyset User Guide - without display
Tenant Group Page1. Lift the handset.
2. Dial 400.
3. Receive confirmation tone.
Page Answer1. Press the Function key and then dial 59.
2. You are immediately connected to the exten-sion initiating the page.
Paging Receive SelectionTo accept paging1. Press the Function key and then dial [ 99.
To reject paging1. Press the Function key and then dial 99.
FUNCTION
5
[ 9 9
9
FUNCTION
FUNCTION
9 9
4 0 0
5 / Paging and Messaging
41Protegé® Keyset User Guide - without display
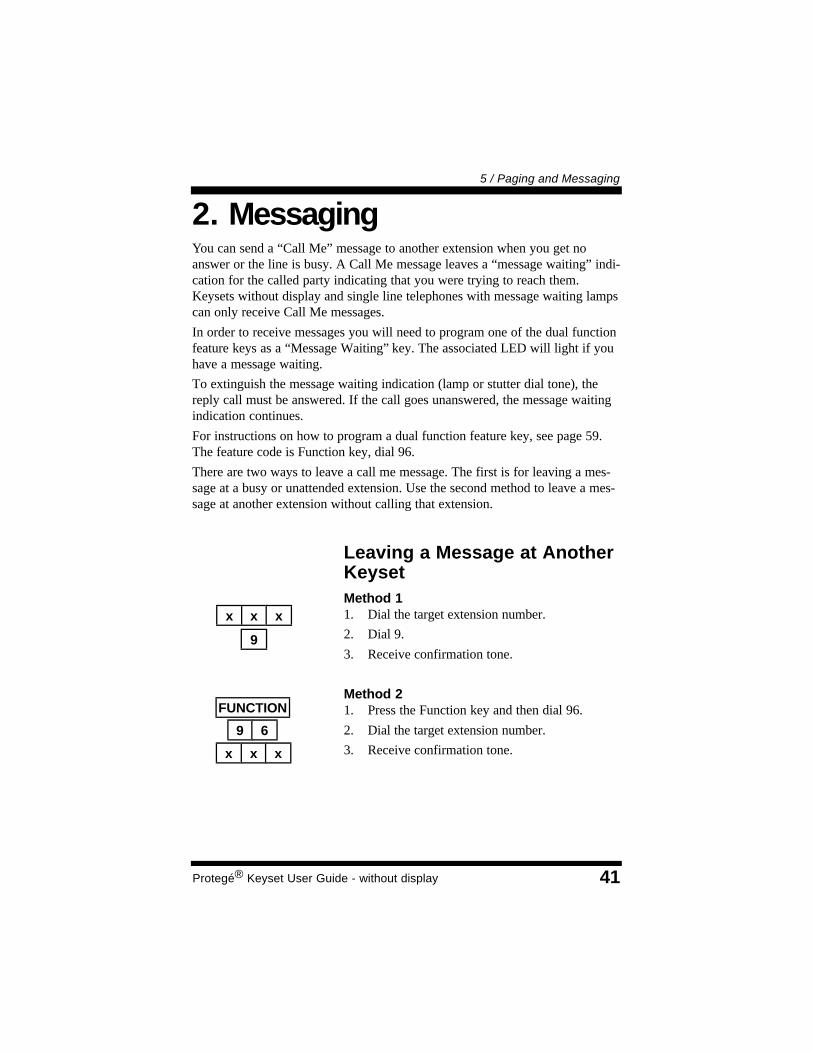
Leaving a Message at AnotherKeysetMethod 11. Dial the target extension number.
2. Dial 9.
3. Receive confirmation tone.
Method 21. Press the Function key and then dial 96.
2. Dial the target extension number.
3. Receive confirmation tone.
2. MessagingYou can send a “Call Me” message to another extension when you get noanswer or the line is busy. A Call Me message leaves a “message waiting” indi-cation for the called party indicating that you were trying to reach them.Keysets without display and single line telephones with message waiting lampscan only receive Call Me messages.
In order to receive messages you will need to program one of the dual functionfeature keys as a “Message Waiting” key. The associated LED will light if youhave a message waiting.
To extinguish the message waiting indication (lamp or stutter dial tone), thereply call must be answered. If the call goes unanswered, the message waitingindication continues.
For instructions on how to program a dual function feature key, see page 59.The feature code is Function key, dial 96.
There are two ways to leave a call me message. The first is for leaving a mes-sage at a busy or unattended extension. Use the second method to leave a mes-sage at another extension without calling that extension.
x x x
x x x
FUNCTION
9
9
6

5 / Paging and Messaging
42 Protegé® Keyset User Guide - without display
Answering a Message1. Message Waiting key light is flashing quickly.
2. Press the Message Waiting key.
3. Call is placed to the extension that sent themessage.
4. If the Message Waiting key continues to flash,you have at least one more message. Repeatthe process to reply to all your messages untilthe Message Waiting key remains dark.
Deleting MessagesDeleting an individual message you sent1. Press the Function key and then dial [ # 9.
2. Dial the target extension number.
3. Receive confirmation tone.
Deleting all messages sent by you 1. Press the Function key and then dial [ # 9 [.
2. Receive confirmation tone.
x x x
FUNCTION
[ # 9
FUNCTION
[ [# 9
43Protegé® Keyset User Guide - without display
Convenience Features
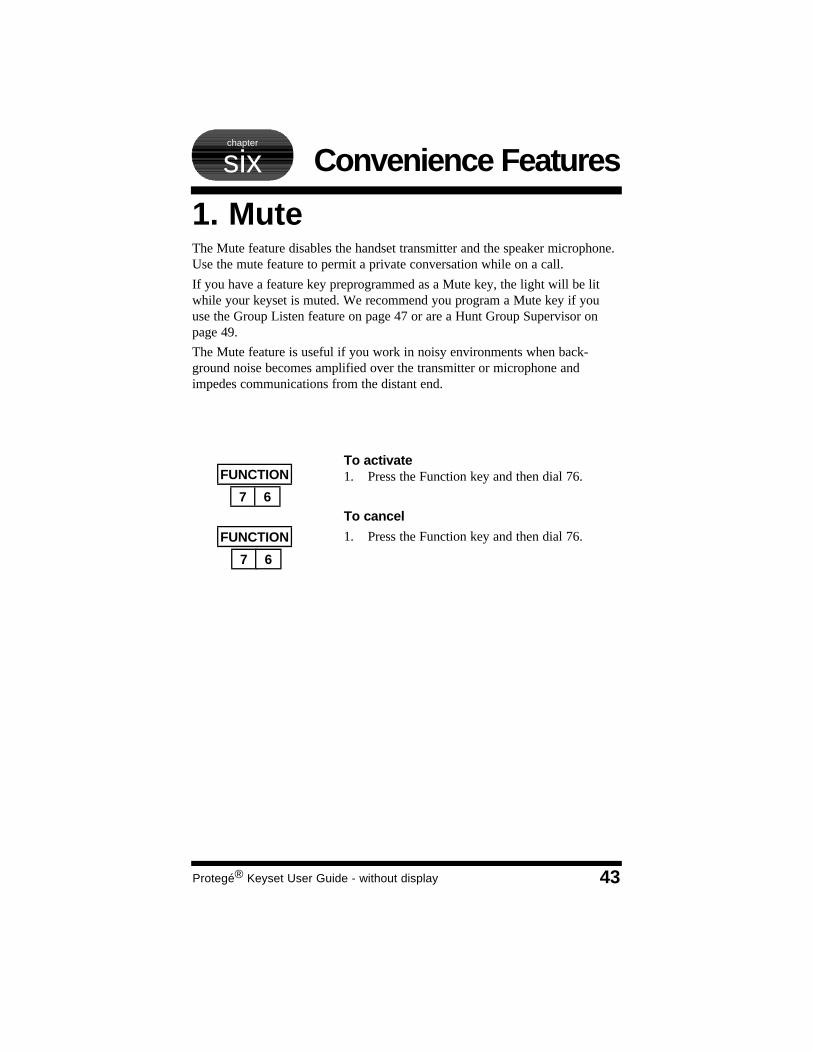
To activate1. Press the Function key and then dial 76.
To cancel
1. Press the Function key and then dial 76.
1. MuteThe Mute feature disables the handset transmitter and the speaker microphone.Use the mute feature to permit a private conversation while on a call.
If you have a feature key preprogrammed as a Mute key, the light will be litwhile your keyset is muted. We recommend you program a Mute key if youuse the Group Listen feature on page 47 or are a Hunt Group Supervisor onpage 49.
The Mute feature is useful if you work in noisy environments when back-ground noise becomes amplified over the transmitter or microphone andimpedes communications from the distant end.
FUNCTION
7 6
FUNCTION
7 6
chapter
six

6 / Convenience Features
44 Protegé® Keyset User Guide - without display
To activate1. Keyset is idle or in use on a call.
2. Press the Function key and then dial 92.
3. Enter time for reminder in 24 hour format.
4. Receive confirmation tone.
To cancel1. Keyset is idle or in use on a call.
2. Press the Function key and then dial [ 92.
3. Receive confirmation tone.
2. Reminder ServiceThe Reminder Service feature acts like an alarm clock. Use it to remind your-self of appointments.
Use the 24 hour clock format to record the time for the reminder. For example,2:23 p.m. is recorded as 1423.
The attendant can program reminders for other keysets in the telephone system.
When the reminder time is reached, your keyset will ring to alert you, even ifyou are active on a call.
FUNCTION
FUNCTION
9 2
[[ 9 2
x x x x
6 / Convenience Features
45Protegé® Keyset User Guide - without display
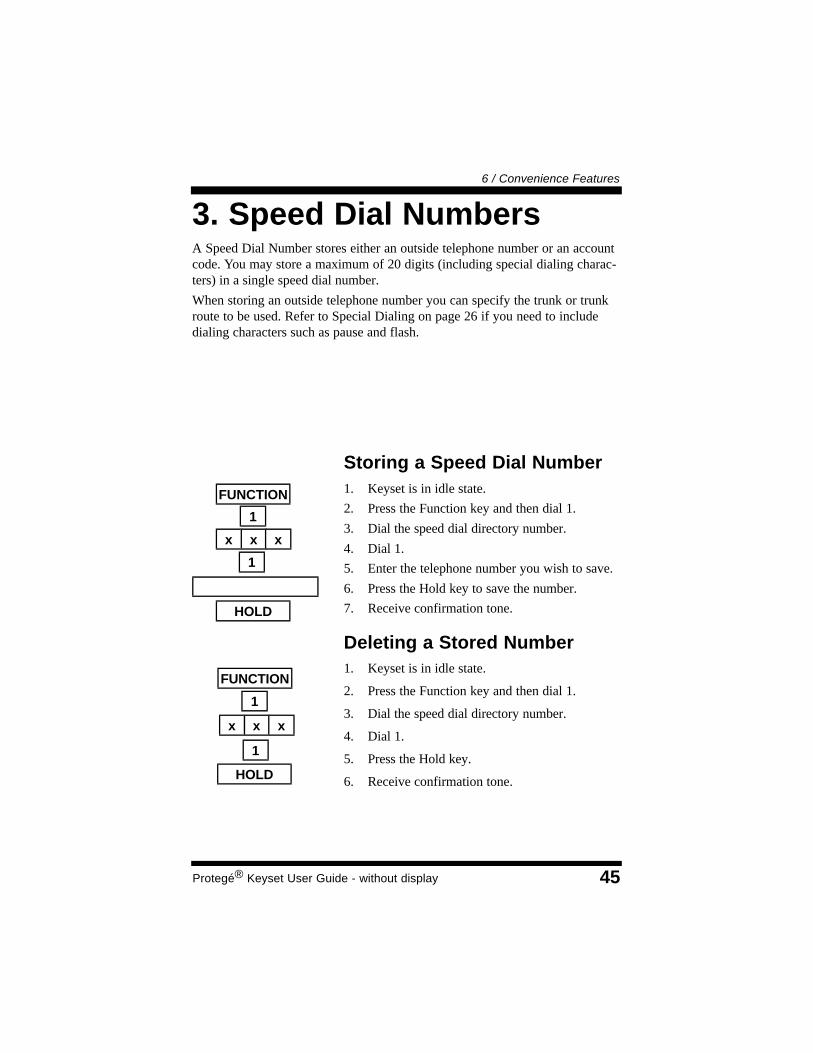
Storing a Speed Dial Number1. Keyset is in idle state.
2. Press the Function key and then dial 1.
3. Dial the speed dial directory number.
4. Dial 1.
5. Enter the telephone number you wish to save.
6. Press the Hold key to save the number.
7. Receive confirmation tone.
Deleting a Stored Number1. Keyset is in idle state.
2. Press the Function key and then dial 1.
3. Dial the speed dial directory number.
4. Dial 1.
5. Press the Hold key.
6. Receive confirmation tone.
3. Speed Dial Numbers A Speed Dial Number stores either an outside telephone number or an accountcode. You may store a maximum of 20 digits (including special dialing charac-ters) in a single speed dial number.
When storing an outside telephone number you can specify the trunk or trunkroute to be used. Refer to Special Dialing on page 26 if you need to includedialing characters such as pause and flash.
FUNCTION
1
1
HOLD
x x x
FUNCTION
HOLD
1
1
x x x

6 / Convenience Features
46 Protegé® Keyset User Guide - without display
Assigning a Trunk or Trunk Route1. Keyset is in idle state.2. Press the Function key and then dial 1.3. Dial the speed dial number.4. Dial 3.5. Enter the number of the trunk or trunk route
you wish to use with the speed dial number.6. Press the Hold key to save the number.7. Receive confirmation tone.
Deleting a Trunk or Trunk Route 1. Keyset is in idle state.2. Press the Function key and then dial 1.3. Dial the speed dial number.4. Dial 3.5. Press the Hold key.6. Receive confirmation tone.
Storing an Account Code1. Keyset is in idle state.2. Press the Function key and then dial 1.3. Dial the speed dial number.4. Dial 2.5. Enter the account code number.6. Press the Hold key to save the number.7. Receive confirmation tone.
Deleting an Account Code1. Keyset is in idle state.2. Press the Function key and then dial 1.3. Dial the speed dial number.4. Dial 2.5. Press the Hold key.6. Receive confirmation tone.
FUNCTION
HOLD
1
x x x
2
FUNCTION
HOLD
1
x x x
2
HOLD
FUNCTION
1
x x x
x x x
3
HOLD
FUNCTION
1
x x x
3

6 / Convenience Features
47Protegé® Keyset User Guide - without display
Activating Group Listen1. While on an active call, press the Speaker key.
3. Distant party is audible over microphonespeaker.
Changing to Full Speakerphone operation1. Mute your keyset by pressing the Mute key.
2. Replace handset on cradle.
3. Press the Mute key again.
Returning to Handset Operation 1. From a Group Listen situation, press the
Speaker key.
Terminating a Group Listen situation1. Press the Clear key.
4. Group ListenYour system administrator can confirm if the Group Listen feature is availableto you.
Activate the Group Listen feature to permit others in the immediate area to lis-ten through the speakerphone to the distant side of a call, while you continue touse the handset. The keyset microphone is muted so your audience can listenbut not participate. You can hang up the handset at any time to change to fullspeakerphone operation. The volume control key on the keyset controls thespeaker volume.
SPEAKER
SPEAKER
CLEAR
Important NoteWe recommend that you activate the Mute feature before returning the handset
to the cradle to avoid the possibility of an audible squeal, or “feedback.”
6 / Convenience Features
48 Protegé® Keyset User Guide - without display
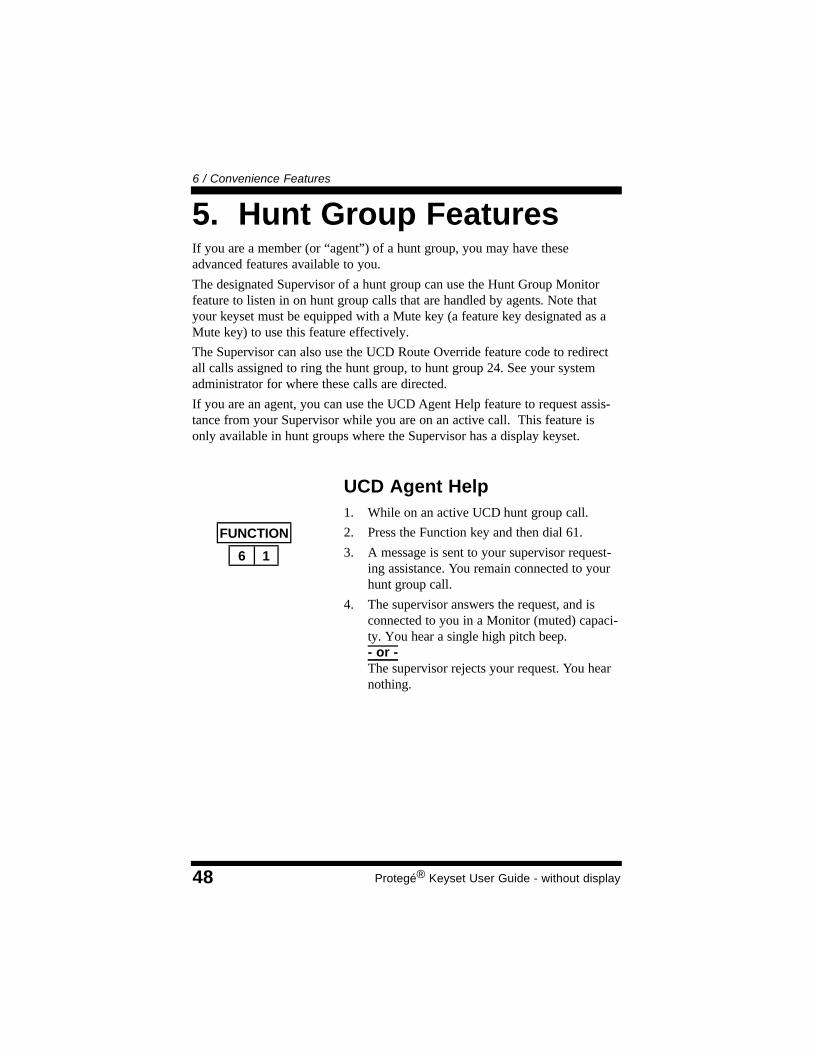
UCD Agent Help1. While on an active UCD hunt group call.
2. Press the Function key and then dial 61.
3. A message is sent to your supervisor request-ing assistance. You remain connected to yourhunt group call.
4. The supervisor answers the request, and isconnected to you in a Monitor (muted) capaci-ty. You hear a single high pitch beep.- or -The supervisor rejects your request. You hearnothing.
5. Hunt Group FeaturesIf you are a member (or “agent”) of a hunt group, you may have theseadvanced features available to you.
The designated Supervisor of a hunt group can use the Hunt Group Monitorfeature to listen in on hunt group calls that are handled by agents. Note thatyour keyset must be equipped with a Mute key (a feature key designated as aMute key) to use this feature effectively.
The Supervisor can also use the UCD Route Override feature code to redirectall calls assigned to ring the hunt group, to hunt group 24. See your systemadministrator for where these calls are directed.
If you are an agent, you can use the UCD Agent Help feature to request assis-tance from your Supervisor while you are on an active call. This feature isonly available in hunt groups where the Supervisor has a display keyset.
FUNCTION
16

6 / Convenience Features
49Protegé® Keyset User Guide - without display
Monitoring a UCD Call inProgress (Supervisor only)
1. Press the Function key and then dial 58.
2. Enter the extension number you wish to moni-tor.
3. You are connected in a muted capacity: youcan hear but cannot participate.
4. To interrupt, press the Mute key (deactivatethe mute condition).
UCD Route Override (Supervisor only)
To activate1. Press the Function key and then dial 6 #.
2. Dial the extension number of the hunt groupyou want to redirect to UCD group number.
3. Receive confirmation tone.
To cancel1. Press the Function key and then dial R 6 #.
2. Dial the extension number of the hunt groupwhich has been redirected.
3. Receive confirmation tone.
FUNCTION
85
FUNCTION
#6
x x x
x x x
FUNCTION
[[ 6 #
x x x

6 / Convenience Features
50 Protegé® Keyset User Guide - without display

Customizing Your Keyset
51Protegé® Keyset User Guide - without display
1. Three Features For EasierDialing
Hot Key Pad, Automatic Line Selection, and Hotline are three features you canuse to make dialing easier and faster.
Hot Key PadWhen you have the Hot Key Pad feature enabled, you can dial an extension oroutside line without lifting the handset or pressing the speaker key. The Protegésystem senses when any dial pad key is pressed, takes the extension off-hook,studies the digits dialed to determine whether the call is for intercom or trunkaccess, and routes it accordingly. At default, your keyset is programmed withHot Key Pad activated.
Automatic Line SelectionAutomatic Line Selection allows you to choose which resource your keysetaccesses when you go off-hook at your extension; intercom dial tone, a specifictrunk, or a trunk route. Note that if you set both Automatic Line Selection andHotline, Hotline takes priority.
HotlineWith a Hotline programmed, you automatically dial another resource when youlift the handset or press the Speaker key. This resource can be one of the fol-lowing:
u An extension numberu A trunk directory numberu A trunk route numberu A system or individual speed dial numberu A pickup group, hunt group, or paging group
A Hotline can be dependent on the time of day. You specify whether theHotline operates all the time, just during the day, or just when your company’sphone system is in Night mode.
In addition, you can specify whether the Hotline should access the resourceimmediately, or wait between one and nine seconds. A delay allows you to dialanother resource before the Hotline takes effect.
chapter
seven

7 / Customizing Your Keyset
52 Protegé® Keyset User Guide - without display
Hot Key PadTo activate1. Keyset is idle or in use on a call.
2. Press the Function key and then dial 93.
3. Receive confirmation tone.
To cancel1. Keyset is idle or in use on a call.
2. Press the Function key and then dial [ 93.
3. Receive confirmation tone.
Automatic Line SelectionTo activate1. Keyset is idle or in use on a call.
2. Press the Function key and then dial 95.
3. Dial 0 to select internal dial tone every timeyou lift the handset.- or -Dial 1 followed by the appropriate directorynumber to select a specific outside line everytime you lift the handset.- or -Dial 1 followed by the appropriate directorynumber to select a specific trunk route everytime you lift the handset.
4. Receive confirmation tone.
To cancel1. Keyset is idle or in use on a call.
2. Press the Function key and then dial [ 95.
3. Receive confirmation tone.
FUNCTION
9
0/1
[ 9 5
5
FUNCTION
FUNCTION
9
[ 9 3
3
FUNCTION

7 / Customizing Your Keyset
53Protegé® Keyset User Guide - without display
HotlineTo activate1. Keyset is idle or active on a call
2. Press the Function key and then dial 9[.
3. Enter the directory number of the resource youwish to hotline (normally three digits).
4. Select the service mode. Dial 1 for day.- or -Dial 2 for night. - or -Dial 3 for always.
5. Dial 0 for immediate action.- or -Dial a digit between 1and 9 for delayed actionof the corresponding number of seconds delaytime you wish. Example: dial 3 if you want 3seconds delay.
6. Receive confirmation tone.
To cancel1. Keyset is idle or active on a call
2. Press the Function key and then dial [ 9 [.
3. Receive confirmation tone.
FUNCTION
9 [[
1/2/3
0-9
x x x
FUNCTION
9 [[[[

7 / Customizing Your Keyset
54 Protegé® Keyset User Guide - without display
2. Three Features For EasierAnswering
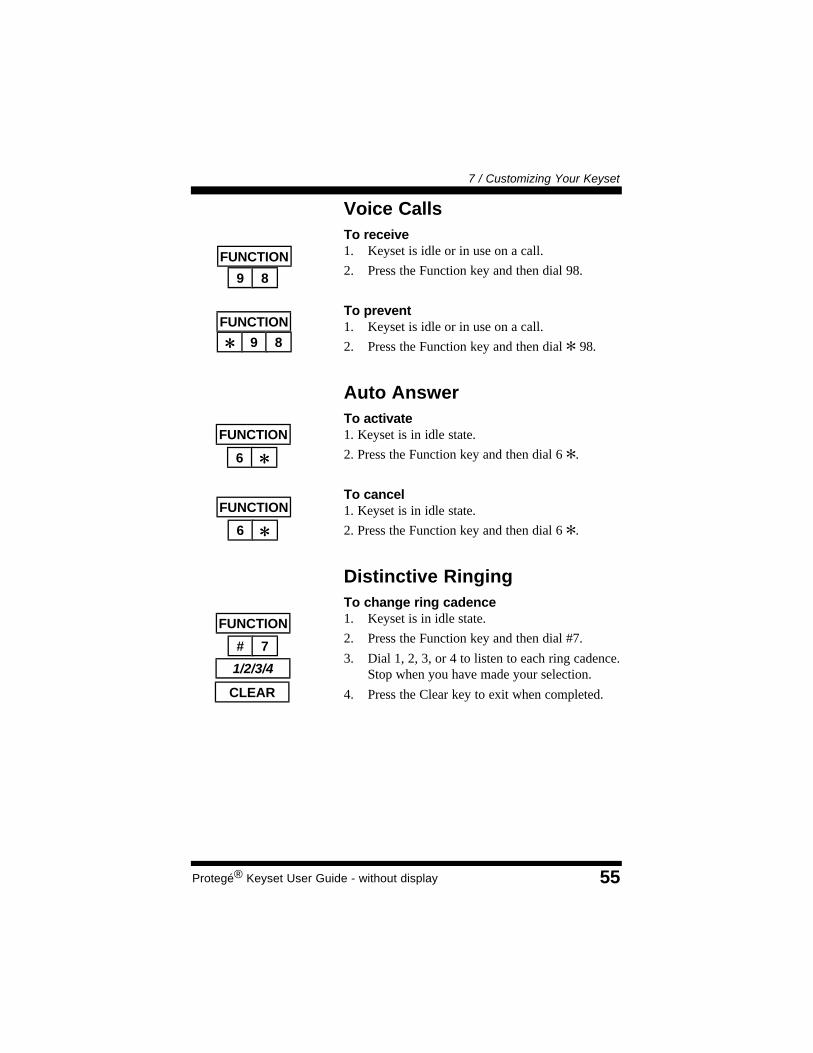
Voice Call, Auto Answer, and Distinctive Ringing are three features that youcan use to make answering calls easier and faster.
Voice Call When you set your keyset to allow voice calls, intercom callers are connectedimmediately over the speakerphone, without requiring you to go off-hook. Youwill hear a single tone to alert you. Outside calls continue to ring at your exten-sion in the usual way, so too will blind transfer calls.
Note that when voice calls are allowed, no Call Forward instructions you haveprogrammed will be followed. Do Not Disturb, however, will continue to oper-ate.
Auto Answer Use the Auto Answer feature to select how incoming calls will be answered.With Auto Answer set to “off” you must press an appropriate feature key toanswer an incoming call. This can be one of the following:
u An ICM key (a feature key designated for intercom calls)
u A Trunk or Trunk Group key
u An Overflow key (a feature key designated for all additional outsidelines).
With Auto Answer set to “on” you can answer ringing calls by lifting the hand-set or pressing the Speaker key.
Distinctive RingingDistinctive Ringing allows you to choose from four different ring cadences todistinuguish your phone’s ring from that of others in your immediate area. Thering cadence you select works for all tones you hear on your keyset. See page 7for a table of ring tones.
7 / Customizing Your Keyset
55Protegé® Keyset User Guide - without display
Voice CallsTo receive 1. Keyset is idle or in use on a call.
2. Press the Function key and then dial 98.
To prevent 1. Keyset is idle or in use on a call.
2. Press the Function key and then dial [ 98.
Auto Answer To activate1. Keyset is in idle state.
2. Press the Function key and then dial 6 [.
To cancel1. Keyset is in idle state.
2. Press the Function key and then dial 6 [.
Distinctive RingingTo change ring cadence 1. Keyset is in idle state.
2. Press the Function key and then dial #7.
3. Dial 1, 2, 3, or 4 to listen to each ring cadence.Stop when you have made your selection.
4. Press the Clear key to exit when completed.
FUNCTION
[[ 9 8
FUNCTION
9 8
FUNCTION
6 [[
FUNCTION
6 [[
FUNCTION
CLEAR
# 7
1/2/3/4
7 / Customizing Your Keyset
56 Protegé® Keyset User Guide - without display
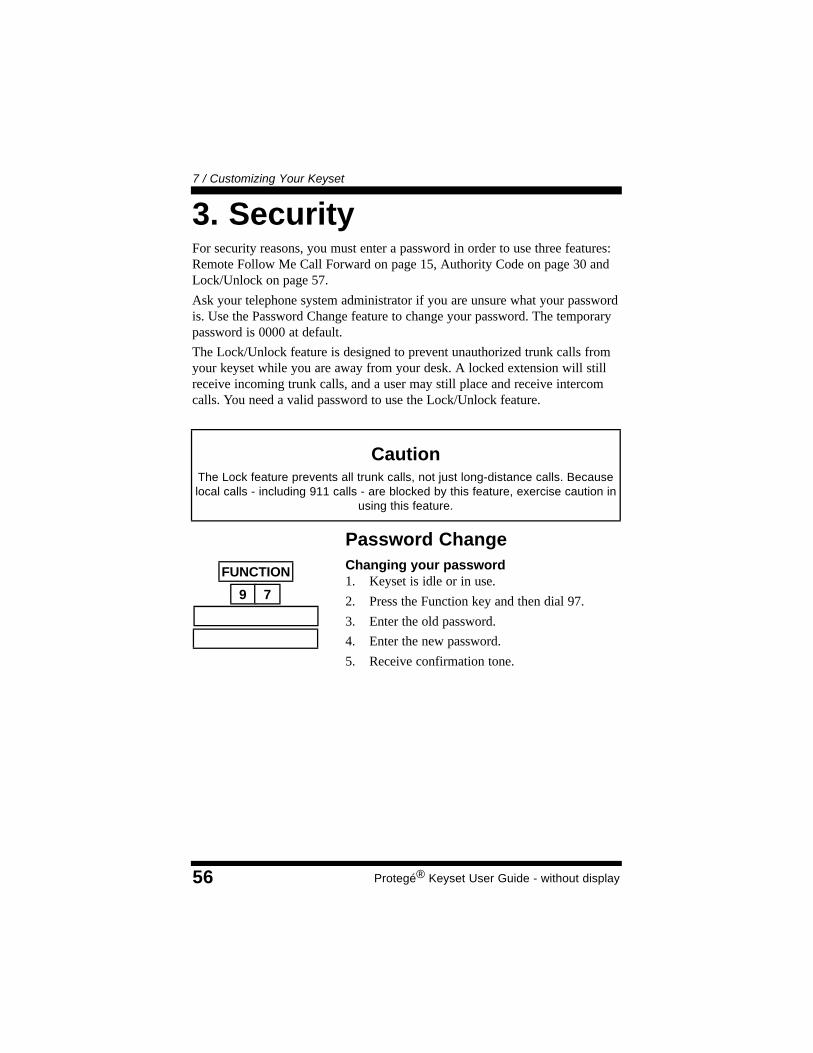
Password ChangeChanging your password1. Keyset is idle or in use.
2. Press the Function key and then dial 97.
3. Enter the old password.
4. Enter the new password.
5. Receive confirmation tone.
3. SecurityFor security reasons, you must enter a password in order to use three features:Remote Follow Me Call Forward on page 15, Authority Code on page 30 andLock/Unlock on page 57.
Ask your telephone system administrator if you are unsure what your passwordis. Use the Password Change feature to change your password. The temporarypassword is 0000 at default.
The Lock/Unlock feature is designed to prevent unauthorized trunk calls fromyour keyset while you are away from your desk. A locked extension will stillreceive incoming trunk calls, and a user may still place and receive intercomcalls. You need a valid password to use the Lock/Unlock feature.
CautionThe Lock feature prevents all trunk calls, not just long-distance calls. Becauselocal calls - including 911 calls - are blocked by this feature, exercise caution in
using this feature.
FUNCTION
9 7

7 / Customizing Your Keyset
57Protegé® Keyset User Guide - without display
Lock/Unlock Locking your phone1. Keyset is idle or in use on a call.
2. Press the Function key and then dial 97.
3. Enter password.
4. Dial # to lock your keyset.
5. Receive confirmation tone.
Unlocking your phone1. Keyset is idle or in use on a call.
2. Press the Function key and then dial 97.
3. Enter password.
4. Dial [ to unlock your keyset.
6. Receive confirmation tone.
FUNCTION
9
#
7
FUNCTION
9
[[
7

7 / Customizing Your Keyset
58 Protegé® Keyset User Guide - without display
Cancel OperationsTo cancel1. Keyset is idle or in use on a call.
2. Press the Function key and then dial 69 [.
4. Cancel OperationsThe Cancel Operations feature can be useful for troubleshooting. If your keysetseems to behave oddly, it is possible that a particular feature is set differently tohow you expect. Each of these features has a big impact on how your keysetoperates: Automatic Hold, Auto Transfer Mode, Hot Key Pad, Automatic LineSelection, Hotline, Voice Call, and Auto Answer.
Use the Cancel Operations feature to terminate your current feature settings.Doing so will reset your keyset to its default settings. It will not, however,change the contents of dual function feature keys.
FUNCTION
6 9 [[

7 / Customizing Your Keyset
59Protegé® Keyset User Guide - without display
FUNCTION
# 3
2
FUNCTION
HOLD
Programming a Feature Undera Feature Key 1. Keyset is idle or in use on a call.2. Press the Function key and then dial # 3.3. Press designated feature key to program fea-
ture to.4. Dial 2. 5. Press the Function key and then enter the
appropriate feature code number.6. Press the Hold key to save your selection.7. Receive confirmation tone.
Programming a DSS Key1. Keyset is idle or in use on a call.2. Press the Function key and then dial # 3.3. Press the feature key you wish to program.4. Dial 1.5. Enter the extension directory number.6. Press the Hold key to save your selection.7. Receive confirmation tone.
5. Setting the Feature KeysYour keyset has a number of dual function feature keys that can be pro-grammed to your requirements. You can program a speed dial number on the“secondary level” of each Dual Function feature key. The “primary level” canbe one of the following:
u An outside line key
u A DSS key
u A feature such as Call Forward
u A speed dial number
When you program a speed dial number under a dual function feature key, notethat you enter the abbreviated number (normally three digits in length), not thefull number.
FUNCTION
# 3
1
x x x
HOLD

7 / Customizing Your Keyset
60 Protegé® Keyset User Guide - without display
Programming a Speed DialNumber Under a Feature Key1. Keyset is idle or in use on a call.2. Press the Function key and then dial # 3.3. Press the feature key you want to program.4. Dial 1.5. Enter the speed dial number.6. Press the Hold key to save your selection.7. Receive confirmation tone.
Programming the SecondaryLevel of a Dual FunctionFeature Key1. Keyset is idle or in use on a call.2. Press the Function key and then dial # 1.3. Press the dual function feature key you want
to program.4. Dial 1.5. Enter the speed dial number.6. Press the Hold key to save your selection.7. Receive confirmation tone.
Deleting a Feature Key’s Contents1. Keyset is idle or in use on a call.2. Press the Function key and then dial # 1 if you
are deleting the upper level of a dual functionfeature key.- or -Press the Function key and then dial # 3 if youare deleting a the contents of a feature key.
3. Press the dual function feature key whose con-tents you want to delete.
4. Press the Hold key.5. Receive confirmation tone.
FUNCTION
# 3
x x x
1
HOLD
FUNCTION
# 1
x x x
1
HOLD
FUNCTION
# 1/3
HOLD
7 / Customizing Your Keyset
61Protegé® Keyset User Guide - without display
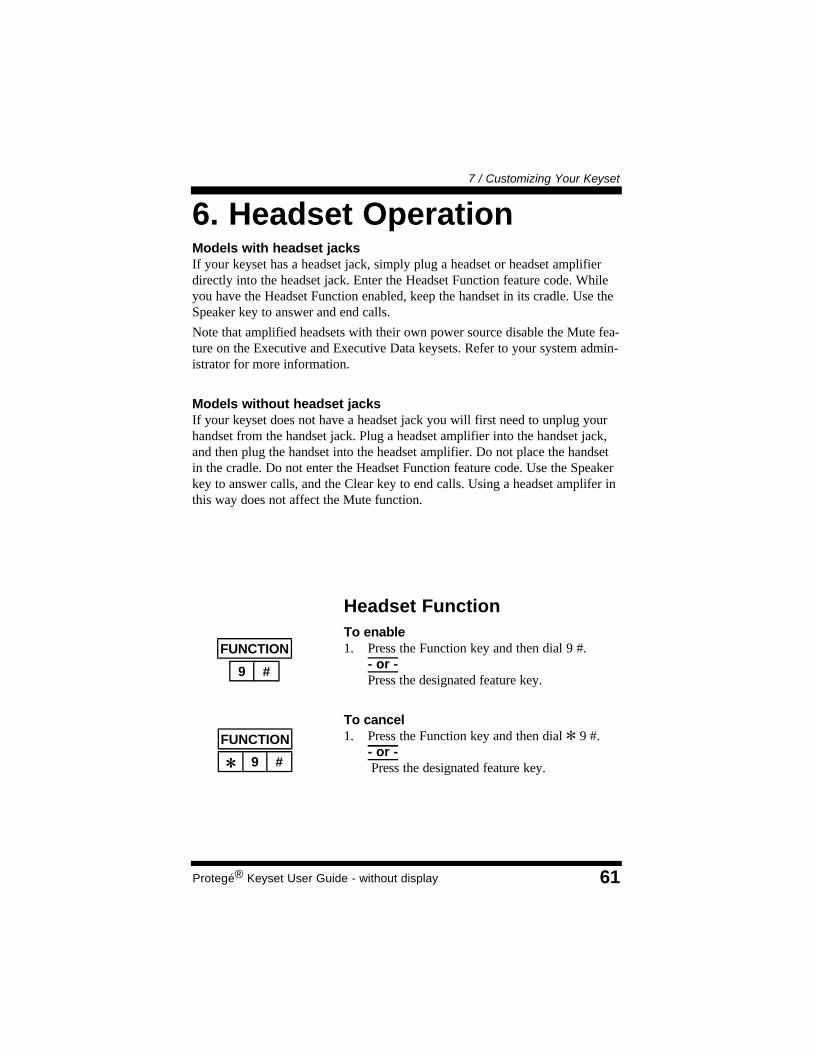
Headset FunctionTo enable 1. Press the Function key and then dial 9 #.
- or -Press the designated feature key.
To cancel1. Press the Function key and then dial [ 9 #.
- or -Press the designated feature key.
6. Headset OperationModels with headset jacksIf your keyset has a headset jack, simply plug a headset or headset amplifierdirectly into the headset jack. Enter the Headset Function feature code. Whileyou have the Headset Function enabled, keep the handset in its cradle. Use theSpeaker key to answer and end calls.
Note that amplified headsets with their own power source disable the Mute fea-ture on the Executive and Executive Data keysets. Refer to your system admin-istrator for more information.
Models without headset jacksIf your keyset does not have a headset jack you will first need to unplug yourhandset from the handset jack. Plug a headset amplifier into the handset jack,and then plug the handset into the headset amplifier. Do not place the handsetin the cradle. Do not enter the Headset Function feature code. Use the Speakerkey to answer calls, and the Clear key to end calls. Using a headset amplifer inthis way does not affect the Mute function.
FUNCTION
FUNCTION
9 #
[[ 9 #
7 / Customizing Your Keyset
62 Protegé® Keyset User Guide - without display
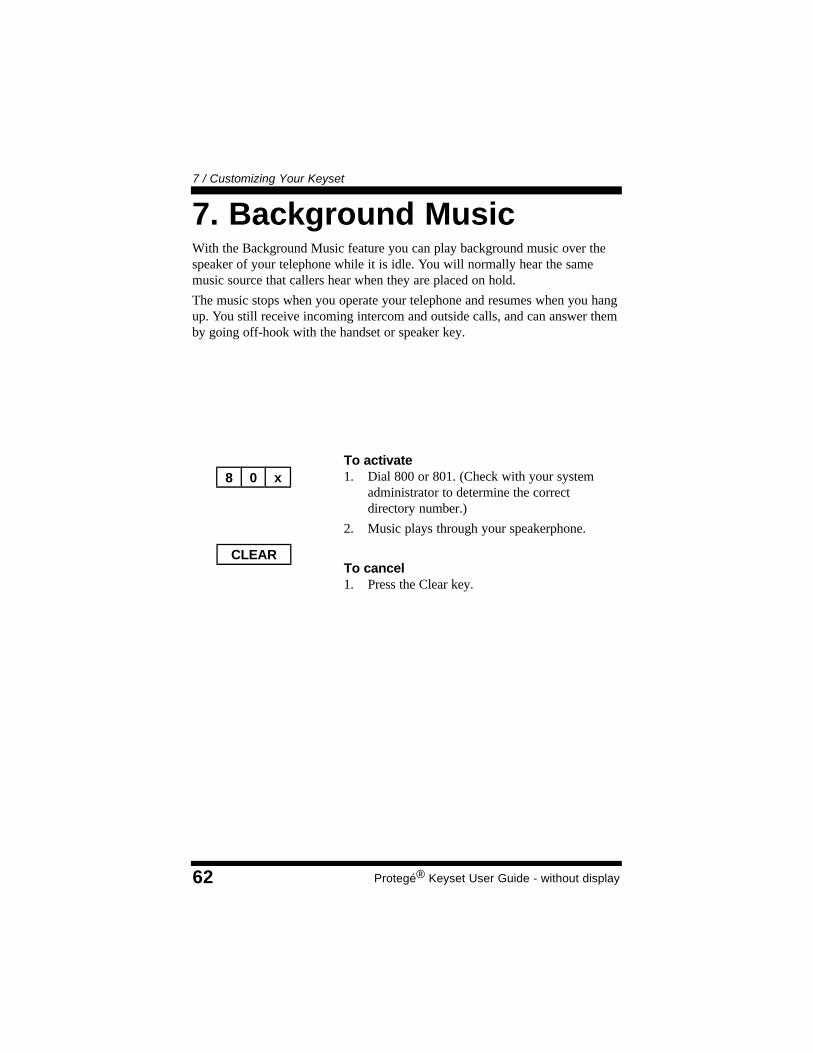
To activate1. Dial 800 or 801. (Check with your system
administrator to determine the correctdirectory number.)
2. Music plays through your speakerphone.
To cancel1. Press the Clear key.
7. Background MusicWith the Background Music feature you can play background music over thespeaker of your telephone while it is idle. You will normally hear the samemusic source that callers hear when they are placed on hold.
The music stops when you operate your telephone and resumes when you hangup. You still receive incoming intercom and outside calls, and can answer themby going off-hook with the handset or speaker key.
CLEAR
8 0 x

63Protegé® Keyset User Guide - without display
1. Voice MailIf you use your voice mail system on a regular basis, we recommend you des-ignate a feature key as a voice mail “Message Waiting” key. This key lightswhen you receive a voice mail message. Press the key to gain access to yourpersonal mail box so you can check your messages. The feature code for this isFunction key, dial 64.
If you call an extension that is unattended or busy you can access the associat-ed voice mail box by dialing a single digit.
Your Protegé phone system offers two useful features to maximize the benefitsof your company’s voice mail system: Extinguish Lit Voice Mail LED, andAuto Conversation Record.
Extinguish Lit Voice Mail LEDThis feature turns off the LED associated with your voice mail MessageWaiting key. Use this feature if your company’s phone and voice mail systemssuffer some kind of connection interruption, and the LED fails to extinguishafter you have checked all your voice mail messages.
Auto Conversation RecordPress your voice mail Message Waiting key (see above) while you are on a callto automatically form a conference with your voice mail box. This allows youto record your conversation. Depending on system programming, you and thedistant party may or may not hear an alert tone. If the tone is not enabled, theAuto Conversation Record feature is invisible to both parties.
chapter
eight Voice MailFeatures
Dialing Voice Mail1. Dial the Voice Mail System general number.
Transferring to Voice Mail1. Begin by using whichever transfer method you
prefer (see pages 33 and 34).2. Dial the Voice Mail System general number.3. Enter the appropriate extension number.4. Conclude the transfer as appropriate to the
transfer method you are using.
x x x
4
4

8 / Voice Mail Features
64 Protegé® Keyset User Guide - without display
Forwarding to Voice Mail1. Begin by using whichever call forward type
you prefer (see pages 11 - 15).
2. Enter the Voice Mail System general number.
3. Enter the extension number of the mailboxwhere calls will be forwarded.
4. Conclude the forward by following the appro-priate documentation (see pages 11 - 15).
Retrieving Your Voice MailMessages1. Keyset is in idle state.2. Press the voice mail Message Waiting key (a
designated feature key).
Calling Another Extension1. Keyset is in idle state.2. Dial extension number. Receive busy tone or
no answer.3. Dial 7 to be transferred directly to the associ-
ated mailbox.
Extinguish Lit Voice Mail LED1. Keyset is idle or in use on a call.
2. Press the Function key and then dial [ 64.
Auto Conversation RecordTo activate1. Keyset is in use on an active call.
2. Press the voice mail Message Waiting key.
FUNCTION
46[[
x
7
xx
x x x
4

65Protegé® Keyset User Guide - without display
GlossaryKeysetAnother name for telephone.Specifically, a phone with a numberof push buttons or “keys.”
LEDLight Emitting Diode. The lightsnext to the feature and dual functionfeature keys. Depending on themodel, your keyset has a number ofsingle- or dual-colored LEDs. Eachprovides information on the status ofthe associated feature or dual func-tion feature key. See also page 6.
Off-HookWhen you lift the handset you are“going off-hook.” Early telephoneshad a metal hook on which the hand-set hung. The modern technology ofthe Protegé system means you cannow also go off-hook and on-hookby pressing the Speaker key.
On-HookWhen the phone handset is resting inthe cradle. See Off-Hook.
Outside LineSee Trunk.
Class of ServiceYour level of access to certain fea-tures. Your company’s phone systemmay assign a different class of ser-vice to particular extensions, torestrict access to certain features.See also Tenant Group.
DSSDirect Station Selection. Press aDSS key to call or transfer to aninternal resource without dialingmanually. The internal resource canbe a single extension, or a group ofextensions such as a hunt group orpaging group. In a Protegé system, aDSS key is a specially programmeddual function feature key.
Hunt GroupA group of extensions with a com-mon access number, organized insuch a way that calls “hunt” fromextension to extension to find a freeline. See also UCD.
Idle stateThe condition of your keyset whenyou are not using it, and when a callis not coming in.
IntercomAn intercom call is a call betweenextensions of your company’s phonesystem.

Glossary
66 Protegé® Keyset User Guide - without display
TrunkA telephone line owned by the localtelephone company that connectsyour office telephone system to theoutside world. Also known as an“outside” line, or “c.o.line.”
UCDUniform Call Distribution. A Protegéfeature that accepts incoming callsand routes them to a series or bankof agents. See also Hunt Group.
Virtual NumberAn extension number that is notphysically connected to a specifickeyset. This number might be pro-grammed under a feature key of oneor several extension keysets. ThisProtegé feature has many possibleapplications. If your company’sphone system uses virtual numbers,consult your system administratorfor an explanation of how they workin your location.
Service ModeThe way calls are handled dependingon the time of day. For example,your company’s phone system maybe configured so that in Day ServiceMode all incoming calls are routedthrough the attendant. In NightService Mode, incoming calls maybe broadcast over a loud bell foranyone to answer.
StationAnother word for extension.
System AdministratorThe person responsible for yourcompany’s telephones. It may be anoutside business, or a person ordepartment at your company.Essentially, whoever you go to toreport problems with your phone orto request changes in your telephoneservice.
Tenant GroupTenant Groups are a way of groupinggroups of extensions in a Protegéphone system. For example, if sever-al companies in a building share acommon phone system, each compa-ny’s extensions would form a TenantGroup. See also class of service.
ToneThe audible sound your keysetmakes. There are many differenttones: for example, dial tone, ringtone, busy tone, and error tone.

Index
67Protegé® Keyset User Guide - without display
Class of Service 30, 65
Cleaning 7
Clear Key 2, 3
Conference 36
Dialing Speed Dial Numbers 25
Dialing Voice Mail 63
Dial Pad 2, 3
Direct Call Forward 11, 12
Directed Call Pickup 10
Distinctive Ringing 54
Diversion - see Call Forward
DND - see Do Not Disturb
DND Override 20
Do Not Disturb 16- Voice Call 55
DSS 65
Dual Function Feature Keys 2, 3, 25, 59
ECF - see External Call Forward
Exclusive Hold 32
External Call Forward 11, 14
Extinguish Voice Mail Light 64
Feature Access 8
Feature Interaction 8
Feature Keys 2, 3
Feature Code Settings 59
Flash 26, 45
Follow Me Call Forward 11, 15
Forced Diversion 17
Forced Release 37
Forward 11
Abbreviated Numbers - see SpeedDial Numbers
ABR - see Automatic Busy Redial
Account Code 11, 14, 22
Agent Help 48
Agent Log Off/Log On 17
Alarm Clock 44
Attendant, Calling the 19
Authority Code 30, 56
Auto Answer 9, 54
Auto Conversation Record 63
Auto Transfer Mode 33
Automatic Busy Redial 23
Automatic Hold 9, 31
Automatic Line Selection 51
Avoiding Calls 16
Background Music 62
BGM - see Background Music
Blind Transfer 33
Busy Call Forward 11, 13
Busy Trunk (route) 27
Call Forward 11-15- Password 56- Voice Call 54
Call Me Messages 41
Call Park - see Transfer, No Ring
Call Pickup 10, 33
Callback 27
Calling an Extension 19
Camp On 9, 29
Cancel All Call Forwards 12
Cancel Operations 58

Index
68 Protegé® Keyset User Guide - without display
Lights, Understanding 6
LNR - see Last Number Redial
Lock/Unlock 30, 57
Loud Bell 10
Messages 19, 41, 63- call me messages 39- deleting a message 42- leaving a message 41
Message Waiting indication 41, 63
Music on Hold 29
Mute 43, 47, 48, 61
No Answer Call Forward 11, 13, 19
No Ring Transfer 35
Off-Hook 65
Off-Hook Voice Announce 21
OHVA - see Off-Hook VoiceAnnounce
On-Hook 65
Outside Line 65
Outside telephone numbers - storing45
Paging 39
Parked Calls 33
Password 11, 15, 30, 56
Pause 26, 45
Pickup Group Number 10
Placing Outside Calls 22
Preset Follow Me Call Forward 11,15
Preventing Unauthorized Calls 56
Private Conversation 43
Forwarding to Voice Mail 64
Function Key 2, 4
Group Call Pickup 10
Group Listen 43, 47
Group Page 39
Headset Operation 61
Headset Jack 2, 4, 61
Hold 31- holding a conference 37- holding an intercom call 32- reminder 31- retrieval order 31- retrieval from 31- system 31
Hold Key 2, 4
Hot Key Pad 51
Hotline 51
Hunt Group 11, 16, 43, 48, 65
Idle State 65
Inserting Special Characters 26
Instant Dialing - see Hotline
Intercom 65
Intercom Key 9
Intrusion 20
Keyset 65
Last Number Redial 23
LCR - see Least Cost Routing
Least Cost Routing 22, 25
LED 65
Index
69Protegé® Keyset User Guide - without display
Transferring to Voice Mail 63
Travelling Class of Service - seeAuthority Code
Trunk 66
Trunk (Route) and Speed DialNumbers 25, 46
UCD Agent Help 48
UCD Route Override 49
Unlocking Your Phone 57
Unsupervised Conference 37
UCD 66
Urgent Calls 29
User Password - see Password
User Saved Number Redial 24
USNR - see User Saved NumberRedial
Virtual Number 10, 19, 66
Voice Call 19, 54
Voice Mail 11, 63
Voice to Ring Interchange 19
Volume Keys 2, 5
Wait-for-Dial Tone 26
Work Group - Pick Up a RingingExtension 10
Xfr/Conf Key 2, 5
Private Talk 37
Programming Feature Keys 59
Pull Out Tray 2, 4
Pulse Dialing 26
Recall, Automatic Transfer 33
Redial Key 2, 5, 23
Redialing 23
Reminder service 44
Remote Follow Me Call Forward 11, 15
Ring Cadences 54
Saved Number Redial 24
Screened Transfer 33
Security 56
Service Mode 66- in hotline programming 51
Setting the Feature Keys 59
SNR - see Saved Number Redial
Speaker Key and Light 2, 4
Speakerphone 2, 5
Special Dialing 26, 45
Speed Dial Numbers 45, 59
Storing Telephone Numbers 45
Supervisor - Hunt Group 49
System Administrator 66
System Hold 31
Tenant Group 66
Time Reminder 44
Toll Restriction 30
Tone 66
Tones, Understanding 7
Transferring Calls 33

70 Protegé® Keyset User Guide - without display
Index

Copyright © 2000 North Supply Company. All Rights Reserved.Sprint and the diamond logo are registered trademarks of Sprint Communications Company L.P., used under license.
QUICK GUIDE TO NUMBERING
DEFAULT PROTEGÉ YOUR COMPANY’SRESOURCE DIRECTORY NUMBERS DIRECTORY NUMBERS
Extension Numbers 200 - 399 _______________Trunk Numbers 700 - 799 _______________Trunk Groups 100 - 129 _______________Page Groups 400 - 429 _______________External Paging 820 - 829 _______________Pickup Groups 460 - 489 _______________System Speed Dial Numbers 600 - 699 _______________Individual Speed Dial Numbers 500 - 599 _______________Hunt Groups 430 - 459 _______________Background Music 800 - 801 _______________Loud Bell 810 - 811 _______________Virtual Numbers 830 - 859 _______________Voice Mail Access _______________Night Ring Pick Up _______________Least Cost Routing _______________
INDIVIDUAL SPEED DIAL NUMBERS
NUMBER ACTUAL DETAIL
500 ______ ____________________________________501 ______ ____________________________________502 ______ ____________________________________503 ______ ____________________________________504 ______ ____________________________________505 ______ ____________________________________506 ______ ____________________________________507 ______ ____________________________________508 ______ ____________________________________509 ______ ____________________________________
SPRINT PRODUCTS GROUP HAS MADE EVERY EFFORT TO ENSURE THE TECHNICAL
ACCURACY OF THIS GUIDE. FEATURES AND TECHNICAL DATA ARE SUBJECT TO CHANGE
WITHOUT NOTICE.
User Guide 699030.qxd 8/9/00 1:47 PM Page 2

PROTEGÉ®
Digital Hybrid Key System
Keyset User Guide—without DisplayItem Number 699030
QUICK GUIDE TO FEATURE CODESFeature CodeACCOUNT CODE ENTRY F71AGENT LOG OFF/ON F91 (OFF)
F*91 (ON)AUTHORITY CODE F55AUTO ANSWER F6*AUTO TRANSFER MODE F54AUTOMATIC BUSY REDIAL F78AUTOMATIC LINE SELECTION F95 (ON)
F*95 (OFF)CALLBACK 5CALLBACK - CANCEL F*#5 (INDIV.)
F*#5* (ALL)CALL FORWARD F2X
F20 (CANX ALL) CALL PICKUP F53CAMP ON 4CANCEL OPERATIONS F69*DISTINCTIVE RINGING F#7DND OVERRIDE 3DO NOT DISTURB (DND) F4DUAL FUNCTION KEY PROGRAMMING F#1EXTINGUISH LIT VOICE MAIL LED F*64FEATURE KEY PROGRAMMING F#3FLASH - INSERT A F3FORCED RELEASE (CONFERENCE) F74HEADSET OPERATION F9# (ON)
F*9# (OFF)HOLD (AUTOMATIC) F94 (ON)
F*94 (OFF)HOLD (EXCLUSIVE) FHOLD (ON)
(TO RETRIEVE CALL) F7* HOLD (SYSTEM) HOLD
(TO RETRIEVE CALL) F7*HOT KEYPAD F93 (ON)
F*93 (OFF)HOTLINE F9* (ON)
F*9* (OFF) INTERCOM ACCESS F65
Feature CodeINTRUSION 8LAST NUMBER REDIAL (LNR) F8LEAST COST ROUTING (LCR) F67LOCK/UNLOCK F97MESSAGES - DELETING F*#9 (INDIV.)
F*#9*(ALL)MESSAGES - SENDING F96
9MUTE F76OHVA 0PAGING - ANSWER F59PAGING - RECEIVE SELECTION F*99 (ON)
F99 (OFF)PASSWORD CHANGE F97PAUSE - INSERT A F70PRIVATE TALK (CONFERENCE) F57PULSE TO TONE CONVERSION *REMINDER SERVICE F92 (ON)
F*92 (OFF)SAVED NUMBER REDIAL (SNR) F51SPEED DIAL NUMBER PROGRAMMING F1TRANSFER HOLD
XFR/CONFTRANSFER (NO RING), PLACING A F73
(TO RETRIEVE CALL) F53 UCD AGENT HELP F61UCD MONITOR F58UCD ROUTE OVERRIDE F6#
F*6# (CANCEL)UNSUPERVISED CONFERENCE F77USER SAVED NUMBER REDIAL (USNR) F5*VOICE CALLS F98 (ON)
F*98 (OFF)VOICE MAIL FROM BUSY OR
UNATTENDED EXTENSION 7VOICE TO RING INTERCHANGE 2WAIT-FOR-DIAL-TONE - INSERT A F79
User Guide 699030.qxd 8/9/00 1:47 PM Page 1