RobusTest - media.readthedocs.org
31
RobusTest Release 2 RobusTest Sep 27, 2017
Transcript of RobusTest - media.readthedocs.org

RobusTestRelease 2
RobusTest
Sep 27, 2017


Contents
1 RITE- RobusTest Integrated Testing Environment 11.1 Home . . . . . . . . . . . . . . . . . . . . . . . . . . . . . . . . . . . . . . . . . . . . . . . . . . . 11.2 Undercovers . . . . . . . . . . . . . . . . . . . . . . . . . . . . . . . . . . . . . . . . . . . . . . . 11.3 Xpath finder . . . . . . . . . . . . . . . . . . . . . . . . . . . . . . . . . . . . . . . . . . . . . . . 21.4 Useful tips . . . . . . . . . . . . . . . . . . . . . . . . . . . . . . . . . . . . . . . . . . . . . . . . 41.5 Examples . . . . . . . . . . . . . . . . . . . . . . . . . . . . . . . . . . . . . . . . . . . . . . . . . 5
2 Selenium 72.1 Installation . . . . . . . . . . . . . . . . . . . . . . . . . . . . . . . . . . . . . . . . . . . . . . . . 72.2 Getting Started . . . . . . . . . . . . . . . . . . . . . . . . . . . . . . . . . . . . . . . . . . . . . . 82.3 Navigating . . . . . . . . . . . . . . . . . . . . . . . . . . . . . . . . . . . . . . . . . . . . . . . . 122.4 Locating Elements . . . . . . . . . . . . . . . . . . . . . . . . . . . . . . . . . . . . . . . . . . . . 162.5 Waits . . . . . . . . . . . . . . . . . . . . . . . . . . . . . . . . . . . . . . . . . . . . . . . . . . . 202.6 WebDriver API . . . . . . . . . . . . . . . . . . . . . . . . . . . . . . . . . . . . . . . . . . . . . . 222.7 Appendix: Frequently Asked Questions . . . . . . . . . . . . . . . . . . . . . . . . . . . . . . . . . 23
3 Indices and tables 27
i

ii

CHAPTER 1
RITE- RobusTest Integrated Testing Environment
Home
In this wiki, we mainly have these three parts.
• About-RITE This section introduces how to use each feature of RITE.
• Xpath-finder This section introduces how to use Xpath finder to get a custom Xpath
• Useful-tips This section is intended to help users avoid some known issues.
• Examples This section contains a few real site examples.
• Q&A This section answers quite a few common questions.
Please share your suggestions with us!
Google Moderator site
Contact us:
Undercovers
After introducing the basic functionalities, let’s take a look at the undercover stuff:
• verification
• code generation
• content map
• descriptor
Comments
You do not have permission to add comments.
1

RobusTest, Release 2
Xpath finder
How to turn on Xpath finder?
The Xpath finder could be either a standalone tool to help find a custom xpath or it could be used along with RITE.
• If you click the Xpath finder option in the extension popup dialog, it goes the standalone mode.
• To use it with RITE, you could open the settings dialog on RITE main console, and check the option “UseXpath”. Now when you enter the recording mode, you’ll see the Xpath Finder shown in page.
A few quick tips to use it
• Press the “Shift” key to pause/resume the content changing while moving cursor. Once you’ve paused it, youcould continue customizing your xpath by checking the options.
• Every time you click on an checkbox in Xpath finder, it will recalculate the xpath based on the change.
• If the Shift key doesn’t pause/resume the xpath changing, it could be the tab is not focused.
How does it work?
When you move cursor around dom elements, you’ll see the content changes correspondingly in Xpath Finder. In thetop text box, it shows the xpath that is generated using the default algorithm. You can also customize the way thatXpath is generated in the following ways.
Based on attributes:
2 Chapter 1. RITE- RobusTest Integrated Testing Environment

RobusTest, Release 2
For example, the text in this case might not be changed anytime soon, so you could check that option, and it’llautomatically show the updated xpath based on the text attribute.
Based on location:
Sometimes, none of the attributes are reliable, and you might just want to make the xpath based on the element’slocation in the dom tree. In this case, you could check all of the options off.
Partial match:
For example, you might just need the text attribute partially matched in some cases. Then you could check the containscheckbox next to the text input box.
After you’ve customized your new xpath, you might want to click the “ping” button to check if it’s still matching thecorrect element. In the end, you could save it, so that RITE will use the new xpath instead of the default xpath whenneeded. When use the tool in the standalone mode, once your page navigates out, the Xpath finder will be gone, andyou could reopen it if needed.
A real example
Let’s say we’d like to get the xpath of the Maps link on Google home page.
When we move the cursor on top of the Maps link, we would see something like the above image, and by default, weget the xpath: //A[@id=”gb_8”]/SPAN[2]
If we think the id in the xpath might be changed a lot more frequently than the text “Maps”, then we could press the“Shift” key to pause the content changing, and then check the text checkbox before “Maps” in Xpath finder. Now, weget another xpath generated: //SPAN[text()=”Maps”]
In some circumstances, there might not be any attributes that are reliable enough, we might just want to generate thexpath based on its location. In this case, we could simply check all of the checkboxes in Xpath finder off. Then we’llget another xpath: //DIV[1]/OL[1]/LI[5]/A[1]/SPAN[2]
Of course we would like to double check that after customizing the xpath, does it still match the correct element?That’s what the ping button next to the Xpath input box does. Clicking the button will highlight the correspondingelement in page with a blue boarder, and it will disappear within a sec.
Limitation
• It doesn’t support iframe right now.
• When use it with RITE, for the custom xpath that is saved, it will be gone if you navigate out of the currentpage.
Comments
You do not have permission to add comments.
1.3. Xpath finder 3

RobusTest, Release 2
Useful tips
Main console
• Double click on a generated command like click(...), verify(...) will open the Details dialog.
• Ctrl + Alt +s to switch the generated script to readable mode and switch back.
Record
• To change the tab under record, click the RITE option in extension popup again. To check if the new tab isselected correctly, you could enter record mode and see if the new tab is popped up to the front and ready torecord.
• To record an action like verify, verify not, and mouseover, try right clicking on the target element. In the poppedup dialog in console, select the correct action and save the command.
• Always keep an eye on the generated code during recording. Most of the time, it should be obvious to understandthe syntax. When there is a URL redirection happens, it should generate a redirectTo command following theoriginal action command.
• Make sure the page is properly loaded and the dom element is yellow highlighted before performing actions,otherwise, it might miss recording the step.
• To turn the Xpath finder on, you’ll need to check the option “Use Xpath” in the settings dialog which could beopened by clicking the settings button in the RITE menu bar.
• During recording, if a new tab is opened after clicking a link, you are still able to record in the original tab butthe new tab.
• Due to an extension bug, RITE couldn’t perform well in case of dynamically created iframes. For example,Gmail or the Google+ sharebox. As a workaround, it’s possible to write up JS functions to simulate the behav-iors.
Playback
• To run a whole project or any number of scripts within a project, you’ll need to load the project first, and selectthe script names in the playback runtime dialog and play. In the end, it will show the links to view the results.
• You could cancel the whole run of multiple tests by clicking the X button in the playback runtime dialog. It onlyappears when you are running multiple tests.
• Try the stop button in playback runtime dialog to clear any playback status in case anything gets stuck.
Code
• The commonly generated commands are the followings:
– click(Element) / dblclick(Element) / ...
– type(Element, Variable) / select(Element, Variable) / verify(Element, Variable) /...
– redirectTo(URL)
– call(Custom Function)
– changeUrl(URL), which could be manually typed in editor to perform a redirection.
Xpath finder
• “Shift” to pause/resume the content changing in Xpath finder.
• Turn on/off the checkboxes to customize the xpath.
Comments
4 Chapter 1. RITE- RobusTest Integrated Testing Environment

RobusTest, Release 2
You do not have permission to add comments.
Examples
In this section, we’ll have a look at a few scripts recorded on popular sites. Once you have the extension installed, youcould click on any of the following screenshots and it will open the RITE main console and automatically load thescript. Feel free to read the code, screenshots, or play it.
(Note that this page can not be recorded correctly because it contains special code for tutorial purpose.)
Google Maps
Expedia
Amazon
Wikipedia
1.5. Examples 5

RobusTest, Release 2
Yahoo
Youtube
Comments
You do not have permission to add comments.
6 Chapter 1. RITE- RobusTest Integrated Testing Environment

CHAPTER 2
Selenium
Installation
Introduction
Selenium Python bindings provides a simple API to write functional/acceptance tests using Selenium WebDriver.Through Selenium Python API you can access all functionalities of Selenium WebDriver in an intuitive way.
Selenium Python bindings provide a convenient API to access Selenium WebDrivers like Firefox, Ie, Chrome, Remoteetc. The current supported Python versions are 2.7, 3.2, 3.3 and 3.4.
This documentation explains Selenium 2 WebDriver API. Selenium 1 / Selenium RC API is not covered here.
Downloading Python bindings for Selenium
You can download Python bindings for Selenium from the PyPI page for selenium package. However, a better ap-proach would be to use pip to install the selenium package. Python 3.4 has pip available in the standard library. Usingpip, you can install selenium like this:
pip install selenium
You may consider using virtualenv to create isolated Python environments. Python 3.4 has pyvenv which is almostsame as virtualenv.
Detailed instructions for Windows users
Note: You should have internet connection to perform this installation.
1. Install Python 3.4 using the MSI available in python.org download page.
7

RobusTest, Release 2
2. Start a command prompt using the cmd.exe program and run the pip command as given below to installselenium.
C:\Python34\Scripts\pip.exe install selenium
Now you can run your test scripts using Python. For example, if you have created a Selenium based script and savedit inside C:\my_selenium_script.py, you can run it like this:
C:\Python34\python.exe C:\my_selenium_script.py
Downloading Selenium server
Note: The Selenium server is only required, if you want to use the remote WebDriver. See the Using Selenium withremote WebDriver section for more details. If you are a beginner learning Selenium, you can skip this section andproceed with next chapter.
Selenium server is a Java program. Java Runtime Environment (JRE) 1.6 or newer version is recommended to runSelenium server.
You can download Selenium server 2.x from the download page of selenium website. The file name should be some-thing like this: selenium-server-standalone-2.x.x.jar. You can always download the latest 2.x versionof Selenium server.
If Java Runtime Environment (JRE) is not installed in your system, you can download the JRE from the Oracle website.If you are using a GNU/Linux system and have root access in your system, you can also use your operating systeminstructions to install JRE.
If java command is available in the PATH (environment variable), you can start the Selenium server using this com-mand:
java -jar selenium-server-standalone-2.x.x.jar
Replace 2.x.x with actual version of Selenium server you downloaded from the site.
If JRE is installed as a non-root user and/or if it is not available in the PATH (environment variable), you can type therelative or absolute path to the java command. Similarly, you can provide relative or absolute path to Selenium serverjar file. Then, the command will look something like this:
/path/to/java -jar /path/to/selenium-server-standalone-2.x.x.jar
Getting Started
Simple Usage
If you have installed Selenium Python bindings, you can start using it from Python like this.
from selenium import webdriverfrom selenium.webdriver.common.keys import Keys
driver = webdriver.Firefox()driver.get("http://www.python.org")assert "Python" in driver.title
8 Chapter 2. Selenium

RobusTest, Release 2
elem = driver.find_element_by_name("q")elem.send_keys("selenium")elem.send_keys(Keys.RETURN)driver.close()
The above script can be saved into a file (eg:- python_org_search.py), then it can be run like this:
python python_org_search.py
The python which you are running should have the selenium module installed.
Walk through of the example
The selenium.webdriver module provides all the WebDriver implementations. Currently supported WebDriver imple-mentations are Firefox, Chrome, Ie and Remote. The Keys class provide keys in the keyboard like RETURN, F1, ALTetc.
from selenium import webdriverfrom selenium.webdriver.common.keys import Keys
Next, the instance of Firefox WebDriver is created.
driver = webdriver.Firefox()
The driver.get method will navigate to a page given by the URL. WebDriver will wait until the page has fully loaded(that is, the “onload” event has fired) before returning control to your test or script. It’s worth noting that if your pageuses a lot of AJAX on load then WebDriver may not know when it has completely loaded.:
driver.get("http://www.python.org")
The next line is an assertion to confirm that title has “Python” word in it:
assert "Python" in driver.title
WebDriver offers a number of ways to find elements using one of the find_element_by_* methods. For example, theinput text element can be located by its name attribute using find_element_by_name method. Detailed explanation offinding elements is available in the Locating Elements chapter:
elem = driver.find_element_by_name("q")
Next we are sending keys, this is similar to entering keys using your keyboard. Special keys can be send using Keysclass imported from selenium.webdriver.common.keys:
elem.send_keys("selenium")elem.send_keys(Keys.RETURN)
After submission of the page, you should get the result if there is any:
Finally, the browser window is closed. You can also call quit method instead of close. The quit will exit entire browserwhere as close will close one tab, but if it just one tab, by default most browser will exit entirely.:
driver.close()
2.2. Getting Started 9

RobusTest, Release 2
Using Selenium to write tests
Selenium is mostly used for writing test cases. The selenium package itself doesn’t provide a testing tool/framework.You can write test cases using Python’s unittest module. The other choices as a tool/framework are py.test and nose.
In this chapter, we use unittest as the framework of choice. Here is the modified example which uses unittest module.This is a test for python.org search functionality:
import unittestfrom selenium import webdriverfrom selenium.webdriver.common.keys import Keys
class PythonOrgSearch(unittest.TestCase):
def setUp(self):self.driver = webdriver.Firefox()
def test_search_in_python_org(self):driver = self.driverdriver.get("http://www.python.org")self.assertIn("Python", driver.title)elem = driver.find_element_by_name("q")elem.send_keys("selenium")elem.send_keys(Keys.RETURN)
def tearDown(self):self.driver.close()
if __name__ == "__main__":unittest.main()
You can run the above test case from a shell like this:
python test_python_org_search.py.----------------------------------------------------------------------Ran 1 test in 15.566s
OK
The above results shows that, the test has been successfully completed.
Walk through of the example
Initially, all the basic modules required are imported. The unittest module is a built-in Python based on Java’s JUnit.This module provides the framework for organizing the test cases. The selenium.webdriver module provides all theWebDriver implementations. Currently supported WebDriver implementations are Firefox, Chrome, Ie and Remote.The Keys class provide keys in the keyboard like RETURN, F1, ALT etc.
import unittestfrom selenium import webdriverfrom selenium.webdriver.common.keys import Keys
The test case class is inherited from unittest.TestCase. Inheriting from TestCase class is the way to tell unittest modulethat, this is a test case:
10 Chapter 2. Selenium
RobusTest, Release 2
class PythonOrgSearch(unittest.TestCase):
The setUp is part of initialization, this method will get called before every test function which you are going to writein this test case class. Here you are creating the instance of Firefox WebDriver.
def setUp(self):self.driver = webdriver.Firefox()
This is the test case method. The first line inside this method create a local reference to the driver object created insetUp method.
def test_search_in_python_org(self):driver = self.driver
The driver.get method will navigate to a page given by the URL. WebDriver will wait until the page has fully loaded(that is, the “onload” event has fired) before returning control to your test or script. It’s worth noting that if your pageuses a lot of AJAX on load then WebDriver may not know when it has completely loaded.:
driver.get("http://www.python.org")
The next line is an assertion to confirm that title has “Python” word in it:
self.assertIn("Python", driver.title)
WebDriver offers a number of ways to find elements using one of the find_element_by_* methods. For example, theinput text element can be located by its name attribute using find_element_by_name method. Detailed explanation offindind elements is available in the Locating Elements chapter:
elem = driver.find_element_by_name("q")
Next we are sending keys, this is similar to entering keys using your keyboard. Special keys can be send using Keysclass imported from selenium.webdriver.common.keys:
elem.send_keys("selenium")elem.send_keys(Keys.RETURN)
After submission of the page, you should get result as per search if there is any.
The tearDown method will get called after every test method. This is a place to do all cleanup actions. In the currentmethod, the browser window is closed. You can also call quit method instead of close. The quit will exit entirebrowser, where as close will close a tab, but if it is just one tab, by default most browser will exit entirely.:
def tearDown(self):self.driver.close()
Final lines are some boiler plate code to run the test suite:
if __name__ == "__main__":unittest.main()
Using Selenium with remote WebDriver
To use the remote WebDriver, you should have Selenium server running. To run the server, use this command:
2.2. Getting Started 11
RobusTest, Release 2
java -jar selenium-server-standalone-2.x.x.jar
While running the Selenium server, you could see a message looks like this:
15:43:07.541 INFO - RemoteWebDriver instances should connect to: http://127.0.0.→˓1:4444/wd/hub
The above line says that, you can use this URL for connecting to remote WebDriver. Here are some examples:
from selenium.webdriver.common.desired_capabilities import DesiredCapabilities
driver = webdriver.Remote(command_executor='http://127.0.0.1:4444/wd/hub',desired_capabilities=DesiredCapabilities.CHROME)
driver = webdriver.Remote(command_executor='http://127.0.0.1:4444/wd/hub',desired_capabilities=DesiredCapabilities.OPERA)
driver = webdriver.Remote(command_executor='http://127.0.0.1:4444/wd/hub',desired_capabilities=DesiredCapabilities.HTMLUNITWITHJS)
The desired capabilities is a dictionary, so instead of using the default dictionaries, you can specifies the values explic-itly:
driver = webdriver.Remote(command_executor='http://127.0.0.1:4444/wd/hub',desired_capabilities={'browserName': 'htmlunit',
'version': '2','javascriptEnabled': True})
Navigating
The first thing you’ll want to do with WebDriver is navigate to a link. The normal way to do this is by calling getmethod:
driver.get("http://www.google.com")
WebDriver will wait until the page has fully loaded (that is, the onload event has fired) before returning control toyour test or script. It’s worth noting that if your page uses a lot of AJAX on load then WebDriver may not know whenit has completely loaded. If you need to ensure such pages are fully loaded then you can use waits.
Interacting with the page
Just being able to go to places isn’t terribly useful. What we’d really like to do is to interact with the pages, or, morespecifically, the HTML elements within a page. First of all, we need to find one. WebDriver offers a number of waysto find elements. For example, given an element defined as:
<input type="text" name="passwd" id="passwd-id" />
you could find it using any of:
12 Chapter 2. Selenium

RobusTest, Release 2
element = driver.find_element_by_id("passwd-id")element = driver.find_element_by_name("passwd")element = driver.find_element_by_xpath("//input[@id='passwd-id']")
You can also look for a link by its text, but be careful! The text must be an exact match! You should also be carefulwhen using XPATH in WebDriver. If there’s more than one element that matches the query, then only the first will bereturned. If nothing can be found, a NoSuchElementException will be raised.
WebDriver has an “Object-based” API; we represent all types of elements using the same interface. This meansthat although you may see a lot of possible methods you could invoke when you hit your IDE’s auto-complete keycombination, not all of them will make sense or be valid. Don’t worry! WebDriver will attempt to do the Right Thing,and if you call a method that makes no sense (“setSelected()” on a “meta” tag, for example) an exception will beraised.
So, you’ve got an element. What can you do with it? First of all, you may want to enter some text into a text field:
element.send_keys("some text")
You can simulate pressing the arrow keys by using the “Keys” class:
element.send_keys(" and some", Keys.ARROW_DOWN)
It is possible to call send_keys on any element, which makes it possible to test keyboard shortcuts such as those usedon GMail. A side-effect of this is that typing something into a text field won’t automatically clear it. Instead, what youtype will be appended to what’s already there. You can easily clear the contents of a text field or textarea with clearmethod:
element.clear()
Filling in forms
We’ve already seen how to enter text into a textarea or text field, but what about the other elements? You can “toggle”the state of drop down, and you can use “setSelected” to set something like an OPTION tag selected. Dealing withSELECT tags isn’t too bad:
element = driver.find_element_by_xpath("//select[@name='name']")all_options = element.find_elements_by_tag_name("option")for option in all_options:
print("Value is: %s" % option.get_attribute("value"))option.click()
This will find the first “SELECT” element on the page, and cycle through each of it’s OPTIONs in turn, printing outtheir values, and selecting each in turn.
As you can see, this isn’t the most efficient way of dealing with SELECT elements . WebDriver’s support classesinclude one called “Select”, which provides useful methods for interacting with these:
from selenium.webdriver.support.ui import Selectselect = Select(driver.find_element_by_name('name'))select.select_by_index(index)select.select_by_visible_text("text")select.select_by_value(value)
WebDriver also provides features for deselecting all the selected options:
2.3. Navigating 13

RobusTest, Release 2
select = Select(driver.find_element_by_id('id'))select.deselect_all()
This will deselect all OPTIONs from the first SELECT on the page.
Suppose in a test, we need the list of all default selected options, Select class provides a property method that returnsa list:
select = Select(driver.find_element_by_xpath("xpath"))all_selected_options = select.all_selected_options
To get all available options:
options = select.options
Once you’ve finished filling out the form, you probably want to submit it. One way to do this would be to find the“submit” button and click it:
# Assume the button has the ID "submit" :)driver.find_element_by_id("submit").click()
Alternatively, WebDriver has the convenience method “submit” on every element. If you call this on an element withina form, WebDriver will walk up the DOM until it finds the enclosing form and then calls submit on that. If the elementisn’t in a form, then the NoSuchElementException will be raised:
element.submit()
Drag and drop
You can use drag and drop, either moving an element by a certain amount, or on to another element:
element = driver.find_element_by_name("source")target = driver.find_element_by_name("target")
from selenium.webdriver import ActionChainsaction_chains = ActionChains(driver)action_chains.drag_and_drop(element, target)
Moving between windows and frames
It’s rare for a modern web application not to have any frames or to be constrained to a single window. WebDriversupports moving between named windows using the “switch_to_window” method:
driver.switch_to_window("windowName")
All calls to driver will now be interpreted as being directed to the particular window. But how do you know thewindow’s name? Take a look at the javascript or link that opened it:
<a href="somewhere.html" target="windowName">Click here to open a new window</a>
Alternatively, you can pass a “window handle” to the “switch_to_window()” method. Knowing this, it’s possible toiterate over every open window like so:
14 Chapter 2. Selenium

RobusTest, Release 2
for handle in driver.window_handles:driver.switch_to_window(handle)
You can also swing from frame to frame (or into iframes):
driver.switch_to_frame("frameName")
It’s possible to access subframes by separating the path with a dot, and you can specify the frame by its index too.That is:
driver.switch_to_frame("frameName.0.child")
would go to the frame named “child” of the first subframe of the frame called “frameName”. All frames are evaluatedas if from *top*.
Once we are done with working on frames, we will have to come back to the parent frame which can be done using:
driver.switch_to_default_content()
Popup dialogs
Selenium WebDriver has built-in support for handling popup dialog boxes. After you’ve triggerd and action that wouldopen a popup, you can access the alert with the following:
alert = driver.switch_to_alert()
This will return the currently open alert object. With this object you can now accept, dismiss, read its contents or eventype into a prompt. This interface works equally well on alerts, confirms, prompts. Refer to the API documentationfor more information.
Navigation: history and location
Earlier, we covered navigating to a page using the “get” command ( driver.get("http://www.example.com")) As you’ve seen, WebDriver has a number of smaller, task-focused interfaces, and navigation is a useful task.To navigate to a page, you can use get method:
driver.get("http://www.example.com")
To move backwards and forwards in your browser’s history:
driver.forward()driver.back()
Please be aware that this functionality depends entirely on the underlying driver. It’s just possible that somethingunexpected may happen when you call these methods if you’re used to the behaviour of one browser over another.
Cookies
Before we leave these next steps, you may be interested in understanding how to use cookies. First of all, you need tobe on the domain that the cookie will be valid for:
2.3. Navigating 15

RobusTest, Release 2
# Go to the correct domaindriver.get("http://www.example.com")
# Now set the cookie. This one's valid for the entire domaincookie = {"key": "value"})driver.add_cookie(cookie)
# And now output all the available cookies for the current URLall_cookies = driver.get_cookies()for cookie_name, cookie_value in all_cookies.items():
print("%s -> %s", cookie_name, cookie_value)
Locating Elements
There are vaious strategies to locate elements in a page. You can use the most appropriate one for your case. Seleniumprovides the following methods to locate elements in a page:
• find_element_by_id
• find_element_by_name
• find_element_by_xpath
• find_element_by_link_text
• find_element_by_partial_link_text
• find_element_by_tag_name
• find_element_by_class_name
• find_element_by_css_selector
To find multiple elements (these methods will return a list):
• find_elements_by_name
• find_elements_by_xpath
• find_elements_by_link_text
• find_elements_by_partial_link_text
• find_elements_by_tag_name
• find_elements_by_class_name
• find_elements_by_css_selector
Locating by Id
Use this when you know id attribute of an element. With this strategy, the first element with the id attribute valuematching the location will be returned. If no element has a matching id attribute, a NoSuchElementExceptionwill be raised.
For instance, conside this page source:
16 Chapter 2. Selenium

RobusTest, Release 2
<html><body><form id="loginForm"><input name="username" type="text" /><input name="password" type="password" /><input name="continue" type="submit" value="Login" /></form>
</body><html>
The form element can be located like this:
login_form = driver.find_element_by_id('loginForm')
Locating by Name
Use this when you know name attribute of an element. With this strategy, the first element with the name attribute valuematching the location will be returned. If no element has a matching name attribute, a NoSuchElementExceptionwill be raised.
For instance, conside this page source:
<html><body><form id="loginForm"><input name="username" type="text" /><input name="password" type="password" /><input name="continue" type="submit" value="Login" /><input name="continue" type="button" value="Clear" /></form>
</body><html>
The username & password elements can be located like this:
username = driver.find_element_by_name('username')password = driver.find_element_by_name('password')
This will give the “Login” button as it occur before the “Clear” button:
continue = driver.find_element_by_name('continue')
Locating by XPath
XPath is the language used for locating nodes in an XML document. As HTML can be an implementation of XML(XHTML), Selenium users can leverage this powerful language to target elements in their web applications. XPathextends beyond (as well as supporting) the simple methods of locating by id or name attributes, and opens up all sortsof new possibilities such as locating the third checkbox on the page.
One of the main reasons for using XPath is when you don’t have a suitable id or name attribute for the element youwish to locate. You can use XPath to either locate the element in absolute terms (not advised), or relative to an elementthat does have an id or name attribute. XPath locators can also be used to specify elements via attributes other than idand name.
2.4. Locating Elements 17

RobusTest, Release 2
Absolute XPaths contain the location of all elements from the root (html) and as a result are likely to fail with onlythe slightest adjustment to the application. By finding a nearby element with an id or name attribute (ideally a parentelement) you can locate your target element based on the relationship. This is much less likely to change and can makeyour tests more robust.
For instance, conside this page source:
<html><body><form id="loginForm"><input name="username" type="text" /><input name="password" type="password" /><input name="continue" type="submit" value="Login" /><input name="continue" type="button" value="Clear" /></form>
</body><html>
The form elements can be located like this:
login_form = driver.find_element_by_xpath("/html/body/form[1]")login_form = driver.find_element_by_xpath("//form[1]")login_form = driver.find_element_by_xpath("//form[@id='loginForm']")
1. Absolute path (would break if the HTML was changed only slightly)
2. First form element in the HTML
3. The form element with attribute named id and the value loginForm
The username element can be located like this:
username = driver.find_element_by_xpath("//form[input/@name='username']")username = driver.find_element_by_xpath("//form[@id='loginForm']/input[1]")username = driver.find_element_by_xpath("//input[@name='username']")
1. First form element with an input child element with attribute named name and the value username
2. First input child element of the form element with attribute named id and the value loginForm
3. First input element with attribute named ‘name’ and the value username
The “Clear” button element can be located like this:
clear_button = driver.find_element_by_xpath("//input[@name='continue'][@type='button']→˓")clear_button = driver.find_element_by_xpath("//form[@id='loginForm']/input[4]")
1. Input with attribute named name and the value continue and attribute named type and the value button
2. Fourth input child element of the form element with attribute named id and value loginForm
These examples cover some basics, but in order to learn more, the following references are recommended:
• W3Schools XPath Tutorial
• W3C XPath Recommendation
• XPath Tutorial - with interactive examples.
There are also a couple of very useful Add-ons that can assist in discovering the XPath of an element:
• XPath Checker - suggests XPath and can be used to test XPath results.
18 Chapter 2. Selenium

RobusTest, Release 2
• Firebug - XPath suggestions are just one of the many powerful features of this very useful add-on.
• XPath Helper - for Google Chrome
Locating Hyperlinks by Link Text
Use this when you know link text used within an anchor tag. With this strategy, the first element with thelink text value matching the location will be returned. If no element has a matching link text attribute, aNoSuchElementException will be raised.
For instance, consider this page source:
<html><body><p>Are you sure you want to do this?</p><a href="continue.html">Continue</a><a href="cancel.html">Cancel</a>
</body><html>
The continue.html link can be located like this:
continue_link = driver.find_element_by_link_text('Continue')continue_link = driver.find_element_by_partial_link_text('Conti')
Locating Elements by Tag Name
Use this when you want to locate an element by tag name. With this strategy, the first element with the give tag namewill be returned. If no element has a matching tag name, a NoSuchElementException will be raised.
For instance, conside this page source:
<html><body><h1>Welcome</h1><p>Site content goes here.</p>
</body><html>
The heading (h1) element can be located like this:
heading1 = driver.find_element_by_tag_name('h1')
Locating Elements by Class Name
Use this when you want to locate an element by class attribute name. With this strategy, the first elementwith the matching class attribute name will be returned. If no element has a matching class attribute name, aNoSuchElementException will be raised.
For instance, consider this page source:
<html><body><p class="content">Site content goes here.</p>
2.4. Locating Elements 19

RobusTest, Release 2
</body><html>
The “p” element can be located like this:
content = driver.find_element_by_class_name('content')
Locating Elements by CSS Selectors
Use this when you want to locate an element by CSS selector syntaxt. With this strategy, the first element with thematching CSS selector will be returned. If no element has a matching CSS selector, a NoSuchElementExceptionwill be raised.
For instance, consider this page source:
<html><body><p class="content">Site content goes here.</p>
</body><html>
The “p” element can be located like this:
content = driver.find_element_by_css_selector('p.content')
Sauce Labs has good documentation on CSS selectors.
Waits
These days most of the web apps are using AJAX techniques. When a page is loaded to browser, the elements withinthat page may load at different time intervals. This makes locating elements difficult, if the element is not present inthe DOM, it will raise ElementNotVisibleException exception. Using waits, we can solve this issue. Waiting providessome time interval between actions performed - mostly locating element or any other operation with the element.
Selenium Webdriver provides two types of waits - implicit & explicit. An explicit wait makes WebDriver to wait fora certain condition to occur before proceeding further with executions. An implicit wait makes WebDriver to poll theDOM for a certain amount of time when trying to locate an element.
Explicit Waits
An explicit waits is code you define to wait for a certain condition to occur before proceeding further in the code. Theworst case of this is time.sleep(), which sets the condition to an exact time period to wait. There are some conveniencemethods provided that help you write code that will wait only as long as required. WebDriverWait in combination withExpectedCondition is one way this can be accomplished.
from selenium import webdriverfrom selenium.webdriver.common.by import Byfrom selenium.webdriver.support.ui import WebDriverWaitfrom selenium.webdriver.support import expected_conditions as EC
driver = webdriver.Firefox()driver.get("http://somedomain/url_that_delays_loading")
20 Chapter 2. Selenium

RobusTest, Release 2
try:element = WebDriverWait(driver, 10).until(
EC.presence_of_element_located((By.ID, "myDynamicElement")))
finally:driver.quit()
This waits up to 10 seconds before throwing a TimeoutException or if it finds the element will return it in 0 - 10seconds. WebDriverWait by default calls the ExpectedCondition every 500 milliseconds until it returns successfully.A successful return is for ExpectedCondition type is Boolean return true or not null return value for all other Expect-edCondition types.
Expected Conditions
There are some common conditions that are frequently come across when automating web browsers. Listed below areImplementations of each. Selenium Python binding provides some convienence methods so you don’t have to code anexpected_condition class yourself or create your own utility package for them.
• title_is
• title_contains
• presence_of_element_located
• visibility_of_element_located
• visibility_of
• presence_of_all_elements_located
• text_to_be_present_in_element
• text_to_be_present_in_element_value
• frame_to_be_available_and_switch_to_it
• invisibility_of_element_located
• element_to_be_clickable - it is Displayed and Enabled.
• staleness_of
• element_to_be_selected
• element_located_to_be_selected
• element_selection_state_to_be
• element_located_selection_state_to_be
• alert_is_present
from selenium.webdriver.support import expected_conditions as EC
wait = WebDriverWait(driver, 10)element = wait.until(EC.element_to_be_clickable((By.ID,'someid')))
The expected_conditions module contains a set of predefined conditions to use with WebDriverWait.
Implicit Waits
An implicit wait is to tell WebDriver to poll the DOM for a certain amount of time when trying to find an element orelements if they are not immediately available. The default setting is 0. Once set, the implicit wait is set for the life of
2.5. Waits 21

RobusTest, Release 2
the WebDriver object instance.
from selenium import webdriver
driver = webdriver.Firefox()driver.implicitly_wait(10) # secondsdriver.get("http://somedomain/url_that_delays_loading")myDynamicElement = driver.find_element_by_id("myDynamicElement")
WebDriver API
Note: This is not an official documentation. Official API documentation is available here.
This chapter cover all the interfaces of Selenium WebDriver.
Recommended Import Style
The API definitions in this chapter shows the absolute location of classes. However the recommended import style isas given below:
from selenium import webdriver
Then, you can access the classes like this:
webdriver.Firefoxwebdriver.FirefoxProfilewebdriver.Chromewebdriver.ChromeOptionswebdriver.Iewebdriver.Operawebdriver.PhantomJSwebdriver.Remotewebdriver.DesiredCapabilitieswebdriver.ActionChainswebdriver.TouchActionswebdriver.Proxy
The special keys class (Keys) can be imported like this:
from selenium.webdriver.common.keys import Keys
The exception classes can be imported like this (Replace the TheNameOfTheExceptionClass with actual classname given below):
from selenium.common.exceptions import [TheNameOfTheExceptionClass]
Conventions used in the API
Some attributes are callable (or methods) and others are non-callable (properties). All the callable attributes are endingwith round brackets.
Here is an example for property:
• current_url
URL of the current loaded page.
22 Chapter 2. Selenium

RobusTest, Release 2
Usage:
driver.current_url
Here is an example for a method:
• close()
Closes the current window.
Usage:
driver.close()
Exceptions
Action Chains
Alerts
Special Keys
Firefox WebDriver
Chrome WebDriver
Remote WebDriver
WebElement
UI Support
Color Support
Expected conditions Support
Appendix: Frequently Asked Questions
Another FAQ: https://code.google.com/p/selenium/wiki/FrequentlyAskedQuestions
How to use ChromeDriver ?
Download the latest chromedriver from download page. Unzip the file:
unzip chromedriver_linux32_x.x.x.x.zip
You should see a chromedriver executable. Now you can create an instance of Chrome WebDriver like this:
driver = webdriver.Chrome(executable_path="/path/to/chromedriver")
The rest of the example should work as given in other documentation.
2.7. Appendix: Frequently Asked Questions 23

RobusTest, Release 2
Does Selenium 2 support XPath 2.0 ?
Ref: http://seleniumhq.org/docs/03_webdriver.html#how-xpath-works-in-webdriver
Selenium delegates XPath queries down to the browser’s own XPath engine, so Selenium support XPath supportswhatever the browser supports. In browsers which don’t have native XPath engines (IE 6,7,8), Selenium supportsXPath 1.0 only.
How to scroll down to the bottom of a page ?
Ref: http://blog.varunin.com/2011/08/scrolling-on-pages-using-selenium.html
You can use the execute_script method to execute javascript on the loaded page. So, you can call the JavaScript APIto scroll to the bottom or any other position of a page.
Here is an example to scroll to the bottom of a page:
driver.execute_script("window.scrollTo(0, document.body.scrollHeight);")
The window object in DOM has a scrollTo method to scroll to any position of an opened window. The scrollHeightis a common property for all elements. The document.body.scrollHeight will give the height of the entire body of thepage.
How to auto save files using custom Firefox profile ?
Ref: http://stackoverflow.com/questions/1176348/access-to-file-download-dialog-in-firefox
Ref: http://blog.codecentric.de/en/2010/07/file-downloads-with-selenium-mission-impossible/
The first step is to identify the type of file you want to auto save.
To identify the content type you want to download automatically, you can use curl:
curl -I URL | grep "Content-Type"
Another way to find content type is using the requests module, you can use it like this:
import requestscontent_type = requests.head('http://www.python.org').headers['content-type']print(content_type)
Once the content type is identified, you can use it to set the firefox profile preference: browser.helperApps.neverAsk.saveToDisk
Here is an example:
import os
from selenium import webdriver
fp = webdriver.FirefoxProfile()
fp.set_preference("browser.download.folderList",2)fp.set_preference("browser.download.manager.showWhenStarting",False)fp.set_preference("browser.download.dir", os.getcwd())fp.set_preference("browser.helperApps.neverAsk.saveToDisk", "application/octet-stream→˓")
24 Chapter 2. Selenium
RobusTest, Release 2
browser = webdriver.Firefox(firefox_profile=fp)browser.get("http://pypi.python.org/pypi/selenium")browser.find_element_by_partial_link_text("selenium-2").click()
In the above example, application/octet-stream is used as the content type.
The browser.download.dir option specify the directory where you want to download the files.
How to use firebug with Firefox ?
First download the Firebug XPI file, later you call the add_extension method available for the firefox profile:
from selenium import webdriver
fp = webdriver.FirefoxProfile()
fp.add_extension(extension='firebug-1.8.4.xpi')fp.set_preference("extensions.firebug.currentVersion", "1.8.4") #Avoid startup screenbrowser = webdriver.Firefox(firefox_profile=fp)
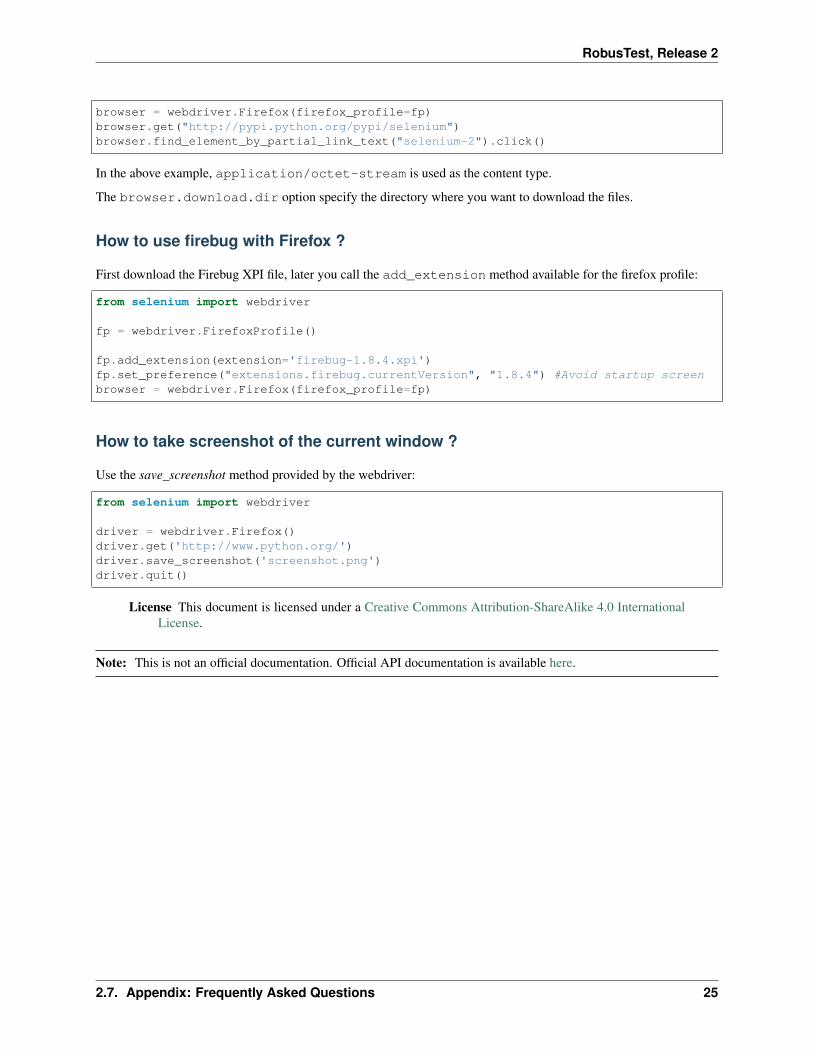
How to take screenshot of the current window ?
Use the save_screenshot method provided by the webdriver:
from selenium import webdriver
driver = webdriver.Firefox()driver.get('http://www.python.org/')driver.save_screenshot('screenshot.png')driver.quit()
License This document is licensed under a Creative Commons Attribution-ShareAlike 4.0 InternationalLicense.
Note: This is not an official documentation. Official API documentation is available here.
2.7. Appendix: Frequently Asked Questions 25

RobusTest, Release 2
26 Chapter 2. Selenium

CHAPTER 3
Indices and tables
• genindex
• modindex
• search
Robustest - One Click Automation
Robustest - Contextual Bug Reporting
27