Road Bike Setup
8
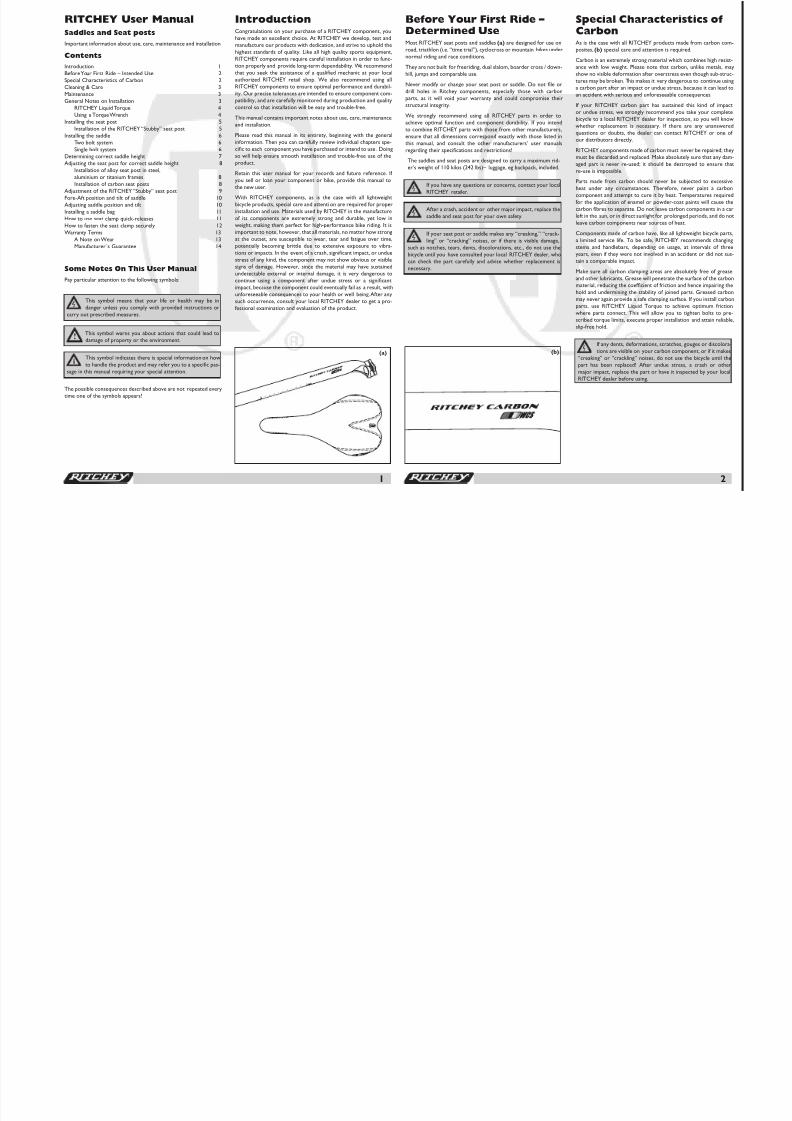
RITCHEY User Manual Saddles and Seat posts Important information about use, care, maintenance and installation Contents Introduction 1 Before Yo ur First Ride – Intended Use 2 Special Characteristics of Carbon 2 Cleaning & Care 3 Maintenance 3 General Notes on Installation 3 RITCHEY Liquid T orque 4 Using a Torque Wrench 4 Installing the seat post 5 Installation of the RITCHEY “Stubby” seat post 5 Installing the saddle 6 T wo bolt system 6 Single bolt system 6 Determining correct saddle height 7 Adjusting the seat post for correct saddle height 8 Installation of alloy seat post in steel, aluminium or titanium frames 8 Installation of carbon seat posts 8 Adjustment of the RITCHEY “Stubby” seat post 9 Fore-Aft position and tilt of saddle 10 Adjusting saddle position and tilt 10 Installing a saddle bag 11 How to use seat clamp quick-releases 11 How to fasten the seat clamp securely 12 Warranty Terms 13 A Note on Wear 13 Manufacturer´s Guarantee 14 Some Notes On This User Manual Pay particular attention to the following symbols: This symbol means that your life or health may be in danger unless you comply with provided instructions or carry out prescribed measures. ! This symbol warns you about actions that could lead to damage of property or the environment. i This symbol indicates there is special information on how to handle the product and may refer you to a specific pas- sage in this manual requiring your special attention. The possible consequences described above are not repeated every time one of the symbols appears! Introduction Congratulations on your purchase of a RITCHEY component, you have made an excellent choice. At RITCHEY we develop, test and manufacture our products with dedication, and strive to uphold the highest standards of quality. Like all high quality sports equipment, RITCHEY components require careful installation in order to func- tion properly and provide long-term dependability. We recommend that you seek the assistance of a qualified mechanic at your local authorized RITCHEY retail shop. We also recommend using all RITCHEY components to ensure optimal performance and durabil- ity. Our precise tolerances are intended to ensure component com- patibility, and are carefully monitored during production and quality control so that installation will be easy and trouble-free. This manual contains important notes about use, care, maintenance and installation. Please read this manual in its entirety, beginning with the general information. Then you can carefully review individual chapters spe- cific to each component you have purchased or intend to use . Doing so will help ensure smooth installation and trouble-free use of the product. Retain this user manual for your records and future reference. If you sell or loan your component or bike, provide this manual to the new user. With RITCHEY components, as is the case with all lightweight bicycle products, special care and attenti on are required for proper installation and use. Materials used by RITCHEY in the manufacture of its components are extremely strong and durable, yet low in weight, making them perfect for high-performance bike riding. It is important to note, however, that all materials, no matter how strong at the outset, are susceptible to wear, tear and fatigue over time, potentially becoming brittle due to extensive exposure to vibra- tions or impacts. In the event of a crash, significant impact, or undue stress of any kind, the component may not show obvious or visible signs of damage. However, since the material may have sustained undetectable external or internal damage, it is very dangerous to continue using a component after undue stress or a significant impact, because the component could eventually fail as a result, with unforeseeable consequences to your health or well being. After any such occurrence, consult your local RITCHEY dealer to get a pro- fessional examination and evaluation of the product. Before Your First Ride – Determined Use Most RITCHEY seat posts and saddles (a) are designed for use on road, triathlon (i.e. “time trial”), cyclocross or mountain bikes under normal riding and race conditions. They are not built for freeriding, dual slalom, boarder cross / down- hill, jumps and comparable use. Never modify or change your seat post or saddle. Do not file or drill holes in Ritchey components, especially those with carbon parts, as it will void your warranty and could compromise their structural integrity. We strongly recommend using all RITCHEY parts in order to achieve optimal function and component durability. If you intend to combine RITCHEY parts with those from other manufacturers, ensure that all dimensions correspond exactly with those listed in this manual, and consult the other manufacturers’ user manuals regarding their specifications and restrictions! The saddles and seat posts are designed to carry a maximum rid- er’s weight of 110 kilos (242 lbs)– luggage, eg backpack, included. If you have any questions or concerns, contact your local RITCHEY retailer. After a crash, accident or other major impact, replace the saddle and seat post for your own safety. If your seat post or saddle makes any “creaking,” “crack- ling” or “cracking” noises, or if there is visible damage, such as notches, tears, dents, discolorations, etc., do not use the bicycle until you have consulted your local RITCHEY dealer, who can check the part carefully and advise whether replacement is necessary. Special Characteristics of Carbon As is the case with all RITCHEY products made from carbon com- posites, (b) special care and attention is required. Carbon is an extremely strong material which combines high resist- ance with low weight. Please note that carbon, unlike metals, may show no visible deformation after overstress even though sub-struc- tures may be broken. T his makes it very dangerous to continue using a carbon part after an impact or undue stress, because it can lead to an accident with serious and unforeseeable consequences. If your RITCHEY carbon part has sustained this kind of impact or undue stress, we strongly recommend you take your complete bicycle to a local RITCHEY dealer for inspection, so you will know whether replacement is necessary. If there are any unanswered questions or doubts, the dealer can contact RITCHEY or one of our distributors directly. RITCHEY components made of carbon must never be repaired; they must be discarded and replaced. Make absolutely sure that any dam- aged part is never re-used; it should be destroyed to ensure that re-use is impossible. Parts made from carbon should never be subjected to excessive heat under any circumstances. Therefore, never paint a carbon component and attempt to cure it by heat. Temperatures required for the application of enamel or powder-coat paints will cause the carbon fibres to separate. Do not leave carbon components in a car left in the sun, or in direct sunlight for prolonged periods, and do not leave carbon components near sources of heat. Components made of carbon have, like all lightweight bicycle parts, a limited service life. To be safe, RITCHEY recommends changing stems and handlebars, depending on usage, at intervals of three years, even if they were not involved in an accident or did not sus- tain a comparable impact. Make sure all carbon clamping areas are absolutely free of grease and other lubricants. Grease will penetrate the surface of the carbon material, reducing the coefficient of friction and hence impairing the hold and undermining the stability of joined parts. Greased carbon may never again provide a safe clamping surface. If you install carbon parts, use RITCHEY Liquid Torque to achieve optimum friction where parts connect. This will allow you to tighten bolts to pre- scribed torque limits, execute proper installation and attain reliable, slip-free hold. If any dents, deformations, scratches, gouges or discolora- tions are visible on your carbon component, or if it makes “creaking” or “crackling” noises, do not use the bicycle until the part has been replaced! After undue stress, a crash or other major impact, replace the part or have it inspected by your local RITCHEY dealer before using. 1 2 (a) (b)
-
Upload
tareqsefat -
Category
Documents
-
view
220 -
download
0
Transcript of Road Bike Setup
8/12/2019 Road Bike Setup
http://slidepdf.com/reader/full/road-bike-setup 1/8
RITCHEY User ManualSaddles and Seat posts
Important information about use, care, maintenance and installation
Contents
Introduction 1
Before Your First Ride – Intended Use 2
Special Characteristics of Carbon 2
Cleaning & Care 3
Maintenance 3
General Notes on Installation 3
RITCHEY Liquid Torque 4
Using a Torque Wrench 4
Installing the seat post 5Installation of the RITCHEY “Stubby” seat post 5
Installing the saddle 6
Two bolt system 6
Single bolt system 6
Determining correct saddle height 7
Adjusting the seat post for correct saddle height 8
Installation of alloy seat post in steel,
aluminium or titanium frames 8
Installation of carbon seat posts 8
Adjustment of the RITCHEY “Stubby” seat post 9
Fore-Aft position and tilt of saddle 10
Adjusting saddle position and tilt 10
Installing a saddle bag 11
How to use seat clamp quick-releases 11
How to fasten the seat clamp securely 12
Warranty Terms 13
A Note on Wear 13
Manufacturer´s Guarantee 14
Some Notes On This User Manual
Pay particular attention to the following symbols:
This symbol means that your life or health may be in
danger unless you comply with provided instructions or
carry out prescribed measures.
! This symbol warns you about actions that could lead to
damage of property or the environment.
i This symbol indicates there is special information on how
to handle the product and may refer you to a specific pas-sage in this manual requiring your special attention.
The possible consequences described above are not repeated every
time one of the symbols appears!
IntroductionCongratulations on your purchase of a RITCHEY component, you
have made an excellent choice. At RITCHEY we develop, test and
manufacture our products with dedication, and strive to uphold the
highest standards of quality. Like all high quality sports equipment,
RITCHEY components require careful installation in order to func-
tion properly and provide long-term dependability. We recommend
that you seek the assistance of a qualified mechanic at your local
authorized RITCHEY retail shop. We also recommend using all
RITCHEY components to ensure optimal performance and durabil-
ity. Our precise tolerances are intended to ensure component com-
patibility, and are carefully monitored during production and quality
control so that installation will be easy and trouble-free.
This manual contains important notes about use, care, maintenance
and installation.
Please read this manual in its entirety, beginning with the general
information. Then you can carefully review individual chapters spe-
cific to each component you have purchased or intend to use . Doing
so will help ensure smooth installation and trouble-free use of the
product.
Retain this user manual for your records and future reference. If
you sell or loan your component or bike, provide this manual to
the new user.
With RITCHEY components, as is the case with all lightweight
bicycle products, special care and attenti on are required for proper
installation and use. Materials used by RITCHEY in the manufacture
of its components are extremely strong and durable, yet low in
weight, making them perfect for high-performance bike riding. It is
important to note, however, that all materials, no matter how strong
at the outset, are susceptible to wear, tear and fatigue over time,
potentially becoming brittle due to extensive exposure to vibra-tions or impacts. In the event of a crash, significant impact, or undue
stress of any kind, the component may not show obvious or visible
signs of damage. However, since the material may have sustained
undetectable external or internal damage, it is very dangerous to
continue using a component after undue stress or a significant
impact, because the component could eventually fail as a result, with
unforeseeable consequences to your health or well being. After any
such occurrence, consult your local RITCHEY dealer to get a pro-
fessional examination and evaluation of the product.
Before Your First Ride –Determined UseMost RITCHEY seat posts and saddles (a) are designed for use on
road, triathlon (i.e. “time trial”), cyclocross or mountain bikes under
normal riding and race conditions.
They are not built for freeriding, dual slalom, boarder cross / down-
hill, jumps and comparable use.
Never modify or change your seat post or saddle. Do not file or
drill holes in Ritchey components, especially those with carbon
parts, as it will void your warranty and could compromise their
structural integrity.
We strongly recommend using all RITCHEY parts in order to
achieve optimal function and component durability. If you intendto combine RITCHEY parts with those from other manufacturers,
ensure that all dimensions correspond exactly with those listed in
this manual, and consult the other manufacturers’ user manuals
regarding their specifications and restrictions!
The saddles and seat posts are designed to carry a maximum rid-
er’s weight of 110 kilos (242 lbs)– luggage, eg backpack, included.
If you have any questions or concerns, contact your local
RITCHEY retailer.
After a crash, accident or other major impact, replace the
saddle and seat post for your own safety.
If your seat post or saddle makes any “creaking,” “crack-
ling” or “cracking” noises, or if there is visible damage,
such as notches, tears, dents, discolorations, etc., do not use the
bicycle until you have consulted your local RITCHEY dealer, who
can check the part carefully and advise whether replacement is
necessary.
Special Characteristics ofCarbonAs is the case with all RITCHEY products made from carbon com-
posites, (b) special care and attention is required.
Carbon is an extremely strong material which combines high resist-
ance with low weight. Please note that carbon, unlike metals, may
show no visible deformation after overstress even though sub-struc-
tures may be broken. This makes it very dangerous to continue using
a carbon part after an impact or undue stress, because it can lead to
an accident with serious and unforeseeable consequences.
If your RITCHEY carbon part has sustained this kind of impact
or undue stress, we strongly recommend you take your complete
bicycle to a local RITCHEY dealer for inspection, so you will know
whether replacement is necessary. If there are any unanswered
questions or doubts, the dealer can contact RITCHEY or one of
our distributors directly.
RITCHEY components made of carbon must never be repaired; they
must be discarded and replaced. Make absolutely sure that any dam-
aged part is never re-used; it should be destroyed to ensure that
re-use is impossible.
Parts made from carbon should never be subjected to excessive
heat under any circumstances. Therefore, never paint a carbon
component and attempt to cure it by heat. Temperatures required
for the application of enamel or powder-coat paints will cause the
carbon fibres to separate. Do not leave carbon components in a car
left in the sun, or in direct sunlight for prolonged periods, and do not
leave carbon components near sources of heat.
Components made of carbon have, like all lightweight bicycle parts,
a limited service life. To be safe, RITCHEY recommends changing
stems and handlebars, depending on usage, at intervals of three
years, even if they were not involved in an accident or did not sus-
tain a comparable impact.
Make sure all carbon clamping areas are absolutely free of grease
and other lubricants. Grease will penetrate the surface of the carbon
material, reducing the coefficient of friction and hence impairing the
hold and undermining the stability of joined parts. Greased carbon
may never again provide a safe clamping surface. If you install carbon
parts, use RITCHEY Liquid Torque to achieve optimum friction
where parts connect. This will allow you to tighten bolts to pre-
scribed torque limits, execute proper installation and attain reliable,
slip-free hold.
If any dents, deformations, scratches, gouges or discolora-
tions are visible on your carbon component, or if it makes
“creaking” or “crackling” noises, do not use the bicycle until the
part has been replaced! After undue stress, a crash or othermajor impact, replace the part or have it inspected by your local
RITCHEY dealer before using.
1 2
(a)
3 1 . 6
(b)

8/12/2019 Road Bike Setup
http://slidepdf.com/reader/full/road-bike-setup 2/8
Cleaning and CareClean your seat post and saddle with water and a soft cloth. If nec-
essary, use a non abrasive soap to remove grime. Only use gasoline
based solvents for cleaning tough stains like oil or grease from hard
surfaces. Do not use degreasing agents, which contain organic sol-
vents (i.e. acetone, trichloroethylene, methylene, etc.). Chemicals of
this sort may damage the finish or substructure of the material.
After drying your bike you can apply a wax based polish (a) to
painted, carbon and metal surfaces. After the wax has dried, polish
the parts. With this treatment your seat post will keep its nice finish
for years.
Saddles with a leather cover
Maintain leather surfaces by applying specialized creams or condi-
tioning liquids every six months, or after each ride in rain, as well as
in muddy or sandy conditions.
After the leather cream or liquid has soaked in, rub it in, then buff
off any excess cream (b) to prevent the saddle surface from becom-
ing slippery.
Saddles with an artificial leather cover
Maintain the surface of artificial leather at least every six months
or after rainy, muddy or sandy rides with a silicone-based liquid
or spray.
After applying the silicone-based liquid or spray, rub it in, then buff
off any excess spray to prevent the saddle surface from becoming
slippery.
While cleaning, look for cracks, scratches, dents, as well as
bent or discoloured material. If you think there may be aproblem, see your local RITCHEY deal er. Have damaged or defec-
tive components replaced immediately.
MaintenanceCheck all bolts after the first 200-400 kilometres (120-240 miles)
and adjust as needed, keeping within the prescribed torque limits.
Check every 2,000 kilometres (1,200 mil es) thereafter.
General Notes onInstallationSeat post installation and saddle installation are jobs for a qualified
mechanic. For your own safety, have your local RITCHEY dealer
perform the installation and maintenance jobs outlined in this
manual. Each of the following instructions must be followed with
exactness. Failure to observe these guidelines can cause a compo-
nent to fail, resulting in a crash or injury.
Installation of parts with differing tolerances can cause problems
due to incompatibility or poor fit, and can lead to component fail-
ure, as well as accident or injury.
We recommend using a RITCHEY seat post with a RITCHEY
saddle and vice versa, because they are designed to fit and function
as an integrated whole. If you choose to use a part from another
manufacturer, consult their product documentation regarding clamp
sizing to ensure proper fit and usability with a RITCHEY compo-
nent.
RITCHEY assumes no responsibility for problems resulting from a
RITCHEY component being used with a part from another manu-
facturer.
Watch out for burrs and sharp edges inside the bike frame’s seat
tube, on the frame’s seat clamp and on the seat post’s saddle
clamp; do not install the seat post or saddle if you identify burrs
or sharp edges. If there are burrs or sharp edges on your frame,
or on a RITCHEY or a non-RITCHEY component, have your local
RITCHEY dealer examine the problem in order to see whether the
issue can be remedied and how.
Once it is determined that a component is damaged, it
should not be used under any circumstances. Stop using
the bicycle until the part has been replaced! If there is any doubt,
we recommend replacing the part.
RITCHEY Liquid Torque
Installing components with RITCHEY Liquid Torque
Carbon fibre components are particularly vulnerable to damage
caused by excessive clamping force. RITCHEY Liquid Torque (c)
creates extra friction between two surfaces, allowing tightening
torque to be reduced by up t o 30%.
This is especially useful in clamping areas, such as between a handle-
bar and stem, or fork steerer tube and stem, or bar ends and han-
dlebars – three areas where too much clamping force can damage
either component, causing component failure or voiding the war-
ranty. By reducing clamping force, RITCHEY Liquid Torque relieves
stress on sensitive carbon surfaces, preventing damage to fibres or
the cracking of the carbon sub-structure. It also retains its effective-
ness in wet conditions and provides maximum protection against
corrosion.
RITCHEY Liquid Torque can be used for all carbon, aluminium and
steel connections, including:
• Seat post/frame interface area and seat post bolt threads
• Stem/handlebar interface area and stem bolts
• Stem/fork interface area and bolt threads
• Bolt threads in any area where reliable clamp force is required,
but where loosening with the appropriate tool should be easy,
even after prolonged use. RITCHEY Liquid Torque is ideally
suited because it does not harden.
Directions for use: Prior to applying Liquid Torque, remove dirt par-
ticles and lubricant residues from the surfaces to be treated. Next,
apply a thin and even coat of RITCHEY Li quid Torque to the cleaned
surfaces using a brush, lint free textile or chamois/artificial chamois.
Install components as directed by the manufacturer, using a torque
wrench (such as the RITCHEY Torqkey, recommended for use with
all RITCHEY handlebars and stems), taking care not to exceed the
manufacturer’s maximum torque recommendations. After tighten-
ing to specified torque, wipe off any excess Liquid Torque.
Re-seal RITCHEY Liquid Torque container aft er use.
Additional information: Many manufacturer warranties will not cover
damage to component due to over-tightening. Refer to manufactur-
er’s recommended torque limits for each component. Always use a
torque wrench to verify you are within specified torque limits, and
do not exceed them. Using RITCHEY Liquid Torque will allow you
to safely install your bicycle components – particularly in the case
of carbon fibre – without exceeding the manufacturer’s specified
torque limits. In most cases, using Liquid Torque will enable you to
use as much as 30% less torque while installing your components.
i RITCHEY Liquid Torque is neutral to copper and alu-
minium alloys, steel and synthetic material, and will not
damage product surfaces.
Using a torque wrench
To achieve long lasting and problem free clamping of parts, RITCHEY
considers the use of a torque wrench (d) absolutely necessar y.
If the maximum torque given by RITCHEY does not generate suf-
ficient clamping force, apply RITCHEY Liquid Torque to intercon-
necting surfaces to increase friction.
Exceeding recommended torque (generally indicated somewhere
on the clamp assembly) on RITCHEY seat post bolts will create too
much clamping force, running the risk of component failure and the
voiding the warranty.
i Loose or overly tightened bolts can lead to failure and
therefore to an accident. Adhere to torque specifications
carefully. If you do not have access to a high-quality torque wrench,
see your local RITCHEY dealer.
3 4
(a) (b) (c) (d)

8/12/2019 Road Bike Setup
http://slidepdf.com/reader/full/road-bike-setup 3/8
(f)
Installing the seat postMake sure the seat post matches the inside diameter of the seat
tube of the frame.
Measure seat post (a) and seat tube (b) of the frame. The differ-
ence between the (bigger) inside diameter of the seat tube and the
(smaller) outside diameter of the seat post should be between 0.05
and 0.1 mm.
Before the seat post is inserted into the seat tube, make sure that
the seat tube is absolutely free of sharp edges or burrs (c). If you
will be inserting a carbon model Ritchey seat post, make sure the
inside of the seat tube is totally degreased! A qualified mechanic can
remove seat tube burrs and smooth as necessary.
If the diameter fits and there are not any burrs, insert the seat post
slowly and carefully into the seat tube. Avoid inserting the seat post
further than necessary so as to avoid marring the finish along what
will be the visible portion of the seat post shaft.
The seat post must fit snugly into the frame, without the need to
push or twist.
Conversely, the seat post should not have play and should not tilt
inside the seat tube.
ncorrect mating of the seat post and seat tube can cause
seat post failure, resulting in a crash and potential injury
to the rider.
i Tighten the binder bolt or quick-release mechanism of
the seat post clamp (read the section below, “How to use
quick-releases”), so that the seat post does not slip when you
install saddle as described further on.
Installation of the RITCHEY “Stubby”
seat post
Installation of a stubby seat post (p. 9) has a lot in common with
normal seat post mounting, except that it is mounted on the exte-
rior (as opposed to the interior) of the extended seat tube of
certain frame models. In other words, the extended seat tube is
inserted in the stubby seat post. All of the information listed in this
manual about tolerances in diameter and the absence of lubricants
for carbon parts are the same.
In order to install a Ritchey stubby seat post, this kind of frame
design generally requires that the seat tube be shortened in order
to achieve appropriate saddle height. This operation should only be
performed by a certified and qualified mechanic.
Strictly follow the frame manufacturer’s directions, and
seek the assistance of a certified and qualified mechanic.
RITCHEY cannot accept responsibility for seat tubes that are cut
to incorrect length or that are damaged by incorrect installation
of its stubby seat post.
Installing the saddleTwo bolt system
The RITCHEY two bolt seat post is designed to suit most perform-
ance bicycle saddles with round 7mm diameter rails – including all
RITCHEY saddles – as well as with ovalized rails within 7mm width
x 9mm height dimensi ons. To install the saddle, unscrew both fixing
bolts 4 to 5 turns. It is often not necessary to take the mechanism
completely apart. If the width of the saddle rails does not fit exactly
into the clamp grooves, do not try to force them in! This can cause
the clamping mechanism or the saddle rails to break, resulting in a
crash and potential injury to the rider. Use a different model saddle
or consult your RITCHEY dealer for help.
If the saddle rails fit into the seat post clamp grooves, slide the
saddle so that the clamp is positioned midway along the rails’ totallength (d). Then position the saddle so that its upper surface is
parallel to the ground. Turn the bolts alternately in small increments
so that the seat post clamp gradually and evenly tightens around
each rail.
Once there is uniform hold on both rails, tighten the bolts alter-
nately and gradually with a torque wrench (e) until each reaches
maximum specified torque, listed on the seat post in newton-
meters (Nm).
5 6
(a)
(b)
(c)
Single bolt system
The RITCHEY single bolt seat post standard clamp is designed to
interface with most performance bicycle saddles featuring round
7mm diameter rails, including all RITCHEY saddles. Replacement
outer clamps are also available to accommodate ovalized rails of
8mm height x 8.5mm width, as well as carbon saddle rails beyond
the 8 x 8.5mm dimensions. Contact your RITCHEY dealer if you
are uncertain what type of rails your saddle has or if you require
more information.
To install the saddle, unscrew (f) the fixing bolt as far as possible
without loosening from the lock nut on the other side of the clamp
assembly. It is generally not necessary to take the mechanism com-
pletely apart if it is already equipped with the correct outer clamps
for your saddle.
If you do find it necessary to unscrew the single fixing bolt com-
pletely, proceed to remove it from assembly. This will free up outer
clamp pieces. Inner clamp pieces are held in position with rubber
retention plate (leave in place). Install saddle rails into inner clamp
pieces, add outer pieces and re-insert fixing bolt.
If the width of the saddle rails does not fit exactly into the clamp
grooves, do not try to force them in! This can cause the clamping
mechanism or the saddle rails to break, resulting in a crash and
potential injury to the rider. Use a different model saddle or consult
your RITCHEY dealer for help.
If the saddle rails fit into the seat post clamp grooves, slide the
saddle so that the clamp is positioned midway along the rails’ total
length (g).
(e)
(d)
(g)

8/12/2019 Road Bike Setup
http://slidepdf.com/reader/full/road-bike-setup 4/8
(c)(b)(a)
7 8
Then position the saddle so that its upper surface is parallel to the
ground. Turn the bolt gradually and ensure that
1) the clamp assembly is still properly mounted on the carbon fiber
seat post head and
2) that the clamp is tightening evenly around each rail.
Once there is uniform hold on both rails, tighten the bolt gradually
with a torque wrench to until you’ve reached specified maximum
torque, which is listed on the seat post in newton-meters (Nm).
Both systems
Check to ensure the saddle rails are being held securely in
the seat post clamp by grabbing (a) the front and back of
the saddle and weighting each end alternately to see whether it
moves. A loose saddle can lead to an acc ident.
i If the clamping mechanism on the WCS carbon seat post
can not be tightened in place by tightening the bolt(s) to
the specified torque, do not ride the bike until you have resolved
the issue with the help of your local RITCHEY dealer.
Never exceed RITCHEY’s recommended torque, specified on the
components.
If you have any doubt regarding proper torque, or you do not have a
torque wrench, seek the assistance of a RITCHEY dealer. Failure to
do so could lead to the over-tightening of bolts, causing premature
wear or component failure while riding, which could in turn lead to
a crash and potential injury.
Determining correctsaddle heightCorrect saddle height provides maximum pedaling comfort and
efficiency. When pedalling, the pedal axles (or “spindles”) should be
positioned directly below or slightly behind the ball of your foot.
With the pedal axles positioned under your feet as described above,
your legs should not extend completely at the pedal’s farthest point
from the saddle during your pedal stroke, otherwise your motions
will become awkward and you can stress your knees and other
joints.
You can check the height of your saddle in the following, simple way.
This is best done wearing flat-soled casual shoes.
Sit on the saddle with your hips even and put your heel on the pedal
at the pedal’s most distant rotational point from the saddle. In thisposition your leg should be fully stretched and your hips should not
be tilted to either side (b).
i When riding off-road it can be helpful to lower the seat
post slightly. However, be aware that a lower seat post
position over extended periods can lead to knee pain. If you expe-
rience knee or hip discomfort, immediately seek the advice and
assistance of a certified bicycle fit expert or qualified retailer.
Adjusting the seat postfor correct saddle heightTo modify saddle height, loosen the seat clamp binder bolt or
quick-release lever (first read the section below: “How to use quick
releases“). Use a suitable tool to loosen the seat clamp binder bolt,
turning it counter clockwise two to three turns, or open the seat
clamp quick release.
Now you can adjust saddle height to the desired position.
Be sure not to pull the seat post too far out of the seat tube. The
“hash” marks or numbered position lines on the back of the seat
post will serve as a guide, especially the “Min. Insert (c)” (i.e. “Mini-
mum Insertion”) line.
! In the case of frames with seat tubes that extend beyondthe top of the frame’s top tube, the seat post should be
inserted into the seat tube at least a few millimeters below the
bottom of the top tube and below the top of the seat stays! This
can mean a minimum insertion length of 10 centimeters (4.5 in.)
or more.
Installation of alloy seat posts in steel,
aluminium or titanium frames
Make sure that the portion of the seat post inserted inside the seat
tube is always well greased. Do not use brute force to insert the
seat post or move it up and down inside the seat tube if it does not
move easily. Instead, ask your RITCHEY dealer for assistance.
Installation of carbon seat posts
If you use carbon seat posts you have to make sure that the seat
tube – no matter what material it is made of – is absolutely free of
lubricants. For road bikes, which do not generally require saddle
height adjustments during a ride, apply RITCHEY Liquid Torque to
the seat post shaft and the inside of the seat tube to ensure the best
possible hold at specified clamp bolt torque. (d)
Tighten the seat clamp again by either turning the seat post binder
bolt clockwise or by closing the quick-release (first read the sec-
tion below: “How to use quick releases“). Closing the quick-release
should not require much strength or force. If it does, it may indicate
that the seat post is the wrong diameter for the frame’s seat tube.
Verify that the seat clamp is sufficiently tight by taking hold of the
saddle at both ends and trying to rotate the seat post inside the seat
tube. This should not be possible to do. If the seat post does rotate ,
you may need to further tighten the clamp bolt or the quick-release
in small increments and check again, making sure not to exceed the
recommended maximum torque.
If there is still movement, verify that the bolt has been tightened
to the recommended torque. If you are unsure what the proper
torque is for the given seat clamp, check the manufacturer’s user
instructions, or seek the assistance of an authorized dealer. If the
recommended torque has been applied to the bolts and the clamp-
ing force is still not sufficient to hold the seat post in place, loosen
the bolt, remove the seat post from the seat tube, apply RITCHEY
Liquid Torque to clamp area and tight en the bolt again t o the speci-
fied torque. If the seat post is still not held firmly in place, seek the
assistance of a RITCHEY dealer or other qualified mechanic.
! In the case of an alloy seat post, never apply grease or
oil to a seat tube made of carbon, unless an aluminium
sleeve has been inserted to interface with the seat post. If youinstall a carbon fibre seat post, do not apply grease to it or the
inside of the seat tube, even if the seat tube is made of a steel or
alloy. If carbon fibre parts have had contact with grease or oil, they
may never be able to be clamped in a secure and safe way again.
Take care not to over-tighten the clamping mechanism of
the seat tube. Too strong a clamping force can cause the
seat post and/or the frame to fail, which can lead to an accident
and possible injury to the rider.
(d)

8/12/2019 Road Bike Setup
http://slidepdf.com/reader/full/road-bike-setup 5/8
9 10
Has the leg extension test described above produced a desirable
result? Check by moving the pedal to its farthest rotational point
from the saddle and placing the ball of your foot over the pedal axle
or slightly forward (the ideal positioning for efficient pedaling). If
your knee is slightly bent, you have probably positioned the saddle
at the correct height (a).
Check whether you can balance safely on your bike while stopped
by sitting on the saddle and extending your legs and touching your
toes to the ground. If not, you should lower the saddle until you c an,
at least to begin with.
Never ride your bike with the seat post drawn out beyond the
minimum insertion mark! The seat post might break or cause severe
damage to the frame (b). It could also result in a cras h and potential
injury.
! In the case of frames with seat tubes that extend beyond
the top of the frame’s top tube, the seat post should be
inserted into the seat tube at least a few millimeters below the
bottom of the top tube and below the top of the seat stays! This
can mean a minimum insertion length of 10 centimeters (4.5 in.)
or more.
i If sitting on your bike causes numbness in your crotch, it
could be due to the saddle. Your local Ritchey dealer
should have access to a wide range of s addles and can assist you in
finding and choosing one that is comfortable and does not cause
numbness.
Fore-aft position and tiltof saddleThe inclination of your upper body, and hence your riding comfort
and pedalling power, are partially influenced by the distance between
the handlebars and the saddle. This distance can be altered slightly
by changing the position of the saddle rails in the seat post clamp.
Be aware, however, that this als o influences your posit ion relative to
the cranks and may affect your pedalling motion.
Depending on whether the saddle is positioned more forward or
more backward in the seat clamp, your legs will extend farther or
not as far forward.
The top of your saddle must be close to horizontal (d) in order
to pedal in a relaxed manner. If it is tilted forward, you will needto apply additional pressure on the handlebars to prevent yourself
from slipping forward on the saddle.
When riding off-road, especially on a full-suspension bike, your posi-
tion may vary. That means the nose of the saddle may point slightly
upward or downward. For best results and to ensure your comfort
and safety, seek assistance from a local RITCHEY dealer.
i A saddle’s range of adjustment is very small. Replacing
the stem allows you to make bigger changes to your posi-
tion, because stems come in differing lengths at one centimeter
intervals. Changing your stem may require changes in shifter and
break cable lengths – a job best left to your RITCHEY dealer!
Make sure the seat post clamp assembly is not positioned
too close to the bends in the rails at either end of the
rails’ flat mounting section.
Adjusting saddle positionand tiltRITCHEY seat post clamp designs consist of one or two bolt clamp-
ing assemblies used to adjust the horizontal orientation and tilt of
the saddle.
Loosen seat clamp bolt(s) at the top of the seat post. Turn the
bolt(s) counterclockwise no more than two to three turns to begin
with, otherwise the whole assembly can come apart.
Move the saddle forward or backward by sliding its rails in the loos-
ened seat post clamp. To adjust tilt, put one hand on the front of
the saddle and one on the back and carefully rotate the saddle in
either direction.
You may need to give the saddle a light tap initially to get it to movein the assembly.
Make sure the top surface of the saddle remains horizontal as you
tighten the bolt(s). Ensuring that the bike is on level ground will
make it easier to determine proper position.
Retighten the bolt(s) with a torque wrench according to the torque
specified on the seat post’s clamp assembly.
After tightening bolt(s) to proper torque, check to see whether the
saddle can still be moved or tilted by putting one hand on the back
of the saddle and one on the front, then alternately applying pres-
sure, first to the front and then to the back. (e)
(e)(d)(b)
Adjustment of theRITCHEY “Stubby” seatpostThe range of vertical adjustment is approximately 20 mm, which is
why the extended seat tube of a compatible frame must be carefully
measured and cut to precisely the right length.
In order to fine-tune and finalize your saddle position, loosen the
bolt one to two turns and shift the stubby seat post up or down a
few millimetres, as needed. If the uppermost end of the seat tube
is visible in the slot of the stubby seat post, the seat tube is not
inserted far enough into the stubby seat post and sufficient clamp-
ing hold might not be possible, potentially resulting in failure, which
could lead to an accident and potential injury (c).If the uppermost end of the seat tube is not visible in the slot of
the stubby seat post, adjust the stubby seat post clamp according to
directions in the “Adjusting the seat post for correct saddle height”
section. Also read “Installing components with RITCHEY Liquid
Torque” and implement Liquid Torque as needed for sure clamp-
ing hold.
ON/OFF Calibrate HOLD
(a)
(c)

8/12/2019 Road Bike Setup
http://slidepdf.com/reader/full/road-bike-setup 6/8
11 12
Installing a saddle bagWhile choosing and installing a saddle bag, be sure it fits securely to
the saddle rails; some models also connect to the seat post. Once
installed, a saddle bag should not swing when the bike is being ridden.
A swinging bag can mar the finish of the saddle or seat post, as well
as distract or disturb the rider, which could prove dangerous.
Ask your RITCHEY dealer for help in selecting a well fitting model.
How to use seat clampquick-releasesBecause the proper use of quick-releases is not common knowl-
edge, they have often been the cause of accidents. We strongly
suggest you read the following instructions and practice the pro-cedures as outlined.
Quick-release retention mechanisms essentially consist of two
adjustable parts (a):
1. A lever on one side of the clamp attached in a hinged fashion to
the clamp’s binder bolt. When the lever is opened, it loosens the
clamp. When it is closed, it tightens, generating significant clamping
force.
2. The binder nut on the other side of the cl amp used to adjust and
set tension by moving it one way or the other along the threaded
portion of the binder bolt.
Check again to see whether the clamp is sufficiently tight by repeat-
ing attempts to rotate the closed lever. If the lever can no longer be
rotated, the clamping force may now be sufficient.
Finally, check whether the seat post is being held firmly in place by
taking hold of the saddle and attempting to twis t the seat post inside
the seat tube. If the seat post does not rotate inside the seat tube,
the seat clamp should be sufficiently tight.
Quick-releases that have not been closed properly can cause parts
to come loose.
i RITCHEY does not recommend using quick-release seat
clamps in conjunction with carbon seat posts, because it
is not possible to measure the torque applied to the seat clamp.
Too much clamping force could damage a carbon seat post shaft,
resulting in component failure, which could lead to an accident
and potential injury.
How to fasten the seatclamp securely
Open the quick-release (b). In many cases you will see “Open”
marked on the lever.
Close it again. Now you should see “Close” marked on the outside
of the l ever.
When closing the lever, it should at first move easily, not yet tighten-
ing the clamp.
As you move the lever toward full closure, you should feel increas-
ing resistance, until it takes considerable effort at the end. Use your
thumb to push on the lever while your fingers wrap around the seat
post or frame for leverage and stability (c). Be sure to close the
lever completely for maximum hold and to ensure the quick-release
assembly remains in the closed position.
In the closed position, the lever should be more or less parallel to
the bike, i.e. the lever should not stick out to the side.
The lever should come to rest close to the clamp and close to the
frame so that it cannot be opened accidentally.
To check whether the clamp is sufficiently tight and the lever
securely locked in place, try to rotate the lever in the closed posi-
tion. Do this by applying pressure to the end of the lever as if to
turn it in a circle.
If you can rotate the lever, the quick-release is not sufficiently tight
and the seat post not securely held in place by the seat clamp. Open
the lever again and screw the binder nut clockwise in small incre-
ments, closing the lever each time to see if clamping force has been
increased sufficiently.
(a) (b) (c)

8/12/2019 Road Bike Setup
http://slidepdf.com/reader/full/road-bike-setup 7/8
13 14
Warranty TermsUnder European consumer law, the purchaser has full statutory
warranty rights within the first two years from date of purchase. In
North America, these rights apply to the first year from the date of
purchase. According to these laws, your bicycle dealer is responsible
for ensuring the product is free of defects that could cause prema-
ture wear from normal use.
i The new European warranty law is valid in the countries
where European (EU) regulations apply! Please ask your
dealer about the regulations in your country!
Warranty claims will only be accepted if the bicycle has been used
solely for its intended purpose (see section, “Before your firstride”).
It does not cover damage resulting from wear, neglect (insufficient
care and maintenance), accidents, overstress caused by overloading,
incorrect installation, improper treatment or as a result of modifica-
tions made to the component.
Be sure to follow all assembly instructions in this manual precisely,
as well as all additional instructions provided by the manufacturers
of products used in conjunction with RITCHEY products, especially
bolt torque specifications and prescribed maintenance. Observe all
instructions with regard to procedures and verification processes
listed in this manual, as well as any other instructions that may be
included in the delivery of RITCHEY products. Also adhere strictly
to any and all instructions pertaining to the replacement of safety
relevant components, such as seat posts , stems, etc.
Your direct contact with regard to all issues outlined in this manual
and corresponding instruction is your local RITCHEY dealer, whoshould be qualified to answer your questions. In order to obtain
assistance from a RITCHEY dealer, you may be required to show
your receipt.
You must contact your reseller if you have a warranty issue
or concern, i.e. the RITCHEY dealer who sold you the bicy-
cle component in questio n. RITCHEY has exclusive agreements
with all of its reseller partners to service potential warranties. If
you purchase a RITCHEY product from an unauthorized reseller
(e.g.: an auction site at the internet), you have no recourse through
RITCHEY or any of its authorized resellers, so you must seek reso-
lution with the reseller who sold you the product.
A Note on Wear
Bicycle components are subject to wear due to normal and proper
use. The rate of wear will depend on care and maintenance, the
bike’s usage and the environment it is exposed to, such as rain, mud,
dust, and sand. Some components require regular care and mainte-
nance, but despite the best maintenance program, all components
will eventually reach the end of their serviceable life, depending on
conditions and intensity of use.
The following RITCHEY part is especially subject to wear due to
the nature of its intended use and not covered for wear under this
warranty:
The saddle covering which is subject to compression, abrasion and
soiling.
Manufacturer’s Guarantee
RITCHEY products have been developed and manufactured with
great care and have gone through numerous testing controls. Our
products are examined as part of our internal quality control proc-
ess to meet strict standards, as well as by external, neutral test
laboratories.
For the EU market we grant, independent of legal regulations, a vol-
untary guarantee that your RITCHEY product is free of manufactur-
ing and processing defects for 2 years from the date of purchase.
For the North American Market we grant, independent of legal
regulations, a voluntarily guarantee, that your RITCHEY product is
free of manufacturing and processing defects for one year from date
of purchase (excluding saddle surfaces, as clarified above.)
This manufacturer’s guarantee only applies to claims made by theinitial buyer, who must present the purchase receipt with date of
purchase, dealer address and model number. Guarantee claims will
only be accepted if the bicycle has been used in accordance with the
intended use of RITCHEY products.
This guarantee does not cover damage resulting from:
• wear
• neglect (insufficient care and maintenance)
• accidents
• overstress caused by overloading
• incorrect installation or improper treatment
• changes or modifications to the component (e.g. cutting
the seat post).
i The instructions in this and all RITCHEY manuals are
carefully designed to maximize the life of RITCHEY
products. Any guarantees are void if installation instructions are
ignored and/or if regular inspection and maintenance intervals areneglected.
In the case of a warranty claim, RITCHEY reserves the right to
provide all or part of the current successor model in an available
colour – or if such part is not available, a higher grade model – to
remedy the c laim. The guarantee does not cover assembly, refitting
costs or any new accessories that may be required (e.g. different
dimension parts).
The guarantee does not cover labour and transport costs, nor does
it cover follow-up costs resulting from defects.
Your direct contact for any issue should be your RITCHEY dealer/
reseller, who is authorized to respond to your inquiries.
Find contact information for your national distributor at
www.ritcheylogic.com
Technical details in the text and illustrations of this manual are
subject to change.
© No part of this publication may be reprinted, copied or
transmitted by hand or with mechanical or electronic systems
or used for an another business purpose without prior written
permission.
Concept and text: Zedler Engineering www.zedler.de
1st Edition August 2007
RITCHEY International
Via Cantonale 2
CH- 6916Grancia-Lugano
RITCHEY Design Inc. Taiwan Branch
22-1, #123 Chungang Rd. Sec 3
Taichung 407
Taiwan R.O.C.
RITCHEY Corporate HQ’s
620 Spice Island Drive
Sparks, NV 89431
RITCHEY Design Inc.
Sales & Warranty Office
575 Old County Road
San Carlos, CA 94070
If you have any question, please ask your national distributor .You will find a distributo rs list at www.ritcheylogic.com.

8/12/2019 Road Bike Setup
http://slidepdf.com/reader/full/road-bike-setup 8/8