Resistivity - web2.ph.utexas.edu
17
Resistivity Here we are going to indicate the necessary steps in order to see the sample preparation, the resistivity measurements procedure and the data analysis. Our sample made by Keeseong Park is BSCCO 2212, oxygen annealed. The sample in this case has the form of pellets, the ones are too thick for our resistivity experiment. Consequently we will cut this pellet in a more appropriate size with the diamond saw. First we will use a holder and wax. The main idea is to use the wax to “glue” the pellet to the holder. Scond, will get a piece of Aluminum Foil to cover the hot plate, and we will set the hot plate with values between 7 and 10
Transcript of Resistivity - web2.ph.utexas.edu

Resistivity
Here we are going to indicate the necessary steps in order to see the sample preparation,
the resistivity measurements procedure and the data analysis.
Our sample made by Keeseong Park is BSCCO 2212, oxygen annealed. The sample in
this case has the form of pellets, the ones are too thick for our resistivity experiment.
Consequently we will cut this pellet in a more appropriate size with the diamond saw.
First we will use a holder and wax. The main idea is to use the wax to “glue” the pellet to
the holder.
Scond, will get a piece of Aluminum Foil to cover the hot plate, and we will set the hot
plate with values between 7 and 10

We will put the holder on the hot plate, and we will let it heat. When sample and holder
are hot enough, the wax bar will melt on the sample when both are put in contact.
Our objective is to cover the entire sample with a thick film of wax.
After the entire sample is very well covered with wax, remove the holder from heat and
keep applying wax to the sample. When the wax dries the sample will be glue to the
holder.
We want to cut the sample in thing and long pieces. Like the ones in the draw. In order to
achieve this, we will use the Diamond Saw.
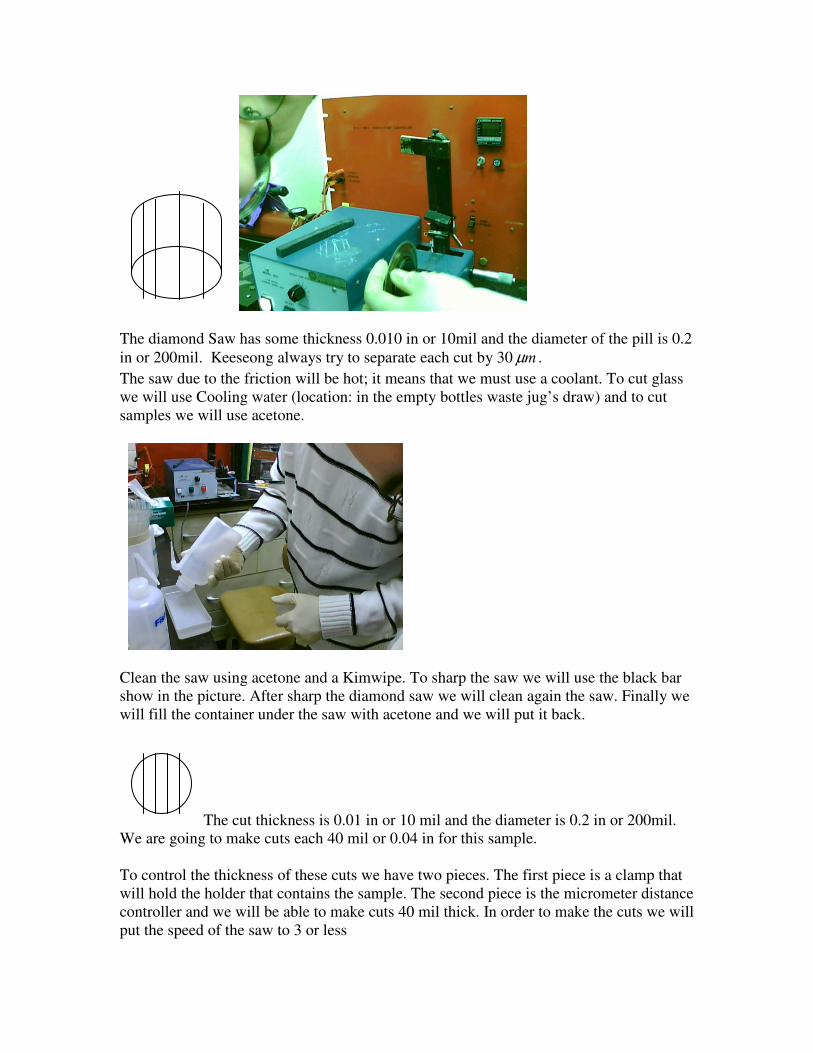
The diamond Saw has some thickness 0.010 in or 10mil and the diameter of the pill is 0.2
in or 200mil. Keeseong always try to separate each cut by 30 mµ .
The saw due to the friction will be hot; it means that we must use a coolant. To cut glass
we will use Cooling water (location: in the empty bottles waste jug’s draw) and to cut
samples we will use acetone.
Clean the saw using acetone and a Kimwipe. To sharp the saw we will use the black bar
show in the picture. After sharp the diamond saw we will clean again the saw. Finally we
will fill the container under the saw with acetone and we will put it back.
The cut thickness is 0.01 in or 10 mil and the diameter is 0.2 in or 200mil.
We are going to make cuts each 40 mil or 0.04 in for this sample.
To control the thickness of these cuts we have two pieces. The first piece is a clamp that
will hold the holder that contains the sample. The second piece is the micrometer distance
controller and we will be able to make cuts 40 mil thick. In order to make the cuts we will
put the speed of the saw to 3 or less

Clamp (A), Sharpener (B), micrometer (C), Saw (D).
Each 1 turn = 25 mil for the micrometer.
Lower the sample and turn on the saw to cut the sample. Keep the cutting until we reach
the other end of the pellet. Careful, the samples can be unglue and fall.
In this case 5 parts were obtained we want to take the samples out of the holder. In order
to do that we will put the samples on the hot plate again (power #10) to melt the wax.
B
A
C
D
Let’s use two glasses beakers, in the first we will put Acetone and in the second we will
put Methanol. When the wax starts melting, we will put the samples in the beaker that
contains acetone, and we stir the samples using a cu tip. After this we will put the
samples on the plate again on the aluminum foil and we will repeat this procedure 3 times
or more, until all the wax is removed.
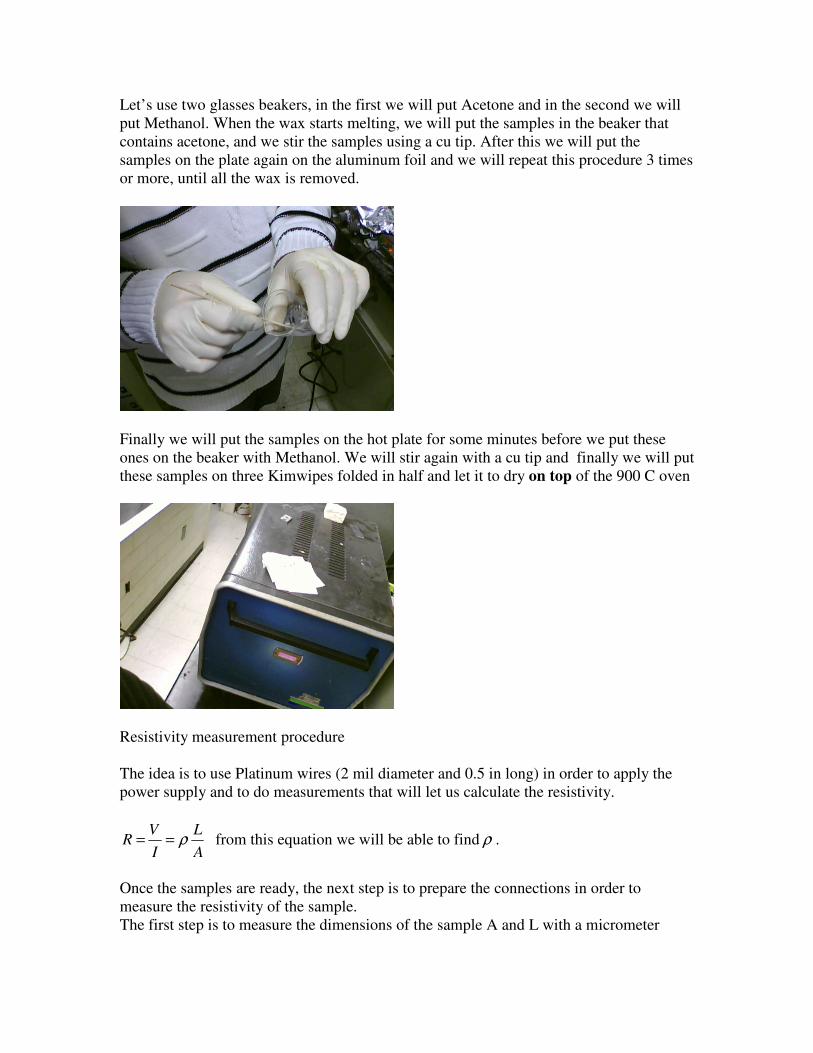
Finally we will put the samples on the hot plate for some minutes before we put these
ones on the beaker with Methanol. We will stir again with a cu tip and finally we will put
these samples on three Kimwipes folded in half and let it to dry on top of the 900 C oven
Resistivity measurement procedure
The idea is to use Platinum wires (2 mil diameter and 0.5 in long) in order to apply the
power supply and to do measurements that will let us calculate the resistivity.
A
L
I
VR ρ== from this equation we will be able to find ρ .
Once the samples are ready, the next step is to prepare the connections in order to
measure the resistivity of the sample.
The first step is to measure the dimensions of the sample A and L with a micrometer

The second is to attach the Pt wires to the sample. In order to do that we should try
different methods, one after the other, in this order:
- Silver Epoxy (from Epoxy technology) 1/10
Not always good for Oxides
Good for Metallic compounds and Manganese.
Put the connections with silver epoxy 2 min at the oven of 335F
If this first attempt doesn’t work we will try
-Same Silver epoxy
1 minute at 200C
If it doesn’t work
-Silver Epoxy (From Lexure) 1/1 [at Refrigerator]
L
A
I I V

2 min at 335F in the oven.
If this attempt also doesn’t work
-Bright Brushing Gold (AESAR company)
Use a cooper wire to put a tiny drop on the sample and dry 3 min at 450C then
over this brushing gold put the Pt with the silver epoxy.
If this also doesn’t work
- Indium
Pressure is necessary to attach wire to the sample (not easy)
If it doesn’t work
- Silver paste
Good for general case, it doesn’t hold the sample by it self (fragile)
Before glue the Pt to the sample we must check if the Silver Epoxy is good enough for
our measurement. We will check the connections by checking the resistance of the silver
Epoxy contact point. To test it is a good idea to use a metal as a sample.
First Measure the resistance between metal and metal connection and second measure the
resistance between metal and Pt connection. This procedure will give us an idea of how
good the connection is. The condition Ω<∆ 100R should be always accomplished.
If the condition is accomplished and the glue chosen is working correctly, we can move
to the next point and glue 4 wires in the sample. The procedure is to use a microscope to
see were we are putting the wires. Always start from the center to the boundaries.

For this case it didn’t work. Consequently we used bright Brushing gold and…succeed!!
Now that the connections are properly arranged, we will measure the resistance and
resistivity. In order to realize such measurements we must use the disc from the probe.
Consequently we will open the probe and we will take the disc

The diagram of the pins connections of the probe are represented in the next 3 pictures.
Ge
2
1
4
3
A
C
F, H
K
B
J F, H
M
R
L
E
S
P N T
D
Ge

Pin Connector
To attach the sample to the disc there is special grease for this purpose. We used
CRY.COM grease. (This grease is kept it in the right draw of the desk.)
We want to put the grease around the sample to hold it to the disc.
The next step is to connect our sample on this disc and connect it to the pins using a
solder. (Check it with a regular multimeter)
D
B A
C
K J H F E
S R P N M L
X W V U T
b a Z Y

We also will use a commercial resistance which value we already know as a test sample.
The next step is to put the disc back to the probe. To do that, check that both white dots at
the borders match.
Diagram of the system set up
Ge
Pt
Thermometers
LR-400 Multimeter
199
Lakeshore
93 CA Temp
Controller

First step id to check the connections between the probe and the measurement equipment.
The 19 pins connector from the probe is connected to a sample selector box
The wheel in the front view indicates which sample is being measured. In this case the #3
will measure the commercial resistance.
This box is connected to the “LR-400 4 wire AC resistance bridge”
and this box is connected to a digital voltimeter.
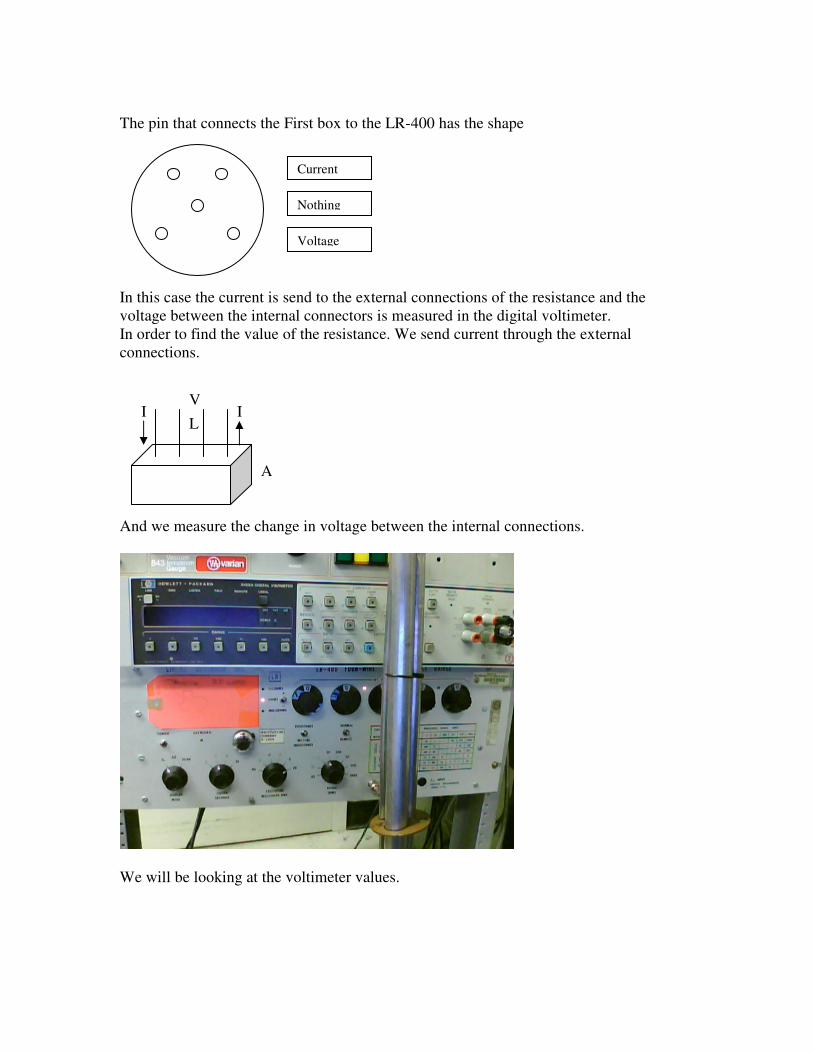
The pin that connects the First box to the LR-400 has the shape
In this case the current is send to the external connections of the resistance and the
voltage between the internal connectors is measured in the digital voltimeter.
In order to find the value of the resistance. We send current through the external
connections.
And we measure the change in voltage between the internal connections.
We will be looking at the voltimeter values.
L
A
I I V
Current
Nothing
Voltage

Knowing that the output voltage from the LR-400 is always 2V changing the value of the
internal resistance of the LR-400 will give us the relation between the resistance and the
voltage measured.
Example:
200 kOhm -> 2V
So the relation between volts and resistance is 100kOhm->1V
Consequently, if the voltage measured by the voltimeter is 42 mV 0.042V then the
resistance is 4.2kOhm.
Now applying A
L
I
VR ρ== we can find ρ .
Because the value measured agrees with the value of the commercial resistance, the
system is working correctly.
Resistance as a function of the temperature
First we cover the sample with a can.
The main idea is to submerge the can into a liquid nitrogen bath and later into a liquid
Nitrogen bath and measure the resistivity of our sample.
Second we will put the can into a liquid helium container.
In order to measure the resistivity as a function of time we are going to use the computer.
LabView software will be used for this purpose.

C:\My Documents\experiments\resistance\vi
Click in simple probe
Introduce the file were you are going to save your data, indicate the dimensions of the
sample. Check that the software works perfectly at room temperature.
If every thing works perfectly, we start the program, and after this we pour Liquid
Nitrogen into the container with the probe.
The temperature will be dropping until 77K and can be monitored by the computer.
We use two temperature sensors, Pt and Ge. The first one works good for high T and the
second one is better under 40 K.
At this point we want to keep cooling the sample. In order to do that, we should use
liquid helium. It will help us to cool the probe until 5K
We must move the probe to a container with Liquid helium.
The use of protective globes is required to protect you from skin burns.
First we must open the yellow valve to remove the difference in pressure. When the
vapor stops flowing out, then we close again the valve.
Second, we must open the top of the Helium container

After extract the top, we can introduce the sample. This procedure must be done very
slowly. The reasons are that we don’t want to introduce a 77K material into 5K container
very fast. This can produce huge amounts of very cold steam. The second reason is that
the thermometer and the sample are not situated at the same position. If the change in
temperature is too fast the thermometer is not measuring the real temperature of the
sample. It is necessary let the probe to cool avoiding big gradients of temperature.
This is only one example of how can be done but usually is not the most appropriate for a
slow cooling and heating.