REGISTRATION - collin.studentaidprocess.com Portal... · Student selects the award year they are...
28
Transcript of REGISTRATION - collin.studentaidprocess.com Portal... · Student selects the award year they are...
2
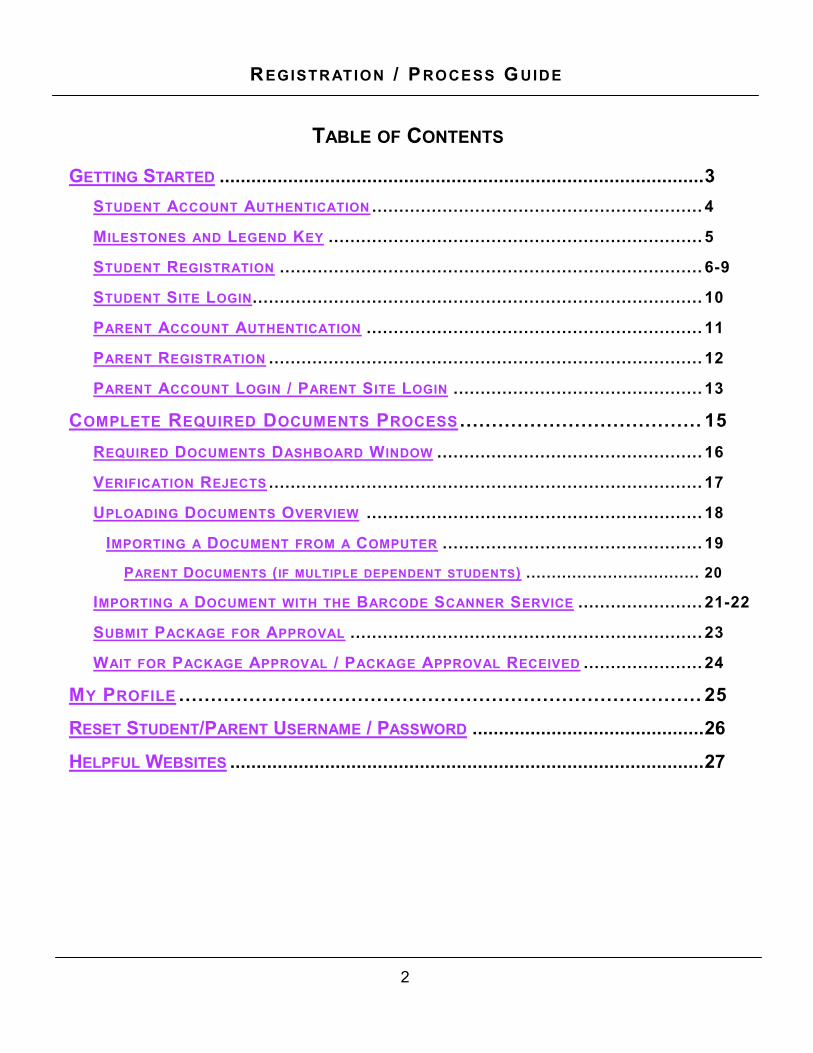
REGISTRATION / PROCESS GUIDE
TABLE OF CONTENTS
GETTING STARTED ............................................................................................ 3
STUDENT ACCOUNT AUTHENTICATION ............................................................. 4
MILESTONES AND LEGEND KEY ..................................................................... 5
STUDENT REGISTRATION .............................................................................. 6-9
STUDENT SITE LOGIN ................................................................................... 10
PARENT ACCOUNT AUTHENTICATION .............................................................. 11
PARENT REGISTRATION ................................................................................ 12
PARENT ACCOUNT LOGIN / PARENT SITE LOGIN .............................................. 13
COMPLETE REQUIRED DOCUMENTS PROCESS ...................................... 15
REQUIRED DOCUMENTS DASHBOARD WINDOW ................................................. 16
VERIFICATION REJECTS ................................................................................ 17
UPLOADING DOCUMENTS OVERVIEW .............................................................. 18
IMPORTING A DOCUMENT FROM A COMPUTER ................................................ 19
PARENT DOCUMENTS ( IF MULTIPLE DEPENDENT STUDENTS) .................................. 20
IMPORTING A DOCUMENT WITH THE BARCODE SCANNER SERVICE ....................... 21-22
SUBMIT PACKAGE FOR APPROVAL ................................................................. 23
WAIT FOR PACKAGE APPROVAL / PACKAGE APPROVAL RECEIVED ...................... 24
MY PROFILE .................................................................................. 25
RESET STUDENT/PARENT USERNAME / PASSWORD ............................................ 26
HELPFUL WEBSITES .......................................................................................... 27

3
REGISTRATION / PROCESS GUIDE
The student portal is an easy and organized way for you to navigate through the application process, an im-
portant step to become eligible for financial aid. The student portal will take you step-by-step through the
process to ensure you provide all the required documentation necessary to be verified.
The Student Portal is broken into milestones:
1. STUDENT/PARENT REGISTRATION
2. COMPLETE REQUIRED DOCUMENTS
3. SUBMIT PACKAGE FOR APPROVAL
4. WAIT FOR PACKAGE APPROVAL
5. PACKAGE APPROVAL RECEIVED
GETTING STARTED...
Ensure your computer is running Windows XP Service Pack 2 or higher and the latest version of Internet
Explorer 7 or higher is installed on your computer as the default browser (Google Chrome, Mozilla Firefox,
or Safari are also alternative browsers). If you need to stop at any time during the process (but not if you
are in the middle of completing a document requirement), the program auto saves your progress.

4
REGISTRATION / PROCESS GUIDE
STUDENT ACCOUNT AUTHENTICATION
After clicking on the hyperlink provided to you in the e-mail from your college, you will see the below screen asking you to verify your account information. The screen will also have your college‟s banner and logo across the top. This first step is to verify your identity and ensure your information is secure. You will need the Email Address where you received your notification, your Social Security Number, and your Date of Birth.
Verify name: Ensure the welcome prompt ad-
dresses student by name. If the name dis-
played is not yours, click the underlined hyper-
link next to the name box.
Enter Email Address: Type in the email ad-
dress you received your notification. Ensure
you enter a valid email address that includes an
“@” symbol followed by a domain address
(example: [email protected]).
Enter Social Security Number: Student will
need to enter their Social Security Number in
the SSN: field. Enter the SSN either with or
without dashes - the program will accept both
formats.
Enter Date of Birth: Student can use the drop
down calendar by clicking the arrow in the field
or type their date of birth manually in the field
with the month/day/year separated by a back-
slash (ex; 10/21/1990).
Click to continue.

5
REGISTRATION / PROCESS GUIDE
MILESTONES AND LEGEND KEY
There will be a Milestone list on the left hand side of
the screen in the student site.
The Milestone list includes the following:
Registration: The initial page of the student/
parent is taken here the first time they log in to
CORE.
Complete Required Docs: The list of all re-
quired verification and/or c-flag documents re-
quiring information from the student/parent.
Submit Package for Approval: The process of
submitting a parent file for inclusion in the student
file, or the process of submitting the student file
for compliance review.
Wait for Package Approval: The student file is
in compliance review.
Package Approval Received: The student file
has successfully passed compliance review.
There is a Legend Key below the Milestones.
The Key includes the following:
You are here: The current milestone that the
student/parent is in the process of completing.
The student/parent will not be able to move to
the next milestone until the current milestone
has a “Completed” icon next to it.
Completed: The milestone has successfully
been completed.
Need additional info: The document(s) re-
quires additional action after compliance re-
view.

6
REGISTRATION / PROCESS GUIDE
STUDENT REGISTRATION

7
REGISTRATION / PROCESS GUIDE
STUDENT REGISTRATION
Personal Information: Fill in any information missing and verify that anything that was auto-filled is
correct. Some information may already be entered based on your FAFSA such as your name and ad-
dress.
Contact Information: Some information may already be auto-filled such as your phone number and
default email address.
Note: Notification Email - Only enter if you want to receive notifications at a different email address. All
emails will be sent to this address only IF the student/parent indicates one.
Select the Email Format you want your notifications to be viewed as - Text or HTML.

8
REGISTRATION / PROCESS GUIDE
Tip: To make a stronger password, use letters of different case and numbers.
Creating password: Enter your
password in the Password field,
then re-enter the password in the
field below. A strong password is
recommended, although a weak
password (ex: 123456A) will still
be accepted.
*Note: Passwords must be a mini-mum of six (6) characters with at least one (1) non-alpha character. Passwords ARE case sensitive.
Create Username: Enter an
easy to remember user name in
the Username box. An example
would be “JohnSmith87 or
“JSmith1987”.
Security:
Note: When student creates a username and if that username is already in use, they will be prompted
(example below) to create a different username after they click <Next>.
Answering security questions: There are three drop- down boxes for student to choose security ques-
tions. They may be asked these questions when logging in for security purposes.
Click the drop-down arrow in the Security Question box and select a question.
Enter the answer to the question in the Answer box below it.
Be sure to pick three (3) security questions they user will be able to remember the answer to.
Note: The program will prevent the user from selecting the same security question multiple times.
Please annotate your Security information (user name, password, security
answers) and your parents information (next page) and store in a safe place.

9
REGISTRATION / PROCESS GUIDE
Parent Information: If a depend-
ent student, then the Parent Infor-
mation box will appear in the
„Student Registration‟ screen. Par-
ent information from the FAFSA will
auto-populate (last name, first ini-
tial, Social Security number, date of
birth - editable fields).
Parent Information (for Dependent student)
If the student listed an email address for the parent on the FAFSA, it may already be populated. If so,
please verify it is correct. Should the parent have to provide any verification documents, they will receive an
email notification.
Note: The parent Email address must be a different Email address than the student. Students will
be prevented from entering their email address in the parent’s email address information. If attempt-
ed, the following prompt appears.
After completion, click <Next> to continue.

10
REGISTRATION / PROCESS GUIDE
STUDENT SITE LOGIN
After the student created an account, they enter the Username / Password they created.
After login, some students will be prompted with the next screen below:
Returning student
New student if first time logging in and Global has ISIRs for more than 1 award year (2013-2014,
2014-2015).
Student selects the award year they are submitting documentation for.
If a student has been disabled by the school and tries to log
in, they will be prompted that their account has been disabled
and to contact their Financial Aid Office it they believe this is
in error.
Note: This prompt will only appear if the student has no active
award years.
Your account has been disabled. If you believe this was done in error, please contact your Financial Aid Office.

11
REGISTRATION / PROCESS GUIDE
PARENT ACCOUNT AUTHENTICATION
After clicking on the hyperlink provided to the parent in the e-mail from the college, the parent will see the
below screen asking them to verify their account information. The screen will also have the college‟s ban-
ner and logo across the top. This first step is to verify your identity and ensure your information is secure.
The parent will need the Email Address where they received their notification, their Social Security Num-
ber, and their Date of Birth.
The parent is able to access each child account by using a single username and password.
The parent will be able to choose which student and which award year to work when they log in.
The parent will only be required to attach/fax a document once. They may then reuse that docu-
ment for another child.
The parent will be identified based on Last Name, SSN, and DOB.
When a subsequent student enters the same parent information, the system will recognize that the
parent already exists and will link that student to the parent user ID.
Each time a student is added to the parent account, the parent will receive a notification alerting
them that they need to return to the site to provide documentation.
If the parent is also a student, they will still have to use a separate username to access their student
account.
PARENT ACCOUNT FOR MULTIPLE CHILDREN ATTENDING SCHOOL

12
REGISTRATION / PROCESS GUIDE
PARENT REGISTRATION
Note: See pages 7-8 for information on completing the fields required.

13
REGISTRATION / PROCESS GUIDE
PARENT ACCOUNT LOG IN (IF MULTIPLE DEPENDENT STUDENTS)
When a parent logs in to their account, they will be presented with a listing of those student accounts linked
to their parent account. They will be able to select what student and award year they wish to access before
proceeding.
Once the parent has selected the student and award year, they press <Next> and will be taken to the se-
lected student‟s Required Documents screen.
PARENT SITE LOGIN
After the parent created an account, they enter the Username / Password they created.

14
REGISTRATION / PROCESS GUIDE
COMPLETE REQUIRED DOCUMENT
PROCESS

15
REGISTRATION / PROCESS GUIDE
COMPLETE REQUIRED DOCUMENTS
The student is now on the Required Document List (RDL). In this step, they will provide any necessary
documentation that your school requires to provide for their application for financial aid.
Registration will have a “Completed” icon next to it and Complete Required Documents will have a “You are
here” icon. The student will be required to complete each required document before moving on to the next
milestone. The student may return to the Registration milestone or the “My Profile” link at the tool bar on
top of the page.
*Note: If the student stops at any time during the process (but not if they are in the middle of completing a
document requirement), the program auto saves their progress.
ATTESTING TO SUBMISSION OF DOCUMENTS
When a student/parent clicks on a required document link, a page will first be presented asking the student/
parent to “I Attest”. By selecting the <I Attest> button they are agreeing the information they will provide is
accurate to the best of their knowledge.
16
REGISTRATION / PROCESS GUIDE
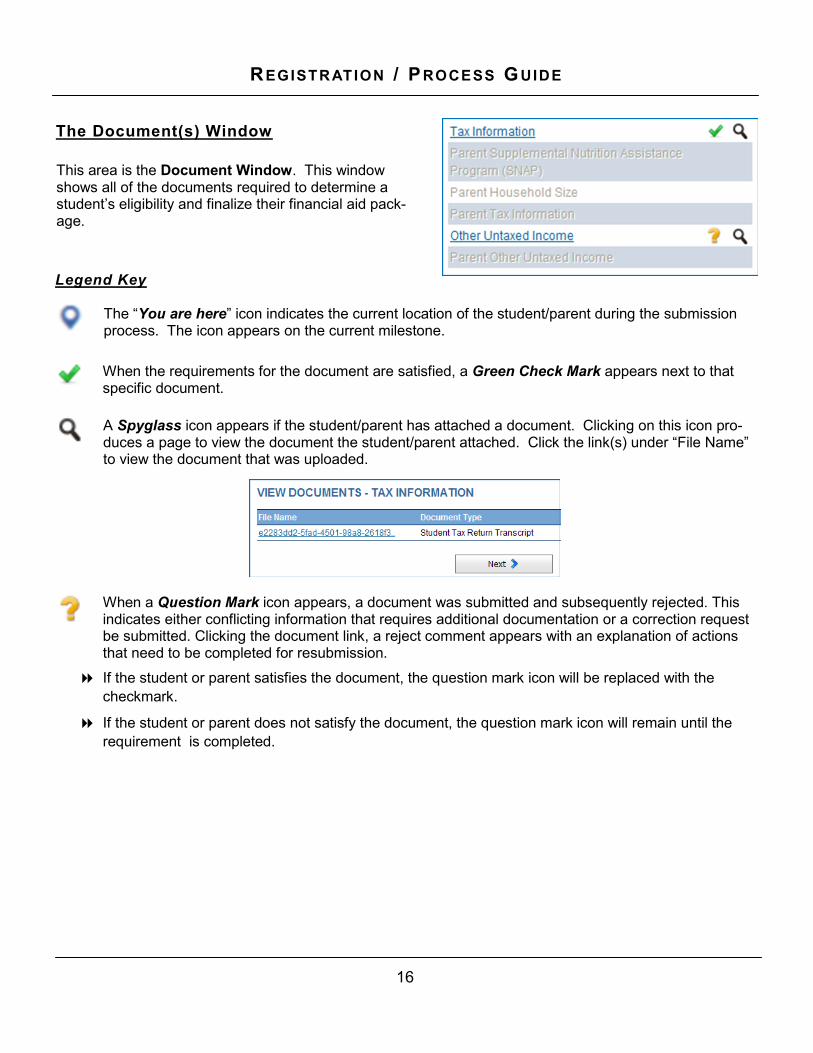
When the requirements for the document are satisfied, a Green Check Mark appears next to that specific document.
The Document(s) Window
This area is the Document Window. This window shows all of the documents required to determine a student‟s eligibility and finalize their financial aid pack-age.
Legend Key
A Spyglass icon appears if the student/parent has attached a document. Clicking on this icon pro-duces a page to view the document the student/parent attached. Click the link(s) under “File Name” to view the document that was uploaded.
When a Question Mark icon appears, a document was submitted and subsequently rejected. This indicates either conflicting information that requires additional documentation or a correction request be submitted. Clicking the document link, a reject comment appears with an explanation of actions that need to be completed for resubmission.
The “You are here” icon indicates the current location of the student/parent during the submission process. The icon appears on the current milestone.
If the student or parent satisfies the document, the question mark icon will be replaced with the
checkmark.
If the student or parent does not satisfy the document, the question mark icon will remain until the
requirement is completed.

17
REGISTRATION / PROCESS GUIDE
VERIFICATION REJECT
If a student/parent is rejected for Verification, when they go back into the site, the individual document in the Required Documents will have the Question mark icon next to it. When a student/parent clicks on the re-jected document link or <Next>, a reject comment page appears.
If the student/parent selects this option, they continue through Verification as they normally would. See applicable document submission pro-cess in the following pages.
Submit New Documentation
If the student selects this option, a text box will appear where they will type their statement. This statement
will show in the list of documents in GlobalAdmin > Student tab > Review ISIR/Docs option.
Submit a Signed Statement
After attesting to the information and documents they will be providing, they will presented with the two (2) choices below. The student/parent will now decide what action they will take.
The user will click <Next> to continue with satisfying the requirement based on the reject comments.

18
REGISTRATION / PROCESS GUIDE
UPLOADING DOCUMENTS
Documents that do not have green checkmarks next to them, the student/parent needs to provide required or additional information for. Click the blue hyperlink with the document‟s name to view the required infor-mation.
The student may be asked specific questions about the document and may also be asked to provide the document itself. Students should have required documentation available before getting started. If the stu-dent needs to stop, they can always come back and finish the section at a later time.
The Student Portal will guide the student through any steps they need to follow to complete the application;
The user-friendly instructions should have them complete the process in less than an hour.
To upload a document, they can send it from their computer or use a fax barcode coversheet. These meth-ods will be explained in further detail over the next pages.
I wish to upload the document(s) now is the
most expedient means if electronic versions of
their documents are available.
You can choose to skip a section with I will up-
load the document(s) later but they will need
to finish it later.
I will fax the document(s) will prompt user to
create a fax coversheet to prepare the docu-
ments to send.
I already uploaded the document(s) will allow
student/parent to move to the next requirement,
but their file cannot be submitted until all neces-
sary documents have been uploaded.
When the application requires a document(s) to be submitted, an upload box will appear providing four (4) options
Note: The student/parent are required to upload a document for each required item in the RDL, even if
they already uploaded the same document to satisfy a different requirement.
UPLOADING A DOCUMENT

19
REGISTRATION / PROCESS GUIDE
IMPORTING A DOCUMENT FROM A COMPUTER
The student can upload a document stored on their computer into the Student Portal by navigating to it
when prompted to. Please read the instructions below:
Step 1. Click the “I wish to upload the document now” button. Click the <Browse> button.
Step 2. Browse to the saved document. Highlight the document and click <Open>.
Note: The student portal will only accept high quality
JPEG, Bitmap, TIF, GIF, or PDF file formats.
Step 3. You should see the file name of the document se-
lected. Click the <Upload> button.
Note: If you want to delete the document before you up-load, select the red “X”.
Step 4. Check the “My Documents” area to ensure the document was acknowledged as uploaded.

20
REGISTRATION / PROCESS GUIDE
PARENT DOCUMENT ATTACHMENT (IF MULTIPLE DEPENDENT STUDENTS)
When a parent is prompted to attach a document, they will be presented with a list of all „Available docu-
ments‟ that have already been attached, regardless of which child or award year the document was at-
tached for.
If a Parent elects to use a document from „Available Documents‟ instead of attaching new documents, they
can do so by clicking the Green plus (+) mark next to the desired document. That document will then be
added to „My Documents‟ and will be used to complete this requirement.
Note: The parent will only be able to view their own documents.

21
REGISTRATION / PROCESS GUIDE
IMPORTING A DOCUMENT WITH THE FAX BARCODE SERVICE
You can fax a document using our state-of-the-art fax upload service to submit for review. Follow these instructions to create a document-specific fax coversheet:
To fax a required document, click the “I will fax the
document(s)” option when prompted to provide a
document.
A message prompt will appear advising that attaching
documents is quicker. Scanning or digitally uploaded
document(s) is the more efficient option for the review
process. To continue, click <OK>.
The student/parent may select the Print Fax Coversheet
link at the bottom of the screen if they want to create the
coversheet now.
The program will create a document-specific coversheet to
print for the document requirement.

22
REGISTRATION / PROCESS GUIDE
DOCUMENTS ALREADY UPLOADED
If student elects to print coversheets (if more than one)
after completion of the document process, they would
select Fax-Coversheets at the bottom of the main
dashboard screen.
A document specific fax cover sheet will be presented for print.
Next, click <Finish> at the bottom of the screen to return to the
main dashboard screen of the student portal.
Note: Please follow the information/steps described on the
coversheet to properly fax the documents with the coversheet.
An example of a coversheet is found in the “Document /
Form / Website Example” section.
* Important *
Student may send multiple documents with multiple cover sheets in one (1) fax provided that each cover sheet comes immediately before each document e.g. the cover sheets separate each docu-ment they send.
“I already uploaded the docu-
ment(s)” : After uploading a doc-
ument, the document file infor-
mation appears under „My Docu-
ments‟. Clicking <Save and Con-
tinue> will allow movement to the
next requirement. The file cannot
be submitted until all necessary
documents are uploaded.
Note: You are required to upload a document for each required item in the RDL, even if you already
uploaded the same document to satisfy a different requirement.

23
REGISTRATION / PROCESS GUIDE
When all required documents have been uploaded satisfactorily and Complete Required Doc show the
checkmark, select the “Submit Package for Review” link.
If a student used the ISR Date Retrieval with no additional document requirements, the student will be pre-
sented with the screen below for example.
SUBMIT PACKAGE FOR APPROVAL
Note: A Dependent can not submit their package until a parent completes their portion of the verification
process. If a Dependent student, verbiage will be displayed to notify the student.

24
REGISTRATION / PROCESS GUIDE
When the student submits their package, they are presented with this screen informing them they have completed their electronic application in the Student Portal.
They should receive an email within 1-10 business days with information regarding the next step of their ap-plication process. The <Next> button will be disabled until the review process is completed.
Note: If the package was “Auto Submitted”, the student will not see this screen (an email notification is sent instead).
PACKAGE APPROVAL RECEIVED
WAIT FOR PACKAGE APPROVAL
The below screen is the “Congratulation” screen that the student will be presented with when their file has
been processed and the awards have been confirmed. Selecting <Previous> will return the student to the
Complete Required Documents page but the document links will be disabled as they have already been re-
viewed and accepted.

25
REGISTRATION / PROCESS GUIDE
MY PROFILE
Under the “My Profile” tab, students
can view and update their personal
account information. If changes are
made, please remember to select
the <Update> button.
Helpful Reminder: If updating in-
formation in the “Security” section,
recommend annotating the infor-
mation and retaining in a safe place
for reference.
Updating the Notification Email:
Changing this information will
send all subsequent Email cor-
respondence to the new Email
inbox.
Note: For schools utilizing single
sign on, the students will not be
able to see the change username/
password area. Parent accounts
will still be able to access however.

26
REGISTRATION / PROCESS GUIDE
RESET STUDENT/PARENT USERNAME/PASSWORD
Students and/or parents that have forgotten their username/password can have it reset by following the steps below. Note: The student will be provided their same username but the password provided will be temporary. Upon logging back in, they will be prompted to change the temporary password that was provid-ed.
Step 1. Select the “I have forgotten my username/password” link in the site
login screen (right).
Step 5. If student/parent entered correct information, they will be prompted that login information re-set instructions will be emailed to them (at the email address provided). Please note that the information provided in the e-mail is temporary and only valid for 24 hours.
Step 2. Student/parent will be prompted to enter their user identification infor-mation (Email and SSN). Select <Next>.
Step 4. The next screen prompts student to answer a security question. The student will have 2 attempts to answer the ques-
tion correctly. Select <Next>.
Student: The email address used must match the email address pro-vided on the FAFSA.
Step 3. If multiple accounts were found with the entered email address and SSN, then the section below will appear. This helps identify the specific account that the user is requesting a password reset for. If only one account was found, they will go straight to the security question page.
Parent: The email address used must match the email address where the parent received their ini-tial login notification. This is also the email address they would have used when registering their ac-count.

27
REGISTRATION / PROCESS GUIDE
Additional Resources
Helpful Websites
Check out the list of websites below that may come in handy as you complete your requirements for finan-cial aid. You can find great information pertaining to many different topics on these sites, and you can also use them to obtain important forms you may need to complete the financial aid process.
http://www.fafsa.ed.gov/ The Free Application for Federal Student Aid (FAFSA) is the cornerstone for any student‟s financial aid process if you want to receive Federal Student Aid. Federal Student Aid includes everything from Stafford and PLUS Loans, to Federal Work Study and Pell Grants. The website allows you to start, continue, or make corrections to your FAFSA online.
http://studentaid.ed.gov/ Your source for free information from the U.S. Department of
Education on preparing for and funding your education beyond high school.
http://www.uscis.gov/ The U.S. Citizenship and Immigration Services website. You can get copies of useful forms related to proof of citizenship status which may be necessary in order to receive Federal Student aid.
http://www.irs.gov/ The Internal Revenue Service (IRS) website allows you to review fil-ing requirements for each year and also request copies of your tax documents for current or previous tax years. If you are selected for verification and filed taxes you will need to be able to provide a signed copy of your tax return or tax return transcript.
https://www.sss.gov/ Through the Selective Service System (SSS) website males can check the status of their registration and also retrieve their SSS registration confirmation number. The Free Application for Federal Student Aid requires that all men that meet require-ments be registered with Selective Service. Those men under the age of 26 can also com-plete their registration online.
https://www.nslds.ed.gov/ The National Student Loan Data System (NSLDS) is the U.S. Department of Education's (ED's) central database for student aid. NSLDS receives da-ta from schools, guaranty agencies, the Direct Loan program, and other Department of ED programs. NSLDS Student Access provides a centralized, integrated view of Title IV loans and grants so that recipients of Title IV Aid can access and inquire about their Title IV loans and/or grant data.
https://studentloans.gov/ The source for information from the Department of Education about managing your Student Loans including signing a Master Promissory Note (MPN) or completing your Entrance Counseling. To be used for both independent and dependent stu-dents and their parents.

28
REGISTRATION / PROCESS GUIDE
THIS PAGE INTENTIONALLY LEFT BLANK