Red Hat Enterprise Linux 8 · Red Hat Enterprise Linux 8 Performing an advanced RHEL installation...
166
Red Hat Enterprise Linux 8 Performing an advanced RHEL installation Installing Red Hat Enterprise Linux 8 using Kickstart Last Updated: 2020-03-24
Transcript of Red Hat Enterprise Linux 8 · Red Hat Enterprise Linux 8 Performing an advanced RHEL installation...

Red Hat Enterprise Linux 8
Performing an advanced RHEL installation
Installing Red Hat Enterprise Linux 8 using Kickstart
Last Updated: 2020-03-24


Red Hat Enterprise Linux 8 Performing an advanced RHEL installation
Installing Red Hat Enterprise Linux 8 using Kickstart
Legal Notice
Copyright © 2020 Red Hat, Inc.
The text of and illustrations in this document are licensed by Red Hat under a Creative CommonsAttribution–Share Alike 3.0 Unported license ("CC-BY-SA"). An explanation of CC-BY-SA isavailable athttp://creativecommons.org/licenses/by-sa/3.0/. In accordance with CC-BY-SA, if you distribute this document or an adaptation of it, you mustprovide the URL for the original version.
Red Hat, as the licensor of this document, waives the right to enforce, and agrees not to assert,Section 4d of CC-BY-SA to the fullest extent permitted by applicable law.
Red Hat, Red Hat Enterprise Linux, the Shadowman logo, the Red Hat logo, JBoss, OpenShift,Fedora, the Infinity logo, and RHCE are trademarks of Red Hat, Inc., registered in the United Statesand other countries.
Linux ® is the registered trademark of Linus Torvalds in the United States and other countries.
Java ® is a registered trademark of Oracle and/or its affiliates.
XFS ® is a trademark of Silicon Graphics International Corp. or its subsidiaries in the United Statesand/or other countries.
MySQL ® is a registered trademark of MySQL AB in the United States, the European Union andother countries.
Node.js ® is an official trademark of Joyent. Red Hat is not formally related to or endorsed by theofficial Joyent Node.js open source or commercial project.
The OpenStack ® Word Mark and OpenStack logo are either registered trademarks/service marksor trademarks/service marks of the OpenStack Foundation, in the United States and othercountries and are used with the OpenStack Foundation's permission. We are not affiliated with,endorsed or sponsored by the OpenStack Foundation, or the OpenStack community.
All other trademarks are the property of their respective owners.
Abstract
This document is aimed at users who want to perform an advanced Red Hat Enterprise Linuxinstallation using Kickstart and configure advanced installation options.
. . . . . . . . . . . . . . . . . . . . . . . . . . . . . . . . . . . . . . . . . . . . . . . . . . . . . . . . . . . . . . . . . . . . . . . . . . . . . . . . . . . . . . . . . . . . . . . . . . . . . . . . . . . . . . . . . . . . . . . . . . . . . . . . . . . . . . . . . . . . . . . . . . . . . . . . . . . . . . . . . . . . . . . . . . . . . . . . . . . . . . . . . . . . . . . . . . . . . . . . . . . . . . . . . . . . . . . . . . . . . . . . . . . . . . . . . . . . . . . . . . . . . . . . . . . . . . . . . . . . . . . . . . . . . . . . . . . . . . . .
. . . . . . . . . . . . . . . . . . . . . . . . . . . . . . . . . . . . . . . . . . . . . . . . . . . . . . . . . . . . . . . . . . . . . . . . . . . . . . . . . . . . . . . . . . . . . . . . . . . . . . . . . . . . . . . . . . . . . . . . . . . . . . . . . . . . . . . . . . . . . . . . . . . . . . . . . . . . . . . . . . . . . . . . . . . . . . . . . . . . . . . . . . . . . . . . . . . . . . . . . . . . . . . . . . . . . . . . . . . . . . . . . . . . . . . . . . . . . . . . . . . . . . . . . . . . . . . . . . . . . . . . . . . . . . . . . . . . . . . .
. . . . . . . . . . . . . . . . . . . . . . . . . . . . . . . . . . . . . . . . . . . . . . . . . . . . . . . . . . . . . . . . . . . . . . . . . . . . . . . . . . . . . . . . . . . . . . . . . . . . . . . . . . . . . . . . . . . . . . . . . . . . . . . . . . . . . . . . . . . . . . . . . . . . . . . . . . . . . . . . . . . . . . . . . . . . . . . . . . . . . . . . . . . . . . . . . . . . . . . . . . . . . . . . . . . . . . . . . . . . . . . . . . . . . . . . . . . . . . . . . . . . . . . . . . . . . . . . . . . . . . . . . . . . . . . . . . . . . . . .
. . . . . . . . . . . . . . . . . . . . . . . . . . . . . . . . . . . . . . . . . . . . . . . . . . . . . . . . . . . . . . . . . . . . . . . . . . . . . . . . . . . . . . . . . . . . . . . . . . . . . . . . . . . . . . . . . . . . . . . . . . . . . . . . . . . . . . . . . . . . . . . . . . . . . . . . . . . . . . . . . . . . . . . . . . . . . . . . . . . . . . . . . . . . . . . . . . . . . . . . . . . . . . . . . . . . . . . . . . . . . . . . . . . . . . . . . . . . . . . . . . . . . . . . . . . . . . . . . . . . . . . . . . . . . . . . . . . . . . . .
. . . . . . . . . . . . . . . . . . . . . . . . . . . . . . . . . . . . . . . . . . . . . . . . . . . . . . . . . . . . . . . . . . . . . . . . . . . . . . . . . . . . . . . . . . . . . . . . . . . . . . . . . . . . . . . . . . . . . . . . . . . . . . . . . . . . . . . . . . . . . . . . . . . . . . . . . . . . . . . . . . . . . . . . . . . . . . . . . . . . . . . . . . . . . . . . . . . . . . . . . . . . . . . . . . . . . . . . . . . . . . . . . . . . . . . . . . . . . . . . . . . . . . . . . . . . . . . . . . . . . . . . . . . . . . . . . . . . . . . .
. . . . . . . . . . . . . . . . . . . . . . . . . . . . . . . . . . . . . . . . . . . . . . . . . . . . . . . . . . . . . . . . . . . . . . . . . . . . . . . . . . . . . . . . . . . . . . . . . . . . . . . . . . . . . . . . . . . . . . . . . . . . . . . . . . . . . . . . . . . . . . . . . . . . . . . . . . . . . . . . . . . . . . . . . . . . . . . . . . . . . . . . . . . . . . . . . . . . . . . . . . . . . . . . . . . . . . . . . . . . . . . . . . . . . . . . . . . . . . . . . . . . . . . . . . . . . . . . . . . . . . . . . . . . . . . . . . . . . . . .
. . . . . . . . . . . . . . . . . . . . . . . . . . . . . . . . . . . . . . . . . . . . . . . . . . . . . . . . . . . . . . . . . . . . . . . . . . . . . . . . . . . . . . . . . . . . . . . . . . . . . . . . . . . . . . . . . . . . . . . . . . . . . . . . . . . . . . . . . . . . . . . . . . . . . . . . . . . . . . . . . . . . . . . . . . . . . . . . . . . . . . . . . . . . . . . . . . . . . . . . . . . . . . . . . . . . . . . . . . . . . . . . . . . . . . . . . . . . . . . . . . . . . . . . . . . . . . . . . . . . . . . . . . . . . . . . . . . . . . . .
. . . . . . . . . . . . . . . . . . . . . . . . . . . . . . . . . . . . . . . . . . . . . . . . . . . . . . . . . . . . . . . . . . . . . . . . . . . . . . . . . . . . . . . . . . . . . . . . . . . . . . . . . . . . . . . . . . . . . . . . . . . . . . . . . . . . . . . . . . . . . . . . . . . . . . . . . . . . . . . . . . . . . . . . . . . . . . . . . . . . . . . . . . . . . . . . . . . . . . . . . . . . . . . . . . . . . . . . . . . . . . . . . . . . . . . . . . . . . . . . . . . . . . . . . . . . . . . . . . . . . . . . . . . . . . . . . . . . . . . .
. . . . . . . . . . . . . . . . . . . . . . . . . . . . . . . . . . . . . . . . . . . . . . . . . . . . . . . . . . . . . . . . . . . . . . . . . . . . . . . . . . . . . . . . . . . . . . . . . . . . . . . . . . . . . . . . . . . . . . . . . . . . . . . . . . . . . . . . . . . . . . . . . . . . . . . . . . . . . . . . . . . . . . . . . . . . . . . . . . . . . . . . . . . . . . . . . . . . . . . . . . . . . . . . . . . . . . . . . . . . . . . . . . . . . . . . . . . . . . . . . . . . . . . . . . . . . . . . . . . . . . . . . . . . . . . . . . . . . . . .
. . . . . . . . . . . . . . . . . . . . . . . . . . . . . . . . . . . . . . . . . . . . . . . . . . . . . . . . . . . . . . . . . . . . . . . . . . . . . . . . . . . . . . . . . . . . . . . . . . . . . . . . . . . . . . . . . . . . . . . . . . . . . . . . . . . . . . . . . . . . . . . . . . . . . . . . . . . . . . . . . . . . . . . . . . . . . . . . . . . . . . . . . . . . . . . . . . . . . . . . . . . . . . . . . . . . . . . . . . . . . . . . . . . . . . . . . . . . . . . . . . . . . . . . . . . . . . . . . . . . . . . . . . . . . . . . . . . . . . . .
. . . . . . . . . . . . . . . . . . . . . . . . . . . . . . . . . . . . . . . . . . . . . . . . . . . . . . . . . . . . . . . . . . . . . . . . . . . . . . . . . . . . . . . . . . . . . . . . . . . . . . . . . . . . . . . . . . . . . . . . . . . . . . . . . . . . . . . . . . . . . . . . . . . . . . . . . . . . . . . . . . . . . . . . . . . . . . . . . . . . . . . . . . . . . . . . . . . . . . . . . . . . . . . . . . . . . . . . . . . . . . . . . . . . . . . . . . . . . . . . . . . . . . . . . . . . . . . . . . . . . . . . . . . . . . . . . . . . . . . .
. . . . . . . . . . . . . . . . . . . . . . . . . . . . . . . . . . . . . . . . . . . . . . . . . . . . . . . . . . . . . . . . . . . . . . . . . . . . . . . . . . . . . . . . . . . . . . . . . . . . . . . . . . . . . . . . . . . . . . . . . . . . . . . . . . . . . . . . . . . . . . . . . . . . . . . . . . . . . . . . . . . . . . . . . . . . . . . . . . . . . . . . . . . . . . . . . . . . . . . . . . . . . . . . . . . . . . . . . . . . . . . . . . . . . . . . . . . . . . . . . . . . . . . . . . . . . . . . . . . . . . . . . . . . . . . . . . . . . . . .
. . . . . . . . . . . . . . . . . . . . . . . . . . . . . . . . . . . . . . . . . . . . . . . . . . . . . . . . . . . . . . . . . . . . . . . . . . . . . . . . . . . . . . . . . . . . . . . . . . . . . . . . . . . . . . . . . . . . . . . . . . . . . . . . . . . . . . . . . . . . . . . . . . . . . . . . . . . . . . . . . . . . . . . . . . . . . . . . . . . . . . . . . . . . . . . . . . . . . . . . . . . . . . . . . . . . . . . . . . . . . . . . . . . . . . . . . . . . . . . . . . . . . . . . . . . . . . . . . . . . . . . . . . . . . . . . . . . . . . . .
. . . . . . . . . . . . . . . . . . . . . . . . . . . . . . . . . . . . . . . . . . . . . . . . . . . . . . . . . . . . . . . . . . . . . . . . . . . . . . . . . . . . . . . . . . . . . . . . . . . . . . . . . . . . . . . . . . . . . . . . . . . . . . . . . . . . . . . . . . . . . . . . . . . . . . . . . . . . . . . . . . . . . . . . . . . . . . . . . . . . . . . . . . . . . . . . . . . . . . . . . . . . . . . . . . . . . . . . . . . . . . . . . . . . . . . . . . . . . . . . . . . . . . . . . . . . . . . . . . . . . . . . . . . . . . . . . . . . . . . .
Table of Contents
PROVIDING FEEDBACK ON RED HAT DOCUMENTATION
CHAPTER 1. INTRODUCTION1.1. SUPPORTED ARCHITECTURES1.2. INSTALLATION TERMINOLOGY
CHAPTER 2. INSTALLATION METHODS2.1. SELECT AN ADVANCED INSTALLATION METHOD
PART I. PERFORMING AN AUTOMATED INSTALLATION USING KICKSTART
CHAPTER 3. KICKSTART INSTALLATION BASICS3.1. WHAT ARE KICKSTART INSTALLATIONS3.2. AUTOMATED INSTALLATION WORKFLOW
CHAPTER 4. CREATING KICKSTART FILES4.1. CREATING A KICKSTART FILE WITH THE KICKSTART CONFIGURATION TOOL4.2. CREATING A KICKSTART FILE BY PERFORMING A MANUAL INSTALLATION4.3. CONVERTING A RHEL 7 KICKSTART FILE FOR RHEL 8 INSTALLATION
CHAPTER 5. MAKING KICKSTART FILES AVAILABLE TO THE INSTALLATION PROGRAM5.1. PORTS FOR NETWORK-BASED INSTALLATION5.2. MAKING A KICKSTART FILE AVAILABLE ON AN NFS SERVER5.3. MAKING A KICKSTART FILE AVAILABLE ON AN HTTP OR HTTPS SERVER5.4. MAKING A KICKSTART FILE AVAILABLE ON AN FTP SERVER5.5. MAKING A KICKSTART FILE AVAILABLE ON A LOCAL VOLUME5.6. MAKING A KICKSTART FILE AVAILABLE ON A LOCAL VOLUME FOR AUTOMATIC LOADING
CHAPTER 6. CREATING INSTALLATION SOURCES FOR KICKSTART INSTALLATIONS6.1. TYPES OF INSTALLATION SOURCE6.2. PORTS FOR NETWORK-BASED INSTALLATION6.3. CREATING AN INSTALLATION SOURCE ON AN NFS SERVER6.4. CREATING AN INSTALLATION SOURCE USING HTTP OR HTTPS6.5. CREATING AN INSTALLATION SOURCE USING FTP
CHAPTER 7. STARTING KICKSTART INSTALLATIONS7.1. STARTING A KICKSTART INSTALLATION MANUALLY7.2. STARTING A KICKSTART INSTALLATION AUTOMATICALLY USING PXE7.3. STARTING A KICKSTART INSTALLATION AUTOMATICALLY USING A LOCAL VOLUME
CHAPTER 8. CONSOLES AND LOGGING DURING INSTALLATION
CHAPTER 9. MAINTAINING KICKSTART FILES9.1. INSTALLING KICKSTART MAINTENANCE TOOLS9.2. VERIFYING A KICKSTART FILE
PART II. REGISTERING AND INSTALLING RHEL FROM THE CONTENT DELIVERY NETWORK
CHAPTER 10. REGISTERING AND INSTALLING RHEL FROM THE CDN USING KICKSTART10.1. REGISTERING AND INSTALLING RHEL FROM THE CDN10.2. VERIFYING YOUR SYSTEM REGISTRATION FROM THE CDN10.3. UNREGISTERING YOUR SYSTEM FROM THE CDN
PART III. PERFORMING A REMOTE RHEL INSTALLATION USING VNC
6
777
88
9
101010
12121213
14141415161819
212121222325
28282829
31
323232
33
34343737
39
Table of Contents
1
. . . . . . . . . . . . . . . . . . . . . . . . . . . . . . . . . . . . . . . . . . . . . . . . . . . . . . . . . . . . . . . . . . . . . . . . . . . . . . . . . . . . . . . . . . . . . . . . . . . . . . . . . . . . . . . . . . . . . . . . . . . . . . . . . . . . . . . . . . . . . . . . . . . . . . . . . . . . . . . . . . . . . . . . . . . . . . . . . . . . . . . . . . . . . . . . . . . . . . . . . . . . . . . . . . . . . . . . . . . . . . . . . . . . . . . . . . . . . . . . . . . . . . . . . . . . . . . . . . . . . . . . . . . . . . . . . . . . . . . .
. . . . . . . . . . . . . . . . . . . . . . . . . . . . . . . . . . . . . . . . . . . . . . . . . . . . . . . . . . . . . . . . . . . . . . . . . . . . . . . . . . . . . . . . . . . . . . . . . . . . . . . . . . . . . . . . . . . . . . . . . . . . . . . . . . . . . . . . . . . . . . . . . . . . . . . . . . . . . . . . . . . . . . . . . . . . . . . . . . . . . . . . . . . . . . . . . . . . . . . . . . . . . . . . . . . . . . . . . . . . . . . . . . . . . . . . . . . . . . . . . . . . . . . . . . . . . . . . . . . . . . . . . . . . . . . . . . . . . . . .
. . . . . . . . . . . . . . . . . . . . . . . . . . . . . . . . . . . . . . . . . . . . . . . . . . . . . . . . . . . . . . . . . . . . . . . . . . . . . . . . . . . . . . . . . . . . . . . . . . . . . . . . . . . . . . . . . . . . . . . . . . . . . . . . . . . . . . . . . . . . . . . . . . . . . . . . . . . . . . . . . . . . . . . . . . . . . . . . . . . . . . . . . . . . . . . . . . . . . . . . . . . . . . . . . . . . . . . . . . . . . . . . . . . . . . . . . . . . . . . . . . . . . . . . . . . . . . . . . . . . . . . . . . . . . . . . . . . . . . . .
. . . . . . . . . . . . . . . . . . . . . . . . . . . . . . . . . . . . . . . . . . . . . . . . . . . . . . . . . . . . . . . . . . . . . . . . . . . . . . . . . . . . . . . . . . . . . . . . . . . . . . . . . . . . . . . . . . . . . . . . . . . . . . . . . . . . . . . . . . . . . . . . . . . . . . . . . . . . . . . . . . . . . . . . . . . . . . . . . . . . . . . . . . . . . . . . . . . . . . . . . . . . . . . . . . . . . . . . . . . . . . . . . . . . . . . . . . . . . . . . . . . . . . . . . . . . . . . . . . . . . . . . . . . . . . . . . . . . . . . .
. . . . . . . . . . . . . . . . . . . . . . . . . . . . . . . . . . . . . . . . . . . . . . . . . . . . . . . . . . . . . . . . . . . . . . . . . . . . . . . . . . . . . . . . . . . . . . . . . . . . . . . . . . . . . . . . . . . . . . . . . . . . . . . . . . . . . . . . . . . . . . . . . . . . . . . . . . . . . . . . . . . . . . . . . . . . . . . . . . . . . . . . . . . . . . . . . . . . . . . . . . . . . . . . . . . . . . . . . . . . . . . . . . . . . . . . . . . . . . . . . . . . . . . . . . . . . . . . . . . . . . . . . . . . . . . . . . . . . . . .
. . . . . . . . . . . . . . . . . . . . . . . . . . . . . . . . . . . . . . . . . . . . . . . . . . . . . . . . . . . . . . . . . . . . . . . . . . . . . . . . . . . . . . . . . . . . . . . . . . . . . . . . . . . . . . . . . . . . . . . . . . . . . . . . . . . . . . . . . . . . . . . . . . . . . . . . . . . . . . . . . . . . . . . . . . . . . . . . . . . . . . . . . . . . . . . . . . . . . . . . . . . . . . . . . . . . . . . . . . . . . . . . . . . . . . . . . . . . . . . . . . . . . . . . . . . . . . . . . . . . . . . . . . . . . . . . . . . . . . . .
. . . . . . . . . . . . . . . . . . . . . . . . . . . . . . . . . . . . . . . . . . . . . . . . . . . . . . . . . . . . . . . . . . . . . . . . . . . . . . . . . . . . . . . . . . . . . . . . . . . . . . . . . . . . . . . . . . . . . . . . . . . . . . . . . . . . . . . . . . . . . . . . . . . . . . . . . . . . . . . . . . . . . . . . . . . . . . . . . . . . . . . . . . . . . . . . . . . . . . . . . . . . . . . . . . . . . . . . . . . . . . . . . . . . . . . . . . . . . . . . . . . . . . . . . . . . . . . . . . . . . . . . . . . . . . . . . . . . . . . .
. . . . . . . . . . . . . . . . . . . . . . . . . . . . . . . . . . . . . . . . . . . . . . . . . . . . . . . . . . . . . . . . . . . . . . . . . . . . . . . . . . . . . . . . . . . . . . . . . . . . . . . . . . . . . . . . . . . . . . . . . . . . . . . . . . . . . . . . . . . . . . . . . . . . . . . . . . . . . . . . . . . . . . . . . . . . . . . . . . . . . . . . . . . . . . . . . . . . . . . . . . . . . . . . . . . . . . . . . . . . . . . . . . . . . . . . . . . . . . . . . . . . . . . . . . . . . . . . . . . . . . . . . . . . . . . . . . . . . . . .
. . . . . . . . . . . . . . . . . . . . . . . . . . . . . . . . . . . . . . . . . . . . . . . . . . . . . . . . . . . . . . . . . . . . . . . . . . . . . . . . . . . . . . . . . . . . . . . . . . . . . . . . . . . . . . . . . . . . . . . . . . . . . . . . . . . . . . . . . . . . . . . . . . . . . . . . . . . . . . . . . . . . . . . . . . . . . . . . . . . . . . . . . . . . . . . . . . . . . . . . . . . . . . . . . . . . . . . . . . . . . . . . . . . . . . . . . . . . . . . . . . . . . . . . . . . . . . . . . . . . . . . . . . . . . . . . . . . . . . . .
CHAPTER 11. PERFORMING A REMOTE RHEL INSTALLATION USING VNC11.1. OVERVIEW11.2. CONSIDERATIONS11.3. PERFORMING A REMOTE RHEL INSTALLATION IN VNC DIRECT MODE11.4. PERFORMING A REMOTE RHEL INSTALLATION IN VNC CONNECT MODE
PART IV. ADVANCED CONFIGURATION OPTIONS
CHAPTER 12. CONFIGURING SYSTEM PURPOSE12.1. OVERVIEW12.2. CONFIGURING SYSTEM PURPOSE IN A KICKSTART FILE12.3. RELATED INFORMATION
CHAPTER 13. UPDATING DRIVERS DURING INSTALLATION13.1. PREREQUISITE13.2. OVERVIEW13.3. TYPES OF DRIVER UPDATE13.4. PREPARING A DRIVER UPDATE13.5. PERFORMING AN AUTOMATIC DRIVER UPDATE13.6. PERFORMING AN ASSISTED DRIVER UPDATE13.7. PERFORMING A MANUAL DRIVER UPDATE13.8. DISABLING A DRIVER
CHAPTER 14. PREPARING TO INSTALL FROM THE NETWORK USING PXE14.1. NETWORK INSTALL OVERVIEW14.2. CONFIGURING A TFTP SERVER FOR BIOS-BASED CLIENTS14.3. CONFIGURING A TFTP SERVER FOR UEFI-BASED CLIENTS14.4. CONFIGURING A NETWORK SERVER FOR IBM POWER SYSTEMS
CHAPTER 15. CREATING A REMOTE REPOSITORY15.1. INSTALLING APACHE ON RHEL15.2. CREATING A REMOTE REPOSITORY
CHAPTER 16. BOOT OPTIONS16.1. TYPES OF BOOT OPTIONS16.2. EDITING BOOT OPTIONS
Editing the boot: prompt in BIOSEditing the > promptEditing the GRUB2 menu
16.3. INSTALLATION SOURCE BOOT OPTIONS16.4. NETWORK BOOT OPTIONS16.5. CONSOLE BOOT OPTIONS16.6. DEBUG BOOT OPTIONS16.7. STORAGE BOOT OPTIONS16.8. KICKSTART BOOT OPTIONS16.9. ADVANCED INSTALLATION BOOT OPTIONS16.10. DEPRECATED BOOT OPTIONS16.11. REMOVED BOOT OPTIONS
PART V. KICKSTART REFERENCES
APPENDIX A. KICKSTART SCRIPT FILE FORMAT REFERENCEA.1. KICKSTART FILE FORMATA.2. PACKAGE SELECTION IN KICKSTART
A.2.1. Package selection section
40404041
42
44
45454647
484848484950505151
5353545659
626262
646464646565667072757677787980
82
83838484
Red Hat Enterprise Linux 8 Performing an advanced RHEL installation
2

. . . . . . . . . . . . . . . . . . . . . . . . . . . . . . . . . . . . . . . . . . . . . . . . . . . . . . . . . . . . . . . . . . . . . . . . . . . . . . . . . . . . . . . . . . . . . . . . . . . . . . . . . . . . . . . . . . . . . . . . . . . . . . . . . . . . . . . . . . . . . . . . . . . . . . . . . . . . . . . . . . . . . . . . . . . . . . . . . . . . . . . . . . . . . . . . . . . . . . . . . . . . . . . . . . . . . . . . . . . . . . . . . . . . . . . . . . . . . . . . . . . . . . . . . . . . . . . . . . . . . . . . . . . . . . . . . . . . . . . .
A.2.2. Package selection commandsA.2.3. Common package selection optionsA.2.4. Options for specific package groups
A.3. SCRIPTS IN KICKSTART FILEA.3.1. %pre script
A.3.1.1. %pre script section optionsA.3.2. %pre-install script
A.3.2.1. %pre-install script section optionsA.3.3. %post script
A.3.3.1. %post script section optionsA.3.3.2. Example: Mounting NFS in a post-install scriptA.3.3.3. Example: Running subscription-manager as a post-install script
A.4. ANACONDA CONFIGURATION SECTIONA.5. KICKSTART ERROR HANDLING SECTIONA.6. KICKSTART ADD-ON SECTIONS
APPENDIX B. KICKSTART COMMANDS AND OPTIONS REFERENCEB.1. KICKSTART CHANGES
B.1.1. auth or authconfig is deprecated in RHEL 8B.1.2. Kickstart no longer supports BtrfsB.1.3. Using Kickstart files from previous RHEL releasesB.1.4. Deprecated Kickstart commands and optionsB.1.5. Removed Kickstart commands and optionsB.1.6. New Kickstart commands and options
B.2. KICKSTART COMMANDS FOR INSTALLATION PROGRAM CONFIGURATION AND FLOW CONTROLB.2.1. autostepB.2.2. cdromB.2.3. cmdlineB.2.4. driverdiskB.2.5. eulaB.2.6. firstbootB.2.7. graphicalB.2.8. haltB.2.9. harddriveB.2.10. install (deprecated)B.2.11. liveimgB.2.12. loggingB.2.13. mediacheckB.2.14. nfsB.2.15. ostreesetupB.2.16. poweroffB.2.17. rebootB.2.18. rhsmB.2.19. shutdownB.2.20. sshpwB.2.21. textB.2.22. urlB.2.23. vncB.2.24. %includeB.2.25. %ksappend
B.3. KICKSTART COMMANDS FOR SYSTEM CONFIGURATIONB.3.1. auth or authconfig (deprecated)B.3.2. authselect
8486878888898989909091
92929393
949494949494959595969696979898989999
100100101102102103103104104105105106107108108108109109109
Table of Contents
3
. . . . . . . . . . . . . . . . . . . . . . . . . . . . . . . . . . . . . . . . . . . . . . . . . . . . . . . . . . . . . . . . . . . . . . . . . . . . . . . . . . . . . . . . . . . . . . . . . . . . . . . . . . . . . . . . . . . . . . . . . . . . . . . . . . . . . . . . . . . . . . . . . . . . . . . . . . . . . . . . . . . . . . . . . . . . . . . . . . . . . . . . . . . . . . . . . . . . . . . . . . . . . . . . . . . . . . . . . . . . . . . . . . . . . . . . . . . . . . . . . . . . . . . . . . . . . . . . . . . . . . . . . . . . . . . . . . . . . . . .
B.3.3. firewallB.3.4. groupB.3.5. keyboard (required)B.3.6. lang (required)B.3.7. moduleB.3.8. repoB.3.9. rootpw (required)B.3.10. selinuxB.3.11. servicesB.3.12. skipxB.3.13. sshkeyB.3.14. syspurposeB.3.15. timezone (required)B.3.16. userB.3.17. xconfig
B.4. KICKSTART COMMANDS FOR NETWORK CONFIGURATIONB.4.1. networkB.4.2. realm
B.5. KICKSTART COMMANDS FOR HANDLING STORAGEB.5.1. device (deprecated)B.5.2. autopartB.5.3. bootloader (required)B.5.4. ziplB.5.5. clearpartB.5.6. fcoeB.5.7. ignorediskB.5.8. iscsiB.5.9. iscsinameB.5.10. logvolB.5.11. mountB.5.12. nvdimmB.5.13. part or partitionB.5.14. raidB.5.15. reqpartB.5.16. snapshotB.5.17. volgroupB.5.18. zerombrB.5.19. zfcp
B.6. KICKSTART COMMANDS FOR ADDONS SUPPLIED WITH THE RHEL INSTALLATION PROGRAMB.6.1. %addon com_redhat_kdumpB.6.2. %addon org_fedora_oscap
B.7. COMMANDS USED IN ANACONDAB.7.1. pwpolicy
B.8. KICKSTART COMMANDS FOR SYSTEM RECOVERYB.8.1. rescue
APPENDIX C. PARTITIONING REFERENCEC.1. SUPPORTED DEVICE TYPESC.2. SUPPORTED FILE SYSTEMSC.3. SUPPORTED RAID TYPESC.4. RECOMMENDED PARTITIONING SCHEMEC.5. ADVICE ON PARTITIONS
110111111
112112113114115115116116116117118119119
120124124124125127129130132132133134134138139140145147148148149150150150151
153153154154
156156156157158160
Red Hat Enterprise Linux 8 Performing an advanced RHEL installation
4

Table of Contents
5
PROVIDING FEEDBACK ON RED HAT DOCUMENTATIONWe appreciate your input on our documentation. Please let us know how we could make it better. To doso:
For simple comments on specific passages:
1. Make sure you are viewing the documentation in the Multi-page HTML format. In addition,ensure you see the Feedback button in the upper right corner of the document.
2. Use your mouse cursor to highlight the part of text that you want to comment on.
3. Click the Add Feedback pop-up that appears below the highlighted text.
4. Follow the displayed instructions.
For submitting more complex feedback, create a Bugzilla ticket:
1. Go to the Bugzilla website.
2. As the Component, use Documentation.
3. Fill in the Description field with your suggestion for improvement. Include a link to therelevant part(s) of documentation.
4. Click Submit Bug.
Red Hat Enterprise Linux 8 Performing an advanced RHEL installation
6
CHAPTER 1. INTRODUCTIONRed Hat Enterprise Linux 8 delivers a stable, secure, consistent foundation across hybrid clouddeployments with the tools needed to deliver workloads faster with less effort. It can be deployed as aguest on supported hypervisors and Cloud provider environments as well as deployed on physicalinfrastructure, so your applications can take advantage of innovations in the leading hardwarearchitecture platforms.
1.1. SUPPORTED ARCHITECTURES
Red Hat Enterprise Linux supports the following architectures:
AMD and Intel 64-bit architectures
The 64-bit ARM architecture
IBM Power Systems, Little Endian
IBM Z
1.2. INSTALLATION TERMINOLOGY
This section describes Red Hat Enterprise Linux installation terminology. Different terminology can beused for the same concepts, depending on its upstream or downstream origin.
Anaconda: The operating system installer used in Fedora, Red Hat Enterprise Linux, and theirderivatives. Anaconda is a set of Python modules and scripts with additional files like Gtk widgets(written in C), systemd units, and dracut libraries. Together, they form a tool that allows users to setparameters of the resulting (target) system. In this document, the term installation program refers tothe installation aspect of Anaconda.
CHAPTER 1. INTRODUCTION
7

CHAPTER 2. INSTALLATION METHODSDepending on your requirements, you can install Red Hat Enterprise Linux using several methods.Review the following sections to determine the best installation method for your requirements.
2.1. SELECT AN ADVANCED INSTALLATION METHOD
Select an advanced installation method that suits your requirements. The advanced installation methodsare:
Perform an automated RHEL installation using Kickstart: Install Red Hat Enterprise Linuxusing Kickstart. Kickstart is an automated installation that allows you to execute unattendedoperating system installation tasks.
Register and install RHEL from the Content Delivery Network: Register and install Red HatEnterprise Linux on all architectures from the Content Delivery Network (CDN). Registration isperformed before the installation packages are downloaded and installed from CDN. Thisinstallation method is supported by the graphical user interface and Kickstart.
IMPORTANT
Registering and installing RHEL from the CDN is available in RHEL 8.2 beta.
Perform a remote RHEL installation using VNC: The RHEL installation program offers twoVNC installation modes: Direct and Connect. Once a connection is established, the two modesdo not differ. The mode you select depends on your environment.
Install RHEL from the network using PXE : A network installation allows you to install Red HatEnterprise Linux to a system that has access to an installation server. At a minimum, twosystems are required for a network installation.
Standard installation methods are also available. They are:
Install RHEL using an ISO image from the Customer Portal: Install Red Hat Enterprise Linuxby downloading the Binary DVD ISO image file from the Customer Portal. Registration isperformed after the installation completes. This installation method is supported by the GUIand Kickstart.
Register and install RHEL from the Content Delivery Network: Register your system, attachsubscriptions, and install Red Hat Enterprise Linux from the Content Delivery Network (CDN).This installation method is supported by the Boot ISO and Binary DVD ISO image files;however, it is recommended that you use the Boot ISO image file as the installation sourcedefaults to CDN for the Boot ISO image file. Registration is performed before the installationpackages are downloaded and installed from the CDN. This installation method is supported bythe GUI and Kickstart.
For more information about the standard installation methods, see the Performing a standard RHELinstallation document.
Red Hat Enterprise Linux 8 Performing an advanced RHEL installation
8

PART I. PERFORMING AN AUTOMATED INSTALLATION USINGKICKSTART
PART I. PERFORMING AN AUTOMATED INSTALLATION USING KICKSTART
9
CHAPTER 3. KICKSTART INSTALLATION BASICSThe following provides basic information about Kickstart and how to use it to automate installingRed Hat Enterprise Linux.
3.1. WHAT ARE KICKSTART INSTALLATIONS
Kickstart provides a way to automate the RHEL installation process, either partially or fully.
Kickstart files contain some or all of the RHEL installation options. For example, the time zone, how thedrives should be partitioned, or which packages should be installed. Providing a prepared Kickstart fileallows an installation without the need for any user intervention. This is especially useful when deployingRed Hat Enterprise Linux on a large number of systems at once.
Kickstart files also provide more options regarding software selection. When installing Red HatEnterprise Linux manually using the graphical installation interface, the software selection is limited topre-defined environments and add-ons. A Kickstart file allows you to install or remove individualpackages as well.
Kickstart files can be kept on a single server system and read by individual computers during theinstallation. This installation method supports the use of a single Kickstart file to install Red HatEnterprise Linux on multiple machines, making it ideal for network and system administrators.
All Kickstart scripts and log files of their execution are stored in the /tmp directory of the newly installedsystem to assist with debugging installation issues.
NOTE
In previous versions of Red Hat Enterprise Linux, Kickstart could be used for upgradingsystems. Starting with Red Hat Enterprise Linux 7, this functionality has been removedand system upgrades are instead handled by specialized tools. For details on upgrading toRed Hat Enterprise Linux 8, see Upgrading to RHEL 8 and Considerations in adoptingRHEL 8.
3.2. AUTOMATED INSTALLATION WORKFLOW
Kickstart installations can be performed using a local DVD, a local hard drive, or a NFS, FTP, HTTP, orHTTPS server. This section provides a high level overview of Kickstart usage.
1. Create a Kickstart file. You can write it by hand, copy a Kickstart file saved after a manualinstallation, or use an online generator tool to create the file, and edit it afterward. SeeChapter 4, Creating Kickstart files .
2. Make the Kickstart file available to the installation program on removable media, a hard drive ora network location using an HTTP(S), FTP, or NFS server. See Chapter 5, Making Kickstart filesavailable to the installation program.
3. Create the boot medium which will be used to begin the installation.See Creating installationmedia and Chapter 14, Preparing to install from the network using PXE .
4. Make the installation source available to the installation program. See Chapter 6, Creatinginstallation sources for Kickstart installations.
5. Start the installation using the boot medium and the Kickstart file. See Chapter 7, StartingKickstart installations.
Red Hat Enterprise Linux 8 Performing an advanced RHEL installation
10

If the Kickstart file contains all mandatory commands and sections, the installation finishesautomatically. If one or more of these mandatory parts are missing, or if an error occurs, the installationrequires manual intervention to finish.
CHAPTER 3. KICKSTART INSTALLATION BASICS
11
CHAPTER 4. CREATING KICKSTART FILESYou can create a Kickstart file using the following methods:
Use the online Kickstart configuration tool.
Copy the Kickstart file created as a result of a manual installation.
Write the entire Kickstart file manually. Note that editing an already existing file from the othermethods is faster, so this method is not recommended.
Convert the Red Hat Enterprise Linux 7 Kickstart file for Red Hat Enterprise Linux 8 installation.
Note that some highly specific installation options can be configured only by manual editing of theKickstart file.
4.1. CREATING A KICKSTART FILE WITH THE KICKSTARTCONFIGURATION TOOL
Users with a Red Hat Customer Portal account can use the Kickstart Generator tool in the CustomerPortal Labs to generate Kickstart files online. This tool will walk you through the basic configuration andenables you to download the resulting Kickstart file.
NOTE
The tool currently does not support any advanced partitioning.
Prerequisites
You must have a Red Hat Customer Portal account.
Procedure
1. Open the Kickstart generator lab information page athttps://access.redhat.com/labsinfo/kickstartconfig
2. Click the Go to Application button to the left of heading and wait for the next page to load.
3. Select Red Hat Enterprise Linux 8 in the drop-down menu and wait for the page to update.
4. Describe the system to be installed using the fields in the form.You can use the links on the left side of the form to quickly navigate between sections of theform.
5. To download the generated Kickstart file, click the red Download button at the top of the page.Your web browser will save the file.
4.2. CREATING A KICKSTART FILE BY PERFORMING A MANUALINSTALLATION
The recommended approach to creating Kickstart files is to use the file created by a manual installationof Red Hat Enterprise Linux. After an installation completes, all choices made during the installation aresaved into a Kickstart file named anaconda-ks.cfg, located in the /root/ directory on the installed
Red Hat Enterprise Linux 8 Performing an advanced RHEL installation
12
system. You can use this file to reproduce the installation in the same way as before. Alternatively, copythis file, make any changes you need, and use the resulting configuration file for further installations.
Procedure
1. Install RHEL. For more details, see Performing a standard RHEL installation .During the installation, create a user with administrator privileges.
2. Finish the installation and reboot into the installed system.
3. Log into the system with the administrator account.
4. Copy the file /root/anaconda-ks.cfg to a location of your choice.
To display the file contents in terminal:
# cat /root/anaconda-ks.cfg
You can copy the output and save to another file of your choice.
To copy the file to another location, use the file manager. Remember to change permissionson the copy, so that the file can be read by non-root users.
CAUTION
The file contains information about users and passwords.
Additional resources
Performing a standard RHEL installation
4.3. CONVERTING A RHEL 7 KICKSTART FILE FOR RHEL 8INSTALLATION
You can use the Kickstart Converter tool to convert a RHEL 7 Kickstart file for use in a new RHEL 8installation. For more information about the tool and how to use it to convert a RHEL 7 Kickstart file, seehttps://access.redhat.com/labs/kickstartconvert/
CHAPTER 4. CREATING KICKSTART FILES
13
CHAPTER 5. MAKING KICKSTART FILES AVAILABLE TO THEINSTALLATION PROGRAM
The following provides information about making the Kickstart file available to the installation programon the target system.
5.1. PORTS FOR NETWORK-BASED INSTALLATION
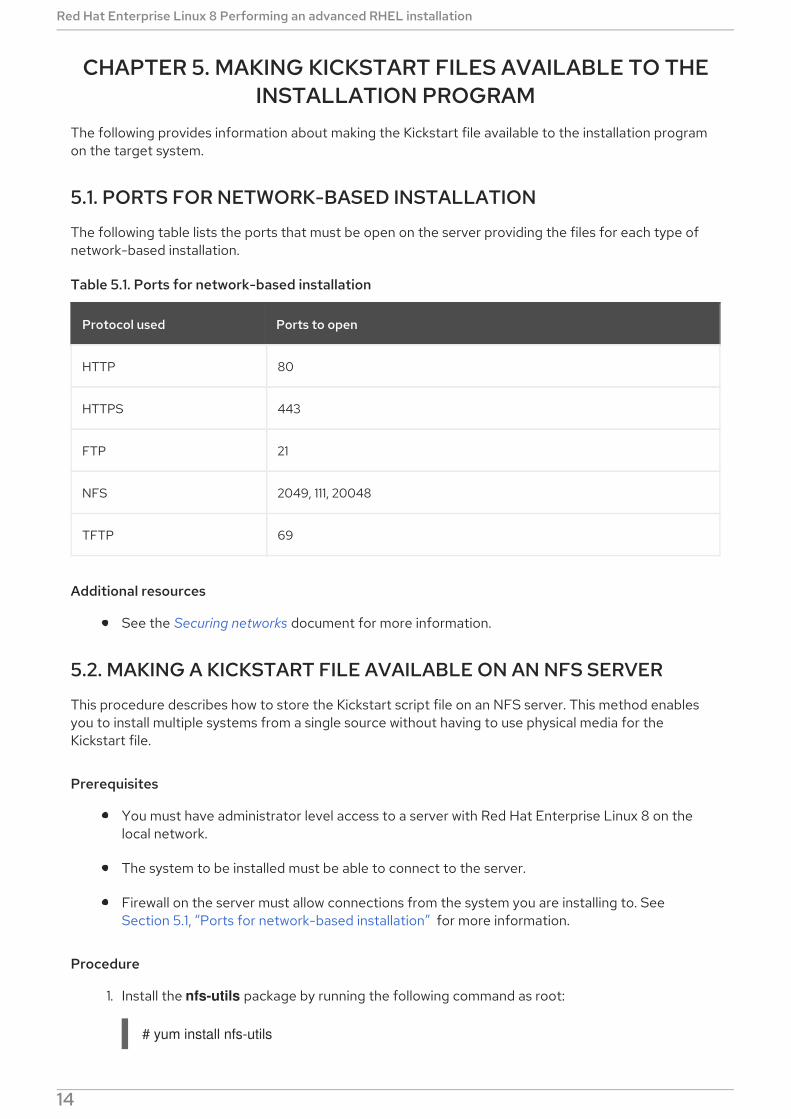
The following table lists the ports that must be open on the server providing the files for each type ofnetwork-based installation.
Table 5.1. Ports for network-based installation
Protocol used Ports to open
HTTP 80
HTTPS 443
FTP 21
NFS 2049, 111, 20048
TFTP 69
Additional resources
See the Securing networks document for more information.
5.2. MAKING A KICKSTART FILE AVAILABLE ON AN NFS SERVER
This procedure describes how to store the Kickstart script file on an NFS server. This method enablesyou to install multiple systems from a single source without having to use physical media for theKickstart file.
Prerequisites
You must have administrator level access to a server with Red Hat Enterprise Linux 8 on thelocal network.
The system to be installed must be able to connect to the server.
Firewall on the server must allow connections from the system you are installing to. SeeSection 5.1, “Ports for network-based installation” for more information.
Procedure
1. Install the nfs-utils package by running the following command as root:
# yum install nfs-utils
Red Hat Enterprise Linux 8 Performing an advanced RHEL installation
14
2. Copy the Kickstart file to a directory on the NFS server.
3. Open the /etc/exports file using a text editor and add a line with the following syntax:
/exported_directory/ clients
4. Replace /exported_directory/ with the full path to the directory holding the Kickstart file.Instead of clients, use the host name or IP address of the computer that is to be installed fromthis NFS server, the subnetwork from which all computers are to have access the ISO image, orthe asterisk sign (*) if you want to allow any computer with network access to the NFS server touse the ISO image. See the exports(5) man page for detailed information about the format ofthis field.A basic configuration that makes the /rhel8-install/ directory available as read-only to all clientsis:
/rhel8-install *
5. Save the /etc/exports file and exit the text editor.
6. Start the nfs service:
# systemctl start nfs-server.service
If the service was running before you changed the /etc/exports file, enter the followingcommand, in order for the running NFS server to reload its configuration:
# systemctl reload nfs-server.service
The Kickstart file is now accessible over NFS and ready to be used for installation.
NOTE
When specifying the Kickstart source, use nfs: as the protocol, the server’s host name orIP address, the colon sign (:), and the path inside directory holding the file. For example, ifthe server’s host name is myserver.example.com and you have saved the file in /rhel8-install/my-ks.cfg, specify inst.ks=nfs:myserver.example.com:/rhel8-install/my-ks.cfgas the installation source boot option.
Additional resources
For details on setting up TFTP server for PXE boot from network, see Chapter 14, Preparing toinstall from the network using PXE.
5.3. MAKING A KICKSTART FILE AVAILABLE ON AN HTTP OR HTTPSSERVER
This procedure describes how to store the Kickstart script file on an HTTP or HTTPS server. This methodenables you to install multiple systems from a single source without having to use physical media for theKickstart file.
Prerequisites
You must have administrator level access to a server with Red Hat Enterprise Linux 8 on the
CHAPTER 5. MAKING KICKSTART FILES AVAILABLE TO THE INSTALLATION PROGRAM
15

You must have administrator level access to a server with Red Hat Enterprise Linux 8 on thelocal network.
The system to be installed must be able to connect to the server.
Firewall on the server must allow connections from the system you are installing to. SeeSection 5.1, “Ports for network-based installation” for more information.
Procedure
1. Install the httpd package by running the following command as root:
# yum install httpd
WARNING
If your Apache web server configuration enables SSL security, verify thatyou only enable the TLSv1 protocol, and disable SSLv2 and SSLv3. This isdue to the POODLE SSL vulnerability (CVE-2014-3566). Seehttps://access.redhat.com/solutions/1232413 for details.
IMPORTANT
If you use an HTTPS server with a self-signed certificate, you must boot theinstallation program with the inst.noverifyssl option.
2. Copy the Kickstart file to the HTTP(S) server into a subdirectory of the /var/www/html/directory.
3. Start the httpd service:
# systemctl start httpd.service
The Kickstart file is now accessible and ready to be used for installation.
NOTE
When specifying the location of the Kickstart file, use http:// or https:// as theprotocol, the server’s host name or IP address, and the path of the Kickstart file,relative to the HTTP server root. For example, if you are using HTTP, the server’shost name is myserver.example.com, and you have copied the Kickstart file as /var/www/html/rhel8-install/my-ks.cfg, specify http://myserver.example.com/rhel8-install/my-ks.cfg as the file location.
Additional resources
For more information about HTTP and FTP servers, see Deploying different types of servers.
5.4. MAKING A KICKSTART FILE AVAILABLE ON AN FTP SERVER
Red Hat Enterprise Linux 8 Performing an advanced RHEL installation
16
This procedure describes how to store the Kickstart script file on an FTP server. This method enablesyou to install multiple systems from a single source without having to use physical media for theKickstart file.
Prerequisites
You must have administrator level access to a server with Red Hat Enterprise Linux 8 on thelocal network.
The system to be installed must be able to connect to the server.
Firewall on the server must allow connections from the system you are installing to. SeeSection 5.1, “Ports for network-based installation” for more information.
Procedure
1. Install the vsftpd package by running the following command as root:
# yum install vsftpd
2. Open and edit the /etc/vsftpd/vsftpd.conf configuration file in a text editor.
a. Change the line anonymous_enable=NO to anonymous_enable=YES
b. Change the line write_enable=YES to write_enable=NO.
c. Add lines pasv_min_port=min_port and pasv_max_port=max_port. Replace min_portand max_port with the port number range used by FTP server in passive mode, e. g. 10021and 10031.This step can be necessary in network environments featuring various firewall/NAT setups.
d. Optionally, add custom changes to your configuration. For available options, see thevsftpd.conf(5) man page. This procedure assumes that default options are used.
WARNING
If you configured SSL/TLS security in your vsftpd.conf file, ensure thatyou enable only the TLSv1 protocol, and disable SSLv2 and SSLv3. Thisis due to the POODLE SSL vulnerability (CVE-2014-3566). Seehttps://access.redhat.com/solutions/1234773 for details.
3. Configure the server firewall.
a. Enable the firewall:
# systemctl enable firewalld# systemctl start firewalld
b. Enable in your firewall the FTP port and port range from previous step:
CHAPTER 5. MAKING KICKSTART FILES AVAILABLE TO THE INSTALLATION PROGRAM
17
# firewall-cmd --add-port min_port-max_port/tcp --permanent# firewall-cmd --add-service ftp --permanent# firewall-cmd --reload
Replace min_port-max_port with the port numbers you entered into the /etc/vsftpd/vsftpd.conf configuration file.
4. Copy the Kickstart file to the FTP server into the /var/ftp/ directory or its subdirectory.
5. Make sure that the correct SELinux context and access mode is set on the file:
# restorecon -r /var/ftp/your-kickstart-file.ks# chmod 444 /var/ftp/your-kickstart-file.ks
6. Start the vsftpd service:
# systemctl start vsftpd.service
If the service was running before you changed the /etc/vsftpd/vsftpd.conf file, restart theservice to load the edited file:
# systemctl restart vsftpd.service
Enable the vsftpd service to start during the boot process:
# systemctl enable vsftpd
The Kickstart file is now accessible and ready to be used for installations by systems on thesame network.
NOTE
When configuring the installation source, use ftp:// as the protocol, the server’shost name or IP address, and the path of the Kickstart file, relative to the FTPserver root. For example, if the server’s host name is myserver.example.comand you have copied the file to /var/ftp/my-ks.cfg, specify ftp://myserver.example.com/my-ks.cfg as the installation source.
5.5. MAKING A KICKSTART FILE AVAILABLE ON A LOCAL VOLUME
This procedure describes how to store the Kickstart script file on a volume on the system to be installed.This method enables you to bypass the need for another system.
Prerequisites
You must have a drive that can be moved to the machine to be installed, such as a USB stick.
The drive must contain a partition that can be read by the installation program. The supportedtypes are ext2, ext3, ext4, xfs, and fat.
The drive must be already connected to the system and its volumes mounted.
Procedure
Red Hat Enterprise Linux 8 Performing an advanced RHEL installation
18
1. List volume information and note the UUID of the volume to which you want to copy theKickstart file.
# lsblk -l -p -o name,rm,ro,hotplug,size,type,mountpoint,uuid
2. Navigate to the file system on the volume.
3. Copy the Kickstart file to this file system.
4. Make a note of the string to use later with the inst.ks= option. This string is in the form hd:UUID=volume-UUID:path/to/kickstart-file.cfg. Note that the path is relative to the filesystem root, not to the / root of file system hierarchy. Replace volume-UUID with the UUID younoted earlier.
5. Unmount all drive volumes:
# umount /dev/xyz ...
Add all the volumes to the command, separated by spaces.
5.6. MAKING A KICKSTART FILE AVAILABLE ON A LOCAL VOLUMEFOR AUTOMATIC LOADING
A specially named Kickstart file can be present in the root of a specially named volume on the system tobe installed. This lets you bypass the need for another system, and makes the installation program loadthe file automatically.
Prerequisites
You must have a drive that can be moved to the machine to be installed, such as a USB stick.
The drive must contain a partition that can be read by the installation program. The supportedtypes are ext2, ext3, ext4, xfs, and fat.
The drive must be already connected to the system and its volumes mounted.
Procedure
1. List volume information and note the UUID of the volume to which you want to copy theKickstart file.
# lsblk -l -p
2. Navigate to the file system on the volume.
3. Copy the Kickstart file into the root of this file system.
4. Rename the Kickstart file to ks.cfg.
5. Rename the volume as OEMDRV:
For ext2, ext3, and ext4 file systems:
# e2label /dev/xyz OEMDRV
CHAPTER 5. MAKING KICKSTART FILES AVAILABLE TO THE INSTALLATION PROGRAM
19
For the XFS file system:
# xfs_admin -L OEMDRV /dev/xyz
Replace /dev/xyz with the path to the volume’s block device.
6. Unmount all drive volumes:
# umount /dev/xyz ...
Add all the volumes to the command, separated by spaces.
Red Hat Enterprise Linux 8 Performing an advanced RHEL installation
20

CHAPTER 6. CREATING INSTALLATION SOURCES FORKICKSTART INSTALLATIONS
This section describes how to create an installation source for the Boot ISO image using the Binary DVDISO image that contains the required repositories and software packages.
6.1. TYPES OF INSTALLATION SOURCE
You can use one of the following installation sources for minimal boot images:
DVD: Burn the Binary DVD ISO image to a DVD. The installation program will automaticallyinstall the software packages from the DVD.
Hard drive or USB drive: Copy the Binary DVD ISO image to the drive and configure theinstallation program to install the software packages from the drive. If you use a USB drive,verify that it is connected to the system before the installation begins. The installation programcannot detect media after the installation begins.
Hard drive limitation: The Binary DVD ISO image on the hard drive must be on a partitionwith a file system that the installation program can mount. The supported file systems are xfs, ext2, ext3, ext4, and vfat (FAT32).
WARNING
On Microsoft Windows systems, the default file system used whenformatting hard drives is NTFS. The exFAT file system is also available.However, neither of these file systems can be mounted during theinstallation. If you are creating a hard drive or a USB drive as an installationsource on Microsoft Windows, verify that you formatted the drive as FAT32.Note that the FAT32 file system cannot store files larger than 4 GiB.
In Red Hat Enterprise Linux 8, you can enable installation from a directoryon a local hard drive. To do so, you need to copy the contents of the DVDISO image to a directory on a hard drive and then specify the directory asthe installation source instead of the ISO image. For example: inst.repo=hd:<device>:<path to the directory>
Network location: Copy the Binary DVD ISO image or the installation tree (extracted contentsof the Binary DVD ISO image) to a network location and perform the installation over thenetwork using the following protocols:
NFS: The Binary DVD ISO image is in a Network File System (NFS) share.
HTTPS, HTTP or FTP: The installation tree is on a network location that is accessible overHTTP, HTTPS or FTP.
6.2. PORTS FOR NETWORK-BASED INSTALLATION
The following table lists the ports that must be open on the server providing the files for each type of
CHAPTER 6. CREATING INSTALLATION SOURCES FOR KICKSTART INSTALLATIONS
21
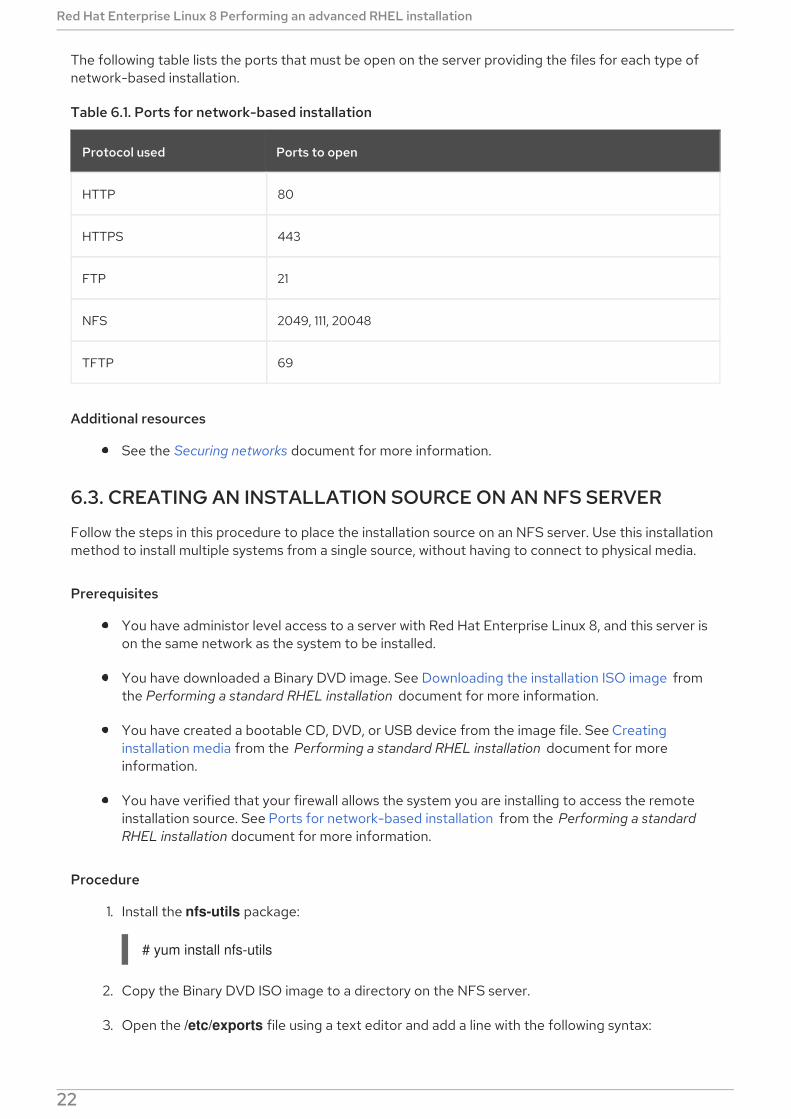
The following table lists the ports that must be open on the server providing the files for each type ofnetwork-based installation.
Table 6.1. Ports for network-based installation
Protocol used Ports to open
HTTP 80
HTTPS 443
FTP 21
NFS 2049, 111, 20048
TFTP 69
Additional resources
See the Securing networks document for more information.
6.3. CREATING AN INSTALLATION SOURCE ON AN NFS SERVER
Follow the steps in this procedure to place the installation source on an NFS server. Use this installationmethod to install multiple systems from a single source, without having to connect to physical media.
Prerequisites
You have administor level access to a server with Red Hat Enterprise Linux 8, and this server ison the same network as the system to be installed.
You have downloaded a Binary DVD image. See Downloading the installation ISO image fromthe Performing a standard RHEL installation document for more information.
You have created a bootable CD, DVD, or USB device from the image file. See Creatinginstallation media from the Performing a standard RHEL installation document for moreinformation.
You have verified that your firewall allows the system you are installing to access the remoteinstallation source. See Ports for network-based installation from the Performing a standardRHEL installation document for more information.
Procedure
1. Install the nfs-utils package:
# yum install nfs-utils
2. Copy the Binary DVD ISO image to a directory on the NFS server.
3. Open the /etc/exports file using a text editor and add a line with the following syntax:
Red Hat Enterprise Linux 8 Performing an advanced RHEL installation
22
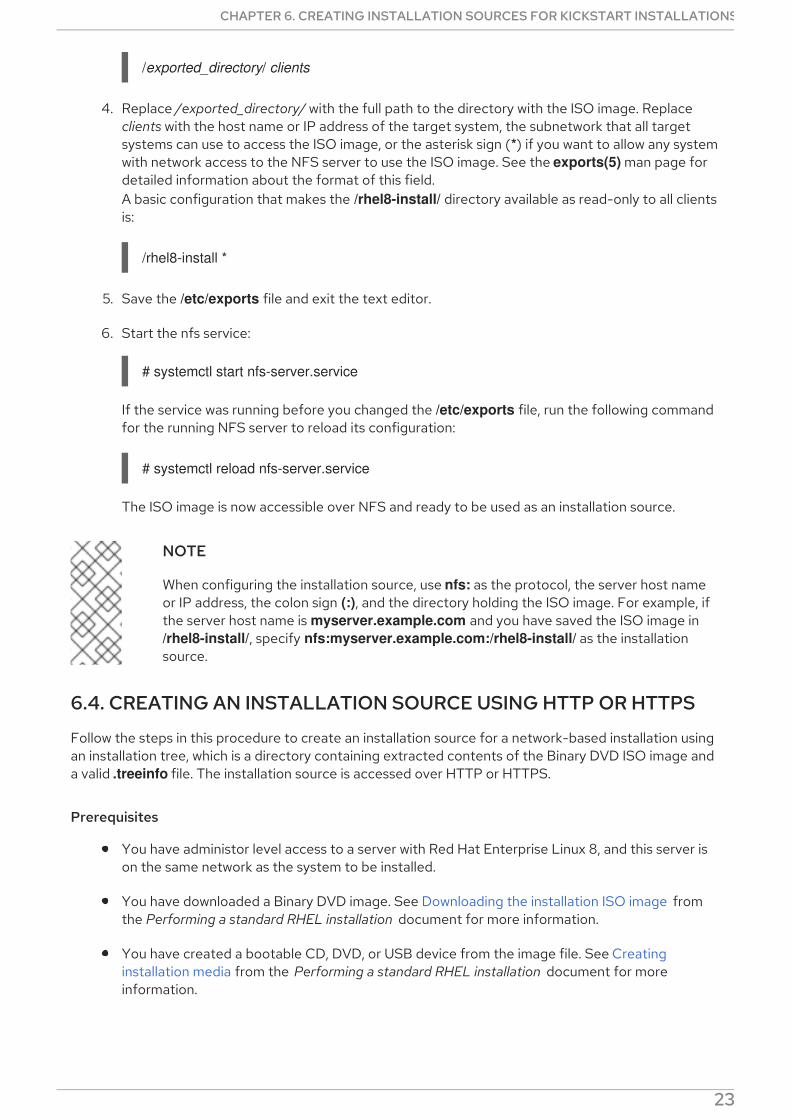
/exported_directory/ clients
4. Replace /exported_directory/ with the full path to the directory with the ISO image. Replaceclients with the host name or IP address of the target system, the subnetwork that all targetsystems can use to access the ISO image, or the asterisk sign (*) if you want to allow any systemwith network access to the NFS server to use the ISO image. See the exports(5) man page fordetailed information about the format of this field.A basic configuration that makes the /rhel8-install/ directory available as read-only to all clientsis:
/rhel8-install *
5. Save the /etc/exports file and exit the text editor.
6. Start the nfs service:
# systemctl start nfs-server.service
If the service was running before you changed the /etc/exports file, run the following commandfor the running NFS server to reload its configuration:
# systemctl reload nfs-server.service
The ISO image is now accessible over NFS and ready to be used as an installation source.
NOTE
When configuring the installation source, use nfs: as the protocol, the server host nameor IP address, the colon sign (:), and the directory holding the ISO image. For example, ifthe server host name is myserver.example.com and you have saved the ISO image in /rhel8-install/, specify nfs:myserver.example.com:/rhel8-install/ as the installationsource.
6.4. CREATING AN INSTALLATION SOURCE USING HTTP OR HTTPS
Follow the steps in this procedure to create an installation source for a network-based installation usingan installation tree, which is a directory containing extracted contents of the Binary DVD ISO image anda valid .treeinfo file. The installation source is accessed over HTTP or HTTPS.
Prerequisites
You have administor level access to a server with Red Hat Enterprise Linux 8, and this server ison the same network as the system to be installed.
You have downloaded a Binary DVD image. See Downloading the installation ISO image fromthe Performing a standard RHEL installation document for more information.
You have created a bootable CD, DVD, or USB device from the image file. See Creatinginstallation media from the Performing a standard RHEL installation document for moreinformation.
You have verified that your firewall allows the system you are installing to access the remote
CHAPTER 6. CREATING INSTALLATION SOURCES FOR KICKSTART INSTALLATIONS
23
You have verified that your firewall allows the system you are installing to access the remoteinstallation source. See Ports for network-based installation from the Performing a standardRHEL installation document for more information.
Procedure
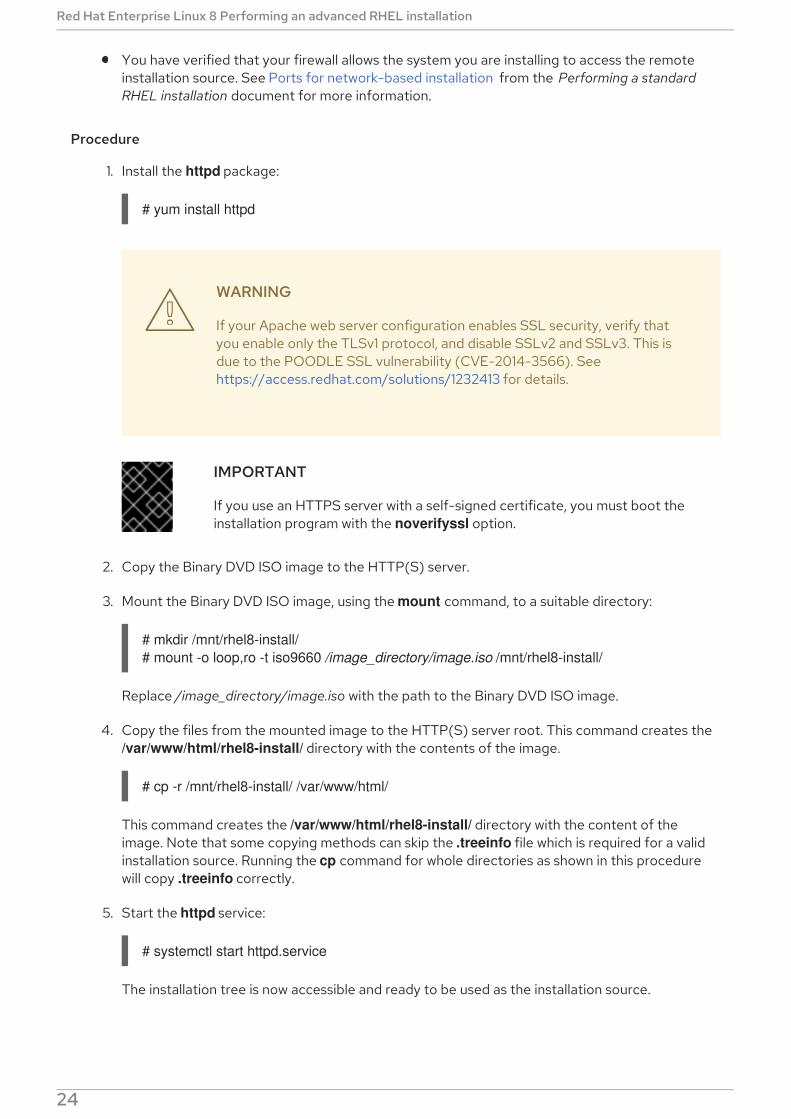
1. Install the httpd package:
# yum install httpd
WARNING
If your Apache web server configuration enables SSL security, verify thatyou enable only the TLSv1 protocol, and disable SSLv2 and SSLv3. This isdue to the POODLE SSL vulnerability (CVE-2014-3566). Seehttps://access.redhat.com/solutions/1232413 for details.
IMPORTANT
If you use an HTTPS server with a self-signed certificate, you must boot theinstallation program with the noverifyssl option.
2. Copy the Binary DVD ISO image to the HTTP(S) server.
3. Mount the Binary DVD ISO image, using the mount command, to a suitable directory:
# mkdir /mnt/rhel8-install/# mount -o loop,ro -t iso9660 /image_directory/image.iso /mnt/rhel8-install/
Replace /image_directory/image.iso with the path to the Binary DVD ISO image.
4. Copy the files from the mounted image to the HTTP(S) server root. This command creates the /var/www/html/rhel8-install/ directory with the contents of the image.
# cp -r /mnt/rhel8-install/ /var/www/html/
This command creates the /var/www/html/rhel8-install/ directory with the content of theimage. Note that some copying methods can skip the .treeinfo file which is required for a validinstallation source. Running the cp command for whole directories as shown in this procedurewill copy .treeinfo correctly.
5. Start the httpd service:
# systemctl start httpd.service
The installation tree is now accessible and ready to be used as the installation source.
NOTE
Red Hat Enterprise Linux 8 Performing an advanced RHEL installation
24
NOTE
When configuring the installation source, use http:// or https:// as the protocol,the server host name or IP address, and the directory that contains the files fromthe ISO image, relative to the HTTP server root. For example, if you are usingHTTP, the server host name is myserver.example.com, and you have copied thefiles from the image to /var/www/html/rhel8-install/, specify http://myserver.example.com/rhel8-install/ as the installation source.
Additional resources
For more information about HTTP servers, see the Deploying different types of serversdocument.
6.5. CREATING AN INSTALLATION SOURCE USING FTP
Follow the steps in this procedure to create an installation source for a network-based installation usingan installation tree, which is a directory containing extracted contents of the Binary DVD ISO image anda valid .treeinfo file. The installation source is accessed over FTP.
Prerequisites
You have administor level access to a server with Red Hat Enterprise Linux 8, and this server ison the same network as the system to be installed.
You have downloaded a Binary DVD image. See Downloading the installation ISO image fromthe Performing a standard RHEL installation document for more information.
You have created a bootable CD, DVD, or USB device from the image file. See Creatinginstallation media from the Performing a standard RHEL installation document for moreinformation.
You have verified that your firewall allows the system you are installing to access the remoteinstallation source. See Ports for network-based installation from the Performing a standardRHEL installation document for more information.
Procedure
1. Install the vsftpd package by running the following command as root:
# yum install vsftpd
2. Open and edit the /etc/vsftpd/vsftpd.conf configuration file in a text editor.
a. Change the line anonymous_enable=NO to anonymous_enable=YES
b. Change the line write_enable=YES to write_enable=NO.
c. Add lines pasv_min_port=min_port and pasv_max_port=max_port. Replace min_portand max_port with the port number range used by FTP server in passive mode, e. g. 10021and 10031.This step can be necessary in network environments featuring various firewall/NAT setups.
d. Optionally, add custom changes to your configuration. For available options, see thevsftpd.conf(5) man page. This procedure assumes that default options are used.
CHAPTER 6. CREATING INSTALLATION SOURCES FOR KICKSTART INSTALLATIONS
25
WARNING
If you configured SSL/TLS security in your vsftpd.conf file, ensure thatyou enable only the TLSv1 protocol, and disable SSLv2 and SSLv3. Thisis due to the POODLE SSL vulnerability (CVE-2014-3566). Seehttps://access.redhat.com/solutions/1234773 for details.
3. Configure the server firewall.
a. Enable the firewall:
# systemctl enable firewalld# systemctl start firewalld
b. Enable in your firewall the FTP port and port range from previous step:
# firewall-cmd --add-port min_port-max_port/tcp --permanent# firewall-cmd --add-service ftp --permanent# firewall-cmd --reload
Replace min_port-max_port with the port numbers you entered into the /etc/vsftpd/vsftpd.conf configuration file.
4. Copy the Binary DVD ISO image to the FTP server.
5. Mount the Binary DVD ISO image, using the mount command, to a suitable directory:
# mkdir /mnt/rhel8-install# mount -o loop,ro -t iso9660 /image-directory/image.iso /mnt/rhel8-install
Replace /image-directory/image.iso with the path to the Binary DVD ISO image.
6. Copy the files from the mounted image to the FTP server root:
# mkdir /var/ftp/rhel8-install# cp -r /mnt/rhel8-install/ /var/ftp/
This command creates the /var/ftp/rhel8-install/ directory with the content of the image. Notethat some copying methods can skip the .treeinfo file which is required for a valid installationsource. Running the cp command for whole directories as shown in this procedure will copy .treeinfo correctly.
7. Make sure that the correct SELinux context and access mode is set on the copied content:
# restorecon -r /var/ftp/rhel8-install# find /var/ftp/rhel8-install -type f -exec chmod 444 {} \;# find /var/ftp/rhel8-install -type d -exec chmod 755 {} \;
8. Start the vsftpd service:
Red Hat Enterprise Linux 8 Performing an advanced RHEL installation
26
# systemctl start vsftpd.service
If the service was running before you changed the /etc/vsftpd/vsftpd.conf file, restart theservice to load the edited file:
# systemctl restart vsftpd.service
Enable the vsftpd service to start during the boot process:
# systemctl enable vsftpd
The installation tree is now accessible and ready to be used as the installation source.
NOTE
When configuring the installation source, use ftp:// as the protocol, the serverhost name or IP address, and the directory in which you have stored the files fromthe ISO image, relative to the FTP server root. For example, if the server hostname is myserver.example.com and you have copied the files from the imageto /var/ftp/rhel8-install/, specify ftp://myserver.example.com/rhel8-install/ asthe installation source.
CHAPTER 6. CREATING INSTALLATION SOURCES FOR KICKSTART INSTALLATIONS
27
CHAPTER 7. STARTING KICKSTART INSTALLATIONSYou can start Kickstart installations in multiple ways:
Manually by entering the installation program boot menu and specifying the options includingKickstart file there.
Automatically by editing the boot options in PXE boot.
Automatically by providing the file on a volume with specific name.
Learn how to perform each of these methods in the following sections.
7.1. STARTING A KICKSTART INSTALLATION MANUALLY
This section explains how to start a Kickstart installation manually, which means some user interaction isrequired (adding boot options at the boot: prompt). Use the boot option inst.ks=location when bootingthe installation system, replacing location with the location of your Kickstart file. The exact way tospecify the boot option depends on your system’s architecture.
Prerequisites
You have a Kickstart file ready in a location accessible from the system to be installated
Procedure
1. Boot the system using a local media (a CD, DVD, or a USB flash drive).
2. At the boot prompt, specify the required boot options.
a. If the Kickstart file or a required repository is in a network location, you may need toconfigure the network using the ip= option. The installer tries to configure all networkdevices using the DHCP protocol by default without this option.
b. Add the inst.ks= boot option and the location of the Kickstart file.
c. In order to access a software source from which necessary packages will be installed, youmay need to add the inst.repo= option. If you do not specify this option, you must specifythe installation source in the Kickstart file.
3. Start the installation by confirming your added boot options.The installation begins now, using the options specified in the Kickstart file. If the Kickstart file isvalid and contains all required commands, the installation is completely automated from thispoint forward.
7.2. STARTING A KICKSTART INSTALLATION AUTOMATICALLY USINGPXE
AMD64, Intel 64, and 64-bit ARM systems and IBM Power Systems servers have the ability to bootusing a PXE server. When you configure the PXE server, you can add the boot option into the bootloader configuration file, which in turn lets you start the installation automatically. Using this approach, itis possible to automate the installation completely, including the boot process.
This procedure is intended as a general reference; detailed steps differ based on your system’s
Red Hat Enterprise Linux 8 Performing an advanced RHEL installation
28
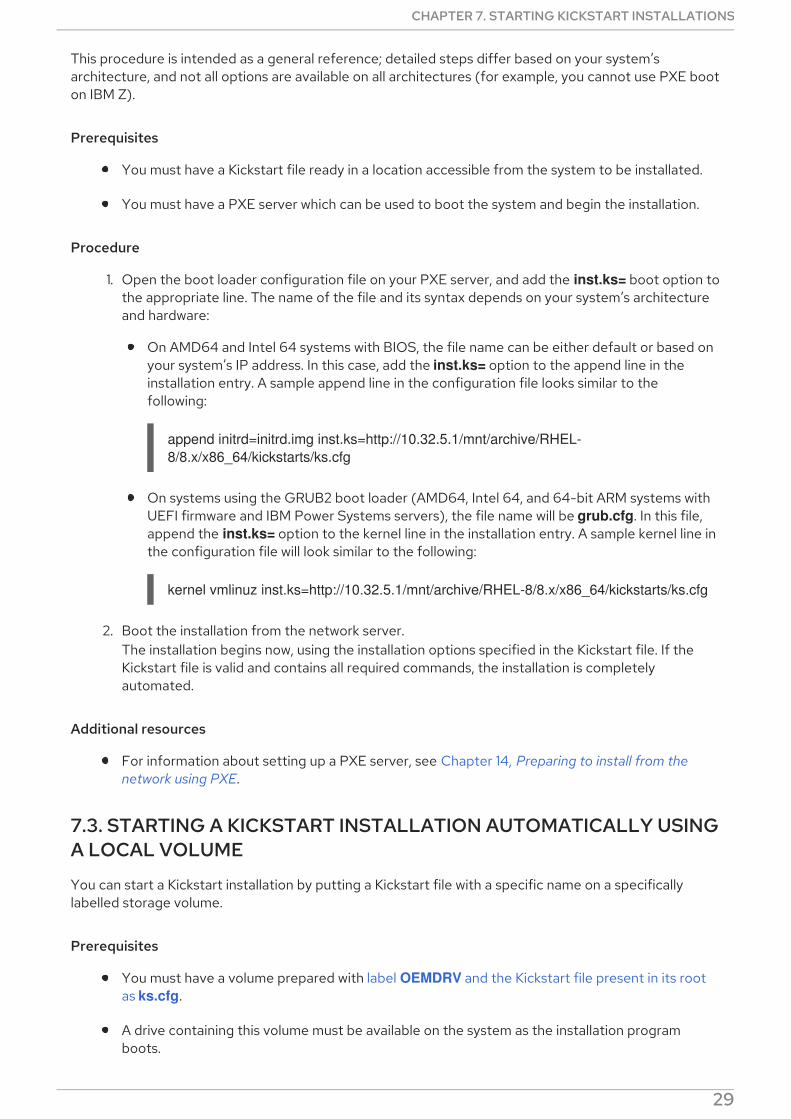
This procedure is intended as a general reference; detailed steps differ based on your system’sarchitecture, and not all options are available on all architectures (for example, you cannot use PXE booton IBM Z).
Prerequisites
You must have a Kickstart file ready in a location accessible from the system to be installated.
You must have a PXE server which can be used to boot the system and begin the installation.
Procedure
1. Open the boot loader configuration file on your PXE server, and add the inst.ks= boot option tothe appropriate line. The name of the file and its syntax depends on your system’s architectureand hardware:
On AMD64 and Intel 64 systems with BIOS, the file name can be either default or based onyour system’s IP address. In this case, add the inst.ks= option to the append line in theinstallation entry. A sample append line in the configuration file looks similar to thefollowing:
append initrd=initrd.img inst.ks=http://10.32.5.1/mnt/archive/RHEL-8/8.x/x86_64/kickstarts/ks.cfg
On systems using the GRUB2 boot loader (AMD64, Intel 64, and 64-bit ARM systems withUEFI firmware and IBM Power Systems servers), the file name will be grub.cfg. In this file,append the inst.ks= option to the kernel line in the installation entry. A sample kernel line inthe configuration file will look similar to the following:
kernel vmlinuz inst.ks=http://10.32.5.1/mnt/archive/RHEL-8/8.x/x86_64/kickstarts/ks.cfg
2. Boot the installation from the network server.The installation begins now, using the installation options specified in the Kickstart file. If theKickstart file is valid and contains all required commands, the installation is completelyautomated.
Additional resources
For information about setting up a PXE server, see Chapter 14, Preparing to install from thenetwork using PXE.
7.3. STARTING A KICKSTART INSTALLATION AUTOMATICALLY USINGA LOCAL VOLUME
You can start a Kickstart installation by putting a Kickstart file with a specific name on a specificallylabelled storage volume.
Prerequisites
You must have a volume prepared with label OEMDRV and the Kickstart file present in its rootas ks.cfg.
A drive containing this volume must be available on the system as the installation programboots.
CHAPTER 7. STARTING KICKSTART INSTALLATIONS
29
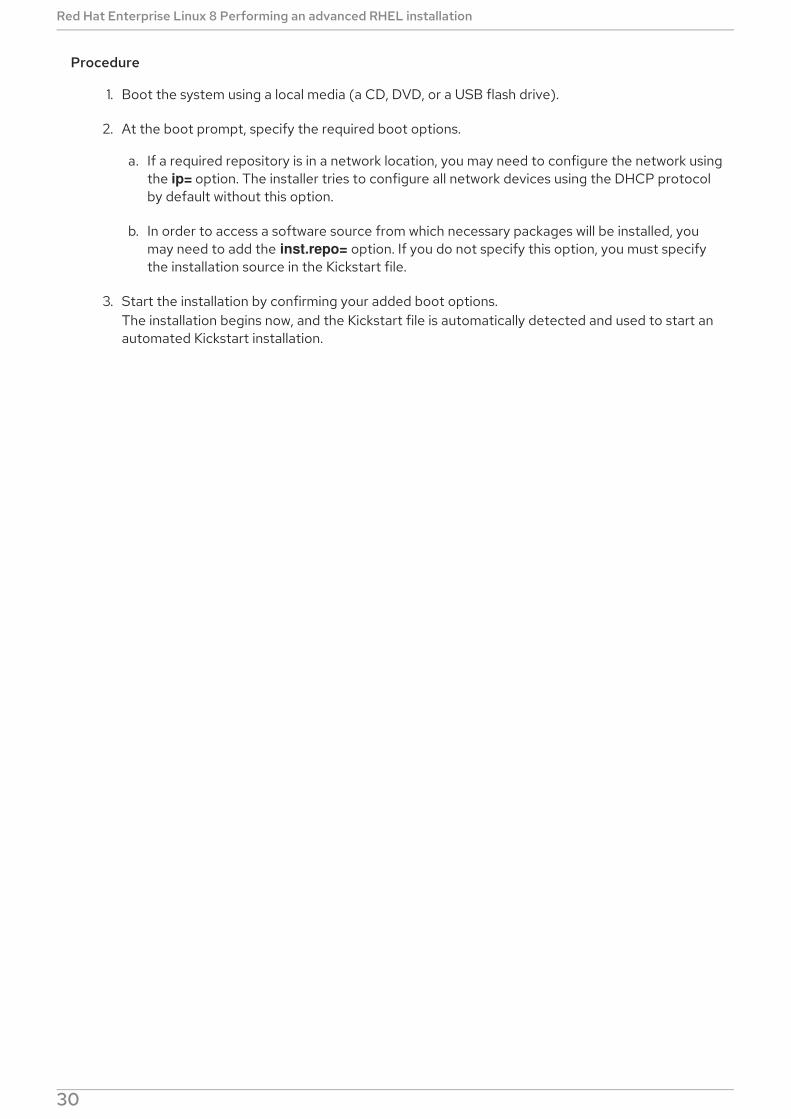
Procedure
1. Boot the system using a local media (a CD, DVD, or a USB flash drive).
2. At the boot prompt, specify the required boot options.
a. If a required repository is in a network location, you may need to configure the network usingthe ip= option. The installer tries to configure all network devices using the DHCP protocolby default without this option.
b. In order to access a software source from which necessary packages will be installed, youmay need to add the inst.repo= option. If you do not specify this option, you must specifythe installation source in the Kickstart file.
3. Start the installation by confirming your added boot options.The installation begins now, and the Kickstart file is automatically detected and used to start anautomated Kickstart installation.
Red Hat Enterprise Linux 8 Performing an advanced RHEL installation
30

CHAPTER 8. CONSOLES AND LOGGING DURINGINSTALLATION
The Red Hat Enterprise Linux installer uses the tmux terminal multiplexer to display and control severalwindows in addition to the main interface. Each of these windows serve a different purpose; they displayseveral different logs, which can be used to troubleshoot issues during the installation process. One ofthe windows provides an interactive shell prompt with root privileges, unless this prompt was specificallydisabled using a boot option or a Kickstart command.
NOTE
In general, there is no reason to leave the default graphical installation environmentunless you need to diagnose an installation problem.
The terminal multiplexer is running in virtual console 1. To switch from the actual installation environmentto tmux, press Ctrl+Alt+F1. To go back to the main installation interface which runs in virtual console 6,press Ctrl+Alt+F6.
NOTE
If you choose text mode installation, you will start in virtual console 1 (tmux), andswitching to console 6 will open a shell prompt instead of a graphical interface.
The console running tmux has five available windows; their contents are described in the following table,along with keyboard shortcuts. Note that the keyboard shortcuts are two-part: first press Ctrl+b, thenrelease both keys, and press the number key for the window you want to use.
You can also use Ctrl+b n, Alt+ Tab, and Ctrl+b p to switch to the next or previous tmux window,respectively.
Table 8.1. Available tmux windows
Shortcut Contents
Ctrl+b 1 Main installation program window. Contains text-based prompts (during text mode installation or ifyou use VNC direct mode), and also some debugginginformation.
Ctrl+b 2 Interactive shell prompt with root privileges.
Ctrl+b 3 Installation log; displays messages stored in /tmp/anaconda.log.
Ctrl+b 4 Storage log; displays messages related to storagedevices and configuration, stored in /tmp/storage.log.
Ctrl+b 5 Program log; displays messages from utilitiesexecuted during the installation process, stored in /tmp/program.log.
CHAPTER 8. CONSOLES AND LOGGING DURING INSTALLATION
31
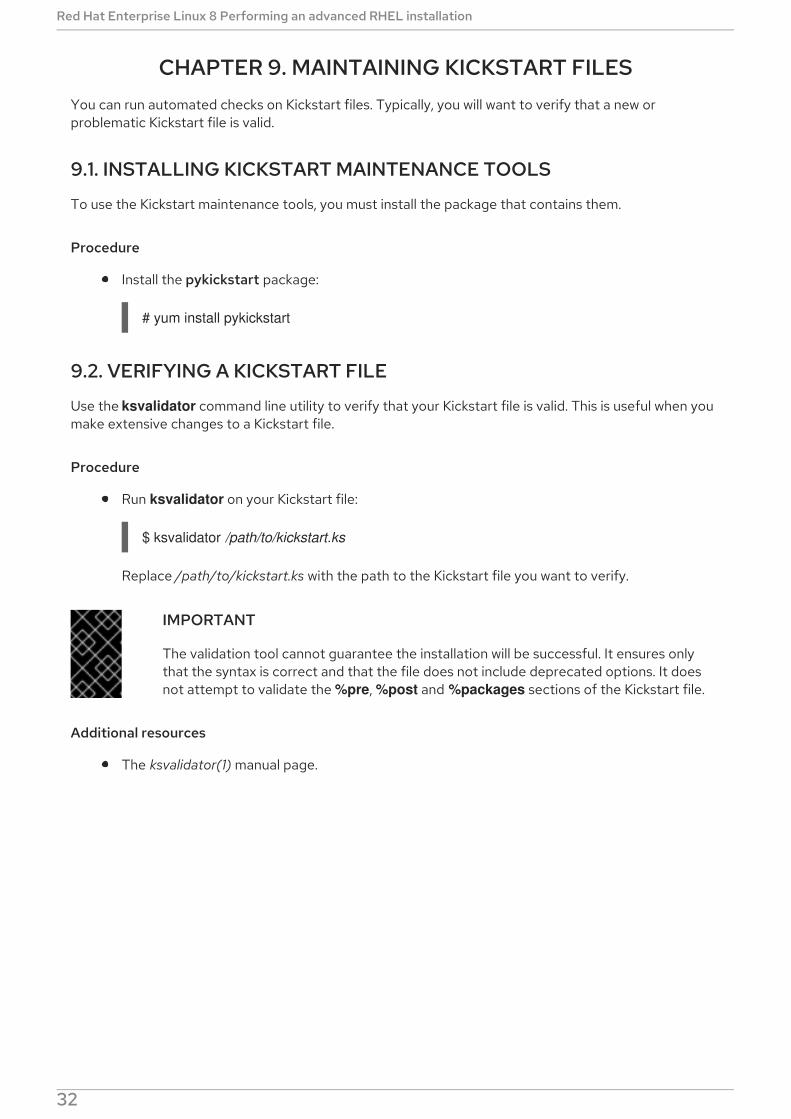
CHAPTER 9. MAINTAINING KICKSTART FILESYou can run automated checks on Kickstart files. Typically, you will want to verify that a new orproblematic Kickstart file is valid.
9.1. INSTALLING KICKSTART MAINTENANCE TOOLS
To use the Kickstart maintenance tools, you must install the package that contains them.
Procedure
Install the pykickstart package:
# yum install pykickstart
9.2. VERIFYING A KICKSTART FILE
Use the ksvalidator command line utility to verify that your Kickstart file is valid. This is useful when youmake extensive changes to a Kickstart file.
Procedure
Run ksvalidator on your Kickstart file:
$ ksvalidator /path/to/kickstart.ks
Replace /path/to/kickstart.ks with the path to the Kickstart file you want to verify.
IMPORTANT
The validation tool cannot guarantee the installation will be successful. It ensures onlythat the syntax is correct and that the file does not include deprecated options. It doesnot attempt to validate the %pre, %post and %packages sections of the Kickstart file.
Additional resources
The ksvalidator(1) manual page.
Red Hat Enterprise Linux 8 Performing an advanced RHEL installation
32

PART II. REGISTERING AND INSTALLING RHEL FROM THECONTENT DELIVERY NETWORK
PART II. REGISTERING AND INSTALLING RHEL FROM THE CONTENT DELIVERY NETWORK
33

CHAPTER 10. REGISTERING AND INSTALLING RHEL FROMTHE CDN USING KICKSTART
Complete the following procedures to register your system, attach RHEL subscriptions, and install fromthe Red Hat Content Delivery Network (CDN) using Kickstart.
IMPORTANT
Registering and installing RHEL from the CDN is available in RHEL 8.2 beta.
10.1. REGISTERING AND INSTALLING RHEL FROM THE CDN
Use this procedure to register your system, attach RHEL subscriptions, and install from the Red HatContent Delivery Network (CDN) using the rhsm Kickstart command, which supports the syspurposecommand as well as Red Hat Insights. The rhsm Kickstart command removes the requirement of usingcustom %post scripts when registering the system.
IMPORTANT
Registering and installing RHEL from the CDN is available in RHEL 8.2 beta. The featureis supported by the Boot ISO and Binary DVD ISO image files. However, it isrecommended that you use the Boot ISO image file as the installation source defaults toCDN for the Boot ISO image file.
Prerequisites
Your system is connected to a network that can access the CDN.
You created a Kickstart file and made it available to the installation program on removablemedia, a hard drive or a network location using an HTTP(S), FTP, or NFS server.
The Kickstart file is in a location that is accessible by the system that is to be installed.
You created the boot media used to begin the installation and made the installation sourceavailable to the installation program.
IMPORTANT
The installation source repository used after system registration isdependent on how the system was booted. For more information, see theInstallation source repository after system registration section in thePerforming a standard RHEL installation document.
Repository configuration is not required in a Kickstart file as your subscriptiongoverns which CDN subset and repositories the system can access.
Procedure
1. Open the Kickstart file.
2. Edit the file to add the rhsm Kickstart command and its options to the file:
Organization (required)
Red Hat Enterprise Linux 8 Performing an advanced RHEL installation
34
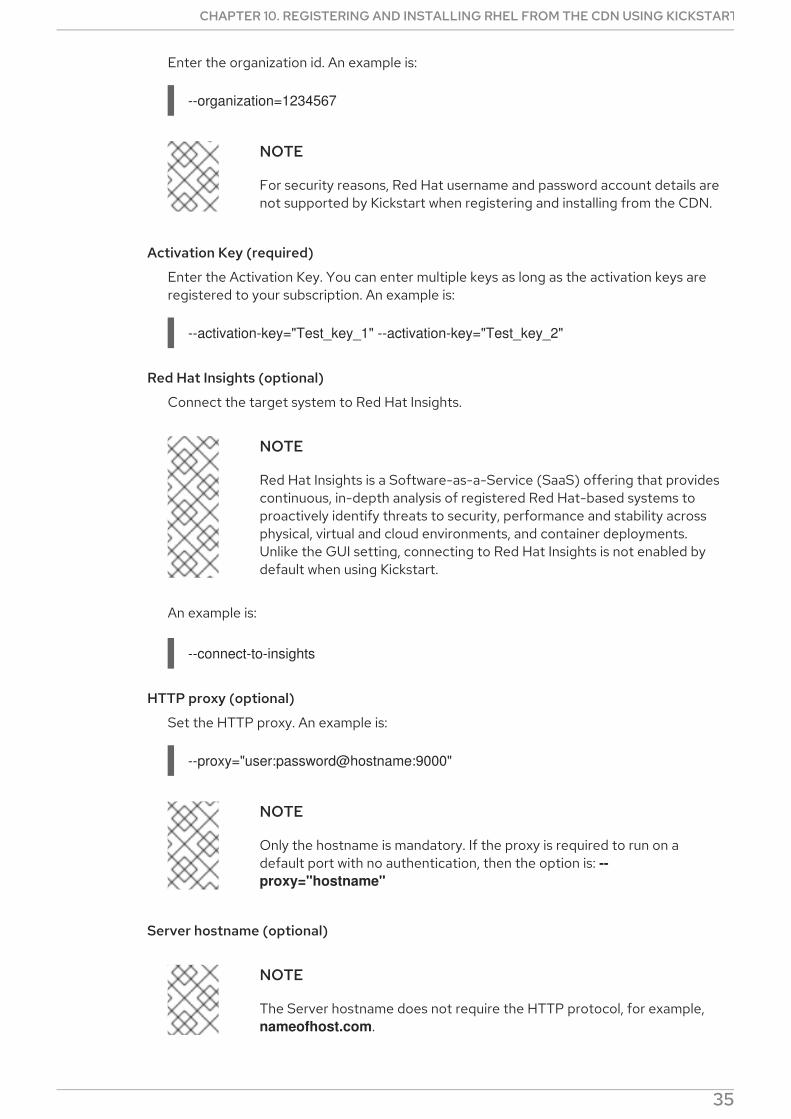
Enter the organization id. An example is:
--organization=1234567
NOTE
For security reasons, Red Hat username and password account details arenot supported by Kickstart when registering and installing from the CDN.
Activation Key (required)
Enter the Activation Key. You can enter multiple keys as long as the activation keys areregistered to your subscription. An example is:
--activation-key="Test_key_1" --activation-key="Test_key_2"
Red Hat Insights (optional)
Connect the target system to Red Hat Insights.
NOTE
Red Hat Insights is a Software-as-a-Service (SaaS) offering that providescontinuous, in-depth analysis of registered Red Hat-based systems toproactively identify threats to security, performance and stability acrossphysical, virtual and cloud environments, and container deployments.Unlike the GUI setting, connecting to Red Hat Insights is not enabled bydefault when using Kickstart.
An example is:
--connect-to-insights
HTTP proxy (optional)
Set the HTTP proxy. An example is:
--proxy="user:password@hostname:9000"
NOTE
Only the hostname is mandatory. If the proxy is required to run on adefault port with no authentication, then the option is: --proxy="hostname"
Server hostname (optional)
NOTE
The Server hostname does not require the HTTP protocol, for example, nameofhost.com.
CHAPTER 10. REGISTERING AND INSTALLING RHEL FROM THE CDN USING KICKSTART
35
Set the server hostname if you are running Satellite Server or performing internal testing.An example is:
--server-hostname="nameofhost.com"
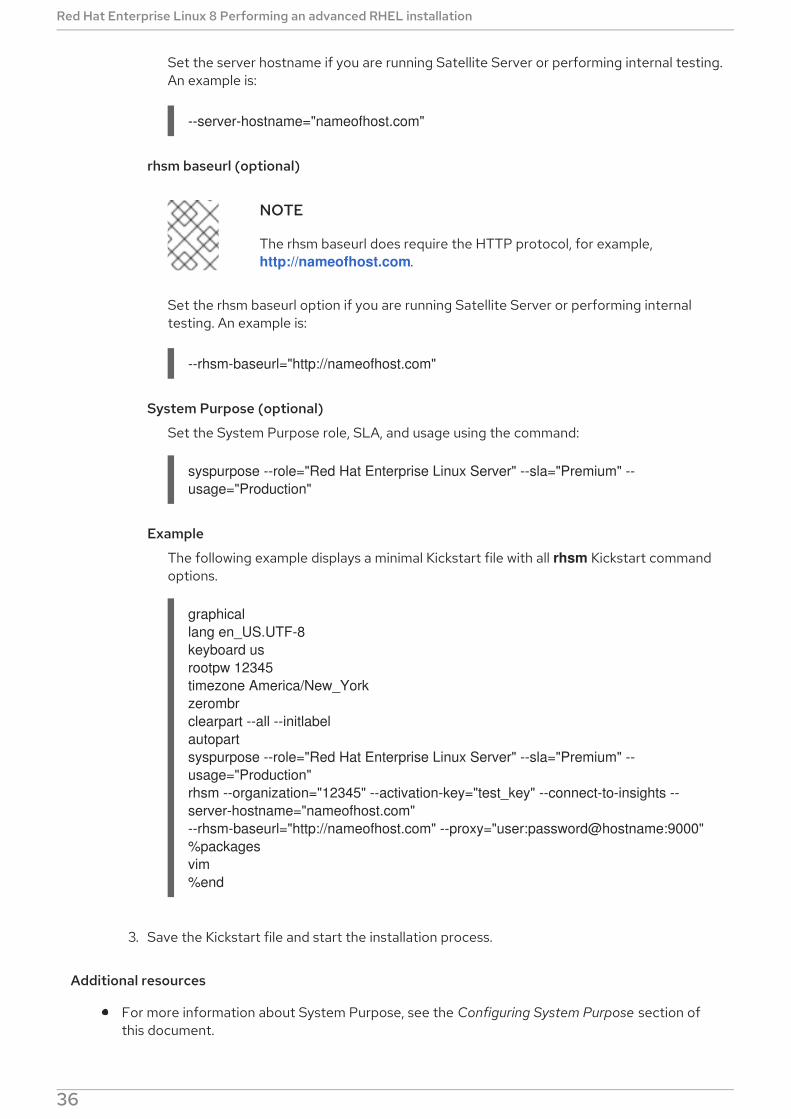
rhsm baseurl (optional)
NOTE
The rhsm baseurl does require the HTTP protocol, for example, http://nameofhost.com.
Set the rhsm baseurl option if you are running Satellite Server or performing internaltesting. An example is:
--rhsm-baseurl="http://nameofhost.com"
System Purpose (optional)
Set the System Purpose role, SLA, and usage using the command:
syspurpose --role="Red Hat Enterprise Linux Server" --sla="Premium" --usage="Production"
Example
The following example displays a minimal Kickstart file with all rhsm Kickstart commandoptions.
graphicallang en_US.UTF-8keyboard usrootpw 12345timezone America/New_Yorkzerombrclearpart --all --initlabelautopartsyspurpose --role="Red Hat Enterprise Linux Server" --sla="Premium" --usage="Production"rhsm --organization="12345" --activation-key="test_key" --connect-to-insights --server-hostname="nameofhost.com"--rhsm-baseurl="http://nameofhost.com" --proxy="user:password@hostname:9000"%packagesvim%end
3. Save the Kickstart file and start the installation process.
Additional resources
For more information about System Purpose, see the Configuring System Purpose section ofthis document.
For more information about how to start a Kickstart installation, see Starting Kickstart
Red Hat Enterprise Linux 8 Performing an advanced RHEL installation
36
For more information about how to start a Kickstart installation, see Starting Kickstartinstallations.
For information about Red Hat Insights, see the Red Hat Insights product documentation .
For information about Activation Keys, see the Understanding Activation Keys chapter of theUsing Red Hat Subscription Management document.
For information about how to set up an HTTP proxy for Subscription Manager, see the Using anHTTP proxy chapter of the Using and Configuring Red Hat Subscription Manager document.
10.2. VERIFYING YOUR SYSTEM REGISTRATION FROM THE CDN
Use this procedure to verify that your system is registered to the CDN.
Prerequisites
You have completed the registration and installation process as documented in Section 10.1,“Registering and installing RHEL from the CDN”
You have started the Kickstart installation as documented in Starting Kickstart installations .
The installed system has rebooted and a terminal window is open.
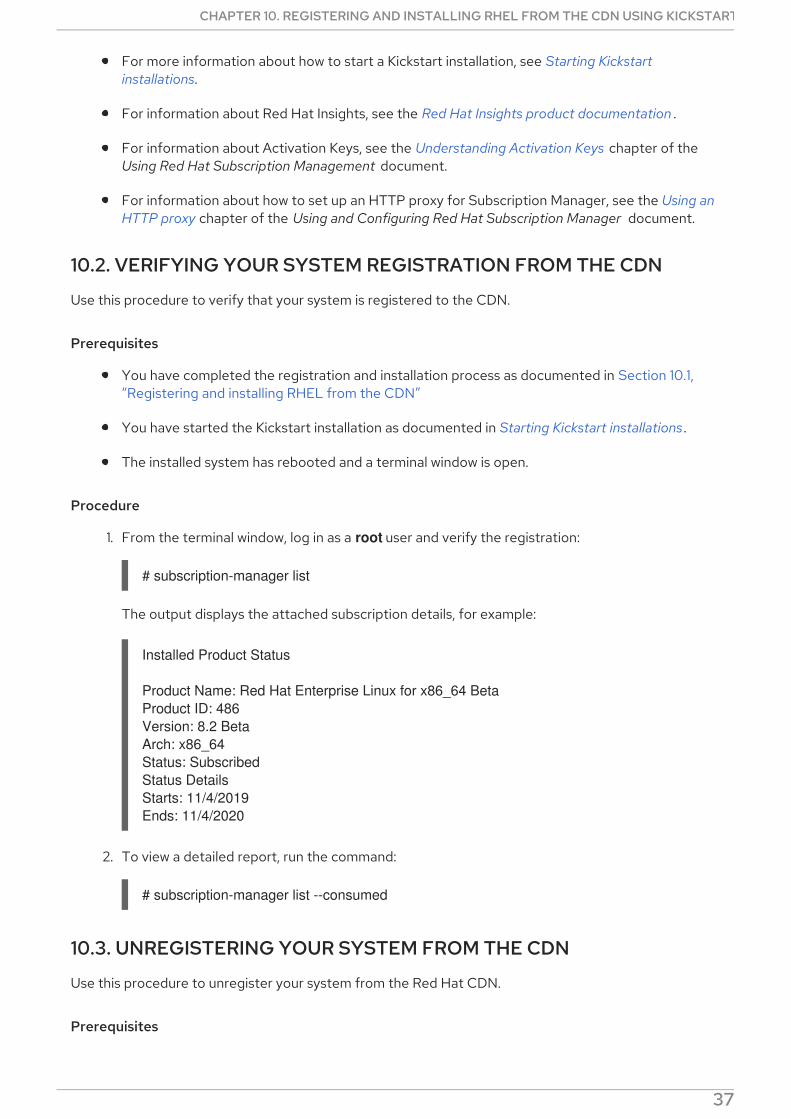
Procedure
1. From the terminal window, log in as a root user and verify the registration:
# subscription-manager list
The output displays the attached subscription details, for example:
Installed Product Status
Product Name: Red Hat Enterprise Linux for x86_64 BetaProduct ID: 486Version: 8.2 BetaArch: x86_64Status: SubscribedStatus DetailsStarts: 11/4/2019Ends: 11/4/2020
2. To view a detailed report, run the command:
# subscription-manager list --consumed
10.3. UNREGISTERING YOUR SYSTEM FROM THE CDN
Use this procedure to unregister your system from the Red Hat CDN.
Prerequisites
You have completed the registration and installation process as documented in Section 10.1,
CHAPTER 10. REGISTERING AND INSTALLING RHEL FROM THE CDN USING KICKSTART
37
You have completed the registration and installation process as documented in Section 10.1,“Registering and installing RHEL from the CDN”.
You have started the Kickstart installation as documented in Starting Kickstart installations .
The installed system has rebooted and a terminal window is open.
Procedure
1. From the terminal window, log in as a root user and unregister:
# subscription-manager unregister
The attached subscription is unregistered from the system and the connection to CDN isremoved.
Red Hat Enterprise Linux 8 Performing an advanced RHEL installation
38

PART III. PERFORMING A REMOTE RHEL INSTALLATIONUSING VNC
PART III. PERFORMING A REMOTE RHEL INSTALLATION USING VNC
39
CHAPTER 11. PERFORMING A REMOTE RHEL INSTALLATIONUSING VNC
This section describes how to perform a remote RHEL installation using Virtual Network Computing(VNC).
11.1. OVERVIEW
The graphical user interface is the recommended method of installing RHEL when you boot the systemfrom a CD, DVD, or USB flash drive, or from a network using PXE. However, many enterprise systems,for example, IBM Power Systems and IBM Z, are located in remote data center environments that arerun autonomously and are not connected to a display, keyboard, and mouse. These systems are oftenreferred to as headless systems and they are typically controlled over a network connection. The RHELinstallation program includes a Virtual Network Computing (VNC) installation that runs the graphicalinstallation on the target machine, but control of the graphical installation is handled by another systemon the network. The RHEL installation program offers two VNC installation modes: Direct and Connect.Once a connection is established, the two modes do not differ. The mode you select depends on yourenvironment.
Direct mode
In Direct mode, the RHEL installation program is configured to start on the target system and waitfor a VNC viewer that is installed on another system before proceeding. As part of the Direct modeinstallation, the IP address and port are displayed on the target system. You can use the VNC viewerto connect to the target system remotely using the IP address and port, and complete the graphicalinstallation.
Connect mode
In Connect mode, the VNC viewer is started on a remote system in listening mode. The VNC viewerwaits for an incoming connection from the target system on a specified port. When the RHELinstallation program starts on the target system, the system host name and port number areprovided by using a boot option or a Kickstart command. The installation program then establishes aconnection with the listening VNC viewer using the specified system host name and port number. Touse Connect mode, the system with the listening VNC viewer must be able to accept incomingnetwork connections.
11.2. CONSIDERATIONS
Consider the following items when performing a remote RHEL installation using VNC:
VNC client application: A VNC client application is required to perform both a VNC Direct andConnect installation. VNC client applications are available in the repositories of most Linuxdistributions, and free VNC client applications are also available for other operating systemssuch as Windows. The following VNC client applications are available in RHEL:
tigervnc is independent of your desktop environment and is installed as part of the tigervnc package.
vinagre is part of the GNOME desktop environment and is installed as part of the vinagrepackage.
NOTE
A VNC server is included in the installation program and doesn’t need to be installed.
Red Hat Enterprise Linux 8 Performing an advanced RHEL installation
40
Network and firewall:
If the target system is not allowed inbound connections by a firewall, then you must useConnect mode or disable the firewall. Disabling a firewall can have security implications.
If the system that is running the VNC viewer is not allowed incoming connections by afirewall, then you must use Direct mode, or disable the firewall. Disabling a firewall can havesecurity implications. See the Security hardening document for more information onconfiguring the firewall.
Custom Boot Options: You must specify custom boot options to start a VNC installation andthe installation instructions might differ depending on your system architecture.
VNC in Kickstart installations: You can use VNC-specific commands in Kickstart installations.Using only the vnc command runs a RHEL installation in Direct mode. Additional options areavailable to set up an installation using Connect mode. For more information about Kickstartinstallations, see Section 3.1, “What are Kickstart installations” .
11.3. PERFORMING A REMOTE RHEL INSTALLATION IN VNC DIRECTMODE
Use this procedure to perform a remote RHEL installation in VNC Direct mode. Direct mode expects theVNC viewer to initiate a connection to the target system that is being installed with RHEL. In thisprocedure, the system with the VNC viewer is called the remote system. You are prompted by the RHELinstallation program to initiate the connection from the VNC viewer on the remote system to the targetsystem.
NOTE
This procedure uses TigerVNC as the VNC viewer. Specific instructions for other viewersmight differ, but the general principles apply.
Prerequisites
As root, you have installed a VNC viewer on a remote system, for example:
# yum install tigervnc
You have set up a network boot server and booted the installation on the target system. Formore information, see Section 14.1, “Network install overview” .
Procedure
1. From the RHEL boot menu on the target system, press the Tab key on your keyboard to editthe boot options.
2. Append the inst.vnc option to the end of the command line.
a. If you want to restrict VNC access to the system that is being installed, add the inst.vncpassword=PASSWORD boot option to the end of the command line. ReplacePASSWORD with the password you want to use for the installation. The VNC passwordmust be between 6 and 8 characters long.
IMPORTANT
CHAPTER 11. PERFORMING A REMOTE RHEL INSTALLATION USING VNC
41
IMPORTANT
Use a temporary password for the inst.vncpassword= option. It should notbe an existing or root password.
3. Press Enter to start the installation. The target system initializes the installation program andstarts the necessary services. When the system is ready, a message is displayed providing the IPaddress and port number of the system.
4. Open the VNC viewer on the remote system.
5. Enter the IP address and the port number into the VNC server field.
6. Click Connect.
7. Enter the VNC password and click OK. A new window opens with the VNC connectionestablished, displaying the RHEL installation menu. From this window, you can install RHEL onthe target system using the graphical user interface.
Additional resources
For more information on how to perform a RHEL installation using the graphical user interface,see the Installing RHEL using the Graphical User Interface section in the Performing a standardRHEL installation document.
11.4. PERFORMING A REMOTE RHEL INSTALLATION IN VNC CONNECTMODE
Use this procedure to perform a remote RHEL installation in VNC Connect mode. In Connect mode, thetarget system that is being installed with RHEL initiates a connect to the VNC viewer that is installed onanother system. In this procedure, the system with the VNC viewer is called the remote system.
NOTE
This procedure uses TigerVNC as the VNC viewer. Specific instructions for other viewersmight differ, but the general principles apply.
Prerequisites
As root, you have installed a VNC viewer on a remote system, for example:
# yum install tigervnc
You have set up a network boot server to start the installation on the target system. For moreinformation, see Section 14.1, “Network install overview” .
You have configured the target system to use the boot options for a VNC Connect installation.
You have verified that the remote system with the VNC viewer is configured to accept anincoming connection on the required port. Verification is dependent on your network andsystem configuration. For more information, see the Security hardening and Securing networksdocuments.
Procedure
Red Hat Enterprise Linux 8 Performing an advanced RHEL installation
42
1. Start the VNC viewer on the remote system in listening mode by running the followingcommand:
$ vncviewer -listen PORT
2. Replace PORT with the port number used for the connection.
3. The terminal displays a message indicating that it is waiting for an incoming connection from thetarget system.
TigerVNC Viewer 64-bit v1.8.0Built on: 2017-10-12 09:20Copyright (C) 1999-2017 TigerVNC Team and many others (see README.txt)See http://www.tigervnc.org for information on TigerVNC.
Thu Jun 27 11:30:57 2019 main: Listening on port 5500
4. Boot the target system from the network.
5. From the RHEL boot menu on the target system, press the Tab key on your keyboard to editthe boot options.
6. Append the inst.vnc inst.vncconnect=HOST:PORT option to the end of the command line.
7. Replace HOST with the IP address of the remote system that is running the listening VNCviewer, and PORT with the port number that the VNC viewer is listening on.
8. Press Enter to start the installation. The system initializes the installation program and startsthe necessary services. When the initialization process is finished, the installation programattempts to connect to the IP address and port provided.
9. When the connection is successful, a new window opens with the VNC connection established,displaying the RHEL installation menu. From this window, you can install RHEL on the targetsystem using the graphical user interface.
Additional resources
For more information on how to perform a RHEL installation using the graphical user interface,see the Installing RHEL using the Graphical User Interface section in the Performing a standardRHEL installation document.
CHAPTER 11. PERFORMING A REMOTE RHEL INSTALLATION USING VNC
43

PART IV. ADVANCED CONFIGURATION OPTIONS
Red Hat Enterprise Linux 8 Performing an advanced RHEL installation
44
CHAPTER 12. CONFIGURING SYSTEM PURPOSEYou use System Purpose to record the intended use of a Red Hat Enterprise Linux 8 system. SettingSystem Purpose enables the entitlement server to auto-attach the most appropriate subscription. Thissection describes how to configure System Purpose using Kickstart.
Benefits include:
In-depth system-level information for system administrators and business operations.
Reduced overhead when determining why a system was procured and its intended purpose.
Improved customer experience of Subscription Manager auto-attach as well as automateddiscovery and reconciliation of system usage.
12.1. OVERVIEW
You can enter System Purpose data in one of the following ways:
During image creation
During a GUI installation when using Connect to Red Hat to register your system and attachyour Red Hat subscription
During a Kickstart installation when using Kickstart automation scripts
After installation using the syspurpose command-line (CLI) tool
To record the intended purpose of your system, you can configure the following components of SystemPurpose. The selected values are used by the entitlement server upon registration to attach the mostsuitable subscription for your system.
Role
Red Hat Enterprise Linux Server
Red Hat Enterprise Linux Workstation
Red Hat Enterprise Linux Compute Node
Service Level Agreement
Premium
Standard
Self-Support
Usage
Production
Development/Test
Disaster Recovery
Additional resources
CHAPTER 12. CONFIGURING SYSTEM PURPOSE
45

For more information about Image Builder, see the Composing a customized RHEL systemimage document.
For more information about Kickstart, see the Performing an advanced RHEL installationdocument.
For more information about Subscription Manager, see the Using and Configuring Red HatSubscription Manager document.
12.2. CONFIGURING SYSTEM PURPOSE IN A KICKSTART FILE
Follow the steps in this procedure to use the syspurpose command to configure System Purpose in aKickstart configuration file.
NOTE
While it is strongly recommended that you configure System Purpose, it is an optionalfeature of the Red Hat Enterprise Linux installation program. If you want to enableSystem Purpose after the installation completes, you can do so using the syspurposecommand-line tool.
The following actions are available:
role
Set the intended role of the system. This action uses the following format:
syspurpose --role=
The assigned role can be:
Red Hat Enterprise Linux Server
Red Hat Enterprise Linux Workstation
Red Hat Enterprise Linux Compute Node
SLA
Set the intended SLA of the system. This action uses the following format:
syspurpose --sla=
The assigned sla can be:
Premium
Standard
Self-Support
usage
Set the intended usage of the system. This action uses the following format:
syspurpose --usage=
Red Hat Enterprise Linux 8 Performing an advanced RHEL installation
46

The assigned usage can be:
Production
Development/Test
Disaster Recovery
12.3. RELATED INFORMATION
For information about configuring System Purpose using the graphical user interface, or the syspurpose command-line utility, see the Performing a standard RHEL installation document.
CHAPTER 12. CONFIGURING SYSTEM PURPOSE
47
CHAPTER 13. UPDATING DRIVERS DURING INSTALLATIONThis section describes how to complete a driver update during the Red Hat Enterprise Linux installationprocess.
NOTE
This is an optional step of the installation process. Red Hat recommends that you do notperform a driver update unless it is necessary.
13.1. PREREQUISITE
You have been notified by Red Hat, your hardware vendor, or a trusted third-party vendor that a driverupdate is required during Red Hat Enterprise Linux installation.
13.2. OVERVIEW
Red Hat Enterprise Linux supports drivers for many hardware devices but some newly-released driversmay not be supported. A driver update should only be performed if an unsupported driver prevents theinstallation from completing. Updating drivers during installation is typically only required to support aparticular configuration. For example, installing drivers for a storage adapter card that provides accessto your system’s storage devices.
WARNING
Driver update disks may disable conflicting kernel drivers. In rare cases, unloading akernel module may cause installation errors.
13.3. TYPES OF DRIVER UPDATE
Red Hat, your hardware vendor, or a trusted third party provides the driver update as an ISO image file.Once you receive the ISO image file, choose the type of driver update.
Types of driver update
Automatic
The recommended driver update method; a storage device (including a CD, DVD, or USB flash drive)labeled OEMDRV is physically connected to the system. If the OEMDRV storage device is presentwhen the installation starts, it is treated as a driver update disk, and the installation programautomatically loads its drivers.
Assisted
The installation program prompts you to locate a driver update. You can use any local storage devicewith a label other than OEMDRV. The inst.dd boot option is specified when starting the installation. Ifyou use this option without any parameters, the installation program displays all of the storagedevices connected to the system, and prompts you to select a device that contains a driver update.
Manual
Manually specify a path to a driver update image or an RPM package. You can use any local storage
Red Hat Enterprise Linux 8 Performing an advanced RHEL installation
48
device with a label other than OEMDRV, or a network location accessible from the installationsystem. The inst.dd=location boot option is specified when starting the installation, where location isthe path to a driver update disk or ISO image. When you specify this option, the installation programattempts to load any driver updates found at the specified location. With manual driver updates, youcan specify local storage devices, or a network location (HTTP, HTTPS or FTP server).
NOTE
You can use both inst.dd=location and inst.dd simultaneously, where location isthe path to a driver update disk or ISO image. In this scenario, the installationprogram attempts to load any available driver updates from the location and alsoprompts you to select a device that contains the driver update.
Initialize the network using the ip= option when loading a driver update from anetwork location.
Limitations
On UEFI systems with the Secure Boot technology enabled, all drivers must be signed with a validcertificate. Red Hat drivers are signed by one of Red Hat’s private keys and authenticated by itscorresponding public key in the kernel. If you load additional, separate drivers, verify that they aresigned.
13.4. PREPARING A DRIVER UPDATE
This procedure describes how to prepare a driver update on a CD and DVD.
Prerequisites
You received the driver update ISO image from Red Hat, your hardware vendor, or a trustedthird-party vendor.
You burned the driver update ISO image to a CD or DVD.
WARNING
If only a single ISO image file ending in .iso is available on the CD or DVD, the burnprocess has not been successful. See your system’s burning softwaredocumentation for instructions on how to burn ISO images to a CD or DVD.
Procedure
1. Insert the driver update CD or DVD into your system’s CD/DVD drive, and browse it using thesystem’s file manager tool.
2. Verify that a single file rhdd3 is available. rhdd3 is a signature file that contains the driverdescription and a directory named rpms, which contains the RPM packages with the actualdrivers for various architectures.
CHAPTER 13. UPDATING DRIVERS DURING INSTALLATION
49
13.5. PERFORMING AN AUTOMATIC DRIVER UPDATE
This procedure describes how to perform an automatic driver update during installation.
Prerequisites
You have placed the driver update image on a standard disk partition with an OEMDRV label orburnt the OEMDRV driver update image to a CD or DVD. Advanced storage, such as RAID orLVM volumes, may not be accessible during the driver update process.
You have connected a block device with an OEMDRV volume label to your system, or insertedthe prepared CD or DVD into your system’s CD/DVD drive before starting the installationprocess.
Procedure
1. Once you have completed the prerequisite steps, the drivers are automatically loaded when theinstallation program starts, and installed on the system during the installation process.
13.6. PERFORMING AN ASSISTED DRIVER UPDATE
This procedure describes how to perform an assisted driver update during installation.
Prerequisites
You have connected a block device without an OEMDRV volume label to your system and copied thedriver disk image to this device, or you have prepared a driver update CD or DVD and inserted it intoyour system’s CD/DVD drive before starting the installation process.
NOTE
If you burned an ISO image file to a CD or DVD but it does not have the OEMDRV volumelabel, you can use the inst.dd option with no arguments. The installation programprovides an option to scan and select drivers from the CD or DVD. In this scenario, theinstallation program does not prompt you to select a driver update ISO image. Anotherscenario is to use the CD or DVD with the inst.dd=location boot option; this allows theinstallation program to automatically scan the CD or DVD for driver updates. For moreinformation, see Section 13.7, “Performing a manual driver update” .
Procedure
1. From the boot menu window, press the Tab key on your keyboard to display the boot commandline.
2. Append the inst.dd boot option to the command line and press Enter to execute the bootprocess.
3. From the menu, select a local disk partition or a CD or DVD device. The installation programscans for ISO files, or driver update RPM packages.
4. Optional: Select the driver update ISO file.
NOTE
Red Hat Enterprise Linux 8 Performing an advanced RHEL installation
50
NOTE
This step is not required if the selected device or partition contains driver updateRPM packages rather than an ISO image file, for example, an optical drivecontaining a driver update CD or DVD.
5. Select the required drivers.
a. Use the number keys on your keyboard to toggle the driver selection.
b. Press c to install the selected driver. The selected driver is loaded and the installationprocess starts.
13.7. PERFORMING A MANUAL DRIVER UPDATE
This procedure describes how to perform a manual driver update during installation.
Prerequisites
Place the driver update ISO image file on a USB flash drive or a web server, and connect it toyour computer.
Procedure
1. From the boot menu window, press the Tab key on your keyboard to display the boot commandline.
2. Append the inst.dd=location boot option to the command line, where location is a path to thedriver update. Typically, the image file is located on a web server, for example,http://server.example.com/dd.iso, or on a USB flash drive, for example, /dev/sdb1. It is alsopossible to specify an RPM package containing the driver update, for examplehttp://server.example.com/dd.rpm.
3. Press Enter to execute the boot process. The drivers available at the specified location areautomatically loaded and the installation process starts.
Additional resources
For more information about the inst.dd boot option, see the upstream inst.dd boot optioncontent.
For more information about all boot options, see the upstream Boot Options content.
13.8. DISABLING A DRIVER
This procedure describes how to disable a malfunctioning driver.
Prerequisites
You have booted the installation program boot menu.
Procedure
1. From the boot menu, press the Tab key on your keyboard to display the boot command line.
CHAPTER 13. UPDATING DRIVERS DURING INSTALLATION
51

2. Append the modprobe.blacklist=driver_name boot option to the command line.
3. Replace driver_name with the name of the driver or drivers you want to disable, for example:
modprobe.blacklist=ahci
Drivers disabled using the modprobe.blacklist= boot option remain disabled on the installedsystem and appear in the /etc/modprobe.d/anaconda-blacklist.conf file.
4. Press Enter to execute the boot process.
Red Hat Enterprise Linux 8 Performing an advanced RHEL installation
52

CHAPTER 14. PREPARING TO INSTALL FROM THE NETWORKUSING PXE
This section describes how to configure TFTP and DHCP on a PXE server to enable PXE boot andnetwork installation.
14.1. NETWORK INSTALL OVERVIEW
A network installation allows you to install Red Hat Enterprise Linux to a system that has access to aninstallation server. At a minimum, two systems are required for a network installation:
PXE Server: A system running a DHCP server, a TFTP server, and an HTTP, HTTPS, FTP, or NFS server.While each server can run on a different physical system, the procedures in this section assume a singlesystem is running all servers.
Client: The system to which you are installing Red Hat Enterprise Linux. Once installation starts, theclient queries the DHCP server, receives the boot files from the TFTP server, and downloads theinstallation image from the HTTP, HTTPS, FTP or NFS server. Unlike other installation methods, theclient does not require any physical boot media for the installation to start.
NOTE
To boot a client from the network, configure it in BIOS/UEFI or a quick boot menu. Onsome hardware, the option to boot from a network might be disabled, or not available.
The workflow steps to prepare to install Red Hat Enterprise Linux from a network using PXE are asfollows:
Steps
1. Export the installation ISO image (or the installation tree) to an NFS, HTTPS, HTTP, or FTPserver.
2. Configure the TFTP server and DHCP server, and start the TFTP service on the PXE server.
3. Boot the client, and start the installation.
IMPORTANT
The GRUB2 boot loader supports a network boot from HTTP in addition to a TFTPserver. Sending the boot files (the kernel and initial RAM disk - vmlinuz and initrd) overthis protocol might be slow and result in timeout failures. An HTTP server does not carrythis risk, but it is recommended that you use a TFTP server when sending the boot files.
Additional resources
To export the installation ISO image to a network location, see Chapter 6, Creating installationsources for Kickstart installations for information.
To configure the TFTP server and DHCP server, and start the TFTP service, see Section 14.2,“Configuring a TFTP server for BIOS-based clients”, Section 14.3, “Configuring a TFTP serverfor UEFI-based clients”, and Section 14.4, “Configuring a network server for IBM Powersystems” for information.
CHAPTER 14. PREPARING TO INSTALL FROM THE NETWORK USING PXE
53
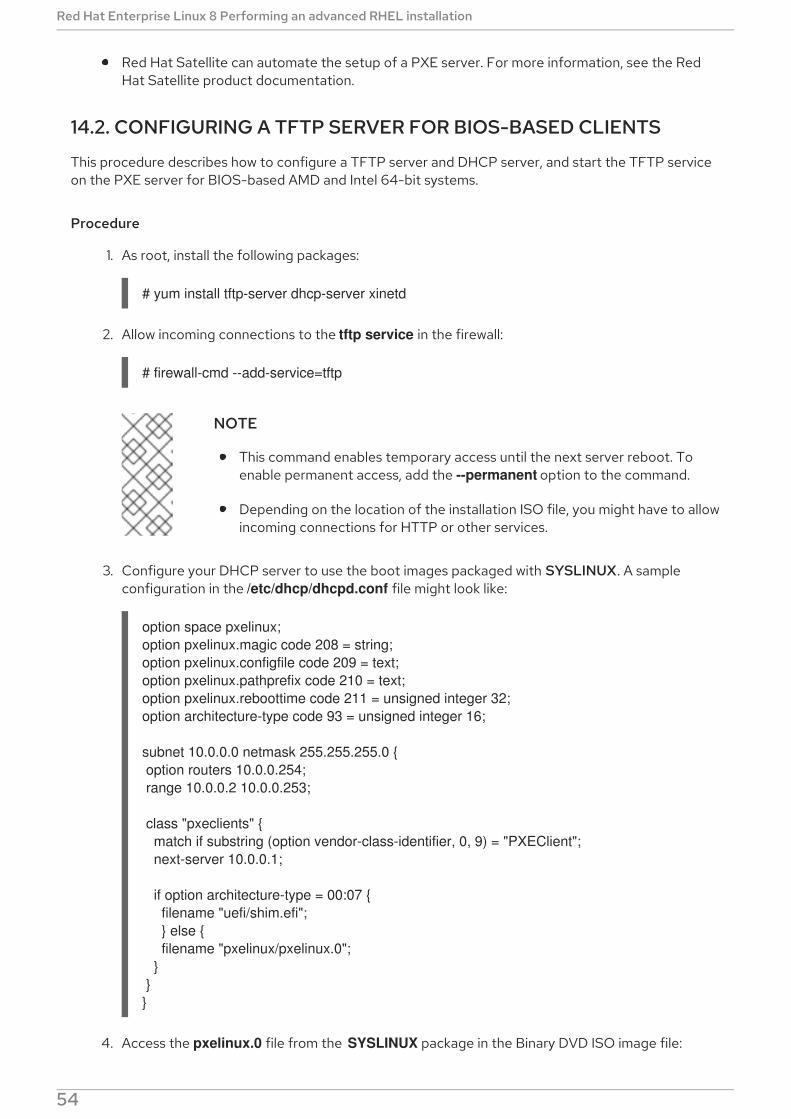
Red Hat Satellite can automate the setup of a PXE server. For more information, see the RedHat Satellite product documentation.
14.2. CONFIGURING A TFTP SERVER FOR BIOS-BASED CLIENTS
This procedure describes how to configure a TFTP server and DHCP server, and start the TFTP serviceon the PXE server for BIOS-based AMD and Intel 64-bit systems.
Procedure
1. As root, install the following packages:
# yum install tftp-server dhcp-server xinetd
2. Allow incoming connections to the tftp service in the firewall:
# firewall-cmd --add-service=tftp
NOTE
This command enables temporary access until the next server reboot. Toenable permanent access, add the --permanent option to the command.
Depending on the location of the installation ISO file, you might have to allowincoming connections for HTTP or other services.
3. Configure your DHCP server to use the boot images packaged with SYSLINUX. A sampleconfiguration in the /etc/dhcp/dhcpd.conf file might look like:
option space pxelinux;option pxelinux.magic code 208 = string;option pxelinux.configfile code 209 = text;option pxelinux.pathprefix code 210 = text;option pxelinux.reboottime code 211 = unsigned integer 32;option architecture-type code 93 = unsigned integer 16;
subnet 10.0.0.0 netmask 255.255.255.0 { option routers 10.0.0.254; range 10.0.0.2 10.0.0.253;
class "pxeclients" { match if substring (option vendor-class-identifier, 0, 9) = "PXEClient"; next-server 10.0.0.1;
if option architecture-type = 00:07 { filename "uefi/shim.efi"; } else { filename "pxelinux/pxelinux.0"; } }}
4. Access the pxelinux.0 file from the SYSLINUX package in the Binary DVD ISO image file:
Red Hat Enterprise Linux 8 Performing an advanced RHEL installation
54
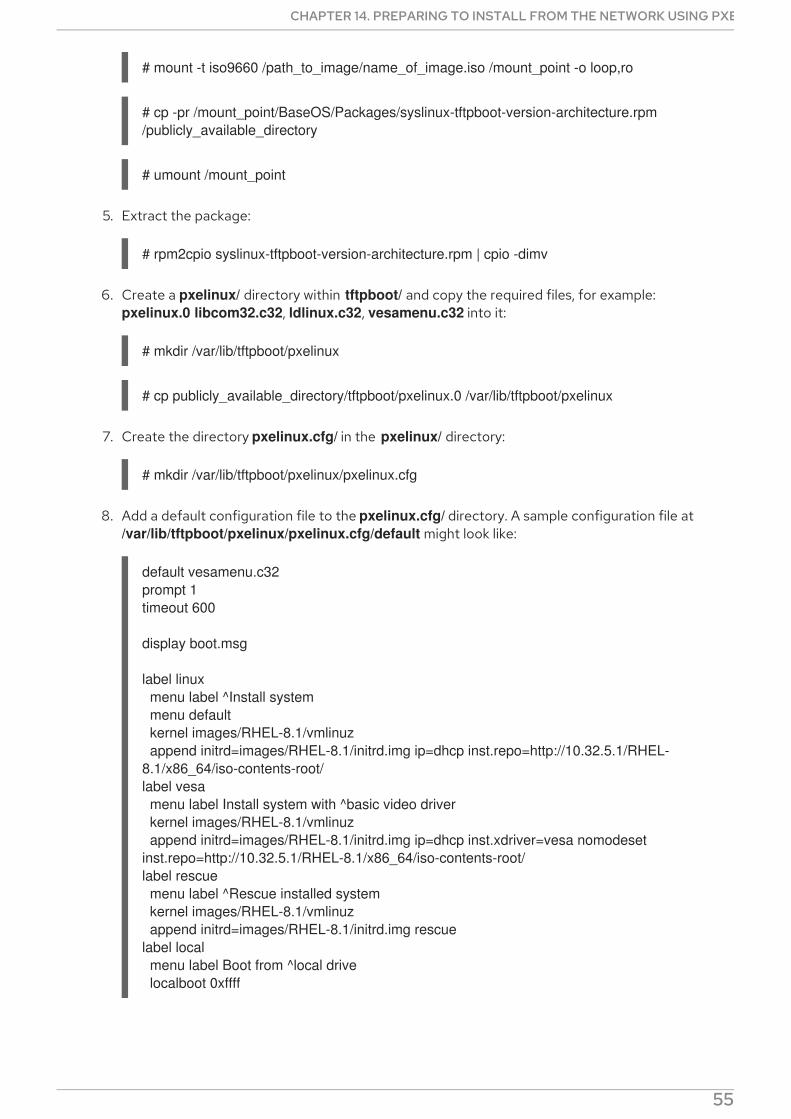
# mount -t iso9660 /path_to_image/name_of_image.iso /mount_point -o loop,ro
# cp -pr /mount_point/BaseOS/Packages/syslinux-tftpboot-version-architecture.rpm /publicly_available_directory
# umount /mount_point
5. Extract the package:
# rpm2cpio syslinux-tftpboot-version-architecture.rpm | cpio -dimv
6. Create a pxelinux/ directory within tftpboot/ and copy the required files, for example: pxelinux.0 libcom32.c32, ldlinux.c32, vesamenu.c32 into it:
# mkdir /var/lib/tftpboot/pxelinux
# cp publicly_available_directory/tftpboot/pxelinux.0 /var/lib/tftpboot/pxelinux
7. Create the directory pxelinux.cfg/ in the pxelinux/ directory:
# mkdir /var/lib/tftpboot/pxelinux/pxelinux.cfg
8. Add a default configuration file to the pxelinux.cfg/ directory. A sample configuration file at /var/lib/tftpboot/pxelinux/pxelinux.cfg/default might look like:
default vesamenu.c32prompt 1timeout 600
display boot.msg
label linux menu label ^Install system menu default kernel images/RHEL-8.1/vmlinuz append initrd=images/RHEL-8.1/initrd.img ip=dhcp inst.repo=http://10.32.5.1/RHEL-8.1/x86_64/iso-contents-root/label vesa menu label Install system with ^basic video driver kernel images/RHEL-8.1/vmlinuz append initrd=images/RHEL-8.1/initrd.img ip=dhcp inst.xdriver=vesa nomodeset inst.repo=http://10.32.5.1/RHEL-8.1/x86_64/iso-contents-root/label rescue menu label ^Rescue installed system kernel images/RHEL-8.1/vmlinuz append initrd=images/RHEL-8.1/initrd.img rescuelabel local menu label Boot from ^local drive localboot 0xffff
NOTE
CHAPTER 14. PREPARING TO INSTALL FROM THE NETWORK USING PXE
55

NOTE
The installation program cannot boot without its runtime image. Use the inst.stage2 boot option to specify location of the image. Alternatively, youcan use the inst.repo= option to specify the image as well as the installationsource.
The installation source location used with inst.repo must contain a valid .treeinfo file.
When you select the RHEL8 installation DVD as the installation source, the .treeinfo file points to the BaseOS and the AppStream repositories. You canuse a single inst.repo option to load both repositories.
9. Create a subdirectory to store the boot image files in the /var/lib/tftpboot/ directory, and copythe boot image files to the directory. In this example, we use the directory /var/lib/tftpboot/pxelinux/images/RHEL-8.1/:
# mkdir -p /var/lib/tftpboot/pxelinux/images/RHEL-8.1/# cp /path_to_x86_64_images/pxeboot/{vmlinuz,initrd.img} /var/lib/tftpboot/pxelinux/images/RHEL-8.1/
10. Start and enable the dhcpd service:
# systemctl start dhcpd# systemctl enable dhcpd
11. Start and enable the xinetd service that manages the tftp service:
# systemctl start xinetd# systemctl enable xinetd
The PXE boot server is now ready to serve PXE clients. You can start the client (the system towhich you are installing Red Hat Enterprise Linux), select PXE Boot when prompted to specify aboot source, and start the network installation.
14.3. CONFIGURING A TFTP SERVER FOR UEFI-BASED CLIENTS
This procedure describes how to configure a TFTP server and DHCP server, and start the TFTP serviceon the PXE server for UEFI-based AMD64, Intel 64, and 64-bit ARM systems.
PROCEDURE
Red Hat Enterprise Linux 8 UEFI PXE boot supports a lowercase file format for a MAC-based grub menu file. For example, the MAC address file format for grub2 is grub.cfg-01-aa-bb-cc-dd-ee-ff
1. As root, install the following packages:
# yum install tftp-server dhcp-server xinetd
2. Allow incoming connections to the tftp service in the firewall:
Red Hat Enterprise Linux 8 Performing an advanced RHEL installation
56
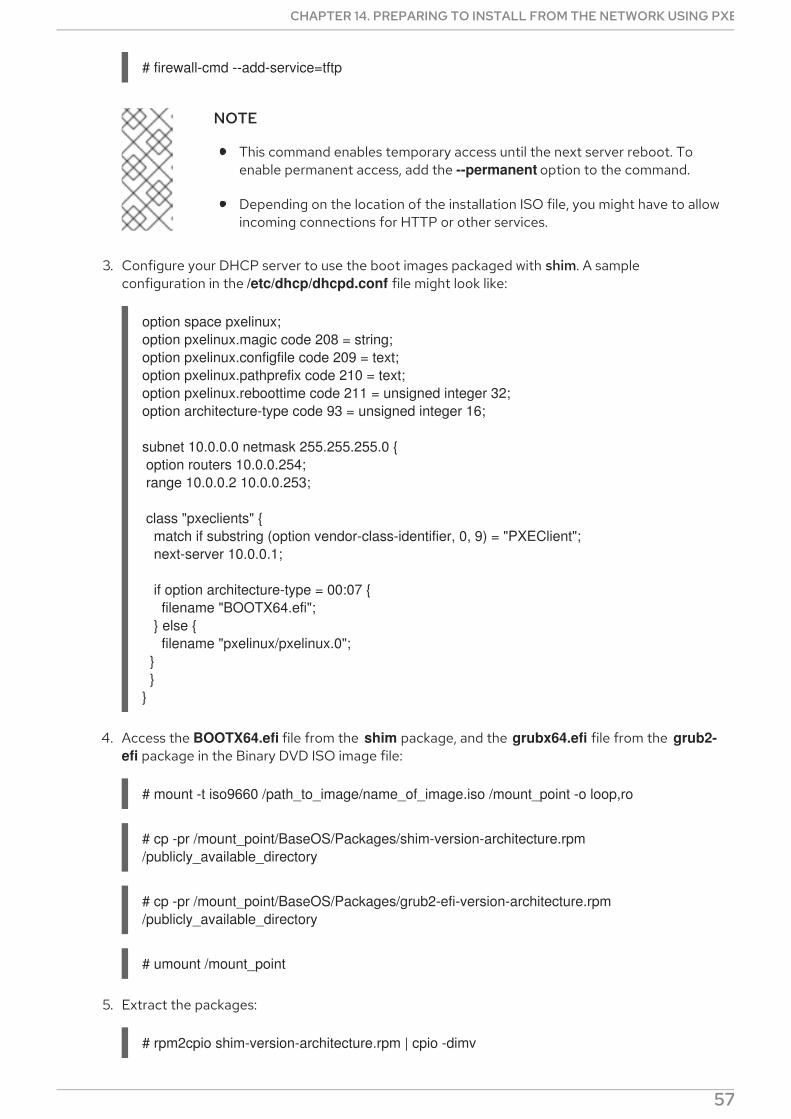
# firewall-cmd --add-service=tftp
NOTE
This command enables temporary access until the next server reboot. Toenable permanent access, add the --permanent option to the command.
Depending on the location of the installation ISO file, you might have to allowincoming connections for HTTP or other services.
3. Configure your DHCP server to use the boot images packaged with shim. A sampleconfiguration in the /etc/dhcp/dhcpd.conf file might look like:
option space pxelinux;option pxelinux.magic code 208 = string;option pxelinux.configfile code 209 = text;option pxelinux.pathprefix code 210 = text;option pxelinux.reboottime code 211 = unsigned integer 32;option architecture-type code 93 = unsigned integer 16;
subnet 10.0.0.0 netmask 255.255.255.0 { option routers 10.0.0.254; range 10.0.0.2 10.0.0.253;
class "pxeclients" { match if substring (option vendor-class-identifier, 0, 9) = "PXEClient"; next-server 10.0.0.1;
if option architecture-type = 00:07 { filename "BOOTX64.efi"; } else { filename "pxelinux/pxelinux.0"; } }}
4. Access the BOOTX64.efi file from the shim package, and the grubx64.efi file from the grub2-efi package in the Binary DVD ISO image file:
# mount -t iso9660 /path_to_image/name_of_image.iso /mount_point -o loop,ro
# cp -pr /mount_point/BaseOS/Packages/shim-version-architecture.rpm /publicly_available_directory
# cp -pr /mount_point/BaseOS/Packages/grub2-efi-version-architecture.rpm /publicly_available_directory
# umount /mount_point
5. Extract the packages:
# rpm2cpio shim-version-architecture.rpm | cpio -dimv
CHAPTER 14. PREPARING TO INSTALL FROM THE NETWORK USING PXE
57
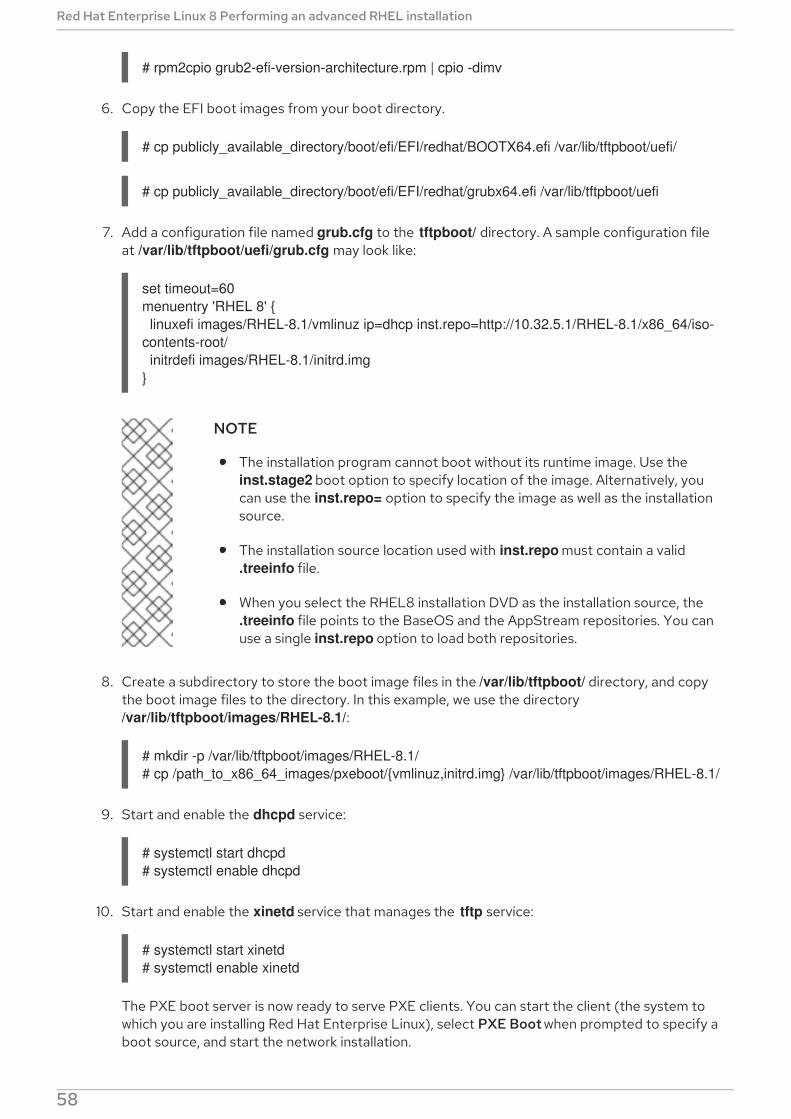
# rpm2cpio grub2-efi-version-architecture.rpm | cpio -dimv
6. Copy the EFI boot images from your boot directory.
# cp publicly_available_directory/boot/efi/EFI/redhat/BOOTX64.efi /var/lib/tftpboot/uefi/
# cp publicly_available_directory/boot/efi/EFI/redhat/grubx64.efi /var/lib/tftpboot/uefi
7. Add a configuration file named grub.cfg to the tftpboot/ directory. A sample configuration fileat /var/lib/tftpboot/uefi/grub.cfg may look like:
set timeout=60menuentry 'RHEL 8' { linuxefi images/RHEL-8.1/vmlinuz ip=dhcp inst.repo=http://10.32.5.1/RHEL-8.1/x86_64/iso-contents-root/ initrdefi images/RHEL-8.1/initrd.img}
NOTE
The installation program cannot boot without its runtime image. Use the inst.stage2 boot option to specify location of the image. Alternatively, youcan use the inst.repo= option to specify the image as well as the installationsource.
The installation source location used with inst.repo must contain a valid .treeinfo file.
When you select the RHEL8 installation DVD as the installation source, the .treeinfo file points to the BaseOS and the AppStream repositories. You canuse a single inst.repo option to load both repositories.
8. Create a subdirectory to store the boot image files in the /var/lib/tftpboot/ directory, and copythe boot image files to the directory. In this example, we use the directory /var/lib/tftpboot/images/RHEL-8.1/:
# mkdir -p /var/lib/tftpboot/images/RHEL-8.1/# cp /path_to_x86_64_images/pxeboot/{vmlinuz,initrd.img} /var/lib/tftpboot/images/RHEL-8.1/
9. Start and enable the dhcpd service:
# systemctl start dhcpd# systemctl enable dhcpd
10. Start and enable the xinetd service that manages the tftp service:
# systemctl start xinetd# systemctl enable xinetd
The PXE boot server is now ready to serve PXE clients. You can start the client (the system towhich you are installing Red Hat Enterprise Linux), select PXE Boot when prompted to specify aboot source, and start the network installation.
Red Hat Enterprise Linux 8 Performing an advanced RHEL installation
58

Additional resources
For more information about shim, see the upstream documentation: Using the Shim Program .
14.4. CONFIGURING A NETWORK SERVER FOR IBM POWER SYSTEMS
This procedure describes how to configure a network boot server for IBM Power systems using GRUB2.
Procedure
1. As root, install the following packages:
# yum install tftp-server dhcp-server xinetd
2. Allow incoming connections to the tftp service in the firewall:
# firewall-cmd --add-service=tftp
NOTE
This command enables temporary access until the next server reboot. Toenable permanent access, add the --permanent option to the command.
Depending on the location of the installation ISO file, you might have to allowincoming connections for HTTP or other services.
3. Create a GRUB2 network boot directory inside the tftp root:
# grub2-mknetdir --net-directory=/var/lib/tftpbootNetboot directory for powerpc-ieee1275 created. Configure your DHCP server to point to /boot/grub2/powerpc-ieee1275/core.elf
NOTE
The command’s output informs you of the file name that needs to be configuredin your DHCP configuration, described in this procedure.
a. If the PXE server runs on an x86 machine, the grub2-ppc64-modules must be installedbefore creating a GRUB2 network boot directory inside the tftp root:
# yum install grub2-ppc64-modules
4. Create a GRUB2 configuration file: /var/lib/tftpboot/boot/grub2/grub.cfg. Below is an exampleconfiguration file:
set default=0set timeout=5
echo -e "\nWelcome to the Red Hat Enterprise Linux 8 installer!\n\n"
menuentry 'Red Hat Enterprise Linux 8' { linux grub2-ppc64/vmlinuz ro ip=dhcp inst.repo=http://10.32.5.1/RHEL-8.1/x86_64/iso-
CHAPTER 14. PREPARING TO INSTALL FROM THE NETWORK USING PXE
59
contents-root/ initrd grub2-ppc64/initrd.img}
NOTE
The installation program cannot boot without its runtime image. Use the inst.stage2 boot option to specify location of the image. Alternatively, youcan use the inst.repo= option to specify the image as well as the installationsource.
The installation source location used with inst.repo must contain a valid .treeinfo file.
When you select the RHEL8 installation DVD as the installation source, the .treeinfo file points to the BaseOS and the AppStream repositories. You canuse a single inst.repo option to load both repositories.
5. Mount the Binary DVD ISO image using the command:
# mount -t iso9660 /path_to_image/name_of_iso/ /mount_point -o loop,ro
6. Create a directory and copy the initrd.img and vmlinuz files from Binary DVD ISO image intoit, for example:
# cp /mount_point/ppc/ppc64/{initrd.img,vmlinuz} /var/lib/tftpboot/grub2-ppc64/
7. Configure your DHCP server to use the boot images packaged with GRUB2. A sampleconfiguration in the /etc/dhcp/dhcpd.conf file might look like:
subnet 192.168.0.1 netmask 255.255.255.0 { allow bootp; option routers 192.168.0.5; group { #BOOTP POWER clients filename "boot/grub2/powerpc-ieee1275/core.elf"; host client1 { hardware ethernet 01:23:45:67:89:ab; fixed-address 192.168.0.112; } }}
8. Adjust the sample parameters (subnet, netmask, routers, fixed-address and hardware ethernet) to fit your network configuration. Note the file name parameter; this is the file namethat was outputted by the grub2-mknetdir command earlier in this procedure.
9. Start and enable the dhcpd service:
# systemctl start dhcpd# systemctl enable dhcpd
10. Start and enable xinetd service that manages the tftp service:
Red Hat Enterprise Linux 8 Performing an advanced RHEL installation
60

# systemctl start xinetd# systemctl enable xinetd
The PXE boot server is now ready to serve PXE clients. You can start the client (the system towhich you are installing Red Hat Enterprise Linux), select PXE Boot when prompted to specify aboot source, and start the network installation.
CHAPTER 14. PREPARING TO INSTALL FROM THE NETWORK USING PXE
61

CHAPTER 15. CREATING A REMOTE REPOSITORYFollow the steps in this procedure to create an installation source for a network-based installation usinga remote repository containing extracted contents of the Binary DVD ISO image. The installationsource is accessed over HTTP or HTTPS.
Prerequisites
A Red Hat Enterprise Linux 8 installation DVD/ISO image
Several servers running Red Hat Enterprise Linux
15.1. INSTALLING APACHE ON RHEL
This procedure will help you install Apache on Red Hat Enterprise Linux 8.
Prerequisites
Access to a repo with Apache webserver
Procedure
1. Install the httpd package
# yum install httpd
2. Run, then enable the Apache webserver. These commands will also start the webserver afterreboot.
# systemctl enable httpd# systemctl start httpd
3. Insert any website files you may have.
# echo Apache on RHEL 8 > /var/www/html/index.html
4. Update the firewall.
# firewall-cmd --add-service=http --permanent# firewall-cmd --add-service=http
5. Access the website.
http://<the-apache-ip-address>
http://<the-apache-hostname>
15.2. CREATING A REMOTE REPOSITORY
Multiple Red Hat Enterprise Linux servers may access a single Red Hat Enterprise Linux repository onthe network. This requires a running web server, most likely this will be Apache.
Red Hat Enterprise Linux 8 Performing an advanced RHEL installation
62

Prerequisites
A Red Hat Enterprise Linux 8 installation DVD
Several servers running Red Hat Enterprise Linux
Procedure
1. Mount and copy the content of downloaded DVD.
mkdir /mnt/rhel8mount -o loop,ro rhel-8.1-x86_64-dvd.iso /mnt/rhel8/cp -r /mnt/rhel8/ /var/www/html/umount /mnt/rhel8
The next step is performed on the client side, not on the server where Apache is installed.
2. Create a repo file for both BaseOS and AppStream repositories.
vi /etc/yum.repos.d/rhel_http_repo.repo
[BaseOS_repo_http]name=RHEL_8.0_x86_64_HTTP BaseOSbaseurl="http://myhost/rhel8/BaseOS"gpgcheck=1gpgkey=file:///etc/pki/rpm-gpg/RPM-GPG-KEY-redhat-release
[AppStream_repo_http]name=RHEL_8.0_x86_64_HTTP AppStreambaseurl="http://myhost/rhel8/AppStream"gpgcheck=1gpgkey=file:///etc/pki/rpm-gpg/RPM-GPG-KEY-redhat-release
[root@localhost ~]# yum repolistUpdating Subscription Management repositories.Unable to read consumer identityThis system is not registered to Red Hat Subscription Management. You can use subscription-manager to register.Last metadata expiration check: 0:08:33 ago on Út 23. července 2019, 16:48:09 CEST.repo id repo name statusAppStream_repo_http RHEL_8.0_x86_64_HTTP AppStream 4,672BaseOS_repo_http RHEL_8.0_x86_64_HTTP BaseOS 1,658[root@localhost ~]#
CHAPTER 15. CREATING A REMOTE REPOSITORY
63

CHAPTER 16. BOOT OPTIONSThis section contains information about some of the boot options that you can use to modify the defaultbehavior of the installation program. For a full list of boot options, see the upstream boot optioncontent.
16.1. TYPES OF BOOT OPTIONS
There are two types of boot options; those with an equals "=" sign, and those without an equals "=" sign.Boot options are appended to the boot command line and multiple options must be separated by asingle space. Boot options that are specific to the installation program always start with inst.
Options with an equals "=" sign
You must specify a value for boot options that use the = symbol. For example, the inst.vncpassword= option must contain a value, in this case, a password. The correct syntax for thisexample is inst.vncpassword=password.
Options without an equals "=" sign
This boot option does not accept any values or parameters. For example, the rd.live.check optionforces the installation program to verify the installation media before starting the installation. If thisboot option is present, the verification is performed; if the boot option is not present, the verificationis skipped.
16.2. EDITING BOOT OPTIONS
This section contains information about the different ways that you can edit boot options from the bootmenu. The boot menu opens after you boot the installation media.
Editing the boot: prompt in BIOSWhen using the boot: prompt, the first option must always specify the installation program image filethat you want to load. In most cases, you can specify the image using the keyword. You can specifyadditional options according to your requirements.
Prerequisites
You have created bootable installation media (USB, CD or DVD).
You have booted the installation from the media, and the installation boot menu is open.
Procedure
1. With the boot menu open, press the Esc key on your keyboard.
2. The boot: prompt is now accessible.
3. Press the Tab key on your keyboard to display the help commands.
4. Press the Enter key on your keyboard to start the installation with your options. To return fromthe boot: prompt to the boot menu, restart the system and boot from the installation mediaagain.
NOTE
Red Hat Enterprise Linux 8 Performing an advanced RHEL installation
64
NOTE
The boot: prompt also accepts dracut kernel options. A list of options is available in the dracut.cmdline(7) man page.
Editing the > promptYou can use the > prompt to edit predefined boot options. For example, select Test this media andinstall Red Hat Enterprise Linux 8.1 from the boot menu to display a full set of options.
NOTE
This procedure is for BIOS-based AMD64 and Intel 64 systems.
Prerequisites
You have created bootable installation media (USB, CD or DVD).
You have booted the installation from the media, and the installation boot menu is open.
Procedure
1. From the boot menu, select an option and press the Tab key on your keyboard. The > prompt isaccessible and displays the available options.
2. Append the options that you require to the > prompt.
3. Press the Enter key on your keyboard to start the installation.
4. Press the Esc key on your keyboard to cancel editing and return to the boot menu.
Editing the GRUB2 menuThe GRUB2 menu is available on UEFI-based AMD64, Intel 64, and 64-bit ARM systems.
Prerequisites
You have created bootable installation media (USB, CD or DVD).
You have booted the installation from the media, and the installation boot menu is open.
Procedure
1. From the boot menu window, select the required option and press the e key on your keyboard.
2. Move the cursor to the kernel command line. On UEFI systems, the kernel command line startswith linuxefi.
3. Move the cursor to the end of the linuxefi kernel command line.
4. Edit the parameters as required. For example, to configure one or more network interfaces, addthe ip= parameter at the end of the linuxefi kernel command line, followed by the requiredvalue.
5. When you finish editing, press Ctrl+X on your keyboard to start the installation using thespecified options.
CHAPTER 16. BOOT OPTIONS
65
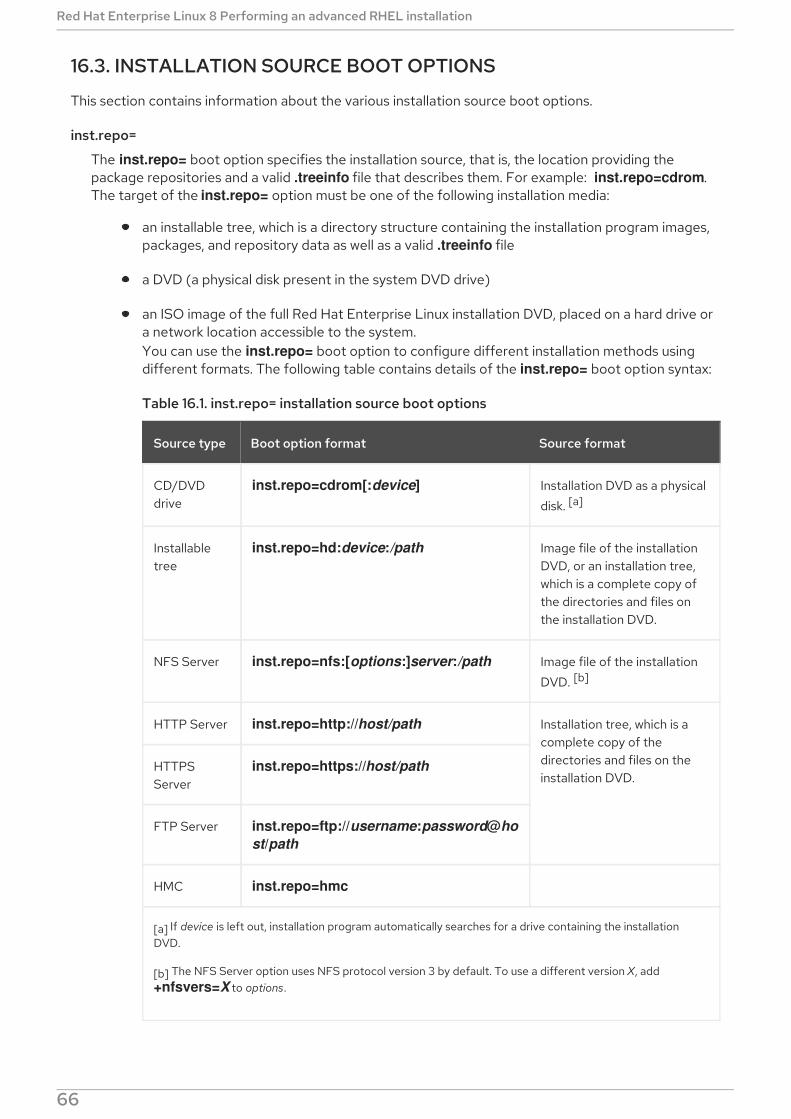
16.3. INSTALLATION SOURCE BOOT OPTIONS
This section contains information about the various installation source boot options.
inst.repo=
The inst.repo= boot option specifies the installation source, that is, the location providing thepackage repositories and a valid .treeinfo file that describes them. For example: inst.repo=cdrom.The target of the inst.repo= option must be one of the following installation media:
an installable tree, which is a directory structure containing the installation program images,packages, and repository data as well as a valid .treeinfo file
a DVD (a physical disk present in the system DVD drive)
an ISO image of the full Red Hat Enterprise Linux installation DVD, placed on a hard drive ora network location accessible to the system.You can use the inst.repo= boot option to configure different installation methods usingdifferent formats. The following table contains details of the inst.repo= boot option syntax:
Table 16.1. inst.repo= installation source boot options
Source type Boot option format Source format
CD/DVDdrive
inst.repo=cdrom[:device] Installation DVD as a physicaldisk. [a]
Installabletree
inst.repo=hd:device:/path Image file of the installationDVD, or an installation tree,which is a complete copy ofthe directories and files onthe installation DVD.
NFS Server inst.repo=nfs:[options:]server:/path Image file of the installationDVD. [b]
HTTP Server inst.repo=http://host/path Installation tree, which is acomplete copy of thedirectories and files on theinstallation DVD.
HTTPSServer
inst.repo=https://host/path
FTP Server inst.repo=ftp://username:password@host/path
HMC inst.repo=hmc
[a] If device is left out, installation program automatically searches for a drive containing the installationDVD.
[b] The NFS Server option uses NFS protocol version 3 by default. To use a different version X, add +nfsvers=X to options.
NOTE
Red Hat Enterprise Linux 8 Performing an advanced RHEL installation
66
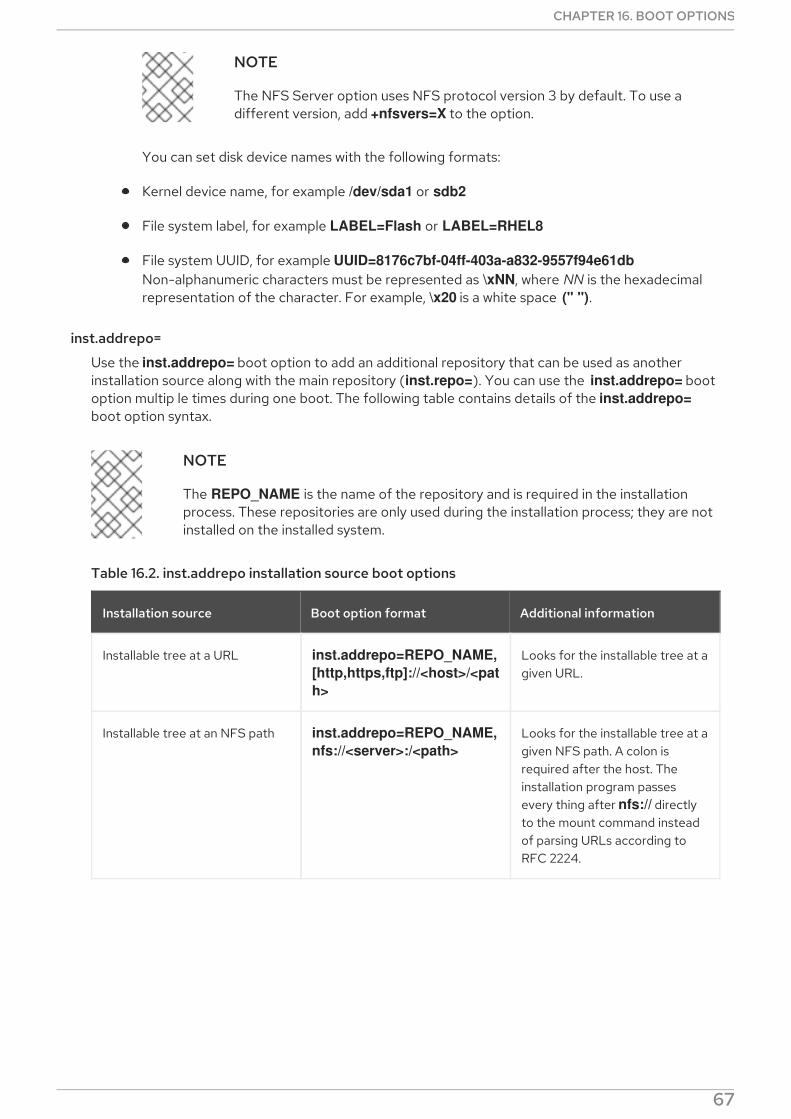
NOTE
The NFS Server option uses NFS protocol version 3 by default. To use adifferent version, add +nfsvers=X to the option.
You can set disk device names with the following formats:
Kernel device name, for example /dev/sda1 or sdb2
File system label, for example LABEL=Flash or LABEL=RHEL8
File system UUID, for example UUID=8176c7bf-04ff-403a-a832-9557f94e61dbNon-alphanumeric characters must be represented as \xNN, where NN is the hexadecimalrepresentation of the character. For example, \x20 is a white space (" ").
inst.addrepo=
Use the inst.addrepo= boot option to add an additional repository that can be used as anotherinstallation source along with the main repository (inst.repo=). You can use the inst.addrepo= bootoption multip le times during one boot. The following table contains details of the inst.addrepo=boot option syntax.
NOTE
The REPO_NAME is the name of the repository and is required in the installationprocess. These repositories are only used during the installation process; they are notinstalled on the installed system.
Table 16.2. inst.addrepo installation source boot options
Installation source Boot option format Additional information
Installable tree at a URL inst.addrepo=REPO_NAME,[http,https,ftp]://<host>/<path>
Looks for the installable tree at agiven URL.
Installable tree at an NFS path inst.addrepo=REPO_NAME,nfs://<server>:/<path>
Looks for the installable tree at agiven NFS path. A colon isrequired after the host. Theinstallation program passesevery thing after nfs:// directlyto the mount command insteadof parsing URLs according toRFC 2224.
CHAPTER 16. BOOT OPTIONS
67

Installable tree in the installationenvironment
inst.addrepo=REPO_NAME,file://<path>
Looks for the installable tree atthe given location in theinstallation environment. To usethis option, the repositor y mustbe mounted before theinstallation program attempts toload the available softwaregroups. The benefit of thisoption is that you can havemultiple repositories on onebootable ISO, and you can installboth the main repository andadditional repositories from theISO. The path to the additionalrepositories is /run/install/source/REPO_ISO_PATH. Additional, you canmount the repository directory inthe %pre secti on in theKickstart file. The path must beabsolute and start with /, forexample inst.addrepo=REPO_NAME,file:///<path>
Hard Drive inst.addrepo=REPO_NAME,hd:<device>:<path>
Mounts the given <device>partition and installs from theISO that is specified by the<path>. If the <path> is notspecified, the installation program looks for a validinstallation ISO on the <device>.This installation method requiresan ISO with a valid installabletree.
Installation source Boot option format Additional information
inst.noverifyssl=
The noverifyssl= boot option prevents the installation program from verifying the SSL certificatefor all HTTPS connections with the exception of the additional Kickstart repositories, where --noverifyssl can be set per repository.
inst.stage2=
Use the inst.stage2= boot option to specify the location of the installation program runtime image.This option expects a path to a directory containing a valid .treeinfo file. The location of the runtimeimage is read from the .treeinfo file. If the .treeinfo file is not available, the installation programattempts to load the image from LiveOS/squashfs.img.When the inst.stage2 option is not specified, the installation program attempts to use the locationspecified with inst.repo option.
You should specify this option only for PXE boot. The installation DVD and Boot ISO already containa correct inst.stage2 option to boot the installation program from themselves.
Red Hat Enterprise Linux 8 Performing an advanced RHEL installation
68
NOTE
By default, the inst.stage2= boot option is used on the installation media and is set toa specific label, for example, inst.stage2=hd:LABEL=RHEL-8-0-0-BaseOS-x86_64.If you modify the default label of the file system containing the runtime image, or ifyou use a customized procedure to boot the installation system, you must verify thatthe inst.stage2= boot option is set to the correct value.
inst.stage2.all
The inst.stage2.all boot option is used to specify several HTTP, HTTPS, or FTP sources. You canuse the inst.stage2= boot option multiple times with the inst.stage2.all option to fetch the imagefrom the sources sequentially until one succeeds. For example:
inst.stage2.allinst.stage2=http://hostname1/path_to_install_tree/inst.stage2=http://hostname2/path_to_install_tree/inst.stage2=http://hostname3/path_to_install_tree/
inst.dd=
The inst.dd= boot option is used to perform a driver update during the installation. See thePerforming an advanced RHEL installation document for information on how to update drivers duringinstallation.
inst.repo=hmc
When booting from a Binary DVD, the installation program prompts you to enter additional kernelparameters. To set the DVD as an installation source, append inst.repo=hmc to the kernelparameters. The installation program then enables SE and HMC file access, fetches the images forstage2 from the DVD, and provides access to the packages on the DVD for software selection. Thisoption eliminates the requirement of an external network setup and expands the installation options.
inst.proxy
The inst.proxy boot option is used when performing an installation from a HTTP, HTTPS, FTPsource. For example:
[PROTOCOL://][USERNAME[:PASSWORD]@]HOST[:PORT]
inst.nosave
Use the inst.nosave boot option to control which installation logs and related files are not saved tothe installed system, for example input_ks, output_ks, all_ks, logs and all. Multiple values can becombined as a comma-separated list, for example: input_ks,logs.
NOTE
The inst.nosave boot option is used for excluding files from the installed system thatcan’t be removed by a Kickstart %post script, such as logs and input/output Kickstartresults.
Table 16.3. inst.nosave boot options
Option Description
CHAPTER 16. BOOT OPTIONS
69

input_ks Disables the ability to save the input Kickstartresults.
output_ks Disables the ability to save the output Kickstartresults generated by the installation program.
all_ks Disables the ability to save the input and outputKickstart results.
logs Disables the ability to save all installation logs.
all Disables the ability to save all Kickstart results, andall logs.
Option Description
inst.multilib
Use the inst.multilib boot option to set DNF’s multilib_policy to all, instead of best.
memcheck
The memcheck boot option performs a check to verify that the system has enough RAM tocomplete the installation. If there isn’t enough RAM, the installation process is stopped. The systemcheck is approximate and memory usage during installation depends on the package selection, userinterface, for example graphical or text, and other parameters.
nomemcheck
The nomemcheck boot option does not perform a check to verify if the system has enough RAM tocomplete the installation. Any attempt to perform the installation with less than the recommendedminimum amount of memory is unsupported, and might result in the installation process failing.
16.4. NETWORK BOOT OPTIONS
This section contains information about commonly used network boot options.
NOTE
Initial network initialization is handled by dracut. For a complete list, see the dracut.cmdline(7) man page.
ip=
Use the ip= boot option to configure one or more network interfaces. To configure multipleinterfaces, you can use the ip option multiple times, once for each interface; to do so, you must usethe rd.neednet=1 option, and you must specify a primary boot interface using the bootdev option.Alternatively, you can use the ip option once, and then use Kickstart to set up further interfaces. Thisoption accepts several different formats. The following tables contain information about the mostcommon options.
NOTE
Red Hat Enterprise Linux 8 Performing an advanced RHEL installation
70
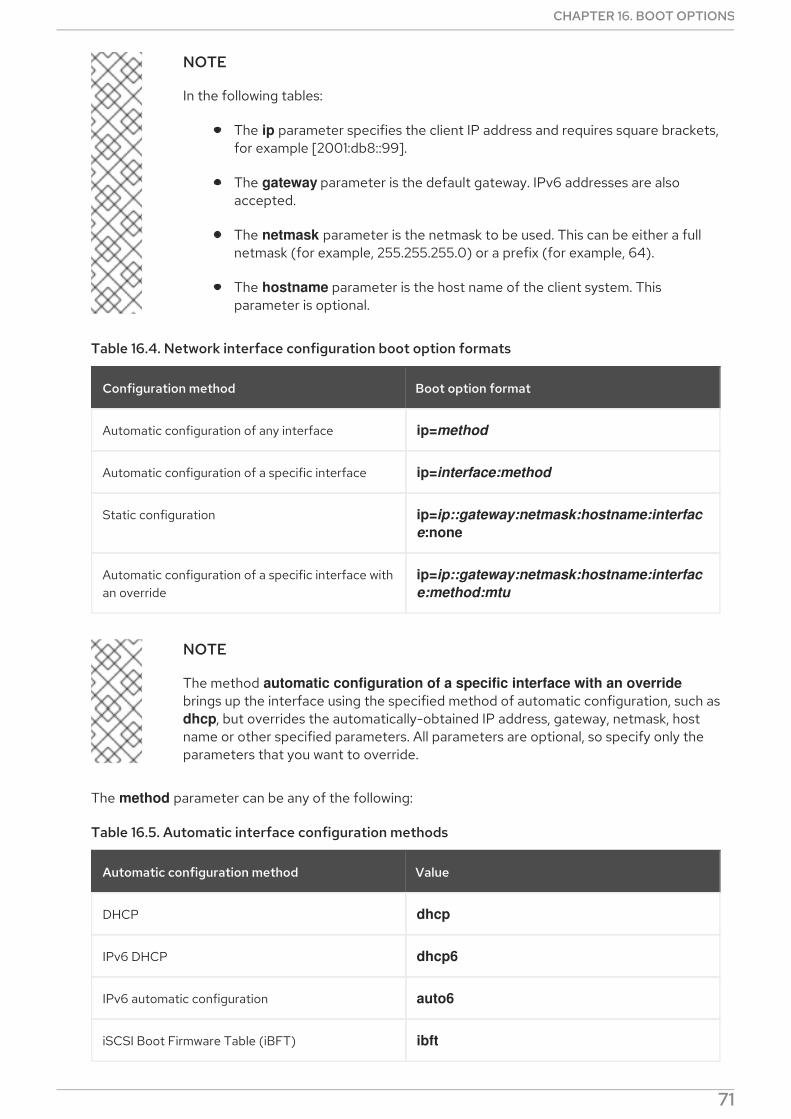
NOTE
In the following tables:
The ip parameter specifies the client IP address and requires square brackets,for example [2001:db8::99].
The gateway parameter is the default gateway. IPv6 addresses are alsoaccepted.
The netmask parameter is the netmask to be used. This can be either a fullnetmask (for example, 255.255.255.0) or a prefix (for example, 64).
The hostname parameter is the host name of the client system. Thisparameter is optional.
Table 16.4. Network interface configuration boot option formats
Configuration method Boot option format
Automatic configuration of any interface ip=method
Automatic configuration of a specific interface ip=interface:method
Static configuration ip=ip::gateway:netmask:hostname:interface:none
Automatic configuration of a specific interface withan override
ip=ip::gateway:netmask:hostname:interface:method:mtu
NOTE
The method automatic configuration of a specific interface with an overridebrings up the interface using the specified method of automatic configuration, such asdhcp, but overrides the automatically-obtained IP address, gateway, netmask, hostname or other specified parameters. All parameters are optional, so specify only theparameters that you want to override.
The method parameter can be any of the following:
Table 16.5. Automatic interface configuration methods
Automatic configuration method Value
DHCP dhcp
IPv6 DHCP dhcp6
IPv6 automatic configuration auto6
iSCSI Boot Firmware Table (iBFT) ibft
CHAPTER 16. BOOT OPTIONS
71
NOTE
If you use a boot option that requires network access, such as inst.ks=http://host:/path, without specifying the ip option, the installationprogram uses ip=dhcp.
To connect to an iSCSI target automatically, you must activate a networkdevice for accessing the target. The recommended way to activate a networkis to use the ip=ibft boot option.
nameserver=
The nameserver= option specifies the address of the name server. You can use this option multipletimes.
NOTE
The ip= parameter requires square brackets. However, an IPv6 address does not workwith square brackets. An example of the correct syntax to use for an IPv6 address is nameserver=2001:db8::1.
bootdev=
The bootdev= option specifies the boot interface. This option is mandatory if you use more than oneip option.
ifname=
The ifname= options assigns an interface name to a network device with a given MAC address. Youcan use this option multiple times. The syntax is ifname=interface:MAC. For example:
ifname=eth0:01:23:45:67:89:ab
NOTE
The ifname= option is the only supported way to set custom network interface namesduring installation.
inst.dhcpclass=
The inst.dhcpclass= option specifies the DHCP vendor class identifier. The dhcpd service sees thisvalue as vendor-class-identifier. The default value is anaconda-$(uname -srm).
inst.waitfornet=
Using the inst.waitfornet=SECONDS boot option causes the installation system to wait for networkconnectivity before installation. The value given in the SECONDS argument specifies the maximumamount of time to wait for network connectivity before timing out and continuing the installationprocess even if network connectivity is not present.
Additional resources
For more information about networking, see the Configuring and managing networkingdocument.
16.5. CONSOLE BOOT OPTIONS
Red Hat Enterprise Linux 8 Performing an advanced RHEL installation
72
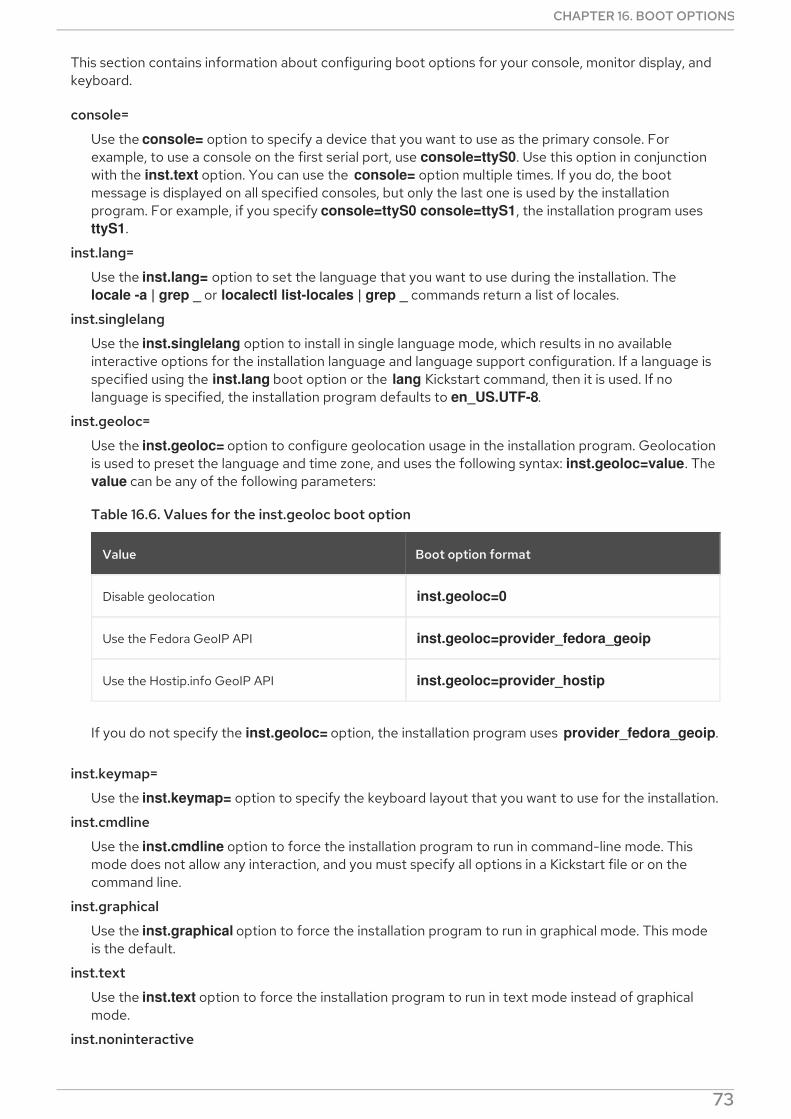
This section contains information about configuring boot options for your console, monitor display, andkeyboard.
console=
Use the console= option to specify a device that you want to use as the primary console. Forexample, to use a console on the first serial port, use console=ttyS0. Use this option in conjunctionwith the inst.text option. You can use the console= option multiple times. If you do, the bootmessage is displayed on all specified consoles, but only the last one is used by the installationprogram. For example, if you specify console=ttyS0 console=ttyS1, the installation program uses ttyS1.
inst.lang=
Use the inst.lang= option to set the language that you want to use during the installation. The locale -a | grep _ or localectl list-locales | grep _ commands return a list of locales.
inst.singlelang
Use the inst.singlelang option to install in single language mode, which results in no availableinteractive options for the installation language and language support configuration. If a language isspecified using the inst.lang boot option or the lang Kickstart command, then it is used. If nolanguage is specified, the installation program defaults to en_US.UTF-8.
inst.geoloc=
Use the inst.geoloc= option to configure geolocation usage in the installation program. Geolocationis used to preset the language and time zone, and uses the following syntax: inst.geoloc=value. Thevalue can be any of the following parameters:
Table 16.6. Values for the inst.geoloc boot option
Value Boot option format
Disable geolocation inst.geoloc=0
Use the Fedora GeoIP API inst.geoloc=provider_fedora_geoip
Use the Hostip.info GeoIP API inst.geoloc=provider_hostip
If you do not specify the inst.geoloc= option, the installation program uses provider_fedora_geoip.
inst.keymap=
Use the inst.keymap= option to specify the keyboard layout that you want to use for the installation.
inst.cmdline
Use the inst.cmdline option to force the installation program to run in command-line mode. Thismode does not allow any interaction, and you must specify all options in a Kickstart file or on thecommand line.
inst.graphical
Use the inst.graphical option to force the installation program to run in graphical mode. This modeis the default.
inst.text
Use the inst.text option to force the installation program to run in text mode instead of graphicalmode.
inst.noninteractive
CHAPTER 16. BOOT OPTIONS
73
Use the inst.noninteractive boot option to run the installation program in a non-interactive mode.User interaction is not permitted in the non-interactive mode, and inst.noninteractive can be usedwith a graphical or text installation. When the inst.noninteractive option is used in text mode itbehaves the same as the inst.cmdline option.
inst.resolution=
Use the inst.resolution= option to specify the screen resolution in graphical mode. The format is NxM, where N is the screen width and M is the screen height (in pixels). The lowest supportedresolution is 1024x768.
inst.vnc=
Use the inst.vnc= option to run the graphical installation using VNC. You must use a VNC clientapplication to interact with the installation program. When VNC sharing is enabled, multiple clientscan connect. A system installed using VNC starts in text mode.
inst.vncpassword=
Use the inst.vncpassword= option to set a password on the VNC server that is used by theinstallation program.
inst.vncconnect=
Use the inst.vncconnect= option to connect to a listening VNC client at the given host location. Forexample inst.vncconnect=<host>[:<port>] The default port is 5900. This option can be used with vncviewer -listen.
inst.xdriver=
Use the inst.xdriver= option to specify the name of the X driver that you want to use both duringinstallation and on the installed system.
inst.usefbx=
Use the inst.usefbx option to prompt the installation program to use the frame buffer X driverinstead of a hardware-specific driver. This option is equivalent to inst.xdriver=fbdev.
modprobe.blacklist=
Use the modprobe.blacklist= option to blacklist or completely disable one or more drivers. Drivers(mods) that you disable using this option cannot load when the installation starts, and after theinstallation finishes, the installed system retains these settings. You can find a list of the blacklisteddrivers in the /etc/modprobe.d/ directory. Use a comma-separated list to disable multiple drivers.For example:
modprobe.blacklist=ahci,firewire_ohci
inst.xtimeout=
Use the inst.xtimeout= option to specify the timeout in seconds for starting X server.
inst.sshd
Use the inst.sshd option to start the sshd service during installation, so that you can connect to thesystem during the installation using SSH, and monitor the installation progress. For more informationabout SSH, see the ssh(1) man page. By default, the sshd option is automatically started only onthe IBM Z architecture. On other architectures, sshd is not started unless you use the inst.sshdoption.
NOTE
During installation, the root account has no password by default. You can set a rootpassword during installation with the sshpw Kickstart command.
Red Hat Enterprise Linux 8 Performing an advanced RHEL installation
74
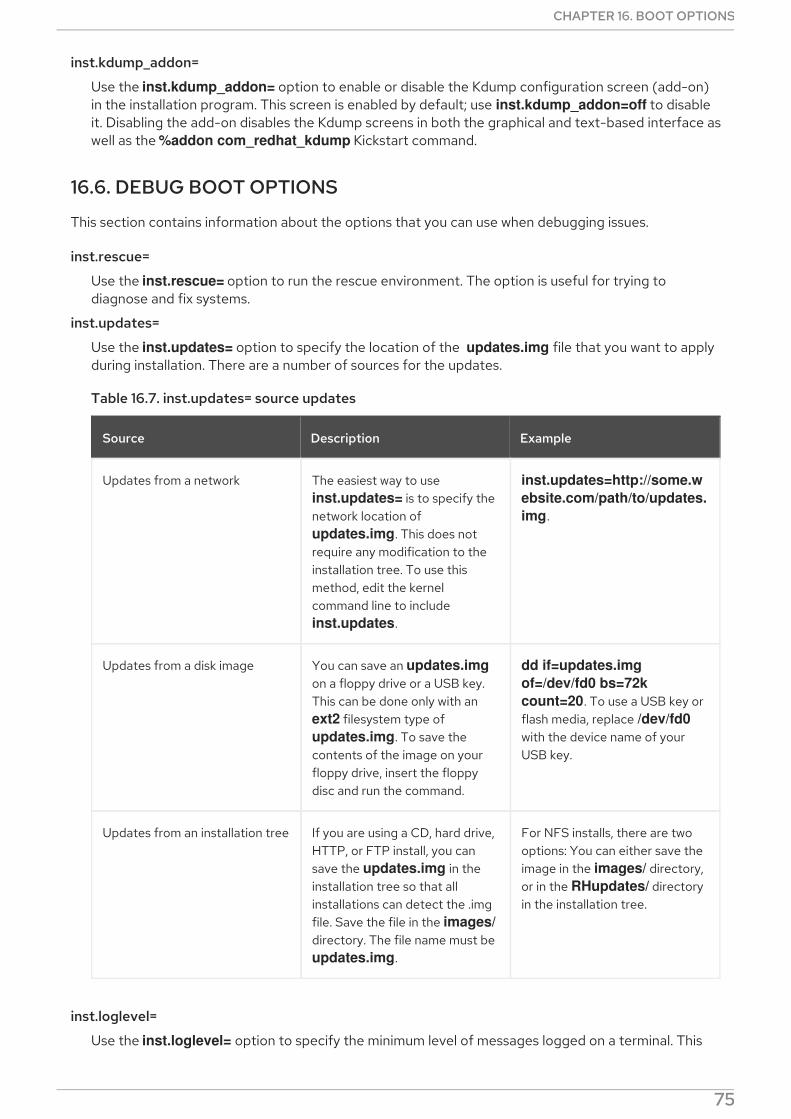
inst.kdump_addon=
Use the inst.kdump_addon= option to enable or disable the Kdump configuration screen (add-on)in the installation program. This screen is enabled by default; use inst.kdump_addon=off to disableit. Disabling the add-on disables the Kdump screens in both the graphical and text-based interface aswell as the %addon com_redhat_kdump Kickstart command.
16.6. DEBUG BOOT OPTIONS
This section contains information about the options that you can use when debugging issues.
inst.rescue=
Use the inst.rescue= option to run the rescue environment. The option is useful for trying todiagnose and fix systems.
inst.updates=
Use the inst.updates= option to specify the location of the updates.img file that you want to applyduring installation. There are a number of sources for the updates.
Table 16.7. inst.updates= source updates
Source Description Example
Updates from a network The easiest way to use inst.updates= is to specify thenetwork location of updates.img. This does notrequire any modification to theinstallation tree. To use thismethod, edit the kernelcommand line to include inst.updates.
inst.updates=http://some.website.com/path/to/updates.img.
Updates from a disk image You can save an updates.imgon a floppy drive or a USB key.This can be done only with an ext2 filesystem type of updates.img. To save thecontents of the image on yourfloppy drive, insert the floppydisc and run the command.
dd if=updates.img of=/dev/fd0 bs=72k count=20. To use a USB key orflash media, replace /dev/fd0with the device name of yourUSB key.
Updates from an installation tree If you are using a CD, hard drive,HTTP, or FTP install, you cansave the updates.img in theinstallation tree so that allinstallations can detect the .imgfile. Save the file in the images/directory. The file name must be updates.img.
For NFS installs, there are twooptions: You can either save theimage in the images/ directory,or in the RHupdates/ directoryin the installation tree.
inst.loglevel=
Use the inst.loglevel= option to specify the minimum level of messages logged on a terminal. This
CHAPTER 16. BOOT OPTIONS
75
concerns only terminal logging; log files always contain messages of all levels. Possible values for thisoption from the lowest to highest level are: debug, info, warning, error and critical. The defaultvalue is info, which means that by default, the logging terminal displays messages ranging from infoto critical.
inst.syslog=
When installation starts, the inst.syslog= option sends log messages to the syslog process on thespecified host. The remote syslog process must be configured to accept incoming connections.
inst.virtiolog=
Use the inst.virtiolog= option to specify the virtio port (a character device at /dev/virtio-ports/name) that you want to use for forwarding logs. The default value is org.fedoraproject.anaconda.log.0; if this port is present, it is used.
inst.zram
The inst.zram option controls the usage of zRAM swap during installation. The option creates acompressed block device inside the system RAM and uses it for swap space instead of the hard drive.This allows the installation program to run with less available memory than is possible withoutcompression, and it might also make the installation faster. By default, swap on zRAM is enabled onsystems with 2 GiB or less RAM, and disabled on systems with more than 2 GiB of memory. You canuse this option to change this behavior; on a system with more than 2 GiB RAM, use inst.zram=1 toenable the feature, and on systems with 2 GiB or less memory, use inst.zram=0 to disable thefeature.
rd.live.ram
If the rd.live.ram option is specified, the stage 2 image is copied into RAM. Using this option whenthe stage 2 image is on an NFS server increases the minimum required memory by the size of theimage by roughly 500 MiB.
inst.nokill
The inst.nokill option is a debugging option that prevents the installation program from rebootingwhen a fatal error occurs, or at the end of the installation process. Use the inst.nokill option tocapture installation logs which would be lost upon reboot.
inst.noshell
Use inst.noshell option if you do not want a shell on terminal session 2 (tty2) during installation.
inst.notmux
Use inst.notmux option if you do not want to use tmux during installation. The output is generatedwithout terminal control characters and is meant for non-interactive uses.
remotelog
You can use the remotelog option to send all of the logs to a remote host:port using a TCPconnection. The connection is retired if there is no listener and the installation proceeds as normal.
16.7. STORAGE BOOT OPTIONS
inst.nodmraid
Use the inst.nodmraid option to disable dmraid support.
Red Hat Enterprise Linux 8 Performing an advanced RHEL installation
76
WARNING
Use this option with caution. If you have a disk that is incorrectly identified as part ofa firmware RAID array, it might have some stale RAID metadata on it that must beremoved using the appropriate tool, for example, dmraid or wipefs.
inst.nompath
Use the inst.nompath option to disable support for multipath devices. This option can be used forsystems on which a false-positive is encountered which incorrectly identifies a normal block device asa multipath device. There is no other reason to use this option.
WARNING
Use this option with caution. You should not use this option with multipath hardware.Using this option to attempt to install to a single path of a multipath is notsupported.
inst.gpt
The inst.gpt boot option forces the installation program to install partition information to a GUIDPartition Table (GPT) instead of a Master Boot Record (MBR). This option is not valid on UEFI-basedsystems, unless they are in BIOS compatibility mode. Normally, BIOS-based systems and UEFI-basedsystems in BIOS compatibility mode attempt to use the MBR schema for storing partitioninginformation, unless the disk is 232 sectors in size or larger. Disk sectors are typically 512 bytes in size,meaning that this is usually equivalent to 2 TiB. Using the inst.gpt boot option changes this behavior,allowing a GPT to be written to smaller disks.
16.8. KICKSTART BOOT OPTIONS
This section contains information about the Kickstart boot options.
inst.ks=
Use the inst.ks= boot option to define the location of a Kickstart file that you want to use toautomate the installation. You can then specify locations using any of the inst.repo formats. If youspecify a device and not a path, the installation program looks for the Kickstart file in /ks.cfg on thedevice that you specify. If you use this option without specifying a device, the installation programuses the following option:
inst.ks=nfs:next-server:/filename
In the previous example, next-server is the DHCP next-server option or the IP address of the DHCPserver itself, and filename is the DHCP filename option, or /kickstart/. If the given file name ends withthe / character, ip-kickstart is appended. The following table contains an example.
Table 16.8. Default Kickstart file location
CHAPTER 16. BOOT OPTIONS
77
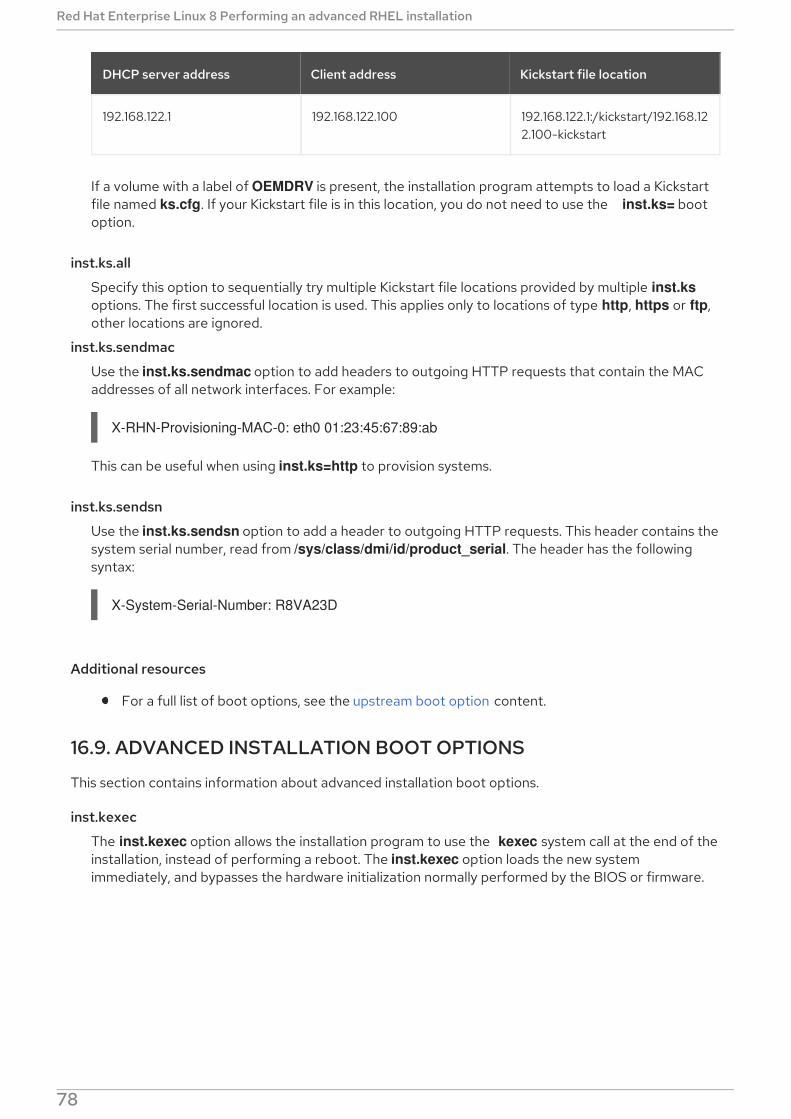
DHCP server address Client address Kickstart file location
192.168.122.1 192.168.122.100 192.168.122.1:/kickstart/192.168.122.100-kickstart
If a volume with a label of OEMDRV is present, the installation program attempts to load a Kickstartfile named ks.cfg. If your Kickstart file is in this location, you do not need to use the inst.ks= bootoption.
inst.ks.all
Specify this option to sequentially try multiple Kickstart file locations provided by multiple inst.ksoptions. The first successful location is used. This applies only to locations of type http, https or ftp,other locations are ignored.
inst.ks.sendmac
Use the inst.ks.sendmac option to add headers to outgoing HTTP requests that contain the MACaddresses of all network interfaces. For example:
X-RHN-Provisioning-MAC-0: eth0 01:23:45:67:89:ab
This can be useful when using inst.ks=http to provision systems.
inst.ks.sendsn
Use the inst.ks.sendsn option to add a header to outgoing HTTP requests. This header contains thesystem serial number, read from /sys/class/dmi/id/product_serial. The header has the followingsyntax:
X-System-Serial-Number: R8VA23D
Additional resources
For a full list of boot options, see the upstream boot option content.
16.9. ADVANCED INSTALLATION BOOT OPTIONS
This section contains information about advanced installation boot options.
inst.kexec
The inst.kexec option allows the installation program to use the kexec system call at the end of theinstallation, instead of performing a reboot. The inst.kexec option loads the new systemimmediately, and bypasses the hardware initialization normally performed by the BIOS or firmware.
IMPORTANT
Red Hat Enterprise Linux 8 Performing an advanced RHEL installation
78
IMPORTANT
This option is deprecated and available as a Technology Preview only. For informationon Red Hat scope of support for Technology Preview features, see the TechnologyPreview Features Support Scope document.
When kexec is used, device registers which would normally be cleared during a fullsystem reboot, might stay filled with data, which could potentially create issues forsome device drivers.
inst.multilib
Use the inst.multilib boot option to configure the system for multilib packages, that is, to allowinstalling 32-bit packages on a 64-bit AMD64 or Intel 64 system. Normally, on an AMD64 or Intel 64system, only packages for this architecture (marked as x86_64) and packages for all architectures(marked as noarch) are installed. When you use the inst.multilib boot option, packages for 32-bitAMD or Intel systems (marked as i686) are automatically installed.This applies only to packages directly specified in the %packages section. If a package is installed asa dependency, only the exact specified dependency is installed. For example, if you are installing the bash package which depends on the glibc package, the former is installed in multiple variants, whilethe latter is installed only in variants that the bash package requires.
selinux=0
By default, the selinux=0 boot option operates in permissive mode in the installation program, and inenforcing mode in the installed system. The selinux=0 boot option disables the use of SELinux in theinstallation program and the installed system.
NOTE
The selinux=0 and inst.selinux=0 options are not the same. The selinux=0 optiondisables the use of SELinux in the installation program and the installed system. The inst.selinux=0 option disables SELinux only in the installation program. By default,SELinux operates in permissive mode in the installation program, so disabling SELinuxhas little effect.
inst.nonibftiscsiboot=
Use the inst.nonibftiscsiboot= boot option to place the boot loader on iSCSI devices that were notconfigured in the iSCSI Boot Firmware Table (iBFT).
16.10. DEPRECATED BOOT OPTIONS
This section contains information about deprecated boot options. These options are still accepted bythe installation program but they are deprecated and are scheduled to be removed in a future release ofRed Hat Enterprise Linux.
method
The method option is an alias for inst.repo.
repo=nfsiso
The repo=nfsiso: option is the same as inst.repo=nfs:.
dns
Use nameserver instead of dns. Note that nameserver does not accept comma-separated lists; usemultiple nameserver options instead.
CHAPTER 16. BOOT OPTIONS
79
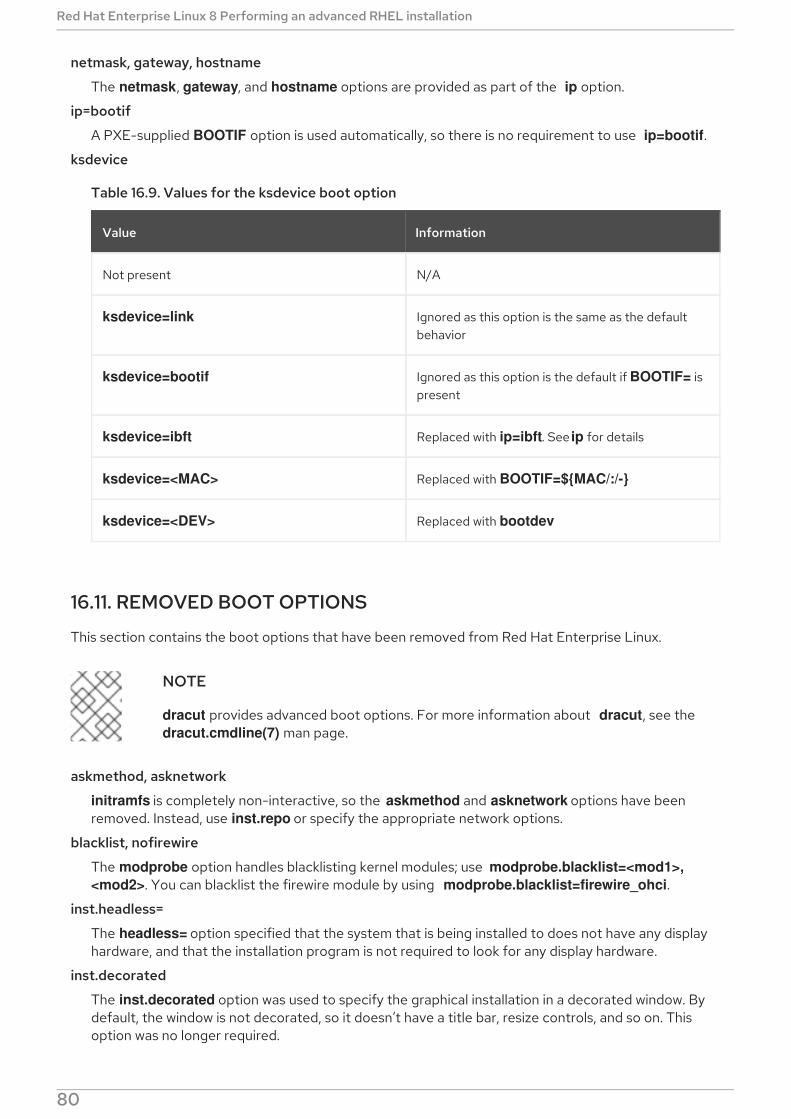
netmask, gateway, hostname
The netmask, gateway, and hostname options are provided as part of the ip option.
ip=bootif
A PXE-supplied BOOTIF option is used automatically, so there is no requirement to use ip=bootif.
ksdevice
Table 16.9. Values for the ksdevice boot option
Value Information
Not present N/A
ksdevice=link Ignored as this option is the same as the defaultbehavior
ksdevice=bootif Ignored as this option is the default if BOOTIF= ispresent
ksdevice=ibft Replaced with ip=ibft. See ip for details
ksdevice=<MAC> Replaced with BOOTIF=${MAC/:/-}
ksdevice=<DEV> Replaced with bootdev
16.11. REMOVED BOOT OPTIONS
This section contains the boot options that have been removed from Red Hat Enterprise Linux.
NOTE
dracut provides advanced boot options. For more information about dracut, see the dracut.cmdline(7) man page.
askmethod, asknetwork
initramfs is completely non-interactive, so the askmethod and asknetwork options have beenremoved. Instead, use inst.repo or specify the appropriate network options.
blacklist, nofirewire
The modprobe option handles blacklisting kernel modules; use modprobe.blacklist=<mod1>,<mod2>. You can blacklist the firewire module by using modprobe.blacklist=firewire_ohci.
inst.headless=
The headless= option specified that the system that is being installed to does not have any displayhardware, and that the installation program is not required to look for any display hardware.
inst.decorated
The inst.decorated option was used to specify the graphical installation in a decorated window. Bydefault, the window is not decorated, so it doesn’t have a title bar, resize controls, and so on. Thisoption was no longer required.
Red Hat Enterprise Linux 8 Performing an advanced RHEL installation
80
serial
Use the console=ttyS0 option.
updates
Use the inst.updates option.
essid, wepkey, wpakey
Dracut does not support wireless networking.
ethtool
This option was no longer required.
gdb
This option was removed as there are many options available for debugging dracut-based initramfs.
inst.mediacheck
Use the dracut option rd.live.check option.
ks=floppy
Use the inst.ks=hd:<device> option.
display
For a remote display of the UI, use the inst.vnc option.
utf8
This option was no longer required as the default TERM setting behaves as expected.
noipv6
ipv6 is built into the kernel and cannot be removed by the installation program. You can disable ipv6using ipv6.disable=1. This setting is used by the installed system.
upgradeany
This option was no longer required as the installation program no longer handles upgrades.
CHAPTER 16. BOOT OPTIONS
81

PART V. KICKSTART REFERENCES
Red Hat Enterprise Linux 8 Performing an advanced RHEL installation
82
APPENDIX A. KICKSTART SCRIPT FILE FORMAT REFERENCEThis reference describes in detail the kickstart file format.
A.1. KICKSTART FILE FORMAT
Kickstart scripts are plain text files that contain keywords recognized by the installation program, whichserve as directions for the installation. Any text editor able to save files as ASCII text, such as Gedit or vim on Linux systems or Notepad on Windows systems, can be used to create and edit Kickstart files.The file name of your Kickstart configuration does not matter; however, it is recommended to use asimple name as you will need to specify this name later in other configuration files or dialogs.
Commands
Commands are keywords that serve as directions for installation. Each command must be on a singleline. Commands can take options. Specifying commands and options is similar to using Linuxcommands in shell.
Sections
Certain special commands that begin with the percent % character start a section. Interpretation ofcommands in sections is different from commands placed outside sections. Every section must befinished with %end command.
Section types
The available sections are:
Add-on sections. These sections use the %addon addon_name command.
Package selection sections. Starts with %packages. Use it to list packages for installation,including indirect means such as package groups or modules.
Script sections. These start with %pre, %pre-install, %post, and %onerror. These sectionsare not required.
Command section
The command section is a term used for the commands in the Kickstart file that are not part of anyscript section or %packages section.
Script section count and ordering
All sections except the command section are optional and can be present multiple times. When aparticular type of script section is to be evaluated, all sections of that type present in the Kickstartare evaluated in order of appearance: two %post sections are evaluated one after another, in theorder as they appear. However, you do not have to specify the various types of script sections in anyorder: it does not matter if there are %post sections before %pre sections.
Comments
Kickstart comments are lines starting with the hash # character. These lines are ignored by theinstallation program.
Items that are not required can be omitted. Omitting any required item results in the installationprogram changing to the interactive mode so that the the user can provide an answer to the relateditem, just as during a regular interactive installation. It is also possible to declare the kickstart script asnon-interactive with the cmdline command. In non-interactive mode, any missing answer aborts theinstallation process.
APPENDIX A. KICKSTART SCRIPT FILE FORMAT REFERENCE
83
A.2. PACKAGE SELECTION IN KICKSTART
Kickstart uses sections started by the %packages command for selecting packages to install. You caninstall packages, groups, environments, module streams, and module profiles this way.
A.2.1. Package selection section
Use the %packages command to begin a Kickstart section which describes the software packages to beinstalled. The %packages section must end with the %end command.
You can specify packages by environment, group, module stream, module profile, or by their packagenames. Several environments and groups that contain related packages are defined. See the repository/repodata/*-comps-repository.architecture.xml file on the Red Hat Enterprise Linux 8Installation DVD for a list of environments and groups.
The *-comps-repository.architecture.xml file contains a structure describing available environments(marked by the <environment> tag) and groups (the <group> tag). Each entry has an ID, user visibilityvalue, name, description, and package list. If the group is selected for installation, the packages marked mandatory in the package list are always installed, the packages marked default are installed if they arenot specifically excluded elsewhere, and the packages marked optional must be specifically includedelsewhere even when the group is selected.
You can specify a package group or environment using either its ID (the <id> tag) or name (the <name>tag).
If you are not sure what package should be installed, Red Hat recommends you to select the MinimalInstall environment. Minimal Install provides only the packages which are essential for running Red HatEnterprise Linux 8. This will substantially reduce the chance of the system being affected by avulnerability. If necessary, additional packages can be added later after the installation. For more detailson Minimal Install, see the Installing the Minimum Amount of Packages Required section of the SecurityHardening document. Note that Initial Setup can not run after a system is installed from a Kickstart fileunless a desktop environment and the X Window System were included in the installation and graphicallogin was enabled.
IMPORTANT
To install a 32-bit package on a 64-bit system:
specify the --multilib option for the %packages section
append the package name with the 32-bit architecture for which the packagewas built; for example, glibc.i686
A.2.2. Package selection commands
These commands can be used within the %packages section of a Kickstart file.
Specifying an environment
Specify an entire environment to be installed as a line starting with the @^ symbols:
%packages@^Infrastructure Server%end
This installs all packages which are part of the Infrastructure Server environment. All available
Red Hat Enterprise Linux 8 Performing an advanced RHEL installation
84
This installs all packages which are part of the Infrastructure Server environment. All availableenvironments are described in the repository/repodata/*-comps-repository.architecture.xml fileon the Red Hat Enterprise Linux 8 Installation DVD.
Only a single environment should be specified in the Kickstart file. If more environments arespecified, only the last specified environment is used.
Specifying groups
Specify groups, one entry to a line, starting with an @ symbol, and then the full group name or groupid as given in the *-comps-repository.architecture.xml file. For example:
%packages@X Window System@Desktop@Sound and Video%end
The Core group is always selected - it is not necessary to specify it in the %packages section.
Specifying individual packages
Specify individual packages by name, one entry to a line. You can use the asterisk character (*) as awildcard in package names. For example:
%packagessqlitecurlaspelldocbook*%end
The docbook* entry includes the packages docbook-dtds and docbook-style that match thepattern represented with the wildcard.
Specifying profiles of module streams
Specify profiles for module streams, one entry to a line, using the syntax for profiles:
%packages@module:stream/profile%end
This installs all packages listed in the specified profile of the module stream.
When a module has a default stream specified, you can leave it out. When the default streamis not specified, you must specify it.
When a module stream has a default profile specified, you can leave it out. When the defaultprofile is not specified, you must specify it.
Installing a module multiple times with different streams is not possible.
Installing multiple profiles of the same module and stream is possible.
Modules and groups use the same syntax starting with the @ symbol. When a module and a packagegroup exist with the same name, the module takes precedence.
APPENDIX A. KICKSTART SCRIPT FILE FORMAT REFERENCE
85
In Red Hat Enterprise Linux 8, modules are present only in the AppStream repository. To list availablemodules, use the yum module list command on an installed Red Hat Enterprise Linux 8 system.
It is also possible to enable module streams using the module Kickstart command and then installpackages contained in the module stream by naming them directly.
Excluding environments, groups, or packages
Use a leading dash (-) to specify packages or groups to exclude from the installation. For example:
%packages-@Graphical Administration Tools-autofs-ipa*compat%end
IMPORTANT
Installing all available packages using only * in a Kickstart file is not supported.
You can change the default behavior of the %packages section by using several options. Some optionswork for the entire package selection, others are used with only specific groups.
Additional resources
For more information about handling packages, see the Installing software with yum chapter ofthe Configuring basic system settings document.
For more information about modules and streams, see the Installing, managing, and removinguser-space components document.
A.2.3. Common package selection options
The following options are available for the %packages sections. To use an option, append it to the startof the package selection section. For example:
%packages --multilib --ignoremissing
--default
Install the default set of packages. This corresponds to the package set which would be installed if noother selections were made in the Package Selection screen during an interactive installation.
--excludedocs
Do not install any documentation contained within packages. In most cases, this excludes any filesnormally installed in the /usr/share/doc directory, but the specific files to be excluded depend onindividual packages.
--ignoremissing
Ignore any packages, groups, module streams, module profiles, and environments missing in theinstallation source, instead of halting the installation to ask if the installation should be aborted orcontinued.
--instLangs=
Specify a list of languages to install. Note that this is different from package group level selections.
Red Hat Enterprise Linux 8 Performing an advanced RHEL installation
86
Specify a list of languages to install. Note that this is different from package group level selections.This option does not describe which package groups should be installed; instead, it sets RPM macroscontrolling which translation files from individual packages should be installed.
--multilib
Configure the installed system for multilib packages, to allow installing 32-bit packages on a 64-bitsystem, and install packages specified in this section as such.Normally, on an AMD64 and Intel 64 system, you can install only the x86_64 and the noarchpackages. However, with the --multilib option, you can automatically install the 32-bit AMD and thei686 Intel system packages available, if any.
This only applies to packages explicitly specified in the %packages section. Packages which are onlybeing installed as dependencies without being specified in the Kickstart file are only installed inarchitecture versions in which they are needed, even if they are available for more architectures.
This option only works during the installation. Already installed systems are not configured for multilibpackages installation using the dnf command.
--nocore
Disables installation of the @Core package group which is otherwise always installed by default.Disabling the @Core package group with --nocore should be only used for creating lightweightcontainers; installing a desktop or server system with --nocore will result in an unusable system.
NOTES
Using -@Core to exclude packages in the @Core package group does notwork. The only way to exclude the @Core package group is with the --nocoreoption.
The @Core package group is defined as a minimal set of packages neededfor installing a working system. It is not related in any way to core packages asdefined in the Package Manifest and Scope of Coverage Details.
--excludeWeakdeps
Disables installation of packages from weak dependencies. These are packages linked to theselected package set by Recommends and Supplements flags. By default weak dependencies will beinstalled.
--retries=
Sets the number of times Yum will attempt to download packages (retries). The default value is 10.This option only applies during the installation, and will not affect Yum configuration on the installedsystem.
--timeout=
Sets the Yum timeout in seconds. The default value is 30. This option only applies during theinstallation, and will not affect Yum configuration on the installed system.
A.2.4. Options for specific package groups
The options in this list only apply to a single package group. Instead of using them at the %packagescommand in the Kickstart file, append them to the group name. For example:
APPENDIX A. KICKSTART SCRIPT FILE FORMAT REFERENCE
87
%packages@Graphical Administration Tools --optional%end
--nodefaults
Only install the group’s mandatory packages, not the default selections.
--optional
Install packages marked as optional in the group definition in the *-comps-repository.architecture.xml file, in addition to installing the default selections.Note that some package groups, such as Scientific Support, do not have any mandatory or defaultpackages specified - only optional packages. In this case the --optional option must always be used,otherwise no packages from this group will be installed.
A.3. SCRIPTS IN KICKSTART FILE
A kickstart file can include the following scripts:
%pre
%pre-install
%post
This section provides the following details about the scripts:
Execution time
Types of commands that can be included in the script
Purpose of the script
Script options
A.3.1. %pre script
The %pre scripts are run on the system immediately after the Kickstart file has been loaded, but beforeit is completely parsed and installation begins. Each of these sections must start with %pre and end with%end.
The %pre script can be used for activation and configuration of networking and storage devices. It isalso possible to run scripts, using interpreters available in the installation environment. Adding a %prescript can be useful if you have networking and storage that needs special configuration beforeproceeding with the installation, or have a script that, for example, sets up additional logging parametersor environment variables.
Debugging problems with %pre scripts can be difficult, so it is recommended only to use a %pre scriptwhen necessary.
Commands related to networking, storage, and file systems are available to use in the %pre script, inaddition to most of the utilities in the installation environment /sbin and /bin directories.
You can access the network in the %pre section. However, the name service has not been configured atthis point, so only IP addresses work, not URLs.
NOTE
Red Hat Enterprise Linux 8 Performing an advanced RHEL installation
88
NOTE
The pre script does not run in the chroot environment.
A.3.1.1. %pre script section options
The following options can be used to change the behavior of pre-installation scripts. To use an option,append it to the %pre line at the beginning of the script. For example:
%pre --interpreter=/usr/libexec/platform-python-- Python script omitted --%end
--interpreter=
Allows you to specify a different scripting language, such as Python. Any scripting language availableon the system can be used; in most cases, these are /usr/bin/sh, /usr/bin/bash, and /usr/libexec/platform-python.Note that the platform-python interpreter uses Python version 3.6. You must change your Pythonscripts from previous RHEL versions for the new path and version. Additionally, platform-python ismeant for system tools: Use the python36 package outside the installation environment. For moredetails about Python in Red Hat Enterprise Linux 8, see Introduction to Python in Configuring basicsystem settings.
--erroronfail
Display an error and halt the installation if the script fails. The error message will direct you to wherethe cause of the failure is logged.
--log=
Logs the script’s output into the specified log file. For example:
%pre --log=/tmp/ks-pre.log
A.3.2. %pre-install script
The commands in the pre-install script are run after the following tasks are complete:
System is partitioned
Filesystems are created and mounted under /mnt/sysimage
Network has been configured according to any boot options and kickstart commands
Each of the %pre-install sections must start with %pre-install and end with %end.
The %pre-install scripts can be used to modify the installation, and to add users and groups withguaranteed IDs before package installation.
It is recommended to use the %post scripts for any modifications required in the installation. Use the %pre-install script only if the %post script falls short for the required modifications.
Note: The pre-install script does not run in chroot environment.
A.3.2.1. %pre-install script section options
APPENDIX A. KICKSTART SCRIPT FILE FORMAT REFERENCE
89
The following options can be used to change the behavior of pre-install scripts. To use an option,append it to the %pre-install line at the beginning of the script. For example:
%pre-install --interpreter=/usr/libexec/platform-python-- Python script omitted --%end
Note that you can have multiple %pre-install sections, with same or different interpreters. They areevaluated in their order of appearance in the Kickstart file.
--interpreter=
Allows you to specify a different scripting language, such as Python. Any scripting language availableon the system can be used; in most cases, these are /usr/bin/sh, /usr/bin/bash, and /usr/libexec/platform-python.Note that the platform-python interpreter uses Python version 3.6. You must change your Pythonscripts from previous RHEL versions for the new path and version. Additionally, platform-python ismeant for system tools: Use the python36 package outside the installation environment. For moredetails about Python in Red Hat Enterprise Linux 8, see Introduction to Python in Configuring basicsystem settings.
--erroronfail
Display an error and halt the installation if the script fails. The error message will direct you to wherethe cause of the failure is logged.
--log=
Logs the script’s output into the specified log file. For example:
%pre-install --log=/mnt/sysimage/root/ks-pre.log
A.3.3. %post script
The %post script is a post-installation script that is run after the installation is complete, but before thesystem is rebooted for the first time. You can use this section to run tasks such as system subscription.
You have the option of adding commands to run on the system once the installation is complete, butbefore the system is rebooted for the first time. This section must start with %post and end with %end.
The %post section is useful for functions such as installing additional software or configuring anadditional name server. The post-install script is run in a chroot environment, therefore, performingtasks such as copying scripts or RPM packages from the installation media do not work by default. Youcan change this behavior using the --nochroot option as described below. Then the %post script will runin the installation environment, not in chroot on the installed target system.
Because post-install script runs in a chroot environment, most systemctl commands will refuse toperform any action. For more information, see the Behavior of systemctl in a chroot Environmentsection of the Configuring and managing system administration document.
Note that during execution of the %post section, the installation media must be still inserted.
A.3.3.1. %post script section options
The following options can be used to change the behavior of post-installation scripts. To use an option,append it to the %post line at the beginning of the script. For example:
Red Hat Enterprise Linux 8 Performing an advanced RHEL installation
90
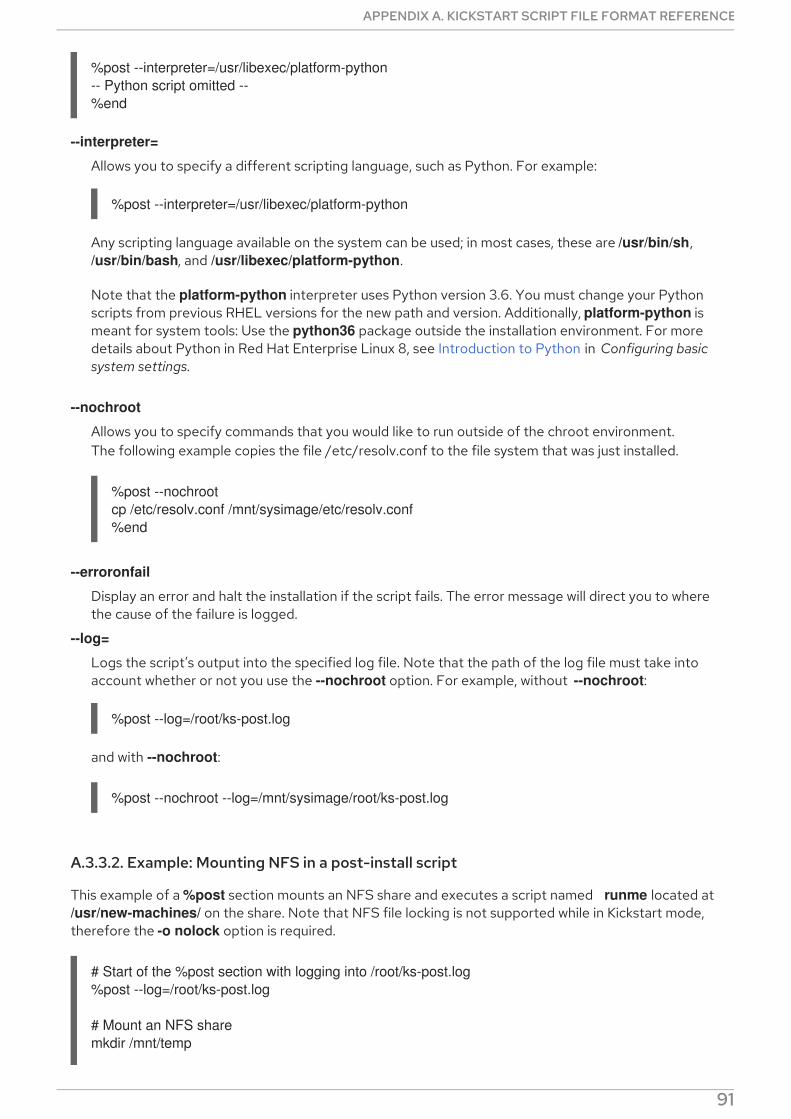
%post --interpreter=/usr/libexec/platform-python-- Python script omitted --%end
--interpreter=
Allows you to specify a different scripting language, such as Python. For example:
%post --interpreter=/usr/libexec/platform-python
Any scripting language available on the system can be used; in most cases, these are /usr/bin/sh, /usr/bin/bash, and /usr/libexec/platform-python.
Note that the platform-python interpreter uses Python version 3.6. You must change your Pythonscripts from previous RHEL versions for the new path and version. Additionally, platform-python ismeant for system tools: Use the python36 package outside the installation environment. For moredetails about Python in Red Hat Enterprise Linux 8, see Introduction to Python in Configuring basicsystem settings.
--nochroot
Allows you to specify commands that you would like to run outside of the chroot environment.The following example copies the file /etc/resolv.conf to the file system that was just installed.
%post --nochrootcp /etc/resolv.conf /mnt/sysimage/etc/resolv.conf%end
--erroronfail
Display an error and halt the installation if the script fails. The error message will direct you to wherethe cause of the failure is logged.
--log=
Logs the script’s output into the specified log file. Note that the path of the log file must take intoaccount whether or not you use the --nochroot option. For example, without --nochroot:
%post --log=/root/ks-post.log
and with --nochroot:
%post --nochroot --log=/mnt/sysimage/root/ks-post.log
A.3.3.2. Example: Mounting NFS in a post-install script
This example of a %post section mounts an NFS share and executes a script named runme located at /usr/new-machines/ on the share. Note that NFS file locking is not supported while in Kickstart mode,therefore the -o nolock option is required.
# Start of the %post section with logging into /root/ks-post.log%post --log=/root/ks-post.log
# Mount an NFS sharemkdir /mnt/temp
APPENDIX A. KICKSTART SCRIPT FILE FORMAT REFERENCE
91
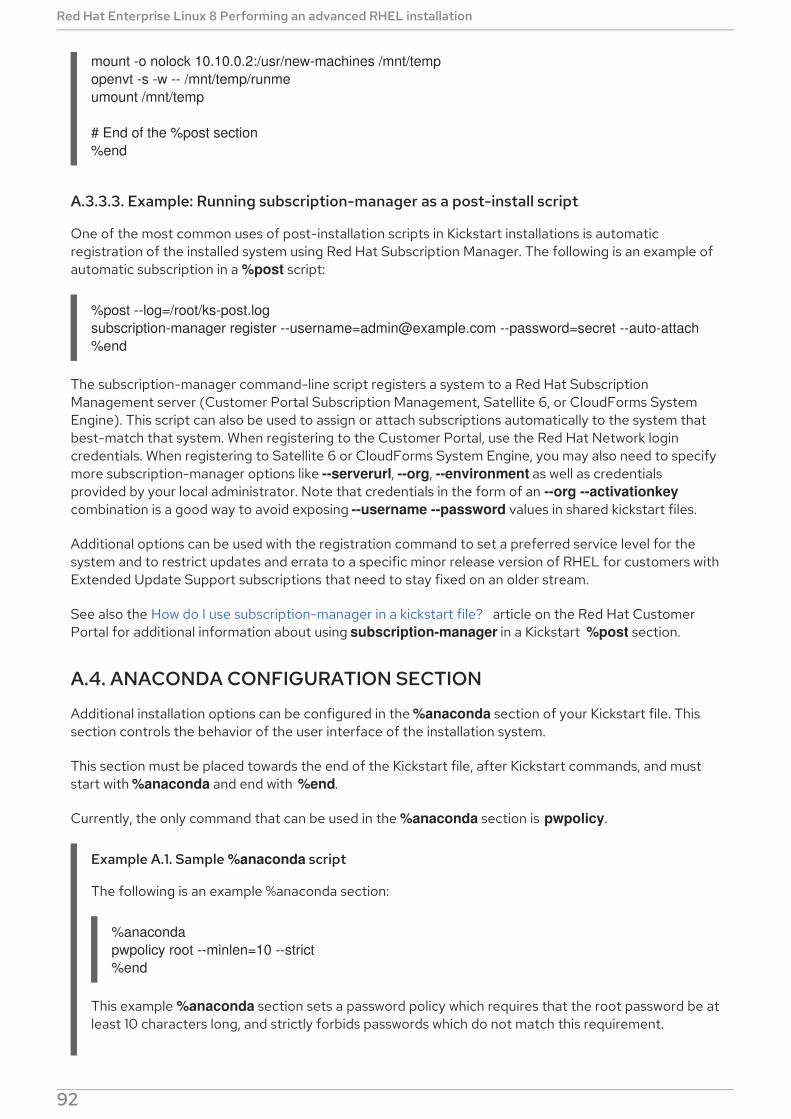
mount -o nolock 10.10.0.2:/usr/new-machines /mnt/tempopenvt -s -w -- /mnt/temp/runmeumount /mnt/temp
# End of the %post section%end
A.3.3.3. Example: Running subscription-manager as a post-install script
One of the most common uses of post-installation scripts in Kickstart installations is automaticregistration of the installed system using Red Hat Subscription Manager. The following is an example ofautomatic subscription in a %post script:
%post --log=/root/ks-post.logsubscription-manager register [email protected] --password=secret --auto-attach%end
The subscription-manager command-line script registers a system to a Red Hat SubscriptionManagement server (Customer Portal Subscription Management, Satellite 6, or CloudForms SystemEngine). This script can also be used to assign or attach subscriptions automatically to the system thatbest-match that system. When registering to the Customer Portal, use the Red Hat Network logincredentials. When registering to Satellite 6 or CloudForms System Engine, you may also need to specifymore subscription-manager options like --serverurl, --org, --environment as well as credentialsprovided by your local administrator. Note that credentials in the form of an --org --activationkeycombination is a good way to avoid exposing --username --password values in shared kickstart files.
Additional options can be used with the registration command to set a preferred service level for thesystem and to restrict updates and errata to a specific minor release version of RHEL for customers withExtended Update Support subscriptions that need to stay fixed on an older stream.
See also the How do I use subscription-manager in a kickstart file? article on the Red Hat CustomerPortal for additional information about using subscription-manager in a Kickstart %post section.
A.4. ANACONDA CONFIGURATION SECTION
Additional installation options can be configured in the %anaconda section of your Kickstart file. Thissection controls the behavior of the user interface of the installation system.
This section must be placed towards the end of the Kickstart file, after Kickstart commands, and muststart with %anaconda and end with %end.
Currently, the only command that can be used in the %anaconda section is pwpolicy.
Example A.1. Sample %anaconda script
The following is an example %anaconda section:
%anacondapwpolicy root --minlen=10 --strict%end
This example %anaconda section sets a password policy which requires that the root password be atleast 10 characters long, and strictly forbids passwords which do not match this requirement.
Red Hat Enterprise Linux 8 Performing an advanced RHEL installation
92
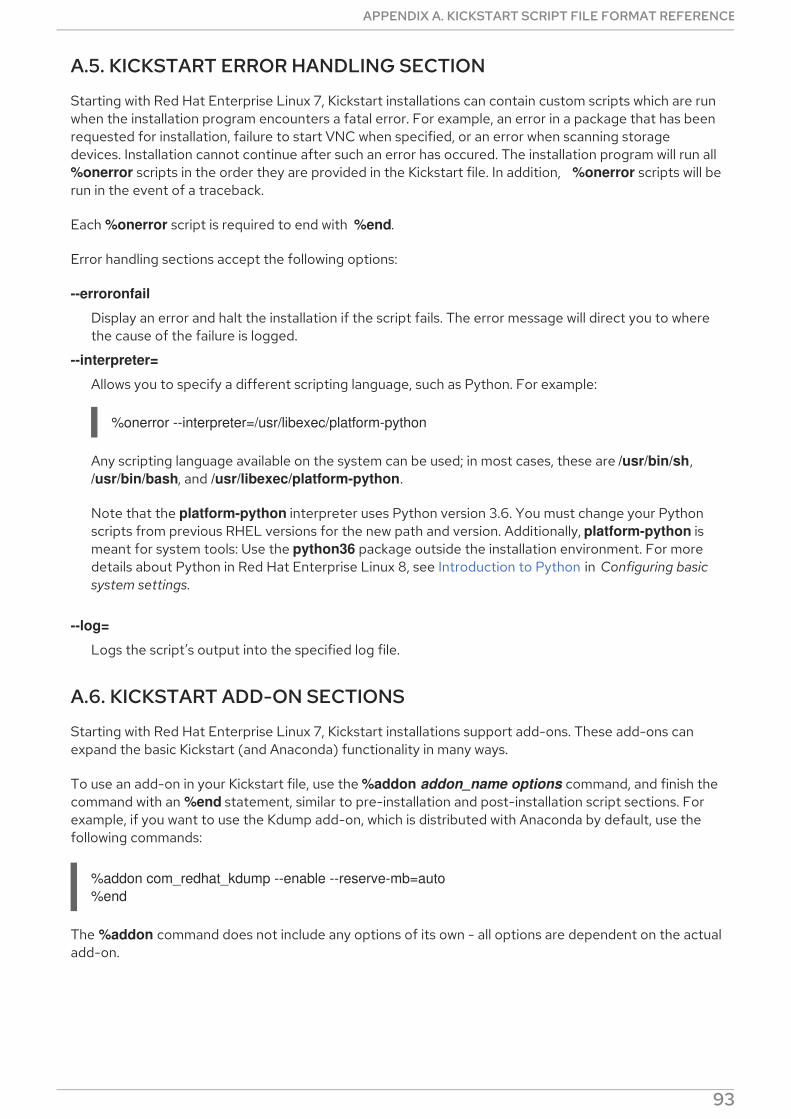
A.5. KICKSTART ERROR HANDLING SECTION
Starting with Red Hat Enterprise Linux 7, Kickstart installations can contain custom scripts which are runwhen the installation program encounters a fatal error. For example, an error in a package that has beenrequested for installation, failure to start VNC when specified, or an error when scanning storagedevices. Installation cannot continue after such an error has occured. The installation program will run all%onerror scripts in the order they are provided in the Kickstart file. In addition, %onerror scripts will berun in the event of a traceback.
Each %onerror script is required to end with %end.
Error handling sections accept the following options:
--erroronfail
Display an error and halt the installation if the script fails. The error message will direct you to wherethe cause of the failure is logged.
--interpreter=
Allows you to specify a different scripting language, such as Python. For example:
%onerror --interpreter=/usr/libexec/platform-python
Any scripting language available on the system can be used; in most cases, these are /usr/bin/sh, /usr/bin/bash, and /usr/libexec/platform-python.
Note that the platform-python interpreter uses Python version 3.6. You must change your Pythonscripts from previous RHEL versions for the new path and version. Additionally, platform-python ismeant for system tools: Use the python36 package outside the installation environment. For moredetails about Python in Red Hat Enterprise Linux 8, see Introduction to Python in Configuring basicsystem settings.
--log=
Logs the script’s output into the specified log file.
A.6. KICKSTART ADD-ON SECTIONS
Starting with Red Hat Enterprise Linux 7, Kickstart installations support add-ons. These add-ons canexpand the basic Kickstart (and Anaconda) functionality in many ways.
To use an add-on in your Kickstart file, use the %addon addon_name options command, and finish thecommand with an %end statement, similar to pre-installation and post-installation script sections. Forexample, if you want to use the Kdump add-on, which is distributed with Anaconda by default, use thefollowing commands:
%addon com_redhat_kdump --enable --reserve-mb=auto%end
The %addon command does not include any options of its own - all options are dependent on the actualadd-on.
APPENDIX A. KICKSTART SCRIPT FILE FORMAT REFERENCE
93
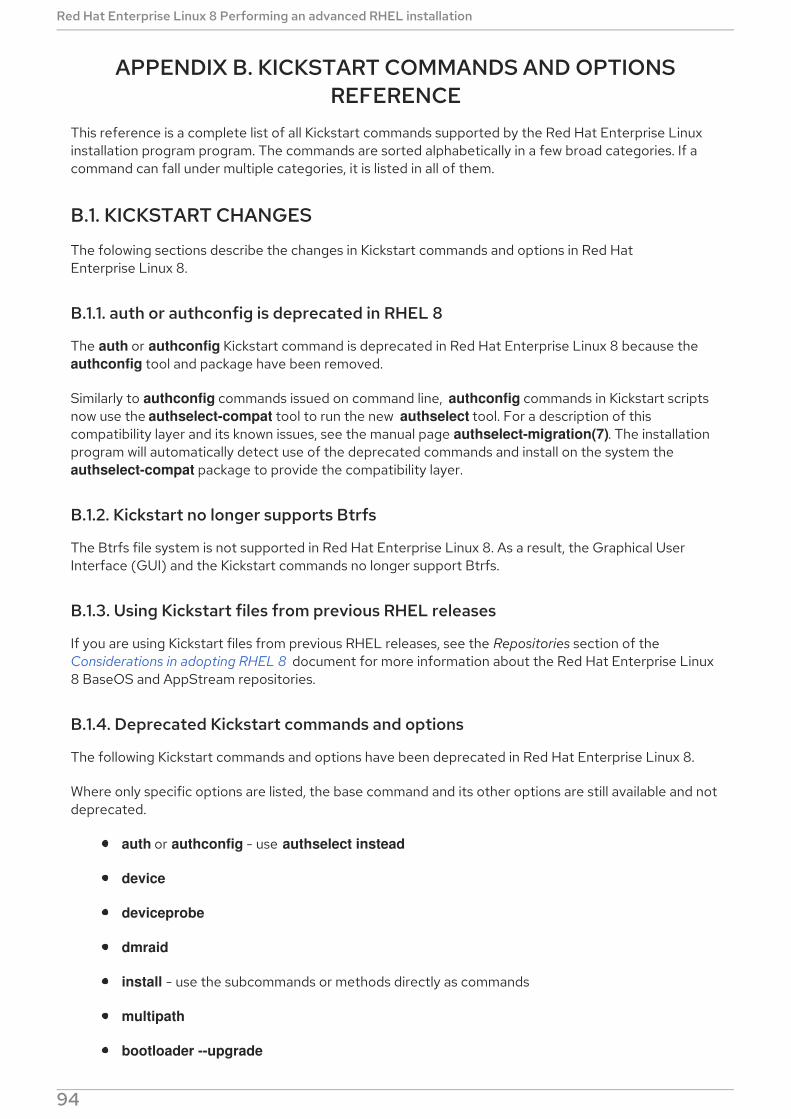
APPENDIX B. KICKSTART COMMANDS AND OPTIONSREFERENCE
This reference is a complete list of all Kickstart commands supported by the Red Hat Enterprise Linuxinstallation program program. The commands are sorted alphabetically in a few broad categories. If acommand can fall under multiple categories, it is listed in all of them.
B.1. KICKSTART CHANGES
The folowing sections describe the changes in Kickstart commands and options in Red HatEnterprise Linux 8.
B.1.1. auth or authconfig is deprecated in RHEL 8
The auth or authconfig Kickstart command is deprecated in Red Hat Enterprise Linux 8 because the authconfig tool and package have been removed.
Similarly to authconfig commands issued on command line, authconfig commands in Kickstart scriptsnow use the authselect-compat tool to run the new authselect tool. For a description of thiscompatibility layer and its known issues, see the manual page authselect-migration(7). The installationprogram will automatically detect use of the deprecated commands and install on the system the authselect-compat package to provide the compatibility layer.
B.1.2. Kickstart no longer supports Btrfs
The Btrfs file system is not supported in Red Hat Enterprise Linux 8. As a result, the Graphical UserInterface (GUI) and the Kickstart commands no longer support Btrfs.
B.1.3. Using Kickstart files from previous RHEL releases
If you are using Kickstart files from previous RHEL releases, see the Repositories section of theConsiderations in adopting RHEL 8 document for more information about the Red Hat Enterprise Linux8 BaseOS and AppStream repositories.
B.1.4. Deprecated Kickstart commands and options
The following Kickstart commands and options have been deprecated in Red Hat Enterprise Linux 8.
Where only specific options are listed, the base command and its other options are still available and notdeprecated.
auth or authconfig - use authselect instead
device
deviceprobe
dmraid
install - use the subcommands or methods directly as commands
multipath
bootloader --upgrade
Red Hat Enterprise Linux 8 Performing an advanced RHEL installation
94
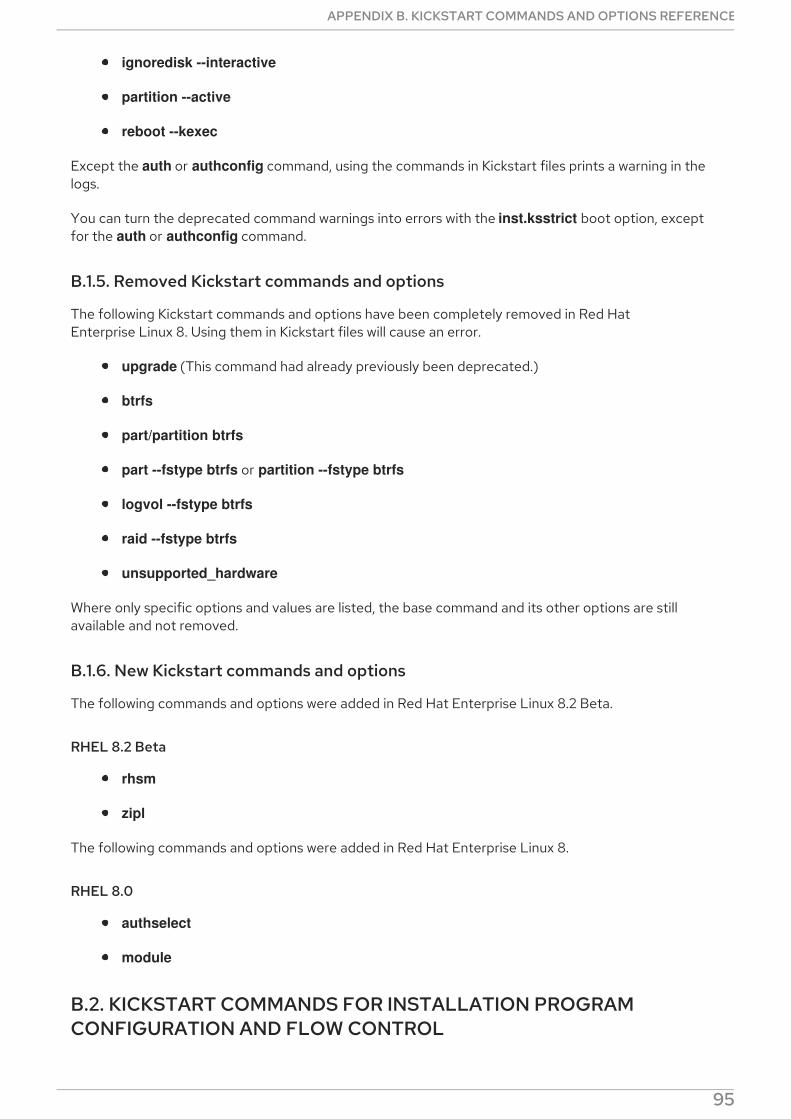
ignoredisk --interactive
partition --active
reboot --kexec
Except the auth or authconfig command, using the commands in Kickstart files prints a warning in thelogs.
You can turn the deprecated command warnings into errors with the inst.ksstrict boot option, exceptfor the auth or authconfig command.
B.1.5. Removed Kickstart commands and options
The following Kickstart commands and options have been completely removed in Red HatEnterprise Linux 8. Using them in Kickstart files will cause an error.
upgrade (This command had already previously been deprecated.)
btrfs
part/partition btrfs
part --fstype btrfs or partition --fstype btrfs
logvol --fstype btrfs
raid --fstype btrfs
unsupported_hardware
Where only specific options and values are listed, the base command and its other options are stillavailable and not removed.
B.1.6. New Kickstart commands and options
The following commands and options were added in Red Hat Enterprise Linux 8.2 Beta.
RHEL 8.2 Beta
rhsm
zipl
The following commands and options were added in Red Hat Enterprise Linux 8.
RHEL 8.0
authselect
module
B.2. KICKSTART COMMANDS FOR INSTALLATION PROGRAMCONFIGURATION AND FLOW CONTROL
The Kickstart commands in this list control the mode and course of installation, and what happens at its
APPENDIX B. KICKSTART COMMANDS AND OPTIONS REFERENCE
95

The Kickstart commands in this list control the mode and course of installation, and what happens at itsend.
B.2.1. autostep
The autostep Kickstart command is optional. This option makes the installation program step throughevery screen, displaying each briefly. Normally, Kickstart installations skip unnecessary screens.
Syntax
autostep [--autoscreenshot]
Options
--autoscreenshot - Take a screenshot at every step during installation. These screenshots arestored in /tmp/anaconda-screenshots/ during the installation, and after the installation finishesyou can find them in /root/anaconda-screenshots.Each screen is only captured right before the installation program switches to the next one. Thisis important, because if you do not use all required Kickstart options and the installationtherefore does not begin automatically, you can go to the screens which were not automaticallyconfigured, perform any configuration you want. Then, when you click Done to continue, thescreen is captured including the configuration you just provided.
Notes
This option should not be used when deploying a system because it can disrupt packageinstallation.
B.2.2. cdrom
The cdrom Kickstart command is optional. It performs the installation from the first optical drive on thesystem.
Syntax
cdrom
Notes
Previously, the cdrom command had to be used together with the install command. The installcommand has been deprecated and cdrom can be used on its own, because it implies install.
This command has no options.
To actually run the installation, one of cdrom, harddrive, hmc, nfs, liveimg, or url must bespecified.
B.2.3. cmdline
The cmdline Kickstart command is optional. It performs the installation in a completely non-interactivecommand line mode. Any prompt for interaction halts the installation.
Syntax
Red Hat Enterprise Linux 8 Performing an advanced RHEL installation
96
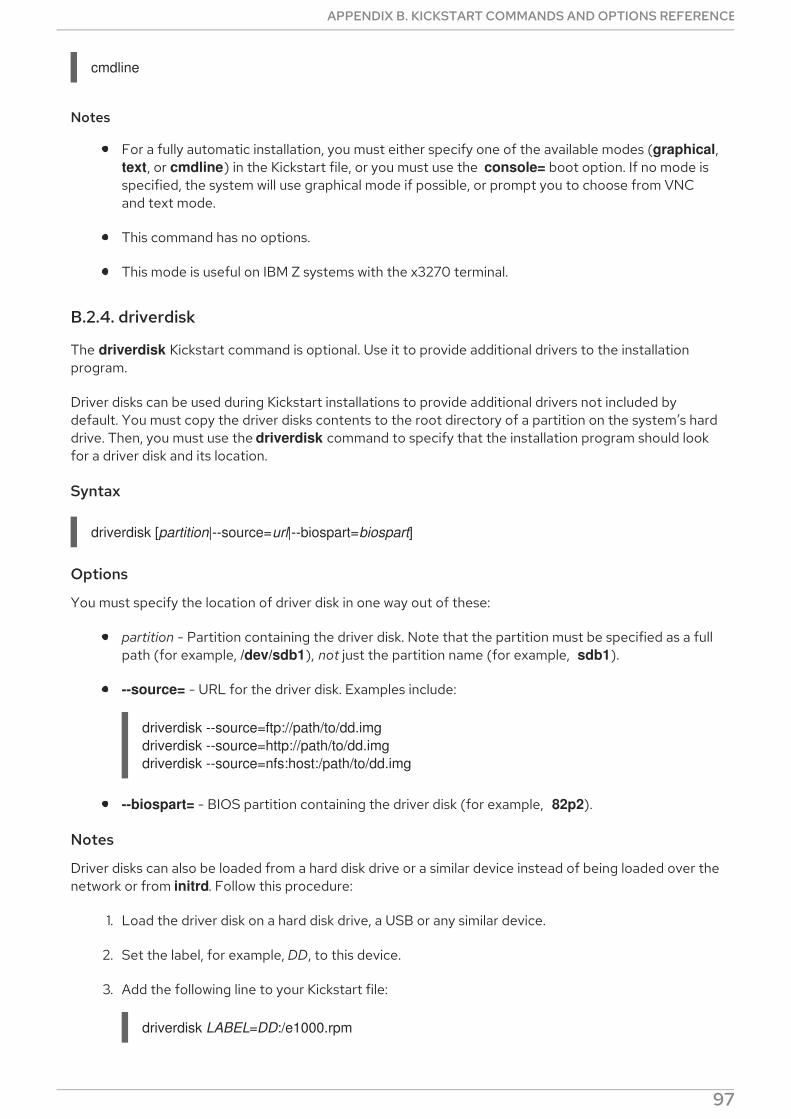
cmdline
Notes
For a fully automatic installation, you must either specify one of the available modes (graphical, text, or cmdline) in the Kickstart file, or you must use the console= boot option. If no mode isspecified, the system will use graphical mode if possible, or prompt you to choose from VNCand text mode.
This command has no options.
This mode is useful on IBM Z systems with the x3270 terminal.
B.2.4. driverdisk
The driverdisk Kickstart command is optional. Use it to provide additional drivers to the installationprogram.
Driver disks can be used during Kickstart installations to provide additional drivers not included bydefault. You must copy the driver disks contents to the root directory of a partition on the system’s harddrive. Then, you must use the driverdisk command to specify that the installation program should lookfor a driver disk and its location.
Syntax
driverdisk [partition|--source=url|--biospart=biospart]
Options
You must specify the location of driver disk in one way out of these:
partition - Partition containing the driver disk. Note that the partition must be specified as a fullpath (for example, /dev/sdb1), not just the partition name (for example, sdb1).
--source= - URL for the driver disk. Examples include:
driverdisk --source=ftp://path/to/dd.imgdriverdisk --source=http://path/to/dd.imgdriverdisk --source=nfs:host:/path/to/dd.img
--biospart= - BIOS partition containing the driver disk (for example, 82p2).
Notes
Driver disks can also be loaded from a hard disk drive or a similar device instead of being loaded over thenetwork or from initrd. Follow this procedure:
1. Load the driver disk on a hard disk drive, a USB or any similar device.
2. Set the label, for example, DD, to this device.
3. Add the following line to your Kickstart file:
driverdisk LABEL=DD:/e1000.rpm
APPENDIX B. KICKSTART COMMANDS AND OPTIONS REFERENCE
97
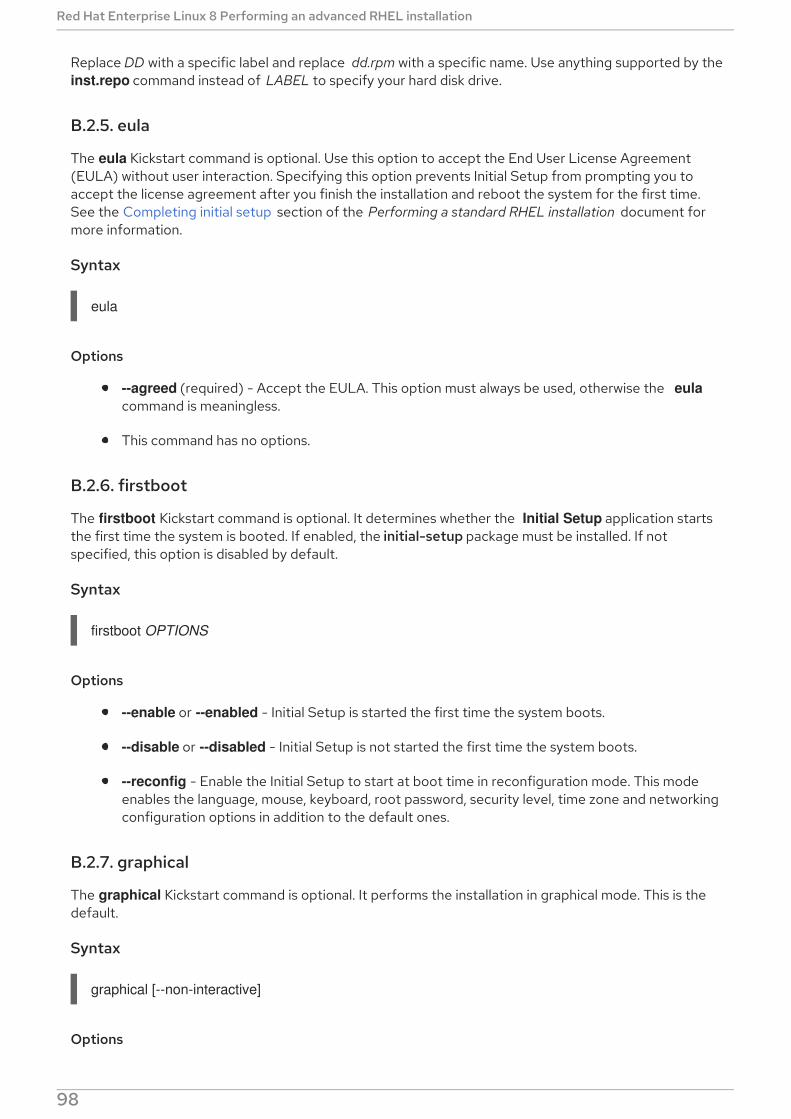
Replace DD with a specific label and replace dd.rpm with a specific name. Use anything supported by theinst.repo command instead of LABEL to specify your hard disk drive.
B.2.5. eula
The eula Kickstart command is optional. Use this option to accept the End User License Agreement(EULA) without user interaction. Specifying this option prevents Initial Setup from prompting you toaccept the license agreement after you finish the installation and reboot the system for the first time.See the Completing initial setup section of the Performing a standard RHEL installation document formore information.
Syntax
eula
Options
--agreed (required) - Accept the EULA. This option must always be used, otherwise the eulacommand is meaningless.
This command has no options.
B.2.6. firstboot
The firstboot Kickstart command is optional. It determines whether the Initial Setup application startsthe first time the system is booted. If enabled, the initial-setup package must be installed. If notspecified, this option is disabled by default.
Syntax
firstboot OPTIONS
Options
--enable or --enabled - Initial Setup is started the first time the system boots.
--disable or --disabled - Initial Setup is not started the first time the system boots.
--reconfig - Enable the Initial Setup to start at boot time in reconfiguration mode. This modeenables the language, mouse, keyboard, root password, security level, time zone and networkingconfiguration options in addition to the default ones.
B.2.7. graphical
The graphical Kickstart command is optional. It performs the installation in graphical mode. This is thedefault.
Syntax
graphical [--non-interactive]
Options
--non-interactive - Performs the installation in a completely non-interactive mode. This mode
Red Hat Enterprise Linux 8 Performing an advanced RHEL installation
98

--non-interactive - Performs the installation in a completely non-interactive mode. This modewill terminate the installation when user interaction is required.
Notes
For a fully automatic installation, you must either specify one of the available modes (graphical, text, or cmdline) in the Kickstart file, or you must use the console= boot option. If no mode isspecified, the system will use graphical mode if possible, or prompt you to choose from VNCand text mode.
B.2.8. halt
The halt Kickstart command is optional.
Halt the system after the installation has successfully completed. This is similar to a manual installation,where Anaconda displays a message and waits for the user to press a key before rebooting. During aKickstart installation, if no completion method is specified, this option is used as the default.
Syntax
halt
Notes
The halt command is equivalent to the shutdown -H command. For more details, see theshutdown(8) man page.
For other completion methods, see the poweroff, reboot, and shutdown commands.
This command has no options.
B.2.9. harddrive
The harddrive Kickstart command is optional. It performs the installation from a Red Hat installationtree or full installation ISO image on a local drive. The drive must contain a file system the installationprogram can mount: ext2, ext3, ext4, vfat, or xfs.
Syntax
harddrive OPTIONS
Options
--biospart= - BIOS partition to install from (such as 82).
--partition= - Partition to install from (such as sdb2).
--dir= - Directory containing the variant directory of the installation tree, or the ISO image ofthe full installation DVD.
Example
harddrive --partition=hdb2 --dir=/tmp/install-tree
APPENDIX B. KICKSTART COMMANDS AND OPTIONS REFERENCE
99
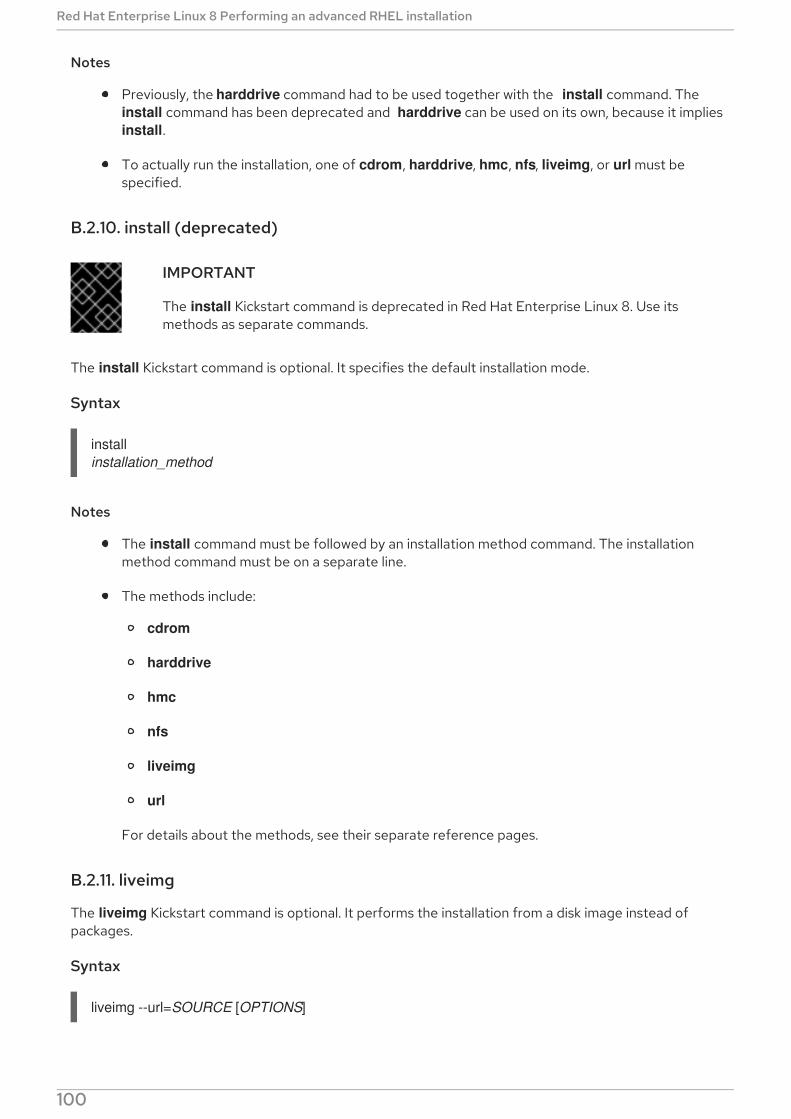
Notes
Previously, the harddrive command had to be used together with the install command. The install command has been deprecated and harddrive can be used on its own, because it impliesinstall.
To actually run the installation, one of cdrom, harddrive, hmc, nfs, liveimg, or url must bespecified.
B.2.10. install (deprecated)
IMPORTANT
The install Kickstart command is deprecated in Red Hat Enterprise Linux 8. Use itsmethods as separate commands.
The install Kickstart command is optional. It specifies the default installation mode.
Syntax
installinstallation_method
Notes
The install command must be followed by an installation method command. The installationmethod command must be on a separate line.
The methods include:
cdrom
harddrive
hmc
nfs
liveimg
url
For details about the methods, see their separate reference pages.
B.2.11. liveimg
The liveimg Kickstart command is optional. It performs the installation from a disk image instead ofpackages.
Syntax
liveimg --url=SOURCE [OPTIONS]
Red Hat Enterprise Linux 8 Performing an advanced RHEL installation
100
Mandatory options
--url= - The location to install from. Supported protocols are HTTP, HTTPS, FTP, and file.
Optional options
--url= - The location to install from. Supported protocols are HTTP, HTTPS, FTP, and file.
--proxy= - Specify an HTTP, HTTPS or FTP proxy to use while performing the installation.
--checksum= - An optional argument with the SHA256 checksum of the image file, used forverification.
--noverifyssl - Disable SSL verification when connecting to an HTTPS server.
Example
liveimg --url=file:///images/install/squashfs.img --checksum=03825f567f17705100de3308a20354b4d81ac9d8bed4bb4692b2381045e56197 --noverifyssl
Notes
The image can be the squashfs.img file from a live ISO image, a compressed tar file ( .tar, .tbz, .tgz, .txz, .tar.bz2, .tar.gz, or .tar.xz.), or any file system that the installation media can mount.Supported file systems are ext2, ext3, ext4, vfat, and xfs.
When using the liveimg installation mode with a driver disk, drivers on the disk will notautomatically be included in the installed system. If necessary, these drivers should be installedmanually, or in the %post section of a kickstart script.
Previously, the liveimg command had to be used together with the install command. The install command has been deprecated and liveimg can be used on its own, because it implies install.
To actually run the installation, one of cdrom, harddrive, hmc, nfs, liveimg, or url must bespecified.
B.2.12. logging
The logging Kickstart command is optional. It controls the error logging of Anaconda during installation.It has no effect on the installed system.
NOTE
Logging is supported over TCP only. For remote logging, ensure that the port numberthat you specify in --port= option is open on the remote server. The default port is 514.
Syntax
logging OPTIONS
Optional options
--host= - Send logging information to the given remote host, which must be running a syslogd
APPENDIX B. KICKSTART COMMANDS AND OPTIONS REFERENCE
101
--host= - Send logging information to the given remote host, which must be running a syslogdprocess configured to accept remote logging.
--port= - If the remote syslogd process uses a port other than the default, set it using thisoption.
--level= - Specify the minimum level of messages that appear on tty3. All messages are still sentto the log file regardless of this level, however. Possible values are debug, info, warning, error,or critical.
B.2.13. mediacheck
The mediacheck Kickstart command is optional. This command forces the installation program toperform a media check before starting the installation. This command requires that installations beattended, so it is disabled by default.
Syntax
mediacheck
Notes
This Kickstart command is equivalent to the rd.live.check boot option.
This command has no options.
B.2.14. nfs
The nfs Kickstart command is optional. It performs the installation from a specified NFS server.
Syntax
nfs OPTIONS
Options
--server= - Server from which to install (host name or IP).
--dir= - Directory containing the variant directory of the installation tree.
--opts= - Mount options to use for mounting the NFS export. (optional)
Example
nfs --server=nfsserver.example.com --dir=/tmp/install-tree
Notes
Previously, the nfs command had to be used together with the install command. The installcommand has been deprecated and nfs can be used on its own, because it implies install.
To actually run the installation, one of cdrom, harddrive, hmc, nfs, liveimg, or url must bespecified.
Red Hat Enterprise Linux 8 Performing an advanced RHEL installation
102
B.2.15. ostreesetup
The ostreesetup Kickstart command is optional. It is used to set up OStree-based installations.
Syntax
ostreesetup --osname=OSNAME [--remote=REMOTE] --url=URL --ref=REF [--nogpg]
Mandatory options:
--osname=OSNAME - Management root for OS installation.
--url=URL - URL of the repository to install from.
--ref=REF - Name of the branch from the repository to be used for installation.
Optional options:
--remote=REMOTE - Management root for OS installation.
--nogpg - Disable GPG key verification.
Notes
For more information about the OStree tools, see the upstream documentation:https://ostree.readthedocs.io/en/latest/
B.2.16. poweroff
The poweroff Kickstart command is optional. It shuts down and powers off the system after theinstallation has successfully completed. Normally during a manual installation, Anaconda displays amessage and waits for the user to press a key before rebooting.
Syntax
poweroff
Notes
The poweroff option is equivalent to the shutdown -P command. For more details, see theshutdown(8) man page.
For other completion methods, see the halt, reboot, and shutdown Kickstart commands. The halt option is the default completion method if no other methods are explicitly specified in theKickstart file.
The poweroff command is highly dependent on the system hardware in use. Specifically, certainhardware components such as the BIOS, APM (advanced power management), and ACPI(advanced configuration and power interface) must be able to interact with the system kernel.Consult your hardware documentation for more information on you system’s APM/ACPIabilities.
This command has no options.
APPENDIX B. KICKSTART COMMANDS AND OPTIONS REFERENCE
103
B.2.17. reboot
The reboot Kickstart command is optional. It instructs the installation program to reboot after theinstallation is successfully completed (no arguments). Normally, Kickstart displays a message and waitsfor the user to press a key before rebooting.
Syntax
reboot OPTIONS
Options
--eject - Attempt to eject the bootable media (DVD, USB, or other media) before rebooting.
--kexec - Uses the kexec system call instead of performing a full reboot, which immediatelyloads the installed system into memory, bypassing the hardware initialization normallyperformed by the BIOS or firmware.
IMPORTANT
This option is deprecated and available as a Technology Preview only. Forinformation on Red Hat scope of support for Technology Preview features, seethe Technology Preview Features Support Scope document.
When kexec is used, device registers (which would normally be cleared during afull system reboot) might stay filled with data, which could potentially createissues for some device drivers.
Notes
Use of the reboot option might result in an endless installation loop, depending on theinstallation media and method.
The reboot option is equivalent to the shutdown -r command. For more details, see theshutdown(8) man page.
Specify reboot to automate installation fully when installing in command line mode on IBM Z.
For other completion methods, see the halt, poweroff, and shutdown Kickstart options. The halt option is the default completion method if no other methods are explicitly specified in theKickstart file.
B.2.18. rhsm
The rhsm Kickstart command is optional. It instructs the installation program to register and installRHEL from the CDN.
NOTE
Registering and installing RHEL from the CDN is available in RHEL 8.2 beta.
The rhsm Kickstart command removes the requirement of using custom %postscripts when registering the system.
Red Hat Enterprise Linux 8 Performing an advanced RHEL installation
104
Options
--organization= - Uses the organization id to register and install RHEL from the CDN.
--activation-key= - Uses the activation key to register and install RHEL from the CDN. Multiplekeys can be used, as long as the activation keys are registered to your subscription.
--connect-to-insights - Connects the target system to Red Hat Insights.
--proxy= - Sets the HTTP proxy.
--server-hostname= - Sets the server hostname. Use this option if you are running SatelliteServer or performing internal testing.
--rhsm-baseurl= - Sets the rhsm baseurl option. Use this option if you are running SatelliteServer or performing internal testing.
NOTE
The Server hostname does not require the HTTP protocol, for example --server-hostname="nameofhost.com". The rhsm baseurl does require the HTTP protocol, forexample --rhsm-baseurl="http://nameofhost.com".
B.2.19. shutdown
The shutdown Kickstart command is optional. It shuts down the system after the installation hassuccessfully completed.
Syntax
shutdown
Notes
The shutdown Kickstart option is equivalent to the shutdown command. For more details, seethe shutdown(8) man page.
For other completion methods, see the halt, poweroff, and reboot Kickstart options. The haltoption is the default completion method if no other methods are explicitly specified in theKickstart file.
This command has no options.
B.2.20. sshpw
The sshpw Kickstart command is optional.
During the installation, you can interact with the installation program and monitor its progress over an SSH connection. Use the sshpw command to create temporary accounts through which to log on. Eachinstance of the command creates a separate account that exists only in the installation environment.These accounts are not transferred to the installed system.
Syntax
sshpw --username=name [OPTIONS] password
APPENDIX B. KICKSTART COMMANDS AND OPTIONS REFERENCE
105

Mandatory options
--username=name - Provides the name of the user. This option is required.
password - The password to use for the user. This option is required.
Optional options
--iscrypted - If this option is present, the password argument is assumed to already beencrypted. This option is mutually exclusive with --plaintext. To create an encrypted password,you can use Python:
$ python3 -c 'import crypt,getpass;pw=getpass.getpass();print(crypt.crypt(pw) if (pw==getpass.getpass("Confirm: ")) else exit())'
This generates a sha512 crypt-compatible hash of your password using a random salt.
--plaintext - If this option is present, the password argument is assumed to be in plain text. Thisoption is mutually exclusive with --iscrypted
--lock - If this option is present, this account is locked by default. This means that the user willnot be able to log in from the console.
--sshkey - If this is option is present, then the <password> string is interpreted as an ssh keyvalue.
Notes
By default, the ssh server is not started during the installation. To make ssh available duringthe installation, boot the system with the kernel boot option inst.sshd.
If you want to disable root ssh access, while allowing another user ssh access, use the following:
sshpw --username=example_username example_password --plaintextsshpw --username=root example_password --lock
To simply disable root ssh access, use the following:
sshpw --username=root example_password --lock
B.2.21. text
The text Kickstart command is optional. It performs the Kickstart installation in text mode. Kickstartinstallations are performed in graphical mode by default.
Syntax
text [--non-interactive]
Options
--non-interactive - Performs the installation in a completely non-interactive mode. This mode
Red Hat Enterprise Linux 8 Performing an advanced RHEL installation
106

--non-interactive - Performs the installation in a completely non-interactive mode. This modewill terminate the installation when user interaction is required.
Notes
Note that for a fully automatic installation, you must either specify one of the available modes(graphical, text, or cmdline) in the Kickstart file, or you must use the console= boot option. Ifno mode is specified, the system will use graphical mode if possible, or prompt you to choosefrom VNC and text mode.
B.2.22. url
The url Kickstart command is optional. It performs the installation from an installation tree image on aremote server using FTP, HTTP, or HTTPS.
Syntax
url --url=FROM [OPTIONS]
Mandatory options
--url=FROM - The location to install from. Supported protocols are HTTP, HTTPS, FTP, and file.
Optional options
--mirrorlist= - The mirror URL to install from.
--proxy= - Specify an HTTP, HTTPS or FTP proxy to use while performing the installation.
--noverifyssl - Disable SSL verification when connecting to an HTTPS server.
--metalink=URL - Specify the metalink URL to install from. Variable substitution is done for $releasever and $basearch in the URL.
Examples
To install from a HTTP server:
url --url=http://server/path
To install from a FTP server:
url --url=ftp://username:password@server/path
To install from a local file:
liveimg --url=file:///images/install/squashfs.img --noverifyssl
Notes
Previously, the url command had to be used together with the install command. The installcommand has been deprecated and url can be used on its own, because it implies install.
APPENDIX B. KICKSTART COMMANDS AND OPTIONS REFERENCE
107

To actually run the installation, one of cdrom, harddrive, hmc, nfs, liveimg, or url must bespecified.
B.2.23. vnc
The vnc Kickstart command is optional. It allows the graphical installation to be viewed remotely throughVNC.
This method is usually preferred over text mode, as there are some size and language limitations in textinstallations. With no additional options, this command starts a VNC server on the installation systemwith no password and displays the details required to connect to it.
Syntax
vnc [--host=host_name] [--port=port] [--password=password]
Options
--host= - Connect to the VNC viewer process listening on the given host name.
--port= - Provide a port that the remote VNC viewer process is listening on. If not provided,Anaconda uses the VNC default port of 5900.
--password= - Set a password which must be provided to connect to the VNC session. This isoptional, but recommended.
Additional resources
For more information about VNC installations, including instructions on how to connect to theinstallation system, see Part III, “Performing a remote RHEL installation using VNC” .
B.2.24. %include
The %include Kickstart command is optional.
Use the %include command to include the contents of another file in the Kickstart file as if the contentswere at the location of the %include command in the Kickstart file.
This inclusion is evaluated only after the %pre script sections and can thus be used to include filesgenerated by scripts in the %pre sections. To include files before evaluation of %pre sections, use the %ksappend command.
Syntax
%include path/to/file
B.2.25. %ksappend
The %ksappend Kickstart command is optional.
Use the %ksappend command to include the contents of another file in the Kickstart file as if thecontents were at the location of the %ksappend command in the Kickstart file.
This inclusion is evaluated before the %pre script sections, unlike inclusion with the %include
Red Hat Enterprise Linux 8 Performing an advanced RHEL installation
108
This inclusion is evaluated before the %pre script sections, unlike inclusion with the %includecommand.
Syntax
%ksappend path/to/file
B.3. KICKSTART COMMANDS FOR SYSTEM CONFIGURATION
The Kickstart commands in this list configure further details on the resulting system such as users,repositories, or services.
B.3.1. auth or authconfig (deprecated)
IMPORTANT
Use the new authselect command instead of the deprecated auth or authconfigKickstart command. auth and authconfig are available only for limited backwardscompatibility.
The auth or authconfig Kickstart command is optional. It sets up the authentication options for thesystem using the authconfig tool, which can also be run on the command line after the installationfinishes.
Syntax
authconfig [OPTIONS]
Notes
Previously, the auth or authconfig Kickstart commands called the authconfig tool. This tool hasbeen deprecated in Red Hat Enterprise Linux 8. These Kickstart commands now use the authselect-compat tool to call the new authselect tool. For a description of the compatibilitylayer and its known issues, see the manual page authselect-migration(7). The installationprogram will automatically detect use of the deprecated commands and install on the systemthe authselect-compat package to provide the compatibility layer.
Passwords are shadowed by default.
When using OpenLDAP with the SSL protocol for security, make sure that the SSLv2 and SSLv3 protocols are disabled in the server configuration. This is due to the POODLE SSLvulnerability (CVE-2014-3566). See https://access.redhat.com/solutions/1234843 for details.
B.3.2. authselect
The authselect Kickstart command is optional. It sets up the authentication options for the system usingthe authselect command, which can also be run on the command line after the installation finishes.
Syntax
authselect [OPTIONS]
APPENDIX B. KICKSTART COMMANDS AND OPTIONS REFERENCE
109
Notes
This command passes all options to the authselect command. Refer to the authselect(8)manual page and the authselect --help command for more details.
This command replaces the deprecated auth or authconfig commands deprecated in Red HatEnterprise Linux 8 together with the authconfig tool.
Passwords are shadowed by default.
When using OpenLDAP with the SSL protocol for security, make sure that the SSLv2 and SSLv3 protocols are disabled in the server configuration. This is due to the POODLE SSLvulnerability (CVE-2014-3566). See https://access.redhat.com/solutions/1234843 for details.
B.3.3. firewall
The firewall Kickstart command is optional. It specifies the firewall configuration for the installedsystem.
Syntax
firewall --enabled|--disabled [incoming] [OPTIONS]
Mandatory options
--enabled or --enable - Reject incoming connections that are not in response to outboundrequests, such as DNS replies or DHCP requests. If access to services running on this machine isneeded, you can choose to allow specific services through the firewall.
--disabled or --disable - Do not configure any iptables rules.
Optional options
--trust - Listing a device here, such as em1, allows all traffic coming to and from that device togo through the firewall. To list more than one device, use the option more times, such as --trust em1 --trust em2. Do not use a comma-separated format such as --trust em1, em2.
--remove-service - Do not allow services through the firewall.
incoming - Replace with one or more of the following to allow the specified services through thefirewall.
--ssh
--smtp
--http
--ftp
--port= - You can specify that ports be allowed through the firewall using the port:protocolformat. For example, to allow IMAP access through your firewall, specify imap:tcp. Numericports can also be specified explicitly; for example, to allow UDP packets on port 1234 through,specify 1234:udp. To specify multiple ports, separate them by commas.
--service= - This option provides a higher-level way to allow services through the firewall. Some
Red Hat Enterprise Linux 8 Performing an advanced RHEL installation
110
services (like cups, avahi, and so on.) require multiple ports to be open or other specialconfiguration in order for the service to work. You can specify each individual port with the --port option, or specify --service= and open them all at once.Valid options are anything recognized by the firewall-offline-cmd program in the firewalldpackage. If the firewalld service is running, firewall-cmd --get-services provides a list of knownservice names.
--use-system-defaults - Do not configure the firewall at all. This option instructs anaconda todo nothing and allows the system to rely on the defaults that were provided with the package orostree. If this option is used with other options then all other options will be ignored.
B.3.4. group
The group Kickstart command is optional. It creates a new user group on the system.
group --name=name [--gid=gid]
Mandatory options
--name= - Provides the name of the group.
Optional options
--gid= - The group’s GID. If not provided, defaults to the next available non-system GID.
Notes
If a group with the given name or GID already exists, this command fails.
The user command can be used to create a new group for the newly created user.
B.3.5. keyboard (required)
The keyboard Kickstart command is required. It sets one or more available keyboard layouts for thesystem.
Syntax
keyboard --vckeymap|--xlayouts OPTIONS
Options
--vckeymap= - Specify a VConsole keymap which should be used. Valid names correspond tothe list of files in the /usr/lib/kbd/keymaps/xkb/ directory, without the .map.gz extension.
--xlayouts= - Specify a list of X layouts that should be used as a comma-separated list withoutspaces. Accepts values in the same format as setxkbmap(1), either in the layout format (suchas cz), or in the layout (variant) format (such as cz (qwerty)).All available layouts can be viewed on the xkeyboard-config(7) man page under Layouts.
--switch= - Specify a list of layout-switching options (shortcuts for switching between multiplekeyboard layouts). Multiple options must be separated by commas without spaces. Acceptsvalues in the same format as setxkbmap(1).
Available switching options can be viewed on the xkeyboard-config(7) man page under
APPENDIX B. KICKSTART COMMANDS AND OPTIONS REFERENCE
111
Available switching options can be viewed on the xkeyboard-config(7) man page under Options.
Notes
Either the --vckeymap= or the --xlayouts= option must be used.
Example
The following example sets up two keyboard layouts (English (US) and Czech (qwerty)) using the --xlayouts= option, and allows to switch between them using Alt+Shift:
keyboard --xlayouts=us,'cz (qwerty)' --switch=grp:alt_shift_toggle
B.3.6. lang (required)
The lang Kickstart command is required. It sets the language to use during installation and the defaultlanguage to use on the installed system.
Syntax
lang language [--addsupport=language,...]
Mandatory options
language - Install support for this language and set it as system default.
Optional options
--addsupport= - Add support for additional languages. Takes the form of comma-separatedlist without spaces. For example:
lang en_US --addsupport=cs_CZ,de_DE,en_UK
Notes
The locale -a | grep _ or localectl list-locales | grep _ commands return a list of supportedlocales.
Certain languages (for example, Chinese, Japanese, Korean, and Indic languages) are notsupported during text-mode installation. If you specify one of these languages with the langcommand, the installation process continues in English, but the installed system uses yourselection as its default language.
Example
To set the language to English, the Kickstart file should contain the following line:
lang en_US
B.3.7. module
The module Kickstart command is optional. Use this command to enable a package module stream
Red Hat Enterprise Linux 8 Performing an advanced RHEL installation
112
The module Kickstart command is optional. Use this command to enable a package module streamwithin kickstart script.
Syntax
module --name=NAME [--stream=STREAM]
Mandatory options
--name= - Specifies the name of the module to enable. Replace NAME with the actual name.
Optional options
--stream= - Specifies the name of the module stream to enable. Replace STREAM with theactual name.You do not need to specify this option for modules with a default stream defined. For moduleswithout a default stream, this option is mandatory and leaving it out results in an error. Enablinga module multiple times with different streams is not possible.
Notes
Using a combination of this command and the %packages section allows you to installpackages provided by the enabled module and stream combination, without specifying themodule and stream explicitly. Modules must be enabled before package installation. Afterenabling a module with the module command, you can install the packages enabled by thismodule by listing them in the %packages section.
A single module command can enable only a single module and stream combination. To enablemultiple modules, use multiple module commands. Enabling a module multiple times withdifferent streams is not possible.
In Red Hat Enterprise Linux 8, modules are present only in the AppStream repository. To listavailable modules, use the yum module list command on an installed Red HatEnterprise Linux 8 system with a valid subscription.
Additional resources
For more information about modules and streams, see the Installing, managing, and removinguser-space components document.
B.3.8. repo
The repo Kickstart command is optional. It configures additional yum repositories that can be used assources for package installation. You can add multiple repo lines.
Syntax
repo --name=repoid [--baseurl=url|--mirrorlist=url|--metalink=url] [OPTIONS]
Mandatory options
--name= - The repository id. This option is required. If a repository has a name which conflictswith another previously added repository, it is ignored. Because the installation program uses alist of preset repositories, this means that you cannot add repositories with the same names as
APPENDIX B. KICKSTART COMMANDS AND OPTIONS REFERENCE
113
the preset ones.
URL options
These options are mutually exclusive and optional. The variables that can be used in yum repositoryconfiguration files are not supported here. You can use the strings $releasever and $basearch whichare replaced by the respective values in the URL.
--baseurl= - The URL to the repository.
--mirrorlist= - The URL pointing at a list of mirrors for the repository.
--metalink= - The URL with metalink for the repository.
Optional options
--install - Save the provided repository configuration on the installed system in the /etc/yum.repos.d/ directory. Without using this option, a repository configured in a Kickstart filewill only be available during the installation process, not on the installed system.
--cost= - An integer value to assign a cost to this repository. If multiple repositories provide thesame packages, this number is used to prioritize which repository will be used before another.Repositories with a lower cost take priority over repositories with higher cost.
--excludepkgs= - A comma-separated list of package names that must not be pulled from thisrepository. This is useful if multiple repositories provide the same package and you want tomake sure it comes from a particular repository. Both full package names (such as publican)and globs (such as gnome-*) are accepted.
--includepkgs= - A comma-separated list of package names and globs that are allowed to bepulled from this repository. Any other packages provided by the repository will be ignored. Thisis useful if you want to install just a single package or set of packages from a repository whileexcluding all other packages the repository provides.
--proxy=[protocol://][username[:password]@]host[:port] - Specify an HTTP/HTTPS/FTPproxy to use just for this repository. This setting does not affect any other repositories, nor howthe install.img is fetched on HTTP installations.
--noverifyssl - Disable SSL verification when connecting to an HTTPS server.
Notes
Repositories used for installation must be stable. The installation can fail if a repository ismodified before the installation concludes.
B.3.9. rootpw (required)
The rootpw Kickstart command is required. It sets the system’s root password to the passwordargument.
Syntax
rootpw [--iscrypted|--plaintext] [--lock] password
Mandatory options
password - Password specification. Either plain text or encrypted string. See --iscrypted and --
Red Hat Enterprise Linux 8 Performing an advanced RHEL installation
114
password - Password specification. Either plain text or encrypted string. See --iscrypted and --plaintext below.
Options
--iscrypted - If this option is present, the password argument is assumed to already beencrypted. This option is mutually exclusive with --plaintext. To create an encrypted password,you can use python:
$ python -c 'import crypt,getpass;pw=getpass.getpass();print(crypt.crypt(pw) if (pw==getpass.getpass("Confirm: ")) else exit())'
This generates a sha512 crypt-compatible hash of your password using a random salt.
--plaintext - If this option is present, the password argument is assumed to be in plain text. Thisoption is mutually exclusive with --iscrypted.
--lock - If this option is present, the root account is locked by default. This means that the rootuser will not be able to log in from the console. This option will also disable the Root Passwordscreens in both the graphical and text-based manual installation.
B.3.10. selinux
The selinux Kickstart command is optional. It sets the state of SELinux on the installed system. Thedefault SELinux policy is enforcing.
Syntax
selinux [--disabled|--enforcing|--permissive]
Options
--enforcing - Enables SELinux with the default targeted policy being enforcing.
--permissive - Outputs warnings based on the SELinux policy, but does not actually enforce thepolicy.
--disabled - Disables SELinux completely on the system.
Additional resources
For more information regarding SELinux, see the Using SElinux document.
B.3.11. services
The services Kickstart command is optional. It modifies the default set of services that will run underthe default systemd target. The list of disabled services is processed before the list of enabled services.Therefore, if a service appears on both lists, it will be enabled.
Syntax
services [--disabled=list] [--enabled=list]
Options
APPENDIX B. KICKSTART COMMANDS AND OPTIONS REFERENCE
115
--disabled= - Disable the services given in the comma separated list.
--enabled= - Enable the services given in the comma separated list.
Notes
Do not include spaces in the list of services. If you do, Kickstart will enable or disable only theservices up to the first space. For example:
services --disabled=auditd, cups,smartd, nfslock
That disables only the auditd service. To disable all four services, this entry must include nospaces:
services --disabled=auditd,cups,smartd,nfslock
B.3.12. skipx
The skipx Kickstart command is optional. If present, X is not configured on the installed system.
If you install a display manager among your package selection options, this package creates an Xconfiguration, and the installed system defaults to graphical.target. That overrides the effect of the skipx option.
Syntax
skipx
Notes
This command has no options.
B.3.13. sshkey
The sshkey Kickstart command is optional. It adds a SSH key to the authorized_keys file of thespecified user on the installed system.
Syntax
sshkey --username=user KEY
Mandatory options
--username= - The user for which the key will be installed.
KEY - The SSH key.
B.3.14. syspurpose
The syspurpose Kickstart command is optional. Use it to set the system purpose which describes howthe system will be used after installation. This information helps apply the correct subscriptionentitlement to the system.
Red Hat Enterprise Linux 8 Performing an advanced RHEL installation
116
Syntax
syspurpose [OPTIONS]
Options
--role= - Set the intended system role. Available values are:
Red Hat Enterprise Linux Server
Red Hat Enterprise Linux Workstation
Red Hat Enterprise Linux Compute Node
--sla= - Set the Service Level Agreement. Available values are:
Premium
Standard
Self-Support
--usage= - The intended usage of the system. Available values are:
Production
Disaster Recovery
Development/Test
--addon= - Specifies additional layered products or features. You can use this option multipletimes.
Notes
Enter the values with spaces and enclose them in double quotes:
syspurpose --role="Red Hat Enterprise Linux Server"
While it is strongly recommended that you configure System Purpose, it is an optional feature ofthe Red Hat Enterprise Linux installation program. If you want to enable System Purpose afterthe installation completes, you can do so using the syspurpose command-line tool.
B.3.15. timezone (required)
The timezone Kickstart command is required. It sets the system time zone.
Syntax
timezone timezone [OPTIONS]
Mandatory options
timezone - the time zone to set for the system.
APPENDIX B. KICKSTART COMMANDS AND OPTIONS REFERENCE
117
Optional options
--utc - If present, the system assumes the hardware clock is set to UTC (Greenwich Mean) time.
--nontp - Disable the NTP service automatic starting.
--ntpservers= - Specify a list of NTP servers to be used as a comma-separated list withoutspaces.
Notes
In Red Hat Enterprise Linux 8, time zone names are validated using the pytz.all_timezones list,provided by the pytz package. In previous releases, the names were validated against pytz.common_timezones, which is a subset of the currently used list. Note that the graphical and textmode interfaces still use the more restricted pytz.common_timezones list; you must use a Kickstart fileto use additional time zone definitions.
B.3.16. user
The user Kickstart command is optional. It creates a new user on the system.
Syntax
user --name=username [OPTIONS]
Mandatory options
--name= - Provides the name of the user. This option is required.
Optional options
--gecos= - Provides the GECOS information for the user. This is a string of various system-specific fields separated by a comma. It is frequently used to specify the user’s full name, officenumber, and so on. See the passwd(5) man page for more details.
--groups= - In addition to the default group, a comma separated list of group names the usershould belong to. The groups must exist before the user account is created. See the groupcommand.
--homedir= - The home directory for the user. If not provided, this defaults to /home/username.
--lock - If this option is present, this account is locked by default. This means that the user willnot be able to log in from the console. This option will also disable the Create User screens inboth the graphical and text-based manual installation.
--password= - The new user’s password. If not provided, the account will be locked by default.
--iscrypted - If this option is present, the password argument is assumed to already beencrypted. This option is mutually exclusive with --plaintext. To create an encrypted password,you can use python:
$ python -c 'import crypt,getpass;pw=getpass.getpass();print(crypt.crypt(pw) if (pw==getpass.getpass("Confirm: ")) else exit())'
This generates a sha512 crypt-compatible hash of your password using a random salt.
Red Hat Enterprise Linux 8 Performing an advanced RHEL installation
118
--plaintext - If this option is present, the password argument is assumed to be in plain text. Thisoption is mutually exclusive with --iscrypted
--shell= - The user’s login shell. If not provided, the system default is used.
--uid= - The user’s UID (User ID). If not provided, this defaults to the next available non-systemUID.
--gid= - The GID (Group ID) to be used for the user’s group. If not provided, this defaults to thenext available non-system group ID.
Notes
Consider using the --uid and --gid options to set IDs of regular users and their default groups atrange starting at 5000 instead of 1000. That is because the range reserved for system users andgroups, 0-999, might increase in the future and thus overlap with IDs of regular users.For changing the minimum UID and GID limits after the installation, which ensures that yourchosen UID and GID ranges are applied automatically on user creation, see the Setting defaultpermissions for new files using umask section of the Configuring basic system settingsdocument.
Files and directories are created with various permissions, dictated by the application used tocreate the file or directory. For example, the mkdir command creates directories with allpermissions enabled. However, applications are prevented from granting certain permissions tonewly created files, as specified by the user file-creation mask setting.The user file-creation mask can be controlled with the umask command. The default settingof the user file-creation mask for new users is defined by the UMASK variable in the /etc/login.defs configuration file on the installed system. If unset, it defaults to 022. This meansthat by default when an application creates a file, it is prevented from granting write permissionto users other than the owner of the file. However, this can be overridden by other settings orscripts. More information can be found in the Setting default permissions for new files usingumask section of the Configuring basic system settings document.
B.3.17. xconfig
The xconfig Kickstart command is optional. It configures the X Window System.
Syntax
xconfig [--startxonboot]
Options
--startxonboot - Use a graphical login on the installed system.
Notes
Because Red Hat Enterprise Linux 8 does not include the KDE Desktop Environment, do not usethe --defaultdesktop= documented in upstream.
B.4. KICKSTART COMMANDS FOR NETWORK CONFIGURATION
The Kickstart commands in this list let you configure networking on the system.
APPENDIX B. KICKSTART COMMANDS AND OPTIONS REFERENCE
119
B.4.1. network
The network Kickstart command is optional. It configures network information for the target system andactivates network devices in the installation environment.
The device specified in the first network command is activated automatically. Activation of the devicecan be also explicitly required by the --activate option.
Syntax
network OPTIONS
Options
--activate - activate this device in the installation environment.If you use the --activate option on a device that has already been activated (for example, aninterface you configured with boot options so that the system could retrieve the Kickstart file)the device is reactivated to use the details specified in the Kickstart file.
Use the --nodefroute option to prevent the device from using the default route.
--no-activate - do not activate this device in the installation environment.By default, Anaconda activates the first network device in the Kickstart file regardless of the --activate option. You can disable the default setting by using the --no-activate option.
--bootproto= - One of dhcp, bootp, ibft, or static. The default option is dhcp; the dhcp and bootp options are treated the same. To disable ipv4 configuration of the device, use --noipv4option.
NOTE
This option configures ipv4 configuration of the device. For ipv6 configurationuse --ipv6 and --ipv6gateway options.
The DHCP method uses a DHCP server system to obtain its networking configuration. TheBOOTP method is similar, requiring a BOOTP server to supply the networking configuration. Todirect a system to use DHCP:
network --bootproto=dhcp
To direct a machine to use BOOTP to obtain its networking configuration, use the following linein the Kickstart file:
network --bootproto=bootp
To direct a machine to use the configuration specified in iBFT, use:
network --bootproto=ibft
The static method requires that you specify at least the IP address and netmask in the Kickstartfile. This information is static and is used during and after the installation.
All static networking configuration information must be specified on one line; you cannot wrap
Red Hat Enterprise Linux 8 Performing an advanced RHEL installation
120
All static networking configuration information must be specified on one line; you cannot wraplines using a backslash (\) as you can on a command line.
network --bootproto=static --ip=10.0.2.15 --netmask=255.255.255.0 --gateway=10.0.2.254 --nameserver=10.0.2.1
You can also configure multiple nameservers at the same time. To do so, use the --nameserver= option once, and specify each of their IP addresses, separated by commas:
network --bootproto=static --ip=10.0.2.15 --netmask=255.255.255.0 --gateway=10.0.2.254 --nameserver=192.168.2.1,192.168.3.1
--device= - specifies the device to be configured (and eventually activated in Anaconda) withthe network command.If the --device= option is missing on the first use of the network command, the value of the ksdevice= Anaconda boot option is used, if available. Note that this is considered deprecatedbehavior; in most cases, you should always specify a --device= for every network command.
The behavior of any subsequent network command in the same Kickstart file is unspecified if its--device= option is missing. Make sure you specify this option for any network commandbeyond the first.
You can specify a device to be activated in any of the following ways:
the device name of the interface, for example, em1
the MAC address of the interface, for example, 01:23:45:67:89:ab
the keyword link, which specifies the first interface with its link in the up state
the keyword bootif, which uses the MAC address that pxelinux set in the BOOTIF variable.Set IPAPPEND 2 in your pxelinux.cfg file to have pxelinux set the BOOTIF variable.
For example:
network --bootproto=dhcp --device=em1
--ip= - IP address of the device.
--ipv6= - IPv6 address of the device, in the form of address[/prefix length] - for example, 3ffe:ffff:0:1::1/128 `. If prefix is omitted, `64 is used. You can also use auto for automaticconfiguration, or dhcp for DHCPv6-only configuration (no router advertisements).
--gateway= - Default gateway as a single IPv4 address.
--ipv6gateway= - Default gateway as a single IPv6 address.
--nodefroute - Prevents the interface being set as the default route. Use this option when youactivate additional devices with the --activate= option, for example, a NIC on a separate subnetfor an iSCSI target.
--nameserver= - DNS name server, as an IP address. To specify more than one name server,use this option once, and separate each IP address with a comma.
--netmask= - Network mask for the installed system.
--hostname= - The host name for the installed system. The host name can either be a fully-
APPENDIX B. KICKSTART COMMANDS AND OPTIONS REFERENCE
121

--hostname= - The host name for the installed system. The host name can either be a fully-qualified domain name (FQDN) in the format host_name.domainname, or a short host namewith no domain. Many networks have a Dynamic Host Configuration Protocol (DHCP) servicewhich automatically supplies connected systems with a domain name; to allow DHCP to assignthe domain name, only specify a short host name.
IMPORTANT
If your network does not provide a DHCP service, always use the FQDN as thesystem’s host name.
--ethtool= - Specifies additional low-level settings for the network device which will be passedto the ethtool program.
--onboot= - Whether or not to enable the device at boot time.
--dhcpclass= - The DHCP class.
--mtu= - The MTU of the device.
--noipv4 - Disable IPv4 on this device.
--noipv6 - Disable IPv6 on this device.
--bondslaves= - When this option is used, the bond device specified by the --device= option iscreated using slaves defined in the --bondslaves= option. For example:
network --device=bond0 --bondslaves=em1,em2
The above command creates a bond device named bond0 using the em1 and em2 interfaces asits slaves.
--bondopts= - a list of optional parameters for a bonded interface, which is specified using the --bondslaves= and --device= options. Options in this list must be separated by commas (“,”) orsemicolons (“;”). If an option itself contains a comma, use a semicolon to separate the options.For example:
network --bondopts=mode=active-backup,balance-rr;primary=eth1
IMPORTANT
The --bondopts=mode= parameter only supports full mode names such as balance-rr or broadcast, not their numerical representations such as 0 or 3.
--vlanid= - Specifies virtual LAN (VLAN) ID number (802.1q tag) for the device created usingthe device specified in --device= as a parent. For example, network --device=em1 --vlanid=171 creates a virtual LAN device em1.171.
--interfacename= - Specify a custom interface name for a virtual LAN device. This optionshould be used when the default name generated by the --vlanid= option is not desirable. Thisoption must be used along with --vlanid=. For example:
network --device=em1 --vlanid=171 --interfacename=vlan171
Red Hat Enterprise Linux 8 Performing an advanced RHEL installation
122
The above command creates a virtual LAN interface named vlan171 on the em1 device with anID of 171.
The interface name can be arbitrary (for example, my-vlan), but in specific cases, the followingconventions must be followed:
If the name contains a dot (.), it must take the form of NAME.ID. The NAME is arbitrary, butthe ID must be the VLAN ID. For example: em1.171 or my-vlan.171.
Names starting with vlan must take the form of vlanID - for example, vlan171.
--teamslaves= - Team device specified by the --device= option will be created using slavesspecified in this option. Slaves are separated by commas. A slave can be followed by itsconfiguration, which is a single-quoted JSON string with double quotes escaped by the \character. For example:
network --teamslaves="p3p1'{\"prio\": -10, \"sticky\": true}',p3p2'{\"prio\": 100}'"
See also the --teamconfig= option.
--teamconfig= - Double-quoted team device configuration which is a JSON string with doublequotes escaped by the \ character. The device name is specified by --device= option and itsslaves and their configuration by --teamslaves= option. For example:
network --device team0 --activate --bootproto static --ip=10.34.102.222 --netmask=255.255.255.0 --gateway=10.34.102.254 --nameserver=10.34.39.2 --teamslaves="p3p1'{\"prio\": -10, \"sticky\": true}',p3p2'{\"prio\": 100}'" --teamconfig="{\"runner\": {\"name\": \"activebackup\"}}"
--bridgeslaves= - When this option is used, the network bridge with device name specifiedusing the --device= option will be created and devices defined in the --bridgeslaves= optionwill be added to the bridge. For example:
network --device=bridge0 --bridgeslaves=em1
--bridgeopts= - An optional comma-separated list of parameters for the bridged interface.Available values are stp, priority, forward-delay, hello-time, max-age, and ageing-time. Forinformation about these parameters, see the bridge setting table in the nm-settings(5) manpage or at https://developer.gnome.org/NetworkManager/0.9/ref-settings.html.Also see the Configuring and managing networking document for general information aboutnetwork bridging.
--bindto=mac - Bind the device configuration ( ifcfg) file on the installed system to the deviceMAC address (HWADDR) instead of the default binding to the interface name ( DEVICE). Notethat this option is independent of the --device= option - --bindto=mac will be applied even ifthe same network command also specifies a device name, link, or bootif.
Notes
The ethN device names such as eth0 are no longer available in Red Hat Enterprise Linux 8 dueto changes in the naming scheme. For more information about the device naming scheme, seethe upstream document Predictable Network Interface Names .
If you used a Kickstart option or a boot option to specify an installation repository on a network,but no network is available at the start of the installation, the installation program displays the
APPENDIX B. KICKSTART COMMANDS AND OPTIONS REFERENCE
123
Network Configuration window to set up a network connection prior to displaying theInstallation Summary window. For more details, see the Configuring network and host nameoptions section of the Performing a standard RHEL installation document.
B.4.2. realm
The realm Kickstart command is optional. Use it to join an Active Directory or IPA domain. For moreinformation about this command, see the join section of the realm(8) man page.
Syntax
realm join [OPTIONS] domain
Mandatory options
domain - The domain to join.
Options
--computer-ou=OU= - Provide the distinguished name of an organizational unit in order tocreate the computer account. The exact format of the distinguished name depends on theclient software and membership software. The root DSE portion of the distinguished name canusually be left out.
--no-password - Join automatically without a password.
--one-time-password= - Join using a one-time password. This is not possible with all types ofrealm.
--client-software= - Only join realms which can run this client software. Valid values include sssd and winbind. Not all realms support all values. By default, the client software is chosenautomatically.
--server-software= - Only join realms which can run this server software. Possible values includeactive-directory or freeipa.
--membership-software= - Use this software when joining the realm. Valid values include samba and adcli. Not all realms support all values. By default, the membership software ischosen automatically.
B.5. KICKSTART COMMANDS FOR HANDLING STORAGE
The Kickstart commands in this section configure aspects of storage such as devices, disks, partitions,LVM, and filesystems.
B.5.1. device (deprecated)
The device Kickstart command is optional. Use it to load additional kernel modules.
On most PCI systems, the installation program automatically detects Ethernet and SCSI cards.However, on older systems and some PCI systems, Kickstart requires a hint to find the proper devices.The device command, which tells the installation program to install extra modules, uses the followingformat:
Red Hat Enterprise Linux 8 Performing an advanced RHEL installation
124

Syntax
device moduleName --opts=options
Options
moduleName - Replace with the name of the kernel module which should be installed.
--opts= - Options to pass to the kernel module. For example:
device --opts="aic152x=0x340 io=11"
B.5.2. autopart
The autopart Kickstart command is optional. It automatically creates partitions.
The automatically created partitions are: a root (/) partition (1 GB or larger), a swap partition, and anappropriate /boot partition for the architecture. On large enough drives (50 GB and larger), this alsocreates a /home partition.
Syntax
autopart OPTIONS
Options
--type= - Selects one of the predefined automatic partitioning schemes you want to use.Accepts the following values:
lvm: The LVM partitioning scheme.
plain: Regular partitions with no LVM.
thinp: The LVM Thin Provisioning partitioning scheme.
For a description of the available partition schemes, see Section C.1, “Supported device types”.
--fstype= - Selects one of the available file system types. The available values are ext2, ext3, ext4, xfs, and vfat. The default file system is xfs. For information about these file systems, seeSection C.2, “Supported file systems” .
--nohome - Disables automatic creation of the /home partition.
--nolvm - Do not use LVM for automatic partitioning. This option is equal to --type=plain.
--noboot - Do not create a /boot partition.
--noswap - Do not create a swap partition.
--encrypted - Encrypts all partitions with Linux Unified Key Setup (LUKS). This is equivalent tochecking the Encrypt partitions check box on the initial partitioning screen during a manualgraphical installation.
NOTE
APPENDIX B. KICKSTART COMMANDS AND OPTIONS REFERENCE
125
NOTE
When encrypting one or more partitions, Anaconda attempts to gather 256 bitsof entropy to ensure the partitions are encrypted securely. Gathering entropycan take some time - the process will stop after a maximum of 10 minutes,regardless of whether sufficient entropy has been gathered.
The process can be sped up by interacting with the installation system (typing onthe keyboard or moving the mouse). If you are installing in a virtual machine, youcan also attach a virtio-rng device (a virtual random number generator) to theguest.
--luks-version=LUKS_VERSION - Specifies which version of LUKS format should be used toencrypt the filesystem. This option is only meaningful if --encrypted is specified.
--passphrase= - Provides a default system-wide passphrase for all encrypted devices.
--escrowcert=URL_of_X.509_certificate - Stores data encryption keys of all encryptedvolumes as files in /root, encrypted using the X.509 certificate from the URL specified withURL_of_X.509_certificate. The keys are stored as a separate file for each encrypted volume.This option is only meaningful if --encrypted is specified.
--backuppassphrase - Adds a randomly-generated passphrase to each encrypted volume.Store these passphrases in separate files in /root, encrypted using the X.509 certificatespecified with --escrowcert. This option is only meaningful if --escrowcert is specified.
--cipher= - Specifies the type of encryption to use if the Anaconda default aes-xts-plain64 isnot satisfactory. You must use this option together with the --encrypted option; by itself it hasno effect. Available types of encryption are listed in the Security hardening document, butRed Hat strongly recommends using either aes-xts-plain64 or aes-cbc-essiv:sha256.
--pbkdf=PBKDF - Sets Password-Based Key Derivation Function (PBKDF) algorithm for LUKSkeyslot. See also the man page cryptsetup(8). This option is only meaningful if --encrypted isspecified.
--pbkdf-memory=PBKDF_MEMORY - Sets the memory cost for PBKDF. See also the manpage cryptsetup(8). This option is only meaningful if --encrypted is specified.
--pbkdf-time=PBKDF_TIME - Sets the number of milliseconds to spend with PBKDFpassphrase processing. See also --iter-time in the man page cryptsetup(8). This option is onlymeaningful if --encrypted is specified, and is mutually exclusive with --pbkdf-iterations.
--pbkdf-iterations=PBKDF_ITERATIONS - Sets the number of iterations directly and avoidsPBKDF benchmark. See also --pbkdf-force-iterations in the man page cryptsetup(8). Thisoption is only meaningful if --encrypted is specified, and is mutually exclusive with --pbkdf-time.
Notes
The autopart option cannot be used together with the part/partition, raid, logvol, or volgroupoptions in the same Kickstart file.
The autopart command is not mandatory, but you must include it if there are no part or mountcommands in your Kickstart script.
It is recommended to use the autopart --nohome Kickstart option when installing on a single
Red Hat Enterprise Linux 8 Performing an advanced RHEL installation
126
It is recommended to use the autopart --nohome Kickstart option when installing on a singleFBA DASD of the CMS type. This ensures that the installation program does not create aseparate /home partition. The installation then proceeds successfully.
If you lose the LUKS passphrase, any encrypted partitions and their data is completelyinaccessible. There is no way to recover a lost passphrase. However, you can save encryptionpassphrases with the --escrowcert and create backup encryption passphrases with the --backuppassphrase options.
B.5.3. bootloader (required)
The bootloader Kickstart command is required. It specifies how the boot loader should be installed.
Syntax
bootloader [OPTIONS]
Options
--append= - Specifies additional kernel parameters. To specify multiple parameters, separatethem with spaces. For example:
bootloader --location=mbr --append="hdd=ide-scsi ide=nodma"
The rhgb and quiet parameters are automatically added when the plymouth package isinstalled, even if you do not specify them here or do not use the --append= command at all. Todisable this behavior, explicitly disallow installation of plymouth:
%packages-plymouth%end
This option is useful for disabling mechanisms which were implemented to mitigate theMeltdown and Spectre speculative execution vulnerabilities found in most modern processors(CVE-2017-5754, CVE-2017-5753, and CVE-2017-5715). In some cases, these mechanisms maybe unnecessary, and keeping them enabled causes decreased performance with noimprovement in security. To disable these mechanisms, add the options to do so into yourKickstart file - for example, bootloader --append="nopti noibrs noibpb" on AMD64/Intel 64systems.
WARNING
Ensure your system is not at risk of attack before disabling any of thevulnerability mitigation mechanisms. See the Red Hat vulnerabilityresponse article for information about the Meltdown and Spectrevulnerabilities.
--boot-drive= - Specifies which drive the boot loader should be written to, and therefore which
APPENDIX B. KICKSTART COMMANDS AND OPTIONS REFERENCE
127

--boot-drive= - Specifies which drive the boot loader should be written to, and therefore whichdrive the computer will boot from. If you use a multipath device as the boot drive, specify onlyone member of the device.
IMPORTANT
The --boot-drive= option is currently being ignored in Red Hat Enterprise Linuxinstallations on IBM Z systems using the zipl boot loader. When zipl is installed, itdetermines the boot drive on its own.
--leavebootorder - The installation program will add Red Hat Enterprise Linux 8 to the top ofthe list of installed systems in the boot loader, and preserve all existing entries as well as theirorder.
--driveorder= - Specifies which drive is first in the BIOS boot order. For example:
bootloader --driveorder=sda,hda
--location= - Specifies where the boot record is written. Valid values are the following:
mbr - The default option. Depends on whether the drive uses the Master Boot Record(MBR) or GUID Partition Table (GPT) scheme:On a GPT-formatted disk, this option installs stage 1.5 of the boot loader into the BIOS bootpartition.
On an MBR-formatted disk, stage 1.5 is installed into the empty space between the MBR andthe first partition.
partition - Install the boot loader on the first sector of the partition containing the kernel.
none - Do not install the boot loader.
In most cases, this option does not need to be specified.
--nombr - Do not install the boot loader to the MBR.
--password= - If using GRUB2, sets the boot loader password to the one specified with thisoption. This should be used to restrict access to the GRUB2 shell, where arbitrary kernel optionscan be passed.If a password is specified, GRUB2 also asks for a user name. The user name is always root.
--iscrypted - Normally, when you specify a boot loader password using the --password=option, it is stored in the Kickstart file in plain text. If you want to encrypt the password, use thisoption and an encrypted password.To generate an encrypted password, use the grub2-mkpasswd-pbkdf2 command, enter thepassword you want to use, and copy the command’s output (the hash starting with grub.pbkdf2) into the Kickstart file. An example bootloader Kickstart entry with an encryptedpassword looks similar to the following:
bootloader --iscrypted --password=grub.pbkdf2.sha512.10000.5520C6C9832F3AC3D149AC0B24BE69E2D4FB0DBEEDBD29CA1D30A044DE2645C4C7A291E585D4DC43F8A4D82479F8B95CA4BA4381F8550510B75E8E0BB2938990.C688B6F0EF935701FF9BD1A8EC7FE5BD2333799C98F28420C5CC8F1A2A233DE22C83705BB614EA17F3FDFDF4AC2161CEA3384E56EB38A2E39102F5334C47405E
Red Hat Enterprise Linux 8 Performing an advanced RHEL installation
128

--timeout= - Specifies the amount of time the boot loader waits before booting the defaultoption (in seconds).
--default= - Sets the default boot image in the boot loader configuration.
--extlinux - Use the extlinux boot loader instead of GRUB2. This option only works on systemssupported by extlinux.
--disabled - This option is a stronger version of --location=none. While --location=none simplydisables boot loader installation, --disabled disables boot loader installation and also disablesinstallation of the package containing the boot loader, thus saving space.
Notes
Red Hat recommends setting up a boot loader password on every system. An unprotected bootloader can allow a potential attacker to modify the system’s boot options and gain unauthorizedaccess to the system.
In some cases, a special partition is required to install the boot loader on AMD64, Intel 64, and64-bit ARM systems. The type and size of this partition depends on whether the disk you areinstalling the boot loader to uses the Master Boot Record (MBR) or a GUID Partition Table(GPT) schema. For more information, see the Configuring boot loader section of thePerforming a standard RHEL installation document.
Device names in the sdX (or /dev/sdX) format are not guaranteed to be consistent acrossreboots, which can complicate usage of some Kickstart commands. When a command calls for adevice node name, you can instead use any item from /dev/disk. For example, instead of:
part / --fstype=xfs --onpart=sda1
You can use an entry similar to one of the following:
part / --fstype=xfs --onpart=/dev/disk/by-path/pci-0000:00:05.0-scsi-0:0:0:0-part1
part / --fstype=xfs --onpart=/dev/disk/by-id/ata-ST3160815AS_6RA0C882-part1
This way the command will always target the same storage device. This is especially useful inlarge storage environments. See the chapter Overview of persistent naming attributes in theManaging storage devices document for more in-depth information about different ways toconsistently refer to storage devices.
The --upgrade option is deprecated in Red Hat Enterprise Linux 8.
B.5.4. zipl
The zipl Kickstart command is optional. It specifies the ZIPL configuration for IBM Z.
Options
--secure-boot - Enables secure boot if it is supported by the installing system.
NOTE
APPENDIX B. KICKSTART COMMANDS AND OPTIONS REFERENCE
129
NOTE
When installed on a system that is later than IBM z14, the installed system cannot bebooted from an IBM z14 or earlier model.
--force-secure-boot - Enables secure boot unconditionally.
NOTE
Installation is not supported on IBM z14 and earlier models.
--no-secure-boot - Disables secure boot.
NOTE
Secure Boot is not supported on IBM z14 and earlier models. Use --no-secure-boot if youintend to boot the installed system on IBM z14 and earlier models.
B.5.5. clearpart
The clearpart Kickstart command is optional. It removes partitions from the system, prior to creation ofnew partitions. By default, no partitions are removed.
Syntax
clearpart OPTIONS
Options
--all - Erases all partitions from the system.This option will erase all disks which can be reached by the installation program, including anyattached network storage. Use this option with caution.
You can prevent clearpart from wiping storage you want to preserve by using the --drives=option and specifying only the drives you want to clear, by attaching network storage later (forexample, in the %post section of the Kickstart file), or by blacklisting the kernel modules used toaccess network storage.
--drives= - Specifies which drives to clear partitions from. For example, the following clears allthe partitions on the first two drives on the primary IDE controller:
clearpart --drives=hda,hdb --all
To clear a multipath device, use the format disk/by-id/scsi-WWID, where WWID is the world-wide identifier for the device. For example, to clear a disk with WWID 58095BEC5510947BE8C0360F604351918, use:
clearpart --drives=disk/by-id/scsi-58095BEC5510947BE8C0360F604351918
This format is preferable for all multipath devices, but if errors arise, multipath devices that donot use logical volume management (LVM) can also be cleared using the format disk/by-id/dm-uuid-mpath-WWID, where WWID is the world-wide identifier for the device. For example, toclear a disk with WWID 2416CD96995134CA5D787F00A5AA11017, use:
Red Hat Enterprise Linux 8 Performing an advanced RHEL installation
130
clearpart --drives=disk/by-id/dm-uuid-mpath-2416CD96995134CA5D787F00A5AA11017
Never specify multipath devices by device names like mpatha. Device names such as this arenot specific to a particular disk. The disk named /dev/mpatha during installation might not bethe one that you expect it to be. Therefore, the clearpart command could target the wrong disk.
--initlabel - Initializes a disk (or disks) by creating a default disk label for all disks in theirrespective architecture that have been designated for formatting (for example, msdos for x86).Because --initlabel can see all disks, it is important to ensure only those drives that are to beformatted are connected.
clearpart --initlabel --drives=names_of_disks
For example:
clearpart --initlabel --drives=dasda,dasdb,dasdc
--list= - Specifies which partitions to clear. This option overrides the --all and --linux options ifused. Can be used across different drives. For example:
clearpart --list=sda2,sda3,sdb1
--disklabel=LABEL - Set the default disklabel to use. Only disklabels supported for theplatform will be accepted. For example, on the 64-bit Intel and AMD architectures, the msdosand gpt disklabels are accepted, but dasd is not accepted.
--linux - Erases all Linux partitions.
--none (default) - Do not remove any partitions.
--cdl - Reformat any LDL DASDs to CDL format.
Notes
Device names in the sdX (or /dev/sdX) format are not guaranteed to be consistent acrossreboots, which can complicate usage of some Kickstart commands. When a command calls for adevice node name, you can instead use any item from /dev/disk. For example, instead of:
part / --fstype=xfs --onpart=sda1
You could use an entry similar to one of the following:
part / --fstype=xfs --onpart=/dev/disk/by-path/pci-0000:00:05.0-scsi-0:0:0:0-part1
part / --fstype=xfs --onpart=/dev/disk/by-id/ata-ST3160815AS_6RA0C882-part1
This way the command will always target the same storage device. This is especially useful inlarge storage environments. See the chapter Overview of persistent naming attributes in theManaging storage devices document for more in-depth information about different ways toconsistently refer to storage devices.
If the clearpart command is used, then the part --onpart command cannot be used on a logicalpartition.
APPENDIX B. KICKSTART COMMANDS AND OPTIONS REFERENCE
131
B.5.6. fcoe
The fcoe Kickstart command is optional. It specifies which FCoE devices should be activatedautomatically in addition to those discovered by Enhanced Disk Drive Services (EDD).
Syntax
fcoe --nic=name [OPTIONS]
Options
--nic= (required) - The name of the device to be activated.
--dcb= - Establish Data Center Bridging (DCB) settings.
--autovlan - Discover VLANs automatically. This option is enabled by default.
B.5.7. ignoredisk
The ignoredisk Kickstart command is optional. It causes the installation program to ignore the specifieddisks.
This is useful if you use automatic partitioning and want to be sure that some disks are ignored. Forexample, without ignoredisk, attempting to deploy on a SAN-cluster the Kickstart would fail, as theinstallation program detects passive paths to the SAN that return no partition table.
Syntax
ignoredisk --drives=drive1,drive2,... | --only-use=drive
Options
--drives=driveN,… - Replace driveN with one of sda, sdb,…, hda,… and so on.
--only-use=driveN,… - Specifies a list of disks for the installation program to use. All otherdisks are ignored. For example, to use disk sda during installation and ignore all other disks:
ignoredisk --only-use=sda
To include a multipath device that does not use LVM:
ignoredisk --only-use=disk/by-id/dm-uuid-mpath-2416CD96995134CA5D787F00A5AA11017
To include a multipath device that uses LVM:
ignoredisk --only-use=disk/by-id/scsi-58095BEC5510947BE8C0360F604351918
You must specify one of the --drives and --only-use.
Notes
The --interactive option is deprecated in Red Hat Enterprise Linux 8. This option allowed usersto manually navigate the advanced storage screen.
Red Hat Enterprise Linux 8 Performing an advanced RHEL installation
132
To ignore a multipath device that does not use logical volume management (LVM), use theformat disk/by-id/dm-uuid-mpath-WWID, where WWID is the world-wide identifier for thedevice. For example, to ignore a disk with WWID 2416CD96995134CA5D787F00A5AA11017,use:
ignoredisk --drives=disk/by-id/dm-uuid-mpath-2416CD96995134CA5D787F00A5AA11017
Multipath devices that use LVM are not assembled until after Anaconda has parsed theKickstart file. Therefore, you cannot specify these devices in the format dm-uuid-mpath.Instead, to ignore a multipath device that uses LVM, use the format disk/by-id/scsi-WWID,where WWID is the world-wide identifier for the device. For example, to ignore a disk with WWID58095BEC5510947BE8C0360F604351918, use:
ignoredisk --drives=disk/by-id/scsi-58095BEC5510947BE8C0360F604351918
Never specify multipath devices by device names like mpatha. Device names such as this arenot specific to a particular disk. The disk named /dev/mpatha during installation might not bethe one that you expect it to be. Therefore, the clearpart command could target the wrong disk.
Device names in the sdX (or /dev/sdX) format are not guaranteed to be consistent acrossreboots, which can complicate usage of some Kickstart commands. When a command calls for adevice node name, you can instead use any item from /dev/disk. For example, instead of:
part / --fstype=xfs --onpart=sda1
You can use an entry similar to one of the following:
part / --fstype=xfs --onpart=/dev/disk/by-path/pci-0000:00:05.0-scsi-0:0:0:0-part1
part / --fstype=xfs --onpart=/dev/disk/by-id/ata-ST3160815AS_6RA0C882-part1
This way the command will always target the same storage device. This is especially useful inlarge storage environments. See the chapter Overview of persistent naming attributes in theManaging storage devices document for more in-depth information about different ways toconsistently refer to storage devices.
B.5.8. iscsi
The iscsi Kickstart command is optional. It specifies additional iSCSI storage to be attached duringinstallation.
Syntax
iscsi --ipaddr=address [OPTIONS]
Mandatory options
--ipaddr= (required) - the IP address of the target to connect to.
Optional options
--port= (required) - the port number. If not present, --port=3260 is used automatically bydefault.
APPENDIX B. KICKSTART COMMANDS AND OPTIONS REFERENCE
133
--target= - the target IQN (iSCSI Qualified Name).
--iface= - bind the connection to a specific network interface instead of using the default onedetermined by the network layer. Once used, it must be specified in all instances of the iscsicommand in the entire Kickstart file.
--user= - the user name required to authenticate with the target
--password= - the password that corresponds with the user name specified for the target
--reverse-user= - the user name required to authenticate with the initiator from a target thatuses reverse CHAP authentication
--reverse-password= - the password that corresponds with the user name specified for theinitiator
Notes
If you use the iscsi command, you must also assign a name to the iSCSI node, using the iscsiname command. The iscsiname command must appear before the iscsi command in theKickstart file.
Wherever possible, configure iSCSI storage in the system BIOS or firmware (iBFT for Intelsystems) rather than use the iscsi command. Anaconda automatically detects and uses disksconfigured in BIOS or firmware and no special configuration is necessary in the Kickstart file.
If you must use the iscsi command, ensure that networking is activated at the beginning of theinstallation, and that the iscsi command appears in the Kickstart file before you refer to iSCSIdisks with commands such as clearpart or ignoredisk.
B.5.9. iscsiname
The iscsiname Kickstart command is optional. It assigns a name to an iSCSI node specified by the iscsicommand.
Syntax
iscsiname iqname
Options
iqname - Name to assign to the iSCSI node.
Notes
If you use the iscsi command in your Kickstart file, you must specify iscsiname earlier in theKickstart file.
B.5.10. logvol
The logvol Kickstart command is optional. It creates a logical volume for Logical Volume Management(LVM).
Syntax
Red Hat Enterprise Linux 8 Performing an advanced RHEL installation
134
logvol mntpoint --vgname=name --name=name [OPTIONS]
Mandatory options
mntpoint - The mount point where the partition is mounted. Must be of one of the followingforms:
/pathFor example, / or /home
swapThe partition is used as swap space.
To determine the size of the swap partition automatically, use the --recommended option:
swap --recommended
To determine the size of the swap partition automatically and also allow extra space for yoursystem to hibernate, use the --hibernation option:
swap --hibernation
The size assigned will be equivalent to the swap space assigned by --recommended plusthe amount of RAM on your system.
For the swap sizes assigned by these commands, see Section C.4, “Recommendedpartitioning scheme” for AMD64, Intel 64, and 64-bit ARM systems.
--vgname=name - name of the volume group.
--name=name - name of the logical volume.
Optional options
--noformat - Use an existing logical volume and do not format it.
--useexisting - Use an existing logical volume and reformat it.
--fstype= - Sets the file system type for the logical volume. Valid values are xfs, ext2, ext3, ext4, swap, and vfat.
--fsoptions= - Specifies a free form string of options to be used when mounting the filesystem.This string will be copied into the /etc/fstab file of the installed system and should be enclosedin quotes.
--mkfsoptions= - Specifies additional parameters to be passed to the program that makes afilesystem on this partition. No processing is done on the list of arguments, so they must besupplied in a format that can be passed directly to the mkfs program. This means multipleoptions should be comma-separated or surrounded by double quotes, depending on thefilesystem.
--fsprofile= - Specifies a usage type to be passed to the program that makes a filesystem onthis partition. A usage type defines a variety of tuning parameters to be used when making afilesystem. For this option to work, the filesystem must support the concept of usage types and
APPENDIX B. KICKSTART COMMANDS AND OPTIONS REFERENCE
135
there must be a configuration file that lists valid types. For ext2, ext3, and ext4, thisconfiguration file is /etc/mke2fs.conf.
--label= - Sets a label for the logical volume.
--grow - Extends the logical volume to occupy the available space (if any), or up to themaximum size specified, if any. The option must be used only if you have pre-allocated aminimum storage space in the disk image, and would want the volume to grow and occupy theavailable space. In a physical environment, this is an one-time-action. However, in a virtualenvironment, the volume size increases as and when the virtual machine writes any data to thevirtual disk.
--size= - The size of the logical volume in MiB. This option cannot be used together with the --percent= option.
--percent= - The size of the logical volume, as a percentage of the free space in the volumegroup after any statically-sized logical volumes are taken into account. This option cannot beused together with the --size= option.
IMPORTANT
When creating a new logical volume, you must either specify its size staticallyusing the --size= option, or as a percentage of remaining free space using the --percent= option. You cannot use both of these options on the same logicalvolume.
--maxsize= - The maximum size in MiB when the logical volume is set to grow. Specify aninteger value here such as 500 (do not include the unit).
--recommended - Use this option when creating a logical volume to determine the size of thisvolume automatically, based on your system’s hardware. For details about the recommendedscheme, see Section C.4, “Recommended partitioning scheme” for AMD64, Intel 64, and 64-bitARM systems.
--resize - Resize a logical volume. If you use this option, you must also specify --useexisting and--size.
--encrypted - Specifies that this logical volume should be encrypted with Linux Unified KeySetup (LUKS), using the passphrase provided in the --passphrase= option. If you do notspecify a passphrase, the installation program uses the default, system-wide passphrase setwith the autopart --passphrase command, or stops the installation and prompts you to providea passphrase if no default is set.
NOTE
When encrypting one or more partitions, Anaconda attempts to gather 256 bitsof entropy to ensure the partitions are encrypted securely. Gathering entropycan take some time - the process will stop after a maximum of 10 minutes,regardless of whether sufficient entropy has been gathered.
The process can be sped up by interacting with the installation system (typing onthe keyboard or moving the mouse). If you are installing in a virtual machine, youcan also attach a virtio-rng device (a virtual random number generator) to theguest.
Red Hat Enterprise Linux 8 Performing an advanced RHEL installation
136
--passphrase= - Specifies the passphrase to use when encrypting this logical volume. You mustuse this option together with the --encrypted option; it has no effect by itself.
--cipher= - Specifies the type of encryption to use if the Anaconda default aes-xts-plain64 isnot satisfactory. You must use this option together with the --encrypted option; by itself it hasno effect. Available types of encryption are listed in the Security hardening document, butRed Hat strongly recommends using either aes-xts-plain64 or aes-cbc-essiv:sha256.
--escrowcert=URL_of_X.509_certificate - Store data encryption keys of all encrypted volumesas files in /root, encrypted using the X.509 certificate from the URL specified withURL_of_X.509_certificate. The keys are stored as a separate file for each encrypted volume.This option is only meaningful if --encrypted is specified.
--luks-version=LUKS_VERSION - Specifies which version of LUKS format should be used toencrypt the filesystem. This option is only meaningful if --encrypted is specified.
--backuppassphrase - Add a randomly-generated passphrase to each encrypted volume.Store these passphrases in separate files in /root, encrypted using the X.509 certificatespecified with --escrowcert. This option is only meaningful if --escrowcert is specified.
--pbkdf=PBKDF - Sets Password-Based Key Derivation Function (PBKDF) algorithm for LUKSkeyslot. See also the man page cryptsetup(8). This option is only meaningful if --encrypted isspecified.
--pbkdf-memory=PBKDF_MEMORY - Sets the memory cost for PBKDF. See also the manpage cryptsetup(8). This option is only meaningful if --encrypted is specified.
--pbkdf-time=PBKDF_TIME - Sets the number of milliseconds to spend with PBKDFpassphrase processing. See also --iter-time in the man page cryptsetup(8). This option is onlymeaningful if --encrypted is specified, and is mutually exclusive with --pbkdf-iterations.
--pbkdf-iterations=PBKDF_ITERATIONS - Sets the number of iterations directly and avoidsPBKDF benchmark. See also --pbkdf-force-iterations in the man page cryptsetup(8). Thisoption is only meaningful if --encrypted is specified, and is mutually exclusive with --pbkdf-time.
--thinpool - Creates a thin pool logical volume. (Use a mount point of none)
--metadatasize=size - Specify the metadata area size (in MiB) for a new thin pool device.
--chunksize=size - Specify the chunk size (in KiB) for a new thin pool device.
--thin - Create a thin logical volume. (Requires use of --poolname)
--poolname=name - Specify the name of the thin pool in which to create a thin logical volume.Requires the --thin option.
--profile=name - Specify the configuration profile name to use with thin logical volumes. Ifused, the name will also be included in the metadata for the given logical volume. By default, theavailable profiles are default and thin-performance and are defined in the /etc/lvm/profile/directory. See the lvm(8) man page for additional information.
--cachepvs= - A comma-separated list of physical volumes which should be used as a cache forthis volume.
--cachemode= - Specify which mode should be used to cache this logical volume - either writeback or writethrough.
APPENDIX B. KICKSTART COMMANDS AND OPTIONS REFERENCE
137
NOTE
For more information about cached logical volumes and their modes, see the lvmcache(7) man page.
--cachesize= - Size of cache attached to the logical volume, specified in MiB. This optionrequires the --cachepvs= option.
Notes
Do not use the dash (-) character in logical volume and volume group names when installingRed Hat Enterprise Linux using Kickstart. If this character is used, the installation finishesnormally, but the /dev/mapper/ directory will list these volumes and volume groups with everydash doubled. For example, a volume group named volgrp-01 containing a logical volumenamed logvol-01 will be listed as /dev/mapper/volgrp— 01-logvol— 01.This limitation only applies to newly created logical volume and volume group names. If you arereusing existing ones using the --noformat option, their names will not be changed.
If you lose the LUKS passphrase, any encrypted partitions and their data is completelyinaccessible. There is no way to recover a lost passphrase. However, you can save encryptionpassphrases with the --escrowcert and create backup encryption passphrases with the --backuppassphrase options.
Examples
Create the partition first, create the logical volume group, and then create the logical volume:
part pv.01 --size 3000volgroup myvg pv.01logvol / --vgname=myvg --size=2000 --name=rootvol
Create the partition first, create the logical volume group, and then create the logical volume tooccupy 90% of the remaining space in the volume group:
part pv.01 --size 1 --growvolgroup myvg pv.01logvol / --vgname=myvg --name=rootvol --percent=90
Additional resources
For more information regarding LVM, see the Configuring and managing logical volumesdocument.
B.5.11. mount
The mount Kickstart command is optional. It assigns a mount point to an existing block device, andoptionally reformats it to a given format.
Syntax
mount [OPTIONS] device mountpoint
Mandatory options:
Red Hat Enterprise Linux 8 Performing an advanced RHEL installation
138
device - The block device to mount.
mountpoint - Where to mount the device. It must be a valid mount point, such as / or /usr, or none if the device is unmountable (for example swap).
Optional options:
--reformat= - Specifies a new format (such as ext4) to which the device should be reformatted.
--mkfsoptions= - Specifies additional options to be passed to the command which creates thenew file system specified in --reformat=. The list of options provided here is not processed, sothey must be specified in a format that can be passed directly to the mkfs program. The list ofoptions should be either comma-separated or surrounded by double quotes, depending on thefile system. See the mkfs man page for the file system you want to create (for example mkfs.ext4(8) or mkfs.xfs(8)) for specific details.
--mountoptions= - Specifies a free form string that contains options to be used when mountingthe file system. The string will be copied to the /etc/fstab file on the installed system and shouldbe enclosed in double quotes. See the mount(8) man page for a full list of mount options, and fstab(5) for basics.
Notes
Unlike most other storage configuration commands in Kickstart, mount does not require you todescribe the entire storage configuration in the Kickstart file. You only need to ensure that thedescribed block device exists on the system. However, if you want to create the storage stackwith all the devices mounted, you must use other commands such as part to do so.
You can not use mount together with other storage-related commands such as part, logvol, or autopart in the same Kickstart file.
B.5.12. nvdimm
The nvdimm Kickstart command is optional. It performs an action on Non-Volatile Dual In-line MemoryModule (NVDIMM) devices.
Syntax
nvdimm action [OPTIONS]
Actions
reconfigure - Reconfigure a specific NVDIMM device into a given mode. Additionally, thespecified device is implicitly marked as to be used, so a subsequent nvdimm use command forthe same device is redundant. This action uses the following format:
nvdimm reconfigure [--namespace=NAMESPACE] [--mode=MODE] [--sectorsize=SECTORSIZE]
--namespace= - The device specification by namespace. For example:
nvdimm reconfigure --namespace=namespace0.0 --mode=sector --sectorsize=512
--mode= - The mode specification. Currently, only the value sector is available.
APPENDIX B. KICKSTART COMMANDS AND OPTIONS REFERENCE
139
--sectorsize= - Size of a sector for sector mode. For example:
nvdimm reconfigure --namespace=namespace0.0 --mode=sector --sectorsize=512
The supported sector sizes are 512 and 4096 bytes.
use - Specify a NVDIMM device as a target for installation. The device must be alreadyconfigured to the sector mode by the nvdimm reconfigure command. This action uses thefollowing format:
nvdimm use [--namespace=NAMESPACE|--blockdevs=DEVICES]
--namespace= - Specifies the device by namespace. For example:
nvdimm use --namespace=namespace0.0
--blockdevs= - Specifies a comma-separated list of block devices corresponding to theNVDIMM devices to be used. The asterisk * wildcard is supported. For example:
nvdimm use --blockdevs=pmem0s,pmem1snvdimm use --blockdevs=pmem*
Notes
By default, all NVDIMM devices are ignored by the installation program. You must use the nvdimm command to enable installation on these devices.
B.5.13. part or partition
The part or partition Kickstart command is required. It creates a partition on the system.
Syntax
part|partition mntpoint --name=name --device=device --rule=rule [OPTIONS]
Options
mntpoint - Where the partition is mounted. The value must be of one of the following forms:
/pathFor example, /, /usr, /home
swapThe partition is used as swap space.
To determine the size of the swap partition automatically, use the --recommended option:
swap --recommended
The size assigned will be effective but not precisely calibrated for your system.
To determine the size of the swap partition automatically but also allow extra space for yoursystem to hibernate, use the --hibernation option:
Red Hat Enterprise Linux 8 Performing an advanced RHEL installation
140
swap --hibernation
The size assigned will be equivalent to the swap space assigned by --recommended plusthe amount of RAM on your system.
For the swap sizes assigned by these commands, see Section C.4, “Recommendedpartitioning scheme” for AMD64, Intel 64, and 64-bit ARM systems.
raid.idThe partition is used for software RAID (see raid).
pv.idThe partition is used for LVM (see logvol).
biosbootThe partition will be used for a BIOS Boot partition. A 1 MiB BIOS boot partition is necessaryon BIOS-based AMD64 and Intel 64 systems using a GUID Partition Table (GPT); the bootloader will be installed into it. It is not necessary on UEFI systems. See also the bootloadercommand.
/boot/efiAn EFI System Partition. A 50 MiB EFI partition is necessary on UEFI-based AMD64, Intel64, and 64-bit ARM; the recommended size is 200 MiB. It is not necessary on BIOS systems.See also the bootloader command.
--size= - The minimum partition size in MiB. Specify an integer value here such as 500 (do notinclude the unit).
IMPORTANT
If the --size value is too small, the installation fails. Set the --size value as theminimum amount of space you require. For size recommendations, seeSection C.4, “Recommended partitioning scheme” .
--grow - Tells the partition to grow to fill available space (if any), or up to the maximum sizesetting, if one is specified.
NOTE
If you use --grow= without setting --maxsize= on a swap partition, Anacondalimits the maximum size of the swap partition. For systems that have less than2 GB of physical memory, the imposed limit is twice the amount of physicalmemory. For systems with more than 2 GB, the imposed limit is the size ofphysical memory plus 2GB.
--maxsize= - The maximum partition size in MiB when the partition is set to grow. Specify aninteger value here such as 500 (do not include the unit).
--noformat - Specifies that the partition should not be formatted, for use with the --onpartcommand.
--onpart= or --usepart= - Specifies the device on which to place the partition. Uses an existingblank device and format it to the new specified type. For example:
APPENDIX B. KICKSTART COMMANDS AND OPTIONS REFERENCE
141

partition /home --onpart=hda1
puts /home on /dev/hda1.
These options can also add a partition to a logical volume. For example:
partition pv.1 --onpart=hda2
The device must already exist on the system; the --onpart option will not create it.
It is also possible to specify an entire drive, rather than a partition, in which case Anaconda willformat and use the drive without creating a partition table. Note, however, that installation ofGRUB2 is not supported on a device formatted in this way, and must be placed on a drive with apartition table.
partition pv.1 --onpart=hdb
--ondisk= or --ondrive= - Creates a partition (specified by the part command) on an existingdisk.This command always creates a partition. Forces the partition to be created on a particulardisk. For example, --ondisk=sdb puts the partition on the second SCSI disk on the system.To specify a multipath device that does not use logical volume management (LVM), use theformat disk/by-id/dm-uuid-mpath-WWID, where WWID is the world-wide identifier for thedevice. For example, to specify a disk with WWID 2416CD96995134CA5D787F00A5AA11017,use:
part / --fstype=xfs --grow --asprimary --size=8192 --ondisk=disk/by-id/dm-uuid-mpath-2416CD96995134CA5D787F00A5AA11017
Multipath devices that use LVM are not assembled until after Anaconda has parsed theKickstart file. Therefore, you cannot specify these devices in the format dm-uuid-mpath.Instead, to specify a multipath device that uses LVM, use the format disk/by-id/scsi-WWID,where WWID is the world-wide identifier for the device. For example, to specify a disk withWWID 58095BEC5510947BE8C0360F604351918, use:
part / --fstype=xfs --grow --asprimary --size=8192 --ondisk=disk/by-id/scsi-58095BEC5510947BE8C0360F604351918
WARNING
Never specify multipath devices by device names like mpatha. Devicenames such as this are not specific to a particular disk. The disk named /dev/mpatha during installation might not be the one that you expect it tobe. Therefore, the clearpart command could target the wrong disk.
--asprimary - Forces the partition to be allocated as a primary partition. If the partition cannotbe allocated as primary (usually due to too many primary partitions being already allocated), thepartitioning process fails. This option only makes sense when the disk uses a Master BootRecord (MBR); for GUID Partition Table (GPT)-labeled disks this option has no meaning.
Red Hat Enterprise Linux 8 Performing an advanced RHEL installation
142
--fsprofile= - Specifies a usage type to be passed to the program that makes a filesystem onthis partition. A usage type defines a variety of tuning parameters to be used when making afilesystem. For this option to work, the filesystem must support the concept of usage types andthere must be a configuration file that lists valid types. For ext2, ext3, ext4, this configurationfile is /etc/mke2fs.conf.
--mkfsoptions= - Specifies additional parameters to be passed to the program that makes afilesystem on this partition. This is similar to --fsprofile but works for all filesystems, not just theones that support the profile concept. No processing is done on the list of arguments, so theymust be supplied in a format that can be passed directly to the mkfs program. This meansmultiple options should be comma-separated or surrounded by double quotes, depending onthe filesystem.
--fstype= - Sets the file system type for the partition. Valid values are xfs, ext2, ext3, ext4, swap, vfat, efi and biosboot.
--fsoptions - Specifies a free form string of options to be used when mounting the filesystem.This string will be copied into the /etc/fstab file of the installed system and should be enclosedin quotes.
--label= - assign a label to an individual partition.
--recommended - Determine the size of the partition automatically. For details about therecommended scheme, see Section C.4, “Recommended partitioning scheme” for AMD64, Intel64, and 64-bit ARM.
IMPORTANT
This option can only be used for partitions which result in a file system such as the/boot partition and swap space. It cannot be used to create LVM physicalvolumes or RAID members.
--onbiosdisk - Forces the partition to be created on a particular disk as discovered by the BIOS.
--encrypted - Specifies that this partition should be encrypted with Linux Unified Key Setup(LUKS), using the passphrase provided in the --passphrase option. If you do not specify apassphrase, Anaconda uses the default, system-wide passphrase set with the autopart --passphrase command, or stops the installation and prompts you to provide a passphrase if nodefault is set.
NOTE
When encrypting one or more partitions, Anaconda attempts to gather 256 bitsof entropy to ensure the partitions are encrypted securely. Gathering entropycan take some time - the process will stop after a maximum of 10 minutes,regardless of whether sufficient entropy has been gathered.
The process can be sped up by interacting with the installation system (typing onthe keyboard or moving the mouse). If you are installing in a virtual machine, youcan also attach a virtio-rng device (a virtual random number generator) to theguest.
--luks-version=LUKS_VERSION - Specifies which version of LUKS format should be used toencrypt the filesystem. This option is only meaningful if --encrypted is specified.
APPENDIX B. KICKSTART COMMANDS AND OPTIONS REFERENCE
143
--passphrase= - Specifies the passphrase to use when encrypting this partition. You must usethis option together with the --encrypted option; by itself it has no effect.
--cipher= - Specifies the type of encryption to use if the Anaconda default aes-xts-plain64 isnot satisfactory. You must use this option together with the --encrypted option; by itself it hasno effect. Available types of encryption are listed in the Security hardening document, butRed Hat strongly recommends using either aes-xts-plain64 or aes-cbc-essiv:sha256.
--escrowcert=URL_of_X.509_certificate - Store data encryption keys of all encryptedpartitions as files in /root, encrypted using the X.509 certificate from the URL specified withURL_of_X.509_certificate. The keys are stored as a separate file for each encrypted partition.This option is only meaningful if --encrypted is specified.
--backuppassphrase - Add a randomly-generated passphrase to each encrypted partition.Store these passphrases in separate files in /root, encrypted using the X.509 certificatespecified with --escrowcert. This option is only meaningful if --escrowcert is specified.
--pbkdf=PBKDF - Sets Password-Based Key Derivation Function (PBKDF) algorithm for LUKSkeyslot. See also the man page cryptsetup(8). This option is only meaningful if --encrypted isspecified.
--pbkdf-memory=PBKDF_MEMORY - Sets the memory cost for PBKDF. See also the manpage cryptsetup(8). This option is only meaningful if --encrypted is specified.
--pbkdf-time=PBKDF_TIME - Sets the number of milliseconds to spend with PBKDFpassphrase processing. See also --iter-time in the man page cryptsetup(8). This option is onlymeaningful if --encrypted is specified, and is mutually exclusive with --pbkdf-iterations.
--pbkdf-iterations=PBKDF_ITERATIONS - Sets the number of iterations directly and avoidsPBKDF benchmark. See also --pbkdf-force-iterations in the man page cryptsetup(8). Thisoption is only meaningful if --encrypted is specified, and is mutually exclusive with --pbkdf-time.
--resize= - Resize an existing partition. When using this option, specify the target size (in MiB)using the --size= option and the target partition using the --onpart= option.
Notes
The part command is not mandatory, but you must include either part, autopart or mount inyour Kickstart script.
The --active option is deprecated in Red Hat Enterprise Linux 8.
If partitioning fails for any reason, diagnostic messages appear on virtual console 3.
All partitions created are formatted as part of the installation process unless --noformat and --onpart are used.
Device names in the sdX (or /dev/sdX) format are not guaranteed to be consistent acrossreboots, which can complicate usage of some Kickstart commands. When a command calls for adevice node name, you can instead use any item from /dev/disk. For example, instead of:
part / --fstype=xfs --onpart=sda1
You could use an entry similar to one of the following:
Red Hat Enterprise Linux 8 Performing an advanced RHEL installation
144
part / --fstype=xfs --onpart=/dev/disk/by-path/pci-0000:00:05.0-scsi-0:0:0:0-part1
part / --fstype=xfs --onpart=/dev/disk/by-id/ata-ST3160815AS_6RA0C882-part1
This way the command will always target the same storage device. This is especially useful inlarge storage environments. See the chapter Overview of persistent naming attributes in theManaging storage devices document for more in-depth information about different ways toconsistently refer to storage devices.
If you lose the LUKS passphrase, any encrypted partitions and their data is completelyinaccessible. There is no way to recover a lost passphrase. However, you can save encryptionpassphrases with the --escrowcert and create backup encryption passphrases with the --backuppassphrase options.
B.5.14. raid
The raid Kickstart command is optional. It assembles a software RAID device.
Syntax
raid mntpoint --level=level --device=device-name partitions*
Options
mntpoint - Location where the RAID file system is mounted. If it is /, the RAID level must be 1unless a boot partition (/boot) is present. If a boot partition is present, the /boot partition mustbe level 1 and the root (/) partition can be any of the available types. The partitions* (whichdenotes that multiple partitions can be listed) lists the RAID identifiers to add to the RAID array.
IMPORTANT
On IBM Power Systems, if a RAID device has been prepared and has not beenreformatted during the installation, ensure that the RAID metadata version is 0.90 if you intend to put the /boot and PReP partitions on the RAID device.
The default Red Hat Enterprise Linux 7 mdadm metadata version is notsupported for the boot device.
--level= - RAID level to use (0, 1, 4, 5, 6, or 10). See Section C.3, “Supported RAID types” forinformation about various available RAID levels.
--device= - Name of the RAID device to use - for example, --device=root.
IMPORTANT
Do not use mdraid names in the form of md0 - these names are not guaranteedto be persistent. Instead, use meaningful names such as root or swap. Usingmeaningful names creates a symbolic link from /dev/md/name to whichever /dev/mdX node is assigned to the array.
If you have an old (v0.90 metadata) array that you cannot assign a name to, youcan specify the array by a filesystem label or UUID (for example, --device=rhel7-root --label=rhel7-root).
APPENDIX B. KICKSTART COMMANDS AND OPTIONS REFERENCE
145
--chunksize= - Sets the chunk size of a RAID storage in KiB. In certain situations, using adifferent chunk size than the default (512 Kib) can improve the performance of the RAID.
--spares= - Specifies the number of spare drives allocated for the RAID array. Spare drives areused to rebuild the array in case of drive failure.
--fsprofile= - Specifies a usage type to be passed to the program that makes a filesystem onthis partition. A usage type defines a variety of tuning parameters to be used when making afilesystem. For this option to work, the filesystem must support the concept of usage types andthere must be a configuration file that lists valid types. For ext2, ext3, and ext4, thisconfiguration file is /etc/mke2fs.conf.
--fstype= - Sets the file system type for the RAID array. Valid values are xfs, ext2, ext3, ext4, swap, and vfat.
--fsoptions= - Specifies a free form string of options to be used when mounting the filesystem.This string will be copied into the /etc/fstab file of the installed system and should be enclosedin quotes.
--mkfsoptions= - Specifies additional parameters to be passed to the program that makes afilesystem on this partition. No processing is done on the list of arguments, so they must besupplied in a format that can be passed directly to the mkfs program. This means multipleoptions should be comma-separated or surrounded by double quotes, depending on thefilesystem.
--label= - Specify the label to give to the filesystem to be made. If the given label is already inuse by another filesystem, a new label will be created.
--noformat - Use an existing RAID device and do not format the RAID array.
--useexisting - Use an existing RAID device and reformat it.
--encrypted - Specifies that this RAID device should be encrypted with Linux Unified Key Setup(LUKS), using the passphrase provided in the --passphrase option. If you do not specify apassphrase, Anaconda uses the default, system-wide passphrase set with the autopart --passphrase command, or stops the installation and prompts you to provide a passphrase if nodefault is set.
NOTE
When encrypting one or more partitions, Anaconda attempts to gather 256 bitsof entropy to ensure the partitions are encrypted securely. Gathering entropycan take some time - the process will stop after a maximum of 10 minutes,regardless of whether sufficient entropy has been gathered.
The process can be sped up by interacting with the installation system (typing onthe keyboard or moving the mouse). If you are installing in a virtual machine, youcan also attach a virtio-rng device (a virtual random number generator) to theguest.
--luks-version=LUKS_VERSION - Specifies which version of LUKS format should be used toencrypt the filesystem. This option is only meaningful if --encrypted is specified.
--cipher= - Specifies the type of encryption to use if the Anaconda default aes-xts-plain64 isnot satisfactory. You must use this option together with the --encrypted option; by itself it hasno effect. Available types of encryption are listed in the Security hardening document, but
Red Hat Enterprise Linux 8 Performing an advanced RHEL installation
146
Red Hat strongly recommends using either aes-xts-plain64 or aes-cbc-essiv:sha256.
--passphrase= - Specifies the passphrase to use when encrypting this RAID device. You mustuse this option together with the --encrypted option; by itself it has no effect.
--escrowcert=URL_of_X.509_certificate - Store the data encryption key for this device in afile in /root, encrypted using the X.509 certificate from the URL specified withURL_of_X.509_certificate. This option is only meaningful if --encrypted is specified.
--backuppassphrase - Add a randomly-generated passphrase to this device. Store thepassphrase in a file in /root, encrypted using the X.509 certificate specified with --escrowcert.This option is only meaningful if --escrowcert is specified.
--pbkdf=PBKDF - Sets Password-Based Key Derivation Function (PBKDF) algorithm for LUKSkeyslot. See also the man page cryptsetup(8). This option is only meaningful if --encrypted isspecified.
--pbkdf-memory=PBKDF_MEMORY - Sets the memory cost for PBKDF. See also the manpage cryptsetup(8). This option is only meaningful if --encrypted is specified.
--pbkdf-time=PBKDF_TIME - Sets the number of milliseconds to spend with PBKDFpassphrase processing. See also --iter-time in the man page cryptsetup(8). This option is onlymeaningful if --encrypted is specified, and is mutually exclusive with --pbkdf-iterations.
--pbkdf-iterations=PBKDF_ITERATIONS - Sets the number of iterations directly and avoidsPBKDF benchmark. See also --pbkdf-force-iterations in the man page cryptsetup(8). Thisoption is only meaningful if --encrypted is specified, and is mutually exclusive with --pbkdf-time.
Example
The following example shows how to create a RAID level 1 partition for /, and a RAID level 5 for /home,assuming there are three SCSI disks on the system. It also creates three swap partitions, one on eachdrive.
part raid.01 --size=6000 --ondisk=sdapart raid.02 --size=6000 --ondisk=sdbpart raid.03 --size=6000 --ondisk=sdcpart swap --size=512 --ondisk=sdapart swap --size=512 --ondisk=sdbpart swap --size=512 --ondisk=sdcpart raid.11 --size=1 --grow --ondisk=sdapart raid.12 --size=1 --grow --ondisk=sdbpart raid.13 --size=1 --grow --ondisk=sdcraid / --level=1 --device=rhel8-root --label=rhel8-root raid.01 raid.02 raid.03raid /home --level=5 --device=rhel8-home --label=rhel8-home raid.11 raid.12 raid.13
Notes
If you lose the LUKS passphrase, any encrypted partitions and their data is completelyinaccessible. There is no way to recover a lost passphrase. However, you can save encryptionpassphrases with the --escrowcert and create backup encryption passphrases with the --backuppassphrase options.
B.5.15. reqpart
APPENDIX B. KICKSTART COMMANDS AND OPTIONS REFERENCE
147

The reqpart Kickstart command is optional. It automatically creates partitions required by your hardwareplatform. These include a /boot/efi partition for systems with UEFI firmware, a biosboot partition forsystems with BIOS firmware and GPT, and a PRePBoot partition for IBM Power Systems.
Syntax
reqpart [--add-boot]
Options
--add-boot - Creates a separate /boot partition in addition to the platform-specific partitioncreated by the base command.
Notes
This command cannot be used toegether with autopart, because autopart does everything the reqpart command does and, in addition, creates other partitions or logical volumes such as / and swap. In contrast with autopart, this command only creates platform-specific partitions andleaves the rest of the drive empty, allowing you to create a custom layout.
B.5.16. snapshot
The snapshot Kickstart command is optional. Use it to create LVM thin volume snapshots during theinstallation process. This enables you to back up a logical volume before or after the installation.
To create multiple snapshots, add the snaphost Kickstart command multiple times.
Syntax
snapshot vg_name/lv_name --name=snapshot_name --when=pre-install|post-install
Options
vg_name/lv_name - Sets the name of the volume group and logical volume to create thesnapshot from.
--name=snapshot_name - Sets the name of the snapshot. This name must be unique withinthe volume group.
--when=pre-install|post-install - Sets if the snapshot is created before the installation beginsor after the installation is completed.
B.5.17. volgroup
The volgroup Kickstart command is optional. It creates a Logical Volume Management (LVM) group.
Syntax
volgroup name [OPTIONS] [partition*]
Mandatory options
name - Name of the new volume group.
Red Hat Enterprise Linux 8 Performing an advanced RHEL installation
148

Options
partition - Physical volume partitions to use as backing storage for the volume group.
--noformat - Use an existing volume group and do not format it.
--useexisting - Use an existing volume group and reformat it. If you use this option, do notspecify a partition. For example:
volgroup rhel00 --useexisting --noformat
--pesize= - Set the size of the volume group’s physical extents in KiB. The default value is 4096(4 MiB), and the minimum value is 1024 (1 MiB).
--reserved-space= - Specify an amount of space to leave unused in a volume group in MiB.Applicable only to newly created volume groups.
--reserved-percent= - Specify a percentage of total volume group space to leave unused.Applicable only to newly created volume groups.
Notes
Create the partition first, then create the logical volume group, and then create the logicalvolume. For example:
part pv.01 --size 10000volgroup my_volgrp pv.01logvol / --vgname=my_volgrp --size=2000 --name=root
Do not use the dash (-) character in logical volume and volume group names when installingRed Hat Enterprise Linux using Kickstart. If this character is used, the installation finishesnormally, but the /dev/mapper/ directory will list these volumes and volume groups with everydash doubled. For example, a volume group named volgrp-01 containing a logical volumenamed logvol-01 will be listed as /dev/mapper/volgrp--01-logvol--01.This limitation only applies to newly created logical volume and volume group names. If you arereusing existing ones using the --noformat option, their names will not be changed.
B.5.18. zerombr
The zerombr Kickstart command is optional. The zerombr initializes any invalid partition tables that arefound on disks and destroys all of the contents of disks with invalid partition tables. This command isrequired when performing an installation on an IBM Z system with unformatted Direct Access StorageDevice (DASD) disks, otherwise the unformatted disks are not formatted and used during theinstallation.
Syntax
zerombr
Notes
On IBM Z, if zerombr is specified, any Direct Access Storage Device (DASD) visible to theinstallation program which is not already low-level formatted is automatically low-levelformatted with dasdfmt. The command also prevents user choice during interactive
APPENDIX B. KICKSTART COMMANDS AND OPTIONS REFERENCE
149
installations.
If zerombr is not specified and there is at least one unformatted DASD visible to the installationprogram, a non-interactive Kickstart installation exits unsuccessfully.
If zerombr is not specified and there is at least one unformatted DASD visible to the installationprogram, an interactive installation exits if the user does not agree to format all visible andunformatted DASDs. To circumvent this, only activate those DASDs that you will use duringinstallation. You can always add more DASDs after installation is complete.
This command has no options.
B.5.19. zfcp
The zfcp Kickstart command is optional. It defines a Fibre channel device.
This option only applies on IBM Z. All of the options described below must be specified.
Syntax
zfcp --devnum=devnum --wwpn=wwpn --fcplun=lun
Options
--devnum= - The device number (zFCP adapter device bus ID).
--wwpn= - The device’s World Wide Port Name (WWPN). Takes the form of a 16-digit number,preceded by 0x.
--fcplun= - The device’s Logical Unit Number (LUN). Takes the form of a 16-digit number,preceded by 0x.
Example
zfcp --devnum=0.0.4000 --wwpn=0x5005076300C213e9 --fcplun=0x5022000000000000
B.6. KICKSTART COMMANDS FOR ADDONS SUPPLIED WITH THERHEL INSTALLATION PROGRAM
The Kickstart commands in this section are related to add-ons supplied by default with the Red HatEnterprise Linux installation program: Kdump and OpenSCAP.
B.6.1. %addon com_redhat_kdump
The %addon com_redhat_kdump Kickstart command is optional. This command configures the kdumpkernel crash dumping mechanism.
Syntax
%addon com_redhat_kdump [OPTIONS]%end
NOTE
Red Hat Enterprise Linux 8 Performing an advanced RHEL installation
150
NOTE
The syntax for this command is unusual because it is an add-on rather than a built-inKickstart command.
Notes
Kdump is a kernel crash dumping mechanism that allows you to save the contents of the system’smemory for later analysis. It relies on kexec, which can be used to boot a Linux kernel from the contextof another kernel without rebooting the system, and preserve the contents of the first kernel’s memorythat would otherwise be lost.
In case of a system crash, kexec boots into a second kernel (a capture kernel). This capture kernelresides in a reserved part of the system memory. Kdump then captures the contents of the crashedkernel’s memory (a crash dump) and saves it to a specified location. The location cannot be configuredusing this Kickstart command; it must be configured after the installation by editing the /etc/kdump.conf configuration file.
For more information about Kdump, see the Installing and configuring kdump chapter of the Managing,monitoring and updating the kernel document.
Options
--enable - Enable kdump on the installed system.
--disable - Disable kdump on the installed system.
--reserve-mb= - The amount of memory you want to reserve for kdump, in MiB. For example:
%addon com_redhat_kdump --enable --reserve-mb=128%end
You can also specify auto instead of a numeric value. In that case, the installation program willdetermine the amount of memory automatically based on the criteria described in the Memoryrequirements for kdump section of the Managing, monitoring and updating the kernel document.
If you enable kdump and do not specify a --reserve-mb= option, the value auto will be used.
--enablefadump - Enable firmware-assisted dumping on systems which allow it (notably, IBMPower Systems servers).
B.6.2. %addon org_fedora_oscap
The %addon org_fedora_oscap Kickstart command is optional.
The OpenSCAP installation program add-on is used to apply SCAP (Security Content AutomationProtocol) content - security policies - on the installed system. This add-on has been enabled by defaultsince Red Hat Enterprise Linux 7.2. When enabled, the packages necessary to provide this functionalitywill automatically be installed. However, by default, no policies are enforced, meaning that no checks areperformed during or after installation unless specifically configured.
IMPORTANT
APPENDIX B. KICKSTART COMMANDS AND OPTIONS REFERENCE
151

IMPORTANT
Applying a security policy is not necessary on all systems. This command should only beused when a specific policy is mandated by your organization rules or governmentregulations.
Unlike most other commands, this add-on does not accept regular options, but uses key-value pairs inthe body of the %addon definition instead. These pairs are whitespace-agnostic. Values can beoptionally enclosed in single quotes (') or double quotes (").
Syntax
%addon org_fedora_oscapkey = value%end
Keys
The following keys are recognized by the add-on:
content-type - Type of the security content. Possible values are datastream, archive, rpm, and scap-security-guide.If the content-type is scap-security-guide, the add-on will use content provided by the scap-security-guide package, which is present on the boot media. This means that all other keysexcept profile will have no effect.
content-url - Location of the security content. The content must be accessible using HTTP,HTTPS, or FTP; local storage is currently not supported. A network connection must be availableto reach content definitions in a remote location.
datastream-id - ID of the data stream referenced in the content-url value. Used only if content-type is datastream.
xccdf-id - ID of the benchmark you want to use.
content-path - Path to the datastream or the XCCDF file which should be used, given as arelative path in the archive.
profile - ID of the profile to be applied. Use default to apply the default profile.
fingerprint - A MD5, SHA1 or SHA2 checksum of the content referenced by content-url.
tailoring-path - Path to a tailoring file which should be used, given as a relative path in thearchive.
Examples
The following is an example %addon org_fedora_oscap section which uses content from thescap-security-guide on the installation media:
Example B.1. Sample OpenSCAP Add-on Definition Using SCAP Security Guide
%addon org_fedora_oscapcontent-type = scap-security-guideprofile = pci-dss%end
Red Hat Enterprise Linux 8 Performing an advanced RHEL installation
152
The following is a more complex example which loads a custom profile from a web server:
Example B.2. Sample OpenSCAP Add-on Definition Using a Datastream
%addon org_fedora_oscapcontent-type = datastreamcontent-url = http://www.example.com/scap/testing_ds.xmldatastream-id = scap_example.com_datastream_testingxccdf-id = scap_example.com_cref_xccdf.xmlprofile = xccdf_example.com_profile_my_profilefingerprint = 240f2f18222faa98856c3b4fc50c4195%end
Additional resources
Additional information about the OpenSCAP installation program add-on is available athttps://www.open-scap.org/tools/oscap-anaconda-addon/.
For more information about the profiles available in the SCAP Security Guide and what they do,see the OpenSCAP Portal.
B.7. COMMANDS USED IN ANACONDA
The pwpolicy command is an Anaconda UI specific command that can be used only in the %anacondasection of the kickstart file.
B.7.1. pwpolicy
The pwpolicy Kickstart command is optional. Use this command to enforce a custom password policyduring installation. The policy requires you to create passwords for the root, users, or the luks useraccounts. The factors such as password length and strength decide the validity of a password.
Syntax
pwpolicy name [--minlen=length] [--minquality=quality] [--strict|--nostrict] [--emptyok|--noempty] [--changesok|--nochanges]
Mandatory options
name - Replace with either root, user or luks to enforce the policy for the root password, userpasswords, or LUKS passphrase, respectively.
Optional options
--minlen= - Sets the minimum allowed password length, in characters. The default is 6.
--minquality= - Sets the minimum allowed password quality as defined by the libpwqualitylibrary. The default value is 1.
--strict - Enables strict password enforcement. Passwords which do not meet the requirements
APPENDIX B. KICKSTART COMMANDS AND OPTIONS REFERENCE
153
--strict - Enables strict password enforcement. Passwords which do not meet the requirementsspecified in --minquality= and --minlen= will not be accepted. This option is disabled bydefault.
--notstrict - Passwords which do not meet the minimum quality requirements specified by the --minquality= and -minlen= options will be allowed, after Done is clicked twice in the GUI. Fortext mode interface, a similar mechanism is used.
--emptyok - Allows the use of empty passwords. Enabled by default for user passwords.
--notempty - Disallows the use of empty passwords. Enabled by default for the root passwordand the LUKS passphrase.
--changesok - Allows changing the password in the user interface, even if the Kickstart filealready specifies a password. Disabled by default.
--nochanges - Disallows changing passwords which are already set in the Kickstart file. Enabledby default.
Notes
The pwpolicy command is an Anaconda-UI specific command that can be used only in the %anaconda section of the kickstart file.
The libpwquality library is used to check minimum password requirements (length and quality).You can use the pwscore and pwmake commands provided by the libpwquality package tocheck the quality score of a password, or to create a random password with a given score. Seethe pwscore(1) and pwmake(1) man page for details about these commands.
B.8. KICKSTART COMMANDS FOR SYSTEM RECOVERY
The Kickstart command in this section repairs an installed system.
B.8.1. rescue
The rescue Kickstart command is optional. It provides a shell environment with root privileges and a setof system management tools to repair the installation and to troubleshoot the issues like:
Mount file systems as read-only
Blacklist or add a driver provided on a driver disc
Install or upgrade system packages
Manage partitions
NOTE
The Kickstart rescue mode is different from the rescue mode and emergency mode,which are provided as part of the systemd and service manager.
The rescue command does not modify the system on its own. It only sets up the rescue environment bymounting the system under /mnt/sysimage in a read-write mode. You can choose not to mount thesystem, or to mount it in read-only mode.
Red Hat Enterprise Linux 8 Performing an advanced RHEL installation
154
Syntax
rescue [--nomount|--romount]
Options
--nomount or --romount - Controls how the installed system is mounted in the rescueenvironment. By default, the installation program finds your system and mount it in read-writemode, telling you where it has performed this mount. You can optionally select to not mountanything (the --nomount option) or mount in read-only mode (the --romount option). Only oneof these two options can be used.
Notes
To run a rescue mode, make a copy of the Kickstart file, and include the rescue command in it.
Using the rescue command causes the installer to perform the following steps:
1. Run the %pre script.
2. Set up environment for rescue mode.The following kickstart commands take effect:
a. updates
b. sshpw
c. logging
d. lang
e. network
3. Set up advanced storage environment.The following kickstart commands take effect:
a. fcoe
b. iscsi
c. iscsiname
d. nvdimm
e. zfcp
4. Mount the system
rescue [--nomount|--romount]
5. Run %post scriptThis step is run only if the installed system is mounted in read-write mode.
6. Start shell
7. Reboot system
APPENDIX B. KICKSTART COMMANDS AND OPTIONS REFERENCE
155
APPENDIX C. PARTITIONING REFERENCE
C.1. SUPPORTED DEVICE TYPES
Standard partition
A standard partition can contain a file system or swap space. Standard partitions are most commonlyused for /boot and the BIOS Boot and EFI System partitions. LVM logical volumes arerecommended for most other uses.
LVM
Choosing LVM (or Logical Volume Management) as the device type creates an LVM logical volume.If no LVM volume group currently exists, one is automatically created to contain the new volume; ifan LVM volume group already exists, the volume is assigned. LVM can improve performance whenusing physical disks, and it allows for advanced setups such as using multiple physical disks for onemount point, and setting up software RAID for increased performance, reliability, or both.
LVM thin provisioning
Using thin provisioning, you can manage a storage pool of free space, known as a thin pool, which canbe allocated to an arbitrary number of devices when needed by applications. You can dynamicallyexpand the pool when needed for cost-effective allocation of storage space.
WARNING
The installation program does not support overprovisioned LVM thin pools.
C.2. SUPPORTED FILE SYSTEMS
This section describes the file systems available in Red Hat Enterprise Linux.
xfs
XFS is a highly scalable, high-performance file system that supports file systems up to 16 exabytes(approximately 16 million terabytes), files up to 8 exabytes (approximately 8 million terabytes), anddirectory structures containing tens of millions of entries. XFS also supports metadata journaling,which facilitates quicker crash recovery. The maximum supported size of a single XFS file system is500 TB. XFS is the default and recommended file system on Red Hat Enterprise Linux.
ext4
The ext4 file system is based on the ext3 file system and features a number of improvements. Theseinclude support for larger file systems and larger files, faster and more efficient allocation of diskspace, no limit on the number of subdirectories within a directory, faster file system checking, andmore robust journaling. The maximum supported size of a single ext4 file system is 50 TB.
ext3
The ext3 file system is based on the ext2 file system and has one main advantage - journaling. Usinga journaling file system reduces the time spent recovering a file system after it terminatesunexpectedly, as there is no need to check the file system for metadata consistency by running thefsck utility every time.
ext2
An ext2 file system supports standard Unix file types, including regular files, directories, or symbolic
Red Hat Enterprise Linux 8 Performing an advanced RHEL installation
156
An ext2 file system supports standard Unix file types, including regular files, directories, or symboliclinks. It provides the ability to assign long file names, up to 255 characters.
swap
Swap partitions are used to support virtual memory. In other words, data is written to a swap partitionwhen there is not enough RAM to store the data your system is processing.
vfat
The VFAT file system is a Linux file system that is compatible with Microsoft Windows long filenames on the FAT file system.
BIOS Boot
A very small partition required for booting from a device with a GUID partition table (GPT) on BIOSsystems and UEFI systems in BIOS compatibility mode.
EFI System Partition
A small partition required for booting a device with a GUID partition table (GPT) on a UEFI system.
PReP
This small boot partition is located on the first partition of the hard drive. The PReP boot partitioncontains the GRUB2 boot loader, which allows other IBM Power Systems servers to boot Red HatEnterprise Linux.
C.3. SUPPORTED RAID TYPES
RAID stands for Redundant Array of Independent Disks, a technology which allows you to combinemultiple physical disks into logical units. Some setups are designed to enhance performance at the costof reliability, while others improve reliability at the cost of requiring more disks for the same amount ofavailable space.
This section describes supported software RAID types which you can use with LVM and LVM ThinProvisioning to set up storage on the installed system.
None
No RAID array is set up.
RAID 0
Performance: Distributes data across multiple disks. RAID 0 offers increased performance overstandard partitions and can be used to pool the storage of multiple disks into one large virtual device.Note that RAID 0 offers no redundancy and that the failure of one device in the array destroys datain the entire array. RAID 0 requires at least two disks.
RAID 1
Redundancy: Mirrors all data from one partition onto one or more other disks. Additional devices inthe array provide increasing levels of redundancy. RAID 1 requires at least two disks.
RAID 4
Error checking: Distributes data across multiple disks and uses one disk in the array to store parityinformation which safeguards the array in case any disk in the array fails. As all parity information isstored on one disk, access to this disk creates a "bottleneck" in the array’s performance. RAID 4requires at least three disks.
RAID 5
Distributed error checking: Distributes data and parity information across multiple disks. RAID 5offers the performance advantages of distributing data across multiple disks, but does not share theperformance bottleneck of RAID 4 as the parity information is also distributed through the array.RAID 5 requires at least three disks.
RAID 6
APPENDIX C. PARTITIONING REFERENCE
157
Redundant error checking: RAID 6 is similar to RAID 5, but instead of storing only one set of paritydata, it stores two sets. RAID 6 requires at least four disks.
RAID 10
Performance and redundancy: RAID 10 is nested or hybrid RAID. It is constructed by distributing dataover mirrored sets of disks. For example, a RAID 10 array constructed from four RAID partitionsconsists of two mirrored pairs of striped partitions. RAID 10 requires at least four disks.
C.4. RECOMMENDED PARTITIONING SCHEME
Red Hat recommends that you create separate file systems at the following mount points:
/boot
/ (root)
/home
swap
/boot/efi
PReP
/boot partition - recommended size at least 1 GiB
The partition mounted on /boot contains the operating system kernel, which allows yoursystem to boot Red Hat Enterprise Linux 8, along with files used during the bootstrapprocess. Due to the limitations of most firmwares, creating a small partition to hold these isrecommended. In most scenarios, a 1 GiB boot partition is adequate. Unlike other mountpoints, using an LVM volume for /boot is not possible - /boot must be located on a separatedisk partition.
WARNING
Normally, the /boot partition is created automatically by the installationprogram. However, if the / (root) partition is larger than 2 TiB and (U)EFIis used for booting, you need to create a separate /boot partition that issmaller than 2 TiB to boot the machine successfully.
NOTE
If you have a RAID card, be aware that some BIOS types do not supportbooting from the RAID card. In such a case, the /boot partition must becreated on a partition outside of the RAID array, such as on a separate harddrive.
root - recommended size of 10 GiB
This is where "/", or the root directory, is located. The root directory is the top-level of thedirectory structure. By default, all files are written to this file system unless a different filesystem is mounted in the path being written to, for example, /boot or /home.
While a 5 GiB root file system allows you to install a minimal installation, it is recommended to
Red Hat Enterprise Linux 8 Performing an advanced RHEL installation
158
While a 5 GiB root file system allows you to install a minimal installation, it is recommended toallocate at least 10 GiB so that you can install as many package groups as you want.
IMPORTANT
Do not confuse the / directory with the /root directory. The /root directory isthe home directory of the root user. The /root directory is sometimes referredto as slash root to distinguish it from the root directory.
/home - recommended size at least 1 GiB
To store user data separately from system data, create a dedicated file system for the /home directory. Base the file system size on the amount of data that is stored locally,number of users, and so on. You can upgrade or reinstall Red Hat Enterprise Linux 8 withouterasing user data files. If you select automatic partitioning, it is recommended to have atleast 55 GiB of disk space available for the installation, to ensure that the /home file systemis created.
swap partition - recommended size at least 1 GB
Swap file systems support virtual memory; data is written to a swap file system when there isnot enough RAM to store the data your system is processing. Swap size is a function ofsystem memory workload, not total system memory and therefore is not equal to the totalsystem memory size. It is important to analyze what applications a system will be running andthe load those applications will serve in order to determine the system memory workload.Application providers and developers can provide guidance.When the system runs out of swap space, the kernel terminates processes as the systemRAM memory is exhausted. Configuring too much swap space results in storage devicesbeing allocated but idle and is a poor use of resources. Too much swap space can also hidememory leaks. The maximum size for a swap partition and other additional information canbe found in the mkswap(8) manual page.
The following table provides the recommended size of a swap partition depending on theamount of RAM in your system and if you want sufficient memory for your system tohibernate. If you let the installation program partition your system automatically, the swappartition size is established using these guidelines. Automatic partitioning setup assumeshibernation is not in use. The maximum size of the swap partition is limited to 10 percent ofthe total size of the hard drive, and the installation program cannot create swap partitionsmore than 128 GB in size. To set up enough swap space to allow for hibernation, or if youwant to set the swap partition size to more than 10 percent of the system’s storage space, ormore than 128 GB, you must edit the partitioning layout manually.
/boot/efi partition - recommended size of 200 MiB
UEFI-based AMD64, Intel 64, and 64-bit ARM require a 200 MiB EFI system partition. Therecommended minimum size is 200 MiB, the default size is 600 MiB, and the maximum sizeis 600 MiB. BIOS systems do not require an EFI system partition.
Table C.1. Recommended System Swap Space
Amount of RAM in the system Recommended swap space Recommended swap space ifallowing for hibernation
Less than 2 GB 2 times the amount of RAM 3 times the amount of RAM
2 GB - 8 GB Equal to the amount of RAM 2 times the amount of RAM
APPENDIX C. PARTITIONING REFERENCE
159
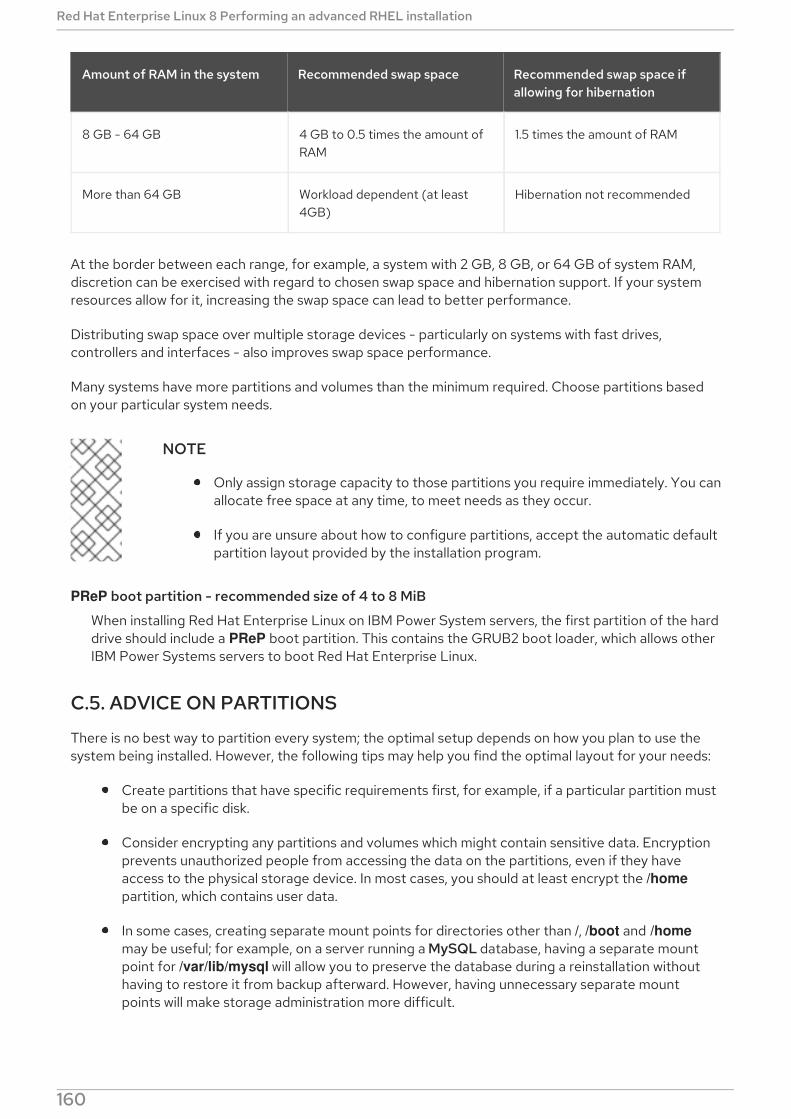
8 GB - 64 GB 4 GB to 0.5 times the amount ofRAM
1.5 times the amount of RAM
More than 64 GB Workload dependent (at least4GB)
Hibernation not recommended
Amount of RAM in the system Recommended swap space Recommended swap space ifallowing for hibernation
At the border between each range, for example, a system with 2 GB, 8 GB, or 64 GB of system RAM,discretion can be exercised with regard to chosen swap space and hibernation support. If your systemresources allow for it, increasing the swap space can lead to better performance.
Distributing swap space over multiple storage devices - particularly on systems with fast drives,controllers and interfaces - also improves swap space performance.
Many systems have more partitions and volumes than the minimum required. Choose partitions basedon your particular system needs.
NOTE
Only assign storage capacity to those partitions you require immediately. You canallocate free space at any time, to meet needs as they occur.
If you are unsure about how to configure partitions, accept the automatic defaultpartition layout provided by the installation program.
PReP boot partition - recommended size of 4 to 8 MiB
When installing Red Hat Enterprise Linux on IBM Power System servers, the first partition of the harddrive should include a PReP boot partition. This contains the GRUB2 boot loader, which allows otherIBM Power Systems servers to boot Red Hat Enterprise Linux.
C.5. ADVICE ON PARTITIONS
There is no best way to partition every system; the optimal setup depends on how you plan to use thesystem being installed. However, the following tips may help you find the optimal layout for your needs:
Create partitions that have specific requirements first, for example, if a particular partition mustbe on a specific disk.
Consider encrypting any partitions and volumes which might contain sensitive data. Encryptionprevents unauthorized people from accessing the data on the partitions, even if they haveaccess to the physical storage device. In most cases, you should at least encrypt the /homepartition, which contains user data.
In some cases, creating separate mount points for directories other than /, /boot and /homemay be useful; for example, on a server running a MySQL database, having a separate mountpoint for /var/lib/mysql will allow you to preserve the database during a reinstallation withouthaving to restore it from backup afterward. However, having unnecessary separate mountpoints will make storage administration more difficult.
Some special restrictions apply to certain directories with regards on which partitioning layouts
Red Hat Enterprise Linux 8 Performing an advanced RHEL installation
160
Some special restrictions apply to certain directories with regards on which partitioning layoutscan they be placed. Notably, the /boot directory must always be on a physical partition (not onan LVM volume).
If you are new to Linux, consider reviewing the Linux Filesystem Hierarchy Standard athttp://refspecs.linuxfoundation.org/FHS_2.3/fhs-2.3.html for information about various systemdirectories and their contents.
Each kernel installed on your system requires approximately 56 MB on the /boot partition:
32 MB initramfs
14 MB kdump initramfs
3.5 MB system map
6.6 MB vmlinuz
NOTE
For rescue mode, initramfs and vmlinuz require 80 MB.
The default partition size of 1 GB for /boot should suffice for most common use cases.However, it is recommended that you increase the size of this partition if you are planning onretaining multiple kernel releases or errata kernels.
The /var directory holds content for a number of applications, including the Apache web server,and is used by the DNF package manager to temporarily store downloaded package updates.Make sure that the partition or volume containing /var has at least 3 GB.
The contents of the /var directory usually change very often. This may cause problems witholder solid state drives (SSDs), as they can handle a lower number of read/write cycles beforebecoming unusable. If your system root is on an SSD, consider creating a separate mount pointfor /var on a classic (platter) HDD.
The /usr directory holds the majority of software on a typical Red Hat Enterprise Linuxinstallation. The partition or volume containing this directory should therefore be at least 5 GBfor minimal installations, and at least 10 GB for installations with a graphical environment.
If /usr or /var is partitioned separately from the rest of the root volume, the boot processbecomes much more complex because these directories contain boot-critical components. Insome situations, such as when these directories are placed on an iSCSI drive or an FCoE location,the system may either be unable to boot, or it may hang with a Device is busy error whenpowering off or rebooting.This limitation only applies to /usr or /var, not to directories below them. For example, aseparate partition for /var/www will work without issues.
Consider leaving a portion of the space in an LVM volume group unallocated. This unallocatedspace gives you flexibility if your space requirements change but you do not wish to remove datafrom other volumes. You can also select the LVM Thin Provisioning device type for thepartition to have the unused space handled automatically by the volume.
The size of an XFS file system can not be reduced - if you need to make a partition or volumewith this file system smaller, you must back up your data, destroy the file system, and create anew, smaller one in its place. Therefore, if you expect needing to manipulate your partitioninglayout later, you should use the ext4 file system instead.
APPENDIX C. PARTITIONING REFERENCE
161
Use Logical Volume Management (LVM) if you anticipate expanding your storage by addingmore hard drives or expanding virtual machine hard drives after the installation. With LVM, youcan create physical volumes on the new drives, and then assign them to any volume group andlogical volume as you see fit - for example, you can easily expand your system’s /home (or anyother directory residing on a logical volume).
Creating a BIOS Boot partition or an EFI System Partition may be necessary, depending on yoursystem’s firmware, boot drive size, and boot drive disk label. See Section C.4, “Recommendedpartitioning scheme” for information about these partitions. Note that graphical installation willnot let you create a BIOS Boot or EFI System Partition if your system does not require one - inthat case, they will be hidden from the menu.
If you need to make any changes to your storage configuration after the installation, Red HatEnterprise Linux repositories offer several different tools which can help you do this. If youprefer a command line tool, try system-storage-manager.
Red Hat Enterprise Linux 8 Performing an advanced RHEL installation
162