
RADIUS Administrator’s Guide · PDF fileRADIUS Administrator’s Guide Livingston...
108
RADIUS Administrator’s Guide Livingston Enterprises, Inc. 4464 Willow Rd Pleasanton, CA 94588 (510) 737-2100 (800) 458-9966 May 1997 950-1185B
Transcript of RADIUS Administrator’s Guide · PDF fileRADIUS Administrator’s Guide Livingston...

RADIUS
Administrator’sGuide
Livingston Enterprises, Inc.4464 Willow Rd
Pleasanton, CA 94588(510) 737-2100(800) 458-9966
May 1997
950-1185B

Copyright and Trademarks
Copyright 1996, 1997 Livingston Enterprises, Inc. All rights reserved.
The Livingston logo and the names Livingston, PortMaster, ComOS, RADIUS, ChoiceNet, PMconsole, IRX, True Digital, RAMP, and Total Access. Sure and Simple. are trademarks of Livingston Enterprises, Inc. ProVision is a service mark of Livingston Enterprises, Inc. All other marks are the property of their respective owners.
Disclaimer
Livingston Enterprises, Inc. makes no express or implied representations or warranties with respect to the contents or use of this manual, and specifically disclaims any implied warranties of merchantability or fitness for a particular purpose. Livingston Enterprises, Inc. further reserves the right to revise this manual and to make changes to its content at any time, without obligation to notify any person or entity of such revisions or changes.
Contents
About This Guide
Audience . . . . . . . . . . . . . . . . . . . . . . . . . . . . . . . . . . . . . . . . . . . . . . . . . . . . . . . . . . . . . . . . . xi
Preview of This Guide . . . . . . . . . . . . . . . . . . . . . . . . . . . . . . . . . . . . . . . . . . . . . . . . . . . . . . xi
Related Documentation . . . . . . . . . . . . . . . . . . . . . . . . . . . . . . . . . . . . . . . . . . . . . . . . . . . . . xii
Additional References . . . . . . . . . . . . . . . . . . . . . . . . . . . . . . . . . . . . . . . . . . . . . . . . . . . . . . xiii
RFCs . . . . . . . . . . . . . . . . . . . . . . . . . . . . . . . . . . . . . . . . . . . . . . . . . . . . . . . . . . . . . . . . . . xiii
Books . . . . . . . . . . . . . . . . . . . . . . . . . . . . . . . . . . . . . . . . . . . . . . . . . . . . . . . . . . . . . . . . . xiii
Document Conventions . . . . . . . . . . . . . . . . . . . . . . . . . . . . . . . . . . . . . . . . . . . . . . . . . . . . . xiv
Contacting Livingston Technical Support . . . . . . . . . . . . . . . . . . . . . . . . . . . . . . . . . . . . . . xv
Subscribing to Livingston Mailing Lists . . . . . . . . . . . . . . . . . . . . . . . . . . . . . . . . . . . . . . . . xv
1. Introducing RADIUS
Introduction to RADIUS . . . . . . . . . . . . . . . . . . . . . . . . . . . . . . . . . . . . . . . . . . . . . . . . . . . . . 1-1
Overview of RADIUS Features . . . . . . . . . . . . . . . . . . . . . . . . . . . . . . . . . . . . . . . . . . . . . . . 1-1
How RADIUS Works . . . . . . . . . . . . . . . . . . . . . . . . . . . . . . . . . . . . . . . . . . . . . . . . . . . . . . . 1-3
Basic RADIUS Functions . . . . . . . . . . . . . . . . . . . . . . . . . . . . . . . . . . . . . . . . . . . . . . . . . 1-3
Ease-of-Use Enhancements . . . . . . . . . . . . . . . . . . . . . . . . . . . . . . . . . . . . . . . . . . . . . . . 1-4
RADIUS Directory Structure . . . . . . . . . . . . . . . . . . . . . . . . . . . . . . . . . . . . . . . . . . . . . . . . . 1-5
2. Configuring a RADIUS Server
Getting Started . . . . . . . . . . . . . . . . . . . . . . . . . . . . . . . . . . . . . . . . . . . . . . . . . . . . . . . . . . . . . 2-1
Selecting a RADIUS Server . . . . . . . . . . . . . . . . . . . . . . . . . . . . . . . . . . . . . . . . . . . . . . . 2-1
Determining a Shared Secret . . . . . . . . . . . . . . . . . . . . . . . . . . . . . . . . . . . . . . . . . . . . . . 2-2
Installing RADIUS on a UNIX Host . . . . . . . . . . . . . . . . . . . . . . . . . . . . . . . . . . . . . . . . . . . 2-2
Installation with pminstall . . . . . . . . . . . . . . . . . . . . . . . . . . . . . . . . . . . . . . . . . . . . . . . 2-3
iii

Contents
Installation without pminstall . . . . . . . . . . . . . . . . . . . . . . . . . . . . . . . . . . . . . . . . . . . . 2-4
Installing RADIUS on a Windows NT Host . . . . . . . . . . . . . . . . . . . . . . . . . . . . . . . . . . . . . 2-7
Configuring RADIUS on a Windows NT Host . . . . . . . . . . . . . . . . . . . . . . . . . . . . . . . . . . 2-9
Configuring Client Information . . . . . . . . . . . . . . . . . . . . . . . . . . . . . . . . . . . . . . . . . . . . . . 2-14
3. Configuring a RADIUS Client
Configuration Using the Command Line Interface . . . . . . . . . . . . . . . . . . . . . . . . . . . . . . 3-1
Configuration Using PMconsole . . . . . . . . . . . . . . . . . . . . . . . . . . . . . . . . . . . . . . . . . . . . . . 3-3
4. Configuring User Information
Editing User Profiles . . . . . . . . . . . . . . . . . . . . . . . . . . . . . . . . . . . . . . . . . . . . . . . . . . . . 4-2
Username . . . . . . . . . . . . . . . . . . . . . . . . . . . . . . . . . . . . . . . . . . . . . . . . . . . . . . . . . . . . . . . . . 4-2
Check Items . . . . . . . . . . . . . . . . . . . . . . . . . . . . . . . . . . . . . . . . . . . . . . . . . . . . . . . . . . . . . . . 4-2
Passwords . . . . . . . . . . . . . . . . . . . . . . . . . . . . . . . . . . . . . . . . . . . . . . . . . . . . . . . . . . . . . 4-2
Client Information . . . . . . . . . . . . . . . . . . . . . . . . . . . . . . . . . . . . . . . . . . . . . . . . . . . . . . 4-5
Prefixes and Suffixes . . . . . . . . . . . . . . . . . . . . . . . . . . . . . . . . . . . . . . . . . . . . . . . . . . . . 4-5
Group . . . . . . . . . . . . . . . . . . . . . . . . . . . . . . . . . . . . . . . . . . . . . . . . . . . . . . . . . . . . . . . . . 4-6
Reply Items . . . . . . . . . . . . . . . . . . . . . . . . . . . . . . . . . . . . . . . . . . . . . . . . . . . . . . . . . . . . . . . 4-7
Service Type . . . . . . . . . . . . . . . . . . . . . . . . . . . . . . . . . . . . . . . . . . . . . . . . . . . . . . . . . . . 4-7
Framed Protocol . . . . . . . . . . . . . . . . . . . . . . . . . . . . . . . . . . . . . . . . . . . . . . . . . . . . . . . . 4-9
Framed IP Address . . . . . . . . . . . . . . . . . . . . . . . . . . . . . . . . . . . . . . . . . . . . . . . . . . . . . . 4-9
Framed IP Netmask . . . . . . . . . . . . . . . . . . . . . . . . . . . . . . . . . . . . . . . . . . . . . . . . . . . . . 4-10
Framed Route . . . . . . . . . . . . . . . . . . . . . . . . . . . . . . . . . . . . . . . . . . . . . . . . . . . . . . . . . . 4-10
Outbound-User . . . . . . . . . . . . . . . . . . . . . . . . . . . . . . . . . . . . . . . . . . . . . . . . . . . . . . . . . 4-10
Callback Information . . . . . . . . . . . . . . . . . . . . . . . . . . . . . . . . . . . . . . . . . . . . . . . . . . . . 4-11
Routing . . . . . . . . . . . . . . . . . . . . . . . . . . . . . . . . . . . . . . . . . . . . . . . . . . . . . . . . . . . . . . . 4-12
Packet Filters . . . . . . . . . . . . . . . . . . . . . . . . . . . . . . . . . . . . . . . . . . . . . . . . . . . . . . . . . . . 4-13
Access Filters . . . . . . . . . . . . . . . . . . . . . . . . . . . . . . . . . . . . . . . . . . . . . . . . . . . . . . . . . . 4-14
Remote Host Information . . . . . . . . . . . . . . . . . . . . . . . . . . . . . . . . . . . . . . . . . . . . . . . . 4-14
iv RADIUS Administrator’s Guide

Contents
MTU . . . . . . . . . . . . . . . . . . . . . . . . . . . . . . . . . . . . . . . . . . . . . . . . . . . . . . . . . . . . . . . . . . 4-15
Compression . . . . . . . . . . . . . . . . . . . . . . . . . . . . . . . . . . . . . . . . . . . . . . . . . . . . . . . . . . . 4-16
IPX Network . . . . . . . . . . . . . . . . . . . . . . . . . . . . . . . . . . . . . . . . . . . . . . . . . . . . . . . . . . . 4-16
Session-Timeout . . . . . . . . . . . . . . . . . . . . . . . . . . . . . . . . . . . . . . . . . . . . . . . . . . . . . . . . 4-17
Idle-Timeout . . . . . . . . . . . . . . . . . . . . . . . . . . . . . . . . . . . . . . . . . . . . . . . . . . . . . . . . . . . 4-18
Port-Limit . . . . . . . . . . . . . . . . . . . . . . . . . . . . . . . . . . . . . . . . . . . . . . . . . . . . . . . . . . . . . 4-18
Default User Entries . . . . . . . . . . . . . . . . . . . . . . . . . . . . . . . . . . . . . . . . . . . . . . . . . . . . . . . . 4-19
Caching User Requests . . . . . . . . . . . . . . . . . . . . . . . . . . . . . . . . . . . . . . . . . . . . . . . . . . . . . . 4-21
Configuring Caching on UNIX Hosts . . . . . . . . . . . . . . . . . . . . . . . . . . . . . . . . . . . . . . 4-21
Configuring Caching on Windows NT Hosts . . . . . . . . . . . . . . . . . . . . . . . . . . . . . . . . 4-22
User Entry Check and Reply Items: Complete Listing . . . . . . . . . . . . . . . . . . . . . . . . . . . . 4-23
Examples . . . . . . . . . . . . . . . . . . . . . . . . . . . . . . . . . . . . . . . . . . . . . . . . . . . . . . . . . . . . . . . . . 4-29
PPP User Entry . . . . . . . . . . . . . . . . . . . . . . . . . . . . . . . . . . . . . . . . . . . . . . . . . . . . . . . . . 4-29
Using Prefixes or Suffixes . . . . . . . . . . . . . . . . . . . . . . . . . . . . . . . . . . . . . . . . . . . . . . . . 4-30
5. Configuring RADIUS Menus
How Menus Work . . . . . . . . . . . . . . . . . . . . . . . . . . . . . . . . . . . . . . . . . . . . . . . . . . . . . . . . . . 5-1
Menu File Format . . . . . . . . . . . . . . . . . . . . . . . . . . . . . . . . . . . . . . . . . . . . . . . . . . . . . . . 5-1
Menus Called by Reference . . . . . . . . . . . . . . . . . . . . . . . . . . . . . . . . . . . . . . . . . . . . . . . 5-2
Menu Filenames . . . . . . . . . . . . . . . . . . . . . . . . . . . . . . . . . . . . . . . . . . . . . . . . . . . . . . . . 5-2
Single-Level Menu . . . . . . . . . . . . . . . . . . . . . . . . . . . . . . . . . . . . . . . . . . . . . . . . . . . . . . 5-3
Nested Menus . . . . . . . . . . . . . . . . . . . . . . . . . . . . . . . . . . . . . . . . . . . . . . . . . . . . . . . . . . 5-4
6. Installing and Configuring SecurID
Overview of SecurID Components . . . . . . . . . . . . . . . . . . . . . . . . . . . . . . . . . . . . . . . . . . . . 6-1
How SecurID Works with RADIUS . . . . . . . . . . . . . . . . . . . . . . . . . . . . . . . . . . . . . . . . . . . 6-2
SecurID Installation . . . . . . . . . . . . . . . . . . . . . . . . . . . . . . . . . . . . . . . . . . . . . . . . . . . . . . . . 6-3
Progress . . . . . . . . . . . . . . . . . . . . . . . . . . . . . . . . . . . . . . . . . . . . . . . . . . . . . . . . . . . . . . . 6-3
ACE/Server . . . . . . . . . . . . . . . . . . . . . . . . . . . . . . . . . . . . . . . . . . . . . . . . . . . . . . . . . . . 6-4
v
Contents
sdadmin . . . . . . . . . . . . . . . . . . . . . . . . . . . . . . . . . . . . . . . . . . . . . . . . . . . . . . . . . . . . . . . 6-5
sdshell . . . . . . . . . . . . . . . . . . . . . . . . . . . . . . . . . . . . . . . . . . . . . . . . . . . . . . . . . . . . . . . . 6-7
RADIUS Configuration . . . . . . . . . . . . . . . . . . . . . . . . . . . . . . . . . . . . . . . . . . . . . . . . . . . . . . 6-8
New PIN Assignment Using RADIUS . . . . . . . . . . . . . . . . . . . . . . . . . . . . . . . . . . . . . . 6-8
Next Cardcode . . . . . . . . . . . . . . . . . . . . . . . . . . . . . . . . . . . . . . . . . . . . . . . . . . . . . . . . . 6-10
Troubleshooting SecurID . . . . . . . . . . . . . . . . . . . . . . . . . . . . . . . . . . . . . . . . . . . . . . . . . . . . 6-10
sdadmin Cannot Find First Token . . . . . . . . . . . . . . . . . . . . . . . . . . . . . . . . . . . . . . . . . 6-11
sdserv.bi and sdlog.bi Consume Too Much Disk Space . . . . . . . . . . . . . . . . . . . . . . . 6-11
sdadmin Runs out of Memory . . . . . . . . . . . . . . . . . . . . . . . . . . . . . . . . . . . . . . . . . . . . 6-12
7. Implementing RADIUS Accounting
How RADIUS Accounting Works . . . . . . . . . . . . . . . . . . . . . . . . . . . . . . . . . . . . . . . . . . . . . 7-1
Getting Started . . . . . . . . . . . . . . . . . . . . . . . . . . . . . . . . . . . . . . . . . . . . . . . . . . . . . . . . . . . . . 7-2
Client Configuration . . . . . . . . . . . . . . . . . . . . . . . . . . . . . . . . . . . . . . . . . . . . . . . . . . . . 7-3
Server Configuration . . . . . . . . . . . . . . . . . . . . . . . . . . . . . . . . . . . . . . . . . . . . . . . . . . . . 7-3
Customizing RADIUS Accounting . . . . . . . . . . . . . . . . . . . . . . . . . . . . . . . . . . . . . . . . . . . . 7-3
Accounting Attributes . . . . . . . . . . . . . . . . . . . . . . . . . . . . . . . . . . . . . . . . . . . . . . . . . . . . . . 7-4
Acct-Status-Type . . . . . . . . . . . . . . . . . . . . . . . . . . . . . . . . . . . . . . . . . . . . . . . . . . . . . . . . 7-4
Acct-Delay-Time . . . . . . . . . . . . . . . . . . . . . . . . . . . . . . . . . . . . . . . . . . . . . . . . . . . . . . . . 7-4
Acct-Session-Id . . . . . . . . . . . . . . . . . . . . . . . . . . . . . . . . . . . . . . . . . . . . . . . . . . . . . . . . . 7-4
Acct-Authentic . . . . . . . . . . . . . . . . . . . . . . . . . . . . . . . . . . . . . . . . . . . . . . . . . . . . . . . . . 7-5
Acct-Session-Time . . . . . . . . . . . . . . . . . . . . . . . . . . . . . . . . . . . . . . . . . . . . . . . . . . . . . . 7-5
NAS-Port-Type . . . . . . . . . . . . . . . . . . . . . . . . . . . . . . . . . . . . . . . . . . . . . . . . . . . . . . . . . 7-5
Acct-Input-Octets and Acct-Output-Octets . . . . . . . . . . . . . . . . . . . . . . . . . . . . . . . . . . 7-5
Called-Station-Id and Calling-Station-Id . . . . . . . . . . . . . . . . . . . . . . . . . . . . . . . . . . . 7-5
Timestamp . . . . . . . . . . . . . . . . . . . . . . . . . . . . . . . . . . . . . . . . . . . . . . . . . . . . . . . . . . . . . 7-5
Request-Authenticator . . . . . . . . . . . . . . . . . . . . . . . . . . . . . . . . . . . . . . . . . . . . . . . . . . . 7-6
Acct-Terminate-Cause . . . . . . . . . . . . . . . . . . . . . . . . . . . . . . . . . . . . . . . . . . . . . . . . . . . 7-6
vi RADIUS Administrator’s Guide
Contents
Examples . . . . . . . . . . . . . . . . . . . . . . . . . . . . . . . . . . . . . . . . . . . . . . . . . . . . . . . . . . . . . . . . . 7-8
A. Troubleshooting RADIUS
Troubleshooting RADIUS Authentication . . . . . . . . . . . . . . . . . . . . . . . . . . . . . . . . . . . . . . A-1
Checking the radiusd Daemon (UNIX RADIUS) . . . . . . . . . . . . . . . . . . . . . . . . . . . . . A-1
Checking the RADIUS NT Service (RADIUS NT) . . . . . . . . . . . . . . . . . . . . . . . . . . . . A-1
Checking the PortMaster . . . . . . . . . . . . . . . . . . . . . . . . . . . . . . . . . . . . . . . . . . . . . . . . . A-2
Checking /etc/raddb/users . . . . . . . . . . . . . . . . . . . . . . . . . . . . . . . . . . . . . . . . . . . . . . A-2
Host Unavailable . . . . . . . . . . . . . . . . . . . . . . . . . . . . . . . . . . . . . . . . . . . . . . . . . . . . . . . A-2
Invalid Login after 30-second wait . . . . . . . . . . . . . . . . . . . . . . . . . . . . . . . . . . . . . . . . A-3
Result of Debugging Output . . . . . . . . . . . . . . . . . . . . . . . . . . . . . . . . . . . . . . . . . . . . . . A-4
Troubleshooting RADIUS Accounting . . . . . . . . . . . . . . . . . . . . . . . . . . . . . . . . . . . . . . . . . A-6
Index
vii

Contents
viii RADIUS Administrator’s Guide

Figures
Figure 1-1 RADIUS Directory Structure . . . . . . . . . . . . . . . . . . . . . . . . . . . . . . . . . . . . . . . 1-6
Figure 4-1 User Entry . . . . . . . . . . . . . . . . . . . . . . . . . . . . . . . . . . . . . . . . . . . . . . . . . . . . . . . 4-1
ix

Tables
Table 2-1 radiusd Flags . . . . . . . . . . . . . . . . . . . . . . . . . . . . . . . . . . . . . . . . . . . . . . . . . . . . 2-6
Table 4-1 Service-Type . . . . . . . . . . . . . . . . . . . . . . . . . . . . . . . . . . . . . . . . . . . . . . . . . . . . . 4-7
Table 4-2 Framed-Routing Options . . . . . . . . . . . . . . . . . . . . . . . . . . . . . . . . . . . . . . . . . . 4-12
Table 4-3 Login-Service . . . . . . . . . . . . . . . . . . . . . . . . . . . . . . . . . . . . . . . . . . . . . . . . . . . . 4-14
Table 4-4 User Entry Check and Reply Items . . . . . . . . . . . . . . . . . . . . . . . . . . . . . . . . . . 4-23
Table 7-1 radiusd Accounting Daemon Flags . . . . . . . . . . . . . . . . . . . . . . . . . . . . . . . . . 7-4
Table 7-2 Session Termination Causes. . . . . . . . . . . . . . . . . . . . . . . . . . . . . . . . . . . . . . . . 7-6
x

About This Guide
The RADIUS Administrator’s Guide provides complete installation and configuration instructions for the Livingston Enterprises, Inc. Remote Authentication Dial-In User Service (RADIUS). This guide covers RADIUS server release 2.0.
RADIUS can be used with the Livingston PortMaster family of products, as well as with the ChoiceNet client/server packet-filtering software. To install and configure these products, see “Related Documentation” on page xii of About This Guide.
Audience
This guide is designed to be used by qualified system administrators and network managers. Knowledge of UNIX or Windows NT and basic networking concepts is required to successfully install RADIUS.
Preview of This Guide
The RADIUS Administrator’s Guide includes the following chapters:
Chapter 1, “Introducing RADIUS,” gives an introduction to RADIUS.
Chapter 2, “Configuring a RADIUS Server,” provides step-by-step configuration instructions for RADIUS servers.
Chapter 3, “Configuring a RADIUS Client,” provides step-by-step configuration instructions for RADIUS clients.
Chapter 4, “Configuring User Information,” describes how to configure user entries on the RADIUS server.
Chapter 5, “Configuring RADIUS Menus,” describes the RADIUS menu feature.
Chapter 6, “Installing and Configuring SecurID,” provides a quick reference for Security Dynamics ACE/Server and ACE/Client installation.
Audience xi

About This Guide
Chapter 7, “Implementing RADIUS Accounting,” describes how to log RADIUS security information.
Troubleshooting information is included in Appendix A.
Related Documentation
The following manuals are available from Livingston. These manuals are included with most Livingston products; if they were not shipped with your unit, contact Livingston for ordering information.
The manuals are also provided as PDF and PostScript files on the PortMaster Software CD shipped with your PortMaster.
• Installation guides
These guides contain complete hardware installation instructions. An installation guide is available for each PortMaster product line—IRX , Office Router, Communications Server, and Integrated Access Server.
• Configuration Guide for PortMaster Products
This guide provides instructions for configuring PortMaster products.
• Command Line Administrator’s Guide
This guide provides the complete description and syntax of each command in the ComOS command set.
• PMconsole for Windows Administrator’s Guide
This guide covers PMconsole Administration Software for Microsoft Windows, a graphical tool for configuring the PortMaster. The majority of the material in this guide also applies to the UNIX version of PMconsole.
• ChoiceNet Administrator’s Guide
This guide provides complete installation and configuration instructions for ChoiceNet Server software.
xii RADIUS Administrator’s Guide
About This Guide
Additional References
RFCsUse any World Wide Web browser to find a Request for Comments (RFC) online.
RFC 768, User Datagram Protocol
RFC 791, Internet Protocol
RFC 792, Internet Control Message Protocol
RFC 793, Transmission Control Protocol
RFC 1035, Domain Names—Implementation and Specification
RFC 1700, Assigned Numbers
RFC 2138, Remote Authentication Dial In User Service (RADIUS)
RFC 2139, RADIUS Accounting
BooksBuilding Internet Firewalls. D. Brent Chapman and Elizabeth D. Zwicky. Sebastopol, CA: O’Reilly & Associates, Inc., 1995. (ISBN 1-56592-124-0)
DNS and BIND, 2nd ed. Paul Albitz and Cricket Liu. Sebastopol, CA: O’Reilly & Associates, Inc., 1992. (ISBN 1-56592-236-0)
Firewalls and Internet Security: Repelling the Wily Hacker. William R. Cheswick and Steven M. Bellovin. Reading, MA: Addison-Wesley Publishing Company, 1994. (ISBN 0-201-63357-4) Japanese translation is available (ISBN 4-89052-672-2). Errata are available from ftp://ftp.research.att.com/dist/internet_security/firewall.book.
Additional References xiii

About This Guide
Document Conventions
The following conventions are used in this guide:
Convention Use Examples
Bold font Indicates a user entry—a command, menu option, button, or key—or the name of a file, directory, or utility, except in code samples.
• Enter version to display the version number.
• Press Enter.
• Open the permit_list file.
Italic font Identifies a command-line placeholder. Replace with a real name or value.
• set Ether0 address Ipaddress
• Replace Area with the name of the OSPF area.
Square brackets ([]) Enclose optional keywords and values in command syntax.
• set nameserver [2] Ipaddress
• set S0 destination Ipaddress [Ipmask]
Vertical bar (|) Separates two or more possible options in command syntax.
• set S0|W1 ospf on|off
• set S0 host default|prompt|Ipaddress
xiv RADIUS Administrator’s Guide

About This Guide
Contacting Livingston Technical Support
The PortMaster comes with a 1-year hardware warranty.
To obtain technical support, contact Livingston Enterprises Monday through Friday between the hours of 6 a.m. and 5 p.m. (GMT -8). Please record your Livingston ComOS version number and report it to the technical support staff.
• By voice, dial (800) 458-9966 within the USA (including Hawaii), Canada, and theCaribbean, or +1 (510) 737-2100 from elsewhere.
• By FAX, dial +1 (510) 737-2110.
• By electronic mail (email), send mail to [email protected].
• Using the World Wide Web, see http://www.livingston.com/.
You can schedule 1-hour software installation appointments in advance by calling the technical support telephone number listed above.
New releases and upgrades of Livingston software are available by anonymous FTP from ftp.livingston.com.
Subscribing to Livingston Mailing Lists
Livingston maintains the following Internet mailing lists for PortMaster users:
• portmaster-users—a discussion of general and specific PortMaster issues,including configuration and troubleshooting suggestions. To subscribe, send emailto [email protected] with subscribe portmaster-users in the body of themessage.
The mailing list is also available in a daily digest format. To receive the digest, send email to [email protected] with subscribe portmaster-users-digest in the body of the message.
• portmaster-radius—a discussion of general and specific RADIUS issues, includingconfiguration and troubleshooting suggestions. To subscribe, send email [email protected] with subscribe portmaster-radius in the body of themessage.
The mailing list is also available in a daily digest format. To receive the digest, send email to [email protected] with subscribe portmaster-radius-digest in the body of the message.
Contacting Livingston Technical Support xv

About This Guide
• portmaster-announce—announcements of new PortMaster products and softwarereleases. To subscribe, send email to [email protected] with subscribeportmaster-announce in the body of the message. All announcements to this listalso go to the portmaster-users list. You do not need to subscribe to both lists.
xvi RADIUS Administrator’s Guide

Introducing RADIUS 1
Introduction to RADIUS
The Remote Authentication Dial-In User Service (RADIUS) is a client/server security protocol created by Livingston Enterprises. Security information is stored in a central location, known as the RADIUS server.
RADIUS clients (such as a PortMaster communications server) communicate with the RADIUS server to authenticate users. Although the term RADIUS refers to the network protocol that the client and server use to communicate, it is often used to refer to the entire client/server system.
Overview of RADIUS Features
RADIUS offers the following features:
• Tight security
In large networks, security information may be scattered throughout the network on different devices. RADIUS allows user information to be stored on one host, minimizing the risk of security loopholes. All authentication and access to network services is managed by the host functioning as the RADIUS server.
• Flexibility
RADIUS server software is distributed in source code format to Livingston customers. Using modifiable “stubs,” RADIUS can be adapted to work with existing security systems and protocols. You adapt the RADIUS server to your network, rather than adjusting your network to work with RADIUS.
RADIUS may be used with any communications server that supports the RADIUS protocol. When new security technology becomes available or your security needs increase, RADIUS can be expanded to offer new services.
Introduction to RADIUS 1-1

Introducing RADIUS
• Simplified management
The RADIUS server stores security information in text files at a central location; you add new users to the database or modify existing user information by editing these text files.
• Extensive logging capabilities
RADIUS provides extensive audit trail capabilities, referred to as RADIUS accounting. Information collected in a log file can be analyzed for security purposes, or used for billing.
The RADIUS server is available for the following operating systems:
• AIX 4.1
• Alpha Digital UNIX 3.0
• BSD/OS 2.0
• HP-UX 10.01
• IRX 5.2
• Linux 1.2.13 (ELF)
• Solaris 2.5.1
• Solaris x86 2.5.1
• SunOS 4.1.4
• Windows NT 4.0 Workstation
• Windows NT 4.0 Server
1-2 RADIUS Administrator’s Guide
Introducing RADIUS
How RADIUS Works
RADIUS performs three primary functions. RADIUS version 2.0 includes enhancements for ease of use.
Basic RADIUS FunctionsThe primary functions of RADIUS are authentication, authorization, and accounting.
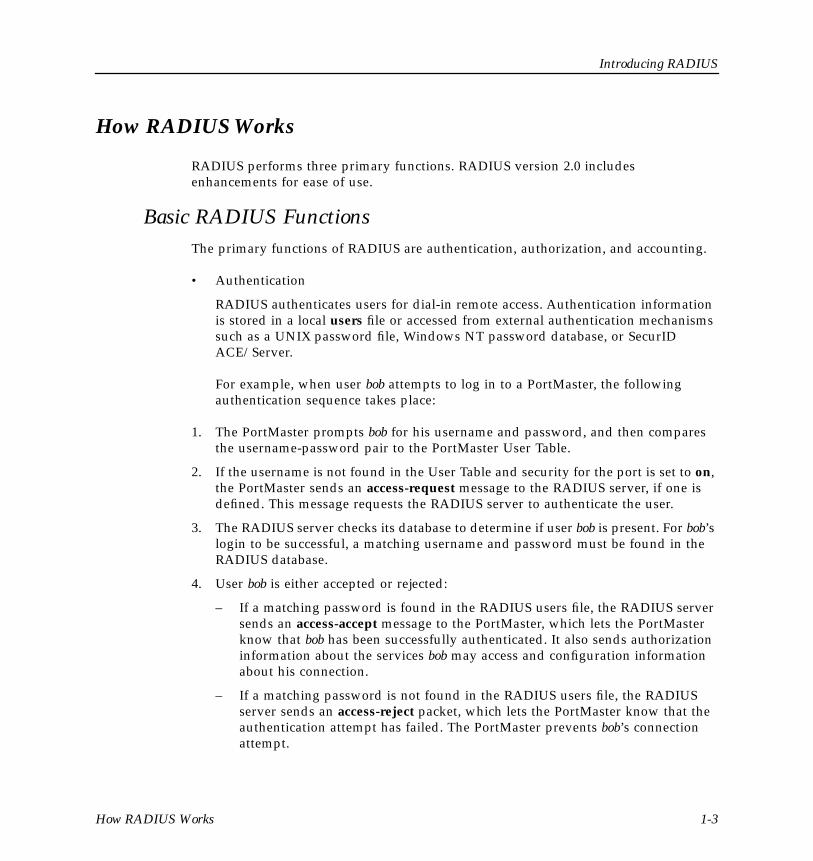
• Authentication
RADIUS authenticates users for dial-in remote access. Authentication information is stored in a local users file or accessed from external authentication mechanisms such as a UNIX password file, Windows NT password database, or SecurID ACE/Server.
For example, when user bob attempts to log in to a PortMaster, the following authentication sequence takes place:
1. The PortMaster prompts bob for his username and password, and then compares the username-password pair to the PortMaster User Table.
2. If the username is not found in the User Table and security for the port is set to on, the PortMaster sends an access-request message to the RADIUS server, if one is defined. This message requests the RADIUS server to authenticate the user.
3. The RADIUS server checks its database to determine if user bob is present. For bob’s login to be successful, a matching username and password must be found in the RADIUS database.
4. User bob is either accepted or rejected:
– If a matching password is found in the RADIUS users file, the RADIUS server sends an access-accept message to the PortMaster, which lets the PortMaster know that bob has been successfully authenticated. It also sends authorization information about the services bob may access and configuration information about his connection.
– If a matching password is not found in the RADIUS users file, the RADIUS server sends an access-reject packet, which lets the PortMaster know that the authentication attempt has failed. The PortMaster prevents bob’s connection attempt.
How RADIUS Works 1-3

Introducing RADIUS
• Authorization
Authorization controls access to specific services on the network. Once a user is authenticated, RADIUS tells the PortMaster what a user is authorized (permitted) to access. For example, user bob may be authorized to use PPP for his connection, use IP address 192.168.200.4, and use packet filter std.ppp.
• Accounting
RADIUS accounting permits system administrators to track dial-in use. This information is often used for billing purposes. See Chapter 7, “Implementing RADIUS Accounting,” for more information.
Ease-of-Use EnhancementsRADIUS version 2.0 provides the following enhancements to improve RADIUS functionality:
• Menus of login options
When RADIUS menus are used, users are presented with a list of login options after they are authenticated. The RADIUS administrator may customize menus, including “chaining” one menu to other menus. See Chapter 5, “Configuring RADIUS Menus,” for more details.
• SecurID authentication
SecurID authentication, based on Security Dynamics’ token technology, is offered in UNIX versions of the RADIUS server. SecurID authenticates users using a patented time-synchronization method. The RADIUS 2.0 server can forward some or all authentication requests to a SecurID ACE/Server running on the same host as the RADIUS server.
For more information, see Chapter 2, “Configuring a RADIUS Server,” and Chapter 6, “Installing and Configuring SecurID.”
• Easy access to multiple accounts
Prefixes and Suffixes allow a user to access multiple accounts by prepending or appending a string of characters defined by the administrator to the username.
1-4 RADIUS Administrator’s Guide

Introducing RADIUS
• Session time limit
The Session-Timeout reply item specifies the time limit for a session. Session-Timeout is specified as a particular number of seconds, up to a maximum of 31536000 (1 year).
• Idle session time limit
The Idle-Timeout reply item controls the maximum time that a session may be idle before it is disconnected. Idle-Timeout is specified as a number of seconds between 120 (2 minutes) and 14400 (4 hours).
• ISDN port limit
The Port-Limit reply item controls the maximum number of ports available for a Multilink PPP or Multilink V.120 connection. Port-Limit only applies to ISDN connections; other connection types are not affected by this setting.
• Port type restriction
The NAS-Port-Type check item restricts the type of port. The user may use one of the following port types: asynchronous, synchronous, ISDN, ISDN-V120, or ISDN-V110.
RADIUS Directory Structure
RADIUS server files are stored in the raddb (RADIUS database) directory. On UNIX, the raddb directory is typically placed within the /etc directory. Livingston recommends that RADIUS NT users store RADIUS files in the \system32\drivers\etc folder located in the folder containing the Windows NT files.
The raddb directory contains files and subdirectories organized as shown in Figure 1-1 on page 1-6.
RADIUS Directory Structure 1-5

Introducing RADIUS
Figure 1-1 RADIUS Directory Structure
The RADIUS server uses the UDP protocol, and listens for UDP packets on port 1645.
To configure RADIUS user information, see Chapter 4. To configure RADIUS accounting, see Chapter 7.
raddb
users dictionary clients menus builddbm
menu1 menu2 menu3...
1-6 RADIUS Administrator’s Guide
Configuring a RADIUS Server 2
This chapter includes the following topics:
• “Getting Started” on page 2-1
• “Installing RADIUS on a UNIX Host” on page 2-2
• “Installing RADIUS on a Windows NT Host” on page 2-7
• “Configuring Client Information” on page 2-14
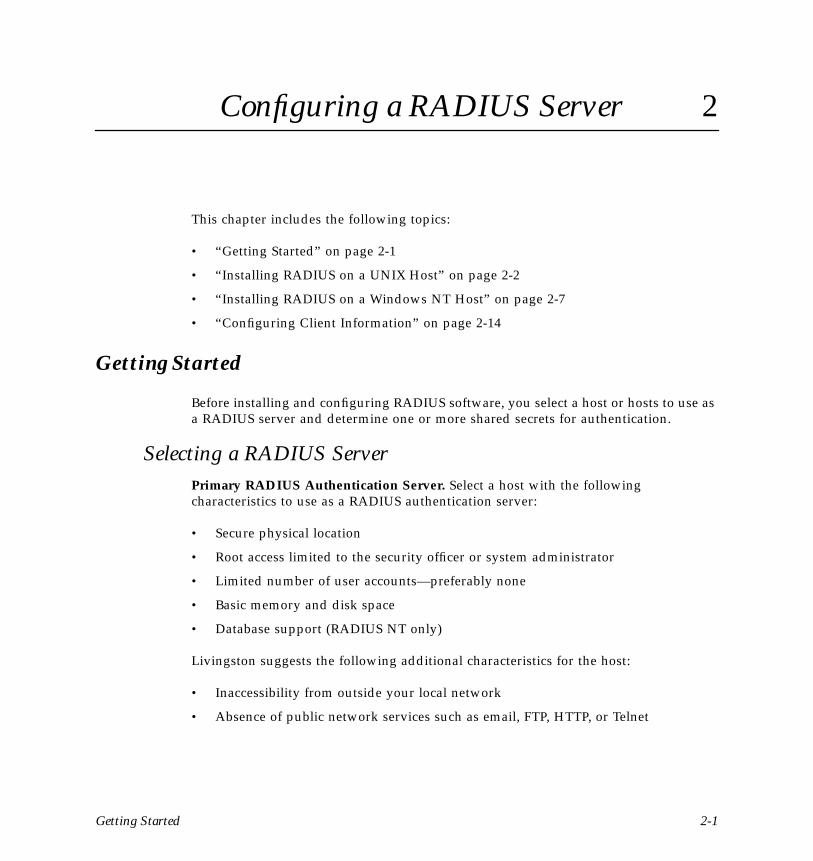
Getting Started
Before installing and configuring RADIUS software, you select a host or hosts to use as a RADIUS server and determine one or more shared secrets for authentication.
Selecting a RADIUS ServerPrimary RADIUS Authentication Server. Select a host with the following characteristics to use as a RADIUS authentication server:
• Secure physical location
• Root access limited to the security officer or system administrator
• Limited number of user accounts—preferably none
• Basic memory and disk space
• Database support (RADIUS NT only)
Livingston suggests the following additional characteristics for the host:
• Inaccessibility from outside your local network
• Absence of public network services such as email, FTP, HTTP, or Telnet
Getting Started 2-1
Configuring a RADIUS Server
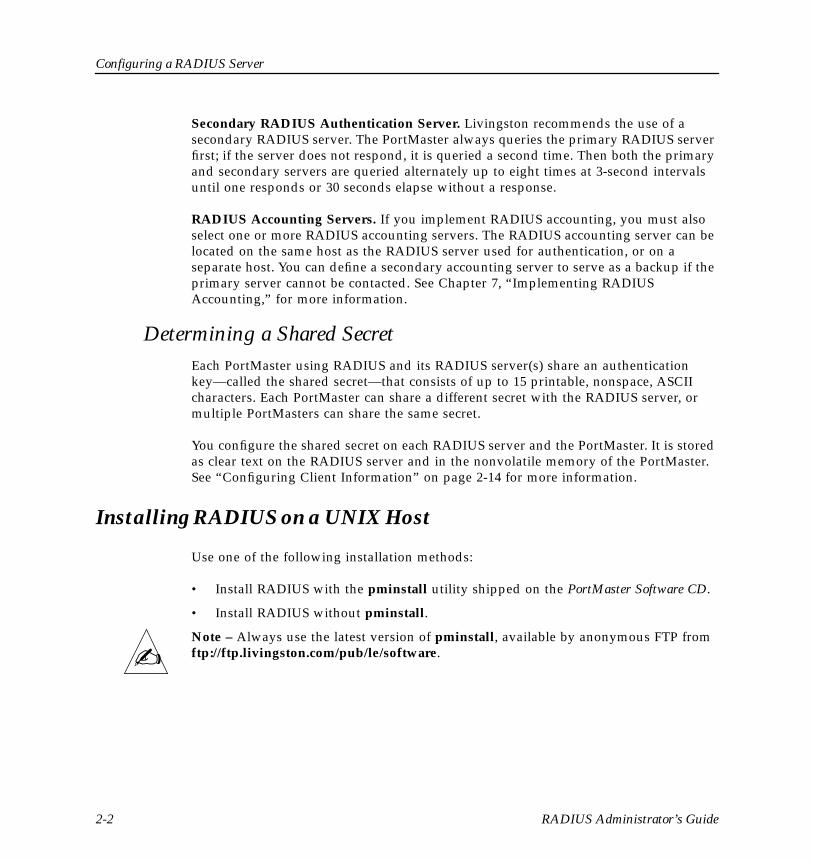
Secondary RADIUS Authentication Server. Livingston recommends the use of a secondary RADIUS server. The PortMaster always queries the primary RADIUS server first; if the server does not respond, it is queried a second time. Then both the primary and secondary servers are queried alternately up to eight times at 3-second intervals until one responds or 30 seconds elapse without a response.
RADIUS Accounting Servers. If you implement RADIUS accounting, you must also select one or more RADIUS accounting servers. The RADIUS accounting server can be located on the same host as the RADIUS server used for authentication, or on a separate host. You can define a secondary accounting server to serve as a backup if the primary server cannot be contacted. See Chapter 7, “Implementing RADIUS Accounting,” for more information.
Determining a Shared SecretEach PortMaster using RADIUS and its RADIUS server(s) share an authentication key—called the shared secret—that consists of up to 15 printable, nonspace, ASCII characters. Each PortMaster can share a different secret with the RADIUS server, or multiple PortMasters can share the same secret.
You configure the shared secret on each RADIUS server and the PortMaster. It is stored as clear text on the RADIUS server and in the nonvolatile memory of the PortMaster. See “Configuring Client Information” on page 2-14 for more information.
Installing RADIUS on a UNIX Host
Use one of the following installation methods:
• Install RADIUS with the pminstall utility shipped on the PortMaster Software CD.
• Install RADIUS without pminstall.
Note – Always use the latest version of pminstall, available by anonymous FTP from ftp://ftp.livingston.com/pub/le/software.✍
2-2 RADIUS Administrator’s Guide

Configuring a RADIUS Server
Installation with pminstallTo install RADIUS using pminstall, complete the following steps.
1. Log in to the selected RADIUS server as root.
2. Mount the CD using the instructions in the CD booklet.
3. Install the PortMaster software by one of the following methods:
– Run /cdrom/lei/unix/setup.
– Follow the instructions in the CD booklet.
4. Enter the /usr/portmaster/pminstall command at the UNIX prompt.
The following list of choices appears:
5. Choose the Install RADIUS option to install all RADIUS files.
– The server prompts you for directory names:
6. Provide directory information for RADIUS files by one of the following methods:
– Enter the appropriate directory.
– Select the default directory (shown in parentheses) by pressing the Return or Enter key.
% /usr/portmaster/pminstall
1. PortMaster Internet Address Setup2. Host Installation3. PortMaster Upgrade4. Host Upgrade5. Install RADIUS6. Exit
Please select an option from above:
Database installation directory (/etc/raddb):RADIUS accounting log directory (/usr/adm/radacct):Directory to install radiusd in (/etc):
Installing RADIUS on a UNIX Host 2-3

Configuring a RADIUS Server
7. When RADIUS installation is complete, select the Exit option to quit pminstall.
8. Enter the following command to start the RADIUS server:
Note – radiusd is a standalone process; it cannot be run from /etc/inetd.conf.
For a list of optional flags for the radiusd command, see Table 2-1 on page 2-6.
9. Go to “Configuring Client Information” on page 2-14.
Installation without pminstallTo install RADIUS without pminstall, complete the following steps:
1. If you are running NIS or NIS+, add the lines in Step 4 to the services NIS map on your NIS master and push the maps.
Note – Pushing the maps updates the database to include recently entered information. Use the make mapname command on the NIS master. For more details, consult your UNIX system documentation.
2. Log in to the selected RADIUS server as root.
3. Mount the CD on /cdrom using the instructions in the CD booklet.
4. If you are not running NIS or NIS+, add the following lines to the /etc/services file:
5. As root, enter the following commands on the RADIUS server:
/etc/radiusd
radius 1645/udp radiusdradacct 1646/udp
umask 022mkdir /etc/raddb /usr/adm/radacctchmod 700 /etc/raddb /usr/adm/radacct
✍
✍
2-4 RADIUS Administrator’s Guide

Configuring a RADIUS Server
The commands in this example create two directories, raddb and radacct. All RADIUS files (except the radiusd executable) are stored in the /etc/raddb directory. The radacct directory is used to store RADIUS accounting logs.
The umask and chmod commands affect the raddb and radacct directory permissions; root access is required for read, write, and execute privileges.
Caution – If you are upgrading from an existing installation of RADIUS 2.0, save the files in /etc/raddb before performing Step 6.
6. Copy all files in /cdrom/lei/unix/radius/raddb to the /etc/raddb directory:
In RADIUS version 1.16, the raddb directory contains three files: users, clients, and dictionary. In RADIUS version 2.0, the raddb directory contains an additional directory named menus.
7. Copy the radiusd file to the /etc directory (or if you prefer, to another directory such as /usr/sbin):
8. Copy the builddbm utility to /etc/raddb/builddbm. Replace platform with the name of your operating system—for example, sun4_4.1.
9. Use the radiusd command to start RADIUS:
radiusd spawns the RADIUS accounting server as a child process. For more information about RADIUS accounting, see Chapter 7.
Note – radiusd is a standalone process; it cannot be run from /etc/inetd.conf.
cp -r /cdrom/lei/unix/radius/raddb/* /etc/raddb
cp /cdrom/lei/unix/platform/radiusd /etc/radiusd
cp /cdrom/lei/unix/platform/builddbm /etc/raddb/builddbm
/etc/radiusd
!
✍
Installing RADIUS on a UNIX Host 2-5
Configuring a RADIUS Server
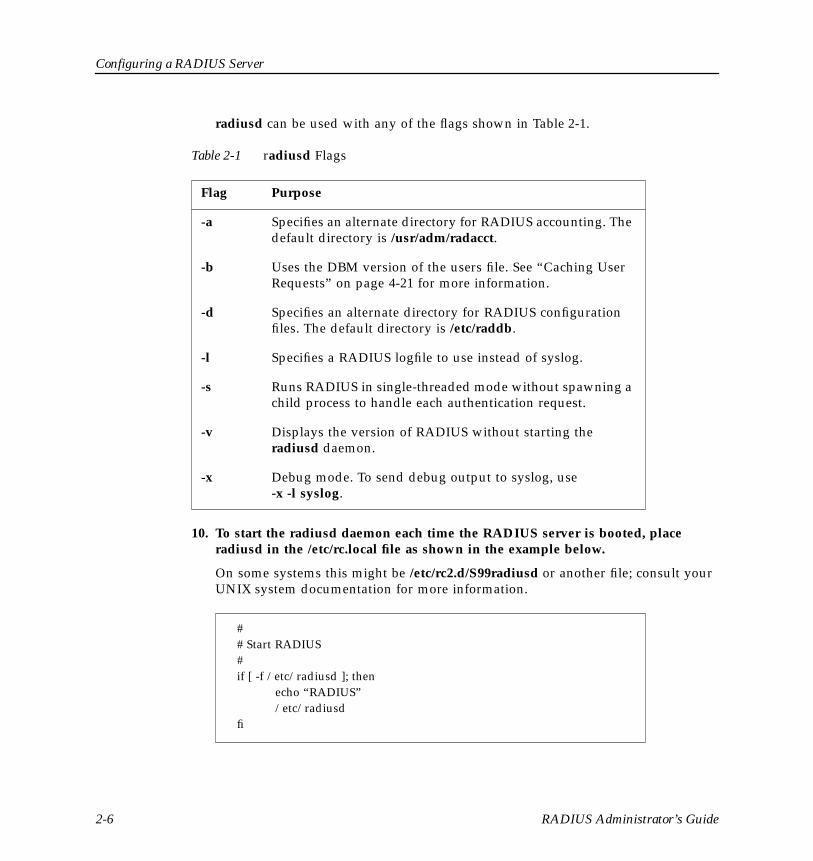
radiusd can be used with any of the flags shown in Table 2-1.
Table 2-1 radiusd Flags
10. To start the radiusd daemon each time the RADIUS server is booted, place radiusd in the /etc/rc.local file as shown in the example below.
On some systems this might be /etc/rc2.d/S99radiusd or another file; consult your UNIX system documentation for more information.
Flag Purpose
-a Specifies an alternate directory for RADIUS accounting. The default directory is /usr/adm/radacct.
-b Uses the DBM version of the users file. See “Caching User Requests” on page 4-21 for more information.
-d Specifies an alternate directory for RADIUS configuration files. The default directory is /etc/raddb.
-l Specifies a RADIUS logfile to use instead of syslog.
-s Runs RADIUS in single-threaded mode without spawning a child process to handle each authentication request.
-v Displays the version of RADIUS without starting the radiusd daemon.
-x Debug mode. To send debug output to syslog, use -x -l syslog.
## Start RADIUS#if [ -f /etc/radiusd ]; then
echo “RADIUS”/etc/radiusd
fi
2-6 RADIUS Administrator’s Guide

Configuring a RADIUS Server
Note – radiusd does not need to be restarted each time the clients or users files are modified. This daemon only needs to be restarted when the dictionary file is modified.
11. Continue to “Configuring Client Information” on page 2-14.
Installing RADIUS on a Windows NT Host
RADIUS NT consists of two sets of files—the RADIUS NT server software and associated files, and the Data Access Objects (DAO) database engine used for caching purposes. To install RADIUS NT, two files are required: setupdao.exe and radiusnt.exe. Ensure that you have these files before beginning installation. They are available on the Livingston PortMaster Software CD and by anonymous FTP from ftp://ftp.livingston.com/pub/le/software/pc.
Note – Always use the latest files, available from the Livingston FTP site.
Complete the following steps to install RADIUS NT:
Note – If you are updating to a newer version of RADIUS NT, you must first remove or uninstall the previous version from your Windows NT server or workstation.
1. Copy setupdao.exe and radiusnt.exe to separate, empty directories.
For example, copy setupdao.exe to C:\temp\dao and copy radiusnt.exe to C:\temp\rad.
2. Double-click setupdao.exe to expand the compressed DAO files.
3. Double-click Setup.exe to run the DAO setup program.
a. Read the information displayed.
b. Click the Next button to continue installation.
4. Double-click radiusnt.exe to expand the compressed RADIUS NT server files.
Overwrite the Setup.exe file when prompted.
5. Double-click Setup.exe to run the RADIUS NT setup program.
a. Follow the instructions on each screen.
✍
✍
✍
Installing RADIUS on a Windows NT Host 2-7

Configuring a RADIUS Server
b. Click the Finished button at the end of the setup program to complete installation.
The RADIUS NT setup program places the RADIUS NT files in C:\WINNT\system32\drivers\etc. It also creates a Livingston RADIUS NT folder within the Program Manager Start menu.
6. To start RADIUS, choose RADIUS NT from the RADIUS NT folder in the Start menu.
The RADIUS Control Panel appears.
You can run RADIUS NT as a Windows NT service or as a nonservice or desktop process.
Note – Livingston recommends that you run RADIUS NT as a Windows NT service. Running RADIUS NT in this manner enables you to log out of your Windows NT session without affecting the operation of RADIUS NT; the service will continue to run.
To run RADIUS NT as a Windows NT service, complete the following steps:
a. To install RADIUS NT as a Windows NT service, click the Install Service button.
✍
2-8 RADIUS Administrator’s Guide

Configuring a RADIUS Server
b. To start the service, click the Start RADIUS Service button. To stop the service, click the Stop RADIUS Service button.
c. If you have previously installed RADIUS NT and want to update the users cache, click the Update Users Cache button or choose the corresponding menu item from the File menu.
If you run RADIUS NT as a nonservice, RADIUS will shut down when you log off or close the NT session. To run RADIUS NT as a nonservice, complete the following steps:
a. To start the service, click the Start RADIUS button. To stop the service, click the Stop RADIUS button.
b. If you have previously installed RADIUS NT and want to update the users cache, click the Update Users Cache button or choose the corresponding menu item from the File menu.
Configuring RADIUS on a Windows NT Host
You configure RADIUS options from the Logging, Users Cache, Multitask Authentication, and Directories tabs in the Service Options window.
Navigate to the desired tab by one of the following methods:
• From the RADIUS Service Control Panel, do one of the following:
– Choose the desired tab from the Setup Options menu.
– Click the Options button to display the Service Options window, and then click the desired tab.
• From the Service Options window, click the desired tab.
When you alter a configuration value in the Service Options window, the Apply button becomes operational. You can click on Apply to save your changes and leave the window open. Or you can click the OK button to save your changes, close the Service Options window, and return to the Service Control Panel. You must stop and restart RADIUS NT for the configuration changes to take effect. Clicking on the Cancel button does not save your changes.
Configuring RADIUS on a Windows NT Host 2-9

Configuring a RADIUS Server
1. To log RADIUS messages to a file for monitoring or debugging purposes, complete the following steps:
a. Display the Logging tab.
b. Ensure that the Enable logfile for RADIUS messages option is checked.
Note – The Windows NT Event Log is not affected by this selection. RADIUS events continue to be logged to the Event Log.
c. The location of the log file appears in the text box. By default, the log file radius.log is placed in C:\temp. To change the location of the log file, enter the filename manually in the text box, or click the Browse button and select the location.
d. By default, verbose (detailed) messages are stored in the log file. To turn off verbose logging, ensure that the Detailed messages for diagnostics option is unchecked.
2. To configure caching options, complete the following steps:
✍
2-10 RADIUS Administrator’s Guide

Configuring a RADIUS Server
a. Display the Users Cache tab.
b. To use the database to cache user requests, ensure that the Enable users cache for authentication option is checked.
Livingston recommends caching user requests when the users file contains more than 500 users.
If caching is used, you must update the database each time the users file is updated. To update the database, click the Update Users Cache button on the RADIUS Control Panel, or choose Update Users Cache from the File menu on the RADIUS Control Panel.
Configuring RADIUS on a Windows NT Host 2-11

Configuring a RADIUS Server
3. To configure multitask authentication, complete the following steps:
a. Display the Multitask Authentication tab.
b. When multitask authentication is on, RADIUS NT handles multiple simultaneous authentication requests. To use this feature, ensure that the Enable simultaneous authentication request handling option is checked. To turn off multitask authentication, uncheck this option.
2-12 RADIUS Administrator’s Guide

Configuring a RADIUS Server
4. To change the default directories for RADIUS server and accounting files, complete the following steps:
a. Display the Directories tab.
b. Enter the desired directory locations manually in the text boxes, or click the Browse button and select the desired directory locations.
C:\WINNT\system32\drivers\etc\raddb is the default RADIUS NT directory. The default Accounting directory is C:\usr\adm\radacct.
5. When you have finished configuring the options in the RADIUS Control Panel, click the Apply button to apply your changes and then click the OK button.
6. Continue to “Configuring Client Information” on page 2-14.
Configuring RADIUS on a Windows NT Host 2-13

Configuring a RADIUS Server
Configuring Client Information
/etc/raddb/clients is a flat text file installed on the RADIUS server. The clients file stores information about RADIUS clients, including each client’s name or IP address and its shared secret.
On a UNIX host, use any text editor to edit the clients file.
On a Windows NT host, open the RADIUS NT control panel and choose Clients from the Edit menu. The clients file is automatically opened in Notepad.
1. To add a client, enter the client’s name or IP address and the shared secret. To add a comment, preface the desired line with the number sign (#).
Shared secrets must consist of 15 or fewer printable, nonspace, ASCII characters. There is no limit to the number of clients that you can add to this file.
Examples of client names and shared secrets are displayed below.
2. Because the clients file contains the shared secrets for the RADIUS clients, verify that only root users have read and write access to the file.
3. Continue to Chapter 3 to configure the PortMaster as a RADIUS client.
#Client Name Shared Secret#------------------------------------------------------------------------------------------ portmaster1 wP40cQ0portmaster2 A3X445A192.168.1.2 wer369st
-rw------- 1 root daemon 802 Jul 15 00:21 clients
2-14 RADIUS Administrator’s Guide
Configuring a RADIUS Client 3
This chapter covers configuration of the PortMaster as a RADIUS client. You must configure the following items on each PortMaster:
• IP addresses of the primary and optional alternate RADIUS servers
• IP addresses of the primary and optional alternate RADIUS accounting servers, if accounting is to be performed
• RADIUS shared secret
There are two steps to configure a RADIUS client: adding the PortMaster and shared secret to the clients file on the RADIUS server (see page 2-14), and configuring the shared secret and address of the RADIUS server on the PortMaster.
You can configure RADIUS clients using the PortMaster command line interface (see the following section) or using PMconsole (see page 3-3).
Configuration Using the Command Line Interface
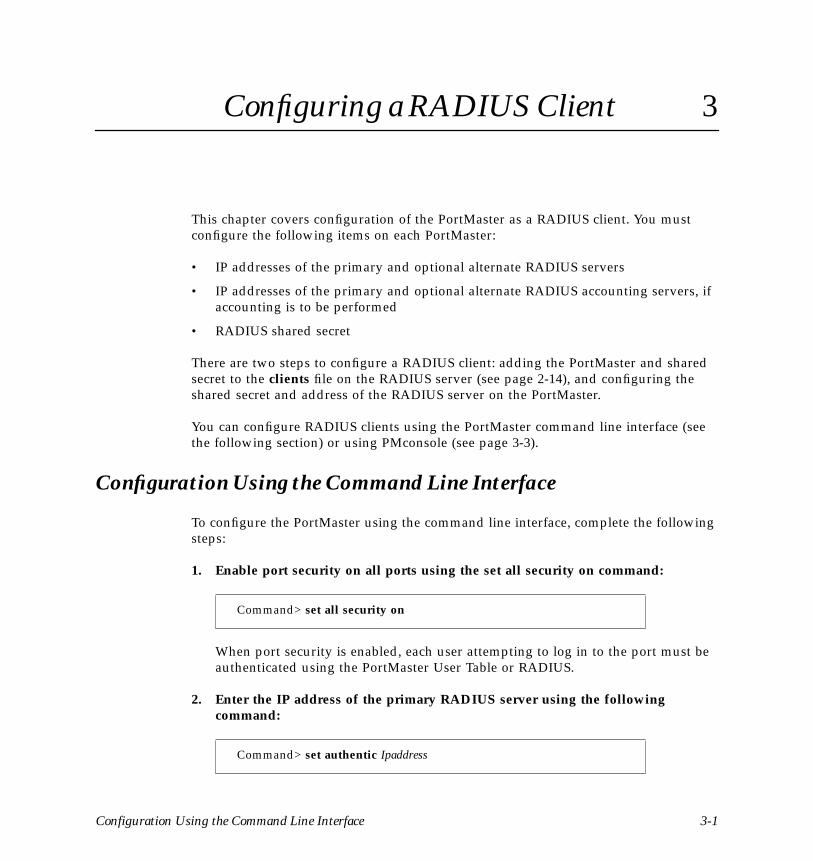
To configure the PortMaster using the command line interface, complete the following steps:
1. Enable port security on all ports using the set all security on command:
When port security is enabled, each user attempting to log in to the port must be authenticated using the PortMaster User Table or RADIUS.
2. Enter the IP address of the primary RADIUS server using the following command:
Command> set all security on
Command> set authentic Ipaddress
Configuration Using the Command Line Interface 3-1

Configuring a RADIUS Client
3. Optionally, specify an alternate RADIUS server:
The primary RADIUS server is consulted first. If the server does not respond, it is queried a second time; then both servers are queried up to eight additional times at 3-second intervals.
4. To log activity using RADIUS accounting, enter the IP address of the primary accounting server:
Optionally, specify an alternate accounting server:
5. Enter the secret shared by the PortMaster and RADIUS server using the set secret command.
This is the same shared secret entered in the clients file on the RADIUS server (see page 2-14).
The shared secret is a string of up to 15 printable, nonspace, ASCII characters. If a secret longer than 15 characters is specified, an error message is displayed.
6. Save your changes using the save all command; then reset all ports.
Caution - Resetting all ports disconnects any user sessions in progress.
7. Continue to Chapter 4, “Configuring User Information.”
Command> set alternate Ipaddress
Command> set accounting Ipaddress
Command> set accounting 2 Ipaddress
Command> set secret String
Command> save allCommand> reset all
!
3-2 RADIUS Administrator’s Guide

Configuring a RADIUS Client
Configuration Using PMconsole
To configure the PortMaster using PMconsole, complete the following steps:
1. Choose RADIUS from the Edit menu.
2. In the dialog box that appears, enter the IP address of the primary and optional alternate RADIUS servers.
3. To log activity using RADIUS accounting, enter the IP address of the primary and optional alternate accounting servers.
4. Enter the secret shared by the RADIUS client and RADIUS server. For security reasons, the secret is not displayed in the dialog box.
The shared secret is case-sensitive, and must consist of 15 or fewer printable, nonspace, ASCII characters. Control characters may not be used.
Note – Do not press the Return key when the cursor is in the RADIUS Secret field of the dialog box. Pressing the Return key at this point will erase the secret when the Save button is pressed.
5. To save the RADIUS settings, click the Save button.
6. To leave the window, click the Done button.
7. On each port, turn Security on; then click the Save button to save the port setting to nonvolatile memory on the PortMaster.
When port security is enabled, each user attempting to log in to the port must be authenticated by the PortMaster User Table or RADIUS.
Note – Some older versions of PMconsole display the Pass-Thru Login option instead of the Security option in this dialog box. In this case, ensure that Pass-Thru Login is disabled; this has the same effect as turning Security on.
8. Click the Remote Reset button, then click the Done button to close the dialog box.
9. Continue to Chapter 4, “Configuring User Information.”
✍
✍
Configuration Using PMconsole 3-3

Configuring a RADIUS Client
3-4 RADIUS Administrator’s Guide

Configuring User Information 4
The RADIUS users file is a flat text file on the RADIUS server. The users file stores authentication and authorization information for all users authenticated with RADIUS. For each user, you must create an entry that consists of three parts: the username, a list of check items, and a list of reply items. Figure 4-1 displays an example.
Figure 4-1 User Entry
• Username
The username is the first part of each user entry. Usernames consist of up to 63 printable, nonspace, ASCII characters. If SecurID or a system password file is used for authentication, the username must conform to any host password limitations.
• Check items
Check items are listed on the first line of a user entry, separated by commas. For an access-request (see “How RADIUS Works” on page 1-3) to succeed, all check items in the user entry must be matched in the access-request.
In Figure 4-1, bob’s password is the only check item. To successfully authenticate bob, the RADIUS server must receive this password in bob’s access-request.
Note – The line in the user entry that contains the username and check items must not exceed 255 characters.
Password = “ge55ep”Service-Type = Framed-User,Framed-protocol = PPP,Framed-IP-Address = 255.255.255.254,Framed-IP-Netmask = 255.255.255.255,Framed-Routing = None,Framed-Compression = Van-Jacobson-TCP-IP,Framed-Filter-Id = “firewall.ppp”,Framed-MTU = 1500
bobUsername Check Item
1st Reply Item
2nd Reply Item
Final Reply Item
✍
4-1

Configuring User Information
• Reply items
Reply items give the PortMaster information about the user’s connection—for example, whether PPP or SLIP is used or whether the user’s IP address is negotiated. In Figure 4-1, Framed-Protocol is a reply item. The value of Framed-Protocol is PPP, indicating that bob uses PPP for his connection.
If all check items in the user entry are satisfied by the access-request, the RADIUS server sends the reply items to the PortMaster to configure the connection.
Several common user entries are listed in “Examples” on page 4-29. All check items and reply items are summarized in Table 4-4 on page 4-23.
Editing User ProfilesUser profiles are maintained in the users file. On a UNIX host, use any text editor to edit the /etc/raddb/users file.
On a Windows NT host, open the RADIUS NT control panel and choose Users from the Edit menu. The users file is automatically opened in Notepad.
Username
Each user entry must have a username. As stated in the previous section, a username must consist of up to 63 printable, nonspace, ASCII characters.
Check Items
Check items can consist of any of the following: password information, client information, prefixes, suffixes, or group.
PasswordsIf you are using ComOS 3.5 or later, the user’s password can be up to 48 printable, nonspace, ASCII characters. If you are using an earlier version of ComOS, the password must not exceed 16 characters.
You can specify two different password characteristics in a user entry: the password’s location and its expiration date.
4-2 RADIUS Administrator’s Guide
Configuring User Information
Password Locations
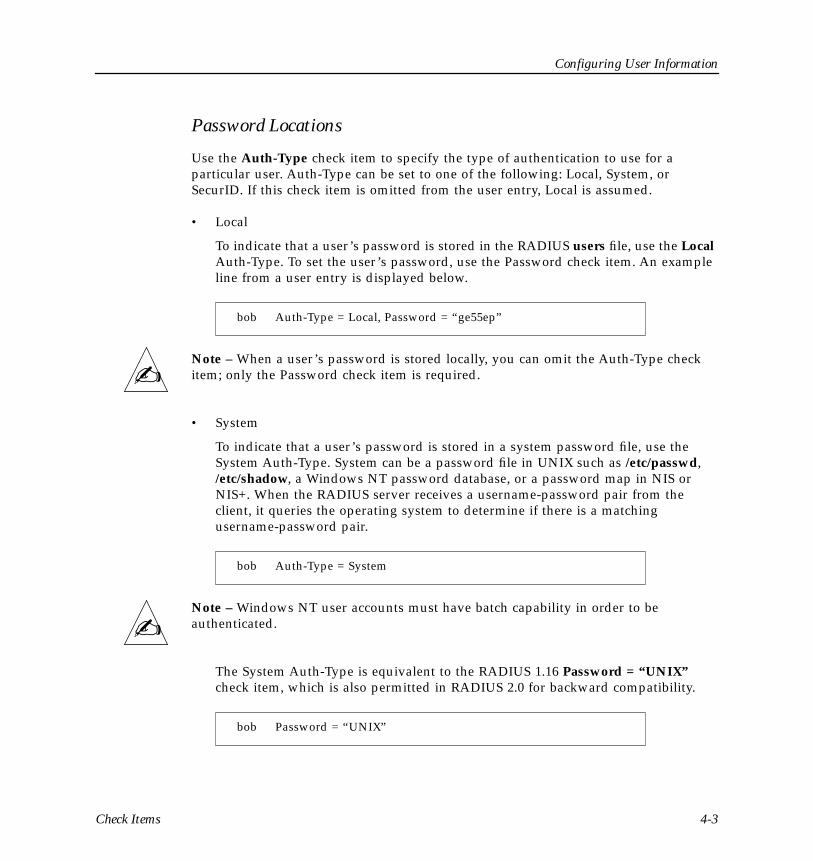
Use the Auth-Type check item to specify the type of authentication to use for a particular user. Auth-Type can be set to one of the following: Local, System, or SecurID. If this check item is omitted from the user entry, Local is assumed.
• Local
To indicate that a user’s password is stored in the RADIUS users file, use the Local Auth-Type. To set the user’s password, use the Password check item. An example line from a user entry is displayed below.
Note – When a user’s password is stored locally, you can omit the Auth-Type check item; only the Password check item is required.
• System
To indicate that a user’s password is stored in a system password file, use the System Auth-Type. System can be a password file in UNIX such as /etc/passwd, /etc/shadow, a Windows NT password database, or a password map in NIS or NIS+. When the RADIUS server receives a username-password pair from the client, it queries the operating system to determine if there is a matching username-password pair.
Note – Windows NT user accounts must have batch capability in order to be authenticated.
The System Auth-Type is equivalent to the RADIUS 1.16 Password = “UNIX” check item, which is also permitted in RADIUS 2.0 for backward compatibility.
bob Auth-Type = Local, Password = “ge55ep”
bob Auth-Type = System
bob Password = “UNIX”
✍
✍
Check Items 4-3
Configuring User Information
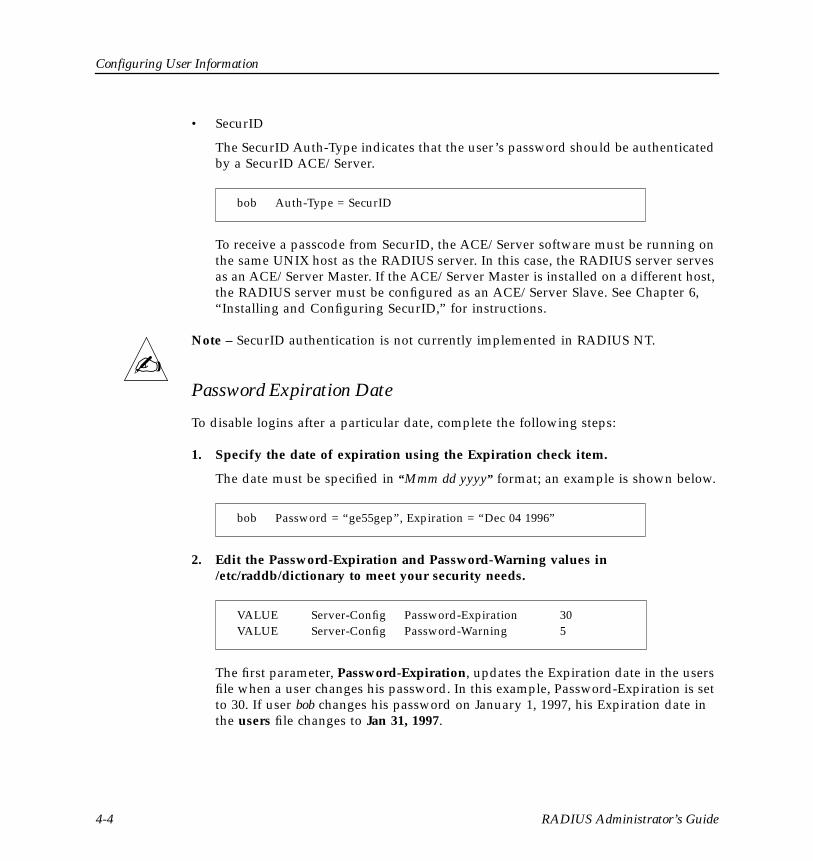
• SecurID
The SecurID Auth-Type indicates that the user’s password should be authenticated by a SecurID ACE/Server.
To receive a passcode from SecurID, the ACE/Server software must be running on the same UNIX host as the RADIUS server. In this case, the RADIUS server serves as an ACE/Server Master. If the ACE/Server Master is installed on a different host, the RADIUS server must be configured as an ACE/Server Slave. See Chapter 6, “Installing and Configuring SecurID,” for instructions.
Note – SecurID authentication is not currently implemented in RADIUS NT.
Password Expiration Date
To disable logins after a particular date, complete the following steps:
1. Specify the date of expiration using the Expiration check item.
The date must be specified in “Mmm dd yyyy” format; an example is shown below.
2. Edit the Password-Expiration and Password-Warning values in /etc/raddb/dictionary to meet your security needs.
The first parameter, Password-Expiration, updates the Expiration date in the users file when a user changes his password. In this example, Password-Expiration is set to 30. If user bob changes his password on January 1, 1997, his Expiration date in the users file changes to Jan 31, 1997.
bob Auth-Type = SecurID
bob Password = “ge55gep”, Expiration = “Dec 04 1996”
VALUE Server-Config Password-Expiration 30VALUE Server-Config Password-Warning 5
✍
4-4 RADIUS Administrator’s Guide

Configuring User Information
Password-Warning controls when users are notified that their accounts are about to expire. In the example above, users receive warning messages 5 days before their password expiration date.
Note – A mechanism to permit users to change their passwords is outside the scope of RADIUS.
3. If you modified the dictionary file, kill and restart the radiusd daemon (UNIX hosts) or stop and start the RADIUS NT service (Windows NT hosts).
Client InformationUse the NAS-IP-Address check item to specify the IP address of a particular PortMaster. When this setting is used as a check item in a user entry, the user must attempt to start a connection on the specified PortMaster for the connection to succeed.
Use the NAS-Port check item to specify a particular PortMaster port. To be successfully authenticated, the user must attempt to log in to this port.
Use the NAS-Port-Type check item to specify the type of port. Options for the NAS-Port-Type are as follows: Async, Sync, ISDN, ISDN-V120, or ISDN-V110. The PortMaster must run ComOS release 3.3.1 or later to support NAS-Port-Type.
The following example displays a user entry containing the NAS-IP-Address and NAS-Port-Type settings.
Prefixes and SuffixesUse the Prefix and Suffix check items to allow a user to access multiple services by prepending or appending a series of characters to his username.
bob Password = “ge55gep”, NAS-IP-Address = 192.168.1.54, NAS-Port-Type = ISDNService-Type = Framed-User,Framed-Protocol = PPP
✍
Check Items 4-5

Configuring User Information
Prefixes and suffixes are most useful when defined in a DEFAULT user entry (see the example on page 4-30). However, they can also be used with individual user entries (see the example below). Prefix and Suffix strings must consist of 16 or fewer printable, nonspace, ASCII characters.
In the above example, bob’s username and password are stored in a system password file. For bob to use this particular account, he must specify a username of Pbob when attempting to connect to the PortMaster.
The RADIUS server strips any prefixes and suffixes and looks up the username. In the previous example, the RADIUS server strips the P and checks the system password for bob.
If bob specified a username of bob%slip, the RADIUS server would configure bob’s connection using the settings in the DEFAULT entry.
See “Default User Entries” on page 4-19 for information on using prefixes and suffixes in a DEFAULT entry.
GroupYou can define a group of users to simplify authentication. If a user entry contains the Group check item, only users that are defined as members of the specified group are authenticated.
The Group string consists of up to 63 printable, nonspace, ASCII characters.
If you specify multiple groups in a user entry, the user must be a member of each group to be authenticated. In the following example, user bob is authenticated only if bob is a member of both the Engineering group and the Hardware group.
Pbob Auth-Type = System, Prefix = “P”Framed-Protocol = PPP,
DEFAULT Auth-Type = System, Suffix = “%slip”Framed-Protocol = SLIP,
bob Group = “Engineering”, “Hardware”
4-6 RADIUS Administrator’s Guide

Configuring User Information
On UNIX hosts, groups are defined in /etc/group or via NIS. Refer to your system documentation for instructions on creating groups and adding members to groups.
On Windows NT hosts, groups are defined with the User Manager in the Administration Tools (Common) menu. Refer to your system documentation for instructions on creating groups and adding members to groups.
Reply Items
Service TypeYou must specify the type of service provided to the user, called the Service-Type, in each user entry. Service-Type must be set to one of the values shown in Figure 4-1.
Table 4-1 Service-Type
Service-Type Explanation
Login-User User connects via Telnet, rlogin, in.pmd, or TCP-Clear.
Framed-User User uses PPP or SLIP for the connection.
Outbound-User User uses Telnet for outbound connections.
Callback-Login-User The PortMaster verifies the user’s identity by disconnecting the port and dialing the user back at a specified number. The user’s identity must be verified before the connection is permitted.
Callback-Framed-User The PortMaster verifies the user’s identity by disconnecting the port and dialing the user back using a specified Location Table entry. When the user’s identity is verified, PPP or SLIP is used for the connection.
Administrative-User The PortMaster grants the user a full administrative login—as if the user had logged in using !root. The user has full configuration ability and access to all PortMaster commands.
This Service-Type is available only with ComOS 3.5 or later versions.
Reply Items 4-7

Configuring User Information
Note – If the RADIUS server is used with non-Livingston products, the Administrative-User and NAS-Prompt-User Service-Types must not be used unless the other vendor’s implementation of these types is compatible with Livingston’s implementation.
Note – To configure the callback number or location, see “Callback Information” on page 4-11.
In the following example, user bob’s Service-Type is Framed-User.
NAS-Prompt-User The PortMaster grants the user a limited administrative login. The user can use the following commands: ifconfig, ping, ptrace, reboot, reset, set console, set debug, show, traceroute, and any nonconfiguration commands.
The following commands are not permitted: add, delete, erase, save, tftp, and any set commands other than those listed above.
This Service-Type is available only with ComOS 3.5 or later versions.
bob Auth-Type = SystemService-Type = Framed-User
Table 4-1 Service-Type (Continued)
Service-Type Explanation
✍
✍
4-8 RADIUS Administrator’s Guide

Configuring User Information
Framed ProtocolWhen the Service-Type is Framed-User, you must include the Framed-Protocol reply item in the user entry to indicate whether PPP or SLIP is used. For example, user bob is a PPP user. His user entry includes the following lines:
Framed-Protocol can also be used as a reply item requiring PPP autodetection by the PortMaster.
To authenticate a user using PAP, set the Auth-Type to any of the following: Local, System, or SecurID. To authenticate a user using CHAP, the Auth-Type must be Local and you must turn off PAP using the following command on the PortMaster:
Framed IP AddressUse the Framed-IP-Address reply item to specify the user’s IP address.
When Framed-IP-Address is set to 255.255.255.255, the PortMaster negotiates the address with the end-node (dial-in user). When it is set to 255.255.255.254 (or omitted), the PortMaster assigns an IP address to the dial-in user from the assigned address pool.
Note – To create an assigned address pool for the PortMaster, see the Configuration Guide for PortMaster Products.
bob Auth-Type = SystemService-Type = Framed-User,Framed-Protocol = PPP
bob Auth-Type = System, Framed-Protocol = PPPService-Type = Framed-User,Framed-Protocol = PPP
Command> set pap off
✍
Reply Items 4-9

Configuring User Information
Framed IP NetmaskYou can specify a netmask for a user using the Framed-IP-Netmask reply item. If this reply item is omitted, the default subnet mask of 255.255.255.255 is used.
Framed RouteUse the Framed-Route reply item to add a route to the PortMaster routing table when service to the user begins. Three pieces of information are required: the destination IP address, gateway IP address, and metric. An example is shown below.
In this example, 150.128.1.0 is the IP address of a destination network. 150.128.1.1 is the IP address of the gateway for this network, and 1 is the metric (hop count).
If 0.0.0.0 is specified as the gateway IP address, the user’s IP address is substituted for the gateway.
Outbound-UserThe Outbound-User setting allows a user to gain outbound access to network device ports using Telnet. This feature is supported in ComOS version 3.3.2 or later and RADIUS 2.0. To use this feature, you must set the relevant PortMaster port to device /dev/network or twoway /dev/network.
To restrict users to outbound access, you must include the Service-Type = Outbound-User check item in the user entry. The Login-TCP-Port setting may be used to specify the TCP port for the connection; the port number must be between 10000 and 10100. An example is displayed below.
bob Auth-Type = SystemService-Type = Framed-User,Framed-Protocol = PPP,Framed-IP-Address = 150.128.1.1Framed-Route = “150.128.1.0 150.128.1.1 1”
bob Password = “ge55gep”, Service-Type = Outbound-UserService-Type = Outbound-User,Login-Service = Telnet,Login-TCP-Port = 10000
4-10 RADIUS Administrator’s Guide

Configuring User Information
In the above example, when user bob is attempting an outbound connection, the PortMaster client checks its local User Table for an entry for bob. If bob is not found in the table, the PortMaster sends an access-request to the RADIUS server indicating that bob is an Outbound-User.
The RADIUS server examines bob’s entry in the users file. If Outbound-User is included as a reply item, the PortMaster is notified to permit the connection.
The PortMaster should be configured as shown in the example below. This example configures port s1; however, you can configure multiple ports to listen at different TCP port numbers or at the same TCP port number to create a pool of devices.
Callback InformationFor a user to be authenticated using callback, a phone number or location must be specified in the user’s entry.
Callback-Login-User
When a user’s Service-Type is Callback-Login-User, specify a phone number using the Callback-Number reply item. An example is displayed below.
After the RADIUS server verifies the password for user bob, it sends an access-accept message including the Callback-Number to the PortMaster. The PortMaster calls the user back at the specified number; if the user is reached successfully, the PortMaster prompts the user to reenter his password and then sets up the connection.
Command> set s1 device /dev/networkCommand> set s1 service_device telnet 10000Command> set s1 modem off
bob Password = “ge55gep”Service-Type = Callback-Login-User,Callback-Number = “9,1-800-555-1212”
Reply Items 4-11
Configuring User Information
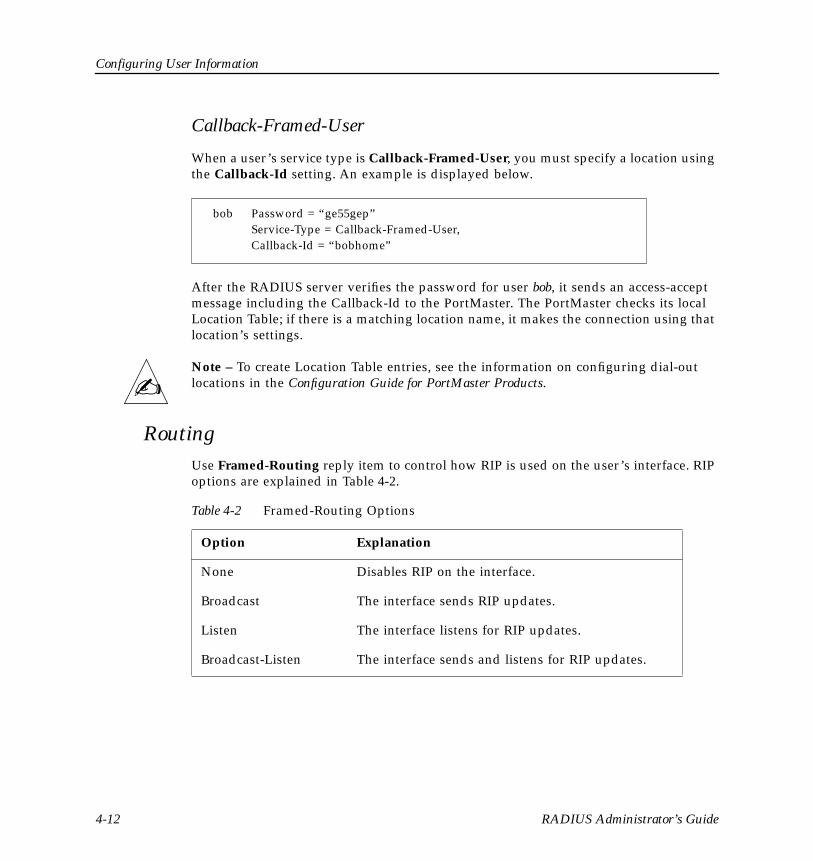
Callback-Framed-User
When a user’s service type is Callback-Framed-User, you must specify a location using the Callback-Id setting. An example is displayed below.
After the RADIUS server verifies the password for user bob, it sends an access-accept message including the Callback-Id to the PortMaster. The PortMaster checks its local Location Table; if there is a matching location name, it makes the connection using that location’s settings.
Note – To create Location Table entries, see the information on configuring dial-out locations in the Configuration Guide for PortMaster Products.
RoutingUse Framed-Routing reply item to control how RIP is used on the user’s interface. RIP options are explained in Table 4-2.
bob Password = “ge55gep”Service-Type = Callback-Framed-User,Callback-Id = “bobhome”
Table 4-2 Framed-Routing Options
Option Explanation
None Disables RIP on the interface.
Broadcast The interface sends RIP updates.
Listen The interface listens for RIP updates.
Broadcast-Listen The interface sends and listens for RIP updates.
✍
4-12 RADIUS Administrator’s Guide

Configuring User Information
The following example displays user bob’s user entry. Framed-Routing is set to None; bob’s interface neither sends nor listens for RIP updates.
Typically, Framed-Routing is set to Broadcast-Listen for connections to other routers, and set to None for user connections.
Packet FiltersUse the Filter-Id reply item to associate packet filters with each PPP or SLIP user authenticated with RADIUS. In the following example, the firewall filter is used during bob’s connection:
You must define filters on each PortMaster the user accesses. To control whether the filter restricts incoming or outgoing traffic, the filter defined on the PortMaster must have an .in or .out suffix attached to its name. In the above example, the filter firewall.in is used as a filter for packets entering the PortMaster via the interface, and firewall.out is used as an output filter for packets leaving the PortMaster via the interface.
You need not specify the .in and .out suffixes in the user entry. When a user dials in to the PortMaster, the .in or .out suffix is automatically appended to the filter name provided by RADIUS.
Note – To configure filters on a PortMaster, see the information on configuring filters in the Configuration Guide for PortMaster Products.
bob Password = “ge55gep”Service-Type = Framed-User,Framed-Protocol = PPP,Framed-Routing = None,
bob Password = “ge55gep”Service-Type = Framed-User,Framed-Protocol = PPP,Filter-Id = “firewall”
✍
Reply Items 4-13

Configuring User Information
Access FiltersUse the Filter-Id reply item to associate an access filter with each host prompt login user authenticated with RADIUS. In the following example, the gnric filter is used to restrict the hosts that bob can access during a connection:
You must define access filters on each PortMaster the user accesses, using the same name as the Filter-Id. The access filter name defined in the user record must be exactly the same as the filter name defined on the PortMaster. The PortMaster does not append anything to the name of an access filter, unlike packet filters.
Remote Host InformationWhen a user’s Service-Type is Login-User or Callback-Login-User, two pieces of information may be supplied: the service used to connect to the host, and the name or IP address of the remote host. You can also specify a TCP port number.
To specify the login service, use the Login-Service reply item. All Login-Service values are described in Table 4-2.
bob Password = “ge55gep”Service-Type = Login-User,Login-IP-Host = 255.255.255.255,Login-Service = Telnet,Login-TCP-Port = 23,Filter-Id = “gnric”
Table 4-3 Login-Service
Login-Service Description
Telnet Establishes a Telnet connection to the remote host.
Rlogin Establishes an rlogin connection to the remote host.
TCP-Clear Establishes a TCP clear connection to the remote host. 8-bit data is passed through this connection without interpretation. This option is the equivalent of the netdata login service on the PortMaster.
4-14 RADIUS Administrator’s Guide
Configuring User Information
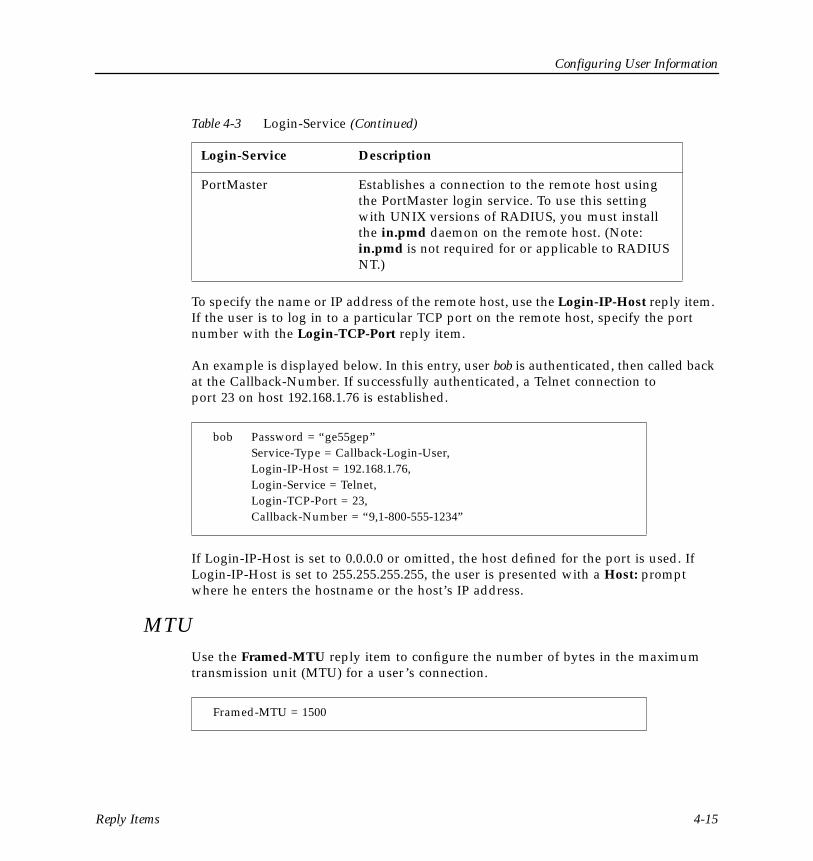
To specify the name or IP address of the remote host, use the Login-IP-Host reply item. If the user is to log in to a particular TCP port on the remote host, specify the port number with the Login-TCP-Port reply item.
An example is displayed below. In this entry, user bob is authenticated, then called back at the Callback-Number. If successfully authenticated, a Telnet connection to port 23 on host 192.168.1.76 is established.
If Login-IP-Host is set to 0.0.0.0 or omitted, the host defined for the port is used. If Login-IP-Host is set to 255.255.255.255, the user is presented with a Host: prompt where he enters the hostname or the host’s IP address.
MTU Use the Framed-MTU reply item to configure the number of bytes in the maximum transmission unit (MTU) for a user’s connection.
PortMaster Establishes a connection to the remote host using the PortMaster login service. To use this setting with UNIX versions of RADIUS, you must install the in.pmd daemon on the remote host. (Note: in.pmd is not required for or applicable to RADIUS NT.)
bob Password = “ge55gep”Service-Type = Callback-Login-User,Login-IP-Host = 192.168.1.76,Login-Service = Telnet,Login-TCP-Port = 23,Callback-Number = “9,1-800-555-1234”
Framed-MTU = 1500
Table 4-3 Login-Service (Continued)
Login-Service Description
Reply Items 4-15

Configuring User Information
Framed-MTU is used only for PPP and SLIP connections. For PPP connections, the Framed-MTU can be between 100 and 1520 bytes. SLIP connections can have an MTU between 100 and 1006 bytes. On IPX networks, set Framed-MTU to at least 600 bytes.
Note – If PPP negotiates an MTU for the connection, the Framed-MTU setting is ignored.
CompressionVan Jacobson TCP/IP header compression is enabled by default. To disable compression, set the Framed-Compression setting to None.
IPX NetworkWhen an IPX network is used for a particular user’s connection, you must include the Framed-IPX-Network reply item in the user entry. The PortMaster supports IPX over PPP.
Specify Framed-IPX-Network in dotted decimal notation (xx.xx.xx.xx). For example, the hexadecimal network number 123456 must be expressed as 0.18.52.86.
Framed-Compression = None
bob Password = “testing”Service-Type = Framed-User,Framed-Protocol = PPPFramed-IPX-Network = 0.18.52.86
✍
4-16 RADIUS Administrator’s Guide
Configuring User Information
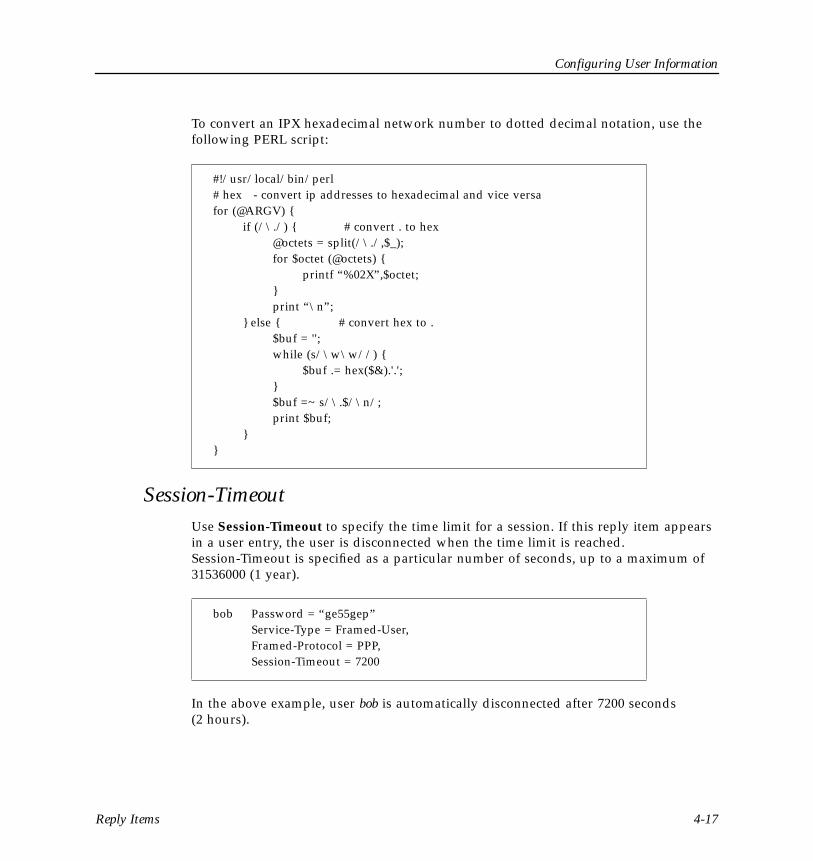
To convert an IPX hexadecimal network number to dotted decimal notation, use the following PERL script:
Session-TimeoutUse Session-Timeout to specify the time limit for a session. If this reply item appears in a user entry, the user is disconnected when the time limit is reached. Session-Timeout is specified as a particular number of seconds, up to a maximum of 31536000 (1 year).
In the above example, user bob is automatically disconnected after 7200 seconds (2 hours).
#!/usr/local/bin/perl# hex - convert ip addresses to hexadecimal and vice versafor (@ARGV) { if (/\./) { # convert . to hex @octets = split(/\./,$_); for $octet (@octets) { printf “%02X”,$octet; } print “\n”; } else { # convert hex to . $buf = ''; while (s/\w\w//) { $buf .= hex($&).'.'; } $buf =~ s/\.$/\n/; print $buf; }}
bob Password = “ge55gep”Service-Type = Framed-User,Framed-Protocol = PPP,Session-Timeout = 7200
Reply Items 4-17

Configuring User Information
Idle-TimeoutUse Idle-Timeout to specify the number of seconds a session can be idle before it is disconnected. Idle-Timeout can range between 120 seconds (2 minutes) and 14400 seconds (4 hours), and is rounded down to a multiple of 60.
In the above example, if the session is inactive longer than 600 seconds (10 minutes), user bob is disconnected.
Note – Idle-Timeout and Session-Timeout values are specified in seconds in the RADIUS users file. If you set these timeout values using the PortMaster command line interface or PMconsole, you specify them in minutes.
Port-LimitUse the Port-Limit reply item to control the maximum number of ports available for a Multilink PPP or Multilink V.120 connection. Port-Limit applies only to ISDN connections; other connection types are not affected.
The Port-Limit value can be as high as the maximum number of B channels available for the ISDN ports. For example, if a PortMaster has 15 ISDN BRI ports, the Port-Limit value can be as high as 30.
In the above example, user bob’s connection can use only one B channel.
bob Password = “ge55gep”Service-Type = Framed-User,Framed-Protocol = PPP,Idle-Timeout = 600
bob Password = “ge55gep”, NAS-Port-Type = ISDN Service-Type = Framed-User,Framed-Protocol = PPP,Port-Limit = 1
✍
4-18 RADIUS Administrator’s Guide
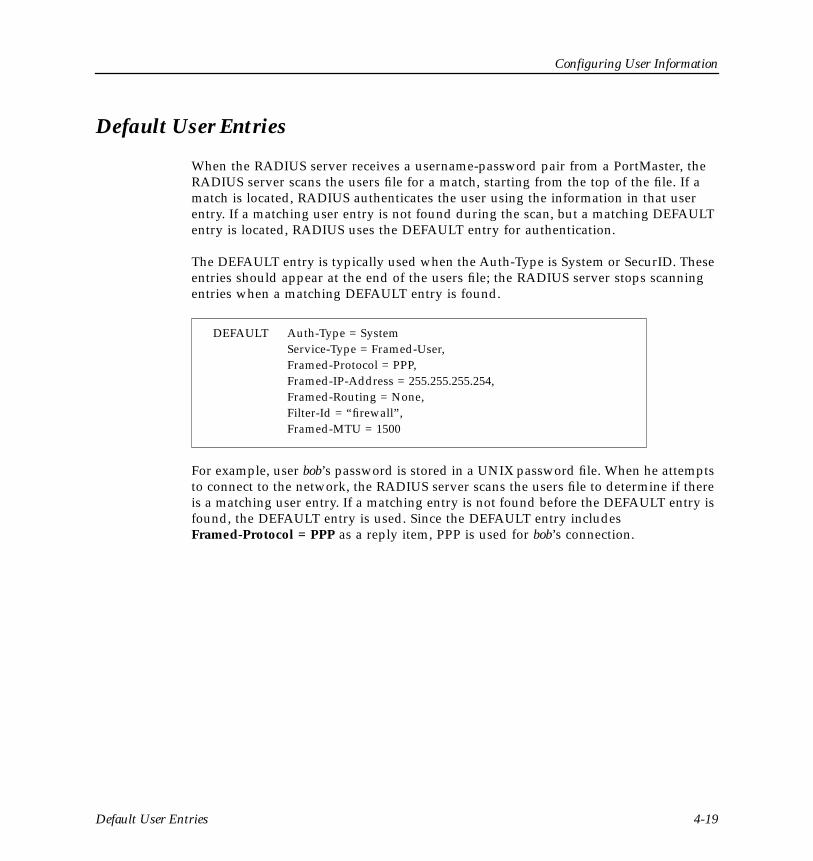
Configuring User Information
Default User Entries
When the RADIUS server receives a username-password pair from a PortMaster, the RADIUS server scans the users file for a match, starting from the top of the file. If a match is located, RADIUS authenticates the user using the information in that user entry. If a matching user entry is not found during the scan, but a matching DEFAULT entry is located, RADIUS uses the DEFAULT entry for authentication.
The DEFAULT entry is typically used when the Auth-Type is System or SecurID. These entries should appear at the end of the users file; the RADIUS server stops scanning entries when a matching DEFAULT entry is found.
For example, user bob’s password is stored in a UNIX password file. When he attempts to connect to the network, the RADIUS server scans the users file to determine if there is a matching user entry. If a matching entry is not found before the DEFAULT entry is found, the DEFAULT entry is used. Since the DEFAULT entry includes Framed-Protocol = PPP as a reply item, PPP is used for bob’s connection.
DEFAULT Auth-Type = System Service-Type = Framed-User,Framed-Protocol = PPP,Framed-IP-Address = 255.255.255.254,Framed-Routing = None,Filter-Id = “firewall”,Framed-MTU = 1500
Default User Entries 4-19

Configuring User Information
RADIUS 2.0 permits multiple DEFAULT user entries. Use the Prefix and Suffix settings to distinguish among DEFAULT entries. When users prepend or append the prefix or suffix to their username, the RADIUS server matches them to the corresponding DEFAULT entry.
In the above example, assume that user bob’s password is stored in a UNIX password file and that there is not a matching entry in the RADIUS users file. If bob uses Pbob as his username, the first DEFAULT entry is used, and bob is authenticated as a PPP user. If bob logs in as bob%C, the second DEFAULT entry is used and he is authenticated as a CSLIP user.
DEFAULT Auth-Type = System, Prefix = “P”Service-Type = Framed-User,Framed-Protocol = PPP,Framed-IP-Address = 255.255.255.254,Framed-Routing = None,Framed-MTU = 1500
DEFAULT Auth-Type = System, Suffix = “%C”Service-Type = Framed-User,Framed-Protocol = CSLIP,Framed-IP-Address = 255.255.255.254,Framed-MTU = 1006
DEFAULT Auth-Type = System, Prefix = “S”Service-Type = Framed-User,Framed-Protocol = SLIP,Framed-IP-Address = 255.255.255.254,Framed-Compression = None, Framed-MTU = 1006
4-20 RADIUS Administrator’s Guide

Configuring User Information
You can name DEFAULT entries simply DEFAULT, or append a number to the end of the entry name—for example, DEFAULT1, DEFAULT2, and so on. An example is shown below.
Caching User Requests
RADIUS offers support for caching user requests, which increases the speed of user lookups. Livingston recommends caching user requests when the users file contains more than 500 users.
Configuring Caching on UNIX Hosts The builddbm utility included with UNIX RADIUS converts the users text file to the UNIX DBM format, which increases the speed of user lookups.
DEFAULT1 Auth-Type = System, Prefix = “P”Service-Type = Framed-User,Framed-Protocol = PPP,Framed-IP-Address = 255.255.255.254,Framed-Routing = None,Framed-MTU = 1500
DEFAULT2 Auth-Type = System, Suffix = “%C”Service-Type = Framed-User,Framed-Protocol = CSLIP,Framed-IP-Address = 255.255.255.254,Framed-MTU = 1006
DEFAULT3 Auth-Type = System, Prefix = “S”Service-Type = Framed-User,Framed-Protocol = SLIP,Framed-IP-Address = 255.255.255.254,Framed-Compression = None,Framed-MTU = 1006
Caching User Requests 4-21

Configuring User Information
To run builddbm, use the following commands:
To run the radiusd daemon after the users file is converted to DBM, execute radiusd with the -b option.
builddbm generates the users.dir and users.pag files, which are used by the radiusd daemon. On some versions of UNIX a single users.db file is created instead.
Note – After the users file has been converted to the DBM format, you must run builddbm again if you make any changes to the user entries.
Configuring Caching on Windows NT HostsTo configure caching options, choose Users Cache from the Setup Options menu. Or, click the Options button, and then click the Users Cache tab.
cd /etc/raddb./builddbm
/etc/radiusd -b
✍
4-22 RADIUS Administrator’s Guide
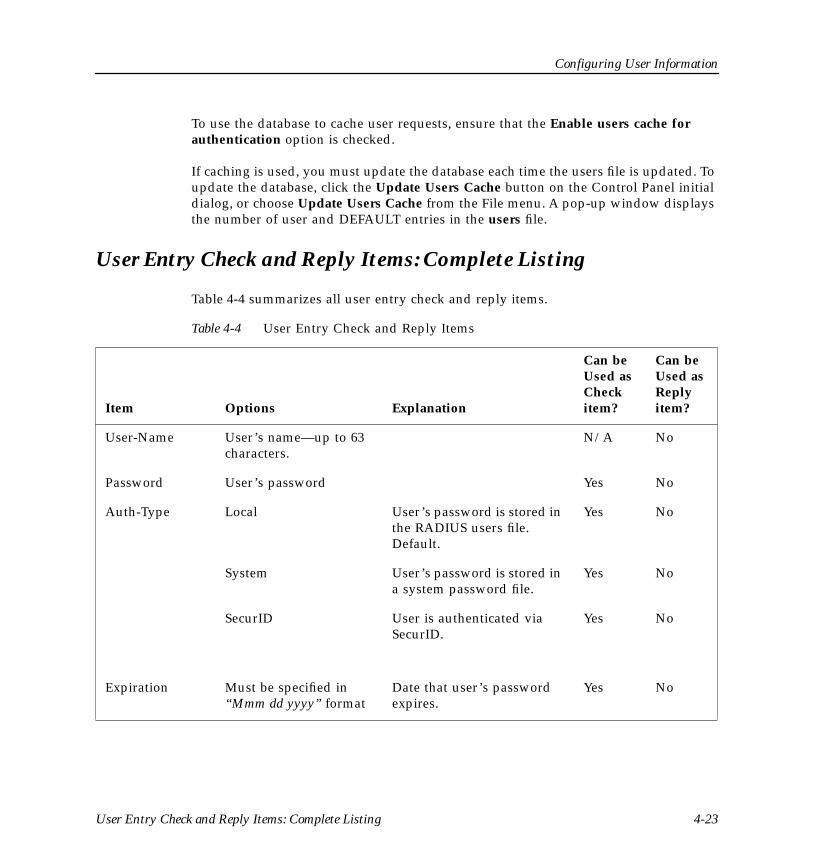
Configuring User Information
To use the database to cache user requests, ensure that the Enable users cache for authentication option is checked.
If caching is used, you must update the database each time the users file is updated. To update the database, click the Update Users Cache button on the Control Panel initial dialog, or choose Update Users Cache from the File menu. A pop-up window displays the number of user and DEFAULT entries in the users file.
User Entry Check and Reply Items: Complete Listing
Table 4-4 summarizes all user entry check and reply items.
Table 4-4 User Entry Check and Reply Items
Item Options Explanation
Can be Used as Check item?
Can be Used as Reply item?
User-Name User’s name—up to 63 characters.
N/A No
Password User’s password Yes No
Auth-Type Local User’s password is stored in the RADIUS users file. Default.
Yes No
System User’s password is stored in a system password file.
Yes No
SecurID User is authenticated via SecurID.
Yes No
Expiration Must be specified in “Mmm dd yyyy” format
Date that user’s password expires.
Yes No
User Entry Check and Reply Items: Complete Listing 4-23

Configuring User Information
Prefix String of characters in double quotation marks (“”)
Prepended to username to match a user to a particular user entry. Used primarily for DEFAULT entries.
Yes No
Suffix String of characters in double quotation marks (“”)
Appended to username to match a user to a particular user entry. Used primarily for DEFAULT entries.
Yes No
Group String of characters in double quotation marks (“”)
List of users—group members—that user must match.
Yes No
NAS-IP-Address
IP address PortMaster’s IP address. Yes No
NAS-Port Number The PortMaster port number that the user is dialed in to (for example, 2 = S2).
Yes No
NAS-Port-Type ISDN ISDN port. Yes No
Async Asynchronous port. Yes No
Sync Synchronous port. Yes No
ISDN-V120 ISDN in V.120 mode. Yes No
ISDN-V110 ISDN in V.110 mode. Yes No
Service-Type Login-User User connects via Telnet, Rlogin, PortMaster, or TCP-Clear login service.
No Yes
Table 4-4 User Entry Check and Reply Items (Continued)
Item Options Explanation
Can be Used as Check item?
Can be Used as Reply item?
4-24 RADIUS Administrator’s Guide

Configuring User Information
Framed-User User uses PPP or SLIP for the connection.
Yes Yes
Service-Type Outbound-User User uses Telnet for outbound connections.
Yes Yes
Callback-Login-User Calls user back and connects via Telnet, rlogin, PortMaster, or TCP-Clear login service.
No Yes
Callback-Framed-User Calls user back and establishes a framed connection (PPP or SLIP).
No Yes
Administrative-User Grants user full access to all configuration commands.
No Yes
NAS-Prompt-User Grants user limited access to commands (nonconfiguration only).
No Yes
Login-Service Telnet Establishes a Telnet connection to the remote host.
No Yes
Rlogin Establishes an rlogin connection to the remote host.
No Yes
TCP-Clear Establishes a TCP clear connection to the remote host.
No Yes
Table 4-4 User Entry Check and Reply Items (Continued)
Item Options Explanation
Can be Used as Check item?
Can be Used as Reply item?
User Entry Check and Reply Items: Complete Listing 4-25

Configuring User Information
PortMaster Establishes a connection to the remote host using the PortMaster login service.
No Yes
Login-IP-Host IP address Address of the remote host. No Yes
Login-TCP-Port TCP port number TCP port number of the Login-Service.
No Yes
Framed-Protocol
PPP PPP is used for the connection.
Yes Yes
SLIP SLIP is used for the connection.
No Yes
Framed-IP-Address
IP Address The user’s IP address. No Yes
Framed-IP-Netmask
Netmask The user’s netmask. No Yes
Framed-Route None Disables RIP on the interface.
No Yes
Broadcast The interface sends RIP updates.
No Yes
Listen The interface listens to RIP updates.
No Yes
Broadcast-Listen The interface sends and listens to RIP updates.
No Yes
Filter-Id Filter name Filter name to be used for packet or access filtering on the interface.
No Yes
Table 4-4 User Entry Check and Reply Items (Continued)
Item Options Explanation
Can be Used as Check item?
Can be Used as Reply item?
4-26 RADIUS Administrator’s Guide

Configuring User Information
Framed-MTU Number Number of bytes in maximum transmission unit (MTU).
No Yes
Framed-Compression
None If this reply item is omitted, Van Jacobson TCP/IP header compression is used.
No Yes
Van-Jacobson-TCP-IP Van Jacobson TCP/IP header compression is used for the connection. Default.
No Yes
Reply-Message Text message in double quotation marks (“ ”)
Displays a message—235 characters maximum—to the user after authentication.
No Yes
Callback-Number
Phone number in double quotation marks (“ ”)
Specify only for Service-Type = Callback-Login-User.
No Yes
Callback-Id Location name in double quotation marks (“ ”)
Specify only for Service-Type = Callback-Framed-User.
No Yes
Framed-IPX-Network
Dotted decimal IPX network number
IPX network number. No Yes
Port-Limit Number of B channels for ISDN Multilink PPP or multilink V.120
Specifies the number of B channels a user might have.
No Yes
Session-Timeout In seconds Specifies the time limit for a session.
No Yes
Table 4-4 User Entry Check and Reply Items (Continued)
Item Options Explanation
Can be Used as Check item?
Can be Used as Reply item?
User Entry Check and Reply Items: Complete Listing 4-27

Configuring User Information
Idle-Timeout In seconds Specifies the idle time limit for a session.
No Yes
Menu Menu name in double quotation marks (“ ”)
Defines a menu in a user record. See Chapter 5, “Configuring RADIUS Menus.”
No Yes
Termination-Menu
Menu name in double quotation marks (“ ”)
Menu to display after service is terminated. This item can be set only in a menu.
No Yes
Table 4-4 User Entry Check and Reply Items (Continued)
Item Options Explanation
Can be Used as Check item?
Can be Used as Reply item?
4-28 RADIUS Administrator’s Guide

Configuring User Information
Examples
User entries can be configured in a number of ways to fit network security requirements. The following examples illustrate a series of typical RADIUS user entries.
PPP User EntryThis example illustrates a typical RADIUS entry for a PPP user.
In this example, user bob has password ge55gep. He is a Framed-User, which indicates that he uses SLIP or PPP for his connections. The following line, Framed-Protocol, specifies PPP.
An IP address of 255.255.255.254 is specified, indicating that an IP address is assigned to bob from the PortMaster assigned address pool.
Note – To create an assigned address pool, see the Configuration Guide for PortMaster Products.
Framed-Routing is set to None, which disables RIP for bob’s interface. RIP packets are not sent or listened for. Van Jacobson TCP/IP compression is used for the connection, and the MTU is set to 1500 bytes.
The Filter-Id identifies the packet filter used for the connection; if they exist on the PortMaster, firewall.in is used as an input filter and firewall.out is used as an output filter.
bob Password = “ge55gep”Service-Type = Framed-User,Framed-Protocol = PPP,Framed-IP-Address = 255.255.255.254,Framed-Routing = None,Framed-Compression = Van-Jacobson-TCP-IP,Framed-MTU = 1500,Filter-Id = “firewall”
✍
Examples 4-29

Configuring User Information
Using Prefixes or Suffixes Creating multiple DEFAULT entries can eliminate the time required to create multiple accounts for users. Users prepend or append the prefix or suffix to their username when they attempt to log in to the PortMaster; the RADIUS server uses these prefixes and suffixes to match the user to the corresponding DEFAULT entry.
In the following example, the users file contains four DEFAULT entries—one entry each for PPP, SLIP, CSLIP, and Telnet users:
If user bob enters Pbob as his username, he is authenticated as a PPP user. If he enters bob as a username, he is authenticated as a Telnet user. If he enters Sbob as a username, he is authenticated as a SLIP user.
DEFAULT1 Auth-Type = System, Prefix = “P”Service-Type = Framed-User,Framed-Protocol = PPP,Framed-IP-Address = 255.255.255.254,Framed-Routing = None,Filter-Id = “firewall”,Framed-MTU = 1500
DEFAULT2 Auth-Type = System, Prefix = “S”Service-Type = Framed-User,Framed-Protocol = SLIP,Framed-IP-Address = 255.255.255.254,Framed-Compression = None
DEFAULT3 Auth-Type = System, Prefix = “C”Service-Type = Framed-User,Framed-Protocol = CSLIP,Framed-IP-Address = 255.255.255.254,Framed-Compression = Van-Jacobson-TCP-IP
DEFAULT4 Auth-Type = SystemService-Type = Login-User,Login-IP-Host = 172.16.1.4,Login-Service = Telnet
4-30 RADIUS Administrator’s Guide

Configuring RADIUS Menus 5
RADIUS menus allow a user to select different login options after being authenticated. Menus allow a user with several different account types to select different options without reconnecting.
How Menus Work
RADIUS menus are implemented as text files located in the /etc/raddb/menus (UNIX) or \etc\raddb\menus (Windows NT) directory on the RADIUS server. The number of menu files under the menus directory is unlimited. A menu file can accommodate up to 2KB of data. A menu can refer to other menus or be a single-level menu.
Menu File FormatMenu files contain the menu and end keywords, each on a separate line, to indicate the start and end of the text displayed to the user. Text between the menu and end keywords can be any printable, nonspace, ASCII characters. The text in the menu file is case-sensitive.
Each menu selection entry consists of the menu choice shown at the beginning of a line, followed by one or more lines of reply items—one per line—starting with spaces or tabs. You can enter comments among the menu selection entries by starting each comment line with a number sign (#).
The special menu choice DEFAULT must be the last menu selection entry. The DEFAULT menu is called when the user enters no choice or a choice that does not match a menu selection entry in the menu file.
Use the special menu choice EXIT for a menu selection—such as “Quit”—that disconnects the user.
Refer to “Single-Level Menu” on page 5-3 and “Nested Menus” on page 5-4 for menu file examples.
How Menus Work 5-1

Configuring RADIUS Menus
Menus Called by ReferenceAny user entry in the users file—including the DEFAULT entry—can call a menu by reference. The Menu reply item is the only reply item in the user entry when a menu is referenced.
In the above example, after user bob is authenticated, the menu1 menu is displayed and he is prompted to make a selection. When bob selects a menu option, the corresponding service is provided.
Menu FilenamesYou must create the menu filename under the /etc/raddb/menus (UNIX) or \etc\raddb\menus (Windows NT) directory of the RADIUS server. Menu names can consist of up to 120 printable, nonspace, ASCII characters and must be enclosed in double quotation marks (“ ”).
DEFAULT Auth-Type = SystemMenu = “menu1”
5-2 RADIUS Administrator’s Guide
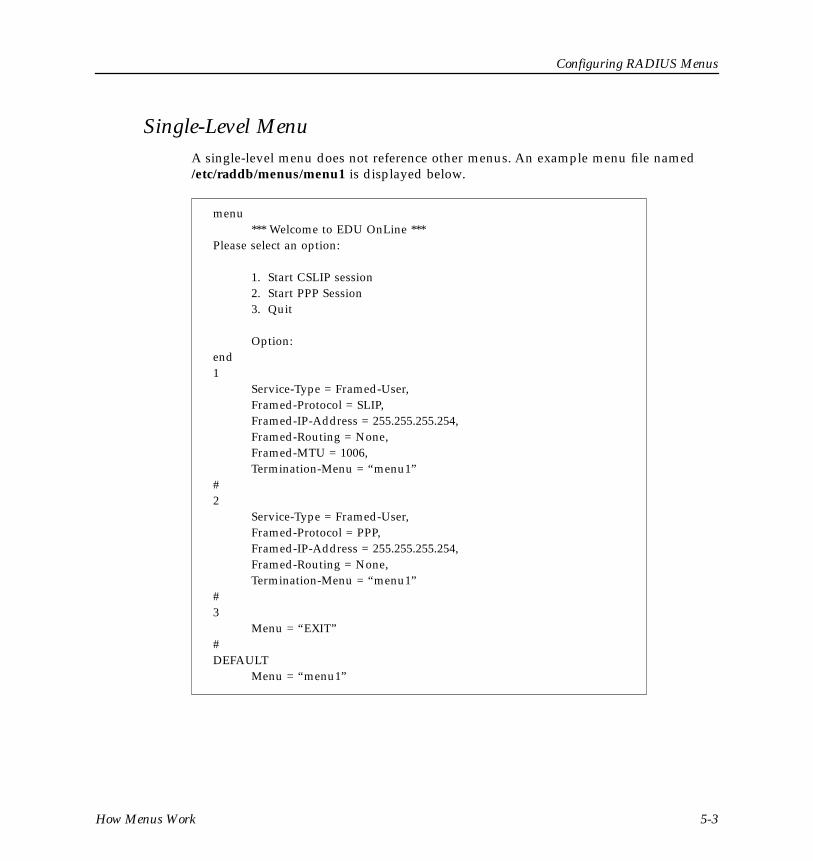
Configuring RADIUS Menus
Single-Level MenuA single-level menu does not reference other menus. An example menu file named /etc/raddb/menus/menu1 is displayed below.
menu*** Welcome to EDU OnLine ***
Please select an option:
1. Start CSLIP session2. Start PPP Session3. Quit
Option:end1
Service-Type = Framed-User,Framed-Protocol = SLIP,Framed-IP-Address = 255.255.255.254,Framed-Routing = None,Framed-MTU = 1006,Termination-Menu = “menu1”
#2
Service-Type = Framed-User,Framed-Protocol = PPP,Framed-IP-Address = 255.255.255.254,Framed-Routing = None,Termination-Menu = “menu1”
#3
Menu = “EXIT”#DEFAULT
Menu = “menu1”
How Menus Work 5-3

Configuring RADIUS Menus
In this example, after RADIUS authenticates the user, menu1 is displayed and the user is prompted to select a service from this menu. Once the user has finished the SLIP or PPP session, the termination menu is displayed and the user is prompted to select a new service. If a Termination-Menu is not included in the reply items, the user is disconnected immediately after the SLIP or PPP session.
Nested MenusNested menus refer to other menus. In the example menu file below, the menu has an other option; if a user chooses this option, a second menu is displayed.
menu*** Welcome to the Internet Service ***Please enter an option:
ppp - Start PPP sessiontelnet - Begin login session with a hostother - Display a second menu
Option:endppp
Service-Type = Framed-UserFramed-Protocol = PPP,Framed-IP-Address = 255.255.255.254,Framed-Routing = None,Framed-MTU = 1500
#telnet
Service-Type = Login-User,Login-IP-Host = 172.16.1.81,Login-Service = Telnet,Login-TCP-Port = 23
#other
Menu = “menu3”#DEFAULT
Menu = “menu2”
5-4 RADIUS Administrator’s Guide

Installing and Configuring SecurID 6
This chapter is an overview of the installation and configuration of SecurID when used with RADIUS. This chapter is applicable only to UNIX versions of the RADIUS server.
This information is intended to serve as a quick reference guide for the ACE/Server and ACE/Client software. Refer to the Security Dynamics manual set for future ACE/Server software releases and detailed features of SecurID.
Note – Livingston Technical Support does not provide support for the ACE/Server and ACE/Client installation and configuration. Contact Security Dynamics Technical Support at (617) 547-7820. Livingston Technical Support provides support for RADIUS when used with SecurID only after the sdshell utility has verified that the ACE/Server is working properly.
The ACE/Server and ACE/Client software version 2.1.1 is supported on the following platforms:
• SunOS version 4.1.4 on a Sun SPARCstation
• Sun Solaris version 2.5 on a Sun SPARCstation
• HP-UX version 10.01 on a Hewlett-Packard HP 9000 Series 7xx or 8xx
• AIX version 3.2.5 on an IBM RISC System/6000
Overview of SecurID Components
The Security Dynamics authentication system (generally referred to as SecurID) consists of the following components:
• ACE/Server authentication server
Stores usernames and serial numbers of tokens and performs calculations to verify the identity of users.
✍
Overview of SecurID Components 6-1

Installing and Configuring SecurID
• ACE/Server client
Machine generating the SecurID authentication attempt.
• Token
A small, handheld device that generates a random number. A new number is generated and displayed every 60 seconds.
There are three types of tokens supported in SecurID: the standard SecurID card, the SecurID Key Fob, and the SecurID PINPAD.
• PASSCODE
A two-part password, consisting of a memorized personal identification number (PIN) followed by the current number displayed on the token.
Note – To use RADIUS with SecurID, you must run the ACE/Server software on the same host as the RADIUS server. If the ACE/Server software is installed on a different machine, then the RADIUS server must be an ACE/Server slave.
How SecurID Works with RADIUS
When SecurID is used with RADIUS, a connection proceeds as follows:
1. A remote user initiates a connection by dialing in to the PortMaster.
2. The PortMaster prompts for the user’s username and password.
3. The user enters a username. At the password prompt, the user enters a PASSCODE (PIN followed by the currently displayed number on the token).
4. The PortMaster forwards this information to the RADIUS server for authentication.
5. The RADIUS server examines the user file, scanning for the appropriate username. When the entry is located, it is examined to determine the user’s authentication method.
6. When the RADIUS server discovers that the authentication method is SecurID, it forwards the username and PASSCODE to the ACE/Server for authentication.
7. The ACE/Server examines its database for the username and serial number of the user’s token. It uses the serial number to verify the PASSCODE entered by the user. It also verifies that the time on the token is synchronized with the ACE/Server.
✍
6-2 RADIUS Administrator’s Guide
Installing and Configuring SecurID
8. The ACE/Server sends the result of the database lookup (identity verified or not verified) to the RADIUS server.
9. If the user’s identity was verified by the ACE/Server, the RADIUS server sends an access-accept message to the PortMaster along with the additional information from the RADIUS user entry. If the ACE/Server rejected the user’s PASSCODE, the RADIUS server sends an access-reject message to the PortMaster.
SecurID Installation
The SecurID software package consists of a number of applications and utilities. This section covers the installation and use of two components, Progress and ACE/Server, and two utilities, sdshell and sdadmin.
SecurID software is not shipped with the PortMaster. This software must be ordered directly from Security Dynamics at (617) 547-7820.
ProgressProgress is an application development environment; you must install this software before you install any additional SecurID software. To run Progress software with ACE/Server version 2.1.1, the Progress software version must be V7.3C01 or later.
Progress requires serial and control numbers for installation. Have these numbers available before beginning the installation.
To install Progress, follow the instructions in the Progress Installation Notes shipped with the Progress software. Note that Progress installs its software using the proinst utility, which must be run in an xterm window. To display an xterm on SunOS or Solaris, use the following command:
/usr/openwin/bin/xterm &
SecurID Installation 6-3

Installing and Configuring SecurID
ACE/Server The RADIUS 2.0 server is compatible with ACE/Server version 1.3 or higher. To install ACE/Server and ACE/Server client, complete the following steps:
1. Log in as root.
2. Read the ACE/Server tape in to the ace_install directory of the ACE/Server machine.
ACE/Server installs its software using the sdsetup utility.
3. If you are installing ACE/Server 2.0.1 on SunOS 4.1.4 or Solaris 2.5, modify the check_os_version subroutine of sdsetup to add the 4.1.4 or 2.5 string.
If the appropriate string is not added, sdsetup stops and displays an “unsupported OS” message.
Change the check_os_version subroutine of sdsetup to contain the following lines:
4. Run sdsetup to install ACE/Server.
Caution – sdsetup cannot be run while the sdconnect process or aceserver daemon are running. Stop these processes before attempting to run sdsetup.
case “$SUN_OS” in‘4.1.3’ | ‘4.1.4’ ) VALID_OS=TRUE;; * ) VALID_OS=FALSE;;
case “$SOL_OS” in‘5.3’ | ‘5.4’ | ‘5.5’ ) VALID_OS=TRUE;; * ) VALID_OS=FALSE;;
ace_install/sdsetup
!
6-4 RADIUS Administrator’s Guide
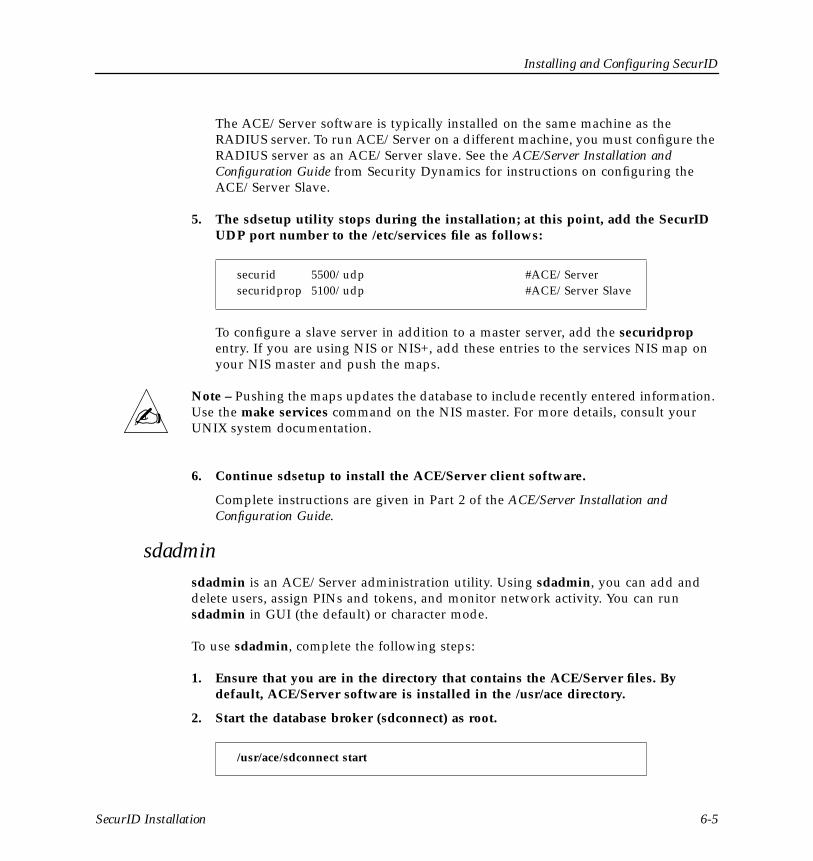
Installing and Configuring SecurID
The ACE/Server software is typically installed on the same machine as the RADIUS server. To run ACE/Server on a different machine, you must configure the RADIUS server as an ACE/Server slave. See the ACE/Server Installation and Configuration Guide from Security Dynamics for instructions on configuring the ACE/Server Slave.
5. The sdsetup utility stops during the installation; at this point, add the SecurID UDP port number to the /etc/services file as follows:
To configure a slave server in addition to a master server, add the securidprop entry. If you are using NIS or NIS+, add these entries to the services NIS map on your NIS master and push the maps.
Note – Pushing the maps updates the database to include recently entered information. Use the make services command on the NIS master. For more details, consult your UNIX system documentation.
6. Continue sdsetup to install the ACE/Server client software.
Complete instructions are given in Part 2 of the ACE/Server Installation and Configuration Guide.
sdadminsdadmin is an ACE/Server administration utility. Using sdadmin, you can add and delete users, assign PINs and tokens, and monitor network activity. You can run sdadmin in GUI (the default) or character mode.
To use sdadmin, complete the following steps:
1. Ensure that you are in the directory that contains the ACE/Server files. By default, ACE/Server software is installed in the /usr/ace directory.
2. Start the database broker (sdconnect) as root.
securid 5500/udp #ACE/Serversecuridprop 5100/udp #ACE/Server Slave
/usr/ace/sdconnect start
✍
SecurID Installation 6-5
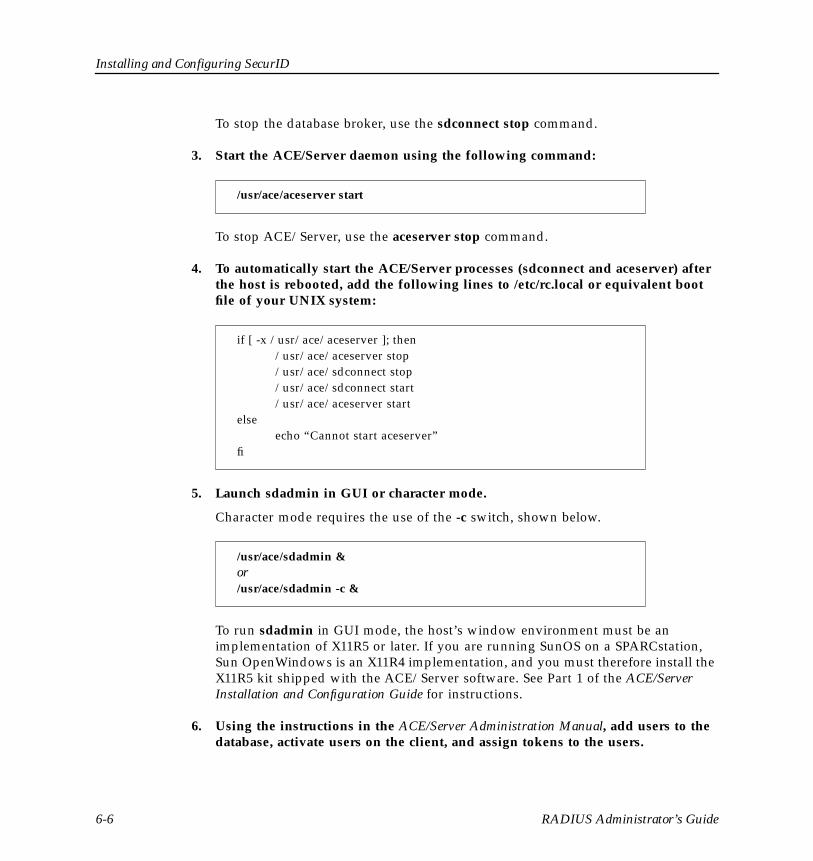
Installing and Configuring SecurID
To stop the database broker, use the sdconnect stop command.
3. Start the ACE/Server daemon using the following command:
To stop ACE/Server, use the aceserver stop command.
4. To automatically start the ACE/Server processes (sdconnect and aceserver) after the host is rebooted, add the following lines to /etc/rc.local or equivalent boot file of your UNIX system:
5. Launch sdadmin in GUI or character mode.
Character mode requires the use of the -c switch, shown below.
To run sdadmin in GUI mode, the host’s window environment must be an implementation of X11R5 or later. If you are running SunOS on a SPARCstation, Sun OpenWindows is an X11R4 implementation, and you must therefore install the X11R5 kit shipped with the ACE/Server software. See Part 1 of the ACE/Server Installation and Configuration Guide for instructions.
6. Using the instructions in the ACE/Server Administration Manual, add users to the database, activate users on the client, and assign tokens to the users.
/usr/ace/aceserver start
if [ -x /usr/ace/aceserver ]; then/usr/ace/aceserver stop/usr/ace/sdconnect stop/usr/ace/sdconnect start/usr/ace/aceserver start
elseecho “Cannot start aceserver”
fi
/usr/ace/sdadmin &or /usr/ace/sdadmin -c &
6-6 RADIUS Administrator’s Guide

Installing and Configuring SecurID
7. Choose a method of PIN assignment using the instructions for pin administration in the ACE/Server Administration Manual.
Note that you can assign PINs using RADIUS.
sdshellsdshell is an ACE/Server client utility used to assign new PINs to users. You can also use it as a troubleshooting method to verify ACE/Server client/server communication before configuring RADIUS.
To run sdshell, you must also have the sdconnect and aceserver daemons running.
To use sdshell, assign tokens to each user (see “sdadmin” on page 6-5) and instruct a user to log in to his or her account and run sdshell. sdshell runs through a PIN assignment sequence, as displayed in the example on the next page.
Instruct the user to enter a new PIN or press Return to have a PIN automatically generated. You must configure the user-generated PIN or system-generated PIN for the user when adding the user to the ACE/Server database.
The PIN options in sdshell (user-selected or system-generated) might vary, depending on how the PIN mode is configured. See the PIN administration information in the ACE/Server Administration Manual for configuration instructions.
% sdshellEnter PASSCODE:
Enter your new PIN, containing 4 to 8 digits,or
Return to generate a new PIN and display it on the screen, or
Ctrl d to cancel the new PIN procedure:
Please re-enter new PIN:
Wait for the code on your token to change, then log in with the new PIN
Enter PASSCODE:PASSCODE Accepted
SecurID Installation 6-7

Installing and Configuring SecurID
If the user’s new PASSCODE is accepted, communication between the ACE/Server client and server is successful. Proceed to the next section, “RADIUS Configuration.”
Note – Livingston Technical Support does not provide support for the ACE/Server and ACE/Client installation and configuration problems. Contact Security Dynamics Technical Support at (617) 547-7820. Livingston Technical Support provides support for RADIUS when used in conjunction with SecurID only after the sdshell utility has verified that the ACE/Server is working properly.
RADIUS Configuration
Each SecurID user must have an entry in the RADIUS users file or must use a DEFAULT entry. In the entry, the Auth-Type check item must be SecurID, as shown in the following example:
Use the sdadmin utility, as discussed under “sdadmin” on page 6-5, to activate and assign tokens to users authenticated with this DEFAULT entry.
When user bob dials in to the PortMaster, the following prompts are displayed:
New PIN Assignment Using RADIUSWhen a new user is added to the ACE/Server database, a token is assigned to the user. If the token does not have a PIN number, the user is put in a New PIN mode by the ACE/Server during the first connection attempt. To be authenticated in this mode, the user must select a PIN number.
DEFAULT Auth-Type = SecurIDService-Type = Framed-User,Framed-Protocol = PPP,Framed-Address = 255.255.255.254,Framed-Routing = None,Framed-MTU = 1500
login: <enter username>Password: <enter PIN number followed by a token code>
✍
6-8 RADIUS Administrator’s Guide

Installing and Configuring SecurID
You can force users in to New PIN mode by the ACE administrator if he or she has forgotten the PIN number or an attacker has learned the PIN number.
A New PIN mode user can assign the PIN number using RADIUS when he is dialing in to the network. Refer to information on pin administration in the ACE/Server Administration Manual for more information on New PIN mode.
User-Generated PIN
When a user in New PIN mode is forced to create a PIN number via RADIUS, the “New PIN required” prompt appears to instruct the user to enter a PIN number.
In the above example, when user bob dials in to the network, he enters his login name at the login prompt. At the “Password” prompt, he enters the token code number, and the PortMaster sends an access-request to the RADIUS server. The ACE/Server searches its database and recognizes user bob as a new PIN mode user. It sends an access-challenge to the PortMaster, and the “New PIN required” prompt is displayed prompting bob to enter a PIN number.
After bob enters his PIN number, the RADIUS server responds with the following message:
In the subsequent login, at the “Password” prompt, bob’s password will be a PIN number followed by a token code.
System-Generated PIN
The ACE/Server provides a system-generated PIN using the sdshell utility as described on page 6-7. sdshell displays the number on the screen for the user to memorize.
login: bobPassword: <token code>New PIN required: 1234
New PIN Accepted: Wait for the next card code to loginPassword:
RADIUS Configuration 6-9

Installing and Configuring SecurID
Note – sdshell displays the system-generated PIN for only 10 seconds. After the PIN number disappears, it cannot be viewed again.
When dialing in to the network, the user enters his system-generated PIN at the “New PIN required” prompt.
Next CardcodeIf a user enters a valid PIN and an invalid token code, the “Next Cardcode” prompt is displayed. This prompt also appears if the user’s token is not synchronized with the ACE/Server.
If an authorized user’s token is not synchronized with the ACE/Server, the user must wait until the token code changes and then enter the new token code number at the Next Cardcode prompt. After the system verifies the second token code, the user is authenticated.
If an unauthorized user enters a stolen PIN followed by a guessed token code, he is given three opportunities to enter the correct token code. If three invalid token codes are entered, the unauthorized user is disconnected.
In the above example, bob has entered a valid PIN number followed by an invalid token code. The “Next Cardcode” prompt appears, indicating that bob’s token is not synchronized with the ACE/Server. Bob must wait for 60 seconds for a new token code and then must enter this code at the “Next Cardcode” prompt.
Troubleshooting SecurID
Progress version V7.3C01 has some known bugs that might cause problems during SecurID installation. This section covers the three bugs that you are most likely to encounter and suggests solutions for them. If you still have problems after trying these solutions, contact Security Dynamics Technical Support at (617) 547-7820.
login: bobPassword: <PIN number followed by invalid token code>Next Cardcode:
✍
6-10 RADIUS Administrator’s Guide

Installing and Configuring SecurID
sdadmin Cannot Find First TokenWhen sdadmin is launched for the first time, the error message “cannot find first token, database may be empty” appears. To correct this problem, complete the following steps:
1. Log in as root.
2. Run sdnewdb, located in the /usr/ace directory:
3. Choose the Select All option to create a new server and log databases.
4. Run the sdimport utility to read the serial numbers of the tokens into the database.
Each batch of tokens from Security Dynamics is accompanied by a file. The filename consists of a 6-digit number and the .asc suffix.
5. Relaunch sdadmin using either of the following commands:
sdserv.bi and sdlog.bi Consume Too Much Disk SpaceThe sdserv.bi and sdlog.bi files (located in the /usr/ace directory) occasionally need to be truncated. If they are not truncated, they might consume too much disk space and cause problems for the ACE/Server database. To truncate these files, use the following commands:
/usr/ace/sdnewdb
/usr/ace/sdimport filename.asc
/usr/ace/sdadmin &or/usr/ace/sdadmin -c &
/usr/dlc/bin/_proutil -c truncate sdserv.bi/usr/dlc/bin/_proutil -c truncate sdlog.bi
Troubleshooting SecurID 6-11
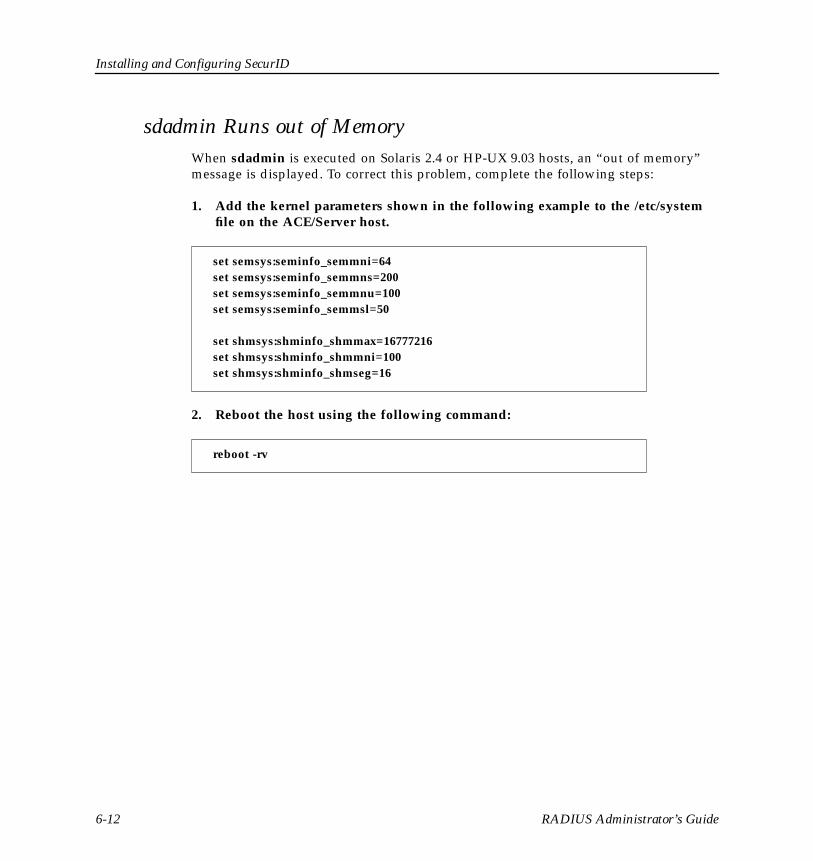
Installing and Configuring SecurID
sdadmin Runs out of MemoryWhen sdadmin is executed on Solaris 2.4 or HP-UX 9.03 hosts, an “out of memory” message is displayed. To correct this problem, complete the following steps:
1. Add the kernel parameters shown in the following example to the /etc/system file on the ACE/Server host.
2. Reboot the host using the following command:
set semsys:seminfo_semmni=64set semsys:seminfo_semmns=200set semsys:seminfo_semmnu=100set semsys:seminfo_semmsl=50
set shmsys:shminfo_shmmax=16777216set shmsys:shminfo_shmmni=100set shmsys:shminfo_shmseg=16
reboot -rv
6-12 RADIUS Administrator’s Guide

Implementing RADIUS Accounting 7
RADIUS accounting logs information about dial-in connections. This information is often used for billing purposes. RADIUS accounting consists of a client/server format; as transactions occur, they are recorded in a file named radacct/portmastername/detail (UNIX) or radacct\portmastername\detail (Windows NT) on the RADIUS accounting server.
How RADIUS Accounting Works
RADIUS accounting consists of an accounting server and accounting clients (PortMaster products). The radiusd daemon for accounting is a child process of the radiusd authentication daemon; it starts automatically when radiusd is executed.
The RADIUS accounting server uses the UDP protocol, and listens for UDP packets at port 1646.
RADIUS accounting consists of the following steps:
1. The PortMaster (accounting client) sends an accounting-request packet containing the record of an event to the accounting server.
2. The accounting server sends an accounting-response packet back to the PortMaster to acknowledge receipt of the request.
3. If the PortMaster does not receive a response, it continues to send accounting-requests until it receives a response.
A backoff algorithm is used to determine the delay between accounting-requests if an accounting-response is not received.
4. The PortMaster records the number of seconds that have passed between the event and the current attempt to send the record; this number is the Acct-Delay-Time value. As additional time passes before an accounting-response is received, the Acct-Delay-Time is updated.
How RADIUS Accounting Works 7-1

Implementing RADIUS Accounting
5. When the user is connected, a Start accounting record is recorded in a file called /usr/adm/radacct/portmastername/detail (UNIX) or \usr\adm\radacct\portmastername\detail (Windows NT) on the accounting server.
The Start record typically contains the Session-Id, the User-Name, Service-Type, Login-Service, Login-IP-Host, Acct-Delay-Time, and other relevant information from a user’s entry in the users file.
Note – When the user is disconnected, a Stop record is generated. This record contains the same information as the Start record; however, it also includes Acct-Session-Time, which records the time (in seconds) of a user’s session.
Getting Started
Select a host to use as the RADIUS accounting server. This host can be the same host as the RADIUS server used for authentication or a separate host.
Choose a host with the following characteristics:
• Secure physical location
• Root access limited to the security officer or system administrator
• Limited number of user accounts—preferably none
• Basic memory
• Enough disk space to store the RADIUS accounting detail files
For typical installations, allocate 50MB per 1000 users if the logs are rotated monthly. Keep in mind that it is much better to allocate too much space than too little; your usage may vary.
For example, if you have 1000 users, one port for every 10 users, an average connection time per user of 1 hour, and all ports in use around the clock, one month of logs would require 50MB of disk space:
700 bytes/session * 1000 users * 1 port/10 users * 1 session/hour * 24 hours/day * 30 days/month
✍
7-2 RADIUS Administrator’s Guide

Implementing RADIUS Accounting
Livingston recommends the use of a secondary RADIUS accounting server. The primary accounting server is always used first; if this server is unavailable, the secondary server is used.
Client ConfigurationTo configure RADIUS accounting information on a PortMaster, see Chapter 3, “Configuring a RADIUS Client.”
Server ConfigurationNote – This section applies to UNIX hosts only. For RADIUS NT server configuration instructions, see “Installing RADIUS on a Windows NT Host” on page 2-7.
To install the RADIUS accounting server, log in to the selected accounting server as root. Create a radacct directory within the /usr/adm directory.
RADIUS accounting automatically creates subdirectories within the /usr/adm/radacct directory for each PortMaster serving as a RADIUS accounting client and logs the accounting start and stop records to the detail file in the directory.
Customizing RADIUS Accounting
Note – This section applies to UNIX hosts only. For RADIUS NT customization instructions, see “Installing RADIUS on a Windows NT Host” on page 2-7.
UNIX flags associated with the parent radiusd are described in Table 2-1 on page 2-6.
mkdir /usr/adm/radacctchmod 700 /usr/adm/radacct
✍
✍
Customizing RADIUS Accounting 7-3

Implementing RADIUS Accounting
The radiusd accounting daemon may also be used with the flags shown in Table 7-1.
Accounting Attributes
For RADIUS accounting to function, a series of accounting attributes are defined in the dictionary file on the RADIUS server and appear in the Start and Stop accounting records. Use the following descriptions to help you interpret Start and Stop records.
Acct-Status-TypeAcct-Status-Type has two values: Start and Stop. A Start record is created when a user session begins. A Stop record is recorded when the session ends.
Acct-Delay-TimeThe PortMaster records the number of seconds that have passed between the event and the current attempt to send the record; this number is the Acct-Delay-Time value.
You can determine the approximate time of an event by subtracting the Acct-Delay-Time value from the time of the record’s arrival on the RADIUS accounting server.
Acct-Session-IdAcct-Session-Id is a unique number assigned to each Start and Stop record to make it easy to match the Start and Stop records in a detail file, and to eliminate duplicate records.
Table 7-1 radiusd Accounting Daemon Flags
Flag Purpose
-a Specifies an alternate directory for RADIUS accounting logs. The default directory is /usr/adm/radacct.
-v Displays the RADIUS version number without starting the radiusd daemon. This flag also applies to the RADIUS authentication server; the RADIUS authentication and accounting servers have the same version number.
7-4 RADIUS Administrator’s Guide
Implementing RADIUS Accounting
The Acct-Session-Id is a string consisting of eight uppercase hexadecimal digits. The first two digits increment each time the PortMaster is rebooted. The next six digits begin at 0 (for the first user login after a reboot) and increment up to approximately 16 million logins. This is equal to one user logging in to each port of a 30-port unit every minute for an entire year.
Acct-AuthenticAcct-Authentic records whether the user was authenticated via RADIUS or by the PortMaster User Table. Accounting records are not generated for passthrough users, because those users are authenticated by the destination host.
Acct-Session-TimeAcct-Session-Time records the user’s connection time in seconds. This information is included only in Stop records.
NAS-Port-TypeNAS-Port-Type records the type of port used in the connection. The port type can be any of the following: Async, Sync, ISDN, ISDN-V120, or ISDN-V110.
Acct-Input-Octets and Acct-Output-OctetsAcct-Input-Octets records the number of bytes received and Acct-Output-Octets records the number sent during a session. These values appear only in Stop records.
Called-Station-Id and Calling-Station-IdCalled-Station-Id and Calling-Station-Id record the called and calling numbers. This information is recorded when the NAS-Port-Type is ISDN, ISDN-V120, or ISDN-V110 where supported by the local telephone company. On the PortMaster 3, this information is available for asynchronous calls as well, where supported by the local telephone company.
TimestampTimestamp records the time of arrival on the RADIUS Accounting host measured in seconds since the epoch (00:00 January 1, 1970).
Accounting Attributes 7-5
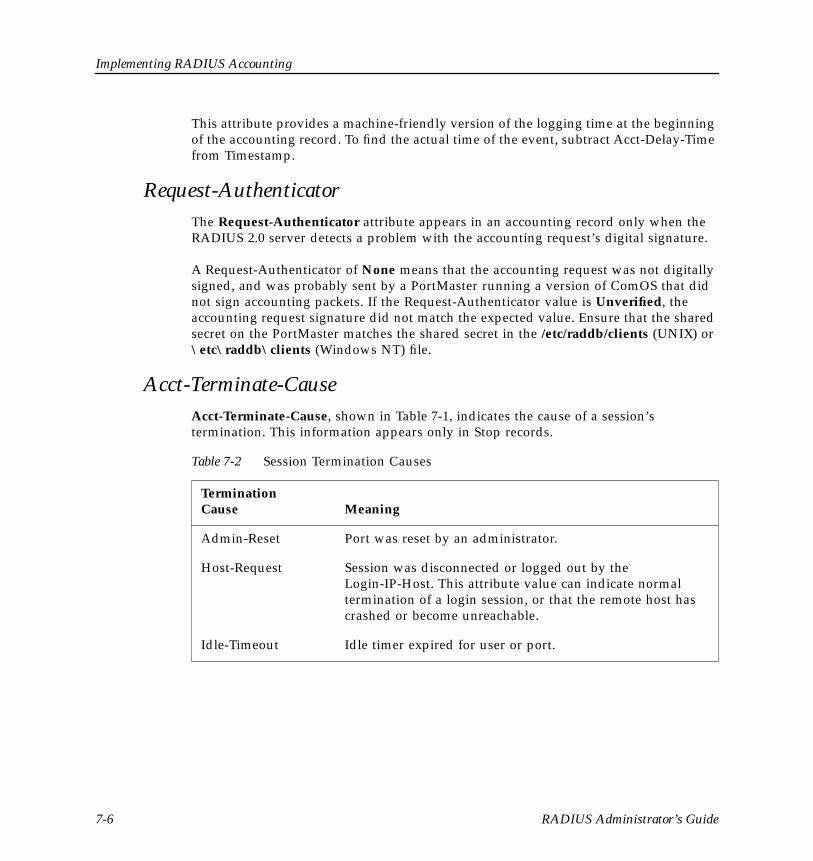
Implementing RADIUS Accounting
This attribute provides a machine-friendly version of the logging time at the beginning of the accounting record. To find the actual time of the event, subtract Acct-Delay-Time from Timestamp.
Request-AuthenticatorThe Request-Authenticator attribute appears in an accounting record only when the RADIUS 2.0 server detects a problem with the accounting request’s digital signature.
A Request-Authenticator of None means that the accounting request was not digitally signed, and was probably sent by a PortMaster running a version of ComOS that did not sign accounting packets. If the Request-Authenticator value is Unverified, the accounting request signature did not match the expected value. Ensure that the shared secret on the PortMaster matches the shared secret in the /etc/raddb/clients (UNIX) or \etc\raddb\clients (Windows NT) file.
Acct-Terminate-CauseAcct-Terminate-Cause, shown in Table 7-1, indicates the cause of a session’s termination. This information appears only in Stop records.
Table 7-2 Session Termination Causes
TerminationCause Meaning
Admin-Reset Port was reset by an administrator.
Host-Request Session was disconnected or logged out by the Login-IP-Host. This attribute value can indicate normal termination of a login session, or that the remote host has crashed or become unreachable.
Idle-Timeout Idle timer expired for user or port.
7-6 RADIUS Administrator’s Guide

Implementing RADIUS Accounting
Lost-Carrier Session terminated when the modem dropped DCD. This value can indicate any of the following:
• The user or his modem hung up the phone from their end (in which case there is no problem).
• The line was dropped.
• The line took a noise hit too severe for the modem to recover from.
• The local modem dropped DCD for some other reason.
Port-Error PortMaster had to reset the port. This error commonly occurs when a device attached to the port caused too many interrupts.
Session-Timeout Session timer expired for user.
User-Error PortMaster received a PPP Configuration Request or ACK when a session was already established, so it terminated the session. This error is caused by a PPP implementation error in the dial-in client.
User-Request Dial-in PPP client requested that the PortMaster terminate the connection. This message is expected from a proper PPP client termination.
Table 7-2 Session Termination Causes (Continued)
TerminationCause Meaning
Accounting Attributes 7-7

Implementing RADIUS Accounting
Examples
The following example displays Start and Stop accounting records in a PortMaster detail file.
Tue Jul 30 14:48:18 1996Acct-Session-Id = “35000004”User-Name = “bob”NAS-IP-Address = 172.16.64.91NAS-Port = 1NAS-Port-Type = AsyncAcct-Status-Type = StartAcct-Authentic = RADIUSService-Type = Login-UserLogin-Service = TelnetLogin-IP-Host = 172.16.64.25Acct-Delay-Time = 0Timestamp = 838763298
Tue Jul 30 14:48:39 1996Acct-Session-Id = “35000004”User-Name = “bob”NAS-IP-Address = 172.16.64.91NAS-Port = 1NAS-Port-Type = AsyncAcct-Status-Type = StopAcct-Session-Time = 21Acct-Authentic = RADIUSAcct-Input-Octets = 22Acct-Output-Octets = 187Acct-Terminate-Cause = Host-RequestService-Type = Login-UserLogin-Service = TelnetLogin-IP-Host = 172.16.64.25Acct-Delay-Time = 0Timestamp = 838763319
7-8 RADIUS Administrator’s Guide
Implementing RADIUS Accounting
The Acct-Status-Type attribute in the record indicates whether the record was sent when the connection began (Start) or when it ended (Stop). In the Start record above, the Acct-Session-Id is listed at the beginning of the record. Note that this value matches the Acct-Session-Id of the Stop record, indicating that these records correspond to the same session.
User-Name specifies the username, in this case, bob. NAS-IP-Address specifies the IP address of the PortMaster. NAS-Port-Type specifies that this is an asynchronous connection. Acct-Authentic specifies that bob is authenticated via RADIUS. Service-Type and Login-Service specify that bob is a login user using Telnet. Login-IP-Host specifies the host that user bob logged in to.
In the Stop accounting record, Acct-Session-Time specifies that bob’s connection lasted 21 seconds. Acct-Input-Octets indicates that 22 bytes of incoming traffic were received; Acct-Output-Octets indicates that 187 bytes of outgoing traffic were sent.
The Acct-Terminate-Cause indicates that a Host-Request terminated the session, meaning that bob logged out of the host or that the host logged him out. The Acct-Delay-Time is 0 seconds, indicating that the RADIUS accounting server received the accounting-request on the first try.
For more information on accounting attributes, see “Accounting Attributes” on page 7-4.✍
Examples 7-9
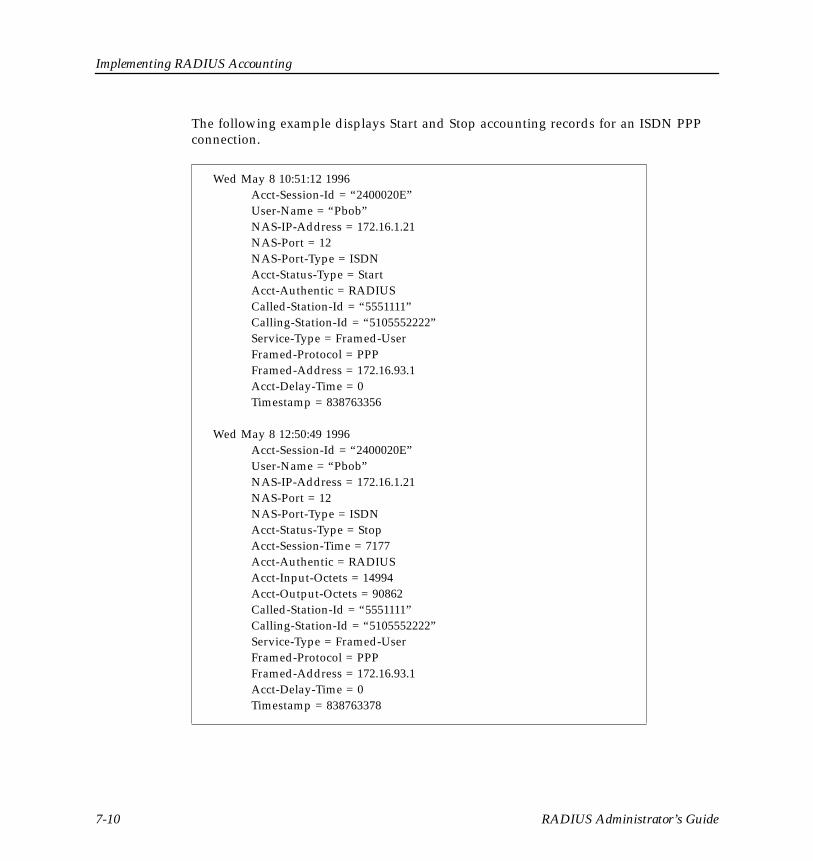
Implementing RADIUS Accounting
The following example displays Start and Stop accounting records for an ISDN PPP connection.
Wed May 8 10:51:12 1996Acct-Session-Id = “2400020E”User-Name = “Pbob”NAS-IP-Address = 172.16.1.21NAS-Port = 12NAS-Port-Type = ISDNAcct-Status-Type = StartAcct-Authentic = RADIUSCalled-Station-Id = “5551111”Calling-Station-Id = “5105552222”Service-Type = Framed-UserFramed-Protocol = PPPFramed-Address = 172.16.93.1Acct-Delay-Time = 0Timestamp = 838763356
Wed May 8 12:50:49 1996Acct-Session-Id = “2400020E”User-Name = “Pbob”NAS-IP-Address = 172.16.1.21NAS-Port = 12NAS-Port-Type = ISDNAcct-Status-Type = StopAcct-Session-Time = 7177Acct-Authentic = RADIUSAcct-Input-Octets = 14994Acct-Output-Octets = 90862Called-Station-Id = “5551111”Calling-Station-Id = “5105552222”Service-Type = Framed-UserFramed-Protocol = PPPFramed-Address = 172.16.93.1Acct-Delay-Time = 0Timestamp = 838763378
7-10 RADIUS Administrator’s Guide
Implementing RADIUS Accounting
In the Start record of the example above, the NAS-Port-Type specifies that the user Pbob is using ISDN for his connection. Called-Station-Id and Calling-Station-Id specify the source and destination of the ISDN call. Service-Type and Framed-Protocol indicate that user Pbob is a framed user using PPP to establish the connection.
The Stop record in this example indicates that the login time for user bob was 7177 seconds or 1 hour, 59 minutes, and 37 seconds. The Acct-Input-Octets and Acct-Output-Octets indicate that the incoming traffic for this session was 14994 bytes, and outgoing traffic was 90862 bytes.
Note – Examples of PERL scripts to process the RADIUS accounting logs are available at Livingston’s FTP site at ftp://ftp.livingston.com/pub/le/radius/.✍
Examples 7-11

Implementing RADIUS Accounting
7-12 RADIUS Administrator’s Guide
Troubleshooting RADIUS A
This appendix provides hints and tips for troubleshooting the RADIUS authentication server and the RADIUS accounting server.
Troubleshooting RADIUS Authentication
Most RADIUS authentication problems occur because the server or client was not configured correctly, or because a step was omitted during installation. Carefully check the instructions in Chapter 2, “Configuring a RADIUS Server,” and Chapter 3, “Configuring a RADIUS Client,” to ensure that the authentication server was properly installed and configured.
If you have not solved the problem after reviewing the instructions in Chapter 2 and Chapter 3, read the troubleshooting suggestions in this section.
Checking the radiusd Daemon (UNIX RADIUS)1. Use radiusd -v command to display the version number:
2. Make sure /etc/radiusd is running.
3. Make sure in the /etc/raddb directory (or wherever you specify with the -d flag) that you have the following files: dictionary, users, and clients.
If you are using RADIUS menus, check the menus subdirectory.
4. Use radiusd -x to view incoming and outgoing packets from RADIUS.
Checking the RADIUS NT Service (RADIUS NT)1. Go to the Services applet and ensure that RADIUS NT has been installed and is
started.
2. Ensure that the buttons and the description in the RADIUS NT Control Panel state that RADIUS NT is currently running.
Troubleshooting RADIUS Authentication A-1

Troubleshooting RADIUS
Checking the PortMaster1. Make sure that the RADIUS server is reachable from the PortMaster.
2. Make sure that security is on for each port:
When security is on, the show S0 command displays (Security) in the Port Type field of its output.
3. Use the show global command to ensure that the RADIUS server IP address is set on the PortMaster.
4. Make sure the secret set on the PortMaster using the set secret password command matches the secret in the /etc/raddb/clients file on the RADIUS server.
The PortMaster will not display the shared secret; however, you can set the secret again if you are not sure that it is set properly. If you update the shared secret, make sure to use the save all command to save the shared secret in the PortMaster nonvolatile memory.
Checking /etc/raddb/users1. Items in the user entries are case-sensitive. You must do the following:
a. Verify the spelling and capitalization of each line of the users file.
b. Compare keywords against the /etc/raddb/dictionary file to ensure that they are the same.
2. Verify that the user can authenticate with a clear text password before authenticating with Auth-Type = System or Auth-Type = SecurID.
Host Unavailable If a “Host Unavailable” message is displayed after a username is entered at the login prompt, security for the port is not enabled and rlogind and in.pmd are not running on the host configured for that port. The PortMaster is attempting to do a passthrough login to a host that is not prepared to accept it.
Command> set all security onCommand> save allCommand> reset all
A-2 RADIUS Administrator’s Guide
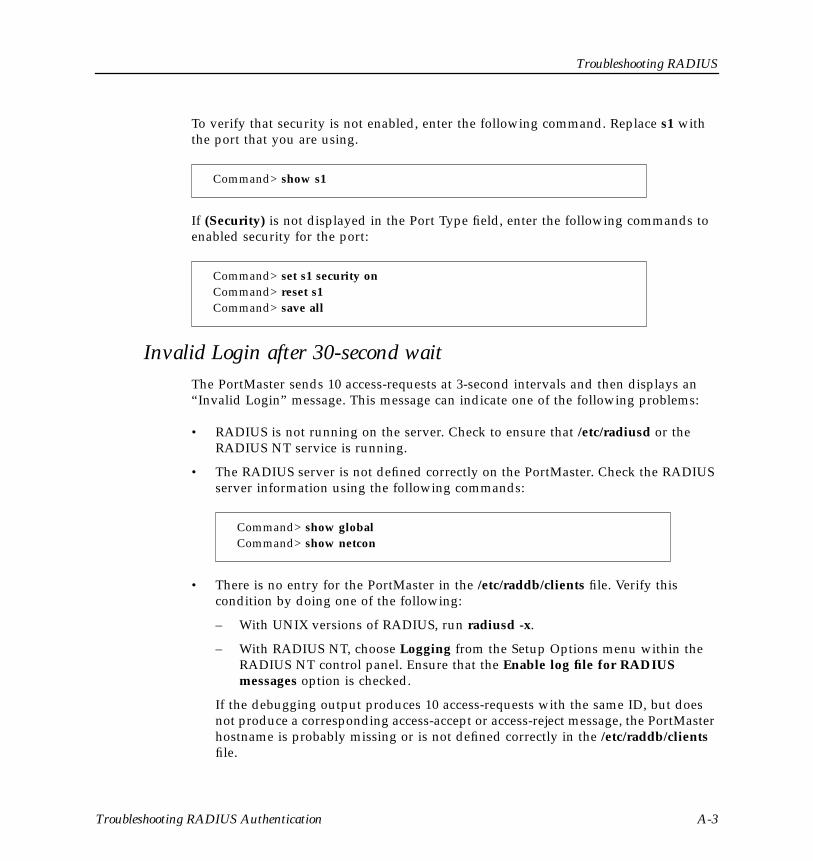
Troubleshooting RADIUS
To verify that security is not enabled, enter the following command. Replace s1 with the port that you are using.
If (Security) is not displayed in the Port Type field, enter the following commands to enabled security for the port:
Invalid Login after 30-second waitThe PortMaster sends 10 access-requests at 3-second intervals and then displays an “Invalid Login” message. This message can indicate one of the following problems:
• RADIUS is not running on the server. Check to ensure that /etc/radiusd or the RADIUS NT service is running.
• The RADIUS server is not defined correctly on the PortMaster. Check the RADIUS server information using the following commands:
• There is no entry for the PortMaster in the /etc/raddb/clients file. Verify this condition by doing one of the following:
– With UNIX versions of RADIUS, run radiusd -x.
– With RADIUS NT, choose Logging from the Setup Options menu within the RADIUS NT control panel. Ensure that the Enable log file for RADIUS messages option is checked.
If the debugging output produces 10 access-requests with the same ID, but does not produce a corresponding access-accept or access-reject message, the PortMaster hostname is probably missing or is not defined correctly in the /etc/raddb/clients file.
Command> show s1
Command> set s1 security onCommand> reset s1Command> save all
Command> show globalCommand> show netcon
Troubleshooting RADIUS Authentication A-3

Troubleshooting RADIUS
• radiusd responses are not getting back to the PortMaster. Examine the routing table on the RADIUS server host, and ping the PortMaster from this host.
• The PortMaster is ignoring radiusd responses. This is a relatively rare occurrence, usually caused by one of the following:
– Multiple IP addresses are assigned to a single Ethernet interface on the RADIUS server host.
– Multiple Ethernet interfaces are enabled, and the RADIUS server is replying to a request from the PortMaster on a different interface from the interface that received the request.
– The source of the access-accept or access-reject packet does not match the destination of the access-request packet.
Result of Debugging OutputIf debugging output shows more than one access-reject packet sent for the same ID, check the following:
Note – To display debugging output with UNIX versions of RADIUS, run radiusd -x. With RADIUS NT, choose Logging from the Setup Options menu within the RADIUS NT control panel. Ensure that the Enable log file for RADIUS messages option is checked.
1. Check the route back to the PortMaster; ensure that replies are getting to the PortMaster.
2. Check to see if the RADIUS server host has more than one Ethernet port or multiple IP addresses assigned to the same Ethernet interface.
3. Check for packet filters between the RADIUS server host and the PortMaster filtering out the RADIUS return packets.
4. On the PortMaster, use ptrace to show packets returning from the host running radiusd:
Command> add filter r Command> set filter r 1 permit udp src eq 1645Command> set filter r 2 permit icmpCommand> ptrace r
✍
A-4 RADIUS Administrator’s Guide

Troubleshooting RADIUS
Note – ptrace on a PortMaster does not show UDP or ICMP packets generated on the PortMaster itself. Outgoing RADIUS access requests are not shown; however, returning packets are displayed. To turn off tracing, use the ptrace command with no arguments.
5. Check the source address of a packet during tracing.
A multihomed RADIUS host might be using the wrong source address when replying to access-request packets.
If debugging output shows an access-reject packet right away, check the following:
1. Check the spelling of the username and password.
The capitalization must match exactly.
2. Check syslog for errors from radiusd.
3. Use the show table user command to verify that the user is not in the PortMaster user table.
The local user table is always checked first during authentication attempts.
4. If Auth-Type = System is not working, attempt to use a clear text password in the user entry.
5. If Auth-Type = System is specified on a UNIX system that has shadow passwords, ensure that radiusd is run as root to access the shadow passwords.
6. Verify the spelling, capitalization, and syntax of the /etc/raddb/users file.
If radiusd finds any errors in the user entry, it sends an access-reject message and logs an error to syslog.
7. Check that the shared secret in /etc/raddb/clients matches the one set on the PortMaster with the set secret command
8. If using PMconsole, ensure that the Return key was not pressed when the cursor was in the RADIUS Secret field of the dialog box.
Pressing the Return key at this point erases the secret when the Save button is clicked.
✍
Troubleshooting RADIUS Authentication A-5
Troubleshooting RADIUS
Troubleshooting RADIUS Accounting
Most RADIUS accounting problems occur because a step was skipped during installation. Carefully check the instructions in Chapter 2, “Configuring a RADIUS Server,” and Chapter 3, “Configuring a RADIUS Client,” to ensure that the accounting server was properly installed and configured.
If you have not solved the problem after reviewing the instructions in Chapter 2 and Chapter 3, read the troubleshooting suggestions in this section.
1. Make sure the /usr/adm/radacct directory exists and that the account used to execute radiusd or the RADIUS NT service has write permission to this directory.
2. Check the RADIUS version number to ensure that radiusd is version 1.16 or 2.0:
– With UNIX versions of RADIUS, run radiusd using the -v flag.
– With RADIUS NT, choose About RADIUS from the Help menu within the RADIUS NT Control Panel.
3. Make sure that you do not have any other process bound to UDP ports 1645 or 1646.
– With UNIX versions of RADIUS, kill radiusd and use the netstat -a command. Start radiusd and use the netstat -a command again. Note that some UNIX operating systems display the sockets symbolically as .radius and .radacct rather than .1645 and .1646.
– With RADIUS NT, start and stop the RADIUS NT service.
4. Use the show global command to verify that the IP address of the accounting host has been configured on the PortMaster.
If it has not been configured, set it using the set accounting IPaddress command on the PortMaster, where IPaddress is the IP address of the host running radiusd.
5. Check syslog (auth.warning) for error messages from radiusd.
During normal use, very few error messages should appear.
6. Ping the PortMaster from the RADIUS server to check connectivity.
7. If the previous suggestions do not solve the problem, run radiusd -x on the RADIUS server host and check to determine if accounting records are displayed.
A-6 RADIUS Administrator’s Guide

Index
Aaccounting
flags 7-3logged information 7-4server configuration 7-3
Acct-Terminate-Cause 7-6ACE/Server 6-4Auth-Type
Local 4-3SecurID 4-4System 4-3
Ccallback 4-11
Callback-Framed-User 4-7, 4-12Callback-Login-User 4-7, 4-11
Called-Station-Id 7-5Calling-Station-Id 7-5check items 4-2
Auth-Type 4-3examples 4-29Expiration 4-4Filter-Id 4-13Framed-IP-Netmask 4-10Framed-MTU 4-15Framed-Protocol 4-9Framed-Route 4-10Outbound-User 4-10Prefixes 4-5Suffixes 4-5
clientsclients file 2-14configuring client information 2-14
configuring PortMaster 3-1NAS-IP-Address 4-5NAS-Port 4-5NAS-Port-Type 4-5
compression, TCP/IP 4-16contact information xv
mailing lists xvconventions in this guide xivconventions in this manual xiiiconverting IPX decimal to dotted decimal 4-17
DDEFAULT user entry 4-19disconnecting users 4-17document conventions xiii, xivdocumentation, related xii
Ffilters 4-13flags, radiusd 2-6, 7-3Framed-Compression 4-16Framed-IP-Netmask 4-10Framed-IPX-Network 4-16Framed-MTU 4-15Framed-Protocol 4-9Framed-Route 4-10Framed-Routing 4-12
Hhost unavailable message A-2
Index-1

Index
Iidle timeouts 4-18in.pmd 4-15installation
accounting 7-3for UNIX 2-2for Windows NT 2-7, 2-9
invalid login message A-3IPX, setting network information 4-16
LLocal Auth-Type 4-3Login-Service 4-14Login-User 4-7
Mmailing lists, subscribing to xvmenus
nested 5-4overview 5-1single-level 5-3
MTU, setting 4-15
NNAS information
NAS-IP-Address 4-5NAS-Port 4-5NAS-Port-Type 4-5, 7-5
nested menus 5-4
Ooperating systems, supported 1-2Outbound-User 4-7, 4-10
Ppacket filters 4-13
Pass-Thru Login option 3-3passwords
expiration date 4-4location of 4-3
PERL script 4-17PIN assignment, SecurID 6-8PMconsole configuration 3-3pminstall 2-3Port-Limit 4-18Prefixes 4-5Progress software 6-3
RRADIUS
menus 5-1server, primary 3-1server, secondary 3-1users file 4-1
radiusd flags 2-6, 7-3references xiii
books xiiiRFCs xiii
related documentation xiiremote host information 4-14reply items 4-7
Callback-Framed-User 4-12Callback-Login-User 4-11examples 4-29Framed-Compression 4-16Framed-IPX-Network 4-16Framed-Routing 4-12Idle-Timeout 4-18Login-Service 4-14Port-Limit 4-18Service-Type 4-7Session-Timeout 4-17
RIP configuration 4-12
Index-2 RADIUS Administrator’s Guide
Index
Ssdadmin 6-5sdsetup 6-4sdshell 6-7SecurID
ACE/Server 6-4Auth-Type 4-4entry in users file 6-8PIN assignment 6-8Progress 6-3sdadmin 6-5sdshell 6-7technical support 6-1troubleshooting 6-10
Security option 3-3servers, selecting 1-5, 7-2Service-Type 4-7
Callback-Framed-User 4-7Callback-Login-User 4-7Login-User 4-7Outbound-User 4-7
session termination, reasons for 7-6Session-Timeout 4-17shared secret 2-14single-level menus 5-3Start and Stop records 7-4Suffixes 4-5support, technical xvSystem Auth-Type 4-3
TTCP/IP header compression 4-16technical support
Livingston xvSecurity Dynamics 6-1
troubleshootingauthentication A-1SecurID 6-10
Uuser entries
complete list of options 4-23DEFAULT 4-19examples 4-29
username, restrictions 4-1users file 4-1users, disconnecting 4-17, 4-18
Index-3

Index
Index-4 RADIUS Administrator’s Guide