
question6
21
Question 6 Leanne, Ariadna, Lauren, Emmanuel.
Transcript of question6

Question 6Leanne, Ariadna, Lauren, Emmanuel.

EDITING

Final Cut ProThrough the whole editing process the main technology that we used was Final cut pro. This is where we edited our film.
When using final cut pro we learnt how to render the clip, to make sure that the sound matches the clip and plays smoothly. The red line on top of the timeline indicates that the film needs rendering. To do this you have to press ‘cmdR’
The timeline can also create layers, meaning that you can have multiple sound effects playing at the same time.
We also included cross fades at the beginning and end of music, to fade it in and out smoothly.

MotionMotion was used to create the 2 idents that were at the beginning of our film, the title of our film and the names of the crew members.
We used a template which already had the transitions of how the text will come on and off, we found this the easiest way.
We used the same text type and transition for the crew members. When doing this we learnt that we had to keep the text simple and small and position it in the corners of the frame. When uploading the text into final cut pro we learnt that we had to make sure that title safe was on so that the text fits in the frame so that it can be seen on the cinema screen.
We also learnt that you can change the colour of the text, which is what we did when we created the ‘Eman production’ ident.

Creative commons
Creative commons is a website that we used when looking for sound.
We learnt that we had to use this website to search for songs through soundcloud as this was the only illegal way to include sound in our film.
Apart from soundcloud, there is other ways you can download music from creative commons, for example ‘ccMixter’ But we decided to use soundcloud which we found was the easiest technology to use.
When we’ve searched for a song that we wanted to use we had to make sure that there’s a download button below the song, after you have downloaded the song, you can upload it into final cut pro.

Handbrake
Handbrake is found on the mac desktop and is used to compress videos. We used handbrake to
compress our trailer and our film when it was finished. After exporting the film from final cut pro we uploaded it into handbrake, and made sure that we pressed ‘blogger’ on the right hand side.
This compressed the video and made it a MP4 file which allowed us to upload the video onto blogger.

Audio converterAudio is similar to handbrake but used for audio. By dragging the downloaded sound from soundcloud into audio converter makes the sound smaller, which then allowed us to use this in final cut pro.

Overall, the variety of technology allowed us to become more creative as media students. The technologies were also helpful throughout the whole editing process as they all worked together. We needed each technology in order to complete our film. Final cut pro, was the most important. Creative commons was used to download our songs which we then converted in ‘audio converter’ to upload it onto final cut pro. Motion was used at the end to make all of our text. Lastly handbrake was used to compress our films to then upload them onto blogger.
PLANNING AND RESEARCH

BloggerBlogger is what we used to post absolutely everything on such as pictures story boards our pitch ect. This was useful as we were able to look back at what we had previously planned and were entitled to make changes which we did quite a lot for example our story board that we originally planned wasn't what we wanted to continue with so we were able to look at it and make changes which was useful.
Blogger in my opinion was the main resourse that we used in order to plan and research for our teen film. This is because we used it from the very beginning where we were reenacting the breakfast club right to the very end of our own media production.
When using blogger we learnt that we can add images into our blog posts as well as videos. We were also able to embed clips from youtube, our prezi presentation etc. This was very useful as it gave us an opportunity to use different technologies that were needed but everything was located on one blog.

TimetoastTimetoast was the second most popular recourse in order for us to plan. We used timetoast at the very beginning to organize the different shots used in the breakfast club opening. This was for us to know how long each shot should be as we made a remake of it. Timetoast was also useful as we were able to present different ident titles that are in films. This helped us massively as it gave us greater understanding of where and why different titles are placed where they are in films. This was an easy way for us show what we knew as we also posted this on our blog as a part of our planning journey. Which also helped us for our final product as we needed to include our own idents.
Through this, we learnt how the shots should be ordered and how long the shots should be. We also learnt the order the titles should be shown in and the length of time they should be shown for; depending on the amount of money each movie ident has put into the production.
Overall when using timetoast we learnt that it creates a timeline and you can add the starting and ending date. These dates don’t necessarily need to have anything to do with the timeline itself its just so that it gives you space so that you can separate information. We also learnt that at each point on the timeline you can add images to do with your text. Overall, timetoast is a good technolgy for orgonising things like key dates and is good for planning.

YouTubeYouTube has been key within our planning and research. We have got so much inspiration from watching different teen movies. We had looked at over 10 different teen film dramas including these three. We wanted to see a range of different stereotypes that star in teen dramas and pick out which ones we think we will be able to demonstrate best. Watching different movie trailers allowed us to think of a range of locations for example in the school toilets, corridors, at home. This allowed us to come up with a better storyline than our original one as we thought about different locations we could use other than at home. If we didn't use youtube as a part of our planning and research I believe that our final product would not have been as good as it is as we would of used more basic ideas for example just filming in the school.

Prezi
We also used prezi throughout our planning. This was an ideal recourse for us as it allowed us as a group to plot down our ideas and tasks into different bubbles on one presentation. We learnt that this made it easy for us whilst planning as we were aware of what it was we all had to do in order to carry our our next tasks and everyone could work on the same presentation at the same time.

Planning has been a long process. We had to make sure everything was in order before we began to do any filming. These different types of technologies that we used in our planning and research process made our blog more interesting and allowed us to varieties the way we presented our work.
FILMING

Filming cameraInstead of using the college camera, we chose to use the Nikon DS3200. This is because we thought that the other camera provided better quality film and because it was more convenient when filming eg. because it’s compact.
This enabled us to film our teen film opening sequence both inside and outside college as and when we wanted. In addition, although it had a slower speed compared to the college one, (a shutter speed of 25), we felt it focused more clearly and for longer periods of time.
In addition, it was more convenient as we could take pictures as well, without having to use a different camera.
From this, we learnt that the quality of the teen film opening sequence is important as if it is low quality, viewers will lose interest. In addition, we learnt how to correctly record our scenes to make our teen film T.E.A.M.
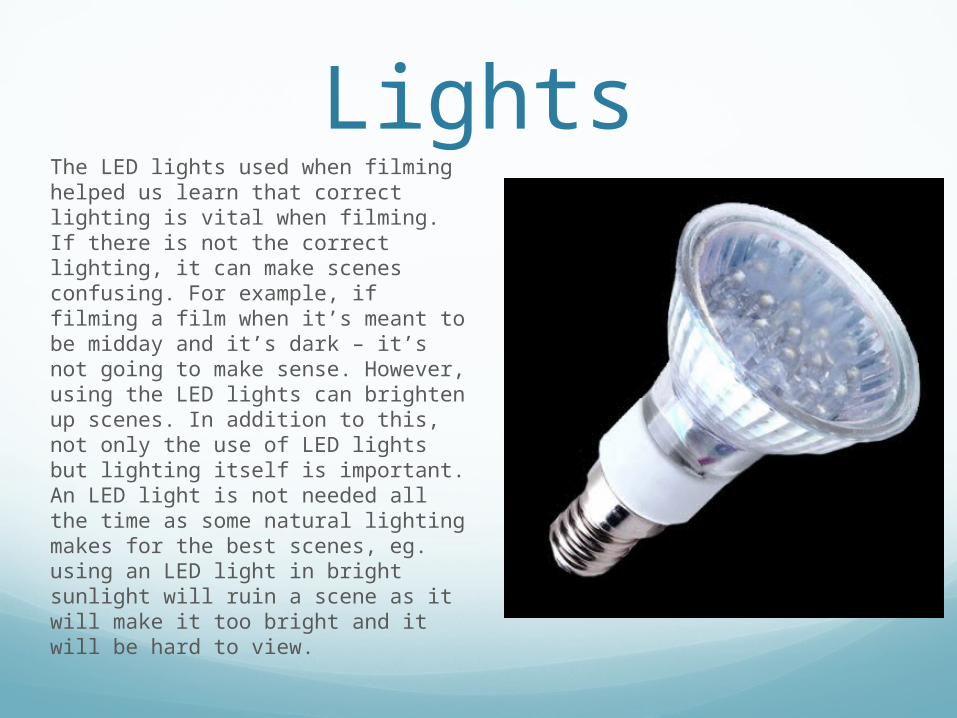
LightsThe LED lights used when filming helped us learn that correct lighting is vital when filming. If there is not the correct lighting, it can make scenes confusing. For example, if filming a film when it’s meant to be midday and it’s dark – it’s not going to make sense. However, using the LED lights can brighten up scenes. In addition to this, not only the use of LED lights but lighting itself is important. An LED light is not needed all the time as some natural lighting makes for the best scenes, eg. using an LED light in bright sunlight will ruin a scene as it will make it too bright and it will be hard to view.

MicrophoneFrom the microphone that is placed on top of the camera to pick up sound, we learnt that if we filmed without this we would produce low quality sound which would result in a low quality film, as viewers would not be able to hear or understand what’s being said or going on. The microphone also comes under sound as it records noise however it also comes under filming as it is used whilst filming to ensure the sound quality is high.
In addition, we learnt that the microphone should be placed horizontally on top of the camera to pick up the best sound, and you mustn’t be too close or too far away from the microphone otherwise the sound may not pick up as well.
Furthermore, we learnt that the microphone must always be connected correctly, switched on and tested before use otherwise you may go filming a scene without the microphone on/working, resulting in you having to refilm the scene.
To conclude, we lernt that the microphone can also be used to record voiceovers and add to the film,. What needs to be done is it must be recorded with the shutters over the camera, so you can’t see anything and then the file is transferred into our editting equipment, Final Cut Pro and then the video is detatched and the audio file is editted and added over a clip.

Flip camera Whilst filming, we also used a flip camera to
record additional clips that would help us with our teen film movie. For example, we got some behind the scenes footage on a flip camera, as well as the camera we used.
Through the use of the flip camera we learnt that the purpose of this camera is not to produce high quality footage and anything filmed on here would be classed as low quality if used as it does not have the correct shutter size and focus settings etc. However, it is to be used to gain extra information for example through interviews of the target audience (in this case, teens) that can help us during the process of filming for example, the locations teens would like the film to be set and the characters they would like to see filmed etc.

Still camera We used the panasonic lumix to take still
images whilst filming. This was really useful for taking pictures of potential locations we were going to film at, the potential outfits the characters were going wear. We also used the images we took and added it to our storyboard, which was useful as it helped us become more prepared whilst filming as we knew what we needed already. Through this, we learnt that using still images can get you organised and is vital for filming process and it helps you know what is going to be filmed. It also helps you spot errors as if you know what is meant to be filmed, and it’s not, that can be changed.
Overall, a lot can be learnt from the filming process. Using just one piece of equipment to film everything is not sufficient and is irresponsible as each technology has it’s function that it’s best at and one technology can’t do everything as good as another. For example, the flip cameras don’t produce as good quality film as the main camera we used to film, however it’s good as the quality is still clear so you can see what is needed eg. For interviews however it’s not high quality so will take less time to upload. Also, this allows us to keep footage separate, making it easier to organise and film what is needed. Using all of the technologies that we have together has made the filming process of the making of T.E.A.M a lot easier as we needed the lighting to brighten up some scenes, we needed the microphone to ensure what is being said is being heard and for the voiceover etc. The filming process, as well as the other processes, is a vital stage in the making of our teen film and it would not be possible without all the technology mentioned.


![NAMIBIA UNIVERSITY OF SCIENCE ANDTECHNOLOGYexampapers.nust.na/greenstone3/sites/localsite... · Question6[16marks] 6.1 Quality managementisboth an organizational and an individual](https://static.fdocuments.in/doc/165x107/5e890a46a9de5e3e2c0717b2/namibia-university-of-science-and-question616marks-61-quality-managementisboth.jpg)


